Cook it once
  • Home
  • Privacy Policy
  • Recipes
    • KETO
    • LC
    • WW
  • Tips
  • Contact
Cook it once
  • Home
  • Privacy Policy
  • Recipes
    • KETO
    • LC
    • WW
  • Tips
  • Contact
Category:

General Recipes

General Recipes

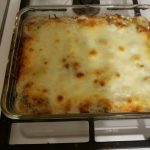
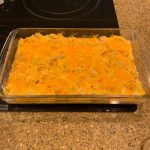
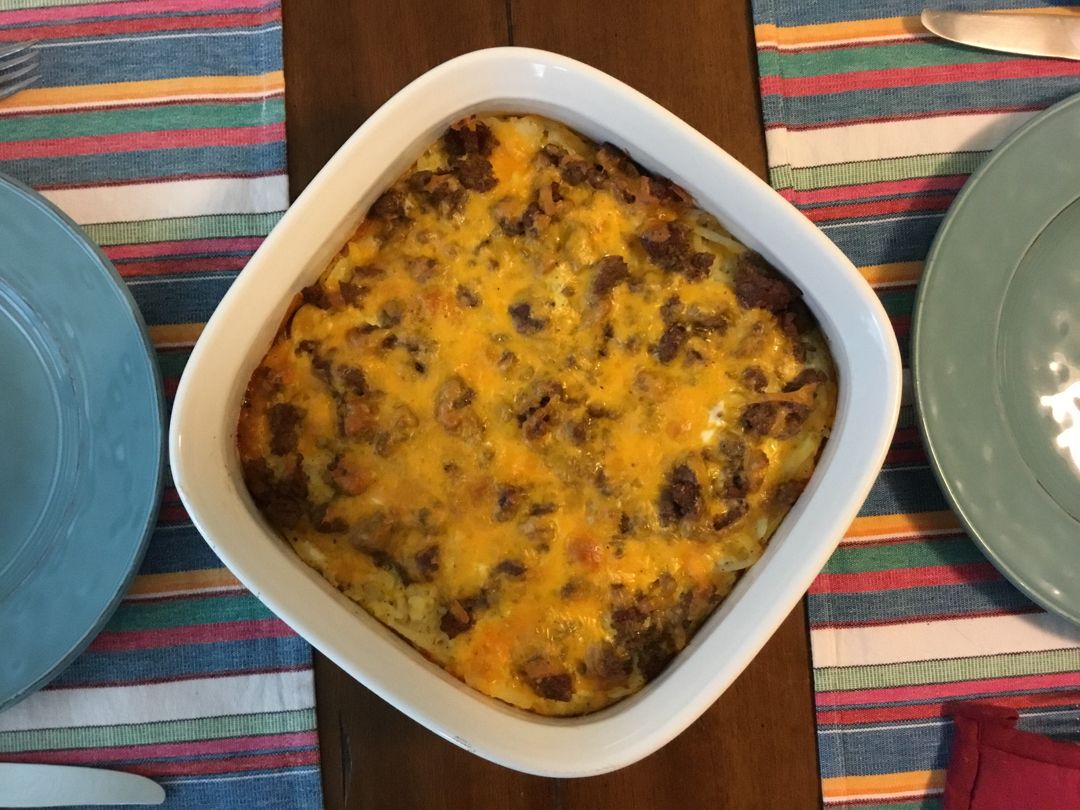
Make Ahead Sausage Breakfast Bake

by Rebecca August 6, 2022
written by Rebecca

Prep time: 15 mins | Cook time: 35 mins | Serves: 8

This Sausage Breakfast Bake is an amazing casserole loaded with your choice of breakfast sausage, hash brown, eggs, milk, and lots of melted cheese. A great make-ahead breakfast perfect for busy days or feeding a big crowd. Prep this in under fifteen minutes and bake. If making in advance, store in the fridge without baking overnight.

INGREDIENTS

8 eggs

2 pounds of crumbled breakfast sausage of your choice

1 tablespoon butter

1 small white or yellow onion

1 30-ounces bag of frozen shredded hash browns

1/4 teaspoon onion powder

1/4 teaspoon garlic powder

2 c. shredded cheddar cheese

2 c. milk

salt and pepper to taste

How to make Make Ahead Sausage Breakfast Bake

Step 1: In a large skillet, melt the butter over medium heat. Add the onions once the butter has melted and cook for about 3 to 5 minutes. To taste, season with salt and pepper. Set the onions aside when done and wipe the pan clean.

Step 2: To the skillet, add the sausage and cook for about 8 minutes over medium heat until brown. Set the cooked sausage aside.

Step 3: In the now-empty skillet, add the potatoes. Adjust the heat to medium and cook for approximately 5 minutes, flipping halfway. To taste, season with salt and pepper.

Step 4: Place the eggs and milk in a large bowl. Beat well until combined. Season with salt and pepper. Then, add the garlic powder and onion powder. Mix well.

Step 5: On the bottom of a greased 9 x 13-inch baking dish, place the hash browns. Top with the onions, eggs, and sausage. Then, sprinkle with cheese.

Step 6: At this point, you can store this in the fridge overnight if making ahead. If baking right away, place in a preheated 350 degrees F oven for about 30 to 35 minutes or until the cheese has melted.

Make Ahead Sausage Breakfast Bake

Rebecca Prep time: 15 mins | Cook time: 35 mins | Serves: 8 This Sausage Breakfast Bake is an amazing casserole loaded with your choice of breakfast sausage, hash brown, eggs,… General Recipes Make Ahead Sausage Breakfast Bake European Print This
Serves: 8 Prep Time: 15 mins Cooking Time: 35 mins 35 mins
Nutrition facts: 200 calories 20 grams fat
Rating: 5.0/5
( 1 voted )

Ingredients

  • 8 eggs
  • 2 pounds of crumbled breakfast sausage of your choice
  • 1 tablespoon butter
  • 1 small white or yellow onion
  • 1 30-ounces bag of frozen shredded hash browns
  • 1/4 teaspoon onion powder
  • 1/4 teaspoon garlic powder
  • 2 c. shredded cheddar cheese
  • 2 c. milk
  • salt and pepper to taste

Instructions

Step 1: In a large skillet, melt the butter over medium heat. Add the onions once the butter has melted and cook for about 3 to 5 minutes. To taste, season with salt and pepper. Set the onions aside when done and wipe the pan clean.

Step 2: To the skillet, add the sausage and cook for about 8 minutes over medium heat until brown. Set the cooked sausage aside.

Step 3: In the now-empty skillet, add the potatoes. Adjust the heat to medium and cook for approximately 5 minutes, flipping halfway. To taste, season with salt and pepper.

Step 4: Place the eggs and milk in a large bowl. Beat well until combined. Season with salt and pepper. Then, add the garlic powder and onion powder. Mix well.

Step 5: On the bottom of a greased 9 x 13-inch baking dish, place the hash browns. Top with the onions, eggs, and sausage. Then, sprinkle with cheese.

Step 6: At this point, you can store this in the fridge overnight if making ahead. If baking right away, place in a preheated 350 degrees F oven for about 30 to 35 minutes or until the cheese has melted.
August 6, 2022 0 comment
0 FacebookTwitterPinterestEmail
General Recipes

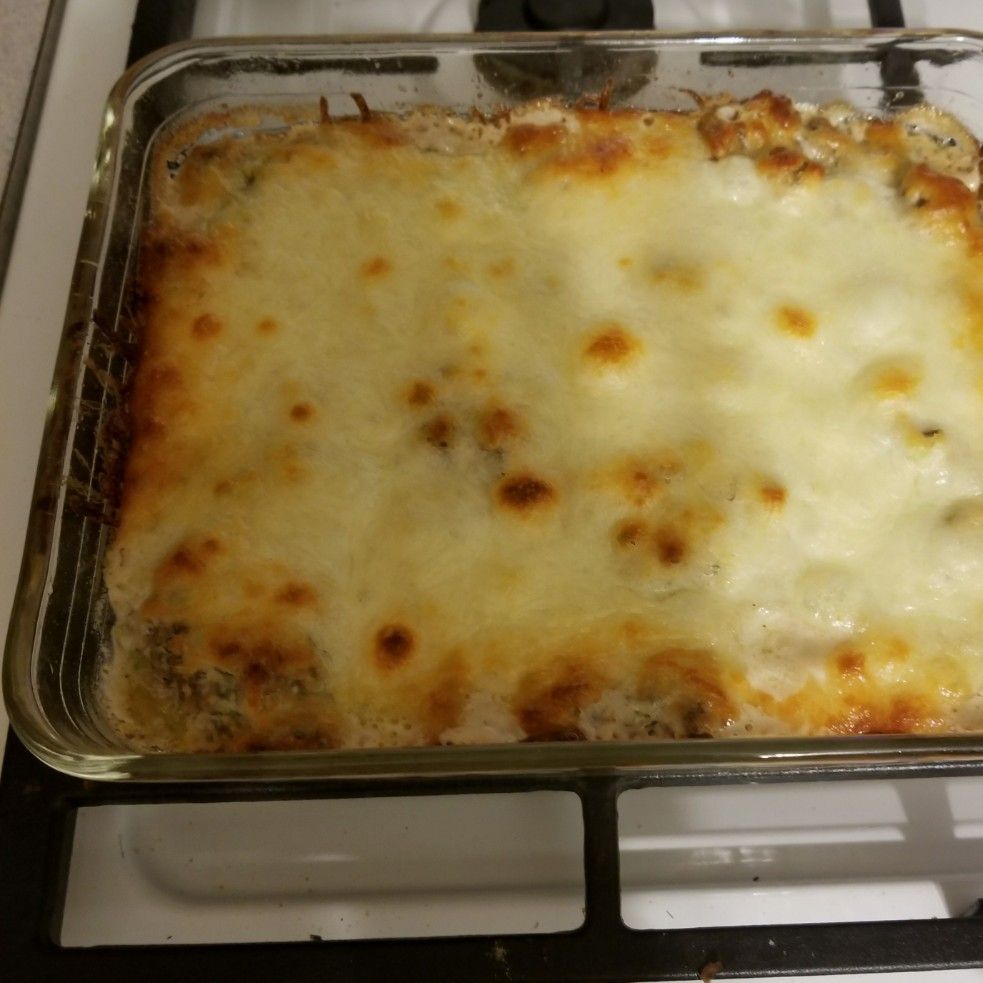
Hamburger, Sausage, Broccoli Alfredo – Low Carb

by Rebecca August 6, 2022
written by Rebecca

Cook time: 45 mins | Prep time: 20 mins | Serves: 6-8

This low-carb Hamburger, Sausage, and Broccoli Alfredo are seriously delicious! This might not look very appealing, but the taste is superb! This dish has a base of beef and sausage with broccoli covered in a mouthwatering creamy Alfredo sauce. This is perfect for people who are on a low-carb diet. This Hamburger, Sausage, and Broccoli Alfredo are incredibly easy to make using just a few simple ingredients. Have this ready on your dinner table in a breeze, and enjoy a healthy meal any time. You can even pair this up with a nice tossed salad.

Ingredients

1 pound bulk sausage (breakfast or Italian will work)

1 pound of ground beef

1 small onion, chopped

1 clove of garlic, minced

1 pkg cream cheese, 8 ounces

1/2 cup heavy cream

8 ounces mozzarella cheese, shredded

1/2 cup Parmesan cheese, grated

10-12 ounces of fresh broccoli

salt and pepper, to taste

1 teaspoon oregano, dried

How to make Hamburger, Sausage, Broccoli Alfredo – Low Carb

Step 1: Place the hamburger, sausage, onion, and garlic in a large skillet. Cook over medium heat until brown. To taste, season with oregano, salt, and pepper. Then, drain the excess grease.

Step 2: In the meantime, steam the broccoli until softened but still slightly crisp. To taste, season with salt and pepper.

Step 3: In a microwaveable bowl, place the cream cheese and heat in the microwave for about 45 seconds on high until soft. Then, stir well until the cream cheese is creamy and smooth. Slowly whisk in the cream until smooth, then mix in the Parmesan cheese.

Step 4: In a large greased casserole dish (about 2 ½ quarts or larger), combine the hamburger, broccoli, and cream sauce. Adjust the salt and pepper according to taste. On top, sprinkle the shredded cheese.

Step 5: Place in the oven and bake for about 35 to 45 minutes at 350 degrees until the edges are bubbly.

Hamburger, Sausage, Broccoli Alfredo – Low Carb

Rebecca Cook time: 45 mins | Prep time: 20 mins | Serves: 6-8 This low-carb Hamburger, Sausage, and Broccoli Alfredo are seriously delicious! This might not look very appealing, but the… General Recipes Hamburger, Sausage, Broccoli Alfredo – Low Carb European Print This
Serves: 6-8 Prep Time: 45 mins Cooking Time: 20 mins 20 mins
Nutrition facts: 200 calories 20 grams fat
Rating: 5.0/5
( 1 voted )

Ingredients

  • 1 pound bulk sausage (breakfast or Italian will work)
  • 1 pound of ground beef
  • 1 small onion, chopped
  • 1 clove of garlic, minced
  • 1 pkg cream cheese, 8 ounces
  • 1/2 cup heavy cream
  • 8 ounces mozzarella cheese, shredded
  • 1/2 cup Parmesan cheese, grated
  • 10-12 ounces of fresh broccoli
  • salt and pepper, to taste
  • 1 teaspoon oregano, dried

Instructions

Step 1: Place the hamburger, sausage, onion, and garlic in a large skillet. Cook over medium heat until brown. To taste, season with oregano, salt, and pepper. Then, drain the excess grease.

Step 2: In the meantime, steam the broccoli until softened but still slightly crisp. To taste, season with salt and pepper.

Step 3: In a microwaveable bowl, place the cream cheese and heat in the microwave for about 45 seconds on high until soft. Then, stir well until the cream cheese is creamy and smooth. Slowly whisk in the cream until smooth, then mix in the Parmesan cheese.

Step 4: In a large greased casserole dish (about 2 ½ quarts or larger), combine the hamburger, broccoli, and cream sauce. Adjust the salt and pepper according to taste. On top, sprinkle the shredded cheese.

Step 5: Place in the oven and bake for about 35 to 45 minutes at 350 degrees until the edges are bubbly.

August 6, 2022 0 comment
0 FacebookTwitterPinterestEmail
General Recipes

Roasted Brussels Sprouts

by Rebecca August 5, 2022
written by Rebecca

Prep time: 5 mins | Cook time: 25 mins | Total time: 30 mins | Servings: 4

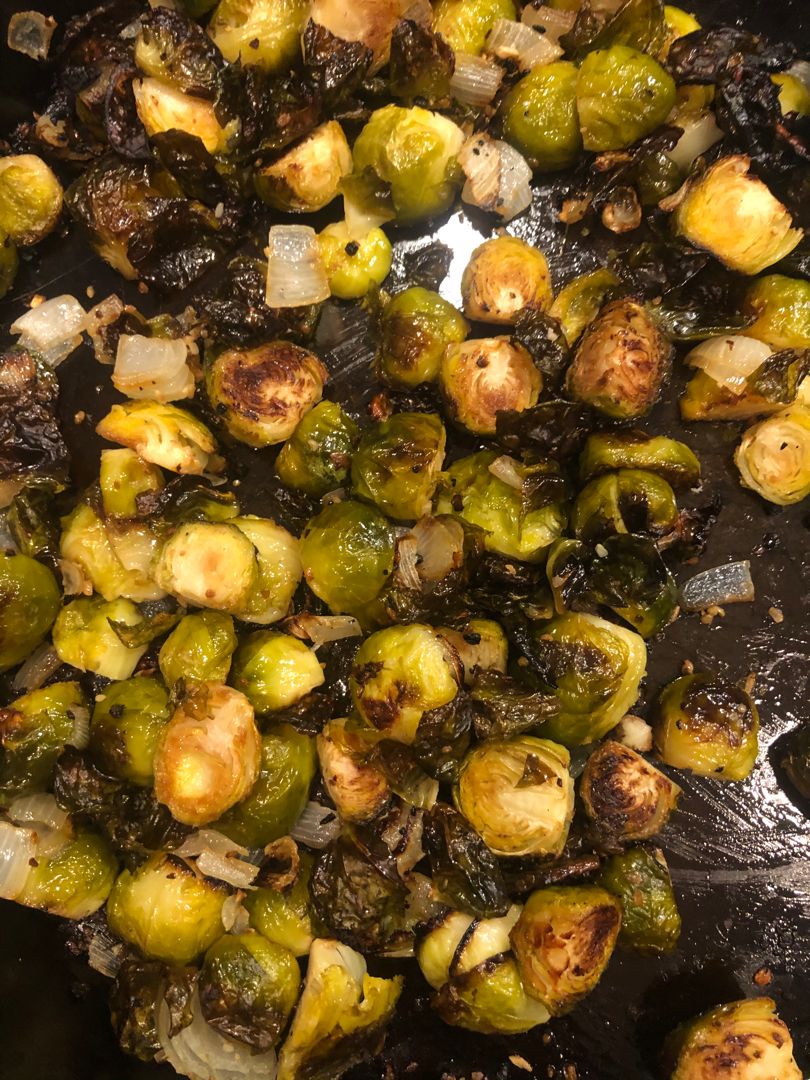
These roasted Brussels sprouts are an amazing side dish that you can easily throw together using just four ingredients. Crispy, nearly sweet, and caramelized Brussels sprouts that are excellent to pair with just about anything!

Ingredients

1 tbsp extra-virgin olive oil, plus 1 tsp

1 ½ lbs Brussels sprouts, trimmed and halved

Optional flavor additions

½ tsp kosher salt

¼ tsp black pepper

How to make Roasted Brussels Sprouts

Step 1: In the upper third of the oven, place the oven rack and preheat the oven to 400 degrees F.

Step 2: In the middle of a large rimmed sheet, place the Brussels sprouts. Over the Brussels sprouts, drizzle the olive oil and sprinkle with salt, pepper, and spice additions. Gently toss to evenly coat the Brussels sprouts. On the baking sheet, spread the Brussels sprouts in a single layer. Flip the Brussels sprouts so all the cut sides are down.

Step 3: Place in the preheated oven and bake for about 20 to 30 minutes or until the Brussels sprouts are lightly charred and crisp on the outside and tender in the middle. At this point, the outer leaves of the Brussels sprouts are very dark. To taste, season with extra salt and pepper.

Step 4: Take the Brussels sprouts out of the oven and serve right away. Enjoy!

Tips:

In an airtight jar, keep the cooked Brussels sprouts and store them in the fridge for up to 4 days.

To reheat, place the Brussels sprouts on a lightly greased baking pan and place them in a 350 degrees F oven. Bake for about 5 minutes or until well heated. You can also do this in the microwave. Place the Brussels sprouts on a plate and reheat for 30 seconds to 1 minute.

You can also freeze cooked Brussels sprouts for up to 12 months. Simply place them in an airtight freezer-safe container. Defrost overnight and reheat accordingly.

Nutritional Facts:

Calories: 104 kcal, Carbohydrate: 15g, Protein: 6g, Fat: 4g, Saturated fat: 1g, Potassium: 662 mg, Fiber: 6g, Sugar: 4g, Vitamin A: 1283IU, Vitamin C: 145mg, Calcium: 71mg, Iron: 2mg

Roasted Brussels Sprouts

Rebecca Prep time: 5 mins | Cook time: 25 mins | Total time: 30 mins | Servings: 4 These roasted Brussels sprouts are an amazing side dish that you can easily… General Recipes Roasted Brussels Sprouts European Print This
Serves: 4 Prep Time: 5 mins Cooking Time: 25 mins 25 mins
Nutrition facts: 104 calories 4 fat
Rating: 5.0/5
( 1 voted )

Ingredients

  • 1 tbsp extra-virgin olive oil, plus 1 tsp
  • 1 ½ lbs Brussels sprouts, trimmed and halved
  • Optional flavor additions
  • ½ tsp kosher salt
  • ¼ tsp black pepper

Instructions

Step 1: In the upper third of the oven, place the oven rack and preheat the oven to 400 degrees F.

Step 2: In the middle of a large rimmed sheet, place the Brussels sprouts. Over the Brussels sprouts, drizzle the olive oil and sprinkle with salt, pepper, and spice additions. Gently toss to evenly coat the Brussels sprouts. On the baking sheet, spread the Brussels sprouts in a single layer. Flip the Brussels sprouts so all the cut sides are down.

Step 3: Place in the preheated oven and bake for about 20 to 30 minutes or until the Brussels sprouts are lightly charred and crisp on the outside and tender in the middle. At this point, the outer leaves of the Brussels sprouts are very dark. To taste, season with extra salt and pepper.

Step 4: Take the Brussels sprouts out of the oven and serve right away. Enjoy!

Notes

In an airtight jar, keep the cooked Brussels sprouts and store them in the fridge for up to 4 days. To reheat, place the Brussels sprouts on a lightly greased baking pan and place them in a 350 degrees F oven. Bake for about 5 minutes or until well heated. You can also do this in the microwave. Place the Brussels sprouts on a plate and reheat for 30 seconds to 1 minute. You can also freeze cooked Brussels sprouts for up to 12 months. Simply place them in an airtight freezer-safe container. Defrost overnight and reheat accordingly.

August 5, 2022 0 comment
0 FacebookTwitterPinterestEmail
General Recipes

Paula Deen’s Amazing Chicken Casserole

by Rebecca August 5, 2022
written by Rebecca

Prep Time: 20 mins | Total Time: 1 hr

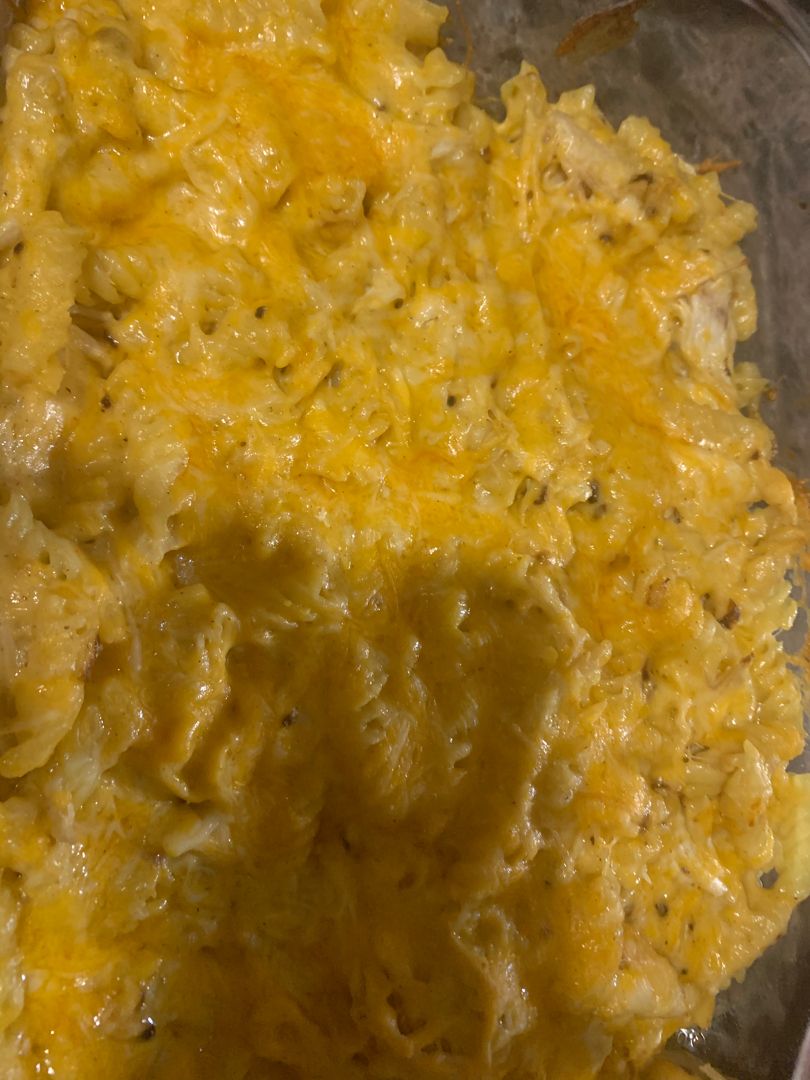
Tender casserole with a delightfully creamy sauce and loads of cheese. This Amazing Chicken Casserole is a filling, mouthwatering, and a great dinner option if you are searching for another chicken dish. The simple sauce makes this casserole a very special creamy texture. And this has a slight hint of special aroma and kick from the red pepper flakes.

This casserole is loaded with chicken and pasta covered in a creamy sauce. This is incredibly easy to whip up, and you’ll have this ready in a snap. I like this recipe as is, but if you prefer more flavor, simply add some finely chopped tomatoes or hot chili to the casserole. As for the cheese, you are welcome to use your favorite cheese. For a filling dinner, pair this casserole up with veggie salads or baked veggies.

Ingredients

3 tbsp butter

2 c. chicken, cooked, cut into small bite-sized pieces

4 c. pasta, cooked and drained (about 2 c. uncooked) – penne, cavatappi, or rigatoni works well

2 garlic cloves, minced

1 small onion, finely chopped

2 tbsp flour

1 c. milk

1/2 c. sour cream

3 c. cheese, grated (cheddar, Colby jack, Swiss, or a combination), with 1/2 c. reserved for sprinkling on top

salt and black pepper to taste

1/2 tsp red pepper flakes

How to make Paula Deen’s Amazing Chicken Casserole

Step 1: In butter, fry the onion and garlic. Stir in the flour and continue to cook for a minute more. Pour in the milk and add the sour cream. Stir and cook until the mixture has thickened. Add the cheese and mix well.

Step 2: Next, add the chicken along with the pasta. Season with salt and red pepper flakes. Toss well and transfer everything into a 9 x 13-inch baking dish.

Step 3: Place in a preheated 350 degrees F oven and bake for about 20 to 30 minutes or until the cheese begins bubbling.

Paula Deen’s Amazing Chicken Casserole

Rebecca Prep Time: 20 mins | Total Time: 1 hr Tender casserole with a delightfully creamy sauce and loads of cheese. This Amazing Chicken Casserole is a filling, mouthwatering, and a… General Recipes Paula Deen’s Amazing Chicken Casserole European Print This
Prep Time: 20 mins
Nutrition facts: 200 calories 20 grams fat
Rating: 4.0/5
( 3 voted )

Ingredients

  • 3 tbsp butter
  • 2 c. chicken, cooked, cut into small bite-sized pieces
  • 4 c. pasta, cooked and drained (about 2 c. uncooked) - penne, cavatappi, or rigatoni works well
  • 2 garlic cloves, minced
  • 1 small onion, finely chopped
  • 2 tbsp flour
  • 1 c. milk
  • 1/2 c. sour cream
  • 3 c. cheese, grated (cheddar, Colby jack, Swiss, or a combination), with 1/2 c. reserved for sprinkling on top
  • salt and black pepper to taste
  • 1/2 tsp red pepper flakes

Instructions

Step 1: In butter, fry the onion and garlic. Stir in the flour and continue to cook for a minute more. Pour in the milk and add the sour cream. Stir and cook until the mixture has thickened. Add the cheese and mix well.

Step 2: Next, add the chicken along with the pasta. Season with salt and red pepper flakes. Toss well and transfer everything into a 9 x 13-inch baking dish.

Step 3: Place in a preheated 350 degrees F oven and bake for about 20 to 30 minutes or until the cheese begins bubbling.

August 5, 2022 0 comment
0 FacebookTwitterPinterestEmail
General Recipes

Chicken Little Casserole: A Favorite Dish From Childhood

by Rebecca August 5, 2022
written by Rebecca

Total time: 45 mins | Serves: 6-8

I love this Chicken Little Casserole. This has been one of my family’s favorite casseroles for years! It is a delicious dish that brings so many good memories. This casserole is a complete meal with chicken and mashed potatoes covered in a simple yet incredibly delicious gravy.

This casserole is very filling. This is unbelievably easy to whip up with less prep time. All you need are a few readily available ingredients to make this. Have this chicken little casserole ready in under forty-five minutes and enjoy this by itself or pair this up with a simple side salad for a great weeknight dinner option.

INGREDIENTS

4 chicken breasts, cooked and shredded

6 c. mashed potatoes, homemade or store-bought

1/2 tsp garlic powder

1 c. whole milk

1/2 tsp onion powder

1/2 tsp dried thyme

1/2 tsp dried rosemary

1/2 c. sharp cheddar cheese, grated

kosher salt and freshly ground pepper, to taste

1-2 (10.5 ounces) cans of condensed cream of chicken soup (depending on your preference)

How to make Chicken Little Casserole

Step 1: Prepare the oven. Preheat it to 350 degrees F. Using a non-stick spray, lightly grease a 9 x 13-inch baking dish.

Step 2: Place 1-2 cans of soup (adjust depending on how creamy/saucy you want this to be), milk, garlic powder, onion powder, rosemary, and thyme. Season with salt and pepper. Mix well until combined.

Step 3: Into the prepared baking dish, spread the mashed potatoes in an even layer and top with the shredded chicken. Over the chicken, pour the gravy and sprinkle with cheddar cheese (optional).

Step 4: Into the prepared oven, place the baking dish, and bake the casserole for about 25 to 30 minutes or until hot and bubbly.

Step 5: When done, take the casserole out of the oven and allow it to cool for about 5 to 10 minutes before serving. Enjoy!

Chicken Little Casserole: A Favorite Dish From Childhood

Rebecca Total time: 45 mins | Serves: 6-8 I love this Chicken Little Casserole. This has been one of my family’s favorite casseroles for years! It is a delicious dish that… General Recipes Chicken Little Casserole: A Favorite Dish From Childhood European Print This
Serves: 6-8
Nutrition facts: 200 calories 20 grams fat
Rating: 5.0/5
( 1 voted )

Ingredients

  • 4 chicken breasts, cooked and shredded
  • 6 c. mashed potatoes, homemade or store-bought
  • 1/2 tsp garlic powder
  • 1 c. whole milk
  • 1/2 tsp onion powder
  • 1/2 tsp dried thyme
  • 1/2 tsp dried rosemary
  • 1/2 c. sharp cheddar cheese, grated
  • kosher salt and freshly ground pepper, to taste
  • 1-2 (10.5 ounces) cans of condensed cream of chicken soup (depending on your preference)

Instructions

Step 1: Prepare the oven. Preheat it to 350 degrees F. Using a non-stick spray, lightly grease a 9 x 13-inch baking dish.

Step 2: Place 1-2 cans of soup (adjust depending on how creamy/saucy you want this to be), milk, garlic powder, onion powder, rosemary, and thyme. Season with salt and pepper. Mix well until combined.

Step 3: Into the prepared baking dish, spread the mashed potatoes in an even layer and top with the shredded chicken. Over the chicken, pour the gravy and sprinkle with cheddar cheese (optional).

Step 4: Into the prepared oven, place the baking dish, and bake the casserole for about 25 to 30 minutes or until hot and bubbly.

Step 5: When done, take the casserole out of the oven and allow it to cool for about 5 to 10 minutes before serving. Enjoy!

August 5, 2022 0 comment
0 FacebookTwitterPinterestEmail
General Recipes

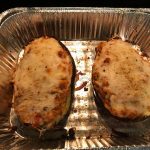
Turkey Stuffed Eggplant

by Rebecca August 5, 2022
written by Rebecca

Total time: 1 hr 15 mins | Serves: 4 – 6

This fork-licking good Turkey Stuffed Eggplant is an amazing dish loaded with ground turkey, veggies, and cheese. A healthy, very delicious, and easy dinner option that is perfect on its own or paired with some green salad.

INGREDIENTS

1 pound ground turkey

1 egg, beaten

3 – 4 small eggplants

2 cloves garlic, minced

1 1/2 c. Pecorino Romano cheese

1 small onion, diced

4 tbsp olive oil

2 tbsp tomato paste

1 tsp dried oregano

1 medium tomato, chopped

2 tsp dried basil

Kosher salt and fresh ground pepper, to taste

1-2 tsp red chili flake (optional)

How to make Turkey Stuffed Eggplant

Step 1: Prepare the oven. Preheat it to 350 degrees F. Ready an 8 x 12-inch baking dish and set aside.

Step 2: In half lengthwise, cut the eggplants and scoop out the centers, making sure to leave enough of the insides intact. Then, finely chop the eggplant you have scooped out. In the baking dish, arrange the eggplant halves.

Step 3: In a large pan, heat 2 tbsp olive oil over medium heat. Once the oil is hot, add the onions to the pan along with the tomato and chopped eggplant. Cook for about 6 to 8 minutes, stirring often, until the onions have softened and are translucent. Next, add the garlic and tomato paste. Continue to cook for additional 2 minutes. To a bowl, transfer the veggies to cool.

Step 4: In the now-empty skillet, drizzle the rest of the olive oil. Add the ground turkey and season with salt and pepper. Sprinkle the ground turkey with basil, oregano, and chili flakes (optional). Cook until the meat is no longer pink, breaking it up using a wooden spoon as it cooks. Set aside when done.

Step 5: Add the slightly cooled turkey to the bowl with the veggies. Then, add the beaten egg and half a cup of cheese. As needed, season with extra salt and pepper.

Step 6: Into the eggplant halves, spoon the mixture, and top with the rest of the cheese. Place in the preheated oven and bake for about 50 minutes or until the cheese has melted and the eggplant is soft. Remove from the oven when done and allow it cool for about 5 minutes.

Step 7: Serve and enjoy!

Turkey Stuffed Eggplant

Rebecca Total time: 1 hr 15 mins | Serves: 4 – 6 This fork-licking good Turkey Stuffed Eggplant is an amazing dish loaded with ground turkey, veggies, and cheese. A healthy,… General Recipes Turkey Stuffed Eggplant European Print This
Serves: 4-6
Nutrition facts: 200 calories 20 grams fat
Rating: 5.0/5
( 1 voted )

Ingredients

  • 1 pound ground turkey
  • 1 egg, beaten
  • 3 - 4 small eggplants
  • 2 cloves garlic, minced
  • 1 1/2 c. Pecorino Romano cheese
  • 1 small onion, diced
  • 4 tbsp olive oil
  • 2 tbsp tomato paste
  • 1 tsp dried oregano
  • 1 medium tomato, chopped
  • 2 tsp dried basil
  • Kosher salt and fresh ground pepper, to taste
  • 1-2 tsp red chili flake (optional)

Instructions

Step 1: Prepare the oven. Preheat it to 350 degrees F. Ready an 8 x 12-inch baking dish and set aside.

Step 2: In half lengthwise, cut the eggplants and scoop out the centers, making sure to leave enough of the insides intact. Then, finely chop the eggplant you have scooped out. In the baking dish, arrange the eggplant halves.

Step 3: In a large pan, heat 2 tbsp olive oil over medium heat. Once the oil is hot, add the onions to the pan along with the tomato and chopped eggplant. Cook for about 6 to 8 minutes, stirring often until the onions have softened and are translucent. Next, add the garlic and tomato paste. Continue to cook for additional 2 minutes. To a bowl, transfer the veggies to cool.

Step 4: In the now-empty skillet, drizzle the rest of the olive oil. Add the ground turkey and season with salt and pepper. Sprinkle the ground turkey with basil, oregano, and chili flakes (optional). Cook until the meat is no longer pink, breaking it up using a wooden spoon as it cooks. Set aside when done.

Step 5: Add the slightly cooled turkey to the bowl with the veggies. Then, add the beaten egg and half a cup of cheese. As needed, season with extra salt and pepper.

Step 6: Into the eggplant halves, spoon the mixture, and top with the rest of the cheese. Place in the preheated oven and bake for about 50 minutes or until the cheese has melted and the eggplant is soft. Remove from the oven when done and allow it cool for about 5 minutes.

Step 7: Serve and enjoy!

August 5, 2022 0 comment
0 FacebookTwitterPinterestEmail
General Recipes

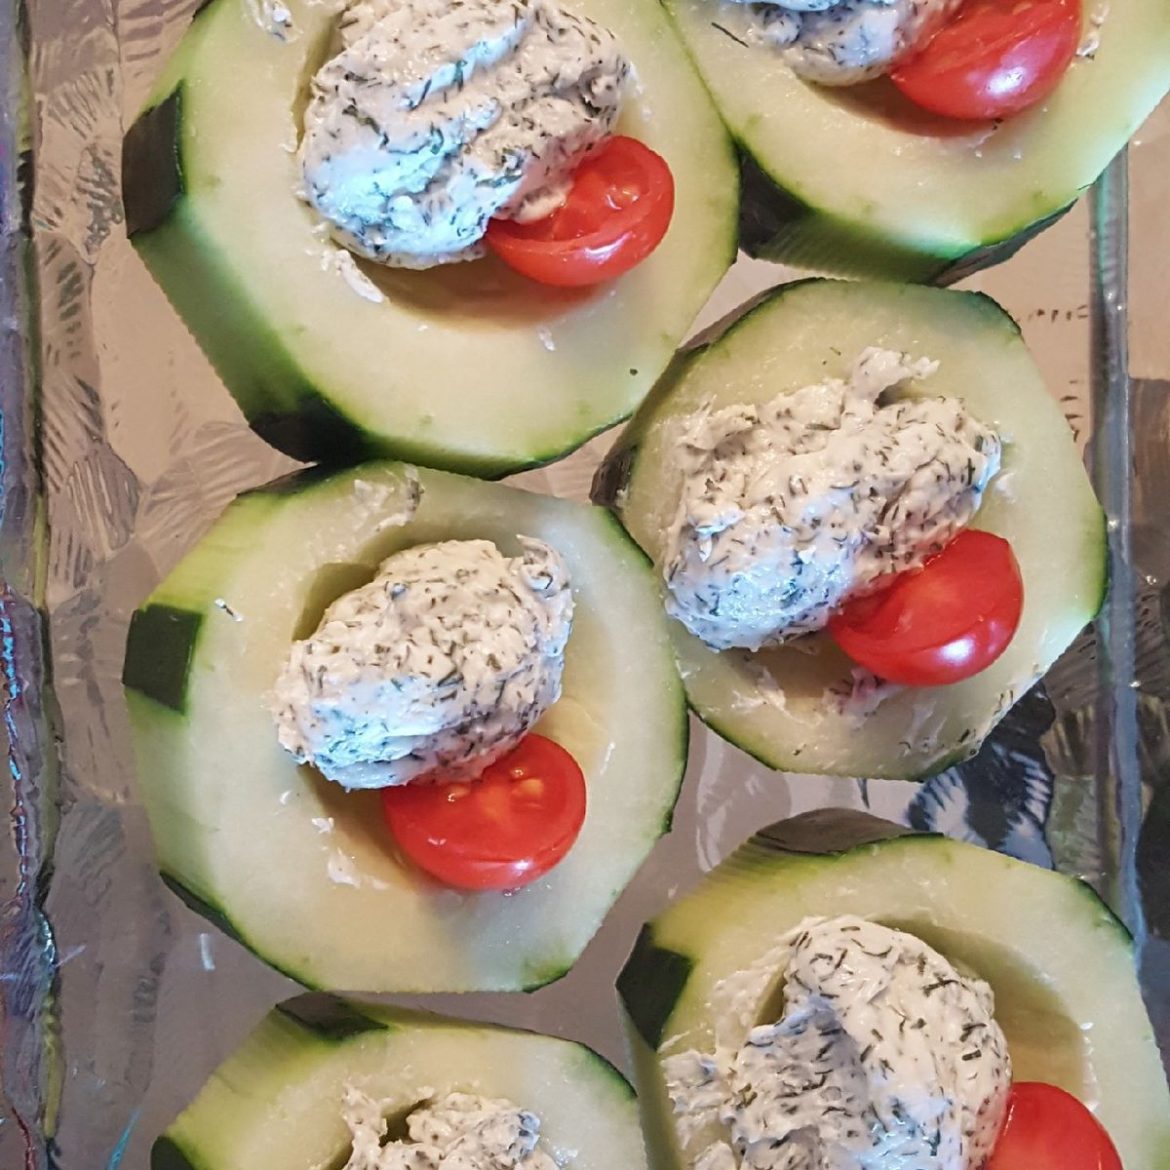
Cucumber Bites with Herbs Cream Cheese and Cherry Tomato

by Rebecca August 5, 2022
written by Rebecca

Prep time: 40 mins | Serving: 8

I am obsessed with these cucumber bites with herbs cream cheese and cherry tomatoes. These are super fancy and excellent if you are searching for another party appetizer. You can whip these cucumber bites up in under an hour using just simple ingredients. Healthy and delicious – these cucumber bites are no doubt a must and for keeps!

This recipe is very simple. The combination of cucumber, tomatoes, cream cheese, and ranch dressing is to die for! Easily throw together a huge batch if serving a big crowd. These are very refreshing and appealing appetizers or party snacks!

Everyone will enjoy these crunchy, fresh cucumber bites topped with heavenly cream and halved cherry tomatoes! These are very tasty, colorful, and excellent for every occasion. If you are throwing another party, make sure not to miss these delightful cucumber bites!

Ingredients

1/4 c. of ranch dressing

4 oz. of brick cream cheese, softened

2 tbsp fresh dill or thyme

15 cherry tomatoes, sliced in half

3-4 long cucumbers, skinned and sliced into 1” slices

Paprika or Cajun spice mix to garnish

Salt to taste

How to make Cucumber Bites with Herbs Cream Cheese and Cherry Tomato

Step 1: For the herb cream cheese, place the softened cream cheese, ranch dressing, and herbs in a mixer. Mix well. Into a piping bag with a star tip, spoon the mixture.

Step 2: After washing the cucumber, peel them and score the sides using a fork. Into 1-inch pieces, slice the cucumber. To remove the portion of the center of one side of the cucumber, use a melon baller, creating a half moon crater.

Step 3: Into the crater, pipe the herb cream cheese to about half an inch up from the top.

Step 4: Push down half of the cheery tomatoes into the herb cream cheese and sprinkle with salt, herbs, and spice mix.

Step 5: Serve these cucumber bites cold. Enjoy!

Cucumber Bites with Herbs Cream Cheese and Cherry Tomato

Rebecca Prep time: 40 mins | Serving: 8 I am obsessed with these cucumber bites with herbs cream cheese and cherry tomatoes. These are super fancy and excellent if you are… General Recipes Cucumber Bites with Herbs Cream Cheese and Cherry Tomato European Print This
Serves: 8 Prep Time: 40 mins
Nutrition facts: 200 calories 20 grams fat
Rating: 3.5/5
( 2 voted )

Ingredients

  • 1/4 c. of ranch dressing
  • 4 oz. of brick cream cheese, softened
  • 2 tbsp fresh dill or thyme
  • 15 cherry tomatoes, sliced in half
  • 3-4 long cucumbers, skinned and sliced into 1” slices
  • Paprika or Cajun spice mix to garnish
  • Salt to taste

Instructions

Step 1: For the herb cream cheese, place the softened cream cheese, ranch dressing, and herbs in a mixer. Mix well. Into a piping bag with a star tip, spoon the mixture.

Step 2: After washing the cucumber, peel them and score the sides using a fork. Into 1-inch pieces, slice the cucumber. To remove the portion of the center of one side of the cucumber, use a melon baller, creating a half moon crater.

Step 3: Into the crater, pipe the herb cream cheese to about half an inch up from the top.

Step 4: Push down half of the cheery tomatoes into the herb cream cheese and sprinkle with salt, herbs, and spice mix.

Step 5: Serve these cucumber bites cold. Enjoy!

August 5, 2022 0 comment
0 FacebookTwitterPinterestEmail
General Recipes

CREAMY GARLIC PASTA

by Rebecca August 5, 2022
written by Rebecca

Prep time: 10 mins | Cook time: 20 mins | Total time: 30 mins | Servings: 4

My family loves pasta. We have our favorites, and this very delightful creamy garlic pasta is one of many. This pasta dish is incredibly easy to whip up using just a few simple ingredients. It is the perfect weeknight dinner option if you want something easy, quick, and delicious. Pair this up with a simple salad for a simple meal that is excellent for everyone!

Enjoy a hearty, cheesy pasta dish with a delicious garlic flavor any time with this easy creamy garlic pasta. And have this budget-friendly pasta dish ready in under thirty minutes.

Ingredients

2 tablespoons virgin olive oil

8 ounces uncooked spaghetti

1 head garlic

1 tablespoon all-purpose flour

1 ¼ c. low-fat milk

1 teaspoon dried oregano

Salt and black pepper, to taste

2 tablespoons finely chopped, fresh parsley

HOW TO MAKE CREAMY GARLIC PASTA

Step 1: With cold water, fill a stock pot halfway and generously season with sea salt. Boil the salted water over high heat.

Step 2: In the meantime, coarsely chop the garlic and finely cut the fresh parsley.

Step 3: Add 8 ounces of uncooked spaghetti to the boiling salted water and toss it around. Cook following the package directions until al dente.

Step 4: Heat 2 tbsp olive oil in a frying pan over medium heat. Once the oil is hot, stir in 1 tbsp all-purpose flour. Keep stirring and cook for about 2 minutes. Next, add 1 tsp dried oregano and 1 1/4 c. milk. Cook for another 4 minutes, stirring constantly until the mixture has thickened. Season with sea salt and black pepper.

Step 5: In a sieve, drain the spaghetti. Add the well-drained spaghetti into the pan with the creamy sauce, along with 2 tbsp finely chopped parsley. Toss well.

Step 6: Serve the creamy garlic pasta immediately. Enjoy!

Tips:

The cream sauce takes about 8 minutes to prep from start to finish. So start making the sauce while the pasta is cooking to prevent the sauce from getting cold.

Nutritional Facts:

Per Serving: 543 calories; protein 17.3g; carbohydrates 46.8g; fat 31.7g; cholesterol 98.5mg; sodium 1388.1mg.

CREAMY GARLIC PASTA

Rebecca Prep time: 10 mins | Cook time: 20 mins | Total time: 30 mins | Servings: 4 My family loves pasta. We have our favorites, and this very delightful creamy… General Recipes CREAMY GARLIC PASTA European Print This
Serves: 4 Prep Time: 10 mins Cooking Time: 20 mins 20 mins
Nutrition facts: 543 calories 31.7 fat
Rating: 5.0/5
( 1 voted )

Ingredients

  • 2 tablespoons virgin olive oil
  • 8 ounces uncooked spaghetti
  • 1 head garlic
  • 1 tablespoon all-purpose flour
  • 1 ¼ c. low-fat milk
  • 1 teaspoon dried oregano
  • Salt and black pepper, to taste
  • 2 tablespoons finely chopped, fresh parsley

Instructions

Step 1: With cold water, fill a stock pot halfway and generously season with sea salt. Boil the salted water over high heat.

Step 2: In the meantime, coarsely chop the garlic and finely cut the fresh parsley.

Step 3: Add 8 ounces of uncooked spaghetti to the boiling salted water and toss it around. Cook following the package directions until al dente.

Step 4: Heat 2 tbsp olive oil in a frying pan over medium heat. Once the oil is hot, stir in 1 tbsp all-purpose flour. Keep stirring and cook for about 2 minutes. Next, add 1 tsp dried oregano and 1 1/4 c. milk. Cook for another 4 minutes, stirring constantly until the mixture has thickened. Season with sea salt and black pepper.

Step 5: In a sieve, drain the spaghetti. Add the well-drained spaghetti into the pan with the creamy sauce, along with 2 tbsp finely chopped parsley. Toss well.

Step 6: Serve the creamy garlic pasta immediately. Enjoy!

Notes

The cream sauce takes about 8 minutes to prep from start to finish. So start making the sauce while the pasta is cooking to prevent the sauce from getting cold.

August 5, 2022 0 comment
0 FacebookTwitterPinterestEmail
General Recipes

Air Fryer Onion Rings

by Rebecca August 5, 2022
written by Rebecca

Prep time: 10 mins | Cook time: 12 mins | Total time: 22 mins

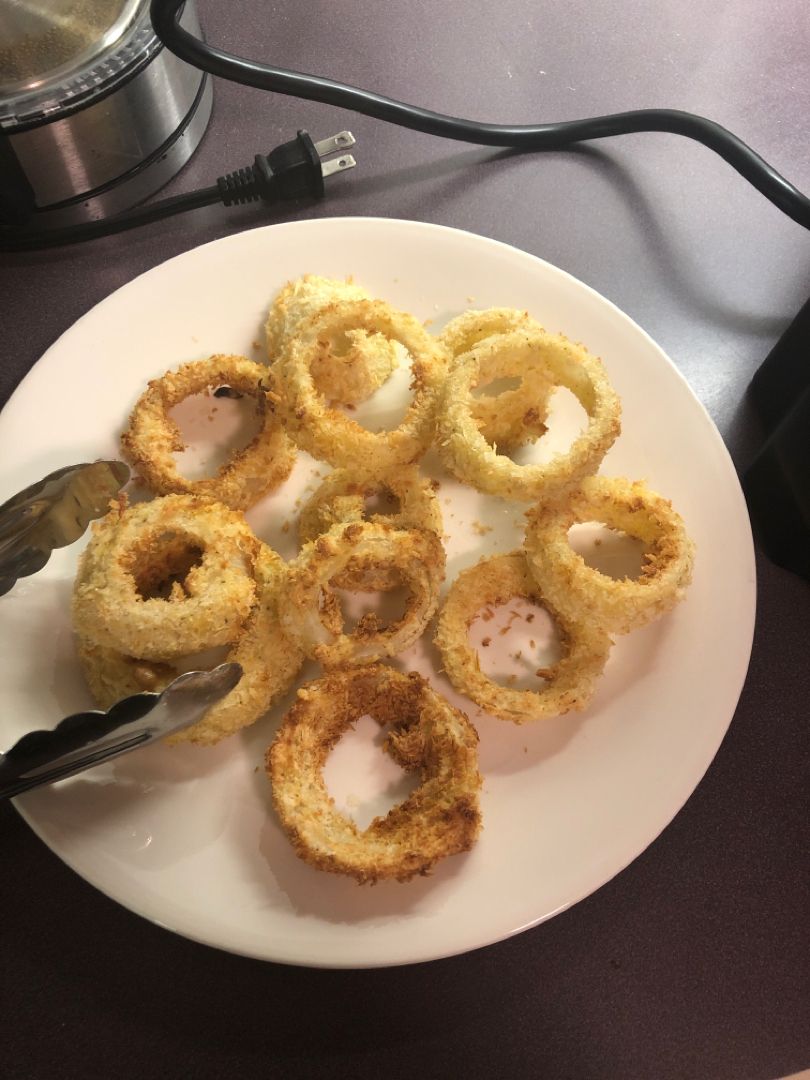
These Air Fryer Onion Rings are way less messy and convenient in comparison to deep frying. Easy, quick, and guarantee extra crispy, perfectly seasoned, and delicious onion rings!

Ingredients

1 egg

1 large yellow sweet onion, sliced ½” thick and separated into rings

1 teaspoon paprika

½ c. all-purpose flour

½ c. buttermilk

1 c. panko breadcrumbs

2 tablespoons olive oil

Oil Spray, optional

1 teaspoon salt, divided

How to make Air Fryer Onion Rings

Step 1: Place the flour, paprika, and half tsp salt on a shallow deep plate. Mix well and set aside. On another plate, whisk the buttermilk or milk and vinegar/lemon juice, and egg. Add 1/4 cup of the flour mixture. Mix well and set aside.

Step 2: Place the panko breadcrumbs, ½ tsp salt, and olive oil in the third bowl and mix using a fork until well blended. In the fourth bowl, place half of the panko.

Step 3: Dry the onion rigs using a paper towel. In the flour mixture, dredge the onion rings using a fork, then dip them in the buttermilk mixture, and coat in the panko mixture.

Step 4: Grease the air fryer basket using an oil spray. In a single layer, place the onion rings. Set to cook the onion rings for about 11 to 15 minutes at 400 degrees F or until golden brown and crispy. After about 6 minutes, spray the onion rings with cooking spray.

Step 5: Using a fork or cookie spatula, lift the onion rings from the air fryer basket. Serve right away. Enjoy!

Tips:

If desired, you are welcome to use sweet onions. White and yellow onions are not recommended for this recipe.

Freeze the breaded onion rings for about 15 minutes to let the panko mixture stick better.

If panko bread crumbs are not available, you can swap them with normal bread crumbs.

Make sure to use a fork to coat the onion rings.

Nutritional Facts:

Calories: 193 kcal | carbohydrates: 26g | protein: 4g | fat: 8g | cholesterol: 3mg | sodium: 1208mg | potassium: 260mg | fiber: 2g | sugar: 9g | vitamin A: 540iu | vitamin C: 7.9mg | calcium: 68mg | iron: 1.4mg

Air Fryer Onion Rings

Rebecca Prep time: 10 mins | Cook time: 12 mins | Total time: 22 mins These Air Fryer Onion Rings are way less messy and convenient in comparison to deep frying.… General Recipes Air Fryer Onion Rings European Print This
Prep Time: 10 mins Cooking Time: 12 mins 12 mins
Nutrition facts: 193 calories 8 fat
Rating: 5.0/5
( 1 voted )

Ingredients

  • 1 egg
  • 1 large yellow sweet onion, sliced ½” thick and separated into rings
  • 1 teaspoon paprika
  • ½ c. all-purpose flour
  • ½ c. buttermilk
  • 1 c. panko breadcrumbs
  • 2 tablespoons olive oil
  • Oil Spray, optional
  • 1 teaspoon salt, divided

Instructions

Step 1: Place the flour, paprika, and half tsp salt on a shallow deep plate. Mix well and set aside. On another plate, whisk the buttermilk or milk and vinegar/lemon juice, and egg. Add 1/4 cup of the flour mixture. Mix well and set aside.

Step 2: Place the panko breadcrumbs, ½ tsp salt, and olive oil in the third bowl and mix using a fork until well blended. In the fourth bowl, place half of the panko.

Step 3: Dry the onion rigs using a paper towel. In the flour mixture, dredge the onion rings using a fork, then dip them in the buttermilk mixture, and coat in the panko mixture.

Step 4: Grease the air fryer basket using an oil spray. In a single layer, place the onion rings. Set to cook the onion rings for about 11 to 15 minutes at 400 degrees F or until golden brown and crispy. After about 6 minutes, spray the onion rings with cooking spray.

Step 5: Using a fork or cookie spatula, lift the onion rings from the air fryer basket. Serve right away. Enjoy!

Notes

If desired, you are welcome to use sweet onions. White and yellow onions are not recommended for this recipe. Freeze the breaded onion rings for about 15 minutes to let the panko mixture stick better. If panko bread crumbs are not available, you can swap them with normal bread crumbs. Make sure to use a fork to coat the onion rings.

August 5, 2022 0 comment
0 FacebookTwitterPinterestEmail
General Recipes

Crockpot Pierogi Casserole with Kielbasa

by Rebecca August 5, 2022
written by Rebecca

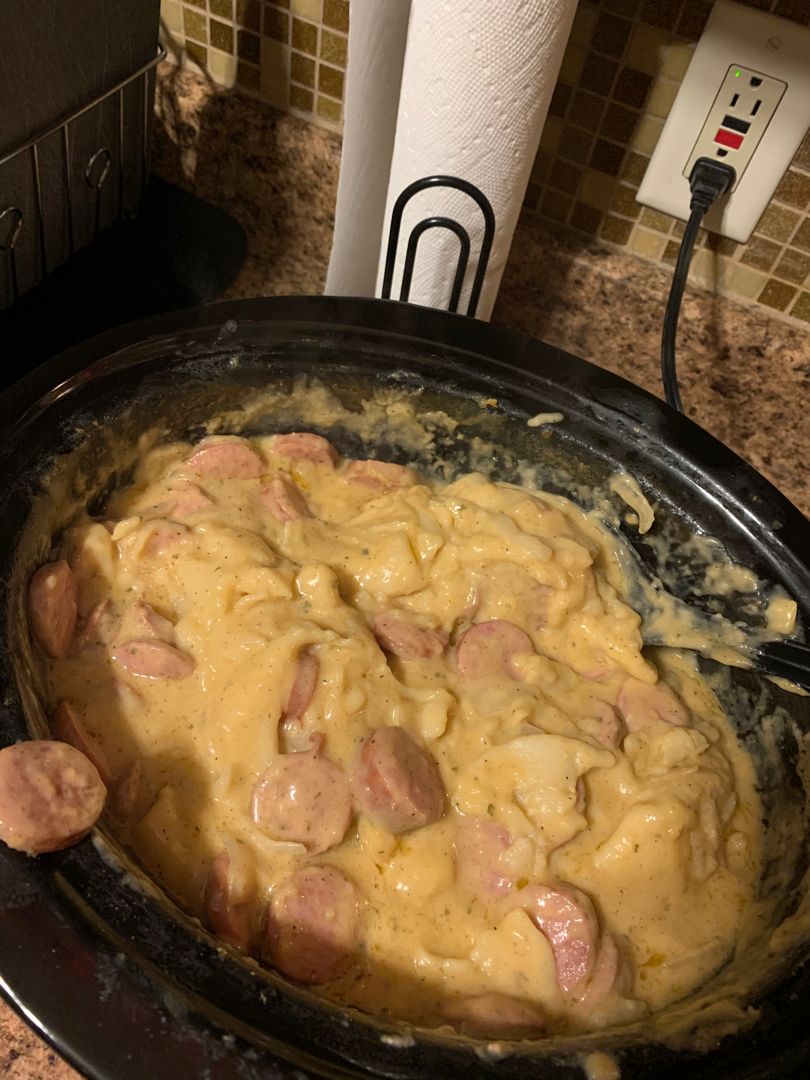
I love crockpot recipes. They make life easier. One of my favorite crockpot recipes is this Crockpot Pierogi Casserole with Kielbasa. This is a scrumptious weeknight dinner with pillowy pierogies in a flavorful cream sauce with pieces of tender and spicy kielbasa. And you can also make this on the stovetop if desired.

Ingredients

1 lb. kielbasa – sliced

3 boxes of Cheddar Pierogi (16 ounces each) – Regular size is preferred

1 c. shredded cheddar cheese

1 8-ounces block of cream cheese

salt & pepper to taste

4 c. chicken broth

How to make Crockpot Pierogi Casserole with Kielbasa

In a crockpot, place all the ingredients. Mix well and set to cook for 3 to 4 hours on high or 6 hours on low.

To make in the Oven:

Step 1: Prepare the oven. Preheat it to 350 degrees F. Ready a 13 x 9-inch baking dish. Grease and set aside.

Step 2: Combine the chicken broth and cream cheese in a saucepan. Cook while stirring often, until the cream cheese has melted.

Step 3: In the bottom of the prepared baking dish, layer the frozen pierogis followed by a layer of kielbasa, then the cream cheese sauce, and a layer of shredded cheddar cheese.

Step 4: Place in the preheated oven and bake for about 30 to 45 minutes or until the cheese is bubbly and starts to appear golden brown.

Notes:

My favorite is Mrs. T’s brand frozen pierogis, but you can try using other brands.

Serve this dish with crusty bread and fresh green salad.

Feel free to give other flavors of pierogi a try.

For a nice crunch addition, you can add crispy fried onions as garnish if making this dish in a crockpot. If baking, add the crispy fried onions at the last minute of baking.

Store any leftovers in the fridge for up to 4 days.

Crockpot Pierogi Casserole with Kielbasa

Rebecca I love crockpot recipes. They make life easier. One of my favorite crockpot recipes is this Crockpot Pierogi Casserole with Kielbasa. This is a scrumptious weeknight dinner with pillowy pierogies… General Recipes Crockpot Pierogi Casserole with Kielbasa European Print This
Nutrition facts: 200 calories 20 grams fat
Rating: 5.0/5
( 1 voted )

Ingredients

  • 1 lb. kielbasa – sliced
  • 3 boxes of Cheddar Pierogi (16 ounces each) – Regular size is preferred
  • 1 c. shredded cheddar cheese
  • 1 8-ounces block of cream cheese
  • salt & pepper to taste
  • 4 c. chicken broth

Instructions

In a crockpot, place all the ingredients. Mix well and set to cook for 3 to 4 hours on high or 6 hours on low.

To make in the Oven:

Step 1: Prepare the oven. Preheat it to 350 degrees F. Ready a 13 x 9-inch baking dish. Grease and set aside.

Step 2: Combine the chicken broth and cream cheese in a saucepan. Cook while stirring often, until the cream cheese has melted.

Step 3: In the bottom of the prepared baking dish, layer the frozen pierogis followed by a layer of kielbasa, then the cream cheese sauce, and a layer of shredded cheddar cheese.

Step 4: Place in the preheated oven and bake for about 30 to 45 minutes or until the cheese is bubbly and starts to appear golden brown.

Notes

My favorite is Mrs. T’s brand frozen pierogis, but you can try using other brands. Serve this dish with crusty bread and fresh green salad. Feel free to give other flavors of pierogi a try. For a nice crunch addition, you can add crispy fried onions as garnish if making this dish in a crockpot. If baking, add the crispy fried onions at the last minute of baking. Store any leftovers in the fridge for up to 4 days.

August 5, 2022 0 comment
0 FacebookTwitterPinterestEmail
Newer Posts
Older Posts

Popular Posts

  • 1

    Crispy Crunchy Parmesan Potatoes

    March 21, 2020
  • 2

    CROCK POT SMOTHERED PORK CHOPS

    March 21, 2020
  • Facebook
  • Twitter

@2019 - All Right Reserved.


Back To Top