Cook it once
  • Home
  • Privacy Policy
  • Recipes
    • KETO
    • LC
    • WW
  • Tips
  • Contact
Cook it once
  • Home
  • Privacy Policy
  • Recipes
    • KETO
    • LC
    • WW
  • Tips
  • Contact
Category:

General Recipes

General Recipes

Pineapple Pretzel Fluff Salad: A Summer Treat

by Rebecca August 8, 2022
written by Rebecca

Total time: 20 mins | Serves: 6

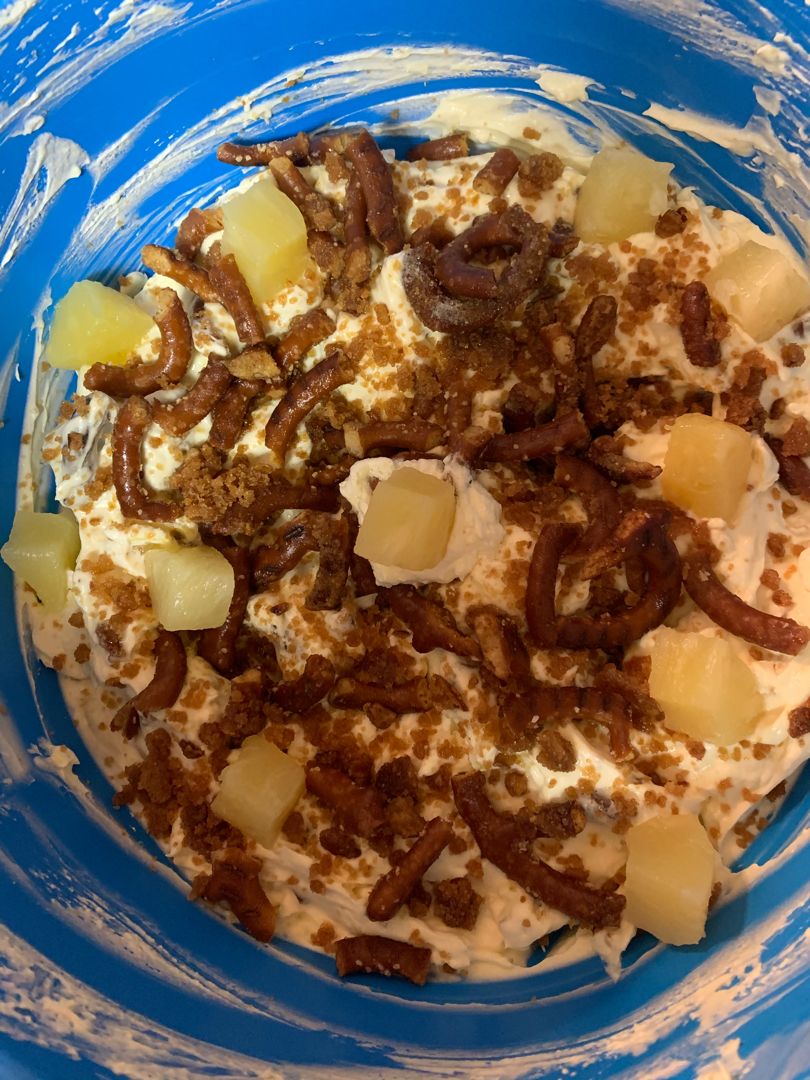
This Pineapple Pretzel Fluff Salad is a refreshing summer treat that has been around for ages. A fruity salad that is made with pineapple, frozen whipped topping, cream cheese, and pretzels. This salad is super good, everyone is crazy over this! The sweet and crunchy combination of this salad is to die for! Right before serving, add the pretzel mixture to keep it crispy.

I love this pineapple pretzel fluff salad is my favorite to bring to potlucks and picnics. And an amazing dessert perfect for any occasion. I often serve the pretzels in a bowl next to the salad and let my guests put them on the salad. This will prevent the pretzels from getting soft.

INGREDIENTS

1/2 c. (1 stick) unsalted butter, melted

1 1/4 c. pretzels, roughly crushed

1 (8 ounces) package of cream cheese, softened

1 c. sugar, divided

1 (12 ounces) container of frozen whipped topping, thawed

1 (20 ounces) can crush pineapple, drained

How to make Pineapple Pretzel Fluff Salad

Step 1: Prepare the oven. Preheat it to 400 degrees F. Using parchment paper or a silicone baking mat, line a baking sheet.

Step 2: In a medium bowl, place the pretzels, melted butter, and 1/2 cup sugar. Mix well until combined.

Step 3: On the prepared baking sheet, spread the mixture in an even layer. Place in the preheated oven and bake for about 7 minutes. When done, take the baking sheet out of the oven. Allow cooling before crumbling into pieces.

Step 4: Place the cream cheese in a large bowl and beat for about 2 to 4 minutes or until fluffy. Then, stir in the rest of the half cup sugar. Next, fold in the drained pineapple along with the thawed frozen whipped topping. Allow this to set for an hour.

Step 5: Right before serving, sprinkle the salad with crumbled pretzel topping. Enjoy!

Pineapple Pretzel Fluff Salad: A Summer Treat

Rebecca Total time: 20 mins | Serves: 6 This Pineapple Pretzel Fluff Salad is a refreshing summer treat that has been around for ages. A fruity salad that is made with… General Recipes Pineapple Pretzel Fluff Salad: A Summer Treat European Print This
Serves: 6
Nutrition facts: 200 calories 20 grams fat
Rating: 5.0/5
( 1 voted )

Ingredients

  • 1/2 c. (1 stick) unsalted butter, melted
  • 1 1/4 c. pretzels, roughly crushed
  • 1 (8 ounces) package of cream cheese, softened
  • 1 c. sugar, divided
  • 1 (12 ounces) container of frozen whipped topping, thawed
  • 1 (20 ounces) can crush pineapple, drained

Instructions

Step 1: Prepare the oven. Preheat it to 400 degrees F. Using parchment paper or a silicone baking mat, line a baking sheet.

Step 2: In a medium bowl, place the pretzels, melted butter, and 1/2 cup sugar. Mix well until combined.

Step 3: On the prepared baking sheet, spread the mixture in an even layer. Place in the preheated oven and bake for about 7 minutes. When done, take the baking sheet out of the oven. Allow cooling before crumbling into pieces.

Step 4: Place the cream cheese in a large bowl and beat for about 2 to 4 minutes or until fluffy. Then, stir in the rest of the half cup sugar. Next, fold in the drained pineapple along with the thawed frozen whipped topping. Allow this to set for an hour.

Step 5: Right before serving, sprinkle the salad with crumbled pretzel topping. Enjoy!
August 8, 2022 0 comment
1 FacebookTwitterPinterestEmail
General Recipes

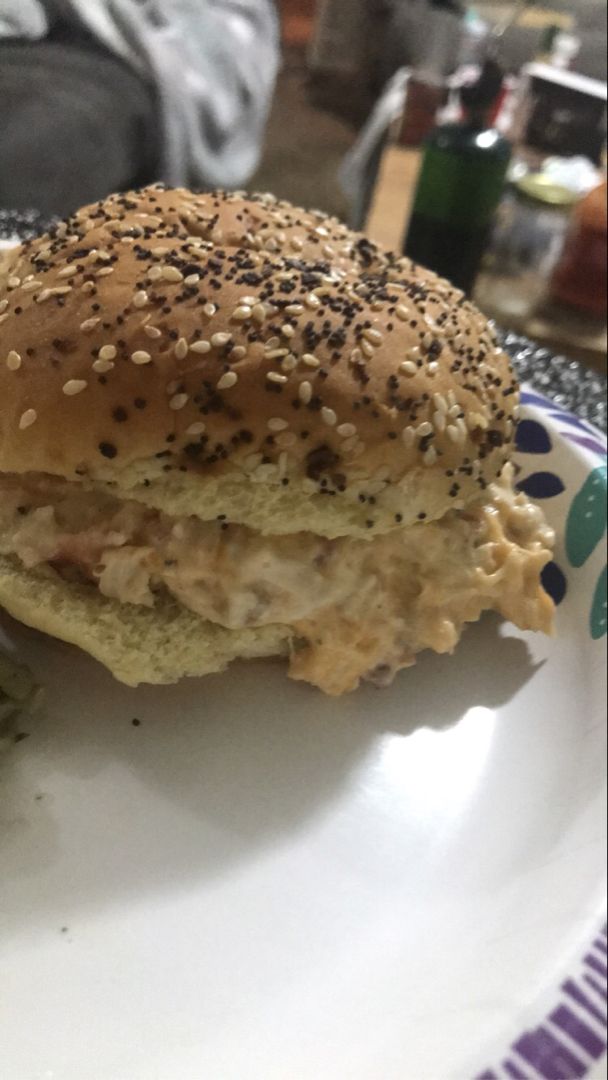
Ohio Shredded Chicken Sandwiches

by Rebecca August 8, 2022
written by Rebecca

Prep time: 15 mins | Cook time: 3 hrs | Serves: 10

Chicken is a staple at home. I have my fair share of chicken recipes that I am very proud of. Adding another recipe is surely a must! This time I want to try these easy Ohio Shredded Chicken Sandwiches. It is super simple, yet incredibly flavorful. All this recipe requires are a few simple ingredients and a slow cooker. We all know that slow cooker recipes are a must if you have a busy schedule or you are just feeling lazy.

I have tried many chicken sandwiches. One that stood out is this Ohio shredded chicken sandwich. These have been one of the most requested sandwiches at picnics and potlucks. This recipe is very economical and easy to prep, and the combination of ingredients is simply superb! Many say that this sandwich is a ballpark classic and a cult favorite! And I could not agree more!

If you have not tried these Ohio Shredded Chicken Sandwiches, you should very soon! It’s one of those sandwiches recipe that you should have in your back pocket!

INGREDIENTS

1 c. chicken flavored stuffing mix

3 pounds boneless, skinless chicken breasts

2 (10 ounces each) cans of cream of chicken soup

1 sleeve of Ritz crackers, crushed

Hamburger buns, for serving

Chicken broth or water, as needed

How to make Ohio Shredded Chicken Sandwiches

Step 1: In the insert of a slow cooker, place the chicken breasts. On top, pour the sauce over. Put the lid on and set to cook for 3 to 4 hours on low until the chicken is easily shredded using two forks.

Step 2: When done, shred the chicken and stir in the stuffing mix and crushed Ritz crackers. Replace the lid and continue to cook for another 30 minutes or until the stuffing and crumbs have softened.

Step 3: You can add chicken broth or water (if needed) to thin the mixture out.

Step 4: Serve the Ohio Shredded Chicken Sandwiches on hamburger buns. Enjoy!

Ohio Shredded Chicken Sandwiches

Rebecca Prep time: 15 mins | Cook time: 3 hrs | Serves: 10 Chicken is a staple at home. I have my fair share of chicken recipes that I am very… General Recipes Ohio Shredded Chicken Sandwiches European Print This
Serves: 10 Prep Time: 15 mins Cooking Time: 3 hrs 3 hrs
Nutrition facts: 200 calories 20 grams fat
Rating: 5.0/5
( 1 voted )

Ingredients

  • 1 c. chicken flavored stuffing mix
  • 3 pounds boneless, skinless chicken breasts
  • 2 (10 ounces each) cans of cream of chicken soup
  • 1 sleeve of Ritz crackers, crushed
  • Hamburger buns, for serving
  • Chicken broth or water, as needed

Instructions

Step 1: In the insert of a slow cooker, place the chicken breasts. On top, pour the sauce over. Put the lid on and set to cook for 3 to 4 hours on low until the chicken is easily shredded using two forks.

Step 2: When done, shred the chicken and stir in the stuffing mix and crushed Ritz crackers. Replace the lid and continue to cook for another 30 minutes or until the stuffing and crumbs have softened.

Step 3: You can add chicken broth or water (if needed) to thin the mixture out.

Step 4: Serve the Ohio Shredded Chicken Sandwiches on hamburger buns. Enjoy!

August 8, 2022 0 comment
0 FacebookTwitterPinterestEmail
General Recipes

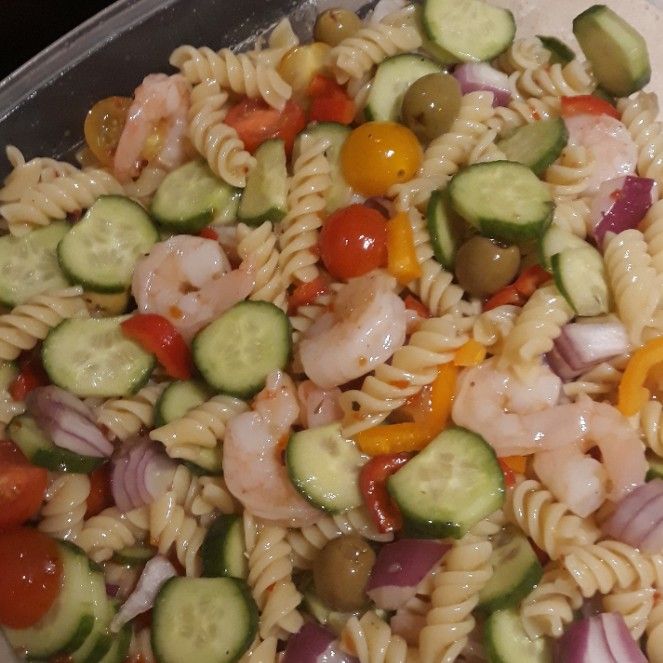
Garden Pasta Salad: The Perfect Meal For Summer!

by Rebecca August 6, 2022
written by Rebecca

Prep time: 15 mins | Cook time: 10 mins | Chill time: 30 mins | Servings: 8

This Garden Pasta Salad is one of my ultimate favorite salads. It is delicious, very refreshing, and incredibly easy and quick to make. This salad is filled with tri-color pasta, grape tomatoes, English cucumber, and broccoli florets, among the other simple ingredients. And tossed in Italian salad dressing. Before serving, make sure to chill this Garden Pasta Salad in the fridge for at least 30 minutes.

I love this Garden Pasta Salad. The combination of flavors and textures is amazing. The cheeses and the light, tangy Italian dressing compliments each other so well. Enjoy this salad as a light lunch or side to your favorite meal. You can even make this salad a day ahead and simply store it in the fridge. Before serving, toss well to redistribute the salad dressing.

Ingredients

1 1/2 c. diced English cucumber

1-pint grape tomatoes – halved

1 1/2 c. tiny chopped broccoli florets

1 c. chopped yellow bell pepper

3/4 c. thinly sliced baby carrots

1/2 c. finely shredded Parmesan cheese

1/3 c. chopped red onion

1 (12 ounces) box tri-color rotini pasta

1 1/3 c. bottled Italian salad dressing

1 c. olives, sliced

How to make Garden Pasta Salad

Step 1: Following the package directions, cook the pasta. Do NOT season the water with salt. Drain when done and rinse the pasta under cold water.

Step 2: Into a bowl, transfer the pasta. Add the tomatoes along with the broccoli, bell pepper, olives, cucumber, carrots, red onion, and Parmesan. Then, add the dressing and toss well until everything is evenly coated.

Step 3: Put the lid on and place the salad in the fridge to chill for at least 30 minutes up to a day. If needed, add extra dressing.

Notes:

You can add a cup of cubed mozzarella cheese to the salad if desired.

Before serving, toss the salad to spread the Italian seasoning.

Garden Pasta Salad: The Perfect Meal For Summer!

Rebecca Prep time: 15 mins | Cook time: 10 mins | Chill time: 30 mins | Servings: 8 This Garden Pasta Salad is one of my ultimate favorite salads. It is… General Recipes Garden Pasta Salad: The Perfect Meal For Summer! European Print This
Serves: 8 Prep Time: 15 mins Cooking Time: 10 mins 10 mins
Nutrition facts: 200 calories 20 grams fat
Rating: 5.0/5
( 1 voted )

Ingredients

  • 1 1/2 c. diced English cucumber
  • 1-pint grape tomatoes - halved
  • 1 1/2 c. tiny chopped broccoli florets
  • 1 c. chopped yellow bell pepper
  • 3/4 c. thinly sliced baby carrots
  • 1/2 c. finely shredded Parmesan cheese
  • 1/3 c. chopped red onion
  • 1 (12 ounces) box tri-color rotini pasta
  • 1 1/3 c. bottled Italian salad dressing
  • 1 c. olives, sliced

Instructions

Step 1: Following the package directions, cook the pasta. Do NOT season the water with salt. Drain when done and rinse the pasta under cold water.

Step 2: Into a bowl, transfer the pasta. Add the tomatoes along with the broccoli, bell pepper, olives, cucumber, carrots, red onion, and Parmesan. Then, add the dressing and toss well until everything is evenly coated.

Step 3: Put the lid on and place the salad in the fridge to chill for at least 30 minutes up to a day. If needed, add extra dressing.

Notes

You can add a cup of cubed mozzarella cheese to the salad if desired. Before serving, toss the salad to spread the Italian seasoning.

August 6, 2022 0 comment
0 FacebookTwitterPinterestEmail
General Recipes

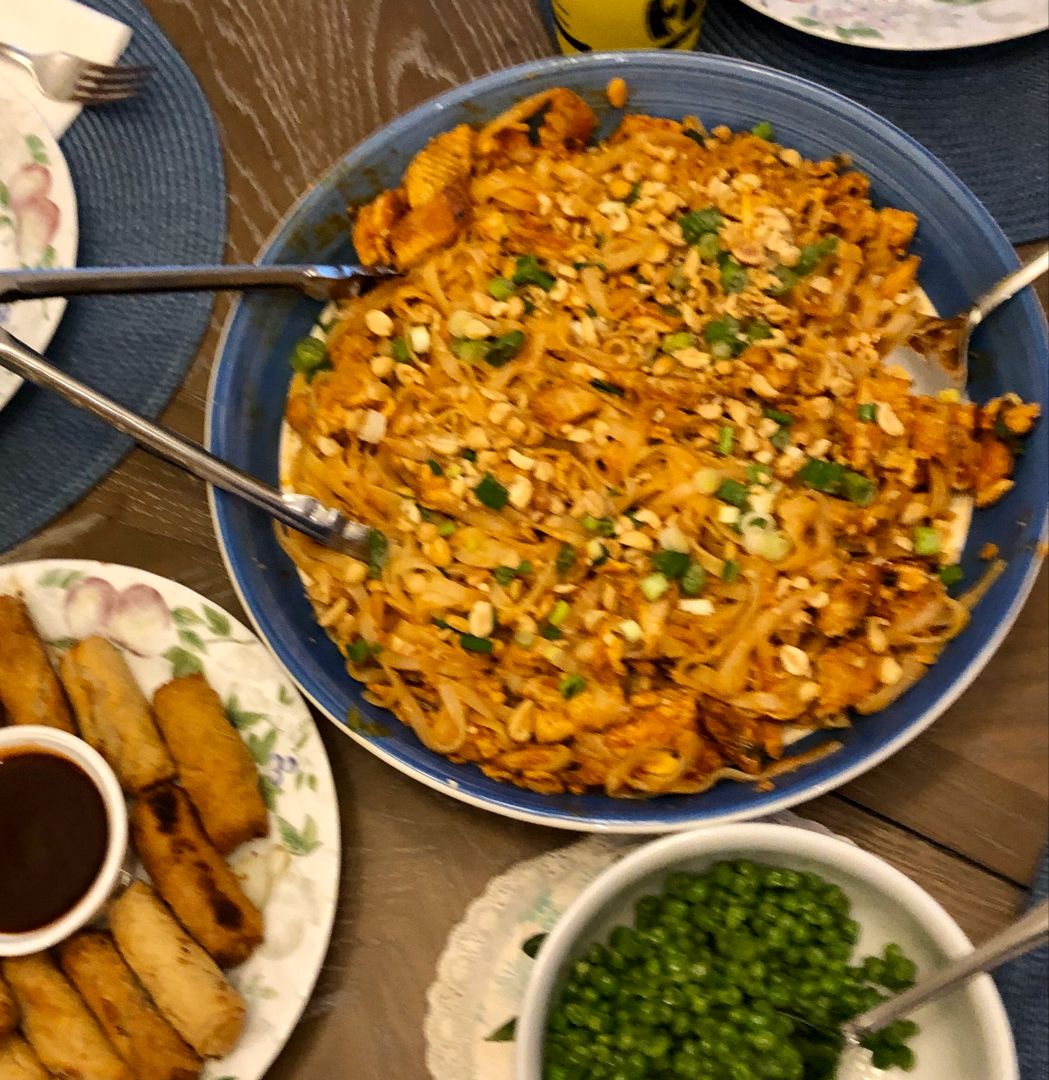
Easy Chicken Pad Thai

by Rebecca August 6, 2022
written by Rebecca

Prep time: 10 mins | Cook time: 20 mins | Serves: 4

I love Chicken Pad Thai! It has been one of my favorite take-out. This easy Chicken Pad Thai recipe is an amazing homemade version that tastes exactly like the real thing. This is incredibly easy to throw together. A thirty-minute restaurant-quality dish that you can easily make at home at any time! If you love Pad Thai as I do, this easy recipe is worth a try!

INGREDIENTS

2 eggs

1/2 pound boneless, skinless chicken breast, chopped into bite-sized pieces

1 c. fresh bean sprouts

1/3 c. green onions, sliced

1/4 c. white onions, thinly sliced

1/3 c. fresh cilantro, roughly chopped

8 ounces flat rice noodles, cooked following the package instructions

SAUCE:

2 cloves garlic, minced

1 1/2 tbsp tamarind puree

Juice of 1 lime

2 tbsp brown sugar

1 tbsp soy sauce

1/4 tsp crushed red pepper flake, plus more to taste

2 tbsp fish sauce

Kosher salt and freshly ground black pepper, to taste

Peanuts, finely chopped, for serving

How to make Easy Chicken Pad Thai

Step 1: Sprinkle the chicken with salt and pepper.

Step 2: In a large skillet or wok, heat the oil over medium heat. Once the oil is hot, add the chicken to the skillet/wok and cook for about 6 minutes until completely cooked. To a plate, transfer the cooked chicken and set it aside.

Step 3: To make the sauce, combine the tamarind puree, fish sauce, brown sugar, soy sauce, garlic, lime juice, and red pepper flake until well blended. Set aside.

Step 4: Into the pan, crack the eggs, and scramble until completely cooked. Then, add the white onions and bean sprouts. Return the chicken to the pan. Pour in the sauce and add the noodles. Toss well.

Step 5: Add the green onions and cilantro. Stir well. Before serving, top with chopped peanuts. If desired, serve with extra lime wedges. Enjoy!

Note:

You can swap tamarind puree with 1 tbsp ketchup plus 2 tbsp rice vinegar.

Easy Chicken Pad Thai

Rebecca Prep time: 10 mins | Cook time: 20 mins | Serves: 4 I love Chicken Pad Thai! It has been one of my favorite take-out. This easy Chicken Pad Thai… General Recipes Easy Chicken Pad Thai European Print This
Serves: 4 Prep Time: 10 mins Cooking Time: 20 mins 20 mins
Nutrition facts: 200 calories 20 grams fat
Rating: 5.0/5
( 1 voted )

Ingredients

  • 2 eggs
  • 1/2 pound boneless, skinless chicken breast, chopped into bite-sized pieces
  • 1 c. fresh bean sprouts
  • 1/3 c. green onions, sliced
  • 1/4 c. white onions, thinly sliced
  • 1/3 c. fresh cilantro, roughly chopped
  • 8 ounces flat rice noodles, cooked following the package instructions
  • SAUCE:
  • 2 cloves garlic, minced
  • 1 1/2 tbsp tamarind puree
  • Juice of 1 lime
  • 2 tbsp brown sugar
  • 1 tbsp soy sauce
  • 1/4 tsp crushed red pepper flake, plus more to taste
  • 2 tbsp fish sauce
  • Kosher salt and freshly ground black pepper, to taste
  • Peanuts, finely chopped, for serving

Instructions

Step 1: Sprinkle the chicken with salt and pepper.

Step 2: In a large skillet or wok, heat the oil over medium heat. Once the oil is hot, add the chicken to the skillet/wok and cook for about 6 minutes until completely cooked. To a plate, transfer the cooked chicken and set it aside.

Step 3: To make the sauce, combine the tamarind puree, fish sauce, brown sugar, soy sauce, garlic, lime juice, and red pepper flake until well blended. Set aside.

Step 4: Into the pan, crack the eggs, and scramble until completely cooked. Then, add the white onions and bean sprouts. Return the chicken to the pan. Pour in the sauce and add the noodles. Toss well.

Step 5: Add the green onions and cilantro. Stir well. Before serving, top with chopped peanuts. If desired, serve with extra lime wedges. Enjoy!

Notes

You can swap tamarind puree with 1 tbsp ketchup plus 2 tbsp rice vinegar.

August 6, 2022 0 comment
0 FacebookTwitterPinterestEmail
General Recipes

Toasted Pecan Chicken Skillet (It’s Good!)

by Rebecca August 6, 2022
written by Rebecca

Total time: 30 mins | Serves: 4 – 6

Juicy and tender pan-seared chicken smothered in a delightful creamy orange Dijon sauce and toasted pecans. This mouthwatering chicken dish is super amazing, packed with impressive flavors, and incredibly easy and quick to make. This requires just minimal prep work and this toasted pecan chicken only takes twenty minutes from start to finish! If desired, you can easily double or triple the sauce.

This toasted pecan chicken has been one of my family’s favorites for years! We love to pair this up with rice and green beans and asparagus on the side for a filling meal any time!

INGREDIENTS

4 boneless, skinless chicken breasts, pounded to even thinness

2 tbsp orange marmalade

3 tbsp unsalted butter or extra-virgin olive oil

1 tbsp Dijon mustard

3/4 c. toasted pecans, roughly chopped

1/2 tsp garlic powder

1 tsp Italian seasoning

1/2 tsp onion powder

kosher salt and freshly ground pepper, to taste

1 1/2 c. heavy whipping cream

How to make Toasted Pecan Chicken Skillet

Step 1: Generously season the chicken with salt and pepper. Set aside.

Step 2: In a large pan or skillet, heat the olive oil or butter over medium-high heat. Then, add the chicken and sear until both sides are browned. To a plate, transfer the cooked chicken and set it aside.

Step 3: Adjust the heat to medium and add the heavy whipping cream in the same pan along with the orange marmalade, mustard, Italian seasoning, garlic, onion powders, salt, and pepper. Then, stir in the roasted pecans. Cook for about 4 to 5 minutes, stirring often. Place the chicken back into the pan and continue to cook for an additional 6 to 8 minutes or until the chicken is completely cooked.

Step 4: Take the pan off the heat when done and serve the toasted pecan chicken skillet hot with spinach or rice. Enjoy!

Toasted Pecan Chicken Skillet (It’s Good!)

Rebecca Total time: 30 mins | Serves: 4 – 6 Juicy and tender pan-seared chicken smothered in a delightful creamy orange Dijon sauce and toasted pecans. This mouthwatering chicken dish is… General Recipes Toasted Pecan Chicken Skillet (It’s Good!) European Print This
Serves: 4-6
Nutrition facts: 200 calories 20 grams fat
Rating: 5.0/5
( 1 voted )

Ingredients

  • 4 boneless, skinless chicken breasts, pounded to even thinness
  • 2 tbsp orange marmalade
  • 3 tbsp unsalted butter or extra-virgin olive oil
  • 1 tbsp Dijon mustard
  • 3/4 c. toasted pecans, roughly chopped
  • 1/2 tsp garlic powder
  • 1 tsp Italian seasoning
  • 1/2 tsp onion powder
  • kosher salt and freshly ground pepper, to taste
  • 1 1/2 c. heavy whipping cream

Instructions

Step 1: Generously season the chicken with salt and pepper. Set aside.

Step 2: In a large pan or skillet, heat the olive oil or butter over medium-high heat. Then, add the chicken and sear until both sides are browned. To a plate, transfer the cooked chicken and set it aside.

Step 3: Adjust the heat to medium and add the heavy whipping cream in the same pan along with the orange marmalade, mustard, Italian seasoning, garlic, onion powders, salt, and pepper. Then, stir in the roasted pecans. Cook for about 4 to 5 minutes, stirring often. Place the chicken back into the pan and continue to cook for an additional 6 to 8 minutes or until the chicken is completely cooked.

Step 4: Take the pan off the heat when done and serve the toasted pecan chicken skillet hot with spinach or rice. Enjoy!

August 6, 2022 0 comment
0 FacebookTwitterPinterestEmail
General Recipes

One-Pan Baked Rice and Vegetables

by Rebecca August 6, 2022
written by Rebecca

Prep time: 10 mins | Cook time: 50 mins | Serves: 4

This baked rice and vegetables is an incredible one-pot meal. It is incredibly easy and quick to throw together and one of the best weeknight dinner options if you are looking for a fuss-free meal to serve to your family. This is packed with flavor from the herb-flavored roasted veggies and fully, tender rice.

INGREDIENTS

2 tbsp butter

1 1/2 c. jasmine rice, uncooked

3 garlic cloves, minced

1 1/4 c. water

2 medium carrots, thinly sliced

1 1/2 c. chicken or vegetable broth

VEGETABLES:

1/2 head broccoli, chopped into florets

1 red onion, halved and cut into wedges

1/2 head cauliflower, chopped into florets

1 bell pepper, chopped into 1” pieces

1/4 c. olive oil

2 zucchini, cut into chunks

SEASONING MIX:

1 tsp dried thyme

1 tsp paprika

1 tsp dried rosemary

1 tsp salt

1 tsp black pepper

1 tsp garlic powder

How to make One-Pan Baked Rice and Vegetables

Step 1: Prepare the oven. Preheat it to 400 degrees F.

Step 2: Place the paprika, thyme, rosemary, garlic powder, salt, and pepper in a small bowl. Mix well until combined and set aside.

Step 3: Add the rice to a 9 x 13-inch baking dish along with broth, water, garlic, sliced carrots, and butter. Then, add 1 1/2 tsp of the seasoning mix. Mix well. Using foil, tightly cover the baking dish. Place in the preheated oven and bake for about 20 minutes.

Step 4: In the meantime, place the red onion, bell pepper, cauliflower, broccoli, zucchini, and olive oil in a large bowl. Then, add the rest of the spice mix and stir well.

Step 5: Take the rice out of the oven and adjust the oven temperature to 425 degrees F.

Step 6: Remove the foil. On top of the rice, arrange the vegetables and drizzle with extra olive oil. If desired, season with salt and pepper.

Step 7: Place in the preheated oven and bake for about 30 minutes. To one side, push the veggies and fluff the rice using a fork. Toss the veggies and rice.

Step 8: Serve and enjoy!

One-Pan Baked Rice and Vegetables

Rebecca Prep time: 10 mins | Cook time: 50 mins | Serves: 4 This baked rice and vegetables is an incredible one-pot meal. It is incredibly easy and quick to throw… General Recipes One-Pan Baked Rice and Vegetables European Print This
Serves: 4 Prep Time: 10 mins Cooking Time: 50 mins 50 mins
Nutrition facts: 200 calories 20 grams fat
Rating: 5.0/5
( 1 voted )

Ingredients

  • 2 tbsp butter
  • 1 1/2 c. jasmine rice, uncooked
  • 3 garlic cloves, minced
  • 1 1/4 c. water
  • 2 medium carrots, thinly sliced
  • 1 1/2 c. chicken or vegetable broth
  • VEGETABLES:
  • 1/2 head broccoli, chopped into florets
  • 1 red onion, halved and cut into wedges
  • 1/2 head cauliflower, chopped into florets
  • 1 bell pepper, chopped into 1” pieces
  • 1/4 c. olive oil
  • 2 zucchini, cut into chunks
  • SEASONING MIX:
  • 1 tsp dried thyme
  • 1 tsp paprika
  • 1 tsp dried rosemary
  • 1 tsp salt
  • 1 tsp black pepper
  • 1 tsp garlic powder

Instructions

Step 1: Prepare the oven. Preheat it to 400 degrees F.

Step 2: Place the paprika, thyme, rosemary, garlic powder, salt, and pepper in a small bowl. Mix well until combined and set aside.

Step 3: Add the rice to a 9 x 13-inch baking dish along with broth, water, garlic, sliced carrots, and butter. Then, add 1 1/2 tsp of the seasoning mix. Mix well. Using foil, tightly cover the baking dish. Place in the preheated oven and bake for about 20 minutes.

Step 4: In the meantime, place the red onion, bell pepper, cauliflower, broccoli, zucchini, and olive oil in a large bowl. Then, add the rest of the spice mix and stir well.

Step 5: Take the rice out of the oven and adjust the oven temperature to 425 degrees F.

Step 6: Remove the foil. On top of the rice, arrange the vegetables and drizzle with extra olive oil. If desired, season with salt and pepper.

Step 7: Place in the preheated oven and bake for about 30 minutes. To one side, push the veggies and fluff the rice using a fork. Toss the veggies and rice.

Step 8: Serve and enjoy!

August 6, 2022 0 comment
0 FacebookTwitterPinterestEmail
General Recipes

Deliciously Sweet Broccoli Cauliflower Salad

by Rebecca August 6, 2022
written by Rebecca

Time: 20 mins | Servings: 12

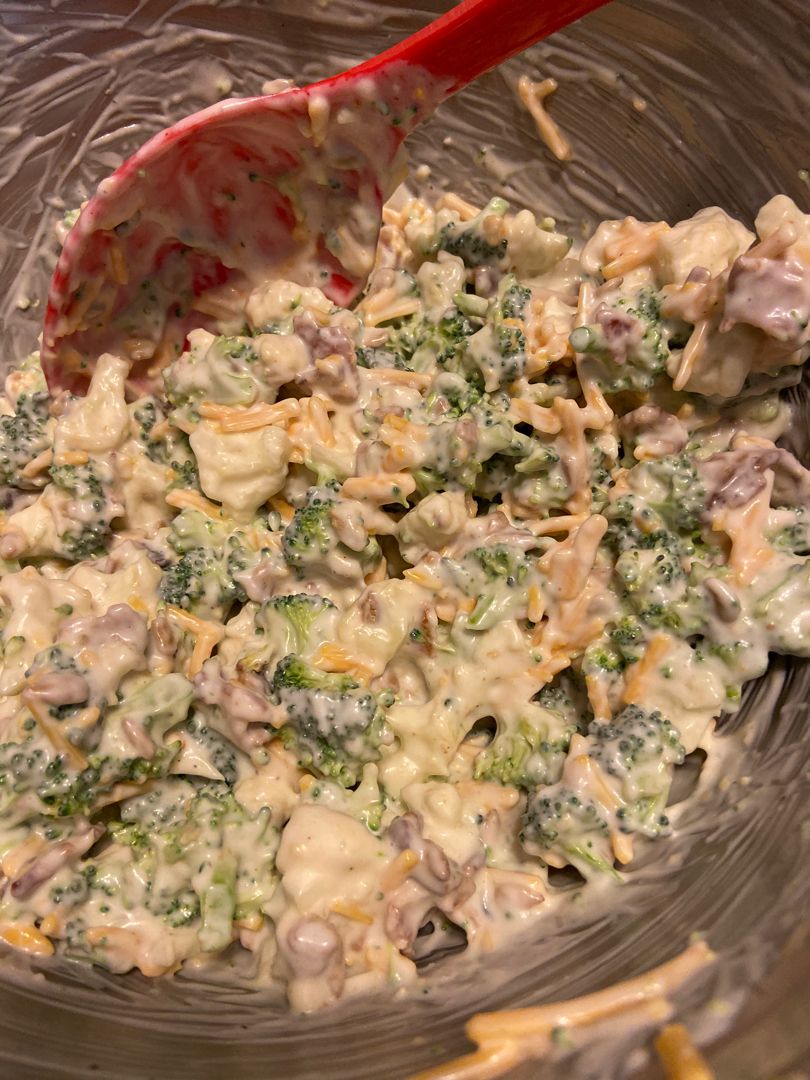
This Broccoli Cauliflower Salad is a staple at home. My family loves everything about this salad. Even my fussiest eaters enjoy this salad. It is super delicious, refreshing, and perfect on a warm summer day.

My kids never like broccoli. They never like anything with veggies! I have the pickiest eaters, and it is an everyday struggle to have them eat (or enjoy) healthy food. Not until I found this Broccoli Cauliflower Salad. Raw broccoli when tossed into a salad with cheese and bacon, amazing things can happen! I would have never expected that my children will love this salad, but still, I went for it. Little do I know, this salad will change everything! My kids love this deliciously sweet broccoli cauliflower salad the first time they tasted it. This has been their most requested for years! I cannot blame them because this salad is wonderful! Not only that this broccoli cauliflower salad tastes great, but this is also impressively easy and quick to whip up.

This salad is great on its own, but this is also amazing to serve alongside pulled pork or pulled chicken sandwiches. This is also excellent to bring to picnics, potlucks, or cookouts. Make this salad any time and enjoy this all year round!

Ingredients

1/2 pound bacon cooked

1 c. sour cream

1 c. mayonnaise

1 head broccoli, chopped

1/2 c. sugar

1 c. shredded cheddar cheese

1/2 tsp salt

1 head cauliflower, chopped

How to make Deliciously Sweet Broccoli Cauliflower Salad

Step 1: In a large bowl, place the broccoli, cauliflower, bacon, and shredded cheese. Mix well until combined.

Step 2: Whisk the mayonnaise, sour cream, sugar, and salt in a small bowl until blended.

Step 3: Over the broccoli mixture, pour the mayonnaise mixture and mix until incorporated.

Step 4: Serve the salad right away or chill until ready to serve. Enjoy!

Deliciously Sweet Broccoli Cauliflower Salad

Rebecca Time: 20 mins | Servings: 12 This Broccoli Cauliflower Salad is a staple at home. My family loves everything about this salad. Even my fussiest eaters enjoy this salad. It… General Recipes Deliciously Sweet Broccoli Cauliflower Salad European Print This
Serves: 12
Nutrition facts: 200 calories 20 grams fat
Rating: 5.0/5
( 1 voted )

Ingredients

  • 1/2 pound bacon cooked
  • 1 c. sour cream
  • 1 c. mayonnaise
  • 1 head broccoli, chopped
  • 1/2 c. sugar
  • 1 c. shredded cheddar cheese
  • 1/2 tsp salt
  • 1 head cauliflower, chopped

Instructions

Step 1: In a large bowl, place the broccoli, cauliflower, bacon, and shredded cheese. Mix well until combined.

Step 2: Whisk the mayonnaise, sour cream, sugar, and salt in a small bowl until blended.

Step 3: Over the broccoli mixture, pour the mayonnaise mixture and mix until incorporated.

Step 4: Serve the salad right away or chill until ready to serve. Enjoy!

August 6, 2022 0 comment
0 FacebookTwitterPinterestEmail
General Recipes

Spinach Pie (Spanakopita) Recipe

by Rebecca August 6, 2022
written by Rebecca

Yield: 18 squares

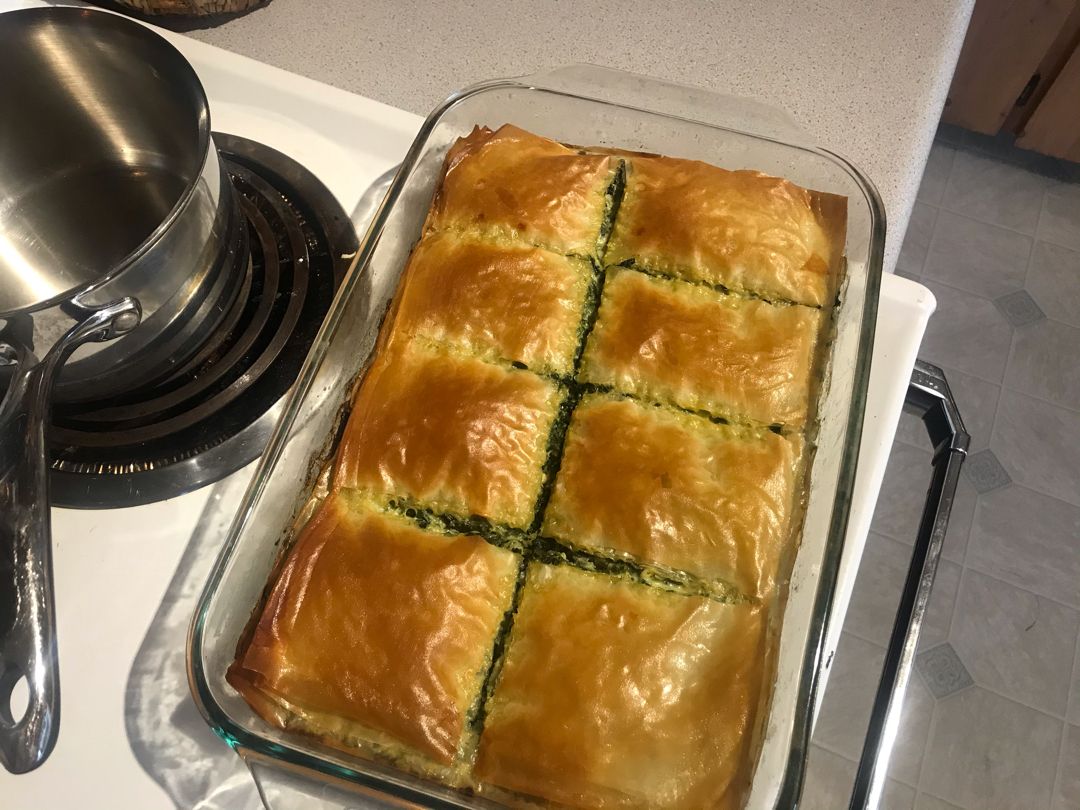
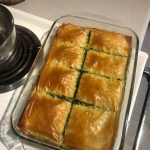
This Spanakopita is an amazing green food option with crispy and delicious phyllo crust that is smothered in lots of butter. This pie is filled with scrumptious spinach mixture. This spinach pie is a great appetizer. You can also serve this as a very delightful side dish.

Ingredients

3 eggs

3 tsp olive oil

3 packages (10 oz. each) of frozen chopped spinach, thawed and squeezed dry

1 onion, finely chopped (equivalent to about 3/4 c.)

3 tbsp dried parsley

6 tsp dried dill

16 sheets of phyllo dough, thawed

12 oz. feta cheese, crumbled (equivalent to about a heaping 1 and 1/4 c.)

3/4 c. butter, melted (equivalent to 1 and 1/2 sticks)

3/4 tsp salt

3/4 tsp pepper

How to make Spinach Pie (Spanakopita)

Step 1: Prepare the oven. Preheat it to 325 degrees F. Grease a 9 x 13-inch pan. Set aside.

Step 2: Heat the olive oil in a skillet over low/medium heat. Add the finely chopped onion and cook until lightly browned.

Step 3: After thawing the frozen spinach, squeeze out the water. In a colander, place the thawed spinach. Using paper towels press the water out. To the skillet, add the spinach and stir well.

Step 4: Set the spinach aside when done and allow them to rest at room temperature.

Step 5: Place the egg, parsley, dill, salt, pepper, and feta cheese in a medium bowl. Mix well until blended. Stir in the spinach and set aside.

Step 6: Into the pan, lay a sheet of thawed phyllo dough and brush the top and sides with melted butter. Repeat for all 8 phyllo sheets.

Step 7: On top, add the spinach filling in an even layer. Over the spinach, lay 1 phyllo sheet and brush with the melted butter. Repeat for all 8 phyllo sheets.

Step 8: Into 18 squares, cut or score the pie before baking. Place in the preheated oven and bake for about 45 to 50 minutes or until the top is golden brown.

Step 9: Remove from the oven when done and allow the pie to sit for about 5 minutes.

Step 10: Serve and enjoy!

Spinach Pie (Spanakopita) Recipe

Rebecca Yield: 18 squares This Spanakopita is an amazing green food option with crispy and delicious phyllo crust that is smothered in lots of butter. This pie is filled with scrumptious… General Recipes Spinach Pie (Spanakopita) Recipe European Print This
Serves: 18
Nutrition facts: 200 calories 20 grams fat
Rating: 5.0/5
( 1 voted )

Ingredients

  • 3 eggs
  • 3 tsp olive oil
  • 3 packages (10 oz. each) of frozen chopped spinach, thawed and squeezed dry
  • 1 onion, finely chopped (equivalent to about 3/4 c.)
  • 3 tbsp dried parsley
  • 6 tsp dried dill
  • 16 sheets of phyllo dough, thawed
  • 12 oz. feta cheese, crumbled (equivalent to about a heaping 1 and 1/4 c.)
  • 3/4 c. butter, melted (equivalent to 1 and 1/2 sticks)
  • 3/4 tsp salt
  • 3/4 tsp pepper

Instructions

Step 1: Prepare the oven. Preheat it to 325 degrees F. Grease a 9 x 13-inch pan. Set aside.

Step 2: Heat the olive oil in a skillet over low/medium heat. Add the finely chopped onion and cook until lightly browned.

Step 3: After thawing the frozen spinach, squeeze out the water. In a colander, place the thawed spinach. Using paper towels press the water out. To the skillet, add the spinach and stir well.

Step 4: Set the spinach aside when done and allow them to rest at room temperature.

Step 5: Place the egg, parsley, dill, salt, pepper, and feta cheese in a medium bowl. Mix well until blended. Stir in the spinach and set aside.

Step 6: Into the pan, lay a sheet of thawed phyllo dough and brush the top and sides with melted butter. Repeat for all 8 phyllo sheets.

Step 7: On top, add the spinach filling in an even layer. Over the spinach, lay 1 phyllo sheet and brush with the melted butter. Repeat for all 8 phyllo sheets.

Step 8: Into 18 squares, cut or score the pie before baking. Place in the preheated oven and bake for about 45 to 50 minutes or until the top is golden brown.

Step 9: Remove from the oven when done and allow the pie to sit for about 5 minutes.

Step 10: Serve and enjoy!

August 6, 2022 0 comment
0 FacebookTwitterPinterestEmail
General Recipes

Hissy Fit Quiche. A Quick, Easy And Delicious Treat

by Rebecca August 6, 2022
written by Rebecca

Prep time: 10 mins | Cook time: 1 hr | Serves: 9

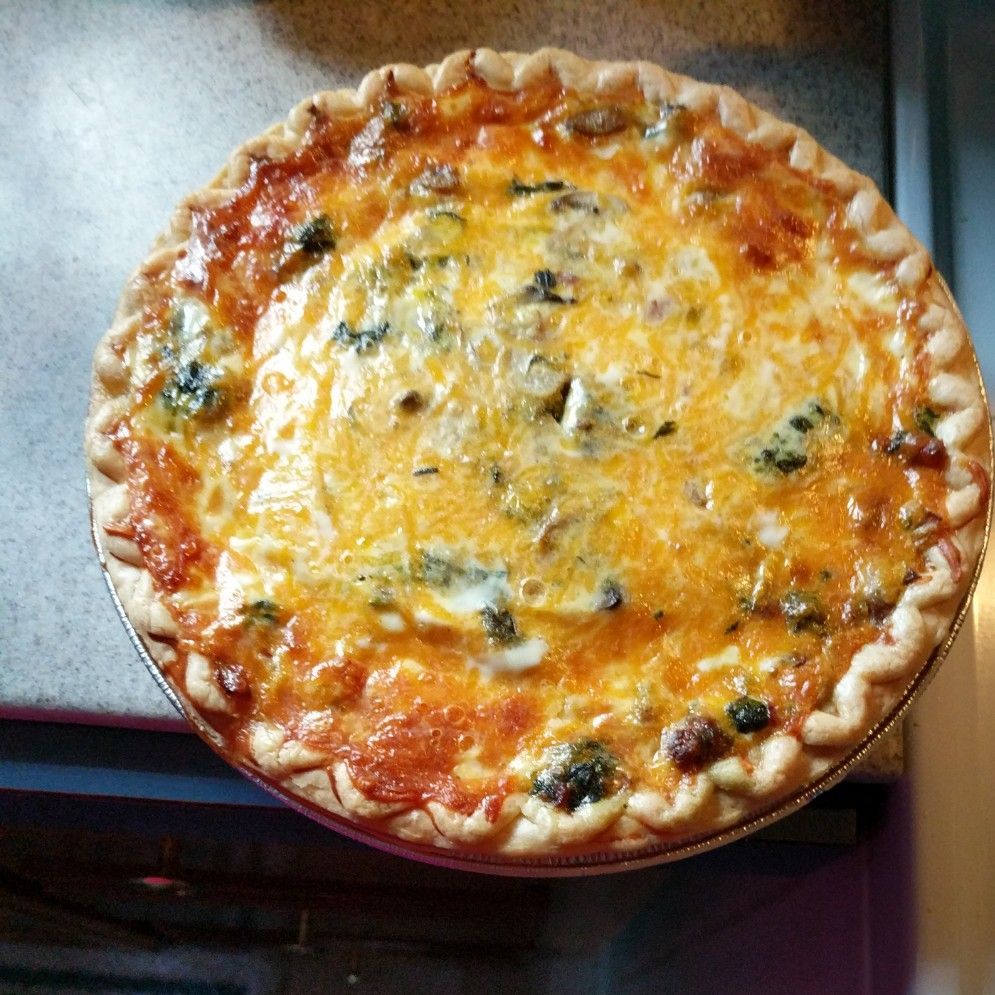
This Hissy Fit Quiche is an amazing, very delicious, and easy treat that you can easily make at home. Super creamy, and savory, with a very impressive combination of ingredients from the pork sausages, Velveeta Velveeta, and Monterey Jack.

This quiche is inspired by a favorite tailgate dip. It is super good. No wonder we never have any leftovers! You can also make this in advance and simply freeze unbaked. When ready to serve, thaw in the fridge and bake as directed.

This quiche is an amazing breakfast or brunch meal. An incredible freezer meal that has all the flavors of our favorite dip in a quiche form. If you are looking for an easy and quick breakfast/brunch, this Hissy Fit Quiche is hard to miss! Pair this up with some biscuits or a simple side salad.

INGREDIENTS

3 eggs

1/2 pound pork sausage, browned and crumbled

1 9” pie crust

4 ounces Monterey Jack cheese, grated

4 ounces Velveeta cheese, diced

1/4 c. sour cream

1 c. heavy cream

2 tsp Worcestershire sauce

1/2 tsp onion powder

1/2 tsp dried parsley

Kosher salt and freshly ground black pepper, to taste

1/2 tsp garlic powder

How to make Hissy Fit Quiche

Step 1: Prepare the oven. Preheat it to 350 degrees F. Using a pie crust, line a pie pan. Across the bottom of the crust, evenly spread the cooked sausage and top with the cheeses.

Step 2: Place the eggs, heavy cream, sour cream, Worcestershire sauce, parsley, onion powder, garlic powder, and salt and pepper in a medium bowl. Mix well until combined, then pour this over the sausage and cheese.

Step 3: Place in the preheated oven and bake for about 1 hour or until set. Remove from the oven when done and allow the quiche to rest for about 15 minutes.

Step 4: Slice and serve. Enjoy!

Hissy Fit Quiche. A Quick, Easy And Delicious Treat

Rebecca Prep time: 10 mins | Cook time: 1 hr | Serves: 9 This Hissy Fit Quiche is an amazing, very delicious, and easy treat that you can easily make at… General Recipes Hissy Fit Quiche. A Quick, Easy And Delicious Treat European Print This
Serves: 9 Prep Time: 10 mins Cooking Time: 1 hr 1 hr
Nutrition facts: 200 calories 20 grams fat
Rating: 5.0/5
( 1 voted )

Ingredients

  • 3 eggs
  • 1/2 pound pork sausage, browned and crumbled
  • 1 9” pie crust
  • 4 ounces Monterey Jack cheese, grated
  • 4 ounces Velveeta cheese, diced
  • 1/4 c. sour cream
  • 1 c. heavy cream
  • 2 tsp Worcestershire sauce
  • 1/2 tsp onion powder
  • 1/2 tsp dried parsley
  • Kosher salt and freshly ground black pepper, to taste
  • 1/2 tsp garlic powder

Instructions

Step 1: Prepare the oven. Preheat it to 350 degrees F. Using a pie crust, line a pie pan. Across the bottom of the crust, evenly spread the cooked sausage and top with the cheeses.

Step 2: Place the eggs, heavy cream, sour cream, Worcestershire sauce, parsley, onion powder, garlic powder, and salt and pepper in a medium bowl. Mix well until combined, then pour this over the sausage and cheese.

Step 3: Place in the preheated oven and bake for about 1 hour or until set. Remove from the oven when done and allow the quiche to rest for about 15 minutes.

Step 4: Slice and serve. Enjoy!

August 6, 2022 0 comment
0 FacebookTwitterPinterestEmail
General Recipes

These Easy Cheesy Ground Beef Enchiladas Are A Mom’s Dream

by Rebecca August 6, 2022
written by Rebecca

Prep time: 10 mins | Cook time: 20 mins | Serves: 6

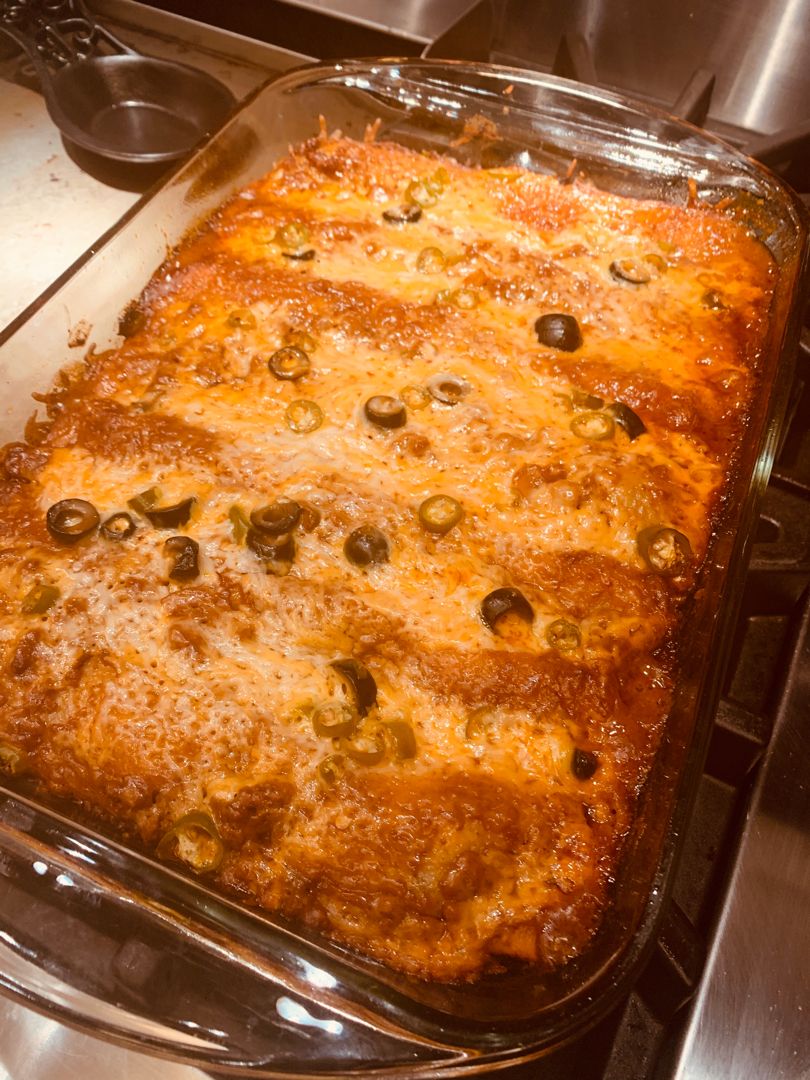
These cheesy ground beef enchiladas are a staple at home. My family is obsessed with these mouthwatering enchiladas covered in tons of melty cheese. All you need to throw these together are just simple ingredients that you might already have on hand. Have these delicious cheesy ground beef enchiladas ready in under thirty minutes, and enjoy a filling weeknight dinner that your entire family will absolutely love!

If you are searching for an easy, quick, and delightful dinner option, then you have to give this easy recipe a try. It is a must and for keeps!

INGREDIENTS

10-14 corn tortillas, warmed

1 pound of ground beef

1/2 white onion, diced

1/4 c. water

2 c. enchilada sauce

3 tbsp taco seasoning

3 c. Cheddar cheese, grated

Fresh cilantro, for serving

Sour cream, for serving

How to make Easy Cheesy Ground Beef Enchiladas

Step 1: Prepare the oven. Preheat it to 375 degrees F.

Step 2: Cook the ground beef and onions in a large skillet over medium heat until the beef has browned. Then, drain the excess grease and season the meat with taco seasoning. Pour in 1/4 c. water and let it simmer until completely reduced. Set aside when done.

Step 3: In the bottom of a 9 x 13-inch baking dish, spread half of the enchilada sauce. In a straight line in the middle of each tortilla, place some of the ground beef and cheddar. Tightly roll each tortilla.

Step 4: In the baking dish, place the enchiladas, seam-side down. On top, pour the enchilada sauce, completely covering the tortillas. Lastly, sprinkle the rest of the cheese on top.

Step 5: Place in the preheated oven and bake for about 20 minutes or until the sauce is bubbly and the cheese has melted.

Step 6: Remove from the oven when done and serve the cheesy ground beef enchilada right away with sour cream. If desired, garnish with cilantro. Enjoy!

These Easy Cheesy Ground Beef Enchiladas Are A Mom’s Dream

Rebecca Prep time: 10 mins | Cook time: 20 mins | Serves: 6 These cheesy ground beef enchiladas are a staple at home. My family is obsessed with these mouthwatering enchiladas… General Recipes These Easy Cheesy Ground Beef Enchiladas Are A Mom’s Dream European Print This
Serves: 6 Prep Time: 10 mins Cooking Time: 20 mins 20 mins
Nutrition facts: 200 calories 20 grams fat
Rating: 5.0/5
( 1 voted )

Ingredients

  • 10-14 corn tortillas, warmed
  • 1 pound of ground beef
  • 1/2 white onion, diced
  • 1/4 c. water
  • 2 c. enchilada sauce
  • 3 tbsp taco seasoning
  • 3 c. Cheddar cheese, grated
  • Fresh cilantro, for serving
  • Sour cream, for serving

Instructions

Step 1: Prepare the oven. Preheat it to 375 degrees F.

Step 2: Cook the ground beef and onions in a large skillet over medium heat until the beef has browned. Then, drain the excess grease and season the meat with taco seasoning. Pour in 1/4 c. water and let it simmer until completely reduced. Set aside when done.

Step 3: In the bottom of a 9 x 13-inch baking dish, spread half of the enchilada sauce. In a straight line in the middle of each tortilla, place some of the ground beef and cheddar. Tightly roll each tortilla.

Step 4: In the baking dish, place the enchiladas, seam-side down. On top, pour the enchilada sauce, completely covering the tortillas. Lastly, sprinkle the rest of the cheese on top.

Step 5: Place in the preheated oven and bake for about 20 minutes or until the sauce is bubbly and the cheese has melted.

Step 6: Remove from the oven when done and serve the cheesy ground beef enchilada right away with sour cream. If desired, garnish with cilantro. Enjoy!

August 6, 2022 0 comment
0 FacebookTwitterPinterestEmail
Newer Posts
Older Posts

Popular Posts

  • 1

    Crispy Crunchy Parmesan Potatoes

    March 21, 2020
  • 2

    CROCK POT SMOTHERED PORK CHOPS

    March 21, 2020
  • Facebook
  • Twitter

@2019 - All Right Reserved.


Back To Top