Cook it once
  • Home
  • Privacy Policy
  • Recipes
    • KETO
    • LC
    • WW
  • Tips
  • Contact
Cook it once
  • Home
  • Privacy Policy
  • Recipes
    • KETO
    • LC
    • WW
  • Tips
  • Contact
Category:

General Recipes

General Recipes

GARLIC and LEMON CHICKEN WITH GREEN BEANS and RED POTATOES

by Rebecca August 9, 2022
written by Rebecca

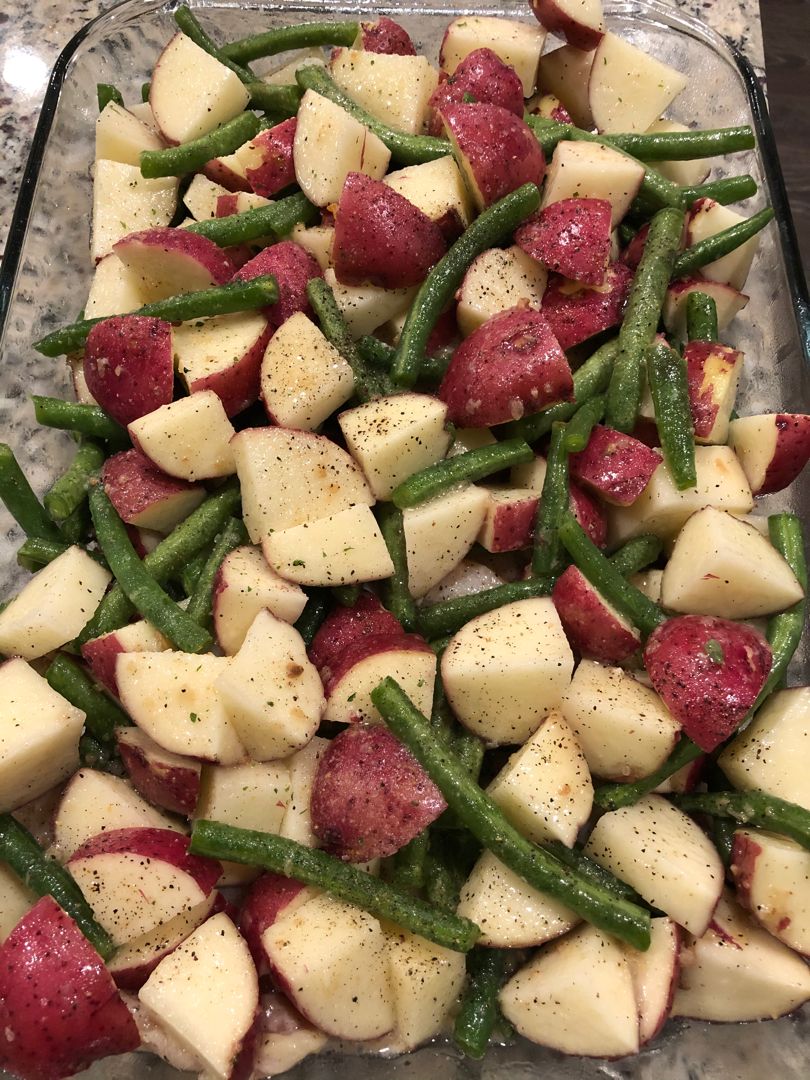
This garlic and lemon chicken with green beans and red potatoes is the best weeknight dinner you’ll ever make for your loved ones. With a brilliant combination of flavors that is seriously delightful! Put this dish together easily and quickly at any time.

Ingredients

4 chicken breasts – bone-in with skin (this will be about 3 ¼ pounds of chicken)

6 tablespoons olive oil – Divided (1 tablespoon and 5 tablespoons)

4 cloves garlic – minced

¾ pound trimmed green beans

2 lemons – 1 very thinly sliced and 1 juiced

8 small red potatoes – quartered (make sure you use small red potatoes)

1 teaspoon salt

½ teaspoon freshly ground black pepper

HOW TO MAKE GARLIC and LEMON CHICKEN WITH GREEN BEANS and RED POTATOES

Marinating Overnight (recommended):

Place 5 tbsp olive oil, lemon juice, garlic, salt, and pepper in a large bowl. Mix well until combined.

To the bowl with the mixture, add the chicken and coat well. Cover the bowl and keep it in the fridge overnight.

On the next day, remove the chicken from the marinade. Then, proceed to coat the green beans and potatoes.

Prepare the oven. Preheat it to 400 degrees F. Using 1 tbsp olive oil, coat a large baking dish or cast-iron skillet.

In the bottom of the prepared dish/skillet, arrange the slices of lemon in a single layer.

If not marinating the chicken overnight:

Whisk 5 tbsp olive oil, lemon juice, garlic, salt, and pepper in a large bowl. Then, add the green beans and toss to coat. Arrange the green beans on top of the lemon slices.

In the same olive oil mixture, add the potatoes and toss to coat. Along the inside edge of the dish/skillet and over the green beans, arrange the potatoes.

Toss the chicken in the same olive oil mixture until completely coated. Then, transfer in the dish/skillet skin-side up.

Over the chicken, pour any remaining olive oil mixture.

Using foil, tent the baking dish/skillet. Place in the preheated oven and bake for about 30 minutes. Remove the cover and roast for another 20 minutes or until the internal temperature of the chicken reaches 165 degrees F and the chicken is a crispy and rich brown.

On a plate, transfer the chicken and let them rest. Set aside.

Return the beans and potatoes to the oven for another 10 minutes or until tender.

In the middle of each 4 plates, divide the green beans and potatoes. Then, arrange the chicken around. Serve with a baguette or crusty dinner rolls. This also pairs well with a salad. Enjoy!

GARLIC and LEMON CHICKEN WITH GREEN BEANS and RED POTATOES

Rebecca This garlic and lemon chicken with green beans and red potatoes is the best weeknight dinner you’ll ever make for your loved ones. With a brilliant combination of flavors that… General Recipes GARLIC and LEMON CHICKEN WITH GREEN BEANS and RED POTATOES European Print This
Nutrition facts: 200 calories 20 grams fat
Rating: 5.0/5
( 1 voted )

Ingredients

  • 4 chicken breasts – bone-in with skin (this will be about 3 ¼ pounds of chicken)
  • 6 tablespoons olive oil – Divided (1 tablespoon and 5 tablespoons)
  • 4 cloves garlic – minced
  • ¾ pound trimmed green beans
  • 2 lemons – 1 very thinly sliced and 1 juiced
  • 8 small red potatoes – quartered (make sure you use small red potatoes)
  • 1 teaspoon salt
  • ½ teaspoon freshly ground black pepper

Instructions

Marinating Overnight (recommended):

Place 5 tbsp olive oil, lemon juice, garlic, salt, and pepper in a large bowl. Mix well until combined.

To the bowl with the mixture, add the chicken and coat well. Cover the bowl and keep it in the fridge overnight.

On the next day, remove the chicken from the marinade. Then, proceed to coat the green beans and potatoes.

Prepare the oven. Preheat it to 400 degrees F. Using 1 tbsp olive oil, coat a large baking dish or cast-iron skillet.

In the bottom of the prepared dish/skillet, arrange the slices of lemon in a single layer.

If not marinating the chicken overnight:

Whisk 5 tbsp olive oil, lemon juice, garlic, salt, and pepper in a large bowl. Then, add the green beans and toss to coat. Arrange the green beans on top of the lemon slices.

In the same olive oil mixture, add the potatoes and toss to coat. Along the inside edge of the dish/skillet and over the green beans, arrange the potatoes.

Toss the chicken in the same olive oil mixture until completely coated. Then, transfer in the dish/skillet skin-side up.

Over the chicken, pour any remaining olive oil mixture.

Using foil, tent the baking dish/skillet. Place in the preheated oven and bake for about 30 minutes. Remove the cover and roast for another 20 minutes or until the internal temperature of the chicken reaches 165 degrees F and the chicken is a crispy and rich brown.

On a plate, transfer the chicken and let them rest. Set aside.

Return the beans and potatoes to the oven for another 10 minutes or until tender.

In the middle of each 4 plates, divide the green beans and potatoes. Then, arrange the chicken around. Serve with a baguette or crusty dinner rolls. This also pairs well with a salad. Enjoy!
August 9, 2022 0 comment
0 FacebookTwitterPinterestEmail
General Recipes

Baked Crispy Chicken

by Rebecca August 9, 2022
written by Rebecca

Prep time: 15 mins | Cook time: 15 mins | Total time: 30 mins | Servings: 4 people

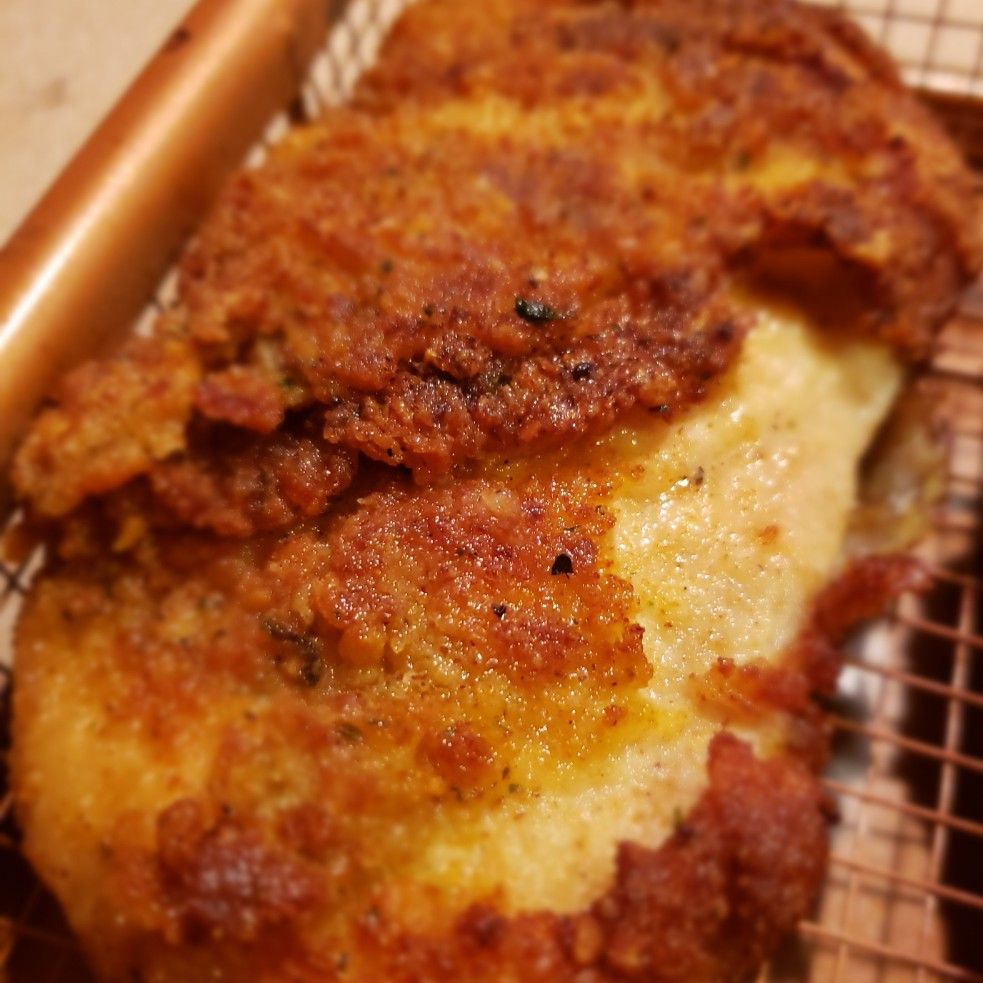
I love the convenience of this baked crispy chicken recipe. No more oil splatters and messy kitchen. This extra crispy, delicious baked crispy chicken is an amazing weeknight meal that your little ones will surely ask for again and again! Serve this with honey mustard sauce for dipping and your favorite roasted/steamed veggies on the side for a simple yet filling meal any time!

Ingredients

BREADCRUMB:

Oil spray

1 ½ c. panko breadcrumbs

BATTER:

1 tablespoon mayonnaise

1 egg

1 ½ tablespoon Dijon mustard or other mustard

Black pepper

½ teaspoon salt

2 tablespoons flour

CHICKEN:

Oil spray

500 grams chicken tenderloins (or breast, cut into 2/3-inch/1.5cm thick slices, lengthwise)

How to make Baked Crispy Chicken

Step 1: Prepare the oven. Preheat it to 390 degrees F.

Step 2: On a baking dish, spread the panko breadcrumbs. Spray with oil and place in the preheated oven. Bake for about 3 to 5 minutes or until the panko breadcrumbs are lightly golden. To a bowl, transfer the panko breadcrumbs when done.

Step 3: Place a rack on a baking tray. Meanwhile, add the batter ingredients to a bowl and mix well using a fork until well combined. Then, add the chicken and toss to coat.

Step 4: Into the bowl with panko breadcrumbs, transfer the chicken. On top, sprinkle the breadcrumbs and press to completely coat the chicken. On a baking tray, lay the chicken. Do the same for the remaining chicken.

Step 5: Lightly spray the chicken with oil and sprinkle with a pinch of salt if desired. For medium-sized chicken, bake them for about 15 minutes and 20 minutes if using big-sized chicken.

Step 6: Tale the chicken out of the oven when done and serve them right away with your preferred sauce. If desired, garnish with some fresh parsley. Enjoy!

Notes:

You can serve the chicken with honey mustard sauce. To make the honey mustard sauce, whisk ⅓ c mayonnaise, 2 tbsp Dijon mustard, 2 tbsp honey, 1-2 lemon juice, salt, and pepper.

Feel free to make this chicken dish in advance. Simply toast the breadcrumbs and dredge the chicken in the batter for up to 2 days. Before baking, crumb the chicken. For preservation, you can also keep it in the freezer.

To reheat, place in the oven for about 3 to 5 minutes at 390 degrees F or until heated through.

Nutritional Facts:

Calories: 416cal (21%), Carbohydrates: 29g (10%), Protein: 42g (84%), Fat: 12g (18%), Cholesterol: 163mg (54%), Sodium: 973mg (42%), Potassium: 705mg (20%), Fiber: 1g (4%), Sugar: 2g (2%), Vitamin C: 2mg (2%), Calcium: 85mg (9%), Iron: 2.9mg (16%)

Baked Crispy Chicken

Rebecca Prep time: 15 mins | Cook time: 15 mins | Total time: 30 mins | Servings: 4 people I love the convenience of this baked crispy chicken recipe. No more… General Recipes Baked Crispy Chicken European Print This
Serves: 4 Prep Time: 15 mins Cooking Time: 15 mins 15 mins
Nutrition facts: 416 calories 12 fat
Rating: 5.0/5
( 1 voted )

Ingredients

  • BREADCRUMB:
  • Oil spray
  • 1 ½ c. panko breadcrumbs
  • BATTER:
  • 1 tablespoon mayonnaise
  • 1 egg
  • 1 ½ tablespoon Dijon mustard or other mustard
  • Black pepper
  • ½ teaspoon salt
  • 2 tablespoons flour
  • CHICKEN:
  • Oil spray
  • 500 grams chicken tenderloins (or breast, cut into 2/3-inch/1.5cm thick slices, lengthwise)

Instructions

Step 1: Prepare the oven. Preheat it to 390 degrees F.

Step 2: On a baking dish, spread the panko breadcrumbs. Spray with oil and place in the preheated oven. Bake for about 3 to 5 minutes or until the panko breadcrumbs are lightly golden. To a bowl, transfer the panko breadcrumbs when done.

Step 3: Place a rack on a baking tray. Meanwhile, add the batter ingredients to a bowl and mix well using a fork until well combined. Then, add the chicken and toss to coat.

Step 4: Into the bowl with panko breadcrumbs, transfer the chicken. On top, sprinkle the breadcrumbs and press to completely coat the chicken. On a baking tray, lay the chicken. Do the same for the remaining chicken.

Step 5: Lightly spray the chicken with oil and sprinkle with a pinch of salt if desired. For medium-sized chicken, bake them for about 15 minutes and 20 minutes if using big-sized chicken.

Step 6: Tale the chicken out of the oven when done and serve them right away with your preferred sauce. If desired, garnish with some fresh parsley. Enjoy!

Notes

You can serve the chicken with honey mustard sauce. To make the honey mustard sauce, whisk ⅓ c mayonnaise, 2 tbsp Dijon mustard, 2 tbsp honey, 1-2 lemon juice, salt, and pepper. Feel free to make this chicken dish in advance. Simply toast the breadcrumbs and dredge the chicken in the batter for up to 2 days. Before baking, crumb the chicken. For preservation, you can also keep it in the freezer. To reheat, place in the oven for about 3 to 5 minutes at 390 degrees F or until heated through.

August 9, 2022 0 comment
0 FacebookTwitterPinterestEmail
General Recipes

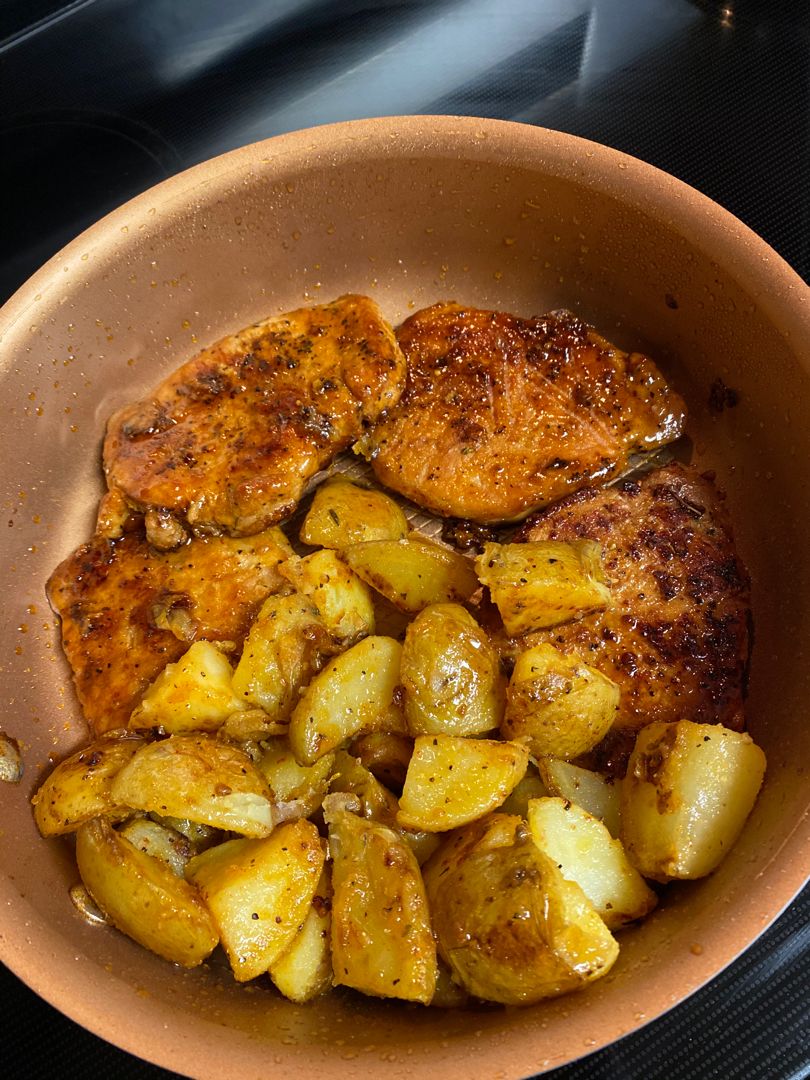
SUPER-EASY HONEY MUSTARD PORK CHOPS AND POTATOES SKILLET

by Rebecca August 8, 2022
written by Rebecca

This melt-in-your-mouth juicy honey mustard pork chops with potatoes are the bomb! A succulent dinner option that everyone will love and enjoy! Seared pork chops coated in a lip-smacking glaze served with crisp baby potatoes. This dish is an ultimate party or family weeknight dinner that you can easily and quickly make at any time. A keeper and a must!

INGREDIENTS

2 tbsp butter, divided

4 pork chops, boneless

2 tbsp oil, divided

1 tbsp lemon juice

1/3 c. whole grain mustard

1/4 c. honey

1 tsp smoked paprika

1 pound (450 grams) of baby yellow potatoes, quartered and rinsed

Chopped fresh parsley, for garnish

Salt and fresh cracked pepper

HOW TO MAKE SUPER-EASY HONEY MUSTARD PORK CHOPS AND POTATOES SKILLET

Step 1: Clean the potatoes, slice them into quarters, then place them in salted boiling water, and cook for about 8 minutes. Drain when done and set aside.

Step 2: In the meantime, pat dry the pork chops and season with salt and pepper on both sides.

Step 3: Place the honey, mustard, paprika, and lemon juice in a small bowl. Mix well until smooth and combined.

Step 4: Heat 1 tbsp each of butter and olive oil in a skillet over medium heat. Once the butter has melted, add the potatoes to the skillet and cook until crust forms, occasionally tossing the potatoes. Onto a plate, transfer the potatoes, and discard the oil from the skillet.

Step 5: In the now-empty skillet, melt the remaining butter. Add the chops and cook for about 4 to 5 minutes until completely cooked. Transfer them to a different plate.

Step 6: Decrease the heat and add the honey mustard sauce to the same skillet. Simmer for about a minute, then return the potatoes to the skillet. Toss the potatoes around until well coated. Add the pork chops and toss them around until completely coated.

Step 7: Serve the honey mustard pork chops and potatoes right away garnished with some chopped parsley. Enjoy!

SUPER-EASY HONEY MUSTARD PORK CHOPS AND POTATOES SKILLET

Rebecca This melt-in-your-mouth juicy honey mustard pork chops with potatoes are the bomb! A succulent dinner option that everyone will love and enjoy! Seared pork chops coated in a lip-smacking glaze… General Recipes SUPER-EASY HONEY MUSTARD PORK CHOPS AND POTATOES SKILLET European Print This
Nutrition facts: 200 calories 20 grams fat
Rating: 5.0/5
( 1 voted )

Ingredients

  • 2 tbsp butter, divided
  • 4 pork chops, boneless
  • 2 tbsp oil, divided
  • 1 tbsp lemon juice
  • 1/3 c. whole grain mustard
  • 1/4 c. honey
  • 1 tsp smoked paprika
  • 1 pound (450 grams) of baby yellow potatoes, quartered and rinsed
  • Chopped fresh parsley, for garnish
  • Salt and fresh cracked pepper

Instructions

Step 1: Clean the potatoes, slice them into quarters, then place them in salted boiling water, and cook for about 8 minutes. Drain when done and set aside.

Step 2: In the meantime, pat dry the pork chops and season with salt and pepper on both sides.

Step 3: Place the honey, mustard, paprika, and lemon juice in a small bowl. Mix well until smooth and combined.

Step 4: Heat 1 tbsp each of butter and olive oil in a skillet over medium heat. Once the butter has melted, add the potatoes to the skillet and cook until crust forms, occasionally tossing the potatoes. Onto a plate, transfer the potatoes, and discard the oil from the skillet.

Step 5: In the now-empty skillet, melt the remaining butter. Add the chops and cook for about 4 to 5 minutes until completely cooked. Transfer them to a different plate.

Step 6: Decrease the heat and add the honey mustard sauce to the same skillet. Simmer for about a minute, then return the potatoes to the skillet. Toss the potatoes around until well coated. Add the pork chops and toss them around until completely coated.

Step 7: Serve the honey mustard pork chops and potatoes right away garnished with some chopped parsley. Enjoy!

August 8, 2022 0 comment
0 FacebookTwitterPinterestEmail
General Recipes

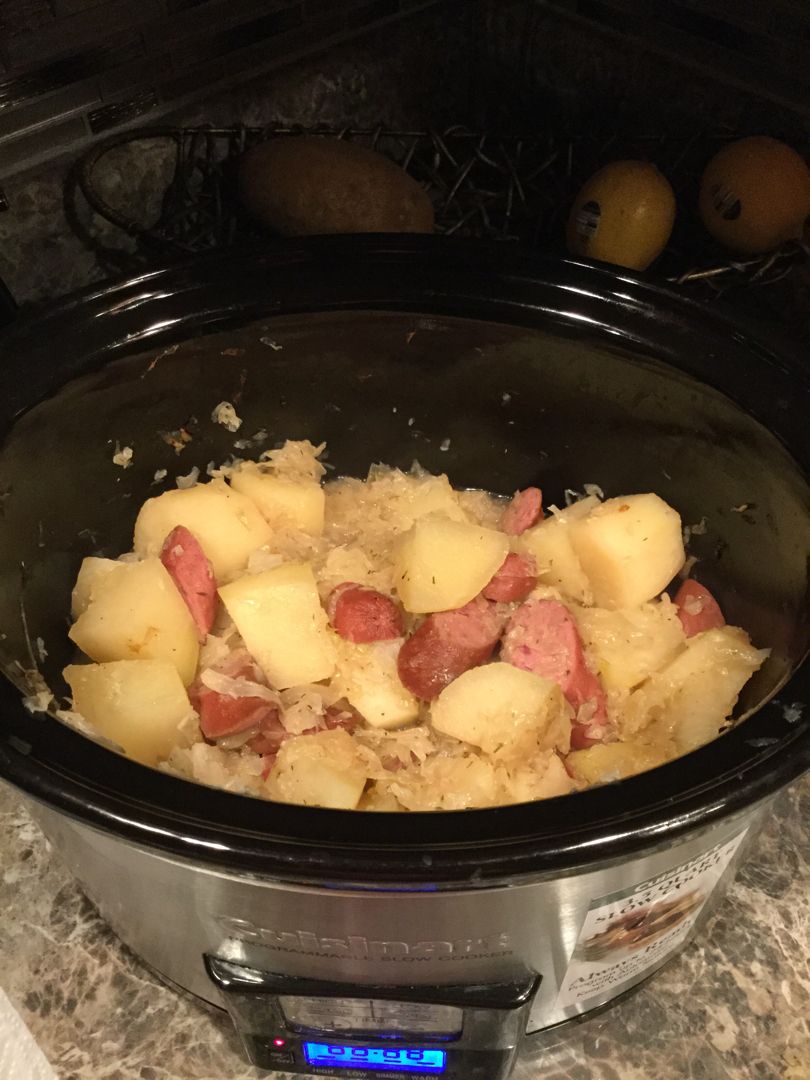
POLISH SAUSAGE SAUERKRAUT AND POTATOES CROCKPOT

by Rebecca August 8, 2022
written by Rebecca

Prep time: 15 mins | Cook Time: 4 hrs | Servings: 8

This is another easy crockpot recipe that will no doubt save any day! Delicious and packed with flavor and the perfect weeknight dinner for your entire family. This crockpot dish is made with Polish sausage, sauerkraut, and potatoes cooked low and slow in a simple brown sugar-laced sauce. The combination of sweet and savory of this amazing dish is superb! The first time I made this my family instantly love every inch of this Polish Sausage sauerkraut and potatoes. And this has been one of our favorite rotations for years!

This one-pot meal is very comforting. You can easily double this recipe if serving a crowd. Leftovers are fantastic, too! Simply store the leftovers in the fridge and enjoy the next day for an easy and quick lunch or dinner.

Ingredients

1 lb. Polish sausage, cut into chunks

5 or 6 potatoes, peeled and cut into large chunks

2 14-oz. cans sauerkraut, undrained

1 c. water

1 tsp caraway seeds

¼ tsp pepper

1 bay leaf

HOW TO MAKE POLISH SAUSAGE SAUERKRAUT AND POTATOES CROCKPOT

Step 1: In a crockpot, place the sauerkraut and potatoes. Then, add the spices and water. On top, place the sausage. Cover and set to cook on low for 6 hours until the potatoes are tender.

Step 2: Serve the Polish Sausage Sauerkraut and Potatoes right away. Enjoy!

Tips:

I suggest peeling the carrots for a cleaner and brighter color.

For this recipe, you are welcome to use any smoked sausage like smoked chicken sausage instead of Polish sausage.

You can also use pork chops. In a mixing bowl, combine all the ingredients except for the potatoes and pork chops. Once the sauerkraut mixture is ready, layer the potatoes and pork chops.

Keep in mind that cooking time varies depending on the slow cooker.

Salt is not required as the sauerkraut and sausage are already salty.

POLISH SAUSAGE SAUERKRAUT AND POTATOES CROCKPOT

Rebecca Prep time: 15 mins | Cook Time: 4 hrs | Servings: 8 This is another easy crockpot recipe that will no doubt save any day! Delicious and packed with flavor… General Recipes POLISH SAUSAGE SAUERKRAUT AND POTATOES CROCKPOT European Print This
Serves: 8 Prep Time: 15 mins Cooking Time: 4 hrs 4 hrs
Nutrition facts: 200 calories 20 grams fat
Rating: 5.0/5
( 1 voted )

Ingredients

  • 1 lb. Polish sausage, cut into chunks
  • 5 or 6 potatoes, peeled and cut into large chunks
  • 2 14-oz. cans sauerkraut, undrained
  • 1 c. water
  • 1 tsp caraway seeds
  • ¼ tsp pepper
  • 1 bay leaf

Instructions

I suggest peeling the carrots for a cleaner and brighter color.

For this recipe, you are welcome to use any smoked sausage like smoked chicken sausage instead of Polish sausage.

You can also use pork chops. In a mixing bowl, combine all the ingredients except for the potatoes and pork chops. Once the sauerkraut mixture is ready, layer the potatoes and pork chops.

Keep in mind that cooking time varies depending on the slow cooker.

Salt is not required as the sauerkraut and sausage are already salty.

August 8, 2022 0 comment
0 FacebookTwitterPinterestEmail
General Recipes

Monte Cristo Sandwich

by Rebecca August 8, 2022
written by Rebecca

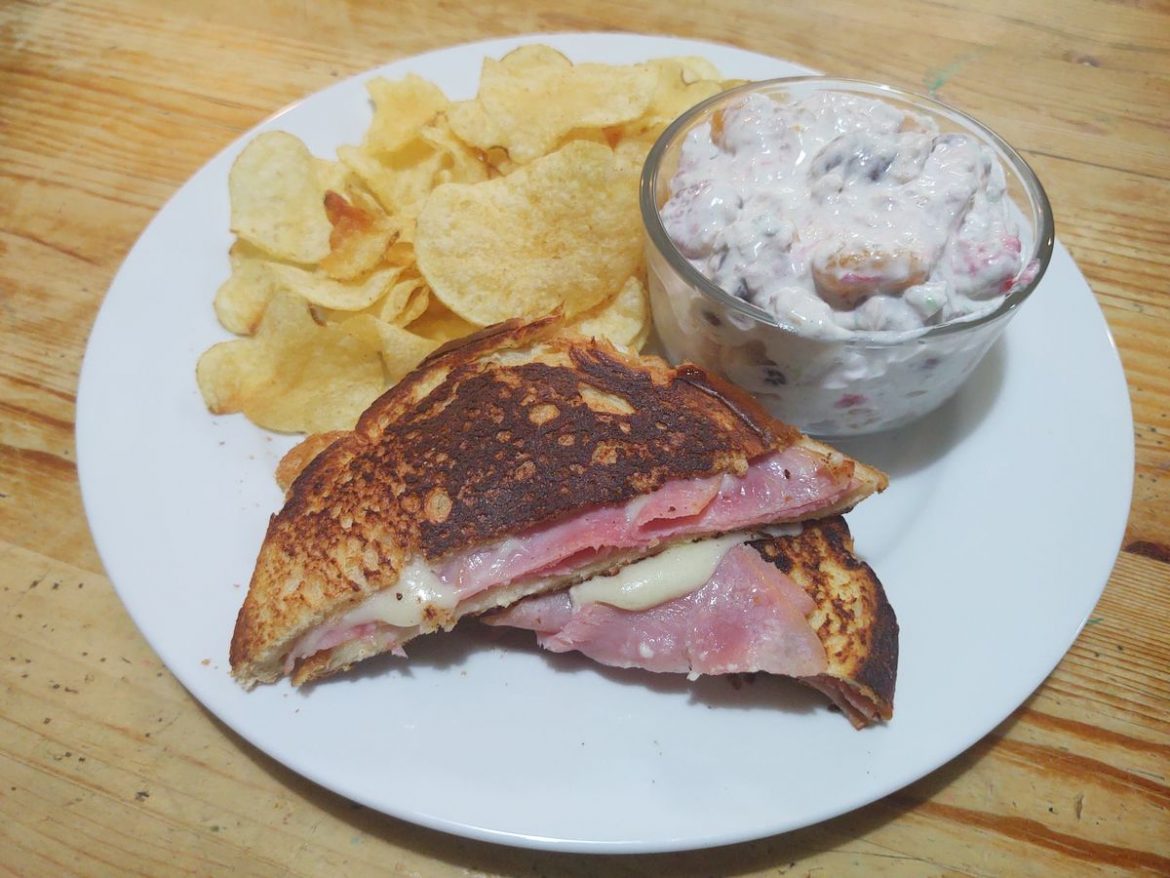
This Monte Cristo Sandwich is a delicious breakfast sandwich or on-the-go snack. Toasted bunds with mayonnaise spread, melty cheese, ham, and turkey. Pair this hearty Monte Cristo Sandwich with fresh fruit and red currant jelly or blackberry jam for dipping.

Ingredients

3 tablespoons butter

3 large eggs, beaten

¼ c. mayonnaise

¼ c. Half and Half or whole milk

12 slices of sturdy white bread

8 slices Gruyère or Swiss cheese

¼ pound deli sliced ham – preferably the Black Forest or Virginia ham

¼ pound deli sliced turkey – Oven Roasted preferably

Confectioners’ Sugar – Optional

Red currant jelly, Blackberry Jam – Optional

How to make Monte Cristo Sandwich

Step 1: Place the eggs and milk in a shallow dish. Whisk well until combined.

Step 2: In a large skillet, melt the butter over medium heat.

To Assemble the Sandwiches:

Step 3: Lay 4 pieces of bread on a cutting board. Top each bread with a slice of cheese, followed by ham.

Step 4: In another 4 slices of bread, spread about half tbsp each of mayonnaise on one side.

Step 5: On top of the ham, place the mayonnaise side down. On the opposite side of the bread, spread another half tbsp of mayonnaise. Do the same for the rest of the sandwiches.

Step 6: On top of each sandwich, place 1/4 of the turkey and top each with a slice of cheese.

Step 7: Over each sandwich, place the remaining 4 slices of bread. Firmly press together each sandwich.

Dipping and Cooking the Sandwiches:

Step 8: Into the egg and milk mixture, quickly dip each sandwich. Make sure to coat the sandwich, but do not soak them.

Step 9: In the heated skillet with butter, place the sandwiches and cook until the bread is toasted and the cheese has melted. Then, flip the sandwiches and continue to cook the other side.

To serve:

Step 10: In half, slice the sandwiches and dust with confectioners’ sugar. If desired, serve the Monte Cristo Sandwich with red currant jelly or blackberry jam for dipping. Enjoy!

Monte Cristo Sandwich

Rebecca This Monte Cristo Sandwich is a delicious breakfast sandwich or on-the-go snack. Toasted bunds with mayonnaise spread, melty cheese, ham, and turkey. Pair this hearty Monte Cristo Sandwich with fresh… General Recipes Monte Cristo Sandwich European Print This
Nutrition facts: 200 calories 20 grams fat
Rating: 5.0/5
( 1 voted )

Ingredients

  • 3 tablespoons butter
  • 3 large eggs, beaten
  • ¼ c. mayonnaise
  • ¼ c. Half and Half or whole milk
  • 12 slices of sturdy white bread
  • 8 slices Gruyère or Swiss cheese
  • ¼ pound deli sliced ham – preferably the Black Forest or Virginia ham
  • ¼ pound deli sliced turkey – Oven Roasted preferably
  • Confectioners’ Sugar – Optional
  • Red currant jelly, Blackberry Jam – Optional

Instructions

Step 1: Place the eggs and milk in a shallow dish. Whisk well until combined.

Step 2: In a large skillet, melt the butter over medium heat.

To Assemble the Sandwiches:

Step 3: Lay 4 pieces of bread on a cutting board. Top each bread with a slice of cheese, followed by ham.

Step 4: In another 4 slices of bread, spread about half tbsp each of mayonnaise on one side.

Step 5: On top of the ham, place the mayonnaise side down. On the opposite side of the bread, spread another half tbsp of mayonnaise. Do the same for the rest of the sandwiches.

Step 6: On top of each sandwich, place 1/4 of the turkey and top each with a slice of cheese.

Step 7: Over each sandwich, place the remaining 4 slices of bread. Firmly press together each sandwich.

Dipping and Cooking the Sandwiches:

Step 8: Into the egg and milk mixture, quickly dip each sandwich. Make sure to coat the sandwich, but do not soak them.

Step 9: In the heated skillet with butter, place the sandwiches and cook until the bread is toasted and the cheese has melted. Then, flip the sandwiches and continue to cook the other side.

To serve:

Step 10: In half, slice the sandwiches and dust with confectioners’ sugar. If desired, serve the Monte Cristo Sandwich with red currant jelly or blackberry jam for dipping. Enjoy!

August 8, 2022 0 comment
0 FacebookTwitterPinterestEmail
General Recipes

Sweet Baby Ray’s Crockpot Chicken Recipe

by Rebecca August 8, 2022
written by Rebecca

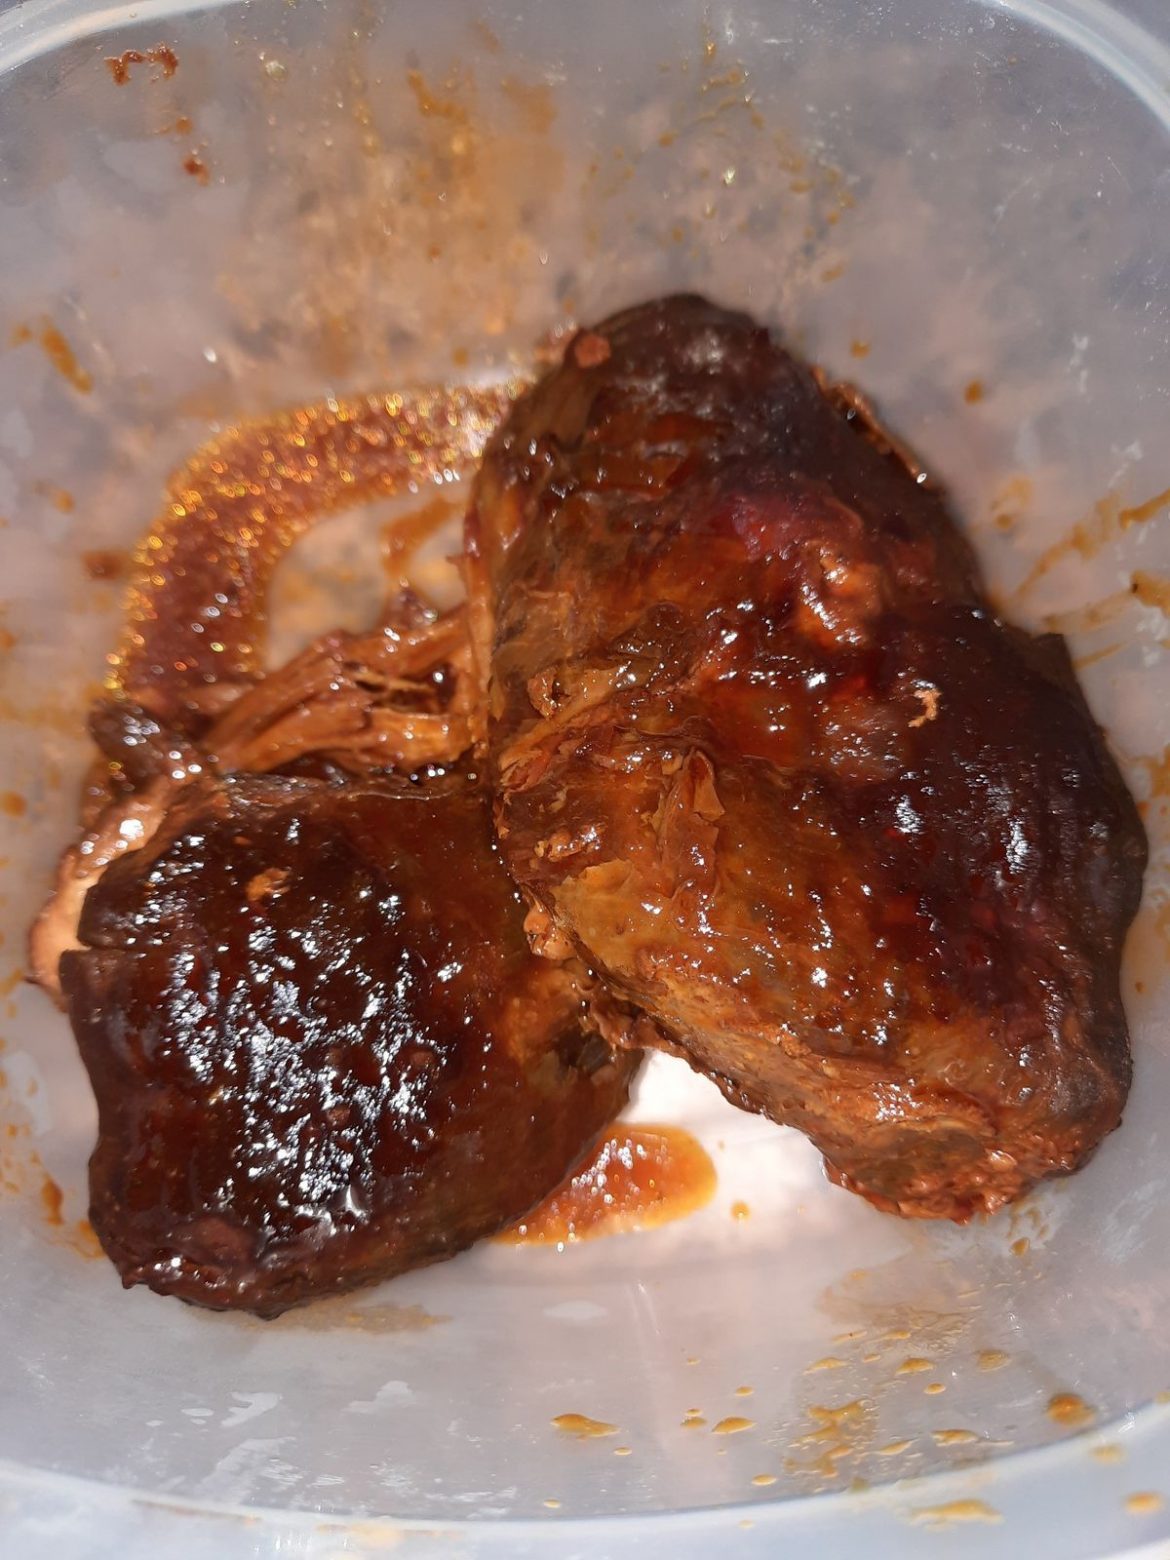
This Crockpot chicken is a staple at home. Tender and juicy chicken cooked low and slow in Sweet Baby Ray’s BBQ sauce. All the flavors from the BBQ sauce coated the chicken from inside and out for a flavor-bursting chicken BBQ. Make this mouthwatering crockpot chicken using only pantry ingredients and with minimal prep work. Serve this BBQ chicken with lightly toasted, buttered brioche buns, coleslaw, potato salad, or even green beans for a simple yet filling meal that your entire family will love!

Ingredients

1 (18 oz.) bottle barbecue sauce (Sweet Baby Ray’s Original)

4-6 chicken breasts – boneless and skinless

¼ c. distilled white vinegar

1 teaspoon garlic powder

¼ c. brown sugar

1 teaspoon black pepper

1 teaspoon red pepper flakes (Optional or adjust according to taste)

How to make Sweet Baby Ray’s Crockpot Chicken

Step 1: For the sauce, place the Sweet Baby Ray’s Original Barbecue Sauce, brown sugar, garlic powder, onion powder, black pepper, and crushed red pepper (optional) in a bowl. Mix well until combined.

Step 2: In the bottom of a crockpot, place the chicken and pour the sauce over it. Set to cook for 4 to 6 hours on low.

Step 3: To a bowl, transfer the chicken when done and shred using two forks. Return the shredded chicken to the crockpot and stir well until the meat is coated with BBQ sauce.

Notes:

If using a BBQ sauce that is not Original, adjust the amount of brown sugar as the sauce might get overly sweet. I do not suggest leaving the sugar out as it helps caramelize the sauce.

For this recipe, you can swap the chicken breasts with boneless, skinless chicken thighs.

You can add 1 tbsp Horseradish sauce if you want to add a nice kick to this crockpot chicken.

You can also substitute the distilled white vinegar with apple cider vinegar.

Sweet Baby Ray’s Crockpot Chicken Recipe

Rebecca This Crockpot chicken is a staple at home. Tender and juicy chicken cooked low and slow in Sweet Baby Ray’s BBQ sauce. All the flavors from the BBQ sauce coated… General Recipes Sweet Baby Ray’s Crockpot Chicken Recipe European Print This
Nutrition facts: 200 calories 20 grams fat
Rating: 5.0/5
( 1 voted )

Ingredients

  • 1 (18 oz.) bottle barbecue sauce (Sweet Baby Ray’s Original)
  • 4-6 chicken breasts – boneless and skinless
  • ¼ c. distilled white vinegar
  • 1 teaspoon garlic powder
  • ¼ c. brown sugar
  • 1 teaspoon black pepper
  • 1 teaspoon red pepper flakes (Optional or adjust according to taste)

Instructions

Step 1: For the sauce, place the Sweet Baby Ray’s Original Barbecue Sauce, brown sugar, garlic powder, onion powder, black pepper, and crushed red pepper (optional) in a bowl. Mix well until combined.

Step 2: In the bottom of a crockpot, place the chicken and pour the sauce over it. Set to cook for 4 to 6 hours on low.

Step 3: To a bowl, transfer the chicken when done and shred using two forks. Return the shredded chicken to the crockpot and stir well until the meat is coated with BBQ sauce.

Notes

If using a BBQ sauce that is not Original, adjust the amount of brown sugar as the sauce might get overly sweet. I do not suggest leaving the sugar out as it helps caramelize the sauce. For this recipe, you can swap the chicken breasts with boneless, skinless chicken thighs. You can add 1 tbsp Horseradish sauce if you want to add a nice kick to this crockpot chicken. You can also substitute the distilled white vinegar with apple cider vinegar.

August 8, 2022 0 comment
0 FacebookTwitterPinterestEmail
General Recipes

Bacon Egg and Hash Brown Casserole for a Lazy Weekend Breakfast

by Rebecca August 8, 2022
written by Rebecca

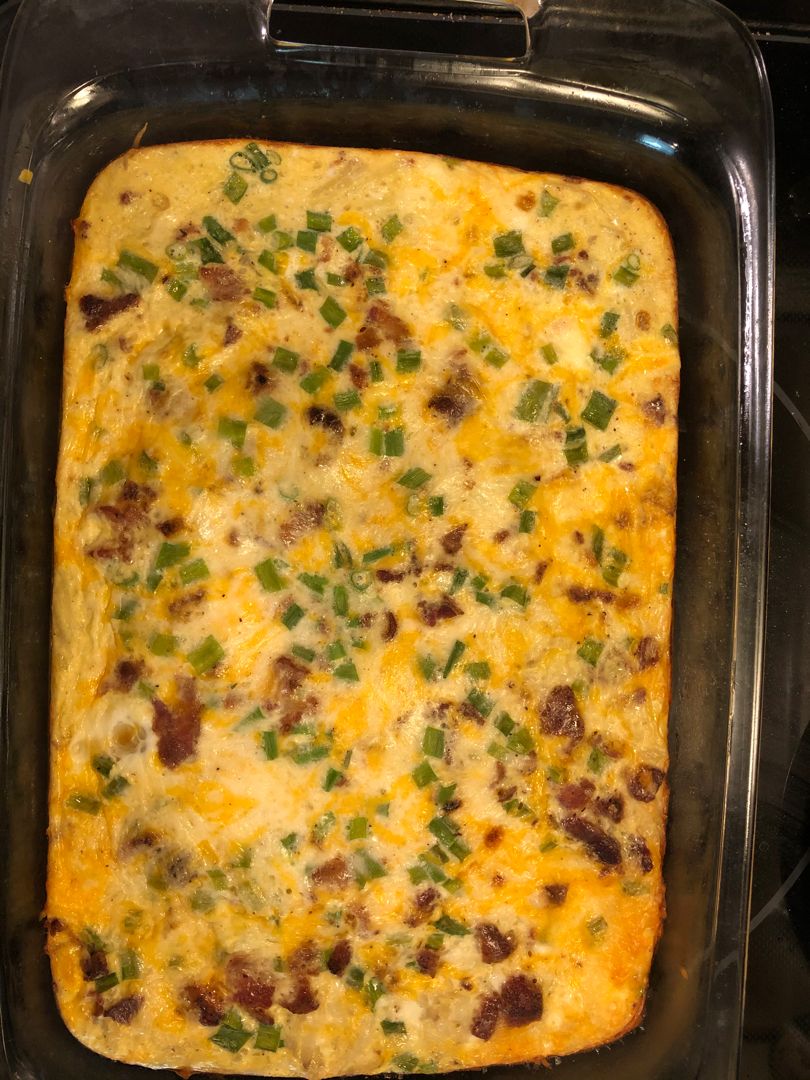
This lazy weekend breakfast casserole is a delicious, incredibly easy casserole to make. An ultimate breakfast/brunch that is jam-packed with hashbrown, eggs, bacon, and cheese.

For an easy and quick meal, make this casserole ahead and simply wrap this in plastic and keep it in the fridge. When ready to serve, bake increasing the cooking time to about 10 to 15 minutes. You can also store individual portions in the fridge for up to 4 days. First, bake and allow the casserole to cool completely. If freezing, wrap the completely cooled baked casserole in two layers of foil and freeze for up to 2 months.

Ingredients

8 eggs

1 (30 ounces) package of frozen shredded hashbrowns – thawed

½ pound bacon – cooked crispy and crumbled

½ c. whole milk or Half and Half

8 ounces shredded cheddar cheese

¼ teaspoon garlic powder

½ teaspoon onion powder

¼ teaspoon Pepper

Pinch of cayenne pepper

Chopped green onions for garnish, optional

½ teaspoon salt

How to make Bacon Egg and Hash Brown Casserole

Step 1: Prepare the oven. Preheat it to 350 degrees F. Using butter, lightly grease a 9 x 13-inch baking dish.

Step 2: In the bottom of the prepared pan, spread the hashbrown in an even layer.

Step 3: Place the eggs, milk, salt, onion powder, garlic powder, pepper, and cayenne in a large bowl. Mix well until combined, then pour this over the hashbrown. On top, sprinkle half of the cheese, followed by the bacon, then the rest of the cheese.

Step 4: Using foil, tightly cover the baking dish. Place in the preheated oven and bake for about 1 hour. Uncover and resume baking for an additional 5 to 10 minutes or until the middle of the casserole is set.

Step 5: Remove the casserole from the oven when done and allow it to stand for about 5 to 10 minutes.

Step 6: If desired, garnish with some chopped green onions. Serve and enjoy!

Bacon Egg and Hash Brown Casserole for a Lazy Weekend Breakfast

Rebecca This lazy weekend breakfast casserole is a delicious, incredibly easy casserole to make. An ultimate breakfast/brunch that is jam-packed with hashbrown, eggs, bacon, and cheese. For an easy and quick… General Recipes Bacon Egg and Hash Brown Casserole for a Lazy Weekend Breakfast European Print This
Nutrition facts: 200 calories 20 grams fat
Rating: 5.0/5
( 1 voted )

Ingredients

  • 8 eggs
  • 1 (30 ounces) package of frozen shredded hashbrowns – thawed
  • ½ pound bacon – cooked crispy and crumbled
  • ½ c. whole milk or Half and Half
  • 8 ounces shredded cheddar cheese
  • ¼ teaspoon garlic powder
  • ½ teaspoon onion powder
  • ¼ teaspoon Pepper
  • Pinch of cayenne pepper
  • Chopped green onions for garnish, optional
  • ½ teaspoon salt

Instructions

Step 1: Prepare the oven. Preheat it to 350 degrees F. Using butter, lightly grease a 9 x 13-inch baking dish.

Step 2: In the bottom of the prepared pan, spread the hashbrown in an even layer.

Step 3: Place the eggs, milk, salt, onion powder, garlic powder, pepper, and cayenne in a large bowl. Mix well until combined, then pour this over the hashbrown. On top, sprinkle half of the cheese, followed by the bacon, then the rest of the cheese.

Step 4: Using foil, tightly cover the baking dish. Place in the preheated oven and bake for about 1 hour. Uncover and resume baking for an additional 5 to 10 minutes or until the middle of the casserole is set.

Step 5: Remove the casserole from the oven when done and allow it to stand for about 5 to 10 minutes.

Step 6: If desired, garnish with some chopped green onions. Serve and enjoy!

August 8, 2022 0 comment
0 FacebookTwitterPinterestEmail
General Recipes

Lobster, Crab and Shrimp Macaroni and Cheese

by Rebecca August 8, 2022
written by Rebecca

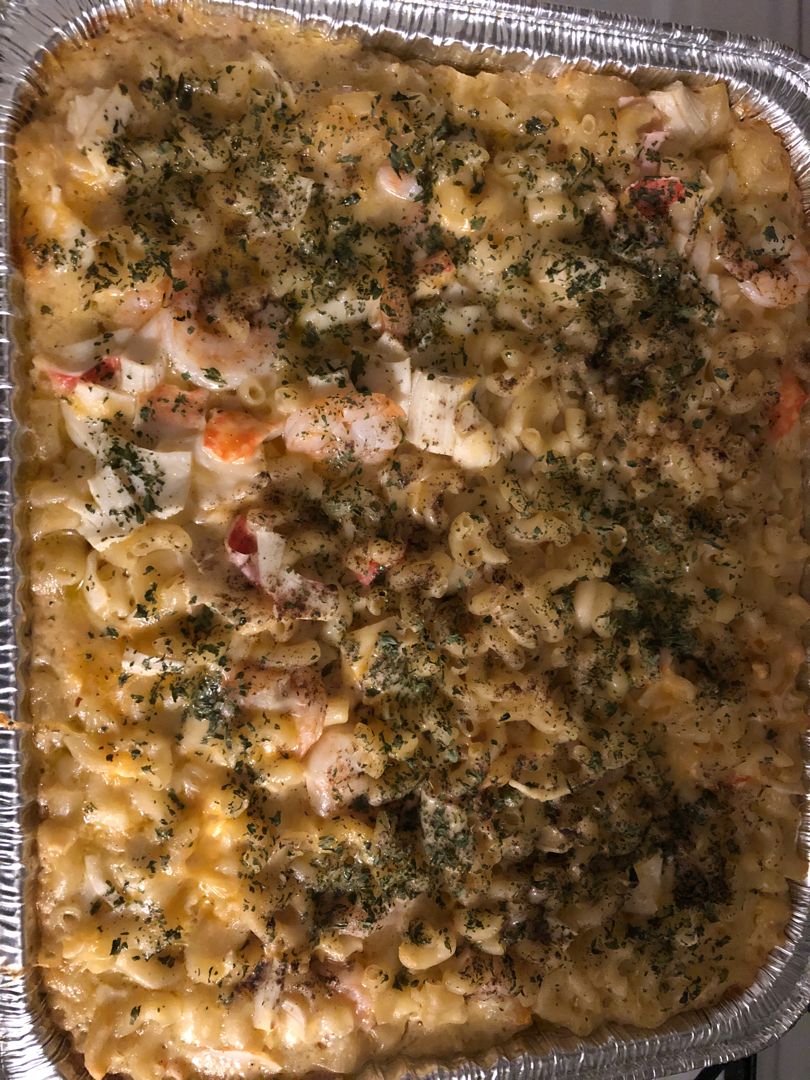
This delightful Lobster, Crab, and Shrimp Mac and Cheese are great to serve by themselves or as a side to an exquisite steak for an extra special meal. For a light meal, this goes perfectly with salad, green beans, and roasted tomatoes, too!

Ingredients

½ c. unsalted butter, divided

1 pound elbow macaroni

½ c. flour

1 c. heavy cream, room temperature

3 c. whole milk, room temperature

2 c. grated sharp cheddar cheese

4 c. grated Gruyere cheese

1 c. panko breadcrumbs

1 ½ pound mixture of cooked lobster, crab, and shrimp

Coarse salt

Fresh ground pepper

How to make Lobster, Crab, and Shrimp Macaroni and Cheese

Step 1: Prepare the oven. Preheat it to 375 degrees F.

Step 2: Using cooking spray, coat a 2-quart baking dish. Alternately, you can lightly coat the baking dish with butter.

Step 3: Following the package directions, cook the pasta until al dente. Drain when done and rinse under cold water. Set aside.

Roux:

Step 4: In a large pot, melt 6 tbsp butter over medium heat. Once the butter has melted, stir in the flour for about 30 seconds until combined.

Step 5: Gradually stir in the milk and cream, cooking for another minute or so until mixed and smooth. Then, adjust the heat to low.

Cheese Sauce:

Step 6: About a handful at a time, stir in the shredded cheeses into the Roux, stirring in between each addition until completely mixed. To taste, season with salt and pepper. Then, take the cheese sauce off the heat.

To Assemble and Bake the Mac and Cheese:

Step 7: Into the cheese sauce, gently stir in the cooked pasta and seafood mixture.

Step 8: Into the prepared baking dish, pour the mixture.

Step 9: Melt the rest of the 2 tbsp butter and whisk it with the Panko. On top of the Mac & cheese, sprinkle the mixture. Place in the preheated oven and bake for about 30 minutes or until the seafood Mac and cheese is hot and the breadcrumbs are golden brown.

Step 10: Remove from the oven when done and serve the Lobster, Crab, and Shrimp Macaroni and Cheese right away. Enjoy!

Lobster, Crab and Shrimp Macaroni and Cheese

Rebecca This delightful Lobster, Crab, and Shrimp Mac and Cheese are great to serve by themselves or as a side to an exquisite steak for an extra special meal. For a… General Recipes Lobster, Crab and Shrimp Macaroni and Cheese European Print This
Nutrition facts: 200 calories 20 grams fat
Rating: 5.0/5
( 1 voted )

Ingredients

  • ½ c. unsalted butter, divided
  • 1 pound elbow macaroni
  • ½ c. flour
  • 1 c. heavy cream, room temperature
  • 3 c. whole milk, room temperature
  • 2 c. grated sharp cheddar cheese
  • 4 c. grated Gruyere cheese
  • 1 c. panko breadcrumbs
  • 1 ½ pound mixture of cooked lobster, crab, and shrimp
  • Coarse salt
  • Fresh ground pepper

Instructions

Step 1: Prepare the oven. Preheat it to 375 degrees F.

Step 2: Using cooking spray, coat a 2-quart baking dish. Alternately, you can lightly coat the baking dish with butter.

Step 3: Following the package directions, cook the pasta until al dente. Drain when done and rinse under cold water. Set aside.

Roux:

Step 4: In a large pot, melt 6 tbsp butter over medium heat. Once the butter has melted, stir in the flour for about 30 seconds until combined.

Step 5: Gradually stir in the milk and cream, cooking for another minute or so until mixed and smooth. Then, adjust the heat to low.

Cheese Sauce:

Step 6: About a handful at a time, stir in the shredded cheeses into the Roux, stirring in between each addition until completely mixed. To taste, season with salt and pepper. Then, take the cheese sauce off the heat.

To Assemble and Bake the Mac and Cheese:

Step 7: Into the cheese sauce, gently stir in the cooked pasta and seafood mixture.

Step 8: Into the prepared baking dish, pour the mixture.

Step 9: Melt the rest of the 2 tbsp butter and whisk it with the Panko. On top of the Mac & cheese, sprinkle the mixture. Place in the preheated oven and bake for about 30 minutes or until the seafood Mac and cheese is hot and the breadcrumbs are golden brown.

Step 10: Remove from the oven when done and serve the Lobster, Crab, and Shrimp Macaroni and Cheese right away. Enjoy!

August 8, 2022 0 comment
0 FacebookTwitterPinterestEmail
General Recipes

Boil Potatoes and Slice Them. Arrange With Meatballs and Cheese And Bake For A Delicious French Treat – Gratin Parmentier

by Rebecca August 8, 2022
written by Rebecca

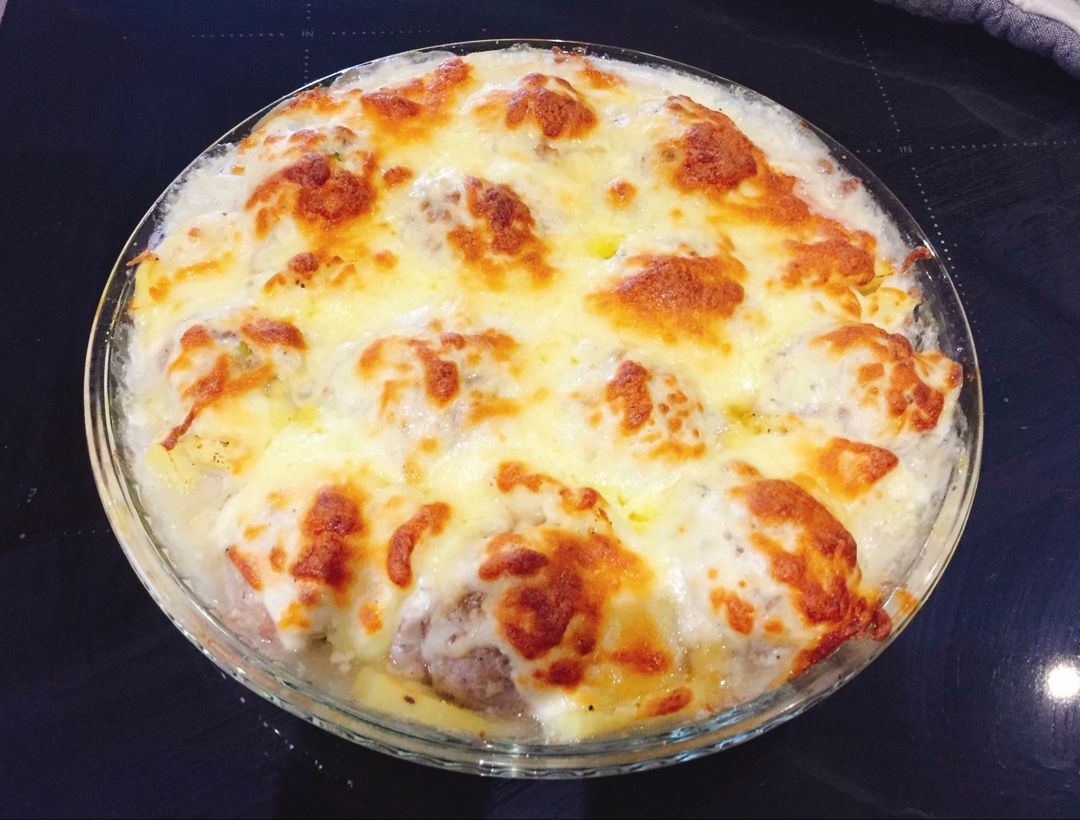
I am obsessed with this Gratin Parmentier. The flavor-packed meatballs are arranged on top of sliced potatoes and baked in a scrumptious bechamel sauce. This Gratin Parmentier has been one of the top French dishes that I can surprisingly make at home without too much fuss!

Ingredients

Bechamel Sauce:

4 tablespoons of all-purpose flour

5 tablespoons of butter

4 c. of whole milk or half and half

½ teaspoon of nutmeg

Salt and freshly ground pepper, to taste

Meat and Potatoes:

1 ½ pounds ground beef

1 white onion

1 teaspoon chopped parsley

3 potatoes – peeled and boiled

⅛ teaspoon (a pinch) of paprika

Salt and fresh ground pepper

1 c. shredded mozzarella

How to make Gratin Parmentier

Bechamel Sauce:

Step 1: Melt the butter in a medium saucepan over medium-low heat. Once the butter has melted, stir in the flour until smooth. Make sure to keep stirring while you cook for about 6 to 7 minutes until the mixture is lightly golden.

Step 2: Heat the milk/half-and-half in another pan until it is almost boiling.

Step 3: To the butter, slowly add in the hot milk/half-and-half about a cup at a time while stirring continuously until smooth. Bring the mixture to a boil and continue to cook for another 10 minutes, stirring constantly. Then, season with salt and nutmeg.

Step 4: Set aside the Bechamel Sauce when done.

Meat and Potatoes:

Step 5: Prepare the oven. Preheat it to 400 degrees F. Using oil or butter, grease a round baking dish.

Step 6: Place the ground beef, chopped parsley, and paprika in a large mixing bowl. Season with a little amount of salt and pepper. Mix well until just combined and set aside.

Step 7: After peeling the potatoes, boil them for about 7 minutes until semi-soft and almost done. Then, slice each potato and arrange them around the bottom of a round glass baking dish. Make sure to lay a layered flat on the bottom and another layer around the sides.

Step 8: Scoop the meatballs mixture using an ice cream scoop. You should be able to make about 15 meatballs. Over the slices of the potato, arrange the meatballs. Between the meatballs, place the rest of the slices of potato and pour the bechamel sauce into each compartment until filled up to the top of the pan. Then, sprinkle a thin layer of shredded mozzarella on top.

Step 9: Place in the preheated oven and bake for about 25 minutes or until the internal temperature of the meatballs reaches 160 degrees F.

Boil Potatoes and Slice Them. Arrange With Meatballs and Cheese And Bake For A Delicious French Treat – Gratin Parmentier

Rebecca I am obsessed with this Gratin Parmentier. The flavor-packed meatballs are arranged on top of sliced potatoes and baked in a scrumptious bechamel sauce. This Gratin Parmentier has been one… General Recipes Boil Potatoes and Slice Them. Arrange With Meatballs and Cheese And Bake For A Delicious French Treat – Gratin Parmentier European Print This
Nutrition facts: 200 calories 20 grams fat
Rating: 4.5/5
( 2 voted )

Ingredients

  • Bechamel Sauce:
  • 4 tablespoons of all-purpose flour
  • 5 tablespoons of butter
  • 4 c. of whole milk or half and half
  • ½ teaspoon of nutmeg
  • Salt and freshly ground pepper, to taste
  • Meat and Potatoes:
  • 1 ½ pounds ground beef
  • 1 white onion
  • 1 teaspoon chopped parsley
  • 3 potatoes – peeled and boiled
  • ⅛ teaspoon (a pinch) of paprika
  • Salt and fresh ground pepper
  • 1 c. shredded mozzarella

Instructions

Bechamel Sauce:

Step 1: Melt the butter in a medium saucepan over medium-low heat. Once the butter has melted, stir in the flour until smooth. Make sure to keep stirring while you cook for about 6 to 7 minutes until the mixture is lightly golden.

Step 2: Heat the milk/half-and-half in another pan until it is almost boiling.

Step 3: To the butter, slowly add in the hot milk/half-and-half about a cup at a time while stirring continuously until smooth. Bring the mixture to a boil and continue to cook for another 10 minutes, stirring constantly. Then, season with salt and nutmeg.

Step 4: Set aside the Bechamel Sauce when done.

Meat and Potatoes:

Step 5: Prepare the oven. Preheat it to 400 degrees F. Using oil or butter, grease a round baking dish.

Step 6: Place the ground beef, chopped parsley, and paprika in a large mixing bowl. Season with a little amount of salt and pepper. Mix well until just combined and set aside.

Step 7: After peeling the potatoes, boil them for about 7 minutes until semi-soft and almost done. Then, slice each potato and arrange them around the bottom of a round glass baking dish. Make sure to lay a layered flat on the bottom and another layer around the sides.

Step 8: Scoop the meatballs mixture using an ice cream scoop. You should be able to make about 15 meatballs. Over the slices of the potato, arrange the meatballs. Between the meatballs, place the rest of the slices of potato and pour the bechamel sauce into each compartment until filled up to the top of the pan. Then, sprinkle a thin layer of shredded mozzarella on top.

Step 9: Place in the preheated oven and bake for about 25 minutes or until the internal temperature of the meatballs reaches 160 degrees F.

August 8, 2022 0 comment
0 FacebookTwitterPinterestEmail
General Recipes

Anti-Crabby Cake

by Rebecca August 8, 2022
written by Rebecca

Cook time: 35 mins | Prep time: 5 mins | Serves: 12

Moist, pineapple-flavored cake with perfectly sweet frosting made with a mixture of cream cheese, vanilla, milk, butter, and sugar. This cake is simple to whip up. All you need are a few simple ingredients that you might already have on hand. Simply mix the cake ingredients and bake. While baking the cake, prep the frosting. When the cake is done and still warm, frost the cake and allow the frosting to set. This cake is delicious to serve cold. Set this in the fridge first before slicing and serving.

This cake has been one of my go-to for years. This cake instantly won me over. The sweet pineapple flavor of this incredibly moist cake is my absolute favorite! I enjoy bringing this cake to picnics and potlucks. This cake is even great for entertaining.

If you are looking for another easy and quick cake recipe, this Anti-Crabby Cake is a great option! It’s simple and enticing!

Ingredients

CAKE:

1 1/2 cups sugar

1 can crushed pineapple in 100% juice (large can – 20 ounces) – do not drain

2 cups all-purpose flour

2 teaspoons baking soda

2 lg eggs

FROSTING:

1 teaspoon vanilla

1 stick unsalted butter, room temp

2 tablespoons milk

2 cups powdered sugar

8 ounces cream cheese, room temp

How to make Anti-Crabby Cake

Step 1: Prepare the oven. Preheat it to 350 degrees.

Step 2: Into a large mixing bowl, place the cake ingredients. Mix well until blended.

Step 3: Into a 9 x 13-inch glass pan, pour the mixture. Place in the preheated oven and bake for about 30 to 40 minutes or until golden and completely baked.

Step 4: While the cake is baking, prepare the frosting. In a large bowl, place the frosting ingredients and beat until well incorporated and smooth.

Step 5: Remove the cake from the oven when done and spread the frosting while the cake is still warm. Allow the frosting to cool, then keep the cake in the fridge.

Step 6: Slice and serve the cake cold. Enjoy!

Anti-Crabby Cake

Rebecca Cook time: 35 mins | Prep time: 5 mins | Serves: 12 Moist, pineapple-flavored cake with perfectly sweet frosting made with a mixture of cream cheese, vanilla, milk, butter, and… General Recipes Anti-Crabby Cake European Print This
Serves: 12 Prep Time: 35 mins Cooking Time: 5 mins 5 mins
Nutrition facts: 200 calories 20 grams fat
Rating: 5.0/5
( 1 voted )

Ingredients

  • CAKE:
  • 1 1/2 cups sugar
  • 1 can crushed pineapple in 100% juice (large can – 20 ounces) – do not drain
  • 2 cups all-purpose flour
  • 2 teaspoons baking soda
  • 2 lg eggs
  • FROSTING:
  • 1 teaspoon vanilla
  • 1 stick unsalted butter, room temp
  • 2 tablespoons milk
  • 2 cups powdered sugar
  • 8 ounces cream cheese, room temp

Instructions

Step 1: Prepare the oven. Preheat it to 350 degrees.

Step 2: Into a large mixing bowl, place the cake ingredients. Mix well until blended.

Step 3: Into a 9 x 13-inch glass pan, pour the mixture. Place in the preheated oven and bake for about 30 to 40 minutes or until golden and completely baked.

Step 4: While the cake is baking, prepare the frosting. In a large bowl, place the frosting ingredients and beat until well incorporated and smooth.

Step 5: Remove the cake from the oven when done and spread the frosting while the cake is still warm. Allow the frosting to cool, then keep the cake in the fridge.

Step 6: Slice and serve the cake cold. Enjoy!

August 8, 2022 0 comment
0 FacebookTwitterPinterestEmail
Newer Posts
Older Posts

Popular Posts

  • 1

    Crispy Crunchy Parmesan Potatoes

    March 21, 2020
  • 2

    CROCK POT SMOTHERED PORK CHOPS

    March 21, 2020
  • Facebook
  • Twitter

@2019 - All Right Reserved.


Back To Top