Cook it once
  • Home
  • Privacy Policy
  • Recipes
    • KETO
    • LC
    • WW
  • Tips
  • Contact
Cook it once
  • Home
  • Privacy Policy
  • Recipes
    • KETO
    • LC
    • WW
  • Tips
  • Contact
Category:

General Recipes

General Recipes

Taco Stuffed Shells

by Rebecca August 11, 2022
written by Rebecca

PREP TIME: 10 mins | COOK TIME: 35 mins | TOTAL TIME: 45 mins | SERVINGS: 6

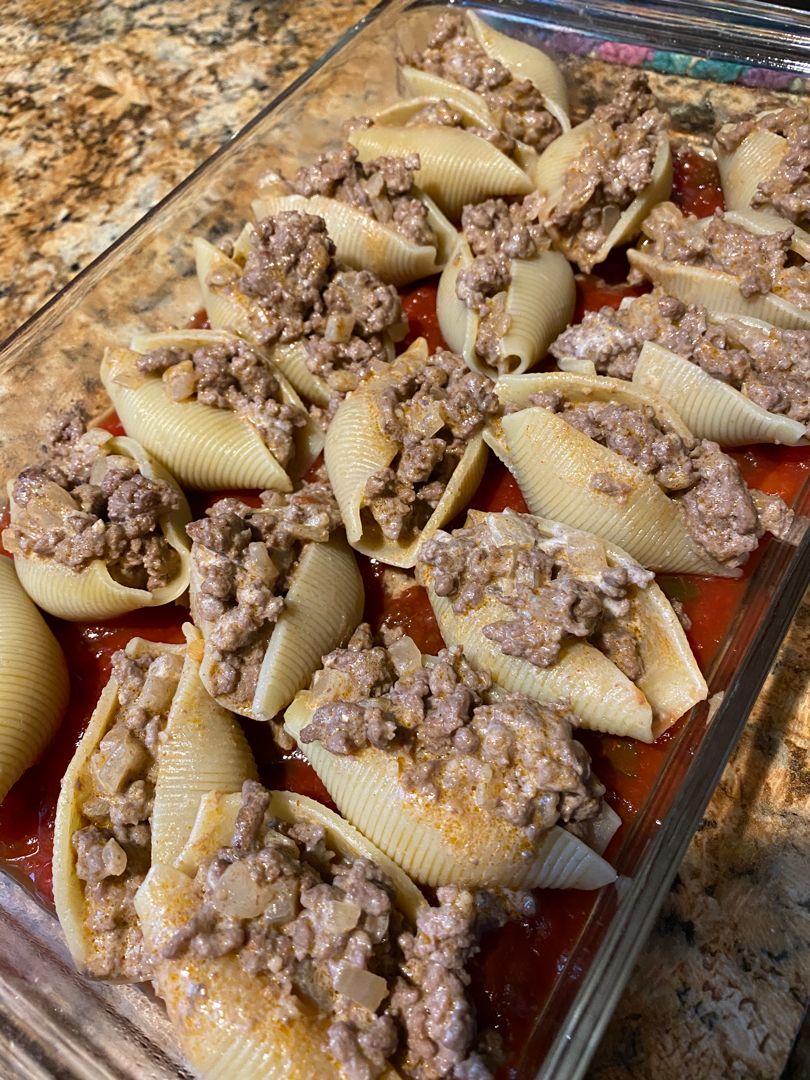
Jumbo shells stuffed with perfectly seasoned ground beef with tons of juicy salsa and melty cheese. This simple recipe creates a fanciful twist to your good old tacos. When serving, add extra sour cream and/or salsa.

INGREDIENTS

1 tbsp olive oil

1 lb extra lean ground beef

2 dozen uncooked jumbo shells

1/2 medium onion, chopped

2 cloves garlic, minced

1 tsp smoked paprika

1 tbsp chili powder

1 tsp ground cumin

1/2 c. sour cream

1 (14.5 oz.) jar of salsa

1.5 c. Tex-Mex cheese blend, divided

Garnish: cilantro, avocado, scallions, tomatoes, sour cream, etc. optional, to taste

Salt & pepper to taste

How to make Taco Stuffed Shells

Step 1: Following the package directions, cook the jumbo shells in a large pot of salted boiling water until al dente.

Step 2: In a skillet, heat the oil over medium-high heat. Then, add the onion and saute for about 4 to 5 minutes or until the onion is just beginning to turn light brown. Add the garlic, stir, and cook for another 30 seconds.

Step 3: To the skillet, add the ground beef, chili powder, smoked paprika, and cumin. Cook for about 8 minutes, breaking the meat into pieces as it cooks using a spoon until browned and completely cooked. Then, spoon most of the excess fat out.

Step 4: In the meantime, prepare the oven. Preheat it to 375 degrees and position the oven rack to the top third of the oven.

Step 5: Spread the salsa on the bottom of a greased 9 x 13-inch baking dish in an even layer.

Step 6: Remove the skillet from the heat. Add the sour cream and half of the cheese to the beef mixture. Stir well until evenly melted and blended. If needed, season with salt and pepper.

Step 7: Once the shells are cooked, rinse them under cold water and drain well. Stuff each shell with the mixture. To do this, use a small spoon and stuff each shell until fairly full. Place the stuffed shell in the baking dish. Do the same for the remaining shells. On top of the stuffed shells, sprinkle the rest of the cheese.

Step 8: Place in the preheated oven and bake for about 20 minutes, uncovered. To brown the cheese, broil the stuffed shells for a couple of minutes.

Step 9: Meanwhile, ready the toppings/garnish.

Step 10: Serve the taco stuffed shells right away topped with your preferred toppings/garnish. Enjoy!

NUTRITION FACTS:

Calories: 395 kcal, Carbohydrates: 32g, Protein: 28g, Fat: 17g, Saturated Fat: 8g, Cholesterol: 79mg, Sodium: 749mg, Potassium: 629mg, Fiber: 3g, Sugar: 5g, Vitamin A: 1197IU, Vitamin C: 2mg, Calcium: 208mg, Iron: 3mg

Taco Stuffed Shells

Rebecca PREP TIME: 10 mins | COOK TIME: 35 mins | TOTAL TIME: 45 mins | SERVINGS: 6 Jumbo shells stuffed with perfectly seasoned ground beef with tons of juicy salsa… General Recipes Taco Stuffed Shells European Print This
Serves: 6 Prep Time: 10 mins Cooking Time: 35 mins 35 mins
Nutrition facts: 395 calories 17 fat
Rating: 5.0/5
( 1 voted )

Ingredients

  • 1 tbsp olive oil
  • 1 lb extra lean ground beef
  • 2 dozen uncooked jumbo shells
  • 1/2 medium onion, chopped
  • 2 cloves garlic, minced
  • 1 tsp smoked paprika
  • 1 tbsp chili powder
  • 1 tsp ground cumin
  • 1/2 c. sour cream
  • 1 (14.5 oz.) jar of salsa
  • 1.5 c. Tex-Mex cheese blend, divided
  • Garnish: cilantro, avocado, scallions, tomatoes, sour cream, etc. optional, to taste
  • Salt & pepper to taste

Instructions

Step 1: Following the package directions, cook the jumbo shells in a large pot of salted boiling water until al dente.

Step 2: In a skillet, heat the oil over medium-high heat. Then, add the onion and saute for about 4 to 5 minutes or until the onion is just beginning to turn light brown. Add the garlic, stir, and cook for another 30 seconds.

Step 3: To the skillet, add the ground beef, chili powder, smoked paprika, and cumin. Cook for about 8 minutes, breaking the meat into pieces as it cooks using a spoon until browned and completely cooked. Then, spoon most of the excess fat out.

Step 4: In the meantime, prepare the oven. Preheat it to 375 degrees and position the oven rack to the top third of the oven.

Step 5: Spread the salsa on the bottom of a greased 9 x 13-inch baking dish in an even layer.

Step 6: Remove the skillet from the heat. Add the sour cream and half of the cheese to the beef mixture. Stir well until evenly melted and blended. If needed, season with salt and pepper.

Step 7: Once the shells are cooked, rinse them under cold water and drain well. Stuff each shell with the mixture. To do this, use a small spoon and stuff each shell until fairly full. Place the stuffed shell in the baking dish. Do the same for the remaining shells. On top of the stuffed shells, sprinkle the rest of the cheese.

Step 8: Place in the preheated oven and bake for about 20 minutes, uncovered. To brown the cheese, broil the stuffed shells for a couple of minutes.

Step 9: Meanwhile, ready the toppings/garnish.

Step 10: Serve the taco stuffed shells right away topped with your preferred toppings/garnish. Enjoy!
August 11, 2022 0 comment
0 FacebookTwitterPinterestEmail
General Recipes

Old Fashioned Potato Salad

by Rebecca August 11, 2022
written by Rebecca

Prep time: 10 mins | Cook time: 10 mins | Total time: 20 mins | Yield: 8 servings

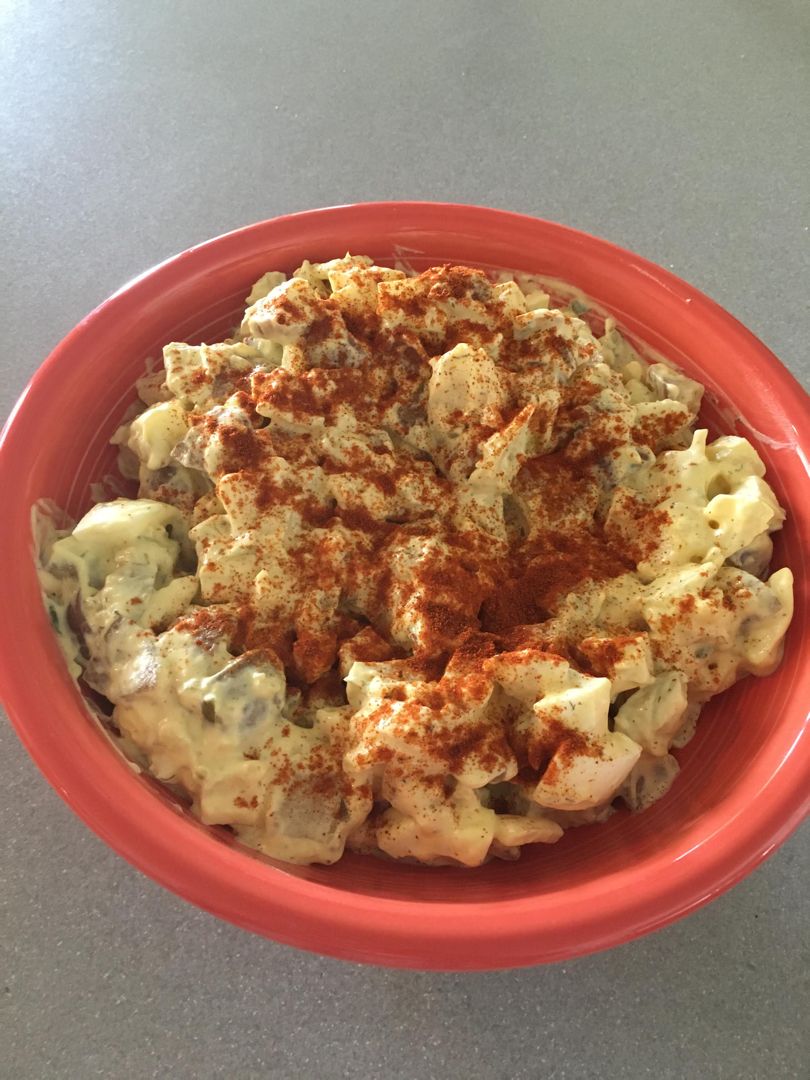
This Old Fashioned Potato Salad is a simple, no-fuss salad recipe that is made with potatoes, mayonnaise, vinegar, mustard, celery, and eggs. I prefer this traditional mayonnaise-based potato salad. This is the same potato salad I love since I was little. It’s facile, quick, and delicious! You can store this potato salad in the fridge for up to 3 to 5 days. You can even keep this in the freezer. When ready to serve, thaw in the fridge overnight, then add a little more dressing for more flavor.

This potato salad is a staple at home. We also love to bring this salad to cookouts. It is a classic, no-frills, old-fashioned potato salad that has been tested by time!

Ingredients

1 medium (½ c.) onion, chopped

6 medium (2 lbs) potatoes, cut into bite-size chunks

1 tablespoon white vinegar

1 ½ c. mayo

1 tablespoon yellow mustard

2 medium (1 c.) stalks of celery, chopped

4 hard-cooked eggs, chopped

1 teaspoon salt

¼ teaspoon pepper

How to make Old Fashioned Potato Salad

Step 1: In a large pan, place the potatoes and cover them with water. Bring the water to a boil and cook the potatoes for about 10 minutes or until tender. Drain the potatoes when done.

Step 2: Place the mayo, vinegar, mustard, salt, and pepper in a large plastic bowl. Mix well, then add the potatoes, celery, and onion. Gently toss. Whisk in the eggs. Cover the plastic bowl and keep it in the fridge for at least 4 hours.

Step 3: Serve the salad after 4 hours of sitting in the fridge. Enjoy!

Notes:

Wrap the salad properly and chill in the fridge for up to 3 to 5 days.

To freeze, place the salad in an airtight freezer bag. Then, lay it flat and squeeze as much air as possible, making sure not to crush the potato.

Thaw the potato salad in the fridge overnight. Before serving, add a little more dressing for more flavor.

Nutritional Facts:

Amount Per Serving: Calories: 463 Kcl, Total Fat: 36g, Saturated Fat: 6g, Cholesterol: 91mg, Sodium: 587 mg, Fiber: 4g, Sugar: 2g, Protein: 6g

Old Fashioned Potato Salad

Rebecca Prep time: 10 mins | Cook time: 10 mins | Total time: 20 mins | Yield: 8 servings This Old Fashioned Potato Salad is a simple, no-fuss salad recipe that… General Recipes Old Fashioned Potato Salad European Print This
Serves: 8 Prep Time: 10 mins Cooking Time: 10 mins 10 mins
Nutrition facts: 463 calories 36 fat
Rating: 5.0/5
( 1 voted )

Ingredients

  • 1 medium (½ c.) onion, chopped
  • 6 medium (2 lbs) potatoes, cut into bite-size chunks
  • 1 tablespoon white vinegar
  • 1 ½ c. mayo
  • 1 tablespoon yellow mustard
  • 2 medium (1 c.) stalks of celery, chopped
  • 4 hard-cooked eggs, chopped
  • 1 teaspoon salt
  • ¼ teaspoon pepper

Instructions

Step 1: In a large pan, place the potatoes and cover them with water. Bring the water to a boil and cook the potatoes for about 10 minutes or until tender. Drain the potatoes when done.

Step 2: Place the mayo, vinegar, mustard, salt, and pepper in a large plastic bowl. Mix well, then add the potatoes, celery, and onion. Gently toss. Whisk in the eggs. Cover the plastic bowl and keep it in the fridge for at least 4 hours.

Step 3: Serve the salad after 4 hours of sitting in the fridge. Enjoy!

Notes

Wrap the salad properly and chill in the fridge for up to 3 to 5 days. To freeze, place the salad in an airtight freezer bag. Then, lay it flat and squeeze as much air as possible, making sure not to crush the potato. Thaw the potato salad in the fridge overnight. Before serving, add a little more dressing for more flavor.

August 11, 2022 0 comment
0 FacebookTwitterPinterestEmail
General Recipes

Crispy Chicken and Mashed Potato Casserole

by Rebecca August 10, 2022
written by Rebecca

Prep time: 15 mins | Cook time: 20 mins | Serves: 6-8

This casserole is not your average casserole. This is loaded with ingredients that will surely make you full and satisfied. Classic comfort food with mashed potatoes, crispy chicken strips, corn, cheddar & Parmesan cheese, drizzled with brown gravy. This casserole is insanely delicious and super easy and quick to make.

All my favorites in a single casserole. I hit the jackpot with this casserole. This is also excellent if you are searching for another chicken recipe. The ingredients are amazing separately, and they are unbeatable together. The best part is you can throw this together in advance for a quick weeknight meal. If you have any mashed potatoes leftover, this recipe is also one of the best options to use them.

This recipe is practically a no-brainer. The ingredients required are very simple, and you can easily make this casserole from scratch. To serve, pair this up with green beans, frozen peas, or carrots.

INGREDIENTS

6 frozen chicken strips

5 c. instant mashed potatoes, prepared according to the box (water, butter, milk & salt)

1/4 c. Parmesan cheese, shredded

3/4 c. cheddar cheese, shredded

1 packet brown gravy mix

1 c. frozen corn

How to make Crispy Chicken and Mashed Potato Casserole

Step 1: Prepare the oven. Preheat it to 400 degrees.

Step 2: Allow the chicken strips to sit for about 5 to 10 minutes at room temperature. Once thawed, chop the chicken strips into bite-sized pieces.

Step 3: On the bottom of a 9 x 13-inch casserole dish, spread the potatoes. On top, add the corn along with the cheeses, and chicken. Place in the preheated oven and bake for about 20 minutes or until the chicken is crisp.

Step 4: In the meantime, make the gravy. Following the package directions, prepare the gravy on the stovetop.

Step 5: Remove the casserole from the oven when done and drizzle the gravy on top. Serve immediately. Enjoy!

Crispy Chicken and Mashed Potato Casserole

Rebecca Prep time: 15 mins | Cook time: 20 mins | Serves: 6-8 This casserole is not your average casserole. This is loaded with ingredients that will surely make you full… General Recipes Crispy Chicken and Mashed Potato Casserole European Print This
Serves: 6-8 Prep Time: 15 mins Cooking Time: 20 mins 20 mins
Nutrition facts: 200 calories 20 grams fat
Rating: 5.0/5
( 1 voted )

Ingredients

  • 6 frozen chicken strips
  • 5 c. instant mashed potatoes, prepared according to the box (water, butter, milk & salt)
  • 1/4 c. Parmesan cheese, shredded
  • 3/4 c. cheddar cheese, shredded
  • 1 packet brown gravy mix
  • 1 c. frozen corn

Instructions

Step 1: Prepare the oven. Preheat it to 400 degrees.

Step 2: Allow the chicken strips to sit for about 5 to 10 minutes at room temperature. Once thawed, chop the chicken strips into bite-sized pieces.

Step 3: On the bottom of a 9 x 13-inch casserole dish, spread the potatoes. On top, add the corn along with the cheeses, and chicken. Place in the preheated oven and bake for about 20 minutes or until the chicken is crisp.

Step 4: In the meantime, make the gravy. Following the package directions, prepare the gravy on the stovetop.

Step 5: Remove the casserole from the oven when done and drizzle the gravy on top. Serve immediately. Enjoy!

August 10, 2022 0 comment
0 FacebookTwitterPinterestEmail
General Recipes

Honey Garlic Boneless Chops That Will Never Be Boring

by Rebecca August 10, 2022
written by Rebecca

Cook time: 40 mins | Prep time: 10 mins | Serves: 4–6

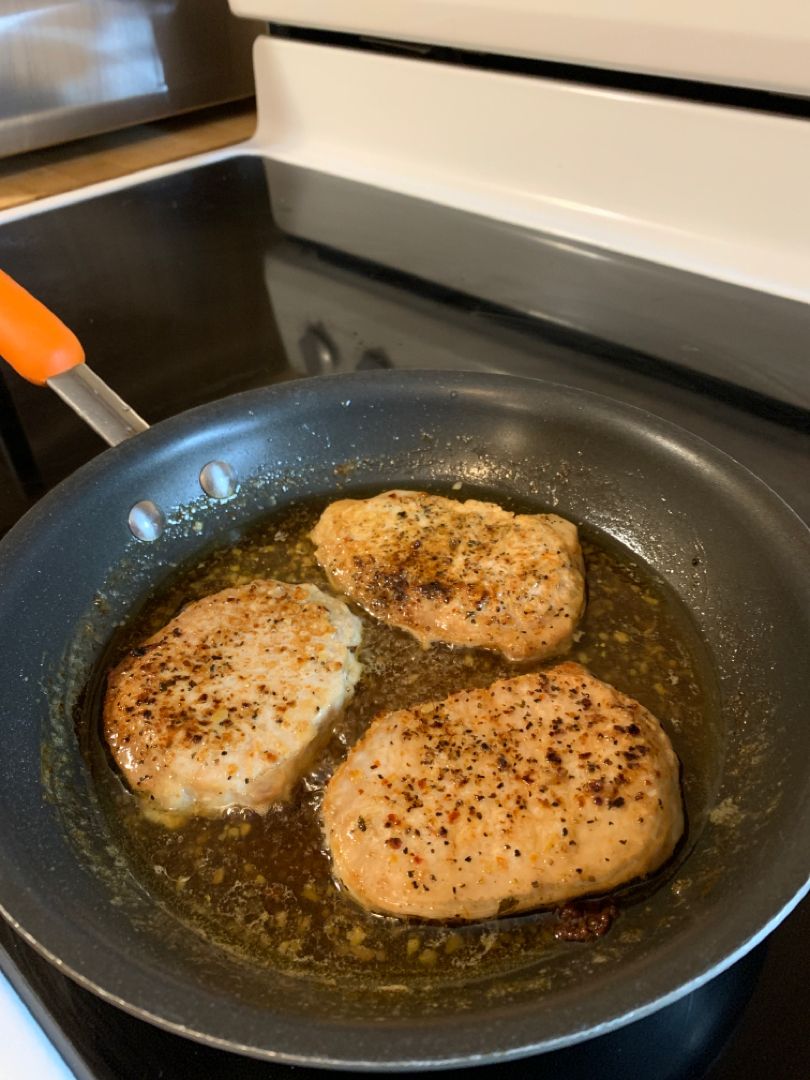
These honey garlic pork chops are my ultimate favorite! The crispy, charred, and caramelized edges of the juicy honey garlic pork chops that have been smothered in a simple sauce are enough to make me drool over these amazing chops. The chops are seared until golden, then simmered/broiled (you can even cook this on the grill) in a fantastic 4-ingredient honey garlic sauce. In under fifteen minutes, you’ll have these easy honey garlic pork chops ready.

This melt-in-your-mouth, delicious, juicy, and tender pork chops are crazy good! Made (first) in the skillet and finishes off under the broiler or grill to achieve that drool-worthy crisp, caramelized edges. These chops not only taste fabulous, but they look very appetizing too!

For this recipe, you are welcome to use either boneless or bone-in. To ensure the chops stay tender and juicy once cooked, do not skip the seasoning step. Sear the chops, then finish them off in the broiler or grill. Note that the pork chop juices are released into the sauce while broiling, which makes that extra flavor and quantity of the sauce. Marinating is not even required!

Ingredients

3 clove garlic, minced

1 1/2 pounds boneless pork chops (6 4-ounces portions) – I used thick center-cut chops

1 cup ketchup

1/4 cup soy sauce

salt and pepper

1/3 cup honey

How to make Honey Garlic Boneless Chops

Step 1: Place the ketchup, honey, soy sauce, and garlic in a medium bowl. Mix well until combined.

Step 2: Using cooking spray, grease a broiler pan. On the broiler tray, place the chops and lightly season with salt and pepper on each side. With the sauce, brush the pork chops to coat.

Step 3: Place the oven rack about two notches down from the top. Then, put the chops in the oven and broil for about 5 minutes. After 5 minutes, baste the chops and broil again for additional 5 minutes. Flip, baste, and broil the chops again. Do this until the pork chops are cooked. As for me, it took around 20 minutes to broil per side.

Honey Garlic Boneless Chops That Will Never Be Boring

Rebecca Cook time: 40 mins | Prep time: 10 mins | Serves: 4–6 These honey garlic pork chops are my ultimate favorite! The crispy, charred, and caramelized edges of the juicy… General Recipes Honey Garlic Boneless Chops That Will Never Be Boring European Print This
Serves: 4-6 Prep Time: 40 mins Cooking Time: 10 mins 10 mins
Nutrition facts: 200 calories 20 grams fat
Rating: 5.0/5
( 1 voted )

Ingredients

  • 3 clove garlic, minced
  • 1 1/2 pounds boneless pork chops (6 4-ounces portions) – I used thick center-cut chops
  • 1 cup ketchup
  • 1/4 cup soy sauce
  • salt and pepper
  • 1/3 cup honey

Instructions

Step 1: Place the ketchup, honey, soy sauce, and garlic in a medium bowl. Mix well until combined.

Step 2: Using cooking spray, grease a broiler pan. On the broiler tray, place the chops and lightly season with salt and pepper on each side. With the sauce, brush the pork chops to coat.

Step 3: Place the oven rack about two notches down from the top. Then, put the chops in the oven and broil for about 5 minutes. After 5 minutes, baste the chops and broil again for additional 5 minutes. Flip, baste, and broil the chops again. Do this until the pork chops are cooked. As for me, it took around 20 minutes to broil per side.

August 10, 2022 0 comment
0 FacebookTwitterPinterestEmail
General Recipes

CRACK CHICKEN SPAGHETTI

by Rebecca August 10, 2022
written by Rebecca

Prep Time: 15 mins | Cook Time: 30 mins | Total Time: 45 mins | Yield: 6 Servings

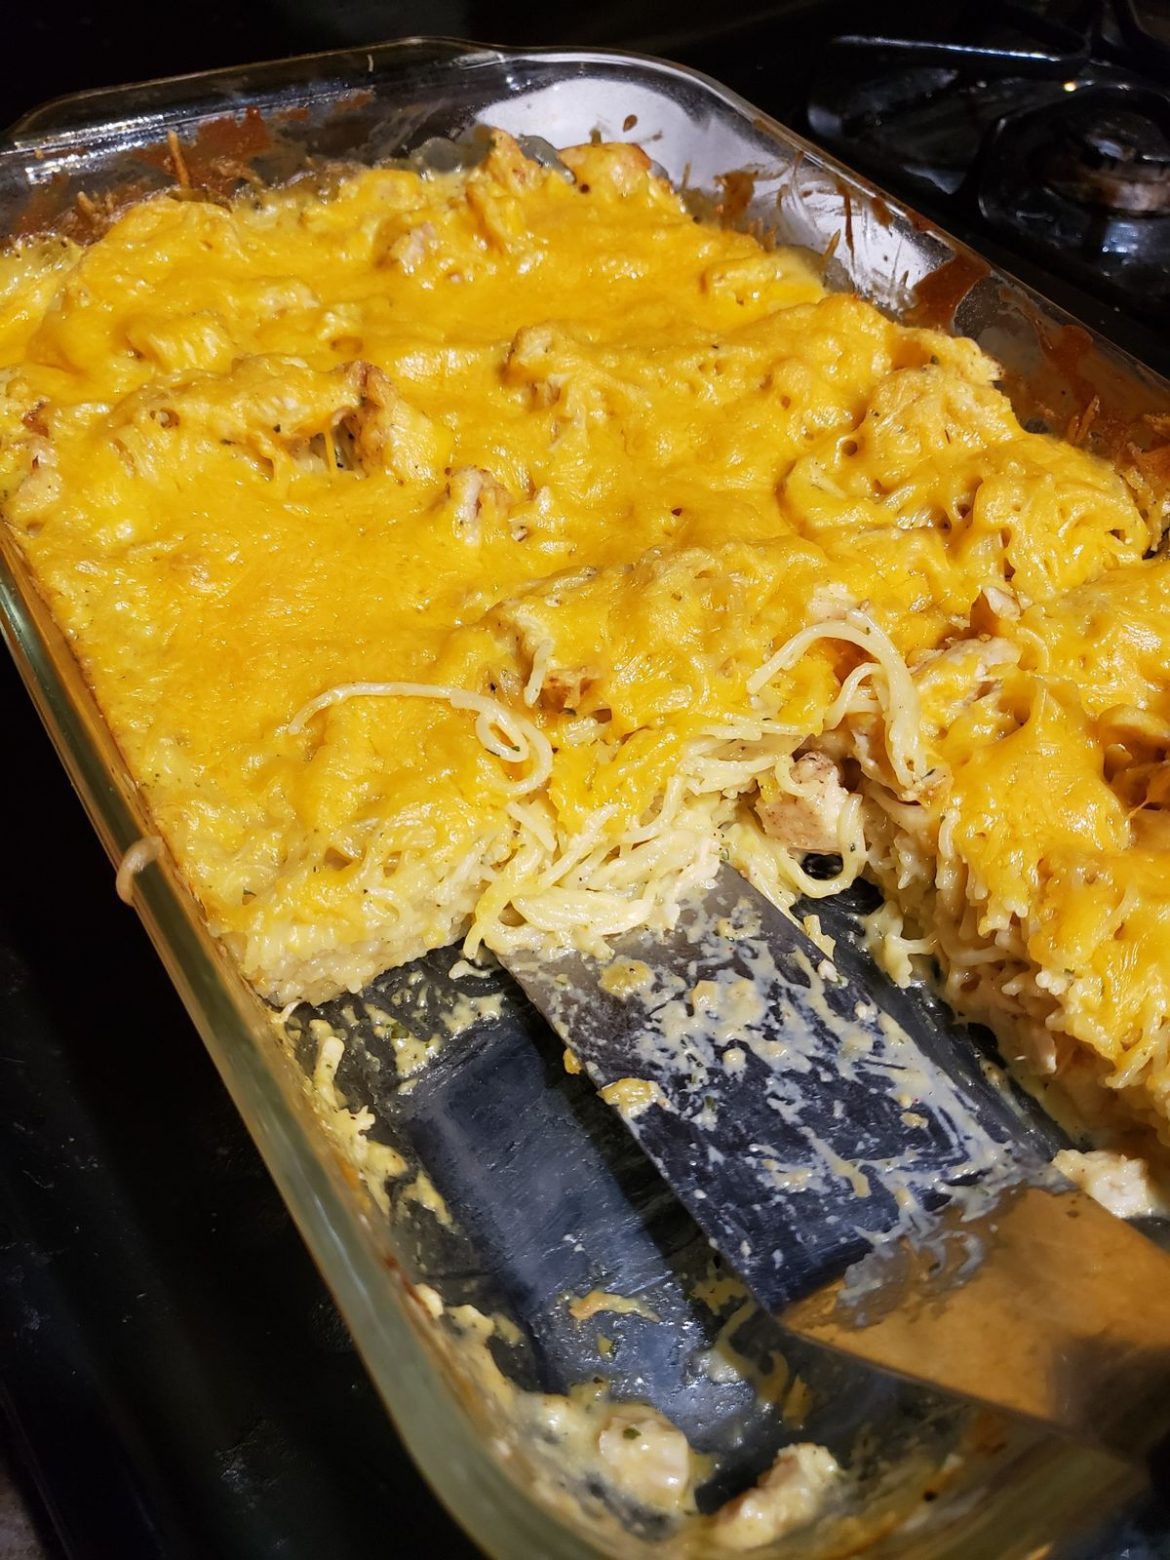
This crack chicken spaghetti is the best spaghetti I’ve made! It is incredibly easy and quick to make and guarantees a delicious meal for the entire family. This is made with cooked, chopped chicken, Ranch dressing, cream of chicken soup, cheese, spaghetti, and bacon. And the melted cheese on top brings another layer of magic to this amazing crack chicken spaghetti!

Ingredients

2 ½ cups cooked, chopped chicken

¾ cup cooked chopped bacon

½ cup chicken broth

8 oz. spaghetti

2 tbsp dry Ranch dressing mix

1 (8 oz.) package of Velveeta cheese, cubed

1 (10.75 oz.) can cream of chicken soup

1 ½ cups shredded cheddar cheese

HOW TO MAKE CRACK CHICKEN SPAGHETTI

Step 1: Prepare the oven. Preheat it to 175 degrees C or 350 degrees F. Using cooking spray, grease a 9 x 9-inch baking pan.

Step 2: Following the package directions, cook the pasta in a large pot with salted boiling water until al dente. Drain when done and rinse the pasta with cold water.

Step 3: Heat a saucepan on low. Then, add the cream of soup along with the Velveeta, and chicken broth. Stir well until combined. Let it simmer for a couple of minutes or until the cheese has melted and is well incorporated. Next, add the Ranch mix and mix well. Toss in the pasta, making sure it is well coated by the sauce. Lastly, stir in the bacon.

Step 4: Into the prepared pan, transfer the mixture and evenly spread it. On top, sprinkle with cheddar cheese.

Step 5: Place in the preheated oven and bake for approximately 30 minutes or until the cheese has melted.

Step 6: When done, take the dish out of the oven and allow it to rest for a couple of minutes at room temperature.

Step 7: Garnish with your favorite herbs and serve the crack chicken spaghetti warm. Enjoy!

CRACK CHICKEN SPAGHETTI

Rebecca Prep Time: 15 mins | Cook Time: 30 mins | Total Time: 45 mins | Yield: 6 Servings This crack chicken spaghetti is the best spaghetti I’ve made! It is… General Recipes CRACK CHICKEN SPAGHETTI European Print This
Serves: 6 Prep Time: 15 mins Cooking Time: 30 mins 30 mins
Nutrition facts: 200 calories 20 grams fat
Rating: 5.0/5
( 1 voted )

Ingredients

  • 2 ½ cups cooked, chopped chicken
  • ¾ cup cooked chopped bacon
  • ½ cup chicken broth
  • 8 oz. spaghetti
  • 2 tbsp dry Ranch dressing mix
  • 1 (8 oz.) package of Velveeta cheese, cubed
  • 1 (10.75 oz.) can cream of chicken soup
  • 1 ½ cups shredded cheddar cheese

Instructions

Step 1: Prepare the oven. Preheat it to 175 degrees C or 350 degrees F. Using cooking spray, grease a 9 x 9-inch baking pan.

Step 2: Following the package directions, cook the pasta in a large pot with salted boiling water until al dente. Drain when done and rinse the pasta with cold water.

Step 3: Heat a saucepan on low. Then, add the cream of soup along with the Velveeta, and chicken broth. Stir well until combined. Let it simmer for a couple of minutes or until the cheese has melted and is well incorporated. Next, add the Ranch mix and mix well. Toss in the pasta, making sure it is well coated by the sauce. Lastly, stir in the bacon.

Step 4: Into the prepared pan, transfer the mixture and evenly spread it. On top, sprinkle with cheddar cheese.

Step 5: Place in the preheated oven and bake for approximately 30 minutes or until the cheese has melted.

Step 6: When done, take the dish out of the oven and allow it to rest for a couple of minutes at room temperature.

Step 7: Garnish with your favorite herbs and serve the crack chicken spaghetti warm. Enjoy!

August 10, 2022 0 comment
0 FacebookTwitterPinterestEmail
General Recipes

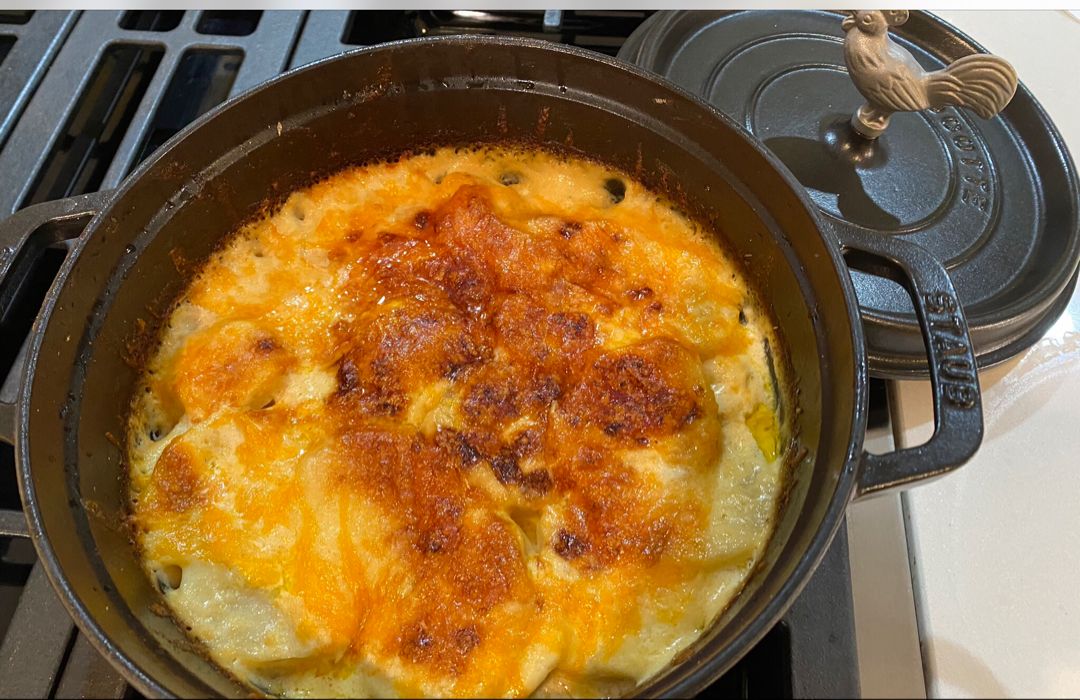
Copycat Ruth’s Chris Potatoes au Gratin

by Rebecca August 10, 2022
written by Rebecca

Prep time: 10 mins | Cook time: 25 mins | Serves: 4

Ruth’s Chris steak is the best! But what I most look forward to is their side dishes. My favorite is the Potato Au Gratin. It’s a delicious, very indulgent cheesy, and creamy side. This homemade version is as great as the original. I am thrilled that I can easily throw my favorite side at home without any fuss!

INGREDIENTS

1 1/2 pounds russet potatoes, peeled and sliced 1/8” thick

1/2 white onion, minced

2 garlic cloves, minced

1/2 c. chicken stock

1 1/4 c. heavy cream, plus more if needed

2 c. cheddar cheese, grated

1/2 c. Parmesan cheese, grated

3/4 c. provolone cheese, grated

Fresh parsley, chopped, for garnish

1 1/2 tsp salt

1/2 tsp freshly ground black pepper

2 tbsp butter, plus more for greasing the baking dish

How to make Copycat Ruth’s Chris Potatoes au Gratin

Step 1: Prepare the oven. Preheat it to 425 degrees F. Using butter, grease an 8 x 8-inch baking dish.

Step 2: Melt the butter in a large pot over medium heat. Once the butter has melted, add the onion to the pot and cook for about 5 minutes or until tender and translucent. Next, add the garlic and season with salt and pepper. Continue to cook for another 30 seconds.

Step 3: To the pot, add the stock, cream, and potatoes. Stir well and bring to a low simmer. Do not boil. Put the lid on and adjust the heat to medium-low. Cook for about 15 to 20 minutes or until the potatoes are tender. As needed, adjust the seasoning.

Step 4: Into the prepared baking dish, transfer the mixture, and top with cheese. Place in the preheated oven and bake for about 10 to 15 minutes or until bubbly and the cheese has melted.

Step 5: Remove from the oven when done and serve the Potatoes Au Gratin right away. If desired, garnish with parsley. Enjoy!

Copycat Ruth’s Chris Potatoes au Gratin

Rebecca Prep time: 10 mins | Cook time: 25 mins | Serves: 4 Ruth’s Chris steak is the best! But what I most look forward to is their side dishes. My… General Recipes Copycat Ruth’s Chris Potatoes au Gratin European Print This
Serves: 4 Prep Time: 10 mins Cooking Time: 25 mins 25 mins
Nutrition facts: 200 calories 20 grams fat
Rating: 3.5/5
( 2 voted )

Ingredients

  • 1 1/2 pounds russet potatoes, peeled and sliced 1/8” thick
  • 1/2 white onion, minced
  • 2 garlic cloves, minced
  • 1/2 c. chicken stock
  • 1 1/4 c. heavy cream, plus more if needed
  • 2 c. cheddar cheese, grated
  • 1/2 c. Parmesan cheese, grated
  • 3/4 c. provolone cheese, grated
  • Fresh parsley, chopped, for garnish
  • 1 1/2 tsp salt
  • 1/2 tsp freshly ground black pepper
  • 2 tbsp butter, plus more for greasing the baking dish

Instructions

Step 1: Prepare the oven. Preheat it to 425 degrees F. Using butter, grease an 8 x 8-inch baking dish.

Step 2: Melt the butter in a large pot over medium heat. Once the butter has melted, add the onion to the pot and cook for about 5 minutes or until tender and translucent. Next, add the garlic and season with salt and pepper. Continue to cook for another 30 seconds.

Step 3: To the pot, add the stock, cream, and potatoes. Stir well and bring to a low simmer. Do not boil. Put the lid on and adjust the heat to medium-low. Cook for about 15 to 20 minutes or until the potatoes are tender. As needed, adjust the seasoning.

Step 4: Into the prepared baking dish, transfer the mixture, and top with cheese. Place in the preheated oven and bake for about 10 to 15 minutes or until bubbly and the cheese has melted.

Step 5: Remove from the oven when done and serve the Potatoes Au Gratin right away. If desired, garnish with parsley. Enjoy!

August 10, 2022 0 comment
0 FacebookTwitterPinterestEmail
General Recipes

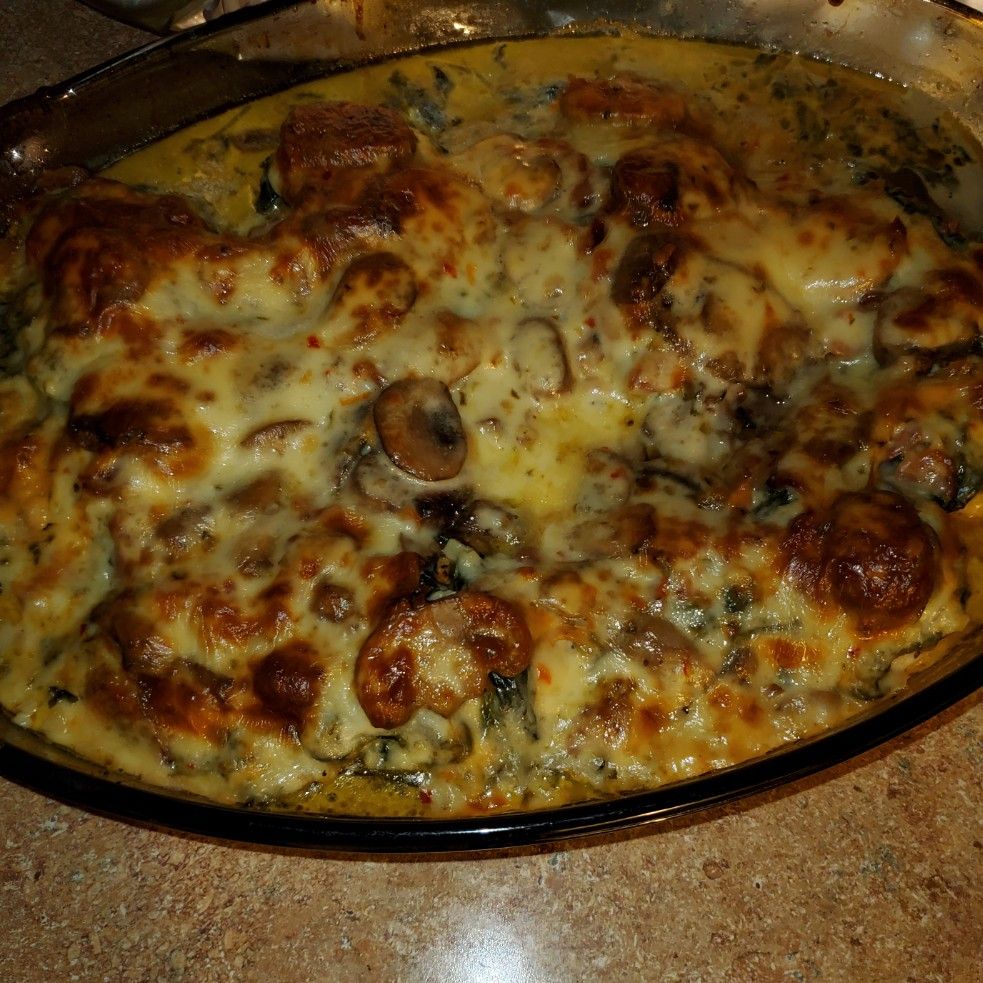
SPINACH AND MUSHROOM SMOTHERED CHICKEN

by Rebecca August 10, 2022
written by Rebecca

Total Time: 40 mins | Yield: 4 Servings

This spinach and mushroom smothered chicken looks fancy, but the truth is this is not tricky to make. Juicy and moist chicken breasts covered in melted cheese. This dish is an excellent meal option for an extra special dinner. Pair this spinach and mushroom chicken up with mashed potatoes and a bottle of your favorite wine.

This recipe is unquestionably an awesome chicken recipe. It guarantees a fabulous, healthy, and quick meal. It’s our popular dinner rotation!

This spinach and mushroom-smothered chicken is a huge hit at home. My family loves every inch of this dish. Not only that this is an excellent weeknight dinner, but a great date night meal option as well! Serve this with mashed potatoes or cauliflower mashed if you rather want a low-carb side.

Ingredients

1-1/2 teaspoon olive oil

4 boneless, skinless chicken breast halves (4 ounces each)

3 green onions, sliced

1-3/4 cup sliced fresh mushrooms

2 slices reduced-fat provolone cheese, halved

2 tablespoon chopped pecans

3 cups fresh baby spinach

1/2 teaspoon rotisserie chicken seasoning

HOW TO MAKE SPINACH AND MUSHROOM SMOTHERED CHICKEN

Step 1: Ready the grill and preheat it.

Step 2: Heat the oil in a large skillet over medium-high heat. Once the oil is hot, add the green onions and mushrooms to the skillet. Saute the veggies until soft. Next, add the pecans along with the spinach. Continue to cook until tender.

Step 3: Take the skillet off the heat when done and cover to keep the veggies warm.

Step 4: On the entire chicken, sprinkle the seasonings and rub until well coated. On the preheated grill, lay the chicken and cook on all sides until done. Add the cheese on top and continue to cook for a couple of minutes until melted.

Step 5: To serve, top each serving with the mushroom mixture. Enjoy right away!

Nutrition Facts:

1 serving: 203 calories, 9g fat (2g saturated fat), 68mg cholesterol, 210mg sodium, 3g carbohydrate (1g sugars, 2g fiber), 27g protein. Diabetic Exchanges: 3 lean meat, 1 vegetable, 1 fat

SPINACH AND MUSHROOM SMOTHERED CHICKEN

Rebecca Total Time: 40 mins | Yield: 4 Servings This spinach and mushroom smothered chicken looks fancy, but the truth is this is not tricky to make. Juicy and moist chicken… General Recipes SPINACH AND MUSHROOM SMOTHERED CHICKEN European Print This
Serves: 4
Nutrition facts: 203 calories 9 fat
Rating: 5.0/5
( 1 voted )

Ingredients

  • 1-1/2 teaspoon olive oil
  • 4 boneless, skinless chicken breast halves (4 ounces each)
  • 3 green onions, sliced
  • 1-3/4 cup sliced fresh mushrooms
  • 2 slices reduced-fat provolone cheese, halved
  • 2 tablespoon chopped pecans
  • 3 cups fresh baby spinach
  • 1/2 teaspoon rotisserie chicken seasoning

Instructions

Step 1: Ready the grill and preheat it.

Step 2: Heat the oil in a large skillet over medium-high heat. Once the oil is hot, add the green onions and mushrooms to the skillet. Saute the veggies until soft. Next, add the pecans along with the spinach. Continue to cook until tender.

Step 3: Take the skillet off the heat when done and cover to keep the veggies warm.

Step 4: On the entire chicken, sprinkle the seasonings and rub until well coated. On the preheated grill, lay the chicken and cook on all sides until done. Add the cheese on top and continue to cook for a couple of minutes until melted.

Step 5: To serve, top each serving with the mushroom mixture. Enjoy right away!

August 10, 2022 0 comment
0 FacebookTwitterPinterestEmail
General Recipes

Cornbread Tamale Pie

by Rebecca August 10, 2022
written by Rebecca

Prep time: 15 mins | Cook time: 45 mins | Serves: 6-8

This casserole is another one of my top favorite casserole recipes. A filling, classic dish in a casserole form! Easily make this Cornbread Tamale Pie in a snap and enjoy this with your favorite toppings.

Ingredients

FILLING:

1 lb ground beef

2 tsp olive oil

1 1/2 tsp garlic, minced

1/2 c. onion, finely chopped

10 oz. can of red enchilada sauce

1 c. corn kernels

1 tbsp taco seasoning

salt and pepper to taste

15 oz. can of black beans, drained and rinsed

TOPPING:

1 c. cheddar cheese, shredded

8.5 oz. box corn muffin mix such as Jiffy

Optional: Assorted toppings like sour cream, avocado, and pico de gallo

egg and milk (as directed on the box)

How to make Cornbread Tamale Pie

Step 1: Prepare the oven. Preheat it to 350 degrees F. Using cooking spray, grease a 2-quart baking dish.

FILLING:

Step 2: In a large pan, heat the olive oil over medium heat. Once the oil is hot, add the ground beef to the pan and season with salt and pepper. Cook the ground beef for about 4 to 5 minutes. Add the onion and continue to cook for another 4 minutes or until the onions have softened and the meat is completely cooked. Next, add the garlic and cook for 30 seconds more.

Step 3: To the meat mixture, stir in the taco seasoning along with the enchilada sauce, beans, and corn. Let everything simmer and cook for additional 5 minutes.

Step 4: Into the prepared baking dish, pour the beef mixture. Into an even layer, spread the beef mixture.

TOPPING:

Step 5: Into a bowl, place the corn muffin mix. Then, add the eggs and milk following the package directions. Mix well until the batter forms. Next, add the cheese and mix again until just blended. Over the meat layer, spread the batter.

Step 6: Place in the preheated oven and bake for about 40 to 45 minutes or until the topping is golden brown and a toothpick inserted in the cornbread comes out with just a couple of crumbs. You can tent the casserole with foil if it is browning too quickly.

Step 7: Remove from the oven when done and slice the casserole into pieces. Enjoy the casserole with your favorite toppings.

Cornbread Tamale Pie

Rebecca Prep time: 15 mins | Cook time: 45 mins | Serves: 6-8 This casserole is another one of my top favorite casserole recipes. A filling, classic dish in a casserole… General Recipes Cornbread Tamale Pie European Print This
Serves: 6-8 Prep Time: 15 mins Cooking Time: 45 mins 45 mins
Nutrition facts: 200 calories 20 grams fat
Rating: 5.0/5
( 1 voted )

Ingredients

  • FILLING:
  • 1 lb ground beef
  • 2 tsp olive oil
  • 1 1/2 tsp garlic, minced
  • 1/2 c. onion, finely chopped
  • 10 oz. can of red enchilada sauce
  • 1 c. corn kernels
  • 1 tbsp taco seasoning
  • salt and pepper to taste
  • 15 oz. can of black beans, drained and rinsed
  • TOPPING:
  • 1 c. cheddar cheese, shredded
  • 8.5 oz. box corn muffin mix such as Jiffy
  • Optional: Assorted toppings like sour cream, avocado, and pico de gallo
  • egg and milk (as directed on the box)

Instructions

Step 1: Prepare the oven. Preheat it to 350 degrees F. Using cooking spray, grease a 2-quart baking dish.

FILLING:

Step 2: In a large pan, heat the olive oil over medium heat. Once the oil is hot, add the ground beef to the pan and season with salt and pepper. Cook the ground beef for about 4 to 5 minutes. Add the onion and continue to cook for another 4 minutes or until the onions have softened and the meat is completely cooked. Next, add the garlic and cook for 30 seconds more.

Step 3: To the meat mixture, stir in the taco seasoning along with the enchilada sauce, beans, and corn. Let everything simmer and cook for additional 5 minutes.

Step 4: Into the prepared baking dish, pour the beef mixture. Into an even layer, spread the beef mixture.

TOPPING:

Step 5: Into a bowl, place the corn muffin mix. Then, add the eggs and milk following the package directions. Mix well until the batter forms. Next, add the cheese and mix again until just blended. Over the meat layer, spread the batter.

Step 6: Place in the preheated oven and bake for about 40 to 45 minutes or until the topping is golden brown and a toothpick inserted in the cornbread comes out with just a couple of crumbs. You can tent the casserole with foil if it is browning too quickly.

Step 7: Remove from the oven when done and slice the casserole into pieces. Enjoy the casserole with your favorite toppings.

August 10, 2022 0 comment
0 FacebookTwitterPinterestEmail
General Recipes

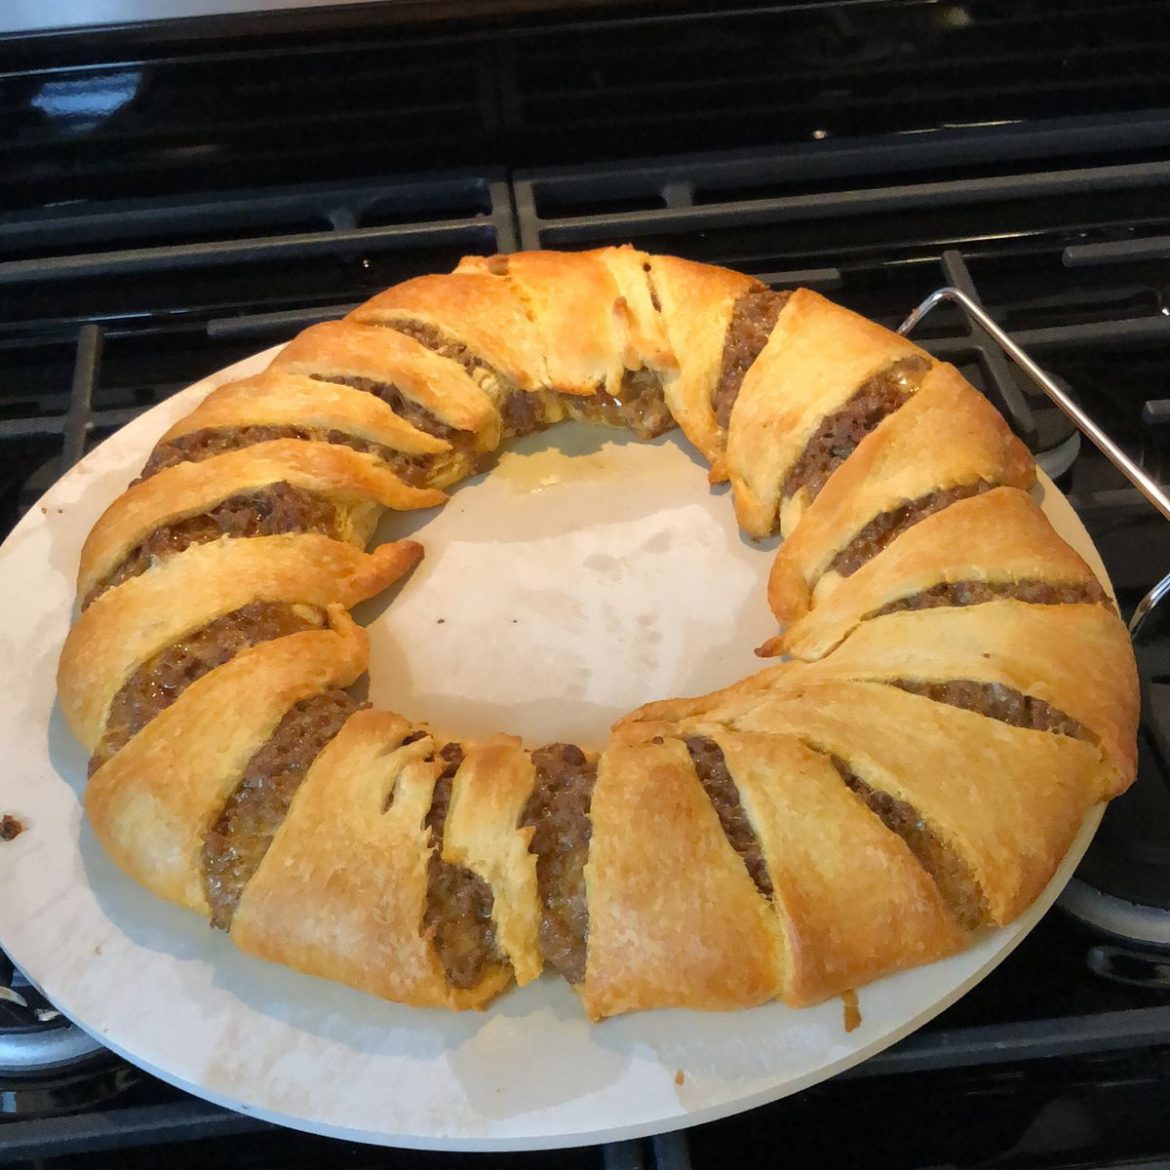
Taco Crescent Ring Recipe

by Rebecca August 10, 2022
written by Rebecca

No more boring dinner routine with this simple taco crescent ring recipe. It is a fun, delicious meal not only for the kids but for adults alike. This taco crescent ring is very simple to make using just four ingredients. Enjoy the big flavors of this scrumptious taco crescent ring with this easy and quick recipe.

Ingredients

2 cans (8 ounces each) of Pillsbury™ refrigerated crescent dinner rolls

1 pound of ground beef

1 c. shredded Cheddar cheese (4 ounces)

Shredded lettuce, chopped tomatoes, sliced ripe olives, taco sauce, or salsa, as desired

1 package taco seasoning mix

How to make Taco Crescent Ring

Step 1: Prepare the oven. Preheat it to 375 degrees F.

Step 2: Cook the beef in a 10-inch nonstick skillet until browned. Then, add the taco seasoning mix and half a cup of water. Let everything simmer for about 3 to 4 minutes or until the mixture has lightly thickened.

Step 3: Place the beef mixture and cheese in a medium bowl. Mix well.

Step 4: After unrolling the cans of dough and separate them into 16 triangles. Arrange the triangles in a ring, overlapping each dough on an ungreased large cookie sheet to make a 5-inch circle in the middle. The ring should resemble the sun.

Step 5: On half of each triangle nearest to the middle of the rig, spoon the beef mixture.

Step 6: Over the filling, bring each dough triangle and tuck the dough under the bottom layer to secure it. Do the same for the rest of the ring until the filling is enclosed. That is fine if some of the fillings might show a bit.

Step 7: Place in the preheated oven and bake for about 20 to 25 minutes or until the dough is golden brown and the taco crescent ring is completely baked.

Step 8: Remove from the oven when done and let the taco crescent ring cool for about 5 to 10 minutes. Slice and serve. Enjoy!

Taco Crescent Ring Recipe

Rebecca No more boring dinner routine with this simple taco crescent ring recipe. It is a fun, delicious meal not only for the kids but for adults alike. This taco crescent… General Recipes Taco Crescent Ring Recipe European Print This
Nutrition facts: 200 calories 20 grams fat
Rating: 5.0/5
( 1 voted )

Ingredients

  • 2 cans (8 ounces each) of Pillsbury™ refrigerated crescent dinner rolls
  • 1 pound of ground beef
  • 1 c. shredded Cheddar cheese (4 ounces)
  • Shredded lettuce, chopped tomatoes, sliced ripe olives, taco sauce, or salsa, as desired
  • 1 package taco seasoning mix

Instructions

Step 1: Prepare the oven. Preheat it to 375 degrees F.

Step 2: Cook the beef in a 10-inch nonstick skillet until browned. Then, add the taco seasoning mix and half a cup of water. Let everything simmer for about 3 to 4 minutes or until the mixture has lightly thickened.

Step 3: Place the beef mixture and cheese in a medium bowl. Mix well.

Step 4: After unrolling the cans of dough and separate them into 16 triangles. Arrange the triangles in a ring, overlapping each dough on an ungreased large cookie sheet to make a 5-inch circle in the middle. The ring should resemble the sun.

Step 5: On half of each triangle nearest to the middle of the rig, spoon the beef mixture.

Step 6: Over the filling, bring each dough triangle and tuck the dough under the bottom layer to secure it. Do the same for the rest of the ring until the filling is enclosed. That is fine if some of the fillings might show a bit.

Step 7: Place in the preheated oven and bake for about 20 to 25 minutes or until the dough is golden brown and the taco crescent ring is completely baked.

Step 8: Remove from the oven when done and let the taco crescent ring cool for about 5 to 10 minutes. Slice and serve. Enjoy!

August 10, 2022 0 comment
0 FacebookTwitterPinterestEmail
General Recipes

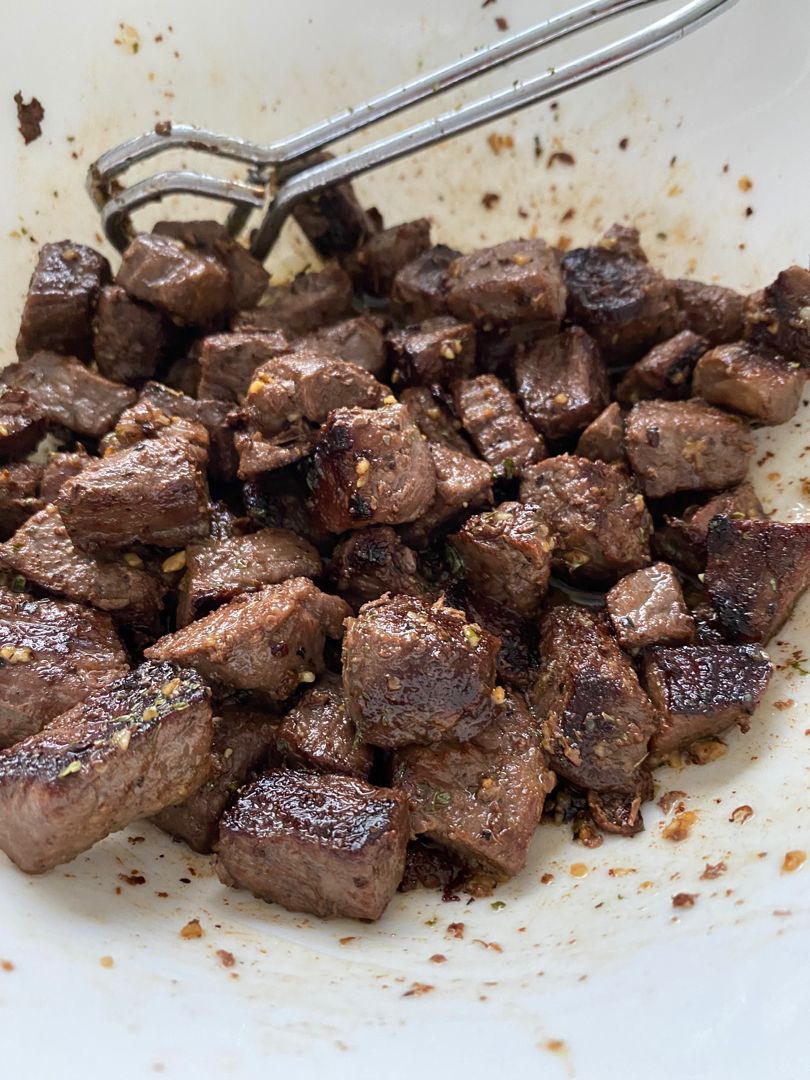
Steak Bites

by Rebecca August 10, 2022
written by Rebecca

PREP TIME: 10 mins | COOK TIME: 15 mins | TOTAL TIME: 25 mins | SERVINGS: 4

Juicy and flavor-packed steak bites! These steak bites are an amazing main course dish drenched in delicious garlicky butter. This recipe requires only five simple ingredients to make. The garlic butter sauce enhances the flavor of the speak excellently. If you love steak and you are searching for another way to prepare your next steak dinner, then you’ll have to give this easy recipe a try. For a filling meal, pair these steak bites with creamy mashed potatoes and green beans or even over-fried rice, zucchini noodles, and egg noodles.

To store, place the steak bites in an airtight container and keep them in the fridge for up to 3 to 4 days. You can also freeze these steak bites for up to 3 months. Then, reheat in the microwave.

Ingredients

1 tbsp olive oil

2 lbs sirloin steak

¼ c. unsalted butter

½ tsp Italian seasoning

5 cloves garlic, minced

1 tbsp fresh parsley, finely chopped

½ tsp cracked black pepper

½ tsp salt

How to make Steak Bites

Step 1: Into about 2-inches in size, chop the steaks and toss in salt and pepper.

Step 2: In a frying pan, heat the olive oil over high heat. Once the oil is hot, add the steak to the frying pan in a single layer. Fry for about 4 to 5 minutes or until completely cooked. In a serving dish, transfer the cooked steak. Repeat with the remaining steak.

Step 3: In the same frying pan, place the butter, garlic, and Italian seasoning. Cook for no more than 2 minutes over medium-high heat until the butter has melted and the garlic is slightly browning.

Step 4: Over the steak bites, pour the butter mixture and toss to evenly coat the steak bites. Before serving, garnish with parsley. Enjoy!

Notes:

Use olive oil to cook the steak and prep the garlic butter because butter can burn at high temperatures.

To let the steak bites get a nice sear and lock the juicy flavor, try not to stir the steak bites for the first minute or so.

Nutrition Facts:

Calories: 446 kcal | Carbohydrates: 2g | Protein: 50g | Fat: 26g | Saturated Fat: 12g | Cholesterol: 169mg | Sodium: 423mg | Potassium: 791mg | Fiber: 1g | Sugar: 1g | Vitamin A: 435IU | Vitamin C: 2mg | Calcium: 77mg | Iron: 4mg

Steak Bites

Rebecca PREP TIME: 10 mins | COOK TIME: 15 mins | TOTAL TIME: 25 mins | SERVINGS: 4 Juicy and flavor-packed steak bites! These steak bites are an amazing main course… General Recipes Steak Bites European Print This
Serves: 4 Prep Time: 10 mins Cooking Time: 15 mins 15 mins
Nutrition facts: 446 calories 26 fat
Rating: 4.0/5
( 2 voted )

Ingredients

  • 1 tbsp olive oil
  • 2 lbs sirloin steak
  • ¼ c. unsalted butter
  • ½ tsp Italian seasoning
  • 5 cloves garlic, minced
  • 1 tbsp fresh parsley, finely chopped
  • ½ tsp cracked black pepper
  • ½ tsp salt

Instructions

Step 1: Into about 2-inches in size, chop the steaks and toss in salt and pepper.

Step 2: In a frying pan, heat the olive oil over high heat. Once the oil is hot, add the steak to the frying pan in a single layer. Fry for about 4 to 5 minutes or until completely cooked. In a serving dish, transfer the cooked steak. Repeat with the remaining steak.

Step 3: In the same frying pan, place the butter, garlic, and Italian seasoning. Cook for no more than 2 minutes over medium-high heat until the butter has melted and the garlic is slightly browning.

Step 4: Over the steak bites, pour the butter mixture and toss to evenly coat the steak bites. Before serving, garnish with parsley. Enjoy!

Notes

Use olive oil to cook the steak and prep the garlic butter because butter can burn at high temperatures. To let the steak bites get a nice sear and lock the juicy flavor, try not to stir the steak bites for the first minute or so.

August 10, 2022 0 comment
0 FacebookTwitterPinterestEmail
Newer Posts
Older Posts

Popular Posts

  • 1

    Crispy Crunchy Parmesan Potatoes

    March 21, 2020
  • 2

    CROCK POT SMOTHERED PORK CHOPS

    March 21, 2020
  • Facebook
  • Twitter

@2019 - All Right Reserved.


Back To Top