Cook it once
  • Home
  • Privacy Policy
  • Recipes
    • KETO
    • LC
    • WW
  • Tips
  • Contact
Cook it once
  • Home
  • Privacy Policy
  • Recipes
    • KETO
    • LC
    • WW
  • Tips
  • Contact
Category:

General Recipes

General Recipes

PEACH COBBLER MUFFINS

by Rebecca August 18, 2022
written by Rebecca

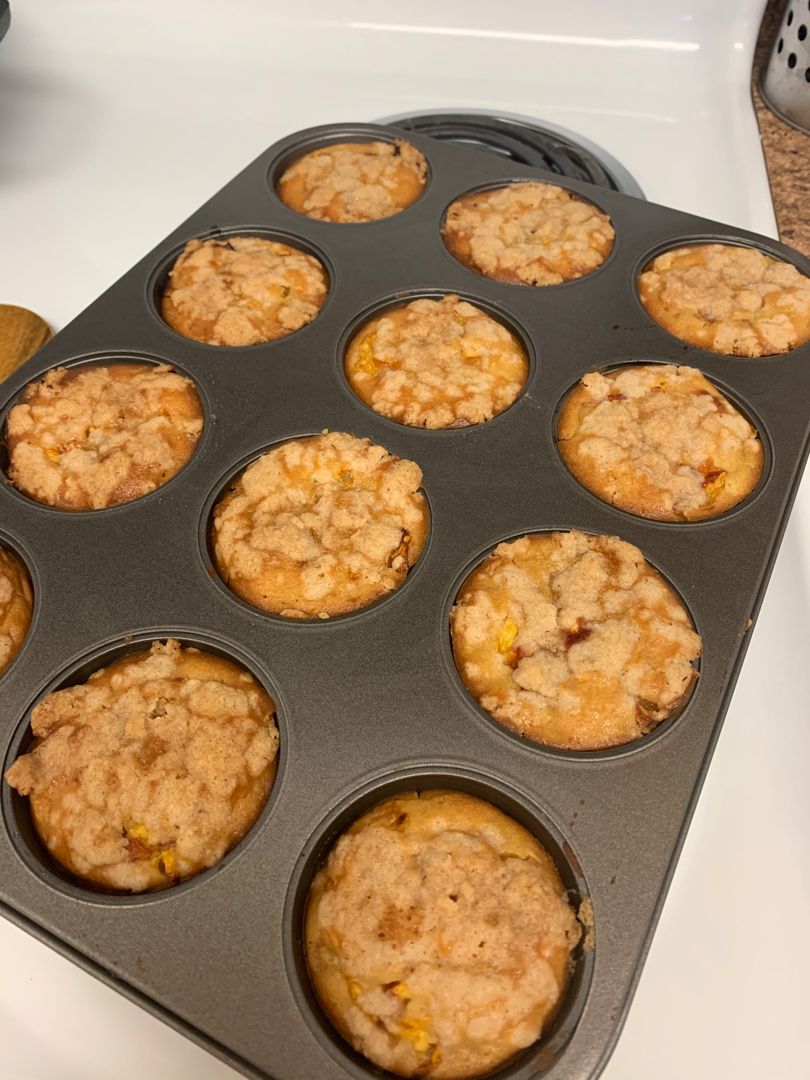
I love peaches. Ripe peaches, smell amazing and they remind me of happy summer memories. One of my favorite peach recipes is this easy peach cobbler muffins recipe. They are super easy to whip up and great to serve for breakfast or even a snack with a cup of tea in the afternoon. Breaking a peach cobbler muffin in half and topping it off with a scoop of vanilla ice cream is my ultimate guilty pleasure!

Ingredients

Muffins:

1 egg

1 ¼ c. all-purpose flour

1 c. chopped fresh peaches -or canned and well drained

⅔ c. white sugar

½ c. whole milk

1 ½ teaspoon baking powder

¼ c. vegetable oil

1 teaspoon vanilla extract

½ teaspoon salt

Streusel Topping:

3 tablespoons white sugar

½ teaspoon baking powder

¼ c. all-purpose flour

4 tablespoons cold unsalted butter

½ teaspoon cinnamon

HOW TO MAKE PEACH COBBLER MUFFINS

Streusel Topping:

Step 1: In a small bowl, place the flour, sugar and cinnamon, and baking powder. Mix well until combined. In chunks, add the cold butter. Break the butter using your fingers and mix it in the flour mixture until you have a mixture that resembles coarse crumbs and set aside.

Muffins:

Step 2: Prepare the oven. Preheat it to 350 degrees F. Using butter, grease a large muffin tin with 12 muffin cups.

Step 3: To a large bowl, whisk the flour, baking powder, salt, and sugar until well blended. Then, add the peaches and toss well using a rubber spatula.

Step 4: Add the milk to a large bowl along with the egg, oil, and vanilla extract. Using the same rubber spatula, mix well until the flour disappears.

Step 5: Into the prepared muffin cups, evenly portion the batter to about 3/4 full, and top each with a spoonful of the streusel topping.

Step 6: Place in the preheated oven and bake for about 20 minutes or until golden brown and a toothpick inserted into the muffin comes out clean. Remove from the oven when done and allow the muffins to cool for about 10 minutes before moving them to a cooling rack.

Step 7: Serve the muffins warm or allow them to cool. You can keep them for up to 3 days in an airtight container.

Notes:

You can keep the completely cooled muffins in an airtight container and freeze them for up to 2 months. To thaw, make sure to cover the muffins to ensure the streusel doesn’t get soggy.

If using frozen peaches, thaw them completely. Drain well and chop them into small pieces.

If desired, you can use other fruits such as blueberries and raspberries.
PEACH COBBLER MUFFINS

Rebecca I love peaches. Ripe peaches, smell amazing and they remind me of happy summer memories. One of my favorite peach recipes is this easy peach cobbler muffins recipe. They are… General Recipes PEACH COBBLER MUFFINS European Print This
Nutrition facts: 200 calories 20 grams fat
Rating: 5.0/5
( 1 voted )

Ingredients

  • Muffins:
  • 1 egg
  • 1 ¼ c. all-purpose flour
  • 1 c. chopped fresh peaches -or canned and well drained
  • ⅔ c. white sugar
  • ½ c. whole milk
  • 1 ½ teaspoon baking powder
  • ¼ c. vegetable oil
  • 1 teaspoon vanilla extract
  • ½ teaspoon salt
  • Streusel Topping:
  • 3 tablespoons white sugar
  • ½ teaspoon baking powder
  • ¼ c. all-purpose flour
  • 4 tablespoons cold unsalted butter
  • ½ teaspoon cinnamon

Instructions

Streusel Topping:

Step 1: In a small bowl, place the flour, sugar and cinnamon, and baking powder. Mix well until combined. In chunks, add the cold butter. Break the butter using your fingers and mix it in the flour mixture until you have a mixture that resembles coarse crumbs and set aside.

Muffins:

Step 2: Prepare the oven. Preheat it to 350 degrees F. Using butter, grease a large muffin tin with 12 muffin cups.

Step 3: To a large bowl, whisk the flour, baking powder, salt, and sugar until well blended. Then, add the peaches and toss well using a rubber spatula.

Step 4: Add the milk to a large bowl along with the egg, oil, and vanilla extract. Using the same rubber spatula, mix well until the flour disappears.

Step 5: Into the prepared muffin cups, evenly portion the batter to about 3/4 full, and top each with a spoonful of the streusel topping.

Step 6: Place in the preheated oven and bake for about 20 minutes or until golden brown and a toothpick inserted into the muffin comes out clean. Remove from the oven when done and allow the muffins to cool for about 10 minutes before moving them to a cooling rack.

Step 7: Serve the muffins warm or allow them to cool. You can keep them for up to 3 days in an airtight container.

Notes

You can keep the completely cooled muffins in an airtight container and freeze them for up to 2 months. To thaw, make sure to cover the muffins to ensure the streusel doesn’t get soggy. If using frozen peaches, thaw them completely. Drain well and chop them into small pieces. If desired, you can use other fruits such as blueberries and raspberries.
August 18, 2022 0 comment
0 FacebookTwitterPinterestEmail
General Recipes

Meatball Boats

by Rebecca August 18, 2022
written by Rebecca

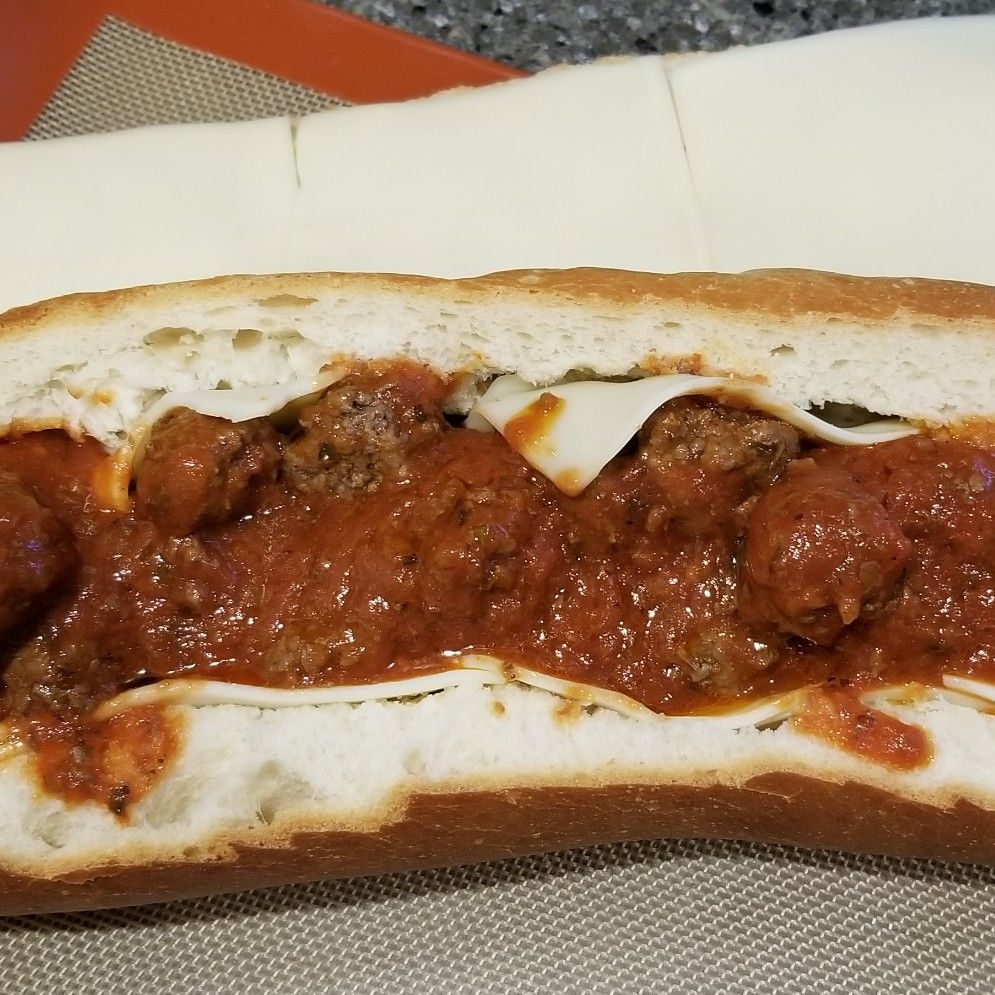
These meatball boats are a great easy dinner option. These can be an amazing appetizer too. Simply use smaller buns and meatballs. These delicious meatball boats are a win-win for everyone who loves meatball subs, but dislikes the messiness of the regular meatball subs.

Ingredients

1 large egg

1 pound of ground beef

2 garlic cloves, minced

1/3 c. breadcrumbs

1/4 c. grated Parmesan cheese

1 tablespoon chopped parsley

1 tablespoon olive oil

4 crusty Italian sandwich rolls

2 c. marinara sauce

12 slices provolone

1/4 c. shredded Parmesan

1/2 c. shredded mozzarella

Kosher salt

Freshly ground black pepper

How to make Meatball Boats

Step 1: Prepare the oven. Preheat it to 375 degrees F. Using a non-stick spray, grease a baking sheet.

Meatballs:

Step 2: Place the ground beef with egg, breadcrumbs, Parmesan, garlic, and parsley in a large bowl. Season with salt and pepper. Mix well until just combined. Then, shape the mixture into 12 even-sized meatballs.

Step 3: Heat the oil in a large skillet over medium heat. Once the oil is hot, add the meatballs to the skillet and sear for about 4 minutes on all sides. Pour in the marinara sauce and gently stir. Put the lid on.
Step 4: Decrease the heat to a simmer and cook the meatballs for about 8 to 10 minutes until no longer pink and the internal temperature of the meatballs reach 160 degrees F.

Bread Boats:
Step 5: On top of a bread loaf. Slice a long rectangle. To make a boat, hollow the top of the hoagie roll.

Step 6: Over the roll, lay 3 slices of provolone to cover the hollowed area. Then, place in the preheated oven and bake for about 5 minutes until the cheese has melted. Remove from the oven and top the cheese in a row with 4 meatballs. Over the meatballs. Spoon the marinara and equally sprinkle with mozzarella, followed by the Parmesan.

Step 7: Return to the oven and continue baking for an additional 6 to 8 minutes. If desired, you can broil the meatball boats.

Notes:

The perfect bread to use for this recipe is Italian or French sandwich rolls. They have a nice crusty exterior and they do not get soggy.

For a little color and additional flavor, you can garnish the meatball boats with some chopped fresh basil.

For a deep flavor meatball, you can use a half each of ground beef and Italian sausage.

If serving as a party platter, I suggest using smaller rolls and making the meatballs smaller.

Meatball Boats

Rebecca These meatball boats are a great easy dinner option. These can be an amazing appetizer too. Simply use smaller buns and meatballs. These delicious meatball boats are a win-win for… General Recipes Meatball Boats European Print This
Nutrition facts: 200 calories 20 grams fat
Rating: 5.0/5
( 1 voted )

Ingredients

  • 1 large egg
  • 1 pound of ground beef
  • 2 garlic cloves, minced
  • 1/3 c. breadcrumbs
  • 1/4 c. grated Parmesan cheese
  • 1 tablespoon chopped parsley
  • 1 tablespoon olive oil
  • 4 crusty Italian sandwich rolls
  • 2 c. marinara sauce
  • 12 slices provolone
  • 1/4 c. shredded Parmesan
  • 1/2 c. shredded mozzarella
  • Kosher salt
  • Freshly ground black pepper

Instructions

Step 1: Prepare the oven. Preheat it to 375 degrees F. Using a non-stick spray, grease a baking sheet.

Meatballs:

Step 2: Place the ground beef with egg, breadcrumbs, Parmesan, garlic, and parsley in a large bowl. Season with salt and pepper. Mix well until just combined. Then, shape the mixture into 12 even-sized meatballs.

Step 3: Heat the oil in a large skillet over medium heat. Once the oil is hot, add the meatballs to the skillet and sear for about 4 minutes on all sides. Pour in the marinara sauce and gently stir. Put the lid on.
Step 4: Decrease the heat to a simmer and cook the meatballs for about 8 to 10 minutes until no longer pink and the internal temperature of the meatballs reach 160 degrees F.

Bread Boats:
Step 5: On top of a bread loaf. Slice a long rectangle. To make a boat, hollow the top of the hoagie roll.

Step 6: Over the roll, lay 3 slices of provolone to cover the hollowed area. Then, place in the preheated oven and bake for about 5 minutes until the cheese has melted. Remove from the oven and top the cheese in a row with 4 meatballs. Over the meatballs. Spoon the marinara and equally sprinkle with mozzarella, followed by the Parmesan.

Step 7: Return to the oven and continue baking for an additional 6 to 8 minutes. If desired, you can broil the meatball boats.

August 18, 2022 0 comment
0 FacebookTwitterPinterestEmail
General Recipes

BEST RICE PUDDING EVER

by Rebecca August 16, 2022
written by Rebecca

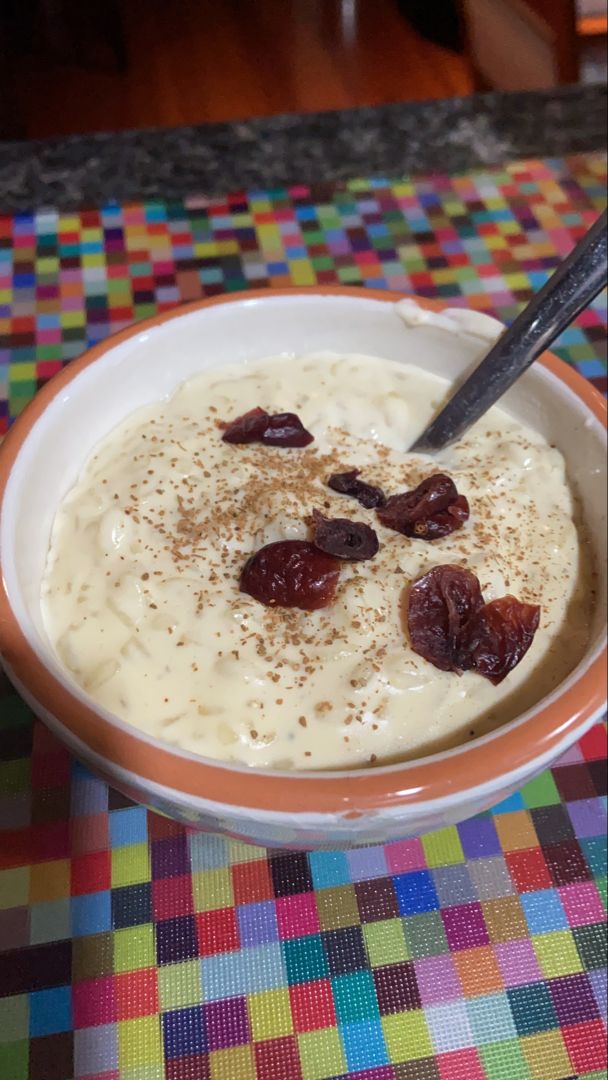
Perfectly creamy, super delicious, and easy to make. This rice pudding is the best ever rice pudding you’ll ever make! Do not be intimated because this is pretty simple to whip up, and those extra easy steps are worth it!

All you need is to be consistent for the best results! I recommend using short or medium-grain rice for a creamier pudding. If desired, serve this with sprinkles of cinnamon or nutmeg.

Rice pudding is a classic. It is very comforting, creamy, and scrumptious! If you are searching for an easy and delightful dessert, then you have to give this rice pudding recipe a try! This is especially great if you love pudding recipes like myself.

INGREDIENTS

1/2 c. uncooked white rice – medium grain

4 c. whole milk – more if needed

1/3 c. white sugar

1 tbsp butter

2 large egg yolks

1 ½ tsp vanilla extract

2/3 c. heavy whipping cream

1/2 c. golden raisins (or regular raisins) – Optional

1/8 tsp salt

HOW TO MAKE RICE PUDDING

Step 1: With cold water, rinse a large saucepan but do not dry. Set the pan on the stovetop over medium heat. Then, pour in the milk. Heat the milk while stirring constantly until just boiling. Make sure to watch the milk closely.

Step 2: When the milk boils, whisk in the rice. Constantly stir until the mixture returns to a boil.

Step 3: Adjust the heat to a shade higher than low and let the mixture gently simmer for about 30 minutes, whisking every 5 to 10 minutes. Do not remove the skin that will form on top of the mixture, instead just stir it back in.

Step 4: In the meantime, place the heavy cream, sugar, yolks, vanilla, and salt in a medium-sized bowl. Stir well until blended and set aside.

Step 5: Continue to simmer once the rice has simmered for 30 minutes, stirring down every 2 to 3 minutes until the rice is tender.

BEST RICE PUDDING EVER

Rebecca Perfectly creamy, super delicious, and easy to make. This rice pudding is the best ever rice pudding you’ll ever make! Do not be intimated because this is pretty simple to… General Recipes BEST RICE PUDDING EVER European Print This
Nutrition facts: 200 calories 20 grams fat
Rating: 5.0/5
( 1 voted )

Ingredients

  • 1/2 c. uncooked white rice – medium grain
  • 4 c. whole milk – more if needed
  • 1/3 c. white sugar
  • 1 tbsp butter
  • 2 large egg yolks
  • 1 ½ tsp vanilla extract
  • 2/3 c. heavy whipping cream
  • 1/2 c. golden raisins (or regular raisins) – Optional
  • 1/8 tsp salt

Instructions

Step 1: With cold water, rinse a large saucepan but do not dry. Set the pan on the stovetop over medium heat. Then, pour in the milk. Heat the milk while stirring constantly until just boiling. Make sure to watch the milk closely.

Step 2: When the milk boils, whisk in the rice. Constantly stir until the mixture returns to a boil.

Step 3: Adjust the heat to a shade higher than low and let the mixture gently simmer for about 30 minutes, whisking every 5 to 10 minutes. Do not remove the skin that will form on top of the mixture, instead just stir it back in.

Step 4: In the meantime, place the heavy cream, sugar, yolks, vanilla, and salt in a medium-sized bowl. Stir well until blended and set aside.

Step 5: Continue to simmer once the rice has simmered for 30 minutes, stirring down every 2 to 3 minutes until the rice is tender.

August 16, 2022 0 comment
0 FacebookTwitterPinterestEmail
General Recipes

Wonton Meatballs

by Rebecca August 16, 2022
written by Rebecca

Total time: 30 mins | Serves: 4

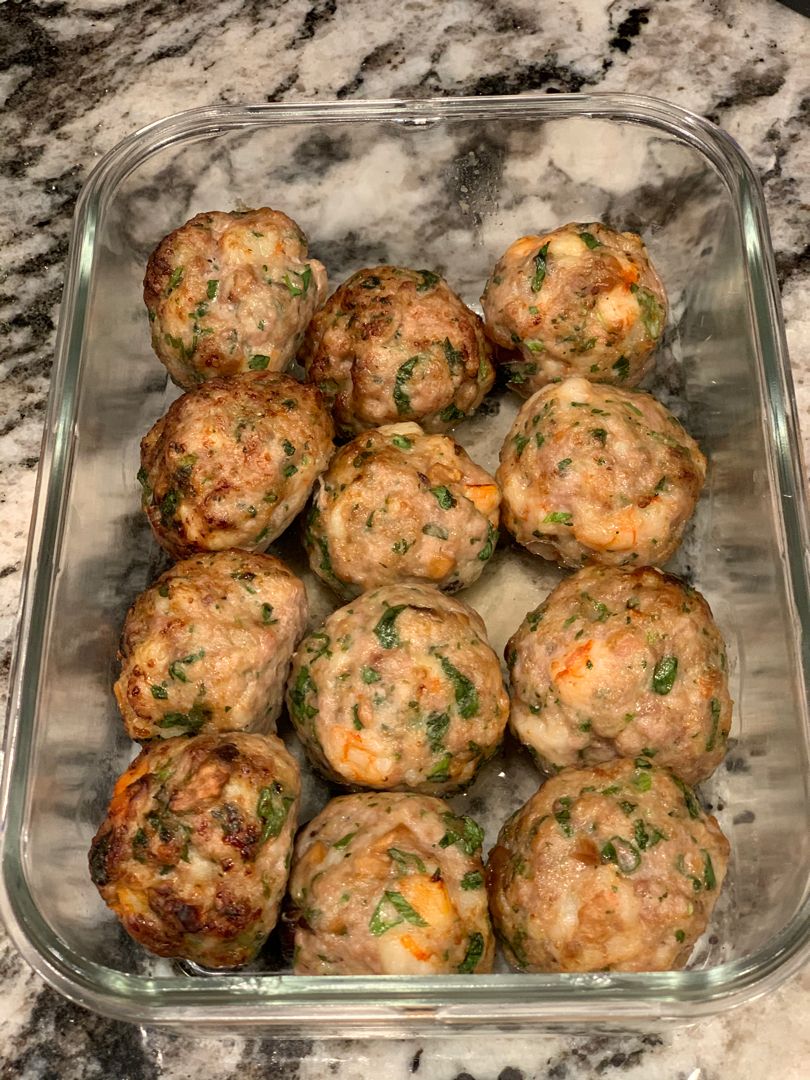
Wonton meatballs are my favorite! It’s an amazing variety if you find yourself craving meatballs. Plus, they are incredibly easy and quick to make using only a few simple ingredients.

These wonton meatballs are juicy and delicious. Just like our favorite wonton minus the wrapper. These wonton meatballs are made with a combination of ground chicken and ground pork combined with pantry ingredients. I have made these flavor-packed wonton meatballs many times without fail. These are super impressive, and everyone loved these! These wonton meatballs are bursting with flavors from our favorite wonton. Easily make these at home any time for a filling, very comforting weeknight dinner that your entire family will absolutely love!

Serve these wonton meatballs with fried cauliflower rice, veggies, mashed potatoes, or zoodles. These are also great to pair with Asian vegetables such as bok choy, green beans, and napa cabbage.

If you have not tried these wonton meatballs yet, then you should give it a go soon! These wonton meatballs will surely be your family’s new favorite.

INGREDIENTS

1 lb ground chicken

1 lb ground pork

2 green onions, finely chopped

1/4 c. cilantro, minced

1 tbsp soy sauce

2 cloves garlic, minced

1/2 tsp fish sauce

1/4 tsp sesame oil

1 tsp Kosher salt

1/2 tsp white pepper

How to make Wonton Meatballs

Step 1: Prepare the oven. Preheat it to 400 degrees F. Using the parchment paper, line a baking sheet.

Step 2: Place the ground pork, chicken, green onions, cilantro, garlic, soy sauce, fish sauce, salt, pepper, and sesame oil in a large bowl. Mix well using your hands until you have a sticky mixture.

Step 3: Into 1 1/2-inch ball, shape the mixture. Place them onto the prepared baking sheet.

Step 4: Place in the preheated oven and bake for about 15 to 20 minutes or until the meatballs are completely cooked.

Wonton Meatballs

Rebecca Total time: 30 mins | Serves: 4 Wonton meatballs are my favorite! It’s an amazing variety if you find yourself craving meatballs. Plus, they are incredibly easy and quick to… General Recipes Wonton Meatballs European Print This
Serves: 4
Nutrition facts: 200 calories 20 grams fat
Rating: 5.0/5
( 1 voted )

Ingredients

  • 1 lb ground chicken
  • 1 lb ground pork
  • 2 green onions, finely chopped
  • 1/4 c. cilantro, minced
  • 1 tbsp soy sauce
  • 2 cloves garlic, minced
  • 1/2 tsp fish sauce
  • 1/4 tsp sesame oil
  • 1 tsp Kosher salt
  • 1/2 tsp white pepper

Instructions

Step 1: Prepare the oven. Preheat it to 400 degrees F. Using the parchment paper, line a baking sheet.

Step 2: Place the ground pork, chicken, green onions, cilantro, garlic, soy sauce, fish sauce, salt, pepper, and sesame oil in a large bowl. Mix well using your hands until you have a sticky mixture.

Step 3: Into 1 1/2-inch ball, shape the mixture. Place them onto the prepared baking sheet.

Step 4: Place in the preheated oven and bake for about 15 to 20 minutes or until the meatballs are completely cooked.

August 16, 2022 0 comment
0 FacebookTwitterPinterestEmail
General Recipes

Pumpkin Pecan Cobbler

by Rebecca August 16, 2022
written by Rebecca

Prep time: 10 mins | Cook time: 40 mins | Yield: 8 servings

I always love this Pumpkin Pecan Cobbler. It is a truly magical dessert that is much more than just a cobbler. The perfect cozy fall dessert alternative to pie. I love to serve this with extra sprinkles of pecans and a big scoop of vanilla ice cream for that ultimate treat that everyone will surely be begging for!

Ingredients

COBBLER:

1 1/2 tsp cinnamon

1 c. plus 3 tbsp flour

2 tsp baking powder

3/4 c. granulated sugar

1/2 tsp nutmeg

1/2 c. pumpkin puree

1/2 tsp cloves

1/4 c. whole milk

1/2 tsp salt

3 tsp vanilla

1/4 c. butter, melted

TOPPING:

1/4 c. chopped pecans

1/2 c. brown sugar

1 1/2 c. very hot water

1/2 c. granulated sugar

How to make Pumpkin Pecan Cobbler

Step 1: Prepare the oven. Preheat it to 350 degrees.

Step 2: In a medium-sized bowl, place the flour, baking powder, salt, sugar, cinnamon, nutmeg, and cloves. Mix well until combined and set aside.

Step 3: Place the pumpkin, milk, melted butter, and vanilla in a smaller bowl. Mix well until blended. Into the dry ingredients, add the wet ingredients, and mix well until you have a thick batter. Into an 8-inch casserole dish with high sides, pour the batter.

Step 4: For the topping, place the sugar, brown sugar, and pecans together in a separate bowl. Mix well until combined, then evenly spread this on top of the batter.

Step 5: Over the whole thing, pour the hot water. DO NOT STIR. Place the dish on a baking dish.

Step 6: Place in the preheated oven and bake for about 40 minutes or until the middle of the cobbler is set. Remove from the oven when done and let the cobbler cool for about 5 to 10 minutes.

Step 7: Serve the cobbler with extra pecans and a big scoop of vanilla ice cream. Enjoy!

Pumpkin Pecan Cobbler

Rebecca Prep time: 10 mins | Cook time: 40 mins | Yield: 8 servings I always love this Pumpkin Pecan Cobbler. It is a truly magical dessert that is much more… General Recipes Pumpkin Pecan Cobbler European Print This
Serves: 8 Prep Time: 10 mins Cooking Time: 40 mins 40 mins
Nutrition facts: 200 calories 20 grams fat
Rating: 5.0/5
( 1 voted )

Ingredients

  • COBBLER:
  • 1 1/2 tsp cinnamon
  • 1 c. plus 3 tbsp flour
  • 2 tsp baking powder
  • 3/4 c. granulated sugar
  • 1/2 tsp nutmeg
  • 1/2 c. pumpkin puree
  • 1/2 tsp cloves
  • 1/4 c. whole milk
  • 1/2 tsp salt
  • 3 tsp vanilla
  • 1/4 c. butter, melted
  • TOPPING:
  • 1/4 c. chopped pecans
  • 1/2 c. brown sugar
  • 1 1/2 c. very hot water
  • 1/2 c. granulated sugar

Instructions

Step 1: Prepare the oven. Preheat it to 350 degrees.

Step 2: In a medium-sized bowl, place the flour, baking powder, salt, sugar, cinnamon, nutmeg, and cloves. Mix well until combined and set aside.

Step 3: Place the pumpkin, milk, melted butter, and vanilla in a smaller bowl. Mix well until blended. Into the dry ingredients, add the wet ingredients, and mix well until you have a thick batter. Into an 8-inch casserole dish with high sides, pour the batter.

Step 4: For the topping, place the sugar, brown sugar, and pecans together in a separate bowl. Mix well until combined, then evenly spread this on top of the batter.

Step 5: Over the whole thing, pour the hot water. DO NOT STIR. Place the dish on a baking dish.

Step 6: Place in the preheated oven and bake for about 40 minutes or until the middle of the cobbler is set. Remove from the oven when done and let the cobbler cool for about 5 to 10 minutes.

Step 7: Serve the cobbler with extra pecans and a big scoop of vanilla ice cream. Enjoy!

August 16, 2022 0 comment
0 FacebookTwitterPinterestEmail
General Recipes

King Ranch Chicken Casserole

by Rebecca August 16, 2022
written by Rebecca

Total time: 1 hr | Serves: 6

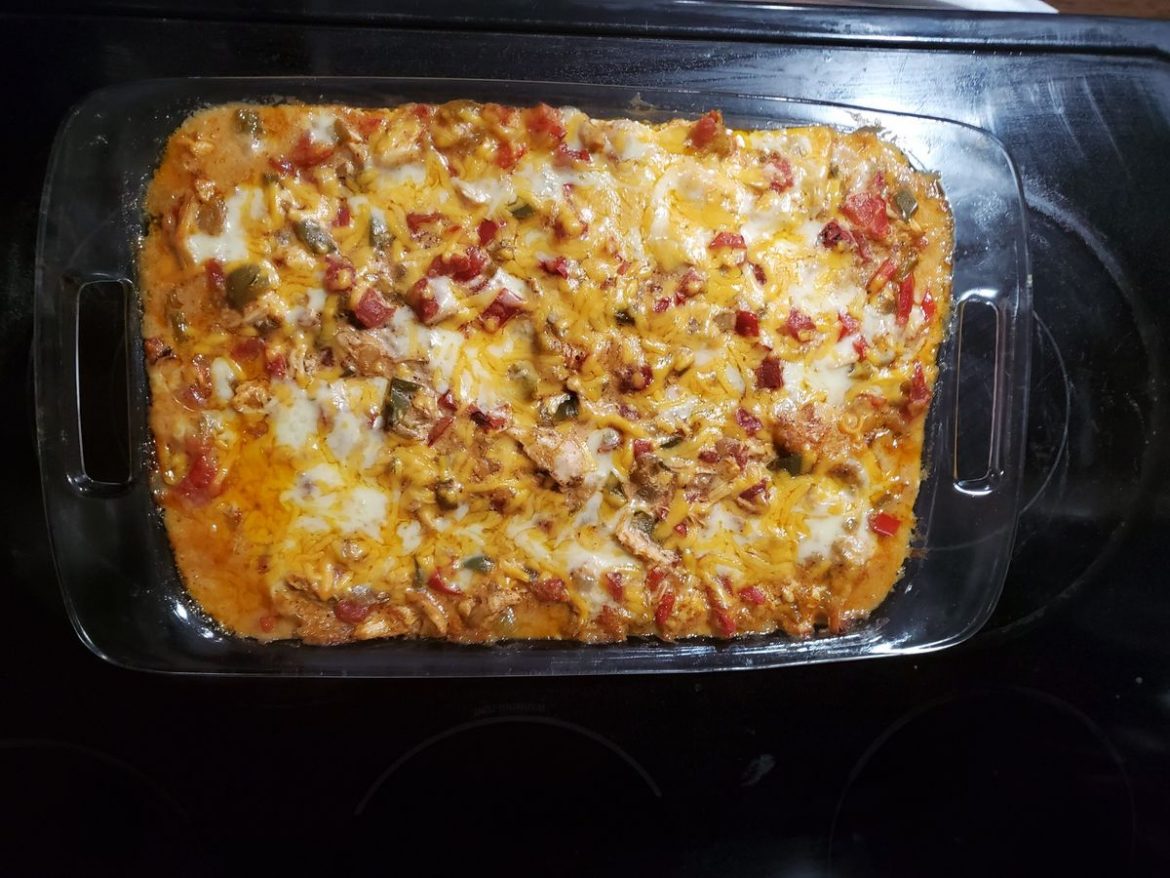
This King Ranch Chicken Casserole is Tex-Mex comfort food that you can easily make in a snap! This casserole is incredibly creamy, cheesy, and delicious. Everyone loved it and this has been my family’s favorite rotation for as long as I can remember!

INGREDIENTS

1 small yellow onion, diced

4 tbsp unsalted butter

4 c. chicken, cooked and shredded

1 red bell pepper, seeded and diced

3 cloves garlic, minced

2 tbsp flour

1 c. chicken broth

1 tbsp chili powder

1 tsp cumin

Juice from one lime

1 (10 ounces) can of diced tomatoes with green chiles, drained

1 c. sour cream

1 jalapeno pepper, seeded and diced

10 ounces tortilla chips, roughly crushed

2 c. cheddar cheese, grated

2 c. pepper jack cheese, grated

Kosher salt and freshly ground black pepper, to taste

1/4 c. cilantro, chopped

How to make King Ranch Chicken Casserole

Step 1: Prepare the oven. Preheat it to 375 degrees F. Using a nonstick spray, grease a 9 x 13-inch baking dish, and set aside.

Step 2: Melt the butter in a large skillet over medium heat. Then, add the onions, bell pepper, and jalapeno pepper. Cook for about 5 to 7 minutes or until soft and aromatic. Add the garlic and continue to cook for another minute.

Step 3: To the skillet, add flour, chili powder, and cumin. Stir and cook for a minute more. Adjust the heat to low and slowly whisk in the chicken broth and lime juice. Cook further until the mixture has thickened.

Step 4: Take the skillet off the heat and stir in the drained tomatoes, chilies, and sour cream. To taste, season with salt and pepper. To a large bowl, transfer everything.

Step 5: To the bowl, add the chicken and cilantro. Toss well and adjust the seasoning according to taste.

Step 6: Place the two kinds of cheese in another bowl and mix well.

Step 7: With 1/3 of the crushed tortilla chips, line the prepared baking dish. Top with half of the chicken mixture, followed by 1/3 of the cheese. Do the same layers once more and topped with another layer of chips and one more layer of cheese.

Step 8: Generously grease a sheet of aluminium foil with nonstick spray. Loosely tent the dish with it. Place in the preheated oven and bake for about 30 minutes. Remove the cover and continue baking for an additional 10 to 15 minutes until golden brown and bubbly.

Step 9: Remove from the oven when done and allow it to sit for about 10 minutes. Serve and enjoy!

King Ranch Chicken Casserole

Rebecca Total time: 1 hr | Serves: 6 This King Ranch Chicken Casserole is Tex-Mex comfort food that you can easily make in a snap! This casserole is incredibly creamy, cheesy,… General Recipes King Ranch Chicken Casserole European Print This
Serves: 6
Nutrition facts: 200 calories 20 grams fat
Rating: 5.0/5
( 1 voted )

Ingredients

  • 1 small yellow onion, diced
  • 4 tbsp unsalted butter
  • 4 c. chicken, cooked and shredded
  • 1 red bell pepper, seeded and diced
  • 3 cloves garlic, minced
  • 2 tbsp flour
  • 1 c. chicken broth
  • 1 tbsp chili powder
  • 1 tsp cumin
  • Juice from one lime
  • 1 (10 ounces) can of diced tomatoes with green chiles, drained
  • 1 c. sour cream
  • 1 jalapeno pepper, seeded and diced
  • 10 ounces tortilla chips, roughly crushed
  • 2 c. cheddar cheese, grated
  • 2 c. pepper jack cheese, grated
  • Kosher salt and freshly ground black pepper, to taste
  • 1/4 c. cilantro, chopped

Instructions

Step 1: Prepare the oven. Preheat it to 375 degrees F. Using a nonstick spray, grease a 9 x 13-inch baking dish, and set aside.

Step 2: Melt the butter in a large skillet over medium heat. Then, add the onions, bell pepper, and jalapeno pepper. Cook for about 5 to 7 minutes or until soft and aromatic. Add the garlic and continue to cook for another minute.

Step 3: To the skillet, add flour, chili powder, and cumin. Stir and cook for a minute more. Adjust the heat to low and slowly whisk in the chicken broth and lime juice. Cook further until the mixture has thickened.

Step 4: Take the skillet off the heat and stir in the drained tomatoes, chilies, and sour cream. To taste, season with salt and pepper. To a large bowl, transfer everything.

Step 5: To the bowl, add the chicken and cilantro. Toss well and adjust the seasoning according to taste.

Step 6: Place the two kinds of cheese in another bowl and mix well.

Step 7: With 1/3 of the crushed tortilla chips, line the prepared baking dish. Top with half of the chicken mixture, followed by 1/3 of the cheese. Do the same layers once more and topped with another layer of chips and one more layer of cheese.

Step 8: Generously grease a sheet of aluminium foil with nonstick spray. Loosely tent the dish with it. Place in the preheated oven and bake for about 30 minutes. Remove the cover and continue baking for an additional 10 to 15 minutes until golden brown and bubbly.

Step 9: Remove from the oven when done and allow it to sit for about 10 minutes. Serve and enjoy!

August 16, 2022 0 comment
0 FacebookTwitterPinterestEmail
General Recipes

Chicken Alfredo Lasagna Roll-Ups

by Rebecca August 16, 2022
written by Rebecca

Prep time: 20 mins | Cook time: 40 mins | Yield: 10 roll-ups

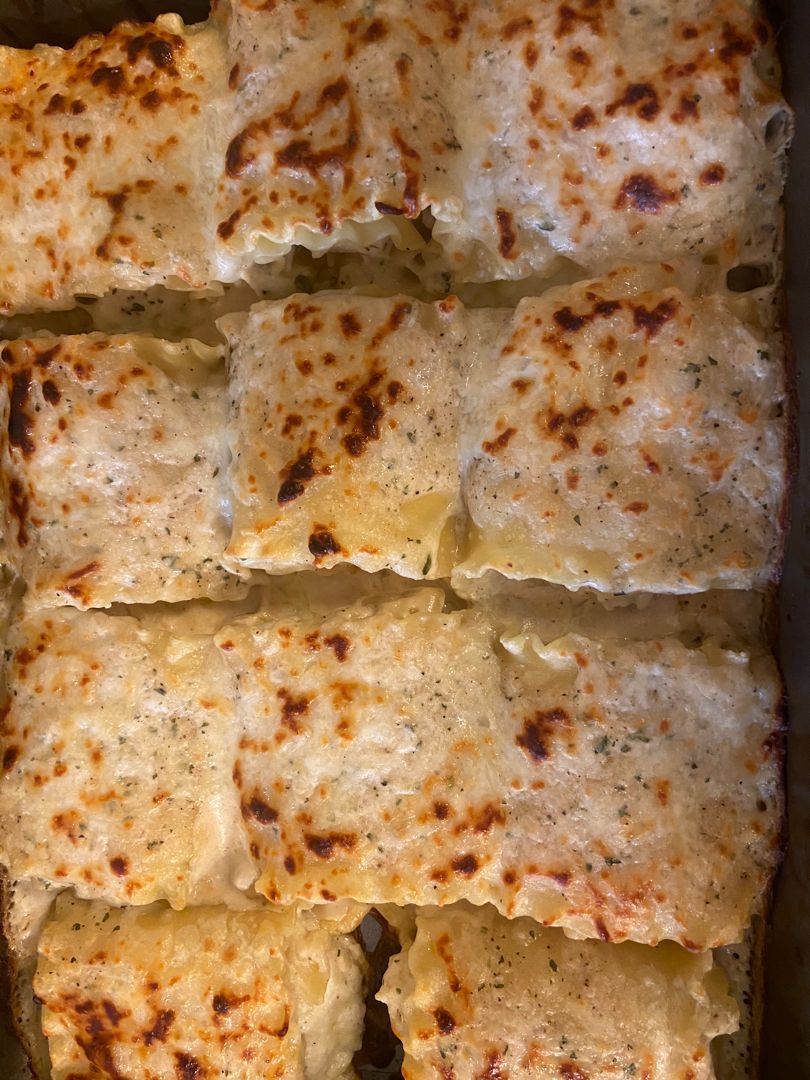
These Chicken Alfredo Lasagna Roll-Ups are an amazing version of the classic lasagna. Super cheesy, creamy, and delicious! These roll-ups are stuffed with chicken and cheese smothered with Alfredo sauce and topped with tons of melty cheese, then baked to perfection.

I prefer these chicken Alfredo lasagna roll-ups because they are fun and a little fancy. All our favorite traditional lasagna flavors are rolled up instead of layered. And these scrumptious lasagna roll-ups are quick to come together and guarantee one of the best weeknight dinner options that are fancy enough for entertaining.

INGREDIENTS

3 c. chicken, cooked and shredded

10 lasagna noodles

16 ounces cottage cheese

1 tsp Italian Seasoning

1/2 tsp garlic powder

1/2 tsp onion powder

1 1/2 c. Alfredo sauce

1 1/2 c. Parmesan, shredded

1 1/2 c. mozzarella, shredded

1 tsp salt

How to make Chicken Alfredo Lasagna Roll-Ups

Step 1: Prepare the oven. Preheat it to 350 degrees. On the bottom of a casserole dish, spread out 1/4 cup of Alfredo sauce. Set aside.

Step 2: Following the package directions, cook the lasagna noodles. Over the counter, place parchment paper, then lay out the cooked lasagna noodles.

Step 3: In a large bowl, place the shredded chicken, cottage cheese, salt, onion powder, garlic powder, and Italian seasoning. Mix well until combined.

Step 4: On each lasagna noodle, spread 3 cups of the chicken mixture. Make sure to leave around 1/3 space. Place 1 to 2 tbsp Alfredo sauce over the chicken mixture. Towards the bare end, roll the noodle up.

Step 5: Into the prepared casserole dish, place each lasagna roll-up and pour the rest of the Alfredo sauce on top. Then, sprinkle with the shredded mozzarella and Parmesan cheese.

Step 6: Using aluminium foil, tent the dish. Place in the preheated oven and bake for about 20 minutes. Uncover and continue baking for another 10 minutes until the cheese has melted and bubbles.

Chicken Alfredo Lasagna Roll-Ups

Rebecca Prep time: 20 mins | Cook time: 40 mins | Yield: 10 roll-ups These Chicken Alfredo Lasagna Roll-Ups are an amazing version of the classic lasagna. Super cheesy, creamy, and… General Recipes Chicken Alfredo Lasagna Roll-Ups European Print This
Serves: 10 Prep Time: 20 mins Cooking Time: 40 mins 40 mins
Nutrition facts: 200 calories 20 grams fat
Rating: 5.0/5
( 1 voted )

Ingredients

  • 3 c. chicken, cooked and shredded
  • 10 lasagna noodles
  • 16 ounces cottage cheese
  • 1 tsp Italian Seasoning
  • 1/2 tsp garlic powder
  • 1/2 tsp onion powder
  • 1 1/2 c. Alfredo sauce
  • 1 1/2 c. Parmesan, shredded
  • 1 1/2 c. mozzarella, shredded
  • 1 tsp salt

Instructions

Step 1: Prepare the oven. Preheat it to 350 degrees. On the bottom of a casserole dish, spread out 1/4 cup of Alfredo sauce. Set aside.

Step 2: Following the package directions, cook the lasagna noodles. Over the counter, place parchment paper, then lay out the cooked lasagna noodles.

Step 3: In a large bowl, place the shredded chicken, cottage cheese, salt, onion powder, garlic powder, and Italian seasoning. Mix well until combined.

Step 4: On each lasagna noodle, spread 3 cups of the chicken mixture. Make sure to leave around 1/3 space. Place 1 to 2 tbsp Alfredo sauce over the chicken mixture. Towards the bare end, roll the noodle up.

Step 5: Into the prepared casserole dish, place each lasagna roll-up and pour the rest of the Alfredo sauce on top. Then, sprinkle with the shredded mozzarella and Parmesan cheese.

Step 6: Using aluminium foil, tent the dish. Place in the preheated oven and bake for about 20 minutes. Uncover and continue baking for another 10 minutes until the cheese has melted and bubbles.

August 16, 2022 0 comment
0 FacebookTwitterPinterestEmail
General Recipes

Gooey Butter Spice Cake

by Rebecca August 16, 2022
written by Rebecca

Prep time: 15 mins | Cook time: 30 mins | Inactive: 1 hr | Yield: 10-12 servings

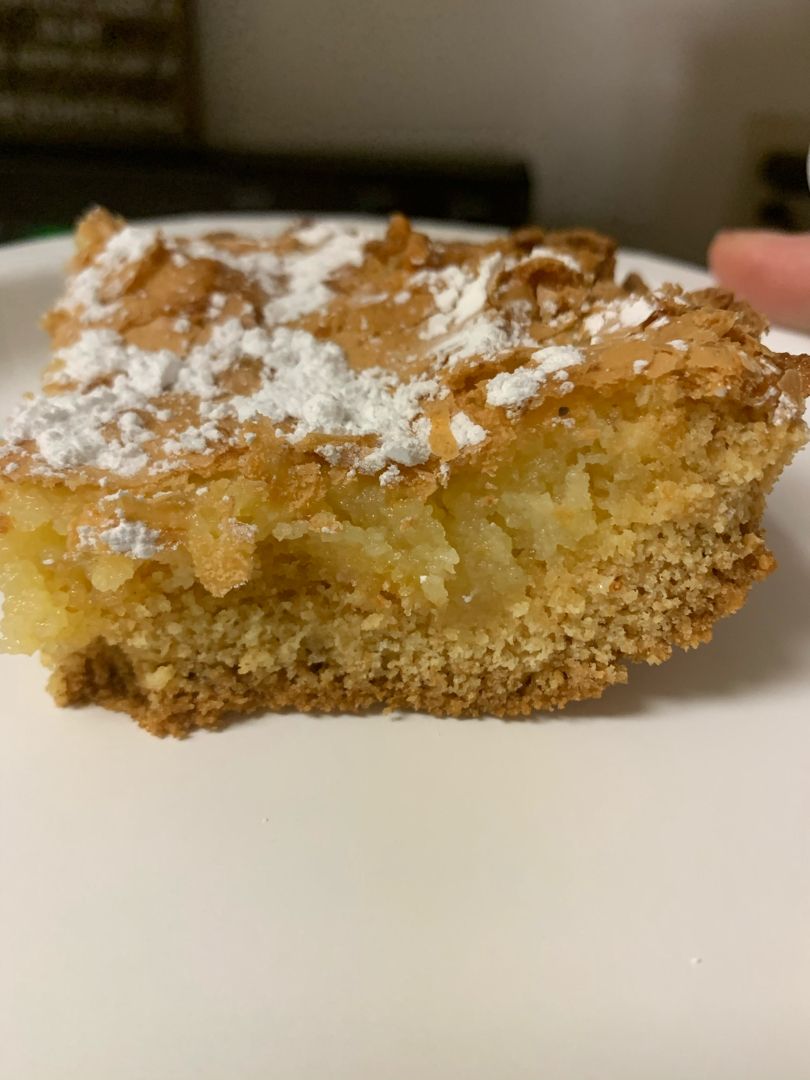
This gooey butter spice cake is a fairly easy cake to make. This needs only simple ingredients, and it all begins with a box of cake mix. This cake is gooey, buttery, and delicious! This cake is nothing fancy, but it is an amazing cake with tasty sweet, gooey, and butter filling! This cake is great to bring to potlucks or gatherings. The combination of the simple ingredients topped with sugar-cinnamon topping takes this cake to a new level!

INGREDIENTS

3 large eggs, divided

1 (15 ounces) box spice cake mix

1 c. salted butter, divided

2 tsp vanilla extract

1/2 tsp ground cinnamon

2 c. powdered sugar

1/4 tsp nutmeg

Extra powdered sugar, for sprinkling

1 (8 ounces) block cream cheese, softened

How to make Gooey Butter Spice Cake

Step 1: Prepare the oven. Preheat it to 350 degrees F. Using nonstick cooking spray, grease a 9 x 13-inch baking pan, and set aside.

Step 2: In a large bowl, place the cake mix, one egg, and one stick of melted butter. Mix well until combined.

Step 3: Into the bottom of the prepared baking dish, press the cake mixture. Make sure to also slightly press up the sides of the dish. Set aside.

Step 4: Place the cream cheese in another bowl. Beat until smooth. Then, add the rest of the eggs along with the vanilla, cinnamon, nutmeg, and remaining melted stick of butter. Beat well until smooth. Next, add the powdered sugar and mix well until blended. Spread this over the cake mix.

Step 5: Place in the preheated oven and bake for about 30 minutes or until the middle is set but still gooey. When done, take the cake out of the oven and allow it to cool for approximately an hour.

Step 6: On top of the cake, sprinkle the powdered sugar. Slice and serve. Enjoy!

Gooey Butter Spice Cake

Rebecca Prep time: 15 mins | Cook time: 30 mins | Inactive: 1 hr | Yield: 10-12 servings This gooey butter spice cake is a fairly easy cake to make. This… General Recipes Gooey Butter Spice Cake European Print This
Serves: 10-12 Prep Time: 15 mins Cooking Time: 30 mins 30 mins
Nutrition facts: 200 calories 20 grams fat
Rating: 5.0/5
( 1 voted )

Ingredients

  • 3 large eggs, divided
  • 1 (15 ounces) box spice cake mix
  • 1 c. salted butter, divided
  • 2 tsp vanilla extract
  • 1/2 tsp ground cinnamon
  • 2 c. powdered sugar
  • 1/4 tsp nutmeg
  • Extra powdered sugar, for sprinkling
  • 1 (8 ounces) block cream cheese, softened

Instructions

Step 1: Prepare the oven. Preheat it to 350 degrees F. Using nonstick cooking spray, grease a 9 x 13-inch baking pan, and set aside.

Step 2: In a large bowl, place the cake mix, one egg, and one stick of melted butter. Mix well until combined.

Step 3: Into the bottom of the prepared baking dish, press the cake mixture. Make sure to also slightly press up the sides of the dish. Set aside.

Step 4: Place the cream cheese in another bowl. Beat until smooth. Then, add the rest of the eggs along with the vanilla, cinnamon, nutmeg, and remaining melted stick of butter. Beat well until smooth. Next, add the powdered sugar and mix well until blended. Spread this over the cake mix.

Step 5: Place in the preheated oven and bake for about 30 minutes or until the middle is set but still gooey. When done, take the cake out of the oven and allow it to cool for approximately an hour.

Step 6: On top of the cake, sprinkle the powdered sugar. Slice and serve. Enjoy!

August 16, 2022 0 comment
0 FacebookTwitterPinterestEmail
General Recipes

Red Velvet Gooey Butter Cake

by Rebecca August 16, 2022
written by Rebecca

Prep Time: 15 mins | Cook Time: 50 mins | Total Time: 1 hr 5 mins

This Red Velvet Gooey Butter Cake is the perfect dessert for all occasions. It is insanely easy to whip up and guarantees an ooey-gooeyness red velvet butter cake that will impress everyone from the first bite!

My daughter had flu, and she’s still a little fussy. I know how much she loves red velvet gooey butter cake, so I figured, why not surprise her with it? Her world instantly lights up when she sees me baking her favorite cake. One bite and she said she’s already better! Lucky me, I know how to cheer my daughter up!

Ingredients

Crust:

1/2 c. unsalted butter 1 stick, melted

1 egg

1 (15.25 oz.) box red velvet cake mix

Filling:

2 eggs

1 (8 oz.) block cream cheese, softened

1/2 c. unsalted butter 1 stick, melted

1 tsp vanilla extract

4 c. powdered sugar

How to make Red Velvet Gooey Butter Cake

Step 1: Prepare the oven. Preheat it to 350 degrees F. Using nonstick cooking spray, lightly grease a 13 x 9-inch baking dish.

Step 2: Place the cake mix, melted butter, and egg in a large bowl. Mix well to make the crust. Into the bottom of the prepared pan, evenly press the mixture.

Step 3: Place the cream cheese in another large bowl. Using a mixer, beat the cream cheese until smooth. Then, add the sugar and mix until blended. Next, add the butter and beat until combined. Slowly add the powdered sugar and mix well. Stir in the vanilla. Over the crust, pour the filling.

Step 4: Place in the preheated oven and bake for about 40 to 50 minutes or until the edges of the cake are just firm, and the center is still jiggly.

Step 5: Remove from the oven when done and allow the cake to cool completely. Then, slice into squares. Serve and enjoy!

Red Velvet Gooey Butter Cake

Rebecca Prep Time: 15 mins | Cook Time: 50 mins | Total Time: 1 hr 5 mins This Red Velvet Gooey Butter Cake is the perfect dessert for all occasions. It… General Recipes Red Velvet Gooey Butter Cake European Print This
Prep Time: 15 mins Cooking Time: 50 mins 50 mins
Nutrition facts: 200 calories 20 grams fat
Rating: 5.0/5
( 1 voted )

Ingredients

  • Crust:
  • 1/2 c. unsalted butter 1 stick, melted
  • 1 egg
  • 1 (15.25 oz.) box red velvet cake mix
  • Filling:
  • 2 eggs
  • 1 (8 oz.) block cream cheese, softened
  • 1/2 c. unsalted butter 1 stick, melted
  • 1 tsp vanilla extract
  • 4 c. powdered sugar

Instructions

Step 1: Prepare the oven. Preheat it to 350 degrees F. Using nonstick cooking spray, lightly grease a 13 x 9-inch baking dish.

Step 2: Place the cake mix, melted butter, and egg in a large bowl. Mix well to make the crust. Into the bottom of the prepared pan, evenly press the mixture.

Step 3: Place the cream cheese in another large bowl. Using a mixer, beat the cream cheese until smooth. Then, add the sugar and mix until blended. Next, add the butter and beat until combined. Slowly add the powdered sugar and mix well. Stir in the vanilla. Over the crust, pour the filling.

Step 4: Place in the preheated oven and bake for about 40 to 50 minutes or until the edges of the cake are just firm, and the center is still jiggly.

Step 5: Remove from the oven when done and allow the cake to cool completely. Then, slice into squares. Serve and enjoy!

August 16, 2022 0 comment
0 FacebookTwitterPinterestEmail
General Recipes

Apple Cream Pie

by Rebecca August 16, 2022
written by Rebecca

Prep time: 3 hrs 20 mins | Cook time: 1 hr 10 mins | Inactive: 2 hrs | Serves: 8

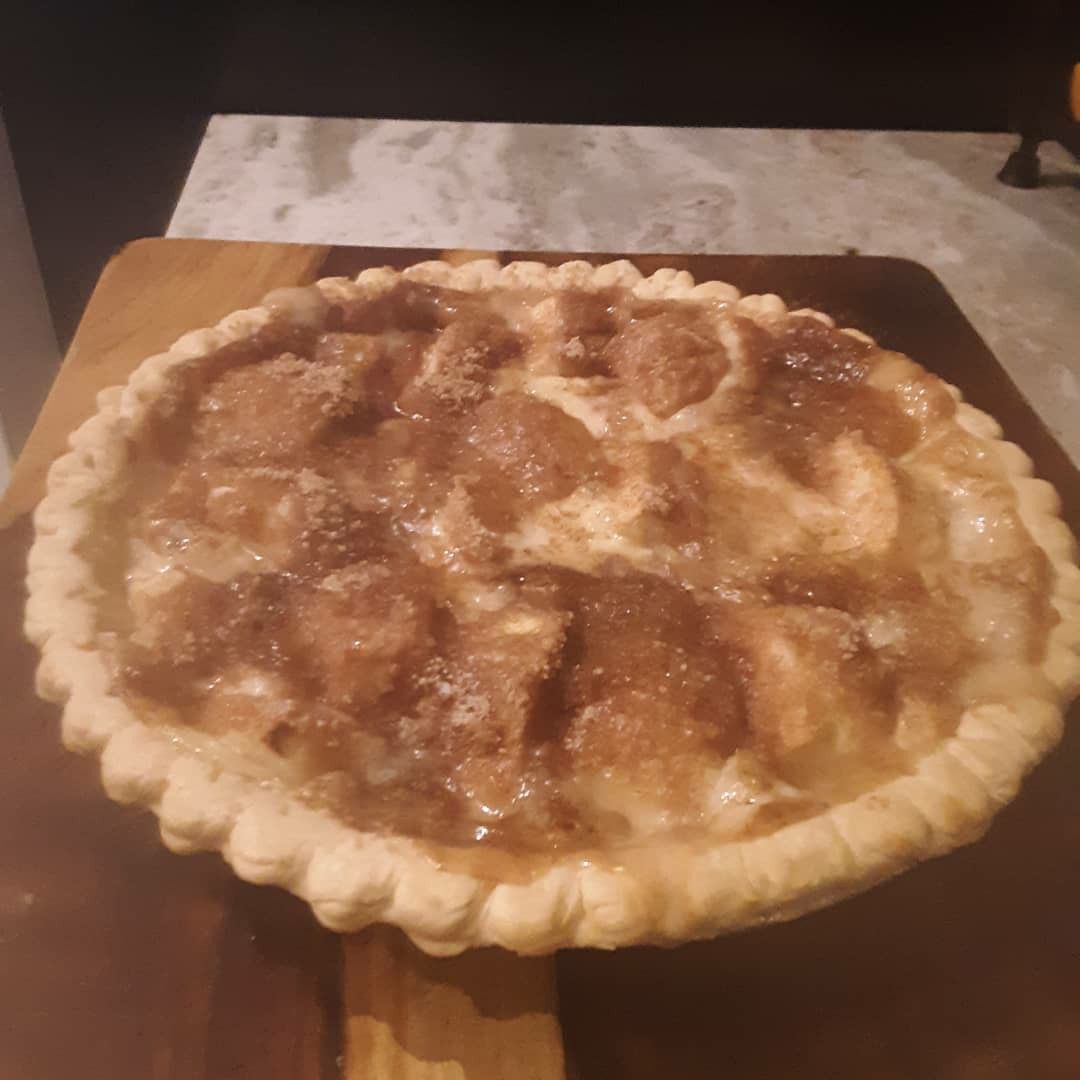
This Apple pie is a classic! It is delicious and loaded with fresh apples. Super easy and quick to make. Serve chilled with ice cream or whipped cream.

Ingredients

CRUST:

1/2 c. butter, melted

2 c. all-purpose flour

3 tbsp cold water

1/4 tsp baking powder

1/2 tsp salt

FILLING:

3 tablespoons all-purpose flour

1 c. packed brown sugar

1 teaspoon ground cinnamon

8 apples (use red or green)

1/2 c. heavy whipping cream

1 tablespoon lemon juice

Serve with additional whipped cream or ice cream (optional)

1/8 teaspoon salt

How to make Apple Cream Pie

CRUST:

Step 1: Prepare the oven. Preheat it to 400 degrees F.

Step 2: Place the crust ingredients in a large bowl. Mix well until the ball forms. Using your hands, press the mixture into a 9-inch pie pan, making sure to even out the center of the crust with a flat-bottom glass. With your hands, crimp the edges, then trim the excess off.

FILLING:

Step 3: Into eights or quarters, cut the peeled apples. Place them in a large bowl and sprinkle the apple pieces with lemon juice. In the center of the pie crust, place the bigger apple pieces. To the edges, place the smaller pieces.

Step 4: Place the sugar, flour, cinnamon, and salt in a small bowl. Mix well. Over the apples, sprinkle 3/4 of the dry ingredients.

Step 5: On top of the apples, slowly pour half a cup of whipping cream. Ensure the apple pieces gets some of the creams.

Step 6: On top, sprinkle the remaining cinnamon sugar.

Step 7: Place in the preheated oven and bake for about 10 minutes. Then, adjust the oven temperature to 350 degrees F and continue baking for an additional 45 to 60 minutes or until the apples are fork tender.

Step 8: Remove from the oven when done. Before serving, chill the pie in the fridge for 2 hours. If desired, serve the pie with ice cream or whipped cream. Enjoy!

Apple Cream Pie

Rebecca Prep time: 3 hrs 20 mins | Cook time: 1 hr 10 mins | Inactive: 2 hrs | Serves: 8 This Apple pie is a classic! It is delicious and… General Recipes Apple Cream Pie European Print This
Serves: 8 Prep Time: 3 hrs 20 mins Cooking Time: 1 hr 10 mins 1 hr 10 mins
Nutrition facts: 200 calories 20 grams fat
Rating: 5.0/5
( 1 voted )

Ingredients

  • CRUST:
  • 1/2 c. butter, melted
  • 2 c. all-purpose flour
  • 3 tbsp cold water
  • 1/4 tsp baking powder
  • 1/2 tsp salt
  • FILLING:
  • 3 tablespoons all-purpose flour
  • 1 c. packed brown sugar
  • 1 teaspoon ground cinnamon
  • 8 apples (use red or green)
  • 1/2 c. heavy whipping cream
  • 1 tablespoon lemon juice
  • Serve with additional whipped cream or ice cream (optional)
  • 1/8 teaspoon salt

Instructions

CRUST:

Step 1: Prepare the oven. Preheat it to 400 degrees F.

Step 2: Place the crust ingredients in a large bowl. Mix well until the ball forms. Using your hands, press the mixture into a 9-inch pie pan, making sure to even out the center of the crust with a flat-bottom glass. With your hands, crimp the edges, then trim the excess off.

FILLING:

Step 3: Into eights or quarters, cut the peeled apples. Place them in a large bowl and sprinkle the apple pieces with lemon juice. In the center of the pie crust, place the bigger apple pieces. To the edges, place the smaller pieces.

Step 4: Place the sugar, flour, cinnamon, and salt in a small bowl. Mix well. Over the apples, sprinkle 3/4 of the dry ingredients.

Step 5: On top of the apples, slowly pour half a cup of whipping cream. Ensure the apple pieces gets some of the creams.

Step 6: On top, sprinkle the remaining cinnamon sugar.

Step 7: Place in the preheated oven and bake for about 10 minutes. Then, adjust the oven temperature to 350 degrees F and continue baking for an additional 45 to 60 minutes or until the apples are fork tender.

Step 8: Remove from the oven when done. Before serving, chill the pie in the fridge for 2 hours. If desired, serve the pie with ice cream or whipped cream. Enjoy!

August 16, 2022 0 comment
0 FacebookTwitterPinterestEmail
Newer Posts
Older Posts

Popular Posts

  • 1

    Crispy Crunchy Parmesan Potatoes

    March 21, 2020
  • 2

    CROCK POT SMOTHERED PORK CHOPS

    March 21, 2020
  • Facebook
  • Twitter

@2019 - All Right Reserved.


Back To Top