Cook it once
  • Home
  • Privacy Policy
  • Recipes
    • KETO
    • LC
    • WW
  • Tips
  • Contact
Cook it once
  • Home
  • Privacy Policy
  • Recipes
    • KETO
    • LC
    • WW
  • Tips
  • Contact
Category:

General Recipes

General Recipes

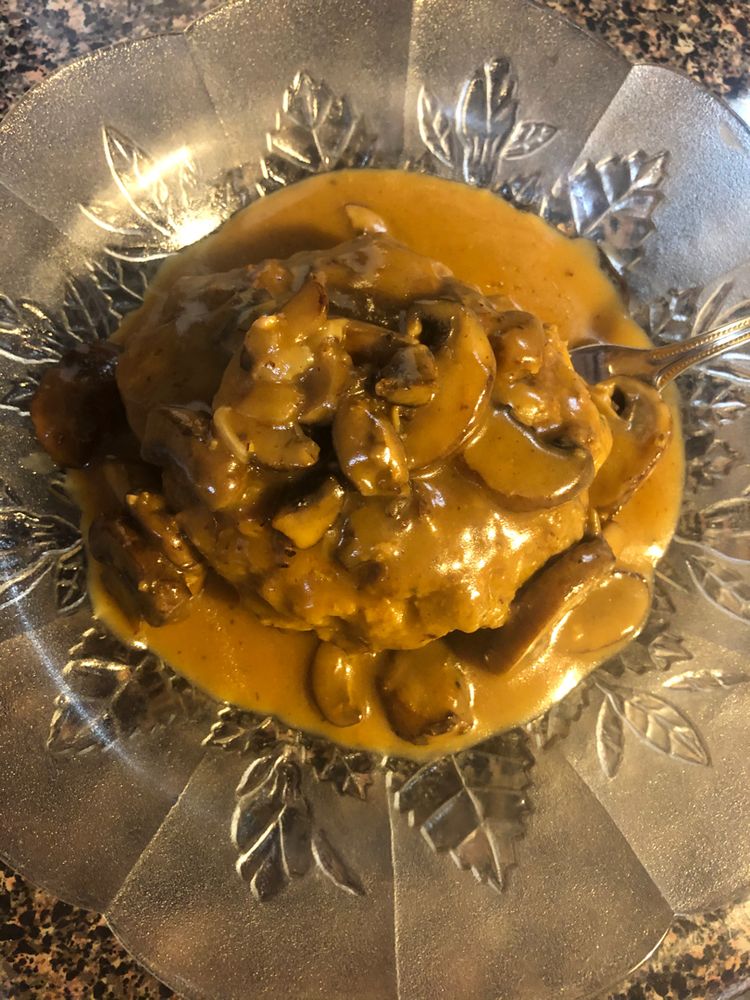
BEST SALISBURY STEAK RECIPE WITH MUSHROOM-ONION GRAVY

by Rebecca August 23, 2022
written by Rebecca

Prep time: 15 mins | Cook time: 30 mins | Total time: 45 mins | Yield: 4 SERVINGS

I am a big fan of classic dishes. One of my ultimate favorites is this hearty Salisbury Steak with Mushroom Onion Gravy. Easy to make and very versatile. It is a great weeknight meal idea perfect for entertaining.

INGREDIENTS

STEAK:

1 large egg

1 lb (454 grams) ground beef

1/4 c. (30 grams) breadcrumbs

1 tsp (5 ml) onion powder

2 tsp (10 ml) Worcestershire sauce

1/2 tsp (2.5 ml) mustard powder

1/2 tsp (2.5 ml) garlic salt

1 tbsp (15 ml) cooking oil, for searing beef patties

1/4 tsp (1.25 ml) kosher salt

lots of fresh ground black pepper, to taste

MUSHROOM GRAVY:

1 medium onion, sliced

8 oz. (227 grams) mushrooms, sliced

black pepper, to taste

3 tbsp (30 grams) butter

1/4-1/2 c. (30-60 grams) flour, depending on how thick you like your gravy

2 cloves garlic, minced or crushed

3 c. (720 ml) broth (beef, chicken, or vegetable)

kosher salt, to taste

HOW TO MAKE THE BEST SALISBURY STEAK RECIPE WITH MUSHROOM-ONION GRAVY

Step 1: Place the beef, bread crumbs, egg, Worcestershire sauce, onion powder, garlic salt, mustard powder, salt, and black pepper in a large bowl. Mix until just combined and form the mixture into 4 oval patties.

Step 2: Heat the oil in a large pan over medium-high heat. Once the oil is hot, add the patties to the pan and cook for about 1 minute on each side until browned. Set aside when done.

Step 3: Add the mushrooms and onion to the same pan over medium-high heat and cook for about 10 minutes until the excess mushroom liquid has evaporated. Then, add the butter and garlic and continue to cook for another minute. Whisk in the flour, stirring constantly until the lumps are gone. Pour in about 1/2–1 cup of beef stock, stirring until blended.

Step 4: Adjust the heat to high and gradually pour in the rest of the broth, whisking until well blended. To taste, season with salt and pepper.

Step 5: Adjust the heat to low once the gravy begins to boil. Simmer for about 5 to 10 minutes until the gravy begins to thicken, stirring often. Return the Salisbury steak patties to the pan and continue to cook for an additional 5 to 10 minutes until the patties are done, making sure to occasionally stir the gravy around the steaks. If needed, adjust the salt and pepper.

Step 6: Serve the steaks over rice, pasta, or mashed potatoes and top with the mushroom sauce. Enjoy!

Nutrition Facts:

calories: 480 kcal, carbohydrates: 19g, protein: 25g, fat: 33g, saturated fat: 13g, cholesterol: 142mg, sodium: 1373mg, potassium: 581mg, fiber: 1g, sugar: 4g, vitamin a: 620IU, vitamin c: 4mg, calcium: 52mg, iron: 3.6mg

BEST SALISBURY STEAK RECIPE WITH MUSHROOM-ONION GRAVY

Rebecca Prep time: 15 mins | Cook time: 30 mins | Total time: 45 mins | Yield: 4 SERVINGS I am a big fan of classic dishes. One of my ultimate… General Recipes BEST SALISBURY STEAK RECIPE WITH MUSHROOM-ONION GRAVY European Print This
Serves: 4 Prep Time: 15 mins Cooking Time: 30 mins 30 mins
Nutrition facts: 480 calories 33 fat
Rating: 5.0/5
( 1 voted )

Ingredients

  • STEAK:
  • 1 large egg
  • 1 lb (454 grams) ground beef
  • 1/4 c. (30 grams) breadcrumbs
  • 1 tsp (5 ml) onion powder
  • 2 tsp (10 ml) Worcestershire sauce
  • 1/2 tsp (2.5 ml) mustard powder
  • 1/2 tsp (2.5 ml) garlic salt
  • 1 tbsp (15 ml) cooking oil, for searing beef patties
  • 1/4 tsp (1.25 ml) kosher salt
  • lots of fresh ground black pepper, to taste
  • MUSHROOM GRAVY:
  • 1 medium onion, sliced
  • 8 oz. (227 grams) mushrooms, sliced
  • black pepper, to taste
  • 3 tbsp (30 grams) butter
  • 1/4-1/2 c. (30-60 grams) flour, depending on how thick you like your gravy
  • 2 cloves garlic, minced or crushed
  • 3 c. (720 ml) broth (beef, chicken, or vegetable)
  • kosher salt, to taste

Instructions

Step 1: Place the beef, bread crumbs, egg, Worcestershire sauce, onion powder, garlic salt, mustard powder, salt, and black pepper in a large bowl. Mix until just combined and form the mixture into 4 oval patties.

Step 2: Heat the oil in a large pan over medium-high heat. Once the oil is hot, add the patties to the pan and cook for about 1 minute on each side until browned. Set aside when done.

Step 3: Add the mushrooms and onion to the same pan over medium-high heat and cook for about 10 minutes until the excess mushroom liquid has evaporated. Then, add the butter and garlic and continue to cook for another minute. Whisk in the flour, stirring constantly until the lumps are gone. Pour in about 1/2–1 cup of beef stock, stirring until blended.

Step 4: Adjust the heat to high and gradually pour in the rest of the broth, whisking until well blended. To taste, season with salt and pepper.

Step 5: Adjust the heat to low once the gravy begins to boil. Simmer for about 5 to 10 minutes until the gravy begins to thicken, stirring often. Return the Salisbury steak patties to the pan and continue to cook for an additional 5 to 10 minutes until the patties are done, making sure to occasionally stir the gravy around the steaks. If needed, adjust the salt and pepper.

Step 6: Serve the steaks over rice, pasta, or mashed potatoes and top with the mushroom sauce. Enjoy!
August 23, 2022 0 comment
0 FacebookTwitterPinterestEmail
General Recipes

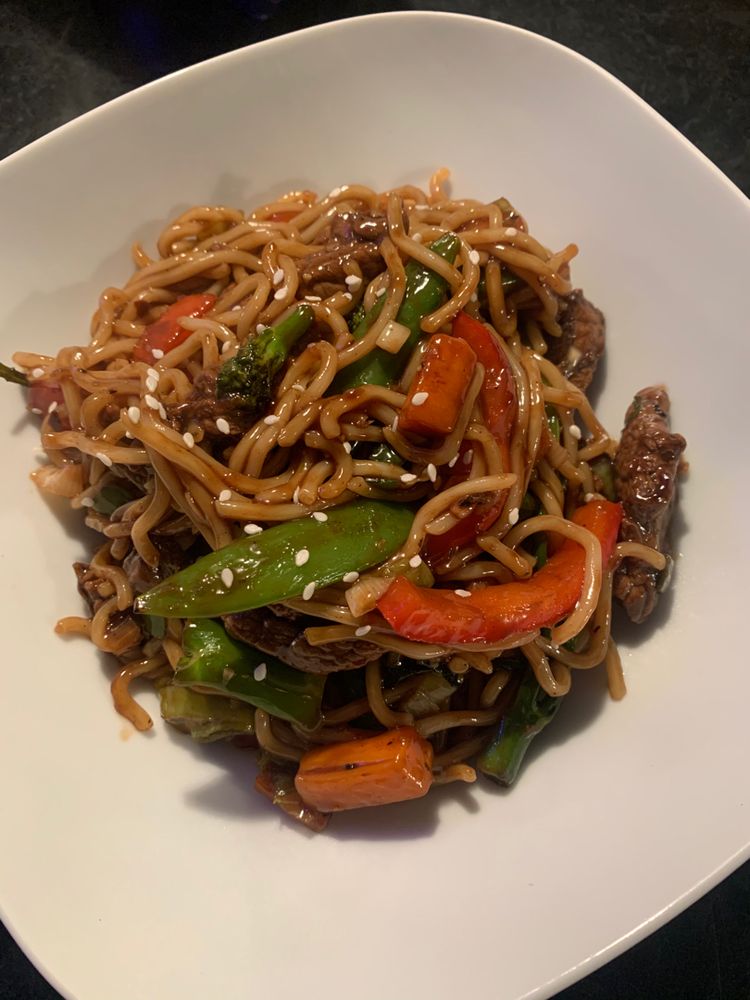
Teriyaki Beef Stir Fry

by Rebecca August 23, 2022
written by Rebecca

PREP TIME: 15 mins | COOK TIME: 15 mins | TOTAL TIME: 30 mins | SERVINGS: 3

Tender beef and veggies in a delicious homemade teriyaki sauce. This Teriyaki Beef Stir Fry is an amazing dish, super healthy, and comes together pretty quickly. The best part is I can easily throw in my favorite vegetables!

Ingredients

Stir Fry:

1 tbsp extra-virgin olive oil divided

1 lb sirloin steak, cut into thin, bite-sized pieces

1 tbsp low-sodium soy sauce

1 red bell pepper, cored and cut into thin slices

1 8-oz. can of sliced water chestnuts, drained

3 medium green onions, finely chopped; divided

3 c. chopped mixed vegetables of choice, such as broccoli, snap peas, or carrots

Prepared brown rice, quinoa, noodles, or cauliflower rice – for serving

1 tbsp sesame seeds, optional

½ tsp ground black pepper

Teriyaki Sauce:

1 tbsp minced garlic

1/3 c. low-sodium soy sauce

3 tbsp pure maple syrup

1 tbsp rice vinegar

1 tbsp minced ginger

¼ c. water

1 tbsp cornstarch

1/4 tsp red pepper flakes plus additional to taste

How to make Teriyaki Beef Stir Fry

Step 1: In a bowl, place the beef and drizzle with 1 tbsp soy sauce and season with black pepper. Toss to coat well and set aside.

Step 2: To make the sauce, whisk the soy sauce, water, maple syrup, rice vinegar, garlic, ginger, red pepper flakes, and cornstarch in a medium mixing bowl or large measuring cup until well combined. Set aside.

Step 3: Heat half tbsp oil in a large, deep saute pan or wok over medium-high heat. Add the beef to the pan/wok once the oil is hot and smoking. Cook the beef on all sides for about 4 minutes until completely cooked. To a plate, transfer the beef and the juices accumulated in the skillet and set aside.

Step 4: In the now-empty pan/wok, heat the rest of the half tbsp oil. Then, add the bell pepper along with the other veggies. Cook for about 4 minutes or until lightly browned and a little soft.

Step 5: To the pan, add the water chestnuts and return the beef and juices once the veggies are ready. Add the sauce and toss to coat. Let everything simmer for about 3 to 4 minutes until the sauce has thickened and the beef is warmed through. Add about half of the green onions. Stir well.

Step 6: Before serving, sprinkle the sesame seeds on top and garnish with the rest of the green onions. Enjoy the Teriyaki Beef Stir Fry warm with extra red pepper flakes/soy sauce if desired.

Notes:

You can keep any leftovers in an airtight storage container and store them in the fridge for up to 3 days.

In a wok, gently reheat the beef and veggies over medium-low heat. Alternately, you can rewarm the stir fry in the microwave.

You can also freeze the beef and vegetables. Place them in an airtight freezer-safe storage container and store them in the freezer for up to 3 months. Before reheating, thaw in the fridge overnight.

Nutrition Facts:

SERVING: 1(of 3); about 1 2/3 c. of stir fry per serving (without rice)
CALORIES: 436 kcal, CARBOHYDRATES: 40g, PROTEIN: 39g, FAT: 14g, SATURATED FAT: 3g, CHOLESTEROL: 92mg, POTASSIUM: 1119mg, FIBER: 6g, SUGAR: 18g, VITAMIN A: 1978IU, VITAMIN C: 136mg, CALCIUM: 151mg, IRON: 5mg

Teriyaki Beef Stir Fry

Rebecca PREP TIME: 15 mins | COOK TIME: 15 mins | TOTAL TIME: 30 mins | SERVINGS: 3 Tender beef and veggies in a delicious homemade teriyaki sauce. This Teriyaki Beef… General Recipes Teriyaki Beef Stir Fry European Print This
Serves: 3 Prep Time: 15 mins Cooking Time: 15 mins 15 mins
Nutrition facts: 436 calories 14 fat
Rating: 5.0/5
( 1 voted )

Ingredients

  • Stir Fry:
  • 1 tbsp extra-virgin olive oil divided
  • 1 lb sirloin steak, cut into thin, bite-sized pieces
  • 1 tbsp low-sodium soy sauce
  • 1 red bell pepper, cored and cut into thin slices
  • 1 8-oz. can of sliced water chestnuts, drained
  • 3 medium green onions, finely chopped; divided
  • 3 c. chopped mixed vegetables of choice, such as broccoli, snap peas, or carrots
  • Prepared brown rice, quinoa, noodles, or cauliflower rice - for serving
  • 1 tbsp sesame seeds, optional
  • ½ tsp ground black pepper
  • Teriyaki Sauce:
  • 1 tbsp minced garlic
  • 1/3 c. low-sodium soy sauce
  • 3 tbsp pure maple syrup
  • 1 tbsp rice vinegar
  • 1 tbsp minced ginger
  • ¼ c. water
  • 1 tbsp cornstarch
  • 1/4 tsp red pepper flakes plus additional to taste

Instructions

Step 1: In a bowl, place the beef and drizzle with 1 tbsp soy sauce and season with black pepper. Toss to coat well and set aside.

Step 2: To make the sauce, whisk the soy sauce, water, maple syrup, rice vinegar, garlic, ginger, red pepper flakes, and cornstarch in a medium mixing bowl or large measuring cup until well combined. Set aside.

Step 3: Heat half tbsp oil in a large, deep saute pan or wok over medium-high heat. Add the beef to the pan/wok once the oil is hot and smoking. Cook the beef on all sides for about 4 minutes until completely cooked. To a plate, transfer the beef and the juices accumulated in the skillet and set aside.

Step 4: In the now-empty pan/wok, heat the rest of the half tbsp oil. Then, add the bell pepper along with the other veggies. Cook for about 4 minutes or until lightly browned and a little soft.

Step 5: To the pan, add the water chestnuts and return the beef and juices once the veggies are ready. Add the sauce and toss to coat. Let everything simmer for about 3 to 4 minutes until the sauce has thickened and the beef is warmed through. Add about half of the green onions. Stir well.

Step 6: Before serving, sprinkle the sesame seeds on top and garnish with the rest of the green onions. Enjoy the Teriyaki Beef Stir Fry warm with extra red pepper flakes/soy sauce if desired.

Notes

You can keep any leftovers in an airtight storage container and store them in the fridge for up to 3 days. In a wok, gently reheat the beef and veggies over medium-low heat. Alternately, you can rewarm the stir fry in the microwave. You can also freeze the beef and vegetables. Place them in an airtight freezer-safe storage container and store them in the freezer for up to 3 months. Before reheating, thaw in the fridge overnight.

August 23, 2022 0 comment
0 FacebookTwitterPinterestEmail
General Recipes

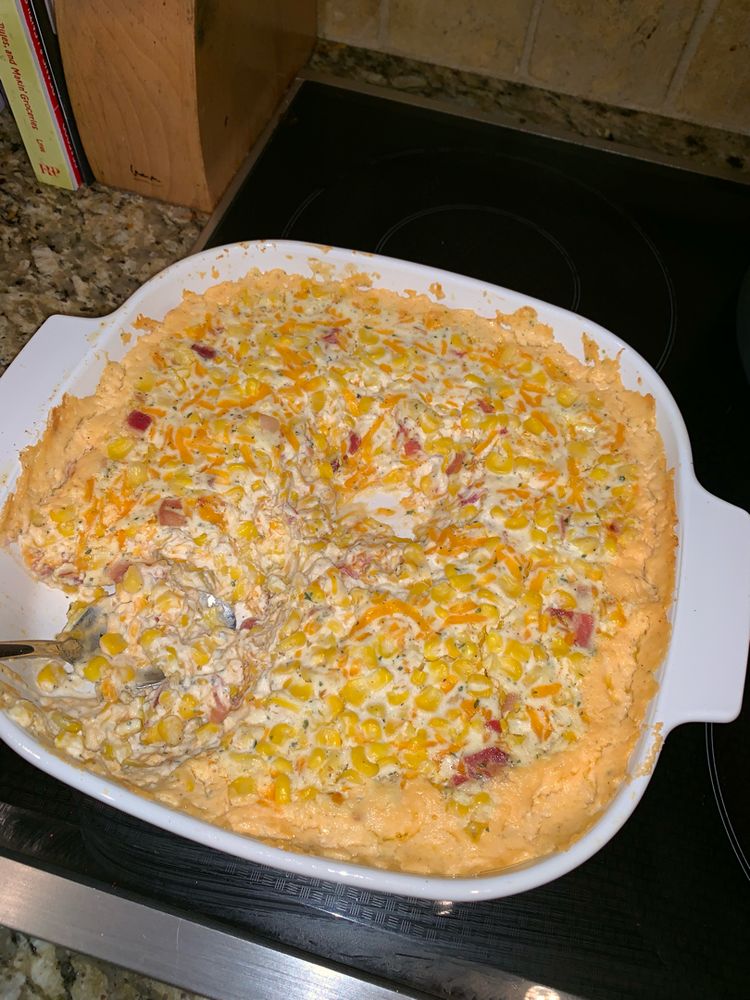
CRACKED OUT CORN DIP

by Rebecca August 23, 2022
written by Rebecca

Prep Time: 5 mins | Cook Time: 25 mins | Total Time: 30 mins | Yield: 10 people

This cracked-out corn dip is one of my ultimate favorite dips. It is made with a combination of corn, cream cheese, sour cream, cheddar, bacon, and Ranch. And this dip is great to pair with Fritos or tortilla chips.

This dip is incredibly easy and quick to make. You can even throw this together in advance. It is crazy good, you’ll want to make a huge batch, especially if serving a crowd as this goes really fast! You can serve this corn dip with Fritos or tortilla chips. And this is great paired with chicken legs, too! If making this dip in advance, simply keep this in the fridge. When ready to serve, just pop it in the oven to bake and serve!

This cracked-out corn dip is a winner! A must-try and for keeps. This dip is everyone’s favorite. A total crowd-pleaser!

Ingredients

3/4 c. cooked chopped bacon

1 (8 ounces) package of cream cheese, softened

2 c. shredded cheddar cheese

3½ c. frozen corn kernels, thawed

1 (16 ounces) container of sour cream

1 (1 ounce) package Original Ranch dressing mix

HOW TO MAKE CRACKED-OUT CORN DIP

Step 1: Prepare the oven. Preheat it to 400 degrees F. Using cooking spray, lightly grease a 2-quart baking dish.

Step 2: Place all the ingredients in a bowl. Mix well until combined. To the prepared baking dish, transfer the mixture and tent with aluminium foil.

Step 3: Place in the preheated oven and bake for about 25 to 30 minutes or until the corn dip is hot and bubbly.

Step 4: Remove from the oven when done and serve. Enjoy!

Notes:

Feel free to prep the dip before baking and just keep it in the fridge overnight. To bake after refrigerating, simply add another 5 to 10 minutes to the baking time.

This corn dip is excellent to serve with Fritos or tortilla chips.

CRACKED OUT CORN DIP

Rebecca Prep Time: 5 mins | Cook Time: 25 mins | Total Time: 30 mins | Yield: 10 people This cracked-out corn dip is one of my ultimate favorite dips. It… General Recipes CRACKED OUT CORN DIP European Print This
Serves: 10 Prep Time: 5 mins Cooking Time: 25 mins 25 mins
Nutrition facts: 200 calories 20 grams fat
Rating: 5.0/5
( 1 voted )

Ingredients

  • 3/4 c. cooked chopped bacon
  • 1 (8 ounces) package of cream cheese, softened
  • 2 c. shredded cheddar cheese
  • 3½ c. frozen corn kernels, thawed
  • 1 (16 ounces) container of sour cream
  • 1 (1 ounce) package Original Ranch dressing mix

Instructions

Step 1: Prepare the oven. Preheat it to 400 degrees F. Using cooking spray, lightly grease a 2-quart baking dish.

Step 2: Place all the ingredients in a bowl. Mix well until combined. To the prepared baking dish, transfer the mixture and tent with aluminium foil.

Step 3: Place in the preheated oven and bake for about 25 to 30 minutes or until the corn dip is hot and bubbly.

Step 4: Remove from the oven when done and serve. Enjoy!

Notes

Feel free to prep the dip before baking and just keep it in the fridge overnight. To bake after refrigerating, simply add another 5 to 10 minutes to the baking time. This corn dip is excellent to serve with Fritos or tortilla chips.

August 23, 2022 0 comment
0 FacebookTwitterPinterestEmail
General Recipes

HONEY MUSTARD SALMON IN FOIL

by Rebecca August 23, 2022
written by Rebecca

Prep time: 7 mins | Cook time: 18 mins | Total time: 25 mins | Yield: 6-8 SERVINGS

This Honey Mustard Salmon in Foil is an amazing dinner option that you can easily bake or cook on the grill. Serve this flavor-packed salmon with some roasted beans or pasta for a restaurant-quality meal that you deserve!

INGREDIENTS

HONEY MUSTARD SALMON IN FOIL:

2 lb side of salmon, boneless and skinless

1 tbsp finely-chopped fresh parsley leaves

1 batch of honey mustard sauce

HONEY MUSTARD SAUCE:

4 cloves garlic, peeled and minced

1/4 c. honey

2 tbsp fresh lemon juice

1/4 tsp Kosher salt

1/3 c. whole grain mustard

1/8 tsp black pepper

1/4 tsp smoked paprika

HOW TO MAKE HONEY MUSTARD SALMON IN FOIL

Step 1: Prepare the oven. Preheat it to 375 degrees F. Or you can heat your grill to medium heat.

Step 2: To make the honey mustard sauce, combine the honey mustard sauce ingredient in a small bowl until well blended.

Step 3: Using a large sheet of aluminium foil, line a large baking sheet and grease the foil with cooking spray. In the center of the foil, lay out the salmon. Over the salmon, spoon the honey mustard sauce and evenly spread it, making sure to cover the entire top of the salmon.

Step 4: Now, start folding the sides of the aluminium foil and over the top of the salmon until it is fully enclosed. If using a not large enough foil, simply lay the second sheet of foil on top and fold the edges to seal the packet.

Step 5: To bake, place in the preheated oven and bake for about 14 to 15 minutes or until the salmon is almost completely cooked. Note that the cooking time varies depending on the thickness of the salmon. Take the salmon out of the oven and pull the aluminium foil back carefully to expose the top of the salmon. Adjust the oven setting to broil, and place the salmon back in the oven. Broil for about 2 to 3 minutes.

Step 6: If cooking on the grill, lay the packet of salmon on the grill and cook for about 12 to 14 minutes or until the salmon is almost fully cooked. Note that the cooking time varies depending on the thickness of the salmon. Pull the aluminium foil back carefully to expose the top of the salmon and continue to cook for additional 3 to 4 minutes or until the salmon is completely cooked.

Step 7: Take the salmon out of the oven and off the grill when done and evenly sprinkle the parsley on top. Serve right away. Enjoy!

NOTE:

You can adjust the amount of mustard to half a cup and/or use a little less honey.

HONEY MUSTARD SALMON IN FOIL

Rebecca Prep time: 7 mins | Cook time: 18 mins | Total time: 25 mins | Yield: 6-8 SERVINGS This Honey Mustard Salmon in Foil is an amazing dinner option that… General Recipes HONEY MUSTARD SALMON IN FOIL European Print This
Serves: 6-8 Prep Time: 7 mins Cooking Time: 18 mins 18 mins
Nutrition facts: 200 calories 20 grams fat
Rating: 5.0/5
( 1 voted )

Ingredients

  • HONEY MUSTARD SALMON IN FOIL:
  • 2 lb side of salmon, boneless and skinless
  • 1 tbsp finely-chopped fresh parsley leaves
  • 1 batch of honey mustard sauce
  • HONEY MUSTARD SAUCE:
  • 4 cloves garlic, peeled and minced
  • 1/4 c. honey
  • 2 tbsp fresh lemon juice
  • 1/4 tsp Kosher salt
  • 1/3 c. whole grain mustard
  • 1/8 tsp black pepper
  • 1/4 tsp smoked paprika

Instructions

Step 1: Prepare the oven. Preheat it to 375 degrees F. Or you can heat your grill to medium heat.

Step 2: To make the honey mustard sauce, combine the honey mustard sauce ingredient in a small bowl until well blended.

Step 3: Using a large sheet of aluminium foil, line a large baking sheet and grease the foil with cooking spray. In the center of the foil, lay out the salmon. Over the salmon, spoon the honey mustard sauce and evenly spread it, making sure to cover the entire top of the salmon.

Step 4: Now, start folding the sides of the aluminium foil and over the top of the salmon until it is fully enclosed. If using a not large enough foil, simply lay the second sheet of foil on top and fold the edges to seal the packet.

Step 5: To bake, place in the preheated oven and bake for about 14 to 15 minutes or until the salmon is almost completely cooked. Note that the cooking time varies depending on the thickness of the salmon. Take the salmon out of the oven and pull the aluminium foil back carefully to expose the top of the salmon. Adjust the oven setting to broil, and place the salmon back in the oven. Broil for about 2 to 3 minutes.

Step 6: If cooking on the grill, lay the packet of salmon on the grill and cook for about 12 to 14 minutes or until the salmon is almost fully cooked. Note that the cooking time varies depending on the thickness of the salmon. Pull the aluminium foil back carefully to expose the top of the salmon and continue to cook for additional 3 to 4 minutes or until the salmon is completely cooked.

Step 7: Take the salmon out of the oven and off the grill when done and evenly sprinkle the parsley on top. Serve right away. Enjoy!

Notes

You can adjust the amount of mustard to half a cup and/or use a little less honey.

August 23, 2022 0 comment
0 FacebookTwitterPinterestEmail
General Recipes

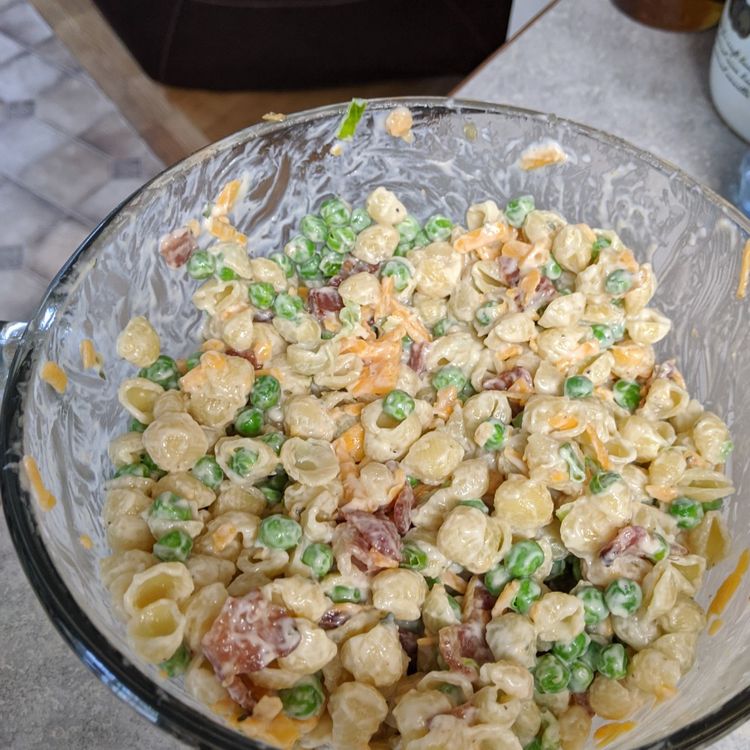
Pea Pasta Salad

by Rebecca August 23, 2022
written by Rebecca

Prep Time: 20 mins | Total Time: 4 hrs 20 mins | Servings: 8

Two of the classics in one. Peas and pasta coated in mayo, tangy spices of the ranch, and bursting with bacon and cheese flavor. This Pea Pasta Salad is an easy, flavor-packed, and fun side that you can easily make at any time. Excellent for potlucks, BBQ, and the best spring and summer dish! Leftovers are amazing, too! Plus, you can throw this salad together in advance. Chill this salad for a few hours or preferably overnight and serve this cold.

Ingredients

2 green onions, sliced

2 c. frozen peas, frozen or refrigerator thawed, but they began as frozen

8 ounces mini pasta shells, cooked and cooled

1 c. real mayonnaise

2 tbsp ranch seasoning

1/2 c. shredded cheddar cheese

6 strips of bacon – cooked and chopped into small pieces

How to make Pea Pasta Salad

Step 1: Start by cooking and chopping 6 strips of crispy bacon. You can also use pre-cooked bacon or bacon bits to save time.

Step 2: Following the package directions cook the mini pasta shells. Drain when done and rinse with cold water.

Step 3: Add the mayonnaise and ranch seasoning to a large mixing bowl. Add the shredded cheddar cheese along with the sliced green onions, crispy bacon, cooled pasta, and frozen peas. Stir the dressing over the pasta and peas using a spatula until well combined and the pasta shells and peas are well coated.

Step 4: Place the salad in the fridge to chill for at least 2 to 4 hours or preferably overnight before serving.

Step 5: Before serving, top the salad with extra shredded cheddar cheese and bacon. Enjoy!

Notes:

For this recipe, you can use frozen peas. Before using, defrost in the fridge. Make sure to pour out any excess water before adding the peas to the salad.

To save time, you can use pre-cooked bacon or bacon bits instead of bacon. Although, I prefer fresh ingredients for the best results.

Nutrition Facts:

Serving: 1 Serving, Calories: 341 kcal, Carbohydrates: 17g, Protein: 9g, Fat: 26g, Saturated Fat: 6g, Polyunsaturated Fat: 20g, Cholesterol: 27mg, Sodium: 605mg, Fiber: 3g, Sugar: 3g

Pea Pasta Salad

Rebecca Prep Time: 20 mins | Total Time: 4 hrs 20 mins | Servings: 8 Two of the classics in one. Peas and pasta coated in mayo, tangy spices of the… General Recipes Pea Pasta Salad European Print This
Serves: 8 Prep Time: 20 mins
Nutrition facts: 341 calories 26 fat
Rating: 5.0/5
( 1 voted )

Ingredients

  • 2 green onions, sliced
  • 2 c. frozen peas, frozen or refrigerator thawed, but they began as frozen
  • 8 ounces mini pasta shells, cooked and cooled
  • 1 c. real mayonnaise
  • 2 tbsp ranch seasoning
  • 1/2 c. shredded cheddar cheese
  • 6 strips of bacon - cooked and chopped into small pieces

Instructions

Step 1: Start by cooking and chopping 6 strips of crispy bacon. You can also use pre-cooked bacon or bacon bits to save time.

Step 2: Following the package directions cook the mini pasta shells. Drain when done and rinse with cold water.

Step 3: Add the mayonnaise and ranch seasoning to a large mixing bowl. Add the shredded cheddar cheese along with the sliced green onions, crispy bacon, cooled pasta, and frozen peas. Stir the dressing over the pasta and peas using a spatula until well combined and the pasta shells and peas are well coated.

Step 4: Place the salad in the fridge to chill for at least 2 to 4 hours or preferably overnight before serving.

Step 5: Before serving, top the salad with extra shredded cheddar cheese and bacon. Enjoy!

Notes

For this recipe, you can use frozen peas. Before using, defrost in the fridge. Make sure to pour out any excess water before adding the peas to the salad. To save time, you can use pre-cooked bacon or bacon bits instead of bacon. Although, I prefer fresh ingredients for the best results.

August 23, 2022 0 comment
0 FacebookTwitterPinterestEmail
General Recipes

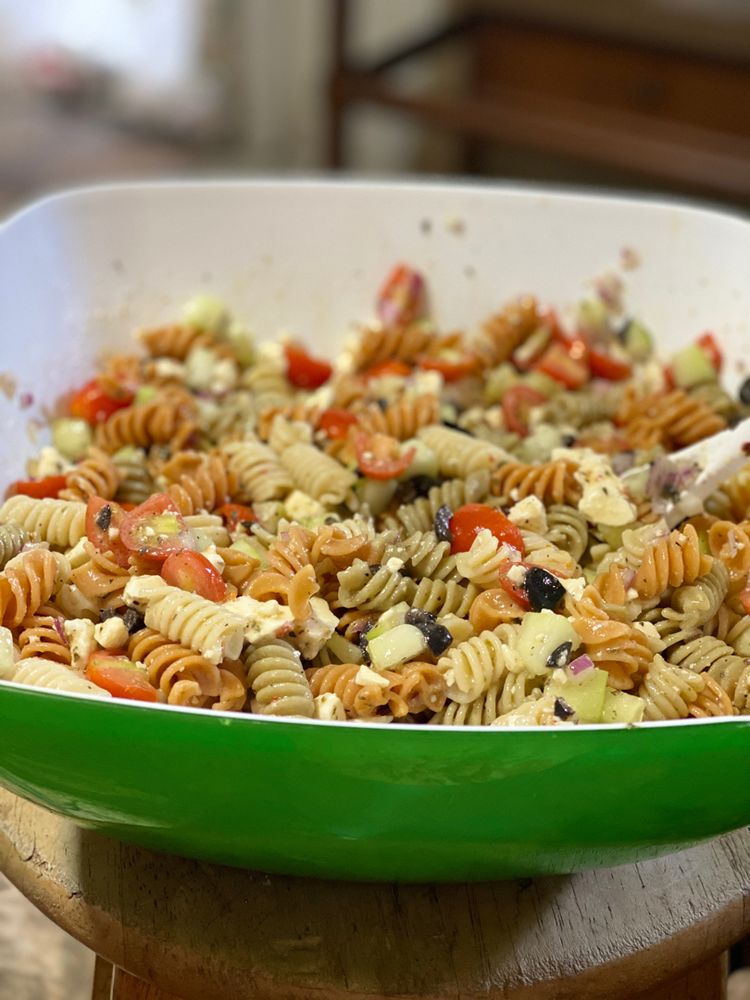
EASY ITALIAN PASTA SALAD

by Rebecca August 23, 2022
written by Rebecca

PREP TIME: 15 mins | TOTAL TIME: 15 mins | SERVINGS: 10

This Italian Pasta Salad is impressively quick to make. Delicious, refreshing, and pretty versatile. Enjoy a bowl of this loaded salad with spiral rotini pasta, cucumber, tomatoes, red onion, black olives, and feta cheese enveloped in your favorite Italian dressing.

INGREDIENTS

1 c. chopped cucumber (peeled and seeded, about 1 cucumber)

1 box (12 ounces) tricolor rotini pasta

1 c. crumbled feta cheese

1 c. halved cherry or grape tomatoes

½ – 1 c. Italian salad dressing

¼ c. finely diced red onion

1 can (2.25 ounces) sliced black olives drained

HOW TO MAKE EASY ITALIAN PASTA SALAD

Step 1: Following the package directions, cook the pasta in a large pot with salted boiling water. Drain the pasta when done and run over cold water.

Step 2: Place the cooked and cooled pasta, cucumber, tomatoes, feta cheese, olives, and red onion in a large mixing bowl. Mix well and add the Italian dressing. Toss well. I suggest starting with a half cup of Italian dressing and adjusting accordingly. Keep the rest of the dressing aside.

Step 3: You can serve the salad immediately or chill it in the fridge first for about 2 to 4 hours. Enjoy!

NOTES:

Feel free to add more pasta if desired. You can even add extra tomato or olive. You can even try using red onion. I love extra feta cheese, so add more if you do, too!

For this recipe, you can use your favorite Italian dressing. I love Olive Garden Italian dressing. Use more dressing or less if desired.

Leftovers can be stored in a covered container and kept in the fridge for 3 to 4 days. If making ahead, make sure to stir the salad and add more dressing before serving to slightly moisten it.

You can add cucumbers to this salad. I use mini cucumbers because they have hardly any seeds. I peel them halfway, slice them in half lengthwise, and cut them into small chunks.

NUTRITION FACTS:

Calories: 313 kcal, Carbohydrates: 39g, Protein: 9g, Fat: 14g, Saturated Fat: 4g, Cholesterol: 13mg, Sodium: 953mg, Potassium: 223mg, Fiber: 3g, Sugar: 5g, Vitamin A: 369IU, Vitamin C: 3mg, Calcium: 112mg, Iron: 1mg

EASY ITALIAN PASTA SALAD

Rebecca PREP TIME: 15 mins | TOTAL TIME: 15 mins | SERVINGS: 10 This Italian Pasta Salad is impressively quick to make. Delicious, refreshing, and pretty versatile. Enjoy a bowl of… General Recipes EASY ITALIAN PASTA SALAD European Print This
Serves: 10 Prep Time: 15 mins
Nutrition facts: 313 calories 14 fat
Rating: 5.0/5
( 1 voted )

Ingredients

  • 1 c. chopped cucumber (peeled and seeded, about 1 cucumber)
  • 1 box (12 ounces) tricolor rotini pasta
  • 1 c. crumbled feta cheese
  • 1 c. halved cherry or grape tomatoes
  • ½ - 1 c. Italian salad dressing
  • ¼ c. finely diced red onion
  • 1 can (2.25 ounces) sliced black olives drained

Instructions

Step 1: Following the package directions, cook the pasta in a large pot with salted boiling water. Drain the pasta when done and run over cold water.

Step 2: Place the cooked and cooled pasta, cucumber, tomatoes, feta cheese, olives, and red onion in a large mixing bowl. Mix well and add the Italian dressing. Toss well. I suggest starting with a half cup of Italian dressing and adjusting accordingly. Keep the rest of the dressing aside.

Step 3: You can serve the salad immediately or chill it in the fridge first for about 2 to 4 hours. Enjoy!

Notes

Feel free to add more pasta if desired. You can even add extra tomato or olive. You can even try using red onion. I love extra feta cheese, so add more if you do, too! For this recipe, you can use your favorite Italian dressing. I love Olive Garden Italian dressing. Use more dressing or less if desired. Leftovers can be stored in a covered container and kept in the fridge for 3 to 4 days. If making ahead, make sure to stir the salad and add more dressing before serving to slightly moisten it. You can add cucumbers to this salad. I use mini cucumbers because they have hardly any seeds. I peel them halfway, slice them in half lengthwise, and cut them into small chunks.

August 23, 2022 0 comment
0 FacebookTwitterPinterestEmail
General Recipes

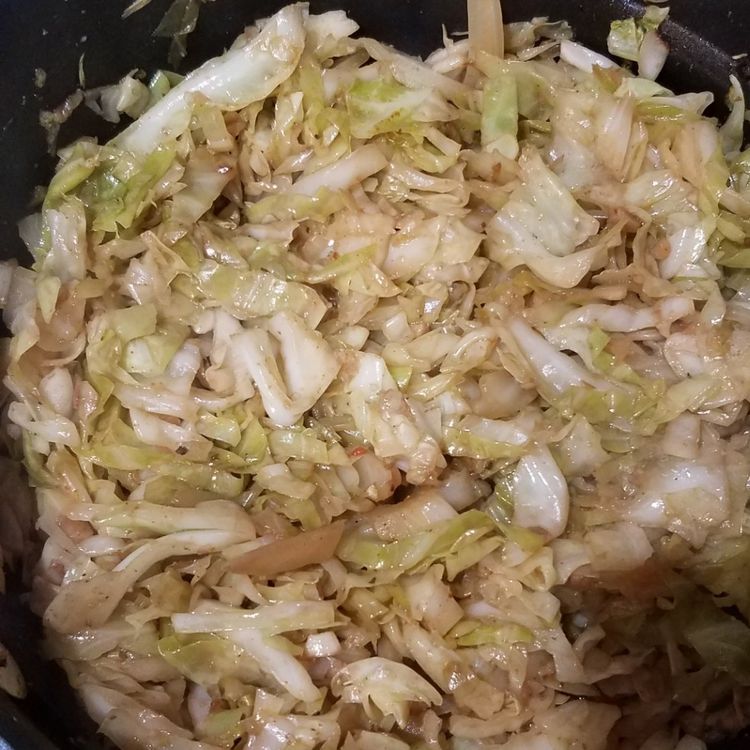
Lemon Garlic Sauteed Cabbage

by Rebecca August 23, 2022
written by Rebecca

PREP TIME: 5 mins | COOK TIME: 15 mins | TOTAL TIME: 20 mins | SERVINGS: 4

I love this lemon garlic-sauteed cabbage. It’s one of my favorite sides. It is delicious, healthy, incredibly easy, and quick to make. Most people thought that cabbage is a bland and boring side, but for me, it is not. Once you try this lemon garlic-sauteed cabbage, all that will change.

For this recipe, I like to use white cabbage. Although, other cabbage varieties work great, too. If using Napa cabbage, note that it will release more moisture and they won’t brown nicely in the pan.

To make this recipe, all you need are a few simple ingredients. Please do not skip the minced garlic as it adds a layer of flavor to this dish and the lemon instantly brights up this dish. If lemon is not available, you can simply swap it with apple cider vinegar.

Ingredients

1 1/2 tbsp extra-virgin olive oil

1 tbsp garlic, minced

2 lbs white cabbage, core removed and shredded (10 c.)

Pinch crushed red pepper flakes

Half of a lemon, cut into wedges

1/2 tsp fine sea salt or more to taste

How to make Lemon Garlic Sauteed Cabbage

Step 1: In a large skillet or Dutch oven, heat the olive oil over medium-high heat. Once the oil is hot, add the cabbage to the skillet along with the garlic, red pepper flakes, and salt. Cook for about 10 to 15 minutes, stirring often, until the cabbage is tender and some of them are light brown.

Step 2: Over the cabbage, squeeze the juice from 2 lemon wedges. If needed, season with extra salt, pepper, and lemon juice.

TIPS:

First, quarter the cabbage through the core. Then, cut the core out. In half, cut each quarter crosswise and finely shred. Rinse the shredded cabbage, then spin or pat them very dry.

I suggest adding onions to this recipe. They go so well with cabbage. Just add the onions to the pan at the same time as the cabbage.

NUTRITION FACTS:

Serving Size 1/4 of the recipe: Calories 105, Total Fat 5.6g, Saturated Fat 0.8g, Cholesterol 0mg, Sodium 338.5mg, Carbohydrate 14.3g, Dietary Fiber 3.9g, Total Sugars 6.9g, Protein 2.7g

Lemon Garlic Sauteed Cabbage

Rebecca PREP TIME: 5 mins | COOK TIME: 15 mins | TOTAL TIME: 20 mins | SERVINGS: 4 I love this lemon garlic-sauteed cabbage. It’s one of my favorite sides. It… General Recipes Lemon Garlic Sauteed Cabbage European Print This
Serves: 4 Prep Time: 5 mins Cooking Time: 15 mins 15 mins
Nutrition facts: 105 calories 5.6 fat
Rating: 5.0/5
( 1 voted )

Ingredients

  • 1 1/2 tbsp extra-virgin olive oil
  • 1 tbsp garlic, minced
  • 2 lbs white cabbage, core removed and shredded (10 c.)
  • Pinch crushed red pepper flakes
  • Half of a lemon, cut into wedges
  • 1/2 tsp fine sea salt or more to taste

Instructions

Step 1: In a large skillet or Dutch oven, heat the olive oil over medium-high heat. Once the oil is hot, add the cabbage to the skillet along with the garlic, red pepper flakes, and salt. Cook for about 10 to 15 minutes, stirring often, until the cabbage is tender and some of them are light brown.

Step 2: Over the cabbage, squeeze the juice from 2 lemon wedges. If needed, season with extra salt, pepper, and lemon juice.

Notes

First, quarter the cabbage through the core. Then, cut the core out. In half, cut each quarter crosswise and finely shred. Rinse the shredded cabbage, then spin or pat them very dry. I suggest adding onions to this recipe. They go so well with cabbage. Just add the onions to the pan at the same time as the cabbage.

August 23, 2022 0 comment
0 FacebookTwitterPinterestEmail
General Recipes

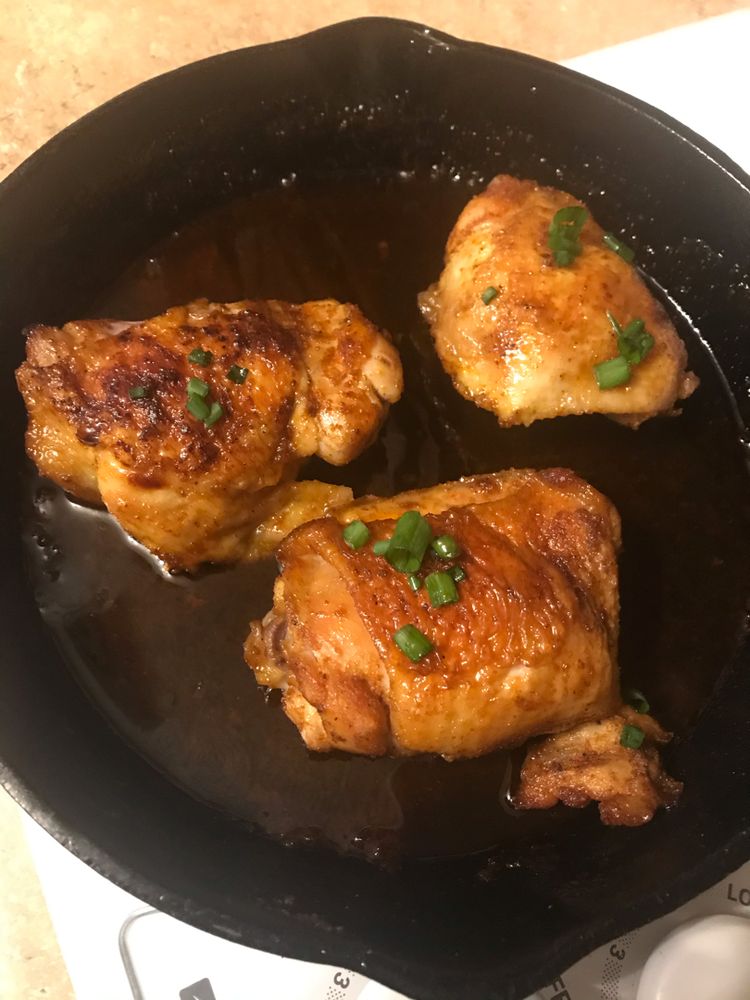
Spicy, Sweet and Sticky Chicken Thighs

by Rebecca August 23, 2022
written by Rebecca

Prep Time: 5 mins | Cook Time: 35 mins | Total Time: 40 mins | Servings: 4

This is another amazing chicken dish that you can easily make in a single skillet. Delicious, sticky, tender chicken thighs coated in a simple homemade spice rub and glazed with an outstanding sweet honey sauce. These Spicy, Sweet, and Sticky Chicken Thighs have been part of our favorite rotation for years! It is an awesome, easy, and quick dish that is loaded with flavor. The perfect saucy, sticky, and sweet treat that your fussiest eaters will no doubt love! The best part of this recipe is the spicy spice rub and honey sauce. You can easily control the heat when making the spice rub. And the honey sauce is made with just honey and apple cider vinegar.

INGREDIENTS

SPICE RUB:

2 tsp garlic powder

2 tsp, or to taste, chili powder

1 tsp ground cumin

1/8 tsp ground black pepper

1/2 tsp salt

1 tsp or to taste, paprika

HONEY SAUCE:

1 tbsp apple cider vinegar

1/3 c. honey

CHICKEN:

6 to 8 boneless, skinless chicken thighs

green onions, for garnish

1 tbsp unrefined, cold pressed coconut oil

How to make Spicy, Sweet, and Sticky Chicken Thighs

Step 1: Prepare the oven. Preheat it to 375 degrees F.

Step 2: In a cast-iron skillet, melt the coconut oil over medium-high heat.

Step 3: Mix the spice rub ingredients until completely blended. Coat the chicken with the prepared rub, rubbing every piece.

Step 4: To the skillet, add the chicken and cook on each side for about 5 minutes until browned.

Step 5: In a mixing bowl, place the honey and apple cider vinegar. Mix well until combined to make the honey sauce.

Step 6: Take the pan off the heat and pour the honey sauce over the chicken thighs. Toss to coat.

Step 7: Place in the preheated oven and bake the chicken thighs for about 25 to 30 minutes or until completely cooked. When done, remove the chicken thighs from the oven and allow them to stand for a few minutes.

Step 8: To a plate, transfer the spicy, sweet, and sticky chicken thighs. Serve garnished with some green onions. Enjoy!

NUTRITION FACTS:

Serving: 2 thighs | Calories: 252 kcal | Carbohydrates: 23 g | Protein: 27.7 g | Fat: 5.7 g | Saturated Fat: 1.4 g | Cholesterol: 114.5 mg | Sodium: 280 mg | Fiber: 0.8 g | Sugar: 21.4 g | Net Carbs: 22 g

Spicy, Sweet and Sticky Chicken Thighs

Rebecca Prep Time: 5 mins | Cook Time: 35 mins | Total Time: 40 mins | Servings: 4 This is another amazing chicken dish that you can easily make in a… General Recipes Spicy, Sweet and Sticky Chicken Thighs European Print This
Serves: 4 Prep Time: 5 mins Cooking Time: 35 mins 35 mins
Nutrition facts: 252 calories 5.7 fat
Rating: 5.0/5
( 1 voted )

Ingredients

  • SPICE RUB:
  • 2 tsp garlic powder
  • 2 tsp, or to taste, chili powder
  • 1 tsp ground cumin
  • 1/8 tsp ground black pepper
  • 1/2 tsp salt
  • 1 tsp or to taste, paprika
  • HONEY SAUCE:
  • 1 tbsp apple cider vinegar
  • 1/3 c. honey
  • CHICKEN:
  • 6 to 8 boneless, skinless chicken thighs
  • green onions, for garnish
  • 1 tbsp unrefined, cold pressed coconut oil

Instructions

Step 1: Prepare the oven. Preheat it to 375 degrees F.

Step 2: In a cast-iron skillet, melt the coconut oil over medium-high heat.

Step 3: Mix the spice rub ingredients until completely blended. Coat the chicken with the prepared rub, rubbing every piece.

Step 4: To the skillet, add the chicken and cook on each side for about 5 minutes until browned.

Step 5: In a mixing bowl, place the honey and apple cider vinegar. Mix well until combined to make the honey sauce.

Step 6: Take the pan off the heat and pour the honey sauce over the chicken thighs. Toss to coat.

Step 7: Place in the preheated oven and bake the chicken thighs for about 25 to 30 minutes or until completely cooked. When done, remove the chicken thighs from the oven and allow them to stand for a few minutes.

Step 8: To a plate, transfer the spicy, sweet, and sticky chicken thighs. Serve garnished with some green onions. Enjoy!

August 23, 2022 0 comment
0 FacebookTwitterPinterestEmail
General Recipes

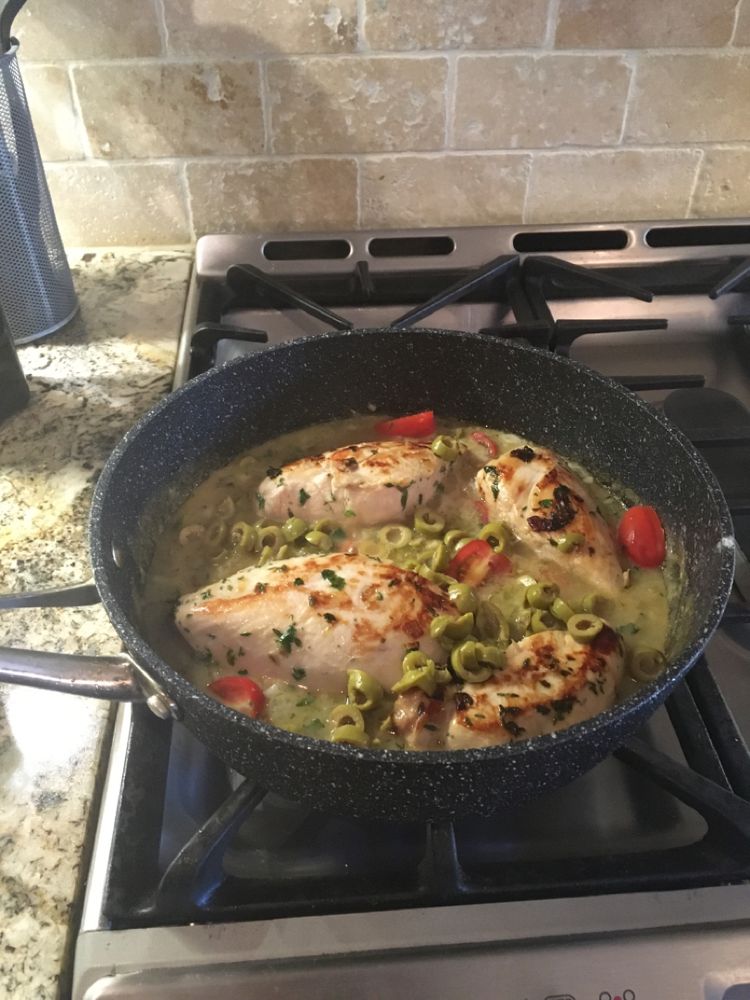
Chicken Provencal

by Rebecca August 23, 2022
written by Rebecca

Prep Time: 15 mins | Cook Time: 25 mins | Marinading time: 2 hrs | Total Time: 40 mins | Servings: 4

This Chicken Provencal is a quick and easy delicious chicken dish that will bring France right to your home. Lush chicken smothered in a scrumptious, aromatic, and delicate sauce. Pair this up with rice, bread, or mashed potatoes for a simple yet filling meal that your entire family will love!

Ingredients

4 skinless, boneless chicken breasts

2 shallots, chopped

1 tablespoon fresh rosemary, chopped

1 teaspoon fennel seeds

1 tablespoon fresh flat-leaf parsley chopped

4 tablespoons olive oil

1 tablespoon fresh thyme, leaves only

½ c/125 ml chicken stock

1 tablespoon flour

1 c/250 ml white wine

6-8 cherry tomatoes, halved

Salt

Parsley for garnish

8 large green olives, pitted

How to make Chicken Provencal

Step 1: Place the chopped shallots, chopped herbs, fennel seeds, wine, and half the olive oil, add chicken breasts in a large bowl. Mix well and place in the fridge to marinate for 2 to 3 hours.

Step 2: After marinating, remove the chicken breasts from the marinade and brush the herbs and shallots off. Season the chicken breasts with salt and set them aside. Set the marinade aside.

Step 3: Prepare the oven. Preheat it to 200 degrees C or 400 degrees F.

Step 4: Cook the chicken breasts in a large pan with 2 tbsp olive oil for about 2 to 3 minutes over medium heat until all sides are golden but not completely cooked. To a plate, transfer the chicken breasts.

Step 5: To the pan, add the flour. Stir it with the oil that is left in the pan. Pour in half of the reserved marinade. Using a spatula, scrape the bottom of the pan. Cook for about 2 minutes over high until the sauce has thickened. Then, adjust the heat to medium.

Step 6: To the pan, add the remaining marinade. Stir and pour in the chicken stock. Add the chicken breasts along with 1/2 of the cherry tomatoes and olives. Bring everything to a boil and transfer the pan into the preheated oven.

Step 7: Bake for about 25 minutes, uncovered until the sauce has reduced by a third and thickened.

Step 8: Remove from the oven when done and serve right away garnished with some chopped fresh parsley. Enjoy with rice or mashed potatoes on the side.

Nutrition Facts:

Calories: 349 kcal | Carbohydrates: 8g | Protein: 26g | Fat: 19g | Saturated Fat: 3g | Polyunsaturated Fat: 2g | Monounsaturated Fat: 12g | Trans Fat: 1g | Cholesterol: 73mg | Sodium: 307mg | Potassium: 623mg | Fiber: 1g | Sugar: 3g | Vitamin A: 374IU | Vitamin C: 13mg | Calcium: 40mg | Iron: 2mg

Chicken Provencal

Rebecca Prep Time: 15 mins | Cook Time: 25 mins | Marinading time: 2 hrs | Total Time: 40 mins | Servings: 4 This Chicken Provencal is a quick and easy… General Recipes Chicken Provencal European Print This
Serves: 4 Prep Time: 15 mins Cooking Time: 25 mins 25 mins
Nutrition facts: 349 calories 19 fat
Rating: 5.0/5
( 1 voted )

Ingredients

  • 4 skinless, boneless chicken breasts
  • 2 shallots, chopped
  • 1 tablespoon fresh rosemary, chopped
  • 1 teaspoon fennel seeds
  • 1 tablespoon fresh flat-leaf parsley chopped
  • 4 tablespoons olive oil
  • 1 tablespoon fresh thyme, leaves only
  • ½ c/125 ml chicken stock
  • 1 tablespoon flour
  • 1 c/250 ml white wine
  • 6-8 cherry tomatoes, halved
  • Salt
  • Parsley for garnish
  • 8 large green olives, pitted

Instructions

Step 1: Place the chopped shallots, chopped herbs, fennel seeds, wine, and half the olive oil, add chicken breasts in a large bowl. Mix well and place in the fridge to marinate for 2 to 3 hours.

Step 2: After marinating, remove the chicken breasts from the marinade and brush the herbs and shallots off. Season the chicken breasts with salt and set them aside. Set the marinade aside.

Step 3: Prepare the oven. Preheat it to 200 degrees C or 400 degrees F.

Step 4: Cook the chicken breasts in a large pan with 2 tbsp olive oil for about 2 to 3 minutes over medium heat until all sides are golden but not completely cooked. To a plate, transfer the chicken breasts.

Step 5: To the pan, add the flour. Stir it with the oil that is left in the pan. Pour in half of the reserved marinade. Using a spatula, scrape the bottom of the pan. Cook for about 2 minutes over high until the sauce has thickened. Then, adjust the heat to medium.

Step 6: To the pan, add the remaining marinade. Stir and pour in the chicken stock. Add the chicken breasts along with 1/2 of the cherry tomatoes and olives. Bring everything to a boil and transfer the pan into the preheated oven.

Step 7: Bake for about 25 minutes, uncovered until the sauce has reduced by a third and thickened.

Step 8: Remove from the oven when done and serve right away garnished with some chopped fresh parsley. Enjoy with rice or mashed potatoes on the side.

August 23, 2022 0 comment
0 FacebookTwitterPinterestEmail
General Recipes

Smoked Sausage and Black-Eyed Peas

by Rebecca August 23, 2022
written by Rebecca

Serves: 4–6

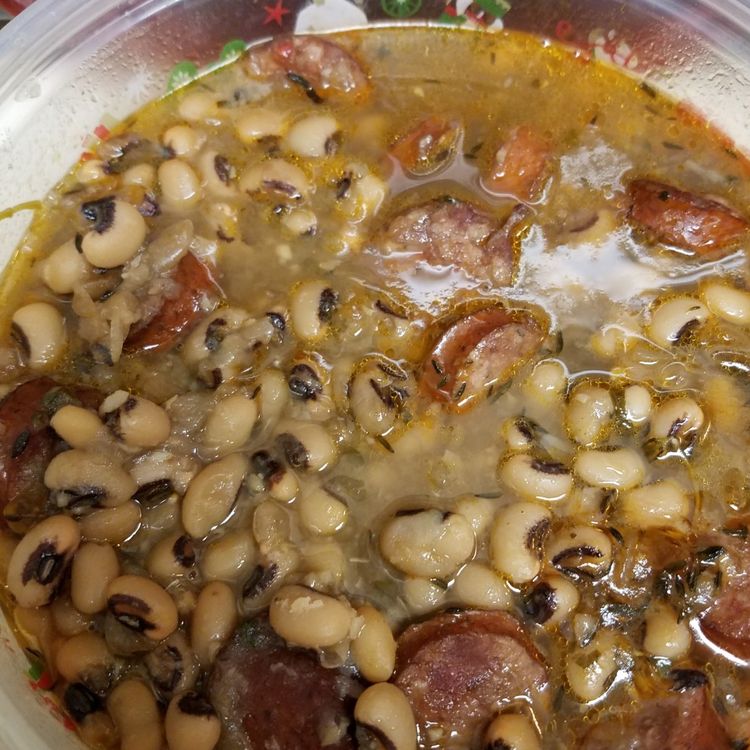
I have been wanting to try this smoked sausage and black-eyed peas recipe for months now. Finally, I got a chance to try it and it was amazing! This is by far the best black-eyed peas recipe I have ever made! From now on, this will be a regular part of our rotation.

My husband is obsessed with this smoked sausage and black-eyed peas. All I heard were great compliments. I made this the first time a few days ago. I love how I can easily make this dish using just a few simple ingredients that you might already have on hand. It took about 2 hours to make it, but it was all worth it! Cooking time is long, but prepping it is a no-fuss. You just let everything simmer and before serving, garnish this dish with some green onions if desired. We ate this with some corn muffins and my fussy eaters loved it!

Ingredients

4 whole cloves of garlic, peeled

12–16 oz. smoked sausage

4 bay leaves

1 c. chopped yellow onion

8 c. chicken stock

¼ tsp cayenne

5 sprigs of fresh thyme

3 tbsp finely chopped Italian parsley

1 lb dried black-eyed peas, rinsed and drained

½ tsp salt

Minced green onions, to garnish (optional)

1 tbsp minced garlic

How to make Smoked Sausage and Black-Eyed Peas

Step 1: Start by slicing the sausage. In a large pot, place the sliced sausage and cook over medium heat to render some of the fat.

Step 2: To the pot with the sausage, add the onions, salt, cayenne, whole garlic cloves, bay leaves, thyme, and parsley. Continue to cook for another 5 minutes, stirring often, until the onions start to soften.

Step 3: Pour in the chicken stock and add the black-eyed peas and minced garlic.

Step 4: Bring everything to a boil, then simmer for about 1 ½ hour, covered until the peas are tender.

Step 5: If desired, garnish with some green onions. Serve the Smoked Sausage and Black-Eyed Peas immediately. Enjoy!

Smoked Sausage and Black-Eyed Peas

Rebecca Serves: 4–6 I have been wanting to try this smoked sausage and black-eyed peas recipe for months now. Finally, I got a chance to try it and it was amazing!… General Recipes Smoked Sausage and Black-Eyed Peas European Print This
Serves: 4-6
Nutrition facts: 200 calories 20 grams fat
Rating: 5.0/5
( 1 voted )

Ingredients

  • 4 whole cloves of garlic, peeled
  • 12–16 oz. smoked sausage
  • 4 bay leaves
  • 1 c. chopped yellow onion
  • 8 c. chicken stock
  • ¼ tsp cayenne
  • 5 sprigs of fresh thyme
  • 3 tbsp finely chopped Italian parsley
  • 1 lb dried black-eyed peas, rinsed and drained
  • ½ tsp salt
  • Minced green onions, to garnish (optional)
  • 1 tbsp minced garlic

Instructions

Step 1: Start by slicing the sausage. In a large pot, place the sliced sausage and cook over medium heat to render some of the fat.

Step 2: To the pot with the sausage, add the onions, salt, cayenne, whole garlic cloves, bay leaves, thyme, and parsley. Continue to cook for another 5 minutes, stirring often, until the onions start to soften.

Step 3: Pour in the chicken stock and add the black-eyed peas and minced garlic.

Step 4: Bring everything to a boil, then simmer for about 1 ½ hour, covered until the peas are tender.

Step 5: If desired, garnish with some green onions. Serve the Smoked Sausage and Black-Eyed Peas immediately. Enjoy!

August 23, 2022 0 comment
0 FacebookTwitterPinterestEmail
Newer Posts
Older Posts

Popular Posts

  • 1

    Crispy Crunchy Parmesan Potatoes

    March 21, 2020
  • 2

    CROCK POT SMOTHERED PORK CHOPS

    March 21, 2020
  • Facebook
  • Twitter

@2019 - All Right Reserved.


Back To Top