Cook it once
  • Home
  • Privacy Policy
  • Recipes
    • KETO
    • LC
    • WW
  • Tips
  • Contact
Cook it once
  • Home
  • Privacy Policy
  • Recipes
    • KETO
    • LC
    • WW
  • Tips
  • Contact
Category:

General Recipes

General Recipes

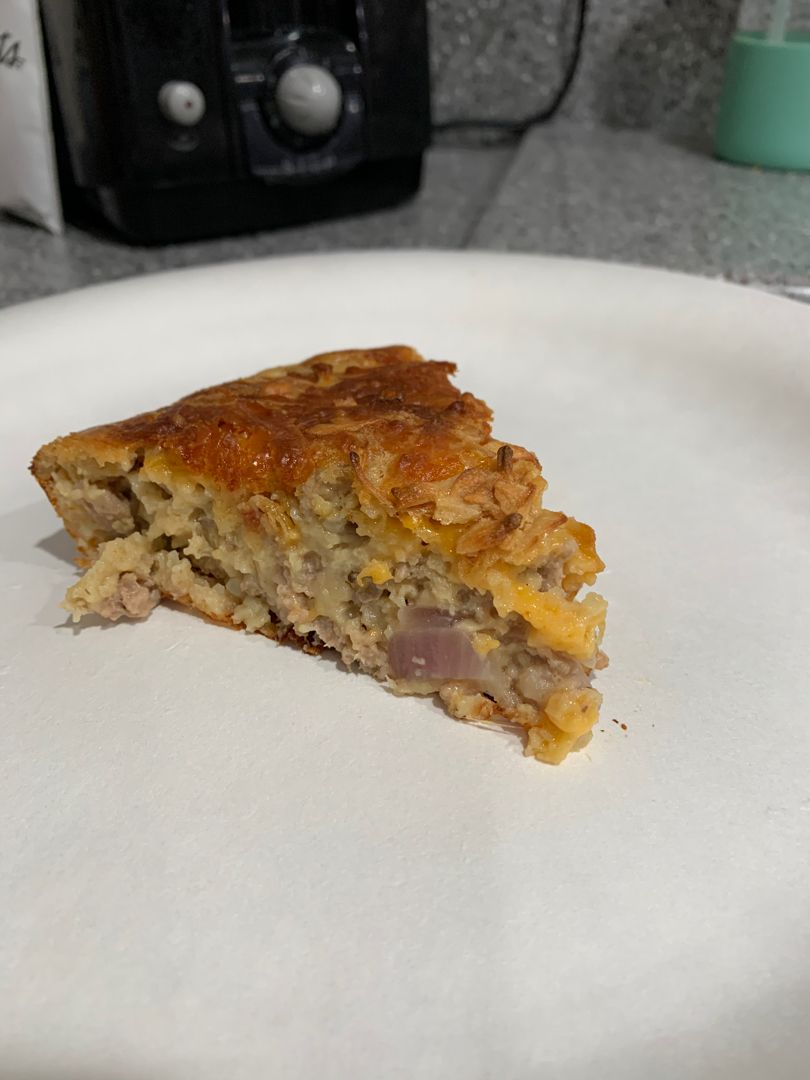
IMPOSSIBLE CHEESEBURGER PIE RECIPE

by Rebecca August 31, 2022
written by Rebecca

This Impossible Cheeseburger Pie is my childhood favorite. Super easy to make using just simple ingredients. Very comforting and takes a breeze to throw together.

Ingredients

3 large eggs

2 pounds of ground beef

3/4 c. baking mix (Bisquick or similar baking mix)

1 c. finely chopped onion

1 package dry onion soup mix

1 1/2 c. finely shredded cheese of your choice

1 1/2 c. milk

3/4 c. water

Sliced American Cheese – optional

1/2 teaspoon salt

1/4 teaspoon pepper

HOW TO MAKE IMPOSSIBLE CHEESEBURGER PIE

Step 1: Ready two pie plates. Lightly grease and set aside. Prepare the oven and preheat it to 400 degrees F.

Step 2: Place the ground beef and onions in a skillet. Cook until the meat has browned. Drain the excess grease when done.

Step 3: To the skillet with the ground beef and onion, add the onion soup mix along with the 3/4 c. water. Allow the mixture to simmer until the liquid is gone.

Step 4: Add the eggs to a mixing bowl and whisk gently. Season with salt and pepper. Then, add the milk and Bisquick mix. Beat well until the batter is evenly combined.

Step 5: In the bottom of the prepared pie plate, layer 1/4 of the meat mixture. Top with 1/4 shredded cheese followed by another layer of the meat mixture and shredded cheese. On top, evenly pour half of the Bisquick mixture.

Step 6: If desired, top with a couple of slices of American cheese.

Step 7: Place in the preheated oven and bake for about 25 to 30 minutes or until the top is golden.

Notes:

For thicker pie, make this in a 9 x 9-inch baking pan or a 9 x 13-inch pan for thinner pieces.

You can swap ground beef with ground turkey or ground chicken if desired.

For some add-in ideas, add corn (or Mexican corn), diced mixed vegetables, green peppers, garlic, ¼ cup ketchup (and 2 Tbsp. yellow mustard if desired) after browning the meat and mushrooms.

If you love extra cheese, do not skip the American cheese! This also gives the dish a more cheeseburger delight.

For the garnish, you can use sliced dill pickles, sliced tomato, chopped lettuce, sauteed mushrooms, etc.
IMPOSSIBLE CHEESEBURGER PIE RECIPE

Rebecca This Impossible Cheeseburger Pie is my childhood favorite. Super easy to make using just simple ingredients. Very comforting and takes a breeze to throw together. Ingredients 3 large eggs 2… General Recipes IMPOSSIBLE CHEESEBURGER PIE RECIPE European Print This
Nutrition facts: 200 calories 20 grams fat
Rating: 5.0/5
( 1 voted )

Ingredients

  • 3 large eggs
  • 2 pounds of ground beef
  • 3/4 c. baking mix (Bisquick or similar baking mix)
  • 1 c. finely chopped onion
  • 1 package dry onion soup mix
  • 1 1/2 c. finely shredded cheese of your choice
  • 1 1/2 c. milk
  • 3/4 c. water
  • Sliced American Cheese – optional
  • 1/2 teaspoon salt
  • 1/4 teaspoon pepper

Instructions

Step 1: Ready two pie plates. Lightly grease and set aside. Prepare the oven and preheat it to 400 degrees F.

Step 2: Place the ground beef and onions in a skillet. Cook until the meat has browned. Drain the excess grease when done.

Step 3: To the skillet with the ground beef and onion, add the onion soup mix along with the 3/4 c. water. Allow the mixture to simmer until the liquid is gone.

Step 4: Add the eggs to a mixing bowl and whisk gently. Season with salt and pepper. Then, add the milk and Bisquick mix. Beat well until the batter is evenly combined.

Step 5: In the bottom of the prepared pie plate, layer 1/4 of the meat mixture. Top with 1/4 shredded cheese followed by another layer of the meat mixture and shredded cheese. On top, evenly pour half of the Bisquick mixture.

Step 6: If desired, top with a couple of slices of American cheese.

Step 7: Place in the preheated oven and bake for about 25 to 30 minutes or until the top is golden.
August 31, 2022 0 comment
0 FacebookTwitterPinterestEmail
General Recipes

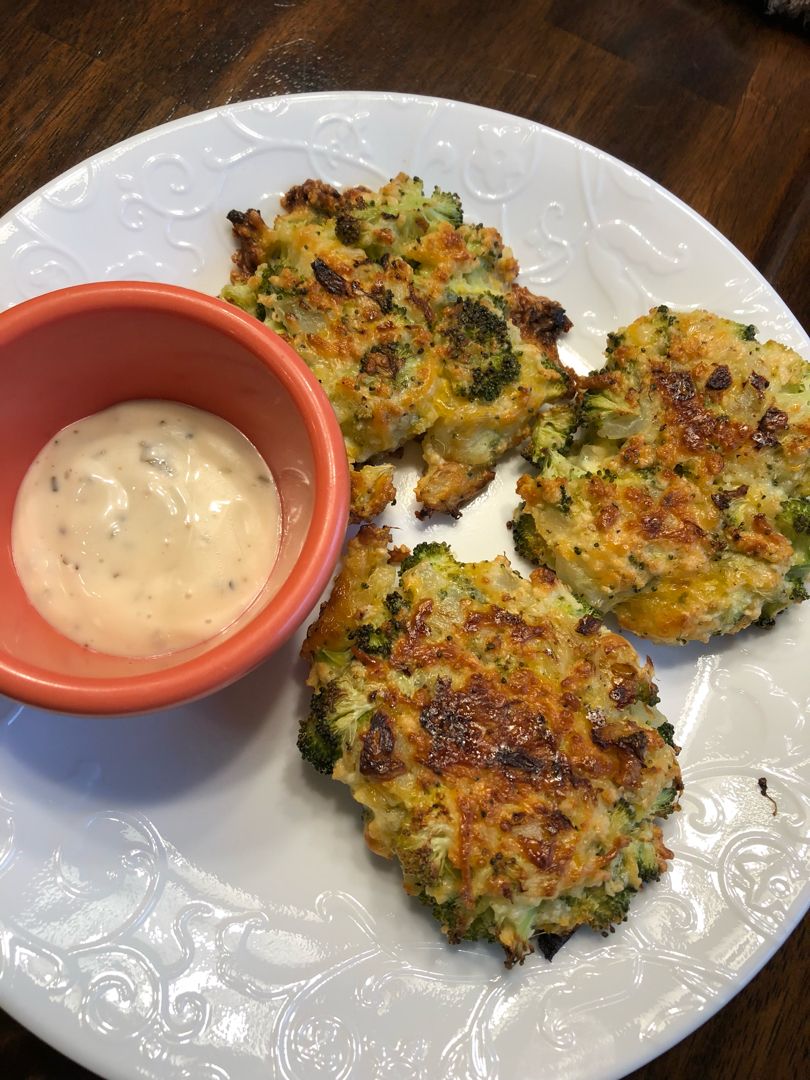
BAKED CHEESE BROCCOLI PATTIES

by Rebecca August 31, 2022
written by Rebecca

Cook time: 30 mins | Total time: 40 mins | Serving: 6

I have the fussiest eaters, but they love these veggie-filled patties! Delicious, healthy veggie patties stuffed with so much cheese that you can easily and quickly make. If you are searching for a healthy side dish option that your entire family will enjoy, then these baked cheese broccoli patties are a must-try!

Ingredients

2 cloves garlic, minced

½ onion, finely chopped

16 oz. broccoli, fresh

¾ c. bread crumbs

2 eggs, lightly beaten

1/3 c. Parmesan cheese, grated

Salt

½ c. Cheddar cheese, shredded

Pepper

1 ½ tbsp avocado oil

HOW TO MAKE BAKED CHEESE BROCCOLI PATTIES

Step 1: In a small skillet, heat the oil. Then, add the onion and garlic. Cook for about 7 minutes or until tender. Remove the onion and garlic from the skillet when done and set aside.

Step 2: Blanch the fresh broccoli for approximately 2 minutes. Into small pieces, chop the broccoli and place into a large bowl.

Step 3: To the bowl with the chopped broccoli, add the breadcrumbs, lightly beaten eggs, Parmesan cheese, Cheddar cheese, onion, and garlic. To taste, season with salt and pepper. Mix well.

Step 4: Prepare the oven. Preheat it to 400 degrees F. Using parchment paper, line a baking sheet. Into patties, shape the mixture. Using plastic wrap, cover the lid and fill it with the mixture, lightly pressing it. Flip the patty out and do the same with the remaining mixture.

Step 5: To the prepared baking sheet, transfer the patties. Place in the preheated oven and bake for about 15 minutes. Flip the patties and continue baking for 10 minutes more.

Step 6: Serve the baked cheese broccoli patties right away. Enjoy!

Tips:

To shape the perfect patties, I recommend using a lid.

To help remove the patty easily, cover the lid with plastic wrap.

To make the eggs firmer, add an extra egg. Do this if you notice that the egg easily falls apart.

BAKED CHEESE BROCCOLI PATTIES

Rebecca Cook time: 30 mins | Total time: 40 mins | Serving: 6 I have the fussiest eaters, but they love these veggie-filled patties! Delicious, healthy veggie patties stuffed with so… General Recipes BAKED CHEESE BROCCOLI PATTIES European Print This
Serves: 6 Cooking Time: 30 mins 30 mins
Nutrition facts: 200 calories 20 grams fat
Rating: 5.0/5
( 1 voted )

Ingredients

  • 2 cloves garlic, minced
  • ½ onion, finely chopped
  • 16 oz. broccoli, fresh
  • ¾ c. bread crumbs
  • 2 eggs, lightly beaten
  • 1/3 c. Parmesan cheese, grated
  • Salt
  • ½ c. Cheddar cheese, shredded
  • Pepper
  • 1 ½ tbsp avocado oil

Instructions

Step 1: In a small skillet, heat the oil. Then, add the onion and garlic. Cook for about 7 minutes or until tender. Remove the onion and garlic from the skillet when done and set aside.

Step 2: Blanch the fresh broccoli for approximately 2 minutes. Into small pieces, chop the broccoli and place into a large bowl.

Step 3: To the bowl with the chopped broccoli, add the breadcrumbs, lightly beaten eggs, Parmesan cheese, Cheddar cheese, onion, and garlic. To taste, season with salt and pepper. Mix well.

Step 4: Prepare the oven. Preheat it to 400 degrees F. Using parchment paper, line a baking sheet. Into patties, shape the mixture. Using plastic wrap, cover the lid and fill it with the mixture, lightly pressing it. Flip the patty out and do the same with the remaining mixture.

Step 5: To the prepared baking sheet, transfer the patties. Place in the preheated oven and bake for about 15 minutes. Flip the patties and continue baking for 10 minutes more.

Step 6: Serve the baked cheese broccoli patties right away. Enjoy!

Notes

To shape the perfect patties, I recommend using a lid. To help remove the patty easily, cover the lid with plastic wrap. To make the eggs firmer, add an extra egg. Do this if you notice that the egg easily falls apart.

August 31, 2022 0 comment
0 FacebookTwitterPinterestEmail
General Recipes

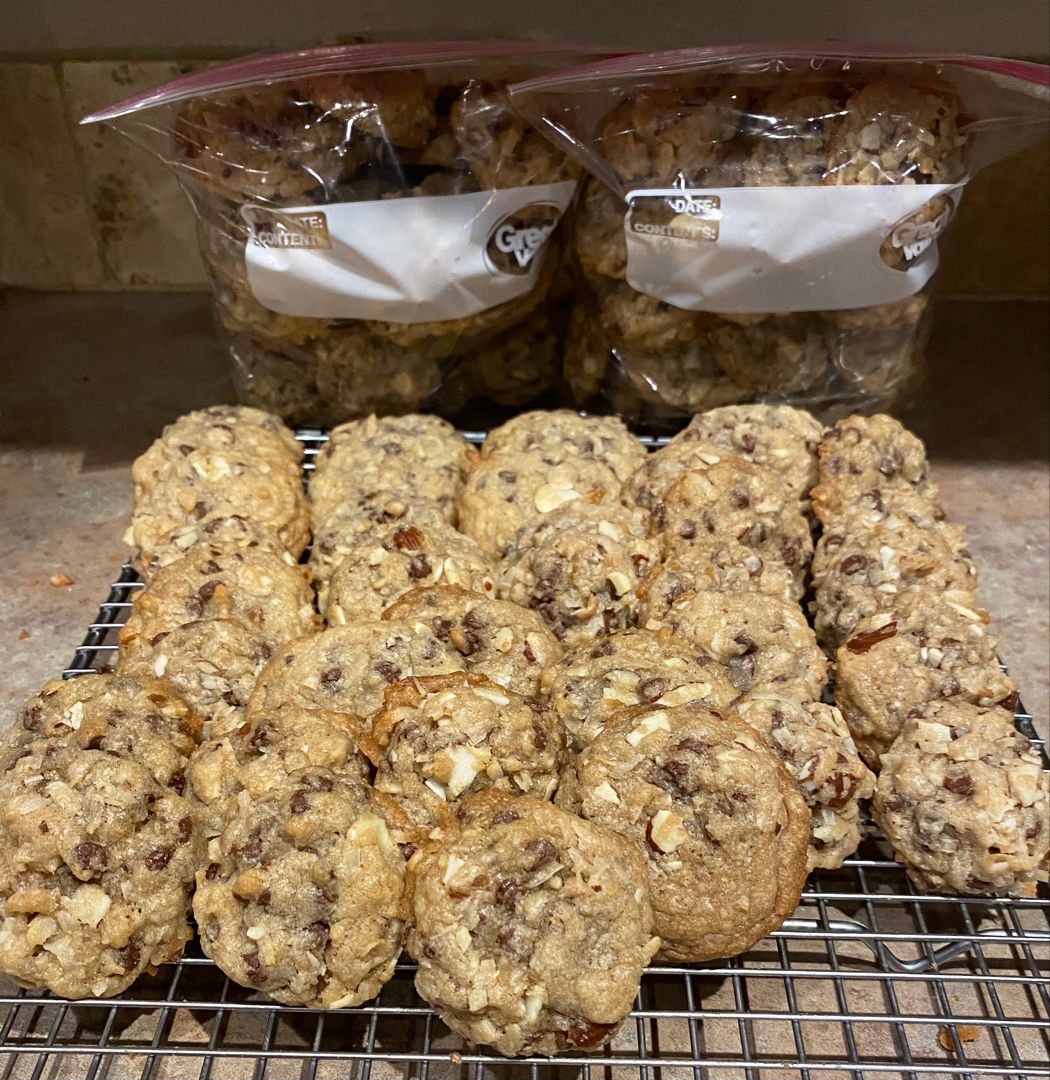
SMALL BATCH ALMOND JOY COOKIES

by Rebecca August 30, 2022
written by Rebecca

I am a big fan of these delicious Almond Joy Cookies! The combination of flavors and the texture caught my heart right away! I always whip up a huge batch of these enjoyable cookies and freeze the other half for later.

Ingredients

½ c butter, softened (1 stick)

1 ⅛ c. all-purpose flour (1 c. plus two tablespoons)

¼ teaspoon Salt

⅓ c. brown sugar

⅓ c. sugar

1 teaspoon vanilla extract

1 c. sweetened coconut flakes (or use shredded coconut)

1 ½ c. semi-sweet chocolate chips

½ teaspoon baking soda

¾ c. sliced almonds

1 egg

HOW TO MAKE SMALL BATCH ALMOND JOY COOKIES

Step 1: Prepare the oven. Preheat it to 350 degrees F.

Step 2: Place the flour, baking soda, and salt in a small bowl. Mix well until combined and set aside.

Step 3: Cream the butter and sugars with a mixer. Then, add the vanilla along with the egg. Mix well until just blended.

Step 4: Gradually add the dry mixture into the cream mixture, mixing well. Then, fold in the chocolate chips, coconut flakes, and sliced almonds.

Step 5: Onto cookie sheets covered with parchment, drop about 1 1/2 tbsp of dough. You can use a spoon or cookie scoop. Place in the preheated oven and bake for about 9 to 12 minutes.

Step 6: Remove from the oven when done and let the cookies cool for about 10 minutes before inverting them to cookie cooling racks.

Notes:

To prevent the cookies from sticking, use parchment paper or silicone baking mats. Alternatively, you can grease the baking sheet.

Doing a test bake is recommended. In case the cookies spread too fast, I suggest keeping the dough in the fridge for 1 to 2 hours. If the dough does not spread enough, press each scoop of dough gently using the palm of your hand and test again.

Keep the cookies in an airtight container.

To freeze the cookies, place them in an airtight container, layering a sheet of wax paper or parchment paper in between the cookies.

I love to press some M&M’s into the top of the cookies. You can also use almonds.

SMALL BATCH ALMOND JOY COOKIES

Rebecca I am a big fan of these delicious Almond Joy Cookies! The combination of flavors and the texture caught my heart right away! I always whip up a huge batch… General Recipes SMALL BATCH ALMOND JOY COOKIES European Print This
Nutrition facts: 200 calories 20 grams fat
Rating: 5.0/5
( 1 voted )

Ingredients

  • ½ c butter, softened (1 stick)
  • 1 ⅛ c. all-purpose flour (1 c. plus two tablespoons)
  • ¼ teaspoon Salt
  • ⅓ c. brown sugar
  • ⅓ c. sugar
  • 1 teaspoon vanilla extract
  • 1 c. sweetened coconut flakes (or use shredded coconut)
  • 1 ½ c. semi-sweet chocolate chips
  • ½ teaspoon baking soda
  • ¾ c. sliced almonds
  • 1 egg

Instructions

Step 1: Prepare the oven. Preheat it to 350 degrees F.

Step 2: Place the flour, baking soda, and salt in a small bowl. Mix well until combined and set aside.

Step 3: Cream the butter and sugars with a mixer. Then, add the vanilla along with the egg. Mix well until just blended.

Step 4: Gradually add the dry mixture into the cream mixture, mixing well. Then, fold in the chocolate chips, coconut flakes, and sliced almonds.

Step 5: Onto cookie sheets covered with parchment, drop about 1 1/2 tbsp of dough. You can use a spoon or cookie scoop. Place in the preheated oven and bake for about 9 to 12 minutes.

Step 6: Remove from the oven when done and let the cookies cool for about 10 minutes before inverting them to cookie cooling racks.

Notes

To prevent the cookies from sticking, use parchment paper or silicone baking mats. Alternatively, you can grease the baking sheet. Doing a test bake is recommended. In case the cookies spread too fast, I suggest keeping the dough in the fridge for 1 to 2 hours. If the dough does not spread enough, press each scoop of dough gently using the palm of your hand and test again. Keep the cookies in an airtight container. To freeze the cookies, place them in an airtight container, layering a sheet of wax paper or parchment paper in between the cookies. I love to press some M&M’s into the top of the cookies. You can also use almonds.

August 30, 2022 0 comment
0 FacebookTwitterPinterestEmail
General Recipes

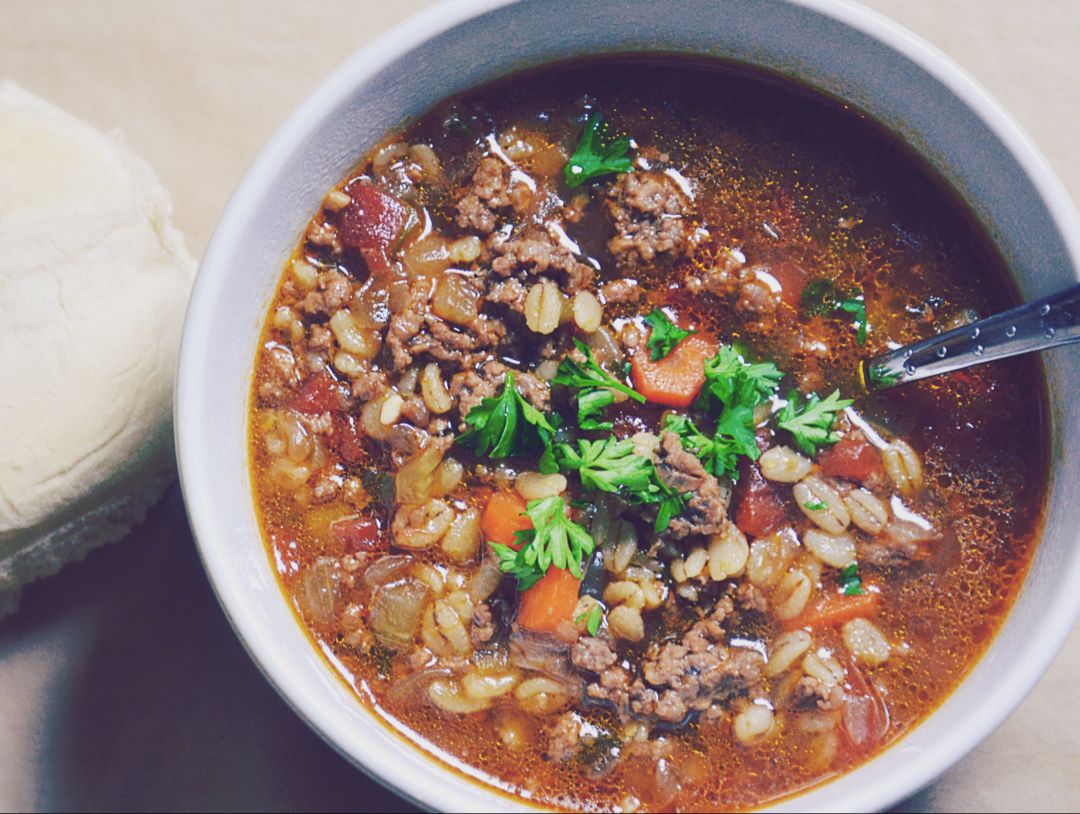
Best Ever Beef And Barley Soup

by Rebecca August 30, 2022
written by Rebecca

This hearty Beef and Barley Soup is an amazing soup that you can make easily at home. Delicious, filling, and great to serve with a crusty baguette, buttered biscuits, or dinner rolls. Perfect for the chilly season or if you are feeling under the weather.

Ingredients

2 c. cooked flank steak or chuck steak – cut into 1” pieces

1 garlic clove, minced

1 tablespoon olive oil

1 onion, chopped

2 carrots, sliced

1 can petite diced tomatoes 14-15 ounces, undrained

1 stalk celery, sliced

6 c. reduced-sodium beef broth

1/2 green pepper, diced

1 tablespoon Worcestershire sauce

1 package beef gravy mix

2/3 c. pearl barley

1 bay leaf

2 tablespoons fresh parsley or 2 teaspoons dried

salt & pepper to taste

1/4 teaspoon dried thyme

2 tablespoons red wine (optional, but makes the broth exceptional)

How to make Beef And Barley Soup

Step 1: Heat the olive in a stock pot over medium-high heat. Once the oil is hot, add the steak to the pot and cook until all sides are browned. Then, add the onions along with the garlic and continue to cook until tender.

Step 2: To the pot, add the rest of the ingredients and bring everything to a boil. Decrease the heat, put the lid on, and simmer for about 40 to 50 minutes until the barley is cooked.

Step 3: When done, discard the bay leaf. Serve the soup hot. Enjoy!

Notes:

You can add extra broth if the soup has thickened too much until you reach your preferred consistency.

If using ground beef instead of steak, make sure to drain the grease after browning the meat.

Serve this soup with a crusty baguette, buttered biscuits, or dinner rolls.

For this recipe, you can add other vegetables such as peas and green beans.

To make this soup in a crockpot, sear the meat, then cook the onions. Place them in the crockpot along with the rest of the ingredients. Set to cook on high for 4 hours or 8 hours on low.

If desired, you can swap the barley with couscous.

This soup is a great freezer meal. You can store this in the freezer for up to 6 months.

Pearl barley takes 25 to 30 minutes to cook. However, if using hulled barley, cook them for 40 to 50 minutes.

Best Ever Beef And Barley Soup

Rebecca This hearty Beef and Barley Soup is an amazing soup that you can make easily at home. Delicious, filling, and great to serve with a crusty baguette, buttered biscuits, or… General Recipes Best Ever Beef And Barley Soup European Print This
Nutrition facts: 200 calories 20 grams fat
Rating: 5.0/5
( 1 voted )

Ingredients

  • 2 c. cooked flank steak or chuck steak – cut into 1” pieces
  • 1 garlic clove, minced
  • 1 tablespoon olive oil
  • 1 onion, chopped
  • 2 carrots, sliced
  • 1 can petite diced tomatoes 14-15 ounces, undrained
  • 1 stalk celery, sliced
  • 6 c. reduced-sodium beef broth
  • 1/2 green pepper, diced
  • 1 tablespoon Worcestershire sauce
  • 1 package beef gravy mix
  • 2/3 c. pearl barley
  • 1 bay leaf
  • 2 tablespoons fresh parsley or 2 teaspoons dried
  • salt & pepper to taste
  • 1/4 teaspoon dried thyme
  • 2 tablespoons red wine (optional, but makes the broth exceptional)

Instructions

Step 1: Heat the olive in a stock pot over medium-high heat. Once the oil is hot, add the steak to the pot and cook until all sides are browned. Then, add the onions along with the garlic and continue to cook until tender.

Step 2: To the pot, add the rest of the ingredients and bring everything to a boil. Decrease the heat, put the lid on, and simmer for about 40 to 50 minutes until the barley is cooked.

Step 3: When done, discard the bay leaf. Serve the soup hot. Enjoy!

Notes

You can add extra broth if the soup has thickened too much until you reach your preferred consistency. If using ground beef instead of steak, make sure to drain the grease after browning the meat. Serve this soup with a crusty baguette, buttered biscuits, or dinner rolls. For this recipe, you can add other vegetables such as peas and green beans. To make this soup in a crockpot, sear the meat, then cook the onions. Place them in the crockpot along with the rest of the ingredients. Set to cook on high for 4 hours or 8 hours on low. If desired, you can swap the barley with couscous. This soup is a great freezer meal. You can store this in the freezer for up to 6 months. Pearl barley takes 25 to 30 minutes to cook. However, if using hulled barley, cook them for 40 to 50 minutes.

August 30, 2022 0 comment
0 FacebookTwitterPinterestEmail
General Recipes

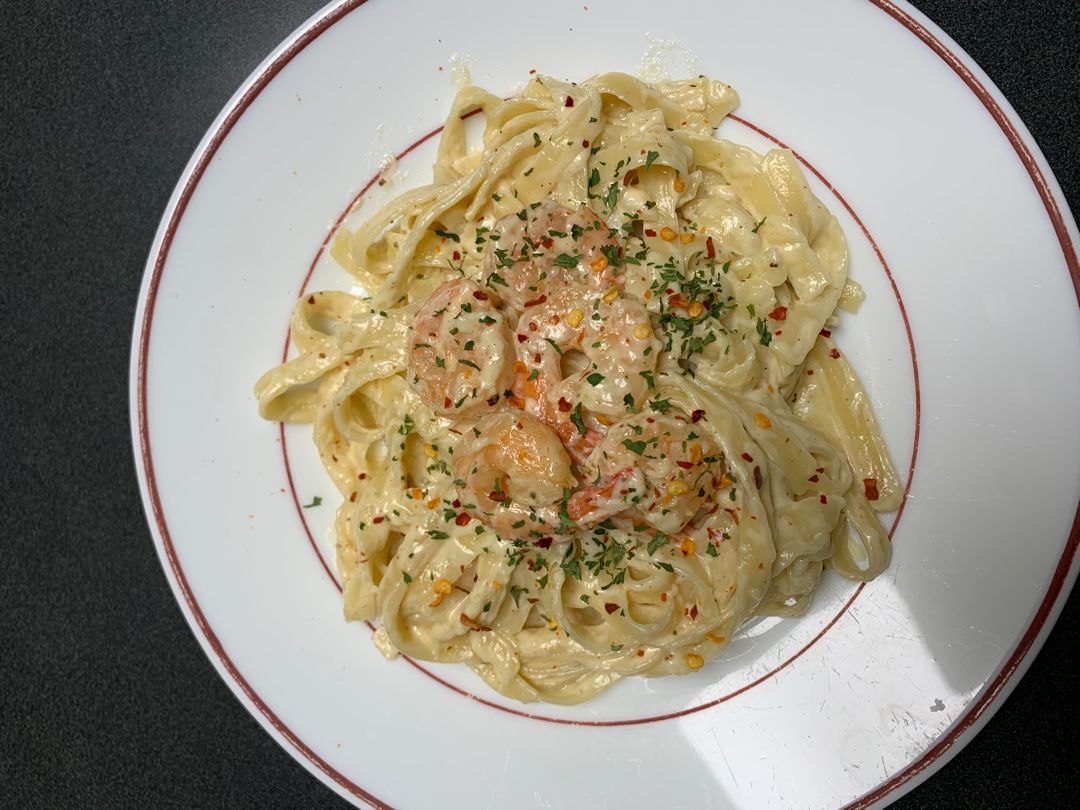
ONE PAN SHRIMP FETTUCCINE ALFREDO

by Rebecca August 30, 2022
written by Rebecca

Total Prep time: 30 mins | Servings: 4

This Shrimp Fettuccine Alfredo is another one-pan wonder with shrimp and pasta tossed in a delightful homemade creamy sauce. An incredibly easy recipe that you can make in under thirty minutes. A classic, restaurant-quality dish that you can easily whip up at home!

My family loves this Shrimp Fettuccine Alfredo by itself, but this is also great as a side dish. If you are searching for an easy weeknight meal, then this dish is an excellent option!

Ingredients

16 oz. large shrimp, peeled, deveined, and tails removed

3 tbsp of unsalted butter, divided

2 cloves garlic, minced

1 c. milk

2 c. chicken broth

8 oz. fettuccine noodles, dry

½ c. heavy cream

Pinch nutmeg

1 c. Parmesan cheese, grated

Parsley to garnish

¼ tsp pepper

HOW TO MAKE ONE PAN SHRIMP FETTUCCINE ALFREDO

Step 1: In a pan, melt 2 tbsp butter over medium heat. Once the butter has melted, add the shrimp to the pan and cook on each side for about 1 to 2 minutes. In a bowl, transfer the shrimp. Cover and allow the shrimp to cool.

Step 2: In the same pan, add the rest of the butter along with the garlic. Cook the garlic for about 30 seconds. Pour in the broth and milk, then add the fettuccine noodles. Toss the noodles well.

Step 3: Once boiling, adjust the heat to low and put the lid on. Simmer for about 11 minutes, stirring once to separate the noodles.

Step 4: To the pan, add the heavy cream, Parmesan cheese, pepper, and nutmeg. Stir well until the cheese has melted. Return the shrimp to the pan and stir again.

Step 5: Take the pan off the heat and let it set for about 5 minutes. Before serving, garnish with some parsley. Enjoy!

Tips:

To reheat the Alfredo sauce, add a splash of heavy cream or milk to prevent the sauce from separating.

Nutrition Facts:

Calories: 640 kcal; Carbs: 46g; Protein: 43g; Fat: 31g; Cholesterol: 417mg

ONE PAN SHRIMP FETTUCCINE ALFREDO

Rebecca Total Prep time: 30 mins | Servings: 4 This Shrimp Fettuccine Alfredo is another one-pan wonder with shrimp and pasta tossed in a delightful homemade creamy sauce. An incredibly easy… General Recipes ONE PAN SHRIMP FETTUCCINE ALFREDO European Print This
Serves: 4
Nutrition facts: 200 calories 20 grams fat
Rating: 5.0/5
( 1 voted )

Ingredients

  • 16 oz. large shrimp, peeled, deveined, and tails removed
  • 3 tbsp of unsalted butter, divided
  • 2 cloves garlic, minced
  • 1 c. milk
  • 2 c. chicken broth
  • 8 oz. fettuccine noodles, dry
  • ½ c. heavy cream
  • Pinch nutmeg
  • 1 c. Parmesan cheese, grated
  • Parsley to garnish
  • ¼ tsp pepper

Instructions

Step 1: In a pan, melt 2 tbsp butter over medium heat. Once the butter has melted, add the shrimp to the pan and cook on each side for about 1 to 2 minutes. In a bowl, transfer the shrimp. Cover and allow the shrimp to cool.

Step 2: In the same pan, add the rest of the butter along with the garlic. Cook the garlic for about 30 seconds. Pour in the broth and milk, then add the fettuccine noodles. Toss the noodles well.

Step 3: Once boiling, adjust the heat to low and put the lid on. Simmer for about 11 minutes, stirring once to separate the noodles.

Step 4: To the pan, add the heavy cream, Parmesan cheese, pepper, and nutmeg. Stir well until the cheese has melted. Return the shrimp to the pan and stir again.

Step 5: Take the pan off the heat and let it set for about 5 minutes. Before serving, garnish with some parsley. Enjoy!

Notes

To reheat the Alfredo sauce, add a splash of heavy cream or milk to prevent the sauce from separating.

August 30, 2022 0 comment
0 FacebookTwitterPinterestEmail
General Recipes

CROCKPOT CUBE STEAK

by Rebecca August 30, 2022
written by Rebecca

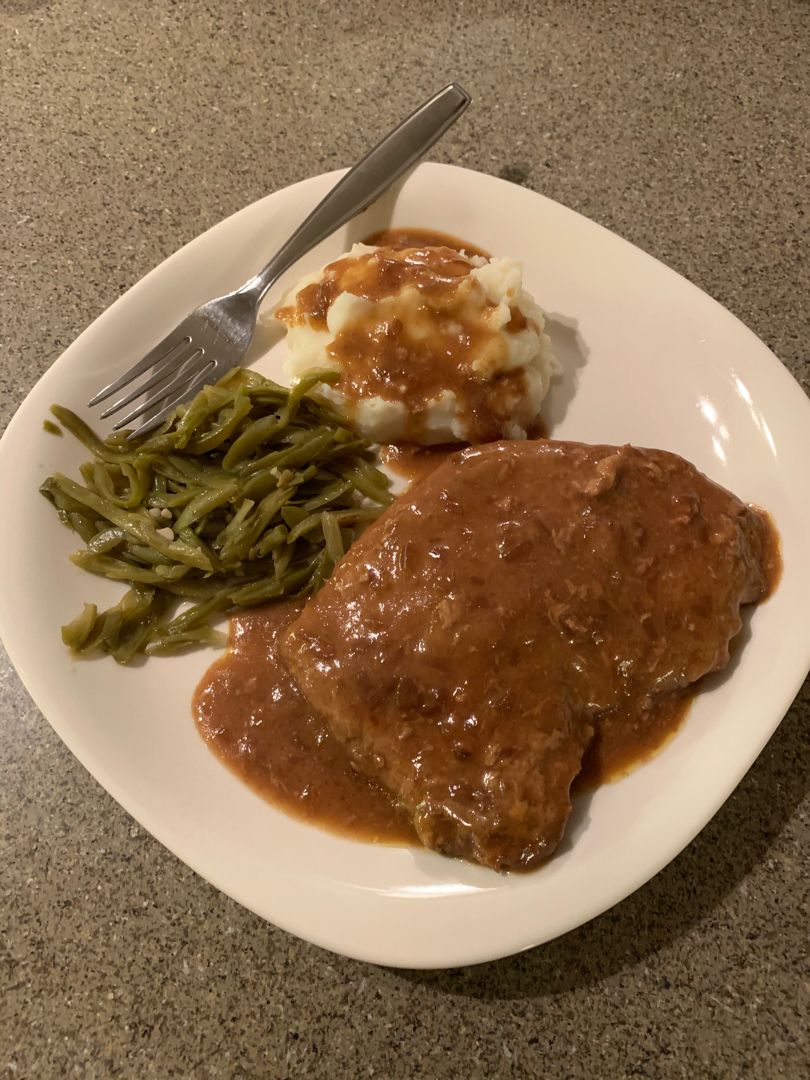
Are you searching for a delicious, easy weeknight dinner? Look no more because this crock pot cube steak is an amazing option! This cube steak is also great if serving a large family. Hearty, delicious, and incredibly easy to prepare. For a filling, satisfying meal, serve these mouthwatering cube steaks with mashed potatoes, noodles, pasta, or rice with light vegetables on the side.

This recipe is one of my go-to crock pot recipes. I love slow cooker/crockpot recipes. They are very easy to prepare and a no-fuss. Recipes like this cube steak are ideal for busy weekends. Once you try this, I am pretty sure that you’ll be including this in your regular menu rotation!

Juicy, tender, flavorful cube steak cooked with onions and mushrooms in a delightfully thick and creamy sauce. Everyone loves this recipe! It’s pretty simple and requires just a few simple ingredients to make.

Ingredients

2 large yellow onions, sliced into 1/4-inch rings

2 pounds cube steak (about 4 pieces)

2 teaspoons garlic powder

1 (2 ounces) packet onion soup mix

¼ c. of cold water

1 c. of low-sodium beef broth

Buttered egg noodles, for serving

2 tablespoons of cornstarch

2 teaspoons kosher salt

1½ teaspoon freshly ground black pepper

HOW TO MAKE CROCKPOT CUBE STEAK

Step 1: In a slow cooker, place the steaks and season with salt and pepper. Then, add the garlic powder along with the onion, onion soup mix, and beef broth. Cook for 8 hours on a low setting.

Step 2: In a small bowl, whisk the cold water and cornstarch until combined. Pour this into the slow cooker an hour before serving and stir well.

Step 3: Adjust the setting to high after adding the cornstarch mix and continue cooking the steak until the gravy has thickened, stirring constantly as it cooks.

Step 4: When done, serve the Cube Steak right away with buttered egg noodles garnished with extra pepper. Enjoy!

CROCKPOT CUBE STEAK

Rebecca Are you searching for a delicious, easy weeknight dinner? Look no more because this crock pot cube steak is an amazing option! This cube steak is also great if serving… General Recipes CROCKPOT CUBE STEAK European Print This
Nutrition facts: 200 calories 20 grams fat
Rating: 4.0/5
( 2 voted )

Ingredients

  • 2 large yellow onions, sliced into 1/4-inch rings
  • 2 pounds cube steak (about 4 pieces)
  • 2 teaspoons garlic powder
  • 1 (2 ounces) packet onion soup mix
  • ¼ c. of cold water
  • 1 c. of low-sodium beef broth
  • Buttered egg noodles, for serving
  • 2 tablespoons of cornstarch
  • 2 teaspoons kosher salt
  • 1½ teaspoon freshly ground black pepper

Instructions

Step 1: In a slow cooker, place the steaks and season with salt and pepper. Then, add the garlic powder along with the onion, onion soup mix, and beef broth. Cook for 8 hours on a low setting.

Step 2: In a small bowl, whisk the cold water and cornstarch until combined. Pour this into the slow cooker an hour before serving and stir well.

Step 3: Adjust the setting to high after adding the cornstarch mix and continue cooking the steak until the gravy has thickened, stirring constantly as it cooks.

Step 4: When done, serve the Cube Steak right away with buttered egg noodles garnished with extra pepper. Enjoy!

August 30, 2022 0 comment
0 FacebookTwitterPinterestEmail
General Recipes

Sweet Blueberry Biscuits

by Rebecca August 30, 2022
written by Rebecca

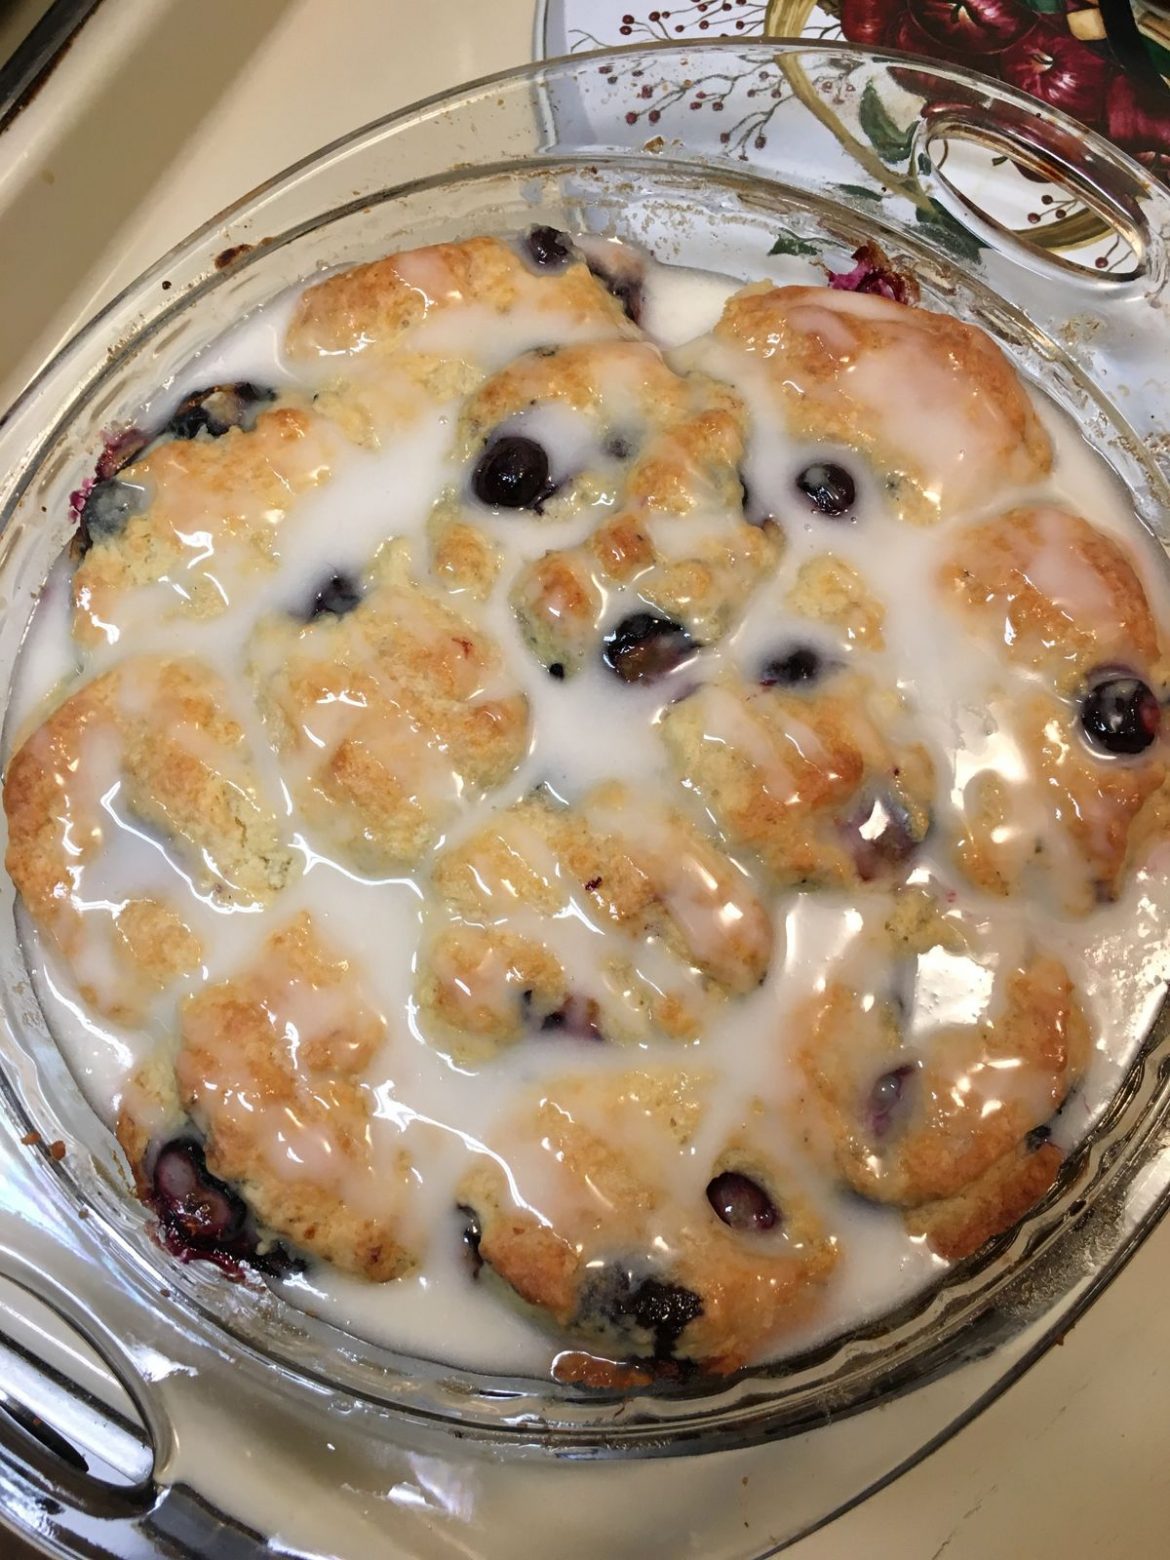
These Sweet Blueberry Biscuits are always a huge hit! A real treat for all blueberry lovers out there. Decadent, super easy to make, and filled with bursting blueberries!

Ingredients

Biscuits:

1 stick (8 tablespoons) butter – Very Cold

2 c. all-purpose flour

1 tablespoon baking powder

2 tablespoons sugar

1 c. fresh blueberries (could use frozen)

3/4 c. buttermilk

4 tablespoons salted butter – melted

1 teaspoon salt

Glaze:

1-2 tsp Lemon Juice

1 c. Powdered Sugar

1 tbsp Milk

1 tsp of Lemon Zest (optional)

How to make Sweet Blueberry Biscuits

Step 1: Into small chunks, cut the butter, and keep them in the freezer.

Step 2: Using butter, grease a cast-iron skillet or baking sheet. Prepare the oven and preheat it to 475 degrees F.

Step 3: For the glaze, place the glaze ingredients in a bowl. Mix well until blended and set aside.

Step 4: Whisk the flour, baking powder, salt, and sugar. Cut in the chilled butter using a fork, pastry cutter, or hands until it is about pea-size.

Step 5: To the flour mixture, gradually add the buttermilk until the dough separates from the sides of the bowl. Mix well until just combined. Onto a floured work surface, transfer the dough.

Step 6: Sprinkle the dough with the flour and roll/press to about half an inch thickness using your hands or a rolling pin.

Step 7: Over the dough, place the blueberries. Fold the dough over onto itself, pushing it down, folding again, pushing it down again, and folding the dough the third time before flattening it out to about 1-inch thickness.

Step 8: Using a biscuit cutter or glass, cut the dough into biscuits. For this, I used 2-inch or 2 1/2 biscuit cutter.

Step 9: Into the prepared cast-iron skillet, place the biscuits. Make sure they are not touching each other. Place in the preheated oven and bake for 10 to 12 minutes. Remove the biscuits out of the oven for around 6 to 8 minutes of baking and brush the tops and any exposed sides of each biscuit with the melted salted butter. Return to the oven and resume baking until the tops of the biscuits are turning light brown and the blueberries burst.

Step 10: Remove the biscuits from the oven and allow them to cool for about 10 minutes in the pan.

Step 11: Before serving, drizzle or pour the glaze on top of the biscuits. Enjoy!

Notes:

Keep the butter in the freezer for at least 10 minutes to make sure that they are very cold.

To make a plain glaze, whisk 1 c powdered sugar. 3 tbsp milk, and half tsp vanilla until well combined.

You can keep any leftover biscuits in an airtight container.

Sweet Blueberry Biscuits

Rebecca These Sweet Blueberry Biscuits are always a huge hit! A real treat for all blueberry lovers out there. Decadent, super easy to make, and filled with bursting blueberries! Ingredients Biscuits:… General Recipes Sweet Blueberry Biscuits European Print This
Nutrition facts: 200 calories 20 grams fat
Rating: 5.0/5
( 1 voted )

Ingredients

  • Biscuits:
  • 1 stick (8 tablespoons) butter – Very Cold
  • 2 c. all-purpose flour
  • 1 tablespoon baking powder
  • 2 tablespoons sugar
  • 1 c. fresh blueberries (could use frozen)
  • 3/4 c. buttermilk
  • 4 tablespoons salted butter – melted
  • 1 teaspoon salt
  • Glaze:
  • 1-2 tsp Lemon Juice
  • 1 c. Powdered Sugar
  • 1 tbsp Milk
  • 1 tsp of Lemon Zest (optional)

Instructions

Step 1: Into small chunks, cut the butter, and keep them in the freezer.

Step 2: Using butter, grease a cast-iron skillet or baking sheet. Prepare the oven and preheat it to 475 degrees F.

Step 3: For the glaze, place the glaze ingredients in a bowl. Mix well until blended and set aside.

Step 4: Whisk the flour, baking powder, salt, and sugar. Cut in the chilled butter using a fork, pastry cutter, or hands until it is about pea-size.

Step 5: To the flour mixture, gradually add the buttermilk until the dough separates from the sides of the bowl. Mix well until just combined. Onto a floured work surface, transfer the dough.

Step 6: Sprinkle the dough with the flour and roll/press to about half an inch thickness using your hands or a rolling pin.

Step 7: Over the dough, place the blueberries. Fold the dough over onto itself, pushing it down, folding again, pushing it down again, and folding the dough the third time before flattening it out to about 1-inch thickness.

Step 8: Using a biscuit cutter or glass, cut the dough into biscuits. For this, I used 2-inch or 2 1/2 biscuit cutter.

Step 9: Into the prepared cast-iron skillet, place the biscuits. Make sure they are not touching each other. Place in the preheated oven and bake for 10 to 12 minutes. Remove the biscuits out of the oven for around 6 to 8 minutes of baking and brush the tops and any exposed sides of each biscuit with the melted salted butter. Return to the oven and resume baking until the tops of the biscuits are turning light brown and the blueberries burst.

Step 10: Remove the biscuits from the oven and allow them to cool for about 10 minutes in the pan.

Step 11: Before serving, drizzle or pour the glaze on top of the biscuits. Enjoy!

Notes

Keep the butter in the freezer for at least 10 minutes to make sure that they are very cold. To make a plain glaze, whisk 1 c powdered sugar. 3 tbsp milk, and half tsp vanilla until well combined. You can keep any leftover biscuits in an airtight container.

August 30, 2022 0 comment
0 FacebookTwitterPinterestEmail
General Recipes

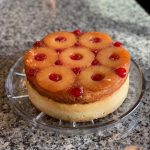
Pineapple Upside Down Cheesecake Cake

by Rebecca August 30, 2022
written by Rebecca

Servings: 12-16

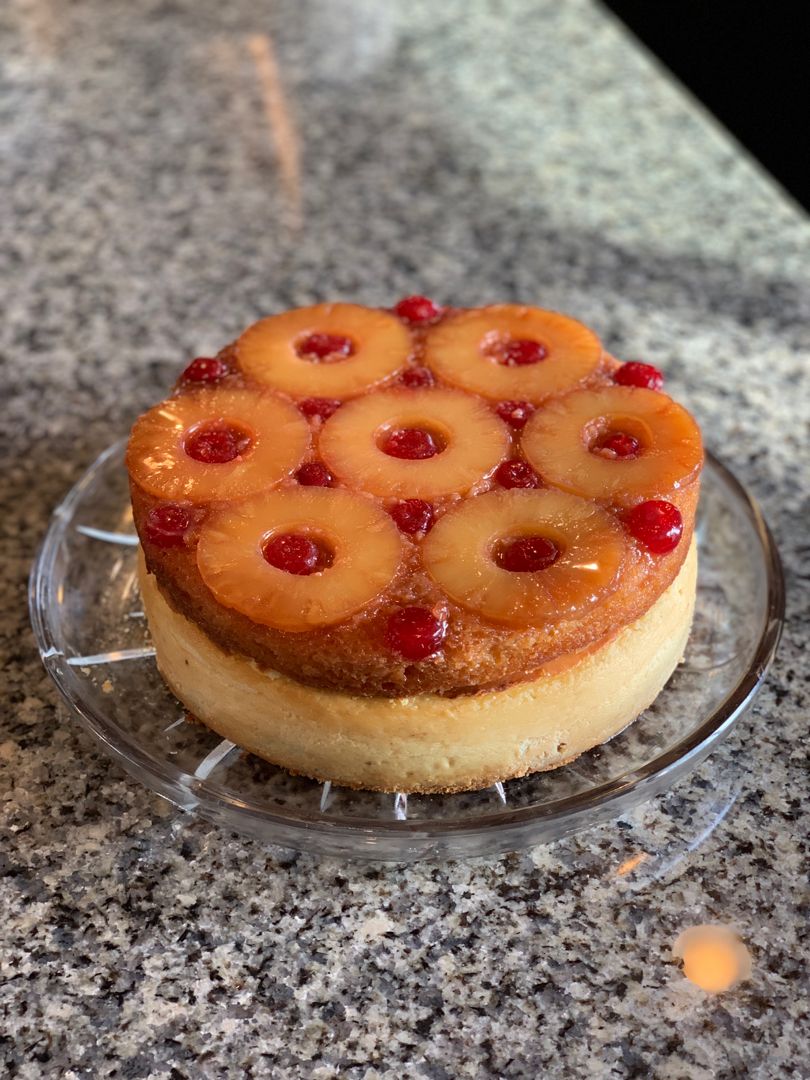
Do not be intimidated by the long steps to make this amazing Pineapple Upside Down Cheesecake Cake. It is simple as it seems to be. Plus, you’ll get to make the cheesecake a day before. On the next day, you’ll just need to make the crazy easy pineapple cake.

Ingredients

Crust:

1 tbsp sugar

6 tbsp melted butter either salted or unsalted

1 1/2 c graham cracker crumbs

Cheesecake:

2 extra large eggs

4 8-oz. packages of cream cheese we use Philadelphia Cream Cheese, room temperature

1 tbsp vanilla

1/4 c. cornstarch

3/4 c. heavy cream

1 2/3 c. sugar

Cake:

4 tbsp salted butter

1/2 c. brown sugar

maraschino cherries 7 or so depending upon your design

1 20-oz. can of pineapple slices in juice, drained

5 tbsp salted butter

2 large or extra large eggs

1 tsp baking powder

1 tsp vanilla extract

2/3 c. sugar

1 1/4 c. all-purpose flour

1/4 tsp baking soda

1/2 c. buttermilk

Extra cherries and warmed caramel sauce for serving

1/4 tsp salt

How to make Pineapple Upside Down Cheesecake Cake

Step 1: To make the cheesecake a day before, start by preheating the oven to 350 degrees F. Using aluminum foil, wrap the bottom and sides of a 9-inch springform pan.

Step 2: Whisk the graham crackers with sugar and melted butter. Pour this into the prepared pan. Press the crumbs on the bottom and up the sides of the pan to about half an inch or so using your hands. Place in the preheated oven and bake for about 8 minutes. Remove from the oven when done and let the crust cool.

Step 3: For the filling, place one package of the cream cheese, 1/3 c. sugar, and cornstarch in a large bowl. Beat using an electric mixer for about 3 minutes on low until creamy. As needed, scrape down the sides of the bow. Beat in the rest of the cream cheese, 1 package at a time, beating well after each addition. Adjust the mixer speed to medium, then beat in the rest of the 1 1/3 cups sugar followed by the vanilla. Add the eggs, one at a time, beating well after each addition. Add the cream and beat until completely combined. At this point, you’ll have a light, creamy, billowy mixture.

Step 4: In a large shallow baking dish, place the pan and pour hot water into the pan to about halfway (1-inch) up the sides. Place in the preheated oven and bake for about 1 hour 15 minutes or until light golden brown and the middle barely jiggles.

Step 5: Take the cheesecake out of the water batch and let it cool for 2 hours on a rack. Loosely tent the pan with plastic wrap and chill the cheesecake in the fridge overnight.

Step 6: To make the cake a day before serving, begin by preheating the oven to 350 degrees F. Using cooking spray, grease a 9-inch cake pan.

Step 7: In a small saucepan, melt half c. brown sugar and 4 tbsp butter until the sugar dissolves and the mixture is completely blended. Make sure not to cook or bring the mixture to a boil/ Take the pan off the heat and pour this into the prepared cake pan. Tilt the pan back and forth to evenly cover the whole bottom of the pan.

Step 8: Think about how you want to arrange the cherries and pineapples. As for us, we used seven pineapple rings (the rest we cut in half) and thirteen cherry halves. If desired, you can slice or keep the cherries whole. Pat the fruits dry with paper towels. On top of the caramel sauce layer, arrange the pineapples and cherries. If using cut cherries, place them cut side-up into the pan.

Step 9: For the cake batter, melt 5 tbsp butter in a large microwave-safe bowl. Cover the bowl and pop in the microwave for about a minute on high or until the butter has melted. Then, add the sugar and stir using a whisk. Next, add the eggs and beat using the same whisk.

Step 10: Stir in the buttermilk, followed by the baking powder, vanilla extract, salt, and baking soda. Stir in the flour until just mixed. Into the top of the fruit layer, carefully pour in the batter.

Step 11: Place in the preheated oven and bake for about 30 minutes or until a toothpick inserted in the center of the cake comes out clean.

Step 12: Remove from the oven when done and allow the cake to cool in the pan for about a minute. On top of the cake pan, place a baking sheet with no rim and invert the cake onto the plate. Allow the cake to cool completely.

Step 13: To assemble the cake, take the chilled cheesecake out of the fridge and remove the sides of the springform pan. For serving, keep the cake on the bottom of the springform pan. On a serving plate, place the cake. Then, onto the top of the cheesecake, lift and slide the cooled pineapple cake off the pan using a large spatula.

Step 14: Slice the cake. If desired, enjoy with the warm caramel sauce and some extra cherries. Enjoy!

Pineapple Upside Down Cheesecake Cake

Rebecca Servings: 12-16 Do not be intimidated by the long steps to make this amazing Pineapple Upside Down Cheesecake Cake. It is simple as it seems to be. Plus, you’ll get… General Recipes Pineapple Upside Down Cheesecake Cake European Print This
Serves: 12-16
Nutrition facts: 200 calories 20 grams fat
Rating: 5.0/5
( 1 voted )

Ingredients

  • Crust:
  • 1 tbsp sugar
  • 6 tbsp melted butter either salted or unsalted
  • 1 1/2 c graham cracker crumbs
  • Cheesecake:
  • 2 extra large eggs
  • 4 8-oz. packages of cream cheese we use Philadelphia Cream Cheese, room temperature
  • 1 tbsp vanilla
  • 1/4 c. cornstarch
  • 3/4 c. heavy cream
  • 1 2/3 c. sugar
  • Cake:
  • 4 tbsp salted butter
  • 1/2 c. brown sugar
  • maraschino cherries 7 or so depending upon your design
  • 1 20-oz. can of pineapple slices in juice, drained
  • 5 tbsp salted butter
  • 2 large or extra large eggs
  • 1 tsp baking powder
  • 1 tsp vanilla extract
  • 2/3 c. sugar
  • 1 1/4 c. all-purpose flour
  • 1/4 tsp baking soda
  • 1/2 c. buttermilk
  • Extra cherries and warmed caramel sauce for serving
  • 1/4 tsp salt

Instructions

Step 1: To make the cheesecake a day before, start by preheating the oven to 350 degrees F. Using aluminum foil, wrap the bottom and sides of a 9-inch springform pan.

Step 2: Whisk the graham crackers with sugar and melted butter. Pour this into the prepared pan. Press the crumbs on the bottom and up the sides of the pan to about half an inch or so using your hands. Place in the preheated oven and bake for about 8 minutes. Remove from the oven when done and let the crust cool.

Step 3: For the filling, place one package of the cream cheese, 1/3 c. sugar, and cornstarch in a large bowl. Beat using an electric mixer for about 3 minutes on low until creamy. As needed, scrape down the sides of the bow. Beat in the rest of the cream cheese, 1 package at a time, beating well after each addition. Adjust the mixer speed to medium, then beat in the rest of the 1 1/3 cups sugar followed by the vanilla. Add the eggs, one at a time, beating well after each addition. Add the cream and beat until completely combined. At this point, you’ll have a light, creamy, billowy mixture.

Step 4: In a large shallow baking dish, place the pan and pour hot water into the pan to about halfway (1-inch) up the sides. Place in the preheated oven and bake for about 1 hour 15 minutes or until light golden brown and the middle barely jiggles.

Step 5: Take the cheesecake out of the water batch and let it cool for 2 hours on a rack. Loosely tent the pan with plastic wrap and chill the cheesecake in the fridge overnight.

Step 6: To make the cake a day before serving, begin by preheating the oven to 350 degrees F. Using cooking spray, grease a 9-inch cake pan.

Step 7: In a small saucepan, melt half c. brown sugar and 4 tbsp butter until the sugar dissolves and the mixture is completely blended. Make sure not to cook or bring the mixture to a boil/ Take the pan off the heat and pour this into the prepared cake pan. Tilt the pan back and forth to evenly cover the whole bottom of the pan.

Step 8: Think about how you want to arrange the cherries and pineapples. As for us, we used seven pineapple rings (the rest we cut in half) and thirteen cherry halves. If desired, you can slice or keep the cherries whole. Pat the fruits dry with paper towels. On top of the caramel sauce layer, arrange the pineapples and cherries. If using cut cherries, place them cut side-up into the pan.

Step 9: For the cake batter, melt 5 tbsp butter in a large microwave-safe bowl. Cover the bowl and pop in the microwave for about a minute on high or until the butter has melted. Then, add the sugar and stir using a whisk. Next, add the eggs and beat using the same whisk.

Step 10: Stir in the buttermilk, followed by the baking powder, vanilla extract, salt, and baking soda. Stir in the flour until just mixed. Into the top of the fruit layer, carefully pour in the batter.

Step 11: Place in the preheated oven and bake for about 30 minutes or until a toothpick inserted in the center of the cake comes out clean.

Step 12: Remove from the oven when done and allow the cake to cool in the pan for about a minute. On top of the cake pan, place a baking sheet with no rim and invert the cake onto the plate. Allow the cake to cool completely.

Step 13: To assemble the cake, take the chilled cheesecake out of the fridge and remove the sides of the springform pan. For serving, keep the cake on the bottom of the springform pan. On a serving plate, place the cake. Then, onto the top of the cheesecake, lift and slide the cooled pineapple cake off the pan using a large spatula.

Step 14: Slice the cake. If desired, enjoy with the warm caramel sauce and some extra cherries. Enjoy!

August 30, 2022 0 comment
0 FacebookTwitterPinterestEmail
General Recipes

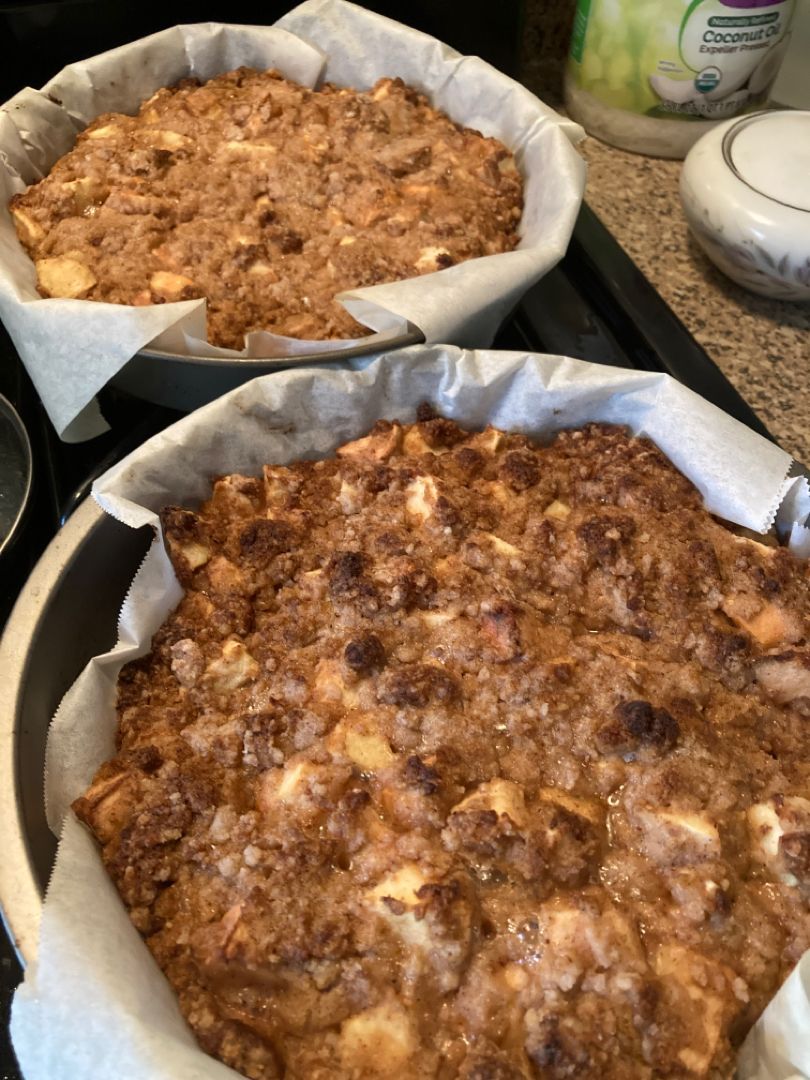
One Bowl Apple Cake

by Rebecca August 30, 2022
written by Rebecca

Perfectly sweet, moist, and tasty cake. This Apple cake is a great dessert option that you can even serve for breakfast/brunch and even perfect for any occasion! An easy cake recipe that is made with a few simple ingredients.

INGREDIENTS

2 large eggs

3 large apples – peeled (if desired) and cut into pieces

3 tsp baking powder

1 c. whole milk yoghurt

1 tsp ground cinnamon

2 c. all-purpose flour

1 c. granulated sugar

½ c. butter – melted and cooled

Confectioner sugar for dusting

½ tsp vanilla extract

¼ tsp kosher salt

How to make One Bowl Apple Cake

Step 1: Prepare the oven. Preheat it to 350 degrees F.


Step 2: Using the parchment paper, line a 9-inch round baking pan. Alternatively, you can grease the baking pan with butter or cooking spray.

Step 3: Place the sugar and eggs in a large mixing bowl. Cream using an electric mixer for about 5 to 8 minutes until creamy and fluffy. Then, add the yoghurt, melted butter, and vanilla extract. Stir using a wooden spoon, fork, or spatula.

Step 4: Whisk the flour, baking powder, cinnamon, and salt in another bowl.

Step 5: Add the dry ingredients to the wet mixture, gently stirring until well blended. Then, gently fold in the apples.

Step 6: Place the baking pan in the preheated oven and bake the cake batter for about 45 minutes or until a toothpick inserted in the center of the cake comes out clean.

Step 7: Tent the cake with foil in the last 10 minutes of baking if the top of the cake begins browning too much.

Step 8: Remove the cake from the oven when done and dust it with confectioner sugar. Slice and serve with freshly whipped cream if desired. Enjoy!

NOTES:

For this recipe, the varieties of apple that works great are Honey crisp, Pink Lady, Granny Smith, and Jonagold.

Adjust the baking time depending on the moisture content of the apples.

For a gluten-free option, you can use Bob’s Red Mill 1:1 instead of the regular flour.

I love to use butter, but you can swap it with oil. Keep in mind that using oil the cake will have a different texture and you won’t have the flavor that butter provides. If you decide to use oil, I recommend using olive oil.

You can substitute yoghurt with sour cream. If using low-fat yoghurt, ensure to use good quality and thick yoghurt.

One Bowl Apple Cake

Rebecca Perfectly sweet, moist, and tasty cake. This Apple cake is a great dessert option that you can even serve for breakfast/brunch and even perfect for any occasion! An easy cake… General Recipes One Bowl Apple Cake European Print This
Nutrition facts: 200 calories 20 grams fat
Rating: 5.0/5
( 1 voted )

Ingredients

  • 2 large eggs
  • 3 large apples – peeled (if desired) and cut into pieces
  • 3 tsp baking powder
  • 1 c. whole milk yoghurt
  • 1 tsp ground cinnamon
  • 2 c. all-purpose flour
  • 1 c. granulated sugar
  • ½ c. butter – melted and cooled
  • Confectioner sugar for dusting
  • ½ tsp vanilla extract
  • ¼ tsp kosher salt

Instructions

Step 1: Prepare the oven. Preheat it to 350 degrees F.

Step 2: Using the parchment paper, line a 9-inch round baking pan. Alternatively, you can grease the baking pan with butter or cooking spray.

Step 3: Place the sugar and eggs in a large mixing bowl. Cream using an electric mixer for about 5 to 8 minutes until creamy and fluffy. Then, add the yoghurt, melted butter, and vanilla extract. Stir using a wooden spoon, fork, or spatula.

Step 4: Whisk the flour, baking powder, cinnamon, and salt in another bowl.

Step 5: Add the dry ingredients to the wet mixture, gently stirring until well blended. Then, gently fold in the apples.

Step 6: Place the baking pan in the preheated oven and bake the cake batter for about 45 minutes or until a toothpick inserted in the center of the cake comes out clean.

Step 7: Tent the cake with foil in the last 10 minutes of baking if the top of the cake begins browning too much.

Step 8: Remove the cake from the oven when done and dust it with confectioner sugar. Slice and serve with freshly whipped cream if desired. Enjoy!


August 30, 2022 0 comment
0 FacebookTwitterPinterestEmail
General Recipes

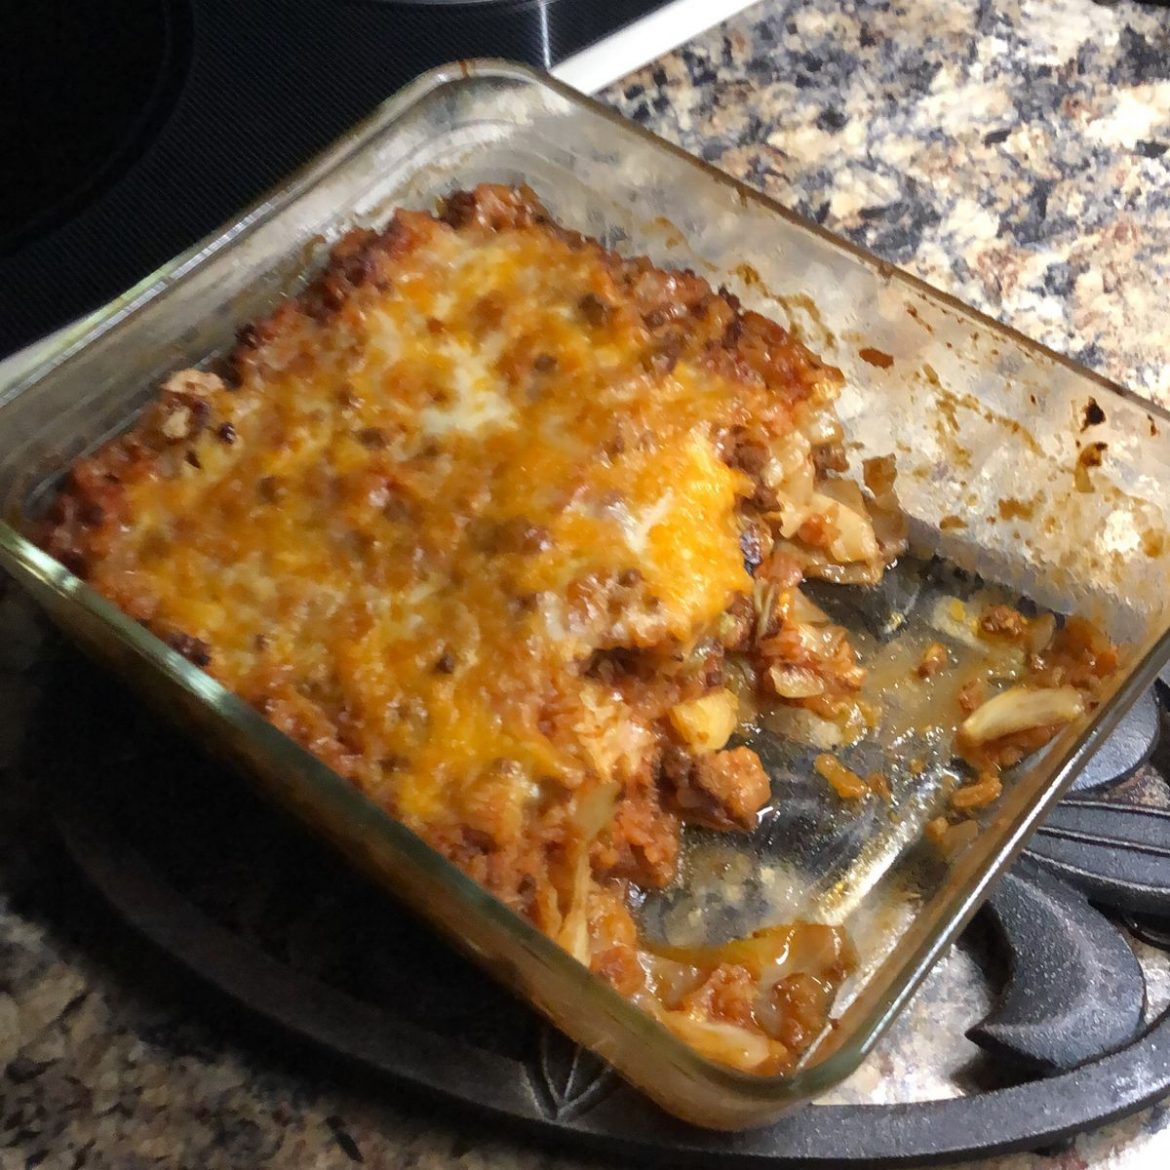
Quick And Easy Cabbage Roll Casserole

by Rebecca August 30, 2022
written by Rebecca

Time: 1 hr | Servings: 8

Cabbage rolls are a favorite at home. Just like cabbage rolls, this cabbage roll casserole is also made with the same ingredients without the hassle of rolling! Chopped cabbage layered with the saucy filling and topped with cheese. This delicious casserole is a satisfying dinner that you can easily make at home!

INGREDIENTS

1 white onion, chopped

2 garlic cloves, minced

4 bacon strips, cooked and crumbled

2 pounds of ground beef

2 (24 ounces) jars of marinara sauce

1 tsp dried thyme

1/2 tsp dried sage

1/2 tsp dried dill

1/4 tsp cayenne pepper

2 c. cooked white rice

1 1/2 c. mozzarella cheese, grated

1 medium head (2 pounds) cabbage, shredded

1 tsp salt

1/2 tsp freshly ground black pepper

How to make Quick And Easy Cabbage Roll Casserole

Step 1: Prepare the oven. Preheat it to 375 degrees F. Using butter or nonstick spray, grease a 9 x 13-inch baking dish.

Step 2: Cook the ground beef and onion in a large skillet over medium heat until the meat is completely cooked. Then, add the garlic and continue to cook for another minute.

Step 3: Drain any excess grease from the beef. Add 1 jar of the marinara sauce, thyme, dill, sage, salt, and pepper. Stir well and bring everything to a boil. Put the lid on and decrease the heat. Let it simmer for about 5 minutes before stirring in the bacon and rice. Then, take the skillet off the heat.

Step 4: With a third of the cabbage, line a baking dish. On top, evenly distribute the meat/rice mixture. Top with another third of the cabbage followed by the rest of the meat mixture and the remaining cabbage.

Step 5: On top, pour the rest of the jar of the marinara sauce. Tightly cover the dish with aluminium foil and place it in the preheated oven. Bake for about 45 minutes. Uncover and sprinkle the cheese on top. Return to the oven and continue baking for an additional 10 to 12 minutes until the cheese is bubbly and melted.

Step 6: Remove from the oven when done and allow the casserole to rest for about 5 minutes.

Step 7: Serve and enjoy!

Quick And Easy Cabbage Roll Casserole

Rebecca Time: 1 hr | Servings: 8 Cabbage rolls are a favorite at home. Just like cabbage rolls, this cabbage roll casserole is also made with the same ingredients without the… General Recipes Quick And Easy Cabbage Roll Casserole European Print This
Serves: 8
Nutrition facts: 200 calories 20 grams fat
Rating: 5.0/5
( 1 voted )

Ingredients

  • 1 white onion, chopped
  • 2 garlic cloves, minced
  • 4 bacon strips, cooked and crumbled
  • 2 pounds of ground beef
  • 2 (24 ounces) jars of marinara sauce
  • 1 tsp dried thyme
  • 1/2 tsp dried sage
  • 1/2 tsp dried dill
  • 1/4 tsp cayenne pepper
  • 2 c. cooked white rice
  • 1 1/2 c. mozzarella cheese, grated
  • 1 medium head (2 pounds) cabbage, shredded
  • 1 tsp salt
  • 1/2 tsp freshly ground black pepper

Instructions

Step 1: Prepare the oven. Preheat it to 375 degrees F. Using butter or nonstick spray, grease a 9 x 13-inch baking dish.

Step 2: Cook the ground beef and onion in a large skillet over medium heat until the meat is completely cooked. Then, add the garlic and continue to cook for another minute.

Step 3: Drain any excess grease from the beef. Add 1 jar of the marinara sauce, thyme, dill, sage, salt, and pepper. Stir well and bring everything to a boil. Put the lid on and decrease the heat. Let it simmer for about 5 minutes before stirring in the bacon and rice. Then, take the skillet off the heat.

Step 4: With a third of the cabbage, line a baking dish. On top, evenly distribute the meat/rice mixture. Top with another third of the cabbage followed by the rest of the meat mixture and the remaining cabbage.

Step 5: On top, pour the rest of the jar of the marinara sauce. Tightly cover the dish with aluminium foil and place it in the preheated oven. Bake for about 45 minutes. Uncover and sprinkle the cheese on top. Return to the oven and continue baking for an additional 10 to 12 minutes until the cheese is bubbly and melted.

Step 6: Remove from the oven when done and allow the casserole to rest for about 5 minutes.

Step 7: Serve and enjoy!

August 30, 2022 0 comment
0 FacebookTwitterPinterestEmail
Newer Posts
Older Posts

Popular Posts

  • 1

    Crispy Crunchy Parmesan Potatoes

    March 21, 2020
  • 2

    CROCK POT SMOTHERED PORK CHOPS

    March 21, 2020
  • Facebook
  • Twitter

@2019 - All Right Reserved.


Back To Top