Cook it once
  • Home
  • Privacy Policy
  • Recipes
    • KETO
    • LC
    • WW
  • Tips
  • Contact
Cook it once
  • Home
  • Privacy Policy
  • Recipes
    • KETO
    • LC
    • WW
  • Tips
  • Contact
Category:

Main Dish Recipes

Main Dish Recipes

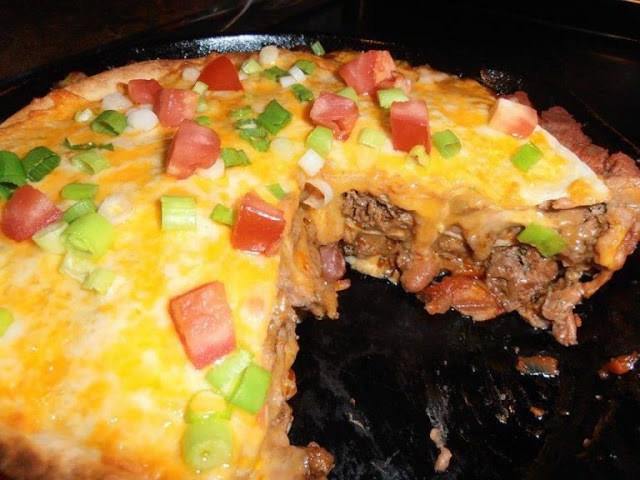
Weight Watchers Taco Pie

by Rebecca June 6, 2020
written by Rebecca

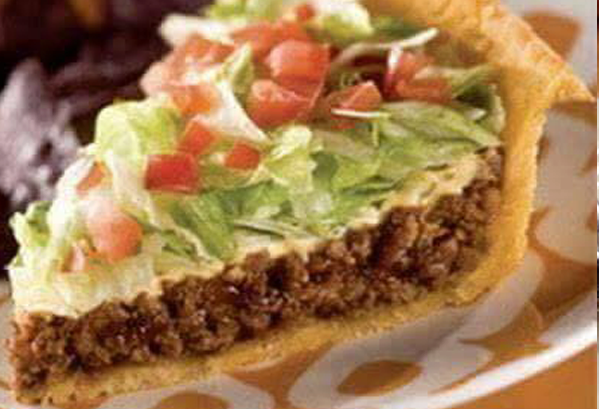
Taco is the best comfort food. All the great flavors bursting inside your mouth in every bite. I’m in love with tacos so when I first saw this recipe for a Taco Pie, I was a bit skeptical at first. But all that is gone when I tasted it. The elements of a taco are put together in one skillet and covered with melted cheese – absolutely stunning, and with no doubt delicious! And it is an absolute weight watcher friendly!

Please PIN THIS RECIPE TO any Relevant boards on your Pinterest (Dinner, Lunch, etc…) To SAVE it for later…

Taco Pie Recipe

Taco Pie Recipe

Ingredients

5 8-inch flour tortillas fat-free

1 lb. ground beef; fat-free

1 16 oz. can refried beans

2 tablespoons reduced-sodium taco seasoning

1/4 cup water

1 jar salsa (I didn’t measure, just used big spoonful’s)

2 cups shredded Colby jack cheese

2 green onions, chopped

1 tomato, chopped

How to make Weight Watchers Taco Pie

Step 1: Brown the ground beef in a skillet while breaking it up as it cooks. Once the beef is browned, drain excess grease, and add in the taco seasoning and water. Mix until incorporated, then, remove from heat. You can use an 8-inch iron skillet or whatever is available.

Step 2: Put the flour tortilla in the bottom of the pan. Evenly spread a few big spoonfuls of salsa on top of the tortilla, followed by some of the refried beans, then, some meat and lastly some cheese. Repeat the exact layers for the remaining spreads. And top each layer with a flour tortilla. Make sure to save some cheese for later use.

Step 3: Place inside the oven, covered with tinfoil, and bake at 350 degrees for about 20 minutes.

Step 4: After 20 minutes, remove from the oven and spread the remaining cheese over.

Step 5: Return the dish into the oven, uncovered, and bake for another 6 to 7 minutes or until the topped cheese is melted and the tortilla edges are crisp.

Step 6: Remove the dish from the oven and sprinkle the green onions on top and top with tomatoes. Slice and serve hot. Enjoy!

Weight Watchers Taco Pie

Rebecca Taco is the best comfort food. All the great flavors bursting inside your mouth in every bite. I’m in love with tacos so when I first saw this recipe for… Main Dish Recipes Weight Watchers Taco Pie European Print This
Nutrition facts: 200 calories 20 grams fat
Rating: 4.0/5
( 2 voted )

Ingredients

  • 5 8-inch flour tortillas fat-free
  • 1 lb. ground beef; fat-free
  • 1 16 oz. can refried beans
  • 2 tablespoons reduced-sodium taco seasoning
  • 1/4 cup water
  • 1 jar salsa (I didn’t measure, just used big spoonful’s)
  • 2 cups shredded Colby jack cheese
  • 2 green onions, chopped
  • 1 tomato, chopped

Instructions

Step 1: Brown the ground beef in a skillet while breaking it up as it cooks. Once the beef is browned, drain excess grease, and add in the taco seasoning and water. Mix until incorporated, then, remove from heat. You can use an 8-inch iron skillet or whatever is available.

Step 2: Put the flour tortilla in the bottom of the pan. Evenly spread a few big spoonfuls of salsa on top of the tortilla, followed by some of the refried beans, then, some meat and lastly some cheese. Repeat the exact layers for the remaining spreads. And top each layer with a flour tortilla. Make sure to save some cheese for later use.

Step 3: Place inside the oven, covered with tinfoil, and bake at 350 degrees for about 20 minutes.

Step 4: After 20 minutes, remove from the oven and spread the remaining cheese over.

Step 5: Return the dish into the oven, uncovered, and bake for another 6 to 7 minutes or until the topped cheese is melted and the tortilla edges are crisp.

Step 6: Remove the dish from the oven and sprinkle the green onions on top and top with tomatoes. Slice and serve hot. Enjoy!
June 6, 2020 0 comment
0 FacebookTwitterPinterestEmail
Main Dish Recipes

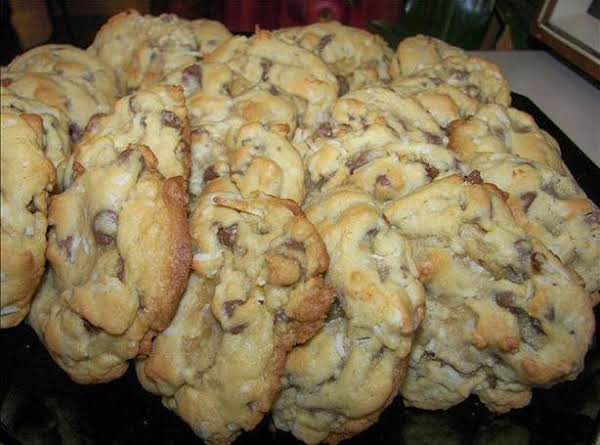
Almond Joy Cookies

by Rebecca June 5, 2020
written by Rebecca

These are the best almond cookies ever! They are pretty easy and quick to make. Plus, you can even prepare these ahead. Just pack them into doubled Ziploc freezer bags and place them into firm glad ware containers and freeze. When ready to bake, remove from the bags to defrost and pop these gorgeous into the oven.

I think cookies are underrated, they say they are the unsung sweet because even if cookies are very popular we always end up thinking and buying cakes or pies and other fancier desserts. But I’m a cookie lover so I’m one in a million! Cookies are as great, like these almond joy cookies that are baked to perfection! The combination of coconut, chocolate chips, and chopped almonds is incomparable. These are my ultimate favorite cookies since then until now. These delectable beauties deserve a 5 star!

Ingredients

1 cup of butter

1 ½ cups of white sugar

1 ½ cups of brown sugar

4 eggs

3 teaspoons of vanilla

4 ½ cups of flour

2 teaspoons of baking soda

1 tsp of salt

5 cups of chocolate chips

2 cups of sweetened coconut

2 cups of chopped almond

How to make Almond Joy Cookies

Step 1: Prepare the oven. Preheat it to 375 degrees.

Step 2: Cream the butter and sugars in a large bowl. Add in the eggs one at a time while beating every each addition. Then, stir in the vanilla.

Step 3: Add in the flour, baking soda, and salt. Mix until incorporated.

Step 4: Mix in the chocolate chips, coconut, and almonds, Stir thoroughly.

Step 5: Scoop the dough and drop into a lightly greased cookie sheets.

Step 6: Place inside the preheated oven and bake for 8 to 10 minutes. Once done, remove from the oven, and it the cookies cool for a few minutes before removing from the baking sheets.

Step 7: Transfer the slightly cooled cookies into a wire rack to cool completely. Serve and enjoy!

Almond Joy Cookies

Rebecca These are the best almond cookies ever! They are pretty easy and quick to make. Plus, you can even prepare these ahead. Just pack them into doubled Ziploc freezer bags… Main Dish Recipes Almond Joy Cookies European Print This
Nutrition facts: 200 calories 20 grams fat
Rating: 5.0/5
( 1 voted )

Ingredients

  • 1 cup of butter
  • 1 ½ cups of white sugar
  • 1 ½ cups of brown sugar
  • 4 eggs
  • 3 teaspoons of vanilla
  • 4 ½ cups of flour
  • 2 teaspoons of baking soda
  • 1 tsp of salt
  • 5 cups of chocolate chips
  • 2 cups of sweetened coconut
  • 2 cups of chopped almond

Instructions

Step 1: Prepare the oven. Preheat it to 375 degrees.

Step 2: Cream the butter and sugars in a large bowl. Add in the eggs one at a time while beating every each addition. Then, stir in the vanilla.

Step 3: Add in the flour, baking soda, and salt. Mix until incorporated.

Step 4: Mix in the chocolate chips, coconut, and almonds, Stir thoroughly.

Step 5: Scoop the dough and drop into a lightly greased cookie sheets.

Step 6: Place inside the preheated oven and bake for 8 to 10 minutes. Once done, remove from the oven, and it the cookies cool for a few minutes before removing from the baking sheets.

Step 7: Transfer the slightly cooled cookies into a wire rack to cool completely. Serve and enjoy!

June 5, 2020 0 comment
0 FacebookTwitterPinterestEmail
Main Dish Recipes

Crispy Fried Potato Cakes

by Rebecca June 5, 2020
written by Rebecca

This recipe is a great variation for mashed potatoes. I admired whoever thought of this, I think it is genius! Mashed and grated potatoes fried into crispy potato cakes. The best! When I learned how to make this, I never stop. It’s the easiest and quickest dish ever. These potato cakes are the best to serve and eat while slightly hot, with either applesauce or sour cream or both on the side. The kids love this so much they never settle for just a single piece, they want more! These potato cakes are crispy, super delicious, and a classic. Another delightful recipe to use up those leftover mashed potatoes.

INGREDIENTS

1 lb potatoes

1 onion chopped fine

3/4 cup flour

1 teaspoon salt

1/4 teaspoon pepper

1 egg

1/2 cup milk

1/2 cup vegetable oil

How to make Crispy Fried Potato Cakes

Step 1: Wash, peel, and cut the potatoes into large pieces. But first, make sure to set half of the unpeeled potatoes aside for later.

Step 2: In a saucepan, cover the potatoes with cold water and bring to a boil over high heat. Then, cook for 15 to 20 minutes more in low heat or until the potatoes are tender. Once done, drain the potatoes. Place in a large bowl and mash. Set aside.

Step 3: Peel the remaining potatoes and grate. Add the grated potatoes into the mashed potatoes and mix well.

Step 4: Add in the onion, flour, salt, and pepper. Mix until combined. Then, stir in the milk and egg to form a batter.

Step 5: Heat oil in a large skillet over medium heat.

Step 6: Spoon the batter and drop into the heated oil. Cook each side for about 3 to 4 minutes and drain the cooked potato cakes on paper towels. Do this for the rest of the batter.

Step 7: Once drained, transfer the cakes into a serving dish. Serve with applesauce and sour cream. Enjoy!

Crispy Fried Potato Cakes

Rebecca This recipe is a great variation for mashed potatoes. I admired whoever thought of this, I think it is genius! Mashed and grated potatoes fried into crispy potato cakes. The… Main Dish Recipes Crispy Fried Potato Cakes European Print This
Nutrition facts: 200 calories 20 grams fat
Rating: 5.0/5
( 1 voted )

Ingredients

  • 1 lb potatoes
  • 1 onion chopped fine
  • 3/4 cup flour
  • 1 teaspoon salt
  • 1/4 teaspoon pepper
  • 1 egg
  • 1/2 cup milk
  • 1/2 cup vegetable oil

Instructions

Step 1: Wash, peel, and cut the potatoes into large pieces. But first, make sure to set half of the unpeeled potatoes aside for later.

Step 2: In a saucepan, cover the potatoes with cold water and bring to a boil over high heat. Then, cook for 15 to 20 minutes more in low heat or until the potatoes are tender. Once done, drain the potatoes. Place in a large bowl and mash. Set aside.

Step 3: Peel the remaining potatoes and grate. Add the grated potatoes into the mashed potatoes and mix well.

Step 4: Add in the onion, flour, salt, and pepper. Mix until combined. Then, stir in the milk and egg to form a batter.

Step 5: Heat oil in a large skillet over medium heat.

Step 6: Spoon the batter and drop into the heated oil. Cook each side for about 3 to 4 minutes and drain the cooked potato cakes on paper towels. Do this for the rest of the batter.

Step 7: Once drained, transfer the cakes into a serving dish. Serve with applesauce and sour cream. Enjoy!


June 5, 2020 0 comment
0 FacebookTwitterPinterestEmail
Main Dish Recipes

Momma’s Creamy Baked Macaroni and Cheese

by Rebecca June 5, 2020
written by Rebecca

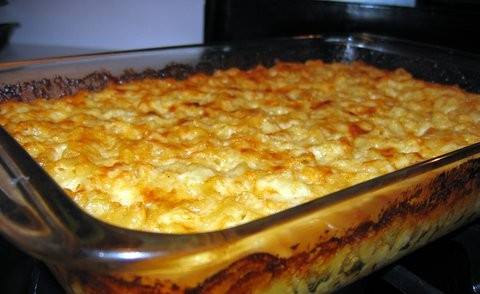
The kid’s favorite – Creamy Baked Macaroni and Cheese. I remember my mom when I was little, she always cooked this for me. I grew up to this dish, it’s the best thing ever! Before I only knew how to eat but now that I’m a mom and have kids of my own, I make sure that they get to experience the best childhood and this dish is one great way for me to ensure that. I think no kids hate this scrumptious dish, as a matter of fact, it’s the kid’s ultimate comfort food! It’s super creamy, cheesy, rich, and satisfying. A simple and no-fuss dish that’s baked to perfection! The kids even the grown-ups will ask for another plate. Definitely a keeper.

INGREDIENTS

16 ounces elbow macaroni (about 3 cups)

3 tablespoons butter or margarine

1 ½ cups milk, divided

2 large eggs, lightly beaten

1 lb (16-ounces) cubed (1/2 inch size) Velveeta cheese

8 ounce shredded Kraft Mild Cheddar Cheese (about 2 cups), divided

8 ounce shredded Kraft Monterrey Jack Cheese

1 teaspoon salt

1 teaspoon freshly ground black pepper

How to make Momma’s Creamy Baked Macaroni and Cheese

Step 1: Prepare the oven. Preheat it to 375 degrees F.

Step 2: In a large pot, cook the macaroni for about 8 to 10 minutes with salted boiling water until tender. Drain the macaroni well and transfer into a large mixing bowl.

Step 3: Melt the Velvetta cheese on low heat and add in the 3/4 cup milk while stirring often until melted.

Step 4: Once melted, carefully pour the sauce over the pasta and mix. Stir in the butter, milk, eggs, 1 cup shredded kinds of cheese, salt, and pepper. Combine until incorporated.

Step 5: Transfer to a 2-quart baking dish and sprinkle the remaining cheese over.

Step 6: Place inside the preheated oven and bake for 25 minutes until the top crust is golden brown and the casserole is bubbling. Once done remove from the oven and serve immediately. Enjoy!

Momma’s Creamy Baked Macaroni and Cheese

Rebecca The kid’s favorite – Creamy Baked Macaroni and Cheese. I remember my mom when I was little, she always cooked this for me. I grew up to this dish, it’s… Main Dish Recipes Momma’s Creamy Baked Macaroni and Cheese European Print This
Nutrition facts: 200 calories 20 grams fat
Rating: 5.0/5
( 1 voted )

Ingredients

  • 16 ounces elbow macaroni (about 3 cups)
  • 3 tablespoons butter or margarine
  • 1 ½ cups milk, divided
  • 2 large eggs, lightly beaten
  • 1 lb (16-ounces) cubed (1/2 inch size) Velveeta cheese
  • 8 ounce shredded Kraft Mild Cheddar Cheese (about 2 cups), divided
  • 8 ounce shredded Kraft Monterrey Jack Cheese
  • 1 teaspoon salt
  • 1 teaspoon freshly ground black pepper

Instructions

Step 1: Prepare the oven. Preheat it to 375 degrees F.

Step 2: In a large pot, cook the macaroni for about 8 to 10 minutes with salted boiling water until tender. Drain the macaroni well and transfer into a large mixing bowl.

Step 3: Melt the Velvetta cheese on low heat and add in the 3/4 cup milk while stirring often until melted.

Step 4: Once melted, carefully pour the sauce over the pasta and mix. Stir in the butter, milk, eggs, 1 cup shredded kinds of cheese, salt, and pepper. Combine until incorporated.

Step 5: Transfer to a 2-quart baking dish and sprinkle the remaining cheese over.

Step 6: Place inside the preheated oven and bake for 25 minutes until the top crust is golden brown and the casserole is bubbling. Once done remove from the oven and serve immediately. Enjoy!

June 5, 2020 0 comment
0 FacebookTwitterPinterestEmail
Main Dish Recipes

Chicken and Broccoli Cheesy Casserole – Low Carb Recipe

by Rebecca June 5, 2020
written by Rebecca

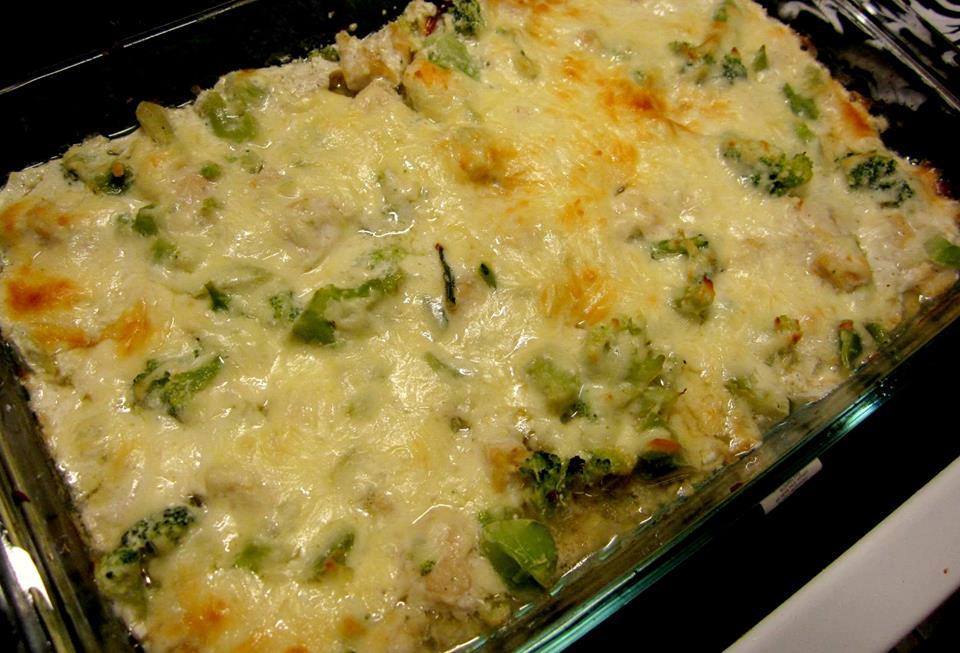
Have you ever heard of the Keto diet? I gained weight this past few months so I’m trying to get in shape. I’m very much into Keto more than you know. My menu follows that of Keto and one of my favorites is this Low Carb Chicken and Broccoli Cheesy Casserole. It’s cheesy, it’s healthy, delicious, and so easy to make. This dish is for all the keto-dreamy out there!

INGREDIENTS

3 cups cubed chicken

16 oz (1lb) bag of frozen broccoli

1 medium onion diced (about 1 cup)

2 cups shredded mozzarella cheese

1 teaspoon garlic powder

1 cube chicken bouillon (or 1 tsp bouillon powder)

1/2 cup water (optional, I added this to help disperse the chicken flavoring but the water from the veggies as they cook also would suffice if the dish seems too watery to you)

1 tablespoon olive oil

1/4 teaspoon pepper (or to taste)

1/4 cup sour cream

1 cup ricotta

Bacon Grease

How to make Chicken and Broccoli Cheesy Casserole

Step 1: To grease your 9 x 13-inch pan, you can use some leftover bacon grease for added flavor or use your regular pan spray.

Step 2: In a medium frying pan, add the broccoli, onion, chicken bouillon, water, olive oil, and pepper. Cook for about 10 minutes, covered while stirring occasionally.

Step 3: Pace the chicken chunks, garlic powder, sour cream, and ricotta cheese in a medium bowl. Mix until well combined.

Step 4: After 10 minutes transfer the broccoli mix into the chicken bowl. Stir until incorporated.

Step 5: Sprinkle 4 cups of shredded mozzarella cheese into the mixture and mix.

Step 6: Pour and evenly spread the mixture into your greased pan.

Step 7: Top with the remaining mozzarella cheese.

Step 8: Place inside the oven and bake at 350 degrees for 50 to 60 minutes or until the top layer of cheese is browned.

Step 9: If you want softer broccoli you can bake the florets to your liking. Serve immediately. Enjoy!

Chicken and Broccoli Cheesy Casserole – Low Carb Recipe

Rebecca Have you ever heard of the Keto diet? I gained weight this past few months so I’m trying to get in shape. I’m very much into Keto more than you… Main Dish Recipes Chicken and Broccoli Cheesy Casserole – Low Carb Recipe European Print This
Nutrition facts: 200 calories 20 grams fat
Rating: 5.0/5
( 1 voted )

Ingredients

  • 3 cups cubed chicken
  • 16 oz (1lb) bag of frozen broccoli
  • 1 medium onion diced (about 1 cup)
  • 2 cups shredded mozzarella cheese
  • 1 teaspoon garlic powder
  • 1 cube chicken bouillon (or 1 tsp bouillon powder)
  • 1/2 cup water (optional, I added this to help disperse the chicken flavoring but the water from the veggies as they cook also would suffice if the dish seems too watery to you)
  • 1 tablespoon olive oil
  • 1/4 teaspoon pepper (or to taste)
  • 1/4 cup sour cream
  • 1 cup ricotta
  • Bacon Grease

Instructions

Step 1: To grease your 9 x 13-inch pan, you can use some leftover bacon grease for added flavor or use your regular pan spray.

Step 2: In a medium frying pan, add the broccoli, onion, chicken bouillon, water, olive oil, and pepper. Cook for about 10 minutes, covered while stirring occasionally.

Step 3: Pace the chicken chunks, garlic powder, sour cream, and ricotta cheese in a medium bowl. Mix until well combined.

Step 4: After 10 minutes transfer the broccoli mix into the chicken bowl. Stir until incorporated.

Step 5: Sprinkle 4 cups of shredded mozzarella cheese into the mixture and mix.

Step 6: Pour and evenly spread the mixture into your greased pan.

Step 7: Top with the remaining mozzarella cheese.

Step 8: Place inside the oven and bake at 350 degrees for 50 to 60 minutes or until the top layer of cheese is browned.

Step 9: If you want softer broccoli you can bake the florets to your liking. Serve immediately. Enjoy!

June 5, 2020 0 comment
0 FacebookTwitterPinterestEmail
Main Dish Recipes

BACON CHEESEBURGER CROCK POT DIP

by Rebecca June 5, 2020
written by Rebecca

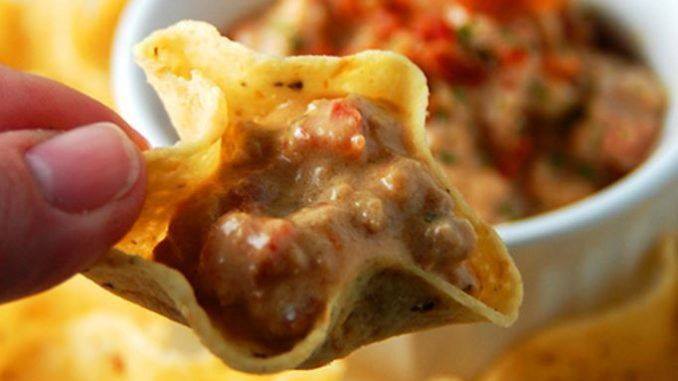
Want an easy and quick food to impress your friends and family? This just might be your lucky day! What I am sharing with you today is the Bacon Cheeseburger Crockpot Dip. I love how artistic this dish is. I mean, look at those pretty looking dips. Your mouth will surely water just by looking at it. I am so glad that I have stumbled upon this amazing recipe. The internet paid out! In this recipe, you can use turkey instead of beef but I prefer beef because it is always present in our fridge. My friend tried the turkey and she said it was as good as the beef so there you go! Either one works perfectly well with this dish. By the way, aside from the beef and cheese, it also has bacon in it. Just think about all the flavors happening at the same time! Man, it’s the best! Try this today. I know you’re gonna love it!

INGREDIENTS

1 lb of lean ground beef or turkey

8 oz package of cream cheese, cubed

2 c shredded cheddar cheese

10 oz can of diced tomatoes with green chiles

6 oz package of real bacon bits, divided

1 t dried parsley

assorted dippers

HOW TO MAKE BACON CHEESEBURGER CROCK POT DIP

Step 1: Place a skillet on the stove and turn the heat to medium. Put the ground meat and cook until the color turns brown.

Step 2: Drain the meat and remove excess oil. Transfer into a larger skillet.

Step 3: Turn the heat to low and add in tomatoes, the cheese ingredients, and bacon strips. (Set aside about 2 tablespoons of bacon bit for garnish.)

Step 4: Stir occasionally until all the ingredients are cooked.

Step 5: Transfer into a 2-quart crockpot.

Step 6: Cover the pot and cook for about 2 to 3 hours on a low setting. Stir the mixture gradually.

Step 7: Top with freshly chopped parsley and the 2 tablespoons of bacon.

Step 8: Serve and enjoy!

BACON CHEESEBURGER CROCK POT DIP

Rebecca Want an easy and quick food to impress your friends and family? This just might be your lucky day! What I am sharing with you today is the Bacon Cheeseburger… Main Dish Recipes BACON CHEESEBURGER CROCK POT DIP European Print This
Nutrition facts: 200 calories 20 grams fat
Rating: 5.0/5
( 1 voted )

Ingredients

  • 1 lb of lean ground beef or turkey
  • 8 oz package of cream cheese, cubed
  • 2 c shredded cheddar cheese
  • 10 oz can of diced tomatoes with green chiles
  • 6 oz package of real bacon bits, divided
  • 1 t dried parsley
  • assorted dippers

Instructions

Step 1: Place a skillet on the stove and turn the heat to medium. Put the ground meat and cook until the color turns brown.

Step 2: Drain the meat and remove excess oil. Transfer into a larger skillet.

Step 3: Turn the heat to low and add in tomatoes, the cheese ingredients, and bacon strips. (Set aside about 2 tablespoons of bacon bit for garnish.)

Step 4: Stir occasionally until all the ingredients are cooked.

Step 5: Transfer into a 2-quart crockpot.

Step 6: Cover the pot and cook for about 2 to 3 hours on a low setting. Stir the mixture gradually.

Step 7: Top with freshly chopped parsley and the 2 tablespoons of bacon.

Step 8: Serve and enjoy!

June 5, 2020 0 comment
0 FacebookTwitterPinterestEmail
Main Dish Recipes

Pillsbury’s Crescent Roll Taco Bake

by Rebecca June 5, 2020
written by Rebecca

This dish always gives me a satisfying feeling every time I eat it. It has beef and tacos! Who wouldn’t like that? I learned about this recipe about 2 months ago when my sister visited me. She told me that she had found the food that has beef in it and that I would definitely love beef after eating it. Yes, I wasn’t always a fan of beef. So, no occasional beef steak for me and burgers too! But after eating this recipe of taco, everything changed. My sister was right. It became my favorite. I don’t know but it has a nice appeal to it. I know there are a lot of recipes that has beef in it, but for now, I will settle for this Pillsbury’s Crescent Roll Taco Bake!

INGREDIENTS:

2 crescent roll tubes

1 pound ground beef (or ground turkey)

1 packet of taco seasoning

1 1/2 cups grated cheddar cheese

Shredded lettuce

1 or 2 diced tomatoes depending on size

1/2 small can sliced olives if desired

Sour cream optional

sliced avocado optional

How to make Pillsbury’s Crescent Roll Taco Bake

Step 1: Roll the sides of the crescent pastry in and lay it out. Set aside the leftovers.

Step 2: Get the leftover rolls and put them in the middle to make it thicker.

Step 3: Place a skillet on the stove and turn the heat to medium. Put the beef and cook until it turns color brown then add the taco seasoning.

Step 4: Transfer the cooked beef into the middle of the crescent rolls.

Step 5: Spread cheese on top of the beef.

Step 6: Get the sides of the rolls and tuck it in beneath the beef and cheese.

Step 7: Add whatever you want in your tacos. Tomato, cheese, sour cream, lettuce or anything. Place it in the center of the tacos.

Step 8: Refer to the instructions provided on the cover of the crescent rolls to cook.

Step 9: Serve and enjoy!

Pillsbury’s Crescent Roll Taco Bake

Rebecca This dish always gives me a satisfying feeling every time I eat it. It has beef and tacos! Who wouldn’t like that? I learned about this recipe about 2 months… Main Dish Recipes Pillsbury’s Crescent Roll Taco Bake European Print This
Nutrition facts: 200 calories 20 grams fat
Rating: 4.5/5
( 2 voted )

Ingredients

  • 2 crescent roll tubes
  • 1 pound ground beef (or ground turkey)
  • 1 packet of taco seasoning
  • 1 1/2 cups grated cheddar cheese
  • Shredded lettuce
  • 1 or 2 diced tomatoes depending on size
  • 1/2 small can sliced olives if desired
  • Sour cream optional
  • sliced avocado optional
June 5, 2020 0 comment
0 FacebookTwitterPinterestEmail
Main Dish Recipes

Chocolate Rice Krispie Balls

by Rebecca June 5, 2020
written by Rebecca

This is the easiest yet the best Chocolate balls you will ever have! Just look at the ingredients and you will have an idea of what the outcome would be. At first, I thought it was just gonna be like one of those treats that you ordinarily have as dessert. Little did I know that it was gonna be special to the point where it somehow ruined the rest of the chocolate recipes that I know of. I don’t mean to bias, but I think this is perfect. The taste of the ingredients complements each other. From the peanut butter to the Rice Krispies, from the shredded coconut to the sweet chocolate, this might be one the most complex set of ingredients I have ever encountered yet they incorporate well once cooked. I hope you give this one a try. It won’t disappoint you!

Please PIN THIS RECIPE TO any Relevant boards on your Pinterest (Dessert, Snacks, etc…) To SAVE it for later…

Rice Kripies Recipe

Rice Kripies Recipe

Ingredients

½ cup of peanut butter

3 tbsps of soft butter

1 tsp of vanilla

1 cup of Rice Krispies

½ cup of chopped pecans

1 cup of shredded coconut

For the chocolate

1 package of chocolate chips

1 square of sweet chocolate

How to make Chocolate Rice Krispie Balls

Step 1: Combine peanut butter, soft butter, vanilla, Rice Krispies, chopped pecans, and shredded coconut in a large bowl. Whisk until all are well blended and put the fridge for 30 minutes to cool.

Step 2: Take it out off the fridge and form balls out it and put back in the fridge to cool for another 1 hour.

Step 3: Melt the chocolate chips and the sweet chocolate in a double broiler. Once melted, get the balls and put them into the melted chocolate mixture one at a time and coat them evenly. To make it quick and easy, you can use a fork to do the job.

Step 4: Transfer the balls into the parchment paper and put it in the freezer for the flavors to set perfectly. Enjoy!

Chocolate Rice Krispie Balls

Rebecca This is the easiest yet the best Chocolate balls you will ever have! Just look at the ingredients and you will have an idea of what the outcome would be.… Main Dish Recipes Chocolate Rice Krispie Balls European Print This
Nutrition facts: 200 calories 20 grams fat
Rating: 5.0/5
( 1 voted )

Ingredients

  • ½ cup of peanut butter
  • 3 tbsps of soft butter
  • 1 tsp of vanilla
  • 1 cup of Rice Krispies
  • ½ cup of chopped pecans
  • 1 cup of shredded coconut
  • For the chocolate
  • 1 package of chocolate chips
  • 1 square of sweet chocolate

Instructions

Step 1: Combine peanut butter, soft butter, vanilla, Rice Krispies, chopped pecans, and shredded coconut in a large bowl. Whisk until all are well blended and put the fridge for 30 minutes to cool.

Step 2: Take it out off the fridge and form balls out it and put back in the fridge to cool for another 1 hour.

Step 3: Melt the chocolate chips and the sweet chocolate in a double broiler. Once melted, get the balls and put them into the melted chocolate mixture one at a time and coat them evenly. To make it quick and easy, you can use a fork to do the job.

Step 4: Transfer the balls into the parchment paper and put it in the freezer for the flavors to set perfectly. Enjoy!

June 5, 2020 0 comment
0 FacebookTwitterPinterestEmail
Main Dish Recipes

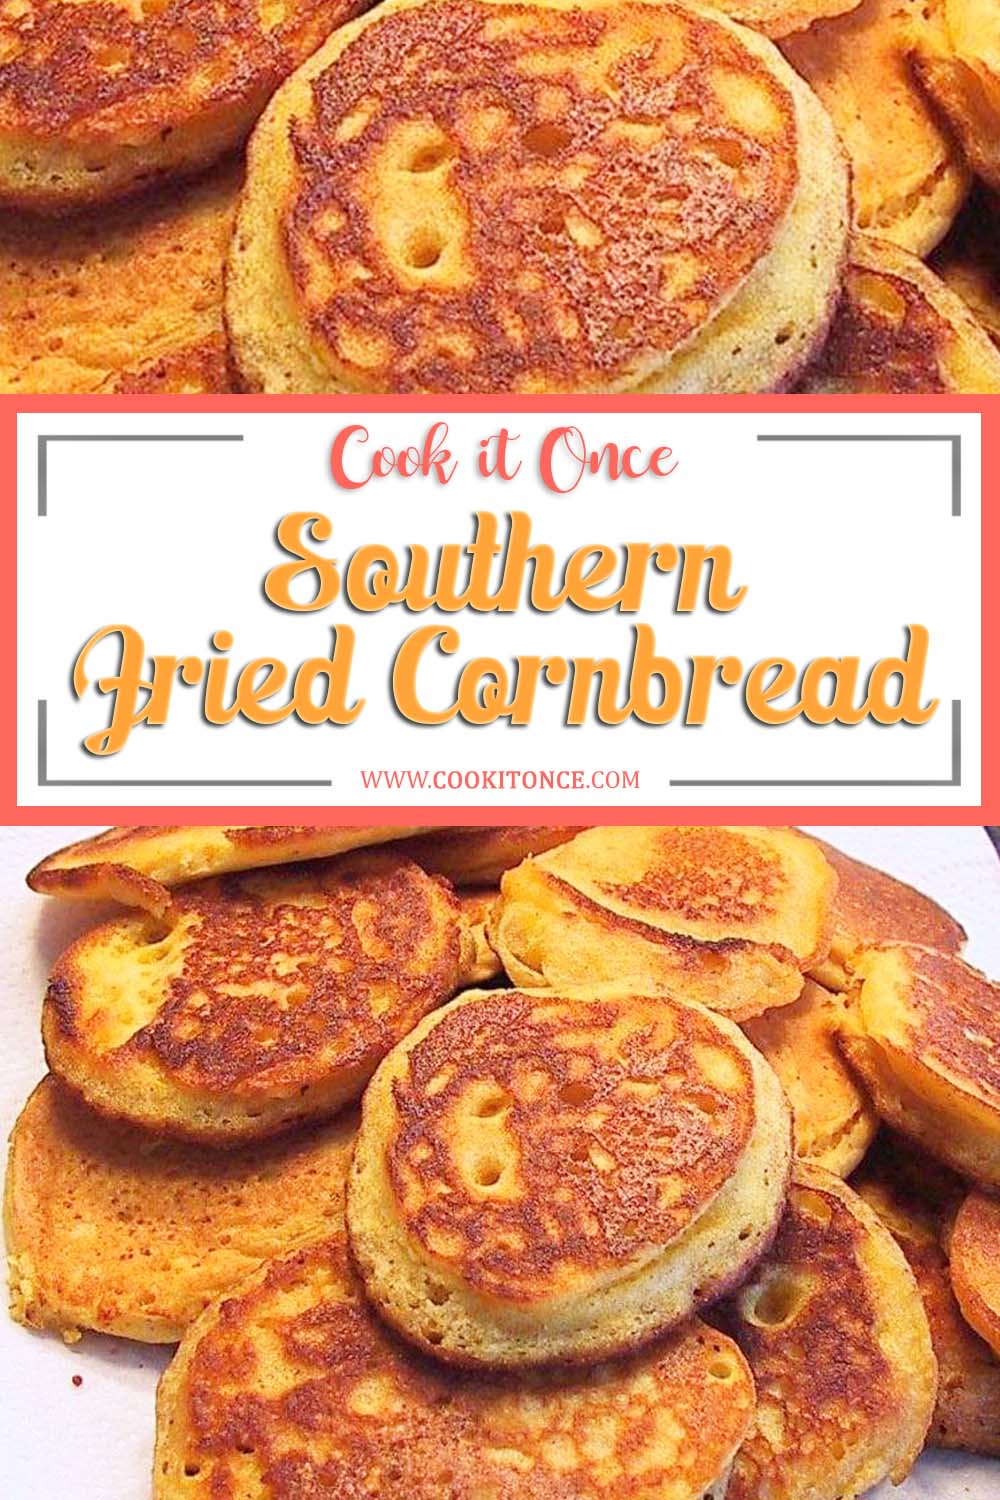
Southern Fried Cornbread

by Rebecca June 5, 2020
written by Rebecca

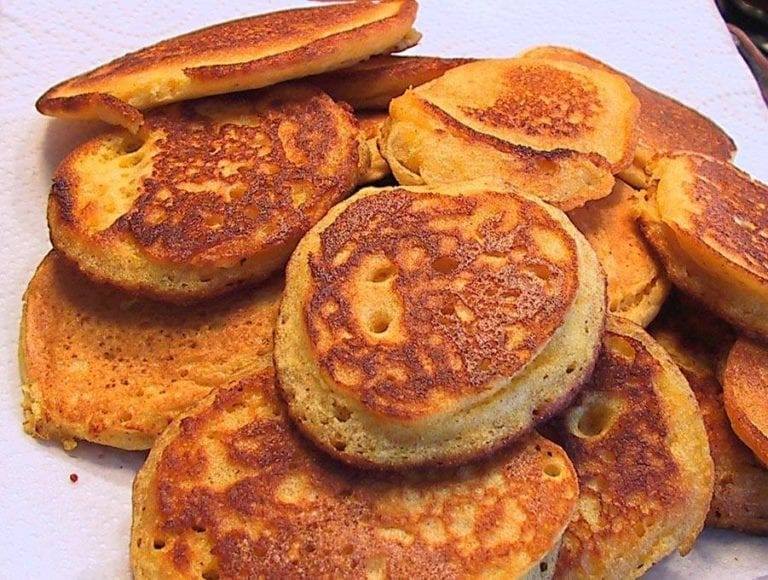
Aside from Mexican dishes, I love Southern, too. Southern dishes are so diverse, few of my favorites are Savannah Red Rice, Jambalaya, Banana Pudding, Cheese Pie, and a lot more. There are too many classic Southern dishes, some we are not even familiar with, but there’s one dish that never leaves our hearts – the Southern Fried Cornbread. These cornbreads are crunchy on the outside and moist on the inside. Easy and quick to make and an absolute cult favorite!

I learned to make this from my mom, she said her mother taught her too. It’s a recipe that has been passed around for centuries. Although, many modifications were made from one family to the other, yet the history of this delicious Southern Fried Cornbread stays the same. One of many Southern dishes pride that’s loved by many. I will teach my kids how to make this so they can pass it around their kids and to the next generation to come. This Southern Fried Cornbread deserves a spot on every family’s menu.

Please PIN THIS RECIPE TO any Relevant boards on your Pinterest (Breakfast, Snacks, etc…) To SAVE it for later…

Fried Cornbread Recipe

Fried Cornbread Recipe

Ingredients

2 cups of self-rising cornmeal

1/2 teaspoon of Kosher salt

3 cup of boiling water

1/4 cup of bacon drippings for frying

1/4 cup of vegetable oil for frying

How to make Southern Fried Cornbread

Step 1: Mix the cornmeal, salt, and water in a medium-sized bowl.

Step 2: Heat the bacon drippings and oil in a cast-iron skillet until almost smoking. Check if the oil is hot with a few drops of water, when they sizzle when dropped into the skillet the oil is hot.

Step 3: Place 2 tablespoons of the cornmeal mixture into the hot oil. Cook for 2 minutes or until golden crust forms around the cornbread edges. Do this for both sides. You can add more oil and/or bacon drippings into the skillet if it becomes too dry.

Step 4: Once cooked, remove from the skillet and transfer to paper towels to drain. Serve immediately. Enjoy!

Southern Fried Cornbread

Rebecca Aside from Mexican dishes, I love Southern, too. Southern dishes are so diverse, few of my favorites are Savannah Red Rice, Jambalaya, Banana Pudding, Cheese Pie, and a lot more.… Main Dish Recipes Southern Fried Cornbread European Print This
Nutrition facts: 200 calories 20 grams fat
Rating: 5.0/5
( 1 voted )

Ingredients

  • 2 cups of self-rising cornmeal
  • 1/2 teaspoon of Kosher salt
  • 3 cup of boiling water
  • 1/4 cup of bacon drippings for frying
  • 1/4 cup of vegetable oil for frying

Instructions

Step 1: Mix the cornmeal, salt, and water in a medium-sized bowl.

Step 2: Heat the bacon drippings and oil in a cast-iron skillet until almost smoking. Check if the oil is hot with a few drops of water, when they sizzle when dropped into the skillet the oil is hot.

Step 3: Place 2 tablespoons of the cornmeal mixture into the hot oil. Cook for 2 minutes or until golden crust forms around the cornbread edges. Do this for both sides. You can add more oil and/or bacon drippings into the skillet if it becomes too dry.

Step 4: Once cooked, remove from the skillet and transfer to paper towels to drain. Serve immediately. Enjoy!

June 5, 2020 0 comment
0 FacebookTwitterPinterestEmail
Main Dish Recipes

SLICED BAKED POTATOES

by Rebecca June 5, 2020
written by Rebecca

The best food for a gloomy afternoon! I made this yesterday and I enjoyed every bite of it! You will only need 5 basic ingredients for this dish and 7 easy steps! Anyone can pull this off. I am not an expert cook myself but I try to be. Well, when it comes to cooking food, we are allowed to give our take to it. I mean, personally, it makes me proud when I cook something good. Take for instance this Sliced Baked Potatoes. Yesterday, it was hit! My kids loved it. Nothing beats that feeling when you know what you did was amazing. Okay, enough with the long introduction and build up to this dish. It’s time for you to try it your own. By the way, if you do not have an oven, you can use your microwave instead. Just poke small holes on the potatoes and cook it in the microwave for 6 minutes only to prevent the potatoes from being overcooked.  So, there you go. I hope this makes your day perfect. Serve it with a nice and cold lemon juice. Enjoy!

Please PIN THIS RECIPE TO any Relevant boards on your Pinterest (Appetizer, Snacks, etc…) To SAVE it for later…

Baked Potatoes Recipe

Baked Potatoes Recipe

INGREDIENTS

Baking potatoes

Cheddar cheese, grated

Bacon, cooked and crumbled

Green onions, sliced

Sour cream

HOW TO MAKE SLICED BAKED POTATOES

Step 1: Ready the oven and preheat to 400 degrees F.

Step 2: Prepare the cookie sheet.

Step 3: Brush with butter both sides of potato slices and put them on the prepared cookie sheet.

Step 4: Place the cookie sheet in the oven and bake for 30 to 40 minutes until both sides of the potatoes turn light brown.

Step 5: Remove the potatoes from the oven and top with cheese, crushed bacon, and green onions.

Step 6: Put the sheet back in the oven and bake until the cheese has completely melted.

Step 7: Remove from the oven and pour sour cream on top. Serve and enjoy!

SLICED BAKED POTATOES

Rebecca The best food for a gloomy afternoon! I made this yesterday and I enjoyed every bite of it! You will only need 5 basic ingredients for this dish and 7… Main Dish Recipes SLICED BAKED POTATOES European Print This
Nutrition facts: 200 calories 20 grams fat
Rating: 5.0/5
( 1 voted )

Ingredients

  • Baking potatoes
  • Cheddar cheese, grated
  • Bacon, cooked and crumbled
  • Green onions, sliced
  • Sour cream

Instructions

Step 1: Ready the oven and preheat to 400 degrees F.

Step 2: Prepare the cookie sheet.

Step 3: Brush with butter both sides of potato slices and put them on the prepared cookie sheet.

Step 4: Place the cookie sheet in the oven and bake for 30 to 40 minutes until both sides of the potatoes turn light brown.

Step 5: Remove the potatoes from the oven and top with cheese, crushed bacon, and green onions.

Step 6: Put the sheet back in the oven and bake until the cheese has completely melted.

Step 7: Remove from the oven and pour sour cream on top. Serve and enjoy!

June 5, 2020 0 comment
0 FacebookTwitterPinterestEmail
Newer Posts
Older Posts

Popular Posts

  • 1

    Crispy Crunchy Parmesan Potatoes

    March 21, 2020
  • 2

    CROCK POT SMOTHERED PORK CHOPS

    March 21, 2020
  • Facebook
  • Twitter

@2019 - All Right Reserved.


Back To Top