Cook it once
  • Home
  • Privacy Policy
  • Recipes
    • KETO
    • LC
    • WW
  • Tips
  • Contact
Cook it once
  • Home
  • Privacy Policy
  • Recipes
    • KETO
    • LC
    • WW
  • Tips
  • Contact
Category:

Main Dish Recipes

Main Dish Recipes

PRALINE CRUNCH

by Rebecca June 8, 2020
written by Rebecca

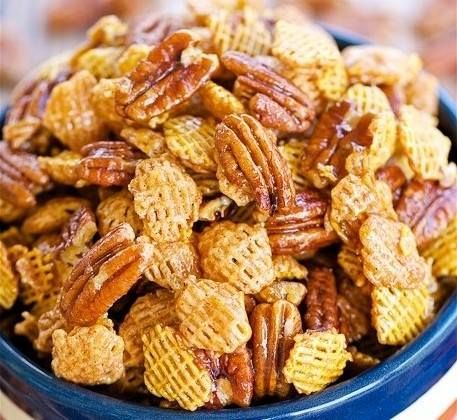
There is only one way to describe this treat. It is extremely addictive! The perfect combination of sweet and salty makes you eat more of this than you can think of. It’s great for a snack, and as a homemade gift. Make this ahead and make sure to make a lot because before you know it it’s already gone. Just store these in an airtight container to ensure it’s freshness.

I made three batches of praline crunch yesterday because my daughter’s friends are coming over tonight. I’m sure they’ll be asking for it and one batch is not gonna enough. The kids are crazy about this treat. Pop, grab, pop, grab, and repeat until the last piece. Such an amazing treat, very easy to make, and always a hit. Kids and adults alike can attest to how great this is. Let me just tell you, once you taste this you would not stop eating. You’ll be lost your self-control around this sweet and salty praline crunch.

INGREDIENTS

10 cups

8 cups Crispix cereal

2 cup pecan halves

1/2 cup brown sugar, packed

1/2 cup corn syrup

1/2 cup butter

1 teaspoon vanilla extract

1/2 teaspoon baking soda

HOW TO MAKE PRALINE CRUNCH

Step 1: Prepare the oven. Preheat it to 250 degrees F.

Step 2: Combine the cereal and pecans in a large bowl.

Step 3: Place the brown sugar, corn syrup, and butter in a medium saucepan. Cook and combine over medium-high heat. Bring to a boil while stirring occasionally.

Step 4: Remove the saucepan from the heat and stir in the vanilla and baking soda.

Step 5: Pour over the cereal mixture and toss to evenly coat.

Step 6: Dump the cereal mixture into a 9 x 13-inch pan.

Step 7: Place inside the preheated oven and bake for an hour. Stir every 20 minutes.

Step 8: Once done, pour onto a wax or parchment paper and cool.

Step 9: Once cooled, break it into pieces.
PRALINE CRUNCH

Rebecca There is only one way to describe this treat. It is extremely addictive! The perfect combination of sweet and salty makes you eat more of this than you can think… Main Dish Recipes PRALINE CRUNCH European Print This
Nutrition facts: 200 calories 20 grams fat
Rating: 5.0/5
( 1 voted )

Ingredients

  • 10 cups
  • 8 cups Crispix cereal
  • 2 cup pecan halves
  • 1/2 cup brown sugar, packed
  • 1/2 cup corn syrup
  • 1/2 cup butter
  • 1 teaspoon vanilla extract
  • 1/2 teaspoon baking soda

Instructions

Step 1: Prepare the oven. Preheat it to 250 degrees F.

Step 2: Combine the cereal and pecans in a large bowl.

Step 3: Place the brown sugar, corn syrup, and butter in a medium saucepan. Cook and combine over medium-high heat. Bring to a boil while stirring occasionally.

Step 4: Remove the saucepan from the heat and stir in the vanilla and baking soda.

Step 5: Pour over the cereal mixture and toss to evenly coat.

Step 6: Dump the cereal mixture into a 9 x 13-inch pan.

Step 7: Place inside the preheated oven and bake for an hour. Stir every 20 minutes.

Step 8: Once done, pour onto a wax or parchment paper and cool.

Step 9: Once cooled, break it into pieces.
June 8, 2020 0 comment
0 FacebookTwitterPinterestEmail
Main Dish Recipes

The Pioneer Woman’s Cinnamon Rolls – Perfect For Family Breakfast!

by Rebecca June 8, 2020
written by Rebecca

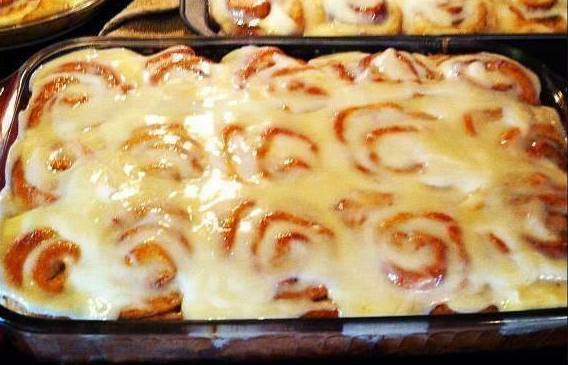
Breakfast is the most important meal of the day. I taught my kids to not skip it so I make sure to prepare healthy and beautiful treats to begin the day. And my family’s favorite breakfast is this perfectly baked and sweet Cinnamon Rolls. These beauties are fluffy, super soft, and delicious! Start your day with a bite and that smile will never leave your face for the entire day!

INGREDIENTS

1 quart Whole Milk

1 cup Vegetable Oil

1 cup Sugar

2 packages Active Dry Yeast

8 cups (Plus 1 Cup Extra, Separated) All-purpose Flour

1 teaspoon (heaping) Baking Powder

1 teaspoon (scant) Baking Soda

1 Tablespoon (heaping) Salt

3 cups (to 4 Cups) Melted Butter

2 cups Sugar

Generous Sprinkling Of Cinnamon

FOR THE MAPLE FROSTING

1 bag Powdered Sugar

2 teaspoons Maple Flavoring

½ cups Milk

¼ cups Melted Butter

¼ cups Brewed Coffee

⅛ teaspoons Salt

How to make The Pioneer Woman’s Cinnamon Rolls

Place the milk, vegetable oil, and sugar in a pan. Mix until incorporated and heat until just the boiling.

Turn the heat off and let the mixture cool for 45 minutes to an hour.

Once the mixture is cooled, sprinkle with the Active Dry Yeasts and leave it for a minute.

Add in 8 cups of all-purpose flour to the mixture and stir until combined.

Cover the dish and let it rise for an hour.

After an hour, add another cup of flour, baking powder, baking soda, and salt. Mix until incorporated. When not ready to use yet, you can cover the dough and place it inside the fridge. If it starts to overflow just punch it down.

When ready to prepare on the same day, lay the dough on a floured surface.

Take half of the dough and form a triangle, and roll until thin yet still maintaining a rectangular shape.

Drizzle the rectangular shaped dough with 1 1/2 to 2 cups of melted butter and sprinkle with 1 cup of sugar, then, dust with a generous amount of cinnamon.

Roll in a neat line toward you starting at the opposite end. Make sure to roll as tight as possible and pinch the seam to seal.

Grease a 7-inch round foil cake or pie pan with 1 tablespoon of melted butter.

Meanwhile, cut the rolls at about 3/4 to an inch thick and layer them in the buttered pans. Repeat the same process with the remaining dough.

Let the rolls rise first for about 20 to 30 minutes.

Then, place inside the oven and bake at 375 degrees for about 15 to 18 minutes or until light brown.

To make the frosting, mix the powdered sugar, maple flavoring, milk, melted butter, brewed coffee, and salt. Stir until incorporated and smooth. You are looking for a thick but pourable consistency. Adjust the taste as needed.

Lavishly drizzle the frosting over the warm rolls and serve. Enjoy!

The Pioneer Woman’s Cinnamon Rolls – Perfect For Family Breakfast!

Rebecca Breakfast is the most important meal of the day. I taught my kids to not skip it so I make sure to prepare healthy and beautiful treats to begin the… Main Dish Recipes The Pioneer Woman’s Cinnamon Rolls – Perfect For Family Breakfast! European Print This
Nutrition facts: 200 calories 20 grams fat
Rating: 5.0/5
( 1 voted )

Ingredients

  • 1 quart Whole Milk
  • 1 cup Vegetable Oil
  • 1 cup Sugar
  • 2 packages Active Dry Yeast
  • 8 cups (Plus 1 Cup Extra, Separated) All-purpose Flour
  • 1 teaspoon (heaping) Baking Powder
  • 1 teaspoon (scant) Baking Soda
  • 1 Tablespoon (heaping) Salt
  • 3 cups (to 4 Cups) Melted Butter
  • 2 cups Sugar
  • Generous Sprinkling Of Cinnamon
  • FOR THE MAPLE FROSTING
  • 1 bag Powdered Sugar
  • 2 teaspoons Maple Flavoring
  • ½ cups Milk
  • ¼ cups Melted Butter
  • ¼ cups Brewed Coffee
  • ⅛ teaspoons Salt

Instructions

Place the milk, vegetable oil, and sugar in a pan. Mix until incorporated and heat until just the boiling.

Turn the heat off and let the mixture cool for 45 minutes to an hour.

Once the mixture is cooled, sprinkle with the Active Dry Yeasts and leave it for a minute.

Add in 8 cups of all-purpose flour to the mixture and stir until combined.

Cover the dish and let it rise for an hour.

After an hour, add another cup of flour, baking powder, baking soda, and salt. Mix until incorporated. When not ready to use yet, you can cover the dough and place it inside the fridge. If it starts to overflow just punch it down.

When ready to prepare on the same day, lay the dough on a floured surface.

Take half of the dough and form a triangle, and roll until thin yet still maintaining a rectangular shape.

Drizzle the rectangular shaped dough with 1 1/2 to 2 cups of melted butter and sprinkle with 1 cup of sugar, then, dust with a generous amount of cinnamon.

Roll in a neat line toward you starting at the opposite end. Make sure to roll as tight as possible and pinch the seam to seal.

Grease a 7-inch round foil cake or pie pan with 1 tablespoon of melted butter.

Meanwhile, cut the rolls at about 3/4 to an inch thick and layer them in the buttered pans. Repeat the same process with the remaining dough.

Let the rolls rise first for about 20 to 30 minutes.

Then, place inside the oven and bake at 375 degrees for about 15 to 18 minutes or until light brown.

To make the frosting, mix the powdered sugar, maple flavoring, milk, melted butter, brewed coffee, and salt. Stir until incorporated and smooth. You are looking for a thick but pourable consistency. Adjust the taste as needed.

Lavishly drizzle the frosting over the warm rolls and serve. Enjoy!

June 8, 2020 0 comment
0 FacebookTwitterPinterestEmail
Main Dish Recipes

JOHN WAYNE CASSEROLE

by Rebecca June 8, 2020
written by Rebecca

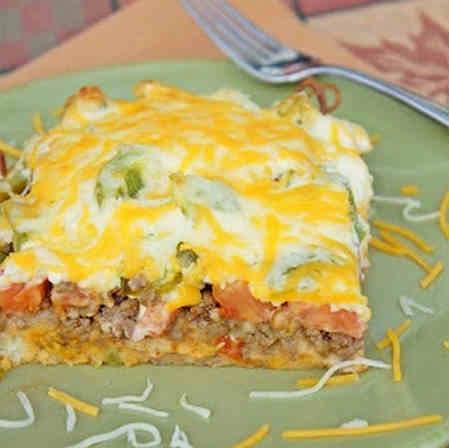
The name of this casserole is intriguing, and honestly, I never know where it originated. All I care about is how great this is. I am a casserole fan, I think they are amazingly delicious and fulfilling. My love for casserole started years back, and my family agrees with me. One of our favorites is this John Wayne casserole. The combination of ground beef, fresh vegetables, cheese mixture, and Jalapeno peppers make this a super delicious addition to your dinner menu. I can say the same for its unique biscuit crust. Try this and you’ll believe me that this is one interesting casserole dish that everyone will fall in love with.

INGREDIENTS

2 pounds ground beef, cooked and drained

1 (1.25-ounce) packet taco seasoning

4 ounces sour cream

4 ounces mayonnaise

8 ounces Cheddar cheese, shredded and divided

1 yellow onion, sliced

2 cups biscuit mix

2 tomatoes, sliced

1 green bell pepper, sliced

1 (4-ounce) can slice jalapeno peppers

HOW TO MAKE JOHN WAYNE CASSEROLE

Step 1: Prepare the oven. Preheat it to 325 degrees.

Step 2: Cook the ground beef in a large skillet. Add in the taco seasoning and water according to package instruction. Set aside.

Step 3: Combine the sour cream, mayonnaise, cheddar cheese, and half on the onions a separate bowl. Mix until incorporated and set aside.

Step 4: Follow the package instructions to stir and form a soft dough.

Step 5: In a 9 x 13-inch greased casserole dish, pat the dough at the bottom and one-half-inch up the sides.

Step 6: Meanwhile, saute the remaining onions with the el pepper until slightly soft.

Step 7: Evenly spread the ground beef, followed by tomato slices, then, green peppers, onion, jalapeno peppers, and sour cream mixture over the biscuit mix. Sprinkle the shredded cheese over.

Step 8: Place inside the preheated oven and bake for 30 to 40 minutes or until the edges are mildly browned. Remove from the oven and serve immediately. Enjoy!

JOHN WAYNE CASSEROLE

Rebecca The name of this casserole is intriguing, and honestly, I never know where it originated. All I care about is how great this is. I am a casserole fan, I… Main Dish Recipes JOHN WAYNE CASSEROLE European Print This
Nutrition facts: 200 calories 20 grams fat
Rating: 5.0/5
( 1 voted )

Ingredients

  • 2 pounds ground beef, cooked and drained
  • 1 (1.25-ounce) packet taco seasoning
  • 4 ounces sour cream
  • 4 ounces mayonnaise
  • 8 ounces Cheddar cheese, shredded and divided
  • 1 yellow onion, sliced
  • 2 cups biscuit mix
  • 2 tomatoes, sliced
  • 1 green bell pepper, sliced
  • 1 (4-ounce) can sliced jalapeno peppers

Instructions

Step 1: Prepare the oven. Preheat it to 325 degrees.

Step 2: Cook the ground beef in a large skillet. Add in the taco seasoning and water according to package instruction. Set aside.

Step 3: Combine the sour cream, mayonnaise, cheddar cheese, and half on the onions a separate bowl. Mix until incorporated and set aside.

Step 4: Follow the package instructions to stir and form a soft dough.

Step 5: In a 9 x 13-inch greased casserole dish, pat the dough at the bottom and one-half-inch up the sides.

Step 6: Meanwhile, saute the remaining onions with the el pepper until slightly soft.

Step 7: Evenly spread the ground beef, followed by tomato slices, then, green peppers, onion, jalapeno peppers, and sour cream mixture over the biscuit mix. Sprinkle the shredded cheese over.

Step 8: Place inside the preheated oven and bake for 30 to 40 minutes or until the edges are mildly browned. Remove from the oven and serve immediately. Enjoy!

June 8, 2020 0 comment
0 FacebookTwitterPinterestEmail
Main Dish Recipes

Mexican Dip

by Rebecca June 6, 2020
written by Rebecca

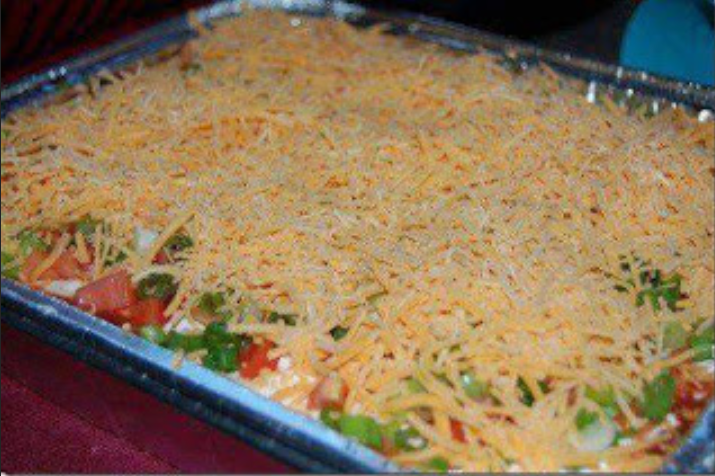
Yet another easy to make and quick recipe to add to your list. This Mexican Dip is guaranteed to add flair and flavor to your every meal. It’s perfect for any corn chips, tortillas, crackers, or veggies. Serve this as an appetizer, on game day, or for the unexpected guest. It’s a guaranteed 5-star!

We don’t have to be a Mexican to appreciate and love everything about their dishes. I can enumerate the Mexican food I love but it’s gonna be a long list. I find their dish completely irresistible. Although, if you will notice most of these dishes are pretty easy recipes but the flavors just burst into your mouth. So going back to this dip, it’s a great illustration of how a simple dip can make everything great! I mean the ingredients are basic and easily found, the direction is straightforward and so easy to understand. Just mixing everything, stir to incorporate, and top with lots of cheese, then, serve with any corn chips of your choice. The creamy layer of this dip that is flavored with taco seasoning, plus your favorite toppings is mouthwatering. Stir in some spice to have a little kick like what I always do because I like hot and spicy. But for the kids, you can serve it as is. I mean this dip is for all ages, versatile, and a keeper!

INGREDIENTS

2 8oz cream cheese boxes

2 big spoonfuls sour cream.

2 packages of taco seasoning

shredded lettuce

chopped black olives

chopped green pepper

chopped tomatoes

4 cups shredded Mexican Cheese

How to make Mexican Dip

Step 1: In a mixing bowl, beat the cream cheese and sour cream until smooth.

Step 2: Mix in the taco seasoning.

Step 3: Evenly spread the mixture into a large glass dish.

Step 4: Top it with lettuce, green onion if using, tomatoes, and sliced black olives.

Step 5: Sprinkle the cheddar cheese over.

Step 6: Serve with any corn chips. Enjoy!

Mexican Dip

Rebecca Yet another easy to make and quick recipe to add to your list. This Mexican Dip is guaranteed to add flair and flavor to your every meal. It’s perfect for… Main Dish Recipes Mexican Dip European Print This
Nutrition facts: 200 calories 20 grams fat
Rating: 5.0/5
( 1 voted )

Ingredients

  • 2 8oz cream cheese boxes
  • 2 big spoonfuls sour cream.
  • 2 packages of taco seasoning
  • shredded lettuce
  • chopped black olives
  • chopped green pepper
  • chopped tomatoes
  • 4 cups shredded Mexican Cheese

Instructions

Step 1: In a mixing bowl, beat the cream cheese and sour cream until smooth.

Step 2: Mix in the taco seasoning.

Step 3: Evenly spread the mixture into a large glass dish.

Step 4: Top it with lettuce, green onion if using, tomatoes, and sliced black olives.

Step 5: Sprinkle the cheddar cheese over.

Step 6: Serve with any corn chips. Enjoy!

June 6, 2020 0 comment
0 FacebookTwitterPinterestEmail
Main Dish Recipes

World’s Best Recipe for Fried Green Tomatoes

by Rebecca June 6, 2020
written by Rebecca

This recipe is super unique. Who would have thought of frying those green tomatoes will result in the World’s Best recipe! When I first made this I didn’t know what to expect, yet I was so excited because it’s different, something I haven’t tried before. And the result was surprisingly good, fresh! You can use red tomatoes as well for this, although, use those that are not overly ripe or they will be mushy. Bring these babies outside and serve these with fresh lemon juice or iced tea for a refreshing taste of summer. Share this with your friends or loved ones, I assure you they will sit there, agape, on how yummy these fried green tomatoes are!

INGREDIENTS

4 large green tomatoes

2 eggs

1/2 cup milk

1 cup all-purpose flour

1/2 cup cornmeal

1/2 cup bread crumbs

2 teaspoons coarse kosher salt

1/4 teaspoon ground black pepper

1-quart vegetable oil for frying

How to make Fried Green Tomatoes

Step 1: Slice in half-inch thick the tomatoes and discard the ends.

Step 2: In a medium-size bowl, mix the eggs and milk. And scoop some flour onto a plate.

Step 3: In another plate, mix the cornmeal, bread crumbs, salt, and pepper.

Step 4: Coat the cut tomatoes first into the flour. Then, dip it into the milk and egg mixture. And lastly, completely coat the tomatoes in breadcrumbs.

Step 5: Pour the vegetable oil in a large skillet just enough to have 1/2 inch oil in the pan and heat over medium heat.

Step 6: Once the oil is hot, drop tomatoes into the frying pan in batches of 4 or 5 depends on the size of the skillet that you are using. Make sure though to not overcrowd and that the tomatoes should not touch each other.

Step 7: Fry until the tomatoes are browned, then flip to brown the other side. Once cooked, drain the tomatoes on paper towels.

World’s Best Recipe for Fried Green Tomatoes

Rebecca This recipe is super unique. Who would have thought of frying those green tomatoes will result in the World’s Best recipe! When I first made this I didn’t know what… Main Dish Recipes World’s Best Recipe for Fried Green Tomatoes European Print This
Nutrition facts: 200 calories 20 grams fat
Rating: 5.0/5
( 2 voted )

Ingredients

  • 4 large green tomatoes
  • 2 eggs
  • 1/2 cup milk
  • 1 cup all-purpose flour
  • 1/2 cup cornmeal
  • 1/2 cup bread crumbs
  • 2 teaspoons coarse kosher salt
  • 1/4 teaspoon ground black pepper
  • 1-quart vegetable oil for frying

Instructions

Step 1: Slice in half-inch thick the tomatoes and discard the ends.

Step 2: In a medium-size bowl, mix the eggs and milk. And scoop some flour onto a plate.

Step 3: In another plate, mix the cornmeal, bread crumbs, salt, and pepper.

Step 4: Coat the cut tomatoes first into the flour. Then, dip it into the milk and egg mixture. And lastly, completely coat the tomatoes in breadcrumbs.

Step 5: Pour the vegetable oil in a large skillet just enough to have 1/2 inch oil in the pan and heat over medium heat.

Step 6: Once the oil is hot, drop tomatoes into the frying pan in batches of 4 or 5 depends on the size of the skillet that you are using. Make sure though to not overcrowd and that the tomatoes should not touch each other.

Step 7: Fry until the tomatoes are browned, then flip to brown the other side. Once cooked, drain the tomatoes on paper towels.

June 6, 2020 0 comment
0 FacebookTwitterPinterestEmail
Main Dish Recipes

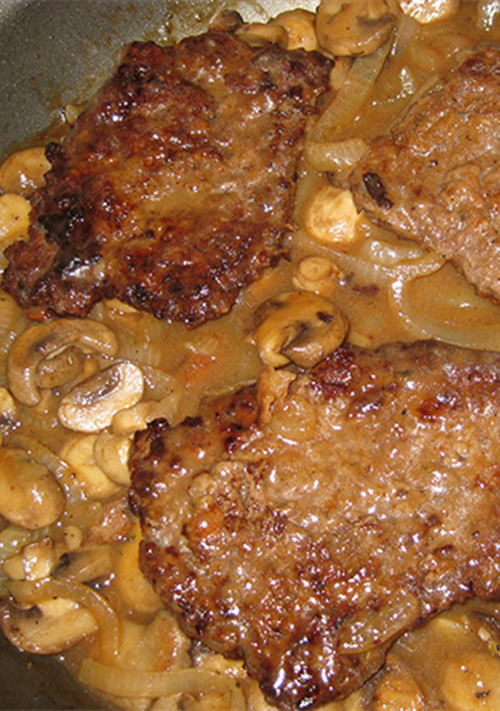
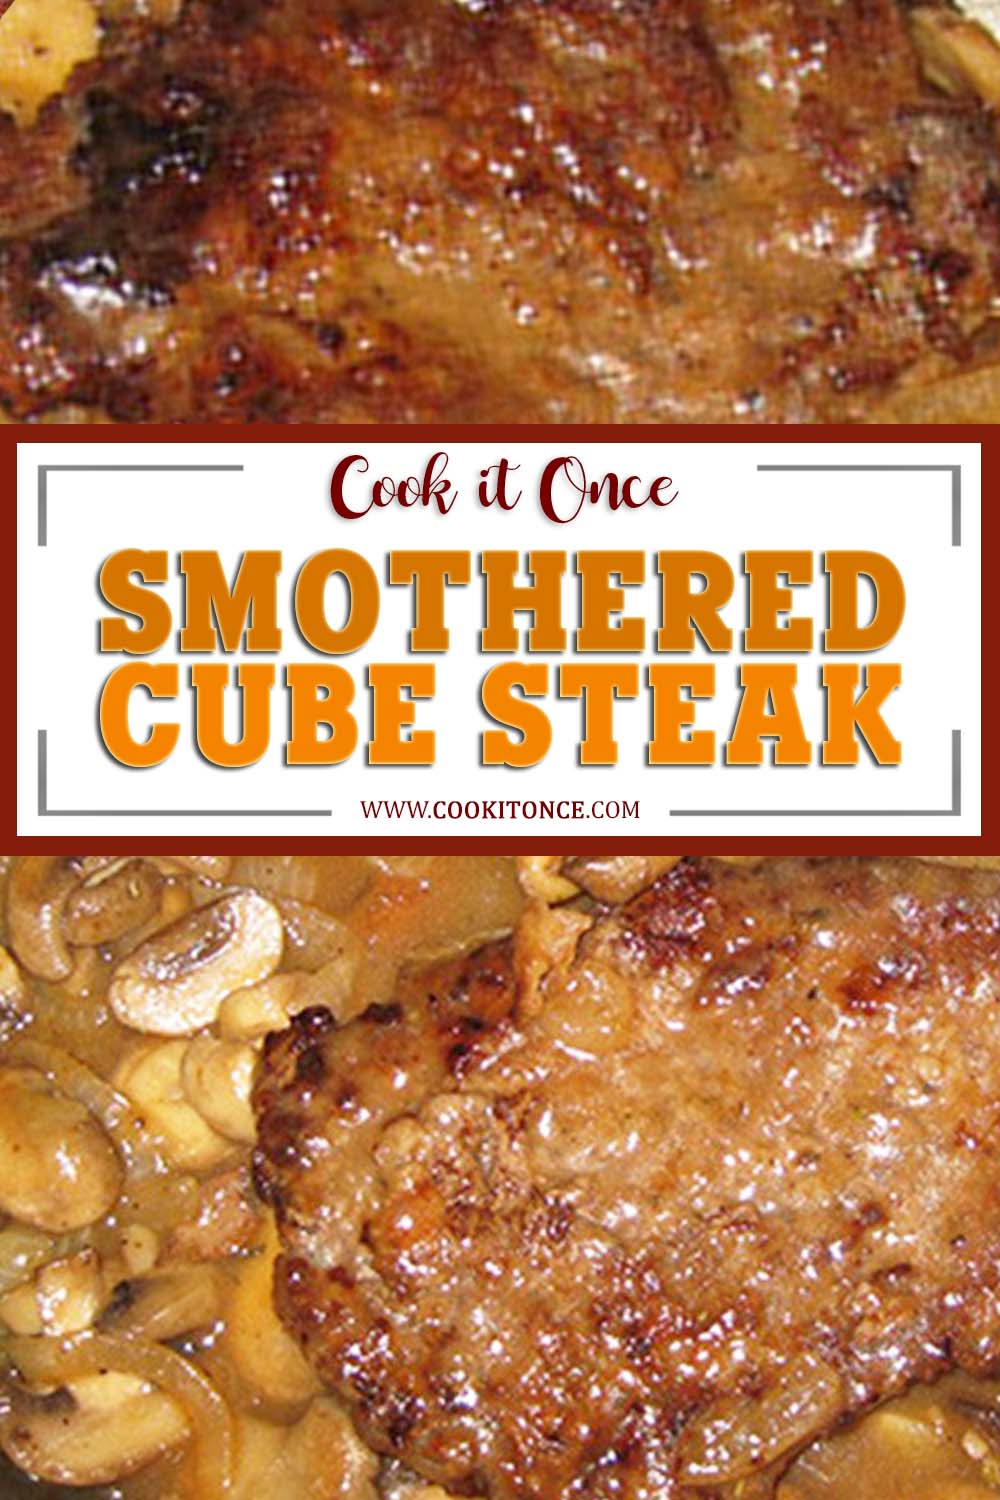
SMOTHERED CUBE STEAK

by Rebecca June 6, 2020
written by Rebecca

Steak anyone? But this, not your typical steak. This might be one of the best steak recipes I have ever tried! Steaks are perfect the way it is but if you were to smother it with a nice thick and delicious gravy, well, it’s beyond perfect! I usually eat this dish with mashed potatoes. It complements well with the gravy and steaks. I have simplified the steps for you so you’d have no trouble in cooking. All you need to do is to get the ingredients and follow. I am so excited for you! I hope you love it!

Please PIN THIS RECIPE TO any Relevant boards on your Pinterest (Dinner, Lunch, etc…) To SAVE it for later…

Steak Recipe

Steak Recipe

INGREDIENTS

2-3 Cube Steaks

3 Cups Sliced Mushrooms

1 Small Onion, halved and sliced (1/2 a Large)

Kosher Salt

Black pepper

Texas Cajun Seasoning

Flour

2 cups Chicken Stock

1/4 teaspoon thyme

Vegetable Oil

HOW TO MAKE SMOTHERED CUBE STEAK

Step 1: Prepare and wash the vegetables.

Step 2: Place the cube steaks on a large plate. Season both sides of the steaks with salt, pepper, and 1 tablespoon of Texas Cajun Seasoning. Add 2 tablespoons of flour and coat both sides of the steaks lightly.

Step 3: Place a skillet on the stove and turn the heat to medium. Add 1/2 cup of oil and wait for it to become hot. When the oil is hot enough, slowly put the cube steaks. Cook for 3 minutes on both sides. Remove the steak and place it on a clean plate.

Step 4: Remove the rest of the oil from the skillet and leave about 2 tablespoons. Toss in the onions and mushrooms. Stir until cooked through or until the onions are translucent and mushrooms are golden brown. Season with a pinch of pepper and salt.

Step 5: Add 2 tablespoons of flour and stir continuously until the vegetables are fully coated.

Step 6: Pour in the chicken stock and stir until all ingredients are blended. Turn the heat to medium-high. When the sauce is thick, turn off the heat.

Step 7: Put the cube steaks back and coat it well with the gravy. Serve and enjoy!

SMOTHERED CUBE STEAK

Rebecca Steak anyone? But this, not your typical steak. This might be one of the best steak recipes I have ever tried! Steaks are perfect the way it is but if… Main Dish Recipes SMOTHERED CUBE STEAK European Print This
Nutrition facts: 200 calories 20 grams fat
Rating: 5.0/5
( 1 voted )

Ingredients

  • 2-3 Cube Steaks
  • 3 Cups Sliced Mushrooms
  • 1 Small Onion, halved and sliced (1/2 a Large)
  • Kosher Salt
  • Black pepper
  • Texas Cajun Seasoning
  • Flour
  • 2 cups Chicken Stock
  • 1/4 teaspoon thyme
  • Vegetable Oil

Instructions

Step 1: Prepare and wash the vegetables.

Step 2: Place the cube steaks on a large plate. Season both sides of the steaks with salt, pepper, and 1 tablespoon of Texas Cajun Seasoning. Add 2 tablespoons of flour and coat both sides of the steaks lightly.

Step 3: Place a skillet on the stove and turn the heat to medium. Add 1/2 cup of oil and wait for it to become hot. When the oil is hot enough, slowly put the cube steaks. Cook for 3 minutes on both sides. Remove the steak and place it on a clean plate.

Step 4: Remove the rest of the oil from the skillet and leave about 2 tablespoons. Toss in the onions and mushrooms. Stir until cooked through or until the onions are translucent and mushrooms are golden brown. Season with a pinch of pepper and salt.

Step 5: Add 2 tablespoons of flour and stir continuously until the vegetables are fully coated.

Step 6: Pour in the chicken stock and stir until all ingredients are blended. Turn the heat to medium-high. When the sauce is thick, turn off the heat.

Step 7: Put the cube steaks back and coat it well with the gravy. Serve and enjoy!

June 6, 2020 0 comment
0 FacebookTwitterPinterestEmail
Main Dish Recipes

Best Lemon Lush Ever

by Rebecca June 6, 2020
written by Rebecca

I am so proud of myself! I just made the perfect Lemon Lush! With the help of the recipe that my friend gave me of course. I feel so good about this recipe that I want to share it with you guys! The good thing about this recipe is that you can always arrange the layers yourself with your preferred ingredients. Yes, you do not necessarily need to follow all the ingredients because some of you might be allergic to nuts for example. So, instead of Pecans, you substitute crushed Oreos, toasted coconut, graham crust, chocolate curls, and the list goes on. It depends on your personal taste. We need to be creative, right? Anyway, enjoy this recipe!

Ingredients

1 stick butter – melted

1 cup flour

1 1/2 cup pecans – chopped (reserve 3/4 cup for topping)

1 16 oz. container Cool Whip

8 oz. cream cheese – softened

1 cup of sugar

2 boxes Lemon Instant Pudding – regular size (made to directions and refrigerated)

How to make Lemon Lush

Step 1: In a 9×13 glass dish, arrange 4 layers.

Layer number 1: Combine 3/4 cups of pecans, butter, and flour in a glass dish. Whisk until well-mixed and apply pressure to stick it on the bottom part of the glass dish. Place in the oven and bake for 10 to 15 minutes at 350 degrees until the color turns light brown. Remove from the oven and let it cool.

Layer number 2: In a small glass bowl, combine 1 cup of Cool Whip, sugar, and cheese. Stir until well-blended. Distribute the mixture on top of the first layer.

Layer number 3: Refer to the instructions provided on the package of the lemon pudding to prepare. When you have done, spread the pudding on top of the second layer.

Layer number 4: Spread the remaining Cool Whip on top of the third layer and garnish with the rest of the pecans.

Step 2: Cover the bowl and put inside the fridge to cool overnight.

Step 3: Serve and enjoy!

Best Lemon Lush Ever

Rebecca I am so proud of myself! I just made the perfect Lemon Lush! With the help of the recipe that my friend gave me of course. I feel so good… Main Dish Recipes Best Lemon Lush Ever European Print This
Nutrition facts: 200 calories 20 grams fat
Rating: 5.0/5
( 1 voted )

Ingredients

  • 1 stick butter - melted
  • 1 cup flour
  • 1 1/2 cup pecans - chopped (reserve 3/4 cup for topping)
  • 1 16 oz. container Cool Whip
  • 8 oz. cream cheese - softened
  • 1 cup of sugar
  • 2 boxes Lemon Instant Pudding - regular size (made to directions and refrigerated)

Instructions

Step 1: In a 9x13 glass dish, arrange 4 layers.

Layer number 1: Combine 3/4 cups of pecans, butter, and flour in a glass dish. Whisk until well-mixed and apply pressure to stick it on the bottom part of the glass dish. Place in the oven and bake for 10 to 15 minutes at 350 degrees until the color turns light brown. Remove from the oven and let it cool.

Layer number 2: In a small glass bowl, combine 1 cup of Cool Whip, sugar, and cheese. Stir until well-blended. Distribute the mixture on top of the first layer.

Layer number 3: Refer to the instructions provided on the package of the lemon pudding to prepare. When you have done, spread the pudding on top of the second layer.

Layer number 4: Spread the remaining Cool Whip on top of the third layer and garnish with the rest of the pecans.

Step 2: Cover the bowl and put inside the fridge to cool overnight.

Step 3: Serve and enjoy!

June 6, 2020 0 comment
0 FacebookTwitterPinterestEmail
Main Dish Recipes

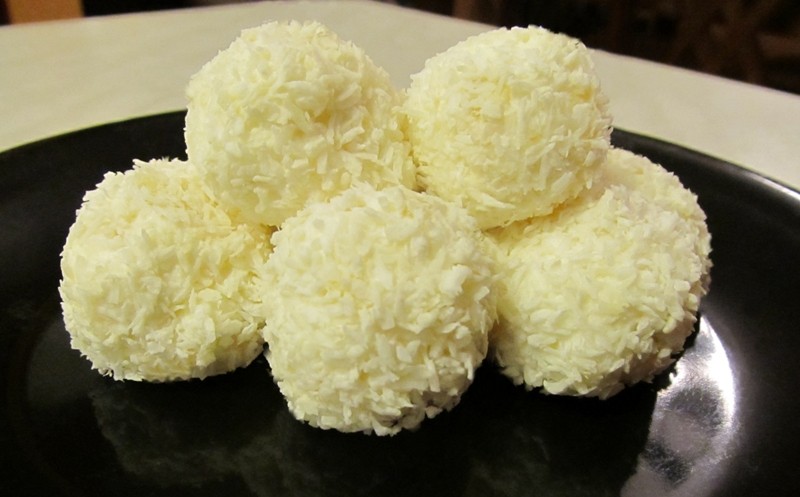
PINEAPPLE COCONUT SNOWBALLS

by Rebecca June 6, 2020
written by Rebecca

What a nice and cold treat to eat on a sunny day. I recently learned about this recipe. My friend introduced me to this heavenly like dessert. I am not a huge fan of pineapples nor coconuts but this made me changed my appetite towards these two fruits. I never thought that the two fruits I despise the most would become my favorite. This recipe helped a lot in changing my mind. It’s kind of weird because the only additional recipe that was included was cream cheese! But the combination of the tastes of coconut and pineapple made perfect sense. It is a dessert that you will not get tired of eating. I mean, aside from the flavors, it’s also nice and cold so it kind of feels like you are eating ice cream. Yesterday was hot so of course, I made these cute little snowballs to somehow ease the heat. My kids and I sat down on our porch while eating this and just bonded. It was the best day and thanks to this amazing treat, it became perfect! I really hope you get to try this. You are in for a treat! You will not be disappointed, I assure you that!

Please PIN THIS RECIPE TO any Relevant boards on your Pinterest (Dessert, Snacks, etc…) To SAVE it for later…

Pineapple Coconut Recipe

Pineapple Coconut Recipe

INGREDIENTS

1 (8 ounce) packages cream cheese, softened

1 (8 ounces) cans crushed pineapple, well-drained

2 1/2 cups flaked coconut

HOW TO MAKE PINEAPPLE COCONUT SNOWBALLS

Step 1: Use a strainer, a fine one, to drain the pineapple. Drain as many juices as you can.

Step 2: Put the drained pineapple into a small bowl and add cream cheese. Mix until blended.

Step 3: Cover the bowl and put inside the fridge for at least 30 minutes.

Step 4: Form 1-inch balls out of the pineapple mixture. Form coconut as well.

Step 4: Put back inside the fridge for 6 hours or overnight if you have more time to spare.

Step 5: Serve and enjoy!

PINEAPPLE COCONUT SNOWBALLS

Rebecca What a nice and cold treat to eat on a sunny day. I recently learned about this recipe. My friend introduced me to this heavenly like dessert. I am not… Main Dish Recipes PINEAPPLE COCONUT SNOWBALLS European Print This
Nutrition facts: 200 calories 20 grams fat
Rating: 5.0/5
( 1 voted )

Ingredients

  • 1 (8 ounce) packages cream cheese, softened
  • 1 (8 ounces) cans crushed pineapple, well-drained
  • 2 1/2 cups flaked coconut

Instructions

Step 1: Use a strainer, a fine one, to drain the pineapple. Drain as many juices as you can.

Step 2: Put the drained pineapple into a small bowl and add cream cheese. Mix until blended.

Step 3: Cover the bowl and put inside the fridge for at least 30 minutes.

Step 4: Form 1-inch balls out of the pineapple mixture. Form coconut as well.

Step 4: Put back inside the fridge for 6 hours or overnight if you have more time to spare.

Step 5: Serve and enjoy!

June 6, 2020 0 comment
0 FacebookTwitterPinterestEmail
Main Dish Recipes

APPLE CAKE WITH VANILLA CREAM SAUCE

by Rebecca June 6, 2020
written by Rebecca

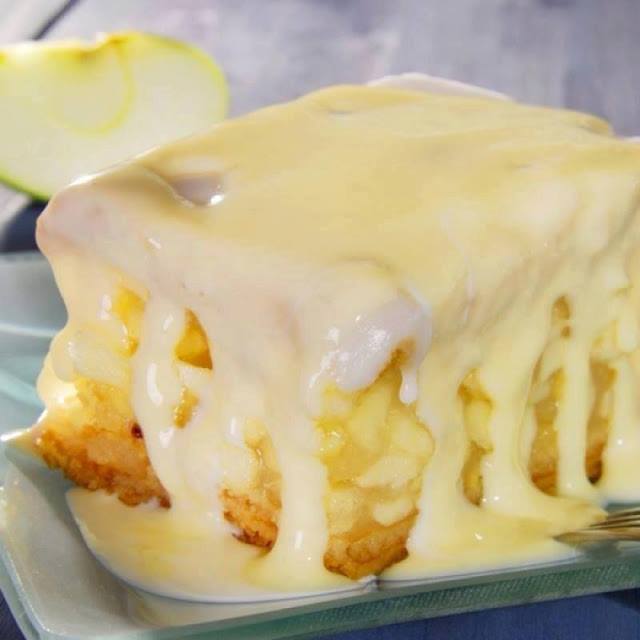
I made this amazing dessert yesterday for the birthday of my husband. He loves apples so much that I figured why not make a special treat just for him on his special day? I was so glad that he loved it! It’s a nice feeling when someone you love appreciates your efforts! It’s my first time to make Apple cake with vanilla cream sauce and I couldn’t be happier with the result. It’s really simple to make and very delicious! Try this today! I know you’re gonna love it.

Please PIN THIS RECIPE TO any Relevant boards on your Pinterest (Breakfast, Dessert, Snacks, etc…) To SAVE it for later…

Apple Cake Recipe

Apple Cake Recipe

INGREDIENTS

For the Apple cake

7 medium apples (any baking apple will do)

1 1/4 cup canola oil

1 cup of sugar

3 large eggs

3 cups whole wheat flour ( or all-purpose flour or half and half whole wheat and all-purpose)

1 teaspoon ground cinnamon

For the Cream sauce

2 cups heavy cream

1/2 cup sugar

8 tablespoons butter

1 teaspoon vanilla extract

HOW TO MAKE APPLE CAKE WITH VANILLA CREAM SAUCE

Step 1: Ready the oven and preheat to 350 degrees. Spray a 13×9 pan with cooking spray.

Step 2: Wash the apples and slice them. Put them into a bowl then set it aside.

Step 3: Add the eggs, sugar, and oil in an electric mixer. Beat until well-mixed and creamy.

Step 4: Add cinnamon and whole wheat flour into the electric mixer with the egg mixture.

Step 5: Add the sliced apples into the egg mixture and stir until well-mixed.

Step 6: Transfer the batter into the pan. Place the pan inside the oven and bake for 45 to 1 hour until cooked through or the color turns golden.

To make the Cream sauce:

Step 1: Mix all the sauce ingredients in a saucepan. Place on the stove and turn the heat to medium until the sauce boils while stirring occasionally.

Step 2: Turn the heat to low and cook for another 10 to 15 minutes until the sauce thickens.

Step 3: Pour the sauce over the Apple Cake. Serve and enjoy!

APPLE CAKE WITH VANILLA CREAM SAUCE

Rebecca I made this amazing dessert yesterday for the birthday of my husband. He loves apples so much that I figured why not make a special treat just for him on… Main Dish Recipes APPLE CAKE WITH VANILLA CREAM SAUCE European Print This
Nutrition facts: 200 calories 20 grams fat
Rating: 5.0/5
( 1 voted )

Ingredients

  • For the Apple cake
  • 7 medium apples (any baking apple will do)
  • 1 1/4 cup canola oil
  • 1 cup of sugar
  • 3 large eggs
  • 3 cups whole wheat flour ( or all-purpose flour or half and half whole wheat and all-purpose)
  • 1 teaspoon ground cinnamon
  • For the Cream sauce
  • 2 cups heavy cream
  • 1/2 cup sugar
  • 8 tablespoons butter
  • 1 teaspoon vanilla extract

Instructions

Step 1: Ready the oven and preheat to 350 degrees. Spray a 13x9 pan with cooking spray.

Step 2: Wash the apples and slice them. Put them into a bowl then set it aside.

Step 3: Add the eggs, sugar, and oil in an electric mixer. Beat until well-mixed and creamy.

Step 4: Add cinnamon and whole wheat flour into the electric mixer with the egg mixture.

Step 5: Add the sliced apples into the egg mixture and stir until well-mixed.

Step 6: Transfer the batter into the pan. Place the pan inside the oven and bake for 45 to 1 hour until cooked through or the color turns golden.

To make the Cream sauce:

Step 1: Mix all the sauce ingredients in a saucepan. Place on the stove and turn the heat to medium until the sauce boils while stirring occasionally.

Step 2: Turn the heat to low and cook for another 10 to 15 minutes until the sauce thickens.

Step 3: Pour the sauce over the Apple Cake. Serve and enjoy!

June 6, 2020 0 comment
0 FacebookTwitterPinterestEmail
Main Dish Recipes

PEANUT BUTTER CHOCOLATE ECLAIR CAKE

by Rebecca June 6, 2020
written by Rebecca

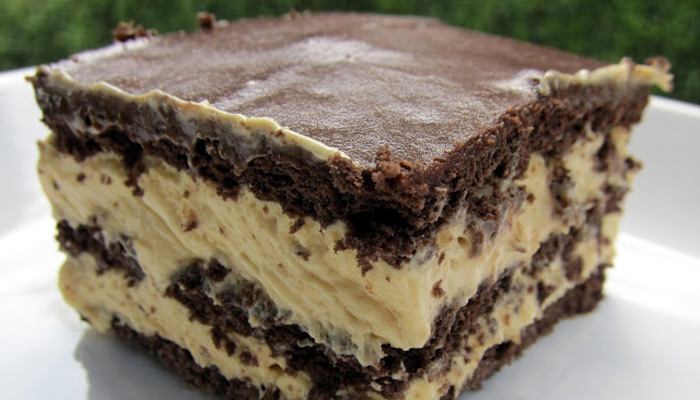
A no-bake, no-fuss dessert that everyone is going crazy about! This Peanut Butter Chocolate Eclair Cake will melt your heart – it’s incredible, super delicious, and an ultimate peanut butter craving hits! This delectable dessert saves me every time I have unexpected guests as it’s pretty easy to put together, and is great when paired with coffee. A 5-star treat that is indeed a keeper.

INGREDIENTS

For the Cake

1 box chocolate graham crackers

2 – 3 1/4 oz. packages instant vanilla pudding

1 cup creamy peanut butter

3 1/2 cup milk

1 – 8 oz. contain Cool Whip, thawed

For the Frosting

1/2 cup semi-sweet chocolate chips, melted

2 tablespoons melted butter

2 tablespoons white corn syrup

1/2 cup powdered sugar

2-3 tablespoons milk

HOW TO MAKE PEANUT BUTTER CHOCOLATE ECLAIR CAKE

To make the cake

Step 1: Use a cooking spray to grease a 9 x 13-inch cake pan.

Step 2: Cut the graham crakers to fully cover the bottom of the pan. Lay them in one layer. You can use either the original or the chocolate graham crackers.

Step 3: Place the pudding, peanut butter, and milk in a mixing bowl. Mix using an electric mixer for 2 minutes. Then, fold in the cool whip.

Step 4: Evenly spread half of the pudding over the first layer of the graham crackers and lay another layer of graham on top.

Step 5: Pour the remaining pudding mix on top of the second layer of cracker and spread evenly. Then finish it off by adding another cracker layer on top.

Step 6: Spread the frosting to the edge.

Step 7: Place inside the fridge and chill overnight so the crackers will become soft and moist.

Step 8: Once ready to serve, remote from the fridge, slice and serve. You can garnish it with some peanut butter cups if you’d like.

To make the frosting: Combine the semi-sweet chocolate chips, melted butter, white corn syrup, powdered sugar, and milk in a small mixer bowl. Beat the ingredients until smooth.

PEANUT BUTTER CHOCOLATE ECLAIR CAKE

Rebecca A no-bake, no-fuss dessert that everyone is going crazy about! This Peanut Butter Chocolate Eclair Cake will melt your heart – it’s incredible, super delicious, and an ultimate peanut butter… Main Dish Recipes PEANUT BUTTER CHOCOLATE ECLAIR CAKE European Print This
Nutrition facts: 200 calories 20 grams fat
Rating: 5.0/5
( 1 voted )

Ingredients

  • For the Cake
  • 1 box chocolate graham crackers
  • 2 - 3 1/4 oz. packages instant vanilla pudding
  • 1 cup creamy peanut butter
  • 3 1/2 cup milk
  • 1 - 8 oz. contain Cool Whip, thawed
  • For the Frosting
  • 1/2 cup semi-sweet chocolate chips, melted
  • 2 tablespoons melted butter
  • 2 tablespoons white corn syrup
  • 1/2 cup powdered sugar
  • 2-3 tablespoons milk

Instructions

To make the cake

Step 1: Use a cooking spray to grease a 9 x 13-inch cake pan.

Step 2: Cut the graham crakers to fully cover the bottom of the pan. Lay them in one layer. You can use either the original or the chocolate graham crackers.

Step 3: Place the pudding, peanut butter, and milk in a mixing bowl. Mix using an electric mixer for 2 minutes. Then, fold in the cool whip.

Step 4: Evenly spread half of the pudding over the first layer of the graham crackers and lay another layer of graham on top.

Step 5: Pour the remaining pudding mix on top of the second layer of cracker and spread evenly. Then finish it off by adding another cracker layer on top.

Step 6: Spread the frosting to the edge.

Step 7: Place inside the fridge and chill overnight so the crackers will become soft and moist.

Step 8: Once ready to serve, remote from the fridge, slice and serve. You can garnish it with some peanut butter cups if you'd like.

To make the frosting: Combine the semi-sweet chocolate chips, melted butter, white corn syrup, powdered sugar, and milk in a small mixer bowl. Beat the ingredients until smooth.

June 6, 2020 0 comment
0 FacebookTwitterPinterestEmail
Newer Posts
Older Posts

Popular Posts

  • 1

    Crispy Crunchy Parmesan Potatoes

    March 21, 2020
  • 2

    CROCK POT SMOTHERED PORK CHOPS

    March 21, 2020
  • Facebook
  • Twitter

@2019 - All Right Reserved.


Back To Top