Cook it once
  • Home
  • Privacy Policy
  • Recipes
    • KETO
    • LC
    • WW
  • Tips
  • Contact
Cook it once
  • Home
  • Privacy Policy
  • Recipes
    • KETO
    • LC
    • WW
  • Tips
  • Contact
Category:

Main Dish Recipes

Main Dish Recipes

HAWAIIAN STYLE TERIYAKI CHICKEN

by Rebecca June 9, 2020
written by Rebecca

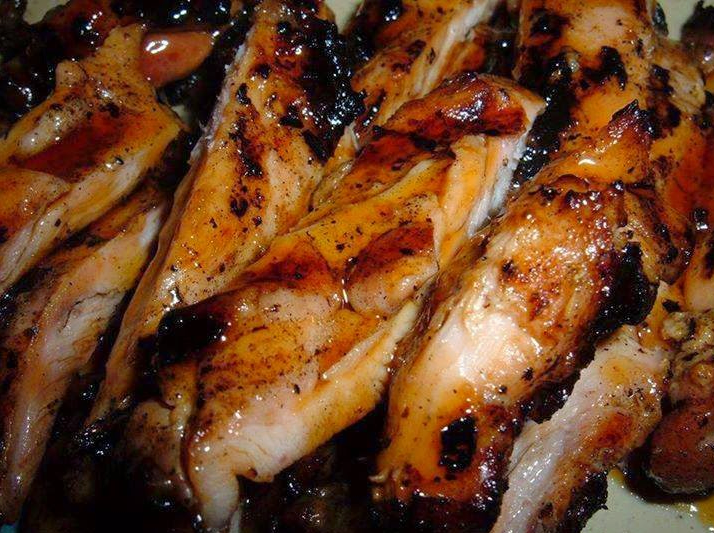
This Hawaiian Style Teriyaki Chicken is a popular Japanese-American dish that is super easy to make and tastes better than takeout. So if you’re craving for it but too lazy to go out then I would suggest making it yourself, or if you have company coming over in a few days, this can be prepared easily and ahead. I’m sure this will not disappoint and everyone will be asking for the recipe. These look vibrant, pretty, and are so ready to go onto the grill.

Ingredients

3 pounds chicken thigh ( boneless, skinless )

1 cup of soy sauce

1 cup of water

1 cup of sugar

5 clove(s) garlic ( 3-5 cloves, crushed )

1 ginger root ( 2-3 slices, cut thin and lengthwise )

HOW TO MAKE HAWAIIAN STYLE TERIYAKI CHICKEN

Step 1: In a bowl, combine the water and soy sauce. Then, dissolve the sugar in the liquid.

Step 2: Stir in desired amounts of ginger and garlic. And, add the chicken.

Step 3: Soak the meat in the marinade for at least 24 hours. Although, you can soak the meat in the marinade for up to 3 days.

Step 4: If you want to eat the meat sooner, you can also boil the chicken in the sauce right after you make it.

Step 5: But if you chose to marinate the meat for a few days, you can just cook the meat on the grill. If you are cooking a lot, make sure that the grill is hot enough and stick the meat in on the grill.

Step 6: Add a bit of fresh teriyaki sauce to the pot. It will help steam the grilled chicken to assure the meat ends up very tender and juicy. Best served over buttery rice.

Note: The ratio for the sauce is the basic ratio, you would need to increase it depends on how much meat you will soak. Make sure that there is enough marinade so you can stir the meat freely. If in case, it’s hard to stir just add more sauce.
HAWAIIAN STYLE TERIYAKI CHICKEN

Rebecca This Hawaiian Style Teriyaki Chicken is a popular Japanese-American dish that is super easy to make and tastes better than takeout. So if you’re craving for it but too lazy… Main Dish Recipes HAWAIIAN STYLE TERIYAKI CHICKEN European Print This
Nutrition facts: 200 calories 20 grams fat
Rating: 5.0/5
( 1 voted )

Ingredients

  • 3 pounds chicken thigh ( boneless, skinless )
  • 1 cup of soy sauce
  • 1 cup of water
  • 1 cup of sugar
  • 5 clove(s) garlic ( 3-5 cloves, crushed )
  • 1 ginger root ( 2-3 slices, cut thin and lengthwise )

Instructions

Step 1: In a bowl, combine the water and soy sauce. Then, dissolve the sugar in the liquid.

Step 2: Stir in desired amounts of ginger and garlic. And, add the chicken.

Step 3: Soak the meat in the marinade for at least 24 hours. Although, you can soak the meat in the marinade for up to 3 days.

Step 4: If you want to eat the meat sooner, you can also boil the chicken in the sauce right after you make it.

Step 5: But if you chose to marinate the meat for a few days, you can just cook the meat on the grill. If you are cooking a lot, make sure that the grill is hot enough and stick the meat in on the grill.

Step 6: Add a bit of fresh teriyaki sauce to the pot. It will help steam the grilled chicken to assure the meat ends up very tender and juicy. Best served over buttery rice.

Note: The ratio for the sauce is the basic ratio, you would need to increase it depends on how much meat you will soak. Make sure that there is enough marinade so you can stir the meat freely. If in case, it's hard to stir just add more sauce.
June 9, 2020 0 comment
0 FacebookTwitterPinterestEmail
Main Dish Recipes

SNICKERS CARAMEL APPLE SALAD

by Rebecca June 9, 2020
written by Rebecca

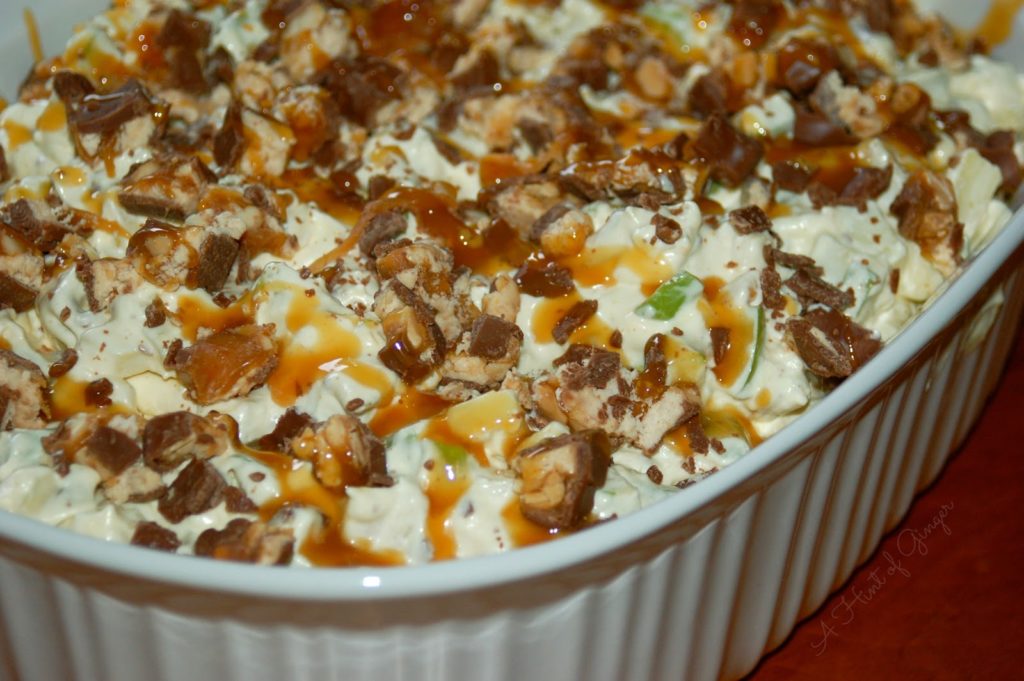
I prefer easy furthermore yummy recipes. I’m a mother of a pretty and smart little girl and I work full time. Because I only want the best for my kid, I make sure to serve a balanced meal, and even if I’m always busy I find time to cook for her every day. She’s not a picky eater, she eats anything that I make, which is great because unlike other kids she loves veggies and fruits. She has many favorites and one of them is this snickers caramel apple salad. This is super easy to put together and quick to make, and we usually make this together. Apple slices and chopped snicker bars are dropped in a pudding mix and cool whip mixture, then, mixed thoroughly, and drizzled with caramel sauce on top is incomparable! This is what I meant basically by a balanced meal, it doesn’t matter if she’s eating chocolates or sweets as long as there are fruits or veggies involved. This salad is mouth-watering, a simple and easy recipe to start with, a recipe that mothers like me keep on our menu, a real keeper. I’m pretty sure your kids will be craving for it, and the adults will love it as much as the kids do. This is a certified family-friendly dessert.

Ingredients

1-ounce package Instant vanilla pudding mix 5.1

1/2 cup of milk

1-ounce container Cool Whip thawed, 16

3-4 in medium Golden delicious apples chopped bite-size pieces

5 in Snickers candy bars chopped bite-size pieces

1/2 cup of caramel sauce

HOW TO MAKE SNICKERS CARAMEL APPLE SALAD

Step 1: Place the vanilla pudding mix and pour the milk in a large bowl. Stir with a whisk until incorporated.

Step 2: Using a spatula, fold in the cool whip until thoroughly combined.

Step 3: Then, mix in the chopped apples and snickers candy bars.

Step 4: And drizzle over the caramel sauce.

Step 5: Cover and place the salad inside the fridge for an hour to chill. Serve and enjoy!

SNICKERS CARAMEL APPLE SALAD

Rebecca I prefer easy furthermore yummy recipes. I’m a mother of a pretty and smart little girl and I work full time. Because I only want the best for my kid,… Main Dish Recipes SNICKERS CARAMEL APPLE SALAD European Print This
Nutrition facts: 200 calories 20 grams fat
Rating: 5.0/5
( 1 voted )

Ingredients

  • 1-ounce package Instant vanilla pudding mix 5.1
  • 1/2 cup of milk
  • 1-ounce container Cool Whip thawed, 16
  • 3-4 in medium Golden delicious apples chopped bite-size pieces
  • 5 in Snickers candy bars chopped bite-size pieces
  • 1/2 cup of caramel sauce

Instructions

Step 1: Place the vanilla pudding mix and pour the milk in a large bowl. Stir with a whisk until incorporated.

Step 2: Using a spatula, fold in the cool whip until thoroughly combined.

Step 3: Then, mix in the chopped apples and snickers candy bars.

Step 4: And drizzle over the caramel sauce.

Step 5: Cover and place the salad inside the fridge for an hour to chill. Serve and enjoy!

June 9, 2020 0 comment
0 FacebookTwitterPinterestEmail
Main Dish Recipes

Slow Cooker Green Beans, Ham and Potatoes

by Rebecca June 9, 2020
written by Rebecca

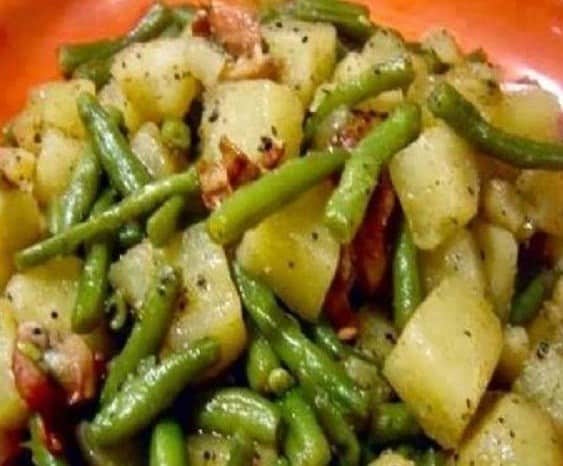
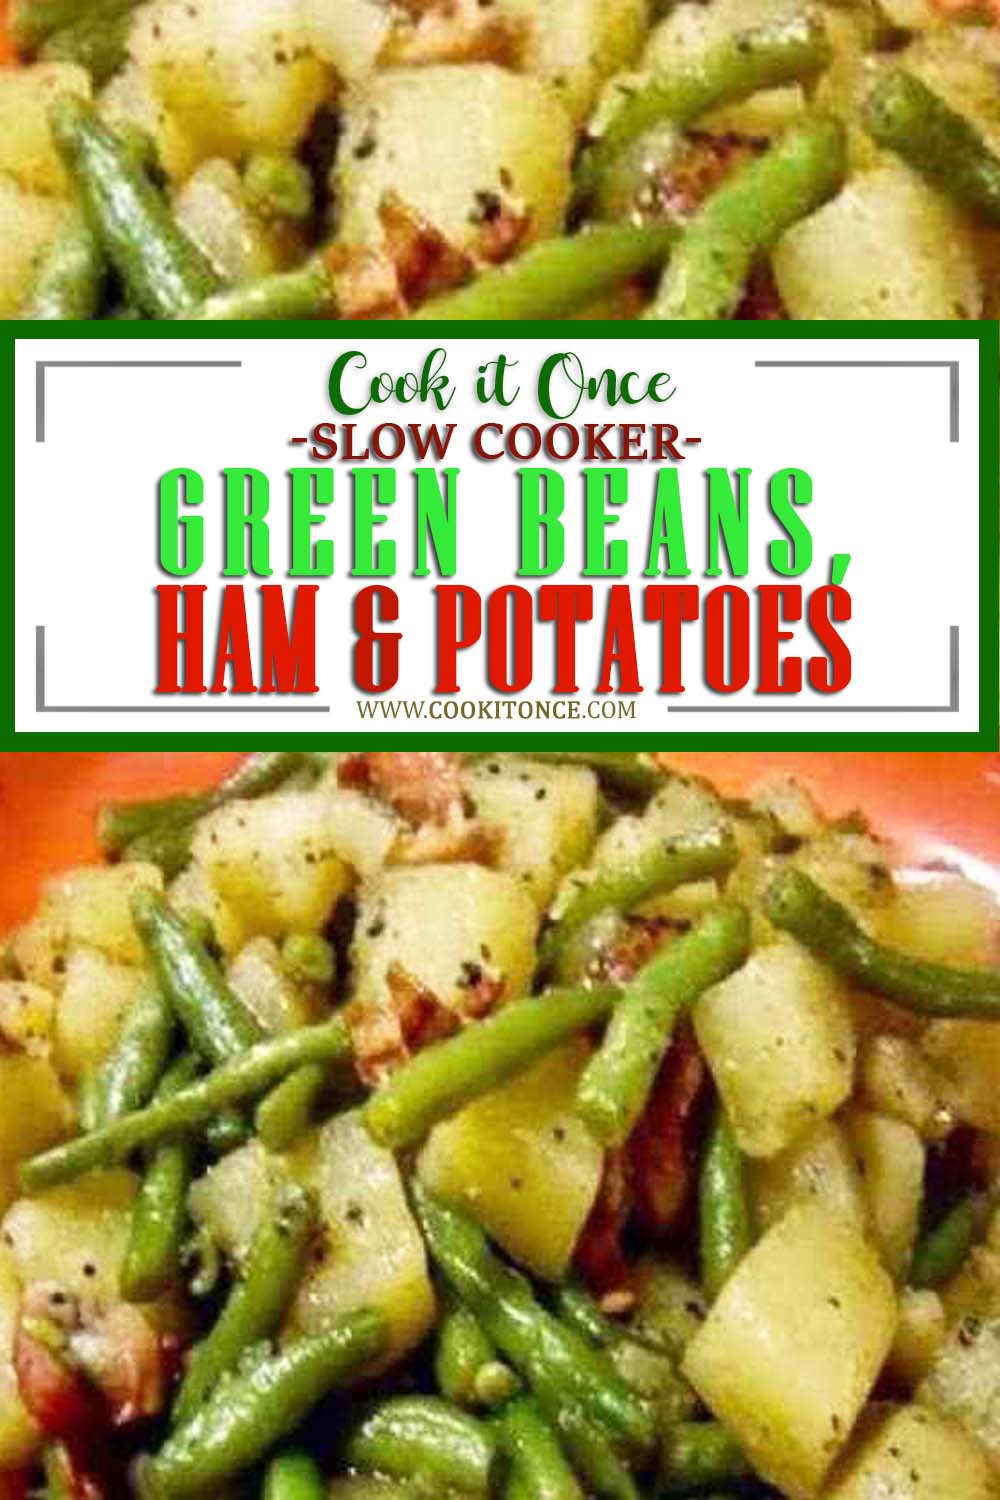
This dish received a star rating when I first served this to family and friends. This truly is an excellent meal, scrumptious, and mouth-watering. Easy to put together but slow to cook, thus, the slow cooker. However, you’ll be surprised how great this is. The meat and potatoes are cooked to perfection, they’re fabulously tender, while, the soup is bursting with flavor. This Slow Cooker Green Beans, Ham and Potatoes is a keeper, and every family’s favorite. A tip, you can try adding Dijon Mustard towards the end, when you are cooking the potatoes, this will take this dish from good to perfect!

Please PIN THIS RECIPE TO any Relevant boards on your Pinterest (

Grean Beans, Ham and Potatoes Recipe

Grean Beans, Ham and Potatoes Recipe

Dinner, Lunch, etc…) To SAVE it for later…


Ingredients

2 pounds of fresh green beans, rinsed and trimmed

1 large onion, chopped

3 ham hocks

1 ½ pound of new potatoes, quartered

1 teaspoon of garlic powder

1 teaspoon of onion powder

1 teaspoon of seasoning salt

1 tablespoon of chicken bouillon granules

ground black pepper to taste

How to make Slow Cooker Green Beans, Ham, and Potatoes

Step 1: Cut the beans in half (if they are large) and place them in a slow cooker. Pour water into the slow cooker rarely covering the beans. Add in the onion and ham hocks.

Step 2: Cook on high, covered. Once simmering, turn the heat to low and cook for 2 to 3 hours until the beans are crisp but not done.

Step 3: Add in the potatoes and continue to cook for 45 minutes more.

Step 4: While cooking the potatoes, remove the ham hocks from the slow cooker.

Step 5: Meanwhile, separate the meat from the bones, then, cho[ or shred the meat. Bring the meat back into the slow cooker. Season with garlic powder, onion powder, seasoning salt, bouillon, and pepper.

Step 6: Continue cooking until the potatoes are done. You can adjust the seasoning as desired.

Step 7: Once done and ready to serve use a slotted spoon to scoop out the beans and ham and transfer to a serving dish with a little broth. Enjoy!

Slow Cooker Green Beans, Ham and Potatoes

Rebecca This dish received a star rating when I first served this to family and friends. This truly is an excellent meal, scrumptious, and mouth-watering. Easy to put together but slow… Main Dish Recipes Slow Cooker Green Beans, Ham and Potatoes European Print This
Nutrition facts: 200 calories 20 grams fat
Rating: 5.0/5
( 3 voted )

Ingredients

  • 2 pounds of fresh green beans, rinsed and trimmed
  • 1 large onion, chopped
  • 3 ham hocks
  • 1 ½ pound of new potatoes, quartered
  • 1 teaspoon of garlic powder
  • 1 teaspoon of onion powder
  • 1 teaspoon of seasoning salt
  • 1 tablespoon of chicken bouillon granules
  • ground black pepper to taste

Instructions

Step 1: Cut the beans in half (if they are large) and place them in a slow cooker. Pour water into the slow cooker rarely covering the beans. Add in the onion and ham hocks.

Step 2: Cook on high, covered. Once simmering, turn the heat to low and cook for 2 to 3 hours until the beans are crisp but not done.

Step 3: Add in the potatoes and continue to cook for 45 minutes more.

Step 4: While cooking the potatoes, remove the ham hocks from the slow cooker.

Step 5: Meanwhile, separate the meat from the bones, then, cho[ or shred the meat. Bring the meat back into the slow cooker. Season with garlic powder, onion powder, seasoning salt, bouillon, and pepper.

Step 6: Continue cooking until the potatoes are done. You can adjust the seasoning as desired.

Step 7: Once done and ready to serve use a slotted spoon to scoop out the beans and ham and transfer to a serving dish with a little broth. Enjoy!

June 9, 2020 0 comment
0 FacebookTwitterPinterestEmail
Main Dish Recipes

Shredded Chicken-Enchilada Casserole

by Rebecca June 8, 2020
written by Rebecca

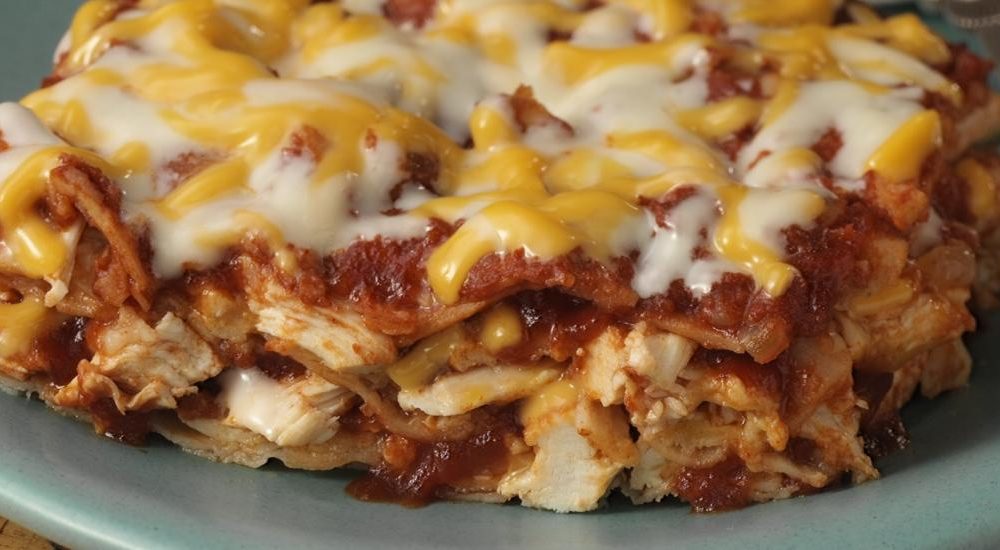
This is yet another easy recipe for a casserole. This melt in your mouth enchilada casserole is love! Perfect for a weeknight dinner with family or to serve in gatherings. The cheesy layer, a bit of tang, and all the amazing flavors just burst in your mouth. It’s a satisfyingly scrumptious meal that hits the spot!

INGREDIENTS

2 spray(s) cooking spray

1 1/2 tablespoons olive oil

3 cup(s), chopped uncooked onion(s), divided

1 pound(s) cremini mushroom(s), sliced 1/4-in thick

2 medium uncooked zucchini, halved lengthwise, sliced 1/4-in thick

1 1/2 teaspoons table salt, divided

28 oz canned diced tomatoes, fire-roasted (undrained)

1 item(s) canned chipotle peppers in adobo sauce, chopped (optional)

4 clove(s), medium garlic clove(s), smashed

2 teaspoons chili powder

2 teaspoons ground cumin

1 teaspoons dried oregano

12 oz cooked boneless skinless chicken breast(s), shredded with two forks

18 small corn tortilla(s), 4-in each

6 oz low fat shredded cheddar cheese, or jack cheese

3/4 cup(s) reduced-fat sour cream

How to make Shredded Chicken-Enchilada Casserole

Step 1: Prepare the oven. Preheat it to 425 degrees F.

Step 2: Spray a 9 x 13-inch baking dish with cooking spray.

Step 3: Heat oil in a large nonstick skillet over medium heat. Once the oil is hot, drop 2 cups of onion and cook for 2 to 3 minutes while stirring occasionally until translucent.

Step 4: Then, add in the mushrooms, zucchini, and salt. Continue to cook and stir for another 15 to 20 minutes until the vegetables are softened.

Step 5: Meanwhile, prepare the sauce. Place the tomatoes, chipotle, remaining onion, garlic, chili powder, cumin, oregano, and salt into a blender to puree.

Step 6: Once the vegetables are cooked, transfer them into a medium mixing bowl. Stir in the chicken and 1 cup of tomato sauce.

Step 7: Pour half a cup of tomato sauce in the greased baking dish and top it with 6 overlapping tortillas.

Step 8: Place half of the chicken mixture and half cup of cheese over, then, again the tortillas, chicken mixture, and cheese (in order). Repeat until you finish the rest, with the cheese as the last layer.

Step 9: Place inside the preheated oven and bake for about 15 to 20 minutes or until golden and the top is bubbling.

Step 10: Then, remove from the oven and let it rest for 5 to 10 minutes.

Step 11: Serve each slice with 1 tablespoon sour cream. Enjoy!

Shredded Chicken-Enchilada Casserole

Rebecca This is yet another easy recipe for a casserole. This melt in your mouth enchilada casserole is love! Perfect for a weeknight dinner with family or to serve in gatherings.… Main Dish Recipes Shredded Chicken-Enchilada Casserole European Print This
Nutrition facts: 200 calories 20 grams fat
Rating: 5.0/5
( 1 voted )

Ingredients

  • 2 spray(s) cooking spray
  • 1 1/2 tablespoons olive oil
  • 3 cup(s), chopped uncooked onion(s), divided
  • 1 pound(s) cremini mushroom(s), sliced 1/4-in thick
  • 2 medium uncooked zucchini, halved lengthwise, sliced 1/4-in thick
  • 1 1/2 teaspoons table salt, divided
  • 28 oz canned diced tomatoes, fire-roasted (undrained)
  • 1 item(s) canned chipotle peppers in adobo sauce, chopped (optional)
  • 4 clove(s), medium garlic clove(s), smashed
  • 2 teaspoons chili powder
  • 2 teaspoons ground cumin
  • 1 teaspoons dried oregano
  • 12 oz cooked boneless skinless chicken breast(s), shredded with two forks
  • 18 small corn tortilla(s), 4-in each
  • 6 oz low fat shredded cheddar cheese, or jack cheese
  • 3/4 cup(s) reduced-fat sour cream

Instructions

Step 1: Prepare the oven. Preheat it to 425 degrees F.

Step 2: Spray a 9 x 13-inch baking dish with cooking spray.

Step 3: Heat oil in a large nonstick skillet over medium heat. Once the oil is hot, drop 2 cups of onion and cook for 2 to 3 minutes while stirring occasionally until translucent.

Step 4: Then, add in the mushrooms, zucchini, and salt. Continue to cook and stir for another 15 to 20 minutes until the vegetables are softened.

Step 5: Meanwhile, prepare the sauce. Place the tomatoes, chipotle, remaining onion, garlic, chili powder, cumin, oregano, and salt into a blender to puree.

Step 6: Once the vegetables are cooked, transfer them into a medium mixing bowl. Stir in the chicken and 1 cup of tomato sauce.

Step 7: Pour half a cup of tomato sauce in the greased baking dish and top it with 6 overlapping tortillas.

Step 8: Place half of the chicken mixture and half cup of cheese over, then, again the tortillas, chicken mixture, and cheese (in order). Repeat until you finish the rest, with the cheese as the last layer.

Step 9: Place inside the preheated oven and bake for about 15 to 20 minutes or until golden and the top is bubbling.

Step 10: Then, remove from the oven and let it rest for 5 to 10 minutes.

Step 11: Serve each slice with 1 tablespoon sour cream. Enjoy!

June 8, 2020 0 comment
0 FacebookTwitterPinterestEmail
Main Dish Recipes

Peach Dumplings Recipe

by Rebecca June 8, 2020
written by Rebecca

What a lovely day! The sun is up, the kids are playing outside, and here I am in the kitchen drinking my coffee. Today I decided to make Peach Dumplings. This is not the first time I am making this but I haven’t had a chance to make this in a long time. I’m excited, and my kids are looking forward to it. This recipe is simple, and to make this amazing peach dumpling is not difficult at all. The ingredients are easily found, and most of it I think you already have. This dessert makes me want to go outside, beside the pool with my sunglasses on. This is a late summer dessert that you can serve all year round. Use either fresh peaches when in season or canned and still it’s going to be amazing! It’s delicious, sweet, and buttery. You can even use the sauce as a drizzle or serve it with a scoop of ice cream or both!

INGREDIENTS

2 whole large peaches

2 8 oz cans crescent rolls

2 sticks butter

1-1/2 cup sugar

1 teaspoon vanilla

cinnamon, to taste

1 1/2 cups orange juice

How to make Peach Dumplings

Step 1: Peel the peaches and cut into 8 slices.

Step 2: Lay the crescent rolls and place each peace slice on the rolls.

Step 3: Roll tightly and line them in a 9 x 13-inch buttered pan.

Step 4: Melt the butter. Add in the sugar while barely stirring.

step 5: Add in the vanilla and stir.

Step 6: Pour the mixture on top of the peaches.

Step 7: Then, the orange juice around the edges of the pan.

Step 8: Sprinkle a generous amount of cinnamon.

Step 9: Place inside the oven and bake at 350 degrees for about 40 minutes.

Step 10: Once done, remove from the oven and serve with ice cream. Drizzle the sweet sauce from the pan on top of the dumplings. Enjoy!

Peach Dumplings Recipe

Rebecca What a lovely day! The sun is up, the kids are playing outside, and here I am in the kitchen drinking my coffee. Today I decided to make Peach Dumplings.… Main Dish Recipes Peach Dumplings Recipe European Print This
Nutrition facts: 200 calories 20 grams fat
Rating: 5.0/5
( 1 voted )

Ingredients

  • 2 whole large peaches
  • 2 8 oz cans crescent rolls
  • 2 sticks butter
  • 1-1/2 cup sugar
  • 1 teaspoon vanilla
  • cinnamon, to taste
  • 1 1/2 cups orange juice

Instructions

Step 1: Peel the peaches and cut into 8 slices.

Step 2: Lay the crescent rolls and place each peace slice on the rolls.

Step 3: Roll tightly and line them in a 9 x 13-inch buttered pan.

Step 4: Melt the butter. Add in the sugar while barely stirring.

step 5: Add in the vanilla and stir.

Step 6: Pour the mixture on top of the peaches.

Step 7: Then, the orange juice around the edges of the pan.

Step 8: Sprinkle a generous amount of cinnamon.

Step 9: Place inside the oven and bake at 350 degrees for about 40 minutes.

Step 10: Once done, remove from the oven and serve with ice cream. Drizzle the sweet sauce from the pan on top of the dumplings. Enjoy!

June 8, 2020 0 comment
0 FacebookTwitterPinterestEmail
Main Dish Recipes

“Lazy Man’s” Pie- Peach Cobbler

by Rebecca June 8, 2020
written by Rebecca

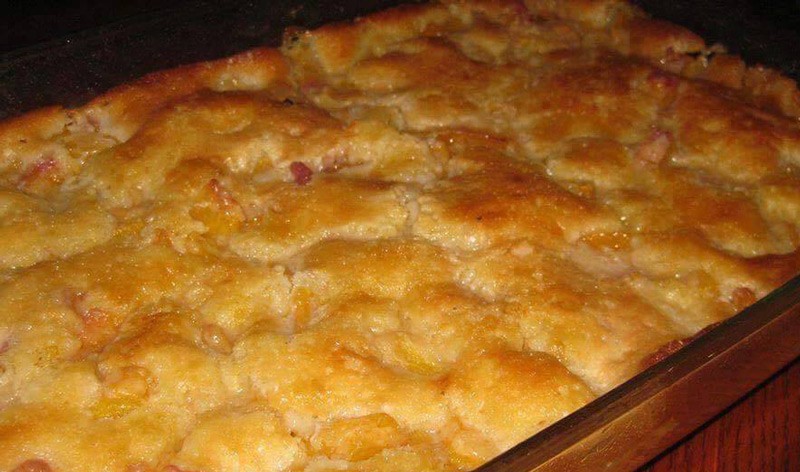
Today we had a family picnic. The kids were so happy. I can’t remember the last time we had such an amazing day. It’s a fun day for all of us. The weather was good, laughter filled the entire picnic area, and we bonded over this crazy delicious pie-peach cobbler. This dessert was the highlight of our day. The kids specifically requested to have this. We gobbled all the way through. This pie-peach cobbler is my family’s favorite, although, I only make this on special occasions. I called it a lazy man’s pie-peach cobbler because it is way to easy to make. You just need to mix the ingredients, and when you add the fruits there is no need to stir as the batter will rise and absorb them. Pop this into the oven and wait until it’s done. It’s a perfect dessert, definitely deserves a 5-star, and it’s a keeper! Try this and you’ll see what I’m babbling about. I assure you this will make your day. Have a fruitful day you all!

Ingredients

1 stick of butter or margarine

1 cup of milk

1 cup of sugar

1 cup of flour

1 teaspoon of baking powder

A dash of salt

1-quart of sweetened fruit (peaches, cherries, blackberries, etc.)

How to make Pie- Peach Cobbler

Step 1: Prepare the oven. Preheat it to 350 degrees.

Step 2: Melt the butter in a baking pan.

Step 3: Mix the flour, sugar, baking powder, salt, and milk in a bowl.

Step 4: Pour the mixture over the melted butter.

Step 5: Spread the fruit over the batter but do not stir. When the batter rises, it will just absorb the fruit flavor.

Step 6: Place the baking pan inside the preheated oven and bake the pie for an hour. When done, remove from the oven and serve immediately. Great with whipped cream or vanilla ice cream. Enjoy!

“Lazy Man’s” Pie- Peach Cobbler

Rebecca Today we had a family picnic. The kids were so happy. I can’t remember the last time we had such an amazing day. It’s a fun day for all of… Main Dish Recipes “Lazy Man’s” Pie- Peach Cobbler European Print This
Nutrition facts: 200 calories 20 grams fat
Rating: 4.3/5
( 3 voted )

Ingredients

  • 1 stick of butter or margarine
  • 1 cup of milk
  • 1 cup of sugar
  • 1 cup of flour
  • 1 teaspoon of baking powder
  • A dash of salt
  • 1-quart of sweetened fruit (peaches, cherries, blackberries, etc.)

Instructions

Step 1: Prepare the oven. Preheat it to 350 degrees.

Step 2: Melt the butter in a baking pan.

Step 3: Mix the flour, sugar, baking powder, salt, and milk in a bowl.

Step 4: Pour the mixture over the melted butter.

Step 5: Spread the fruit over the batter but do not stir. When the batter rises, it will just absorb the fruit flavor.

Step 6: Place the baking pan inside the preheated oven and bake the pie for an hour. When done, remove from the oven and serve immediately. Great with whipped cream or vanilla ice cream. Enjoy!

June 8, 2020 0 comment
0 FacebookTwitterPinterestEmail
Main Dish Recipes

KEY LIME POUND CAKE

by Rebecca June 8, 2020
written by Rebecca

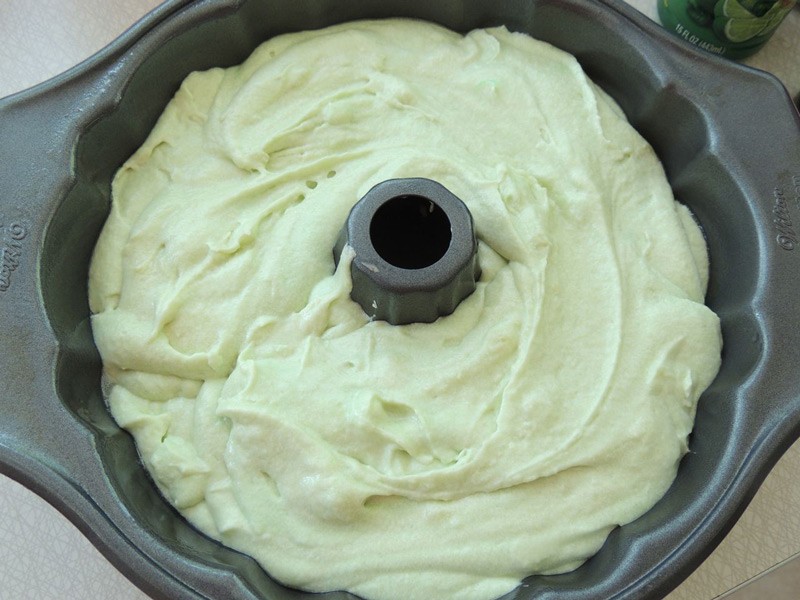
This is not gonna be your traditional pound cake, it’s way better! Your classic Southern dessert infused in tropical flavors is a must-have. It’s moist, dense, and has a wonderful tart and sweet flavor. It is drizzled with a tart key lime glaze that makes this pound cake nothing but irresistibly delicious!

INGREDIENTS

1 cup butter, softened

2 cups granulated sugar

3/4 cup buttermilk

1/3 cup key lime juice

5 large eggs

3 cups all-purpose flour

1 1/2 teaspoons salt

1/2 teaspoon baking powder

1/2 teaspoon baking soda

green food coloring (optional)

Key Lime Buttercream Frosting

1/2 cup butter, softened

1 1/2 teaspoons key lime zest

1 teaspoon vanilla extract

1/8 teaspoon salt

2 cups powdered sugar

3 tablespoons key lime juice

1-2 tablespoons  milk

HOW TO MAKE KEY LIME POUND CAKE

To make the Cake Layers

Step 1: Prepare the oven. Preheat it to 350 degrees F.

Step 2: Ready a 3 layered cake pans, or a 10-inch tube pan, or 2 loaf pans.

Step 3: Combine the buttermilk and lime juice in a small bowl. Set aside.

Step 4: Meanwhile, cream the butter and sugar until fluffy. Then, add in the eggs one at a time and beat until incorporated.

Step 5: In a separate bowl, combine the flour salt, baking soda, and powder. Mix in the flour and buttermilk mixture to the butter mixture, alternating both on every addition and end with flour. Make sure to not over mix.

Step 6: Add in food coloring, and adjust to desired darkness. Stir until well combined.

Step 7: Pour the batter into the prepared pans. Plae inside the preheated oven and bale for about 30 to 35 minutes, layered or 50 to 60 minutes, if pound. The cake is done when the toothpick inserted in the middle comes out clean.

Step 8: Remove the cake from the oven and let it cool in the pan for 15 minutes. Then, carefully invert onto a cooling rack to cool completely.

For the Frosting

Step 1: Place the softened butter, lime zest, vanilla extract, and salt in a mixing bowl. Beat until creamy.

Step 2: Slowly add the powdered sugar, alternating it with the key lime juice, 1 tablespoon at a time, and 1 tablespoon milk. Beat at a slow speed until well blended and smooth. You can tablespoons of milk to reach your desired consistency.

Step 3: Frost the cake and garnish with key lime and kiwi slices. Enjoy

KEY LIME POUND CAKE

Rebecca This is not gonna be your traditional pound cake, it’s way better! Your classic Southern dessert infused in tropical flavors is a must-have. It’s moist, dense, and has a wonderful… Main Dish Recipes KEY LIME POUND CAKE European Print This
Nutrition facts: 200 calories 20 grams fat
Rating: 3.5/5
( 2 voted )

Ingredients

  • 1 cup butter, softened
  • 2 cups granulated sugar
  • 3/4 cup buttermilk
  • 1/3 cup key lime juice
  • 5 large eggs
  • 3 cups all-purpose flour
  • 1 1/2 teaspoons salt
  • 1/2 teaspoon baking powder
  • 1/2 teaspoon baking soda
  • green food coloring (optional)
  • Key Lime Buttercream Frosting
  • 1/2 cup butter, softened
  • 1 1/2 teaspoons key lime zest
  • 1 teaspoon vanilla extract
  • 1/8 teaspoon salt
  • 2 cups powdered sugar
  • 3 tablespoons key lime juice
  • 1-2 tablespoons  milk

Instructions

To make the Cake Layers

Step 1: Prepare the oven. Preheat it to 350 degrees F.

Step 2: Ready a 3 layered cake pans, or a 10-inch tube pan, or 2 loaf pans.

Step 3: Combine the buttermilk and lime juice in a small bowl. Set aside.

Step 4: Meanwhile, cream the butter and sugar until fluffy. Then, add in the eggs one at a time and beat until incorporated.

Step 5: In a separate bowl, combine the flour salt, baking soda, and powder. Mix in the flour and buttermilk mixture to the butter mixture, alternating both on every addition and end with flour. Make sure to not over mix.

Step 6: Add in food coloring, and adjust to desired darkness. Stir until well combined.

Step 7: Pour the batter into the prepared pans. Plae inside the preheated oven and bale for about 30 to 35 minutes, layered or 50 to 60 minutes, if pound. The cake is done when the toothpick inserted in the middle comes out clean.

Step 8: Remove the cake from the oven and let it cool in the pan for 15 minutes. Then, carefully invert onto a cooling rack to cool completely.

For the Frosting

Step 1: Place the softened butter, lime zest, vanilla extract, and salt in a mixing bowl. Beat until creamy.

Step 2: Slowly add the powdered sugar, alternating it with the key lime juice, 1 tablespoon at a time, and 1 tablespoon milk. Beat at a slow speed until well blended and smooth. You can tablespoons of milk to reach your desired consistency.

Step 3: Frost the cake and garnish with key lime and kiwi slices. Enjoy!

June 8, 2020 0 comment
0 FacebookTwitterPinterestEmail
Main Dish Recipes

CRESCENT ROLL TACO DINNER!

by Rebecca June 8, 2020
written by Rebecca

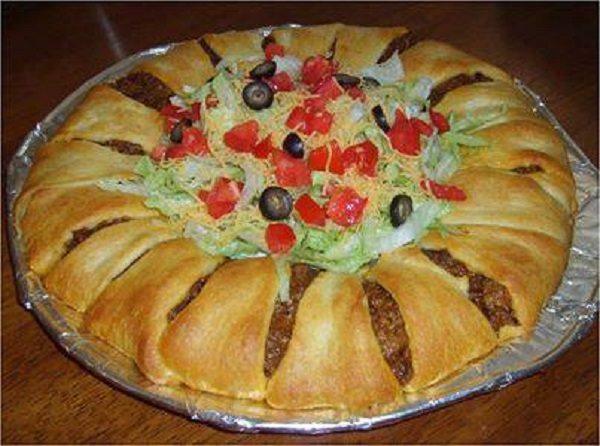
The meat is placed in a circle form, and your favorite taco toppings right in the middle – not only delicious but appealing. This crescent roll taco is the prettiest taco I’ve seen in my life! I don’t even want to touch it and ruin the presentation. But boy, this taco is so irresistible I want to have it all for myself! And only that this is mouthwatering but it’s pretty easy to put together. The ingredients are simple, you might already have them sitting in your pantry! I remembered when I saw this recipe online, I instantly marched into the kitchen and made this. Served this for dinner and everyone loved it! No leftovers just praise on how delicious and pretty this is.

INGREDIENTS

2 crescent roll tubes

1 pound ground beef (or ground turkey)

1 packet of taco seasoning

1 1/2 cups grated cheddar cheese

Shredded lettuce

1 or 2 diced tomatoes depending on size

1/2 small can sliced olives if desired

Sour cream optional

sliced avocado optional

HOW TO MAKE CRESCENT ROLL TACO DINNER

Step 1: Cook the beef in a large skillet. Once browned, add in the taco seasoning. Mix until well combined.

Step 2: Meanwhile, lay the two tubes of the crescent pastry and thick sides in.

Step 3: You can use leftover crescent rolls to thicken the center a bit.

Step 4: Remove the skillet from the heat. And spread the beef in the middle of the laid crescent rolls in a circle.

Step 5: Sprinkle the cheese over the meat mixture.

Step 6: Pull the end of the crescent rolls and tuck under the meat and cheese.

Step 7: Place the cheese, lettuce, tomato, black olives, sour cream in the middle. You are welcome to use whatever toppings or addition you desire for your tacos.

Step 8: To cook, just follow the instructions written on the pack of the crescent rolls. Serve immediately. Enjoy!

CRESCENT ROLL TACO DINNER!

Rebecca The meat is placed in a circle form, and your favorite taco toppings right in the middle – not only delicious but appealing. This crescent roll taco is the prettiest… Main Dish Recipes CRESCENT ROLL TACO DINNER! European Print This
Nutrition facts: 200 calories 20 grams fat
Rating: 5.0/5
( 1 voted )

Ingredients

  • 2 crescent roll tubes
  • 1 pound ground beef (or ground turkey)
  • 1 packet of taco seasoning
  • 1 1/2 cups grated cheddar cheese
  • Shredded lettuce
  • 1 or 2 diced tomatoes depending on size
  • 1/2 small can sliced olives if desired
  • Sour cream optional
  • sliced avocado optional

Instructions

Step 1: Cook the beef in a large skillet. Once browned, add in the taco seasoning. Mix until well combined.

Step 2: Meanwhile, lay the two tubes of the crescent pastry and thick sides in.

Step 3: You can use leftover crescent rolls to thicken the center a bit.

Step 4: Remove the skillet from the heat. And spread the beef in the middle of the laid crescent rolls in a circle.

Step 5: Sprinkle the cheese over the meat mixture.

Step 6: Pull the end of the crescent rolls and tuck under the meat and cheese.

Step 7: Place the cheese, lettuce, tomato, black olives, sour cream in the middle. You are welcome to use whatever toppings or addition you desire for your tacos.

Step 8: To cook, just follow the instructions written on the pack of the crescent rolls. Serve immediately. Enjoy!

June 8, 2020 0 comment
0 FacebookTwitterPinterestEmail
Main Dish Recipes

Incredible Breakfast Bake – Worthy of All Breakfasts!

by Rebecca June 8, 2020
written by Rebecca

Easy breakfast meal to start the day right. This Breakfast Bake is incredible and is worthy of all breakfast. It’s Creamylicious, and a fulfilling breakfast that the whole family loves! It’s made with eggs, ground beef, or cubed ham, with lots of cheese, milk, and biscuit that are a breakfast staple. Great to serve with brewed coffee and freshly squeezed lemon juice.

As we all know breakfast is the most important meal of the day. So what better way to start your day but to have a delicious and easy breakfast bake. The ingredients are what you normally have for breakfast, yet instead of cooking them separately you just have to mix them into one. Surely a no-fuss way to begin your day. If you haven’t tried this yet I would suggest that you do. Add this to your breakfast menu and you’ll never regret it. My kids are a fan of this breakfast bake, they look forward to each day that I make it. My husband loves this too because it has everything that he wanted for breakfast with of course a freshly brewed coffee – absolutely completes his day. And even if it says breakfast you can have this for dinner as well. Just serve it with salad or anything that you can think of.

INGREDIENTS

1 can Flaky Grands

Bag shredded cheddar 8 oz.

Half cup milk

Cubed ham or ground cooked sausage 1 cup cooked

5 eggs

Salt and pepper to taste

How to make this Incredible Breakfast Bake

Step 1: Add in the shredded cheddar, milk, cooked ham or ground beef, eggs, and salt and pepper. Mix until incorporated.

Step 2: Slice the biscuits into four parts and mix them into the mixture.

Step 3: Pour to a large greased casserole dish.

Step 4: Place inside the oven and bake at 350 degrees for about 25 minutes.

Incredible Breakfast Bake – Worthy of All Breakfasts!

Rebecca Easy breakfast meal to start the day right. This Breakfast Bake is incredible and is worthy of all breakfast. It’s Creamylicious, and a fulfilling breakfast that the whole family loves!… Main Dish Recipes Incredible Breakfast Bake – Worthy of All Breakfasts! European Print This
Nutrition facts: 200 calories 20 grams fat
Rating: 4.7/5
( 3 voted )

Ingredients

  • 1 can Flaky Grands
  • Bag shredded cheddar 8 oz.
  • Half cup milk
  • Cubed ham or ground cooked sausage 1 cup cooked
  • 5 eggs
  • Salt and pepper to taste

Instructions

Step 1: Add in the shredded cheddar, milk, cooked ham or ground beef, eggs, and salt and pepper. Mix until incorporated.

Step 2: Slice the biscuits into four parts and mix them into the mixture.

Step 3: Pour to a large greased casserole dish.

Step 4: Place inside the oven and bake at 350 degrees for about 25 minutes.

June 8, 2020 0 comment
0 FacebookTwitterPinterestEmail
Main Dish Recipes

The Absolute BEST Crockpot Beef Stroganoff Recipe

by Rebecca June 8, 2020
written by Rebecca

This is another incredible crockpot recipe to add to your long list of menu. The tender meat, creamy sauce with mushroom is perfect for a weeknight dinner with family and friends. A crockpot is way to easy to make but takes time to cook. Best suited for mothers like me as we get to do other things. Just mix everything in one pot and leave it to cook. Before you know it dinner is ready!

I cannot count how many times I’ve made this Beef Stroganoff and it’s always a hit every time! No leftovers, just dirty dishes. A straight 5-star dish! The meat effortlessly falls apart, and juicy in the inside, with a deep flavor that you cannot get elsewhere. A melt in your mouth dish with a magnificent sauce that is perfect for a regular weeknight dinner with family and great to share with guests.

Ingredients

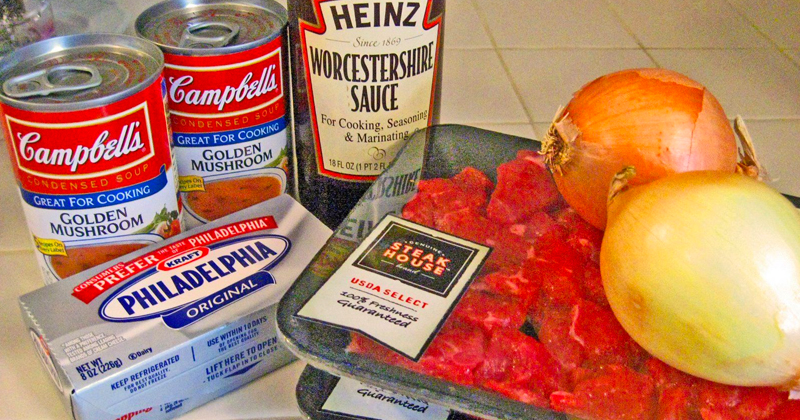
2 pounds cubed stew meat

2 cans Condensed Golden Mushroom Soup

1 largish onion diced

2-3-4 tables of Worcestershire

1/2 cup water

8 oz of cream cheese

a couple of dashes of Garlic Salt (1 teaspoon)

couple dashes of Hot Paprika

How to make Crockpot Beef Stroganoff

Step 1: Place the mushroom soup, diced onion, Worcestershire, water, garlic salt, and a couple of dashes of hot paprika in a slow cooker. Stir until well combined.

Step 2: Add in the meat mixture and mix until incorporated.

Step 3: Cook for 8 hours in low.

Step 4: Meanwhile, cut the cream cheese into cubes.

Step 5: Turn the crockpot on high and scatter the cubed cream cheese on top of the mixture. Mix until incorporated. Put the lid back and cook for 10 minutes more.

Step 6: Place any leftover inside the fridge and when ready to eat just reheat on the stove. You can add the cream cheese 10 minutes before serving. This is great when chilled as the meat becomes so much more tender when reheated.

The Absolute BEST Crockpot Beef Stroganoff Recipe

Rebecca This is another incredible crockpot recipe to add to your long list of menu. The tender meat, creamy sauce with mushroom is perfect for a weeknight dinner with family and… Main Dish Recipes The Absolute BEST Crockpot Beef Stroganoff Recipe European Print This
Nutrition facts: 200 calories 20 grams fat
Rating: 5.0/5
( 1 voted )

Ingredients

  • 2 pounds cubed stew meat
  • 2 cans Condensed Golden Mushroom Soup
  • 1 largish onion diced
  • 2-3-4 tables of Worcestershire
  • 1/2 cup water
  • 8 oz of cream cheese
  • a couple of dashes of Garlic Salt (1 teaspoon)
  • couple dashes of Hot Paprika

Instructions

Step 1: Place the mushroom soup, diced onion, Worcestershire, water, garlic salt, and a couple of dashes of hot paprika in a slow cooker. Stir until well combined.

Step 2: Add in the meat mixture and mix until incorporated.

Step 3: Cook for 8 hours in low.

Step 4: Meanwhile, cut the cream cheese into cubes.

Step 5: Turn the crockpot on high and scatter the cubed cream cheese on top of the mixture. Mix until incorporated. Put the lid back and cook for 10 minutes more.

Step 6: Place any leftover inside the fridge and when ready to eat just reheat on the stove. You can add the cream cheese 10 minutes before serving. This is great when chilled as the meat becomes so much more tender when reheated.

June 8, 2020 0 comment
0 FacebookTwitterPinterestEmail
Newer Posts
Older Posts

Popular Posts

  • 1

    Crispy Crunchy Parmesan Potatoes

    March 21, 2020
  • 2

    CROCK POT SMOTHERED PORK CHOPS

    March 21, 2020
  • Facebook
  • Twitter

@2019 - All Right Reserved.


Back To Top