Cook it once
  • Home
  • Privacy Policy
  • Recipes
    • KETO
    • LC
    • WW
  • Tips
  • Contact
Cook it once
  • Home
  • Privacy Policy
  • Recipes
    • KETO
    • LC
    • WW
  • Tips
  • Contact
Category:

Main Dish Recipes

Main Dish Recipes

Jack Skellington-Inspired Pumpkin Caramel Pie

by Rebecca October 14, 2020
written by Rebecca

YIELDS: 10 SERVINGS

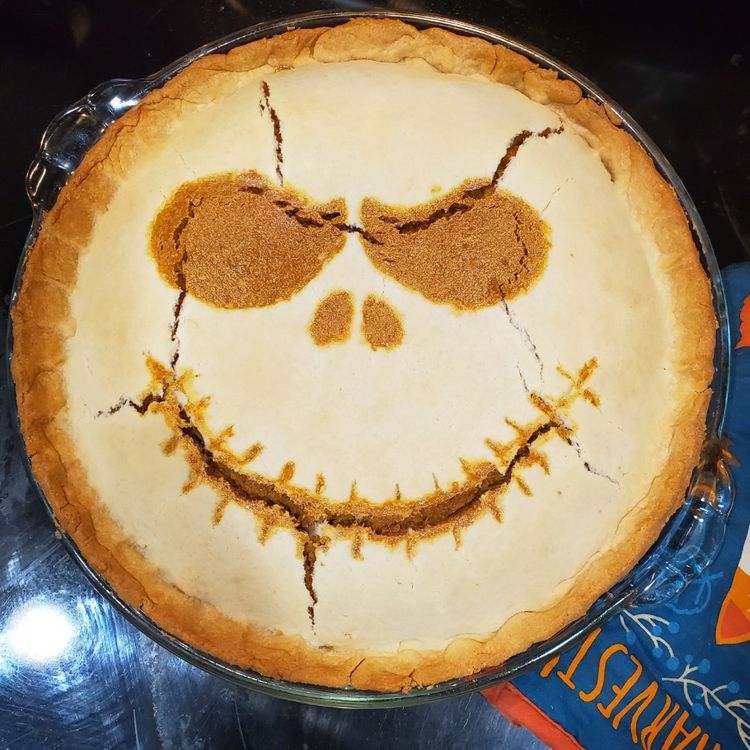
It’s almost Halloween and the kids are super excited! We all love Jack! And this Jack Skellington-inspired pumpkin caramel pie will be the star of this year’s Halloween. This wicked dessert is scary delicious, super fun, and easy to make.

INGREDIENTS

1 15-oz. can pumpkin purée

1/4 tsp. salt

1 1/2 tsp. cinnamon

1/2 tsp. nutmeg

1/2 tsp. ginger

1 14-oz. can sweeten condensed milk

2 large eggs

1 double pie crust (store-bought or homemade)

1/2 c. thick caramel sauce

How to make Jack Skellington-Inspired Pumpkin Caramel Pie

Step 1: Prepare the oven. Preheat it to 425 degrees F.

Step 2: Combine the pumpkin puree, salt, spices, and sweetened condensed milk in a medium-sized saucepan over medium-low heat. Whisk until incorporated. Turn the heat off and allow it to cool for about a minute before whisking in the eggs. Set aside.

Step 3: At the bottom of an 8-inch pie plate, unroll one-piece pie crust. Pour over the pumpkin filling followed by the caramel. Gently swirl with a spoon or butter knife to make a marble-like texture. Make sure not to combine them completely.

Step 4: Place the rest of the pie crust on top and snip excess with a knife around the edges.

Step 5: Sketch Jack Skellington’s face with a toothpick, tracing it after to cut out the design using a sharp knife. You might want to cut the stitches first before cutting the line of the mouth to make it easier. Crimp the edges of the pie after.

Step 6: Place inside the preheated oven to bake for around 15 minutes. Then, with an aluminium foil, cover the top of the pie and continue baking at 350 degrees F for 38 to 40 minutes more. This way, Jack’s face will stay pale as a skeleton and the edges won’t burn.

Step 7: Remove from the oven and allow to cool before serving.

Jack Skellington-Inspired Pumpkin Caramel Pie

Rebecca YIELDS: 10 SERVINGS It’s almost Halloween and the kids are super excited! We all love Jack! And this Jack Skellington-inspired pumpkin caramel pie will be the star of this year’s… Main Dish Recipes Jack Skellington-Inspired Pumpkin Caramel Pie European Print This
Serves: 10
Nutrition facts: 200 calories 20 grams fat
Rating: 5.0/5
( 1 voted )

Ingredients

  • 1 15-oz. can pumpkin purée
  • 1/4 tsp. salt
  • 1 1/2 tsp. cinnamon
  • 1/2 tsp. nutmeg
  • 1/2 tsp. ginger
  • 1 14-oz. can sweeten condensed milk
  • 2 large eggs
  • 1 double pie crust (store-bought or homemade)
  • 1/2 c. thick caramel sauce

Instructions

Step 1: Prepare the oven. Preheat it to 425 degrees F.

Step 2: Combine the pumpkin puree, salt, spices, and sweetened condensed milk in a medium-sized saucepan over medium-low heat. Whisk until incorporated. Turn the heat off and allow it to cool for about a minute before whisking in the eggs. Set aside.

Step 3: At the bottom of an 8-inch pie plate, unroll one-piece pie crust. Pour over the pumpkin filling followed by the caramel. Gently swirl with a spoon or butter knife to make a marble-like texture. Make sure not to combine them completely.

Step 4: Place the rest of the pie crust on top and snip excess with a knife around the edges.

Step 5: Sketch Jack Skellington's face with a toothpick, tracing it after to cut out the design using a sharp knife. You might want to cut the stitches first before cutting the line of the mouth to make it easier. Crimp the edges of the pie after.

Step 6: Place inside the preheated oven to bake for around 15 minutes. Then, with an aluminium foil, cover the top of the pie and continue baking at 350 degrees F for 38 to 40 minutes more. This way, Jack's face will stay pale as a skeleton and the edges won't burn.

Step 7: Remove from the oven and allow to cool before serving.
October 14, 2020 0 comment
0 FacebookTwitterPinterestEmail
Main Dish Recipes

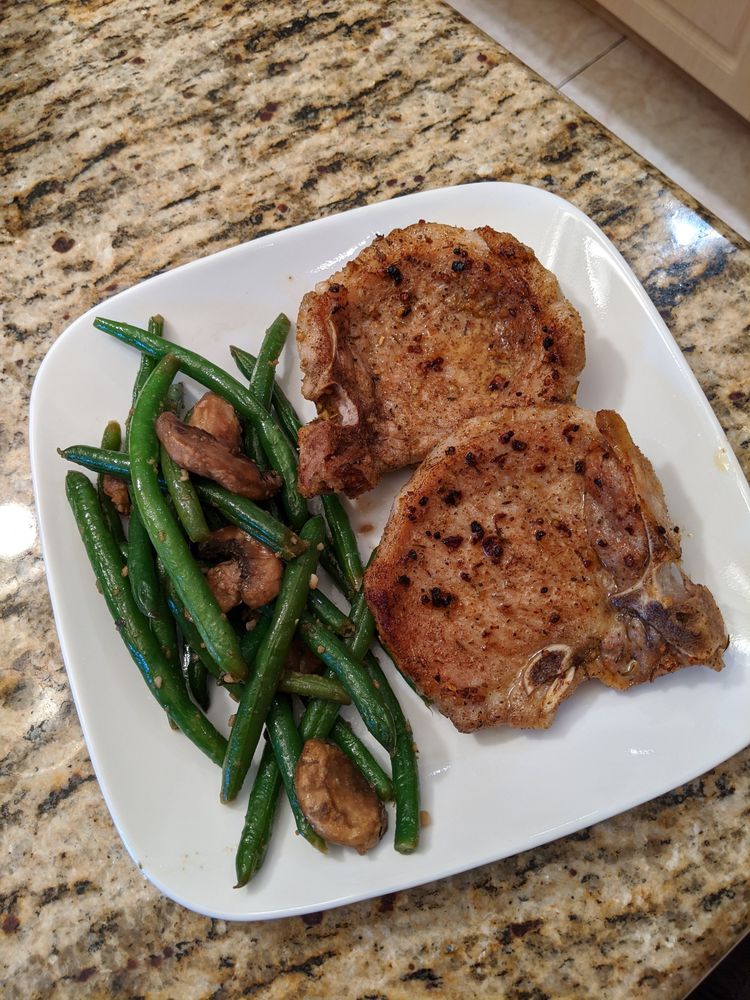
15 MINUTE EASY BONELESS PORK CHOPS

by Rebecca October 13, 2020
written by Rebecca

Prep Time: 5 mins | Cook Time: 10 mins | Total Time: 15 mins | Servings: 4

Juicy and mouthwatering pan-fried Boneless Pork Chops that are perfect for a weeknight dinner with family and friends. There one too many reasons why I love these; it’s low carb, budget-friendly, easy to cook, not to mention extra delicious! My go-to for a quick meal.

Ingredients

4 boneless pork chops, 1-inch thick

3 tablespoons olive oil

1 teaspoon paprika

1 teaspoon garlic powder, or onion powder

1 1/2 teaspoon salt

1 teaspoon black pepper

fresh parsley and thyme, optional garnish

HOW TO MAKE BONELESS PORK CHOP

Step 1: For even cooking, allow the pork chops to reach room temperature. Take them out of the fridge at least 20 minutes before cooking.

Step 2: Remove excess moisture, pat the chicken dry with paper towels, and set aside.

Step 3: Add the garlic powder, paprika, salt, and black pepper in a small bowl. Mix well. Or drop the salt if using brined pork chops.

Step 4: With a tbsp of olive oil, rub the chops on all sides. Then, coat evenly with seasoning mixture on each side.

Step 5: Heat a large cast-iron pan over medium-high heat. Once hot, drizzle a tbsp of oil, swirling the pan to coat.

Step 6: Fry the pork chops, flipping each minute so it’ll not overheat until it reaches 140 degrees F or 60 degrees C internal temperature.

Step 7: Add thyme to the pan halfway through cooking if desired.

Step 8: Once done cooking, transfer the chops to a plate. Use a foil to cover the plate, allowing the chops to rest for about 3 to 5 minutes to redistribute the juices within the meat.

Step 9: Before serving, garnish with minced parsley if desired. Enjoy!

Notes:

I prefer refined olive oil because it has a higher smoke period compared to extra virgin olive oil

Use an instant-read thermometer and insert it in the middle of the chops. Remove the chops from heat once it reads 140 degrees F or 60 degrees C. The temp while resting will rise to 145 degrees F or 63 degrees C (safe level).

Cooking time based on thickness:

¾ inch 4-5 min

1 inch 6-7 min

1 ¼ inch 7-8 min

1 ½ inch 8-10 min

For leftovers, make sure to store them in an airtight container for up to 3 days. When serving, reheat for about 5 to 7 minutes on medium-low or 3 to 4 minutes with 50% power in the microwave.

Nutrition Facts:

Amount Per Serving (6 oz): Calories 275 | Fat 16g25% | Saturated Fat 4g20% | Cholesterol 90mg30% | Sodium 647mg27% | Potassium 520mg15% | Carbohydrates 1g0% | Fiber 1g4% | Sugar 1g1% | Protein 29g58% | Vitamin A 246IU5% | Calcium 9mg1% | Iron 1mg6%

15 MINUTE EASY BONELESS PORK CHOPS

Rebecca Prep Time: 5 mins | Cook Time: 10 mins | Total Time: 15 mins | Servings: 4 Juicy and mouthwatering pan-fried Boneless Pork Chops that are perfect for a weeknight… Main Dish Recipes 15 MINUTE EASY BONELESS PORK CHOPS European Print This
Serves: 4 Prep Time: 5 mins Cooking Time: 10 mins 10 mins
Nutrition facts: 275 calories 16 fat
Rating: 5.0/5
( 1 voted )

Ingredients

  • 4 boneless pork chops, 1-inch thick
  • 3 tablespoons olive oil
  • 1 teaspoon paprika
  • 1 teaspoon garlic powder, or onion powder
  • 1 1/2 teaspoon salt
  • 1 teaspoon black pepper
  • fresh parsley and thyme, optional garnish

Instructions

Step 1: For even cooking, allow the pork chops to reach room temperature. Take them out of the fridge at least 20 minutes before cooking.

Step 2: Remove excess moisture, pat the chicken dry with paper towels, and set aside.

Step 3: Add the garlic powder, paprika, salt, and black pepper in a small bowl. Mix well. Or drop the salt if using brined pork chops.

Step 4: With a tbsp of olive oil, rub the chops on all sides. Then, coat evenly with seasoning mixture on each side.

Step 5: Heat a large cast-iron pan over medium-high heat. Once hot, drizzle a tbsp of oil, swirling the pan to coat.

Step 6: Fry the pork chops, flipping each minute so it'll not overheat until it reaches 140 degrees F or 60 degrees C internal temperature.

Step 7: Add thyme to the pan halfway through cooking if desired.

Step 8: Once done cooking, transfer the chops to a plate. Use a foil to cover the plate, allowing the chops to rest for about 3 to 5 minutes to redistribute the juices within the meat.

Step 9: Before serving, garnish with minced parsley if desired. Enjoy!

Notes:

I prefer refined olive oil because it has a higher smoke period compared to extra virgin olive oil

Use an instant-read thermometer and insert it in the middle of the chops. Remove the chops from heat once it reads 140 degrees F or 60 degrees C. The temp while resting will rise to 145 degrees F or 63 degrees C (safe level).

Cooking time based on thickness:

¾ inch 4-5 min

1 inch 6-7 min

1 ¼ inch 7-8 min

1 ½ inch 8-10 min

For leftovers, make sure to store them in an airtight container for up to 3 days. When serving, reheat for about 5 to 7 minutes on medium-low or 3 to 4 minutes with 50% power in the microwave.

October 13, 2020 0 comment
0 FacebookTwitterPinterestEmail
Main Dish Recipes

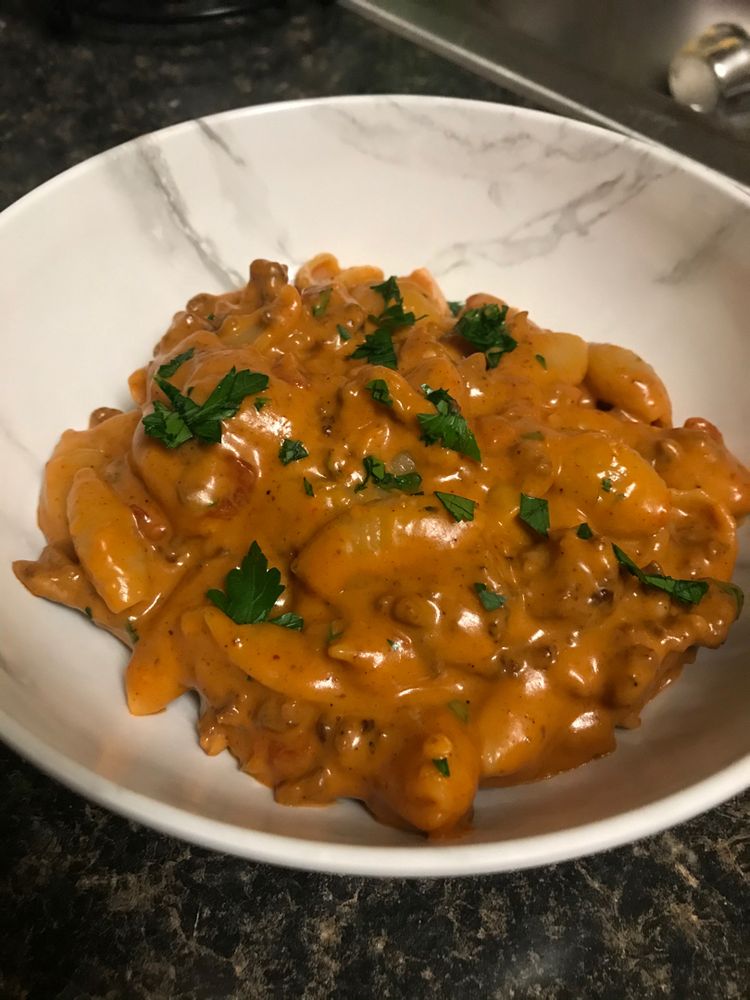
CHEESY TACO PASTA

by Rebecca October 13, 2020
written by Rebecca

Prep Time: 10 mins | Cook Time: 10 mins | Total Time: 20 mins | Servings: 8

In under 20 minutes, you’ll have this exciting, super flavorful Cheesy Taco Pasta on your dinner table. An excellent meal to enjoy for a quick weeknight dinner with your loved ones. Comforting, delicious taco flavour homemade meat sauce with shell pasta.

Ingredients

3 cups small shell pasta

1 pound ground beef, lean or extra lean

1/2 cup onions, chopped

2 cloves garlic, minced, optional

1/4 cup taco seasoning

2 cups of water

1 cup tomato sauce

1 cup shredded cheese, cheddar or mozzarella

fresh cilantro, chopped, optional

HOW TO MAKE CHEESY TACO PASTA

Step 1: Heat a large frying pan on medium heat. Add and stir the ground beef. Cook until no longer pink. Drain any excess fat.

Step 2: Saute the onions and garlic (optional) to the beef and cook for 2 to 3 minutes more or until the onions are translucent.

Step 3: Pour in the tomato sauce, and add in the taco seasoning followed by water, and pasta. Cover the pan loosely and adjust the heat to medium.

Step 4: Continue to cook, occasionally stirring, for another 5 to 10 minutes or until the pasta is done.

Step 5: Take the frying out of the heat and stir in the cheese and fresh cilantro if using.

Step 6: Serve immediately. Enjoy!

Notes:

You can make a homemade taco seasoning. All you have to do is combine the below ingredients in a bowl:

2 tbsp chilli powder

1/2 tsp garlic powder

1/2 tsp onion powder

1/2 tsp cayenne

1/2 tsp oregano

1/2 tsp paprika

2 tsp ground cumin

2 tsp salt

Nutrition Facts:

Amount Per Serving: Calories 268 | Fat 6g9% | Saturated Fat 3g15% | Cholesterol 46mg15% | Sodium 377mg16% | Potassium 391mg11% | Carbohydrates 30g10% | Fiber 1g4% | Sugar 2g2% | Protein 20g40% | Vitamin A 330IU7% | Vitamin C 2.6mg3% | Calcium 88mg9% | Iron 2.3mg13%

CHEESY TACO PASTA

Rebecca Prep Time: 10 mins | Cook Time: 10 mins | Total Time: 20 mins | Servings: 8 In under 20 minutes, you’ll have this exciting, super flavorful Cheesy Taco Pasta… Main Dish Recipes CHEESY TACO PASTA European Print This
Serves: 8 Prep Time: 10 mins Cooking Time: 10 mins 10 mins
Nutrition facts: 268 calories 6 fat
Rating: 5.0/5
( 2 voted )

Ingredients

  • 3 cups small shell pasta
  • 1 pound ground beef, lean or extra lean
  • 1/2 cup onions, chopped
  • 2 cloves garlic, minced, optional
  • 1/4 cup taco seasoning
  • 2 cups of water
  • 1 cup tomato sauce
  • 1 cup shredded cheese, cheddar or mozzarella
  • fresh cilantro, chopped, optional

Instructions

Step 1: Heat a large frying pan on medium heat. Add and stir the ground beef. Cook until no longer pink. Drain any excess fat.

Step 2: Saute the onions and garlic (optional) to the beef and cook for 2 to 3 minutes more or until the onions are translucent.

Step 3: Pour in the tomato sauce, and add in the taco seasoning followed by water, and pasta. Cover the pan loosely and adjust the heat to medium.

Step 4: Continue to cook, occasionally stirring, for another 5 to 10 minutes or until the pasta is done.

Step 5: Take the frying out of the heat and stir in the cheese and fresh cilantro if using.

Step 6: Serve immediately. Enjoy!

Notes:

You can make a homemade taco seasoning. All you have to do is combine the below ingredients in a bowl:

2 tbsp chilli powder

1/2 tsp garlic powder

1/2 tsp onion powder

1/2 tsp cayenne

1/2 tsp oregano

1/2 tsp paprika

2 tsp ground cumin

2 tsp salt

October 13, 2020 0 comment
0 FacebookTwitterPinterestEmail
Main Dish Recipes

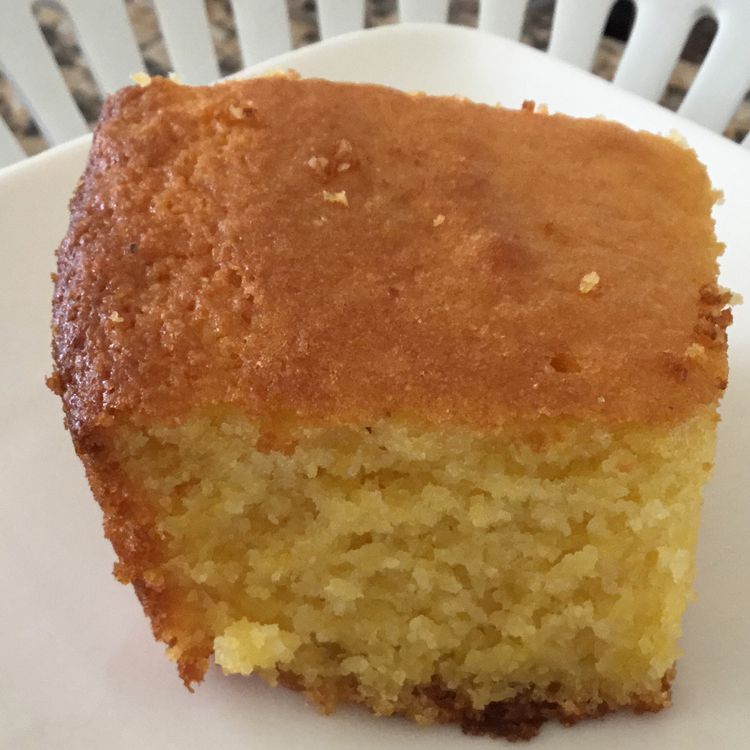
What Can I Do To Make Jiffy Cornbread More Moist?

by Rebecca October 13, 2020
written by Rebecca

PREP TIME: 5 minutes | COOK TIME: 30 minutes | TOTAL TIME: 35 minutes | YIELD: 16 PIECES

What does it take to make the moistest Jiffy Cornbread? I have been making this for a while, I don’t understand why most of the time it turned out crumbly and dry. And nothing is more frustrating than a dry and crumbly cornbread. This recipe answered all my doubts and I have nothing but the moistest and satisfying Jiffy Cornbread ever since. Mystery solved – all you got to do is to add a few more extra ingredients to have that perfect Jiffy. This recipe makes all these pretty simple. Jiffy Cornbread will always be an incredible treat and side to almost anything!

Ingredients

2 – 8.5 oz. boxes Jiffy Corn Muffin Mix

2 eggs

2/3 cup milk

1 cup sour cream

1/2 cup vegetable oil

2 Tbsp. sugar (optional)

How to make Jiffy Cornbread

Step 1: Prepare the oven. Preheat it to 400 degrees.

Step 2: In a large bowl, add the Jiffy Corn Muffin Mixes.

Step 3: Break the eggs, pour in the milk and add in the sour cream, vegetable oil, and sugar in the bowl with the Jiffy Corn Muffin Mixes.

Step 4: Stir well until incorporated.

Step 5: Transfer the batter into a greased 9 x 9-inch casserole dish.

Step 6: Place inside the preheated oven and bake for about 25 to 30 minutes. Check the doneness by inserting a toothpick in the centre of the cake. Once it comes out clean the cake is done.

Nutrition Facts:

Amount Per Serving: CALORIES: 231 | TOTAL FAT: 14.2g | SATURATED FAT: 5.1g | TRANS FAT: 0g | UNSATURATED FAT: 0g | CHOLESTEROL: 32mg | SODIUM: 290mg | CARBOHYDRATES: 22.6g | FIBER: 0.8g | SUGAR: 6.1g | PROTEIN: 3.1g

What Can I Do To Make Jiffy Cornbread More Moist?

Rebecca PREP TIME: 5 minutes | COOK TIME: 30 minutes | TOTAL TIME: 35 minutes | YIELD: 16 PIECES What does it take to make the moistest Jiffy Cornbread? I have… Main Dish Recipes What Can I Do To Make Jiffy Cornbread More Moist? European Print This
Serves: 16 Prep Time: 5 mins Cooking Time: 30 mins 30 mins
Nutrition facts: 231 calories 14.2 fat
Rating: 5.0/5
( 1 voted )

Ingredients

  • 2 - 8.5 oz. boxes Jiffy Corn Muffin Mix
  • 2 eggs
  • 2/3 cup milk
  • 1 cup sour cream
  • 1/2 cup vegetable oil
  • 2 Tbsp. sugar (optional)

Instructions

Step 1: Prepare the oven. Preheat it to 400 degrees.

Step 2: In a large bowl, add the Jiffy Corn Muffin Mixes.

Step 3: Break the eggs, pour in the milk and add in the sour cream, vegetable oil, and sugar in the bowl with the Jiffy Corn Muffin Mixes.

Step 4: Stir well until incorporated.

Step 5: Transfer the batter into a greased 9 x 9-inch casserole dish.

Step 6: Place inside the preheated oven and bake for about 25 to 30 minutes. Check the doneness by inserting a toothpick in the centre of the cake. Once it comes out clean the cake is done.

October 13, 2020 0 comment
0 FacebookTwitterPinterestEmail
Main Dish Recipes

Low Carb Garlic and Herb Bottom Round Roast

by Rebecca October 13, 2020
written by Rebecca

Prep Time: 10 minutes | Cook Time: 6 hours | Total Time: 6 hours 10 minutes | Servings: 8 servings

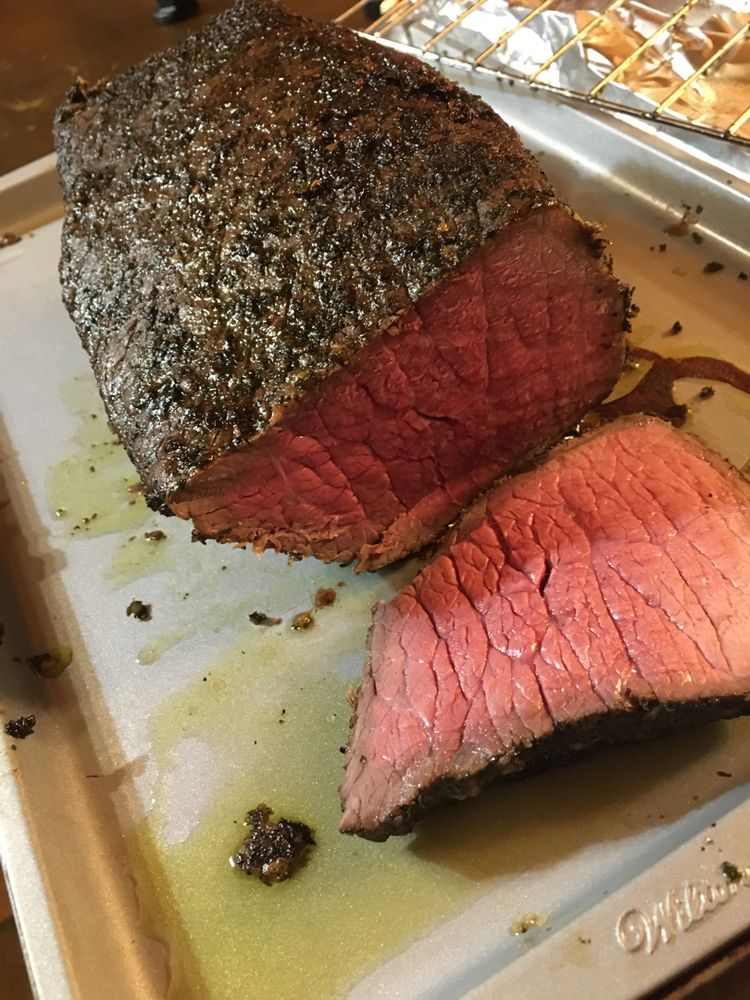
Bottom Round Roast is simple to come about if you know how to roast them the right way. The affordable cut of meat and when done well can be as tender as the pricey ones! Well-seasoned, low-carb, garlic, and herb bottom round roast that your whole family will love.

Ingredients

3-4 lb bottom round roast

2 tsp minced garlic

2 tsp dried basil

2 tsp dried thyme

1 tsp dried parsley

1 tsp Kosher salt

1 tsp black pepper

2 tbsp olive oil

How to make Low Carb Garlic and Herb Bottom Round Roast

Step 1: Prepare the oven. Preheat it to 450 degrees F.

Step 2: Take the completely thawed roast from the fridge and extract it from its packaging.

Step 3: On a cutting board, put down the bottom round roast and coat both sides with olive oil or avocado oil.

Step 4: In a small bowl, mix the minced garlic, basil, thyme, parsley, Kosher salt, and black pepper.

Step 5: Over the entire roast surface, rub the seasoning.

Step 6: Transfer in a cast-iron skillet and cook at 450 degrees for about 20 minutes.

Step 7: Adjust the heat to 170 degrees F. Cook some more until it reaches about 135 to 140 degrees internal temperature. If opting for medium-rare (145 degrees), don’t worry as the roast will keep cooking as it cools.

Step 8: If you prefer medium to medium-well, slice the roast while in the pan and pour 2 cups of beef broth over. Heat over low heat on the stove until the roasts reach the aspired level of doneness.

Note:

How long the roast will cook vary depending on its exact size. Allow the roast to cool if it gets done pretty early and follow step 8 above when almost time to serve.

Nutrition Facts:

Calories: 299kcal | Carbohydrates: 1g | Protein: 56g | Fat: 15g

Low Carb Garlic and Herb Bottom Round Roast

Rebecca Prep Time: 10 minutes | Cook Time: 6 hours | Total Time: 6 hours 10 minutes | Servings: 8 servings Bottom Round Roast is simple to come about if you… Main Dish Recipes Low Carb Garlic and Herb Bottom Round Roast European Print This
Serves: 8 Prep Time: 10 mins Cooking Time: 6 hrs 6 hrs
Nutrition facts: 299 calories 15 fat
Rating: 5.0/5
( 1 voted )

Ingredients

  • 3-4 lb bottom round roast
  • 2 tsp minced garlic
  • 2 tsp dried basil
  • 2 tsp dried thyme
  • 1 tsp dried parsley
  • 1 tsp Kosher salt
  • 1 tsp black pepper
  • 2 tbsp olive oil

Instructions

Step 1: Prepare the oven. Preheat it to 450 degrees F.

Step 2: Take the completely thawed roast from the fridge and extract it from its packaging.

Step 3: On a cutting board, put down the bottom round roast and coat both sides with olive oil or avocado oil.

Step 4: In a small bowl, mix the minced garlic, basil, thyme, parsley, Kosher salt, and black pepper.

Step 5: Over the entire roast surface, rub the seasoning.

Step 6: Transfer in a cast-iron skillet and cook at 450 degrees for about 20 minutes.

Step 7: Adjust the heat to 170 degrees F. Cook some more until it reaches about 135 to 140 degrees internal temperature. If opting for medium-rare (145 degrees), don't worry as the roast will keep cooking as it cools.

Step 8: If you prefer medium to medium-well, slice the roast while in the pan and pour 2 cups of beef broth over. Heat over low heat on the stove until the roasts reach the aspired level of doneness.

Note:

How long the roast will cook vary depending on its exact size. Allow the roast to cool if it gets done pretty early and follow step 8 above when almost time to serve.

October 13, 2020 0 comment
0 FacebookTwitterPinterestEmail
Main Dish Recipes

SWEET AND SOUR CHICKEN

by Rebecca October 13, 2020
written by Rebecca

Prep Time: 15 mins | Cook Time: 15 mins | Total Time: 30 mins | Servings: 4

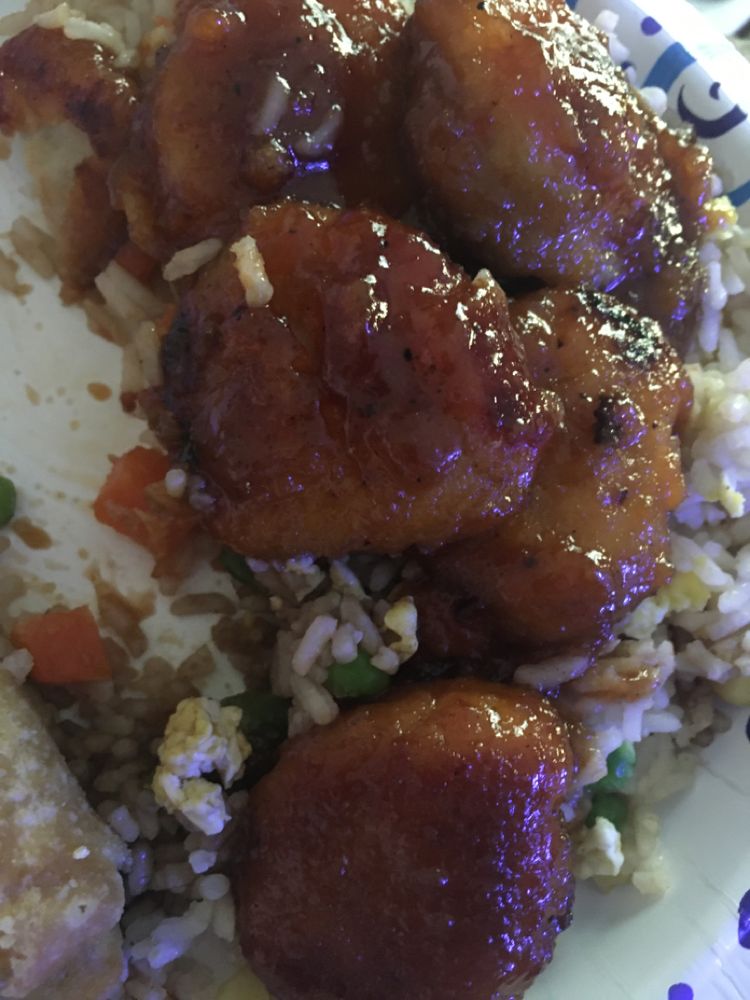
Crispy chicken bites on the outside, tender inside with bell peppers, onion, and pineapple coated in sticky sweet and sour sauce. A quick and easy Chinese chicken recipe that is way better than takeouts!

Ingredients

Chicken:

1 pound boneless skinless chicken thighs, cut into 1-inch pieces, or chicken breasts

1 teaspoon salt

1/2 cup cornstarch

1 1/2 cups flour

1 egg, beaten

1 tablespoon oil, canola oil, or similar

1 ¼ cups water

vegetable oil, for frying

Vegetables:

1 red bell pepper, cut into 1″ pieces

1 green bell pepper, cut into 1″ pieces

1 medium yellow onion, cut into 1″ pieces

1 tablespoon oil, canola oil, or similar

1 cup pineapple chunks, fresh, or canned/frozen

Sweet and Sour Sauce:

1/2 cup sugar

¼ cup rice vinegar, or white vinegar

2 teaspoon garlic, minced, or garlic powder

2 tablespoons soy sauce, low sodium recommended

1/4 cup ketchup

2 tablespoons cornstarch, mixed with 2 tablespoons water

sesame seeds, optional garnish

HOW TO MAKE CRISPY SWEET AND SOUR CHICKEN

Step 1: Add the cornstarch, flour, and salt in a large bowl. Mix well before adding in the egg, a tbsp oil, and water. Whisk the mixture until smooth. At this point, the consistency of the mixture is thick like a pancake batter.

Step 2: Add into the batter the cubed chicken pieces. Coat well and allow to marinate at room temperature for at least 10 minutes or in the fridge for up to an hour.

Step 3: In a medium saucepan or deep fryer, add an inch of oil and heat to 350 degrees F. Ready a wire rack and slotted spoon or mesh strainer.

Step 4: Once the oil is hot, fry the chicken in batches for about 3 to 4 minutes or until golden and crispy. Use the slotted spoon to take the chicken out of the oil. Do the same for the rest.

Step 5: Add a tbsp of oil in a skillet or wok over medium-high heat. saute the onion and bell peppers for about 2 to 4 minutes until a bit softened.

Step 6: Add in the pineapple and the sweet and sour sauce ingredients. Simmer and adjust the taste to your liking, adding in sugar and vinegar to balance the flavour.

Step 7: In a cup, whisk the cornstarch with water. Gradually stir this into the pan. Adjusting the heat a bit to simmer for 2 to 3 minutes more or until the sauce is thick enough the cover the vegetables.

Step 8: Add in the cooked chicken and stir until coated evenly.

Step 9: Take the skillet out of the heat. Before serving, garnish with sesame seeds if desired. Enjoy!

Notes:

The longer you marinate the chicken the more tender they become. Place them in the fridge and don’t forget to take them out at least 15 minutes before cooking. This way, the oil temperature will prevent from dropping.

To make a lighter version, drop the batter and stir fry the cubed chicken in a tbsp oil. Or bake at 350 degrees F on a baking sheet for about 15 minutes.

This is a great make-ahead dish as well. You just need to store them in the fridge in an airtight container for up to 3 days. The flavours will develop, though, will lose the crispiness. Or freeze for up to 3 months.

Nutrition Facts:

Amount Per Serving (4 oz): Calories 466 | Fat 10g15% | Saturated Fat 2g10% | Cholesterol 128mg43% | Sodium 1096mg46% | Potassium 802mg23% | Carbohydrates 68g23% | Fiber 5g20% | Sugar 45g50% | Protein 27g54% | Vitamin A 1419IU28% | Vitamin C 81mg98% | Calcium 54mg5% | Iron 3mg17%

SWEET AND SOUR CHICKEN

Rebecca Prep Time: 15 mins | Cook Time: 15 mins | Total Time: 30 mins | Servings: 4 Crispy chicken bites on the outside, tender inside with bell peppers, onion, and… Main Dish Recipes SWEET AND SOUR CHICKEN European Print This
Serves: 4 Prep Time: 15 mins Cooking Time: 15 mins 15 mins
Nutrition facts: 466 calories 10 fat
Rating: 5.0/5
( 1 voted )

Ingredients

  • Chicken:
  • 1 pound boneless skinless chicken thighs, cut into 1-inch pieces, or chicken breasts
  • 1 teaspoon salt
  • 1/2 cup cornstarch
  • 1 1/2 cups flour
  • 1 egg, beaten
  • 1 tablespoon oil, canola oil, or similar
  • 1 ¼ cups water
  • vegetable oil, for frying
  • Vegetables:
  • 1 red bell pepper, cut into 1" pieces
  • 1 green bell pepper, cut into 1" pieces
  • 1 medium yellow onion, cut into 1" pieces
  • 1 tablespoon oil, canola oil, or similar
  • 1 cup pineapple chunks, fresh, or canned/frozen
  • Sweet and Sour Sauce:
  • 1/2 cup sugar
  • ¼ cup rice vinegar, or white vinegar
  • 2 teaspoon garlic, minced, or garlic powder
  • 2 tablespoons soy sauce, low sodium recommended
  • 1/4 cup ketchup
  • 2 tablespoons cornstarch, mixed with 2 tablespoons water
  • sesame seeds, optional garnish

Instructions

Step 1: Add the cornstarch, flour, and salt in a large bowl. Mix well before adding in the egg, a tbsp oil, and water. Whisk the mixture until smooth. At this point, the consistency of the mixture is thick like a pancake batter.

Step 2: Add into the batter the cubed chicken pieces. Coat well and allow to marinate at room temperature for at least 10 minutes or in the fridge for up to an hour.

Step 3: In a medium saucepan or deep fryer, add an inch of oil and heat to 350 degrees F. Ready a wire rack and slotted spoon or mesh strainer.

Step 4: Once the oil is hot, fry the chicken in batches for about 3 to 4 minutes or until golden and crispy. Use the slotted spoon to take the chicken out of the oil. Do the same for the rest.

Step 5: Add a tbsp of oil in a skillet or wok over medium-high heat. saute the onion and bell peppers for about 2 to 4 minutes until a bit softened.

Step 6: Add in the pineapple and the sweet and sour sauce ingredients. Simmer and adjust the taste to your liking, adding in sugar and vinegar to balance the flavour.

Step 7: In a cup, whisk the cornstarch with water. Gradually stir this into the pan. Adjusting the heat a bit to simmer for 2 to 3 minutes more or until the sauce is thick enough the cover the vegetables.

Step 8: Add in the cooked chicken and stir until coated evenly.

Step 9: Take the skillet out of the heat. Before serving, garnish with sesame seeds if desired. Enjoy!

Notes:

The longer you marinate the chicken the more tender they become. Place them in the fridge and don't forget to take them out at least 15 minutes before cooking. This way, the oil temperature will prevent from dropping.

To make a lighter version, drop the batter and stir fry the cubed chicken in a tbsp oil. Or bake at 350 degrees F on a baking sheet for about 15 minutes.

This is a great make-ahead dish as well. You just need to store them in the fridge in an airtight container for up to 3 days. The flavours will develop, though, will lose the crispiness. Or freeze for up to 3 months.

October 13, 2020 0 comment
0 FacebookTwitterPinterestEmail
Main Dish Recipes

CINNAMON ROLL APPLE PIE CUPS

by Rebecca October 13, 2020
written by Rebecca

Prep Time: 10 mins | Cook Time: 15 mins | Total Time: 25 mins | Servings: 12

I love the pillowy soft crust and a velvety apple pie filling of these mini apple pie like treats. Excellent for parties, even potlucks, and holidays! A fabulous addition to your long list of Christmas must-have this year and the years to come.

Ingredients

2 13-oz packages refrigerated cinnamon roll dough, I used Pillsbury

1 21-oz can apple pie filling

Icing, from cinnamon roll package, or ice cream

HOW TO MAKE CINNAMON ROLL APPLE PIE CUPS

Step 1: Prepare the oven. Preheat it to 375 degrees F or 190 degrees C.

Step 2: Use a nonstick baking spray to grease a 12-cup standard muffin tin.

Step 3: Unroll a cinnamon roll package on a light flour work surface. Using your fingers or a rolling pin, flatten the dough.

Step 4: Into each muffin cup, press individual flattened cinnamon roll to fit.

Step 5: Spoon until 3/4 full the apple pie filling per muffin cup.

Step 6: Place inside the preheated oven and bake for about 15 to 18 minutes or until puffy and golden.

Step 7: Allow cooling in the pan for at least 10 minutes. Take them out of the cups by sliding a small spatula around the edges.

Optional: Drizzle the cups with icing, but first heat the icing in the microwave on low for at least 10 seconds. Serve them alternately with ice cream or caramel sauce. Enjoy!

Notes:

Follow the specified package direction when using any kind of cinnamon roll dough.

To make a homemade apple pie filling, simmer 4 large (peeled and sliced) apples, 2 tbsp butter, 1tbsp lemon juice, half a tsp cinnamon, and 1/4 cup sugar in a saucepan for about 5 to 7 minutes over medium heat until soft.

If using large cinnamon rolls, you need to slice them to fit the muffin cups.

These cinnamon roll apple pie cups you can make a day ahead, you just need to store them in an airtight container at room temperature. Or freeze them for up to 2 months.

Nutrition Facts:

Amount Per Serving (1 cup): Calories 200 | Fat 7g11% | Saturated Fat 3g15% | Sodium 356mg15% | Potassium 16mg0% | Carbohydrates 33g11% | Fiber 1g4% | Sugar 15g17% | Protein 2g4% | Vitamin A 9IU0% | Vitamin C 1mg1% | Calcium 1mg0% | Iron 1mg6%

CINNAMON ROLL APPLE PIE CUPS

Rebecca Prep Time: 10 mins | Cook Time: 15 mins | Total Time: 25 mins | Servings: 12 I love the pillowy soft crust and a velvety apple pie filling of… Main Dish Recipes CINNAMON ROLL APPLE PIE CUPS European Print This
Serves: 12 Prep Time: 10 mins Cooking Time: 15 mins 15 mins
Nutrition facts: 200 calories 7 fat
Rating: 5.0/5
( 1 voted )

Ingredients

  • 2 13-oz packages refrigerated cinnamon roll dough, I used Pillsbury
  • 1 21-oz can apple pie filling
  • Icing, from cinnamon roll package, or ice cream

Instructions

Step 1: Prepare the oven. Preheat it to 375 degrees F or 190 degrees C.

Step 2: Use a nonstick baking spray to grease a 12-cup standard muffin tin.

Step 3: Unroll a cinnamon roll package on a light flour work surface. Using your fingers or a rolling pin, flatten the dough.

Step 4: Into each muffin cup, press individual flattened cinnamon roll to fit.

Step 5: Spoon until 3/4 full the apple pie filling per muffin cup.

Step 6: Place inside the preheated oven and bake for about 15 to 18 minutes or until puffy and golden.

Step 7: Allow cooling in the pan for at least 10 minutes. Take them out of the cups by sliding a small spatula around the edges.

Optional: Drizzle the cups with icing, but first heat the icing in the microwave on low for at least 10 seconds. Serve them alternately with ice cream or caramel sauce. Enjoy!

Notes:

Follow the specified package direction when using any kind of cinnamon roll dough.

To make a homemade apple pie filling, simmer 4 large (peeled and sliced) apples, 2 tbsp butter, 1tbsp lemon juice, half a tsp cinnamon, and 1/4 cup sugar in a saucepan for about 5 to 7 minutes over medium heat until soft.

If using large cinnamon rolls, you need to slice them to fit the muffin cups.

These cinnamon roll apple pie cups you can make a day ahead, you just need to store them in an airtight container at room temperature. Or freeze them for up to 2 months.

October 13, 2020 0 comment
0 FacebookTwitterPinterestEmail
Main Dish Recipes

CHOCOLATE COVERED COOKIE DOUGH BITES

by Rebecca October 13, 2020
written by Rebecca

Prep Time: 15 mins | Chilling Time: 1 hr | Total Time: 1 hr 15 mins | Servings: 12 pieces

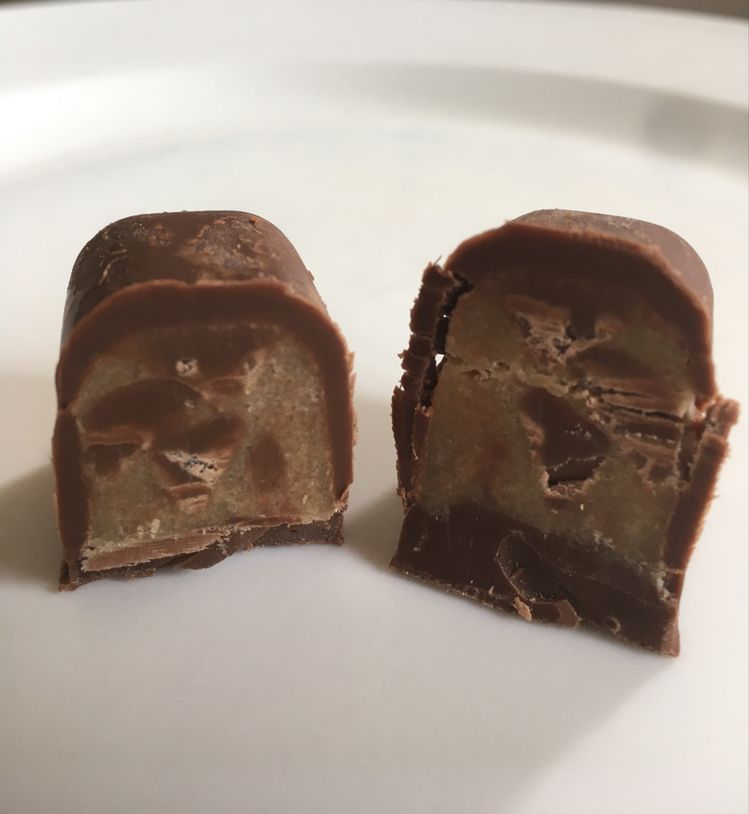
A DIY treat that is super easy to make. Cookie dough covered in melted chocolate made in an ice cube tray. These delicious bites surely will be your kids new favourite!

Ingredients

12 oz semisweet chocolate

1 cup all-purpose flour

1/2 cup brown sugar

1/2 cup butter, softened

1 tablespoons milk

1/2 teaspoon vanilla

1/4 teaspoon salt

1 cup chocolate chips, semisweet or milk

HOW TO MAKE CHOCOLATE COVERED COOKIE DOUGH BITES

Step 1: Prepare the oven and a baking sheet. Preheat to 350 degrees F and set aside the baking sheet.

Step 2: In a medium bowl, add the chocolate. Microwave in 30-second intervals on medium power until smooth.

Step 3: Brush with chocolate the inside of each ice cube tray.

Step 4: Freeze for at least 5 minutes.

To make the Cookie Dough:

Step 5: On the prepared baking sheet, pour flour and bake for about 5 minutes in the preheated oven. Set aside to cool.

Step 6: Beat the flour, brown sugar, butter, and salt in a medium bowl until smooth.

Step 7: Pour in the milk and add in the vanilla. Mix well to combine.

Step 8: Take the ice cube tray from the freezer and fill each cavity with cookie dough mixture. Cover each with melted chocolate on top.

Step 9: Place in the fridge to set for an hour.

Step 10: Once set, invert on a work surface and allow to sit for 10 minutes until the bites fall out from the tray. Tap to loosen if needed.

Note:

For easy moulding, the most reliable ice cube tray to use is a small-medium size with rounded edges.

Nutrition Facts:

Amount Per Serving: Calories 358 | Fat 21g32% | Saturated Fat 13g65% | Polyunsaturated Fat 1g | Monounsaturated Fat 5g | Cholesterol 22mg7% | Sodium 90mg4% | Potassium 118mg3% | Carbohydrates 45g15% | Fiber 2g8% | Sugar 32g36% | Protein 3g6% | Vitamin A 250IU5% | Calcium 20mg2% | Iron 1.8mg10%

CHOCOLATE COVERED COOKIE DOUGH BITES

Rebecca Prep Time: 15 mins | Chilling Time: 1 hr | Total Time: 1 hr 15 mins | Servings: 12 pieces A DIY treat that is super easy to make. Cookie… Main Dish Recipes CHOCOLATE COVERED COOKIE DOUGH BITES European Print This
Serves: 12 Prep Time: 15 mins Cooking Time: 1 hr 1 hr
Nutrition facts: 358 calories 21 fat
Rating: 5.0/5
( 1 voted )

Ingredients

  • 12 oz semisweet chocolate
  • 1 cup all-purpose flour
  • 1/2 cup brown sugar
  • 1/2 cup butter, softened
  • 1 tablespoons milk
  • 1/2 teaspoon vanilla
  • 1/4 teaspoon salt
  • 1 cup chocolate chips, semisweet or milk

Instructions

Step 1: Prepare the oven and a baking sheet. Preheat to 350 degrees F and set aside the baking sheet.

Step 2: In a medium bowl, add the chocolate. Microwave in 30-second intervals on medium power until smooth.

Step 3: Brush with chocolate the inside of each ice cube tray.

Step 4: Freeze for at least 5 minutes.

To make the Cookie Dough:

Step 5: On the prepared baking sheet, pour flour and bake for about 5 minutes in the preheated oven. Set aside to cool.

Step 6: Beat the flour, brown sugar, butter, and salt in a medium bowl until smooth.

Step 7: Pour in the milk and add in the vanilla. Mix well to combine.

Step 8: Take the ice cube tray from the freezer and fill each cavity with cookie dough mixture. Cover each with melted chocolate on top.

Step 9: Place in the fridge to set for an hour.

Step 10: Once set, invert on a work surface and allow to sit for 10 minutes until the bites fall out from the tray. Tap to loosen if needed.

Note:

For easy moulding, the most reliable ice cube tray to use is a small-medium size with rounded edges.

October 13, 2020 0 comment
0 FacebookTwitterPinterestEmail
Main Dish Recipes

DEEP FRIED S’MORES

by Rebecca October 13, 2020
written by Rebecca

Prep Time: 25 mins | Cook Time: 10 mins | Total Time: 35 mins | Servings: 36

These melt in your mouth deep-fried s’ mores are so irresistible and addicting! Golden on the outside, fluffy inside with graham cracker, chocolate, and marshmallow layers. Excellent party treats that are always a huge hit and perfect for all ages!

Ingredients

S’mores:

9 graham cracker sheets

2 cups mini marshmallows

2 cups chocolate chips, or 8 oz baking chocolate, divided

Batter:

2 large eggs

2 tsp oil

1 1/2 cups milk

2 1/4 cups all-purpose flour

6 tbsp granulated sugar

1 tsp baking powder

1/4 tsp salt

Frying & Serving:

1-quart vegetable oil, for frying

powdered sugar, optional for serving

HOW TO MAKE DEEP FRIED S’MORES

To prepare the S’ mores:

Step 1: Use parchment paper to line an 8 x 8-inch pan.

Step 2: Cover the bottom of the pan with graham crackers. Tear them apart to fit, if needed.

Step 3: In a bowl, add a cup of chocolate chips. Microwave in the 30-second interval, stirring in between, until smooth.

Step 4: Drizzle the graham crackers with 1/3 melted chocolate. Top with the rest of the chocolate chips, then, 1/3 melted chocolate, marshmallows, and the rest of the melted chocolate.

Step 5: Top it all up with another layer of graham crackers. Let it sit in the fridge for at least 10 minutes.

To make the Batter:

Step 1: Add the vegetable oil in a medium saucepan or deep fryer. Heat at 425 degrees F.

Step 2: Place the eggs, oil, and milk in a medium bowl. Whisk until combined.

Step 3: Then, in another bowl, put the flour, sugar, baking powder, and salt. Mix well.

Step 4: Add the wet ingredients into the dry and whisk until smooth.

To fry:

Step 1: With paper towels, line a large plate. And take the s’ mores out of the fridge.

Step 2: Remove the s’ mores from the pan using the parchment paper and lay onto a work surface. Slice into 6 x 6 grid with a sharp knife to make 36 pieces. Use melted chocolate to fix the pieces that might break.

Step 3: Use tongs to fully coat an s’ mores piece into the batter. Lift to drip off the excess.

Step 4: Fry the s’ mores in hot oil for a minute or until golden brown and has puffed into a ball. Transfer into the prepared plate.

Step 5: Do the same for the rest.

Step 6: Before the meal, dust with powdered sugar. Serve warm. Enjoy!

Notes:

Use dry pancake mix with water in place of homemade batter. Follow the direction on the package.

Remember to keep the s’mores in the fridge while waiting to fry, particularly in warm weather.

Nutrition Facts:

Amount Per Serving: Calories 117 | Fat 5g8% | Saturated Fat 3g15% | Cholesterol 6mg2% | Sodium 51mg2% | Potassium 30mg1% | Carbohydrates 15g5% | Sugar 9g10% | Protein 1g2% | Vitamin A 35IU1% | Vitamin C 0.1mg0% | Calcium 26mg3% | Iron 0.5mg3%

DEEP FRIED S’MORES

Rebecca Prep Time: 25 mins | Cook Time: 10 mins | Total Time: 35 mins | Servings: 36 These melt in your mouth deep-fried s’ mores are so irresistible and addicting!… Main Dish Recipes DEEP FRIED S’MORES European Print This
Serves: 36 Prep Time: 25 mins Cooking Time: 10 mins 10 mins
Nutrition facts: 117 calories 5 fat
Rating: 5.0/5
( 1 voted )

Ingredients

  • S'mores:
  • 9 graham cracker sheets
  • 2 cups mini marshmallows
  • 2 cups chocolate chips, or 8 oz baking chocolate, divided
  • Batter:
  • 2 large eggs
  • 2 tsp oil
  • 1 1/2 cups milk
  • 2 1/4 cups all-purpose flour
  • 6 tbsp granulated sugar
  • 1 tsp baking powder
  • 1/4 tsp salt
  • Frying & Serving:
  • 1-quart vegetable oil, for frying
  • powdered sugar, optional for serving

Instructions

To prepare the S' mores:

Step 1: Use parchment paper to line an 8 x 8-inch pan.

Step 2: Cover the bottom of the pan with graham crackers. Tear them apart to fit, if needed.

Step 3: In a bowl, add a cup of chocolate chips. Microwave in the 30-second interval, stirring in between, until smooth.

Step 4: Drizzle the graham crackers with 1/3 melted chocolate. Top with the rest of the chocolate chips, then, 1/3 melted chocolate, marshmallows, and the rest of the melted chocolate.

Step 5: Top it all up with another layer of graham crackers. Let it sit in the fridge for at least 10 minutes.

To make the Batter:

Step 1: Add the vegetable oil in a medium saucepan or deep fryer. Heat at 425 degrees F.

Step 2: Place the eggs, oil, and milk in a medium bowl. Whisk until combined.

Step 3: Then, in another bowl, put the flour, sugar, baking powder, and salt. Mix well.

Step 4: Add the wet ingredients into the dry and whisk until smooth.

To fry:

Step 1: With paper towels, line a large plate. And take the s' mores out of the fridge.

Step 2: Remove the s' mores from the pan using the parchment paper and lay onto a work surface. Slice into 6 x 6 grid with a sharp knife to make 36 pieces. Use melted chocolate to fix the pieces that might break.

Step 3: Use tongs to fully coat an s' mores piece into the batter. Lift to drip off the excess.

Step 4: Fry the s' mores in hot oil for a minute or until golden brown and has puffed into a ball. Transfer into the prepared plate.

Step 5: Do the same for the rest.

Step 6: Before the meal, dust with powdered sugar. Serve warm. Enjoy!

Notes:

Use dry pancake mix with water in place of homemade batter. Follow the direction on the package.

Remember to keep the s'mores in the fridge while waiting to fry, particularly in warm weather.

October 13, 2020 0 comment
0 FacebookTwitterPinterestEmail
Main Dish Recipes

Cheesy Fried Hot Dogs by Bien Tasty

by Rebecca October 13, 2020
written by Rebecca

Servings: 6

First, try and it was a huge success! Cheesy Fried Hot Dogs are super fun and surprisingly easy to make. My kids are crazy over these bad boys, first bite and they went overboard! A tremendous accomplishment for both me and the kids.

INGREDIENTS

8 slices American cheese, sliced

8 hot dogs

8 wooden skewers

2 cups flour(250 g)

1 teaspoon salt

1 teaspoon pepper

1 tablespoon baking powder

1 ½ cups milk(360 ml)

2 eggs

oil, for frying

ketchup, to serve

mustard, to serve

How to make Cheesy Fried Hot Dogs by Bien Tasty

Step 1: In the middle of a cheese slice, add the hot dog. Roll the cheese, wrapping the hot dog, and push inside a wooden skewer.

Step 2: Transfer seam side down on a baking sheet the cheese-wrapped hot dogs

Step 3: Place in the fridge to freeze for at least 20 minutes.

Step 4: Add the flour, salt, pepper, baking powder, milk, and eggs in a large bowl. Mix until the batter is smooth and the lumps are gone.

Step 5: For easier dripping, pour the batter into a tall glass cup.

Step 6: In a pot, heat oil over medium-high heat until 375 degrees F or 400 degrees F (190 to 200 degrees C).

Step 7: Take the hot dogs out of the freezer. Dip each into the batter and coat completely. Lift out and rotate so the excess drip off.

Step 8: Carefully put the battered hot dog using tongs into the pot once the oil is hot. Turn to evenly fry.

Step 9: Once golden brown, remove from the pot and transfer on paper towels to drain.

Step 10: Serve warm with ketchup and mustard. Enjoy!

Nutrition Facts:

Calories 474 | Fat 27g | Carbs 40g | Fiber 1g | Sugar 2g | Protein 17g

Cheesy Fried Hot Dogs by Bien Tasty

Rebecca Servings: 6 First, try and it was a huge success! Cheesy Fried Hot Dogs are super fun and surprisingly easy to make. My kids are crazy over these bad boys,… Main Dish Recipes Cheesy Fried Hot Dogs by Bien Tasty European Print This
Serves: 6
Nutrition facts: 474 calories 27 fat
Rating: 5.0/5
( 1 voted )

Ingredients

  • 8 slices American cheese, sliced
  • 8 hot dogs
  • 8 wooden skewers
  • 2 cups flour(250 g)
  • 1 teaspoon salt
  • 1 teaspoon pepper
  • 1 tablespoon baking powder
  • 1 ½ cups milk(360 ml)
  • 2 eggs
  • oil, for frying
  • ketchup, to serve
  • mustard, to serve

Instructions

Step 1: In the middle of a cheese slice, add the hot dog. Roll the cheese, wrapping the hot dog, and push inside a wooden skewer.

Step 2: Transfer seam side down on a baking sheet the cheese-wrapped hot dogs

Step 3: Place in the fridge to freeze for at least 20 minutes.

Step 4: Add the flour, salt, pepper, baking powder, milk, and eggs in a large bowl. Mix until the batter is smooth and the lumps are gone.

Step 5: For easier dripping, pour the batter into a tall glass cup.

Step 6: In a pot, heat oil over medium-high heat until 375 degrees F or 400 degrees F (190 to 200 degrees C).

Step 7: Take the hot dogs out of the freezer. Dip each into the batter and coat completely. Lift out and rotate so the excess drip off.

Step 8: Carefully put the battered hot dog using tongs into the pot once the oil is hot. Turn to evenly fry.

Step 9: Once golden brown, remove from the pot and transfer on paper towels to drain.

Step 10: Serve warm with ketchup and mustard. Enjoy!

October 13, 2020 0 comment
0 FacebookTwitterPinterestEmail
Newer Posts
Older Posts

Popular Posts

  • 1

    Crispy Crunchy Parmesan Potatoes

    March 21, 2020
  • 2

    CROCK POT SMOTHERED PORK CHOPS

    March 21, 2020
  • Facebook
  • Twitter

@2019 - All Right Reserved.


Back To Top