Cook it once
  • Home
  • Privacy Policy
  • Recipes
    • KETO
    • LC
    • WW
  • Tips
  • Contact
Cook it once
  • Home
  • Privacy Policy
  • Recipes
    • KETO
    • LC
    • WW
  • Tips
  • Contact
Category:

Main Dish Recipes

Main Dish Recipes

Garlic Brown Sugar Baked Chicken

by Rebecca June 24, 2020
written by Rebecca

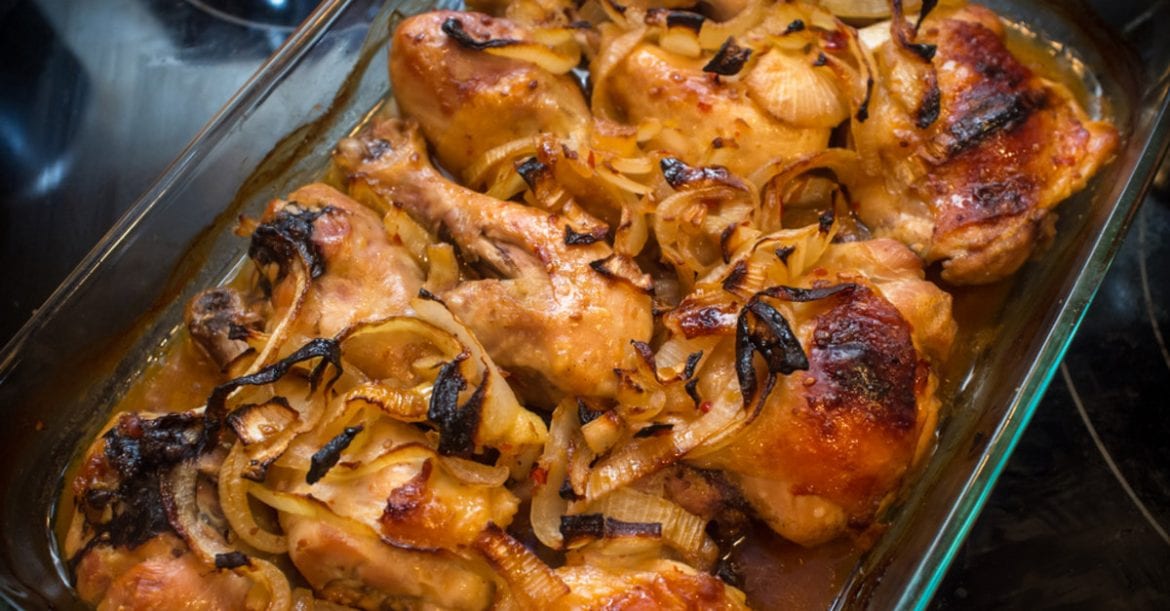
This is a restaurant-quality dish that will leave you wanting more. It is mouthwatering and super delicious! The chickens are perfectly cooked, moist, that’s drench in a sweet, savory, and a little spicy sauce. This aromatic garlic flavor dish is very easy and quick to make, you’ll have this ready in under 30 minutes! I so love the sauce, it is almost drinkable and is great to drizzle over rice. This is a perfect dish to serve on your next family dinner. Trust me, I am pretty sure everybody will love and enjoy this Garlic Brown Sugar Baked Chicken. If you can see below the ingredients are readily available, so wait no more, put on your apron, and make your dinner special tonight.

INGREDIENTS

8 pieces of chicken, bone-in

1 large onion, sliced

4 tablespoons butter

4 cloves garlic

1/4 cup brown sugar, packed

1 tablespoon honey

1/2 teaspoon dried oregano

1/2 teaspoon dried thyme

1/2 teaspoon dried basil

Salt and pepper to taste

How to make Garlic Brown Sugar Baked Chicken

Step 1: Prepare the oven. Preheat it to 400 degrees. Grease lightly a 9 x 13-inch baking dish.

Step 2: Melt 2 tablespoons butter in a large skillet over medium heat.

Step 3: Sprinkle salt and pepper over the chicken for seasoning and place it into the skillet with the melted butter.

Step 4: Cook both sides of the chicken for 1 to 2 minutes or until golden brown. Once browned, transfer the chicken into the prepared baking dish with onion slices.

Step 5: In the same skillet, melt the remaining 2 tablespoons of butter and add in the garlic. Cook for about 1 to 2 minutes.

Step 6: In a small bowl, stir the born sugar, honey, oregano, thyme, and basil until combined.

Step 7: Drizzle the glaze over the chicken and onion. Place inside the preheated oven and bake for 25 to 30 minutes.

Step 8: Remove the chicken from the oven once cooked all the way through. Serve immediately. Enjoy!

Garlic Brown Sugar Baked Chicken

Rebecca This is a restaurant-quality dish that will leave you wanting more. It is mouthwatering and super delicious! The chickens are perfectly cooked, moist, that’s drench in a sweet, savory, and… Main Dish Recipes Garlic Brown Sugar Baked Chicken European Print This
Nutrition facts: 200 calories 20 grams fat
Rating: 4.5/5
( 2 voted )

Ingredients

  • 8 pieces of chicken, bone-in
  • 1 large onion, sliced
  • 4 tablespoons butter
  • 4 cloves garlic
  • 1/4 cup brown sugar, packed
  • 1 tablespoon honey
  • 1/2 teaspoon dried oregano
  • 1/2 teaspoon dried thyme
  • 1/2 teaspoon dried basil
  • Salt and pepper to taste

Instructions

Step 1: Prepare the oven. Preheat it to 400 degrees. Grease lightly a 9 x 13-inch baking dish.

Step 2: Melt 2 tablespoons butter in a large skillet over medium heat.

Step 3: Sprinkle salt and pepper over the chicken for seasoning and place it into the skillet with the melted butter.

Step 4: Cook both sides of the chicken for 1 to 2 minutes or until golden brown. Once browned, transfer the chicken into the prepared baking dish with onion slices.

Step 5: In the same skillet, melt the remaining 2 tablespoons of butter and add in the garlic. Cook for about 1 to 2 minutes.

Step 6: In a small bowl, stir the born sugar, honey, oregano, thyme, and basil until combined.

Step 7: Drizzle the glaze over the chicken and onion. Place inside the preheated oven and bake for 25 to 30 minutes.

Step 8: Remove the chicken from the oven once cooked all the way through. Serve immediately. Enjoy!
June 24, 2020 0 comment
0 FacebookTwitterPinterestEmail
Main Dish Recipes

Ritz Cracker Salted Caramel Icebox Cake

by Rebecca June 24, 2020
written by Rebecca

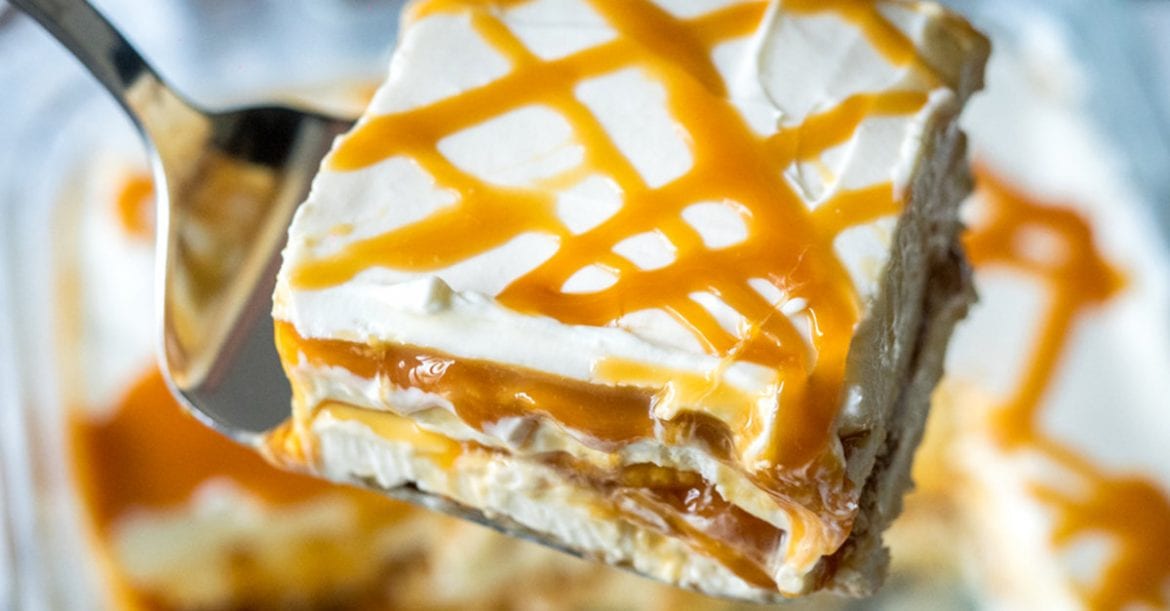
Looking for a perfect summer dessert? This Ritz Cracker Salted Caramel Icebox Cake is all you need for a summer experience all year round. This no-bake, creamy, salty, and sweet dessert is dreamy, amazingly delicious, and to die for! It is an easy, quick, and absolutely tasty cake that will satisfy your taste buds. I love caramel and this recipe is one of the many caramel dessert recipes that I’ve been keeping for a long time. It is one of my favorites. The combination of sweet and salty is a match made in heaven! And it’s the creamlike texture is unbelievably pretty and refreshing to look at. And it tastes amazing!

INGREDIENTS

48 ritz crackers

2 (8 oz.) packages cream cheese, softened

1 cup granulated sugar

1 cup heavy whipping cream

1 teaspoon vanilla extract

1 cup salted caramel sauce, divided

Whipped cream, for garnish (optional)

How to make Ritz Cracker Salted Caramel Icebox Cake

Step 1: Spray with non-stick cooking spray an 8 x 8-inch baking dish. Set aside.

Step 2: Place the cream cheese and sugar in a large bowl. Beat using an electric mixer on medium speed until smooth.

Step 3: Stir in the heavy cream and vanilla. Beat for about 3 to 5 minutes or until a stiff peak form.

Step 4: Place the crackers on an even layer at the bottom of the baking dish. Then, top the crackers with 1/3 of the cream cheese mixture and 1/3 of the caramel sauce over the cream cheese.

Step 5: Repeat the step in the same layer; crackers, 1/3 cream cheese mixture, 1/3 of the caramel sauce, crackers again, and the remaining cream cheese mixture.

Step 6: Place inside the fridge to chill, covered, for at least 4 hours until set or overnight.

Step 7: Once the cake is chilled, remove from the fridge and cut into squares. Top with whipped cream and drizzle with caramel sauce before serving. Enjoy!

Ritz Cracker Salted Caramel Icebox Cake

Rebecca Looking for a perfect summer dessert? This Ritz Cracker Salted Caramel Icebox Cake is all you need for a summer experience all year round. This no-bake, creamy, salty, and sweet… Main Dish Recipes Ritz Cracker Salted Caramel Icebox Cake European Print This
Nutrition facts: 200 calories 20 grams fat
Rating: 3.8/5
( 20 voted )

Ingredients

  • 48 ritz crackers
  • 2 (8 oz.) packages cream cheese, softened
  • 1 cup granulated sugar
  • 1 cup heavy whipping cream
  • 1 teaspoon vanilla extract
  • 1 cup salted caramel sauce, divided
  • Whipped cream, for garnish (optional)

Instructions

Step 1: Spray with non-stick cooking spray an 8 x 8-inch baking dish. Set aside.

Step 2: Place the cream cheese and sugar in a large bowl. Beat using an electric mixer on medium speed until smooth.

Step 3: Stir in the heavy cream and vanilla. Beat for about 3 to 5 minutes or until a stiff peak form.

Step 4: Place the crackers on an even layer at the bottom of the baking dish. Then, top the crackers with 1/3 of the cream cheese mixture and 1/3 of the caramel sauce over the cream cheese.

Step 5: Repeat the step in the same layer; crackers, 1/3 cream cheese mixture, 1/3 of the caramel sauce, crackers again, and the remaining cream cheese mixture.

Step 6: Place inside the fridge to chill, covered, for at least 4 hours until set or overnight.

Step 7: Once the cake is chilled, remove from the fridge and cut into squares. Top with whipped cream and drizzle with caramel sauce before serving. Enjoy!

June 24, 2020 0 comment
1 FacebookTwitterPinterestEmail
Main Dish Recipes

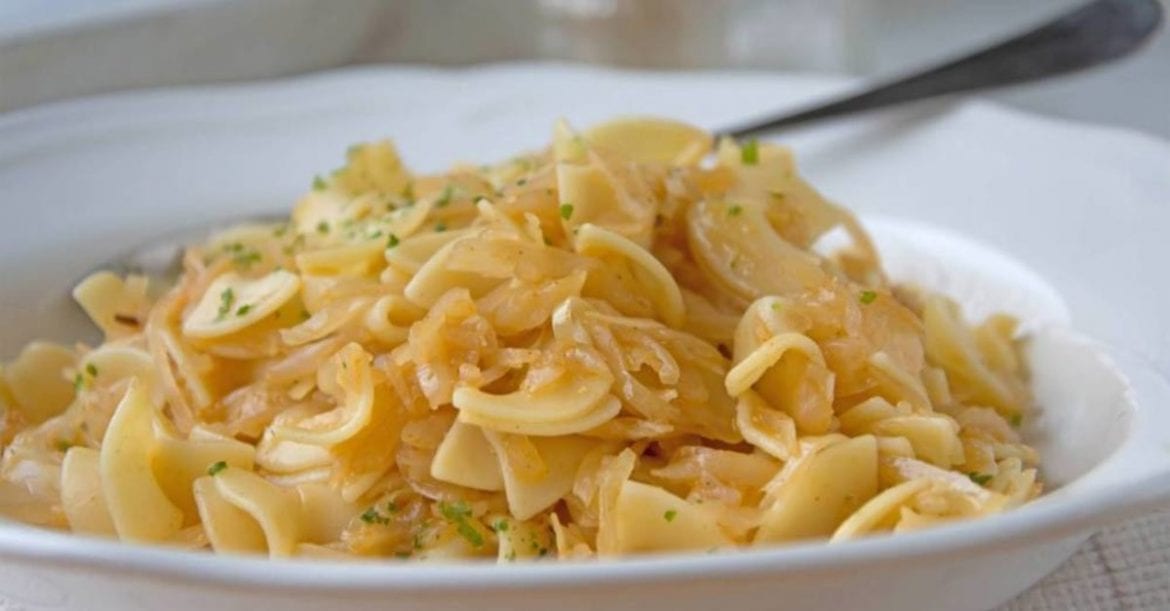
Haluski: Polish Cabbage, Onions, And Noodles

by Rebecca June 24, 2020
written by Rebecca

This pan-fried noodles and cabbage that are drench in butter is love. The caramelized cabbage, onion tossed in egg noodles and bathed in rich butter is the ultimate comfort food.

I just recently found out about this Polish Cabbage, Onions, and Noodles or popularly called Haluski. From the name of this recipe, it is obvious that it is a Polish original. The name commonly pronounces as either ha-loosh-key or ha-loosh-ken. Cabbage, onions, and noodles are the main ingredients used that are bathed in deep and creamy butter. You can add kielbasa or bacon bits but this is optional if you want to add some meat to your Haluski. Putting meat helps with extra flavor but this dish is great enough as is. My first impression when I tasted this dish was it’s incredibly delicious! You know what they say, you can never have enough butter. This dish is as simple as it looks, pretty easy to make, and the ingredients are almost readily available. This Polish Cabbage, Onions, and Noodles is a must-try, worth the spot for your next dinner menu, and definitely  5-star!

INGREDIENTS

½ head green cabbage, chopped into 1-inch pieces

1 stick unsalted butter

1 small yellow onion, diced

8 ounces wide egg noodles, cooked according to package instructions

Kosher salt

Black pepper

Optional: chopped parsley as garnish

How to make Haluski: Polish Cabbage, Onions, And Noodles

Step 1: Melt 1 stick of butter in a Dutch oven or a heavy-bottomed skillet over medium heat.

Step 2: Stir in the carnage, onions, and 2 tablespoons of Kosher salt.

Step 3: Saute and cook for 15 to 20 minutes while frequently stirring until the cabbage is soft and the onions are translucent.

Step 4: Then, add in the cooked noodles into the pot and toss to combine.

Step 5: Sprinkle with some black pepper and season with more Kosher salt to taste.

Haluski: Polish Cabbage, Onions, And Noodles

Rebecca This pan-fried noodles and cabbage that are drench in butter is love. The caramelized cabbage, onion tossed in egg noodles and bathed in rich butter is the ultimate comfort food.… Main Dish Recipes Haluski: Polish Cabbage, Onions, And Noodles European Print This
Nutrition facts: 200 calories 20 grams fat
Rating: 5.0/5
( 1 voted )

Ingredients

  • ½ head green cabbage, chopped into 1-inch pieces
  • 1 stick unsalted butter
  • 1 small yellow onion, diced
  • 8 ounces wide egg noodles, cooked according to package instructions
  • Kosher salt
  • Black pepper
  • Optional: chopped parsley as garnish
June 24, 2020 0 comment
0 FacebookTwitterPinterestEmail
Main Dish Recipes

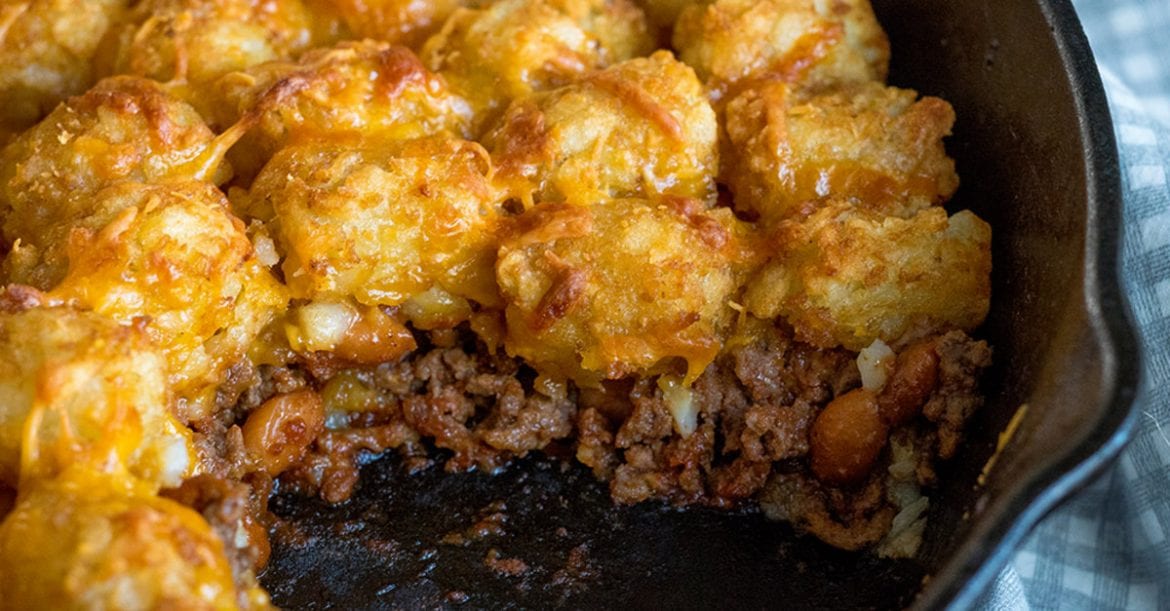
Tater Tot Sloppy Joe Casserole

by Rebecca June 24, 2020
written by Rebecca

This is an awesome recipe! This Tater Tot Sloppy Joe Casserole tastes amazing! I have read this online last week and I am so glad that tried it because I never would have tasted how delicious this is. This is my definition of a perfect meal! Try it, I am sure you’ll love it! Enjoy!

INGREDIENTS

1 pound ground beef

1 (16 oz.) bag frozen tater tots

1 (15 oz.) can pinto beans, rinsed and drained

1 (8 oz.) can tomato sauce

1 1/2 cups sharp cheddar cheese, divided

1/2 cup ketchup

3 cloves garlic, minced, optional

2 tablespoons Worcestershire sauce

1 1/2 tablespoons brown sugar

1 tablespoon Dijon mustard

1 teaspoon onion powder

1 teaspoon garlic powder

1/4 teaspoon red pepper flakes, optional

Kosher salt and freshly ground pepper

Extra-virgin olive oil, as needed

How to make Tater Tot Sloppy Joe Casserole

Step 1: Ready the oven and preheat to 425 degrees F.

Step 2: Combine ketchup, red pepper flakes, garlic powder, onion powder, mustard, brown sugar, Worcestershire sauce, and tomato sauce in a medium bowl. Whisk until well-blended.

Step 3: Place a large skillet on the stove and turn the heat to medium. Add 1 tablespoon of olive oil. When the oil is hot, cook the chopped garlic for a minute or until it turns light brown and aromatic.

Step 4: Toss in the ground beef and stir. Add salt and pepper to taste. When the beef turns brown, drain the excess oil.

Step 5: Transfer the sauce into the skillet with the beef and beans. Stir until the beef and beans are fully coated with sauce.

Step 6: Cook for another 5 to 10 minutes or until the sauce is a little thick.

Step 7: Spread the mixture and form a layer. Add 1 cup of cheese on top of the mixture.

Step 8: Add the tater tots on top and sprinkle the rest of the cheese on top.

Step 9: Place the skillet inside the preheated oven and bake for 30 minutes or until the tots turn golden brown, crispy, and the cheese is melted.

Step 10: Remove from the oven and let it sit on a wire rack for 5 minutes. Serve and enjoy!

Tater Tot Sloppy Joe Casserole

Rebecca This is an awesome recipe! This Tater Tot Sloppy Joe Casserole tastes amazing! I have read this online last week and I am so glad that tried it because I… Main Dish Recipes Tater Tot Sloppy Joe Casserole European Print This
Nutrition facts: 200 calories 20 grams fat
Rating: 3.4/5
( 10 voted )

Ingredients

  • 1 pound ground beef
  • 1 (16 oz.) bag frozen tater tots
  • 1 (15 oz.) can pinto beans, rinsed and drained
  • 1 (8 oz.) can tomato sauce
  • 1 1/2 cups sharp cheddar cheese, divided
  • 1/2 cup ketchup
  • 3 cloves garlic, minced, optional
  • 2 tablespoons Worcestershire sauce
  • 1 1/2 tablespoons brown sugar
  • 1 tablespoon Dijon mustard
  • 1 teaspoon onion powder
  • 1 teaspoon garlic powder
  • 1/4 teaspoon red pepper flakes, optional
  • Kosher salt and freshly ground pepper
  • Extra-virgin olive oil, as needed

Instructions

Step 1: Ready the oven and preheat to 425 degrees F.

Step 2: Combine ketchup, red pepper flakes, garlic powder, onion powder, mustard, brown sugar, Worcestershire sauce, and tomato sauce in a medium bowl. Whisk until well-blended.

Step 3: Place a large skillet on the stove and turn the heat to medium. Add 1 tablespoon of olive oil. When the oil is hot, cook the chopped garlic for a minute or until it turns light brown and aromatic.

Step 4: Toss in the ground beef and stir. Add salt and pepper to taste. When the beef turns brown, drain the excess oil.

Step 5: Transfer the sauce into the skillet with the beef and beans. Stir until the beef and beans are fully coated with sauce.

Step 6: Cook for another 5 to 10 minutes or until the sauce is a little thick.

Step 7: Spread the mixture and form a layer. Add 1 cup of cheese on top of the mixture.

Step 8: Add the tater tots on top and sprinkle the rest of the cheese on top.

Step 9: Place the skillet inside the preheated oven and bake for 30 minutes or until the tots turn golden brown, crispy, and the cheese is melted.

Step 10: Remove from the oven and let it sit on a wire rack for 5 minutes. Serve and enjoy!

June 24, 2020 0 comment
0 FacebookTwitterPinterestEmail
Main Dish Recipes

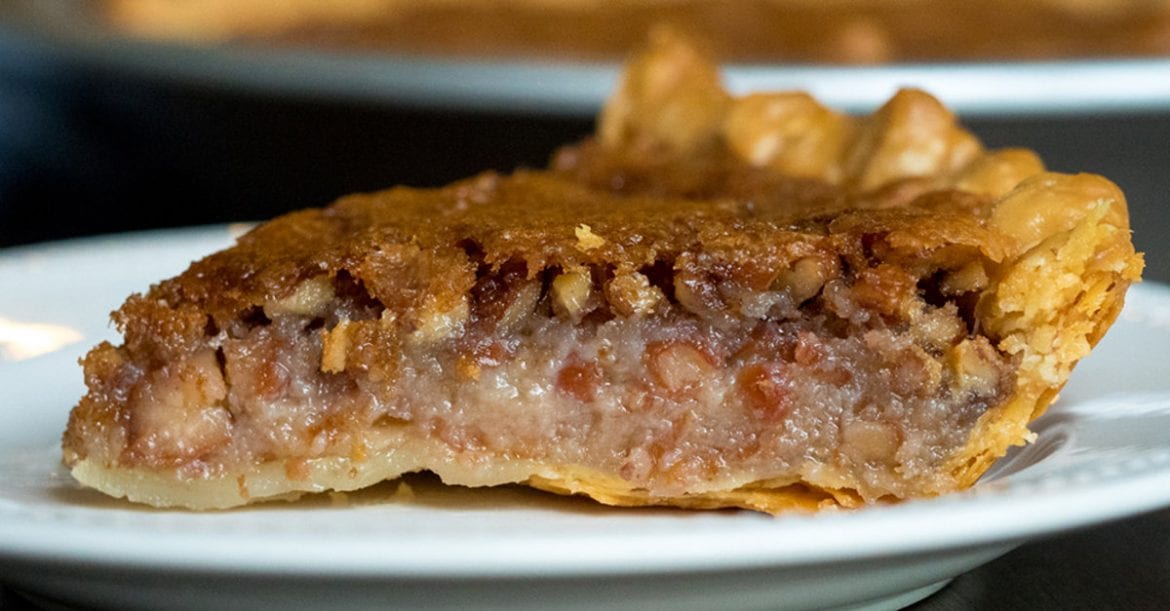
Vintage Pinto Bean Pie

by Rebecca June 24, 2020
written by Rebecca

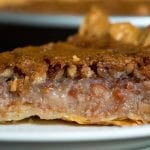
Old recipe but still works in this modern age! My grandma used to make this incredible Bean Pie. She loved working around the kitchen and her number one customer and critique were me! We spent a lot of time together in the kitchen. She taught me everything I know in the kitchen and I am so grateful for that. Now, as a way of thanking her, I decided to bake this amazing Pinto Bean Pie. This was her favorite type of pie. It is really simple to make. You will only be needing 8 ingredients for this perfect treat! This is perfect to eat pretty much any time of the day and after eating pretty much every food. Once you get a bite of this heaven-like pie, you will surely want more! That’s usually the case every time I make this at home. My kids could not get enough of it that’s why I make sure to bake 3 or more pies. Imagine 3 pies a day. Yeah, that’s how awesome this pie is! I’ll stop writing now so you can focus on preparing the ingredients. Enjoy!

INGREDIENTS

1 unbaked pie crust (homemade or store-bought)

3/4 cup pinto beans (heated and lightly mashed)

1 cup of sugar

2 eggs, beaten

3/4 cup (1 1/2 sticks) unsalted butter, melted

1/2 cup pecans, finely chopped

1 teaspoon vanilla extract

1/4 teaspoon salt

How to make Vintage Pinto Bean Pie

Step 1: Ready the oven and preheat to 350 degrees F.

Step 2: Combine beaten eggs, beans, melted butter, vanilla extract, salt, and sugar in a large bowl. Stir until well-mixed.

Step 3: Fold the mixture in the prepared chopped pecan.

Step 4: When the mixture is well-combined, transfer the mixture into the pie shell.

Step 5: Put the pie inside the preheated oven and cook for 45 to 50 minutes or until the pie is cooked through and soft.

Step 6: Remove from the oven and let it sit on a wire rack to cool.

Step 7: Serve and enjoy!

Vintage Pinto Bean Pie

Rebecca Old recipe but still works in this modern age! My grandma used to make this incredible Bean Pie. She loved working around the kitchen and her number one customer and… Main Dish Recipes Vintage Pinto Bean Pie European Print This
Nutrition facts: 200 calories 20 grams fat
Rating: 5.0/5
( 1 voted )

Ingredients

  • 1 unbaked pie crust (homemade or store-bought)
  • 3/4 cup pinto beans (heated and lightly mashed)
  • 1 cup of sugar
  • 2 eggs, beaten
  • 3/4 cup (1 1/2 sticks) unsalted butter, melted
  • 1/2 cup pecans, finely chopped
  • 1 teaspoon vanilla extract
  • 1/4 teaspoon salt

Instructions

Step 1: Ready the oven and preheat to 350 degrees F.

Step 2: Combine beaten eggs, beans, melted butter, vanilla extract, salt, and sugar in a large bowl. Stir until well-mixed.

Step 3: Fold the mixture in the prepared chopped pecan.

Step 4: When the mixture is well-combined, transfer the mixture into the pie shell.

Step 5: Put the pie inside the preheated oven and cook for 45 to 50 minutes or until the pie is cooked through and soft.

Step 6: Remove from the oven and let it sit on a wire rack to cool.

Step 7: Serve and enjoy!

June 24, 2020 0 comment
0 FacebookTwitterPinterestEmail
Main Dish Recipes

6-Ingredient Blender Lemon Pie

by Rebecca June 24, 2020
written by Rebecca

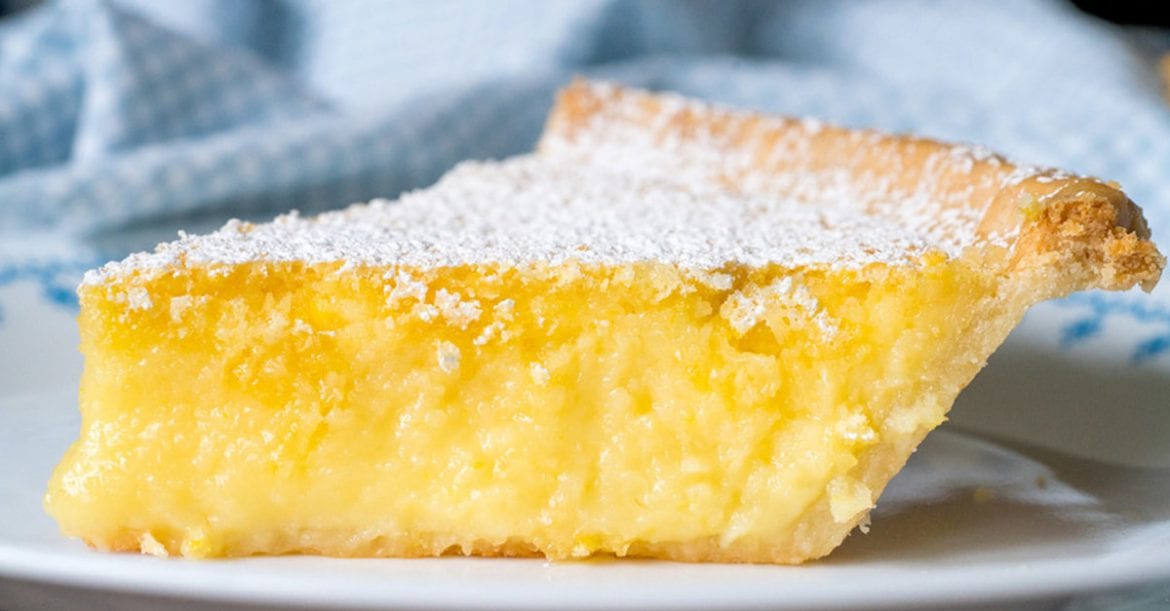
Yeah, you read it right! You will only need 6 basic ingredients to make this amazing Lemon Pie! I made this two days ago and I could not get enough of it so I bake one again today! It tastes like one of those lemon cakes you order at a pastry shop. I am not kidding. This has a fancy taste and look. Maybe it’s just me but the name got my attention. Imagine 6 basic ingredients make the perfect Pie! I have eaten plenty of pies in my life and this surely made it to my top picks for pies. That’s how good this is! I am not a pastry chef but I make the best Lemon pie so I think that counts to label myself as a pastry wizard! Okay, enough with my bragging, it is time for you to know if what I am saying is true. Do you have all these ingredients? Yeah? Great! Then go to your kitchen and start preparing. I’ll be with you all the way just follow these steps I have provided and I am sure that you will be successful! Enjoy!

INGREDIENTS

4 large eggs1/2 cup (1 stick) unsalted butter, melted

1 lemon, sliced into wedges, seeds removed

1 1/4 cups sugar

1 teaspoon vanilla extract

1 frozen pie shell

Powdered sugar, garnish

How to make 6-Ingredient Blender Lemon Pie

Step 1: Ready the oven and preheat to 350 degrees F.

Step 2: Combine lemon slices, butter, sugar, vanilla extract, and eggs in a blender. Blend until all ingredients are well-combined and smooth.

Step 3: Fill the frozen pie shell with the mixture.

Step 4: Place inside the preheated oven and bake for 45 minutes or until cooked through.

Step 5: Remove from the oven and let it sit on a wire rack to cool to room temperature.

Step 6: Sprinkle white sugar and slice.

Step 7: Serve and enjoy!

6-Ingredient Blender Lemon Pie

Rebecca Yeah, you read it right! You will only need 6 basic ingredients to make this amazing Lemon Pie! I made this two days ago and I could not get enough… Main Dish Recipes 6-Ingredient Blender Lemon Pie European Print This
Nutrition facts: 200 calories 20 grams fat
Rating: 5.0/5
( 2 voted )

Ingredients

  • 4 large eggs1/2 cup (1 stick) unsalted butter, melted
  • 1 lemon, sliced into wedges, seeds removed
  • 1 1/4 cups sugar
  • 1 teaspoon vanilla extract
  • 1 frozen pie shell
  • Powdered sugar, garnish

Instructions

Step 1: Ready the oven and preheat to 350 degrees F.

Step 2: Combine lemon slices, butter, sugar, vanilla extract, and eggs in a blender. Blend until all ingredients are well-combined and smooth.

Step 3: Fill the frozen pie shell with the mixture.

Step 4: Place inside the preheated oven and bake for 45 minutes or until cooked through.

Step 5: Remove from the oven and let it sit on a wire rack to cool to room temperature.

Step 6: Sprinkle white sugar and slice.

Step 7: Serve and enjoy!

June 24, 2020 0 comment
0 FacebookTwitterPinterestEmail
Main Dish Recipes

Cajun Shrimp Scampi

by Rebecca June 23, 2020
written by Rebecca

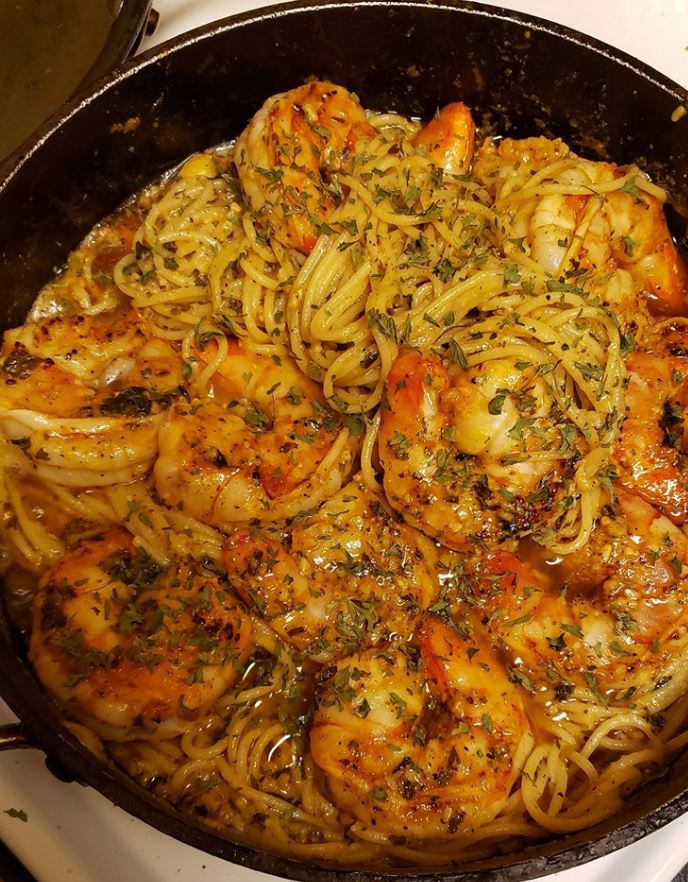
This Cajun Shrimp Scampi is pretty darn delicious! Its smoky, spicy seasoning is a classic Cajun flavor. By far one of my favorite Cajun recipes. It’s a must-try and I promise this dish worth everything! It is super satisfying, it makes my mouth water. You can try this with chicken, too and it’s equally tasty. Having this on your dinner table feels like dining in at one of the expensive restaurants downtown. I will always give this a 5-star. Try it and see for yourself!

INGREDIENTS

12 raw shrimps (as many as you’d like, I like having a lot in my pasta)

1 serving of pasta (preferably linguine)

2 cloves garlic, minced

2 tablespoons butter

1/2 cup  heavy cream

shredded parmesan cheese

1/8 teaspoon basil

salt and pepper to taste

flour (to thicken)

cajun seasoning

1/4 cup parsley

White wine (not shown)

olive oil (not shown)

How to make Cajun Shrimp Scampi

Step 1: Place the butter in a heated saucepan over medium-high heat.

Step 2: Drizzle some olive oil into the pan.

Step 3: And a splash of white wine.

Step 4: Bring the mixture to a boil.

Step 5: Saute the garlic for about 2 minutes more.

Step 6: Place the shrimp into the pan and season with the Cajun seasoning. You can put as much depends on how you like it.

Step 7: Cook both sides of the shrimp until pink and remove it from the pan. Leaving the liquid behind.

Step 8: Pour in the heavy cream into the pan and add in the basil, parsley, salt, and pepper.

Step 9: Bring the mixture to a boil and sprinkle some flour to thicken the sauce.

Step 10: And reduce the heat to medium-low before adding the shrimp back.

Step 11: Make sure to thoroughly coat the shrimp with the sauce. Toss the shrimp until well coated with sauce and serve over the pasta.

Step 12: Sprinkle a good amount of parmesan cheese on top. Serve and enjoy!

Cajun Shrimp Scampi

Rebecca This Cajun Shrimp Scampi is pretty darn delicious! Its smoky, spicy seasoning is a classic Cajun flavor. By far one of my favorite Cajun recipes. It’s a must-try and I… Main Dish Recipes Cajun Shrimp Scampi European Print This
Nutrition facts: 200 calories 20 grams fat
Rating: 5.0/5
( 1 voted )

Ingredients

  • 12 raw shrimps (as many as you’d like, I like having a lot in my pasta)
  • 1 serving of pasta (preferably linguine)
  • 2 cloves garlic, minced
  • 2 tablespoons butter
  • 1/2 cup  heavy cream
  • shredded parmesan cheese
  • 1/8 teaspoon basil
  • salt and pepper to taste
  • flour (to thicken)
  • cajun seasoning
  • 1/4 cup parsley
  • White wine (not shown)
  • olive oil (not shown)

Instructions

Step 1: Place the butter in a heated saucepan over medium-high heat.

Step 2: Drizzle some olive oil into the pan.

Step 3: And a splash of white wine.

Step 4: Bring the mixture to a boil.

Step 5: Saute the garlic for about 2 minutes more.

Step 6: Place the shrimp into the pan and season with the Cajun seasoning. You can put as much depends on how you like it.

Step 7: Cook both sides of the shrimp until pink and remove it from the pan. Leaving the liquid behind.

Step 8: Pour in the heavy cream into the pan and add in the basil, parsley, salt, and pepper.

Step 9: Bring the mixture to a boil and sprinkle some flour to thicken the sauce.

Step 10: And reduce the heat to medium-low before adding the shrimp back.

Step 11: Make sure to thoroughly coat the shrimp with the sauce. Toss the shrimp until well coated with sauce and serve over the pasta.

Step 12: Sprinkle a good amount of parmesan cheese on top. Serve and enjoy!


June 23, 2020 0 comment
0 FacebookTwitterPinterestEmail
Main Dish Recipes

Slow Cooker Beef Pot Roast

by Rebecca June 23, 2020
written by Rebecca

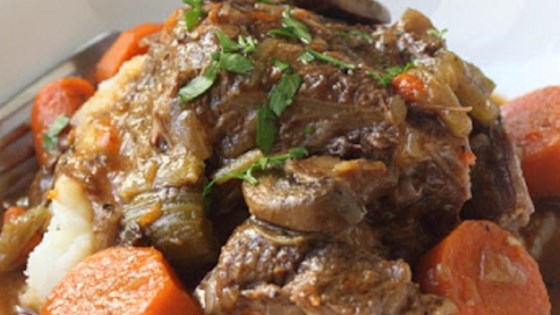
My mouth is watering because of this Beef Pot Roast. The beef is meltingly tender with vegetables and potatoes that are smothered in rich gravy. I cannot think of a perfect dinner to serve that is warm, hearty, and deliciously flavorful than this fall apart beef.

INGREDIENTS

1 (5 pounds) bone-in beef pot roast

salt and pepper to taste

1 tablespoon all-purpose flour, or as needed

2 tablespoons vegetable oil

8 ounces sliced mushrooms

1 medium onion, chopped

2 cloves garlic, minced

1 tablespoon butter

1 1/2 tablespoons all-purpose flour

1 tablespoon tomato paste

2 1/2 cups chicken broth

3 medium carrots, cut into chunks

2 stalks celery, cut into chunks

1 sprig fresh rosemary

2 sprigs fresh thyme

How to make Slow Cooker Beef Pot Roast

Step 1: Don’t be shy with the salt and pepper, generously season both sides of the roast.

Step 2: Then, sprinkle some flour on the top of the meat, pat, and shake off any excess flour.

Step 3: In a large skillet, heat the vegetable oil over medium-high heat.

Step 4: Cook both sides of the roast for about 5 to 6 minutes each side until browned. Once the roast is well browned, remove from the skillet and set aside.

Step 5: Decrease the heat to medium and saute the mushrooms and butter. Cook for about 3 to 4 minutes.

Step 6: Add the onion and cook for 5 minutes or until translucent.

Step 7: Stir in the garlic and saute for a minute.

Step 8: Add 1 1/2 tablespoons of flour and cook for a minute.

Step 9: Pour the tomato paste and again cook for another minute.

Step 10: Slowly pour in the chicken stock and stir to combine. Continue to cook until simmer and remover from the heat.

Step 11: Drop the sliced carrots and celery into the slow cooker.

Step 12: Finally, put the roast over the vegetables. Make sure to include any accumulated juice.

Step 13: Sprinkle in some rosemary and thyme.

Step 14: And pour the onion and mushroom mixture on top of the roast.

Step 15: Turn the slow cooker to high and continue cooking the roast for 5 to 6 hours, covered, until the meat is fork-tender.

Step 16: Once done, remove any fat from the surface and strip off the bones. Then, season with salt and pepper to taste.

Slow Cooker Beef Pot Roast

Rebecca My mouth is watering because of this Beef Pot Roast. The beef is meltingly tender with vegetables and potatoes that are smothered in rich gravy. I cannot think of a… Main Dish Recipes Slow Cooker Beef Pot Roast European Print This
Nutrition facts: 200 calories 20 grams fat
Rating: 5.0/5
( 1 voted )

Ingredients

  • 1 (5 pounds) bone-in beef pot roast
  • salt and pepper to taste
  • 1 tablespoon all-purpose flour, or as needed
  • 2 tablespoons vegetable oil
  • 8 ounces sliced mushrooms
  • 1 medium onion, chopped
  • 2 cloves garlic, minced
  • 1 tablespoon butter
  • 1 1/2 tablespoons all-purpose flour
  • 1 tablespoon tomato paste
  • 2 1/2 cups chicken broth
  • 3 medium carrots, cut into chunks
  • 2 stalks celery, cut into chunks
  • 1 sprig fresh rosemary
  • 2 sprigs fresh thyme

Instructions

Step 1: Don't be shy with the salt and pepper, generously season both sides of the roast.

Step 2: Then, sprinkle some flour on the top of the meat, pat, and shake off any excess flour.

Step 3: In a large skillet, heat the vegetable oil over medium-high heat.

Step 4: Cook both sides of the roast for about 5 to 6 minutes each side until browned. Once the roast is well browned, remove from the skillet and set aside.

Step 5: Decrease the heat to medium and saute the mushrooms and butter. Cook for about 3 to 4 minutes.

Step 6: Add the onion and cook for 5 minutes or until translucent.

Step 7: Stir in the garlic and saute for a minute.

Step 8: Add 1 1/2 tablespoons of flour and cook for a minute.

Step 9: Pour the tomato paste and again cook for another minute.

Step 10: Slowly pour in the chicken stock and stir to combine. Continue to cook until simmer and remover from the heat.

Step 11: Drop the sliced carrots and celery into the slow cooker.

Step 12: Finally, put the roast over the vegetables. Make sure to include any accumulated juice.

Step 13: Sprinkle in some rosemary and thyme.

Step 14: And pour the onion and mushroom mixture on top of the roast.

Step 15: Turn the slow cooker to high and continue cooking the roast for 5 to 6 hours, covered, until the meat is fork-tender.

Step 16: Once done, remove any fat from the surface and strip off the bones. Then, season with salt and pepper to taste.

June 23, 2020 0 comment
0 FacebookTwitterPinterestEmail
Main Dish Recipes

Krispy Kreme Donuts

by Rebecca June 23, 2020
written by Rebecca

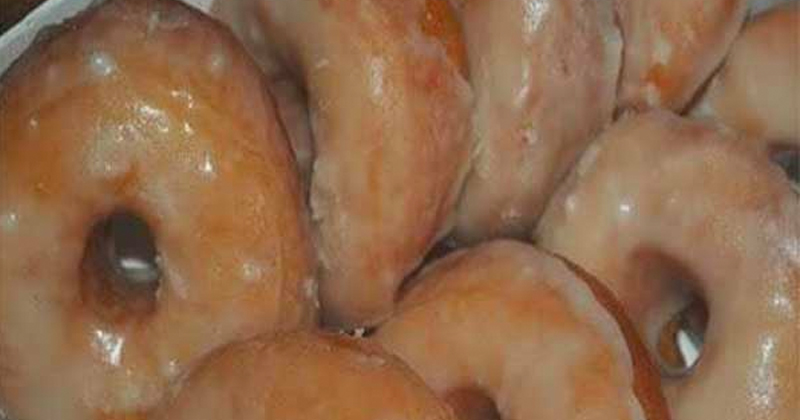
These little treats made our weekend very special. My cousins and their kids went to the house for a simple family gathering. We had a barbecue and burgers. We bonded and talked a lot. It was the perfect weekend. For dessert, we tried this one recipe we watched on TV that day. It was this Krispy Kreme Donuts. We decided to make it together with the kids. It was so fun. They were so excited by the idea of cooking. Aside from being easy to make, these little treats are very delicious. Well, the name speaks for itself, right? They taste like Krispy Kreme! Give it a try so you’d know what I’m talking about.

INGREDIENTS

2 cups scalded milk

1/2 cup butter

2/3 cup sugar, divided

1 teaspoon salt

2 tablespoons yeast

4 eggs (beaten)

1/4 teaspoon nutmeg

7 cups sifted flour

For the Glaze

3 cups powdered sugar

1/2 teaspoon salt

1/2 teaspoon vanilla

1/2 cup cold water

How to make Krispy Kreme Donuts

Step 1: In a medium bowl, add 3 cups of sugar, 1/2 teaspoon salt, 1/2 teaspoon vanilla, 1/2 cold water. Whisk until well-mixed.

Step 2: In a small bowl, pour hot milk and add butter then wait for the butter to melt. Add salt and 1 teaspoon sugar then let it cool. Add the yeast, 3 cups of flour, remaining sugar, eggs, and nutmeg. Add the remaining flour.

Step 3: Pummel for 5 minutes and let it rise for 1 1/2 hours. Roll the dough out the slice into shapes. (Remember not to unroll the dough.)

Step 4: Let the dough rise for 45 minutes.

Step 5: Place a pan on the stove and turn the heat to 365 degrees C. When the oil is hot, add the dough and fry for 1 to 2 minutes on each side until the color turns brown. You fry the doughnut holes first followed by the donuts.

Step 6: Place the fried donuts onto a plate with a paper towel to drain the excess oil then dip into the glaze. Serve and enjoy!

Krispy Kreme Donuts

Rebecca These little treats made our weekend very special. My cousins and their kids went to the house for a simple family gathering. We had a barbecue and burgers. We bonded… Main Dish Recipes Krispy Kreme Donuts European Print This
Nutrition facts: 200 calories 20 grams fat
Rating: 5.0/5
( 1 voted )

Ingredients

  • 2 cups scalded milk
  • 1/2 cup butter
  • 2/3 cup sugar, divided
  • 1 teaspoon salt
  • 2 tablespoons yeast
  • 4 eggs (beaten)
  • 1/4 teaspoon nutmeg
  • 7 cups sifted flour
  • For the Glaze
  • 3 cups powdered sugar
  • 1/2 teaspoon salt
  • 1/2 teaspoon vanilla
  • 1/2 cup cold water

Instructions

Step 1: In a medium bowl, add 3 cups of sugar, 1/2 teaspoon salt, 1/2 teaspoon vanilla, 1/2 cold water. Whisk until well-mixed.

Step 2: In a small bowl, pour hot milk and add butter then wait for the butter to melt. Add salt and 1 teaspoon sugar then let it cool. Add the yeast, 3 cups of flour, remaining sugar, eggs, and nutmeg. Add the remaining flour.

Step 3: Pummel for 5 minutes and let it rise for 1 1/2 hours. Roll the dough out the slice into shapes. (Remember not to unroll the dough.)

Step 4: Let the dough rise for 45 minutes.

Step 5: Place a pan on the stove and turn the heat to 365 degrees C. When the oil is hot, add the dough and fry for 1 to 2 minutes on each side until the color turns brown. You fry the doughnut holes first followed by the donuts.

Step 6: Place the fried donuts onto a plate with a paper towel to drain the excess oil then dip into the glaze. Serve and enjoy!

June 23, 2020 0 comment
0 FacebookTwitterPinterestEmail
Main Dish Recipes

White Chicken Enchiladas

by Rebecca June 23, 2020
written by Rebecca

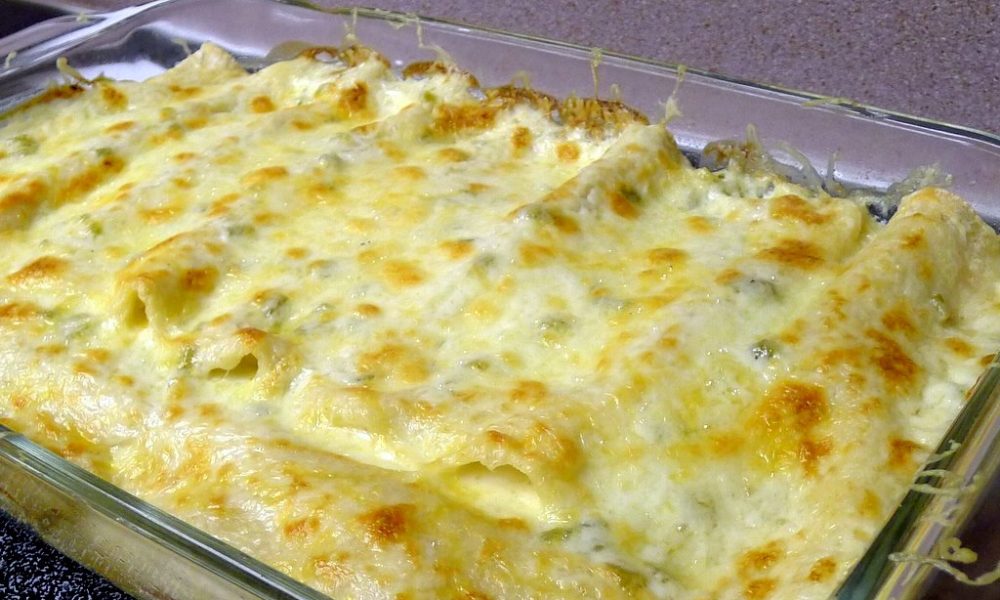
These bad boys were the highlight of my week! From the moment I learned how easy it is to make this amazing dish, I was non-stop. I cooked it pretty much every day! I just love the taste of melted cheese on tortillas. Since the first time I ate tortilla, I fell in love with it. As of now, you should know that Enchilada is my favorite food. It is my comfort food. Happy or sad, it is always what I crave for. I am not a great chef, I try but most of the time, I fail. This was the first time I perfected a dish that is why I am so excited to share this with you today. I really hope you enjoy this recipe!

Ingredients

8-10 flour tortillas (soft taco size)

2 cups of cooked and shredded chicken

2 cups of shredded Monterey Jack cheese

3 tbsps of butter

3 tbsps of flour

2 cups of chicken broth

1 cup of sour cream

1 (4 oz) can of diced green chiles

How to make White Chicken Enchiladas

Step 1: Grease a 9×13 pan.

Step 2: In a medium bowl, add 1 cup of cheese and chicken. Stir until well-mixed then roll it up in tortillas and put them into the greased pan.

Step 3: Place a pan on the stove and turn the heat to medium. Add the butter and wait until it is melted then add in the flour. Whisk for a minute until creamy. Pour the broth and whisk again until well-blended.

Step 4: When the sauce is thick, remove the pan from the stove and add the chilies and sour cream into the mixture, Stirn until well-mixed.

Step 5: Pour the mixture on top of the prepared enchiladas. Garnish with the rest of the cheese.

Step 6: Place inside the oven and bake for 25 to 30 minutes at 350 degrees C.

Step 7: Remove from the oven. Serve and enjoy!

White Chicken Enchiladas

Rebecca These bad boys were the highlight of my week! From the moment I learned how easy it is to make this amazing dish, I was non-stop. I cooked it pretty… Main Dish Recipes White Chicken Enchiladas European Print This
Nutrition facts: 200 calories 20 grams fat
Rating: 5.0/5
( 1 voted )

Ingredients

  • 8-10 flour tortillas (soft taco size)
  • 2 cups of cooked and shredded chicken
  • 2 cups of shredded Monterey Jack cheese
  • 3 tbsps of butter
  • 3 tbsps of flour
  • 2 cups of chicken broth
  • 1 cup of sour cream
  • 1 (4 oz) can of diced green chiles

Instructions

Step 1: Grease a 9x13 pan.

Step 2: In a medium bowl, add 1 cup of cheese and chicken. Stir until well-mixed then roll it up in tortillas and put them into the greased pan.

Step 3: Place a pan on the stove and turn the heat to medium. Add the butter and wait until it is melted then add in the flour. Whisk for a minute until creamy. Pour the broth and whisk again until well-blended.

Step 4: When the sauce is thick, remove the pan from the stove and add the chilies and sour cream into the mixture, Stirn until well-mixed.

Step 5: Pour the mixture on top of the prepared enchiladas. Garnish with the rest of the cheese.

Step 6: Place inside the oven and bake for 25 to 30 minutes at 350 degrees C.

Step 7: Remove from the oven. Serve and enjoy!

June 23, 2020 0 comment
0 FacebookTwitterPinterestEmail
Newer Posts
Older Posts

Popular Posts

  • 1

    Crispy Crunchy Parmesan Potatoes

    March 21, 2020
  • 2

    CROCK POT SMOTHERED PORK CHOPS

    March 21, 2020
  • Facebook
  • Twitter

@2019 - All Right Reserved.


Back To Top