Cook it once
  • Home
  • Privacy Policy
  • Recipes
    • KETO
    • LC
    • WW
  • Tips
  • Contact
Cook it once
  • Home
  • Privacy Policy
  • Recipes
    • KETO
    • LC
    • WW
  • Tips
  • Contact
Category:

Main Dish Recipes

Main Dish Recipes

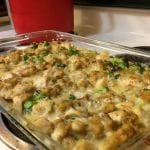
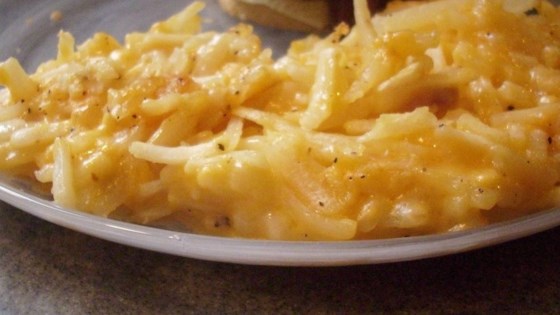
Restaurant-Style Hashbrown Casserole

by Rebecca July 8, 2020
written by Rebecca

Too lazy to drive and dine in just to satisfy your cravings for a restaurant-quality hashbrowns casserole? This recipe will blow your mind! A copycat of your favorite restaurant-style hashbrowns casserole. Creamy, cheesy, so delicious just like the real thing! When I first made this casserole, my family went crazy! Because they taught that it was a take out. They gobbled and gobbled until nothings left before I revealed to them the big secret. That it was me who made it! Their reaction was super funny! And from that day forward, they never ask me for anything rather than this hashbrown casserole. I make it almost every day! My youngest is so obsessed, he loves this casserole so much. He is a picky eater, we can’t force him to eat anything that he doesn’t like. But when it comes to this casserole, he’s always first to finish and without fail ask for another plate. This recipe is a great addition to your family’s menu. Super easy to make, family-friendly, and a versatile recipe. It goes along with just about anything. A comfort food fix that will not empty your pocket. For any leftovers, if there is any, this casserole is great even if you eat it the next day.

INGREDIENTS

1 (2 pounds) package frozen hash brown potatoes, thawed

1/2 cup butter, softened

1 teaspoon salt

1/2 teaspoon ground black pepper

1/2 cup chopped onion

1 (10.75 ounces) can condense cream of chicken soup

2 cups shredded Cheddar cheese

How to make Restaurant-Style Hashbrown Casserole

Step 1: Prepare the oven. Preheat it to 350 degrees F or 175 degrees C.

Step 2: Grease a 9 x 13-inch pan by spraying it with a non-stick cooking spray.

Step 3: Combine the potatoes, butter, salt, pepper, onions, soup, and cheese in a large bowl. Lightly mix until combined.

Step 4: Pour the potato mixture into the prepared pan.

Step 5: Place inside the preheated oven and bake for approximately 35 minutes or until browned.
Restaurant-Style Hashbrown Casserole

Rebecca Too lazy to drive and dine in just to satisfy your cravings for a restaurant-quality hashbrowns casserole? This recipe will blow your mind! A copycat of your favorite restaurant-style hashbrowns… Main Dish Recipes Restaurant-Style Hashbrown Casserole European Print This
Nutrition facts: 200 calories 20 grams fat
Rating: 5.0/5
( 1 voted )

Ingredients

  • 1 (2 pounds) package frozen hash brown potatoes, thawed
  • 1/2 cup butter, softened
  • 1 teaspoon salt
  • 1/2 teaspoon ground black pepper
  • 1/2 cup chopped onion
  • 1 (10.75 ounces) can condense cream of chicken soup
  • 2 cups shredded Cheddar cheese

Instructions

Step 1: Prepare the oven. Preheat it to 350 degrees F or 175 degrees C.

Step 2: Grease a 9 x 13-inch pan by spraying it with a non-stick cooking spray.

Step 3: Combine the potatoes, butter, salt, pepper, onions, soup, and cheese in a large bowl. Lightly mix until combined.

Step 4: Pour the potato mixture into the prepared pan.

Step 5: Place inside the preheated oven and bake for approximately 35 minutes or until browned.
July 8, 2020 0 comment
0 FacebookTwitterPinterestEmail
Main Dish Recipes

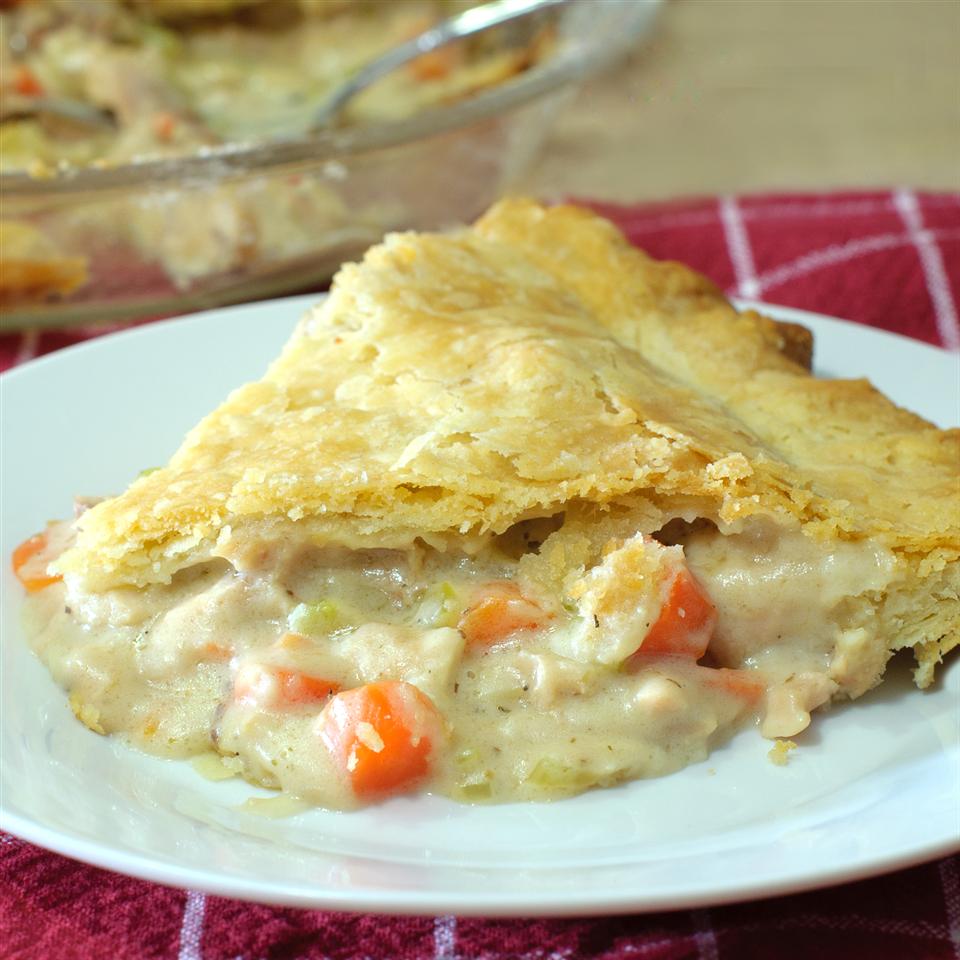
Mom’s Chicken Pot Pie

by Rebecca July 8, 2020
written by Rebecca

A beginner’s pot pie. Place whatever vegetables you’d like and make your own custom pot pie recipe. This will instantly become your family’s favorite. Comforting, savory, with a flaky crust, hearty meat, and vegetables. This pot pie will change your outlook and you’ll realize that pot pies are a lot more simple to make than you might think. This is a delicious and satisfying beginner-friendly pot pie your family will enjoy!

INGREDIENTS

⅓ cup butter

⅓ cup chopped onion

⅓ cup all-purpose flour

½ teaspoon salt

¼ teaspoon ground black pepper

1 ¾ cups chicken broth

⅔ cup milk

2 cups chopped cooked chicken

1 (14.5 ounces) can peas and carrots

½ (15 ounces) can whole new potatoes, drained

1 (15 ounces) package prepared double-crust pie pastry

How to make Mom’s Chicken Pot Pie

Step 1: Prepare the oven. Preheat it to 425 degrees F or 220 degrees C.

Step 2: In a large skillet, melt the butter over medium heat. Stir the onion, flour, salt, and pepper. Cook for about 5 minutes or until the onion is translucent.

Step 3: Once done, remove the skillet from the heat. Then, pour in the chicken broth and milk. Bring the mixture into a boil and cook for about a minute until slightly thickened.

Step 4: Remove from the heat and stir in the chicken, peas, carrots, then the potatoes into the broth mixture.

Step 5: Into the bottom of a deep-dish pie pan, press one pie pastry, and pour the broth mixture.

Step 6: Place the remaining pastry over the mixture and press the edges to seal. Then, cut some slits into the top of the pastry and place the pie plate on a baking sheet.

Step 6: Place inside the preheated oven and bake for approximately 30 minutes or until the crust is golden brown.

Step 7: Once done, remove from the oven and let the pie cool for about 15 to 20 minutes at room temperature so the filling will thicken. Slice and serve. Enjoy!

Mom’s Chicken Pot Pie

Rebecca A beginner’s pot pie. Place whatever vegetables you’d like and make your own custom pot pie recipe. This will instantly become your family’s favorite. Comforting, savory, with a flaky crust,… Main Dish Recipes Mom’s Chicken Pot Pie European Print This
Nutrition facts: 200 calories 20 grams fat
Rating: 5.0/5
( 1 voted )

Ingredients

  • ⅓ cup butter
  • ⅓ cup chopped onion
  • ⅓ cup all-purpose flour
  • ½ teaspoon salt
  • ¼ teaspoon ground black pepper
  • 1 ¾ cups chicken broth
  • ⅔ cup milk
  • 2 cups chopped cooked chicken
  • 1 (14.5 ounces) can peas and carrots
  • ½ (15 ounces) can whole new potatoes, drained
  • 1 (15 ounces) package prepared double-crust pie pastry

Instructions

Step 1: Prepare the oven. Preheat it to 425 degrees F or 220 degrees C.

Step 2: In a large skillet, melt the butter over medium heat. Stir the onion, flour, salt, and pepper. Cook for about 5 minutes or until the onion is translucent.

Step 3: Once done, remove the skillet from the heat. Then, pour in the chicken broth and milk. Bring the mixture into a boil and cook for about a minute until slightly thickened.

Step 4: Remove from the heat and stir in the chicken, peas, carrots, then the potatoes into the broth mixture.

Step 5: Into the bottom of a deep-dish pie pan, press one pie pastry, and pour the broth mixture.

Step 6: Place the remaining pastry over the mixture and press the edges to seal. Then, cut some slits into the top of the pastry and place the pie plate on a baking sheet.

Step 6: Place inside the preheated oven and bake for approximately 30 minutes or until the crust is golden brown.

Step 7: Once done, remove from the oven and let the pie cool for about 15 to 20 minutes at room temperature so the filling will thicken. Slice and serve. Enjoy!

July 8, 2020 0 comment
0 FacebookTwitterPinterestEmail
Main Dish Recipes

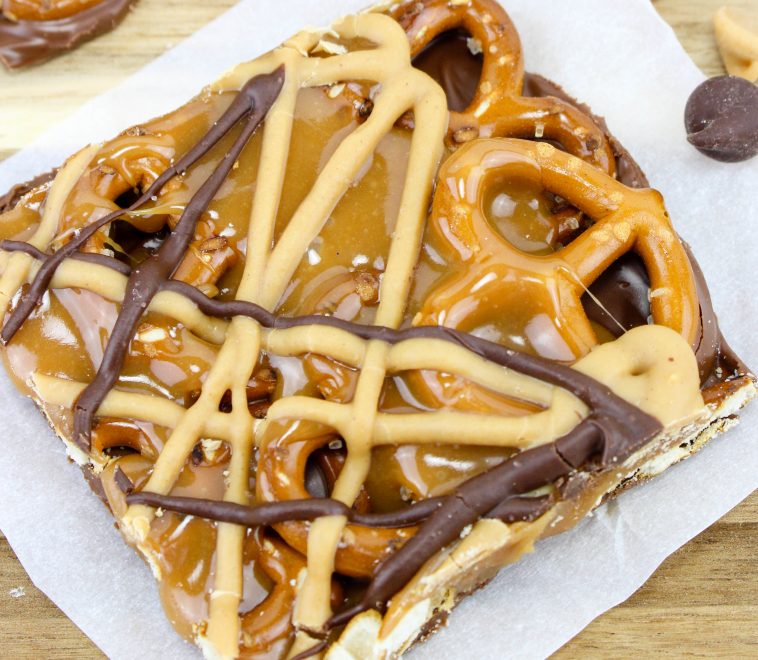
No Bake Caramel Pretzel Crack Bars

by Rebecca July 8, 2020
written by Rebecca

This for me is heaven! My favorite and my go-to whenever I need a pick me up moment. This caramel pretzel crack is the prettiest thing! The easiest and quickest to make. I am obsessed with these bars! Because it is not only easy to prepare but you only need four simple ingredients to make these crazy delish bars; Hershey’s milk chocolate chips, Kraft caramel bits, Reese’s (oh my gosh! this is the best part!), and Mini Twist Pretzels. The combination of sweet and salty is perfect! This is yet another amazing no-bake recipe that I super love! If you are searching for the perfect treat, look no more because this No-Bake Caramel Pretzel Crack bar is all you need. It is perfect for everyone, anytime, and any day! I am pretty sure that this will quickly be your family’s new favorite.

INGREDIENTS

11.5 oz bag of Hershey’s Milk Chocolate Chips

11 oz bag of Kraft Caramel Bits

½ Cup Reese’s Peanut Butter Chips

8 oz of Mini Twist Pretzels

How to make No-Bake Caramel Pretzel Crack Bars

Step 1: Place the Hershey chocolate chips in a small glass bowl. But make sure to reserve about 1/4 cup of chips. Put inside the microwave to melt with 20 seconds interval.

Step 2: Evenly spread the melted chocolate on a cookie sheet lined with parchment paper.

Step 3: Layer the pretzels over the melted chocolate. It is okay if the pretzels are overlapping each other.

Step 4: In a bowl, place the Kraft caramel bits with 2 tablespoons of water. Place inside the microwave and melt for 1 1/2 to 2 minutes.

Step 5: And drizzle over the pretzels and spread. Set aside to cool.

Step 6: Now, for the reserved chocolate chips, melt and drizzle it on top of the cooled caramel.

Step 7: Do the same for Reese’s peanut butter chips.

Step 8: Let the bars sit until completely cooled. Enjoy!

No Bake Caramel Pretzel Crack Bars

Rebecca This for me is heaven! My favorite and my go-to whenever I need a pick me up moment. This caramel pretzel crack is the prettiest thing! The easiest and quickest… Main Dish Recipes No Bake Caramel Pretzel Crack Bars European Print This
Nutrition facts: 200 calories 20 grams fat
Rating: 5.0/5
( 1 voted )

Ingredients

  • 11.5 oz bag of Hershey’s Milk Chocolate Chips
  • 11 oz bag of Kraft Caramel Bits
  • ½ Cup Reese’s Peanut Butter Chips
  • 8 oz of Mini Twist Pretzels

Instructions

Step 1: Place the Hershey chocolate chips in a small glass bowl. But make sure to reserve about 1/4 cup of chips. Put inside the microwave to melt with 20 seconds interval.

Step 2: Evenly spread the melted chocolate on a cookie sheet lined with parchment paper.

Step 3: Layer the pretzels over the melted chocolate. It is okay if the pretzels are overlapping each other.

Step 4: In a bowl, place the Kraft caramel bits with 2 tablespoons of water. Place inside the microwave and melt for 1 1/2 to 2 minutes.

Step 5: And drizzle over the pretzels and spread. Set aside to cool.

Step 6: Now, for the reserved chocolate chips, melt and drizzle it on top of the cooled caramel.

Step 7: Do the same for Reese's peanut butter chips.

Step 8: Let the bars sit until completely cooled. Enjoy!

July 8, 2020 0 comment
0 FacebookTwitterPinterestEmail
Main Dish Recipes

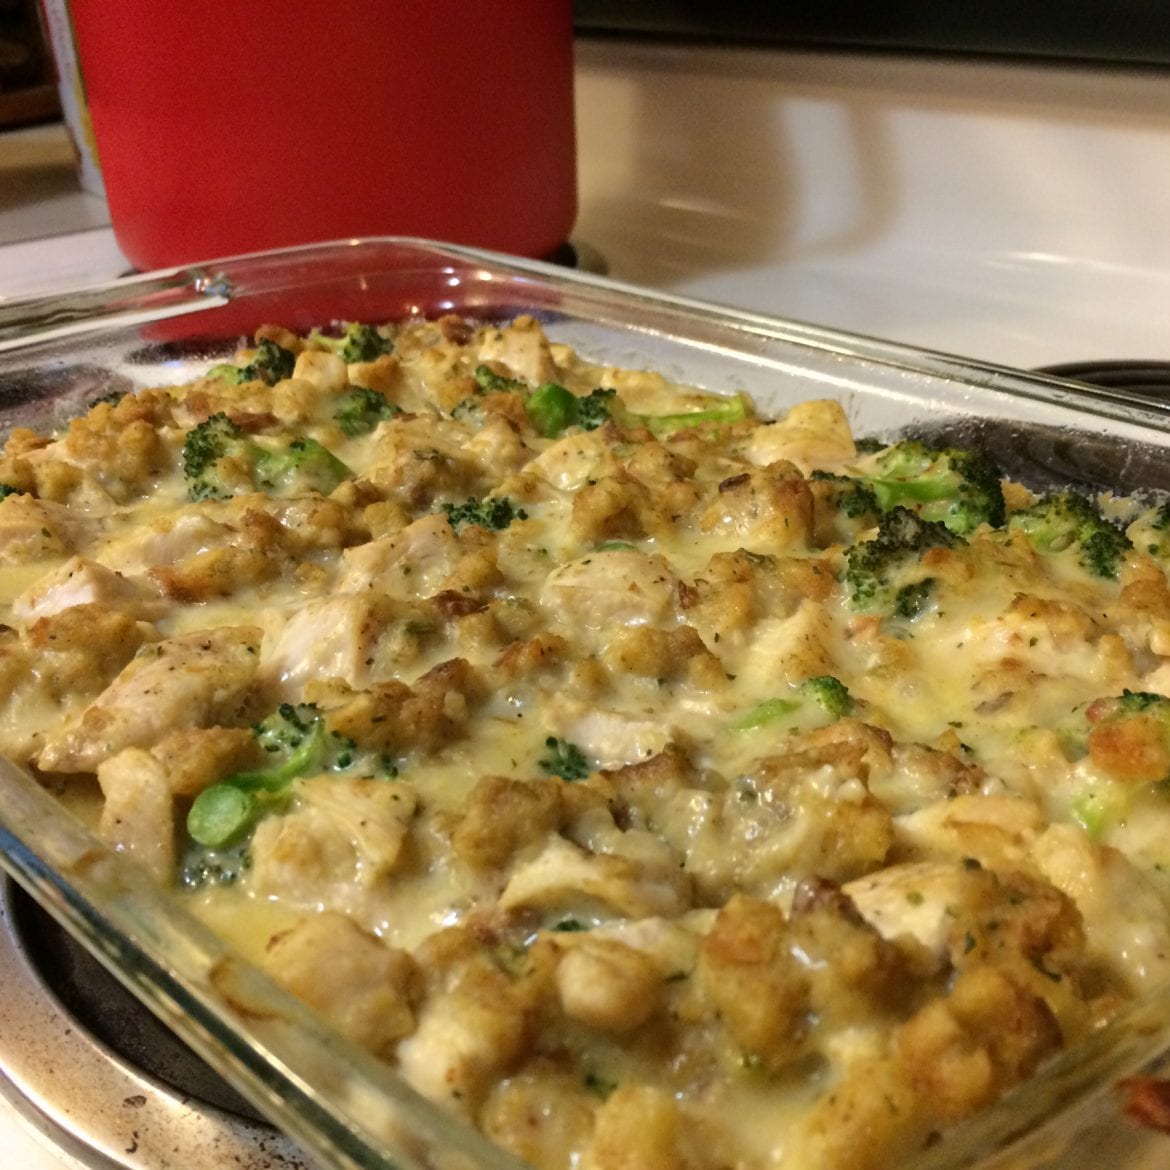
Broccoli Chicken Casserole

by Rebecca July 8, 2020
written by Rebecca

If you are looking for new comfort food, you have come to the right page! This will surely warm your heart. Happy thoughts are the only ones you would think of. Okay, a little exaggeration but this will surely cheer you up! I recently discovered this recipe while I was browsing the internet for new and easy recipes. I was so lucky to have stumbled upon this specific recipe because I love chicken and broccoli. What else can I say rather than, it’s just plain awesome!  I hope you all love it! Feel free to add more amounts of the ingredients indicated. You all have a great day!

INGREDIENTS

4 skinless, boneless chicken breast halves

1 pound broccoli florets, cooked

1 (10.75 ounces) can condense cream of mushroom soup

1 tablespoon mayonnaise

1 cup shredded Cheddar cheese

1 cup dry stuffing mix

How to make Broccoli Chicken Casserole

Step 1: Ready the oven and preheat to 175 degrees C or 350 degrees F.

Step 2: Place a pot on the stove and turn the heat to high.

Step 3: Pour enough water to submerge the chicken and allow it to boil.

Step 4: Add in the chicken and cook until soft and tender.

Step 5: Cut the cooked chicken into bite sizes or you can shred it.

Step 6: In a separate pot, add water and allow it to boil.

Step 7: Add in the broccoli and steam until tender and crisp.

Step 8: Add in mayonnaise and the soup in a small mixing bowl. Stir until well-mixed then set aside.

Step 9: Arrange the chicken in a layer in a 9×13-inch baking dish together with the soup mixture, broccoli, and cheese.

Step 10: Sprinkle the dry mix on top.

Step 11: Place the baking dish inside the preheated oven and bake for 25 to 30 minutes or until cooked through.

Step 12: Remove from the oven and let it sit on a wire rack. Allow it to cool at room temperature before serving. Enjoy!

Broccoli Chicken Casserole

Rebecca If you are looking for new comfort food, you have come to the right page! This will surely warm your heart. Happy thoughts are the only ones you would think… Main Dish Recipes Broccoli Chicken Casserole European Print This
Nutrition facts: 200 calories 20 grams fat
Rating: 4.0/5
( 8 voted )

Ingredients

  • 4 skinless, boneless chicken breast halves
  • 1 pound broccoli florets, cooked
  • 1 (10.75 ounces) can condense cream of mushroom soup
  • 1 tablespoon mayonnaise
  • 1 cup shredded Cheddar cheese
  • 1 cup dry stuffing mix

Instructions

Step 1: Ready the oven and preheat to 175 degrees C or 350 degrees F.

Step 2: Place a pot on the stove and turn the heat to high.

Step 3: Pour enough water to submerge the chicken and allow it to boil.

Step 4: Add in the chicken and cook until soft and tender.

Step 5: Cut the cooked chicken into bite sizes or you can shred it.

Step 6: In a separate pot, add water and allow it to boil.

Step 7: Add in the broccoli and steam until tender and crisp.

Step 8: Add in mayonnaise and the soup in a small mixing bowl. Stir until well-mixed then set aside.

Step 9: Arrange the chicken in a layer in a 9x13-inch baking dish together with the soup mixture, broccoli, and cheese.

Step 10: Sprinkle the dry mix on top.

Step 11: Place the baking dish inside the preheated oven and bake for 25 to 30 minutes or until cooked through.

Step 12: Remove from the oven and let it sit on a wire rack. Allow it to cool at room temperature before serving. Enjoy!

July 8, 2020 0 comment
0 FacebookTwitterPinterestEmail
Main Dish Recipes

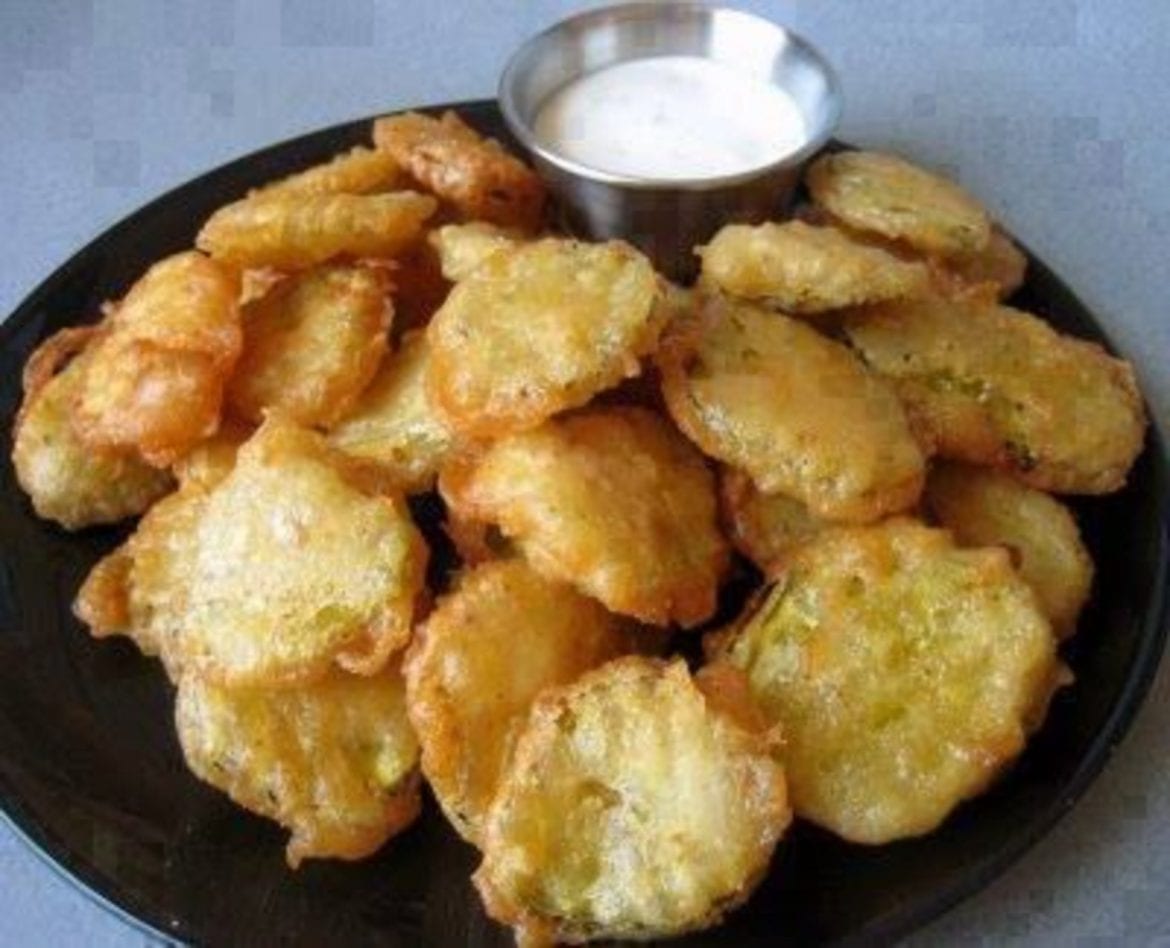
Southern Fried Pickles

by Rebecca July 8, 2020
written by Rebecca

I have never tasted like this before until I decided to cook it. It may seem a bit odd at first because it is pickles. It’s best served plain but I was completely wrong. It is best served, fried! This amazing recipe has become my go-to-food for the past 3 weeks. It’s just really simple. Make the sauce, which I have included in the ingredients, by the way, fry the pickles and serve. That’s it! No extra steps or ingredients. It is the easiest dish I have ever prepared and cooked in my whole life. Give it try and taste for yourself. Enjoy!

INGREDIENTS

For the sauce

1/4 cup mayonnaise

1 tablespoon drained horseradish

2 teaspoons ketchup

1/4 teaspoon Cajun seasoning

For the pickles

Peanut or vegetable oil, for frying

1/2 cup all-purpose flour

1 3/4 teaspoons Cajun seasoning

1/2 teaspoon Italian seasoning

1/4 teaspoon cayenne pepper

Kosher salt

2 cups sliced dill pickles, drained

How to make Southern Fried Pickles

Step 1: In a medium mixing bowl, add the ketchup, mayonnaise, Cajun seasoning, and horseradish. Stirn until well-mixed.

Step 2: Place a pot on the stove and 1-inch of peanut oil.

Step 3: Turn the heat to medium-high or 375 degrees F.

Step 4: Add in the pickles and fry until cooked through.

Step 5: In a large bowl, add Italian seasoning, Cajun seasoning, cayenne pepper, flour, 1/2 cup of water, and 1/2 teaspoon of salt. Whisk until well-mixed.

Step 6: Place the fried pickles on the plate with a paper towel and allow it to dry.

Step 7: Toss in 1/2 of the pickles on into the batter and coat it completely.

Step 8: Remove the fried pickles from the batter and dip them into the heated oil. One pickle at a time.

Step 9: Fry for 1 to 2 minutes or until the color turns folded brown.

Step 10: Remove from the oil and place them on the paper towel.

Step 11: Do the same procedure for the rest of the pickles.

Step 12: Serve right away with the sauce. Enjoy!

Southern Fried Pickles

Rebecca I have never tasted like this before until I decided to cook it. It may seem a bit odd at first because it is pickles. It’s best served plain but… Main Dish Recipes Southern Fried Pickles European Print This
Nutrition facts: 200 calories 20 grams fat
Rating: 5.0/5
( 1 voted )

Ingredients

  • For the sauce
  • 1/4 cup mayonnaise
  • 1 tablespoon drained horseradish
  • 2 teaspoons ketchup
  • 1/4 teaspoon Cajun seasoning
  • For the pickles
  • Peanut or vegetable oil, for frying
  • 1/2 cup all-purpose flour
  • 1 3/4 teaspoons Cajun seasoning
  • 1/2 teaspoon Italian seasoning
  • 1/4 teaspoon cayenne pepper
  • Kosher salt
  • 2 cups sliced dill pickles, drained

Instructions

Step 1: In a medium mixing bowl, add the ketchup, mayonnaise, Cajun seasoning, and horseradish. Stirn until well-mixed.

Step 2: Place a pot on the stove and 1-inch of peanut oil.

Step 3: Turn the heat to medium-high or 375 degrees F.

Step 4: Add in the pickles and fry until cooked through.

Step 5: In a large bowl, add Italian seasoning, Cajun seasoning, cayenne pepper, flour, 1/2 cup of water, and 1/2 teaspoon of salt. Whisk until well-mixed.

Step 6: Place the fried pickles on the plate with a paper towel and allow it to dry.

Step 7: Toss in 1/2 of the pickles on into the batter and coat it completely.

Step 8: Remove the fried pickles from the batter and dip them into the heated oil. One pickle at a time.

Step 9: Fry for 1 to 2 minutes or until the color turns folded brown.

Step 10: Remove from the oil and place them on the paper towel.

Step 11: Do the same procedure for the rest of the pickles.

Step 12: Serve right away with the sauce. Enjoy!

July 8, 2020 0 comment
0 FacebookTwitterPinterestEmail
Main Dish Recipes

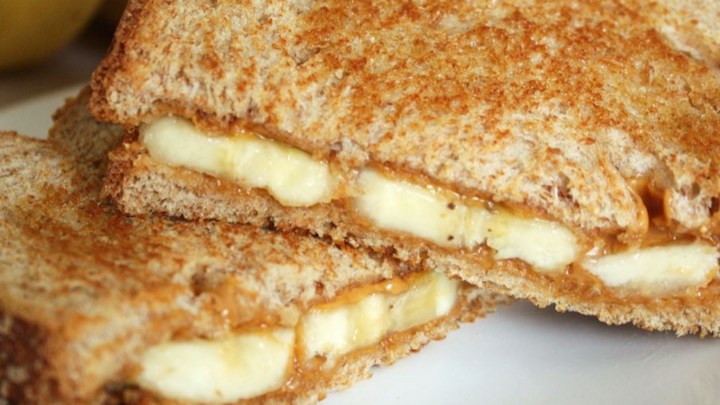
Grilled Peanut Butter and Banana Sandwich

by Rebecca July 8, 2020
written by Rebecca

Breakfast for champions! This amazing recipe will make your breakfast extra special. I remember when I was a kid, this was my favorite breakfast. I would tell my mom to add more peanut butter because I love peanut butter. As simple as it is, but until now, I still make this for breakfast. I am so glad that my kids love it as well! It’s a good thing because it’s the only recipe I know. Just kidding, I just love the simplicity of the procedure and the simplicity of its taste. I mean, I guess this peanut butter and banana combination is not new to us. The only difference in this recipe is that I toast each side first. By the way, make sure not to burn the bread or the banana because it will ruin not only the appearance but most importantly the taste. We don’t wanna eat burnt food right? Anyway, I hope you all love it. I like to think that in my simple way, I’ll be able to bring a smile to your faces today. You all have a great day. Enjoy!

INGREDIENTS

cooking spray

2 tablespoons peanut butter

2 slices whole-wheat bread

1 banana, sliced

How to make Grilled Peanut Butter and Banana Sandwich

Step 1: Place a skillet or a griddle on the stove.

Step 2: Apply cooking spray into the skillet then turn the heat to medium.

Step 3: Add 1 tablespoon of peanut butter and spread it evenly on one side of the individual sliced bread.

Step 4: Put the sliced banana on top of each bread with the peanut butter then press them together.

Step 5: Place the stuffed sliced bread into the heated skillet or girdle.

Step 6: Fry each side for 2 minutes or until slightly toasted.

Step 7: Remove from the skillet and transfer it into a clean plate.

Step 8: Serve warm and enjoy!

Grilled Peanut Butter and Banana Sandwich

Rebecca Breakfast for champions! This amazing recipe will make your breakfast extra special. I remember when I was a kid, this was my favorite breakfast. I would tell my mom to… Main Dish Recipes Grilled Peanut Butter and Banana Sandwich European Print This
Nutrition facts: 200 calories 20 grams fat
Rating: 5.0/5
( 1 voted )

Ingredients

  • cooking spray
  • 2 tablespoons peanut butter
  • 2 slices whole-wheat bread
  • 1 banana, sliced

Instructions

Step 1: Place a skillet or a griddle on the stove.

Step 2: Apply cooking spray into the skillet then turn the heat to medium.

Step 3: Add 1 tablespoon of peanut butter and spread it evenly on one side of the individual sliced bread.

Step 4: Put the sliced banana on top of each bread with the peanut butter then press them together.

Step 5: Place the stuffed sliced bread into the heated skillet or girdle.

Step 6: Fry each side for 2 minutes or until slightly toasted.

Step 7: Remove from the skillet and transfer it into a clean plate.

Step 8: Serve warm and enjoy!

July 8, 2020 0 comment
0 FacebookTwitterPinterestEmail
Main Dish Recipes

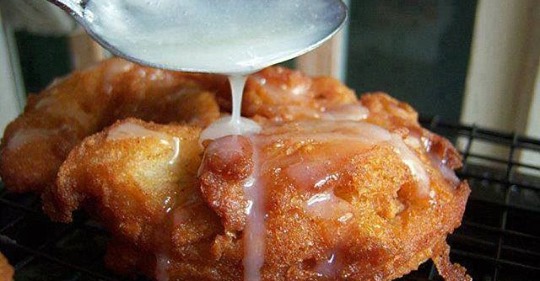
Easy Homemade Apple Fritters

by Rebecca July 8, 2020
written by Rebecca

These homemade Apple Fritters are the best! It’s homemade but the quality of taste is like store-bought. I kid you not! It is awesome. This is the perfect treat for me because I love apples so much! Just the smell of these incredible Fritterz will make your mouth water. What I love about this recipe is the frying stage. You can just imagine how awesome it’s gonna be when you are in this stage. I guess, all you need to do right now is to try it yourself. Enjoy!

INGREDIENTS

1 cup all-purpose flour

1/4 cup granulated sugar

3/4 teaspoon salt

1 1/2 teaspoons baking powder

1 teaspoon ground cinnamon

1/3 cup milk (used low-fat)

1 large egg

1 cup apple, chopped (used 2 small apples, peeled)

Oil (for frying, we used vegetable oil)

FOR THE GLAZE

2 cups powdered sugar

1 1/2 tablespoons milk

How to make Easy Homemade Apple Fritters

Step 1: In a large bowl add baking powder, cinnamon, flour, salt, and sugar. Whisk until well-mixed.

Step 2: Pour in the milk and egg. Stir until well-mixed.

Step 3: Toss in the sliced apple then coat completely.

Step 4: Place a skillet on the stove and add oil about 1 1/2 cups.

Step 5: Turn the heat to 350 degrees F and allow the oil to bubble.

Step 6: Gently add in the dough. Use a tablespoon to scoop the dough.

Step 7: Fry for 2 minutes on each side or until the color turns brown.

Step 8: Put the fried dough into a plate covered with paper towels to remove the excess oil.

Step 9: Let it sit on a wire rack to cool.

Step 10: In a small bowl, add powdered sugar and milk. Stir until well-mixed.

Step 11: Pour the mixture on top of the apples and allow it to harden for about 3 minutes.

Step 12: Drizzle the other side of the fritters with the glaze.

Step 13: Allow it to warm to room temperature.

Step 14: Serve and enjoy!

Easy Homemade Apple Fritters

Rebecca These homemade Apple Fritters are the best! It’s homemade but the quality of taste is like store-bought. I kid you not! It is awesome. This is the perfect treat for… Main Dish Recipes Easy Homemade Apple Fritters European Print This
Nutrition facts: 200 calories 20 grams fat
Rating: 5.0/5
( 1 voted )

Ingredients

  • 1 cup all-purpose flour
  • 1/4 cup granulated sugar
  • 3/4 teaspoon salt
  • 1 1/2 teaspoons baking powder
  • 1 teaspoon ground cinnamon
  • 1/3 cup milk (used low-fat)
  • 1 large egg
  • 1 cup apple, chopped (used 2 small apples, peeled)
  • Oil (for frying, we used vegetable oil)
  • FOR THE GLAZE
  • 2 cups powdered sugar
  • 1 1/2 tablespoons milk

Instructions

Step 1: In a large bowl add baking powder, cinnamon, flour, salt, and sugar. Whisk until well-mixed.

Step 2: Pour in the milk and egg. Stir until well-mixed.

Step 3: Toss in the sliced apple then coat completely.

Step 4: Place a skillet on the stove and add oil about 1 1/2 cups.

Step 5: Turn the heat to 350 degrees F and allow the oil to bubble.

Step 6: Gently add in the dough. Use a tablespoon to scoop the dough.

Step 7: Fry for 2 minutes on each side or until the color turns brown.

Step 8: Put the fried dough into a plate covered with paper towels to remove the excess oil.

Step 9: Let it sit on a wire rack to cool.

Step 10: In a small bowl, add powdered sugar and milk. Stir until well-mixed.

Step 11: Pour the mixture on top of the apples and allow it to harden for about 3 minutes.

Step 12: Drizzle the other side of the fritters with the glaze.

Step 13: Allow it to warm to room temperature.

Step 14: Serve and enjoy!

July 8, 2020 0 comment
0 FacebookTwitterPinterestEmail
Main Dish Recipes

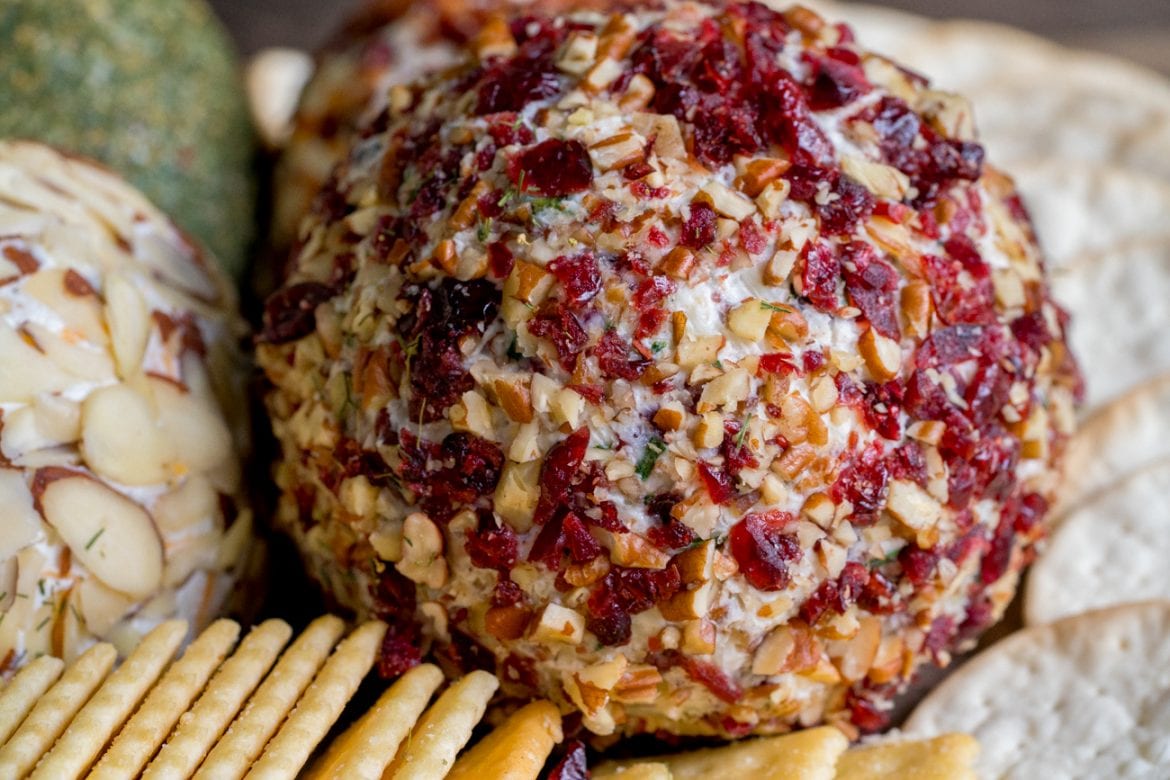
4 Easy Cheese Balls

by Rebecca July 8, 2020
written by Rebecca

Four kinds of balls you can choose from so you will have all the flavors in one sitting. How good is that? I learned about this recipe about three weeks ago. I was blown away with how awesome it is! This will make a great gift to your friends or loved ones. It is also very easy to make! All you need to do is to just follow all the steps I have provided and you are bound to perfection! You are in for a treat! I hope you like it. Enjoy!

INGREDIENTS

Dill Chive Cheese Ball

1 (8 oz) package cream cheese, softened

1/2 cup Gouda cheese, grated

1/2 teaspoon Worcestershire sauce

1/2 teaspoon garlic powder

2 tablespoons chives, snipped

1 teaspoon dried dill

For the coating

1 tablespoon dried dill

Cranberry Pecan Cheese Ball

1 (8 oz) package cream cheese, softened

3/4 cup Gouda cheese, grated

1/2 cup dried cranberries, chopped

1/2 cup pecans, chopped

2 tablespoons chives, chopped

1/2 teaspoon garlic powder

For the coating

1/2 cup dried cranberries, chopped

1/2 cup pecans, chopped

2 tablespoons chives, chopped

Glorious Garlic Cheese Ball

1 (8 oz) package cream cheese, softened

2-3 cloves garlic, minced

1/4 cup sour cream

1/2 cup cheddar cheese, grated

1/2 teaspoon Italian seasoning

For the coating

1/2 cup sliced almonds

Bacon Cheddar Ranch Cheese Ball

1 (8 oz) package cream cheese, softened

1/2 packet Ranch seasoning mix

1/2 cup cheddar cheese, grated

1/4 cup chives or green onions, chopped

4 strips bacon, cooked and crumbled

For the coating

2 strips bacon, cooked and crumbled

How to make 4 Easy Cheese Balls

Step 1: In a large bowl, add all the ingredients for the individual cheese ball. Use an electric mixer to mix all the ingredients until the texture becomes fluffy.

Step 2: Transfer the mixture in a 1 piece plastic wrap.

Step 3: Shape the mixture into a ball the cover.

Step 4: Put them inside the fridge to cool for 4 hours or more.

Step 5: Unwrap the balls when you are ready to serve. Roll the balls into the cup of sliced almonds.

Step 6: Serve and enjoy!

4 Easy Cheese Balls

Rebecca Four kinds of balls you can choose from so you will have all the flavors in one sitting. How good is that? I learned about this recipe about three weeks… Main Dish Recipes 4 Easy Cheese Balls European Print This
Nutrition facts: 200 calories 20 grams fat
Rating: 5.0/5
( 1 voted )

Ingredients

  • Dill Chive Cheese Ball
  • 1 (8 oz) package cream cheese, softened
  • 1/2 cup Gouda cheese, grated
  • 1/2 teaspoon Worcestershire sauce
  • 1/2 teaspoon garlic powder
  • 2 tablespoons chives, snipped
  • 1 teaspoon dried dill
  • For the coating
  • 1 tablespoon dried dill
  • Cranberry Pecan Cheese Ball
  • 1 (8 oz) package cream cheese, softened
  • 3/4 cup Gouda cheese, grated
  • 1/2 cup dried cranberries, chopped
  • 1/2 cup pecans, chopped
  • 2 tablespoons chives, chopped
  • 1/2 teaspoon garlic powder
  • For the coating
  • 1/2 cup dried cranberries, chopped
  • 1/2 cup pecans, chopped
  • 2 tablespoons chives, chopped
  • Glorious Garlic Cheese Ball
  • 1 (8 oz) package cream cheese, softened
  • 2-3 cloves garlic, minced
  • 1/4 cup sour cream
  • 1/2 cup cheddar cheese, grated
  • 1/2 teaspoon Italian seasoning
  • For the coating
  • 1/2 cup sliced almonds
  • Bacon Cheddar Ranch Cheese Ball
  • 1 (8 oz) package cream cheese, softened
  • 1/2 packet Ranch seasoning mix
  • 1/2 cup cheddar cheese, grated
  • 1/4 cup chives or green onions, chopped
  • 4 strips bacon, cooked and crumbled
  • For the coating
  • 2 strips bacon, cooked and crumbled

Instructions

Step 1: In a large bowl, add all the ingredients for the individual cheese ball. Use an electric mixer to mix all the ingredients until the texture becomes fluffy.

Step 2: Transfer the mixture in a 1 piece plastic wrap.

Step 3: Shape the mixture into a ball the cover.

Step 4: Put them inside the fridge to cool for 4 hours or more.

Step 5: Unwrap the balls when you are ready to serve. Roll the balls into the cup of sliced almonds.

Step 6: Serve and enjoy!

July 8, 2020 0 comment
0 FacebookTwitterPinterestEmail
Main Dish Recipes

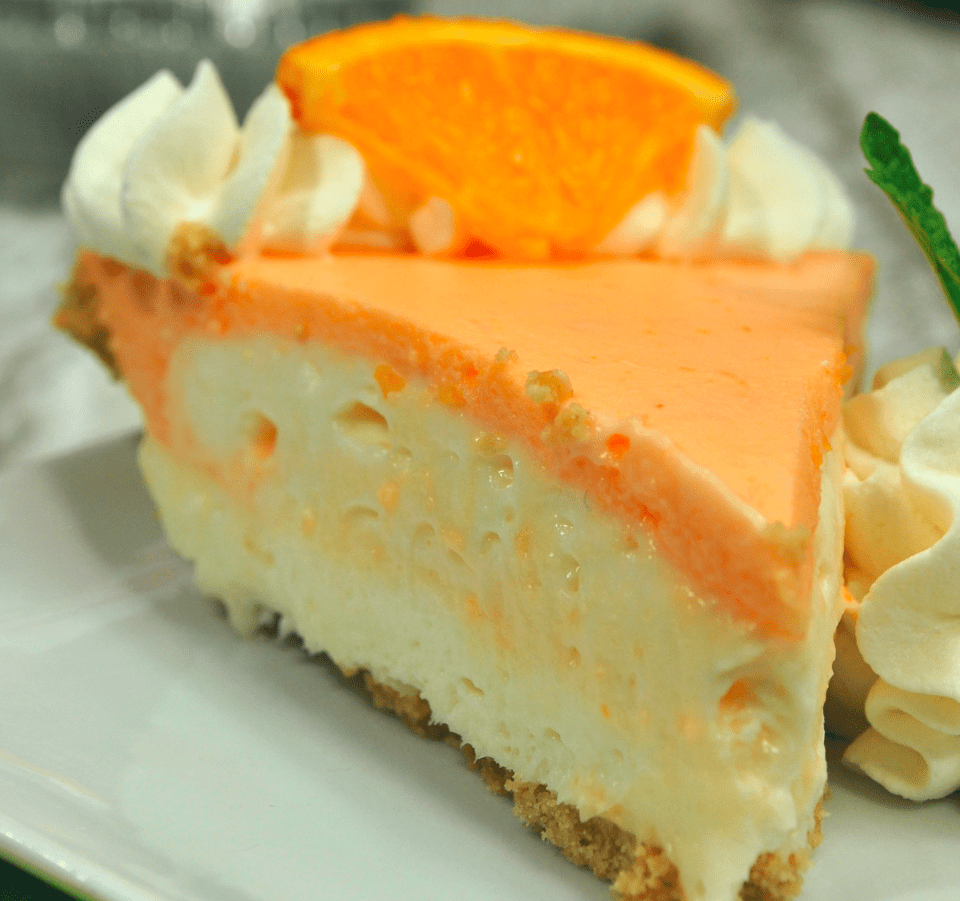
NO BAKE ORANGE CREAMSICLE CHEESECAKE

by Rebecca July 8, 2020
written by Rebecca

This is legit! I made this amazing cake yesterday and I am so glad that I did. The complexity of the taste will surely make your mouth crave for more! Give this one a try today. Enjoy!

INGREDIENTS

1 pouch of Betty Crocker Sugar Cookie Mix OR 1 pre-made pie crust if you want totally ‘No Bake”

3/4 + 1 cup powder sugar

2 8oz boxes of cream cheese, softened

2 cups heavy whipping cream + 1 cup for the topping

1 3 oz box of orange-flavored jello

1 cup boiling water

1 orange, zested

1/4 teaspoon + 1/2 teaspoon for the topping of vanilla extract

1 disposable piping bag with a star tip

HOW TO MAKE NO-BAKE ORANGE CREAMSICLE CHEESECAKE

TO MAKE THE COOKIE CRUST

Step 1: Ready the oven and preheat to 350 degrees F.

Step 2: Apply cooking spray in an 8-inch springform cheesecake pan.

Step 3: Refer to the directions provided on the cookie mix package.

Step 4: Press the batter on the bottom of the sprayed pan.

Step 5: Place inside the oven and bake until cooked through or until the color turns light brown.

Step 6: Remove from the oven and allow it to cool to room temperature.

FOR PRE-MADE CRUST

Step 1: Add the cream cheese in a large mixing bowl. Mix until smooth and creamy.

Step 2: Add in the 3/4 cup of powder sugar and stir until well-mixed.

Step 3: Add boiling water and jello in a medium bowl. Whisk until the jello is dissolved.

Step 4: Get the zest of the orange and set it aside.

Step 5: Use a standing mixer to whisk 1/2 cup of powdered sugar, vanilla, and heavy whipping cream until the Set the speed to medium.

Step 6: Combine the cooled jello and half of the whipped cream. Whisk until well-mixed.

Step 7: Add the other half of the whipped cream into the cream cheese mixture. Whisk until well-mixed.

Step 8: Add in half of the cream cheese mixture over the crust then spread evenly.

Step 9: Add 2 cups of the orange mixture on top of the cream cheese mixture. Spread evenly.

Step 10: Gently add and spread the rest of the cream cheese mixture.

Step 11: Put inside the refrigerator and allow it to cool for at least 12 hours.

Step 12: In a medium bowl, add 1/2 cup of powder sugar, 1/2 teaspoon vanilla extract, and 1 cup heavy whipping cream. Use a standing mixture to mix all the ingredients.

Step 13: Transfer into a piping bag and decorate the edge of the pie.

Step 14: Slice into even cuts. Serve and enjoy!

NO BAKE ORANGE CREAMSICLE CHEESECAKE

Rebecca This is legit! I made this amazing cake yesterday and I am so glad that I did. The complexity of the taste will surely make your mouth crave for more!… Main Dish Recipes NO BAKE ORANGE CREAMSICLE CHEESECAKE European Print This
Nutrition facts: 200 calories 20 grams fat
Rating: 5.0/5
( 1 voted )

Ingredients

  • 1 pouch of Betty Crocker Sugar Cookie Mix OR 1 pre-made pie crust if you want totally ‘No Bake”
  • 3/4 + 1 cup powder sugar
  • 2 8oz boxes of cream cheese, softened
  • 2 cups heavy whipping cream + 1 cup for the topping
  • 1 3 oz box of orange-flavored jello
  • 1 cup boiling water
  • 1 orange, zested
  • 1/4 teaspoon + 1/2 teaspoon for the topping of vanilla extract
  • 1 disposable piping bag with a star tip

Instructions

TO MAKE THE COOKIE CRUST

Step 1: Ready the oven and preheat to 350 degrees F.

Step 2: Apply cooking spray in an 8-inch springform cheesecake pan.

Step 3: Refer to the directions provided on the cookie mix package.

Step 4: Press the batter on the bottom of the sprayed pan.

Step 5: Place inside the oven and bake until cooked through or until the color turns light brown.

Step 6: Remove from the oven and allow it to cool to room temperature.

FOR PRE-MADE CRUST

Step 1: Add the cream cheese in a large mixing bowl. Mix until smooth and creamy.

Step 2: Add in the 3/4 cup of powder sugar and stir until well-mixed.

Step 3: Add boiling water and jello in a medium bowl. Whisk until the jello is dissolved.

Step 4: Get the zest of the orange and set it aside.

Step 5: Use a standing mixer to whisk 1/2 cup of powdered sugar, vanilla, and heavy whipping cream until the Set the speed to medium.

Step 6: Combine the cooled jello and half of the whipped cream. Whisk until well-mixed.

Step 7: Add the other half of the whipped cream into the cream cheese mixture. Whisk until well-mixed.

Step 8: Add in half of the cream cheese mixture over the crust then spread evenly.

Step 9: Add 2 cups of the orange mixture on top of the cream cheese mixture. Spread evenly.

Step 10: Gently add and spread the rest of the cream cheese mixture.

Step 11: Put inside the refrigerator and allow it to cool for at least 12 hours.

Step 12: In a medium bowl, add 1/2 cup of powder sugar, 1/2 teaspoon vanilla extract, and 1 cup heavy whipping cream. Use a standing mixture to mix all the ingredients.

Step 13: Transfer into a piping bag and decorate the edge of the pie.

Step 14: Slice into even cuts. Serve and enjoy!

July 8, 2020 0 comment
0 FacebookTwitterPinterestEmail
Main Dish Recipes

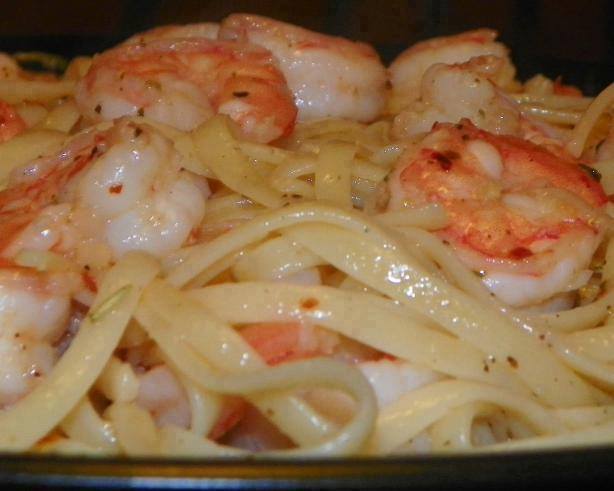
Garlic Shrimp Pasta

by Rebecca July 6, 2020
written by Rebecca

Looking for a delicious, budget-friendly, and healthy pasta dish? This one is for you. Garlic Shrimp Pasta for the seafood and pasta lover out there. It is a quick and easy recipe that will look like you put in a lot of effort preparing. A restaurant-quality pasta dish that is mouthwatering, incredibly delicious, and impressive. With very little effort, you are sure to impress your family and friends. So toss the ingredients in a large skillet, and show off your effortless cooking skills.

INGREDIENTS

1 lb medium shrimp, deveined and tails removed

1 lb spaghetti noodles (more or less, depending on family size)

6 -8 garlic cloves, according to personal taste, minced

1/4 cup butter

olive oil (3 drizzles)

Italian seasoning

fresh ground pepper

red pepper flakes

salt

herbs (according to taste)

How to make Garlic Shrimp Pasta

Step 1: In boiling water, put in some oil, salt, and fresh herbs. Then, put in the pasta and cook until tender. Save a cup of pasta water and drain the rest. Set aside.

Step 2: Meanwhile, wash the shrimps.

Step 3: Over medium heat, melt the butter and add in the shrimps.

Step 4: Let the shrimps cook until a bit pink and start curling.

Step 5: Add in the garlic.

Step 6: Continue to cook the shrimps for 5 to 7 minutes, then, add oil. Sautee the shrimps until pink and curled.

Step 7: Now, add in the pasta into the skillet. Sprinkle the seasonings. And pour in just enough saved pasta water. Make sure that the shrimps are not swimming in the liquid nor not to dry. The liquid will depend on the amount of pasta you are adding into the skillet. This recipe requires half a cup or all of the saved pasta water. Don’t pour everything though, start by adding just 1/4 and work up from there.

Step 8: Constantly toss the ingredients until incorporated. Serve hot. Enjoy!

Garlic Shrimp Pasta

Rebecca Looking for a delicious, budget-friendly, and healthy pasta dish? This one is for you. Garlic Shrimp Pasta for the seafood and pasta lover out there. It is a quick and… Main Dish Recipes Garlic Shrimp Pasta European Print This
Nutrition facts: 200 calories 20 grams fat
Rating: 5.0/5
( 1 voted )

Ingredients

  • 1 lb medium shrimp, deveined and tails removed
  • 1 lb spaghetti noodles (more or less, depending on family size)
  • 6 -8 garlic cloves, according to personal taste, minced
  • 1/4 cup butter
  • olive oil (3 drizzles)
  • Italian seasoning
  • fresh ground pepper
  • red pepper flakes
  • salt
  • herbs (according to taste)

Instructions

Step 1: In boiling water, put in some oil, salt, and fresh herbs. Then, put in the pasta and cook until tender. Save a cup of pasta water and drain the rest. Set aside.

Step 2: Meanwhile, wash the shrimps.

Step 3: Over medium heat, melt the butter and add in the shrimps.

Step 4: Let the shrimps cook until a bit pink and start curling.

Step 5: Add in the garlic.

Step 6: Continue to cook the shrimps for 5 to 7 minutes, then, add oil. Sautee the shrimps until pink and curled.

Step 7: Now, add in the pasta into the skillet. Sprinkle the seasonings. And pour in just enough saved pasta water. Make sure that the shrimps are not swimming in the liquid nor not to dry. The liquid will depend on the amount of pasta you are adding into the skillet. This recipe requires half a cup or all of the saved pasta water. Don't pour everything though, start by adding just 1/4 and work up from there.

Step 8: Constantly toss the ingredients until incorporated. Serve hot. Enjoy!

July 6, 2020 0 comment
0 FacebookTwitterPinterestEmail
Newer Posts
Older Posts

Popular Posts

  • 1

    Crispy Crunchy Parmesan Potatoes

    March 21, 2020
  • 2

    CROCK POT SMOTHERED PORK CHOPS

    March 21, 2020
  • Facebook
  • Twitter

@2019 - All Right Reserved.


Back To Top