Cook it once
  • Home
  • Privacy Policy
  • Recipes
    • KETO
    • LC
    • WW
  • Tips
  • Contact
Cook it once
  • Home
  • Privacy Policy
  • Recipes
    • KETO
    • LC
    • WW
  • Tips
  • Contact
Category:

Main Dish Recipes

Main Dish Recipes

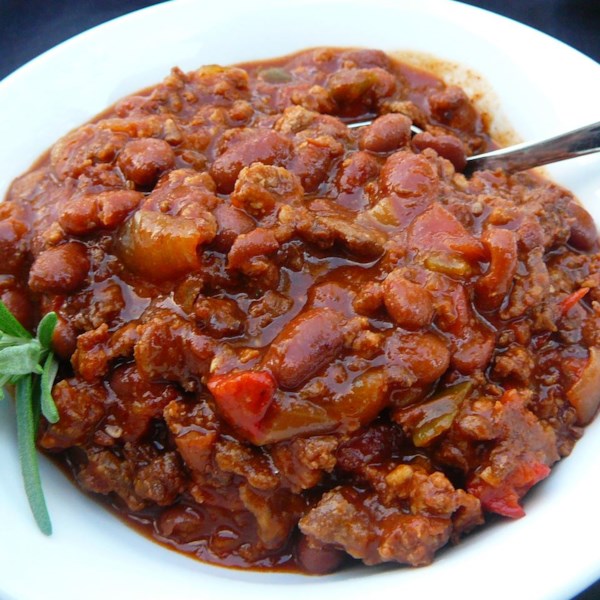
Boilermaker Tailgate Chili

by Rebecca August 18, 2020
written by Rebecca

Prep: 30 min | Cook: 2 hr | Ready In: 2 hr 30 min

This is the best chili I’ve had in my life! I always love chili and I have tried a lot of chili recipes but this recipe is one of a kind. It’s legit and by far the most delicious! It’s insanely good and it has all the amazing flavors that just burst inside the mouth!

Ingredients

2 pounds ground beef chuck

1 pound bulk Italian sausage

3 (15 ounce) cans chili beans, drained

1 (15 ounce) can chili beans in spicy sauce

2 (28 ounce) cans diced tomatoes with juice

1 (6 ounce) can tomato paste

1 large yellow onion, chopped

3 stalks celery, chopped

1 green bell pepper, seeded and chopped

1 red bell pepper, seeded and chopped

2 green chile peppers, seeded and chopped

1 tablespoon bacon bits

4 cubes beef bouillon

1/2 cup beer

1/4 cup chili powder

1 tablespoon Worcestershire sauce

1 tablespoon minced garlic

1 tablespoon dried oregano

2 teaspoons ground cumin

2 teaspoons hot pepper sauce (e.g. Tabasco™)

1 teaspoon dried basil

1 teaspoon salt

1 teaspoon ground black pepper

1 teaspoon cayenne pepper

1 teaspoon paprika

1 teaspoon white sugar

1 (10.5 ounce) bag corn chips such as Fritos®

1 (8 ounce) package shredded Cheddar cheese

How to make Boilermaker Tailgate Chili

Step 1: Place a large stockpot on the stove and turn the heat to medium heat.

Step 2: Add in the sausage and break the ground chunk then cook until it turns brown. Remove the excess oil.

Step 3: Add in the spicy chili beans, chili beans, tomato paste, and diced tomatoes.

Step 4: Add in the celery, onion, red and green bell peppers, bacon bits, bouillon, beer, and chili peppers. Season with chili powder, garlic, Worcestershire sauce, cumin, oregano, basil, hot pepper sauce, paprika, cayenne, sugar, salt, and pepper to taste. Stir until well mixed and simmer while stirring from time to time for 2 hours.

Step 5: Taste to your liking. Add more salt, chili powder, and pepper if needed. The taste of the chili depends on how long it stays while on simmer.

Step 6: Turn off the heat and remove the pot. You can serve right away or place inside the fridge if serving the next morning.

Step 7: When serving, use a ladle to scoop into bowls. Sprinkle Cheddar cheese and corn chips on top. Enjoy!

Nutrition Facts:

Per Serving: 600 calories; 30.1 g fat; 55.3 g carbohydrates; 30.8 g protein; 70 mg cholesterol; 2092 mg sodium

Boilermaker Tailgate Chili

Rebecca Prep: 30 min | Cook: 2 hr | Ready In: 2 hr 30 min This is the best chili I’ve had in my life! I always love chili and I… Main Dish Recipes Boilermaker Tailgate Chili European Print This
Prep Time: 30 mins Cooking Time: 2 hrs 2 hrs
Nutrition facts: 600 calories 20 grams fat
Rating: 4.5/5
( 2 voted )

Ingredients

  • 2 pounds ground beef chuck
  • 1 pound bulk Italian sausage
  • 3 (15 ounce) cans chili beans, drained
  • 1 (15 ounce) can chili beans in spicy sauce
  • 2 (28 ounce) cans diced tomatoes with juice
  • 1 (6 ounce) can tomato paste
  • 1 large yellow onion, chopped
  • 3 stalks celery, chopped
  • 1 green bell pepper, seeded and chopped
  • 1 red bell pepper, seeded and chopped
  • 2 green chile peppers, seeded and chopped
  • 1 tablespoon bacon bits
  • 4 cubes beef bouillon
  • 1/2 cup beer
  • 1/4 cup chili powder
  • 1 tablespoon Worcestershire sauce
  • 1 tablespoon minced garlic
  • 1 tablespoon dried oregano
  • 2 teaspoons ground cumin
  • 2 teaspoons hot pepper sauce (e.g. Tabasco™)
  • 1 teaspoon dried basil
  • 1 teaspoon salt
  • 1 teaspoon ground black pepper
  • 1 teaspoon cayenne pepper
  • 1 teaspoon paprika
  • 1 teaspoon white sugar
  • 1 (10.5 ounce) bag corn chips such as Fritos®
  • 1 (8 ounce) package shredded Cheddar cheese

Instructions

Step 1: Place a large stockpot on the stove and turn the heat to medium heat.

Step 2: Add in the sausage and break the ground chunk then cook until it turns brown. Remove the excess oil.

Step 3: Add in the spicy chili beans, chili beans, tomato paste, and diced tomatoes.

Step 4: Add in the celery, onion, red and green bell peppers, bacon bits, bouillon, beer, and chili peppers. Season with chili powder, garlic, Worcestershire sauce, cumin, oregano, basil, hot pepper sauce, paprika, cayenne, sugar, salt, and pepper to taste. Stir until well mixed and simmer while stirring from time to time for 2 hours.

Step 5: Taste to your liking. Add more salt, chili powder, and pepper if needed. The taste of the chili depends on how long it stays while on simmer.

Step 6: Turn off the heat and remove the pot. You can serve right away or place inside the fridge if serving the next morning.

Step 7: When serving, use a ladle to scoop into bowls. Sprinkle Cheddar cheese and corn chips on top. Enjoy!
August 18, 2020 0 comment
0 FacebookTwitterPinterestEmail
Main Dish Recipes

Slow Cooker Creamy Chicken Taco Soup

by Rebecca August 18, 2020
written by Rebecca

Prep: 25 mins | Cook: 2 hrs 20 mins | Total: 2 hrs 45 mins | Servings: 6 | Yield: 6 servings

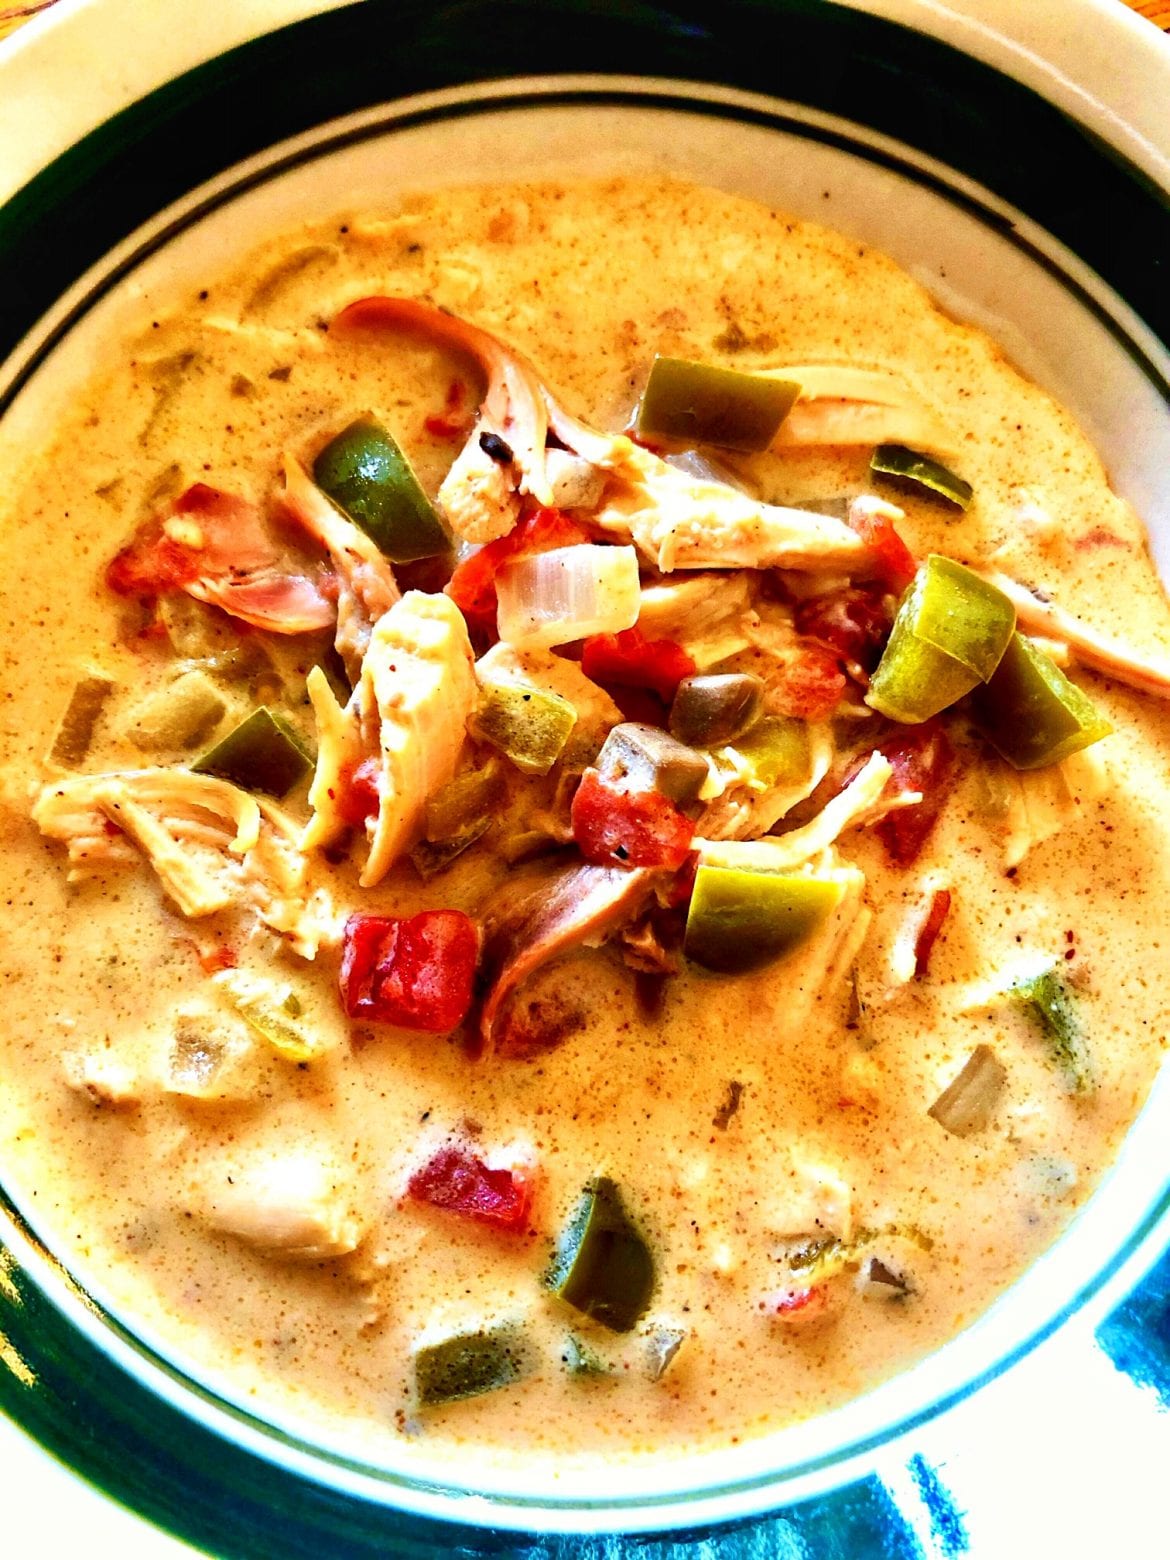
The convenience of a slow cooker is what a busy mom like me needs. I have my favorites and one of them is this Slow Cooker Creamy Chicken Taco Soup. It’s not only easy to prepare but the taste is simply amazing! The flavors just burst in your mouth and you want to just slurp and slurp until there is nothing left! This soup is unquestionably heartwarming, freaking great, and super satisfying.

Ingredients

1 serving nonstick cooking spray

1 cup diced onion

1 cup diced bell pepper

2 teaspoons salt, divided

2 cups chicken broth

1 (10 ounce) can diced tomatoes and green chiles (such as RO*TEL®)

1 (10 ounce) can condensed cream of mushroom soup

1 (4 ounce) can chopped green chiles (such as Ortega®)

2 tablespoons oil

1 tablespoon taco seasoning

½ teaspoon ground cumin

¼ teaspoon ground black pepper

1 pound skinless, boneless chicken breast

1 (8 ounce) package Neufchatel cheese, softened

How to make Slow Cooker Creamy Chicken Taco Soup

Step 1: Use a cooking spray to lightly grease your slow cooker before adding in the onions, bell pepper, and 1 teaspoon salt. Then, stir in the chicken broth, diced tomatoes, condensed soup, and chiles

Step 2: In a bowl, combine the oil, taco seasoning, 1 teaspoon salt, cumin, and black pepper. Add in the chicken, then, toss to coat on all sides.

Step 3: Place the chicken into the slow cooker.

Step 4: Cook on low for about 2 to 3 hours until the chicken is no longer pink in the middle and the juices run clear. If an instant-read thermometer is available, insert it in the middle and when it reads at least 165 degrees F or 74 degrees C the chicken is good.

Step 5: Remove the chicken from the slow cooker and shred to pieces.

Step 6: Stir in Neufchatel cheese into the slow cooker until melted, then, place the shredded chicken back into the cooker. Continue to cook for another 20 to 30 minutes until warmed through.

Nutrition Facts

Per Serving: 301.6 calories; 21.7 g protein; 12.2 g carbohydrates; 73.5 mg cholesterol; 2172.4 mg sodium

Slow Cooker Creamy Chicken Taco Soup

Rebecca Prep: 25 mins | Cook: 2 hrs 20 mins | Total: 2 hrs 45 mins | Servings: 6 | Yield: 6 servings The convenience of a slow cooker is what… Main Dish Recipes Slow Cooker Creamy Chicken Taco Soup European Print This
Serves: 6 Prep Time: 25 mins Cooking Time: 2 hrs 20 mins 2 hrs 20 mins
Nutrition facts: 200 calories 20 grams fat
Rating: 5.0/5
( 1 voted )

Ingredients

  • 1 serving nonstick cooking spray
  • 1 cup diced onion
  • 1 cup diced bell pepper
  • 2 teaspoons salt, divided
  • 2 cups chicken broth
  • 1 (10 ounce) can diced tomatoes and green chiles (such as RO*TEL®)
  • 1 (10 ounce) can condensed cream of mushroom soup
  • 1 (4 ounce) can chopped green chiles (such as Ortega®)
  • 2 tablespoons oil
  • 1 tablespoon taco seasoning
  • ½ teaspoon ground cumin
  • ¼ teaspoon ground black pepper
  • 1 pound skinless, boneless chicken breast
  • 1 (8 ounce) package Neufchatel cheese, softened

Instructions

Step 1: Use a cooking spray to lightly grease your slow cooker before adding in the onions, bell pepper, and 1 teaspoon salt. Then, stir in the chicken broth, diced tomatoes, condensed soup, and chiles

Step 2: In a bowl, combine the oil, taco seasoning, 1 teaspoon salt, cumin, and black pepper. Add in the chicken, then, toss to coat on all sides.

Step 3: Place the chicken into the slow cooker.

Step 4: Cook on low for about 2 to 3 hours until the chicken is no longer pink in the middle and the juices run clear. If an instant-read thermometer is available, insert it in the middle and when it reads at least 165 degrees F or 74 degrees C the chicken is good.

Step 5: Remove the chicken from the slow cooker and shred to pieces.

Step 6: Stir in Neufchatel cheese into the slow cooker until melted, then, place the shredded chicken back into the cooker. Continue to cook for another 20 to 30 minutes until warmed through.

August 18, 2020 0 comment
0 FacebookTwitterPinterestEmail
Main Dish Recipes

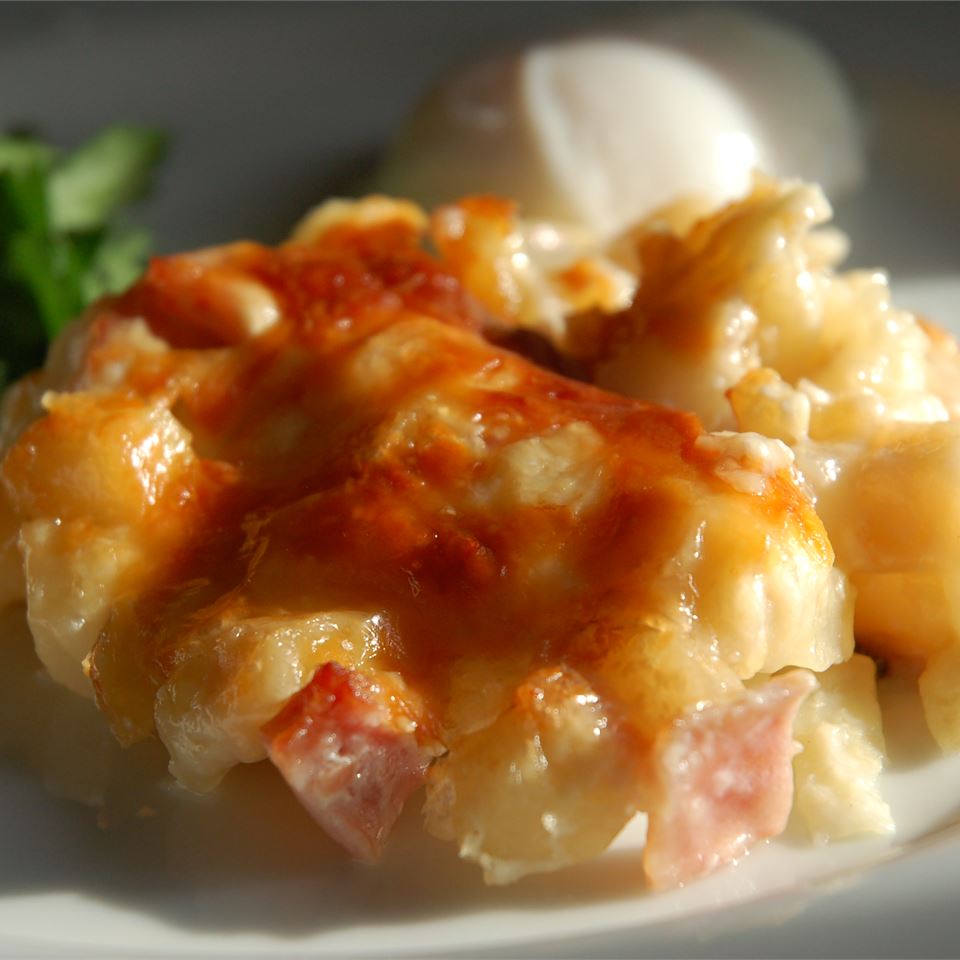
Cheesy Ham and Hash Brown Casserole

by Rebecca August 18, 2020
written by Rebecca

Prep: 15 mins | Cook: 1 hr | Total: 1 hr 15 mins | Servings: 12 | Yield: 12 servings

This is another treat for all the casserole lovers out there! This Ham and Hash Brown casserole is easy, quick, delicious not to mention perfect for any time. I serve this mostly during breakfast but it’s so good I have to make another for dinner. What I love most about this casserole is it calls for just a few simple ingredients, it’s easy on the wallet, and you can serve this with or without ham. This casserole is pretty straightforward, nothing fancy, not fussy yet the result is superb! Smothered in cheesy and mouthwatering creamy sauce. It’s a phenomenal brunch dish that you can serve any time of the day. Perfect for the whole family and can easily feed the crowd.

It is the casserole that I have been bringing to potlucks and this never fails to impress everyone! It’s perfect, it’s great and it never stays long. One bite and this amazing casserole is gone in a heartbeat!

Ingredients

1 (32 ounce) package frozen hash brown potatoes

8 ounces cooked, diced ham

2 (10.75 ounce) cans condensed cream of potato soup

1 (16 ounce) container sour cream

2 cups shredded sharp Cheddar cheese

1 ½ cups grated Parmesan cheese

How to make Cheesy Ham and Hash Brown Casserole

Step 1: Prepare the oven. Preheat it to 375 degrees F or 190 degrees C.

Step 2: Then, lightly grease a 9 x 13-inch baking dish.

Step 3: Combine the hash browns, ham, cream of potato soup, sour cream, and Cheddar cheese in a large bowl. Mix well.

Step 4: Spread the mix evenly into the prepared dish, then, sprinkle over the parmesan cheese.

Step 5: Place inside the preheated oven and bake for about an hour until bubbly and lightly brown.

Step 6: Once done, remove the casserole from the oven and serve hot. Enjoy!

Nutrition Facts

Per Serving: 414.6 calories; 14.4 g protein; 29.7 g carbohydrates; 52.6 mg cholesterol; 760.6 mg sodium

Cheesy Ham and Hash Brown Casserole

Rebecca Prep: 15 mins | Cook: 1 hr | Total: 1 hr 15 mins | Servings: 12 | Yield: 12 servings This is another treat for all the casserole lovers out… Main Dish Recipes Cheesy Ham and Hash Brown Casserole European Print This
Serves: 12 Prep Time: 15 mins Cooking Time: 1 hr 1 hr
Nutrition facts: 414.6 calories 20 grams fat
Rating: 5.0/5
( 1 voted )

Ingredients

  • 1 (32 ounce) package frozen hash brown potatoes
  • 8 ounces cooked, diced ham
  • 2 (10.75 ounce) cans condensed cream of potato soup
  • 1 (16 ounce) container sour cream
  • 2 cups shredded sharp Cheddar cheese
  • 1 ½ cups grated Parmesan cheese

Instructions

Step 1: Prepare the oven. Preheat it to 375 degrees F or 190 degrees C.

Step 2: Then, lightly grease a 9 x 13-inch baking dish.

Step 3: Combine the hash browns, ham, cream of potato soup, sour cream, and Cheddar cheese in a large bowl. Mix well.

Step 4: Spread the mix evenly into the prepared dish, then, sprinkle over the parmesan cheese.

Step 5: Place inside the preheated oven and bake for about an hour until bubbly and lightly brown.

Step 6: Once done, remove the casserole from the oven and serve hot. Enjoy!

August 18, 2020 0 comment
0 FacebookTwitterPinterestEmail
Main Dish Recipes

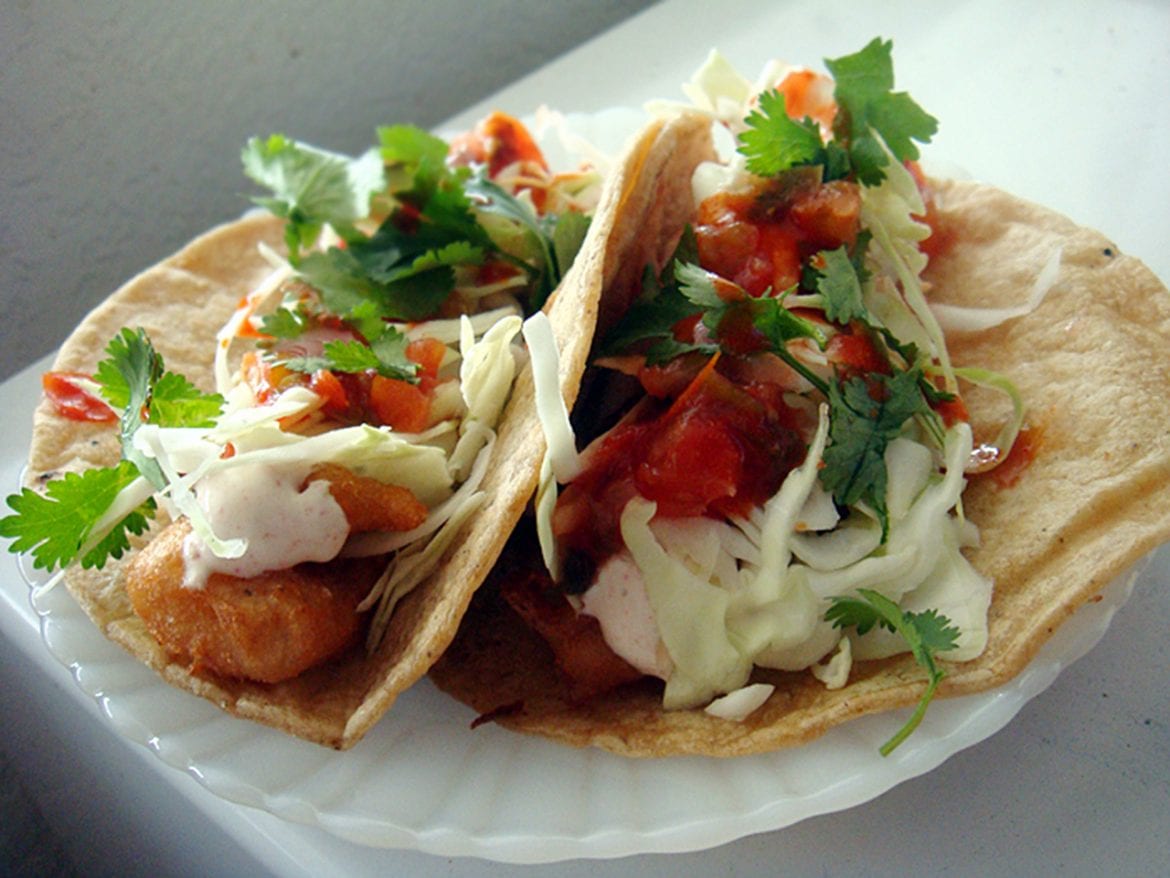
Fish Tacos

by Rebecca August 18, 2020
written by Rebecca

Prep: 40 mins | Cook: 20 mins | Total: 1 hr | Servings: 8 | Yield: 8 servings

I am excited! It’s taco Tuesday again. And what better way to enjoy this day but by serving my favorites. The top dish on my list is this Fish Taco. Healthy, light, and pleasing fish tacos with shredded cabbage in white sauce. I could not ask for anything else! Easy to assemble, easy on the wallet, and deliciously inviting.

Ingredients

1 cup all-purpose flour

2 tablespoons cornstarch

1 teaspoon baking powder

½ teaspoon salt

1 egg

1 cup beer

½ cup plain yogurt

½ cup mayonnaise

1 lime, juiced

1 jalapeno pepper, minced

1 teaspoon minced capers

½ teaspoon dried oregano

½ teaspoon ground cumin

½ teaspoon dried dill weed

1 teaspoon ground cayenne pepper

1-quart oil for frying

1 pound cod fillets, cut into 2 to 3 ounce portions

1 (12 ounce) package corn tortillas

½ medium head cabbage, finely shredded

How to make Fish Tacos

Step 1: For the batter, combine the flour, cornstarch, baking powder, and salt in a large bowl. Then, mix the egg and beer and immediately stir it into the flour mixture. There will be a few lumps and that is okay.

Step 2: For the sauce. mix the yogurt and mayonnaise in a medium bowl. Stir in the fresh lime juice gradually until you reach a slightly runny consistency.

Step 3: Season the yogurt-mayonnaise with lime mixture with jalapeno, capers, oregano, cumin, dill, and cayenne.

Step 4: Pour oil in a deep fryer and heat to 375 degrees F or 190 degrees C.

Step 5: Lightly dust the pieces of fish with flour. Then, dunk the pieces into the beer batter and fry until crisp and golden brown. Once done, remove the pieces of fish from the oil and transfer them on paper towels to drain.

Step 6: Place the fried fish in a tortilla and top with shredded cabbage. Serve with white sauce. Enjoy!

Nutrition Facts

Per Serving: 409.4 calories; 17.3 g protein; 43 g carbohydrates; 54.3 mg cholesterol; 406.5 mg sodium

Fish Tacos

Rebecca Prep: 40 mins | Cook: 20 mins | Total: 1 hr | Servings: 8 | Yield: 8 servings I am excited! It’s taco Tuesday again. And what better way to… Main Dish Recipes Fish Tacos European Print This
Serves: 8 Prep Time: 40 mins Cooking Time: 1 hr 20 mins 1 hr 20 mins
Nutrition facts: 409.4 calories 20 grams fat
Rating: 5.0/5
( 1 voted )

Ingredients

  • 1 cup all-purpose flour
  • 2 tablespoons cornstarch
  • 1 teaspoon baking powder
  • ½ teaspoon salt
  • 1 egg
  • 1 cup beer
  • ½ cup plain yogurt
  • ½ cup mayonnaise
  • 1 lime, juiced
  • 1 jalapeno pepper, minced
  • 1 teaspoon minced capers
  • ½ teaspoon dried oregano
  • ½ teaspoon ground cumin
  • ½ teaspoon dried dill weed
  • 1 teaspoon ground cayenne pepper
  • 1-quart oil for frying
  • 1 pound cod fillets, cut into 2 to 3 ounce portions
  • 1 (12 ounce) package corn tortillas
  • ½ medium head cabbage, finely shredded

Instructions

Step 1: For the batter, combine the flour, cornstarch, baking powder, and salt in a large bowl. Then, mix the egg and beer and immediately stir it into the flour mixture. There will be a few lumps and that is okay.

Step 2: For the sauce. mix the yogurt and mayonnaise in a medium bowl. Stir in the fresh lime juice gradually until you reach a slightly runny consistency.

Step 3: Season the yogurt-mayonnaise with lime mixture with jalapeno, capers, oregano, cumin, dill, and cayenne.

Step 4: Pour oil in a deep fryer and heat to 375 degrees F or 190 degrees C.

Step 5: Lightly dust the pieces of fish with flour. Then, dunk the pieces into the beer batter and fry until crisp and golden brown. Once done, remove the pieces of fish from the oil and transfer them on paper towels to drain.

Step 6: Place the fried fish in a tortilla and top with shredded cabbage. Serve with white sauce. Enjoy!

August 18, 2020 0 comment
0 FacebookTwitterPinterestEmail
Main Dish Recipes

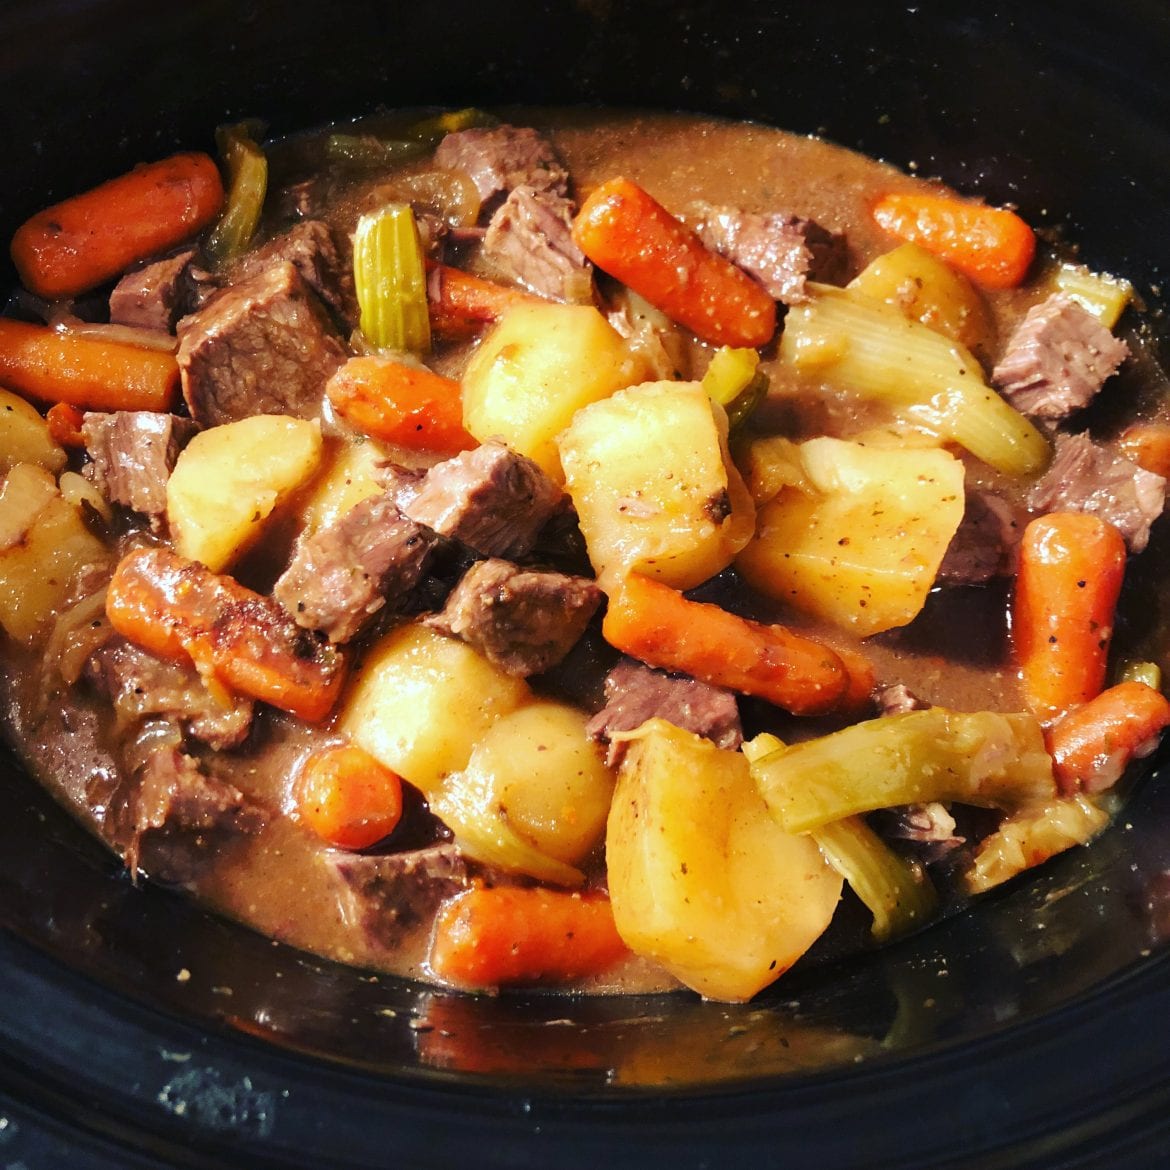
Quick and easy to assemble slow cooker pot roast

by Rebecca August 18, 2020
written by Rebecca

Prep: 15 mins | Cook: 8 hrs | Total: 8 hrs 15 mins | Servings: 6 | Yield: 6 servings

A plate of this hearty, saucy, and the most delicious pot roast will fill your tummy. This easy and quick to assemble Slow Cooker Pot Roast is everything you need to know this season. It is so freaking good it will have your mouth water in anticipation. You will love the bright vegetables, the tender meat, and the savory sauce of this dish. It is cooked in a slow cooker so you don’t need to spend forever in the kitchen. Just pop everything into the cooker and leave.

Ingredients

1 onion, sliced

¼ cup all-purpose flour

1 (2 1/2 pound) boneless beef chuck roast

1 pinch salt and ground black pepper to taste

1 (1.2 ounce) package dry beef gravy mix

1 (1 ounce) package ranch dressing mix

1 (.7 ounce) package dry Italian-style salad dressing mix

½ cup water, or as needed

5 carrot, (7-1/2″)s whole peeled carrots

How to make Slow Cooker Pot Roast

Step 1: Use a cooking spray to grease the inside of a slow cooker. Then, place the onion slices evenly into the bottom of the slow cooker.

Step 2: Disperse the flour onto your work surface. Season the chuck roast with some salt and black pepper, then, roll the roasts in the flour to coat all sides.

Step 3: Pound the four with the edge of a small and sturdy plate into the meat.

Step 4: Put the floured roast on top of the onions.

Step 5: In a bowl, whisk the beef gravy mix, ranch dressing mix, and Italian dressing mix. Pour water into the bowl and whisk until the mix is smooth.

Step 6: Pour the mix over the chuck roast.

Step 7: Scatter the carrots around the meat.

Step 8: Set the cooker to low and cook, covered, for approximately 8 hours until the roast is tender and the gravy has thickened.

Nutrition Facts:
Per Serving: 385.2 calories; 23.9 g protein; 20.8 g carbohydrates; 86.8 mg cholesterol; 1287.8 mg sodium

Quick and easy to assemble slow cooker pot roast

Rebecca Prep: 15 mins | Cook: 8 hrs | Total: 8 hrs 15 mins | Servings: 6 | Yield: 6 servings A plate of this hearty, saucy, and the most delicious… Main Dish Recipes Quick and easy to assemble slow cooker pot roast European Print This
Serves: 6 Prep Time: 15 mins Cooking Time: 8 hrs 8 hrs
Nutrition facts: 385.2 calories 20 grams fat
Rating: 4.5/5
( 2 voted )

Ingredients

  • 1 onion, sliced
  • ¼ cup all-purpose flour
  • 1 (2 1/2 pound) boneless beef chuck roast
  • 1 pinch salt and ground black pepper to taste
  • 1 (1.2 ounce) package dry beef gravy mix
  • 1 (1 ounce) package ranch dressing mix
  • 1 (.7 ounce) package dry Italian-style salad dressing mix
  • ½ cup water, or as needed
  • 5 carrot, (7-1/2")s whole peeled carrots

Instructions

Step 1: Use a cooking spray to grease the inside of a slow cooker. Then, place the onion slices evenly into the bottom of the slow cooker.

Step 2: Disperse the flour onto your work surface. Season the chuck roast with some salt and black pepper, then, roll the roasts in the flour to coat all sides.

Step 3: Pound the four with the edge of a small and sturdy plate into the meat.

Step 4: Put the floured roast on top of the onions.

Step 5: In a bowl, whisk the beef gravy mix, ranch dressing mix, and Italian dressing mix. Pour water into the bowl and whisk until the mix is smooth.

Step 6: Pour the mix over the chuck roast.

Step 7: Scatter the carrots around the meat.

Step 8: Set the cooker to low and cook, covered, for approximately 8 hours until the roast is tender and the gravy has thickened.

August 18, 2020 0 comment
0 FacebookTwitterPinterestEmail
Main Dish Recipes

Southern Banana Pudding

by Rebecca August 17, 2020
written by Rebecca

Serves: 6-8 | Prep: 5 Min | Cook: 15 Min

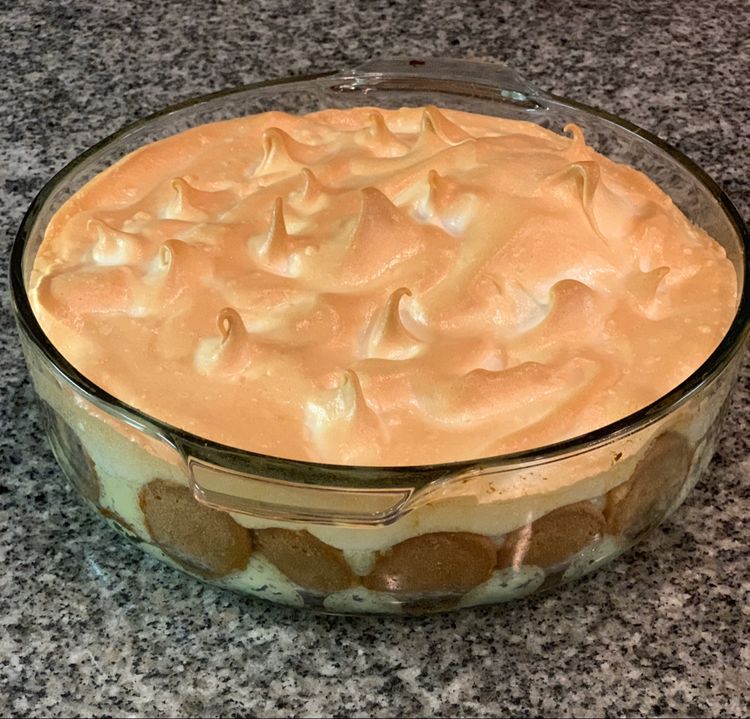
We all love a classic pudding. Every bite is nostalgic and reminds us of our good old childhood. This Southern Banana Pudding is so rich and sweet but it’s super good we don’t mind the calories! I am a food enthusiast, I eat what I love, and what makes me happy even if it means added weight. And this pudding makes its way straight into my heart with its creamy texture and fluffy-and-toasty meringue. You got the flavors, you got the aroma, and you got the texture in a breeze that just cracks in your mouth!

Ingredients

1/2 cup white sugar

1/3 cup all-purpose flour

pinch salt

3 eggs, separated

2 cups whole milk

1/2 teaspoon vanilla extract

1 box vanilla wafers

5 ripe bananas, sliced

1/4 cup white sugar, for meringue

pinch cream of tartar

How to Make Southern Banana Pudding

Step 1: Whisk half a cup of sugar, flour, and salt in a saucepan over low heat.

Step 2: Pour in the milk and continue cooking for about 10 to 12 minutes while constantly stirring until the mixture thickened.

Step 3: Then, whisk in the egg yolks and cook for another 3 minutes.

Step 4: After 3 minutes, remove the pan from the heat and stir in the vanilla.

Step 5: Place a layer of wafers on the bottom of a 1 1/2-quart casserole. Top the wafers with a layer of bananas.

Step 6: Pour 1/3 of the custard over the bananas.

Step 7: Repeat for the remaining layer, ending with the custard.

Step 8: Place the egg whites in a bowl and beat until stiff peaks form. Then, slowly add in the 1/4 cup sugar and cream of tartar.

Step 9: Top with the meringue.

Step 10: Place inside the oven and bake at 425 degrees for about 5 minutes or until the top is lightly browned.

Step 11: Once done, remove from the oven and garnish the pudding with more vanilla wafers around the edges.

Step 12: Allow the pudding to slightly cool. Serve or refrigerate. Enjoy!

Southern Banana Pudding

Rebecca Serves: 6-8 | Prep: 5 Min | Cook: 15 Min We all love a classic pudding. Every bite is nostalgic and reminds us of our good old childhood. This Southern… Main Dish Recipes Southern Banana Pudding European Print This
Serves: 6-8 Prep Time: 5 mins Cooking Time: 15 mins 15 mins
Nutrition facts: 200 calories 20 grams fat
Rating: 5.0/5
( 1 voted )

Ingredients

  • 1/2 cup white sugar
  • 1/3 cup all-purpose flour
  • pinch salt
  • 3 eggs, separated
  • 2 cups whole milk
  • 1/2 teaspoon vanilla extract
  • 1 box vanilla wafers
  • 5 ripe bananas, sliced
  • 1/4 cup white sugar, for meringue
  • pinch cream of tartar

Instructions

Step 1: Whisk half a cup of sugar, flour, and salt in a saucepan over low heat.

Step 2: Pour in the milk and continue cooking for about 10 to 12 minutes while constantly stirring until the mixture thickened.

Step 3: Then, whisk in the egg yolks and cook for another 3 minutes.

Step 4: After 3 minutes, remove the pan from the heat and stir in the vanilla.

Step 5: Place a layer of wafers on the bottom of a 1 1/2-quart casserole. Top the wafers with a layer of bananas.

Step 6: Pour 1/3 of the custard over the bananas.

Step 7: Repeat for the remaining layer, ending with the custard.

Step 8: Place the egg whites in a bowl and beat until stiff peaks form. Then, slowly add in the 1/4 cup sugar and cream of tartar.

Step 9: Top with the meringue.

Step 10: Place inside the oven and bake at 425 degrees for about 5 minutes or until the top is lightly browned.

Step 11: Once done, remove from the oven and garnish the pudding with more vanilla wafers around the edges.

Step 12: Allow the pudding to slightly cool. Serve or refrigerate. Enjoy!

August 17, 2020 0 comment
0 FacebookTwitterPinterestEmail
Main Dish Recipes

Old-Fashioned Stack Cake with Appalachian Apple Butter Filling

by Rebecca August 17, 2020
written by Rebecca

Serves: 8-10 or 1 – 6 stack – 9″ cake | Prep: 30 Min | Cook: 10 Min

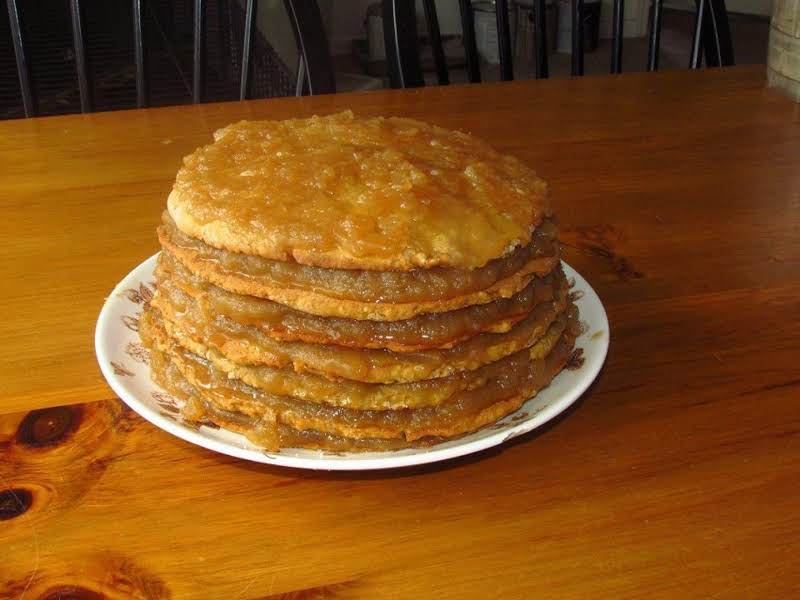
Simple, amazing, and very delicious! This recipe will make it to your top 5 of go-to-comfort food! The taste of this treat will make you want to eat the whole thing! The fresh Apple flavor is so good! Give it a try and enjoy!

Ingredients

FOR THE CAKE INGREDIENTS:

1/2 cup vegetable shortening

1/2 cup sugar

1/2 cup buttermilk

1/3 cup molasses

1 large egg, slightly beaten

1 teaspoon vanilla extract

3 1/2 cups all-purpose flour

1 teaspoon ground ginger

1/2 teaspoon baking soda

1/2 teaspoon cinnamon

1/2 teaspoon salt

pinch of nutmeg

powdered sugar for dusting

FOR THE APPALACHIAN APPLE BUTTER FILLING:

4 cups roughly chopped dried apples

3/4 cup dark brown sugar, firmly packed

1 teaspoon ground ginger

1 teaspoon cinnamon, ground

6 cups apple cider (not juice)

How to Make Old-Fashioned Stack Cake with Appalachian Apple Butter Filling

Step 1: Ready the oven and preheat to 350 degrees.

Step 2: Apply cooking spray on 9-inch cake pans then line with parchment paper then layer it with another spray of cooking spray.

Step 3: Add in sugar and shortening in a medium mixing bowl and beat at medium speed until well blended and creamy.

Step 4: Add molasses, egg, buttermilk, and vanilla then beat again until well mixed.

Step 5: In another bowl, add ginger, baking soda, salt, flour, cinnamon, and nutmeg. Create a hole in the middle then add in the shortening mixture. Stir until well mixed.

Step 6: Flour the surface and form the dough then cut into six slices.

Step 7: Add in the sliced doughs into each of the prepared pans then pat the dough using your fingers.

Step 8: Place inside the preheated oven and bake for 10 to 12 minutes or until the color turns golden brown.

Step 9: Remove from the oven and let them sit on a wire rack.

To Make The Filling:

Step 1: Place a large saucepan on the stove and turn the heat to medium.

Step 2: Add in all the dry ingredients and the dried fruit right away.

Step 3: Add enough water to submerge all the dry ingredients then bring to a boil. Cook and stir for 45 minutes.

Step 4: Turn off the heat and remove the saucepan.

Step 5: Allow the filling to cool in the saucepan for 10 minutes.

Step 6: Transfer into a food processor and process until the texture becomes smooth.

Step 7: Place one cake layer on a serving plate then pour and spread the filling on top.

Step 8: Repeat this process to the rest of the cake layers.

Step 9: Cover then place inside the fridge for at least 24 hours.

Step 10: Sprinkle confectioners’ sugar on top and serve. Enjoy!

Old-Fashioned Stack Cake with Appalachian Apple Butter Filling

Rebecca Serves: 8-10 or 1 – 6 stack – 9″ cake | Prep: 30 Min | Cook: 10 Min Simple, amazing, and very delicious! This recipe will make it to your… Main Dish Recipes Old-Fashioned Stack Cake with Appalachian Apple Butter Filling European Print This
Serves: 8-10 Prep Time: 30 mins Cooking Time: 10 mins 10 mins
Nutrition facts: 200 calories 20 grams fat
Rating: 5.0/5
( 1 voted )

Ingredients

  • FOR THE CAKE INGREDIENTS:
  • 1/2 cup vegetable shortening
  • 1/2 cup sugar
  • 1/2 cup buttermilk
  • 1/3 cup molasses
  • 1 large egg, slightly beaten
  • 1 teaspoon vanilla extract
  • 3 1/2 cups all-purpose flour
  • 1 teaspoon ground ginger
  • 1/2 teaspoon baking soda
  • 1/2 teaspoon cinnamon
  • 1/2 teaspoon salt
  • pinch of nutmeg
  • powdered sugar for dusting
  • FOR THE APPALACHIAN APPLE BUTTER FILLING:
  • 4 cups roughly chopped dried apples
  • 3/4 cup dark brown sugar, firmly packed
  • 1 teaspoon ground ginger
  • 1 teaspoon cinnamon, ground
  • 6 cups apple cider (not juice)

Instructions

Step 1: Ready the oven and preheat to 350 degrees.

Step 2: Apply cooking spray on 9-inch cake pans then line with parchment paper then layer it with another spray of cooking spray.

Step 3: Add in sugar and shortening in a medium mixing bowl and beat at medium speed until well blended and creamy.

Step 4: Add molasses, egg, buttermilk, and vanilla then beat again until well mixed.

Step 5: In another bowl, add ginger, baking soda, salt, flour, cinnamon, and nutmeg. Create a hole in the middle then add in the shortening mixture. Stir until well mixed.

Step 6: Flour the surface and form the dough then cut into six slices.

Step 7: Add in the sliced doughs into each of the prepared pans then pat the dough using your fingers.

Step 8: Place inside the preheated oven and bake for 10 to 12 minutes or until the color turns golden brown.

Step 9: Remove from the oven and let them sit on a wire rack.

To Make The Filling:

Step 1: Place a large saucepan on the stove and turn the heat to medium.

Step 2: Add in all the dry ingredients and the dried fruit right away.

Step 3: Add enough water to submerge all the dry ingredients then bring to a boil. Cook and stir for 45 minutes.

Step 4: Turn off the heat and remove the saucepan.

Step 5: Allow the filling to cool in the saucepan for 10 minutes.

Step 6: Transfer into a food processor and process until the texture becomes smooth.

Step 7: Place one cake layer on a serving plate then pour and spread the filling on top.

Step 8: Repeat this process to the rest of the cake layers.

Step 9: Cover then place inside the fridge for at least 24 hours.

Step 10: Sprinkle confectioners' sugar on top and serve. Enjoy!

August 17, 2020 0 comment
0 FacebookTwitterPinterestEmail
Main Dish Recipes

Chocolate Pecan Cheesecake Pie

by Rebecca August 17, 2020
written by Rebecca

Serves: 8 | Prep: 25 Min | Cook: 55 Min

I love desserts that are not only delicious but are Instagram worthy like this Chocolate Pecan Cheesecake Pie. It is a decadent dessert that no one can say no to. This gorgeous pie has everything I can ask for. I am a certified chocoholic so this is perfect. Plus, it has cheesecake and pecans which makes this pie even harder to resist.

Ingredients

1 deep-dish pie shell

1 cup dark chocolate chips

3 tablespoons whipping cream

8 oz cream cheese

3/4 cup sugar – divided

2 teaspoons vanilla extract

4 eggs

1/4 teaspoon salt

3 tablespoons melted butter

1 cup light corn syrup

1 1/2 cups pecan halves

How to Make Chocolate Pecan Cheesecake Pie

Step 1: Stuff a pie plate with crust or defrost frozen deep-dish crust.

Step 2: In a bowl, beat the cream cheese, 1 egg, half a cup of sugar, salt, and a tablespoon of vanilla. Mix until smooth.

Step 3: Place the dark chocolate chips into a microwavable dish. Add the whipping cream, then, microwave on 50% power for about a minute until the morsels just begins to melt.

Step 4: Then, remove the chocolate-whip cream mix from the microwave and stir using a fork until mixed and smooth.

Step 5: In a medium bowl, place the corn syrup, melted butter, 3 eggs, 1 teaspoon vanilla, and 1/4 cup of sugar. Whisk until combined, then, stir in the pecans.

Step 6: Top the pie crust with the chocolate mixture and with a spatula, smooth the mixture until evenly distributed.

Step 7: Pour the cream cheese mixture on top of the chocolate. Smooth the cream cheese out until evenly spread.

Step 8: Then, pour the pecan mixture on top and spread evenly.

Step 9: Place inside the oven and bake at 350 degrees for approximately 55 minutes or until set.

Step 10: Once done, remove from the oven and allow the pie to cool completely on a wire rack.

Step 11: If you have any leftovers, store them in the fridge. Enjoy!

Chocolate Pecan Cheesecake Pie

Rebecca Serves: 8 | Prep: 25 Min | Cook: 55 Min I love desserts that are not only delicious but are Instagram worthy like this Chocolate Pecan Cheesecake Pie. It is… Main Dish Recipes Chocolate Pecan Cheesecake Pie European Print This
Serves: 8 Prep Time: 25 mins Cooking Time: 55 mins 55 mins
Nutrition facts: 200 calories 20 grams fat
Rating: 5.0/5
( 1 voted )

Ingredients

  • 1 deep-dish pie shell
  • 1 cup dark chocolate chips
  • 3 tablespoons whipping cream
  • 8 oz cream cheese
  • 3/4 cup sugar - divided
  • 2 teaspoons vanilla extract
  • 4 eggs
  • 1/4 teaspoon salt
  • 3 tablespoons melted butter
  • 1 cup light corn syrup
  • 1 1/2 cups pecan halves

Instructions

Step 1: Stuff a pie plate with crust or defrost frozen deep-dish crust.

Step 2: In a bowl, beat the cream cheese, 1 egg, half a cup of sugar, salt, and a tablespoon of vanilla. Mix until smooth.

Step 3: Place the dark chocolate chips into a microwavable dish. Add the whipping cream, then, microwave on 50% power for about a minute until the morsels just begins to melt.

Step 4: Then, remove the chocolate-whip cream mix from the microwave and stir using a fork until mixed and smooth.

Step 5: In a medium bowl, place the corn syrup, melted butter, 3 eggs, 1 teaspoon vanilla, and 1/4 cup of sugar. Whisk until combined, then, stir in the pecans.

Step 6: Top the pie crust with the chocolate mixture and with a spatula, smooth the mixture until evenly distributed.

Step 7: Pour the cream cheese mixture on top of the chocolate. Smooth the cream cheese out until evenly spread.

Step 8: Then, pour the pecan mixture on top and spread evenly.

Step 9: Place inside the oven and bake at 350 degrees for approximately 55 minutes or until set.

Step 10: Once done, remove from the oven and allow the pie to cool completely on a wire rack.

Step 11: If you have any leftovers, store them in the fridge. Enjoy!

August 17, 2020 0 comment
0 FacebookTwitterPinterestEmail
Main Dish Recipes

Chicken Pineapple Kabobs

by Rebecca August 17, 2020
written by Rebecca

Serves: 8 | Cook: 20 Min

Super satisfying skewers with pineapple chunks and chicken breasts drench in a savory bbq sauce. My mouth is watery! These skewers are super good, pretty simple to make, and the most delicious when you marinate them longer.

My kids love a simple backyard bbq and this Chicken Pineapple Kabobs are our go-to. They are the easiest to prepare. Make them a few hours before or even a day before so the flavors will soak in well. When ready to grill just take them out from the fridge, thread the pieces into skewers, and grill. Perfect for an easy and quick dinner meal or a great appetizer for your dinner party. These kabobs are tender, juicy, savory, and a sure win! My family loves it so much, they prefer it more than anything. Every bite is satisfyingly good. The flavors just burst into your mouth and you’ll taste a whirlwind of amazing flavors.

Ingredients

3 tablespoons soy sauce

3 tablespoons brown sugar

1 tablespoon sesame oil

1/4 teaspoon ground ginger

1 teaspoon garlic powder

8 boneless chicken breast, cut into 2″ pieces

1 20 oz can pineapple chunks, drained

1/2 cup your favorite bbq sauce

How to Make Chicken Pineapple Kabobs

Step 1: Combine the soy sauce, brown sugar, sesame oil, ginger, and garlic powder in a shallow glass dish.

Step 2: Add in the chicken pieces and pineapple into the marinade and stir well until the chicken pieces are thoroughly coated.

Step 3: Place the marinade in the fridge, covered, for at least 2 hours.

Step 4: When ready to cook, prepare the drill. Preheat it to medium-high heat.

Step 5: Then, oil the grill grate a little.

Step 6: Attach alternately the chicken and pineapple onto the skewers.

Step 7: Put on the grill and cook for about 15 to 20 minutes. Baste with bbq sauce and occasionally turn the skewers until the chicken juices run clear.

Chicken Pineapple Kabobs

Rebecca Serves: 8 | Cook: 20 Min Super satisfying skewers with pineapple chunks and chicken breasts drench in a savory bbq sauce. My mouth is watery! These skewers are super good,… Main Dish Recipes Chicken Pineapple Kabobs European Print This
Serves: 8 Cooking Time: 20 mins 20 mins
Nutrition facts: 200 calories 20 grams fat
Rating: 5.0/5
( 1 voted )

Ingredients

  • 3 tablespoons soy sauce
  • 3 tablespoons brown sugar
  • 1 tablespoon sesame oil
  • 1/4 teaspoon ground ginger
  • 1 teaspoon garlic powder
  • 8 boneless chicken breast, cut into 2" pieces
  • 1 20 oz can pineapple chunks, drained
  • 1/2 cup your favorite bbq sauce

Instructions

Step 1: Combine the soy sauce, brown sugar, sesame oil, ginger, and garlic powder in a shallow glass dish.

Step 2: Add in the chicken pieces and pineapple into the marinade and stir well until the chicken pieces are thoroughly coated.

Step 3: Place the marinade in the fridge, covered, for at least 2 hours.

Step 4: When ready to cook, prepare the drill. Preheat it to medium-high heat.

Step 5: Then, oil the grill grate a little.

Step 6: Attach alternately the chicken and pineapple onto the skewers.

Step 7: Put on the grill and cook for about 15 to 20 minutes. Baste with bbq sauce and occasionally turn the skewers until the chicken juices run clear.

August 17, 2020 0 comment
0 FacebookTwitterPinterestEmail
Main Dish Recipes

Great Grandma’s Coconut Cream Pie

by Rebecca August 17, 2020
written by Rebecca

Serves: 6-8 | Prep: 20 Min | Cook: 1 Hr 10 Min

This pie is worth every inch! Its light, fluffy, and delightfully creamy texture makes this pie stands out above the rest. This is perfect all year round, but exceptional to serve as a holiday dessert. Whenever I make this Coconut Cream Pie, it never stays long, it is gone in a heartbeat! This pie’s impressively delicious taste makes its way to everyone’s heart.

Ingredients

1 cup milk

1 cup sweetened, flaked coconut

1 cup light cream

1/2 cup sugar

2 tablespoons corn starch

2 eggs, separated

1 teaspoon vanilla

1 pre-made pie crust

8 oz whipped cream

How to Make Great Grandma’s Coconut Cream Pie

Step 1: Place the pie inside the oven and bake according to the package direction. Once done, remove from the oven and allow it to cool completely.

Step 2: In a double boiler, combine the milk and light cream. As a substitute, if you cannot find light cream is mixing 3 tablespoons of melted butter in room temperature and a scant cup of whole milk.

Step 3: Add in the sugar and bring the mixture to a boil.

Step 4: In a small bowl, stir well 2 tablespoons of wald water and cornstarch.

Step 5: Beat the egg yolks in another bowl until they are light.

Step 6: Stir in the corn starch mixture into the yolks and mix thoroughly.

Step 7: Pour the egg mixture in the double boiler and cook for about 5 minutes while constantly stirring.

Step 8: After 5 minutes remove the boiler from the heat and add in the vanilla and coconut. Stir well and allow the mixture to sit for 30 minutes.

Step 9: Then, pour the mixture into the prepared crust. Place inside the fridge to chill, covered with plastic wrap for 30 minutes or until set.

Step 10: When ready to serve, remove the plastic wrap and cover the top of the pie with whipped cream. Sprinkle with coconut flakes if desired. Enjoy!

Great Grandma's Coconut Cream Pie

Rebecca Serves: 6-8 | Prep: 20 Min | Cook: 1 Hr 10 Min This pie is worth every inch! Its light, fluffy, and delightfully creamy texture makes this pie stands out… Main Dish Recipes Great Grandma’s Coconut Cream Pie European Print This
Serves: 6-8 Prep Time: 20 mins Cooking Time: 1 hr 10 mins 1 hr 10 mins
Nutrition facts: 200 calories 20 grams fat
Rating: 5.0/5
( 1 voted )

Ingredients

  • 1 cup milk
  • 1 cup sweetened, flaked coconut
  • 1 cup light cream
  • 1/2 cup sugar
  • 2 tablespoons corn starch
  • 2 eggs, separated
  • 1 teaspoon vanilla
  • 1 pre-made pie crust
  • 8 oz whipped cream

Instructions

Step 1: Place the pie inside the oven and bake according to the package direction. Once done, remove from the oven and allow it to cool completely.

Step 2: In a double boiler, combine the milk and light cream. As a substitute, if you cannot find light cream is mixing 3 tablespoons of melted butter in room temperature and a scant cup of whole milk.

Step 3: Add in the sugar and bring the mixture to a boil.

Step 4: In a small bowl, stir well 2 tablespoons of wald water and cornstarch.

Step 5: Beat the egg yolks in another bowl until they are light.

Step 6: Stir in the corn starch mixture into the yolks and mix thoroughly.

Step 7: Pour the egg mixture in the double boiler and cook for about 5 minutes while constantly stirring.

Step 8: After 5 minutes remove the boiler from the heat and add in the vanilla and coconut. Stir well and allow the mixture to sit for 30 minutes.

Step 9: Then, pour the mixture into the prepared crust. Place inside the fridge to chill, covered with plastic wrap for 30 minutes or until set.

Step 10: When ready to serve, remove the plastic wrap and cover the top of the pie with whipped cream. Sprinkle with coconut flakes if desired. Enjoy!

August 17, 2020 0 comment
0 FacebookTwitterPinterestEmail
Newer Posts
Older Posts

Popular Posts

  • 1

    Crispy Crunchy Parmesan Potatoes

    March 21, 2020
  • 2

    CROCK POT SMOTHERED PORK CHOPS

    March 21, 2020
  • Facebook
  • Twitter

@2019 - All Right Reserved.


Back To Top