Cook it once
  • Home
  • Privacy Policy
  • Recipes
    • KETO
    • LC
    • WW
  • Tips
  • Contact
Cook it once
  • Home
  • Privacy Policy
  • Recipes
    • KETO
    • LC
    • WW
  • Tips
  • Contact
Category:

Main Dish Recipes

Main Dish Recipes

PECAN CARAMEL CLUSTERS

by Rebecca August 25, 2020
written by Rebecca

Prep: 30 min | Cook: 5 mins | Additional: 15 min | Total: 50 min | Servings: 54 | Yield: 54 servings

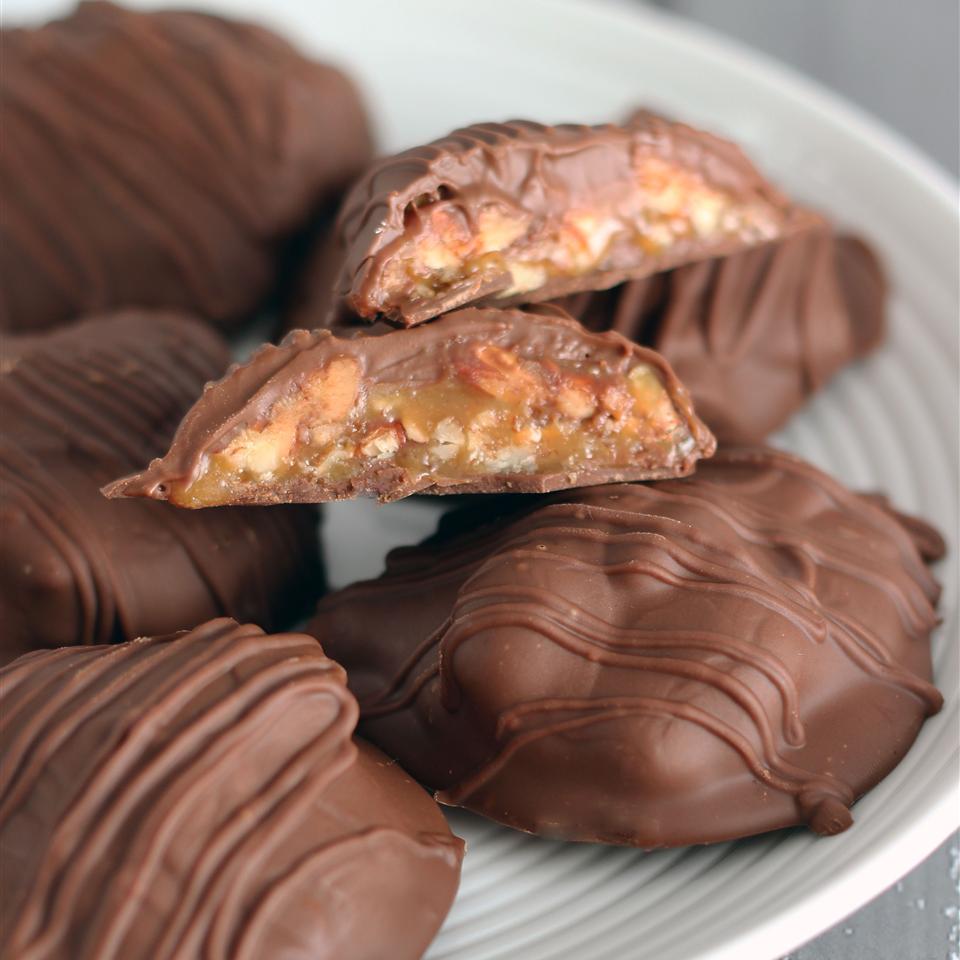
These chewy caramel clusters that are coated in rich dark chocolate are what I needed today. I was not feeling okay, this pandemic is causing me more stress and to worry too much. I badly needed a pick me up and these luscious, perfectly sweet treats were my escape. This is a no-fuss, super simple, easy and quick to assemble. With only minimal ingredients that are always available, you can be able to make this any time, any day. For all the chocolate, caramel, and pecan lovers out there (like myself) these delish treats will undoubtedly make your day. I made batches of this caramel clusters today and I am planning to pack them and give them to friends and family.

INGREDIENTS

1 14oz package individually wrapped caramels, unwrapped

3 tablespoons butter

2 tablespoons water

2 cups chopped pecans

1 pound dark chocolate, broken into small pieces

HOW TO MAKE PECAN CARAMEL CLUSTERS

Step 1: In a microwave-safe bowl, add the caramels, butter, and water. Place inside the microwave for about 3 minutes, stirring every 30 seconds, until smooth. Then, stir in the pecans.

Step 2: By spoonfuls, drop the caramel pecan mixture onto a parchment paper.

Step 3: Place in the fridge to freeze for at least 15 to 20 minutes.

Step 4: In another microwave-safe bowl, add the chocolate and melt on high for about 1 to 2 minutes. Stir every 15 seconds until melted and smooth.

Step 5: Take the caramel cluster out the fridge and using a fondue fork, dip each cluster into the melted chocolate. Transfer the chocolate-coated clusters on a parchment paper to dry.

Step 6: You can chill them if needed before serving.

NOTE:

You can use varieties of chocolate from semi-sweet to milk chocolate or use dark chocolate like what I did for this recipe.

Nutrition Facts:

Per Serving: 103.3 calories; 2.2 mg cholesterol; 24.5 mg sodium; 1.2 g protein; 11.8 g carbohydrates

PECAN CARAMEL CLUSTERS

Rebecca Prep: 30 min | Cook: 5 mins | Additional: 15 min | Total: 50 min | Servings: 54 | Yield: 54 servings These chewy caramel clusters that are coated in rich dark chocolate are what I needed today. I was not… Main Dish Recipes PECAN CARAMEL CLUSTERS European Print This
Serves: 54 Prep Time: 30 mins Cooking Time: 20 mins 20 mins
Nutrition facts: 103.3 calories 20 grams fat
Rating: 5.0/5
( 1 voted )

Ingredients

  • 1 14oz package individually wrapped caramels, unwrapped
  • 3 tablespoons butter
  • 2 tablespoons water
  • 2 cups chopped pecans
  • 1 pound dark chocolate, broken into small pieces

Instructions

Step 1: In a microwave-safe bowl, add the caramels, butter, and water. Place inside the microwave for about 3 minutes, stirring every 30 seconds, until smooth. Then, stir in the pecans.

Step 2: By spoonfuls, drop the caramel pecan mixture onto a parchment paper.

Step 3: Place in the fridge to freeze for at least 15 to 20 minutes.

Step 4: In another microwave-safe bowl, add the chocolate and melt on high for about 1 to 2 minutes. Stir every 15 seconds until melted and smooth.

Step 5: Take the caramel cluster out the fridge and using a fondue fork, dip each cluster into the melted chocolate. Transfer the chocolate-coated clusters on a parchment paper to dry.

Step 6: You can chill them if needed before serving.

NOTE:

You can use varieties of chocolate from semi-sweet to milk chocolate or use dark chocolate like what I did for this recipe.
August 25, 2020 0 comment
0 FacebookTwitterPinterestEmail
Main Dish Recipes

MISS BETTY’S 24 HOUR LETTUCE SALAD

by Rebecca August 25, 2020
written by Rebecca

Prep: 20 min | Cook: 10 mins | Additional: 1 day | Total: 1 day 30 min | Servings: 12 | Yield: 12 servings

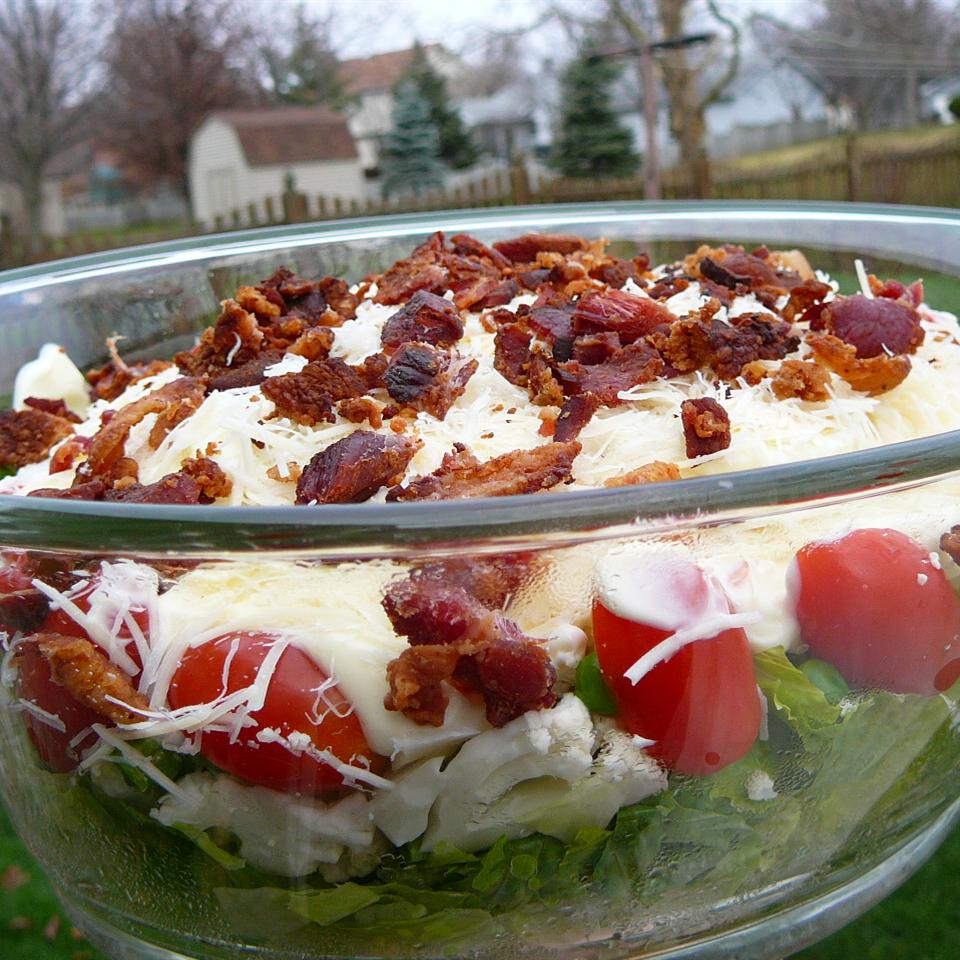
Overloaded with goodness, this 24-hour Lettuce Salad vanishes in a blink. Super refreshing, crazy delicious, with amazing flavors bursting in your mouth in every bite. All the ingredients perfectly complement each other. This easy to assemble salad absorbs all the great flavors as it sits in the fridge overnight before serving.  Sprinkled with salty crispy bacon on top this crunchy salad captures the amazing flavor of the seven-layer salad in a not fussy way with fewer layers. I am obsessed with this salad and this has been my favorite among all the salad recipes out there. It is freaking good that every time my colleagues come to visit, they are asking for this. And this salad never settles on the table for long.

INGREDIENTS

¾ pound sliced bacon

1 large head iceberg lettuce, shredded

¼ cup sliced onion

¼ cup thinly sliced celery

1 8oz can water chestnuts, drained and sliced

1 10oz package frozen peas

1 cup mayonnaise, or to taste

1 tablespoon white sugar

2 tablespoons grated Romano or Parmesan cheese

4 tomatoes, cut into wedges

2 hard-cooked eggs, sliced

1 tablespoon chopped fresh parsley for garnish

HOW TO MAKE MISS BETTY’S 24 HOUR LETTUCE SALAD

Step 1: On a large serving dish or bowl, spread out the lettuce.

Step 2: Add and sprinkle in layers the onion, celery, water chestnuts, and frozen peas (unthawed) over the lettuce.

Step 3: Spread like a frosting the mayonnaise over the top.

Step 4: Then, sprinkle over the sugar and grated cheese.

Step 5: Place inside the fridge, covered, overnight.

Step 6: In a large, deep skillet, cook the bacon over medium-high heat until evenly brown. When done, drain and crumble. Set aside.

Step 7: When ready to serve, sprinkle the crumbled bacon on top and garnish with tomato wedges, slices of hard-cooked egg, and parsley. Enjoy!

Nutrition Facts:

Per Serving: 248.7 calories; 49.6 mg cholesterol; 385.7 mg sodium; 7.5 g protein; 11.3 g carbohydrates

MISS BETTY’S 24 HOUR LETTUCE SALAD

Rebecca Prep: 20 min | Cook: 10 mins | Additional: 1 day | Total: 1 day 30 min | Servings: 12 | Yield: 12 servings Overloaded with goodness, this 24-hour Lettuce Salad vanishes in a blink. Super refreshing, crazy delicious, with amazing… Main Dish Recipes MISS BETTY’S 24 HOUR LETTUCE SALAD European Print This
Serves: 12 Prep Time: 20 mins Cooking Time: 24 hrs 10 mins 24 hrs 10 mins
Nutrition facts: 248.7 calories 20 grams fat
Rating: 4.2/5
( 22 voted )

Ingredients

  • ¾ pound sliced bacon
  • 1 large head iceberg lettuce, shredded
  • ¼ cup sliced onion
  • ¼ cup thinly sliced celery
  • 1 8oz can water chestnuts, drained and sliced
  • 1 10oz package frozen peas
  • 1 cup mayonnaise, or to taste
  • 1 tablespoon white sugar
  • 2 tablespoons grated Romano or Parmesan cheese
  • 4 tomatoes, cut into wedges
  • 2 hard-cooked eggs, sliced
  • 1 tablespoon chopped fresh parsley for garnish

Instructions

Step 1: On a large serving dish or bowl, spread out the lettuce.

Step 2: Add and sprinkle in layers the onion, celery, water chestnuts, and frozen peas (unthawed) over the lettuce.

Step 3: Spread like a frosting the mayonnaise over the top.

Step 4: Then, sprinkle over the sugar and grated cheese.

Step 5: Place inside the fridge, covered, overnight.

Step 6: In a large, deep skillet, cook the bacon over medium-high heat until evenly brown. When done, drain and crumble. Set aside.

Step 7: When ready to serve, sprinkle the crumbled bacon on top and garnish with tomato wedges, slices of hard-cooked egg, and parsley. Enjoy!

August 25, 2020 0 comment
0 FacebookTwitterPinterestEmail
Main Dish Recipes

MARSHMALLOW BUTTERCREAM FROSTING

by Rebecca August 25, 2020
written by Rebecca

Prep: 15 min | Total: 15 min | Serving: 8 | Yield: 5 cups

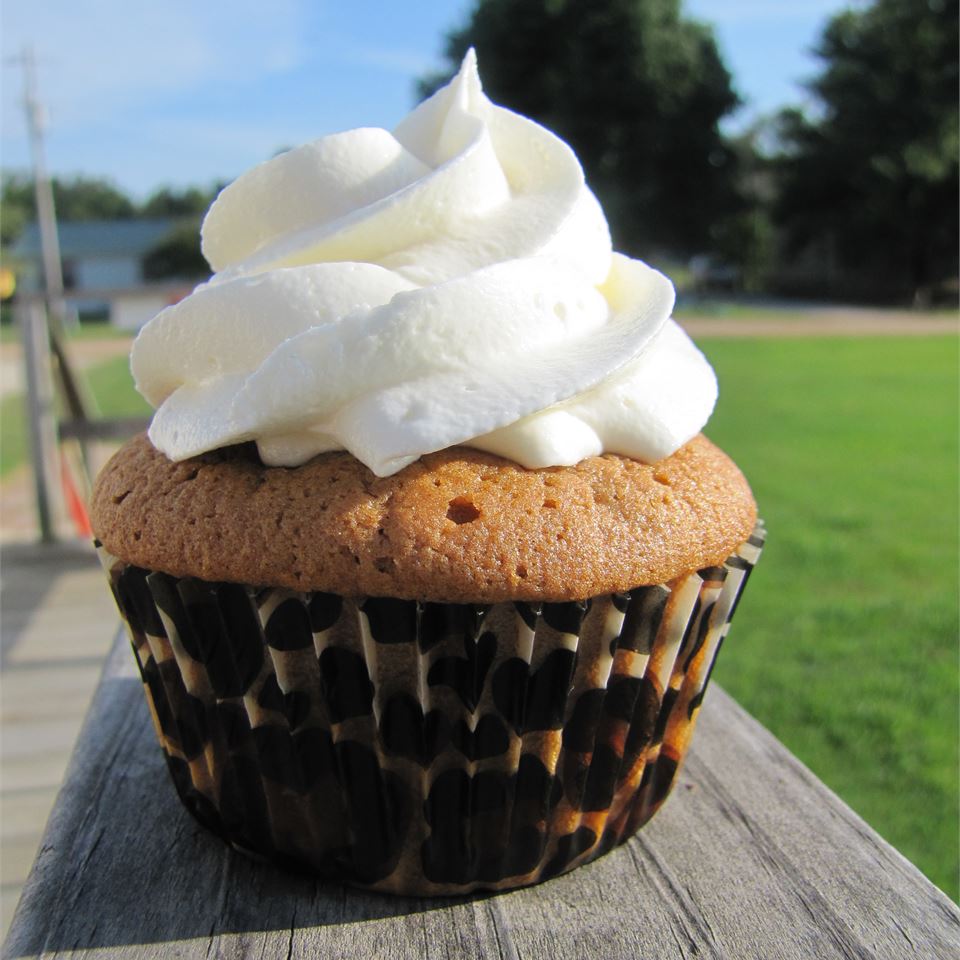
This sweet and creamy frosting is my life savior! I have used it on many occasions and what I like most about this Marshmallow Buttercream Frosting is you can make this way ahead of time. It is great not only when decorating the top of the cupcakes but it works wonders too when frosting a whole cake! A light and fluffy frosting that is here to keep. And to make it super fancy, try adding in a little vanilla.

INGREDIENTS

2 cups butter, softened

2 ½ cups confectioners’ sugar

1 teaspoon almond extract

1 13oz jar marshmallow creme

HOW TO MAKE MARSHMALLOW BUTTERCREAM FROSTING

Step 1: Add the butter in a mixing bowl. Crea, using an electric mixer over medium speed until soft and fluffy.

Step 2: Gradually beat in the confectioner’s sugar, about half a cup at a time.

Step 3: Add in the almond extract and beat.

Step 4: Then, fold in the marshmallow creme into the frosting until fully incorporated.

NOTES:

Having trouble looking for the marshmallow fluff? Look for a mark that says “jet puffed marshmallow cream” in your grocery store’s baking aisle. That will work the same! And Amazon is still an option, just in case.

When mixing the ingredients and before adding anything else, ensure that the confectioner’s sugar and butter are cream completely with no visible clumps from the confectioner’s sugar.

The coverage will depend on how you use the frosting. With this recipe, you will be able to cover enough cupcakes whether pipping or decorating. And when you put this frosting on with a knife, this will cover a lot more.

This frosting you can make days ahead. Just place it in the fridge when you are not using it yet. This will remain in good condition so long as you keep this cool.

Nutrition Facts:

Per Serving: 708.7 calories; 122 mg cholesterol; 364 mg sodium; 0.8 g protein; 75.3 g carbohydrates

MARSHMALLOW BUTTERCREAM FROSTING

Rebecca Prep: 15 min | Total: 15 min | Serving: 8 | Yield: 5 cups This sweet and creamy frosting is my life savior! I have used it on many occasions and what I like most about this… Main Dish Recipes MARSHMALLOW BUTTERCREAM FROSTING European Print This
Serves: 8 Prep Time: 15 mins
Nutrition facts: 708.7 calories 20 grams fat
Rating: 5.0/5
( 1 voted )

Ingredients

  • 2 cups butter, softened
  • 2 ½ cups confectioners' sugar
  • 1 teaspoon almond extract
  • 1 13oz jar marshmallow creme

Instructions

Step 1: Add the butter in a mixing bowl. Crea, using an electric mixer over medium speed until soft and fluffy.

Step 2: Gradually beat in the confectioner's sugar, about half a cup at a time.

Step 3: Add in the almond extract and beat.

Step 4: Then, fold in the marshmallow creme into the frosting until fully incorporated.

NOTES:

Having trouble looking for the marshmallow fluff? Look for a mark that says "jet puffed marshmallow cream" in your grocery store's baking aisle. That will work the same! And Amazon is still an option, just in case.

When mixing the ingredients and before adding anything else, ensure that the confectioner's sugar and butter are cream completely with no visible clumps from the confectioner's sugar.

The coverage will depend on how you use the frosting. With this recipe, you will be able to cover enough cupcakes whether pipping or decorating. And when you put this frosting on with a knife, this will cover a lot more.

This frosting you can make days ahead. Just place it in the fridge when you are not using it yet. This will remain in good condition so long as you keep this cool.

August 25, 2020 0 comment
0 FacebookTwitterPinterestEmail
Main Dish Recipes

SPICY JALAPENO-BACON MAC AND CHEESE

by Rebecca August 25, 2020
written by Rebecca

Prep: 10 min | Cook: 35 mins | Additional: 10 min | Total: 55 min | Servings: 8 | Yield: 8 servings

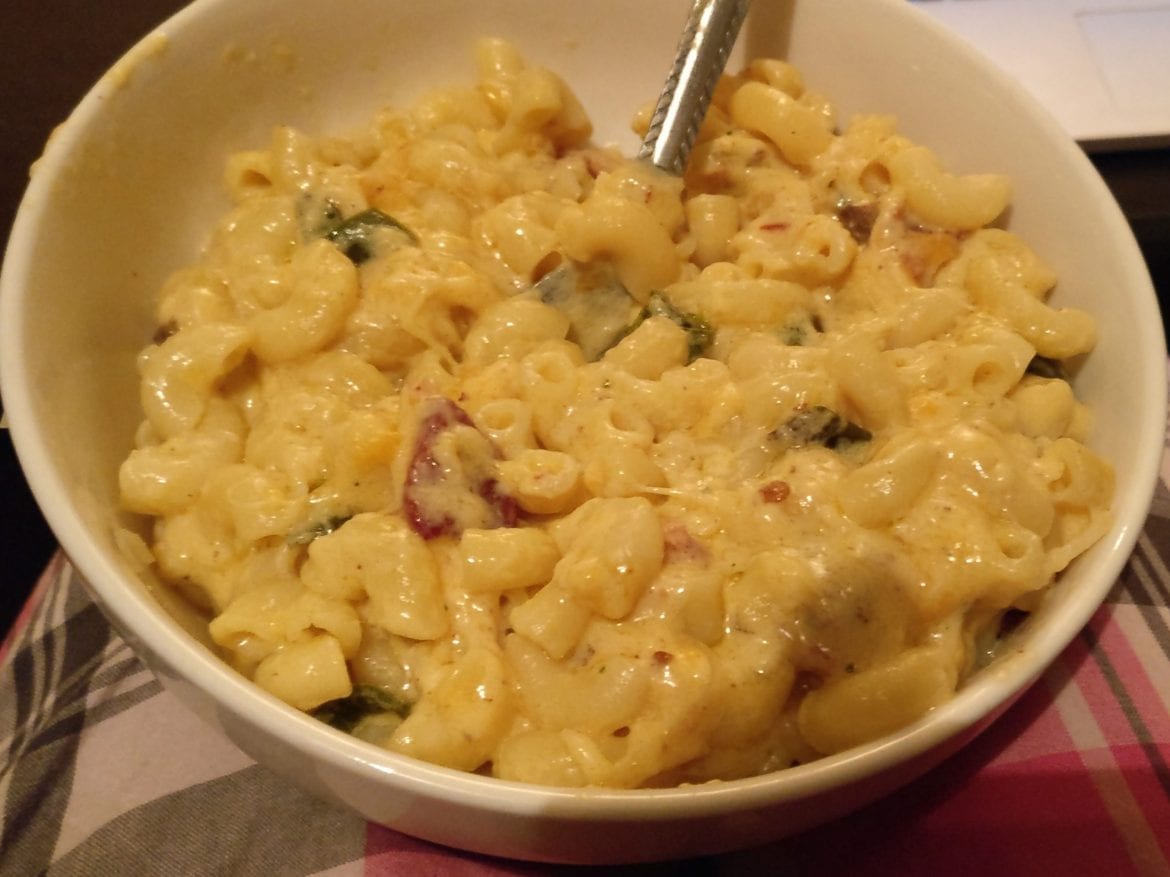
This looks a little bit too much but I promise this mac and cheese is way better than it looks. It has a rich cheddar cheese flavor with a bit of kick from the jalapenos. This mac and cheese is too much to handle – super delicious and satisfying!

INGREDIENTS

1 16oz package elbow macaroni

1 16oz package bacon, cut into bite-size pieces

10 eaches jalapeno peppers, seeded and diced

2 tablespoons chile paste, or to taste

1 pinch salt and ground black pepper

4 tablespoons all-purpose flour

1 tablespoon minced garlic

4 cups whole milk

16oz shredded extra-sharp Cheddar cheese

8oz shredded Parmesan cheese

HOW TO MAKE SPICY JALAPENO-BACON MAC AND CHEESE

Step 1: Bring to a boil a large, lightly salted pot of water. When boiling, place the elbow macaroni and cook for about 8 minutes until tender yet firm. Make sure to stir occasionally. Then, drain the macaroni and set aside.

Step 2: In a large skillet, cook the bacon, turning occasionally over medium-high heat for about 5 minutes until nearly crispy. Stir in the jalapenos and fry for another 5 minutes until the soft and the bacon is crispy. Drain the fats but leave at least 4 tablespoons of the bacon fat in the pan.

Step 3: Add the chile paste into the pan. Fry for a minute before adding salt and pepper to taste. Stir in the flour and cook for a minute more. Add in the garlic and stir for another minute. Then, pour in the milk and cook for 5 minutes over medium heat while continuously whisking. Take the pan out of the heat and allow the mixture to cool for at least 10 minutes to block the cheese from separating.

Step 4: Stir in the cheddar cheese and Parmesan cheese until melted before adding the drained pasta. Stir to coat.

Step 5: Serve and enjoy!

Nutrition Facts:

Per Serving: 745.6 calories; 112.4 mg cholesterol; 1371.8 mg sodium; 43.4 g protein; 56.8 g carbohydrates

SPICY JALAPENO-BACON MAC AND CHEESE

Rebecca Prep: 10 min | Cook: 35 mins | Additional: 10 min | Total: 55 min | Servings: 8 | Yield: 8 servings This looks a little bit too much but I promise this mac and cheese is way better than it… Main Dish Recipes SPICY JALAPENO-BACON MAC AND CHEESE European Print This
Serves: 8 Prep Time: 10 mins Cooking Time: 45 mins 45 mins
Nutrition facts: 745.6 calories 20 grams fat
Rating: 5.0/5
( 1 voted )

Ingredients

  • 1 16oz package elbow macaroni
  • 1 16oz package bacon, cut into bite-size pieces
  • 10 eaches jalapeno peppers, seeded and diced
  • 2 tablespoons chile paste, or to taste
  • 1 pinch salt and ground black pepper
  • 4 tablespoons all-purpose flour
  • 1 tablespoon minced garlic
  • 4 cups whole milk
  • 16oz shredded extra-sharp Cheddar cheese
  • 8oz shredded Parmesan cheese

Instructions

Step 1: Bring to a boil a large, lightly salted pot of water. When boiling, place the elbow macaroni and cook for about 8 minutes until tender yet firm. Make sure to stir occasionally. Then, drain the macaroni and set aside.

Step 2: In a large skillet, cook the bacon, turning occasionally over medium-high heat for about 5 minutes until nearly crispy. Stir in the jalapenos and fry for another 5 minutes until the soft and the bacon is crispy. Drain the fats but leave at least 4 tablespoons of the bacon fat in the pan.

Step 3: Add the chile paste into the pan. Fry for a minute before adding salt and pepper to taste. Stir in the flour and cook for a minute more. Add in the garlic and stir for another minute. Then, pour in the milk and cook for 5 minutes over medium heat while continuously whisking. Take the pan out of the heat and allow the mixture to cool for at least 10 minutes to block the cheese from separating.

Step 4: Stir in the cheddar cheese and Parmesan cheese until melted before adding the drained pasta. Stir to coat.

Step 5: Serve and enjoy!

August 25, 2020 0 comment
0 FacebookTwitterPinterestEmail
Main Dish Recipes

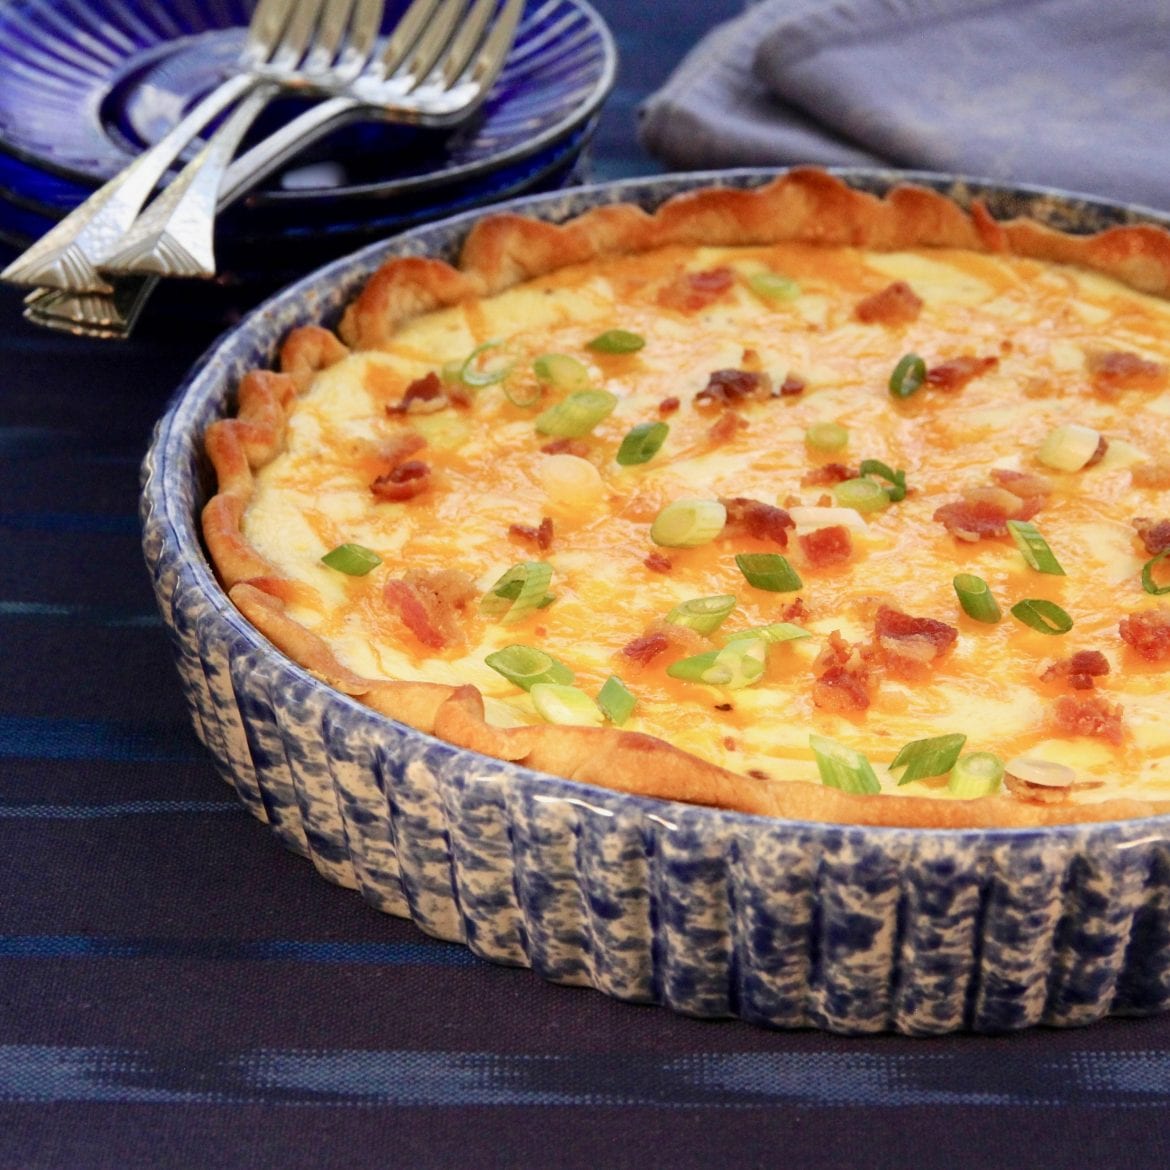
BACON, CHEESE, AND CARAMELIZED ONION QUICHE

by Rebecca August 25, 2020
written by Rebecca

Prep: 20 min | Cook: 1 hr 45 mins | Additional: 20 min | Total: 2 hrs 25 min | Servings: 8 | Yield: 1 9-inch quiche

Oh, that gorgeously looking quiche will fill you with delicious caramelized onions with your all-time favorite bacon, gooey cheese, and egg in a crisp pastry base. I will excitedly wake up to this every day. This is the definition of the perfect meal of the day!

INGREDIENTS

4 slices bacon

1 9-inches unbaked pie crust

¼ cup butter

1 medium onion, finely chopped

1 egg, beaten

2 eaches eggs

1 ¼ cups sour cream

¼ cup cream cheese softened

¼ teaspoon salt

⅛ teaspoon ground black pepper

1 cup shredded Cheddar cheese

HOW TO MAKE BACON, CHEESE, AND CARAMELIZED ONION QUICHE

Step 1: Prepare the oven. Preheat it to 350 degrees F or 175 degrees C.

Step 2: In a large skillet, fry the bacon, turning occasionally over medium-high heat for about 10 minutes until crispy. Then, remove from the skillet and place the bacon slices on paper towels. Allow them to cool for at least 10 minutes and crumble. Set aside.

Step 3: Use a lightly floured rolling pin to roll out the pastry crust into a circle. With the crust, line a 9-inch pie pan, then, using a fork, prick holes into the dough.

Step 4: Place inside the preheated oven and bake the crust on the middle rack for about 15 minutes.

Step 5: Once done, remove the pastry from the oven and brush with a beaten egg. Place the crust back into the oven and bake for 5 minutes more.

Step 6: In a pan, melt the butter over medium heat. Sautee the onion and cook for about 5 minutes until soft and translucent. Adjust the heat to low and remain cooking and stirring the onion until very tender and dark brown. This takes about 40 minutes more.

Step 7: Whisk two eggs using a fork in a bowl. Add in the sour cream and cream cheese. Beat with an electric mixer until thoroughly combined. Add a dash of salt and pepper and beat again.

Step 8: Transfer the caramelized onions with the rest of the butter onto pastry crust. Sprinkle half of the cheddar cheese over and evenly place the crumbled bacon on top. Then, pour the egg mixture on top of the bacon and sprinkle the rest of the cheddar cheese.

Step 9: Place in the oven and bake the quiche for about 30 minutes or until golden and fluffy.

Step 10: Once done, remove from the oven and allow the quiche to cool for at least 10 minutes before serving.

Nutrition Facts:

Per Serving: 389.8 calories; 123.5 mg cholesterol; 505.6 mg sodium; 11.3 g protein; 13.7 g carbohydrates

BACON, CHEESE, AND CARAMELIZED ONION QUICHE

Rebecca Prep: 20 min | Cook: 1 hr 45 mins | Additional: 20 min | Total: 2 hrs 25 min | Servings: 8 | Yield: 1 9-inch quiche Oh, that gorgeously looking quiche will fill you with delicious caramelized onions with your… Main Dish Recipes BACON, CHEESE, AND CARAMELIZED ONION QUICHE European Print This
Serves: 8 Prep Time: 20 mins Cooking Time: 1 hr 45 mins 1 hr 45 mins
Nutrition facts: 389.8 calories 20 grams fat
Rating: 5.0/5
( 1 voted )

Ingredients

  • 4 slices bacon
  • 1 9-inches unbaked pie crust
  • ¼ cup butter
  • 1 medium onion, finely chopped
  • 1 egg, beaten
  • 2 eaches eggs
  • 1 ¼ cups sour cream
  • ¼ cup cream cheese softened
  • ¼ teaspoon salt
  • ⅛ teaspoon ground black pepper
  • 1 cup shredded Cheddar cheese

Instructions

Step 1: Prepare the oven. Preheat it to 350 degrees F or 175 degrees C.

Step 2: In a large skillet, fry the bacon, turning occasionally over medium-high heat for about 10 minutes until crispy. Then, remove from the skillet and place the bacon slices on paper towels. Allow them to cool for at least 10 minutes and crumble. Set aside.

Step 3: Use a lightly floured rolling pin to roll out the pastry crust into a circle. With the crust, line a 9-inch pie pan, then, using a fork, prick holes into the dough.

Step 4: Place inside the preheated oven and bake the crust on the middle rack for about 15 minutes.

Step 5: Once done, remove the pastry from the oven and brush with a beaten egg. Place the crust back into the oven and bake for 5 minutes more.

Step 6: In a pan, melt the butter over medium heat. Sautee the onion and cook for about 5 minutes until soft and translucent. Adjust the heat to low and remain cooking and stirring the onion until very tender and dark brown. This takes about 40 minutes more.

Step 7: Whisk two eggs using a fork in a bowl. Add in the sour cream and cream cheese. Beat with an electric mixer until thoroughly combined. Add a dash of salt and pepper and beat again.

Step 8: Transfer the caramelized onions with the rest of the butter onto pastry crust. Sprinkle half of the cheddar cheese over and evenly place the crumbled bacon on top. Then, pour the egg mixture on top of the bacon and sprinkle the rest of the cheddar cheese.

Step 9: Place in the oven and bake the quiche for about 30 minutes or until golden and fluffy.

Step 10: Once done, remove from the oven and allow the quiche to cool for at least 10 minutes before serving.

August 25, 2020 0 comment
0 FacebookTwitterPinterestEmail
Main Dish Recipes

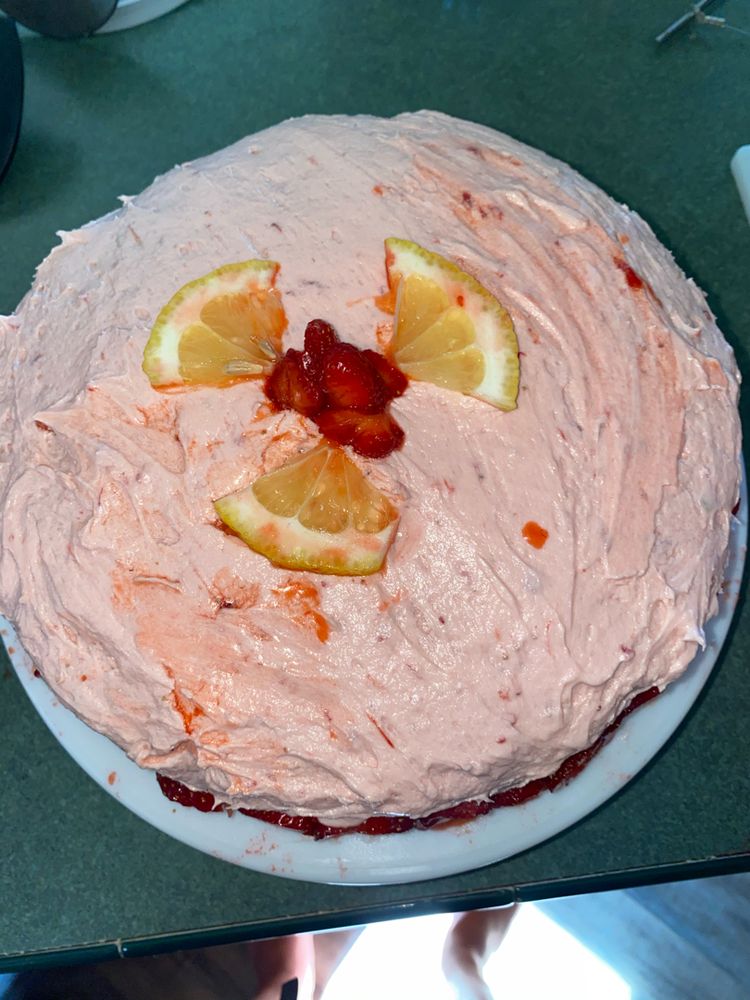
STRAWBERRY-LEMONADE CAKE

by Rebecca August 24, 2020
written by Rebecca

Prep: 45 min | Total: 4 hrs 30 min | Yield: 12 Servings

Anyone special in your life having their birthday soon? What better way to surprise them than to make them a special cake for their special day? This recipe will surely make your loved one very happy on his or her birthday! I have listed all the ingredients and steps. All you need to do is to follow them and they will guide you to perfection! The taste of strawberry is so refreshing in this particular cake recipe. I hope you all like it. Enjoy!

INGREDIENTS

What you need for the Cake:

1 cup butter, softened

4 large eggs, separated

2 cups granulated sugar

3 cups cake flour

1 tablespoon baking powder

1/8 teaspoon table salt

1 cup milk

1 tablespoon lemon zest

1 tablespoon fresh lemon juice

Shortening

What you need for the  Strawberry-lemonade jam:

2 1/2 cups coarsely chopped fresh strawberries

3/4 cup sugar

1/4 cup fresh lemon juice

3 tablespoons cornstarch

What you need for the Strawberry Frosting:

1 8-oz package cream cheese softened

2/3 cup sugar, divided

2/3 cup chopped fresh strawberries

1 drop pink food coloring gel (optional)

1 1/2 cups heavy cream

3 tablespoons fresh lemon juice

HOW TO MAKE STRAWBERRY-LEMONADE CAKE

Prepare cake:

Step 1: Ready the oven and preheat to 350 degrees C.

Step 2: Place the butter in a mixing bowl and beat using an electric mixer at medium speed until it becomes creamy.

Step 3: Add a little amount of sugar at a time and beat until the texture becomes fluffy.

Step 4: Add in the egg yolks gradually and beat every added yolk.

Step 5: In another mixing bowl, add in the flour and the dry ingredients then transfer into the butter mixture with the milk alternately.

Step 6: Beat at low speed until well mixed the adding the juice and zest into the mixture.

Step 7: In another mixing bowl, add in the egg whites and beat until it forms stiff peaks at high speed.

Step 8: Transfer about 1/3 of the beaten egg whites into the batter and stir then add in the rest of the egg whites.

Step 9: Grease and flour four 9-inch round cake pans.

Step 10: Spoon the mixture into the prepared round cake pans.

Step 11: Place inside the preheated oven and bake for 16 to 20 minutes or until the inserted toothpick in the middle of the cake comes out clean.

Step 12: Remove from the oven let it sit on a wire rack to cool for 10 minutes.

Step 13: Remove from the pans and allow the cakes to cool at room temperature on the wire rack.

For the Strawberry-Lemonade Jam:

Step 1: Place the strawberries in the blender and process until it becomes smooth.

Step 2: Squeeze into a wire-mesh strainer on a saucepan. Remove the pulp then add in the sugar. Stir until well blended.

Step 3: Add in cornstarch and lemon juice. Add a little amount of the strawberry mixture at a time then whisk.

Step 4: Place on the stove and allow it to boil on medium heat then simmer for 1 minute while whisking.

Step 5: Remove from the heat and wrap with plastic and place inside the fridge to chill for at least 2 hours.

To make the frosting: 

Step 1: In a mixing bowl, add the cream cheese and 1/3 cup of sugar and beat using an electric mixer until the texture becomes smooth.

Step 2: Add in the strawberries and beat until well mixed.

Step 3: Mix juice and cream at a medium speed until it becomes foamy and add in the rest of the sugar then beat again.

Step 4: Add in about 1/2 of the cream mixture into the cheese mixture. Use right away.

For Cake Layer:

Step 1: Place 1 cake later on a serving plate and spread 1/2 cup of the Strawberry-Lemonade Jam on top. Leave a half-inch border on the sides.

Step 2: Add 1 cup of the Strawberry Frosting into a zip-top bag. Pinch a tiny hole and spread the frosting around the cake. Spread the 2nd and 3rd layer on top of the cake. Repeat this method until all the layers have been filled.

Step 4: Place the final layer over and spread the rest of the Strawbery Frosting on the sides and top of the cake.

Step 5: Serve and enjoy!

Nutrition facts: 200 calories | 20 grams fat

STRAWBERRY-LEMONADE CAKE

Rebecca Prep: 45 min | Total: 4 hrs 30 min | Yield: 12 Servings Anyone special in your life having their birthday soon? What better way to surprise them than to make them a special cake… Main Dish Recipes STRAWBERRY-LEMONADE CAKE European Print This
Serves: 12 Prep Time: 45 mins
Nutrition facts: 200 calories 20 fat
Rating: 5.0/5
( 1 voted )

Ingredients

  • What you need for the Cake:
  • 1 cup butter, softened
  • 4 large eggs, separated
  • 2 cups granulated sugar
  • 3 cups cake flour
  • 1 tablespoon baking powder
  • 1/8 teaspoon table salt
  • 1 cup milk
  • 1 tablespoon lemon zest
  • 1 tablespoon fresh lemon juice
  • Shortening
  • What you need for the  Strawberry-lemonade jam:
  • 2 1/2 cups coarsely chopped fresh strawberries
  • 3/4 cup sugar
  • 1/4 cup fresh lemon juice
  • 3 tablespoons cornstarch
  • What you need for the Strawberry Frosting:
  • 1 8-oz package cream cheese softened
  • 2/3 cup sugar, divided
  • 2/3 cup chopped fresh strawberries
  • 1 drop pink food coloring gel (optional)
  • 1 1/2 cups heavy cream
  • 3 tablespoons fresh lemon juice

Instructions

Prepare cake:

Step 1: Ready the oven and preheat to 350 degrees C.

Step 2: Place the butter in a mixing bowl and beat using an electric mixer at medium speed until it becomes creamy.

Step 3: Add a little amount of sugar at a time and beat until the texture becomes fluffy.

Step 4: Add in the egg yolks gradually and beat every added yolk.

Step 5: In another mixing bowl, add in the flour and the dry ingredients then transfer into the butter mixture with the milk alternately.

Step 6: Beat at low speed until well mixed the adding the juice and zest into the mixture.

Step 7: In another mixing bowl, add in the egg whites and beat until it forms stiff peaks at high speed.

Step 8: Transfer about 1/3 of the beaten egg whites into the batter and stir then add in the rest of the egg whites.

Step 9: Grease and flour four 9-inch round cake pans.

Step 10: Spoon the mixture into the prepared round cake pans.

Step 11: Place inside the preheated oven and bake for 16 to 20 minutes or until the inserted toothpick in the middle of the cake comes out clean.

Step 12: Remove from the oven let it sit on a wire rack to cool for 10 minutes.

Step 13: Remove from the pans and allow the cakes to cool at room temperature on the wire rack.

For the Strawberry-Lemonade Jam:

Step 1: Place the strawberries in the blender and process until it becomes smooth.

Step 2: Squeeze into a wire-mesh strainer on a saucepan. Remove the pulp then add in the sugar. Stir until well blended.

Step 3: Add in cornstarch and lemon juice. Add a little amount of the strawberry mixture at a time then whisk.

Step 4: Place on the stove and allow it to boil on medium heat then simmer for 1 minute while whisking.

Step 5: Remove from the heat and wrap with plastic and place inside the fridge to chill for at least 2 hours.

To make the frosting: 

Step 1: In a mixing bowl, add the cream cheese and 1/3 cup of sugar and beat using an electric mixer until the texture becomes smooth.

Step 2: Add in the strawberries and beat until well mixed.

Step 3: Mix juice and cream at a medium speed until it becomes foamy and add in the rest of the sugar then beat again.

Step 4: Add in about 1/2 of the cream mixture into the cheese mixture. Use right away.

For Cake Layer:

Step 1: Place 1 cake later on a serving plate and spread 1/2 cup of the Strawberry-Lemonade Jam on top. Leave a half-inch border on the sides.

Step 2: Add 1 cup of the Strawberry Frosting into a zip-top bag. Pinch a tiny hole and spread the frosting around the cake. Spread the 2nd and 3rd layer on top of the cake. Repeat this method until all the layers have been filled.

Step 4: Place the final layer over and spread the rest of the Strawbery Frosting on the sides and top of the cake.

Step 5: Serve and enjoy!

August 24, 2020 0 comment
0 FacebookTwitterPinterestEmail
Main Dish Recipes

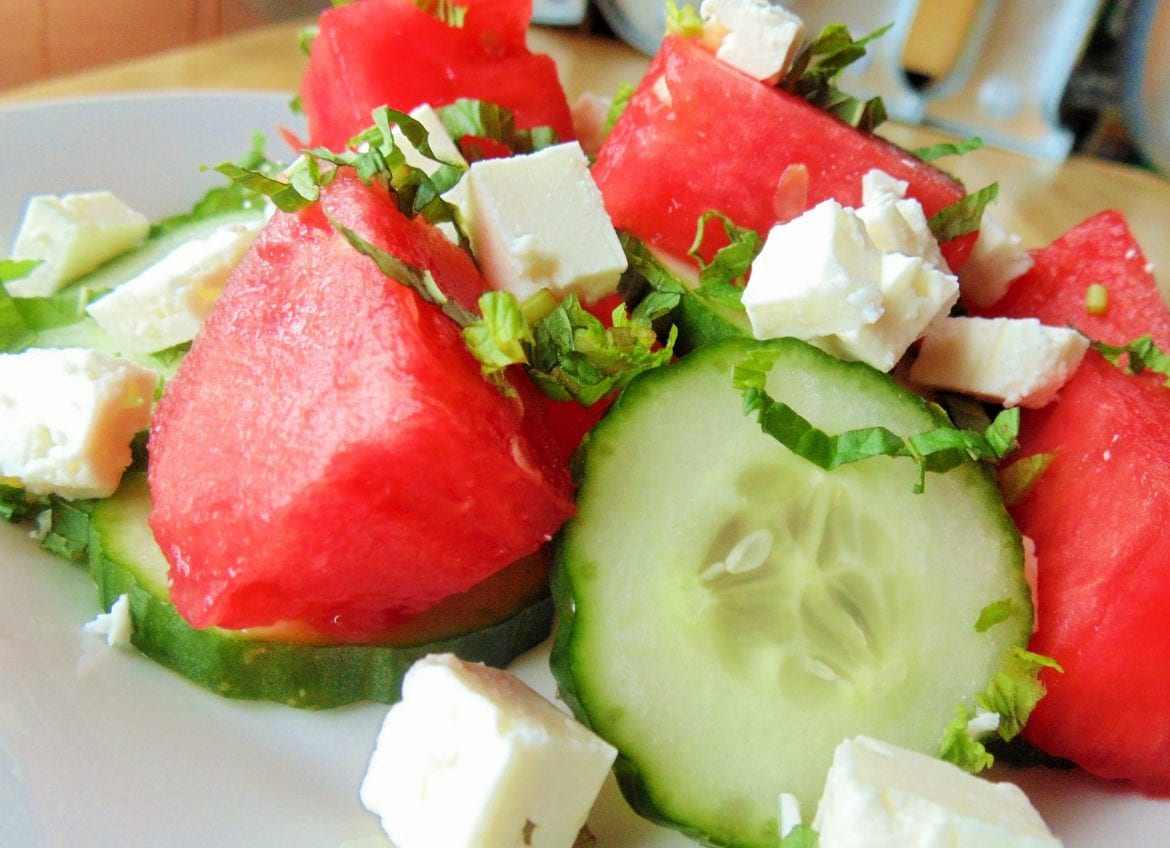
WATERMELON CUCUMBER SALAD WITH FETA

by Rebecca August 24, 2020
written by Rebecca

Prep time: 20 min | Total: 20 min | Serving: 8 | Yield: 8 servings

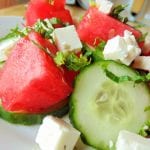
I don’t know about you but I am a salad fan. They are light, healthy, and super versatile. You can put just about anything, you can even be creative. There are no rules, as long as the result is edible and tastes good. Believe me, I have been experimenting with varieties of salad and yes I failed many times but most of the time I end up having the most delicious salad! This is not my recipe but I love this Watermelon Cucumber Salad with Feta with all my heart. Every bite is like a never-ending burst of freshness. This easy and quick to make salad is very convenient, budget-friendly, and most loved by many. You can find almost all of the mentioned ingredients in your pantry, all you got to do is toss them all together and voila! The best, freshest, most delicious, and light salad you will ever have is yours to enjoy.

INGREDIENTS

large seedless watermelon cut into 1-inch cubes

2 eaches cucumbers, thinly sliced

12 leaves fresh mint, thinly sliced

¼ cup olive oil

2 tablespoons apple cider vinegar

1 pinch coarse salt and ground black pepper

1 cup crumbled feta cheese

HOW TO MAKE WATERMELON CUCUMBER SALAD WITH FETA

Step 1: Add in watermelon, mint, and cucumbers in a large mixing bowl.

Step 2: In a small mixing bowl, add in the vinegar, olive oil, salt, and pepper. Whisk until well mixed.

Step 3: Drizzle over the salad and toss until all the vegetables are completely coated.

Step 4: Add in the feta cheese and carefully toss until well mixed.

Step 5: Serve and enjoy!

NOTE: 

I only use feta blocks because it tastes better than the pre-crumbled feta.

Make sure to remove the seeds of the cucumber slicing. Any type of cucumber works perfectly with this recipe of salad.

Nutrition Facts:

Per Serving: 447.5 calories; 16.7 mg cholesterol; 240.2 mg sodium; 9.5 g protein; 85.7 g carbohydrates

WATERMELON CUCUMBER SALAD WITH FETA

Rebecca Prep time: 20 min | Total: 20 min | Serving: 8 | Yield: 8 servings I don’t know about you but I am a salad fan. They are light, healthy, and super versatile. You can put just… Main Dish Recipes WATERMELON CUCUMBER SALAD WITH FETA European Print This
Serves: 8 Prep Time: 20 mins
Nutrition facts: 447.5 calories 20 grams fat
Rating: 5.0/5
( 1 voted )

Ingredients

  • large seedless watermelon cut into 1-inch cubes
  • 2 eaches cucumbers, thinly sliced
  • 12 leaves fresh mint, thinly sliced
  • ¼ cup olive oil
  • 2 tablespoons apple cider vinegar
  • 1 pinch coarse salt and ground black pepper
  • 1 cup crumbled feta cheese

Instructions

Step 1: Add in watermelon, mint, and cucumbers in a large mixing bowl.

Step 2: In a small mixing bowl, add in the vinegar, olive oil, salt, and pepper. Whisk until well mixed.

Step 3: Drizzle over the salad and toss until all the vegetables are completely coated.

Step 4: Add in the feta cheese and carefully toss until well mixed.

Step 5: Serve and enjoy!

NOTE: 

I only use feta blocks because it tastes better than the pre-crumbled feta.

Make sure to remove the seeds of the cucumber slicing. Any type of cucumber works perfectly with this recipe of salad.

August 24, 2020 0 comment
0 FacebookTwitterPinterestEmail
Main Dish Recipes

RANCH, BACON, AND PARMESAN PASTA SALAD

by Rebecca August 24, 2020
written by Rebecca

Prep: 15 min | Additional: 2 hrs and 30 min | Total: 2 hrs 45 min | Servings: 6 | Yield: 6 servings

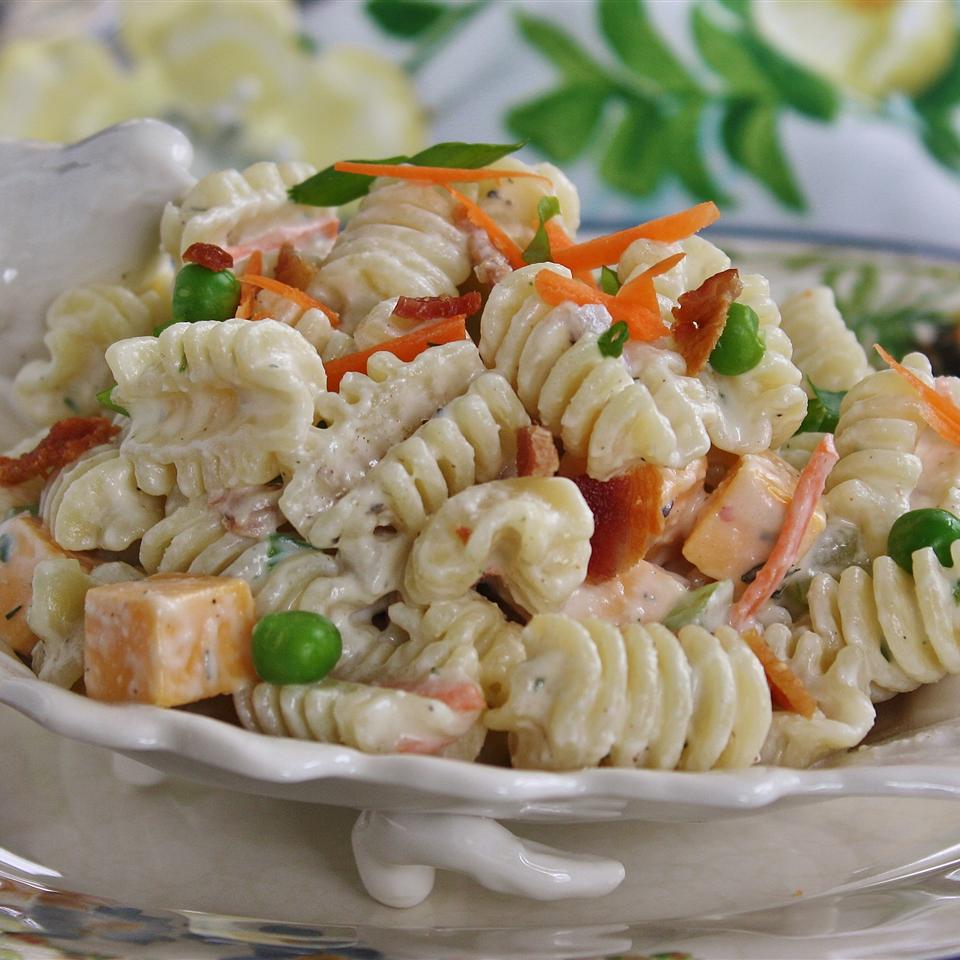
The presentation got me. It is enticing, inviting me to dig straight in! The pop of colors is so refreshing to look at and that creamy coat is mouth-watering. This simple, quick-and-easy Pasta Salad is insanely delicious and oh so satisfying!

INGREDIENTS

1 16-oz package farfalle (bow-tie) pasta

1 cup prepared ranch dressing

6 slices bacon

½ cup shredded Parmesan cheese

1 carrot, peeled and diced

1 stalk celery, diced

1 red onion, diced

HOW TO MAKE RANCH, BACON, AND PARMESAN PASTA SALAD

Step 1: Fill a large pot with salted water. Bring to a boil over high heat. When the water is boiling, stir in the bow tie pasta. Allow to boil to cook the pasta, uncovered, for about 12 minutes until cooked through yet still firm to the bite. Make sure to occasionally stir. Drain in a colander set and transfer the pasta into a bowl. Place in the fridge for at least 30 minutes to cool.

Step 2: While waiting for the pasta to cool, cook the bacon in a large deep skillet over medium-high heat for about 10 minutes until evenly browned. Making sure to occasionally turn the bacon. Once done, remove from the skillet and transfer the cooked bacon on a paper towel-lined plate. Let the bacon cool before chopping.

Step 3: Add the ranch dressing, bacon, Parmesan cheese, carrot, celery, and red onion in a large salad bowl. Stir to combine. Then, lightly stir in the cooled pasta to coat and again place in the fridge for at least 2 hours for the flavors to blend before serving.

NOTES:

For this recipe, you can use any type of noodle. But I stick to traditional farfalle (bow-tie) pasta as it reminds me of my Grandmother’s pasta salad.

You can use pasta instead of lettuce or cabbage for a lighter summer salad with crunch.

Nutrition Facts:

Per Serving: 583.8 calories; 26.8 mg cholesterol; 712.7 mg sodium; 17.7 g protein; 62.8 g carbohydrates

RANCH, BACON, AND PARMESAN PASTA SALAD

Rebecca Prep: 15 min | Additional: 2 hrs and 30 min | Total: 2 hrs 45 min | Servings: 6 | Yield: 6 servings The presentation got me. It is enticing, inviting me to dig straight in! The pop of… Main Dish Recipes RANCH, BACON, AND PARMESAN PASTA SALAD European Print This
Serves: 6 Prep Time: 2 hrs 45 mins
Nutrition facts: 583.8 calories 20 grams fat
Rating: 4.5/5
( 2 voted )

Ingredients

  • 1 16-oz package farfalle (bow-tie) pasta
  • 1 cup prepared ranch dressing
  • 6 slices bacon
  • ½ cup shredded Parmesan cheese
  • 1 carrot, peeled and diced
  • 1 stalk celery, diced
  • 1 red onion, diced

Instructions

Step 1: Fill a large pot with salted water. Bring to a boil over high heat. When the water is boiling, stir in the bow tie pasta. Allow to boil to cook the pasta, uncovered, for about 12 minutes until cooked through yet still firm to the bite. Make sure to occasionally stir. Drain in a colander set and transfer the pasta into a bowl. Place in the fridge for at least 30 minutes to cool.

Step 2: While waiting for the pasta to cool, cook the bacon in a large deep skillet over medium-high heat for about 10 minutes until evenly browned. Making sure to occasionally turn the bacon. Once done, remove from the skillet and transfer the cooked bacon on a paper towel-lined plate. Let the bacon cool before chopping.

Step 3: Add the ranch dressing, bacon, Parmesan cheese, carrot, celery, and red onion in a large salad bowl. Stir to combine. Then, lightly stir in the cooled pasta to coat and again place in the fridge for at least 2 hours for the flavors to blend before serving.

NOTES:

For this recipe, you can use any type of noodle. But I stick to traditional farfalle (bow-tie) pasta as it reminds me of my Grandmother's pasta salad.

You can use pasta instead of lettuce or cabbage for a lighter summer salad with crunch.

August 24, 2020 0 comment
0 FacebookTwitterPinterestEmail
Main Dish Recipes

GRANDMA’S EGG-DIPPED ITALIAN GRILLED CHEESE SANDWICH

by Rebecca August 24, 2020
written by Rebecca

Prep: 10 min | Cook: 15 mins | Total: 25 min | Serving: 6 | Yield: 6 sandwiches

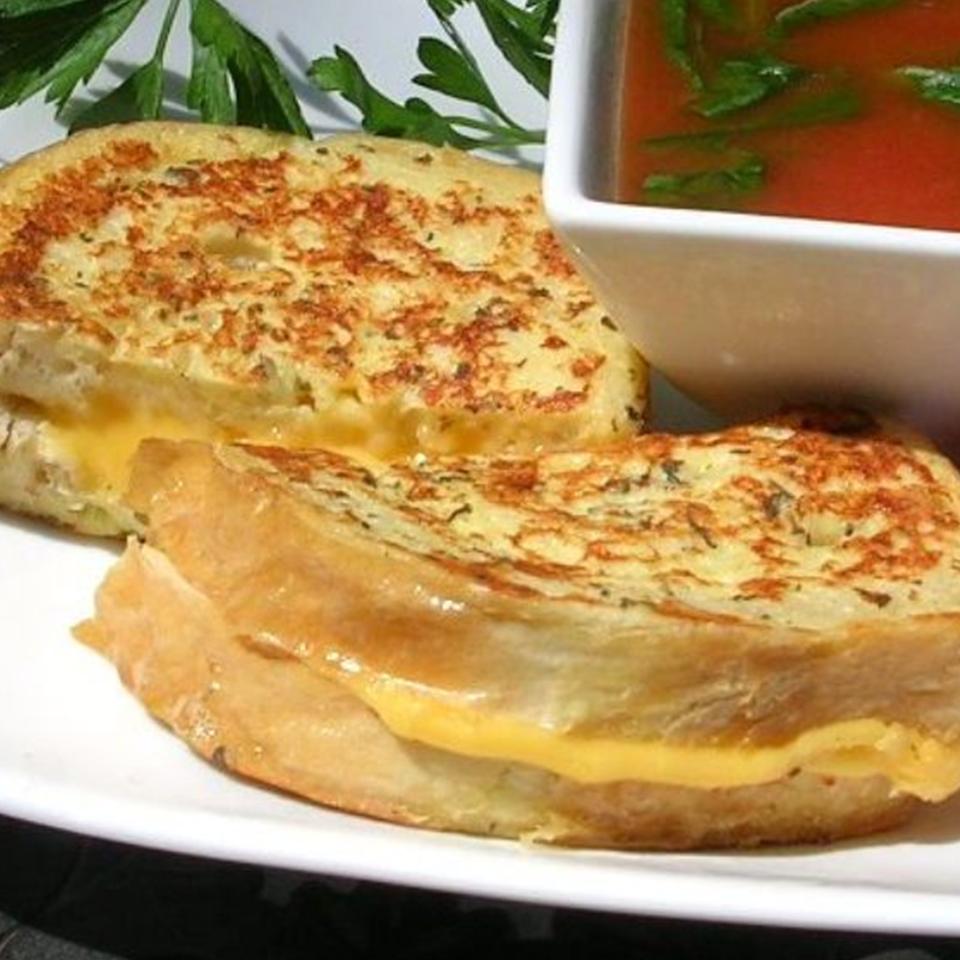
I have been making grilled cheese sandwich ever since I can remember. When I was still at the University, grilled cheese was my everyday thing. Aside from it was the simplest and quickest I can make and grab, it’s filling and justifiable delicious. I adapted that until now. But hey! My grilled cheese is not any more “just” delicious, they are now DEVILICIOUS! And lately, I am obsessing on this egg-dipped Italian grilled cheese sandwich. It’s super yummy, with melty cheese dipped in egg mixture which makes this “the” perfect grab-and-go breakfast for my entire family! A great twist to the good old grilled cheese sandwich I kept on making those days. These pan-fried sandwiches have that perfect golden brown color and a nice crunch on every bite. This is not only my go-to breakfast but it is perfect for lunch or dinner as well. Serve this beside a homemade pizza sauce or along your favorite pasta dish.

INGREDIENTS

3 eggs

2 tablespoons milk

2 teaspoons garlic powder

2 teaspoons Italian seasoning

2 tablespoons grated Parmesan cheese

6 slices American cheese

12 slices sandwich bread

HOW TO MAKE GRANDMA’S EGG-DIPPED ITALIAN GRILLED CHEESE SANDWICH

Step 1: Add the eggs, milk, garlic powder, Italian seasoning, and Parmesan cheese in a bowl and whisk.

Step 2: Between two pieces of bread, place each American slice to assemble six sandwiches.

Step 3: Dip both sides of each sandwich into the egg mixture.

Step 4: Heat over medium heat a non-stick frying pan.

Step 5: Place the dipped sandwiches into the hot frying pan. Cook for about 3 minutes on each side until golden brown and the cheese has melted.

NOTE:

To decide which bread to use, I use whatever I have. Some say to use fancy, crusty bread to make a nice grilled cheese but I use whatever is available.

Nutrition Facts:

Per Serving: 289.4 calories; 121.5 mg cholesterol; 825.5 mg sodium; 14.3 g protein; 27.3 g carbohydrates

GRANDMA’S EGG-DIPPED ITALIAN GRILLED CHEESE SANDWICH

Rebecca Prep: 10 min | Cook: 15 mins | Total: 25 min | Serving: 6 | Yield: 6 sandwiches I have been making grilled cheese sandwich ever since I can remember. When I was still at the University, grilled cheese… Main Dish Recipes GRANDMA’S EGG-DIPPED ITALIAN GRILLED CHEESE SANDWICH European Print This
Serves: 6 Prep Time: 10 mins Cooking Time: 15 mins 15 mins
Nutrition facts: 289.4 calories 20 grams fat
Rating: 5.0/5
( 1 voted )

Ingredients

  • 3 eggs
  • 2 tablespoons milk
  • 2 teaspoons garlic powder
  • 2 teaspoons Italian seasoning
  • 2 tablespoons grated Parmesan cheese
  • 6 slices American cheese
  • 12 slices sandwich bread

Instructions

Step 1: Add the eggs, milk, garlic powder, Italian seasoning, and Parmesan cheese in a bowl and whisk.

Step 2: Between two pieces of bread, place each American slice to assemble six sandwiches.

Step 3: Dip both sides of each sandwich into the egg mixture.

Step 4: Heat over medium heat a non-stick frying pan.

Step 5: Place the dipped sandwiches into the hot frying pan. Cook for about 3 minutes on each side until golden brown and the cheese has melted.

NOTE:

To decide which bread to use, I use whatever I have. Some say to use fancy, crusty bread to make a nice grilled cheese but I use whatever is available.

August 24, 2020 0 comment
0 FacebookTwitterPinterestEmail
Main Dish Recipes

CHEESECAKE-STUFFED STRAWBERRIES

by Rebecca August 24, 2020
written by Rebecca

Prep time: 20 min | Total: 20 mins | Servings: 20 | Yield: 1-pint strawberries

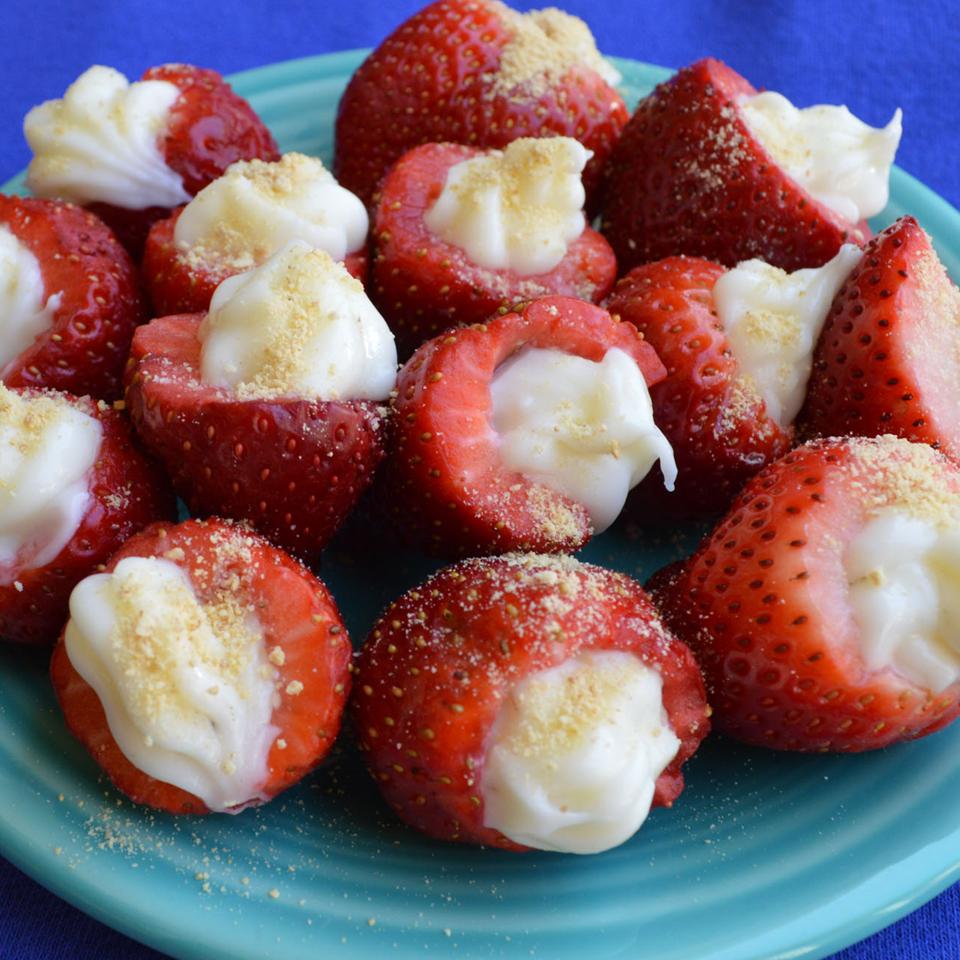
A pretty simple, not fussy dessert that is made with fresh strawberries and filled with cream cheese filling and a dash of crushed graham crackers on top. Indulgent simple dessert that you can make in a heartbeat. Enjoy these cream cheese filled fresh strawberries any time, any day.

The perfect balance of tanginess from the cream cheese and the sweetness of the strawberries with a bit of crunch from the graham cracker crumb is what I love most about this dessert. A pop of color to finish off your meal. Go gaga with this heavenly dessert. Make this tonight and watch the plate get empty in a breeze! I am sure everyone will love these cheesecake-stuffed strawberries. Don’t forget to double the recipe because it is so freaking good, you’ll be fighting for that last piece. This is a must-try and to keep.

INGREDIENTS

1 8-oz package cream cheese softened

½ cup confectioners’ sugar

½ teaspoon vanilla extract

1 pint fresh strawberries, hulled and cored

3 graham crackers, crushed, or as needed

HOW TO MAKE CHEESECAKE-STUFFED STRAWBERRIES

Step 1: Add the cream cheese, confectioners’ sugar, and vanilla extract in a bowl. Beat until smooth.

Step 2: Spoon this into your piping bag. If using a resealable bag, snip the corner.

Step 3: Fill with cream cheese mixture the holes of the cored strawberries.

Step 4: Then, dip in crushed graham crackers the filled side of the strawberries to coat.

NOTES:

You can melt about half a cup of chocolate chips in a double boiler and drizzle over the strawberries. This works great as a variation.

Use a Swerve Confectioners in place of confectioner’s sugar if you prefer a low-carb. Swerve Confectioners is zero-calories sweetener so it is perfect for a keto recipe.

Nutrition Facts:

Per Serving: 61.7 calories; 12.3 mg cholesterol; 39.7 mg sodium; 1 g protein; 5.6 g carbohydrates

CHEESECAKE-STUFFED STRAWBERRIES

Rebecca Prep time: 20 min | Total: 20 mins | Servings: 20 | Yield: 1-pint strawberries A pretty simple, not fussy dessert that is made with fresh strawberries and filled with cream cheese filling and a dash of… Main Dish Recipes CHEESECAKE-STUFFED STRAWBERRIES European Print This
Serves: 20 Prep Time: 20 mins
Nutrition facts: 61.7 calories 20 grams fat
Rating: 5.0/5
( 1 voted )

Ingredients

  • 1 8-oz package cream cheese softened
  • ½ cup confectioners' sugar
  • ½ teaspoon vanilla extract
  • 1 pint fresh strawberries, hulled and cored
  • 3 graham crackers, crushed, or as needed

Instructions

Step 1: Add the cream cheese, confectioners' sugar, and vanilla extract in a bowl. Beat until smooth.

Step 2: Spoon this into your piping bag. If using a resealable bag, snip the corner.

Step 3: Fill with cream cheese mixture the holes of the cored strawberries.

Step 4: Then, dip in crushed graham crackers the filled side of the strawberries to coat.

NOTES:

You can melt about half a cup of chocolate chips in a double boiler and drizzle over the strawberries. This works great as a variation.

Use a Swerve Confectioners in place of confectioner's sugar if you prefer a low-carb. Swerve Confectioners is zero-calories sweetener so it is perfect for a keto recipe.

August 24, 2020 0 comment
0 FacebookTwitterPinterestEmail
Newer Posts
Older Posts

Popular Posts

  • 1

    Crispy Crunchy Parmesan Potatoes

    March 21, 2020
  • 2

    CROCK POT SMOTHERED PORK CHOPS

    March 21, 2020
  • Facebook
  • Twitter

@2019 - All Right Reserved.


Back To Top