Cook it once
  • Home
  • Privacy Policy
  • Recipes
    • KETO
    • LC
    • WW
  • Tips
  • Contact
Cook it once
  • Home
  • Privacy Policy
  • Recipes
    • KETO
    • LC
    • WW
  • Tips
  • Contact
Category:

Main Dish Recipes

Main Dish Recipes

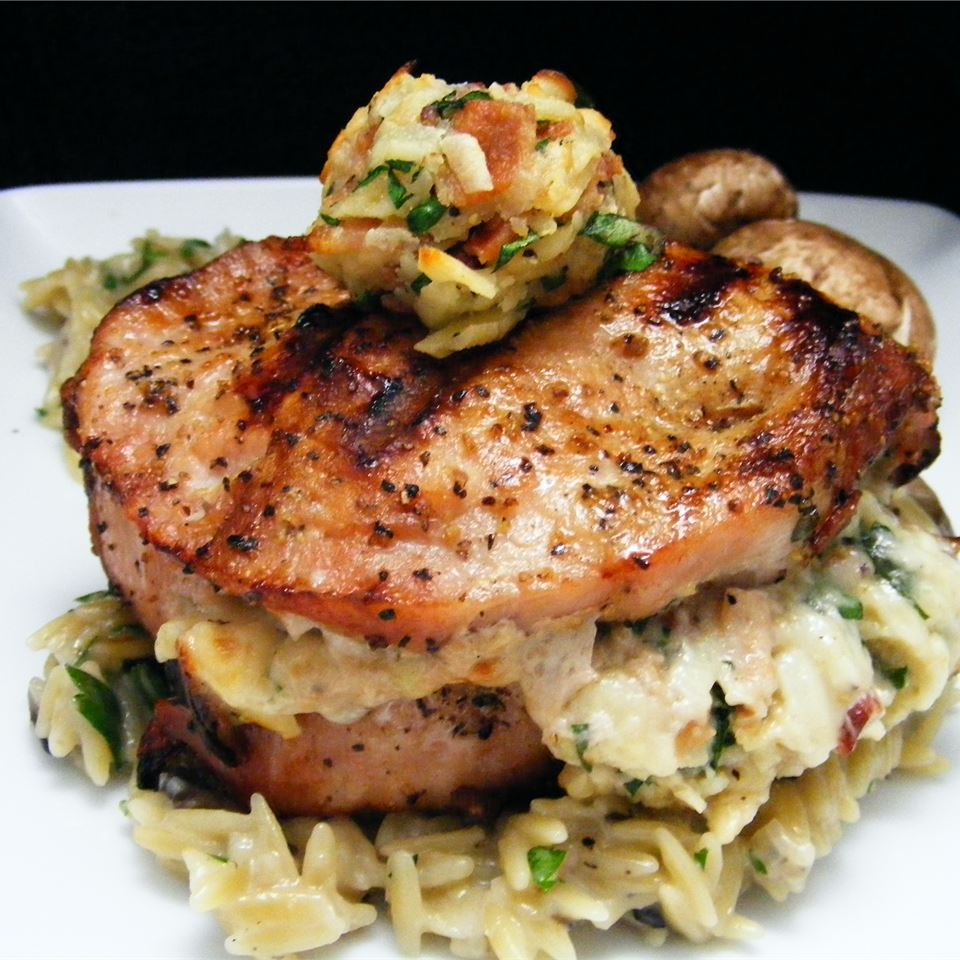
PORK CHOPS STUFFED WITH SMOKED GOUDA AND BACON

by Rebecca August 29, 2020
written by Rebecca

Prep: 15mins | Cook: 20mins | Total: 35mins | Servings: 2 | Yield: 2 servings

These loaded chops are overwhelming with exciting flavors, mouthwatering, and never fail to please the crowd. A pretty simple, not fussy recipe that you can make all the time! Yes, all the time because it’s freaking delicious you’ll crave for it more than you know! Stuffed with smoked cheese, bacon, and spices, these chops will never cut you short and that is guaranteed. And the secret? Make sure to not stuff the pork chops too much or the meat will be done before the cheese has a chance to melt. That is it! Easy peasy, right?

INGREDIENTS

2 ounces Gouda cheese, smoked [cloned from Cheese, gouda]

4 slices Pork, cured, bacon, raw

¼ cup Parsley, raw

⅛ teaspoon Spices, pepper, black

2 pork, fresh, loin, center rib (chops or roasts), bone-in, separable lean only, raw

1 teaspoon oil, olive, salad or cooking

¼ teaspoon salt, table

⅛ teaspoon spices, pepper, black

HOW TO MAKE PORK CHOPS STUFFED WITH SMOKED GOUDA AND BACON

Step 1: Prepare your outdoor grill. Heat it to medium heat.

Step 2: Combine the cheese, bacon, parsley, and 1/8 tsp of black pepper in a small bowl.

Step 3: On a cutting board, lay the chop flat. Held a sharp knife parallel to the board to cut a pocket into the pork, going all the way to the bone. Make sure to leave the sides intact.

Step 4: Stuff the pocket with the cheese mixture and close it using a wooden toothpick.

Step 5: Brush the meat with oil. Then, season with salt and black pepper.

Step 6: Oil lightly the grill grate. Place the stuffed chops onto the grill and cook for about 5 to 8 minutes over medium heat until the pork is done. Be sure to not overcook the chops.

Nutrition Facts:

Per Serving: 394.2 calories; 120.5 mg cholesterol; 1001 mg sodium; 36.9 g protein; 1.5 g carbohydrates

PORK CHOPS STUFFED WITH SMOKED GOUDA AND BACON

Rebecca Prep: 15mins | Cook: 20mins | Total: 35mins | Servings: 2 | Yield: 2 servings These loaded chops are overwhelming with exciting flavors, mouthwatering, and never fail to please the crowd. A pretty simple, not fussy recipe that you… Main Dish Recipes PORK CHOPS STUFFED WITH SMOKED GOUDA AND BACON European Print This
Serves: 2 Prep Time: 15 mins Cooking Time: 20 mins 20 mins
Nutrition facts: 394.2 calories 20 grams fat
Rating: 5.0/5
( 1 voted )

Ingredients

  • 2 ounces Gouda cheese, smoked [cloned from Cheese, gouda]
  • 4 slices Pork, cured, bacon, raw
  • ¼ cup Parsley, raw
  • ⅛ teaspoon Spices, pepper, black
  • 2 pork, fresh, loin, center rib (chops or roasts), bone-in, separable lean only, raw
  • 1 teaspoon oil, olive, salad or cooking
  • ¼ teaspoon salt, table
  • ⅛ teaspoon spices, pepper, black

Instructions

Step 1: Prepare your outdoor grill. Heat it to medium heat.

Step 2: Combine the cheese, bacon, parsley, and 1/8 tsp of black pepper in a small bowl.

Step 3: On a cutting board, lay the chop flat. Held a sharp knife parallel to the board to cut a pocket into the pork, going all the way to the bone. Make sure to leave the sides intact.

Step 4: Stuff the pocket with the cheese mixture and close it using a wooden toothpick.

Step 5: Brush the meat with oil. Then, season with salt and black pepper.

Step 6: Oil lightly the grill grate. Place the stuffed chops onto the grill and cook for about 5 to 8 minutes over medium heat until the pork is done. Be sure to not overcook the chops.
August 29, 2020 0 comment
0 FacebookTwitterPinterestEmail
Main Dish Recipes

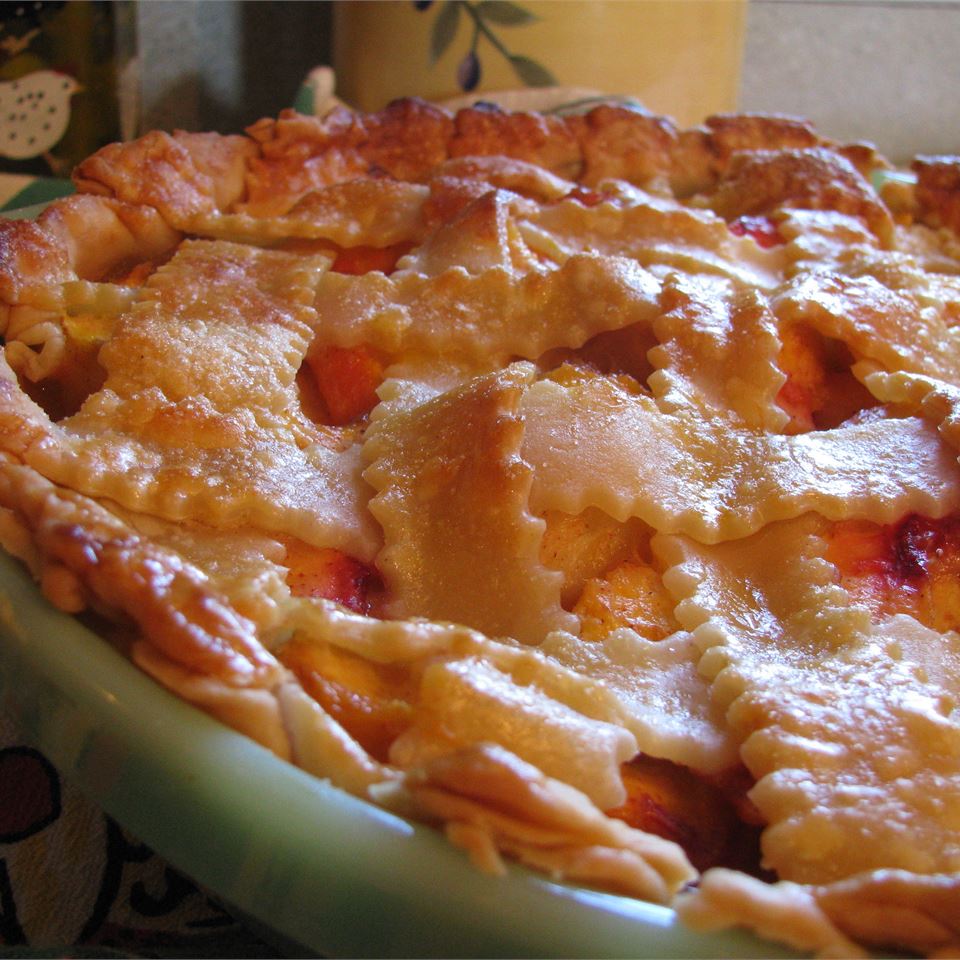
PEACH PIE THE OLD FASHIONED TWO CRUST WAY

by Rebecca August 29, 2020
written by Rebecca

Prep: 30mins | Cook: 45mins | Total: 1hr 15mins | Serving: 8 | Yield: 8 servings

This is an amazing two-crust pie that is filled with fresh peaches and simple ingredients. A heavenly old-fashioned Peach Pie that is pretty easy and quick to make. Always the star of the show and so good like how our Grandmother used to make.

INGREDIENTS

1 15oz package of pie crust, standard-type, prepared from recipe, unbaked

1 egg, whole, raw, fresh

5 cups Peaches, raw

2 tablespoons Lemon juice, raw

½ cup wheat flour, white, all-purpose, enriched, bleached

1 cup sugars, granulated

½ teaspoon spices, cinnamon, ground

¼ teaspoon spices, nutmeg, ground

¼ teaspoon salt, table

2 tablespoons butter, with salt

HOW TO MAKE PEACH PIE THE OLD FASHIONED TWO CRUST WAY

Step 1: Prepare the oven. Preheat it to 450 degrees F or 220 degrees C.

Step 2: In the bottom and sides of a 9-inch plate, line the pie crust and brush with beaten eggs. This will make sure that the dough will not get soggy.

Step 3: In a large bowl, add the sliced peaches and sprinkle with lemon juice. Gently mix.

Step 4: Add the flour, sugar, cinnamon, nutmeg, and salt in a separate bowl. Then, the pour the peaches over the sugar mixture and gently mix.

Step 5: Transfer the peaches mixture into the pie crust and dot the top with butter. Place the other pie crust on top, then, fold the edges down. Using tines or forked dipped in egg, flute, or press the edges of the crust to seal. Brush the top of the crust with the rest of the beaten egg. And slice several slits on top to vent steam.

Step 6: Place inside the preheated oven and bake for about 10 minutes. Then, adjust the heat to 350 degrees F or 175 degrees C and continue to bake for 30 to 35 minutes more until the crust is brown and the juice starts to bubble through the vents. And about halfway through baking, cover the strips with aluminum foil if the edges brown fast.

Step 7: Remove from the oven and let the pie cool before serving. This tastes way better when warm than hot.

Nutrition Facts:

Per Serving: 427.8 calories; 30.9 mg cholesterol; 358.3 mg sodium; 4.7 g protein; 58.6 g carbohydrates

PEACH PIE THE OLD FASHIONED TWO CRUST WAY

Rebecca Prep: 30mins | Cook: 45mins | Total: 1hr 15mins | Serving: 8 | Yield: 8 servings This is an amazing two-crust pie that is filled with fresh peaches and simple ingredients. A heavenly old-fashioned Peach Pie that is pretty… Main Dish Recipes PEACH PIE THE OLD FASHIONED TWO CRUST WAY European Print This
Serves: 8 Prep Time: 30 mins Cooking Time: 45 mins 45 mins
Nutrition facts: 427.8 calories 20 grams fat
Rating: 5.0/5
( 1 voted )

Ingredients

  • 1 15oz package of pie crust, standard-type, prepared from recipe, unbaked
  • 1 egg, whole, raw, fresh
  • 5 cups Peaches, raw
  • 2 tablespoons Lemon juice, raw
  • ½ cup wheat flour, white, all-purpose, enriched, bleached
  • 1 cup sugars, granulated
  • ½ teaspoon spices, cinnamon, ground
  • ¼ teaspoon spices, nutmeg, ground
  • ¼ teaspoon salt, table
  • 2 tablespoons butter, with salt

Instructions

Step 1: Prepare the oven. Preheat it to 450 degrees F or 220 degrees C.

Step 2: In the bottom and sides of a 9-inch plate, line the pie crust and brush with beaten eggs. This will make sure that the dough will not get soggy.

Step 3: In a large bowl, add the sliced peaches and sprinkle with lemon juice. Gently mix.

Step 4: Add the flour, sugar, cinnamon, nutmeg, and salt in a separate bowl. Then, the pour the peaches over the sugar mixture and gently mix.

Step 5: Transfer the peaches mixture into the pie crust and dot the top with butter. Place the other pie crust on top, then, fold the edges down. Using tines or forked dipped in egg, flute, or press the edges of the crust to seal. Brush the top of the crust with the rest of the beaten egg. And slice several slits on top to vent steam.

Step 6: Place inside the preheated oven and bake for about 10 minutes. Then, adjust the heat to 350 degrees F or 175 degrees C and continue to bake for 30 to 35 minutes more until the crust is brown and the juice starts to bubble through the vents. And about halfway through baking, cover the strips with aluminum foil if the edges brown fast.

Step 7: Remove from the oven and let the pie cool before serving. This tastes way better when warm than hot.

August 29, 2020 0 comment
0 FacebookTwitterPinterestEmail
Main Dish Recipes

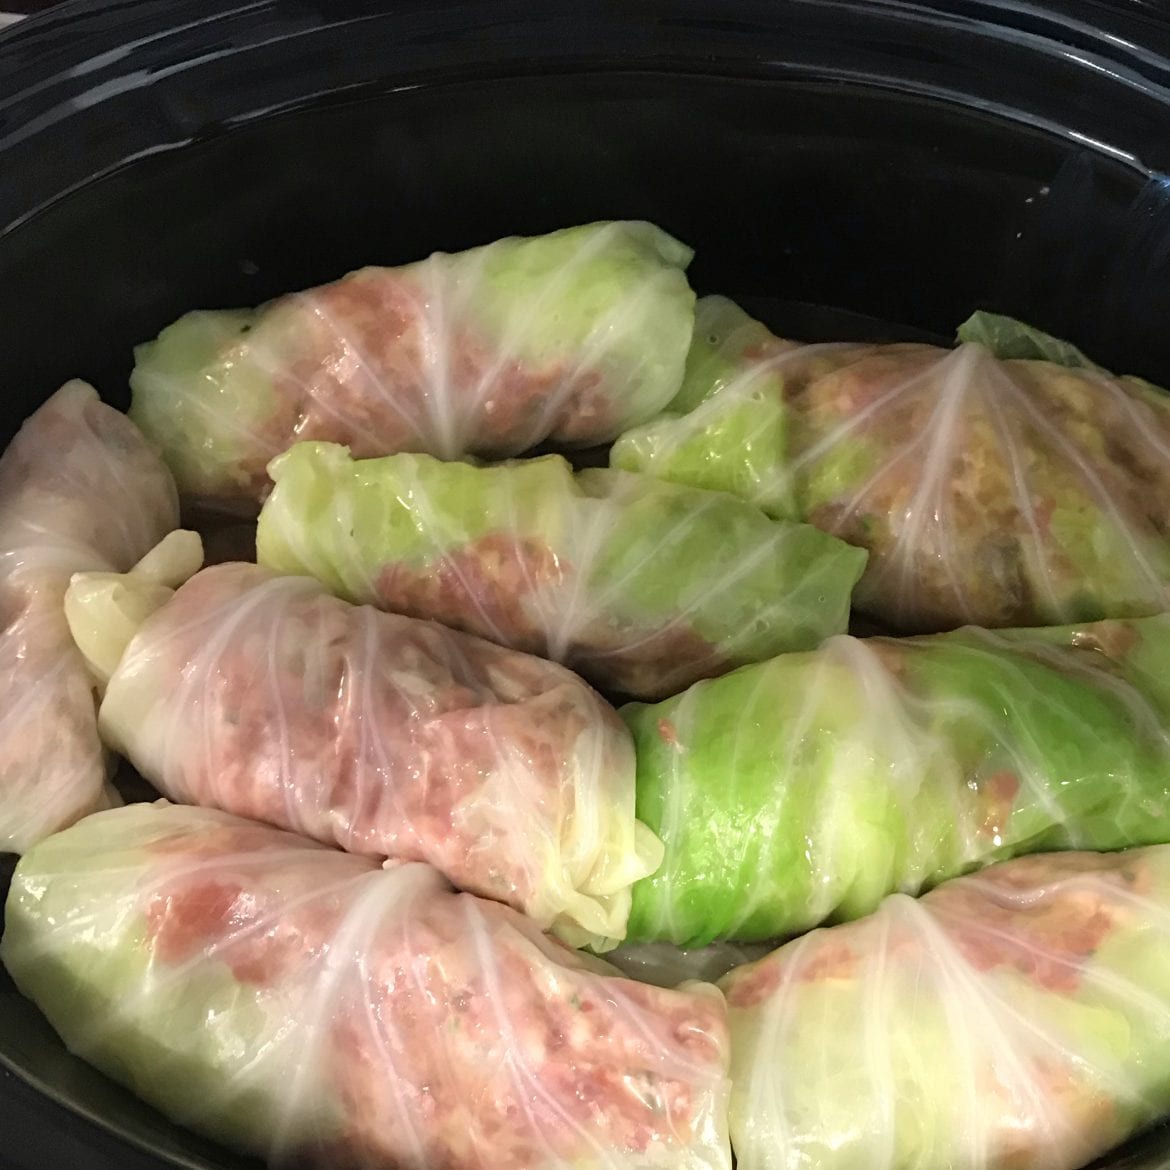
GRANDMA’S HUNGARIAN STUFFED CABBAGE, SLOW COOKER VARIATION

by Rebecca August 29, 2020
written by Rebecca

Prep: 25min| Cook: 7hrs 14mins | Additional: 5mins | Total: 7hr44min| Serving: 8 | Yield: 8 servings

I can spell art just by making this Hungarian Stuffed Cabbage. A delicious slow cooker variation that has been passed around through generation. Making this is an art itself, roll and tuck the mixture finely to achieve this perfect stuffed cabbage dish.

INGREDIENTS

1 head Cabbage, raw

1 tablespoon oil, soybean, salad or cooking

1 onions, raw

2 cloves Garlic, raw

¾ cup rice, white, long-grain, regular, raw, enriched

1 lb beef, ground, regular, (about 27% fat), raw

1 lb pork sausage, fresh, raw

1 egg, whole, raw, fresh

1 32oz can Tomato juice, canned, with salt added

INSTRUCTIONS

Step 1: Bring to a boil a large pot of water. Cook the cabbage for about 3 to 5 minutes until the outer leaves easily pull away from the head. Then, separate the leaves. Allow the cabbage to cool, making sure to keep 1 1/2 cup of the cooking water.

Step 2: In a large skillet, heat the oil and sautee the onion and garlic for about 5 minutes until translucent. Add in the wet rice and stir until the moisture evaporates for a minute. Remove the skillet from the heat and let cool for 5 minutes.

Step 3: Add the beef, sausage, and egg in a large bowl. Mix well, then, stir into the cooled rice mixture.

Step 4: On the ribbed end of the cabbage leaf, place a golfball-sized of the beef mixture. Roll up and tuck in the sides. Do this for the rest of the beef mixture and cabbage leaves.

Step 5: Place the rolls seam-side down in a slow cooker. Pour the tomato juice into the cooker enough to cover the stuffed cabbage and add in the reserved cooking water.

Step 6: Cook over high for about 30 minutes, then adjust to low and continue to cook for 6 1/2 hours.

NOTES:

You are welcome to swap the tomato juice for vegetable juice if preferred.

If using a stove, boil for about 30 to 45 minutes in a large pot.

Nutrition Facts:

Per Serving: 403 calories; 91.2 mg cholesterol; 884 mg sodium; 22.4 g protein; 30.6 g carbohydrates

GRANDMA’S HUNGARIAN STUFFED CABBAGE, SLOW COOKER VARIATION

Rebecca Prep: 25min| Cook: 7hrs 14mins | Additional: 5mins | Total: 7hr44min| Serving: 8 | Yield: 8 servings I can spell art just by making this Hungarian Stuffed Cabbage. A delicious slow cooker variation that has been passed around through generation. Making… Main Dish Recipes GRANDMA’S HUNGARIAN STUFFED CABBAGE, SLOW COOKER VARIATION European Print This
Serves: 8 Prep Time: 25 mins Cooking Time: 7 hrs 19mins 7 hrs 19mins
Nutrition facts: 403 calories 20 grams fat
Rating: 3.1/5
( 25 voted )

Ingredients

  • 1 head Cabbage, raw
  • 1 tablespoon oil, soybean, salad or cooking
  • 1 onions, raw
  • 2 cloves Garlic, raw
  • ¾ cup rice, white, long-grain, regular, raw, enriched
  • 1 lb beef, ground, regular, (about 27% fat), raw
  • 1 lb pork sausage, fresh, raw
  • 1 egg, whole, raw, fresh
  • 1 32oz can Tomato juice, canned, with salt added

Instructions

Step 1: Bring to a boil a large pot of water. Cook the cabbage for about 3 to 5 minutes until the outer leaves easily pull away from the head. Then, separate the leaves. Allow the cabbage to cool, making sure to keep 1 1/2 cup of the cooking water.

Step 2: In a large skillet, heat the oil and sautee the onion and garlic for about 5 minutes until translucent. Add in the wet rice and stir until the moisture evaporates for a minute. Remove the skillet from the heat and let cool for 5 minutes.

Step 3: Add the beef, sausage, and egg in a large bowl. Mix well, then, stir into the cooled rice mixture.

Step 4: On the ribbed end of the cabbage leaf, place a golfball-sized of the beef mixture. Roll up and tuck in the sides. Do this for the rest of the beef mixture and cabbage leaves.

Step 5: Place the rolls seam-side down in a slow cooker. Pour the tomato juice into the cooker enough to cover the stuffed cabbage and add in the reserved cooking water.

Step 6: Cook over high for about 30 minutes, then adjust to low and continue to cook for 6 1/2 hours.

NOTES:

You are welcome to swap the tomato juice for vegetable juice if preferred.

If using a stove, boil for about 30 to 45 minutes in a large pot.

August 29, 2020 0 comment
0 FacebookTwitterPinterestEmail
Main Dish Recipes

APPLE CINNAMON ZUCCHINI MUFFINS

by Rebecca August 29, 2020
written by Rebecca

Prep: 15mins | Cook: 25mins | Total: 40mins | Serving: 24 | Yield: 24 muffins

Yet another zucchinis best. These muffins are surprisingly good and wonderfully moist (thanks to the zucchini). Sprinkle the top with some autumn-colored sugar for presentation. The fresh apples give these a great texture and the combination of all the ingredients is superb! A quality, Instagram worthy, and crazy delicious muffins for all ages! Go gaga with these cute muffins and share these with everyone! And don’t forget to put this recipe on your list for your Christmas giveaway. I am pretty sure everybody will praise the perfect sweetness and all the exciting flavors of these Apple Cinnamon Zucchini Muffins.

INGREDIENTS

1 serving of Pam Butter Cooking Spray-1/3Sec Spray IHF

1 ¼ cups Sugars, granulated

⅔ cup Oil, soybean, salad or cooking

3 Egg, whole, raw, fresh

1 tablespoon Vanilla extract

2 ¼ cups Wheat flour, white, all-purpose, enriched, bleached

1 ½ tablespoons Spices, cinnamon, ground

¾ teaspoon Leavening agents, baking soda

¾ teaspoon Leavening agents, baking powder, sodium aluminum sulfate, double-acting

2 cups Zucchini, raw

1 cup Apples, raw

HOW TO MAKE APPLE CINNAMON ZUCCHINI MUFFINS

Step 1: Prepare the oven. Preheat it to 350 degrees F or 175 degrees C.

Step 2: Use a cooking spray to grease 24 muffin cups or paper liners to line them.

Step 3: In a bowl, add the sugar, oil, eggs, and vanilla extract. Whisk until smooth. Add in the flour, cinnamon, baking soda, and baking powder. Stir until combined before folding in the zucchini and apple.

Step 4: Fill the prepared muffin cups with the batter.

Step 5: Place inside the preheated oven and bake for about 25 minutes or until the muffin tops springs back after pressing.

NOTES:

To make even quantities of all the muffins, I would suggest using an ice cream scoop to fill the muffin cups.

Sprinkle some autumn-colored sugar on top of the muffins for color and slight texture.

Nutrition Facts:

Per Serving: 152.6 calories; 23.3 mg cholesterol; 64.7 mg sodium; 2.2 g protein; 20.9 g carbohydrates

APPLE CINNAMON ZUCCHINI MUFFINS

Rebecca Prep: 15mins | Cook: 25mins | Total: 40mins | Serving: 24 | Yield: 24 muffins Yet another zucchinis best. These muffins are surprisingly good and wonderfully moist (thanks to the zucchini). Sprinkle the top with some autumn-colored sugar for… Main Dish Recipes APPLE CINNAMON ZUCCHINI MUFFINS European Print This
Serves: 24 Prep Time: 15 mins Cooking Time: 25 mins 25 mins
Nutrition facts: 152.6 calories 20 grams fat
Rating: 5.0/5
( 1 voted )

Ingredients

  • 1 serving of Pam Butter Cooking Spray-1/3Sec Spray IHF
  • 1 ¼ cups Sugars, granulated
  • ⅔ cup Oil, soybean, salad or cooking
  • 3 Egg, whole, raw, fresh
  • 1 tablespoon Vanilla extract
  • 2 ¼ cups Wheat flour, white, all-purpose, enriched, bleached
  • 1 ½ tablespoons Spices, cinnamon, ground
  • ¾ teaspoon Leavening agents, baking soda
  • ¾ teaspoon Leavening agents, baking powder, sodium aluminum sulfate, double-acting
  • 2 cups Zucchini, raw
  • 1 cup Apples, raw

Instructions

Step 1: Prepare the oven. Preheat it to 350 degrees F or 175 degrees C.

Step 2: Use a cooking spray to grease 24 muffin cups or paper liners to line them.

Step 3: In a bowl, add the sugar, oil, eggs, and vanilla extract. Whisk until smooth. Add in the flour, cinnamon, baking soda, and baking powder. Stir until combined before folding in the zucchini and apple.

Step 4: Fill the prepared muffin cups with the batter.

Step 5: Place inside the preheated oven and bake for about 25 minutes or until the muffin tops springs back after pressing.

NOTES:

To make even quantities of all the muffins, I would suggest using an ice cream scoop to fill the muffin cups.

Sprinkle some autumn-colored sugar on top of the muffins for color and slight texture.

August 29, 2020 0 comment
0 FacebookTwitterPinterestEmail
Main Dish Recipes

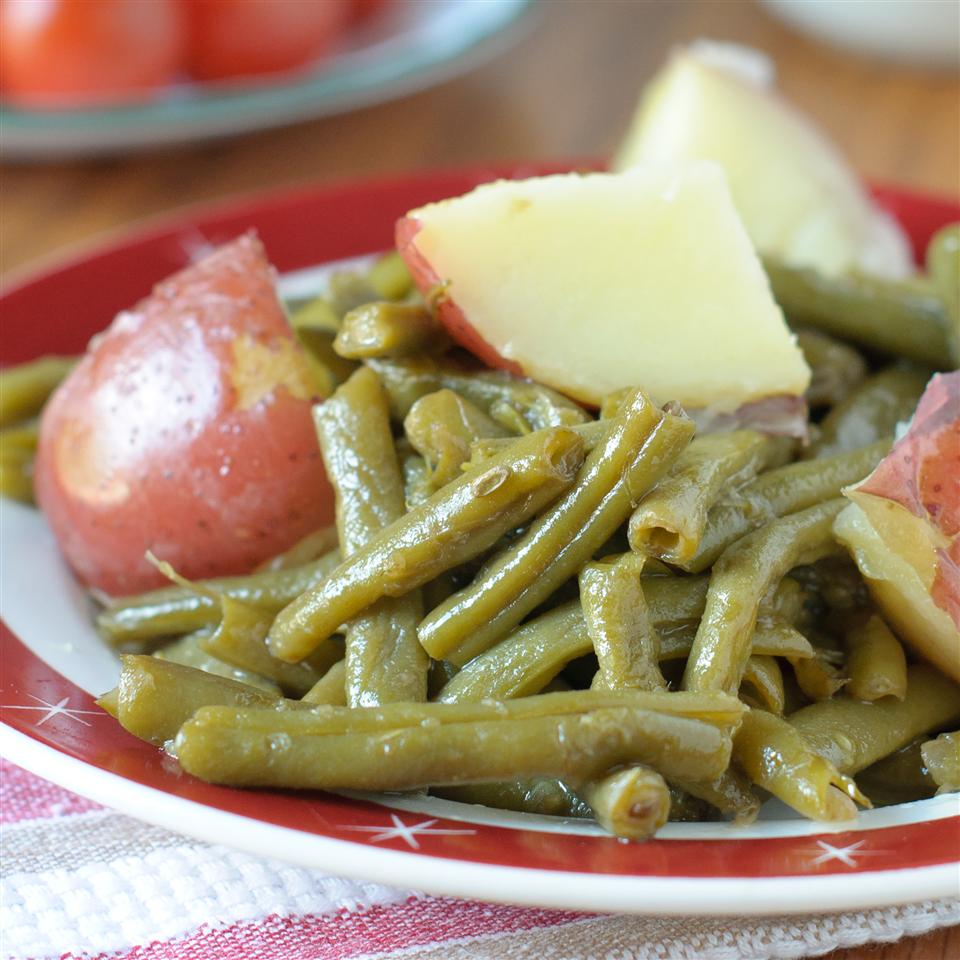
COUNTRY STYLE GREEN BEANS WITH RED POTATOES

by Rebecca August 29, 2020
written by Rebecca

Prep: 20min | Cook: 3hrs | Total: 3hrs 20min | Servings: 8 | Yield: 8 servings

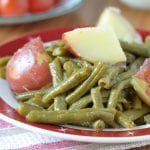
This dish is perfect during cold autumn or winter evening. Well, it is perfect all year round. It is packed with green beans and red potatoes with turkey meat and spices. A spectacular dish that you can make in a breeze. It is a flavorful, healthy, and a fairly straightforward dish that your family will love. I have been making this for years now and it is a favorite at my church. I double the recipe so I can serve a big bowl, yet it never settles long. In a snap, all I have left is an empty plate! And this is a great recipe to make use of your leftovers. You can also add ham, like what I mostly do if I have some leftover in the fridge. This Country Style Green Beans with Red Potatoes is unquestionably delicious and a crowd-favorite no matter what!

INGREDIENTS

½ pound smoked turkey

2 14.5oz cans Beans, snap, green, canned, regular pack, drained solids

1 large Onions, raw

10 small potato, red, flesh, and skin, raw

1 tablespoon seasoned salt

2 teaspoons Spices, pepper, black

1 tablespoon Spices, garlic powder

HOW TO MAKE COUNTRY STYLE GREEN BEANS WITH RED POTATOES

Step 1: In a 4-quart Dutch oven, add the turkey tails and onion. Fill it halfway full with water.

Step 2: Season the turkey with salt, pepper, and garlic powder.

Step 3: Cover and bring to a boil. Then, over low heat, simmer for 2 hours until the meat falls off the bones.

Step 4: Discard the turkey’s bones and skin. Then, return the meat into the pot.

Step 5: Add in the green beans and simmer for another 20 minutes before adding in the potatoes.

Step 6: Allow the mixture to simmer for about 10 to 15 minutes more until you can easily pierce the potatoes with a fork.

Nutrition Facts:

Per Serving: 231.5 calories; 16.2 mg cholesterol; 935 mg sodium; 10.7 g protein; 42 g carbohydrates

COUNTRY STYLE GREEN BEANS WITH RED POTATOES

Rebecca Prep: 20min | Cook: 3hrs | Total: 3hrs 20min | Servings: 8 | Yield: 8 servings This dish is perfect during cold autumn or winter evening. Well, it is perfect all year round. It is packed with green beans… Main Dish Recipes COUNTRY STYLE GREEN BEANS WITH RED POTATOES European Print This
Serves: 8 Prep Time: 20 mins Cooking Time: 3 hrs 3 hrs
Nutrition facts: 231.5 calories 20 grams fat
Rating: 4.1/5
( 9 voted )

Ingredients

  • ½ pound smoked turkey
  • 2 14.5oz cans Beans, snap, green, canned, regular pack, drained solids
  • 1 large Onions, raw
  • 10 small potato, red, flesh, and skin, raw
  • 1 tablespoon seasoned salt
  • 2 teaspoons Spices, pepper, black
  • 1 tablespoon Spices, garlic powder

Instructions

Step 1: In a 4-quart Dutch oven, add the turkey tails and onion. Fill it halfway full with water.

Step 2: Season the turkey with salt, pepper, and garlic powder.

Step 3: Cover and bring to a boil. Then, over low heat, simmer for 2 hours until the meat falls off the bones.

Step 4: Discard the turkey's bones and skin. Then, return the meat into the pot.

Step 5: Add in the green beans and simmer for another 20 minutes before adding in the potatoes.

Step 6: Allow the mixture to simmer for about 10 to 15 minutes more until you can easily pierce the potatoes with a fork.

August 29, 2020 0 comment
0 FacebookTwitterPinterestEmail
Main Dish Recipes

THESE VANILLA BROWNIES ARE THE TREAT YOU DIDN’T KNOW YOU NEEDED

by Rebecca August 28, 2020
written by Rebecca

Prep: 15min | Cook: 45min | Total: 1hr

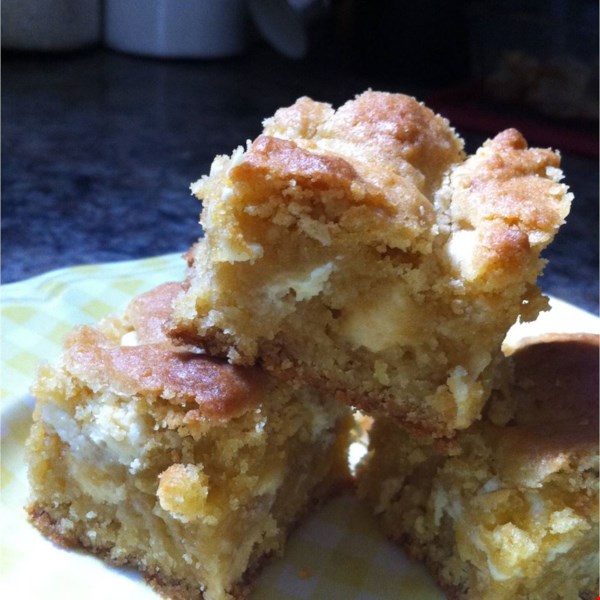
Nothing will compare to a brownie that is crispy on the outside and gooey on the inside. And the trick? Shave off the baking time for just a tad and you’ll be guaranteed a decadent, delicious, fudgy brownies. And these Vanilla Brownies are the perfect illustration. This brownie has everything nice – crispy outside, fudgy inside, not to mention insanely delicious! I am sure you will love this vanilla treat. It is a breeze to make, not fussy, and it calls for just a few simple ingredients that you might already have on hand.

INGREDIENTS

2 1/4 cups all-purpose flour

2 1/2 teaspoons baking powder

1/2 teaspoon salt

3/4 cup unsalted butter, softened

1 1/4 cups white sugar

1 1/4 cups packed brown sugar

1 teaspoon vanilla extract

3 eggs

2 cups semisweet chocolate chips (optional)

HOW TO MAKE VANILLA BROWNIES

Step 1: Prepare the oven. Preheat it to 350 degrees F or 175 degrees C.

Step 2: Then, grease a 10 x 15-inch jellyroll pan.

Step 3: Combine the flour, baking powder, and salt in a small bowl and set aside.

Step 4: Add the butter, white sugar, brown sugar, and vanilla into a large bowl. Cream until smooth.

Step 5: Beat the egg, a piece at a time, and add it into the flour mixture. Stir until incorporated.

Step 6: And stir in some chocolate chips if you’d like.

Step 7: Transfer the batter into the prepared pan and spread evenly.

Step 8: Place inside the preheated oven and bake for about 35 to 40 minutes.

Step 9: Once done, remove from the oven and let it cool in the pan on the wire rack. When cooled completely, cut the brownie into squares.

NOTE:

If you want a decadent, delicious, fudgy brownies shave off the baking time. Don’t worry about underbake brownies because nothing is much worse than a dried-out brownie. Take the brownie out early and you’ll be guaranteed the best result.

Nutrition Facts:

Per Serving: 169 calories; 1.8 g protein; 26 mg cholesterol; 76 mg sodium; 7.1 g fat; 26.4 g carbohydrates

THESE VANILLA BROWNIES ARE THE TREAT YOU DIDN’T KNOW YOU NEEDED

Rebecca Prep: 15min | Cook: 45min | Total: 1hr Nothing will compare to a brownie that is crispy on the outside and gooey on the inside. And the trick? Shave off the baking time… Main Dish Recipes THESE VANILLA BROWNIES ARE THE TREAT YOU DIDN’T KNOW YOU NEEDED European Print This
Prep Time: 15 mins Cooking Time: 45 mins 45 mins
Nutrition facts: 169 calories 7.1 fat
Rating: 5.0/5
( 1 voted )

Ingredients

  • 2 1/4 cups all-purpose flour
  • 2 1/2 teaspoons baking powder
  • 1/2 teaspoon salt
  • 3/4 cup unsalted butter, softened
  • 1 1/4 cups white sugar
  • 1 1/4 cups packed brown sugar
  • 1 teaspoon vanilla extract
  • 3 eggs
  • 2 cups semisweet chocolate chips (optional)

Instructions

Step 1: Prepare the oven. Preheat it to 350 degrees F or 175 degrees C.

Step 2: Then, grease a 10 x 15-inch jellyroll pan.

Step 3: Combine the flour, baking powder, and salt in a small bowl and set aside.

Step 4: Add the butter, white sugar, brown sugar, and vanilla into a large bowl. Cream until smooth.

Step 5: Beat the egg, a piece at a time, and add it into the flour mixture. Stir until incorporated.

Step 6: And stir in some chocolate chips if you'd like.

Step 7: Transfer the batter into the prepared pan and spread evenly.

Step 8: Place inside the preheated oven and bake for about 35 to 40 minutes.

Step 9: Once done, remove from the oven and let it cool in the pan on the wire rack. When cooled completely, cut the brownie into squares.

NOTE:

If you want a decadent, delicious, fudgy brownies shave off the baking time. Don't worry about underbake brownies because nothing is much worse than a dried-out brownie. Take the brownie out early and you'll be guaranteed the best result.

August 28, 2020 0 comment
0 FacebookTwitterPinterestEmail
Main Dish Recipes

PEANUT BUTTER CHOCOLATE CHIP COOKIES

by Rebecca August 28, 2020
written by Rebecca

Servings: 18 | Yield: 3 dozen

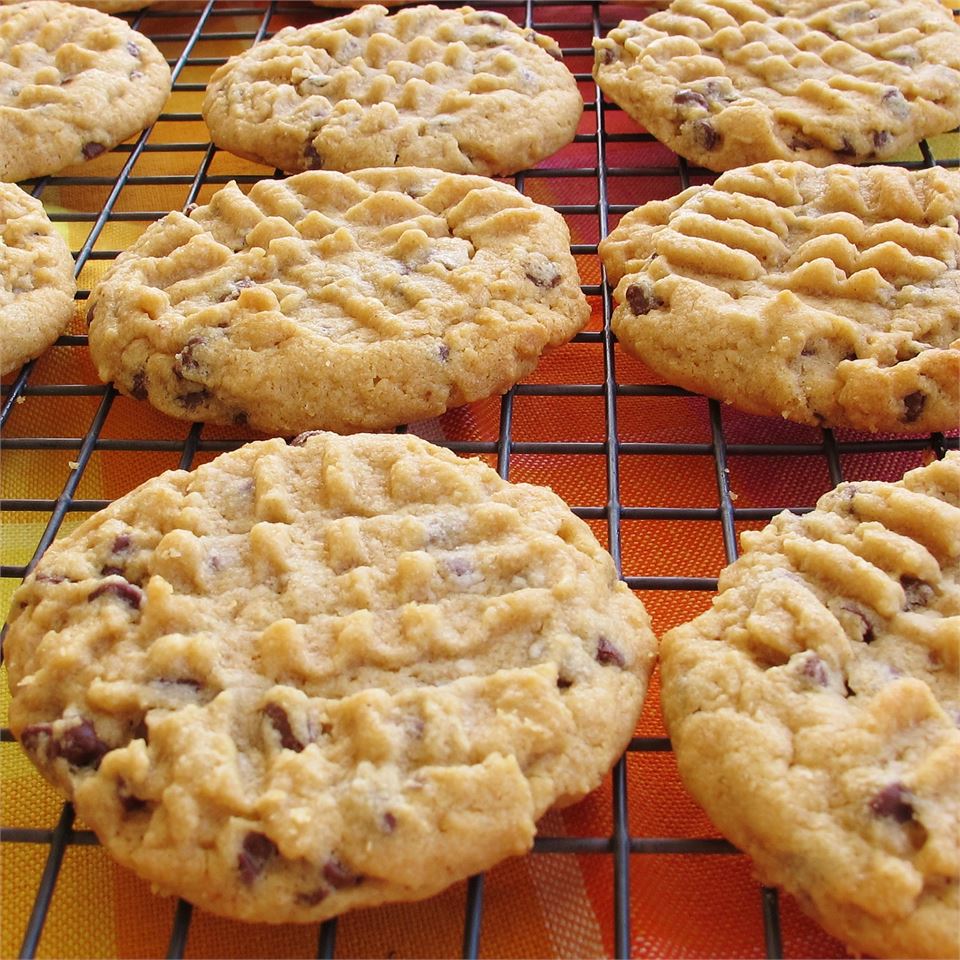
These big, thick, chewy, and soft cookies are packed with peanut butter and chocolate chips. My two favorites in a cookie. I could not ask for more! This is a no-fuss, simple, yet super yummy treat that everyone will love. And since Christmas is fast approaching, make sure to include this on your list of homemade giveaways.

INGREDIENTS

½ cup Butter, with salt

6 tablespoons Sugars, brown

6 tablespoons Sugars, granulated

1 Egg, whole, raw, fresh

1 teaspoon Vanilla extract

1 cup Natural Peanut Butter-Salted

½ teaspoon Leavening agents, baking soda

½ teaspoon Morton Kosher Salt, coarse

¾ cup Wheat flour, white, all-purpose, enriched, bleached

¾ cup miniature semisweet chocolate chips

HOW TO MAKE PEANUT BUTTER CHOCOLATE CHIP COOKIES

Step 1: Prepare the oven. Preheat it to 375 degrees F or 190 degrees C.

Step 2: Cream the butter or margarine with the brown sugar and white sugar. Stir in the egg and vanilla and mix well. Add in the peanut butter, baking soda, and salt. Thoroughly mix until well blended before adding in the flour and the chocolate chips.

Step 3: Place teaspoons of the cookie dough onto the greased cookie sheet and use a fork to flatten them slightly.

Step 4: Place inside the preheated oven and bake for about 5 to 6 minutes or until you see a hint of brown on each cookie. making sure not to overbake them.

Step 5: Remove from the oven and let them cool for at least 5 to 10 minutes on the cookie sheet before transferring the cookies onto a cooling rack.

NOTE:

These cookies are denser because of the peanut butter so make sure to flatten them slightly before baking. This way you can guarantee that they will bake evenly. No one would like a burnt-edged cookies with a doughy middle. You can make patterns like criss-cross on top of the dough before baking or just flatten them. Simple and easy.

Nutrition Facts:

Per Serving: 224.9 calories; 23.9 mg cholesterol; 168.5 mg sodium; 4.9 g protein; 20.4 g carbohydrates

PEANUT BUTTER CHOCOLATE CHIP COOKIES

Rebecca Servings: 18 | Yield: 3 dozen These big, thick, chewy, and soft cookies are packed with peanut butter and chocolate chips. My two favorites in a cookie. I could not ask for more!… Main Dish Recipes PEANUT BUTTER CHOCOLATE CHIP COOKIES European Print This
Serves: 18
Nutrition facts: 224.9 calories 20 grams fat
Rating: 5.0/5
( 1 voted )

Ingredients

  • ½ cup Butter, with salt
  • 6 tablespoons Sugars, brown
  • 6 tablespoons Sugars, granulated
  • 1 Egg, whole, raw, fresh
  • 1 teaspoon Vanilla extract
  • 1 cup Natural Peanut Butter-Salted
  • ½ teaspoon Leavening agents, baking soda
  • ½ teaspoon Morton Kosher Salt, coarse
  • ¾ cup Wheat flour, white, all-purpose, enriched, bleached
  • ¾ cup miniature semisweet chocolate chips

Instructions

Step 1: Prepare the oven. Preheat it to 375 degrees F or 190 degrees C.

Step 2: Cream the butter or margarine with the brown sugar and white sugar. Stir in the egg and vanilla and mix well. Add in the peanut butter, baking soda, and salt. Thoroughly mix until well blended before adding in the flour and the chocolate chips.

Step 3: Place teaspoons of the cookie dough onto the greased cookie sheet and use a fork to flatten them slightly.

Step 4: Place inside the preheated oven and bake for about 5 to 6 minutes or until you see a hint of brown on each cookie. making sure not to overbake them.

Step 5: Remove from the oven and let them cool for at least 5 to 10 minutes on the cookie sheet before transferring the cookies onto a cooling rack.

NOTE:

These cookies are denser because of the peanut butter so make sure to flatten them slightly before baking. This way you can guarantee that they will bake evenly. No one would like a burnt-edged cookies with a doughy middle. You can make patterns like criss-cross on top of the dough before baking or just flatten them. Simple and easy.

August 28, 2020 0 comment
0 FacebookTwitterPinterestEmail
Main Dish Recipes

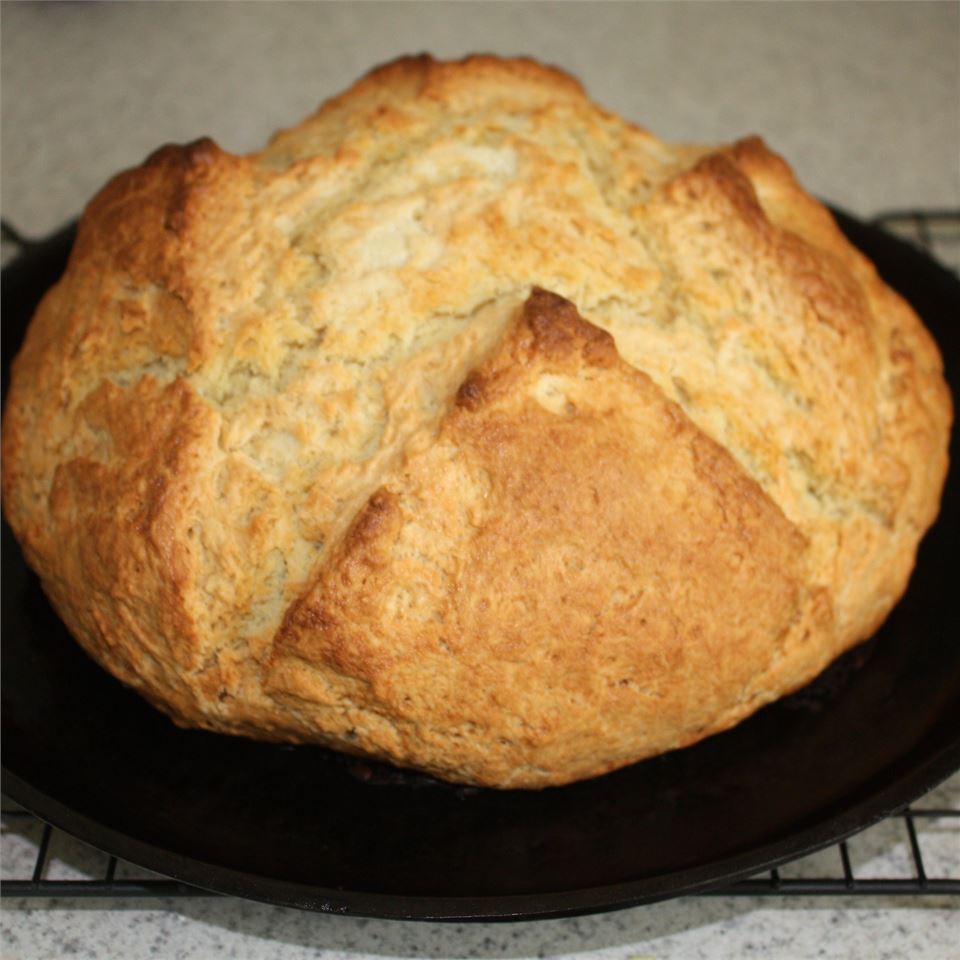
AMAZINGLY EASY IRISH SODA BREAD

by Rebecca August 28, 2020
written by Rebecca

Prep: 15min | Cook: 50mins | Total: 1hr 5min | Servings: 20 | Yield: 1 1 1/1 pound loaf

Some thought that this bread is too plain and boring. I care to disagree. This rustic bread is simply amazing! You can make this in a flash with just a few simple ingredients and it doesn’t require a yeast! And the buttermilk gives this crusty traditional Irish loaf a nice flavor. Perfect with a cup of tea or coffee or with your favorite spread. This loaf has the perfect crusty interior, it is thick and amazingly light. Try this now and I am pretty sure that everything you thought about this Irish Soda Bread will change 360 degrees.

INGREDIENTS

4 cups Wheat flour, white, all-purpose, enriched, bleached

4 tablespoons Sugars, granulated

1 teaspoon Leavening agents, baking soda

1 tablespoon Baking Powder

½ teaspoon salt, table

½ cup Margarine, soft, corn (hydrogenated and regular)

1 cup of milk, buttermilk, fluid, cultured, low fat

1 egg, whole, raw, fresh

¼ cup Butter, with salt

¼ cup Milk, buttermilk, fluid, cultured, low fat

HOW TO MAKE IRISH SODA BREAD

Step 1: Prepare the oven. Preheat it to 375 degrees F or 190 degrees C.

Step 2: Then, grease lightly a large baking sheet.

Step 3: Combine the flour, sugar, baking soda, baking powder, salt, and margarine in a large bowl. Mix in a cup of buttermilk and egg.

Step 4: Transfer the dough onto a lightly floured surface and lightly knead. Shape it round and place it into the prepared baking sheet.

Step 5: Mix the melted butter and 1/4 cup of buttermilk in a small bowl. Brush this onto the loaf. And using a sharp knife, slice an “X” into the top of the loaf.

Step 6: Place inside the preheated oven and bake for about 45 to 50 minutes or until a toothpick inserted in the center comes out clean. make sure to check after 30 minutes if it is done. Continue brushing the loaf with the butter while baking.

Nutrition Facts:

Per Serving: 171.6 calories; 16 mg cholesterol; 269.1 mg sodium; 3.5 g protein; 22.5 g carbohydrates

AMAZINGLY EASY IRISH SODA BREAD

Rebecca Prep: 15min | Cook: 50mins | Total: 1hr 5min | Servings: 20 | Yield: 1 1 1/1 pound loaf Some thought that this bread is too plain and boring. I care to disagree. This rustic bread is simply amazing!… Main Dish Recipes AMAZINGLY EASY IRISH SODA BREAD European Print This
Serves: 20 Prep Time: 15 mins Cooking Time: 50 mins 50 mins
Nutrition facts: 171.6 calories 20 grams fat
Rating: 5.0/5
( 1 voted )

Ingredients

  • 4 cups Wheat flour, white, all-purpose, enriched, bleached
  • 4 tablespoons Sugars, granulated
  • 1 teaspoon Leavening agents, baking soda
  • 1 tablespoon Baking Powder
  • ½ teaspoon salt, table
  • ½ cup Margarine, soft, corn (hydrogenated and regular)
  • 1 cup of milk, buttermilk, fluid, cultured, low fat
  • 1 egg, whole, raw, fresh
  • ¼ cup Butter, with salt
  • ¼ cup Milk, buttermilk, fluid, cultured, low fat

Instructions

Step 1: Prepare the oven. Preheat it to 375 degrees F or 190 degrees C.

Step 2: Then, grease lightly a large baking sheet.

Step 3: Combine the flour, sugar, baking soda, baking powder, salt, and margarine in a large bowl. Mix in a cup of buttermilk and egg.

Step 4: Transfer the dough onto a lightly floured surface and lightly knead. Shape it round and place it into the prepared baking sheet.

Step 5: Mix the melted butter and 1/4 cup of buttermilk in a small bowl. Brush this onto the loaf. And using a sharp knife, slice an "X" into the top of the loaf.

Step 6: Place inside the preheated oven and bake for about 45 to 50 minutes or until a toothpick inserted in the center comes out clean. make sure to check after 30 minutes if it is done. Continue brushing the loaf with the butter while baking.

August 28, 2020 0 comment
0 FacebookTwitterPinterestEmail
Main Dish Recipes

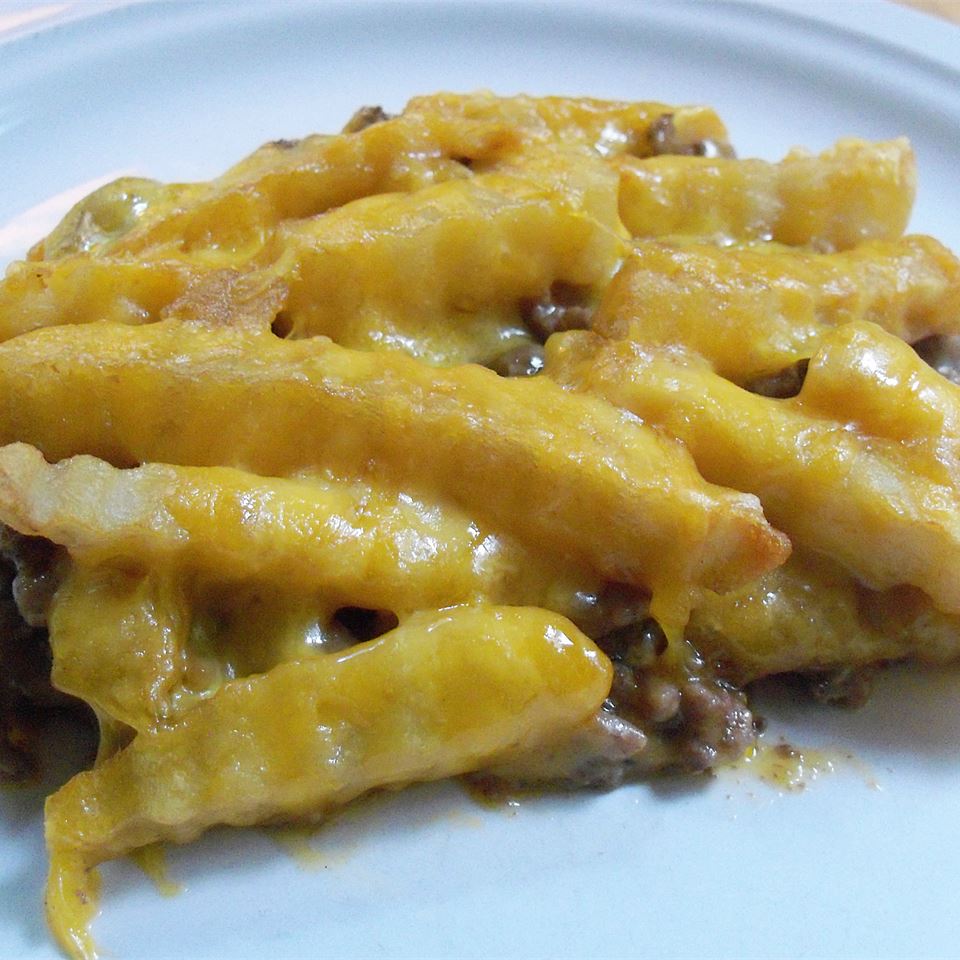
CHEESEBURGER AND FRIES CASSEROLE

by Rebecca August 28, 2020
written by Rebecca

Prep: 20min | Cook: 20mins | Total: 40min | Serving: 8 | Yield: 8 servings

Oh, this is pure evil! My mouth is watering and I’m craving to death! I had this weeks ago and I am dying to make this again. That cheese oozing and smothering the beef is so inviting! Just by looking at this picture, makes me want to just jump out of this bed and go straight to the kitchen. This casserole is bursting with goodness! It is ridiculously easy and quick to prepare and outrageously delicious! Two of my childhood favorites in one!

INGREDIENTS

2 pounds Beef, ground, lean, (approximately 21% fat), raw

½ medium onions, raw

Salt, table

1 pinch Spices, garlic powder

1 10.75oz can Campbells Condensed Golden Mushroom Soup

1 10.75oz can Soup, cheese, canned, condensed, commercial

1 16oz package Potatoes, french fried, frozen, unprepared

2 cups Cheddar cheese

HOW TO MAKE CHEESEBURGER AND FRIES CASSEROLE

Step 1: Prepare the oven. Preheat it to 375 degrees F or 190 degrees C.

Step 2: In a skillet, add the ground beef and onion. Cook over medium-high heat until the beef is no longer pink and the onions are translucent. make sure to occasionally stir. Then, drain any excess grease before seasoning with salt, pepper, and garlic powder.

Step 3: Return the skillet to heat, then, add in the golden mushroom and cheese soups. Stir until combined. Thoroughly heat before removing the skillet from the stove.

Step 4: Transfer the mixture into a 9 x 13-inch baking dish. Spread the frozen French fries over the ground beef mixture enough to cover it.

Step 5: Place inside the preheated oven and bake for about 25 to 30 minutes. When the fries turn into golden brown, it is time to remove the casserole from the oven. Sprinkle the cheese over and return the casserole into the oven and bake until the cheese has melted.

Nutrition Facts:

Per Serving: 511.1 calories; 120.7 mg cholesterol; 1018.7 mg sodium; 33.7 g protein; 21.1 g carbohydrates

CHEESEBURGER AND FRIES CASSEROLE

Rebecca Prep: 20min | Cook: 20mins | Total: 40min | Serving: 8 | Yield: 8 servings Oh, this is pure evil! My mouth is watering and I’m craving to death! I had this weeks ago and I am dying to… Main Dish Recipes CHEESEBURGER AND FRIES CASSEROLE European Print This
Serves: 8 Prep Time: 20 mins Cooking Time: 20 mins 20 mins
Nutrition facts: 511.1 calories 20 grams fat
Rating: 5.0/5
( 2 voted )

Ingredients

  • 2 pounds Beef, ground, lean, (approximately 21% fat), raw
  • ½ medium onions, raw
  • Salt, table
  • 1 pinch Spices, garlic powder
  • 1 10.75oz can Campbells Condensed Golden Mushroom Soup
  • 1 10.75oz can Soup, cheese, canned, condensed, commercial
  • 1 16oz package Potatoes, french fried, frozen, unprepared
  • 2 cups Cheddar cheese

Instructions

Step 1: Prepare the oven. Preheat it to 375 degrees F or 190 degrees C.

Step 2: In a skillet, add the ground beef and onion. Cook over medium-high heat until the beef is no longer pink and the onions are translucent. make sure to occasionally stir. Then, drain any excess grease before seasoning with salt, pepper, and garlic powder.

Step 3: Return the skillet to heat, then, add in the golden mushroom and cheese soups. Stir until combined. Thoroughly heat before removing the skillet from the stove.

Step 4: Transfer the mixture into a 9 x 13-inch baking dish. Spread the frozen French fries over the ground beef mixture enough to cover it.

Step 5: Place inside the preheated oven and bake for about 25 to 30 minutes. When the fries turn into golden brown, it is time to remove the casserole from the oven. Sprinkle the cheese over and return the casserole into the oven and bake until the cheese has melted.

August 28, 2020 0 comment
0 FacebookTwitterPinterestEmail
Main Dish Recipes

GRANDMA’S PINEAPPLE UPSIDE-DOWN CAKE

by Rebecca August 28, 2020
written by Rebecca

Prep: 15min | Cook: 30mins | Total: 45min | Servings: 8 | Yield: 8 servings

This is a classic sweet dessert baked in an iron skillet. How awesome is that? The brown sugar and butter form a rich, caramel glaze that coats the pineapple rings and pecans. And the magic happens when you flip it onto a serving plate. What not to love about this amazing cake that is pineapple sweet? Sure, it sounds a bit intimidating but this is surprisingly a no-fuss cake that you can make in a heartbeat!

INGREDIENTS

⅓ cup Butter, with salt

½ cup Sugars, brown

8 S & W Sliced Pineapple-Canned SW

8 Nuts, pecans

1 cup Wheat flour, white, all-purpose, enriched, bleached

1 teaspoon of leavening agents; baking powder, sodium aluminum sulfate, doubling-acting

¼ teaspoon salt, table

⅔ cup sugars, granulated

2 egg, whole, raw, fresh

¼ cup Pineapple juice, canned, unsweetened, without added ascorbic acid

HOW TO MAKE GRANDMA’S PINEAPPLE UPSIDE-DOWN CAKE

Step 1: Prepare the oven. Preheat it to 350 degrees F or 175 degrees C.

Step 2: In a 9-inch iron skillet, melt the butter over medium heat. Once melted, stir in the brown sugar and heat until bubbly. Then, remove the skillet from the heat and arrange the pineapple rings and pecans on top.

Step 3: In a bowl, sift the flour, baking powder, and salt. Sift two times.

Step 4: In a bowl, add the sugar and eggs and beat with an electric mixer until light and fluffy.

Step 5: Alternately fold in 3 batches the flour mixture and pineapple juice into the egg mixture. Start and end with the flour mixture.

Step 6: Pour this over the pineapple slices.

Step 7: Place inside the preheated oven and bake for about 30 to 35 minutes or until a toothpick inserted in the center comes out clean.

Step 8: Remove from the oven and let the cake cool for at least 5 minutes before carefully inverting it onto a serving plate.

Nutrition Facts:

Per Serving: 319.3 calories; 66.8 mg cholesterol; 214.9 mg sodium; 3.4 g protein; 55.1 g carbohydrates

GRANDMA’S PINEAPPLE UPSIDE-DOWN CAKE

Rebecca Prep: 15min | Cook: 30mins | Total: 45min | Servings: 8 | Yield: 8 servings This is a classic sweet dessert baked in an iron skillet. How awesome is that? The brown sugar and butter form a rich, caramel… Main Dish Recipes GRANDMA’S PINEAPPLE UPSIDE-DOWN CAKE European Print This
Serves: 8 Prep Time: 15 mins Cooking Time: 30 mins 30 mins
Nutrition facts: 319.3 calories 20 grams fat
Rating: 5.0/5
( 1 voted )

Ingredients

  • ⅓ cup Butter, with salt
  • ½ cup Sugars, brown
  • 8 S & W Sliced Pineapple-Canned SW
  • 8 Nuts, pecans
  • 1 cup Wheat flour, white, all-purpose, enriched, bleached
  • 1 teaspoon of leavening agents; baking powder, sodium aluminum sulfate, doubling-acting
  • ¼ teaspoon salt, table
  • ⅔ cup sugars, granulated
  • 2 egg, whole, raw, fresh
  • ¼ cup Pineapple juice, canned, unsweetened, without added ascorbic acid

Instructions

Step 1: Prepare the oven. Preheat it to 350 degrees F or 175 degrees C.

Step 2: In a 9-inch iron skillet, melt the butter over medium heat. Once melted, stir in the brown sugar and heat until bubbly. Then, remove the skillet from the heat and arrange the pineapple rings and pecans on top.

Step 3: In a bowl, sift the flour, baking powder, and salt. Sift two times.

Step 4: In a bowl, add the sugar and eggs and beat with an electric mixer until light and fluffy.

Step 5: Alternately fold in 3 batches the flour mixture and pineapple juice into the egg mixture. Start and end with the flour mixture.

Step 6: Pour this over the pineapple slices.

Step 7: Place inside the preheated oven and bake for about 30 to 35 minutes or until a toothpick inserted in the center comes out clean.

Step 8: Remove from the oven and let the cake cool for at least 5 minutes before carefully inverting it onto a serving plate.

August 28, 2020 0 comment
0 FacebookTwitterPinterestEmail
Newer Posts
Older Posts

Popular Posts

  • 1

    Crispy Crunchy Parmesan Potatoes

    March 21, 2020
  • 2

    CROCK POT SMOTHERED PORK CHOPS

    March 21, 2020
  • Facebook
  • Twitter

@2019 - All Right Reserved.


Back To Top