Cook it once
  • Home
  • Privacy Policy
  • Recipes
    • KETO
    • LC
    • WW
  • Tips
  • Contact
Cook it once
  • Home
  • Privacy Policy
  • Recipes
    • KETO
    • LC
    • WW
  • Tips
  • Contact
Category:

Main Dish Recipes

Main Dish Recipes

One Pot Lasagna Soup

by Rebecca September 5, 2020
written by Rebecca

Prep Time: 10 minutes | Cook Time: 40 minutes | Servings: 4-8 servings

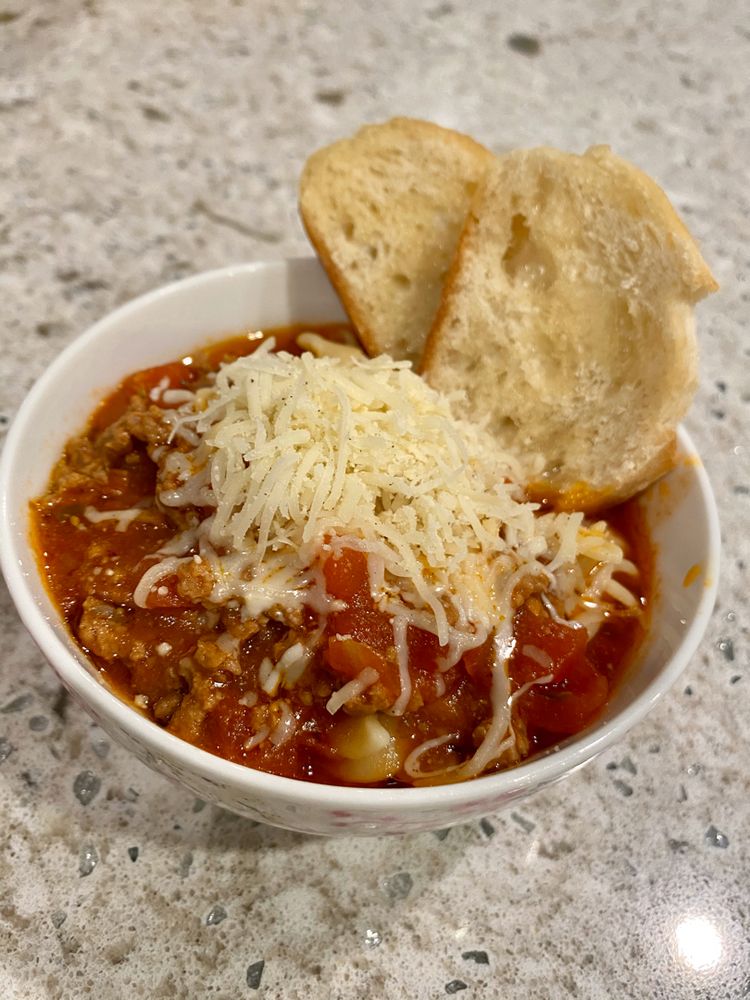
Who is up for an awesome Lasagna Soup? Yeah, me too! This might be the best Lasagna recipe I have ever tasted. Did I mention that it is one-pot? Oh, yes it is! This recipe is not only very delicious but it is also hassle-free. All you need to do is to follow the steps and you are good to go. By the way, be very generous with the cheese. Just take my advice and you will see. Enjoy!

INGREDIENTS

1 pound lean ground beef or half Italian sausage

1 yellow onion, diced

4-5 garlic cloves, minced

1/4 – 1/2 teaspoon red pepper flakes

1 24 oz. jar Prego Traditional Italian Sauce

8-10 cups low sodium chicken broth, divided

1 14 oz. can crushed tomatoes

2 tablespoons tomato paste

2 teaspoons balsamic vinegar

1 1/2 teaspoons granulated sugar

1 tablespoon dried basil

1 teaspoon EACH dried parsley, dried oregano, salt

1/2 teaspoon pepper

1 whole bay leaf

10 uncooked lasagna noodles broken into approx. 1-2 inch pieces*

1/2 cup heavy cream, optional**

Cheese Garnish:

shredded mozzarella cheese

freshly finely grated Parmesan cheese

ricotta cheese

How to make One Pot Lasagna Soup

Step 1: Place a large pot on the stove and turn the heat to medium-high.

Step 2: Add in the beef and onion. Cook until the beef turns brown while stirring from time to time.

Step 3: Add in the garlic and red pepper flakes and cook for another 30 seconds. Drain the excess grease.

Step 4: Add in 6 cups of chicken broth, crushed tomatoes, Prego sauce, tomato paste, sugar, balsamic vinegar, spices, and lasagna noodles. Stir and allow the mixture to boil.

Step 5: Turn the heat down to low and simmer until the lasagna noodles are al dente’. Cook and stir for 20 to 30 minutes.

Step 6: Remove the bay leaf and add in the heavy cream and stir. Pour about 2 to 4 cups of the chicken broth and stir until you achieve your preferred consistency.

Step 7: Sprinkle a lot of cheese on top.

Step 8: Serve and enjoy!

RECIPE NOTES:

I use lasagna noodles because it gives a nicer texture compared to pasta noodles.

If you do not want a thick soup, do not use heavy cream. Instead, try adding cornstarch.

One Pot Lasagna Soup

Rebecca Prep Time: 10 minutes | Cook Time: 40 minutes | Servings: 4-8 servings Who is up for an awesome Lasagna Soup? Yeah, me too! This might be the best Lasagna… Main Dish Recipes One Pot Lasagna Soup European Print This
Serves: 4-8 Prep Time: 10 mins Cooking Time: 40 mins 40 mins
Nutrition facts: 200 calories 20 grams fat
Rating: 4.0/5
( 8 voted )

Ingredients

  • 1 pound lean ground beef or half Italian sausage
  • 1 yellow onion, diced
  • 4-5 garlic cloves, minced
  • 1/4 - 1/2 teaspoon red pepper flakes
  • 1 24 oz. jar Prego Traditional Italian Sauce
  • 8-10 cups low sodium chicken broth, divided
  • 1 14 oz. can crushed tomatoes
  • 2 tablespoons tomato paste
  • 2 teaspoons balsamic vinegar
  • 1 1/2 teaspoons granulated sugar
  • 1 tablespoon dried basil
  • 1 teaspoon EACH dried parsley, dried oregano, salt
  • 1/2 teaspoon pepper
  • 1 whole bay leaf
  • 10 uncooked lasagna noodles broken into approx. 1-2 inch pieces*
  • 1/2 cup heavy cream, optional**
  • Cheese Garnish:
  • shredded mozzarella cheese
  • freshly finely grated Parmesan cheese
  • ricotta cheese

Instructions

Step 1: Place a large pot on the stove and turn the heat to medium-high.

Step 2: Add in the beef and onion. Cook until the beef turns brown while stirring from time to time.

Step 3: Add in the garlic and red pepper flakes and cook for another 30 seconds. Drain the excess grease.

Step 4: Add in 6 cups of chicken broth, crushed tomatoes, Prego sauce, tomato paste, sugar, balsamic vinegar, spices, and lasagna noodles. Stir and allow the mixture to boil.

Step 5: Turn the heat down to low and simmer until the lasagna noodles are al dente'. Cook and stir for 20 to 30 minutes.

Step 6: Remove the bay leaf and add in the heavy cream and stir. Pour about 2 to 4 cups of the chicken broth and stir until you achieve your preferred consistency.

Step 7: Sprinkle a lot of cheese on top.

Step 8: Serve and enjoy!

RECIPE NOTES:

I use lasagna noodles because it gives a nicer texture compared to pasta noodles.

If you do not want a thick soup, do not use heavy cream. Instead, try adding cornstarch.
September 5, 2020 0 comment
0 FacebookTwitterPinterestEmail
Main Dish Recipes

Slow Cooker Cheesy Baked Ziti

by Rebecca September 5, 2020
written by Rebecca

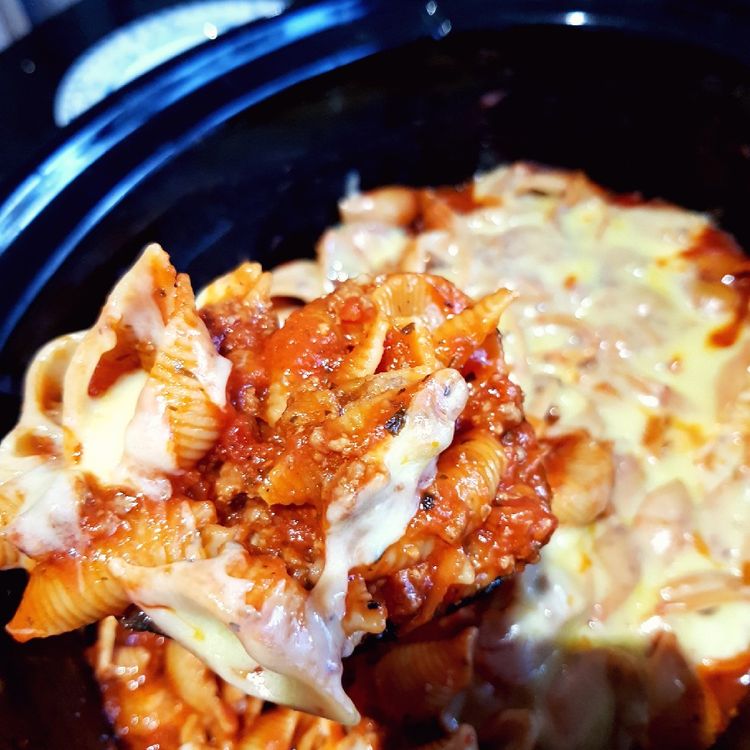
You all know by now my love for slow cooker recipes. Slow cookers save my life all the time! I am a busy bee and I needed something that I can make without spending eternity in the kitchen. And slow cooker recipes are delicious! Just like this Cheesy Baked Ziti. It is overwhelmingly good! And slow cooking it is one of the most flavorful ways of making this one of a kind dish without ever turning on the oven. My family’s favorite! And this freezes well. So what I normally do is freeze them in separate containers for lunch throughout the week. This indeed saves me a lot of time. This dish never disappoints. Always on top of its game.

Ingredients

1/2 brick (4 oz.) cream cheese, softened to room temperature

1/4 cup sour cream

1 pound of ground beef, cooked

1/2 cup ricotta cheese

2 garlic cloves, minced

3 sprigs basil, chopped

2 (24 oz.) jars marinara sauce

1 (16 oz.) jar tomato sauce

1 cup water

16 oz. ziti pasta, uncooked

1 1/2 cups shredded parmesan cheese

1 cup shredded mozzarella cheese

How to make Slow Cooker Cheesy Baked Ziti

Step 1: In a medium bowl, add the cream cheese, sour cream, ricotta cheese, garlic, and chopped basil. Mix with a hand mixer until well incorporated.

Step 2: In another bowl, combine the marinara sauce, tomato sauce, cooked ground beef, and water.

Step 3: Into a slow cooker, add about 2 cups of the tomato sauce mixture. Then, top with half of the ziti pasta. Sprinkle half of the cheese mixture over the ziti pasta and spread. Top it with half of the parmesan cheese.

Step 4: Do this for the rest of the ingredients and end with tomato sauce.

Step 5: Cook on high, covered, for about 2 to 3 hours.

Step 6: Sprinkle the remaining mozzarella cheese on top and continue to cook on high for 15 minutes more, covered, until the cheese has melted.

Step 7: Serve and enjoy!

Slow Cooker Cheesy Baked Ziti

Rebecca You all know by now my love for slow cooker recipes. Slow cookers save my life all the time! I am a busy bee and I needed something that I… Main Dish Recipes Slow Cooker Cheesy Baked Ziti European Print This
Nutrition facts: 200 calories 20 grams fat
Rating: 3.7/5
( 12 voted )

Ingredients

  • 1/2 brick (4 oz.) cream cheese, softened to room temperature
  • 1/4 cup sour cream
  • 1 pound of ground beef, cooked
  • 1/2 cup ricotta cheese
  • 2 garlic cloves, minced
  • 3 sprigs basil, chopped
  • 2 (24 oz.) jars marinara sauce
  • 1 (16 oz.) jar tomato sauce
  • 1 cup water
  • 16 oz. ziti pasta, uncooked
  • 1 1/2 cups shredded parmesan cheese
  • 1 cup shredded mozzarella cheese

Instructions

Step 1: In a medium bowl, add the cream cheese, sour cream, ricotta cheese, garlic, and chopped basil. Mix with a hand mixer until well incorporated.

Step 2: In another bowl, combine the marinara sauce, tomato sauce, cooked ground beef, and water.

Step 3: Into a slow cooker, add about 2 cups of the tomato sauce mixture. Then, top with half of the ziti pasta. Sprinkle half of the cheese mixture over the ziti pasta and spread. Top it with half of the parmesan cheese.

Step 4: Do this for the rest of the ingredients and end with tomato sauce.

Step 5: Cook on high, covered, for about 2 to 3 hours.

Step 6: Sprinkle the remaining mozzarella cheese on top and continue to cook on high for 15 minutes more, covered, until the cheese has melted.

Step 7: Serve and enjoy!

September 5, 2020 0 comment
0 FacebookTwitterPinterestEmail
Main Dish Recipes

S’MORES COOKIES

by Rebecca September 5, 2020
written by Rebecca

Yield: 20 COOKIES | Prep Time: 30 minutes | Cook Time: 8 MINUTES | Inactive Time: 1-hour | Total Time: 1 HOUR 38 MINUTES

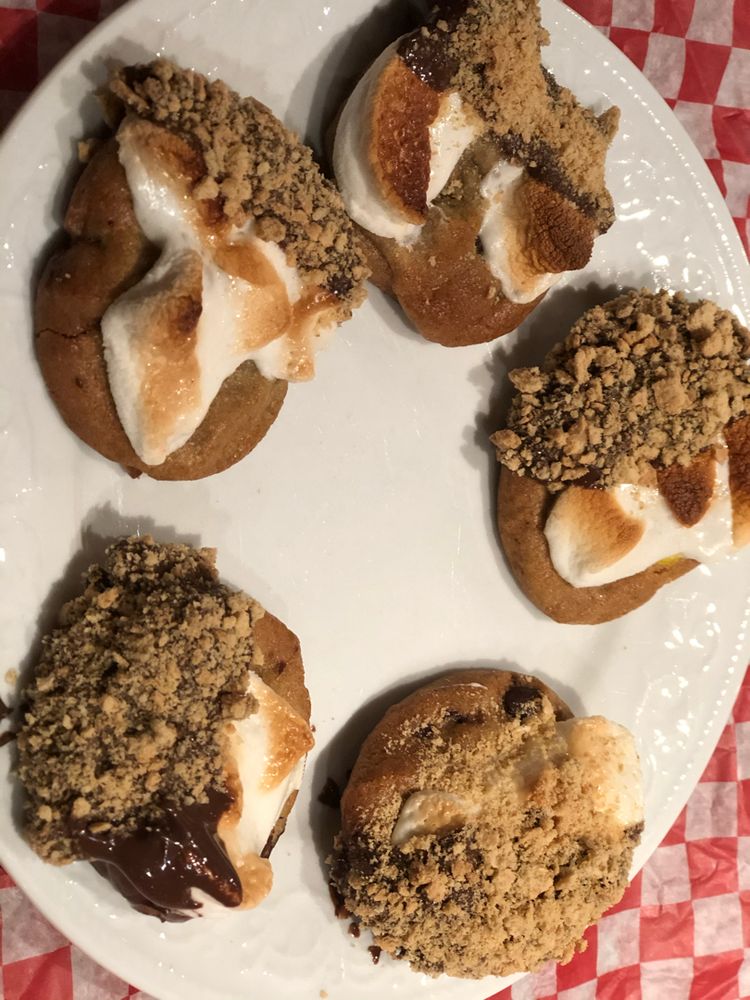
These cookies stole my heart in an instant! I have a big love with S’mores and these cookies are just perfect! I normally cheat because I want my marshmallows to not disappear. Read through so you’ll know (about the simple cheat). All I’m saying is these cookies are insanely delicious no matter what!

INGREDIENTS

2 1/2 cups (320 grams) all-purpose flour

1/2 (2.5 grams) teaspoon salt

1 teaspoon (5 grams) baking soda

1/2 teaspoon (2.5 grams) baking powder

1 cup (90 grams) crushed cinnamon graham crackers

1 teaspoon ground cinnamon (optional)

1 cup (227 grams) butter, room temperature

3/4 cup (165 grams) brown sugar

1/2 cup (100 grams) granulated sugar

1 large egg, room temperature

1 large egg yolk, room temperature

1 teaspoon (5 grams) vanilla extract

2/3 cup (117 grams)  semi-sweet chocolate chips

1/2 cup (88 grams) roughly chopped milk chocolate

1 cup (50 grams) mini marshmallows, for dough

2 cups (100 grams) mini marshmallows, for filling

HOW TO MAKE S’MORES COOKIES

Step 1: In a bowl, combine the flour, salt, cinnamon, baking soda, and baking powder. Set aside.

Step 2: Crush the graham crackers into little pieces but be careful not to let the cracker get too powdery. Although, come graham cracker powder is fine. Then, set aside.

Step 3: Add the butter and sugars into a bowl. Cream until fluffy.

Step 4: Gradually add in the egg and yolk, one at a time, followed by the vanilla. Beat well. Gradually add in the flour mixture and continue beating until just combined.

Step 5: Then, fold in the graham crackers, chocolate, and mini marshmallows.

Step 6: Grab a tablespoon of the cookie and make a little dent.

Step 7: Into the dent, stuff 4 to 5 pieces of the mini marshmallows. making sure that the mallows are tightly packed in. Put 2 tablespoons of the cookie dough on top and press together until the dough fully covers the marshmallows. Do this with the rest of the dough and marshmallows. To make them prettier, you can top the finished cookies with more chocolate and/or marshmallows if desired.

Step 8: Transfer the cookies on a baking sheet. Cover with plastic wrap and place in the fridge to chill for at least an hour or preferably overnight (up to 3 days).

Step 9: When ready to bake, preheat the oven to 350 degrees F.

Step 10: Remove the plastic wrap and place the cookies inside the preheated oven. bake for about 8 to 9 minutes or until light golden brown.

Step 11: remove the cookies using a spatula and transfer on a wire rack to cool. If you want to have the best result, you can place the cookies near the fan so they can cool quickly.

Step 12: Serve the cookies immediately or store them in an airtight container. Enjoy these cookies within 24 hours.

NOTES:

A simple cheat, without the marshmallows, roll the cookie dough into balls about 2 tablespoons big. Then, bake for about 8 to 10 minutes. Once the cookies are cooled, toast the mallows and sandwich them using the cookies.

A lot preferred this method as this help prevent the marshmallow from disappearing.

NUTRITION INFORMATION:

Amount Per Serving: CALORIES: 91TOTAL FAT: 2gSATURATED FAT: 1gTRANS FAT: 0gUNSATURATED FAT: 1gCHOLESTEROL: 19mgSODIUM: 42mgCARBOHYDRATES: 17gFIBER: 1gSUGAR: 4gPROTEIN: 2g

S’MORES COOKIES

Rebecca Yield: 20 COOKIES | Prep Time: 30 minutes | Cook Time: 8 MINUTES | Inactive Time: 1-hour | Total Time: 1 HOUR 38 MINUTES These cookies stole my heart in… Main Dish Recipes S’MORES COOKIES European Print This
Serves: 20 Prep Time: 30 mins Cooking Time: 8 mins 8 mins
Nutrition facts: 91 calories 2 fat
Rating: 5.0/5
( 1 voted )

Ingredients

  • 2 1/2 cups (320 grams) all-purpose flour
  • 1/2 (2.5 grams) teaspoon salt
  • 1 teaspoon (5 grams) baking soda
  • 1/2 teaspoon (2.5 grams) baking powder
  • 1 cup (90 grams) crushed cinnamon graham crackers
  • 1 teaspoon ground cinnamon (optional)
  • 1 cup (227 grams) butter, room temperature
  • 3/4 cup (165 grams) brown sugar
  • 1/2 cup (100 grams) granulated sugar
  • 1 large egg, room temperature
  • 1 large egg yolk, room temperature
  • 1 teaspoon (5 grams) vanilla extract
  • 2/3 cup (117 grams)  semi-sweet chocolate chips
  • 1/2 cup (88 grams) roughly chopped milk chocolate
  • 1 cup (50 grams) mini marshmallows, for dough
  • 2 cups (100 grams) mini marshmallows, for filling

Instructions

Step 1: In a bowl, combine the flour, salt, cinnamon, baking soda, and baking powder. Set aside.

Step 2: Crush the graham crackers into little pieces but be careful not to let the cracker get too powdery. Although, come graham cracker powder is fine. Then, set aside.

Step 3: Add the butter and sugars into a bowl. Cream until fluffy.

Step 4: Gradually add in the egg and yolk, one at a time, followed by the vanilla. Beat well. Gradually add in the flour mixture and continue beating until just combined.

Step 5: Then, fold in the graham crackers, chocolate, and mini marshmallows.

Step 6: Grab a tablespoon of the cookie and make a little dent.

Step 7: Into the dent, stuff 4 to 5 pieces of the mini marshmallows. making sure that the mallows are tightly packed in. Put 2 tablespoons of the cookie dough on top and press together until the dough fully covers the marshmallows. Do this with the rest of the dough and marshmallows. To make them prettier, you can top the finished cookies with more chocolate and/or marshmallows if desired.

Step 8: Transfer the cookies on a baking sheet. Cover with plastic wrap and place in the fridge to chill for at least an hour or preferably overnight (up to 3 days).

Step 9: When ready to bake, preheat the oven to 350 degrees F.

Step 10: Remove the plastic wrap and place the cookies inside the preheated oven. bake for about 8 to 9 minutes or until light golden brown.

Step 11: remove the cookies using a spatula and transfer on a wire rack to cool. If you want to have the best result, you can place the cookies near the fan so they can cool quickly.

Step 12: Serve the cookies immediately or store them in an airtight container. Enjoy these cookies within 24 hours.

NOTES:

A simple cheat, without the marshmallows, roll the cookie dough into balls about 2 tablespoons big. Then, bake for about 8 to 10 minutes. Once the cookies are cooled, toast the mallows and sandwich them using the cookies.

A lot preferred this method as this help prevent the marshmallow from disappearing.

September 5, 2020 0 comment
0 FacebookTwitterPinterestEmail
Main Dish Recipes

Giant Peanut Butter Cup Cheesecake

by Rebecca September 5, 2020
written by Rebecca

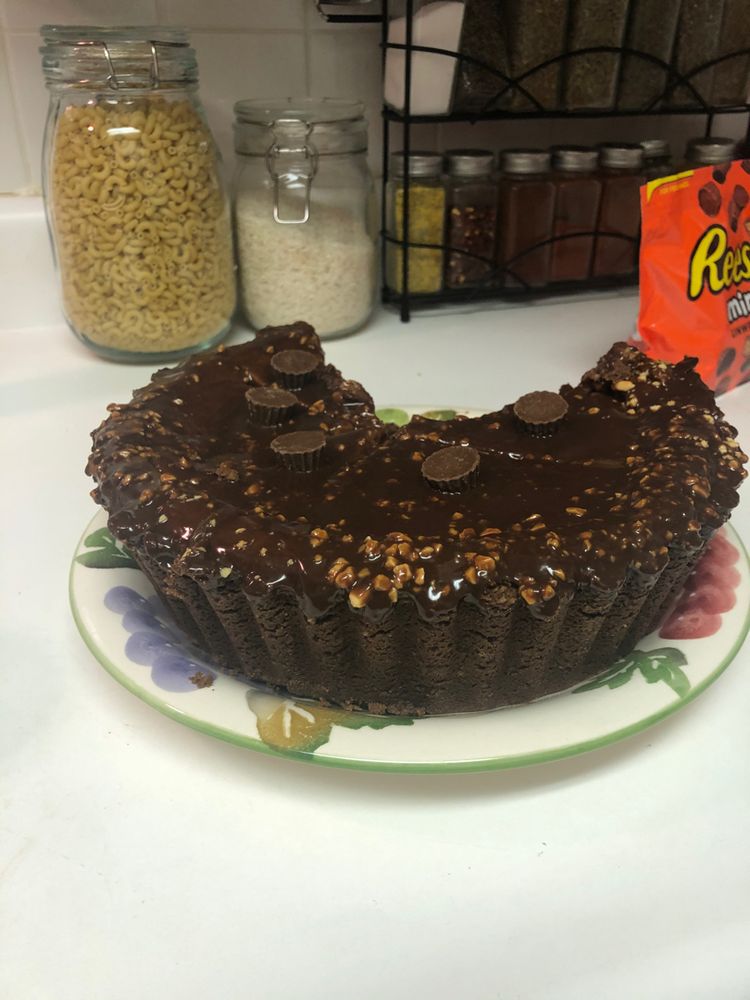
My heart is melting. Everything I love is in this heavenly delicious cake – Reese, chocolate, cheesecake, and peanut butter. This Giant Peanut Butter Cup Cheesecake makes my sweet dreams a reality.

Ingredients

For the crust:

5 cups chocolate wafer cookies

1 cup peanuts, roasted and salted

1/2 cup butter, melted and slightly cooled

For the filling:

2 pounds cream cheese, softened

5 eggs, room temperature

1 cup dark brown sugar, packed

1/4 cup granulated sugar

1 1/4 cups smooth peanut butter

1/2 cup heavy cream

1 vanilla bean, scraped

12 peanut butter cups, chopped

1/2 cup milk chocolate chips

For the ganache topping:

2 cups heavy cream

16 ounces chocolate, chopped

1 pinch salt

1 cup mini peanut butter cups

1/2 cup peanuts, roasted, salted, and roughly chopped

How to make Giant Peanut Butter Cup Cheesecake

Step 1: To make the crust. In a food processor, mix the crust ingredients until crumbly. Then, press the crust mixture into a 9 1/2-inch deep-dish tart pan with removable bottom. Chill in the fridge.

Step 2: To make the filling. Prepare the oven. Preheat it to 275 degrees. Add the softened cream cheese in a bowl of a stand mixer and cream until fluffy. Add in the eggs, one at a time, mixing every addition until well combined. Stir in the sugars, peanut butter, cream, and vanilla bean and mix thoroughly.

Step 3: Stir in gently the peanut butter cups and chocolate chips.  Transfer the filling into the chilled crust and make sure to gently level the top.

Step 4: On a large sheet of aluminum foil in a large baking pan, place the tart pan. Then, pour water around the pan, making sure that the water will not seep into the tart pan. Bake in the preheated oven for about 1 1/2 hours or until just firm.

Step 5: Remove from the oven and let the cheesecake cool for at least 20 minutes before placing in the fridge to set for 4 hours.

Step 6: To make the ganache. Bring the cream to just boiling in a heavy bottom saucepan. Add into a heatproof bowl the chopped chocolate and salt. Then, pour the cream over. Set aside for 5 minutes. Do not mix. After 5 minutes, whisk the cream until shiny and smooth. Pour this over the chilled cheesecake and garnish with mini peanut butter cups and chopped peanuts. Serve instantly. Enjoy!

Giant Peanut Butter Cup Cheesecake

Rebecca My heart is melting. Everything I love is in this heavenly delicious cake – Reese, chocolate, cheesecake, and peanut butter. This Giant Peanut Butter Cup Cheesecake makes my sweet dreams… Main Dish Recipes Giant Peanut Butter Cup Cheesecake European Print This
Nutrition facts: 200 calories 20 grams fat
Rating: 5.0/5
( 1 voted )

Ingredients

  • For the crust:
  • 5 cups chocolate wafer cookies
  • 1 cup peanuts, roasted and salted
  • 1/2 cup butter, melted and slightly cooled
  • For the filling:
  • 2 pounds cream cheese, softened
  • 5 eggs, room temperature
  • 1 cup dark brown sugar, packed
  • 1/4 cup granulated sugar
  • 1 1/4 cups smooth peanut butter
  • 1/2 cup heavy cream
  • 1 vanilla bean, scraped
  • 12 peanut butter cups, chopped
  • 1/2 cup milk chocolate chips
  • For the ganache topping:
  • 2 cups heavy cream
  • 16 ounces chocolate, chopped
  • 1 pinch salt
  • 1 cup mini peanut butter cups
  • 1/2 cup peanuts, roasted, salted, and roughly chopped

Instructions

Step 1: To make the crust. In a food processor, mix the crust ingredients until crumbly. Then, press the crust mixture into a 9 1/2-inch deep-dish tart pan with removable bottom. Chill in the fridge.

Step 2: To make the filling. Prepare the oven. Preheat it to 275 degrees. Add the softened cream cheese in a bowl of a stand mixer and cream until fluffy. Add in the eggs, one at a time, mixing every addition until well combined. Stir in the sugars, peanut butter, cream, and vanilla bean and mix thoroughly.

Step 3: Stir in gently the peanut butter cups and chocolate chips.  Transfer the filling into the chilled crust and make sure to gently level the top.

Step 4: On a large sheet of aluminum foil in a large baking pan, place the tart pan. Then, pour water around the pan, making sure that the water will not seep into the tart pan. Bake in the preheated oven for about 1 1/2 hours or until just firm.

Step 5: Remove from the oven and let the cheesecake cool for at least 20 minutes before placing in the fridge to set for 4 hours.

Step 6: To make the ganache. Bring the cream to just boiling in a heavy bottom saucepan. Add into a heatproof bowl the chopped chocolate and salt. Then, pour the cream over. Set aside for 5 minutes. Do not mix. After 5 minutes, whisk the cream until shiny and smooth. Pour this over the chilled cheesecake and garnish with mini peanut butter cups and chopped peanuts. Serve instantly. Enjoy!

September 5, 2020 0 comment
0 FacebookTwitterPinterestEmail
Main Dish Recipes

Crispy Cheesy Hash Browns

by Rebecca September 5, 2020
written by Rebecca

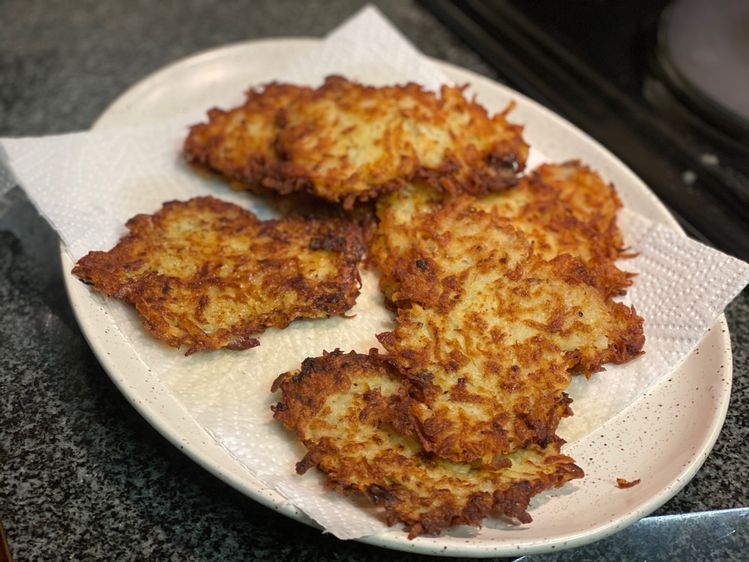
Simple but incredible. These crispy, oh so cheesy hash browns are the most sought after side dish for any occasion. Outrageously crispy and filled with melted cheese, these hash browns are dangerously addictive! It is a pretty simple, not fussy side dish that you can make any time on any day. The kids are obsessed with these, even the grown-ups are crazy in love with these yummy hash. You have to make a lot of these because you will not be able to eat just one! These are darn delicious, you’ll keep coming back for more! Just yesterday, I made these delicious hash and they went poof! I needed to make another batch because my eldest was not able to grab a piece! These are a perfect addition to your weekly menu. Simple, easy, and quick, not to mention insanely delish. Try to top these with sour cream and it makes a great difference!

Ingredients

3 small russet potatoes, peeled

1/3 cup flour

1 egg

3 tablespoons butter, softened

3/4 cup shredded cheddar cheese

1 teaspoon salt

1/2 teaspoon pepper

oil, for frying

How to make Crispy Cheesy Hash Browns

Step 1: In a boiling pot of water, carefully add the potatoes and boil for about 6 minutes.

Step 2: Drain and rinse the potatoes with cold water until they are cool enough to handle.

Step 3: Grate the potatoes and place the grated potatoes into a medium-sized bowl.

Step 4: In a bowl, add the flour, egg, butter, cheese, salt, and pepper. Mix until incorporated.

Step 5: To portion out the mixture, use a greased 1/3 cup of measuring cup. And form the mixture with your hands into patties.

Step 6: In a large skillet, heat a few tablespoons of oil over medium-high heat.

Step 7: Cook the hashbrowns in batches for about 3 minutes on each side.

Step 8: Feel free to add more oil into the skillet if needed.

Step 9: Place the cooked hashbrowns onto a paper towel-lined plate and serve hot. Enjoy!

Crispy Cheesy Hash Browns

Rebecca Simple but incredible. These crispy, oh so cheesy hash browns are the most sought after side dish for any occasion. Outrageously crispy and filled with melted cheese, these hash browns… Main Dish Recipes Crispy Cheesy Hash Browns European Print This
Nutrition facts: 200 calories 20 grams fat
Rating: 5.0/5
( 1 voted )

Ingredients

  • 3 small russet potatoes, peeled
  • 1/3 cup flour
  • 1 egg
  • 3 tablespoons butter, softened
  • 3/4 cup shredded cheddar cheese
  • 1 teaspoon salt
  • 1/2 teaspoon pepper
  • oil, for frying

Instructions

Step 1: In a boiling pot of water, carefully add the potatoes and boil for about 6 minutes.

Step 2: Drain and rinse the potatoes with cold water until they are cool enough to handle.

Step 3: Grate the potatoes and place the grated potatoes into a medium-sized bowl.

Step 4: In a bowl, add the flour, egg, butter, cheese, salt, and pepper. Mix until incorporated.

Step 5: To portion out the mixture, use a greased 1/3 cup of measuring cup. And form the mixture with your hands into patties.

Step 6: In a large skillet, heat a few tablespoons of oil over medium-high heat.

Step 7: Cook the hashbrowns in batches for about 3 minutes on each side.

Step 8: Feel free to add more oil into the skillet if needed.

Step 9: Place the cooked hashbrowns onto a paper towel-lined plate and serve hot. Enjoy!

September 5, 2020 0 comment
0 FacebookTwitterPinterestEmail
Main Dish Recipes

Raspberry Cream Cheese Coffee Cake

by Rebecca September 3, 2020
written by Rebecca

Prep Time: 30 minutes | Cook Time: 45 minutes | Yield: serves 8

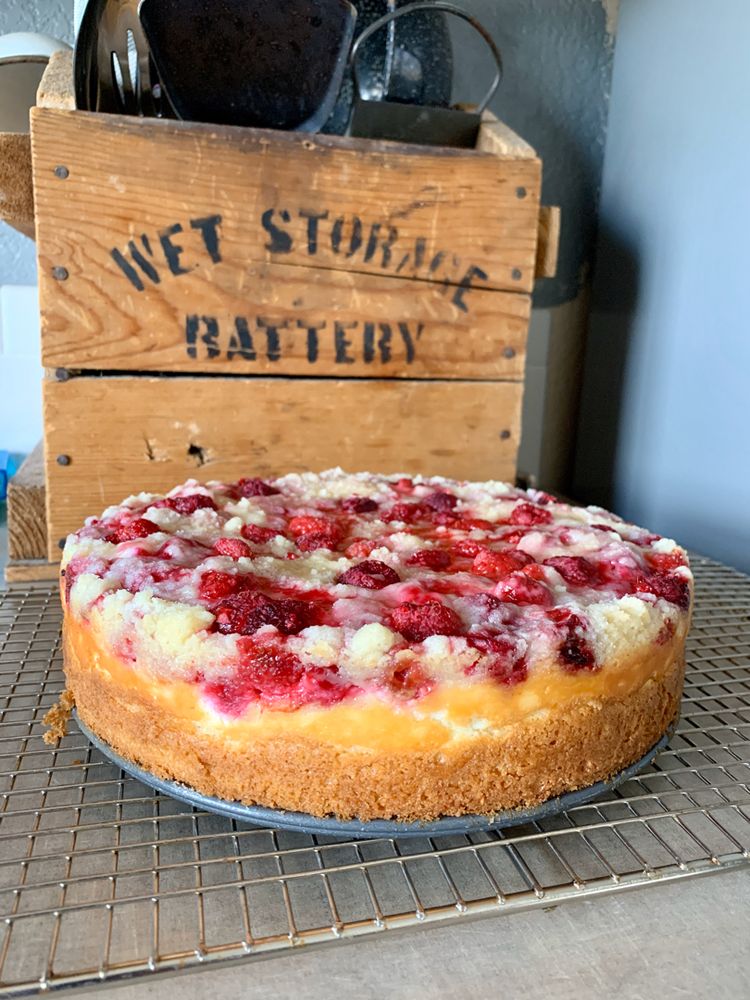
What an awesome cake! Give this one a try and I’m sure that you’re gonna love it so much! It is a very refreshing and very satisfying cake to eat. Have your friends come over and surprise them with how amazing this cake is. Enjoy!

Ingredients

For the filling:

1/4 cup sugar

8 oz. cream cheese-softened

1 egg white

1 cup raspberries-washed and well-drained

For the cake:

1 and 1/2 cups all-purpose flour

1/2 teaspoon baking powder

1/2 teaspoon baking soda

1/4 teaspoon salt

5.5 Tablespoons unsalted butter- softened

1/2 cup sugar

1 egg + 1 egg yolk

3/4 cup sour cream

1 teaspoon vanilla extract

For the streusel topping:

1/3 cup sugar

1/2 cup flour

3 tablespoons butter-chilled and cubed

How to make Raspberry Cream Cheese Coffee Cake

Step 1: Ready the oven and preheat to 350 degrees F.

Step 2: Apply cooking spray in a 9-inch springform the line it with parchment paper.

To Make the Filling: 

Step 1: In a medium mixing bowl, add in the cream cheese and sugar. Use a stand mixer and beat at medium speed until the texture becomes creamy.

Step 2: Add in the egg white and mix at low speed until well mixed.

To Make the Cake Batter: 

Step 1: In a medium mixing bowl, add in the baking powder, baking soda, flour, and salt. Stir until well mixed.

Step 2: Add in the sugar and butter then beat until well mixed.

Step 3: Add in the egg yolk, egg, and vanilla. Add in the flour and sour cream gradually.

Step 4: Transfer the batter into the greased and lined pan then use a spatula to flatten out the batter.

Step 5: Spread the cream cheese filling over the batter.

Step 6: Put the raspberries on top of the cream cheese filling.

To Make the Topping: 

Step 1: In a medium mixing bowl, add in the flour, sugar, and 1 cube of butter. Stir using a fork and mix until it becomes crumbly.

Step 2: Add the streusel on top of the raspberries.

Step 3: Place inside the preheated oven and bake for 40 to 45 minutes or until the toothpick inserted in the middle comes out clean.

Step 4: Remove from the oven and let it sit on a wire rack to cool for at least 5 minutes.

Step 5: Remove from the springform pan.

Step 6: Place inside the fridge to chill.

Step 7: Serve and enjoy!

Nutrition Facts

Amount Per Serving: Calories 493 % Daily Value* Total Fat 26.6g 34% Cholesterol 115.1mg 38% Sodium 276.5mg 12% Total Carbohydrate 56.3g 20% Sugars 29g Protein 8.4g 17% Vitamin A26% Vitamin C5%

Raspberry Cream Cheese Coffee Cake

Rebecca Prep Time: 30 minutes | Cook Time: 45 minutes | Yield: serves 8 What an awesome cake! Give this one a try and I’m sure that you’re gonna love it so much! It is… Main Dish Recipes Raspberry Cream Cheese Coffee Cake European Print This
Serves: 8 Prep Time: 30 mins Cooking Time: 45 mins 45 mins
Nutrition facts: 493 calories 26.6 fat
Rating: 3.4/5
( 8 voted )

Ingredients

  • For the filling:
  • 1/4 cup sugar
  • 8 oz. cream cheese-softened
  • 1 egg white
  • 1 cup raspberries-washed and well-drained
  • For the cake:
  • 1 and 1/2 cups all-purpose flour
  • 1/2 teaspoon baking powder
  • 1/2 teaspoon baking soda
  • 1/4 teaspoon salt
  • 5.5 Tablespoons unsalted butter- softened
  • 1/2 cup sugar
  • 1 egg + 1 egg yolk
  • 3/4 cup sour cream
  • 1 teaspoon vanilla extract
  • For the streusel topping:
  • 1/3 cup sugar
  • 1/2 cup flour
  • 3 tablespoons butter-chilled and cubed

Instructions

Step 1: Ready the oven and preheat to 350 degrees F.

Step 2: Apply cooking spray in a 9-inch springform the line it with parchment paper.

To Make the Filling: 

Step 1: In a medium mixing bowl, add in the cream cheese and sugar. Use a stand mixer and beat at medium speed until the texture becomes creamy.

Step 2: Add in the egg white and mix at low speed until well mixed.

To Make the Cake Batter: 

Step 1: In a medium mixing bowl, add in the baking powder, baking soda, flour, and salt. Stir until well mixed.

Step 2: Add in the sugar and butter then beat until well mixed.

Step 3: Add in the egg yolk, egg, and vanilla. Add in the flour and sour cream gradually.

Step 4: Transfer the batter into the greased and lined pan then use a spatula to flatten out the batter.

Step 5: Spread the cream cheese filling over the batter.

Step 6: Put the raspberries on top of the cream cheese filling.

To Make the Topping: 

Step 1: In a medium mixing bowl, add in the flour, sugar, and 1 cube of butter. Stir using a fork and mix until it becomes crumbly.

Step 2: Add the streusel on top of the raspberries.

Step 3: Place inside the preheated oven and bake for 40 to 45 minutes or until the toothpick inserted in the middle comes out clean.

Step 4: Remove from the oven and let it sit on a wire rack to cool for at least 5 minutes.

Step 5: Remove from the springform pan.

Step 6: Place inside the fridge to chill.

Step 7: Serve and enjoy!

September 3, 2020 0 comment
0 FacebookTwitterPinterestEmail
Main Dish Recipes

Cherry Dr Pepper Cake with Cherry Buttercream Frosting!

by Rebecca September 3, 2020
written by Rebecca

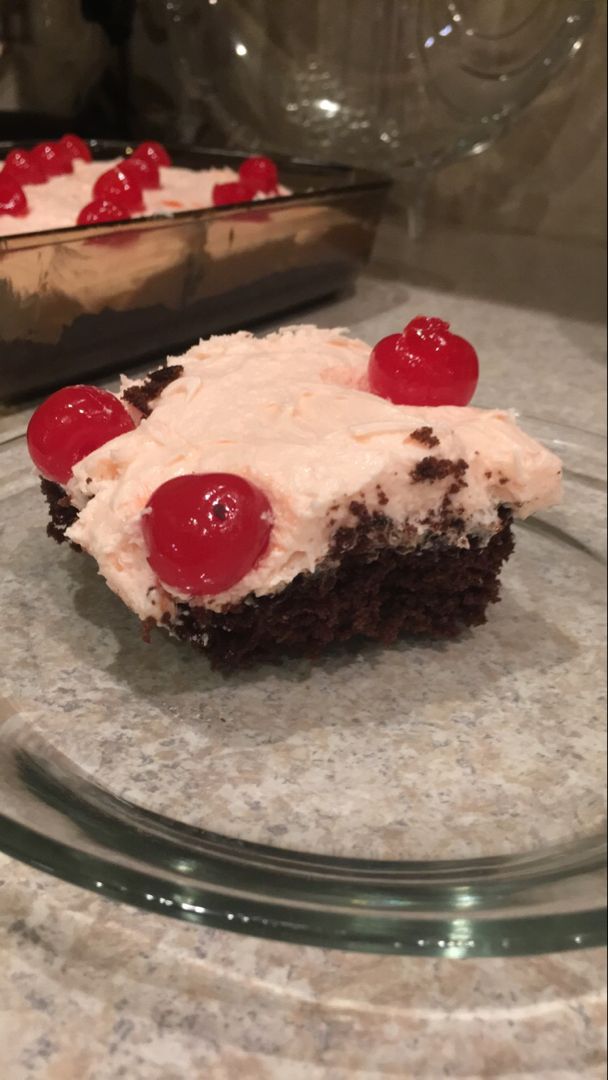
Who doesn’t love a nice tasting cake, right? This recipe that I am sharing with you today is one of the best cakes I have ever tasted. I love it so much that I researched the ingredients and steps to make this amazing cake. Lucky for me you can find anything on the internet! God bless technology! To my surprise, it is not hard to bake as long as you follow the steps, you are bound to perfection! I hope you all love this recipe of cake. Enjoy!

Ingredients

1 box chocolate cake mix, only using the dry mix

1 1/2 cups Dr. Pepper Cherry Soda

1 jar maraschino cherries with no stem (Remove 24 cherries from the jar and set aside)

1 cups unsalted sweet cream butter, softened

3 cups powdered sugar, plus 2 more cups if needed

1 container of chocolate shavings (optional) (Found at Hobby Lobby)

How to make Cherry Dr Pepper Cake with Cherry Buttercream Frosting

To make the Cake:

Step 1: Ready the oven and preheat to 350 degrees F.

Step 2: Apply cooking spray in a 9×13-inch baking dish and set aside.

Step 3: In a medium mixing bowl, add in the soda and cake mix. Use a standing mixer. Mix until well combined.

Step 4: Slice the cherries into two and add them into the batter. Stir until well mixed.

Step 5: Transfer the batter into the prepared baking dish.

Step 6: Place inside the preheated oven and bake for 30 minutes or until the toothpick comes out clean after inserting it in the center of the cake.

Step 7: Remove from the oven and let it sit on a wire rack to cool to room temperature.

To make the Cherry Frosting:

Step 1: In a medium mixing bowl, add in the powdered sugar, butter, and cherry juice. Beat until well combined.

Step 2: Add more sugar about 1 cup, if the frosting this thin.

Step 3: Spread the frosting on top of the cake and use a spatula to smoothen the layer.

Step 4: Sprinkle the chocolate shavings on top of the frosting and place a few cherries.

Step 5: Place inside the refrigerator for at least 1 hour to let the frosting harden.

Step 6: Slice, serve, and enjoy!

Cherry Dr Pepper Cake with Cherry Buttercream Frosting!

Rebecca Who doesn’t love a nice tasting cake, right? This recipe that I am sharing with you today is one of the best cakes I have ever tasted. I love it… Main Dish Recipes Cherry Dr Pepper Cake with Cherry Buttercream Frosting! European Print This
Nutrition facts: 200 calories 20 grams fat
Rating: 5.0/5
( 1 voted )

Ingredients

  • 1 box chocolate cake mix, only using the dry mix
  • 1 1/2 cups Dr. Pepper Cherry Soda
  • 1 jar maraschino cherries with no stem (Remove 24 cherries from the jar and set aside)
  • 1 cups unsalted sweet cream butter, softened
  • 3 cups powdered sugar, plus 2 more cups if needed
  • 1 container of chocolate shavings (optional) (Found at Hobby Lobby)

Instructions

To make the Cake:

Step 1: Ready the oven and preheat to 350 degrees F.

Step 2: Apply cooking spray in a 9x13-inch baking dish and set aside.

Step 3: In a medium mixing bowl, add in the soda and cake mix. Use a standing mixer. Mix until well combined.

Step 4: Slice the cherries into two and add them into the batter. Stir until well mixed.

Step 5: Transfer the batter into the prepared baking dish.

Step 6: Place inside the preheated oven and bake for 30 minutes or until the toothpick comes out clean after inserting it in the center of the cake.

Step 7: Remove from the oven and let it sit on a wire rack to cool to room temperature.

To make the Cherry Frosting:

Step 1: In a medium mixing bowl, add in the powdered sugar, butter, and cherry juice. Beat until well combined.

Step 2: Add more sugar about 1 cup, if the frosting this thin.

Step 3: Spread the frosting on top of the cake and use a spatula to smoothen the layer.

Step 4: Sprinkle the chocolate shavings on top of the frosting and place a few cherries.

Step 5: Place inside the refrigerator for at least 1 hour to let the frosting harden.

Step 6: Slice, serve, and enjoy!

September 3, 2020 0 comment
0 FacebookTwitterPinterestEmail
Main Dish Recipes

MINI CHOCOLATE PEANUT BUTTER PIES

by Rebecca September 3, 2020
written by Rebecca

Prep Time: 25 minutes | Cook Time: 7 minutes | Servings: 12

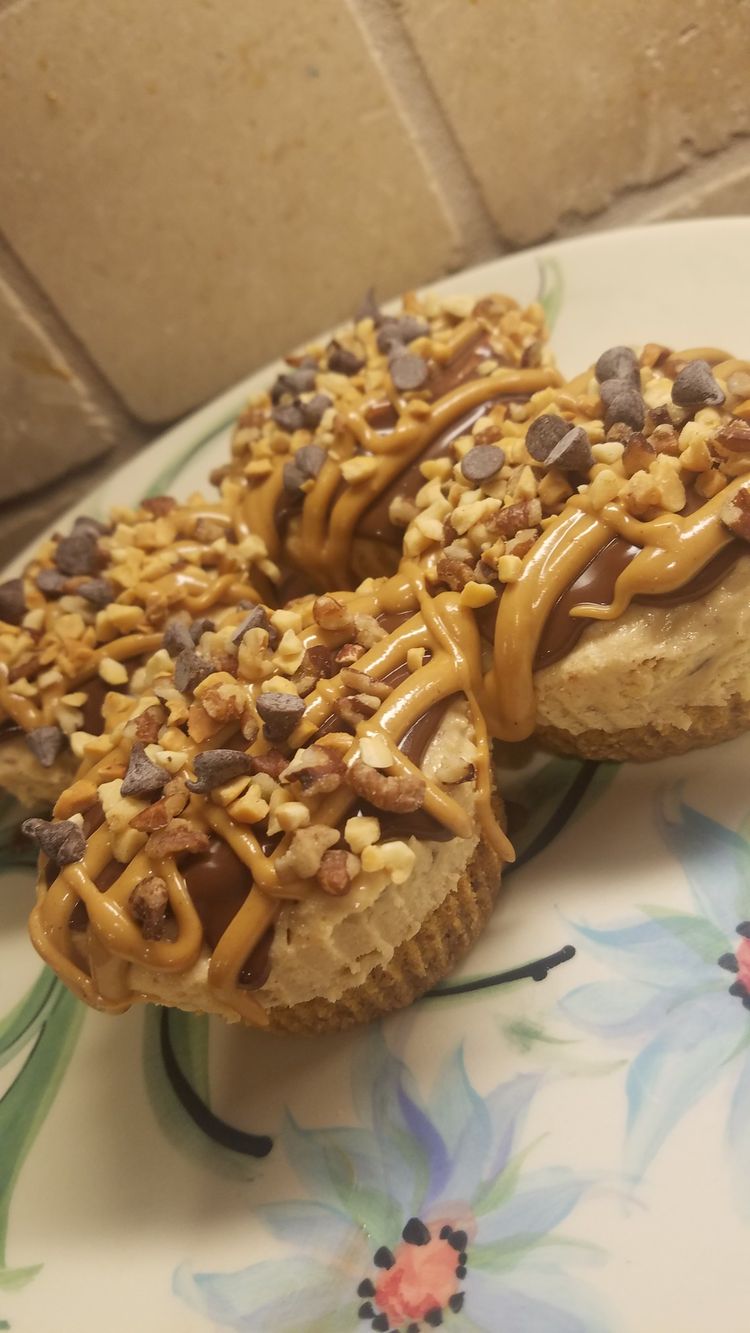
These small wonders are the best! Prepare your coffee or hot cocoa, sit and relax while you eat these amazing pies. I have listed all the ingredients but feel free to add the ingredients that you think will make this recipe perfect. Enjoy!

INGREDIENTS

Graham Cracker Toffee Crust:

5 whole graham cracker sheets

3 tablespoons unsalted butter, melted

1 tablespoon brown sugar

2 tablespoons toffee bits (I use Heath Bits ‘O Brickle Toffee Bits)

Peanut Butter Pie Filling:

1 cup heavy cream

6 oz. cream cheese, room temperature

1 cup smooth peanut butter

1 cup confectioners’ sugar

1/2 cup toffee bits (I use Heath Bits ‘O Brickle Toffee its)

2 teaspoons vanilla extract

1/4 teaspoon salt

Chocolate Ganache:

4 oz. quality semisweet chocolate, chopped

1/2 cup heavy cream

Garnish:

1/4 cup chopped salted peanuts

1 1/2 tablespoons smooth peanut butter

mini chocolate chips (optional)

chopped peanut butter cups (optional)

HOW TO MAKE MINI CHOCOLATE PEANUT BUTTER PIES

Step 1: Ready the oven and preheat to 350 degrees F.

Step 2: Line a 12 muffin tin with cupcake liners.

Step 3: In a food processor, add in the Graham Cracker Crust and blend.

Step 4: Fill each liner with the crumbled Graham Crust.

Step 5: Place inside the oven and bake for 5 to 7 minutes or until it becomes golden in color then set aside.

Step 6: In a large mixing bowl, add in the heavy cream and beat using an electric mixer until the peaks form.

Step 7: In another large mixing bowl, add in the cream cheese and peanut butter. Beat until well mixed.

Step 8: Add in the toffee bits, vanilla, confectioners’ sugar, and salt. Beat until well combined and thick.

Step 9: Transfer the peanut butter mixture into the heavy cream and mix using a spatula until well combined.

Step 10: Fill each of the muffin tins with the mixture and place inside the fridge to chill for about 1 hour.

Step 11: Place the heavy cream inside the microwave and heat for about 90 seconds.

Step 12: Add in the chocolate and heat for another 1 minute until it becomes smooth.

Step 13: Spoon the Ganache on top of the peanut butter cups and spread using the pack of a spoon.

Step 14: Garnish with melted peanut butter and drizzle on top of the mini pies.

Step 15: Sprinkle the mini chocolate chips and salted peanut on top.

Step 16: Place inside the fridge for 4 to 7 hours.

Step 17: Serve and enjoy!

NOTE:

When to Garnish: Garnish after you have spooned the ganache on top.

MINI CHOCOLATE PEANUT BUTTER PIES

Rebecca Prep Time: 25 minutes | Cook Time: 7 minutes | Servings: 12 These small wonders are the best! Prepare your coffee or hot cocoa, sit and relax while you eat… Main Dish Recipes MINI CHOCOLATE PEANUT BUTTER PIES European Print This
Serves: 12 Prep Time: 25 mins Cooking Time: 7 mins 7 mins
Nutrition facts: 200 calories 20 grams fat
Rating: 5.0/5
( 1 voted )

Ingredients

  • Graham Cracker Toffee Crust:
  • 5 whole graham cracker sheets
  • 3 tablespoons unsalted butter, melted
  • 1 tablespoon brown sugar
  • 2 tablespoons toffee bits (I use Heath Bits ‘O Brickle Toffee Bits)
  • Peanut Butter Pie Filling:
  • 1 cup heavy cream
  • 6 oz. cream cheese, room temperature
  • 1 cup smooth peanut butter
  • 1 cup confectioners’ sugar
  • 1/2 cup toffee bits (I use Heath Bits ‘O Brickle Toffee its)
  • 2 teaspoons vanilla extract
  • 1/4 teaspoon salt
  • Chocolate Ganache:
  • 4 oz. quality semisweet chocolate, chopped
  • 1/2 cup heavy cream
  • Garnish:
  • 1/4 cup chopped salted peanuts
  • 1 1/2 tablespoons smooth peanut butter
  • mini chocolate chips (optional)
  • chopped peanut butter cups (optional)

Instructions

Step 1: Ready the oven and preheat to 350 degrees F.

Step 2: Line a 12 muffin tin with cupcake liners.

Step 3: In a food processor, add in the Graham Cracker Crust and blend.

Step 4: Fill each liner with the crumbled Graham Crust.

Step 5: Place inside the oven and bake for 5 to 7 minutes or until it becomes golden in color then set aside.

Step 6: In a large mixing bowl, add in the heavy cream and beat using an electric mixer until the peaks form.

Step 7: In another large mixing bowl, add in the cream cheese and peanut butter. Beat until well mixed.

Step 8: Add in the toffee bits, vanilla, confectioners' sugar, and salt. Beat until well combined and thick.

Step 9: Transfer the peanut butter mixture into the heavy cream and mix using a spatula until well combined.

Step 10: Fill each of the muffin tins with the mixture and place inside the fridge to chill for about 1 hour.

Step 11: Place the heavy cream inside the microwave and heat for about 90 seconds.

Step 12: Add in the chocolate and heat for another 1 minute until it becomes smooth.

Step 13: Spoon the Ganache on top of the peanut butter cups and spread using the pack of a spoon.

Step 14: Garnish with melted peanut butter and drizzle on top of the mini pies.

Step 15: Sprinkle the mini chocolate chips and salted peanut on top.

Step 16: Place inside the fridge for 4 to 7 hours.

Step 17: Serve and enjoy!

NOTE:

When to Garnish: Garnish after you have spooned the ganache on top.

September 3, 2020 0 comment
0 FacebookTwitterPinterestEmail
Main Dish Recipes

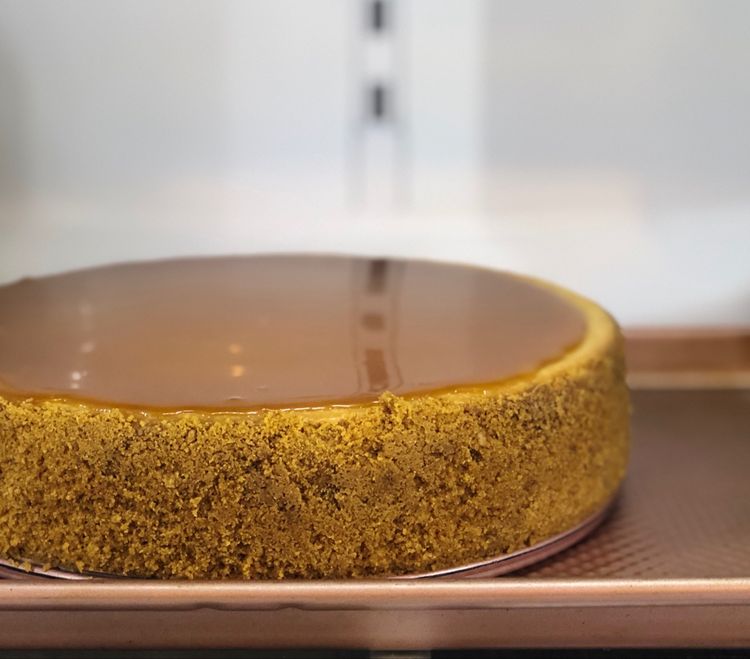
BEST SALTED CARAMEL CHEESECAKE

by Rebecca September 3, 2020
written by Rebecca

Prep Time: 1 hour | Cook Time: 2 hours 55 minutes | Total Time: 3 hours 55 minutes | Yield: 12-14 slices

If you are thinking of baking for someone special, give this awesome cake a try. It will be the best gift you will ever give to your loved ones. I have provided all the steps that you will be needing as well as the ingredients. Enjoy!

INGREDIENTS

CARAMEL SAUCE:

2 1/2 cups (518g) sugar

10 tbsp (140g) salted butter, room temperature

1 1/4 cups (300ml) heavy whipping cream, room temperature

6 tbsp (49g) all-purpose flour, sifted

CRUST:

2 cups (268g) graham cracker crumbs

1/2 cup salted butter, melted

3 tbsp brown sugar

FILLING:

24 oz (678g) cream cheese, room temperature

1 cup (144g) light brown sugar

3 tbsp (24g) all-purpose flour

1 cup (230g) sour cream

1 1/2 tbsp vanilla extract

4 large eggs

Toffee bits

HOW TO MAKE SALTED CARAMEL CHEESECAKE

Step 1: Place the sugar in a large saucepan then place it on the stove. Turn the heat to medium and whisk the sugar until melted.

Step 2: Remove the saucepan from the heat once it turns into caramel.

Step 3: Add in the butter and whisk until well blended.

Step 4: Gently add in the heavy cream and whisk until well blended.

Step 5: Set aside 1 cup of the caramel sauce.

Step 6: Add in the rest of the flour into the caramel.

To make Cheesecake Crust:

Step 1: Ready the oven and preheat to 325 degrees F.

Step 2: Line a 9-inch with parchment paper and apply cooking spray on the sides.

Step 3: In a small bowl, add in the crust ingredients. Stir until well mixed.

Step 4: Place the mixture on the bottom of the springform pan and press.

Step 5: Place inside the preheated oven and bake for 10 minutes. Remove and allow it to cool to room temperature.

Step 6: Cover the sides with aluminum foil

Step 7: Turn the temperature down to 300 degrees F.

Step 8: Transfer the caramel sauce on the bottom of the crust. Spread into a layer.

To make the Filling: 

Step 1: In a large bowl, add in the cream cheese and brown sugar. Beat until well mixed at low speed.

Step 2: Add in the vanilla and sour cream and beat until well combined.

Step 3: Add one egg at a time and beat slowly.

Step 4: Transfer the batter into the caramel.

Step 5: Place the springform pan inside a bigger pan. Fill the bigger pan with water, just enough.

Step 6: Place inside the oven and bake for 1 hour and 45 minutes or until jiggly.

Step 7: Turn off the oven and let the cake sit inside for 30 minutes.

Step 8: Remove from the oven and remove the wrapping and water.

Step 9: Place inside the fridge to chill for about 5 to 6 hours.

Step 10: Serve and enjoy!

Nutrition Facts:

Amount Per Serving: Calories 632% | Total Fat 34.7g 45% | Cholesterol 148.4mg 49% | Sodium 453.8mg 20% | Total Carbohydrate 72.5g 26% | Sugars 55.7g | Protein 9.1g 18% | Vitamin A37%| Vitamin C0%

BEST SALTED CARAMEL CHEESECAKE

Rebecca Prep Time: 1 hour | Cook Time: 2 hours 55 minutes | Total Time: 3 hours 55 minutes | Yield: 12-14 slices If you are thinking of baking for someone… Main Dish Recipes BEST SALTED CARAMEL CHEESECAKE European Print This
Serves: 12-14 Prep Time: 1 hr Cooking Time: 2 hrs 55 mins 2 hrs 55 mins
Nutrition facts: 632 calories 34.7 fat
Rating: 5.0/5
( 1 voted )

Ingredients

  • CARAMEL SAUCE:
  • 2 1/2 cups (518g) sugar
  • 10 tbsp (140g) salted butter, room temperature
  • 1 1/4 cups (300ml) heavy whipping cream, room temperature
  • 6 tbsp (49g) all-purpose flour, sifted
  • CRUST:
  • 2 cups (268g) graham cracker crumbs
  • 1/2 cup salted butter, melted
  • 3 tbsp brown sugar
  • FILLING:
  • 24 oz (678g) cream cheese, room temperature
  • 1 cup (144g) light brown sugar
  • 3 tbsp (24g) all-purpose flour
  • 1 cup (230g) sour cream
  • 1 1/2 tbsp vanilla extract
  • 4 large eggs
  • Toffee bits

Instructions

Step 1: Place the sugar in a large saucepan then place on the stove. Turn the heat to medium and whisk the sugar until melted.

Step 2: Remove the saucepan from the heat once it turns into caramel.

Step 3: Add in the butter and whisk until well blended.

Step 4: Gently add in the heavy cream and whisk until well blended.

Step 5: Set aside 1 cup of the caramel sauce.

Step 6: Add in the rest of the flour into the caramel.

To make Cheesecake Crust:

Step 1: Ready the oven and preheat to 325 degrees F.

Step 2: Line a 9-inch with parchment paper and apply cooking spray on the sides.

Step 3: In a small bowl, add in the crust ingredients. Stir until well mixed.

Step 4: Place the mixture on the bottom of the springform pan and press.

Step 5: Place inside the preheated oven and bake for 10 minutes. Remove and allow it to cool to room temperature.

Step 6: Cover the sides with aluminum foil

Step 7: Turn the temperature down to 300 degrees F.

Step 8: Transfer the caramel sauce on the bottom of the crust. Spread into a layer.

To make the Filling: 

Step 1: In a large bowl, add in the cream cheese and brown sugar. Beat until well mixed at low speed.

Step 2: Add in the vanilla and sour cream and beat until well combined.

Step 3: Add one egg at a time and beat slowly.

Step 4: Transfer the batter into the caramel.

Step 5: Place the springform pan inside a bigger pan. Fill the bigger pan with water, just enough.

Step 6: Place inside the oven and bake for 1 hour and 45 minutes or until jiggly.

Step 7: Turn off the oven and let the cake sit inside for 30 minutes.

Step 8: Remove from the oven and remove the wrapping and water.

Step 9: Place inside the fridge to chill for about 5 to 6 hours.

Step 10: Serve and enjoy!

September 3, 2020 0 comment
0 FacebookTwitterPinterestEmail
Main Dish Recipes

SLOW COOKER QUESO CHICKEN TACOS

by Rebecca September 3, 2020
written by Rebecca

SLOW COOKER QUESO CHICKEN TACOS

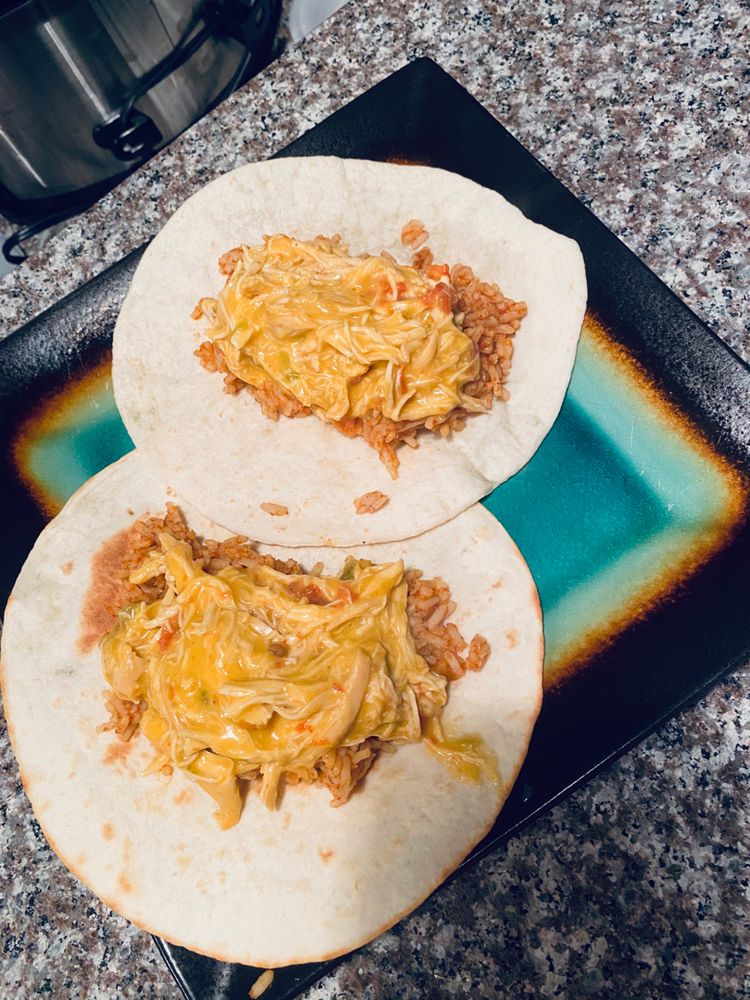
It’s taco night, quarantine edition! Enjoy today with this super simple and easy to make Slow Cooker Queso Chicken Tacos. And since it is quarantine and we have limited supplies, you can drop the green chiles and the chicken broth and this will be as great! The Rotel can be substituted with Salsa. See, this recipe is so versatile, you don’t need to stress on the ingredients. Which makes this a perfect quarantine taco night dish. And it tastes outrageously delicious, mouthwatering, and to die for!

Ingredients

2  pounds boneless skinless chicken breasts

1 packet (1 ounce) of your favorite taco seasoning or use homemade

10 ounce can of Rotel with lime juice and cilantro (you can use Original Rotel too, or use homemade Rotel – Tomatoes and Green Chilies)

4 ounce can mild diced green chiles

1/2  cup chicken broth

3/4 cup salsa con queso  – use your favorite brand or use homemade

taco shells, hard or soft

favorite toppings – lettuce, tomato, cheddar cheese, onions, jalapenos, sour cream, guacamole, fresh lime, cilantro, hot sauce, queso

HOW TO MAKE SLOW COOKER QUESO CHICKEN TACOS

Step 1: Apply cooking spray in a slow cooker.

Step 2: Place the chicken in a single layer. Season with the taco seasoning.

Step 3: In a medium mixing bowl, add in the green chiles, chicken broth, and Rotel. Stir until well mixed.

Step 4: Pour the mixture over the seasoned chicken.

Step 5: Cook on low setting for 6 to 8 hours and 4 to 6 hours on high.

Step 6: Remove the excess liquid and leave a little so the chicken won’t be dry.

Step 7: Using two forks, shred the chicken.

Step 8: Spoon the queso on top and coat the chicken entirely.

Step 9: Cover and cook for 20 minutes on low or until cooked through.

Step 10: Serve with taco toppings and enjoy!

TIPS:
Cooking time depends on the size of the slow cooker. Adjust the cooking time according to your slow cooker.

SLOW COOKER QUESO CHICKEN TACOS

Rebecca SLOW COOKER QUESO CHICKEN TACOS It’s taco night, quarantine edition! Enjoy today with this super simple and easy to make Slow Cooker Queso Chicken Tacos. And since it is quarantine… Main Dish Recipes SLOW COOKER QUESO CHICKEN TACOS European Print This
Nutrition facts: 200 calories 20 grams fat
Rating: 5.0/5
( 1 voted )

Ingredients

  • 2  pounds boneless skinless chicken breasts
  • 1 packet (1 ounce) of your favorite taco seasoning or use homemade
  • 10 ounce can of Rotel with lime juice and cilantro (you can use Original Rotel too, or use homemade Rotel – Tomatoes and Green Chilies)
  • 4 ounce can mild diced green chiles
  • 1/2  cup chicken broth
  • 3/4 cup salsa con queso  – use your favorite brand or use homemade
  • taco shells, hard or soft
  • favorite toppings – lettuce, tomato, cheddar cheese, onions, jalapenos, sour cream, guacamole, fresh lime, cilantro, hot sauce, queso

Instructions

Step 1: Apply cooking spray in a slow cooker.

Step 2: Place the chicken in a single layer. Season with the taco seasoning.

Step 3: In a medium mixing bowl, add in the green chiles, chicken broth, and Rotel. Stir until well mixed.

Step 4: Pour the mixture over the seasoned chicken.

Step 5: Cook on low setting for 6 to 8 hours and 4 to 6 hours on high.

Step 6: Remove the excess liquid and leave a little so the chicken won't be dry.

Step 7: Using two forks, shred the chicken.

Step 8: Spoon the queso on top and coat the chicken entirely.

Step 9: Cover and cook for 20 minutes on low or until cooked through.

Step 10: Serve with taco toppings and enjoy!

TIPS:
Cooking time depends on the size of the slow cooker. Adjust the cooking time according to your slow cooker.

September 3, 2020 0 comment
0 FacebookTwitterPinterestEmail
Newer Posts
Older Posts

Popular Posts

  • 1

    Crispy Crunchy Parmesan Potatoes

    March 21, 2020
  • 2

    CROCK POT SMOTHERED PORK CHOPS

    March 21, 2020
  • Facebook
  • Twitter

@2019 - All Right Reserved.


Back To Top