Cook it once
  • Home
  • Privacy Policy
  • Recipes
    • KETO
    • LC
    • WW
  • Tips
  • Contact
Cook it once
  • Home
  • Privacy Policy
  • Recipes
    • KETO
    • LC
    • WW
  • Tips
  • Contact
Category:

Main Dish Recipes

Main Dish Recipes

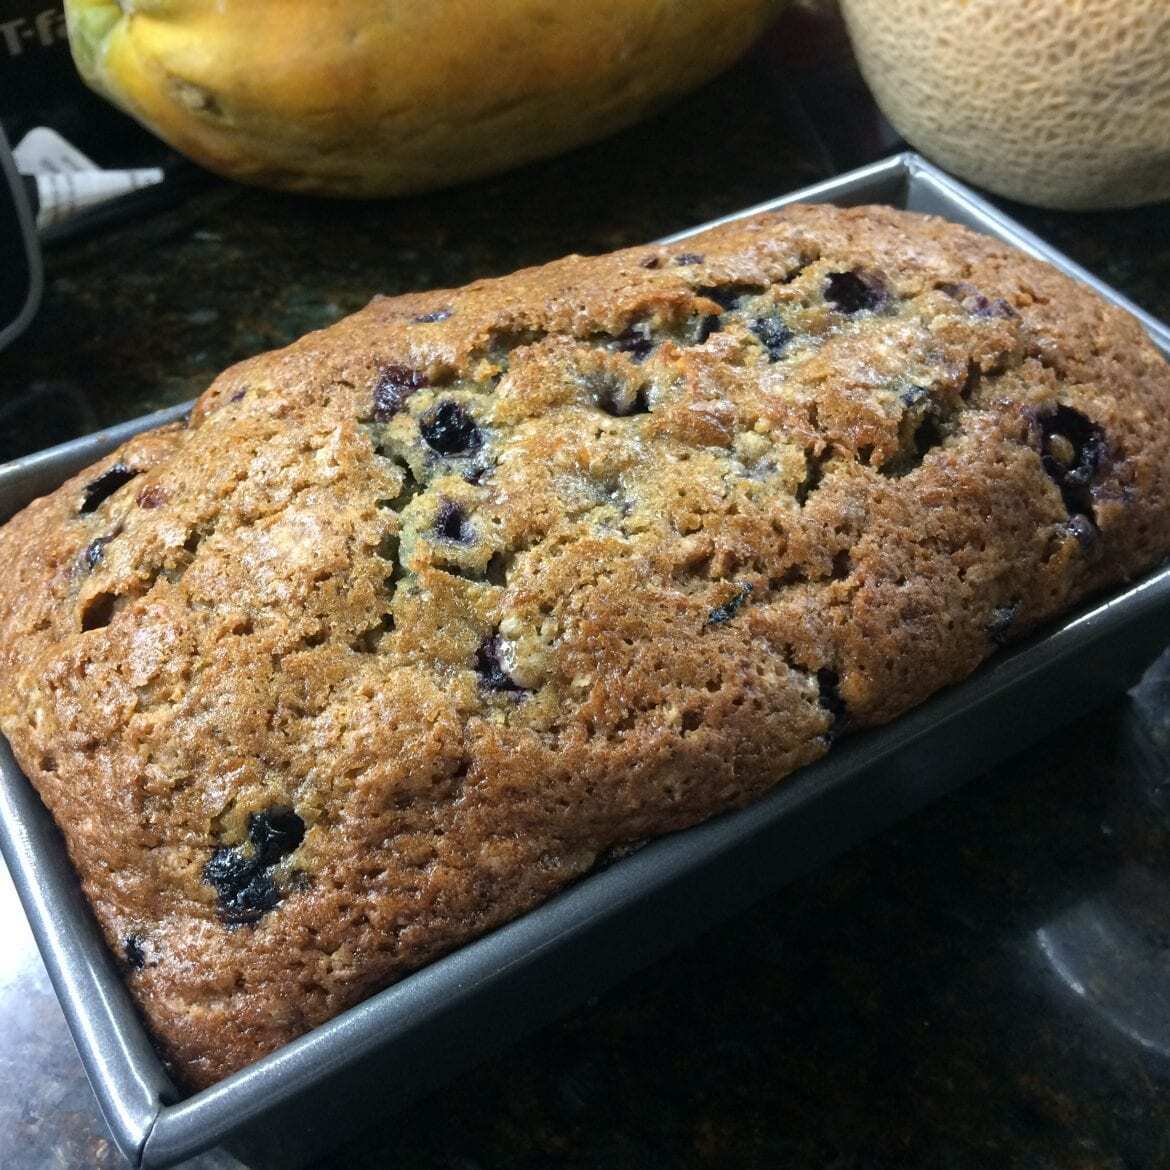
BLUEBERRY ZUCCHINI BREAD

by Rebecca September 6, 2020
written by Rebecca

Again, zucchini! And oh, blueberries! Yum! This incredibly delicious loaf is made out of the amazing zucchini and fresh (or frozen) blueberries. A pretty simple, not fussy bread recipe that you can make in a heartbeat. Everybody will love this healthy, refreshing, and one of a kind Blueberry Zucchini Bread. This is a must-try and to keep.

INGREDIENTS:

3 eggs, lightly beaten

1 cup of vegetable oil

3 teaspoons vanilla extract

2 ¼ cups white sugar

2 cups shredded zucchini (as fresh as possible)

3 cups all-purpose flour

1 teaspoon salt

1 teaspoon baking powder

¼ teaspoon baking soda

1 tablespoon ground cinnamon

1 pint fresh blueberries (The blueberries need to be as fresh as possible)

Equipment to use:

An oven  (preferably one that is temperature-regulated)

4 Mini-loaf pans

One large bowl

A big spoon (for mixing/stirring. No need to use a mixer for this recipe.)

A knife

Aluminum foil

Plastic wrap

A sealable freezer bag

A freezer/refrigerator

HOW TO MAKE BLUEBERRY ZUCCHINI BREAD

Step 1: Prepare the oven. Preheat it to 350 degrees F or 175 degrees C.

Step 2: Then, lightly grease 4 min-loaf pans.

Step 3: Beat the eggs, oil, vanilla, and sugar in a large bowl. Then, fold in the zucchini. Add in the flour, salt, baking powder, baking soda, and cinnamon. Beat well before gently folding in the blueberries.

Step 4: Pour the batter into the prepared mini-loaf pans.

Step 5: Place inside the preheated oven and bake for about 50 minutes until a knife inserted in the center of the loaf comes out clean.

Step 6: Remove from the oven and allow the loaves to cool in the pan for at least 20 minutes before turning them out onto wire racks to completely cool.

NOTES:

Once cooled, wrap the loaf in a sheet of aluminum foil. Put the wrapped loaves into a sealed freezer bag and freeze. For additional protection, first, wrap the loaves in plastic wraps, wrap it in foil, and put them in the freezer bag.

You can either use fresh or frozen blueberries for this recipe. Although, using frozen blueberries will color the loaves a bit but the taste will still be the same.
BLUEBERRY ZUCCHINI BREAD

Rebecca Again, zucchini! And oh, blueberries! Yum! This incredibly delicious loaf is made out of the amazing zucchini and fresh (or frozen) blueberries. A pretty simple, not fussy bread recipe that… Main Dish Recipes BLUEBERRY ZUCCHINI BREAD European Print This
Nutrition facts: 200 calories 20 grams fat
Rating: 5.0/5
( 1 voted )

Ingredients

  • 3 eggs, lightly beaten
  • 1 cup of vegetable oil
  • 3 teaspoons vanilla extract
  • 2 ¼ cups white sugar
  • 2 cups shredded zucchini (as fresh as possible)
  • 3 cups all-purpose flour
  • 1 teaspoon salt
  • 1 teaspoon baking powder
  • ¼ teaspoon baking soda
  • 1 tablespoon ground cinnamon
  • 1 pint fresh blueberries (The blueberries need to be as fresh as possible)

Instructions

Step 1: Prepare the oven. Preheat it to 350 degrees F or 175 degrees C.

Step 2: Then, lightly grease 4 min-loaf pans.

Step 3: Beat the eggs, oil, vanilla, and sugar in a large bowl. Then, fold in the zucchini. Add in the flour, salt, baking powder, baking soda, and cinnamon. Beat well before gently folding in the blueberries.

Step 4: Pour the batter into the prepared mini-loaf pans.

Step 5: Place inside the preheated oven and bake for about 50 minutes until a knife inserted in the center of the loaf comes out clean.

Step 6: Remove from the oven and allow the loaves to cool in the pan for at least 20 minutes before turning them out onto wire racks to completely cool.

NOTES:

Once cooled, wrap the loaf in a sheet of aluminum foil. Put the wrapped loaves into a sealed freezer bag and freeze. For additional protection, first, wrap the loaves in plastic wraps, wrap it in foil, and put them in the freezer bag.

You can either use fresh or frozen blueberries for this recipe. Although, using frozen blueberries will color the loaves a bit but the taste will still be the same.
September 6, 2020 0 comment
0 FacebookTwitterPinterestEmail
Main Dish Recipes

HOMEMADE PAY DAY CANDY BARS

by Rebecca September 6, 2020
written by Rebecca

Serves: 6-8

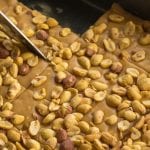
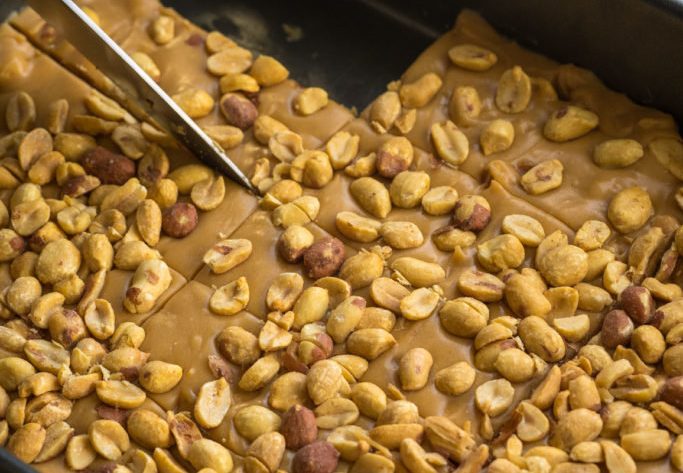
My sweet tooth fixer – these jawbreaker candy bars are one of the easiest and quickest treats you can make. These bars have everything; peanuts, peanut butter chips, and marshmallows. Nothing about this treat is intimidating, all straightforward, no fancy ingredients you cannot pronounce. And it can be a perfect homemade giveaway. Don’t forget to add this to your list of gifts to give this holiday season. I am pretty sure that whoever you give these will enjoy and love these homemade candy bars. Loaded with all the things you love and crazy delicious! A perfectly sweet, nutty candy bars that are tested over time.

INGREDIENTS:

3 cups salted peanuts

2 cups peanut butter chips

2 cups mini marshmallows

1 (14 oz.) can sweeten condensed milk

3 tablespoons unsalted butter

1/2 teaspoon vanilla extract

EQUIPMENTS TO USE:

A working cooker

One large saucepan

A long-handled spoon or a ladle (or any other utensil you use for stirring. There’s a whole lot of stirring involved in this recipe.)

A 9×13-inch baking dish

Non-stick spray or parchment paper

A refrigerator

HOW TO MAKE HOMEMADE PAYDAY CANDY BARS

Step 1: In a large saucepan, melt the butter and peanut butter chips over medium heat until smooth. Add in the condensed milk, vanilla extract, and marshmallows. Stir until smooth and well combined.

Step 2: Use butter or a non-stick spray to generously grease a 9 x 13-inch baking dish. Or you can line the baking dish with parchment paper.

Step 3: Across the baking dish, spread half of the peanuts.

Step 4: Then, pour over the condensed milk mixture and sprinkle with the rest of the peanuts.

Step 5: This is optional but if you want your candy bars to taste better, I would recommend chilling them. I usually prefer to freeze them as frozen as they can get. I like these candy bars crunch and have a jawbreaker quality.

HOMEMADE PAY DAY CANDY BARS

Rebecca Serves: 6-8 My sweet tooth fixer – these jawbreaker candy bars are one of the easiest and quickest treats you can make. These bars have everything; peanuts, peanut butter chips, and… Main Dish Recipes HOMEMADE PAY DAY CANDY BARS European Print This
Nutrition facts: 200 calories 20 grams fat
Rating: 5.0/5
( 1 voted )

Ingredients

  • 3 cups salted peanuts
  • 2 cups peanut butter chips
  • 2 cups mini marshmallows
  • 1 (14 oz.) can sweeten condensed milk
  • 3 tablespoons unsalted butter
  • 1/2 teaspoon vanilla extract

Instructions

Step 1: In a large saucepan, melt the butter and peanut butter chips over medium heat until smooth. Add in the condensed milk, vanilla extract, and marshmallows. Stir until smooth and well combined.

Step 2: Use butter or a non-stick spray to generously grease a 9 x 13-inch baking dish. Or you can line the baking dish with parchment paper.

Step 3: Across the baking dish, spread half of the peanuts.

Step 4: Then, pour over the condensed milk mixture and sprinkle with the rest of the peanuts.

Step 5: This is optional but if you want your candy bars to taste better, I would recommend chilling them. I usually prefer to freeze them as frozen as they can get. I like these candy bars crunch and have a jawbreaker quality.

September 6, 2020 0 comment
0 FacebookTwitterPinterestEmail
Main Dish Recipes

BEST EVER BEEF AND BARLEY SOUP

by Rebecca September 6, 2020
written by Rebecca

Servings: 10 servings | Cook Time: 40 minutes

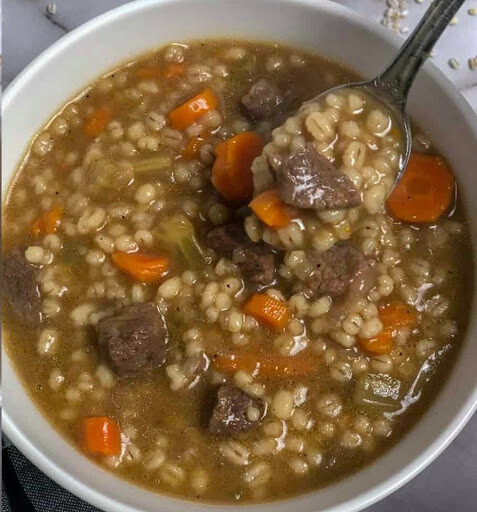
Enjoy the best soup in the comfort of your home. Grab your slow cooker and prepare everything. The next thing you know, you have this healthy, rich, and delish Beef and Barley Soup on your dinner table. This is the best soup – you got the flavors, then, you got blends of texture in a snap that just cracks in your mouth.

This is a complete meal in a bowl. It got loads of nutritious vegetables, tender beef, and plump barley. You can never ask for anything better than this! This is great as a make-ahead dish, too. And it freezes well. Making this the perfect family meal. This has been my go-to and this meal never fails me. My family loves this, even my picky eater can finish a big bowl in a heartbeat! This is pretty easy to prepare and the ingredients are simple and are readily available. All you have to do is just add everything in your slow cooker and leave.

INGREDIENTS

1 pound boneless chuck roast trimmed and cut into 1/2-inch pieces

1 1/2 cups carrots thinly sliced

1 1/2 cups celery thinly sliced

2/3 cup onion chopped

1 package pre-sliced mushrooms 8-ounce

2 tablespoons beef base (this is different than beef broth it is a base that makes beef broth)

8-10 cups water

1 large bay leaf

HOW TO MAKE BEEF AND BARLEY SOUP

Step 1: In a non-stick frypan, cook the beef while frequently stirring until browned.

Step 2: Once cooked, transfer the browned beef into a crockpot. Add in the carrot, celery, onion, and mushrooms, beef base, water, garlic, and bay leaf.

Step 3: Cook for an hour on high heat. Then, add in the pearl barley. Adjust the heat to low and continue cooking until the vegetables and beef are tender.

Step 4: Sprinkle some salt and pepper. Stir well.

Step 5: Then, discard the bay leaf.

BEST EVER BEEF AND BARLEY SOUP

Rebecca Servings: 10 servings | Cook Time: 40 minutes Enjoy the best soup in the comfort of your home. Grab your slow cooker and prepare everything. The next thing you know,… Main Dish Recipes BEST EVER BEEF AND BARLEY SOUP European Print This
Serves: 10 Cooking Time: 40 mins 40 mins
Nutrition facts: 200 calories 20 grams fat
Rating: 3.3/5
( 48 voted )

Ingredients

  • 1 pound boneless chuck roast trimmed and cut into 1/2-inch pieces
  • 1 1/2 cups carrots thinly sliced
  • 1 1/2 cups celery thinly sliced
  • 2/3 cup onion chopped
  • 1 package pre-sliced mushrooms 8-ounce
  • 2 tablespoons beef base (this is different than beef broth it is a base that makes beef broth)
  • 8-10 cups water
  • 1 large bay leaf

Instructions

Step 1: In a non-stick frypan, cook the beef while frequently stirring until browned.

Step 2: Once cooked, transfer the browned beef into a crockpot. Add in the carrot, celery, onion, and mushrooms, beef base, water, garlic, and bay leaf.

Step 3: Cook for an hour on high heat. Then, add in the pearl barley. Adjust the heat to low and continue cooking until the vegetables and beef are tender.

Step 4: Sprinkle some salt and pepper. Stir well.

Step 5: Then, discard the bay leaf.

September 6, 2020 0 comment
0 FacebookTwitterPinterestEmail
Main Dish Recipes

PUMPKIN COOKIES WITH CREAM CHEESE FROSTING (THE WORLD’S BEST!)

by Rebecca September 6, 2020
written by Rebecca

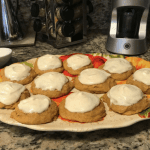
These are the World’s Best Pumpkin Cookies with Cream Cheese Frosting. Soft and chewy topped with a sweet and rich frosting. A no-fuss, heavenly, and the perfect dessert. These autumn spiced cookies are way too good, you’ll want to make these all year round!

Ingredients

2 cups all-purpose flour

1 teaspoon baking powder

1 teaspoon ground cinnamon

½ teaspoon baking soda

½ teaspoon ground nutmeg

½ teaspoon ground ginger

1 cup butter

¾ cup white sugar

¾ cup brown sugar

2 teaspoon vanilla extract

1 egg

1 15oz can of pumpkin puree

1 3oz package cream cheese, softened

¼ cup butter softened

1 teaspoon vanilla extract

2 cups confectioners’ sugar

HOW TO MAKE PUMPKIN COOKIES WITH CREAM CHEESE FROSTING

Step 1: Prepare the oven. Preheat it to 350 degrees F or 175 degrees C.

Step 2: Then, grease lightly your baking sheets.

Step 3: In a bowl, whisk the flour, baking powder, cinnamon, baking soda, nutmeg, and ginger.

Step 4: In another bowl,  add a cup of butter, white sugar, brown sugar, 2 teaspoons vanilla extract, and egg. Beat with an electric mixer until smooth.

Step 5: Add in the pumpkin puree and beat. Then, slowly stir in the dry ingredients until moist.

Step 6: Onto the prepared baking sheets, place teaspoonfuls of the batter at least 2 inches apart.

Step 7: Place inside the preheated oven and bake for about 10 to 12 minutes until lightly brown.

Step 8: Remove from the oven and allow the cookies to cool on the sheets for at least 5 minutes before transferring them on waxed paper to completely cool.

Step 9: In a bowl, add the cream cheese, 1/4 cup butter, and a teaspoon of vanilla extract. Beat with an electric mixer until soft and creamy. Beat in the confectioners’ sugar, half a cup at a time, until the frosting is smooth and spreadable.

Step 10: Once the cookies are cooled completely, frost them with the cream cheese frosting.

Nutrition Facts :

Per Serving: 152.3 calories; 24.7 mg cholesterol; 115 mg sodium; 1.3 g protein; 20.6 g carbohydrates

PUMPKIN COOKIES WITH CREAM CHEESE FROSTING (THE WORLD’S BEST!)

Rebecca These are the World’s Best Pumpkin Cookies with Cream Cheese Frosting. Soft and chewy topped with a sweet and rich frosting. A no-fuss, heavenly, and the perfect dessert. These autumn… Main Dish Recipes PUMPKIN COOKIES WITH CREAM CHEESE FROSTING (THE WORLD’S BEST!) European Print This
Nutrition facts: 152.3 calories 20 grams fat
Rating: 5.0/5
( 1 voted )

Ingredients

  • 2 cups all-purpose flour
  • 1 teaspoon baking powder
  • 1 teaspoon ground cinnamon
  • ½ teaspoon baking soda
  • ½ teaspoon ground nutmeg
  • ½ teaspoon ground ginger
  • 1 cup butter
  • ¾ cup white sugar
  • ¾ cup brown sugar
  • 2 teaspoon vanilla extract
  • 1 egg
  • 1 15oz can of pumpkin puree
  • 1 3oz package cream cheese, softened
  • ¼ cup butter softened
  • 1 teaspoon vanilla extract
  • 2 cups confectioners’ sugar

Instructions

Step 1: Prepare the oven. Preheat it to 350 degrees F or 175 degrees C.

Step 2: Then, grease lightly your baking sheets.

Step 3: In a bowl, whisk the flour, baking powder, cinnamon, baking soda, nutmeg, and ginger.

Step 4: In another bowl,  add a cup of butter, white sugar, brown sugar, 2 teaspoons vanilla extract, and egg. Beat with an electric mixer until smooth.

Step 5: Add in the pumpkin puree and beat. Then, slowly stir in the dry ingredients until moist.

Step 6: Onto the prepared baking sheets, place teaspoonfuls of the batter at least 2 inches apart.

Step 7: Place inside the preheated oven and bake for about 10 to 12 minutes until lightly brown.

Step 8: Remove from the oven and allow the cookies to cool on the sheets for at least 5 minutes before transferring them on waxed paper to completely cool.

Step 9: In a bowl, add the cream cheese, 1/4 cup butter, and a teaspoon of vanilla extract. Beat with an electric mixer until soft and creamy. Beat in the confectioners’ sugar, half a cup at a time, until the frosting is smooth and spreadable.

Step 10: Once the cookies are cooled completely, frost them with the cream cheese frosting.

September 6, 2020 0 comment
0 FacebookTwitterPinterestEmail
Main Dish Recipes

TEXAS SHEET CAKE RECIPE

by Rebecca September 6, 2020
written by Rebecca

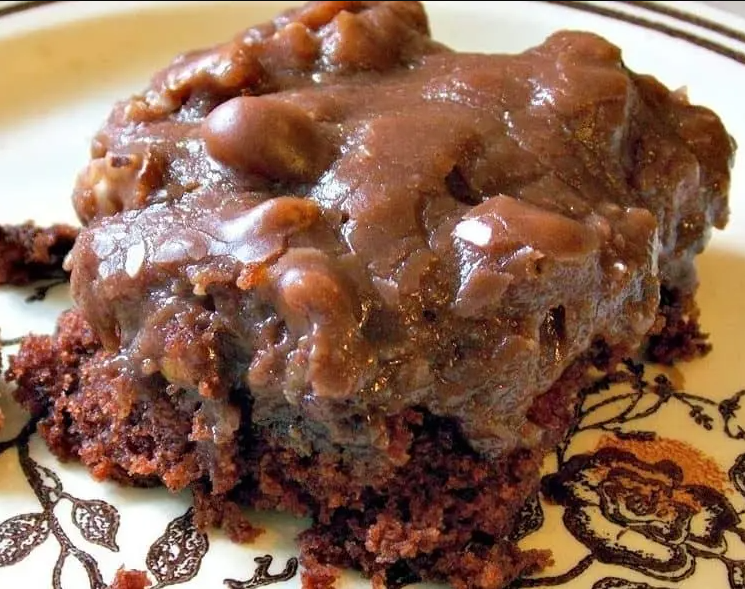
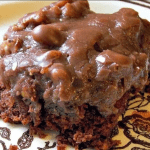
This incredibly moist Texas Sheet Cake is perfect for any occasion. A no-fuss cake filled with chopped pecans. A quick fix if you are craving for something sweet but not too sweet. This is heavenly delicious, outrageously rich topped with perfectly sweet chocolate frosting. It is a classic Texas dessert recipe to keep.

INGREDIENTS

Cake:

1 cup butter

1 cup of water

¼ cup of cocoa

2 cups of sugar

2 cups flour

⅛ teaspoon salt

2 eggs

1 teaspoon baking soda

½ cup sour cream

1 teaspoon vanilla

Icing

Icing:

½ cup butter

¼ cup of cocoa

¼ cup plus 2 tablespoons milk

1 box (1 pound) confectioners’ sugar (sift it first to remove lumps – otherwise icing remains lumpy)

½ teaspoon vanilla

Chopped Pecans (optional)

HOW TO MAKE TEXAS SHEET CAKE

To make the cake:

Step 1: Add the butter, water, and cocoa in a saucepan. Heat over medium heat until the butter has melted. Make sure to not cook it too long, though.

Step 2: Combine the sugar, flour, salt, eggs, and baking soda in another bowl.

Step 3: Carefully, add the melted butter into the dry ingredients.

Step 4: Stir in the sour cream and vanilla.

Step 5: Transfer the mixture into a sheet cake pan or jelly roll pan.

Step 6: Place inside the oven and bake for about 20 minutes at 350 degrees.

To make the icing:

Step 1: Add the butter, cocoa, and milk in a saucepan. Bring to a boil over medium heat.

Step 2: Remove the saucepan immediately from the heat, then, stir in the confectioner’s sugar and vanilla.

Step 3: Use a mixer to mix the icing well to get rid of the lumps.

Step 4: While the icing is still hot, pour it over the sheet cake and spread.

Step 5: For the chopped pecans, you can either stir them into the icing before you pour it over the hot sheet cake or you can sprinkle them over the cake after icing it. Or leave them if you don’t want pecans.

TEXAS SHEET CAKE RECIPE

Rebecca This incredibly moist Texas Sheet Cake is perfect for any occasion. A no-fuss cake filled with chopped pecans. A quick fix if you are craving for something sweet but not… Main Dish Recipes TEXAS SHEET CAKE RECIPE European Print This
Nutrition facts: 200 calories 20 grams fat
Rating: 3.3/5
( 28 voted )

Ingredients

  • Cake:
  • 1 cup butter
  • 1 cup of water
  • ¼ cup of cocoa
  • 2 cups of sugar
  • 2 cups flour
  • ⅛ teaspoon salt
  • 2 eggs
  • 1 teaspoon baking soda
  • ½ cup sour cream
  • 1 teaspoon vanilla
  • Icing
  • Icing:
  • ½ cup butter
  • ¼ cup of cocoa
  • ¼ cup plus 2 tablespoons milk
  • 1 box (1 pound) confectioners’ sugar (sift it first to remove lumps – otherwise icing remains lumpy)
  • ½ teaspoon vanilla
  • Chopped Pecans (optional)

Instructions

To make the cake:

Step 1: Add the butter, water, and cocoa in a saucepan. Heat over medium heat until the butter has melted. Make sure to not cook it too long, though.

Step 2: Combine the sugar, flour, salt, eggs, and baking soda in another bowl.

Step 3: Carefully, add the melted butter into the dry ingredients.

Step 4: Stir in the sour cream and vanilla.

Step 5: Transfer the mixture into a sheet cake pan or jelly roll pan.

Step 6: Place inside the oven and bake for about 20 minutes at 350 degrees.

To make the icing:

Step 1: Add the butter, cocoa, and milk in a saucepan. Bring to a boil over medium heat.

Step 2: Remove the saucepan immediately from the heat, then, stir in the confectioner's sugar and vanilla.

Step 3: Use a mixer to mix the icing well to get rid of the lumps.

Step 4: While the icing is still hot, pour it over the sheet cake and spread.

Step 5: For the chopped pecans, you can either stir them into the icing before you pour it over the hot sheet cake or you can sprinkle them over the cake after icing it. Or leave them if you don't want pecans.

September 6, 2020 0 comment
0 FacebookTwitterPinterestEmail
Main Dish Recipes

CRAB AND SHRIMP SEAFOOD BISQUE

by Rebecca September 6, 2020
written by Rebecca

Serves: 6 – 8

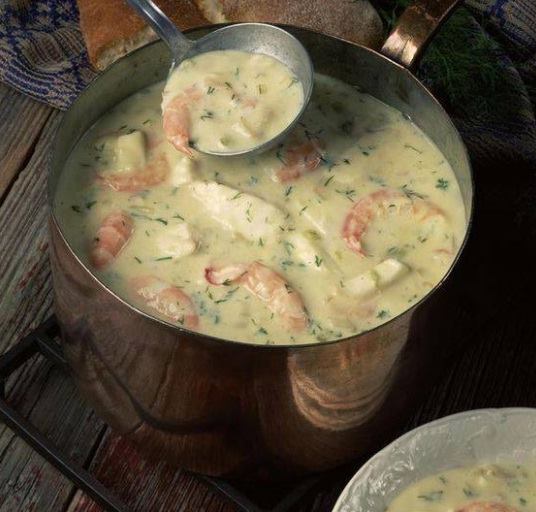
This is the best Bisque I’ve ever tasted in my entire existence! It is an exotic dish that tastes simply amazing! Although, this is not for those who are allergic to seafood because it is loaded with all the seafood you can eat. This dish is not limited to just shrimps, you can add other seafood that you’d like! Isn’t that exciting? And this will taste extra special! Give this a try and I’m pretty sure that you’ll be head over heels!

INGREDIENTS

3 tablespoons butter

2 tablespoons chopped green onion

2 tablespoons chopped celery

3 tablespoons all-purpose flour

2 1/2 cups milk

1/2 teaspoon freshly ground black pepper

1 tablespoon tomato paste

1 cup heavy whipping cream

8 ounces of crab meat

4 to 8 ounces small cooked shrimp or other seafood

2 tablespoon sherry wine* (Optional; especially if a child is going to be eating this.)

Equipment:

A stove (of course)

A large saucepan or a Dutch oven

A ladle or a long-handled spoon

A blender or a food processor

A sieve (for sifting the flour)

A knife (for chopping the vegetables)

HOW TO MAKE CRAB AND SHRIMP SEAFOOD BISQUE

Step 1: Use a sieve to sift the flour. Mix this into the butter and vegetables until well combined. Cook and stir for about 2 minutes.

Step 2: In another saucepan, warm the milk over medium heat.

Step 3: Stir the warmed milk slowly and continue to cook while stirring until the milk has thickened.

Step 4: Stir in the freshly ground black pepper, tomato paste, then, the heavy cream.

Step 5: You can puree the soup if desired using a blender or a food processor. Then, pour it back into the saucepan.

Step 6: Add in the crab, shrimp, and the sherry. Stir and bring to a simmer.

Step 7: Serve immediately. Enjoy!

Tips and Variations:

You can add small cooked bay scallops or lobster in place of the shrimp.

Substitute the green onions with finely chopped shallots.

Garnish the soup with thinly sliced green onion tops, cilantro, or parsley, if desired. You can even add a spoonful of sour cream, then, swirl it.

CRAB AND SHRIMP SEAFOOD BISQUE

Rebecca Serves: 6 – 8 This is the best Bisque I’ve ever tasted in my entire existence! It is an exotic dish that tastes simply amazing! Although, this is not for… Main Dish Recipes CRAB AND SHRIMP SEAFOOD BISQUE European Print This
Serves: 6-8
Nutrition facts: 200 calories 20 grams fat
Rating: 3.2/5
( 17 voted )

Ingredients

  • 3 tablespoons butter
  • 2 tablespoons chopped green onion
  • 2 tablespoons chopped celery
  • 3 tablespoons all-purpose flour
  • 2 1/2 cups milk
  • 1/2 teaspoon freshly ground black pepper
  • 1 tablespoon tomato paste
  • 1 cup heavy whipping cream
  • 8 ounces of crab meat
  • 4 to 8 ounces small cooked shrimp or other seafood
  • 2 tablespoon sherry wine* (Optional; especially if a child is going to be eating this.)

Instructions

Step 1: Use a sieve to sift the flour. Mix this into the butter and vegetables until well combined. Cook and stir for about 2 minutes.

Step 2: In another saucepan, warm the milk over medium heat.

Step 3: Stir the warmed milk slowly and continue to cook while stirring until the milk has thickened.

Step 4: Stir in the freshly ground black pepper, tomato paste, then, the heavy cream.

Step 5: You can puree the soup if desired using a blender or a food processor. Then, pour it back into the saucepan.

Step 6: Add in the crab, shrimp, and the sherry. Stir and bring to a simmer.

Step 7: Serve immediately. Enjoy!

Tips and Variations:

You can add small cooked bay scallops or lobster in place of the shrimp.

Substitute the green onions with finely chopped shallots.

Garnish the soup with thinly sliced green onion tops, cilantro, or parsley, if desired. You can even add a spoonful of sour cream, then, swirl it.

September 6, 2020 0 comment
0 FacebookTwitterPinterestEmail
Main Dish Recipes

Creamy Garlic Dream Chicken w/ Asparagus

by Rebecca September 5, 2020
written by Rebecca

This creamy dish will bring a smile to your face today for sure! Give this one a try and fill your stomach and soul with the awesome taste of this delicious meal. I usually eat it with steamed rice but toasted bread also works for this recipe of chicken. Dinner will be great again if you serve this. Enjoy!

Ingredients

6-8 chicken thighs

1/2 teaspoon white pepper

1 teaspoon black pepper

1/2 teaspoon garlic powder

1/2 teaspoon onion powder

2 tablespoons olive oil

For the SAUCE:

12 ounces of heavy cream

2 tablespoons all-purpose flour

1/4 cup butter, melted

1 teaspoon olive oil

5 cloves of garlic, minced

1 tablespoon of dried chives

1/2 tablespoon fresh parsley

1/2 cup of freshly grated parmesan cheese

1 teaspoon black pepper

1/2 teaspoon salt

1 pound of fresh asparagus, cut the ends off and cut them into 3 inch strips

How to make Creamy Garlic Dream Chicken w/ Asparagus

Step 1: Place a large non-stick skillet on the stove and turn the heat to medium.

Step 2: Add in the oil and allow it to become hot.

Step 3: Place the chicken thighs in a medium mixing bowl. Season the chicken with the dry ingredients.

Step 4: Place the seasoned chicken into the hot skillet one by one and cook each for 15 minutes or until cooked through on both sides.

Step 5: Place the cooked chicken on a clean plate and set aside.

Step 6: Add the heavy cream, all-purpose flour, melted butter, dried chives, parsley, parmesan cheese, salt, and pepper in a large mixing bowl. Stir until well combined.

Step 7: In the same skillet, add in 1 teaspoon of olive oil and minced garlic. Saute’ the garlic for at least 1 to 2 minutes until aromatic.

Step 8: Transfer the sauce mixture into the skillet and allow it to boil for at least 3 minutes. Stir gradually.

Step 9: Turn the heat down to low and in the chicken and the asparagus. Cook for 5 to 7 minutes or until the asparagus is soft and tender.

Step 10: Remove from the heat and let it sit for at least 5 minutes to incorporate the flavor.

Step 11: Serve and enjoy!

Creamy Garlic Dream Chicken w/ Asparagus

Rebecca This creamy dish will bring a smile to your face today for sure! Give this one a try and fill your stomach and soul with the awesome taste of this… Main Dish Recipes Creamy Garlic Dream Chicken w/ Asparagus European Print This
Nutrition facts: 200 calories 20 grams fat
Rating: 5.0/5
( 1 voted )

Ingredients

  • 6-8 chicken thighs
  • 1/2 teaspoon white pepper
  • 1 teaspoon black pepper
  • 1/2 teaspoon garlic powder
  • 1/2 teaspoon onion powder
  • 2 tablespoons olive oil
  • For the SAUCE:
  • 12 ounces of heavy cream
  • 2 tablespoons all-purpose flour
  • 1/4 cup butter, melted
  • 1 teaspoon olive oil
  • 5 cloves of garlic, minced
  • 1 tablespoon of dried chives
  • 1/2 tablespoon fresh parsley
  • 1/2 cup of freshly grated parmesan cheese
  • 1 teaspoon black pepper
  • 1/2 teaspoon salt
  • 1 pound of fresh asparagus, cut the ends off and cut them into 3 inch strips

Instructions

Step 1: Place a large non-stick skillet on the stove and turn the heat to medium.

Step 2: Add in the oil and allow it to become hot.

Step 3: Place the chicken thighs in a medium mixing bowl. Season the chicken with the dry ingredients.

Step 4: Place the seasoned chicken into the hot skillet one by one and cook each for 15 minutes or until cooked through on both sides.

Step 5: Place the cooked chicken on a clean plate and set aside.

Step 6: Add the heavy cream, all-purpose flour, melted butter, dried chives, parsley, parmesan cheese, salt, and pepper in a large mixing bowl. Stir until well combined.

Step 7: In the same skillet, add in 1 teaspoon of olive oil and minced garlic. Saute' the garlic for at least 1 to 2 minutes until aromatic.

Step 8: Transfer the sauce mixture into the skillet and allow it to boil for at least 3 minutes. Stir gradually.

Step 9: Turn the heat down to low and in the chicken and the asparagus. Cook for 5 to 7 minutes or until the asparagus is soft and tender.

Step 10: Remove from the heat and let it sit for at least 5 minutes to incorporate the flavor.

Step 11: Serve and enjoy!

September 5, 2020 0 comment
0 FacebookTwitterPinterestEmail
Main Dish Recipes

Creamy Bacon Alfredo Pasta

by Rebecca September 5, 2020
written by Rebecca

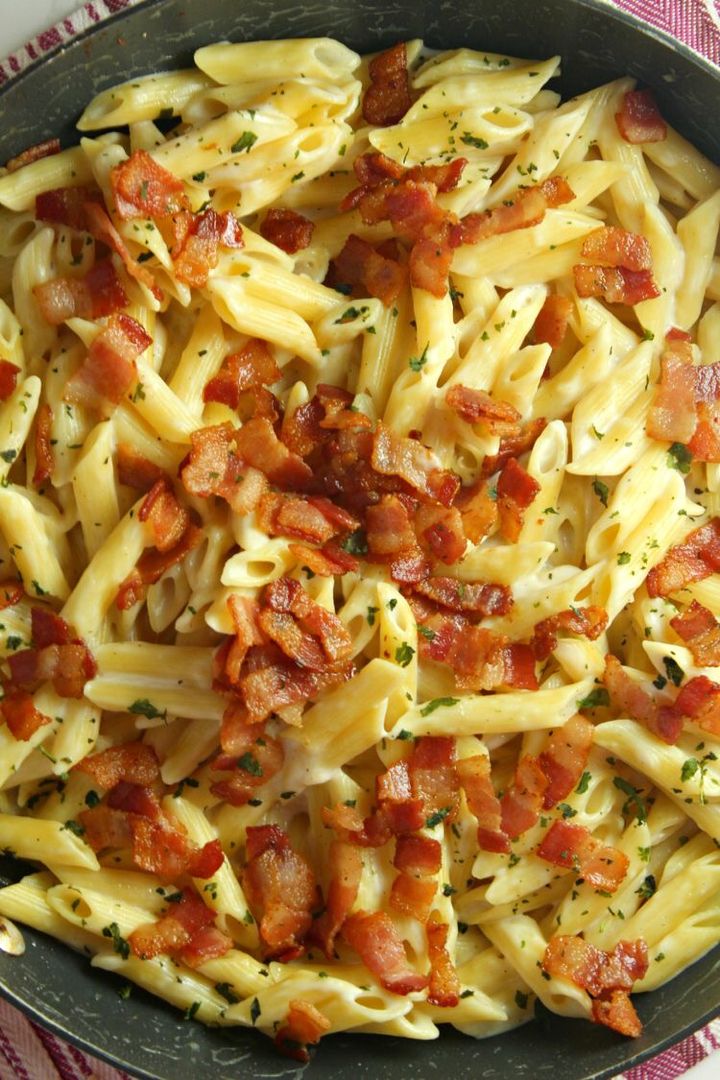
This Alfredo Pasta is simply amazing! I love how the cheese and the other ingredients incorporate with each other. My only advice to you if you are going to try this recipe is to be very generous with the bacon and cheese. These two ingredients will make this recipe perfect! I hope you all love and enjoy this recipe. You all have an awesome day ahead of you!

Ingredients

10 slices thick-cut bacon, cut into 1/2 inch slices

1 tablespoon olive oil

1/2 onion, finely chopped

3 large cloves garlic minced

8 ounces penne pasta

2 cups chicken broth

1/2 teaspoon salt

1/4 teaspoon pepper

1/2 cup heavy cream

1 cup finely grated Parmesan cheese

1-2 teaspoons cornstarch

1 tablespoon water

1-2 tablespoons fresh basil, finely chopped

How to make Creamy Bacon Alfredo Pasta

Step 1: Place a large skillet on the stove and turn the heat to medium.

Step 2: Add in oil and allow it to heat through.

Step 3: Add in the bacon and cook until it becomes brown and crispy.

Step 4: Place the cooked bacon on a plate with a paper towel. Drain the excess oil.

Step 5: Leave about 2 tablespoons of grease in the pan.

Step 6: Add in the onion and saute’ the translucent then add in the garlic and saute’ until aromatic for about 30 seconds.

Step 7: Add in the pasta and stir. Season with salt and pepper for additional flavor.

Step 8: Allow the mixture to boil and simmer on low heat.

Step 9: Cook while stirring every 5 minutes for another 13 to 15 minutes or until the pasta is al dente’.

Step 10: In a small mixing bowl, add in the water and cornstarch. Stir until the cornstarch is melted completely.

Step 11: Add in the melted cornstarch into the skillet and stir until well mixed and thick.

Step 12: Remove the skillet from the heat and add in the all the cheese and cream. Stir until the cheese is melted completely.

Step 13: For garnish, sprinkle the basil and chopped bacon on top.

Step 14: Serve and enjoy!

Creamy Bacon Alfredo Pasta

Rebecca This Alfredo Pasta is simply amazing! I love how the cheese and the other ingredients incorporate with each other. My only advice to you if you are going to try… Main Dish Recipes Creamy Bacon Alfredo Pasta European Print This
Nutrition facts: 200 calories 20 grams fat
Rating: 5.0/5
( 2 voted )

Ingredients

  • 10 slices thick-cut bacon, cut into 1/2 inch slices
  • 1 tablespoon olive oil
  • 1/2 onion, finely chopped
  • 3 large cloves garlic minced
  • 8 ounces penne pasta
  • 2 cups chicken broth
  • 1/2 teaspoon salt
  • 1/4 teaspoon pepper
  • 1/2 cup heavy cream
  • 1 cup finely grated Parmesan cheese
  • 1-2 teaspoons cornstarch
  • 1 tablespoon water
  • 1-2 tablespoons fresh basil, finely chopped

Instructions

Step 1: Place a large skillet on the stove and turn the heat to medium.

Step 2: Add in oil and allow it to heat through.

Step 3: Add in the bacon and cook until it becomes brown and crispy.

Step 4: Place the cooked bacon on a plate with a paper towel. Drain the excess oil.

Step 5: Leave about 2 tablespoons of grease in the pan.

Step 6: Add in the onion and saute' the translucent then add in the garlic and saute' until aromatic for about 30 seconds.

Step 7: Add in the pasta and stir. Season with salt and pepper for additional flavor.

Step 8: Allow the mixture to boil and simmer on low heat.

Step 9: Cook while stirring every 5 minutes for another 13 to 15 minutes or until the pasta is al dente'.

Step 10: In a small mixing bowl, add in the water and cornstarch. Stir until the cornstarch is melted completely.

Step 11: Add in the melted cornstarch into the skillet and stir until well mixed and thick.

Step 12: Remove the skillet from the heat and add in the all the cheese and cream. Stir until the cheese is melted completely.

Step 13: For garnish, sprinkle the basil and chopped bacon on top.

Step 14: Serve and enjoy!

September 5, 2020 0 comment
0 FacebookTwitterPinterestEmail
Main Dish Recipes

Bang Bang Shrimp Pasta!

by Rebecca September 5, 2020
written by Rebecca

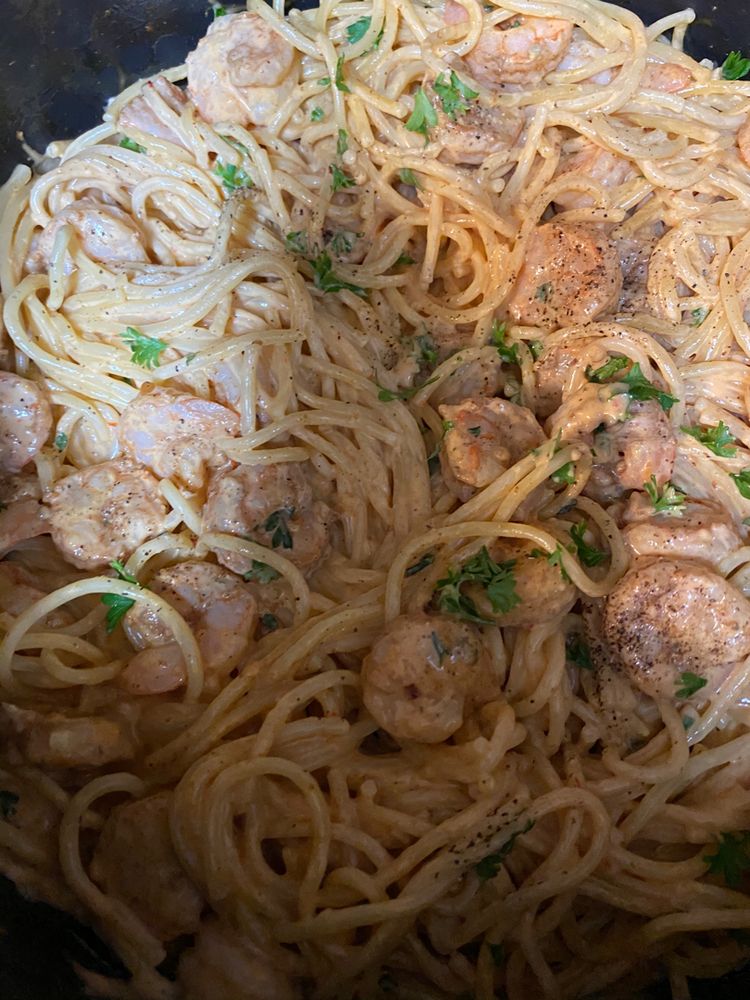
Chicken or shrimp works perfectly with this amazing pasta recipe. I happen to have shrimp that is why I used it instead of chicken. The creaminess if this dish is super amazing. You will love every bite of it. I have listed all the ingredients and steps. Just follow them and they will guide you to perfection. Enjoy!

Ingredients

1 lb of spaghetti or your favorite pasta of choice

1 1/2 lbs of medium shrimp, peeled and deveined (or 1 pound boneless chicken, chopped)

1 1/2 Tablespoons olive oil

3 cloves garlic, minced

3 tsp paprika

1 Tablespoon fresh parsley

Black pepper to taste

For the Sauce:

1/2 cup of Hellman’s mayonnaise

1/2 cup Thai sweet chili sauce (in the Asian aisle)

2 cloves garlic, minced

2 Tablespoons of lime juice

1/4 tsp of crushed red pepper flakes

1/2 tablespoon onion powder

Note: The mayo CAN be substituted for Plain yogurt, heavy cream, cream cheese or even sour cream

How to make Bang Bang Shrimp Pasta

Step 1: In a large mixing bowl, add in the Mayonnaise, Thai sweet chili sauce, garlic, lime juice, red pepper flakes, and onion powder. Stir until well mixed.

Step 2: Place a large pot on the stove and pour enough water to submerge the pasta. Turn the heat to high.

Step 3: Add in the pasta and a little salt and oil. Cook until the pasta is al dente’ and drain.

Step 4: In a medium mixing bowl, add in the shrimp or chicken. Season with 3 cloves of garlic, paprika, and pepper.

Step 5: Place a large skillet on the stove and turn the heat to medium-high.

Step 6: Add in the coated chicken or shrimp and cook for about 10 minutes or until cooked through and the meat is no longer pink in color.

Step 7: Remove from the heat and let it sit in the skillet for at least 5 minutes.

Step 8: In a large mixing bowl, add in the pasta, cooked chicken or shrimp, and the sauce. Toss until well mixed.

Step 9: Serve and enjoy!

Bang Bang Shrimp Pasta!

Rebecca Chicken or shrimp works perfectly with this amazing pasta recipe. I happen to have shrimp that is why I used it instead of chicken. The creaminess if this dish is… Main Dish Recipes Bang Bang Shrimp Pasta! European Print This
Nutrition facts: 200 calories 20 grams fat
Rating: 5.0/5
( 1 voted )

Ingredients

  • 1 lb of spaghetti or your favorite pasta of choice
  • 1 1/2 lbs of medium shrimp, peeled and deveined (or 1 pound boneless chicken, chopped)
  • 1 1/2 Tablespoons olive oil
  • 3 cloves garlic, minced
  • 3 tsp paprika
  • 1 Tablespoon fresh parsley
  • Black pepper to taste
  • For the Sauce:
  • 1/2 cup of Hellman's mayonnaise
  • 1/2 cup Thai sweet chili sauce (in the Asian aisle)
  • 2 cloves garlic, minced
  • 2 Tablespoons of lime juice
  • 1/4 tsp of crushed red pepper flakes
  • 1/2 tablespoon onion powder

Instructions

Step 1: In a large mixing bowl, add in the Mayonnaise, Thai sweet chili sauce, garlic, lime juice, red pepper flakes, and onion powder. Stir until well mixed.

Step 2: Place a large pot on the stove and pour enough water to submerge the pasta. Turn the heat to high.

Step 3: Add in the pasta and a little salt and oil. Cook until the pasta is al dente' and drain.

Step 4: In a medium mixing bowl, add in the shrimp or chicken. Season with 3 cloves of garlic, paprika, and pepper.

Step 5: Place a large skillet on the stove and turn the heat to medium-high.

Step 6: Add in the coated chicken or shrimp and cook for about 10 minutes or until cooked through and the meat is no longer pink in color.

Step 7: Remove from the heat and let it sit in the skillet for at least 5 minutes.

Step 8: In a large mixing bowl, add in the pasta, cooked chicken or shrimp, and the sauce. Toss until well mixed.

Step 9: Serve and enjoy!

September 5, 2020 0 comment
0 FacebookTwitterPinterestEmail
Main Dish Recipes

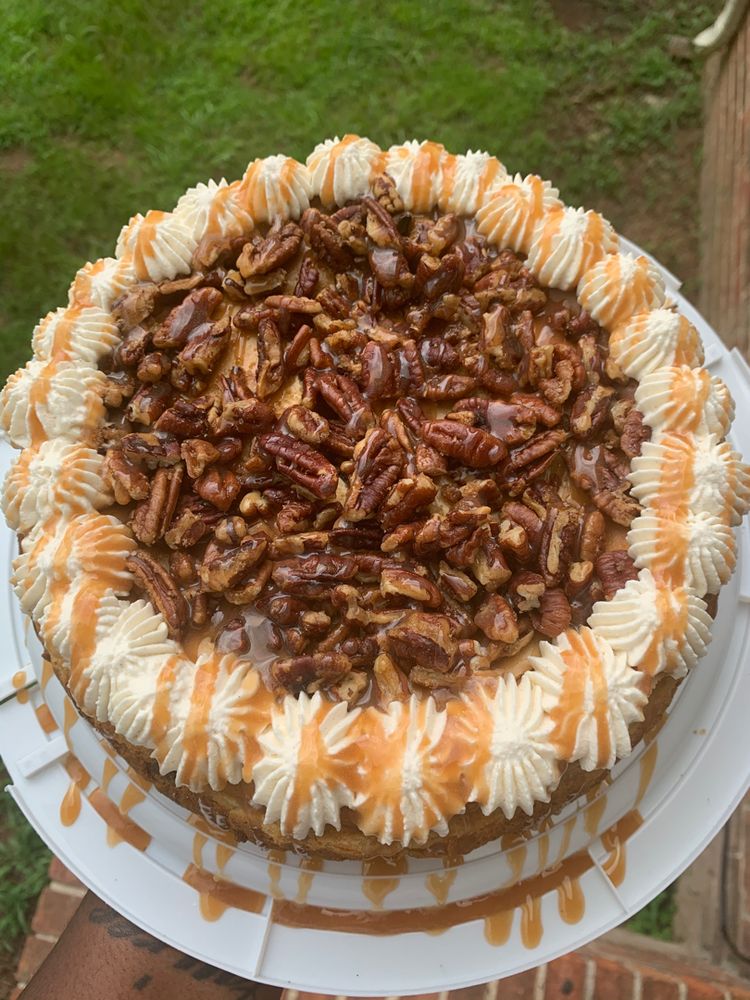
Butter Pecan Cheesecake

by Rebecca September 5, 2020
written by Rebecca

Prep Time: 30 mins | Cook Time: 1 hr 20 mins | Total Time: 1 hr 50 mins

If you are looking for an amazing cake for today, then, you have come to the right page. Give this a go today and be amazed by how awesome this cake recipe is. I learned about this while I was browsing the internet for new and easy recipes. I am so glad that I gave this a try because I never would have tasted how incredible this is. I hope you all enjoy this cake!

Ingredients

CRUST:

1 1/2 cups graham cracker crumbs

1/2 cup finely chopped pecans

1/3 cup sugar

1/3 cup butter melted

FILLING:

24 oz cream cheese softened (8 oz pkg x 3)

1 1/2 cups sugar

2 cups sour cream

1 tsp vanilla extract see NOTES

3 eggs

1 cup finely chopped pecans

How to make Butter Pecan Cheesecake

Step 1: In a large mixing bowl, add in the butter, cracker crumbs, sugar, and pecans. Stir until well mixed. Get about 1/3 cup of the topping and set aside.

Step 2: Apply cooking spray in a 9-inch springform pan.

Step 3: Transfer the crumb mixture into the greased pan and press it on the bottom part.

Step 4: Cover the pan with aluminum foil.

Step 5: In a large mixing bowl, add in the sugar and cream cheese. Beat until well mixed.

Step 6: Add in the vanilla and sour cream beat until well mixed.

Step 7: Add in 1 egg at a time and beat every addition.

Step 8: Add in the pecans.

Step 9: Transfer the mixture into the pie crust and add in the reserved crumb mixture.

Step 10: Place the pan in a large baking pan and pour about 1-inch hot water into the bigger pan.

Step 11: Place inside the oven and bake for 70 to 80 minutes at 325 F or until the middle is set.

Step 12: Remove the pan from the hot water.

Step 13: Let it sit on a wire rack to cool for at least 10 minutes. Run a knife on the sides of the pan and loosen the cake.

Step 14: Allow the cake to cool for another 1 hour.

Step 15: Place inside the fridge overnight to chill.

Step 16: Serve and enjoy!

NOTE:

Try adding 1/2 teaspoon of rum extract together with the vanilla for extra flavor.

Nutrition:

Serving: 1g | Calories: 440kcal | Carbohydrates: 33g | Protein: 6g | Fat: 33g | Saturated Fat: 15g | Cholesterol: 103mg | Sodium: 257mg | Potassium: 166mg | Fiber: 1g | Sugar: 27g | Vitamin A: 915IU | Vitamin C: 0.3mg | Calcium: 92mg | Iron: 0.9mg

Butter Pecan Cheesecake

Rebecca Prep Time: 30 mins | Cook Time: 1 hr 20 mins | Total Time: 1 hr 50 mins If you are looking for an amazing cake for today, then, you have come to the right page. Give… Main Dish Recipes Butter Pecan Cheesecake European Print This
Prep Time: 30 mins Cooking Time: 1 hr 20 mins 1 hr 20 mins
Nutrition facts: 440 calories 33 fat
Rating: 5.0/5
( 1 voted )

Ingredients

  • CRUST:
  • 1 1/2 cups graham cracker crumbs
  • 1/2 cup finely chopped pecans
  • 1/3 cup sugar
  • 1/3 cup butter melted
  • FILLING:
  • 24 oz cream cheese softened (8 oz pkg x 3)
  • 1 1/2 cups sugar
  • 2 cups sour cream
  • 1 tsp vanilla extract see NOTES
  • 3 eggs
  • 1 cup finely chopped pecans

Instructions

Step 1: In a large mixing bowl, add in the butter, cracker crumbs, sugar, and pecans. Stir until well mixed. Get about 1/3 cup of the topping and set aside.

Step 2: Apply cooking spray in a 9-inch springform pan.

Step 3: Transfer the crumb mixture into the greased pan and press it on the bottom part.

Step 4: Cover the pan with aluminum foil.

Step 5: In a large mixing bowl, add in the sugar and cream cheese. Beat until well mixed.

Step 6: Add in the vanilla and sour cream beat until well mixed.

Step 7: Add in 1 egg at a time and beat every addition.

Step 8: Add in the pecans.

Step 9: Transfer the mixture into the pie crust and add in the reserved crumb mixture.

Step 10: Place the pan in a large baking pan and pour about 1-inch hot water into the bigger pan.

Step 11: Place inside the oven and bake for 70 to 80 minutes at 325 F or until the middle is set.

Step 12: Remove the pan from the hot water.

Step 13: Let it sit on a wire rack to cool for at least 10 minutes. Run a knife on the sides of the pan and loosen the cake.

Step 14: Allow the cake to cool for another 1 hour.

Step 15: Place inside the fridge overnight to chill.

Step 16: Serve and enjoy!

NOTE:

Try adding 1/2 teaspoon of rum extract together with the vanilla for extra flavor.

September 5, 2020 0 comment
0 FacebookTwitterPinterestEmail
Newer Posts
Older Posts

Popular Posts

  • 1

    Crispy Crunchy Parmesan Potatoes

    March 21, 2020
  • 2

    CROCK POT SMOTHERED PORK CHOPS

    March 21, 2020
  • Facebook
  • Twitter

@2019 - All Right Reserved.


Back To Top