Cook it once
  • Home
  • Privacy Policy
  • Recipes
    • KETO
    • LC
    • WW
  • Tips
  • Contact
Cook it once
  • Home
  • Privacy Policy
  • Recipes
    • KETO
    • LC
    • WW
  • Tips
  • Contact
Category:

Main Dish Recipes

Main Dish Recipes

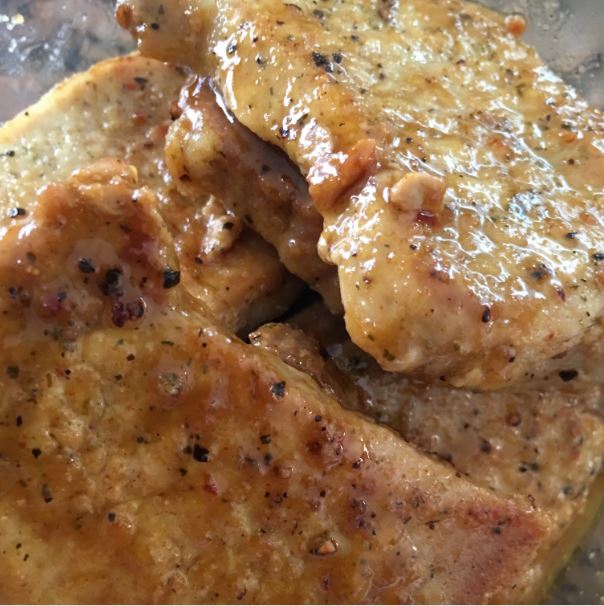
SUPER-EASY HONEY MUSTARD PORK CHOPS

by Rebecca September 8, 2020
written by Rebecca

Prep: 10 mins | Cook: 20mins | Ready In 30 mins

Crispy, golden brown chops smothered in a mouthwatering sauce. I cannot stop eating these chops. They are freaking delicious, super flavorful, and every bite is bursting with goodness. The garlic and honey mustard combine excellently. This dish is an awesome addition to your weeknight menu. Pretty easy to make, not fussy, and undeniably good! Great alongside mashed potatoes, roasted potatoes, or rice. Goes perfectly with anything!

This pan-fried pork chops with savory sauce are what made my day yesterday. I went home tired and my husband surprised me with a simple meal that he prepared himself. He knows how much I love this Honey Mustard Pork Chops. He served it alongside roasted potatoes. One bite and everything seemed fine. All the amazing flavors just burst inside my mouth. And we finished it off with a bottle of sparkling wine.

INGREDIENTS

1/4 cup honey

2 tablespoons prepared yellow mustard

1 tablespoon butter

1/2 lbs of center-cut boneless pork chops, 1/2-inch thick

garlic powder, or to taste

HOW TO MAKE HONEY MUSTARD PORK CHOPS

Step 1: In a bowl, add the honey and mustard. Mix until well combined.

Step 2: In a skillet, heat the butter over medium-high heat. When hot, lay the pork chops into the butter.

Step 3: Sprinkle each pork chop with half of the garlic powder. Cook for about 3 minutes until browned. Turn the chops over and again sprinkle the other side with the rest of the garlic powder and pan-fry for another 3 minutes.

Step 4: Brush the chops with honey mustard sauce. Flip and cook for 5 minutes. Do the same on the other side. Continue to cook until the chops are no longer pink inside. If there is an instant-read meat thermometer inserted it should read 165 degrees F or 75 degrees C.

Nutrition Facts:

Per Serving: 287 calories; 22.1 g protein; 66 mg cholesterol; 150 mg sodium; 14.2 g fat; 18.1 g carbohydrates
SUPER-EASY HONEY MUSTARD PORK CHOPS

Rebecca Prep: 10 mins | Cook: 20mins | Ready In 30 mins Crispy, golden brown chops smothered in a mouthwatering sauce. I cannot stop eating these chops. They are freaking delicious, super flavorful, and every bite… Main Dish Recipes SUPER-EASY HONEY MUSTARD PORK CHOPS European Print This
Prep Time: 10 mins Cooking Time: 20 mins 20 mins
Nutrition facts: 287 calories 14.2 fat
Rating: 3.5/5
( 33 voted )

Ingredients

  • 1/4 cup honey
  • 2 tablespoons prepared yellow mustard
  • 1 tablespoon butter
  • 1/2 lbs of center-cut boneless pork chops, 1/2-inch thick
  • garlic powder, or to taste

Instructions

Step 1: In a bowl, add the honey and mustard. Mix until well combined.

Step 2: In a skillet, heat the butter over medium-high heat. When hot, lay the pork chops into the butter.

Step 3: Sprinkle each pork chop with half of the garlic powder. Cook for about 3 minutes until browned. Turn the chops over and again sprinkle the other side with the rest of the garlic powder and pan-fry for another 3 minutes.

Step 4: Brush the chops with honey mustard sauce. Flip and cook for 5 minutes. Do the same on the other side. Continue to cook until the chops are no longer pink inside. If there is an instant-read meat thermometer inserted it should read 165 degrees F or 75 degrees C.

September 8, 2020 0 comment
0 FacebookTwitterPinterestEmail
Main Dish Recipes

CRISPY AND CREAMY DOUGHNUTS

by Rebecca September 8, 2020
written by Rebecca

Prep: 10 mins | Cook: 30mins | Ready In 2 hrs 40 mins

A copycat of the famous Krispy Kreme glazed. Don’t be deceived because of these tastes like the real deal. Light and fluffy with a rich glaze on top. A melt-in-your-mouth homemade doughnut that you can make any time, any day.

INGREDIENTS

2 (.25 ounce) envelopes active dry yeast

1/4 (105 to 115 degrees) cup warm water

1 1/2 cups lukewarm milk

1/2 cup white sugar

1 teaspoon salt

2 eggs

1/3 cup shortening

5 cups all-purpose flour

1-quart vegetable oil for frying

1/3 cup butter

2 cups confectioners’ sugar

1 1/2 teaspoon vanilla

4 tablespoons hot water or as needed

HOW TO MAKE CRISPY AND CREAMY DOUGHNUTS

Step 1: Over warm water, sprinkle the yeast and allow it to sit for about 5 minutes or until foamy.

Step 2: Add the yeast mixture, milk, sugar, salt, eggs, shortening, and 2 cups of the flour in a large bowl. Mix at low speed for a couple of minutes or stir using a wooden spoon. Beat in the rest of the flour, half a cup at a time, until the dough no longer sticks to the bowl.

Step 3: Knead the dough for at least 5 minutes until smooth and elastic. Then, transfer into a greased bowl. Place in a warm place, covered, to rise until double. Touch the dough to see if it is ready. When the indent remains after touching the dough, it is set.

Step 4: Onto a floured surface, flip out the dough, and roll out gently to make half an inch thickness. Then, cut it using a floured doughnut cutter. Allow the doughnuts to rise again until double.

Step 5: In a saucepan, melt the butter over medium heat. Add in the confectioners’ sugar and vanilla. Stir until smooth. Remove the saucepan from the heat and add in hot water, 1 tablespoon at a time, stirring until the icing is a bit thin but not watery. And set aside.

Step 6: In a deep-fryer or large heavy skillet, add the oil and heat to about 350 degrees F or 175 degrees C.

Step 7: With a wide spatula, slide the doughnuts into the hot oil. As the doughnuts rise to the surface, flip over and fry until golden brown.

Step 8: Remove the doughnuts from the oil and transfer to a wire rack to drain.

Step 9: While still hot, dip the doughnuts into the glaze and again set onto wire racks. For easier clean-up, place a cookie sheet or tray under the racks.

Nutrition Facts:

Per Serving: 330 calories; 5.3 g protein; 31 mg cholesterol; 171 mg sodium; 13.4 g fat; 47.3 g carbohydrates

CRISPY AND CREAMY DOUGHNUTS

Rebecca Prep: 10 mins | Cook: 30mins | Ready In 2 hrs 40 mins A copycat of the famous Krispy Kreme glazed. Don’t be deceived because of these tastes like the real deal. Light and fluffy… Main Dish Recipes CRISPY AND CREAMY DOUGHNUTS European Print This
Prep Time: 10 mins Cooking Time: 30 mins 30 mins
Nutrition facts: 330 calories 13.4 fat
Rating: 5.0/5
( 1 voted )

Ingredients

  • 2 (.25 ounce) envelopes active dry yeast
  • 1/4 (105 to 115 degrees) cup warm water
  • 1 1/2 cups lukewarm milk
  • 1/2 cup white sugar
  • 1 teaspoon salt
  • 2 eggs
  • 1/3 cup shortening
  • 5 cups all-purpose flour
  • 1-quart vegetable oil for frying
  • 1/3 cup butter
  • 2 cups confectioners’ sugar
  • 1 1/2 teaspoon vanilla
  • 4 tablespoons hot water or as needed

Instructions

Step 1: Over warm water, sprinkle the yeast and allow it to sit for about 5 minutes or until foamy.

Step 2: Add the yeast mixture, milk, sugar, salt, eggs, shortening, and 2 cups of the flour in a large bowl. Mix at low speed for a couple of minutes or stir using a wooden spoon. Beat in the rest of the flour, half a cup at a time, until the dough no longer sticks to the bowl.

Step 3: Knead the dough for at least 5 minutes until smooth and elastic. Then, transfer into a greased bowl. Place in a warm place, covered, to rise until double. Touch the dough to see if it is ready. When the indent remains after touching the dough, it is set.

Step 4: Onto a floured surface, flip out the dough, and roll out gently to make half an inch thickness. Then, cut it using a floured doughnut cutter. Allow the doughnuts to rise again until double.

Step 5: In a saucepan, melt the butter over medium heat. Add in the confectioners’ sugar and vanilla. Stir until smooth. Remove the saucepan from the heat and add in hot water, 1 tablespoon at a time, stirring until the icing is a bit thin but not watery. And set aside.

Step 6: In a deep-fryer or large heavy skillet, add the oil and heat to about 350 degrees F or 175 degrees C.

Step 7: With a wide spatula, slide the doughnuts into the hot oil. As the doughnuts rise to the surface, flip over and fry until golden brown.

Step 8: Remove the doughnuts from the oil and transfer to a wire rack to drain.

Step 9: While still hot, dip the doughnuts into the glaze and again set onto wire racks. For easier clean-up, place a cookie sheet or tray under the racks.

September 8, 2020 0 comment
0 FacebookTwitterPinterestEmail
Main Dish Recipes

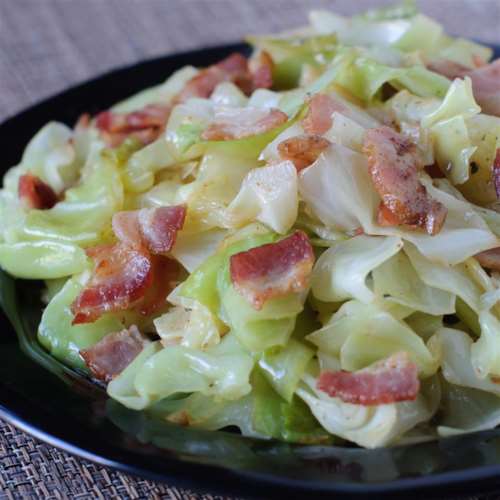
FRIED IRISH CABBAGE WITH BACON

by Rebecca September 8, 2020
written by Rebecca

Prep: 10 mins | Cook: 15mins | Ready In 25 mins

This simple, savory dish is one of my go-to, especially during busy days. I can make this in a snap, it is healthy, and it has bacon. Everything with bacon is love! I think everyone will agree with me. And if you don’t want regular bacon, you can always find a healthy variety of bacon. Or if you want to go full vegan, you can use vegan bacon. This is ideal for the whole family, or if you are watching your weight, then, this is perfect! We normally pair it with pork chops and corned beef but this goes well, too with pot roast and grilled chicken. The kids love this so much and, unusually, they eat veggies. Try this and I am pretty sure that even your picky eaters will want more of this awesome fried cabbage with bacon.

INGREDIENTS

1 12oz package bacon

1/4 cup bacon drippings

1 small head cabbage, cored and finely chopped

ground black pepper to taste

HOW TO MAKE FRIED IRISH CABBAGE WITH BACON

Step 1: In a deep skillet, cook the bacon for about 5 to 7 minutes over medium heat.

Step 2: Once done, remove the bacon from the skillet and transfer it on a paper towel-lined plate to drain. Make sure to reserve 1/4 cup drippings from the skillet.

Step 3: Add the cabbage into the skillet with the hot bacon drippings. Cook for about 5 to 7 minutes over medium heat until the cabbage wilts.

Step 4: Crumble the bacon over the cabbage and stir. Simmer for about 2 to 3 minutes until the bacon warms. And season with black pepper.

NOTES:

You can use any variety of bacon as you desire. If using turkey or vegan bacon, you might need to add extra oil or butter because vegan and turkey bacon are not very fatty.

Don’t overcook the cabbage. You don’t want a very soft, smooth-textured cabbage.

Nutrition Facts:

Per Serving: 220 calories; 8.5 g protein; 30 mg cholesterol; 468 mg sodium; 17.8 g fat; 7.3 g carbohydrates

FRIED IRISH CABBAGE WITH BACON

Rebecca Prep: 10 mins | Cook: 15mins | Ready In 25 mins This simple, savory dish is one of my go-to, especially during busy days. I can make this in a snap, it is healthy, and… Main Dish Recipes FRIED IRISH CABBAGE WITH BACON European Print This
Prep Time: 10 mins Cooking Time: 15 mins 15 mins
Nutrition facts: 220 calories 7.8 fat
Rating: 5.0/5
( 1 voted )

Ingredients

  • 1 12oz package bacon
  • 1/4 cup bacon drippings
  • 1 small head cabbage, cored and finely chopped
  • ground black pepper to taste

Instructions

Step 1: In a deep skillet, cook the bacon for about 5 to 7 minutes over medium heat.

Step 2: Once done, remove the bacon from the skillet and transfer it on a paper towel-lined plate to drain. Make sure to reserve 1/4 cup drippings from the skillet.

Step 3: Add the cabbage into the skillet with the hot bacon drippings. Cook for about 5 to 7 minutes over medium heat until the cabbage wilts.

Step 4: Crumble the bacon over the cabbage and stir. Simmer for about 2 to 3 minutes until the bacon warms. And season with black pepper.

NOTES:

You can use any variety of bacon as you desire. If using turkey or vegan bacon, you might need to add extra oil or butter because vegan and turkey bacon are not very fatty.

Don't overcook the cabbage. You don't want a very soft, smooth-textured cabbage.

September 8, 2020 0 comment
0 FacebookTwitterPinterestEmail
Main Dish Recipes

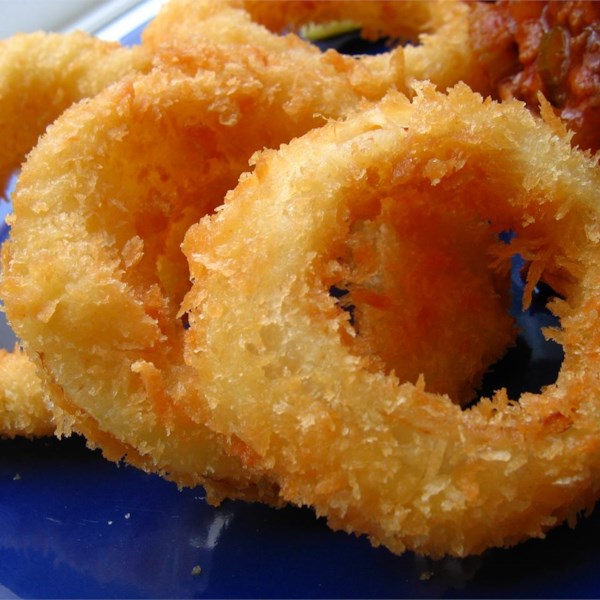
OLD FASHIONED ONION RINGS

by Rebecca September 8, 2020
written by Rebecca

Prep: 15 mins | Cook: 3mins | Ready In 18 mins

Onion rings are my thing. I prefer them more than fries or chips. And this recipe will give you the crispiest onion rings. Pretty simple, not fussy extra crispy onion rings that your whole family will enjoy. Onion ring is my go-to appetizer and my kids most requested. If you are looking for the perfect recipe, this is all you need.

INGREDIENTS

1 large onion, cut into 1/4-inch slices

1 1/4 cups all-purpose flour

1 teaspoon baking powder

1 teaspoon salt

1 egg

1 cup milk, or as needed

3/4 cup dry bread crumbs

seasoned salt to taste

1-quart oil for frying, or as needed

HOW TO MAKE OLD FASHIONED ONION RINGS

Step 1: In a deep fryer, add the oil and heat to about 365 degrees F or 185 degrees C.

Step 2: Then, part the onion slices into rings and set aside.

Step 3: Sift the flour, baking powder, and salt in a small bowl.

Step 4: Dip each onion slice into the flour mixture until all sides are evenly coated. Set aside.

Step 5: Whisk with a fork the egg and milk into the flour mixture.

Step 6: Dredge the floured rings into the batter until completely coated. Transfer the coated rings on a wire rack until the batter stops dripping. You can place a sheet of aluminum foil under the wire rack for easier cleaning.

Step 7: In a plate or shallow dish, add and spread the bread crumbs.

Step 8: Dip the rings in the crumbs one at a time. Scoop the crumbs to better cover the rings. Then, give the rings a hard tap to get rid of the excess crumbs. Don’t worry because the coating will cling very well.

Step 9: Repeat with the rest of the rings.

Step 10: Deep fry the rings by batches for about 2 to 3 minutes until golden brown.

Step 11: Transfer the cooked onion rings to paper towels to drain.

Step 12: Before serving season them with salt. Enjoy!

Nutrition Facts:

Per Serving: 641 calories; 14.3 g protein; 69 mg cholesterol; 1272 mg sodium; 34.6 g fat; 68.3 g carbohydrates

OLD FASHIONED ONION RINGS

Rebecca Prep: 15 mins | Cook: 3mins | Ready In 18 mins Onion rings are my thing. I prefer them more than fries or chips. And this recipe will give you the crispiest onion rings. Pretty… Main Dish Recipes OLD FASHIONED ONION RINGS European Print This
Prep Time: 15 mins Cooking Time: 3 mins 3 mins
Nutrition facts: 641 calories 34.6 fat
Rating: 5.0/5
( 1 voted )

Ingredients

  • 1 large onion, cut into 1/4-inch slices
  • 1 1/4 cups all-purpose flour
  • 1 teaspoon baking powder
  • 1 teaspoon salt
  • 1 egg
  • 1 cup milk, or as needed
  • 3/4 cup dry bread crumbs
  • seasoned salt to taste
  • 1-quart oil for frying, or as needed

Instructions

Step 1: In a deep fryer, add the oil and heat to about 365 degrees F or 185 degrees C.

Step 2: Then, part the onion slices into rings and set aside.

Step 3: Sift the flour, baking powder, and salt in a small bowl.

Step 4: Dip each onion slice into the flour mixture until all sides are evenly coated. Set aside.

Step 5: Whisk with a fork the egg and milk into the flour mixture.

Step 6: Dredge the floured rings into the batter until completely coated. Transfer the coated rings on a wire rack until the batter stops dripping. You can place a sheet of aluminum foil under the wire rack for easier cleaning.

Step 7: In a plate or shallow dish, add and spread the bread crumbs.

Step 8: Dip the rings in the crumbs one at a time. Scoop the crumbs to better cover the rings. Then, give the rings a hard tap to get rid of the excess crumbs. Don't worry because the coating will cling very well.

Step 9: Repeat with the rest of the rings.

Step 10: Deep fry the rings by batches for about 2 to 3 minutes until golden brown.

Step 11: Transfer the cooked onion rings to paper towels to drain.

Step 12: Before serving season them with salt. Enjoy!

September 8, 2020 0 comment
0 FacebookTwitterPinterestEmail
Main Dish Recipes

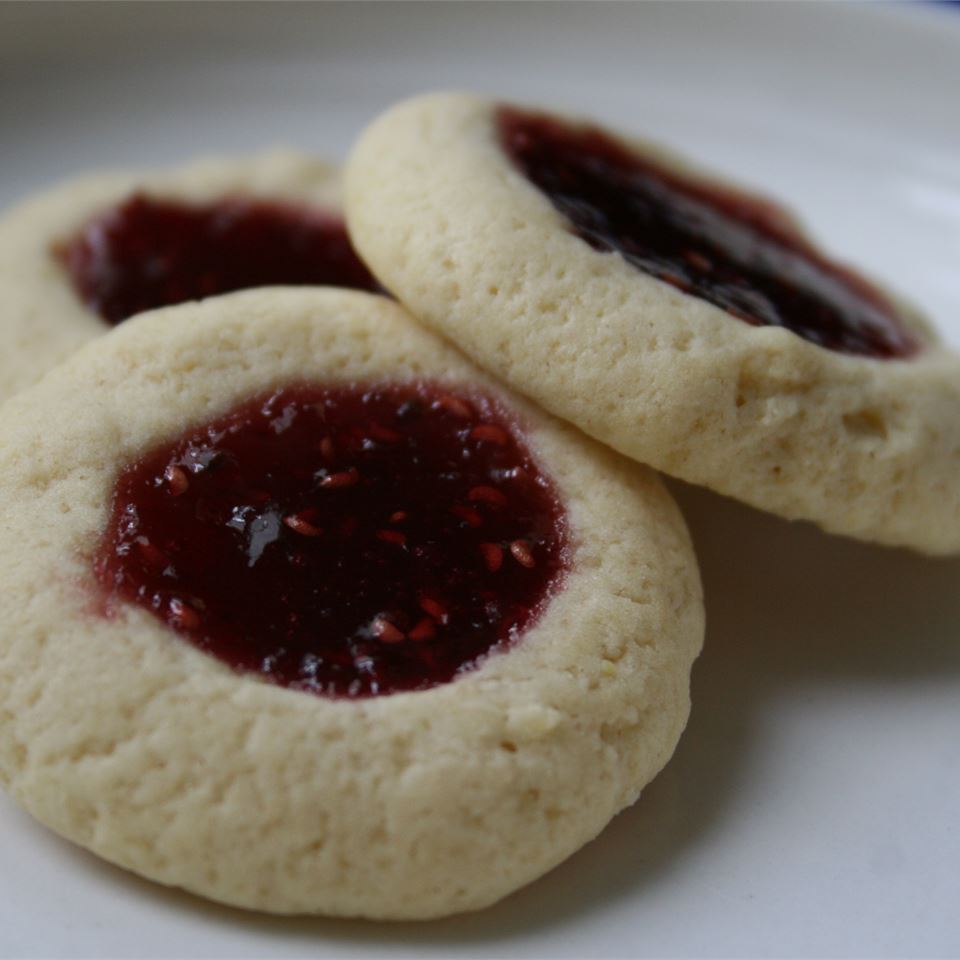
JAM FILLED BUTTER COOKIES

by Rebecca September 8, 2020
written by Rebecca

Prep: 30 mins | Cook: 10mins | Ready In: 40 mins

These are the perfect holiday cookies! Buttery and perfectly sweet. A breeze to make and you can even fill them with your favorite preserves. I am pretty sure that whoever you give these cuties will go gaga over this tasty treat. Ask the kids to help out and let them pick whatever preserves they want to fill these cookies with.

INGREDIENTS

3/4 cup butter, softened

1/2 cup white sugar

2 egg yolks

1 3/4 cups all-purpose flour

1/2 cup fruit preserves, any flavor

HOW TO MAKE JAM FILLED BUTTER COOKIES

Step 1: Ready the oven. Preheat it to about 375 degrees F or 190 degrees C.

Step 2: Add the butter, white sugar, and egg yolks in a medium bowl. Cream together before stirring in a small amount of flour at a time until it forms a soft dough.

Step 3: Roll and shape the dough into an inch ball.

Step 4: If the dough is too soft, place inside the fridge for at least 15 to 20 minutes. Making sure to place the dough 2-inches apart onto ungreased cookie sheets.

Step 5: Then, put an indent in the middle of the cookies using your finger or any instrument with the same size.

Step 6: Fill each indent with half a teaspoon of preserves.

Step 7: Place on the bottom of the preheated oven and bake for about 8 to 10 minutes until golden brown.

Step 8: Remove from the oven and allow the cookies to cook for a bit before moving them to a wire rack.

NOTES:

If you desire to cover the cookies with coconut flakes. Put 1 beaten egg in a tub. Then, in another tub, place 7 ounces of sweetened and shredded coconut flakes.

Check the cookies if already chilled but not finished. First, dip each cookie in the beaten egg, next, into the coconut until thoroughly coated before adding the jam.

Place on the bottom of the preheated oven and bake at the same amount as above.

Nutrition Facts:

Per Serving: 82 calories; 0.8 g protein; 22 mg cholesterol; 29 mg sodium; 4.1 g fat; 10.5 g carbohydrates

JAM FILLED BUTTER COOKIES

Rebecca Prep: 30 mins | Cook: 10mins | Ready In: 40 mins These are the perfect holiday cookies! Buttery and perfectly sweet. A breeze to make and you can even fill them with your favorite… Main Dish Recipes JAM FILLED BUTTER COOKIES European Print This
Prep Time: 30 mins Cooking Time: 10 mins 10 mins
Nutrition facts: 82 calories 4.1 fat
Rating: 5.0/5
( 1 voted )

Ingredients

  • 3/4 cup butter, softened
  • 1/2 cup white sugar
  • 2 egg yolks
  • 1 3/4 cups all-purpose flour
  • 1/2 cup fruit preserves, any flavor

Instructions

Step 1: Ready the oven. Preheat it to about 375 degrees F or 190 degrees C.

Step 2: Add the butter, white sugar, and egg yolks in a medium bowl. Cream together before stirring in a small amount of flour at a time until it forms a soft dough.

Step 3: Roll and shape the dough into an inch ball.

Step 4: If the dough is too soft, place inside the fridge for at least 15 to 20 minutes. Making sure to place the dough 2-inches apart onto ungreased cookie sheets.

Step 5: Then, put an indent in the middle of the cookies using your finger or any instrument with the same size.

Step 6: Fill each indent with half a teaspoon of preserves.

Step 7: Place on the bottom of the preheated oven and bake for about 8 to 10 minutes until golden brown.

Step 8: Remove from the oven and allow the cookies to cook for a bit before moving them to a wire rack.

NOTES:

If you desire to cover the cookies with coconut flakes. Put 1 beaten egg in a tub. Then, in another tub, place 7 ounces of sweetened and shredded coconut flakes.

Check the cookies if already chilled but not finished. First, dip each cookie in the beaten egg, next, into the coconut until thoroughly coated before adding the jam.

Place on the bottom of the preheated oven and bake at the same amount as above.

September 8, 2020 0 comment
0 FacebookTwitterPinterestEmail
Main Dish Recipes

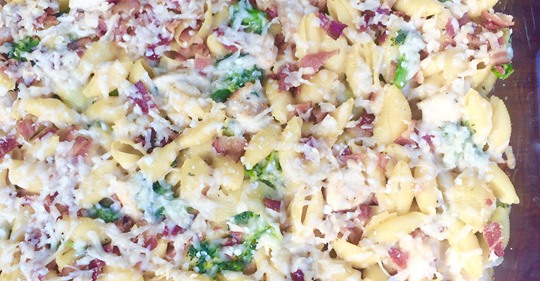
CREAMY BAKED BACON RANCH CHICKEN AND PASTA

by Rebecca September 8, 2020
written by Rebecca

Prep: 10 mins | Cook: 1hr | Ready In 1 hr 10 mins

I am obsessed with this rich, creamy, bursting with flavor bacon ranch chicken and pasta dish. This is the ultimate comfort food and the most requested in my house. To keep and a must-have! I will never fail to give this a million stars every time.

INGREDIENTS

2 1/2 cups broccoli florets

3 tablespoons water

3 tablespoons ranch dressing mix, divided

2 lbs of skinless, boneless chicken breasts, cut into bite-sized pieces

1/2 teaspoon ground black pepper

1 48oz container chicken broth

1 16oz package small shell pasta

1 tablespoon unsalted butter

1 tablespoon extra virgin olive oil

2 3/4 cups milk

1 1.6oz package dry Alfredo sauce mix (such as Knorr®)

1/2 cup sour cream

salt and ground black pepper

1 cup grated Parmesan cheese

4 slices cooked and crumbled bacon

HOW TO MAKE CREAMY BAKED BACON RANCH CHICKEN AND PASTA

Step 1: Place the broccoli with water in a microwave-safe bowl. Microwave on high, covered, for about 3 to 4 minutes until steamed and tender. Remove from the microwave and drain excess liquids. Set aside.

Step 2: Meanwhile, in a large resealable plastic bag, put a tablespoon of ranch dressing mix. Then, add in the chicken and pepper. Seal the bag to close and massage the chicken to coat with seasonings.

Step 3: In a large pot, pour the chicken broth and boil over medium-high heat. Add in the shells and continue to boil. Adjust the heat to medium-low and cook the pasta for approximately 10 minutes until almost done while occasionally stirring. Dain and make sure to reserve half a cup of cooking broth.

Step 4: Prepare the oven. Preheat it to 350 degrees F or 175 degrees C.

Step 5: Then, grease a 9 x 13-inch casserole dish.

Step 6: In a large nonstick skillet, heat the butter and olive oil over medium-high heat. Add in the chicken and cook for about 7 minutes until browned. If needed, work in batches. Once done, transfer the cooked chicken onto a plate.

Step 7: Add the milk, Alfredo sauce mix, and the other 2 tablespoons of ranch dressing mix into the hot skillet. Allow the mixture to boil. Then, turn the heat off before adding in the chicken and any collected juices, pasta, broccoli, sour cream, reserved half a cup pasta cooking broth, salt, and pepper.

Step 8: Transfer the mixture to the greased casserole dish and sprinkle over the Parmesan cheese and bacon.

Step 9: Place inside the preheated oven and bake for about 20 minutes until the cheese has melted and bubbly. Serve immediately. Enjoy!

Nutrition Facts:

Per Serving: 457 calories; 35.7 g protein; 86 mg cholesterol; 1389 mg sodium; 15.6 g fat; 42.4 g carbohydrates

CREAMY BAKED BACON RANCH CHICKEN AND PASTA

Rebecca Prep: 10 mins | Cook: 1hr | Ready In 1 hr 10 mins I am obsessed with this rich, creamy, bursting with flavor bacon ranch chicken and pasta dish. This is the ultimate comfort food… Main Dish Recipes CREAMY BAKED BACON RANCH CHICKEN AND PASTA European Print This
Prep Time: 10 mins Cooking Time: 1 hr 1 hr
Nutrition facts: 457 calories 15.6 fat
Rating: 5.0/5
( 1 voted )

Ingredients

  • 2 1/2 cups broccoli florets
  • 3 tablespoons water
  • 3 tablespoons ranch dressing mix, divided
  • 2 lbs of skinless, boneless chicken breasts, cut into bite-sized pieces
  • 1/2 teaspoon ground black pepper
  • 1 48oz container chicken broth
  • 1 16oz package small shell pasta
  • 1 tablespoon unsalted butter
  • 1 tablespoon extra virgin olive oil
  • 2 3/4 cups milk
  • 1 1.6oz package dry Alfredo sauce mix (such as Knorr®)
  • 1/2 cup sour cream
  • salt and ground black pepper
  • 1 cup grated Parmesan cheese
  • 4 slices cooked and crumbled bacon

Instructions

Step 1: Place the broccoli with water in a microwave-safe bowl. Microwave on high, covered, for about 3 to 4 minutes until steamed and tender. Remove from the microwave and drain excess liquids. Set aside.

Step 2: Meanwhile, in a large resealable plastic bag, put a tablespoon of ranch dressing mix. Then, add in the chicken and pepper. Seal the bag to close and massage the chicken to coat with seasonings.

Step 3: In a large pot, pour the chicken broth and boil over medium-high heat. Add in the shells and continue to boil. Adjust the heat to medium-low and cook the pasta for approximately 10 minutes until almost done while occasionally stirring. Dain and make sure to reserve half a cup of cooking broth.

Step 4: Prepare the oven. Preheat it to 350 degrees F or 175 degrees C.

Step 5: Then, grease a 9 x 13-inch casserole dish.

Step 6: In a large nonstick skillet, heat the butter and olive oil over medium-high heat. Add in the chicken and cook for about 7 minutes until browned. If needed, work in batches. Once done, transfer the cooked chicken onto a plate.

Step 7: Add the milk, Alfredo sauce mix, and the other 2 tablespoons of ranch dressing mix into the hot skillet. Allow the mixture to boil. Then, turn the heat off before adding in the chicken and any collected juices, pasta, broccoli, sour cream, reserved half a cup pasta cooking broth, salt, and pepper.

Step 8: Transfer the mixture to the greased casserole dish and sprinkle over the Parmesan cheese and bacon.

Step 9: Place inside the preheated oven and bake for about 20 minutes until the cheese has melted and bubbly. Serve immediately. Enjoy!

September 8, 2020 0 comment
0 FacebookTwitterPinterestEmail
Main Dish Recipes

4 INGREDIENT DISH

by Rebecca September 6, 2020
written by Rebecca

Serve: maximum of 8

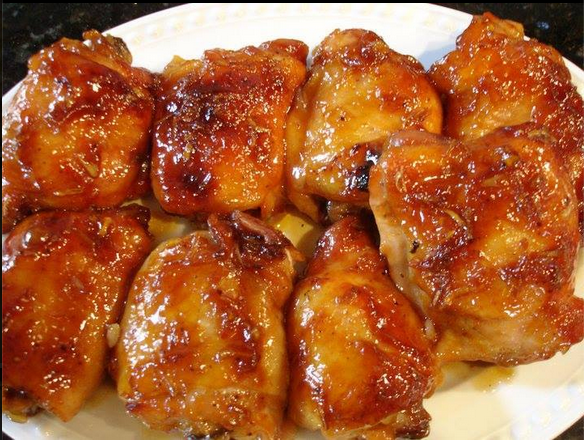
This dish is a must-try. A pretty simple, not fussy chicken dish that your whole family will enjoy. This 4-ingredients dish is perfect with any side dish. Mouthwatering, insanely delicious, and amazing addition to your weeknight menu. Give this a try and I promise you, once you taste this you’ll crave it always!

Chicken is a staple at my house. My kids normally request chicken for dinner. So I always make sure that I have something new and delicious to serve. And this 4-ingredient dish is one of the newest addition to my chicken recipe collection. When I saw this online, I did not think twice. I was sure that this will be amazing and I was not wrong! The kids love it! This did not sit long, I was left with empty plates in a blink! This dish is super good and a keeper.

Ingredients

8 chicken thighs (you can use the whole chicken or other parts).

1 package of dry French onion soup mix.

1 (8 oz) bottle of Russian dressing.

1 small jar of apricot preserves

HOW TO MAKE 4 INGREDIENT DISH

Step 1: Add the dry onion soup mix, the Russian dressing, and the apricot preserves in a bowl. Mix well.

Step 2: Arrange the pieces of chicken in a baking pan and season with pepper. And pour the sauce over the chicken. Mix well to coat. (Prepare the baking pan ahead and grease with cooking spray to ensure that the bits of the chicken will not stick in the pan.)

Step 3: Prepare the oven. Preheat it to 400 degrees.

Step 4: Place the chicken inside the preheated oven and roast for an hour to an hour and a half depending on the chicken. Making sure to baste many times while cooking. (Baste is to pour the juices in the pan over the roasting chicken.)

Step 5: Remove from the oven and serve warm. Enjoy!

4 INGREDIENT DISH

Rebecca Serve: maximum of 8 This dish is a must-try. A pretty simple, not fussy chicken dish that your whole family will enjoy. This 4-ingredients dish is perfect with any side dish.… Main Dish Recipes 4 INGREDIENT DISH European Print This
Serves: 8
Nutrition facts: 200 calories 20 grams fat
Rating: 4.6/5
( 7 voted )

Ingredients

  • 8 chicken thighs (you can use the whole chicken or other parts).
  • 1 package of dry French onion soup mix.
  • 1 (8 oz) bottle of Russian dressing.
  • 1 small jar of apricot preserves

Instructions

Step 1: Add the dry onion soup mix, the Russian dressing, and the apricot preserves in a bowl. Mix well.

Step 2: Arrange the pieces of chicken in a baking pan and season with pepper. And pour the sauce over the chicken. Mix well to coat. (Prepare the baking pan ahead and grease with cooking spray to ensure that the bits of the chicken will not stick in the pan.)

Step 3: Prepare the oven. Preheat it to 400 degrees.

Step 4: Place the chicken inside the preheated oven and roast for an hour to an hour and a half depending on the chicken. Making sure to baste many times while cooking. (Baste is to pour the juices in the pan over the roasting chicken.)

Step 5: Remove from the oven and serve warm. Enjoy!

September 6, 2020 0 comment
0 FacebookTwitterPinterestEmail
Main Dish Recipes

CHILI CHEESE DOG BAKE

by Rebecca September 6, 2020
written by Rebecca

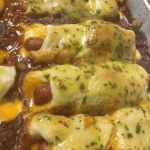
My go-to almost every weekend! These baked chili cheese dogs are a no-fuss, pretty simple to assemble, and are freaking delicious! Game nights will never be complete without these savory and mouthwatering chili cheese dogs. Must-have and the most requested. Oozing with cheese, super flavorful, and every bite is heaven! Make sure that the chili is hot for that insane kick on the butt delicious experience. This outrageously scrumptious dish is amazing for parties, get together, of course, game nights, or as a weeknight meal that your whole family will enjoy.

INGREDIENTS

1 can (14 to 15 oz) chili, heated

1 can Pillsbury™ refrigerated classic pizza crust

4 Cheddar cheese sticks

4 all-beef hot dogs

1 tablespoon butter

1/4 teaspoon garlic powder

1/4 teaspoon parsley flakes

HOW TO MAKE CHILI CHEESE DOG BAKE

Step 1: Prepare the oven. Preheat it to 375 degrees F.

Step 2: Use a cooking spray to grease a 9-inch square or 11×7-inch (2-quart) glass baking dish.

Step 3: Transfer the hot chili into the prepared dish and evenly spread.

Step 4: Unroll and slice the dough into 4 strips.

Step 5: Slice a cheese stick in half lengthwise and put half on each side of a hot dog. Then, wrap the pizza dough strip around the cheese and hot dog. Slightly overlapping in the middle. Do this with the rest of the dough strips, cheese sticks, and hot dogs.

Step 6: Arrange the wrapped hot dogs on top of the hot chili. Making sure that the chili is hot.

Step 7: Place inside the preheated oven and bake for about 15 to 20 minutes or until the dough is light golden brown.

Step 8: In the meantime, place the butter in a small microwavable cup and microwave on high until melted. Add in the garlic powder and parsley. Stir well.

Step 9: Remove the dish from the oven and brush the tops of the cheese dogs with butter mixture.

Step 10: Serve warm. Enjoy!

CHILI CHEESE DOG BAKE

Rebecca My go-to almost every weekend! These baked chili cheese dogs are a no-fuss, pretty simple to assemble, and are freaking delicious! Game nights will never be complete without these savory… Main Dish Recipes CHILI CHEESE DOG BAKE European Print This
Nutrition facts: 200 calories 20 grams fat
Rating: 5.0/5
( 1 voted )

Ingredients

  • 1 can (14 to 15 oz) chili, heated
  • 1 can Pillsbury™ refrigerated classic pizza crust
  • 4 Cheddar cheese sticks
  • 4 all-beef hot dogs
  • 1 tablespoon butter
  • 1/4 teaspoon garlic powder
  • 1/4 teaspoon parsley flakes

Instructions

Step 1: Prepare the oven. Preheat it to 375 degrees F.

Step 2: Use a cooking spray to grease a 9-inch square or 11x7-inch (2-quart) glass baking dish.

Step 3: Transfer the hot chili into the prepared dish and evenly spread.

Step 4: Unroll and slice the dough into 4 strips.

Step 5: Slice a cheese stick in half lengthwise and put half on each side of a hot dog. Then, wrap the pizza dough strip around the cheese and hot dog. Slightly overlapping in the middle. Do this with the rest of the dough strips, cheese sticks, and hot dogs.

Step 6: Arrange the wrapped hot dogs on top of the hot chili. Making sure that the chili is hot.

Step 7: Place inside the preheated oven and bake for about 15 to 20 minutes or until the dough is light golden brown.

Step 8: In the meantime, place the butter in a small microwavable cup and microwave on high until melted. Add in the garlic powder and parsley. Stir well.

Step 9: Remove the dish from the oven and brush the tops of the cheese dogs with butter mixture.

Step 10: Serve warm. Enjoy!

September 6, 2020 0 comment
0 FacebookTwitterPinterestEmail
Main Dish Recipes

SEAFOOD MAC AND CHEESE

by Rebecca September 6, 2020
written by Rebecca

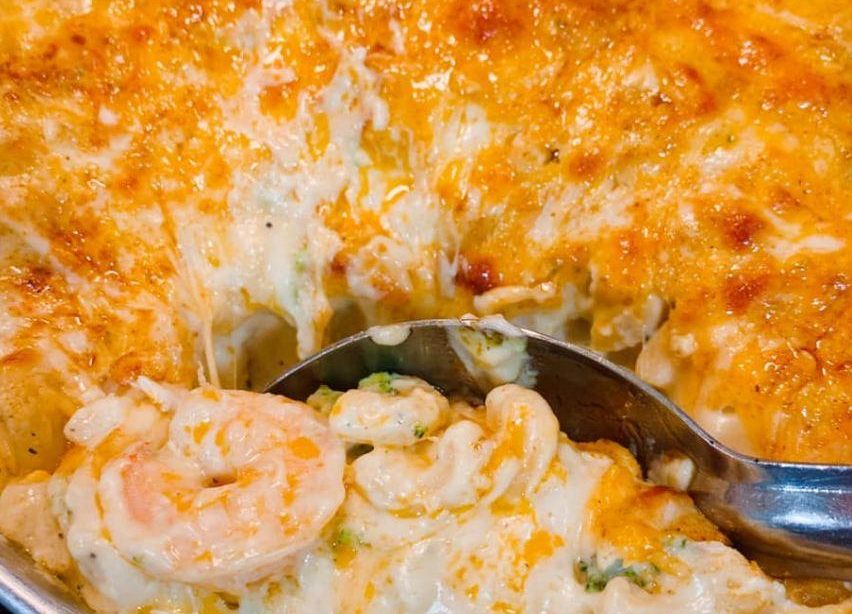
This is the ultimate comfort food – seafood mac and cheese with varieties of seafood you can put in a creamy, rich, and cheesy sauce. A true mouthwatering and oh so savory dish that is perfect for everyone!

INGREDIENTS

2 cups of dry Macaroni

6 oz. Claw Crab Meat

8 oz. Shrimp, peeled and deveined

8 oz. Sour Cream

4 tablespoons butter

2 tablespoons flour

1 Spring Onion

1 can Evaporated Milk

8 oz. block Sharp White Cheddar Cheese

4 oz. block Mozzarella Cheese

¼ cup Panko Bread Crumbs

Salt, Black Pepper, paprika to taste

HOW TO MAKE SEAFOOD MAC AND CHEESE

Step 1: Prepare the oven. Preheat it to 350 degrees.

Step 2: Wash, peel, and de-vein shrimp if needed. Or you can just buy peeled and deveined shrimps at the grocery to save time.

Step 3: Cook the macaroni. Follow the direction found in the package direction. Then, drain well using a sieve if available.

Step 4: Transfer the drained macaroni into a large mixing bowl.

Step 5: Stir in the sour cream until the noodles are well coated. This helps to even up the flavor.

Step 6: Then, add in the crab meat and stir well.

Step 7: Grab the green onions and chop finely. Grate the white cheddar cheese, then, the mozzarella cheese, and set aside.

Step 8: In a medium saucepan or skillet, melt the butter on low to medium heat. Add in the shrimps and cook while turning and stirring until almost done.

Step 9: Take the shrimps out of the pan and allow them to cool. Then, slightly chop the cooled shrimps and add them into the macaroni mixture.

Step 10: Saute the finely chopped onion in the pan until tender. Sprinkle the flour over the onions and stir well. Cook and brown for a minute before gradually add in the milk while constantly stirring until the mixture starts to thicken.

Step 11: Slowly add in the grated Cheddar Cheese while constantly stirring until the cheese has melted. Then, pour the cheese mixture over the macaroni and seafood mixture. Mix well until incorporated. Sprinkle salt and pepper to taste.

Step 12: In a well-buttered baking dish, place the mixture and sprinkle the grated mozzarella cheese on top.

Step 13: On top of the mozzarella cheese. Sprinkle the bread crumbs.

Step 14: Lightly sprinkle with paprika to add color.

Step 15: Place inside the preheated oven and bake for about 20 to 25 minutes or until lightly browned on top.

Step 16: Remove the seafood Mac and Cheese from the oven and serve warm. Enjoy!

NOTES:

Make sure to butter the baking dish well to ensure that the Seafood Mac and Cheese will not stick into the pan. Or you can use aluminum foil to line the pan. Not only that it’ll help to ensure that the dish will not stick but foil improves the heat efficiency inside the oven.

Use a variety of seafood as desired. And add another half cup of milk if you like a creamier mac and cheese.

SEAFOOD MAC AND CHEESE

Rebecca This is the ultimate comfort food – seafood mac and cheese with varieties of seafood you can put in a creamy, rich, and cheesy sauce. A true mouthwatering and oh… Main Dish Recipes SEAFOOD MAC AND CHEESE European Print This
Nutrition facts: 200 calories 20 grams fat
Rating: 5.0/5
( 1 voted )

Ingredients

  • 2 cups of dry Macaroni
  • 6 oz. Claw Crab Meat
  • 8 oz. Shrimp, peeled and deveined
  • 8 oz. Sour Cream
  • 4 tablespoons butter
  • 2 tablespoons flour
  • 1 Spring Onion
  • 1 can Evaporated Milk
  • 8 oz. block Sharp White Cheddar Cheese
  • 4 oz. block Mozzarella Cheese
  • ¼ cup Panko Bread Crumbs
  • Salt, Black Pepper, paprika to taste

Instructions

Step 1: Prepare the oven. Preheat it to 350 degrees.

Step 2: Wash, peel, and de-vein shrimp if needed. Or you can just buy peeled and deveined shrimps at the grocery to save time.

Step 3: Cook the macaroni. Follow the direction found in the package direction. Then, drain well using a sieve if available.

Step 4: Transfer the drained macaroni into a large mixing bowl.

Step 5: Stir in the sour cream until the noodles are well coated. This helps to even up the flavor.

Step 6: Then, add in the crab meat and stir well.

Step 7: Grab the green onions and chop finely. Grate the white cheddar cheese, then, the mozzarella cheese and set aside.

Step 8: In a medium saucepan or skillet, melt the butter on low to medium heat. Add in the shrimps and cook while turning and stirring until almost done.

Step 9: Take the shrimps out of the pan and allow them to cool. Then, slightly chop the cooled shrimps and add them into the macaroni mixture.

Step 10: Saute the finely chopped onion in the pan until tender. Sprinkle the flour over the onions and stir well. Cook and brown for a minute before gradually add in the milk while constantly stirring until the mixture starts to thicken.

Step 11: Slowly add in the grated Cheddar Cheese while constantly stirring until the cheese has melted. Then, pour the cheese mixture over the macaroni and seafood mixture. Mix well until incorporated. Sprinkle salt and pepper to taste.

Step 12: In a well-buttered baking dish, place the mixture and sprinkle the grated mozzarella cheese on top.

Step 13: On top of the mozzarella cheese. Sprinkle the bread crumbs.

Step 14: Lightly sprinkle with paprika to add color.

Step 15: Place inside the preheated oven and bake for about 20 to 25 minutes or until lightly browned on top.

Step 16: Remove the seafood Mac and Cheese from the oven and serve warm. Enjoy!

NOTES:

Make sure to butter the baking dish well to ensure that the Seafood Mac and Cheese will not stick into the pan. Or you can use aluminum foil to line the pan. Not only that it’ll help to ensure that the dish will not stick but foil improves the heat efficiency inside the oven.

Use a variety of seafood as desired. And add another half cup of milk if you like a creamier mac and cheese.

September 6, 2020 0 comment
0 FacebookTwitterPinterestEmail
Main Dish Recipes

PECAN PRALINES

by Rebecca September 6, 2020
written by Rebecca

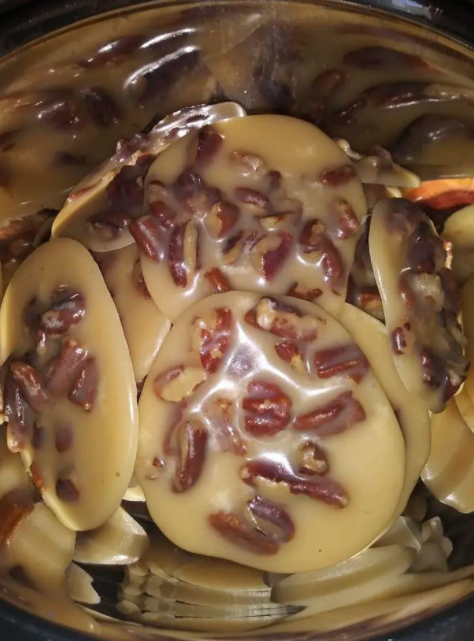
Yes, these pralines only need four simple ingredients to make – butter, sugar, evaporated milk, and of course pecans. All you have to do is mix everything, allow the mixture to reach a soft ball stage, and drop spoonfuls to a foil or waxed paper. Then, you are all set! Easy peasy, right?

I love this classic sweet candy confection. It is a simple quick fix that you can make any time, any day! A melt in your mouth, crunchy, and utterly mouthwatering treat. My personal favorite because of the pecans and because they are amazing gifts to give to family and friends. And these candy-coated and rich indulgence are a keeper. I have been making these for a long time, I grew up to this. I watched my mom made these. And she made the best pralines. I may not be as good as her but I am proud that I was able to pull this off. And I am sure that you can make this, too. These are super simple, not fussy 4-ingredient pralines that you can prepare whenever you want. Beware though, these are dangerously addicting! Perfectly sweet, melt in your mouth with crunchy pecans in every bite.

Ingredients

4 oz. butter

4 cups white sugar

12 oz. can evaporate milk

2 cups pecans

How to make Pecan Pralines

Step 1: In a heavy 5-quart pot, combine the butter, milk, and sugar. Cook on medium heat while occasionally stirring until the mixture is boiling. Then, continuously stir until the mixture reached the softball stage.

Step 2: Make sure that you don’t cook on high heat. Now, remove the pot from the heat and allow the mixture to cool for some time until it loses the glossy appearance.

Step 3: Stir in the pecans until the mixture begins to thicken. Then, place spoonfuls of the mixture on foil or waxed paper.

PECAN PRALINES

Rebecca Yes, these pralines only need four simple ingredients to make – butter, sugar, evaporated milk, and of course pecans. All you have to do is mix everything, allow the mixture… Main Dish Recipes PECAN PRALINES European Print This
Nutrition facts: 200 calories 20 grams fat
Rating: 5.0/5
( 1 voted )

Ingredients

  • 4 oz. butter
  • 4 cups white sugar
  • 12 oz. can evaporate milk
  • 2 cups pecans

Instructions

Step 1: In a heavy 5-quart pot, combine the butter, milk, and sugar. Cook on medium heat while occasionally stirring until the mixture is boiling. Then, continuously stir until the mixture reached the softball stage.

Step 2: Make sure that you don’t cook on high heat. Now, remove the pot from the heat and allow the mixture to cool for some time until it loses the glossy appearance.

Step 3: Stir in the pecans until the mixture begins to thicken. Then, place spoonfuls of the mixture on foil or waxed paper.

September 6, 2020 0 comment
0 FacebookTwitterPinterestEmail
Newer Posts
Older Posts

Popular Posts

  • 1

    Crispy Crunchy Parmesan Potatoes

    March 21, 2020
  • 2

    CROCK POT SMOTHERED PORK CHOPS

    March 21, 2020
  • Facebook
  • Twitter

@2019 - All Right Reserved.


Back To Top