Cook it once
  • Home
  • Privacy Policy
  • Recipes
    • KETO
    • LC
    • WW
  • Tips
  • Contact
Cook it once
  • Home
  • Privacy Policy
  • Recipes
    • KETO
    • LC
    • WW
  • Tips
  • Contact
Category:

Main Dish Recipes

Main Dish Recipes

SLOW COOKER GREEN BEANS, HAM AND POTATOES

by Rebecca September 10, 2020
written by Rebecca

Prep: 30 mins | Cook: 4 hrs | Total: 4 hrs 30 mins | Servings: 10 | Yield: 10 servings

This is a budget-friendly meal that you can add to your weekly menu. It calls for leftover ham or you can use ham hocks if you’d like. A pretty simple dish that is cooked in a slow cooker. Healthy, easy to make, and on the wallet. If you have picky eaters at home, don’t worry because this dish is too good to pass.

INGREDIENTS

2 lbs of fresh green beans, rinsed, trimmed

1 large onion, chopped

3 eaches ham hocks

1 ½ pounds new potatoes, quartered

1 tsp garlic powder

1 tsp onion powder

1 tsp seasoning salt

1 tbsp chicken bouillon granules

ground black pepper to taste

HOW TO MAKE SLOW COOKER GREEN BEANS, HAM, AND POTATOES

Step 1: Before putting the beans in a slow cooker, slice them in halves if they are large. Pour water in the slow cooker barely covering the beans. Add in the onion and ham hocks.

Step 2: Cook, covered, on high until simmering. Adjust the heat to low and continue to cook for about 2 to 3 hours or until the beans are crisp but not done.

Step 3: Add in the potatoes and cook for 45 minutes more.

Step 4: Extract the ham hocks from the slow cooker. Remove the bones. Shred or chop the meat before putting it back into the slow cooker. Season with garlic powder, onion powder, seasoning salt, bouillon, and pepper. Continue cooking until the potatoes are done. Season to taste.

Step 5: Time to serve. Place the beans, potatoes, and ham in a serving plate. With a slotted spoon, add in a bit of broth.

NOTE:

I recommend using a ham hock for this recipe because the bone will add extra flavor. Or use any leftover ham that is available on hand.

Nutrition Facts:

Per Serving: 199.8 calories; fat 9g 14% DV; cholesterol 28.6mg 10% DV; sodium 133.1mg 5% DV; protein 10.2g 21% DV; carbohydrates 20.6g 7% DV
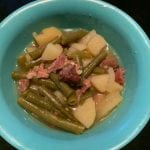
SLOW COOKER GREEN BEANS, HAM AND POTATOES

Rebecca Prep: 30 mins | Cook: 4 hrs | Total: 4 hrs 30 mins | Servings: 10 | Yield: 10 servings This is a budget-friendly meal that you can add to your weekly menu. It calls for leftover… Main Dish Recipes SLOW COOKER GREEN BEANS, HAM AND POTATOES European Print This
Serves: 10 Prep Time: 30 mins Cooking Time: 4 hrs 4 hrs
Nutrition facts: 199.8 calories 9 fat
Rating: 5.0/5
( 1 voted )

Ingredients

  • 2 lbs of fresh green beans, rinsed, trimmed
  • 1 large onion, chopped
  • 3 eaches ham hocks
  • 1 ½ pounds new potatoes, quartered
  • 1 tsp garlic powder
  • 1 tsp onion powder
  • 1 tsp seasoning salt
  • 1 tbsp chicken bouillon granules
  • ground black pepper to taste

Instructions

Step 1: Before putting the beans in a slow cooker, slice them in halves if they are large. Pour water in the slow cooker barely covering the beans. Add in the onion and ham hocks.

Step 2: Cook, covered, on high until simmering. Adjust the heat to low and continue to cook for about 2 to 3 hours or until the beans are crisp but not done.

Step 3: Add in the potatoes and cook for 45 minutes more.

Step 4: Extract the ham hocks from the slow cooker. Remove the bones. Shred or chop the meat before putting it back into the slow cooker. Season with garlic powder, onion powder, seasoning salt, bouillon, and pepper. Continue cooking until the potatoes are done. Season to taste.

Step 5: Time to serve. Place the beans, potatoes, and ham in a serving plate. With a slotted spoon, add in a bit of broth.

NOTE:

I recommend using a ham hock for this recipe because the bone will add extra flavor. Or use any leftover ham that is available on hand.

September 10, 2020 0 comment
0 FacebookTwitterPinterestEmail
Main Dish Recipes

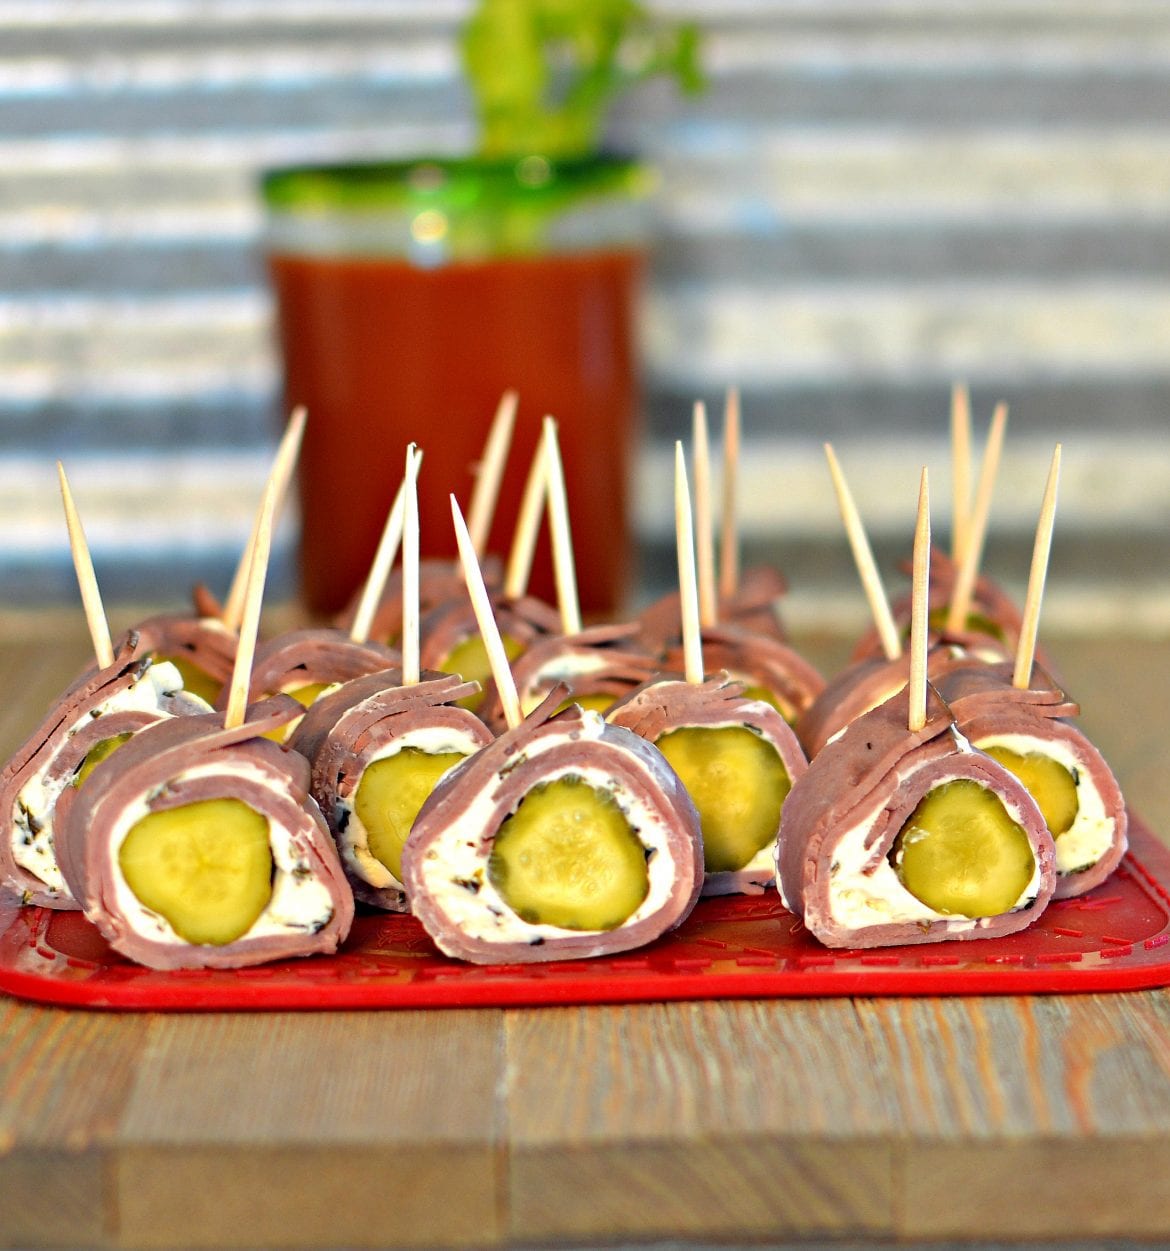
CREAM CHEESE PICKLES

by Rebecca September 10, 2020
written by Rebecca

Prep: 10 mins | Additional: 7hrs 50mins | Total: 8 hrs | Servings: 8 | Yield: 8 servings

Who here is a pickle lover? Raising my two hands, here. For all of us who are addicted to pickles, this appetizer is made especially for us. Pretty easy to make and it only needs three, yes, you read it right, three ingredients; kosher dill pickles, cream cheese, and beef luncheon meat. I have been making these rolled-up pickles and they are a huge hit every time. This Cream Cheese Pickle is the perfect party appetizer. Not fussy, just plain simple but wildly addictive! An interesting appetizer for everyone to enjoy.

Want to switch up a little bit on how you enjoy your pickles? Give this recipe a try and I am pretty sure that you will be impressed. These rolled pickles taste amazing! Even the kids enjoy these. This has been the most requested appetizer. Creamy, crunchy, and flavorful pinwheels wrapped in a blanket of cream cheese and rolled up in luncheon meat. It is time to say goodbye to your usual, boring pickles straight from the jar and say hello to these pickle pinwheels. Enjoy every bite and don’t forget to share.

INGREDIENTS

8 large (4″ long)s kosher dill pickles, patted dry

2 (8 oz) packages cream cheese, softened

2 ½ ounces thin-sliced beef luncheon meat

HOW TO MAKE CREAM CHEESE PICKLES

Step 1: Spread or pat around each pickle the cream cheese.

Step 2: Around each piece of pickles, wrap 2 sheets of meat.

Step 3: Place in the fridge overnight.

Step 4: Before serving, slice the wrapped pickles. Enjoy!

NOTES:

You can add minced garlic or chive or garlic salt into the cream cheese. Or use onion cream cheese instead.

In place of luncheon meat, use either dried beef slices or ham.

Nutrition Facts:

Per Serving: 230.1 calories; fat 20.1g 31% DV; cholesterol 65.9mg 22% DV; sodium 1995.4mg 80% DV; protein 6.7g 13% DV; carbohydrates 7.3g 2% DV

CREAM CHEESE PICKLES

Rebecca Prep: 10 mins | Additional: 7hrs 50mins | Total: 8 hrs | Servings: 8 | Yield: 8 servings Who here is a pickle lover? Raising my two hands, here. For all of us who are addicted to pickles, this… Main Dish Recipes CREAM CHEESE PICKLES European Print This
Serves: 8 Prep Time: 8 hrs
Nutrition facts: 230.1 calories 20.1 fat
Rating: 5.0/5
( 1 voted )

Ingredients

  • 8 large (4″ long)s kosher dill pickles, patted dry
  • 2 (8 oz) packages cream cheese, softened
  • 2 ½ ounces thin-sliced beef luncheon meat

Instructions

Step 1: Spread or pat around each pickle the cream cheese.

Step 2: Around each piece of pickles, wrap 2 sheets of meat.

Step 3: Place in the fridge overnight.

Step 4: Before serving, slice the wrapped pickles. Enjoy!

NOTES:

You can add minced garlic or chive or garlic salt into the cream cheese. Or use onion cream cheese instead.

In place of luncheon meat, use either dried beef slices or ham.

September 10, 2020 0 comment
0 FacebookTwitterPinterestEmail
Main Dish Recipes

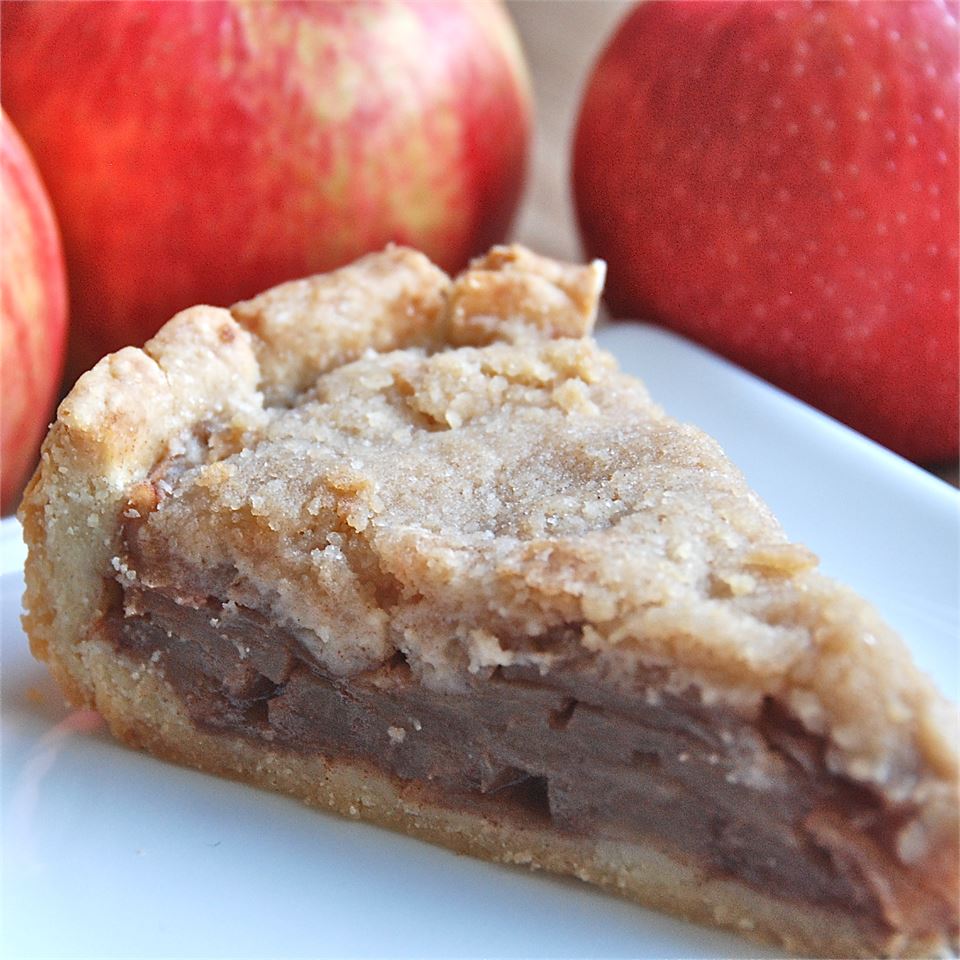
APPLE CRUMBLE PIE

by Rebecca September 10, 2020
written by Rebecca

Prep: 30 mins | Cook: 40 mins | Total: 1 hr 10 mins | Servings: 8 | Yield: 1 deep-dish 9-inch pie

Is it the chunky apple filling or the crumb topping of this amazing pie the reason why it never settles long? For me, it’s both! I dearly love this Apple Crumble Pie. It has everything I could ask for in a dessert – buttery, flaky crust, rich apple filling, juicy, perfectly sweet, cinnamon-spiced, and topped with a brown-sugary, buttery, toasty walnut crumble. Perfect with a scoop of vanilla ice cream for an afternoon snack or alongside freshly brewed coffee for breakfast.

INGREDIENTS

1 (9 inches) deep-dish pie crust

5 cups of apples peeled, cored, and thinly sliced

½ cup white sugar

¾ tsp ground cinnamon

⅓ cup white sugar

¾ cup all-purpose flour

6 tbsp butter

HOW TO MAKE APPLE CRUMBLE PIE

Step 1: Prepare the oven. Preheat it to 400 degrees F or 200 degrees C.

Step 2: In an unbaked pie shell, arrange the apple slices.

Step 3: In a small bowl, mix half a cup of sugar and cinnamon. Sprinkle this over the apple slices.

Step 4: In another bowl, add 1/3 cup of sugar with flour. Mix well, then, add in the butter. Mix until crumbly. Spoon this over the apples.

Step 5: Place inside the preheated oven and bake for about 40 minutes until the apples are soft and the top is light brown.

NOTES:

Make sure to cook the liquid down properly until it turns into caramel. Then, add this back to the apples. A simple trick to prevent a mushy pie.

Opt for a thicker consistency after mixing and baking with apples.

You are welcome to add an extra apple for a better apple flavor in your pie.

Don’t skimp on the ingredients. When done baking, the butter will keep the crumble nice and crisp. In case the crumble turned out dry and powdery, you can mix a tablespoon of melted butter until you have nice small clumps. Make sure that the butter is not a little too warm as it will result in a big blob. Place in the fridge for at least 5 minutes. Then, using your hands or a fork, break the pieces down into crumbles.

Nutrition Facts:

Per Serving: 357.7 calories; fat 16.4g 25% DV; cholesterol 22.9mg 8% DV; sodium 209.6mg 8% DV; protein 2.5g 5% DV; carbohydrates 52g 17% DV

APPLE CRUMBLE PIE

Rebecca Prep: 30 mins | Cook: 40 mins | Total: 1 hr 10 mins | Servings: 8 | Yield: 1 deep-dish 9-inch pie Is it the chunky apple filling or the crumb topping of this amazing pie the… Main Dish Recipes APPLE CRUMBLE PIE European Print This
Serves: 8 Prep Time: 30 mins Cooking Time: 40 mins 40 mins
Nutrition facts: 357.7 calories 16.4 fat
Rating: 5.0/5
( 1 voted )

Ingredients

  • 1 (9 inches) deep-dish pie crust
  • 5 cups of apples peeled, cored, and thinly sliced
  • ½ cup white sugar
  • ¾ tsp ground cinnamon
  • ⅓ cup white sugar
  • ¾ cup all-purpose flour
  • 6 tbsp butter

Instructions

Step 1: Prepare the oven. Preheat it to 400 degrees F or 200 degrees C.

Step 2: In an unbaked pie shell, arrange the apple slices.

Step 3: In a small bowl, mix half a cup of sugar and cinnamon. Sprinkle this over the apple slices.

Step 4: In another bowl, add 1/3 cup of sugar with flour. Mix well, then, add in the butter. Mix until crumbly. Spoon this over the apples.

Step 5: Place inside the preheated oven and bake for about 40 minutes until the apples are soft and the top is light brown.

NOTES:

Make sure to cook the liquid down properly until it turns into caramel. Then, add this back to the apples. A simple trick to prevent a mushy pie.

Opt for a thicker consistency after mixing and baking with apples.

You are welcome to add an extra apple for a better apple flavor in your pie.

Don't skimp on the ingredients. When done baking, the butter will keep the crumble nice and crisp. In case the crumble turned out dry and powdery, you can mix a tablespoon of melted butter until you have nice small clumps. Make sure that the butter is not a little too warm as it will result in a big blob. Place in the fridge for at least 5 minutes. Then, using your hands or a fork, break the pieces down into crumbles.

September 10, 2020 0 comment
0 FacebookTwitterPinterestEmail
Main Dish Recipes

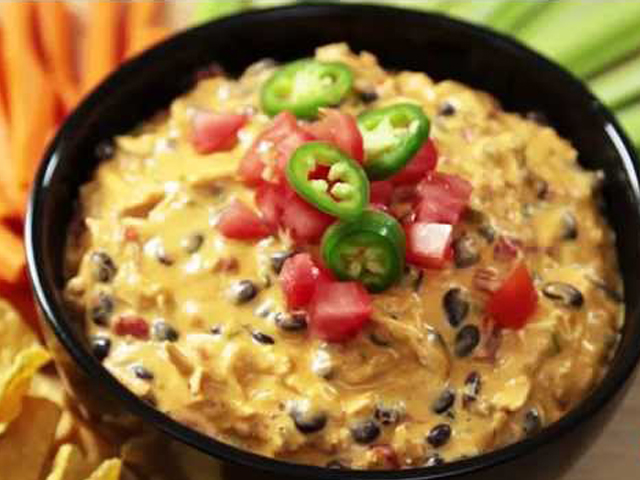
OUTRAGEOUS WARM CHICKEN NACHO DIP

by Rebecca September 10, 2020
written by Rebecca

Prep: 20 mins | Cook: 1hr 15mins | Total: 1 hr 35 mins | Servings: 12 | Yield: 12 servings

I am obsessed with this Warm Chicken Nacho Dip. It is a hyped-up version of the classic queso dip. And a healthier variant, too. Pretty simple and a no-fuss that is excellent to serve as a hot-dip, or go nacho style by adding spoonfuls over crisp tortilla chips, or rolled up in a warm flour tortilla. This Dip is mouthwatering and a serious crowd-pleaser. Adjust the kick as you like and add or not some jalapeno to taste.

I prefer more cheese and more kick. I cannot tell you how much I love this dip with more spice. Every bite is satisfying – all the amazing flavors dancing inside my mouth. This Nacho Dip is a keeper and a must-try.

INGREDIENTS

1 can of drained diced tomatoes with green chile peppers (such as RO*TEL®)

1 (1 pound) loaf processed cheese food (such as Velveeta®), cubed

2 large cooked skinless, boneless chicken breast halves, shredded

⅓ cup sour cream

¼ cup diced green onion

1 ½ tbsp taco seasoning mix

2 tbsp minced jalapeno pepper, or to taste

1 cup black beans, rinsed and drained

HOW TO MAKE OUTRAGEOUS WARM CHICKEN NACHO DIP

Step 1: Add in a slow cooker the diced tomatoes, processed cheese, chicken meat, sour cream, green onion, taco seasoning, and jalapeno pepper. Cook on high, stirring occasionally, for about 1 to 2 hours until the cheese has melted and the dip is hot.

Step 2: Add in the black beans. Stir and cook for another 15 minutes.

NOTES:

Add in a small amount of milk to thin the mixture if the dip becomes too thick.

You can use a blender to shred the chicken or a hand mixer if you are boiling or baking or grilling the chicken. As those perform well at shredding the meat in 3 seconds.

Nutrition Facts:

Per Serving: 232.3 calories; fat 13.6g 21% DV; cholesterol 60.2mg 20% DV; sodium 790.4mg 32% DV; protein 18.6g 37% DV; carbohydrates 8.7g 3% DV

OUTRAGEOUS WARM CHICKEN NACHO DIP

Rebecca Prep: 20 mins | Cook: 1hr 15mins | Total: 1 hr 35 mins | Servings: 12 | Yield: 12 servings I am obsessed with this Warm Chicken Nacho Dip. It is a hyped-up version of the classic queso dip.… Main Dish Recipes OUTRAGEOUS WARM CHICKEN NACHO DIP European Print This
Serves: 12 Prep Time: 20 mins Cooking Time: 1 hr 15 mins 1 hr 15 mins
Nutrition facts: 232.3 calories 13.6 fat
Rating: 5.0/5
( 1 voted )

Ingredients

  • 1 can of drained diced tomatoes with green chile peppers (such as RO*TEL®)
  • 1 (1 pound) loaf processed cheese food (such as Velveeta®), cubed
  • 2 large cooked skinless, boneless chicken breast halves, shredded
  • ⅓ cup sour cream
  • ¼ cup diced green onion
  • 1 ½ tbsp taco seasoning mix
  • 2 tbsp minced jalapeno pepper, or to taste
  • 1 cup black beans, rinsed and drained

Instructions

Step 1: Add in a slow cooker the diced tomatoes, processed cheese, chicken meat, sour cream, green onion, taco seasoning, and jalapeno pepper. Cook on high, stirring occasionally, for about 1 to 2 hours until the cheese has melted and the dip is hot.

Step 2: Add in the black beans. Stir and cook for another 15 minutes.

NOTES:

Add in a small amount of milk to thin the mixture if the dip becomes too thick.

You can use a blender to shred the chicken or a hand mixer if you are boiling or baking or grilling the chicken. As those perform well at shredding the meat in 3 seconds.

September 10, 2020 0 comment
0 FacebookTwitterPinterestEmail
Main Dish Recipes

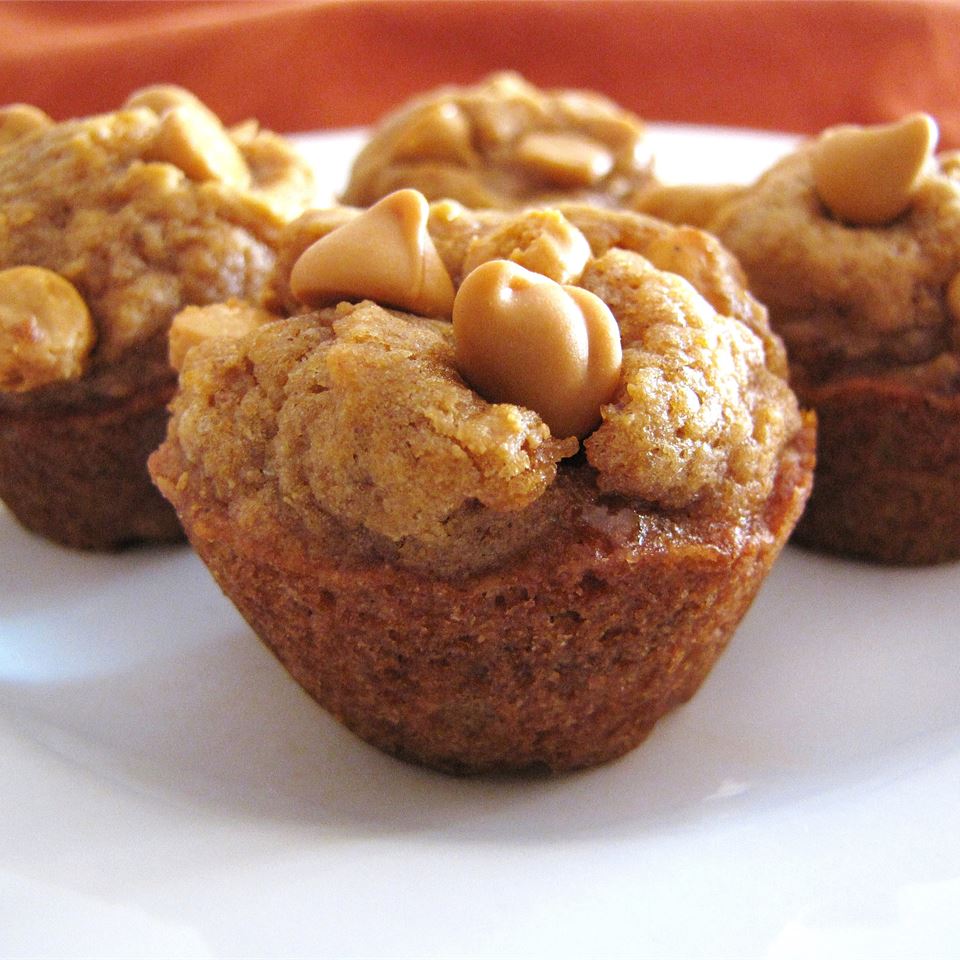
MINI PUMPKIN BUTTERSCOTCH MUFFINS

by Rebecca September 10, 2020
written by Rebecca

Prep: 15 mins | Cook: 10mins | Total: 25 mins | Servings: 48 | Yield: 48 muffins

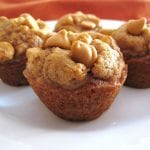
These mini pumpkin muffins are super big in flavor. Pretty easy, not fussy, and a sure hit every time. The combination of pumpkin and butterscotch gives these muffins an interesting taste. Perfect for fall, and oh, since Holloween is fast approaching, these are gonna be excellent to give as treats. Just make sure to make batches because the kids will surely keep on coming back for more. I love the unique taste of these made from scratch muffins. And their size is just perfect. I would have made it a bit bigger but I prefer mini muffins because they are way cuter and easy to eat.

INGREDIENTS

1 ¾ cups all-purpose flour

½ cup brown sugar

½ cup white sugar

1 tsp ground cinnamon

½ tsp ground ginger

½ tsp ground nutmeg

1 tsp baking soda

¼ tsp baking powder

½ tsp salt

2 large eggs

½ cup melted butter

1 cup canned pumpkin

1 (6 oz) package butterscotch chips

HOW TO MAKE MINI PUMPKIN BUTTERSCOTCH MUFFINS

Step 1: Prepare the oven. Preheat it to 350 degrees F or 175 degrees C.

Step 2: Using a cooking spray, grease the mini-muffin pan.

Step 3: In a large bowl, sift the flour, brown sugar, white sugar, cinnamon, ginger, nutmeg, baking soda, baking powder, and salt.

Step 4: In another bowl, whisk the eggs, butter, and pumpkin.

Step 5: Add and mix the flour mixture into the egg mixture. Then, stir in the butterscotch chips.

Step 6: Fill each muffin cup to about 3/4 full.

Step 7: Place inside the preheated oven and bake for about 10 to 12 minutes until a toothpick inserted in the middle of the muffin comes out clean.

NOTE:

You can place the muffins in a Ziploc freezer bag or airtight freezer-safe container. Freeze until completely cooled.

Remove from the freezer and place it in a bag or container. Thaw overnight or for several hours on the counter.

Nutrition Facts:

Per Serving: 75.1 calories; fat 3.2g 5% DV; cholesterol 12.8mg 4% DV; sodium 86.3mg 4% DV; protein 0.8g 2% DV; carbohydrates 10.5g 3% DV

MINI PUMPKIN BUTTERSCOTCH MUFFINS

Rebecca Prep: 15 mins | Cook: 10mins | Total: 25 mins | Servings: 48 | Yield: 48 muffins These mini pumpkin muffins are super big in flavor. Pretty easy, not fussy, and a sure hit every time. The combination of… Main Dish Recipes MINI PUMPKIN BUTTERSCOTCH MUFFINS European Print This
Serves: 48 Prep Time: 15 mins Cooking Time: 10 mins 10 mins
Nutrition facts: 75.1 calories 3.2 fat
Rating: 4.0/5
( 2 voted )

Ingredients

  • 1 ¾ cups all-purpose flour
  • ½ cup brown sugar
  • ½ cup white sugar
  • 1 tsp ground cinnamon
  • ½ tsp ground ginger
  • ½ tsp ground nutmeg
  • 1 tsp baking soda
  • ¼ tsp baking powder
  • ½ tsp salt
  • 2 large eggs
  • ½ cup melted butter
  • 1 cup canned pumpkin
  • 1 (6 oz) package butterscotch chips

Instructions

Step 1: Prepare the oven. Preheat it to 350 degrees F or 175 degrees C.

Step 2: Using a cooking spray, grease the mini-muffin pan.

Step 3: In a large bowl, sift the flour, brown sugar, white sugar, cinnamon, ginger, nutmeg, baking soda, baking powder, and salt.

Step 4: In another bowl, whisk the eggs, butter, and pumpkin.

Step 5: Add and mix the flour mixture into the egg mixture. Then, stir in the butterscotch chips.

Step 6: Fill each muffin cup to about 3/4 full.

Step 7: Place inside the preheated oven and bake for about 10 to 12 minutes until a toothpick inserted in the middle of the muffin comes out clean.

NOTE:

You can place the muffins in a Ziploc freezer bag or airtight freezer-safe container. Freeze until completely cooled.

Remove from the freezer and place it in a bag or container. Thaw overnight or for several hours on the counter.

September 10, 2020 0 comment
0 FacebookTwitterPinterestEmail
Main Dish Recipes

KAHLUA COCOA

by Rebecca September 10, 2020
written by Rebecca

Total: 15 mins | Servings: 1

A cup of warm cocoa makes everything okay.

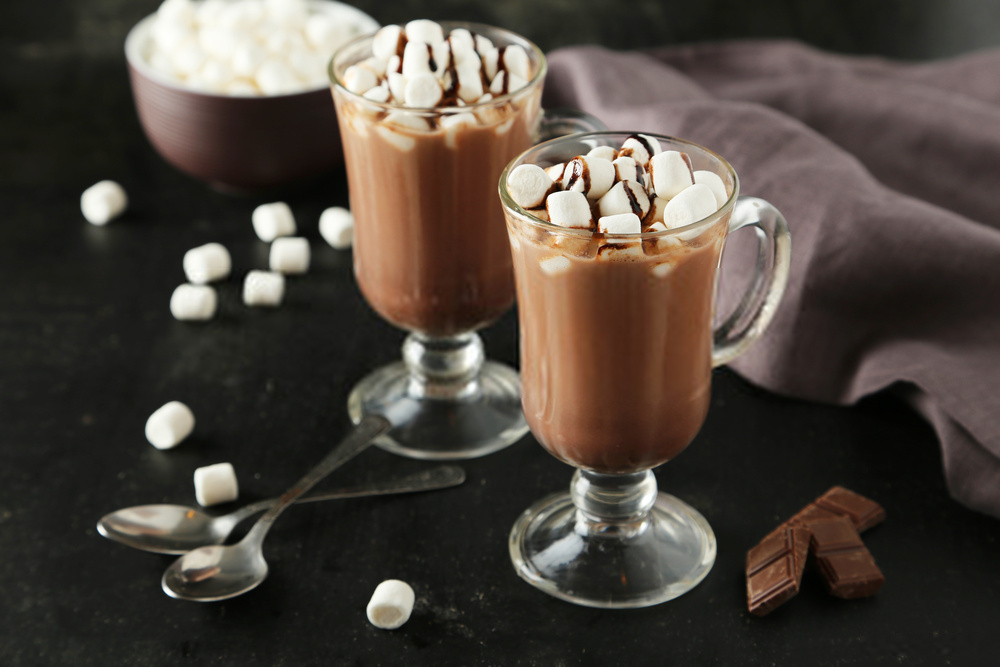
I love hot cocoa – warming and lovely especially during cold days. But I never thought that I can dress it up with varieties of toppings to serve to guests, friends, and family. The kids are very excited! We are going to have a mini cocoa party tonight with all the toppings they can lay their hands on. Their favorite? Marshmallows, grated chocolate, and crushed nuts. Not to mention chocolate syrup! Yum!  You should try this too. I am pretty sure that your kids will go crazy over this Kahlua Cocoa.

Before we use to just have simple and plain cocoa. Now that I have found this excellent recipe, our favorite drink will never be the same again! Everyone is thrilled. And I am about to be busy preparing everything. I will lay the toppings on the table so they can pick whatever they want. Tonight is gonna be special. Cocoa Party, quarantine edition.

INGREDIENTS

1 tbsp brown sugar

1 tbsp unsweetened cocoa powder

1 tbsp Kahlua, or cognac

¼ tsp vanilla extract

¼ tsp ground cinnamon

¾ cup 1% milk

HOW TO MAKE KAHLUA COCOA

Step 1: In a blender, add the brown sugar, cocoa powder, Kahlua (or cognac), vanilla extract, and cinnamon.

Step 2: In a saucepan, heat the milk until steaming.

Step 3: Pour the hot milk into the blender.

Step 4: Then, blend until frothy.

NOTE:

Play around with toppings depending on the occasion. Or you can put a variety of toppings on the table so your guests can just pick whatever they want.

Nutrition Facts:

Per Serving: 192 calories; sodium 83mg 3% DV; potassium 363mg 10% DV; carbohydrates 31.5g 10% DV; fiber 2.3g 9% DV; sugar 27g; protein 7.3g 15% DV; exchange other carbs 2; vitamin a iu 361IU; vitamin cmg; folate 11mcg; calcium 242mg; iron 1mg; magnesium 48mg; thiaminmg; total fat 2.6g 4% DV; saturated fat 1.6g; cholesterol 9mg 3% DV

KAHLUA COCOA

Rebecca Total: 15 mins | Servings: 1 A cup of warm cocoa makes everything okay. I love hot cocoa – warming and lovely especially during cold days. But I never thought that I can… Main Dish Recipes KAHLUA COCOA European Print This
Prep Time: 15 mins
Nutrition facts: 192 calories 2.6 fat
Rating: 5.0/5
( 1 voted )

Ingredients

  • 1 tbsp brown sugar
  • 1 tbsp unsweetened cocoa powder
  • 1 tbsp Kahlua, or cognac
  • ¼ tsp vanilla extract
  • ¼ tsp ground cinnamon
  • ¾ cup 1% milk

Instructions

Step 1: In a blender, add the brown sugar, cocoa powder, Kahlua (or cognac), vanilla extract, and cinnamon.

Step 2: In a saucepan, heat the milk until steaming.

Step 3: Pour the hot milk into the blender.

Step 4: Then, blend until frothy.

NOTE:

Play around with toppings depending on the occasion. Or you can put a variety of toppings on the table so your guests can just pick whatever they want.

September 10, 2020 0 comment
0 FacebookTwitterPinterestEmail
Main Dish Recipes

MAHI MAHI WITH COCONUT RICE AND MANGO SALSA

by Rebecca September 10, 2020
written by Rebecca

Prep: 30 mins | Cook: 30 mins | Additional: 1 hr | Total: 2 hrs | Servings: 4 | Yield: 4 servings

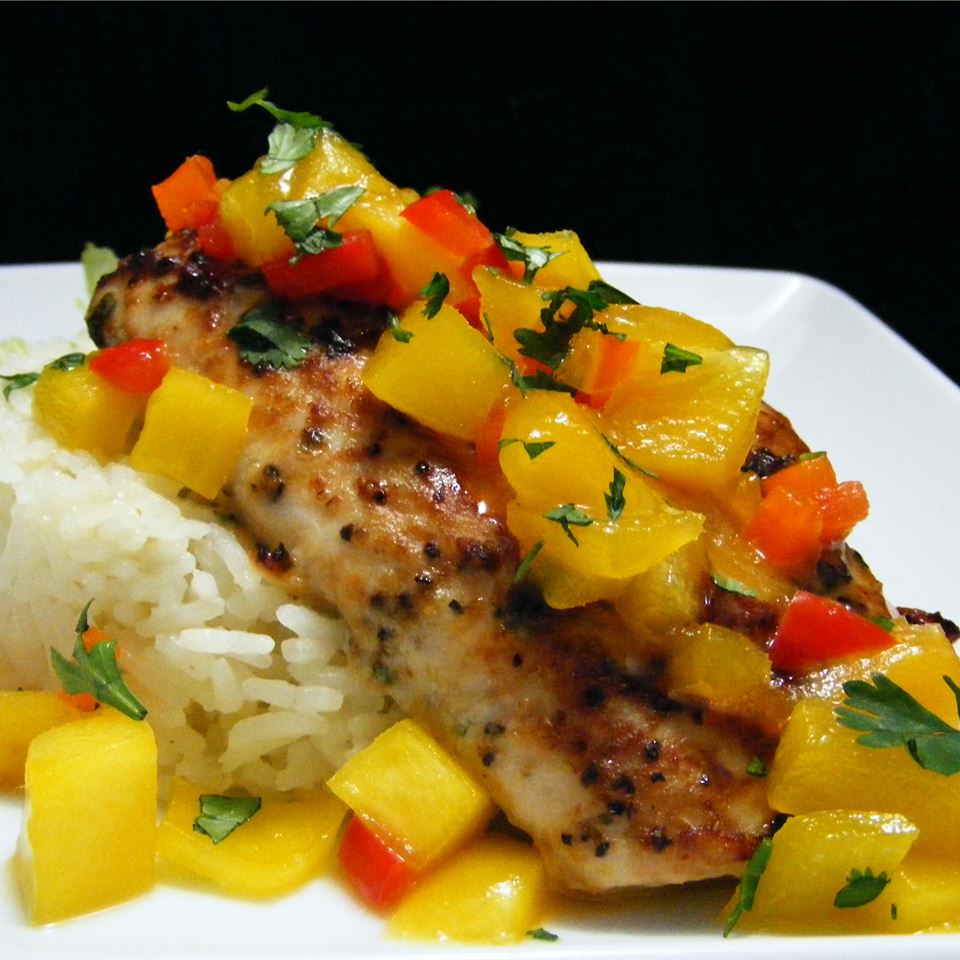
That is one heck of a refreshing dish! Outrageously delicious and surprisingly easy to prepare. Light with the fresh taste – simply to die for!

INGREDIENTS

2 tbsp olive oil

1 ½ tsp soy sauce

2 tsp lemon juice

1 clove garlic, crushed

2 tsp red pepper flakes

1 tsp fresh ground black pepper

½ tsp minced fresh ginger root

2 tbsp chopped green onion

1 pinch salt to taste

4 (4 oz) mahi-mahi fillets

2 cups uncooked jasmine rice

2 cups of water

1 cube chicken bouillon

1 tbsp butter

¾ (14 oz) can coconut milk

2 tbsp white sugar

1 ½ tsp butter

1 ½ tbsp white sugar

1 ½ cups fresh mango, cubed

HOW TO MAKE MAHI MAHI WITH COCONUT RICE AND MANGO SALSA

Step 1: In a bowl, add the olive oil, soy sauce, lemon juice, garlic, red pepper flakes, black pepper, ginger, green onion, and salt. Whisk well before adding in the mahi-mahi. And toss to coat evenly. Using a plastic wrap, cover the bowl and place inside the fridge for an hour to marinate.

Step 2: Prepare the oven’s broiler. Set the oven rack in the middle.

Step 3: In a saucepan, add the rice, water, chicken bouillon, and a tbsp of butter. Boil over high heat. Adjust the heat to medium-low and simmer for about 20 minutes, covered, until the rice absorbs the liquid. Then, pour in the coconut milk and 2 tbsp of sugar. Give it a good stir until the rice absorbed most of the coconut milk.

Step 4: Meanwhile, transfer the mahi-mahi in a large baking dish in a single layer. Making sure to shake off the excess marinade.

Step 5: Place in the preheated oven and broil for about 10 to 15 minutes until the fish flakes easily using a fork. If the fish browns too quickly, cover the baking dish with a sheet of aluminum foil.

Step 6: In a skillet, melt 1 1/2 tsp of butter and 1 1/2 tbsp of sugar over medium-high heat. When the mixture starts to bubble, stir in the mango cubes. Cook and stir for about 5 minutes until the mango is tender.

Step 7: To serve, place a mahi-mahi fillet over a scoop of hot rice. Top with the mango salsa. Enjoy!

Nutrition Facts:

Per Serving: 807.9 calories; fat 28.9g 45% DV; cholesterol 93.8mg 31% DV; sodium 548.6mg 22% DV; protein 30.9g 62% DV; carbohydrates 107g 35% DV

MAHI MAHI WITH COCONUT RICE AND MANGO SALSA

Rebecca Prep: 30 mins | Cook: 30 mins | Additional: 1 hr | Total: 2 hrs | Servings: 4 | Yield: 4 servings That is one heck of a refreshing dish!… Main Dish Recipes MAHI MAHI WITH COCONUT RICE AND MANGO SALSA European Print This
Serves: 4 Prep Time: 30 mins Cooking Time: 1 hr 30 mins 1 hr 30 mins
Nutrition facts: 807.9 calories 28.9 fat
Rating: 5.0/5
( 1 voted )

Ingredients

  • 2 tbsp olive oil
  • 1 ½ tsp soy sauce
  • 2 tsp lemon juice
  • 1 clove garlic, crushed
  • 2 tsp red pepper flakes
  • 1 tsp fresh ground black pepper
  • ½ tsp minced fresh ginger root
  • 2 tbsp chopped green onion
  • 1 pinch salt to taste
  • 4 (4 oz) mahi-mahi fillets
  • 2 cups uncooked jasmine rice
  • 2 cups of water
  • 1 cube chicken bouillon
  • 1 tbsp butter
  • ¾ (14 oz) can coconut milk
  • 2 tbsp white sugar
  • 1 ½ tsp butter
  • 1 ½ tbsp white sugar
  • 1 ½ cups fresh mango, cubed

Instructions

Step 1: In a bowl, add the olive oil, soy sauce, lemon juice, garlic, red pepper flakes, black pepper, ginger, green onion, and salt. Whisk well before adding in the mahi-mahi. And toss to coat evenly. Using a plastic wrap, cover the bowl and place inside the fridge for an hour to marinate.

Step 2: Prepare the oven's broiler. Set the oven rack in the middle.

Step 3: In a saucepan, add the rice, water, chicken bouillon, and a tbsp of butter. Boil over high heat. Adjust the heat to medium-low and simmer for about 20 minutes, covered, until the rice absorbs the liquid. Then, pour in the coconut milk and 2 tbsp of sugar. Give it a good stir until the rice absorbed most of the coconut milk.

Step 4: Meanwhile, transfer the mahi-mahi in a large baking dish in a single layer. Making sure to shake off the excess marinade.

Step 5: Place in the preheated oven and broil for about 10 to 15 minutes until the fish flakes easily using a fork. If the fish browns too quickly, cover the baking dish with a sheet of aluminum foil.

Step 6: In a skillet, melt 1 1/2 tsp of butter and 1 1/2 tbsp of sugar over medium-high heat. When the mixture starts to bubble, stir in the mango cubes. Cook and stir for about 5 minutes until the mango is tender.

Step 7: To serve, place a mahi-mahi fillet over a scoop of hot rice. Top with the mango salsa. Enjoy!

September 10, 2020 0 comment
0 FacebookTwitterPinterestEmail
Main Dish Recipes

CHICKEN PARMESAN CASSEROLE

by Rebecca September 9, 2020
written by Rebecca

Prep: 5 mins | Cook: 45mins | Total: 50 mins | Servings: 6 | Yield: 6 servings

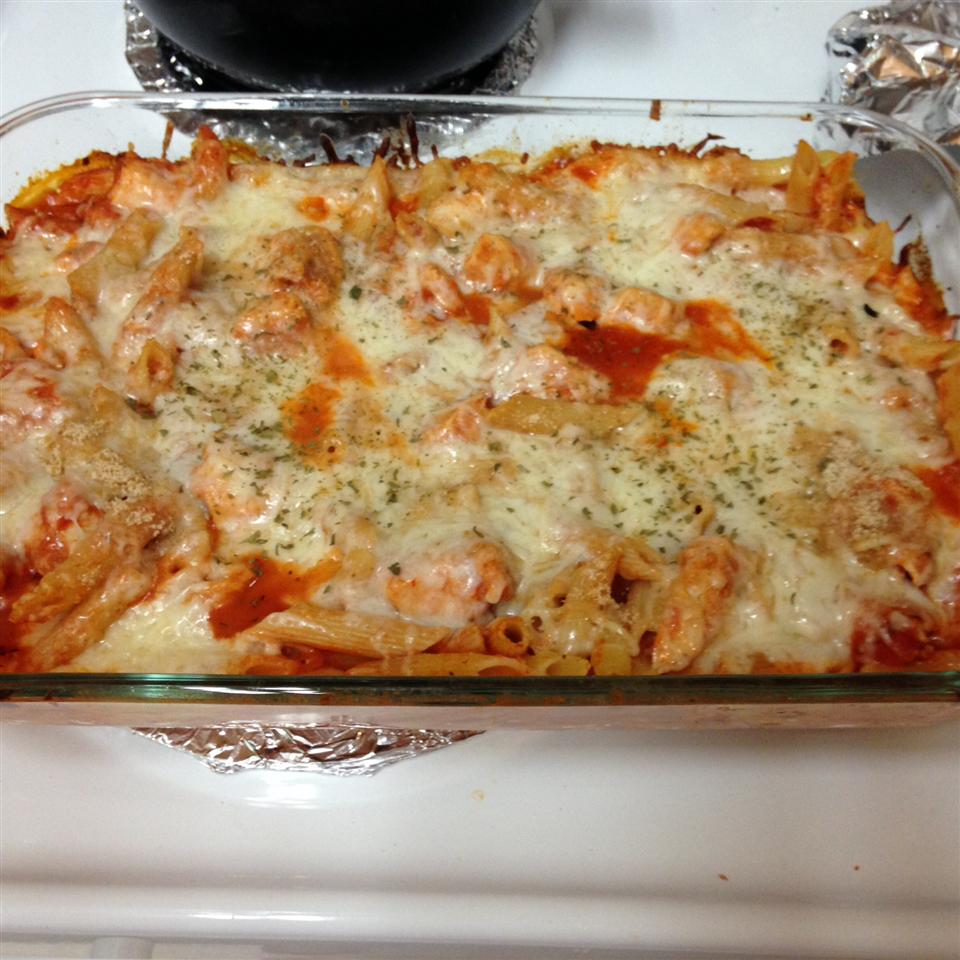
Who would ever think that one dish can give you everything? This casserole is so comforting with to die for melted cheese, bite-sized chicken, perfectly firm pasta in the mouthwatering sauce. This did not sit long. It’s gone in a heartbeat! The kids are obsessed with this Chicken Parmesan Casserole and are asking for more! Irresistibly good and the combination of the ingredients blend perfectly. A great addition to your weeknight meal – family-friendly, easy to make, and healthy. What more can you ask for?

INGREDIENTS

2 cups rotini pasta

1 (12 oz) can chicken chunks, drained

1 cup shredded mozzarella cheese

2 cups marinara sauce

½ cup seasoned bread crumbs

HOW TO MAKE CHICKEN PARMESAN CASSEROLE

Step 1:  Prepare the oven. Preheat it to 350 degrees F or 175 degrees C.

Step 2: Bring to a rolling boil over high heat a large pot with lightly salted water. When boiling, add in the rotini and stir. Keep boiling and cook, covered, for about 8 minutes until the pasta is cooked through but firm to the bite. Making sure to occasionally stir while cooking. Drain in the sink using a colander.

Step 3: In a large casserole dish, add the rotini, chicken, and mozzarella cheese. Stir well. Then, pour the marinara sauce over the pasta mixture and sprinkle with bread crumbs. Using an aluminum foil, cover the dish.

Step 4: Place inside the preheated oven and bake for about 35 minutes until the cheese has melted entirely.

NOTES:

I prefer to slice still the bite-sized chicken as they cook quicker and are easier to chew. And what’s best is you don’t need to slice it more while eating.

If you want a healthy meal, you are welcome to use whole grain or whole wheat paste, even panko breadcrumbs.

Add whatever you want, vegetables, or any meat variety.

For added color and taste, garnish with parsley or basil on top.

If you have any leftover chicken, you are welcome to use them in this recipe.

Nutrition Facts:

Per Serving: 358.7 calories; fat 11g 17% DV; cholesterol 47.3mg 16% DV; sodium 891.1mg 36% DV; protein 23.8g 48% DV; carbohydrates 39.4g 13% DV

CHICKEN PARMESAN CASSEROLE

Rebecca Prep: 5 mins | Cook: 45mins | Total: 50 mins | Servings: 6 | Yield: 6 servings Who would ever think that one dish can give you everything? This casserole is so comforting with to die for melted cheese,… Main Dish Recipes CHICKEN PARMESAN CASSEROLE European Print This
Serves: 6 Prep Time: 5 mins Cooking Time: 45 mins 45 mins
Nutrition facts: 358.7 calories 11 fat
Rating: 3.7/5
( 38 voted )

Ingredients

  • 2 cups rotini pasta
  • 1 (12 oz) can chicken chunks, drained
  • 1 cup shredded mozzarella cheese
  • 2 cups marinara sauce
  • ½ cup seasoned bread crumbs

Instructions

Step 1:  Prepare the oven. Preheat it to 350 degrees F or 175 degrees C.

Step 2: Bring to a rolling boil over high heat a large pot with lightly salted water. When boiling, add in the rotini and stir. Keep boiling and cook, covered, for about 8 minutes until the pasta is cooked through but firm to the bite. Making sure to occasionally stir while cooking. Drain in the sink using a colander.

Step 3: In a large casserole dish, add the rotini, chicken, and mozzarella cheese. Stir well. Then, pour the marinara sauce over the pasta mixture and sprinkle with bread crumbs. Using an aluminum foil, cover the dish.

Step 4: Place inside the preheated oven and bake for about 35 minutes until the cheese has melted entirely.

NOTES:

I prefer to slice still the bite-sized chicken as they cook quicker and are easier to chew. And what's best is you don't need to slice it more while eating.

If you want a healthy meal, you are welcome to use whole grain or whole wheat paste, even panko breadcrumbs.

Add whatever you want, vegetables, or any meat variety.

For added color and taste, garnish with parsley or basil on top.

If you have any leftover chicken, you are welcome to use them in this recipe.

September 9, 2020 0 comment
0 FacebookTwitterPinterestEmail
Main Dish Recipes

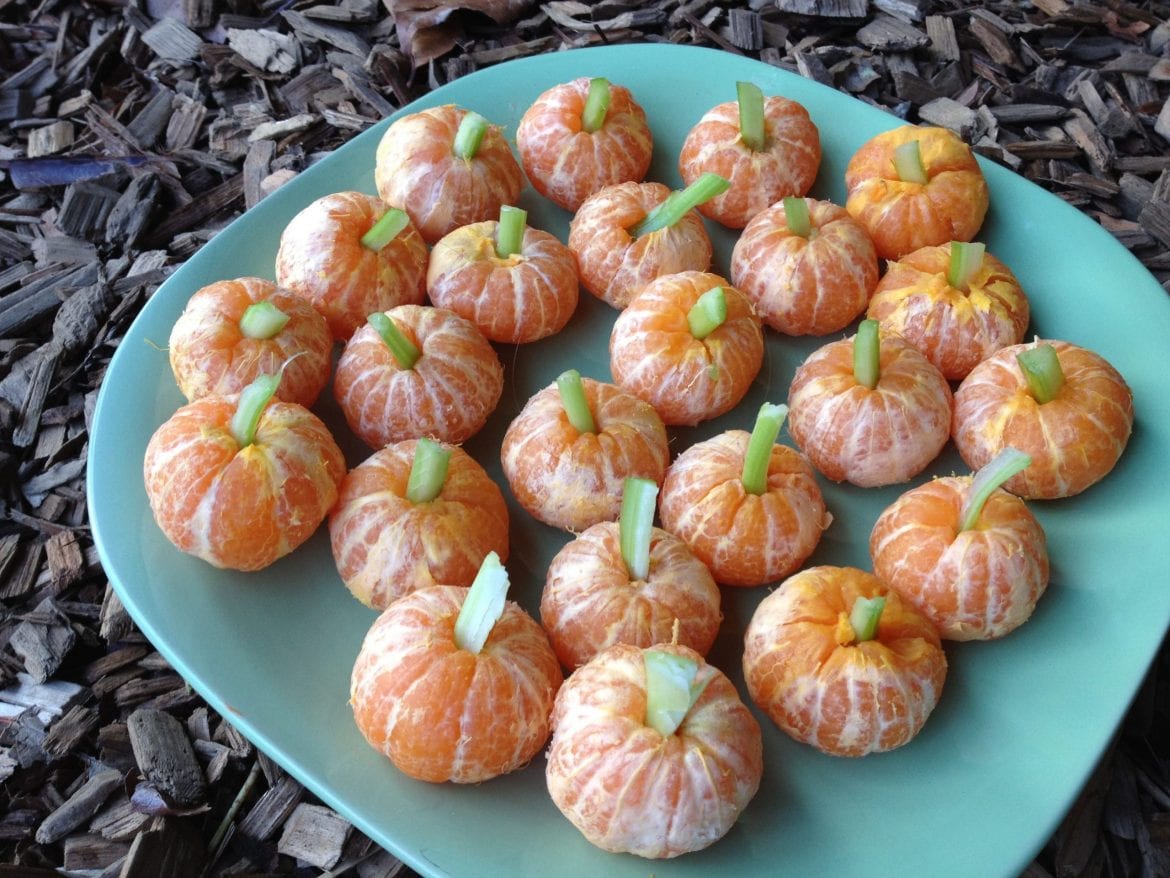
MANDARIN PUMPKINS (HEALTHY HALLOWEEN SNACK)

by Rebecca September 9, 2020
written by Rebecca

Prep: 10mins | Total: 10 mins | Servings: 10 | Yield: 10 mandarin pumpkins

It’s Halloween in a month’s time. The kids are very excited and this year Halloween is not gonna be the same. With all that is happening now, I’ll try my best to make this year’s Halloween special for the kiddos. I’ve been cooking a plan for a simple celebration and I am pretty sure that the kids will love it! And it’ll involve great food.

I saw this recipe yesterday and it gave me an amazing idea! All I need are mandarin oranges and stalks of celery. Nice, huh? Two ingredients for a pumpkin-like snack for the kids to enjoy. Healthy and super simple. Easy and quick to prepare. You can even ask the kids to help stick the celery into the mandarin. It’ll be a great family bonding, too. We will try this today. My husband already brought mandarin oranges and celery. And the kids are so looking forward to it.

I urge you to try this as well. Not only that it’ll be an amazing family bonding but this is so simple you don’t need to turn the oven on or buy any other ingredients. And the mandarin orange is healthy. It has lots of incredible health benefits. Fun, healthy treats for the little and big kids. You can drizzle melted chocolate on the oranges and sprinkle crushed candies for presentation.

INGREDIENTS

10 (2-3/8″ dia)s medium mandarin or clementine oranges, peeled, pith removed

2 stalks celery

HOW TO MAKE MANDARIN PUMPKINS (HEALTHY HALLOWEEN SNACK)

Step 1: Cut the celery into tiny pieces.

Step 2: Peel the mandarin oranges.

Step 3: Stick a piece of celery into the center of a peeled mandarin orange.

Step 4: Do the same for the remaining mandarin oranges and celery.

Nutrition Facts:

Per Serving: 45.8 calories; fat 0.3g; cholesterol mg; sodium 8.1mg; protein 0.7g 2% DV; carbohydrates 11.4g 4% DV

MANDARIN PUMPKINS (HEALTHY HALLOWEEN SNACK)

Rebecca Prep: 10mins | Total: 10 mins | Servings: 10 | Yield: 10 mandarin pumpkins It’s Halloween in a month’s time. The kids are very excited and this year Halloween is not gonna be the same. With all… Main Dish Recipes MANDARIN PUMPKINS (HEALTHY HALLOWEEN SNACK) European Print This
Serves: 10 Prep Time: 10 mins
Nutrition facts: 45.8 calories 0.3 fat
Rating: 5.0/5
( 1 voted )

Ingredients

  • 10 (2-3/8″ dia)s medium mandarin or clementine oranges, peeled, pith removed
  • 2 stalks celery

Instructions

Step 1: Cut the celery into tiny pieces.

Step 2: Peel the mandarin oranges.

Step 3: Stick a piece of celery into the center of a peeled mandarin orange.

Step 4: Do the same for the remaining mandarin oranges and celery.

September 9, 2020 0 comment
0 FacebookTwitterPinterestEmail
Main Dish Recipes

TIRAMISU LAYER CAKE

by Rebecca September 9, 2020
written by Rebecca

Prep: 5 mins | Cook: 20 mins | Additional: 1 hr 35 mins | Total: 2 hrs | Servings: 12 | Yield: 1 – 3 layers 9-inch cake

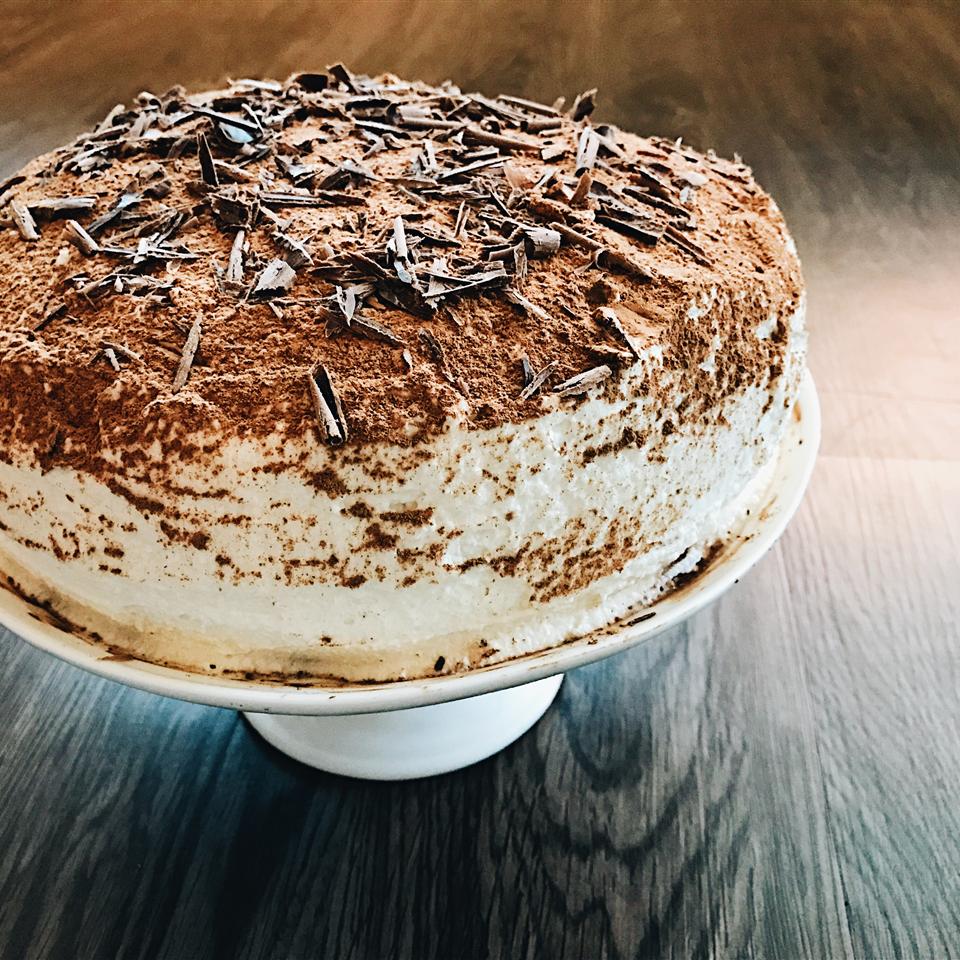
This cake is everything! Just look at that! Pleasing to the eyes and the taste is nothing like anything I tasted before. It is heaven in every bite!

INGREDIENTS

For the Cake:

1 (18.25 oz) package moist white cake mix

1 teaspoon instant coffee powder

¼ cup coffee

1 tablespoon coffee-flavored liqueur

For the Filling:

1 (8 oz) container mascarpone cheese

½ cup confectioners’ sugar

2 tablespoons coffee-flavored liqueur

For the frosting:

2 cups heavy cream

¼ cup confectioners’ sugar

2 tablespoons coffee-flavored liqueur

For the Garnish:

2 tablespoons unsweetened cocoa powder

1 (1 ounce) square semisweet chocolate

HOW TO MAKE TIRAMISU LAYER CAKE

Step 1: Prepare the oven. Preheat it to 350 degrees F or 175 degrees C.

Step 2: Then, grease and flour 3 9-inches pans.

Step 3: According to the package direction, prepare the cake mix and split two-thirds of the batter into the (2) pans. Into the remaining batter, stir in the instant coffee, and transfer into the remaining pan.

Step 4: Place inside the preheated oven and bake for about 20 to 25 minutes until a toothpick inserted into the center comes out clean.

Step 5: Remove from the oven and allow the cakes to cool for at least 10 minutes before inverting them onto a wire rack to completely cool.

Step 6: Combine brewed coffee and a tablespoon of coffee liqueur into a measuring cup and set aside.

Step 7: It is time to make the filling. Combine the mascarpone, half a cup of confectioners’ sugar, and 2 tablespoons of coffee liqueur in a small bowl. Beat with an electric mixer until just smooth. Using a plastic wrap, cover the filling and place in the fridge.

Step 8: For the frosting, add the beat the cream, 1/4 cup confectioners’ sugar, and 2 tablespoons of coffee liqueur in a medium bowl. Beat with an electric mixer on medium-high speed until stiff. Fold in half a cup of cream mixture into the filling mixture.

Step 9: Time to assemble the cake. On a serving plate, place one plain cake layer. Poke holes with a thin skewer about 1 inch apart. Then, pour 1/3 of the reserved coffee mixture over the cake. Followed by spreading half of the filling mixture on top. Place the coffee-flavored cake layer on top and again poke holes in the cake before pouring another third of the coffee mixture over and spreading the rest of the filling. Add the third cake layer, poke holes, pour over the coffee mixture, and spread the frosting from the sides and top of the cakes. Add the cocoa in a sieve and dust lightly the top of the cake. Then, garnish with chocolate curls.

Step 10: Place the cake inside the fridge to chill for at least 30 minutes. Serve and enjoy!

Step 11: To make the chocolate balls, use a vegetable peeler and run it down the sides of the chocolate bar.

Nutrition Facts:

Per Serving: 465 calories; fat 28.9g 44% DV; cholesterol 77.7mg 26% DV; sodium 308.8mg 12% DV; protein 4.4g 9% DV; carbohydrates 46.3g 15% DV

TIRAMISU LAYER CAKE

Rebecca Prep: 5 mins | Cook: 20 mins | Additional: 1 hr 35 mins | Total: 2 hrs | Servings: 12 | Yield: 1 – 3 layers 9-inch cake This cake is everything! Just look at that! Pleasing to the eyes… Main Dish Recipes TIRAMISU LAYER CAKE European Print This
Serves: 12 Prep Time: 5 mins Cooking Time: 1 hr 55 mins 1 hr 55 mins
Nutrition facts: 465 calories 28.9 fat
Rating: 5.0/5
( 1 voted )

Ingredients

  • For the Cake:
  • 1 (18.25 oz) package moist white cake mix
  • 1 teaspoon instant coffee powder
  • ¼ cup coffee
  • 1 tablespoon coffee-flavored liqueur
  • For the Filling:
  • 1 (8 oz) container mascarpone cheese
  • ½ cup confectioners’ sugar
  • 2 tablespoons coffee-flavored liqueur
  • For the frosting:
  • 2 cups heavy cream
  • ¼ cup confectioners’ sugar
  • 2 tablespoons coffee-flavored liqueur
  • For the Garnish:
  • 2 tablespoons unsweetened cocoa powder
  • 1 (1 ounce) square semisweet chocolate

Instructions

Step 1: Prepare the oven. Preheat it to 350 degrees F or 175 degrees C.

Step 2: Then, grease and flour 3 9-inches pans.

Step 3: According to the package direction, prepare the cake mix and split two-thirds of the batter into the (2) pans. Into the remaining batter, stir in the instant coffee, and transfer into the remaining pan.

Step 4: Place inside the preheated oven and bake for about 20 to 25 minutes until a toothpick inserted into the center comes out clean.

Step 5: Remove from the oven and allow the cakes to cool for at least 10 minutes before inverting them onto a wire rack to completely cool.

Step 6: Combine brewed coffee and a tablespoon of coffee liqueur into a measuring cup and set aside.

Step 7: It is time to make the filling. Combine the mascarpone, half a cup of confectioners’ sugar, and 2 tablespoons of coffee liqueur in a small bowl. Beat with an electric mixer until just smooth. Using a plastic wrap, cover the filling and place in the fridge.

Step 8: For the frosting, add the beat the cream, 1/4 cup confectioners’ sugar, and 2 tablespoons of coffee liqueur in a medium bowl. Beat with an electric mixer on medium-high speed until stiff. Fold in half a cup of cream mixture into the filling mixture.

Step 9: Time to assemble the cake. On a serving plate, place one plain cake layer. Poke holes with a thin skewer about 1 inch apart. Then, pour 1/3 of the reserved coffee mixture over the cake. Followed by spreading half of the filling mixture on top. Place the coffee-flavored cake layer on top and again poke holes in the cake before pouring another third of the coffee mixture over and spreading the rest of the filling. Add the third cake layer, poke holes, pour over the coffee mixture, and spread the frosting from the sides and top of the cakes. Add the cocoa in a sieve and dust lightly the top of the cake. Then, garnish with chocolate curls.

Step 10: Place the cake inside the fridge to chill for at least 30 minutes. Serve and enjoy!

Step 11: To make the chocolate balls, use a vegetable peeler and run it down the sides of the chocolate bar.

September 9, 2020 0 comment
0 FacebookTwitterPinterestEmail
Newer Posts
Older Posts

Popular Posts

  • 1

    Crispy Crunchy Parmesan Potatoes

    March 21, 2020
  • 2

    CROCK POT SMOTHERED PORK CHOPS

    March 21, 2020
  • Facebook
  • Twitter

@2019 - All Right Reserved.


Back To Top