Cook it once
  • Home
  • Privacy Policy
  • Recipes
    • KETO
    • LC
    • WW
  • Tips
  • Contact
Cook it once
  • Home
  • Privacy Policy
  • Recipes
    • KETO
    • LC
    • WW
  • Tips
  • Contact
Category:

Main Dish Recipes

Main Dish Recipes

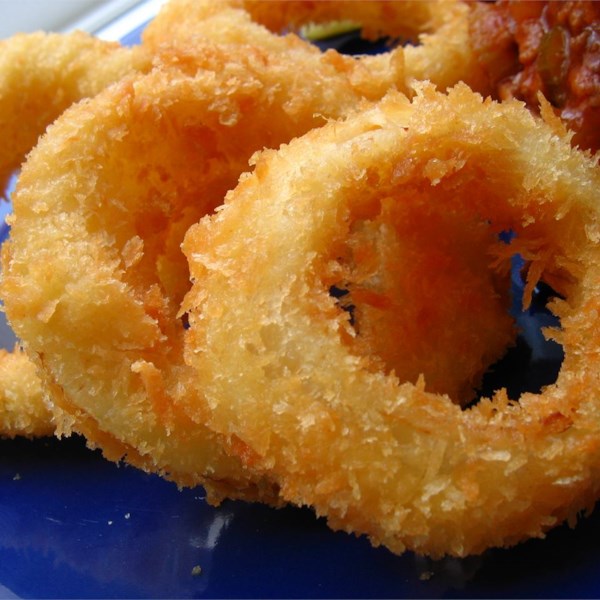
OLD FASHIONED ONION RINGS

by Rebecca September 15, 2020
written by Rebecca

Prep: 15 mins | Cook: 3mins | Ready In 18 mins

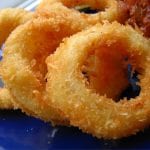
These rings are just amazing! Super easy to prepare, you can make it whenever. They have that perfect crunch in every bite and the flavor is simple but superb. I have been making this Fashioned Onion Rings for years now and they never fail to impress the crowd.

Ingredients

1 large onion, cut into 1/4-inch slices

1 1/4 cups all-purpose flour

1 tsp baking powder

1 tsp salt

1 egg

1 cup milk, or as needed

3/4 cup dry bread crumbs

seasoned salt to taste

1-quart oil for frying, or as needed

HOW TO MAKE OLD FASHIONED ONION RINGS

Step 1: In a deep-fryer, add the oil and heat to 365 degrees F or 185 degrees C.

Step 2: Divide the onion slices into rings. Set aside.

Step 3: Add the flour, baking powder, and salt in a small bowl.

Step 4: First, dip the onion slices into the flour mixture. Coat well and set aside.

Step 5: Then, whisk the egg and milk into the flour mixture with a fork.

Step 6: Into the batter, dip each floured ring. Coat and place them onto a wire rack to drain until the batter stops dripping. You can put a sheet of aluminum foil over the wire rack for easy cleaning.

Step 7: On a plate or shallow dish, spread the bread crumbs. Place the rings over the beard crumbs, one at a time, scooping the crumbs to coat the rings. Give them a hard pat to remove any excess crumbs. The coat should cling super well.

Step 8: Do the same for the rest of the rings.

Step 9: Deep fry the rings a couple of times for about 2 to 3 minutes or until golden brown.

Step 10: Transfer the cooked rings onto paper towels to drain.

Step 11: Sprinkle them with seasoning salt and serve. Enjoy!

Nutrition Facts:

Per Serving: 641 calories; 14.3 g protein; 69 mg cholesterol; 1272 mg sodium; 34.6 g fat; 68.3 g carbohydrates
OLD FASHIONED ONION RINGS

Rebecca Prep: 15 mins | Cook: 3mins | Ready In 18 mins These rings are just amazing! Super easy to prepare, you can make it whenever. They have that perfect crunch in every bite and the… Main Dish Recipes OLD FASHIONED ONION RINGS European Print This
Prep Time: 15 mins Cooking Time: 3 mins 3 mins
Nutrition facts: 641 calories 34.6 fat
Rating: 5.0/5
( 1 voted )

Ingredients

  • 1 large onion, cut into 1/4-inch slices
  • 1 1/4 cups all-purpose flour
  • 1 tsp baking powder
  • 1 tsp salt
  • 1 egg
  • 1 cup milk, or as needed
  • 3/4 cup dry bread crumbs
  • seasoned salt to taste
  • 1-quart oil for frying, or as needed

Instructions

Step 1: In a deep-fryer, add the oil and heat to 365 degrees F or 185 degrees C.

Step 2: Divide the onion slices into rings. Set aside.

Step 3: Add the flour, baking powder, and salt in a small bowl.

Step 4: First, dip the onion slices into the flour mixture. Coat well and set aside.

Step 5: Then, whisk the egg and milk into the flour mixture with a fork.

Step 6: Into the batter, dip each floured ring. Coat and place them onto a wire rack to drain until the batter stops dripping. You can put a sheet of aluminum foil over the wire rack for easy cleaning.

Step 7: On a plate or shallow dish, spread the bread crumbs. Place the rings over the beard crumbs, one at a time, scooping the crumbs to coat the rings. Give them a hard pat to remove any excess crumbs. The coat should cling super well.

Step 8: Do the same for the rest of the rings.

Step 9: Deep fry the rings a couple of times for about 2 to 3 minutes or until golden brown.

Step 10: Transfer the cooked rings onto paper towels to drain.

Step 11: Sprinkle them with seasoning salt and serve. Enjoy!
September 15, 2020 0 comment
0 FacebookTwitterPinterestEmail
Main Dish Recipes

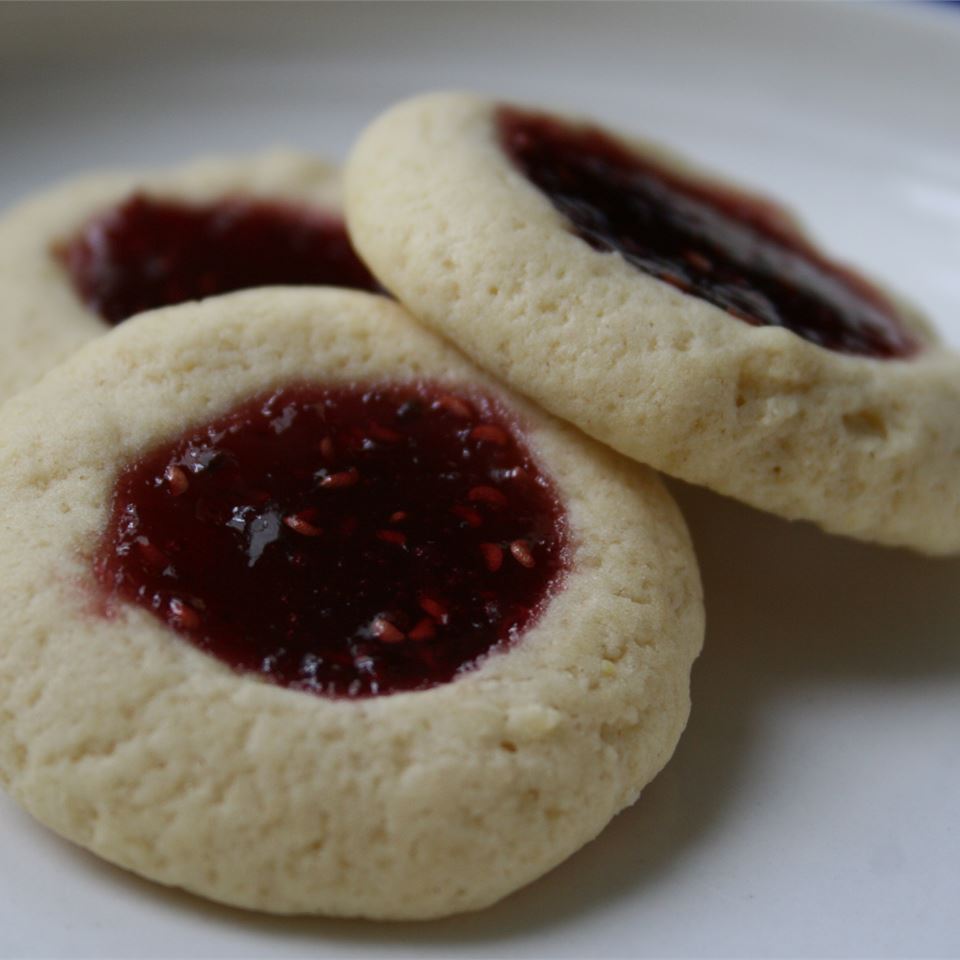
JAM FILLED BUTTER COOKIES

by Rebecca September 15, 2020
written by Rebecca

Prep: 30 mins | Cook: 10mins | Ready In 40 mins

These gorgeous cookies are my kids favorite. They are requesting for this almost all the time! Pretty easy to make, not fussy, and excellent as a homemade giveaway. I never failed to ask my kids to help out and they are loving the process. Sweet, lovely, and super delicious!

Ingredients

3/4 cup butter, softened

1/2 cup white sugar

2 egg yolks

1 3/4 cups all-purpose flour

1/2 cup fruit preserves, any flavor

HOW TO MAKE JAM FILLED BUTTER COOKIES

Step 1: Prepare the oven. Preheat it to 375 degrees F or 190 degrees C.

Step 2: Add the butter, white sugar, and egg yolks in a medium bowl. Cream, then, mix in the flour a little at a time to form a soft dough.

Step 3: Roll the dough into an inch ball.

Step 4: If the dough is too soft place inside the fridge for at least 15 to 20 minutes.

Step 5: Transfer the balls onto ungreased cookie sheets at least 2 inches apart.

Step 6: With your finger or something similar, make a well in the center of the balls.

Step 7: Fill them with half a teaspoon of preserves.

Step 8: Place inside the preheated oven and bake for about 8 to 10 minutes until the bottom of the cookies is golden brown.

Step 9: Remove from the oven and allow the cookies to cool down before moving them onto a wire rack.

NOTE:

If you want these cookies to be covered in coconut flakes, place one beaten egg in a tub, then, in another tub, 7 ounces of sweetened and shredded coconut.

Dip the chilled but not finished cookies in the beaten egg first, then, into the coconut. Coat well.

Add the jam and place inside the preheated oven to bake for the same time as above.

Nutrition Facts:

Per Serving: 82 calories; 0.8 g protein; 22 mg cholesterol; 29 mg sodium; 4.1 g fat; 10.5 g carbohydrates

JAM FILLED BUTTER COOKIES

Rebecca Prep: 30 mins | Cook: 10mins | Ready In 40 mins These gorgeous cookies are my kids favorite. They are requesting for this almost all the time! Pretty easy to make, not fussy, and excellent… Main Dish Recipes JAM FILLED BUTTER COOKIES European Print This
Prep Time: 30 mins Cooking Time: 10 mins 10 mins
Nutrition facts: 82 calories 4.1 fat
Rating: 5.0/5
( 1 voted )

Ingredients

  • 3/4 cup butter, softened
  • 1/2 cup white sugar
  • 2 egg yolks
  • 1 3/4 cups all-purpose flour
  • 1/2 cup fruit preserves, any flavor

Instructions

Step 1: Prepare the oven. Preheat it to 375 degrees F or 190 degrees C.

Step 2: Add the butter, white sugar, and egg yolks in a medium bowl. Cream, then, mix in the flour a little at a time to form a soft dough.

Step 3: Roll the dough into an inch ball.

Step 4: If the dough is too soft place inside the fridge for at least 15 to 20 minutes.

Step 5: Transfer the balls onto ungreased cookie sheets at least 2 inches apart.

Step 6: With your finger or something similar, make a well in the center of the balls.

Step 7: Fill them with half a teaspoon of preserves.

Step 8: Place inside the preheated oven and bake for about 8 to 10 minutes until the bottom of the cookies is golden brown.

Step 9: Remove from the oven and allow the cookies to cool down before moving them onto a wire rack.

NOTE:

If you want these cookies to be covered in coconut flakes, place one beaten egg in a tub, then, in another tub, 7 ounces of sweetened and shredded coconut.

Dip the chilled but not finished cookies in the beaten egg first, then, into the coconut. Coat well.

Add the jam and place inside the preheated oven to bake for the same time as above.

September 15, 2020 0 comment
0 FacebookTwitterPinterestEmail
Main Dish Recipes

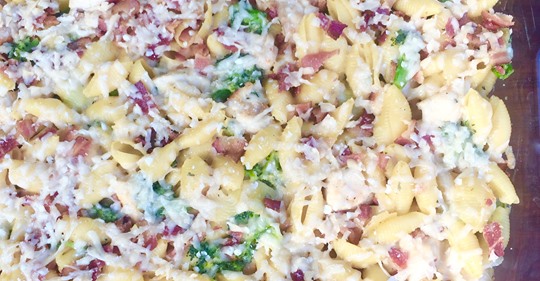
CREAMY BAKED BACON RANCH CHICKEN AND PASTA

by Rebecca September 15, 2020
written by Rebecca

Prep: 10 mins | Cook: 1hr | Ready In 1 hr 10 mins

This is my new addiction – Creamy Baked Bacon Ranch Chicken and Pasta. All the amazing flavors just burst inside your mouth. This pasta and chicken dish is outrageously creamy, cheesy, and comforting.

Ingredients

2 1/2 cups broccoli florets

3 tbsp water

3 tbsp ranch dressing mix, divided

2 lbs of skinless, boneless chicken breasts, cut into bite-sized pieces

1/2 tsp ground black pepper

1 (48 oz) container chicken broth

1 (16 oz) package small shell pasta

1 tbsp unsalted butter

1 tbsp extra virgin olive oil

2 3/4 cups milk

1 (1.6 oz) package dry Alfredo sauce mix (such as Knorr®)

1/2 cup sour cream

salt and ground black pepper

1 cup grated Parmesan cheese

4 slices cooked and crumbled bacon

HOW TO MAKE CREAMY BAKED BACON RANCH CHICKEN AND PASTA

Step 1: Put the broccoli and water in a microwave-safe bowl. Microwave for about 3 to 4 minutes on high heat, covered, until steamed and tender. Remove from the microwave and drain any excess liquid. Set aside.

Step 2: In a large resealable plastic bag place a tablespoon of dressing mix. Then, add in the chicken and pepper. Massage the chicken to coat with seasonings.

Step 3: In a large pot, pour the chicken broth and bring to a boil over medium-high heat. When boiling, add in the shells. Then, adjust the heat to medium-low and continue cooking for another 10 minutes or until the pasta is almost done. Making sure to occasionally stir. Drain and don’t forget to reserve half a cup of cooking broth.

Step 4: Prepare the oven. Preheat it to 350 degrees F or 175 degrees C.

Step 5: Then, grease a 9 x 13-inch casserole dish.

Step 6: In a large nonstick skillet, add the butter over medium-high heat. Add in the chicken and cook for about 7 minutes until browned. You can work in batches if needed. Once done, transfer the chicken to a plate.

Step 7: In a hot skillet, pour the milk, alfredo sauce mix, and add the other 2 tablespoons of ranch dressing mix. Allow the mixture to boil, then, turn the heat off. Immediately add the chicken with the accumulated juice, pasta, broccoli, sour cream, the reserved half a cup pasta cooking broth, salt, and pepper.

Step 8: Then, transfer the mixture into the prepared casserole dish and sprinkle over the Parmesan cheese and bacon.

Step 9: Place inside the preheated oven and bake for about 20 minutes or until the cheese has melted and the sauce is bubbly.

Step 10: Serve warm. Enjoy!

Nutrition Facts:

Per Serving: 457 calories; 35.7 g protein; 86 mg cholesterol; 1389 mg sodium; 15.6 g fat; 42.4 g carbohydrates

CREAMY BAKED BACON RANCH CHICKEN AND PASTA

Rebecca Prep: 10 mins | Cook: 1hr | Ready In 1 hr 10 mins This is my new addiction – Creamy Baked Bacon Ranch Chicken and Pasta. All the amazing flavors just burst inside your mouth.… Main Dish Recipes CREAMY BAKED BACON RANCH CHICKEN AND PASTA European Print This
Prep Time: 10 mins Cooking Time: 1 hr 1 hr
Nutrition facts: 457 calories 15.6 fat
Rating: 5.0/5
( 1 voted )

Ingredients

  • 2 1/2 cups broccoli florets
  • 3 tbsp water
  • 3 tbsp ranch dressing mix, divided
  • 2 lbs of skinless, boneless chicken breasts, cut into bite-sized pieces
  • 1/2 tsp ground black pepper
  • 1 (48 oz) container chicken broth
  • 1 (16 oz) package small shell pasta
  • 1 tbsp unsalted butter
  • 1 tbsp extra virgin olive oil
  • 2 3/4 cups milk
  • 1 (1.6 oz) package dry Alfredo sauce mix (such as Knorr®)
  • 1/2 cup sour cream
  • salt and ground black pepper
  • 1 cup grated Parmesan cheese
  • 4 slices cooked and crumbled bacon

Instructions

Step 1: Put the broccoli and water in a microwave-safe bowl. Microwave for about 3 to 4 minutes on high heat, covered, until steamed and tender. Remove from the microwave and drain any excess liquid. Set aside.

Step 2: In a large resealable plastic bag place a tablespoon of dressing mix. Then, add in the chicken and pepper. Massage the chicken to coat with seasonings.

Step 3: In a large pot, pour the chicken broth and bring to a boil over medium-high heat. When boiling, add in the shells. Then, adjust the heat to medium-low and continue cooking for another 10 minutes or until the pasta is almost done. Making sure to occasionally stir. Drain and don't forget to reserve half a cup of cooking broth.

Step 4: Prepare the oven. Preheat it to 350 degrees F or 175 degrees C.

Step 5: Then, grease a 9 x 13-inch casserole dish.

Step 6: In a large nonstick skillet, add the butter over medium-high heat. Add in the chicken and cook for about 7 minutes until browned. You can work in batches if needed. Once done, transfer the chicken to a plate.

Step 7: In a hot skillet, pour the milk, alfredo sauce mix, and add the other 2 tablespoons of ranch dressing mix. Allow the mixture to boil, then, turn the heat off. Immediately add the chicken with the accumulated juice, pasta, broccoli, sour cream, the reserved half a cup pasta cooking broth, salt, and pepper.

Step 8: Then, transfer the mixture into the prepared casserole dish and sprinkle over the Parmesan cheese and bacon.

Step 9: Place inside the preheated oven and bake for about 20 minutes or until the cheese has melted and the sauce is bubbly.

Step 10: Serve warm. Enjoy!

September 15, 2020 0 comment
0 FacebookTwitterPinterestEmail
Main Dish Recipes

GARLIC CHICKEN FRIED BROWN RICE

by Rebecca September 15, 2020
written by Rebecca

Prep: 20 mins | Cook: 15mins | Total: 35 mins | Servings: 3 | Yield: 3 servings

I am obsessed with this dish. It is so simple yet superb. A pretty nice addition to your weekly menu. Rice, peas,  with vegetables in a sweet and savory sauce. Yum! I have been loving this short-grain born rice dish. Loaded with goodness and amazing flavors that I crave over and over again. Perfect to serve right away but freeze for a novel freezer meal. The flavor of this Garlic Chicken fried Brown Rice is so much better than your local take-out fried rice. I urge you to give this a try and I am a hundred percent sure that you’ll want this even more.

Ingredients

2 tbsp vegetable oil, divided

8 oz of skinless and boneless chicken breast, cut into strips

½ red bell pepper, chopped

½ cup green onion, chopped

4 cloves garlic, minced

3 cups cooked brown rice

2 tbsp light soy sauce

1 tbsp rice vinegar

1 cup frozen peas, thawed

HOW TO MAKE GARLIC CHICKEN FRIED BROWN RICE

Step 1: In a large skillet, add 1 tablespoon of vegetable oil. Het over medium heat. When hot, add the chicken, bell pepper, green onion, and garlic. Sautee for about 5 minutes until the chicken is cook through.

Step 2: Transfer the chicken onto a plate and keep warm.

Step 3: Using the same skillet, add the rest of the vegetable oil. Heat over medium-high heat, then, add in the rice. Stir and cook until heated through. Add in the soy sauce, rice vinegar, and peas. Stir and continue cooking for another minute. Place the chicken back into the skillet and mix to combine.

Step 4: Heat through and serve. Enjoy!

NOTE:

To save time, I recommend using 2 ready-to-serve rice pouches. Frozen peas that are mixed with rice don’t need to be thawed.

Nutrition Facts:

Per Serving: 444.4 calories; fat 12.8g 20% DV; cholesterol 43.1mg 14% DV; sodium 701.4mg 28% DV; protein 24.3g 49% DV; carbohydrates 57.4g 19% DV

GARLIC CHICKEN FRIED BROWN RICE

Rebecca Prep: 20 mins | Cook: 15mins | Total: 35 mins | Servings: 3 | Yield: 3 servings I am obsessed with this dish. It is so simple yet superb. A pretty nice addition to your weekly menu. Rice, peas, … Main Dish Recipes GARLIC CHICKEN FRIED BROWN RICE European Print This
Serves: 3 Prep Time: 20 mins Cooking Time: 15 mins 15 mins
Nutrition facts: 444.4 calories 12.8 fat
Rating: 5.0/5
( 1 voted )

Ingredients

  • 2 tbsp vegetable oil, divided
  • 8 oz of skinless and boneless chicken breast, cut into strips
  • ½ red bell pepper, chopped
  • ½ cup green onion, chopped
  • 4 cloves garlic, minced
  • 3 cups cooked brown rice
  • 2 tbsp light soy sauce
  • 1 tbsp rice vinegar
  • 1 cup frozen peas, thawed

Instructions

Step 1: In a large skillet, add 1 tablespoon of vegetable oil. Het over medium heat. When hot, add the chicken, bell pepper, green onion, and garlic. Sautee for about 5 minutes until the chicken is cook through.

Step 2: Transfer the chicken onto a plate and keep warm.

Step 3: Using the same skillet, add the rest of the vegetable oil. Heat over medium-high heat, then, add in the rice. Stir and cook until heated through. Add in the soy sauce, rice vinegar, and peas. Stir and continue cooking for another minute. Place the chicken back into the skillet and mix to combine.

Step 4: Heat through and serve. Enjoy!

NOTE:

To save time, I recommend using 2 ready-to-serve rice pouches. Frozen peas that are mixed with rice don't need to be thawed.

September 15, 2020 0 comment
0 FacebookTwitterPinterestEmail
Main Dish Recipes

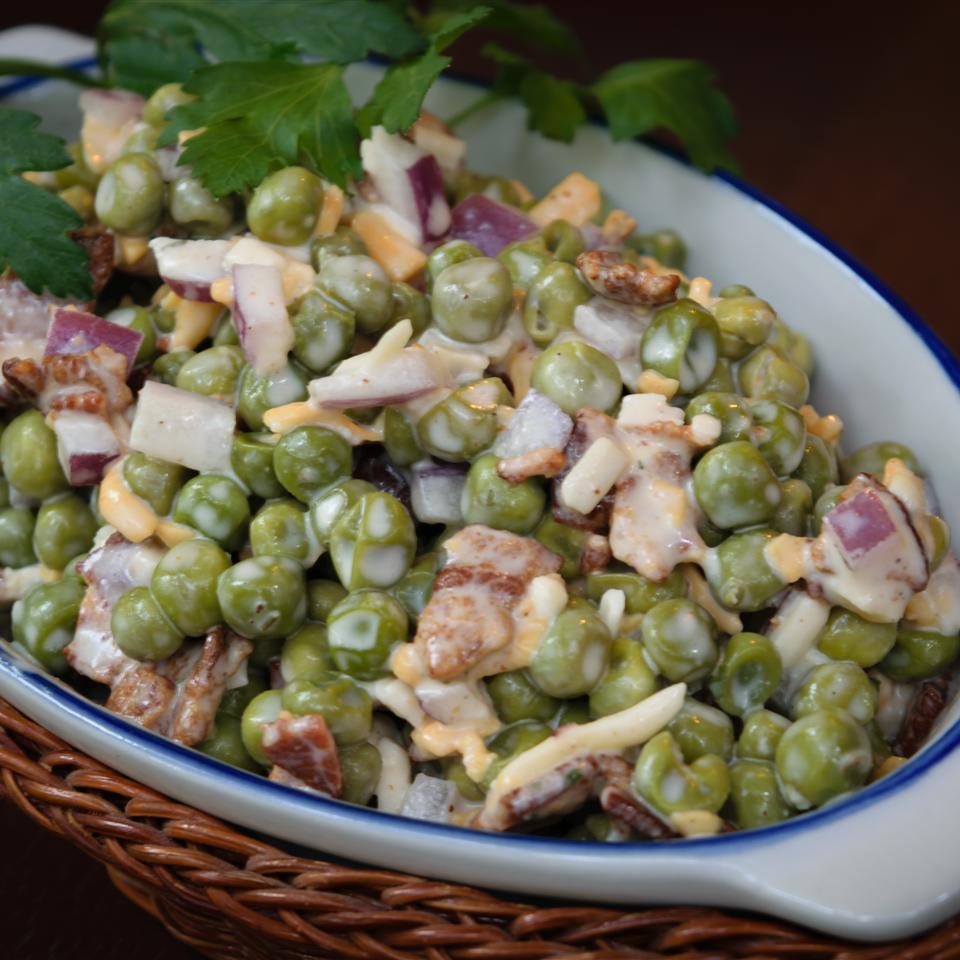
BACON RANCH PEA SALAD

by Rebecca September 15, 2020
written by Rebecca

Prep: 10 mins | Cook: 10mins | Additional: 30 mins | Total: 50 mins | Servings: 4 | Yield: 4 servings

I am never buying peas salad from the grocery store ever again because I have found the perfect recipe that will give me a better result. A simple summer side salad that you’ll be able to enjoy all year round. Creamy with all the goodness of the world. Even my picky eaters love this. This is excellent to bring to potlucks, too as it can easily feed the crowd. And everything with bacon is love. Outrageously delicious, pretty easy, and not fussy. I enjoyed this so much a few hours after because the flavors sink into the ingredients. This is a must-try, a must-have, and to keep.

Ingredients

4 slices bacon

1-quart water

1 (16 oz) package frozen green peas

⅓ cup chopped onions

½ cup Ranch dressing

½ cup shredded Cheddar cheese

HOW TO MAKE BACON RANCH PEA SALAD

Step 1: In a skillet, put the bacon and cook over medium-high heat until evenly brown. Drain any excess oil, then, crumble the bacon and set aside.

Step 2: Boil a pot of water. When boiling, add the peas and cook for a minute or until just tender. Drain and allow the peas to cool under running water.

Step 3: Add the bacon, peas, onion, Ranch dressing, and Cheddar cheese in a bowl. Toss and refrigerate for at least 30 minutes or until the salad is chilled.

Step 4: Serve and enjoy!

NOTE:

In my experience, this Bacon Ranch Pea Salad is best after a few hours of making it. Some preferred it the next day. This way, the moisture, and flavors will be absorbed.

When preparing this salad ahead, add some extra sour cream, mayo, or ranch dressing before serving.

Nutrition Facts:

Per Serving: 359.2 calories; fat 25.6g 39% DV; cholesterol 36.4mg 12% DV; sodium 740.7mg 30% DV; protein 14.1g 28% DV; carbohydrates 18.3g 6% DV

BACON RANCH PEA SALAD

Rebecca Prep: 10 mins | Cook: 10mins | Additional: 30 mins | Total: 50 mins | Servings: 4 | Yield: 4 servings I am never buying peas salad from the grocery store ever again because I have found the perfect recipe that… Main Dish Recipes BACON RANCH PEA SALAD European Print This
Serves: 4 Prep Time: 10 mins Cooking Time: 40 mins 40 mins
Nutrition facts: 359.2 calories 25.6 fat
Rating: 3.5/5
( 2 voted )

Ingredients

  • 4 slices bacon
  • 1-quart water
  • 1 (16 oz) package frozen green peas
  • ⅓ cup chopped onions
  • ½ cup Ranch dressing
  • ½ cup shredded Cheddar cheese

Instructions

Step 1: In a skillet, put the bacon and cook over medium-high heat until evenly brown. Drain any excess oil, then, crumble the bacon and set aside.

Step 2: Boil a pot of water. When boiling, add the peas and cook for a minute or until just tender. Drain and allow the peas to cool under running water.

Step 3: Add the bacon, peas, onion, Ranch dressing, and Cheddar cheese in a bowl. Toss and refrigerate for at least 30 minutes or until the salad is chilled.

Step 4: Serve and enjoy!

NOTE:

In my experience, this Bacon Ranch Pea Salad is best after a few hours of making it. Some preferred it the next day. This way, the moisture, and flavors will be absorbed.

When preparing this salad ahead, add some extra sour cream, mayo, or ranch dressing before serving.

September 15, 2020 0 comment
0 FacebookTwitterPinterestEmail
Main Dish Recipes

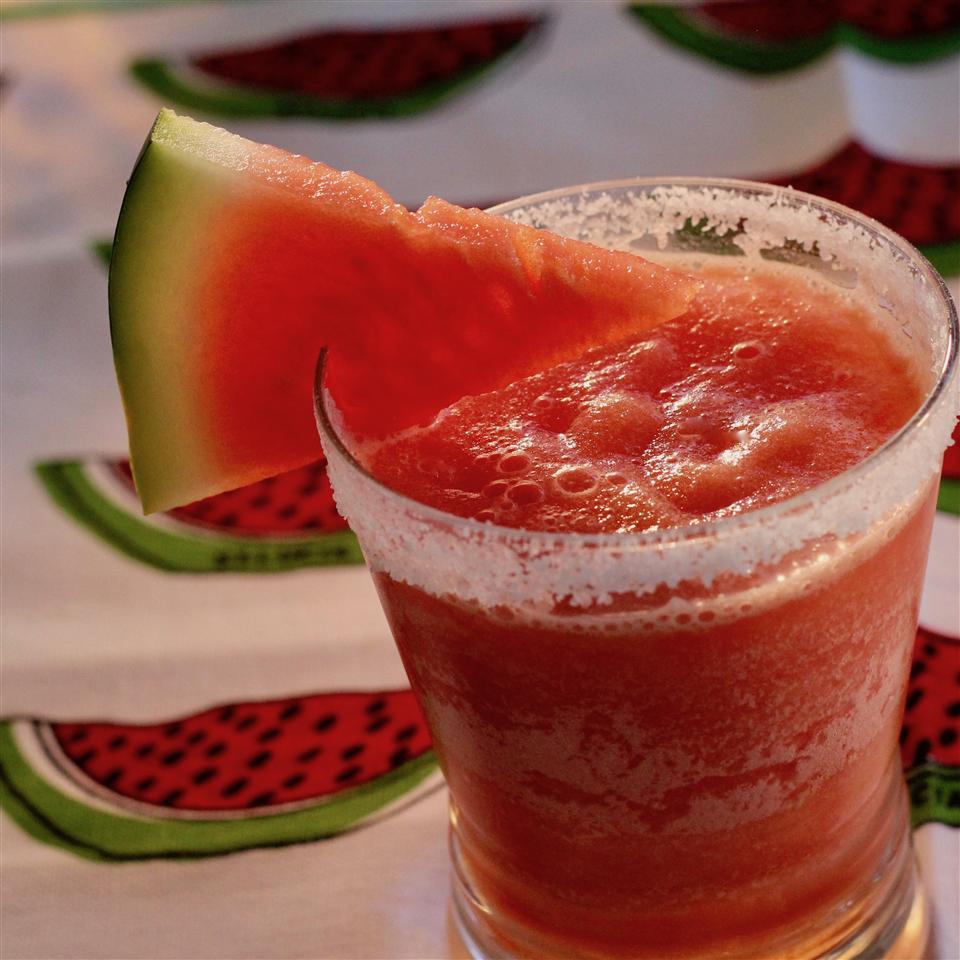
JUICY-SWEET EASY WATERMELON MARGARITAS

by Rebecca September 15, 2020
written by Rebecca

Prep: 10 mins | Total: 10mins | Servings: 4 | Yield: 4 margaritas

This pandemic changed everything in a snap. A whole 360 degrees changed from everything we used to. But looking at the bright side of life, we continue. And for those days that we were not able to go out, I made my restaurant and bar at home. I have found amazing cocktail recipes and this one of my favorite. I get to tweak it whatever way I want. Most of the time, I just sit by the window or by the pool and sip this refreshing, semi-sweet, easy watermelon margarita while reminiscing the good old days.

Ingredients

2 cups cubed seeded watermelon

2 cups crushed ice

⅓ cup tequila

¼ cup white sugar

¼ cup lime juice

1 tbsp vodka

1 tbsp orange liqueur

HOW TO MAKE JUICY-SWEET EASY WATERMELON MARGARITAS

Step 1: In a blender, add the watermelon, ice, tequila, sugar, lime juice, vodka, and orange liqueur. Blend well until combined.

Step 2: Pour this into glasses. Enjoy!

NOTES:

When made without alcohol, this can be considered an amazing drink for kids to enjoy, too.

I love this drink on its own. But when I am feeling fancy, I salt the rim of my glass. Simply rub a lime wedge on the rim of an empty glass, dip the rimmed part of the glass onto coarse salt or kosher salt. Fill the glass with ice, add in the watermelon juice mixture, then, mix in the vodka.

You are welcome to tweak this recipe until you find the right flavor according to your liking, For a sweeter cocktail, add some watermelon and lime juice for that extra splash. For more tartness, squeeze in some extra lime. And if you want your margarita to be spicier, add some extra jalapenos and let it rest of a couple of minutes. The varieties are endless, tweak this as much as you want.

JUICY-SWEET EASY WATERMELON MARGARITAS

Rebecca Prep: 10 mins | Total: 10mins | Servings: 4 | Yield: 4 margaritas This pandemic changed everything in a snap. A whole 360 degrees changed from everything we used to. But looking at the bright side of… Main Dish Recipes JUICY-SWEET EASY WATERMELON MARGARITAS European Print This
Serves: 4 Prep Time: 10 mins
Nutrition facts: 200 calories 20 grams fat
Rating: 5.0/5
( 1 voted )

Ingredients

  • 2 cups cubed seeded watermelon
  • 2 cups crushed ice
  • ⅓ cup tequila
  • ¼ cup white sugar
  • ¼ cup lime juice
  • 1 tbsp vodka
  • 1 tbsp orange liqueur

Instructions

Step 1: In a blender, add the watermelon, ice, tequila, sugar, lime juice, vodka, and orange liqueur. Blend well until combined.

Step 2: Pour this into glasses. Enjoy!

NOTES:

When made without alcohol, this can be considered an amazing drink for kids to enjoy, too.

I love this drink on its own. But when I am feeling fancy, I salt the rim of my glass. Simply rub a lime wedge on the rim of an empty glass, dip the rimmed part of the glass onto coarse salt or kosher salt. Fill the glass with ice, add in the watermelon juice mixture, then, mix in the vodka.

You are welcome to tweak this recipe until you find the right flavor according to your liking, For a sweeter cocktail, add some watermelon and lime juice for that extra splash. For more tartness, squeeze in some extra lime. And if you want your margarita to be spicier, add some extra jalapenos and let it rest of a couple of minutes. The varieties are endless, tweak this as much as you want.

September 15, 2020 0 comment
0 FacebookTwitterPinterestEmail
Main Dish Recipes

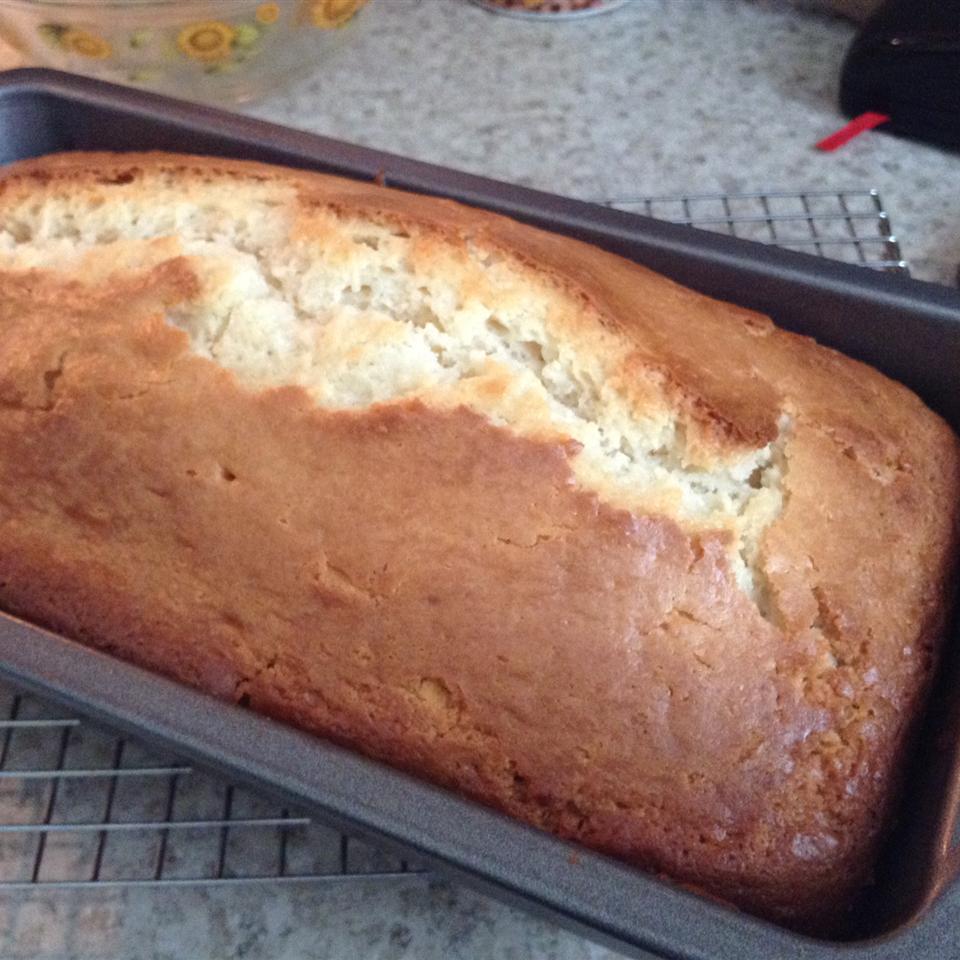
ONE EGG LEMON POUND CAKE

by Rebecca September 15, 2020
written by Rebecca

Servings: 10 | Yield: 1 -8×4 inch loaf pan

This pound cake is super moist and bursting in lemon flavor in every bite. A simple, easy, and quick, not-fussy pound cake that you can make whenever you want to. I always make a piece or two because the kids love this so much. This delicious pound cake has been their favorite breakfast alongside bacon, egg, mashed, or with their preferred spread.

Ingredients

2 cups all-purpose flour

2 tsp baking powder

1 cup white sugar

1 tsp salt

½ cup butter

1 egg

1 cup milk

1 tsp vanilla extract

1 tsp lemon extract

HOW TO MAKE ONE EGG LEMON POUND CAKE

Step 1: Prepare the oven. Preheat it to 350 degrees F or 175 degrees C.

Step 2: Then, grease and flour an 8 x 4-inch loaf pan.

Step 3: Add the flour, baking powder, sugar, and salt in a large bowl. Mix well. Then, slice in the butter.

Step 4: In a measuring cup, break the egg and fill it to a cup, lining with milk. Add this to the dry ingredients, making sure to beat well. Then, stir in the vanilla and lemon flavoring.

Step 5: Transfer the batter into an 8 x 4-inch loaf pan.

Step 6: Place inside the preheated oven and bake for about 30 minutes or until a toothpick inserted in the middle of the cake comes out clean.

NOTE:

This pound cake is great when frozen. Put it in a jar, or slice, then freeze. I would recommend slicing the cake first before freezing as it’ll be easier instead of slicing and thawing the whole thing. To thaw a slice, put a frozen slice on the counter on a piece of a paper towel. Wait for 20 to 30 minutes, then it is ready to eat. To thaw the whole cake, simply put the pound cake inside a freezer bag, then on the counter until thawed.

Nutrition Facts:

Per Serving: 272 calories; fat 10.4g 16% DV; cholesterol 45mg 15% DV; sodium 413mg 17% DV; protein 4.1g 8% DV; carbohydrates 40.6g 13% DV

ONE EGG LEMON POUND CAKE

Rebecca Servings: 10 | Yield: 1 -8×4 inch loaf pan This pound cake is super moist and bursting in lemon flavor in every bite. A simple, easy, and quick, not-fussy pound cake that you… Main Dish Recipes ONE EGG LEMON POUND CAKE European Print This
Serves: 10
Nutrition facts: 272 calories 10.4 fat
Rating: 4.5/5
( 2 voted )

Ingredients

  • 2 cups all-purpose flour
  • 2 tsp baking powder
  • 1 cup white sugar
  • 1 tsp salt
  • ½ cup butter
  • 1 egg
  • 1 cup milk
  • 1 tsp vanilla extract
  • 1 tsp lemon extract

Instructions

Step 1: Prepare the oven. Preheat it to 350 degrees F or 175 degrees C.

Step 2: Then, grease and flour an 8 x 4-inch loaf pan.

Step 3: Add the flour, baking powder, sugar, and salt in a large bowl. Mix well. Then, slice in the butter.

Step 4: In a measuring cup, break the egg and fill it to a cup, lining with milk. Add this to the dry ingredients, making sure to beat well. Then, stir in the vanilla and lemon flavoring.

Step 5: Transfer the batter into an 8 x 4-inch loaf pan.

Step 6: Place inside the preheated oven and bake for about 30 minutes or until a toothpick inserted in the middle of the cake comes out clean.

NOTE:

This pound cake is great when frozen. Put it in a jar, or slice, then freeze. I would recommend slicing the cake first before freezing as it'll be easier instead of slicing and thawing the whole thing. To thaw a slice, put a frozen slice on the counter on a piece of a paper towel. Wait for 20 to 30 minutes, then it is ready to eat. To thaw the whole cake, simply put the pound cake inside a freezer bag, then on the counter until thawed.

September 15, 2020 0 comment
0 FacebookTwitterPinterestEmail
Main Dish Recipes

BAKED HONEY MUSTARD CHICKEN

by Rebecca September 15, 2020
written by Rebecca

Prep: 15 mins | Cook: 45mins | Total: 1 hr | Servings: 6 | Yield: 6 servings

The perfect chicken recipe that your whole family will enjoy. A great addition to your weekly menu. This savory, tender chicken is great alongside anything – mashed or roasted potatoes, beans, rice, and more. Juicy chicken breasts in a zesty and mouthwatering sauce. This dish is a huge hit and to keep. The combination of flavors is simply amazing. Plus, this dish is pretty easy and not fussy. You can make it whenever.

Ingredients

6 breast (blank)s skinless and boneless chicken breast halves

salt and pepper

½ cup honey

½ cup prepared mustard

1 tsp dried basil

1 tsp paprika

½ tsp dried parsley

HOW TO MAKE BAKED HONEY MUSTARD CHICKEN

Step 1: Prepare the oven. Preheat it to 350 degrees F or 175 degrees C.

Step 2: In a lightly greased 9 x 13-inch baking dish, add the chicken breasts and season salt and pepper to taste.

Step 3: Add the honey, mustard, basil, paprika, and parsley in a small bowl. Mix well until combined.

Step 4: Pour this mixture over the chicken breasts, then, brush to cover the chicken well.

Step 5: Place inside the preheated oven and bake for about 30 minutes. Flip the chicken pieces over, then, brush with the rest of the half of the mustard mixture. Continue baking for another 10 to 15 minutes or until the chicken is no longer pink and the juices run clear.

Step 6: Remove from the oven and allow to cool for at least 10 minutes before serving. Enjoy!

NOTES:

You can use chicken thigh for this recipe, too. But the cooking time will vary. If an instant-read thermometer is available, use that to check the doneness of the chicken.

Store the chicken in an airtight container. Place in the fridge and keep for up to 3 to 4 days.

Nutrition Facts

Per Serving: 232 calories; fat 3.7g 6% DV; cholesterol 67.1mg 22% DV; sodium 296.4mg 12% DV; protein 25.6g 51% DV; carbohydrates 24.8g 8% DV

BAKED HONEY MUSTARD CHICKEN

Rebecca Prep: 15 mins | Cook: 45mins | Total: 1 hr | Servings: 6 | Yield: 6 servings The perfect chicken recipe that your whole family will enjoy. A great addition to your weekly menu. This savory, tender chicken is… Main Dish Recipes BAKED HONEY MUSTARD CHICKEN European Print This
Serves: 6 Prep Time: 15 mins Cooking Time: 45 mins 45 mins
Nutrition facts: 232 calories 3.7 fat
Rating: 5.0/5
( 1 voted )

Ingredients

  • 6 breast (blank)s skinless and boneless chicken breast halves
  • salt and pepper
  • ½ cup honey
  • ½ cup prepared mustard
  • 1 tsp dried basil
  • 1 tsp paprika
  • ½ tsp dried parsley

Instructions

Step 1: Prepare the oven. Preheat it to 350 degrees F or 175 degrees C.

Step 2: In a lightly greased 9 x 13-inch baking dish, add the chicken breasts and season salt and pepper to taste.

Step 3: Add the honey, mustard, basil, paprika, and parsley in a small bowl. Mix well until combined.

Step 4: Pour this mixture over the chicken breasts, then, brush to cover the chicken well.

Step 5: Place inside the preheated oven and bake for about 30 minutes. Flip the chicken pieces over, then, brush with the rest of the half of the mustard mixture. Continue baking for another 10 to 15 minutes or until the chicken is no longer pink and the juices run clear.

Step 6: Remove from the oven and allow to cool for at least 10 minutes before serving. Enjoy!

NOTES:

You can use chicken thigh for this recipe, too. But the cooking time will vary. If an instant-read thermometer is available, use that to check the doneness of the chicken.

Store the chicken in an airtight container. Place in the fridge and keep for up to 3 to 4 days.

September 15, 2020 0 comment
0 FacebookTwitterPinterestEmail
Main Dish Recipes

SENSATIONAL SLOW COOKED BEEF BRISKET

by Rebecca September 15, 2020
written by Rebecca

Prep: 30mins | Cook: 5hrs 15mins | Additional: 20 mins | Total: 6 hrs 5 mins | Servings: 10 | Yield: 10 servings

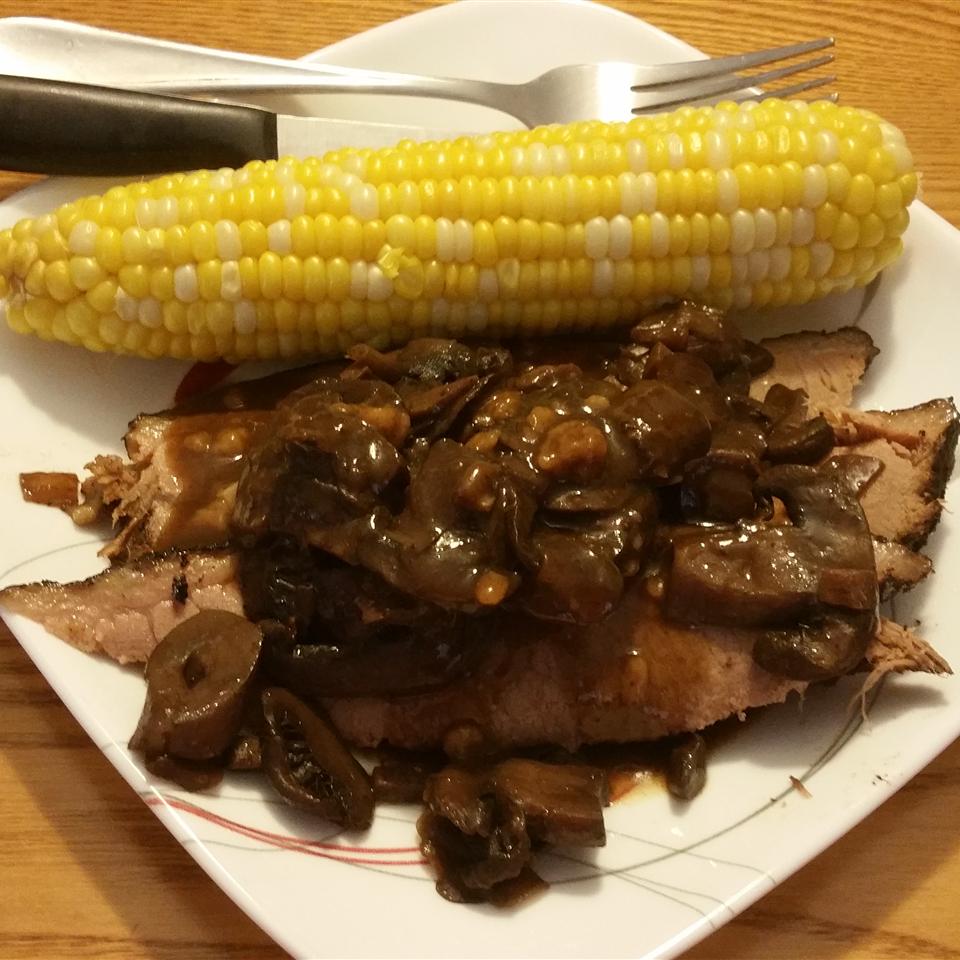
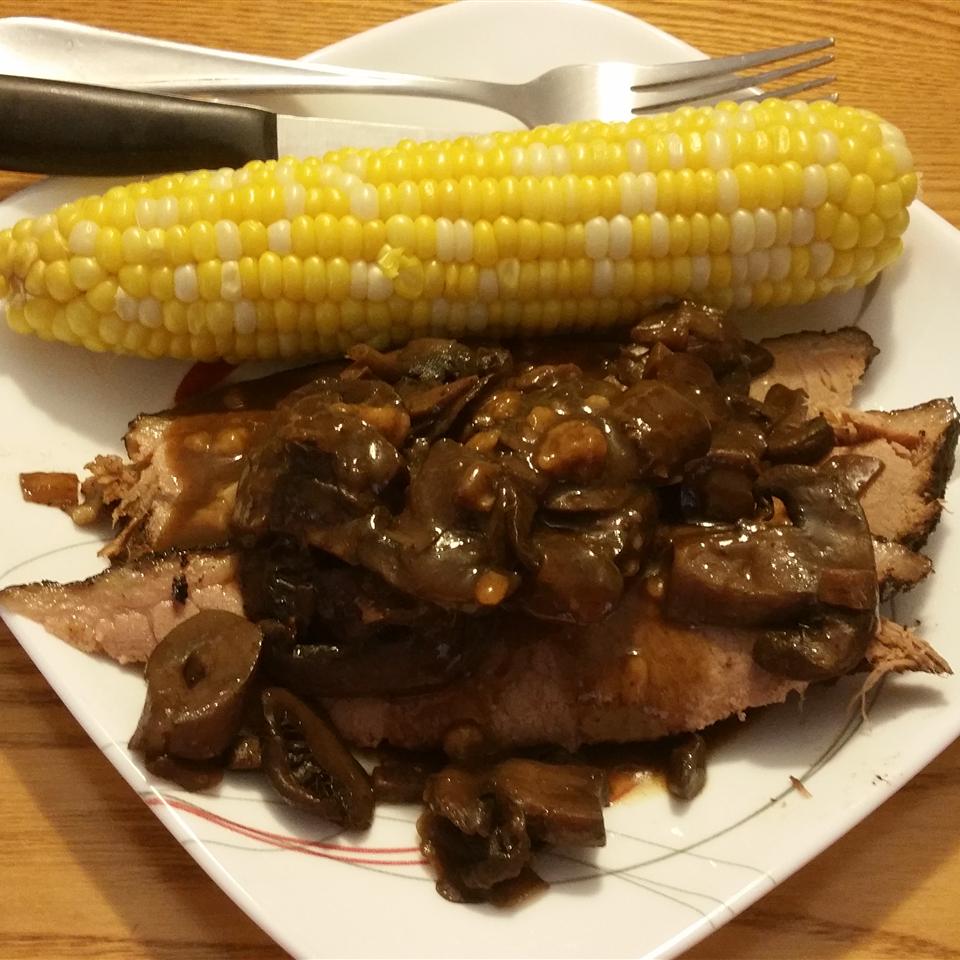
Savory brisket with mushrooms, Worcestershire sauce, red wine, and seasonings are cooked slowly for that fork-tender goodness. A mouthwatering dish that you can never say no to. My personal favorite alongside rice, corn, and roasted potatoes. This worth everything!

Ingredients

2 tbsp paprika

2 tbsp garlic powder

2 tbsp ground black pepper

2 tbsp of sea salt

1 tsp cayenne pepper

⅓ cup extra-virgin olive oil

1 (16 oz) package sliced fresh mushrooms

3 eaches shallots, chopped

¼ cup unsalted margarine

1 ½ cups Worcestershire sauce (like Lea & Perrins®), divided

1 (5 lbs) beef brisket

2 cups red wine

½ cup of water

1 clove garlic, chopped

1 (32 fluid ounce) container beef broth (such as Progresso®)

1 tbsp Worcestershire sauce (such as Lea & Perrins®)

2 tbsp unsalted margarine, thinly sliced

HOW TO MAKE SENSATIONAL SLOW COOKED BEEF BRISKET

Step 1: Prepare the oven. Preheat it to 325 degrees F or 165 degrees C.

Step 2: In a bowl, add the paprika, garlic powder, black pepper, sea salt, and cayenne pepper. Mix until completely combined and set aside.

Step 3: In a large skillet, heat the olive oil over medium heat. When hot, sautee the mushrooms and shallots for about 5 to 8 minutes until the mushrooms have released their liquid. Set aside.

Step 4: Cook the brisket for approximately 5 minutes on each side until the brisket turns brown and cook through on both sides. Add in the Worcestershire sauce half a cup at a time until the 1 1/2 cup of the sauce has been poured onto the brisket.

Step 5: In a large skillet, melt 1/4 cup margarine over medium-high heat. Stir in 1/4 cup of the Worcestershire sauce.

Step 6: Thoroughly rub the beef brisket with the spice mixture. Transfer the brisket into the margarine, then, into the Worcestershire sauce.

Step 7: Put the rack into a heavy Dutch oven. Add the brisket into the rack, then, pour in the drippings from the Worcestershire sauce’s pan. Followed by the red wine, water, garlic, and beef broth. Then, add in the brisket and mushroom into the rack. Drizzle over the mushrooms with a tablespoon of Worcestershire sauce and top it all up with 2 tablespoons of sliced unsalted margarine.

Step 8: Place into the preheated oven and bake the brisket for about 3 minutes, covered. Adjust the heat to 300 degrees F or 150 degrees C, then, bake for another hour. Again, lower the oven temperature to about 225 degrees F or 105 degrees C and continue baking for an hour more. Making sure to baste the pan with the drippings every hour.

Step 9: Remove from the oven and allow the brisket to sit for at least 20 minutes before slicing the brisket thinly across the grain.

Step 10: Serve the brisket with the pan gravy. Enjoy!

Nutrition Facts:

Per Serving: 623.8 calories; fat 46.1g 71% DV; cholesterol 93.2mg 31% DV; sodium 1836.6mg 74% DV; protein 26.8g 54% DV; carbohydrates 16.5g 5% DV

SENSATIONAL SLOW COOKED BEEF BRISKET

Rebecca Prep: 30mins | Cook: 5hrs 15mins | Additional: 20 mins | Total: 6 hrs 5 mins | Servings: 10 | Yield: 10 servings Savory brisket with mushrooms, Worcestershire sauce, red wine, and seasonings are cooked slowly for that fork-tender goodness. A… Main Dish Recipes SENSATIONAL SLOW COOKED BEEF BRISKET European Print This
Serves: 10 Prep Time: 30 mins Cooking Time: 5 hrs 35 mins 5 hrs 35 mins
Nutrition facts: 623.8 calories 46.1 fat
Rating: 5.0/5
( 1 voted )

Ingredients

  • 2 tbsp paprika
  • 2 tbsp garlic powder
  • 2 tbsp ground black pepper
  • 2 tbsp of sea salt
  • 1 tsp cayenne pepper
  • ⅓ cup extra-virgin olive oil
  • 1 (16 oz) package sliced fresh mushrooms
  • 3 eaches shallots, chopped
  • ¼ cup unsalted margarine
  • 1 ½ cups Worcestershire sauce (like Lea & Perrins®), divided
  • 1 (5 lbs) beef brisket
  • 2 cups red wine
  • ½ cup of water
  • 1 clove garlic, chopped
  • 1 (32 fluid ounce) container beef broth (such as Progresso®)
  • 1 tbsp Worcestershire sauce (such as Lea & Perrins®)
  • 2 tbsp unsalted margarine, thinly sliced

Instructions

Step 1: Prepare the oven. Preheat it to 325 degrees F or 165 degrees C.

Step 2: In a bowl, add the paprika, garlic powder, black pepper, sea salt, and cayenne pepper. Mix until completely combined and set aside.

Step 3: In a large skillet, heat the olive oil over medium heat. When hot, sautee the mushrooms and shallots for about 5 to 8 minutes until the mushrooms have released their liquid. Set aside.

Step 4: Cook the brisket for approximately 5 minutes on each side until the brisket turns brown and cook through on both sides. Add in the Worcestershire sauce half a cup at a time until the 1 1/2 cup of the sauce has been poured onto the brisket.

Step 5: In a large skillet, melt 1/4 cup margarine over medium-high heat. Stir in 1/4 cup of the Worcestershire sauce.

Step 6: Thoroughly rub the beef brisket with the spice mixture. Transfer the brisket into the margarine, then, into the Worcestershire sauce.

Step 7: Put the rack into a heavy Dutch oven. Add the brisket into the rack, then, pour in the drippings from the Worcestershire sauce's pan. Followed by the red wine, water, garlic, and beef broth. Then, add in the brisket and mushroom into the rack. Drizzle over the mushrooms with a tablespoon of Worcestershire sauce and top it all up with 2 tablespoons of sliced unsalted margarine.

Step 8: Place into the preheated oven and bake the brisket for about 3 minutes, covered. Adjust the heat to 300 degrees F or 150 degrees C, then, bake for another hour. Again, lower the oven temperature to about 225 degrees F or 105 degrees C and continue baking for an hour more. Making sure to baste the pan with the drippings every hour.

Step 9: Remove from the oven and allow the brisket to sit for at least 20 minutes before slicing the brisket thinly across the grain.

Step 10: Serve the brisket with the pan gravy. Enjoy!

September 15, 2020 0 comment
0 FacebookTwitterPinterestEmail
Main Dish Recipes

SENSATIONAL SLOW COOKED BEEF BRISKET

by Rebecca September 12, 2020
written by Rebecca

Prep: 30mins | Cook: 5hrs 15mins | Additional: 20 mins | Total: 6 hrs 5 mins | Servings: 10 | Yield: 10 servings

This tender-fork brisket is the way to go. Mouthwatering and crazy delicious! Slowly cooked in a slow cooker to make the meat tender and for the flavors to settle in. My family’s first pick and unquestionably a crowd pleaser!

INGREDIENTS

2 tbsp paprika

2 tbsp garlic powder

2 tbsp ground black pepper

2 tbsp of sea salt

1 tsp cayenne pepper

⅓ cup extra-virgin olive oil

1 (16 oz) package sliced fresh mushrooms

3 eaches shallots, chopped

¼ cup unsalted margarine

1 ½ cups Worcestershire sauce (like Lea & Perrins®), divided

1 (5 lbs) beef brisket

2 cups red wine

½ cup of water

1 clove garlic, chopped

1 (32 fluid ounce) container beef broth (such as Progresso®)

1 tbsp Worcestershire sauce (such as Lea & Perrins®)

2 tbsp unsalted margarine, thinly sliced

HOW TO MAKE SENSATIONAL SLOW COOKED BEEF BRISKET

Step 1: Ready the oven. Preheat it to 325 degrees F or 165 degrees C.

Step 2: In a bowl, add the paprika, garlic powder, black pepper, sea salt, and cayenne pepper. Mix until fully combined and set aside.

Step 3: In a large skillet, heat the oil over medium heat. When the oil is hot, sautee the mushrooms and shallots for about 5 to 8 minutes until the mushrooms released all the liquid. Set aside.

Step 4: Then, cook the brisket for about 5 minutes on each side until brown. Add in the Worcestershire sauce half a cup at a time until you have added the whole 1 1/2 cup.

Step 5: In a large skillet, melt 1/4 cup margarine over medium-high heat. And stir in 1/4 cup of Worcestershire sauce.

Step 6: Mix the cooked brisket into the spice mixture, then, add into the margarine and Worcestershire sauce.

Step 7: Put a rack into a heavy Dutch oven. Transfer the brisket onto the rack. Pour in the Worcestershire sauce pan drippings, red wine, water, garlic, and beef broth. And top the brisket with the mushroom mixture before drizzling over a tablespoon of Worcestershire sauce on top of the mushrooms. Lastly, top it all up with slices of 2 tablespoons unsalted margarine.

Step 8: Place inside the preheated oven and bake for about 3 hours, covered. Adjust the heat to about 300 degrees F or 150 degrees C. Continue to baking for another hour. Lower the oven temperature to 225 degrees F or 105 degrees C and bake one more hour. Make sure to not forget to baste the brisket with the pan drippings every hour.

Step 9: Remove from the oven and allow the brisket to sit for at least 20 minutes before slicing thinly across the grain. Serve with the pan gravy. Enjoy!

Nutrition Facts:

Per Serving: 623.8 calories; fat 46.1g 71% DV; cholesterol 93.2mg 31% DV; sodium 1836.6mg 74% DV; protein 26.8g 54% DV; carbohydrates 16.5g 5% DV

SENSATIONAL SLOW COOKED BEEF BRISKET

Rebecca Prep: 30mins | Cook: 5hrs 15mins | Additional: 20 mins | Total: 6 hrs 5 mins | Servings: 10 | Yield: 10 servings This tender-fork brisket is the way to go. Mouthwatering and crazy delicious! Slowly cooked in a slow cooker… Main Dish Recipes SENSATIONAL SLOW COOKED BEEF BRISKET European Print This
Serves: 10 Prep Time: 30 mins Cooking Time: 5 hrs 35 mins 5 hrs 35 mins
Nutrition facts: 623.8 calories 46.1 fat
Rating: 5.0/5
( 1 voted )

Ingredients

  • 2 tbsp paprika
  • 2 tbsp garlic powder
  • 2 tbsp ground black pepper
  • 2 tbsp of sea salt
  • 1 tsp cayenne pepper
  • ⅓ cup extra-virgin olive oil
  • 1 (16 oz) package sliced fresh mushrooms
  • 3 eaches shallots, chopped
  • ¼ cup unsalted margarine
  • 1 ½ cups Worcestershire sauce (like Lea & Perrins®), divided
  • 1 (5 lbs) beef brisket
  • 2 cups red wine
  • ½ cup of water
  • 1 clove garlic, chopped
  • 1 (32 fluid ounce) container beef broth (such as Progresso®)
  • 1 tbsp Worcestershire sauce (such as Lea & Perrins®)
  • 2 tbsp unsalted margarine, thinly sliced

Instructions

Step 1: Ready the oven. Preheat it to 325 degrees F or 165 degrees C.

Step 2: In a bowl, add the paprika, garlic powder, black pepper, sea salt, and cayenne pepper. Mix until fully combined and set aside.

Step 3: In a large skillet, heat the oil over medium heat. When the oil is hot, sautee the mushrooms and shallots for about 5 to 8 minutes until the mushrooms released all the liquid. Set aside.

Step 4: Then, cook the brisket for about 5 minutes on each side until brown. Add in the Worcestershire sauce half a cup at a time until you have added the whole 1 1/2 cup.

Step 5: In a large skillet, melt 1/4 cup margarine over medium-high heat. And stir in 1/4 cup of Worcestershire sauce.

Step 6: Mix the cooked brisket into the spice mixture, then, add into the margarine and Worcestershire sauce.

Step 7: Put a rack into a heavy Dutch oven. Transfer the brisket onto the rack. Pour in the Worcestershire sauce pan drippings, red wine, water, garlic, and beef broth. And top the brisket with the mushroom mixture before drizzling over a tablespoon of Worcestershire sauce on top of the mushrooms. Lastly, top it all up with slices of 2 tablespoons unsalted margarine.

Step 8: Place inside the preheated oven and bake for about 3 hours, covered. Adjust the heat to about 300 degrees F or 150 degrees C. Continue to baking for another hour. Lower the oven temperature to 225 degrees F or 105 degrees C and bake one more hour. Make sure to not forget to baste the brisket with the pan drippings every hour.

Step 9: Remove from the oven and allow the brisket to sit for at least 20 minutes before slicing thinly across the grain. Serve with the pan gravy. Enjoy!

September 12, 2020 0 comment
0 FacebookTwitterPinterestEmail
Newer Posts
Older Posts

Popular Posts

  • 1

    Crispy Crunchy Parmesan Potatoes

    March 21, 2020
  • 2

    CROCK POT SMOTHERED PORK CHOPS

    March 21, 2020
  • Facebook
  • Twitter

@2019 - All Right Reserved.


Back To Top