Cook it once
  • Home
  • Privacy Policy
  • Recipes
    • KETO
    • LC
    • WW
  • Tips
  • Contact
Cook it once
  • Home
  • Privacy Policy
  • Recipes
    • KETO
    • LC
    • WW
  • Tips
  • Contact
Category:

Main Dish Recipes

Main Dish Recipes

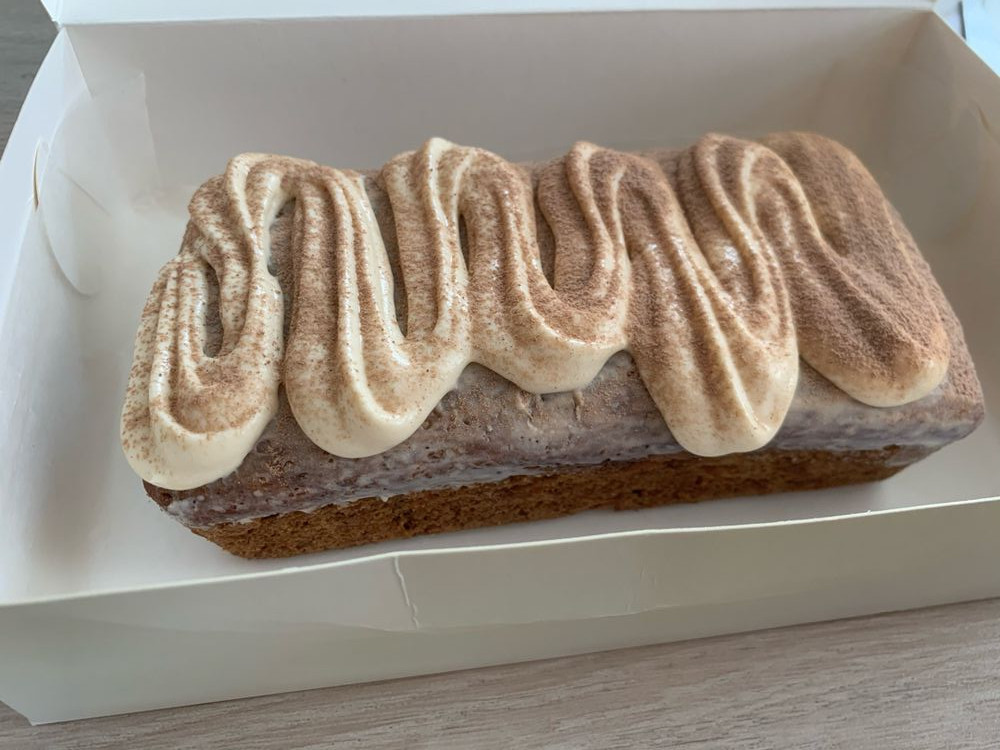
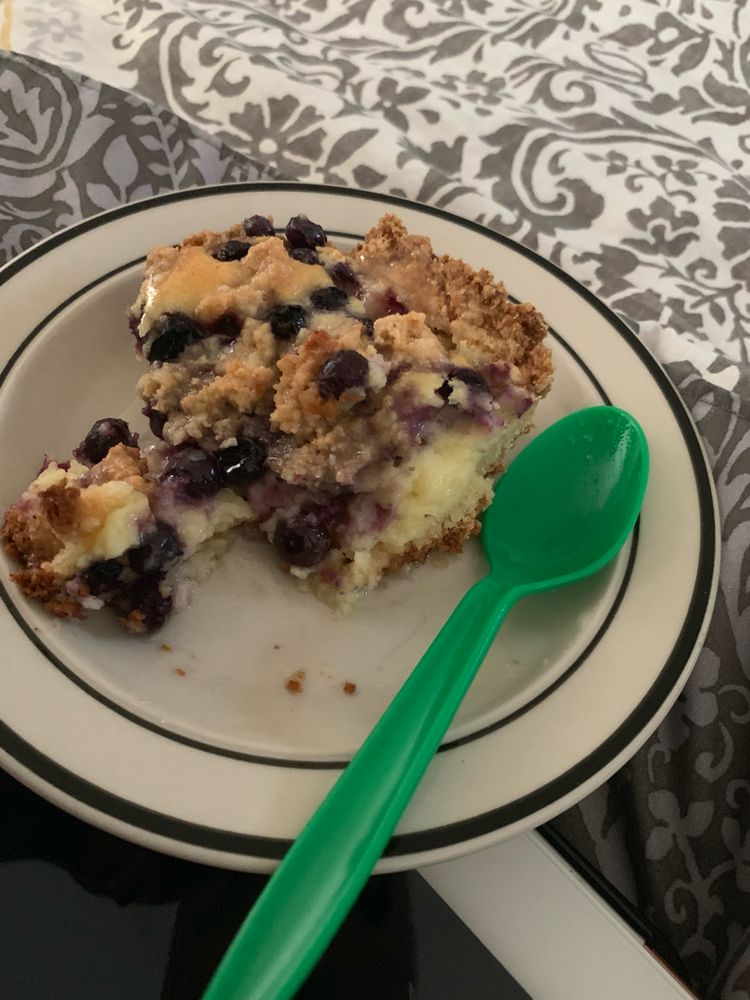
Blueberry Cheesecake Crumb Cake

by Rebecca September 24, 2020
written by Rebecca

Prep Time: 15 | Cook Time: 1 hr 15 mins | Yield: 8

You can easily make your favourites: crumb cake and blueberry cheesecake in one heavenly cake. This creamy, smooth, and decadent dessert made simple by using the same mixture for both the crumbs and topping.

Ingredients

Crumb Cake:

3 and 1/3 cups flour

2 teaspoons baking powder

¼ teaspoon salt

2/3 cup butter-cold and cut in cubes

Grated zest from 1 lemon(optional)

1/3 cup light brown sugar

1/3 cup sugar

2 eggs

1 teaspoon vanilla

Blueberry Cheesecake Filling:

8 oz. mascarpone

8 oz. cream cheese-softened

½ cup + 2 Tablespoons caster sugar

2 Tablespoons corn starch

2 eggs

1 teaspoon vanilla

1 and 2/3 cups of blueberries

Glaze:

½ cup powdered sugar

2–3 teaspoons milk

How to make Blueberry Cheesecake Crumb Cake

Step 1: Prepare the oven. Preheat it to 350 degrees F.

Step 2: Using a parchment paper, line the bottom of a 9-inch springform pan. Grease the bottom sides using a cooking spray. Set aside.

Step 3: Combine the flour, baking powder, salt, brown sugar, sugar, and lemon zest in a large bowl.

Step 4: Stir in the butter into the flour mixture. Work the mixture with your hands or fork or even a mixer until grainy.

Step 5: Add in the eggs and vanilla. Stir until incorporated. The consistency should be crumbly. To make pea-sized crumbs, squeeze the batter with your fingers.

Step 6: In the bottom and side of the pan, press 2/3 of the mixture to about 1 1/2-inch height.

Step 7: Then, place both the pan and the rest of the crumbs in the fridge.

To make the filling:

Step 8: Mix the cream cheese, mascarpone, vanilla, sugar, and corn starch until just combined. Add in the eggs and again mix until just incorporated. Do not overmix.

Step 9: Into the chilled crust, pour half of the cheesecake mixture, then, scatter 2/3 cup blueberries on top of the filling. And spread the rest of the cheesecake mixture over. Finish it off with some blueberries on top and sprinkle of crumbs.

Step 10: Place inside the preheated oven and bake for about 65 to 75 minutes or until a toothpick inserted in the centre of the cake comes out clean. Check the cake, if browning too much, cover with aluminium foil.

To make the glaze:

Step 11: In a bowl, stir the powdered sugar and milk or cream. Add in some powdered sugar if the consistency is too thin and more milk if too thick.

NOTE:

You can easily make caster sugar at home using a process regular granulated sugar. To make smaller granules, process the sugar in a food processor, blender, or coffee grinder. Remember to keep an eye because blending for too long will result in powdered sugar.
Blueberry Cheesecake Crumb Cake

Rebecca Prep Time: 15 | Cook Time: 1 hr 15 mins | Yield: 8 You can easily make your favourites: crumb cake and blueberry cheesecake in one heavenly cake. This creamy,… Main Dish Recipes Blueberry Cheesecake Crumb Cake European Print This
Serves: 8 Prep Time: 15 mins Cooking Time: 1 hr 15 mins 1 hr 15 mins
Nutrition facts: 200 calories 20 grams fat
Rating: 5.0/5
( 2 voted )

Ingredients

  • Crumb Cake:
  • 3 and 1/3 cups flour
  • 2 teaspoons baking powder
  • ¼ teaspoon salt
  • 2/3 cup butter-cold and cut in cubes
  • Grated zest from 1 lemon(optional)
  • 1/3 cup light brown sugar
  • 1/3 cup sugar
  • 2 eggs
  • 1 teaspoon vanilla
  • Blueberry Cheesecake Filling:
  • 8 oz. mascarpone
  • 8 oz. cream cheese-softened
  • ½ cup + 2 Tablespoons caster sugar
  • 2 Tablespoons corn starch
  • 2 eggs
  • 1 teaspoon vanilla
  • 1 and 2/3 cups of blueberries
  • Glaze:
  • ½ cup powdered sugar
  • 2–3 teaspoons milk

Instructions

Step 1: Prepare the oven. Preheat it to 350 degrees F.

Step 2: Using a parchment paper, line the bottom of a 9-inch springform pan. Grease the bottom sides using a cooking spray. Set aside.

Step 3: Combine the flour, baking powder, salt, brown sugar, sugar, and lemon zest in a large bowl.

Step 4: Stir in the butter into the flour mixture. Work the mixture with your hands or fork or even a mixer until grainy.

Step 5: Add in the eggs and vanilla. Stir until incorporated. The consistency should be crumbly. To make pea-sized crumbs, squeeze the batter with your fingers.

Step 6: In the bottom and side of the pan, press 2/3 of the mixture to about 1 1/2-inch height.

Step 7: Then, place both the pan and the rest of the crumbs in the fridge.

To make the filling:

Step 8: Mix the cream cheese, mascarpone, vanilla, sugar, and corn starch until just combined. Add in the eggs and again mix until just incorporated. Do not overmix.

Step 9: Into the chilled crust, pour half of the cheesecake mixture, then, scatter 2/3 cup blueberries on top of the filling. And spread the rest of the cheesecake mixture over. Finish it off with some blueberries on top and sprinkle of crumbs.

Step 10: Place inside the preheated oven and bake for about 65 to 75 minutes or until a toothpick inserted in the centre of the cake comes out clean. Check the cake, if browning too much, cover with aluminium foil.

To make the glaze:

Step 11: In a bowl, stir the powdered sugar and milk or cream. Add in some powdered sugar if the consistency is too thin and more milk if too thick.

NOTE:

You can easily make caster sugar at home using a process regular granulated sugar. To make smaller granules, process the sugar in a food processor, blender, or coffee grinder. Remember to keep an eye because blending for too long will result in powdered sugar.
September 24, 2020 0 comment
0 FacebookTwitterPinterestEmail
Main Dish Recipes

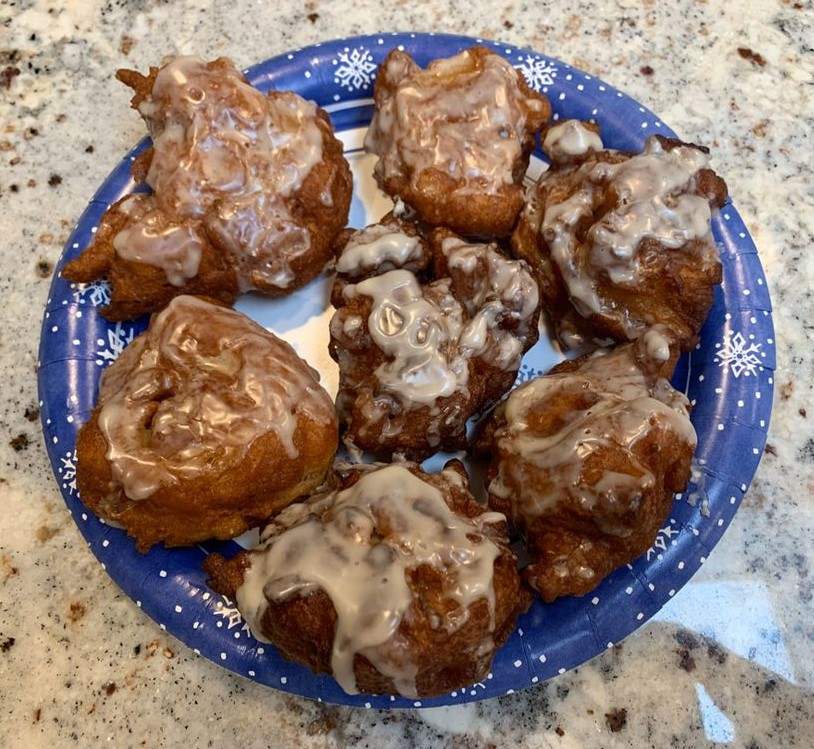
APPLE PECAN FRITTER BITES

by Rebecca September 23, 2020
written by Rebecca

Prep Time: 20 mins | Cook Time: 10 mins | Total Time: 30 mins

I love these apple pecan fritters. They are the best fall dessert I have ever made! The glaze is optional but who would want to skip it? With or without glaze these bites are amazing!

Ingredients

For the Fritters:

1 cup Gold Medal® unbleached all-purpose flour

1 1/2 tsp baking powder

1/4 tsp salt

2 Tbs organic sugar

1 tsp cinnamon

1 1/2 tsp Ener-G Egg Replacer + 2 Tbs warm water, equals 1 egg

1/2 cup plus 1 Tbs unsweetened almond milk

2 cups granny smith apples, peeled and chopped

1/2 cup pecans, chopped

Vegetable oil

For the Glaze:

2 cups powdered sugar

1 tsp vanilla

3-4 Tbs unsweetened almond milk

How to make Apple Pecan Fritter Bites:

To make the Fritters:

Step 1: In a skillet, pour about an inch of vegetable oil. Heat the oil over medium-high heat.

Step 2: Mix the egg replacer with warm water in a small glass bowl. Set aside.

Step 3: Whisk the flour, baking powder, salt, sugar, and cinnamon in a large mixing bowl and set aside.

Step 4: Add the egg replacer and milk into the dry ingredients. Mix until incorporated.

Step 5: Stir in the chopped apples and pecans.

Step 6: Add the mixture by teaspoon into the hot oil. Cook on both sides until golden brown.

Step 7: Remove from the skillet and transfer on paper towels to drain until cool.

To make the Glaze:

Step 1: In a small bowl, add the powdered sugar, vanilla, and milk. Whisk to combine.

Step 2: Take one cooled apple pecan fitters one at a time to glaze.

Step 3: Fully cover the fritters with glaze. Transfer each on a wire rack until the glaze has set.

Step 4: For easy cleanup, you can place the parchment paper underneath the wire rack.

APPLE PECAN FRITTER BITES

Rebecca Prep Time: 20 mins | Cook Time: 10 mins | Total Time: 30 mins I love these apple pecan fritters. They are the best fall dessert I have ever made!… Main Dish Recipes APPLE PECAN FRITTER BITES European Print This
Prep Time: 20 mins Cooking Time: 10 mins 10 mins
Nutrition facts: 200 calories 20 grams fat
Rating: 5.0/5
( 1 voted )

Ingredients

  • For the Fritters:
  • 1 cup Gold Medal® unbleached all-purpose flour
  • 1 1/2 tsp baking powder
  • 1/4 tsp salt
  • 2 Tbs organic sugar
  • 1 tsp cinnamon
  • 1 1/2 tsp Ener-G Egg Replacer + 2 Tbs warm water, equals 1 egg
  • 1/2 cup plus 1 Tbs unsweetened almond milk
  • 2 cups granny smith apples, peeled and chopped
  • 1/2 cup pecans, chopped
  • Vegetable oil
  • For the Glaze:
  • 2 cups powdered sugar
  • 1 tsp vanilla
  • 3-4 Tbs unsweetened almond milk

Instructions

To make the Fritters:

Step 1: In a skillet, pour about an inch of vegetable oil. Heat the oil over medium-high heat.

Step 2: Mix the egg replacer with warm water in a small glass bowl. Set aside.

Step 3: Whisk the flour, baking powder, salt, sugar, and cinnamon in a large mixing bowl and set aside.

Step 4: Add the egg replacer and milk into the dry ingredients. Mix until incorporated.

Step 5: Stir in the chopped apples and pecans.

Step 6: Add the mixture by teaspoon into the hot oil. Cook on both sides until golden brown.

Step 7: Remove from the skillet and transfer on paper towels to drain until cool.

To make the Glaze:

Step 1: In a small bowl, add the powdered sugar, vanilla, and milk. Whisk to combine.

Step 2: Take one cooled apple pecan fitters one at a time to glaze.

Step 3: Fully cover the fritters with glaze. Transfer each on a wire rack until the glaze has set.

Step 4: For easy cleanup, you can place the parchment paper underneath the wire rack.

September 23, 2020 0 comment
0 FacebookTwitterPinterestEmail
Main Dish Recipes

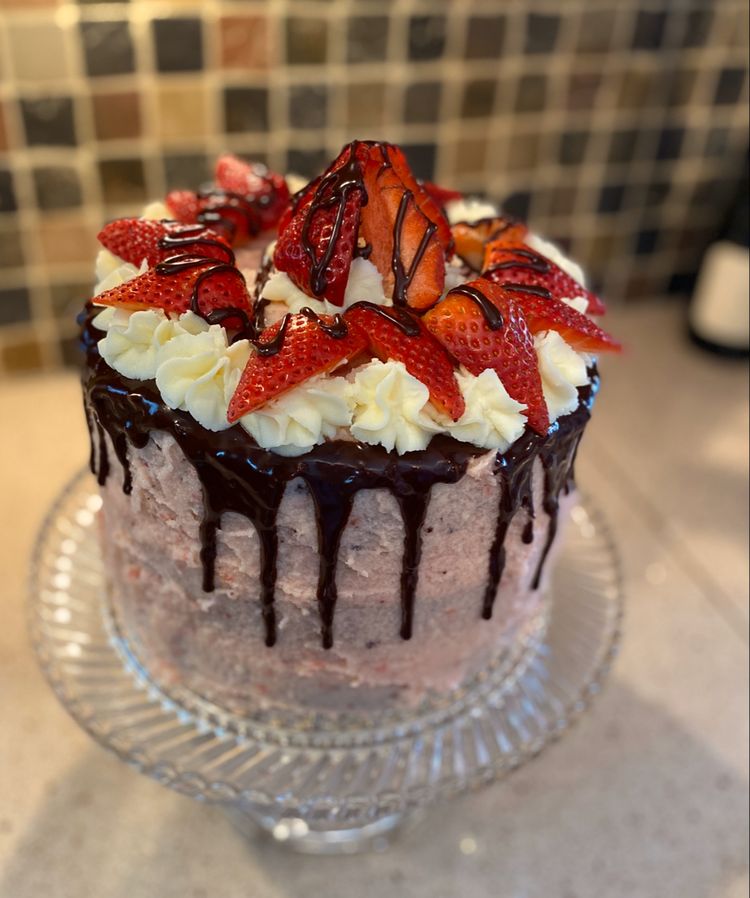
Chocolate Kahlua Cake with Strawberry Buttercream Frosting

by Rebecca September 23, 2020
written by Rebecca

This moist, Kahlua soaked cake topped with decadent strawberry buttercream drizzled with ganache and top with fresh strawberries is heaven!

Ingredients

Cake:

3 cups flour

3 cups Sugar

1 1/2 cup special dark chocolate cocoa powder

1 tbsp baking powder

1 1/2 tsp baking soda

1 1/2 tsp kosher salt

4 large eggs

1/2 cup sour cream

1 cup buttermilk

1 cup of warm water

1/2 cup Kahlua

1/2 tsp espresso powder

1/2 cup canola oil

1 tbsp pure vanilla extract

Strawberry Buttercream Frosting:

2 cups unsalted sweet cream butter, softened

6 cups powdered sugar

4 tsp vanilla extract

1/2 cup finely diced strawberries

5-7 tbsp heavy whipping cream

Strawberries for topping

1 large piping bag fitted with a star tip

Large ice cream scooper

Chocolate Ganache:

1 cup semi-sweet chocolate chips

1/2 cup heavy whipping cream

1 large squeeze bottle

How to make Chocolate Kahlua Cake with Strawberry Buttercream Frosting

Step 1: Prepare the oven. Preheat it to 350 degrees.

Step 2: Using a pam baking spray, grease three 9-inch cake pans.

Step 3: Add the espresso, Kahlua, and warm water in a small bowl. Whisk to combine.

Step 4: Whisk the flour, sugar, and cocoa powder, baking soda, baking powder, and salt until combined.

Step 5: Slowly add in the eggs followed by sour cream, buttermilk, espresso, oil, and vanilla extract. Mix until incorporated.

Step 6: Pour the batter in the prepared cake pans.

Step 7: Place in the preheated oven and bake for about 25 to 35 minutes or until a toothpick inserted in the middle of the cake comes out clean.

Step 8: Remove from the oven and let the cakes cool for at least 20 minutes.

To make the Frosting:

Step 1: Cream the butter, vanilla, powdered sugar, diced strawberries, and heavy whipping cream with a stand mixer until creamy and stiff peaks form.

Step 2: Then, scoop a cup of frosting into the piping bag.

Building the cake:

Step 1: On a cake board, put the first cake layer.

Step 2: Scoop with an ice cream scooper 4 to 6 scoops of frosting. Evenly smooth the scoops of frosting on the first cake layer.

Step 3: Add the second cake layer on top and evenly spread the frosting over.

Step 4: Put the last cake layer on top of the frosting and frost the top with the rest of the frosting.

To make the chocolate ganache:

Step 1: Add the heavy whipping cream in a small pot. Heat until steaming.

Step 2: Meanwhile, add the chocolate chips into a heat-proof bowl.

Step 3: Then, pour the heated heavy whipping cream over the chocolate chips. Let it sit for a minute before whisking until smooth.

Step 4: Transfer the ganache into a squeeze bottle.

Step 5: Over the edge of the cake, pipe dollops of ganache.

Step 6: Then, on top of the cake pipe dollops of frosting.

Step 7: And place the strawberries into the dollops of frosting.

Step 8: Slice and serve. Enjoy!

Chocolate Kahlua Cake with Strawberry Buttercream Frosting

Rebecca This moist, Kahlua soaked cake topped with decadent strawberry buttercream drizzled with ganache and top with fresh strawberries is heaven! Ingredients Cake: 3 cups flour 3 cups Sugar 1 1/2… Main Dish Recipes Chocolate Kahlua Cake with Strawberry Buttercream Frosting European Print This
Nutrition facts: 200 calories 20 grams fat
Rating: 5.0/5
( 1 voted )

Ingredients

  • Cake:
  • 3 cups flour
  • 3 cups Sugar
  • 1 1/2 cup special dark chocolate cocoa powder
  • 1 tbsp baking powder
  • 1 1/2 tsp baking soda
  • 1 1/2 tsp kosher salt
  • 4 large eggs
  • 1/2 cup sour cream
  • 1 cup buttermilk
  • 1 cup of warm water
  • 1/2 cup Kahlua
  • 1/2 tsp espresso powder
  • 1/2 cup canola oil
  • 1 tbsp pure vanilla extract
  • Strawberry Buttercream Frosting:
  • 2 cups unsalted sweet cream butter, softened
  • 6 cups powdered sugar
  • 4 tsp vanilla extract
  • 1/2 cup finely diced strawberries
  • 5-7 tbsp heavy whipping cream
  • Strawberries for topping
  • 1 large piping bag fitted with a star tip
  • Large ice cream scooper
  • Chocolate Ganache:
  • 1 cup semi-sweet chocolate chips
  • 1/2 cup heavy whipping cream
  • 1 large squeeze bottle

Instructions

Step 1: Prepare the oven. Preheat it to 350 degrees.

Step 2: Using a pam baking spray, grease three 9-inch cake pans.

Step 3: Add the espresso, Kahlua, and warm water in a small bowl. Whisk to combine.

Step 4: Whisk the flour, sugar, and cocoa powder, baking soda, baking powder, and salt until combined.

Step 5: Slowly add in the eggs followed by sour cream, buttermilk, espresso, oil, and vanilla extract. Mix until incorporated.

Step 6: Pour the batter in the prepared cake pans.

Step 7: Place in the preheated oven and bake for about 25 to 35 minutes or until a toothpick inserted in the middle of the cake comes out clean.

Step 8: Remove from the oven and let the cakes cool for at least 20 minutes.

To make the Frosting:

Step 1: Cream the butter, vanilla, powdered sugar, diced strawberries, and heavy whipping cream with a stand mixer until creamy and stiff peaks form.

Step 2: Then, scoop a cup of frosting into the piping bag.

Building the cake:

Step 1: On a cake board, put the first cake layer.

Step 2: Scoop with an ice cream scooper 4 to 6 scoops of frosting. Evenly smooth the scoops of frosting on the first cake layer.

Step 3: Add the second cake layer on top and evenly spread the frosting over.

Step 4: Put the last cake layer on top of the frosting and frost the top with the rest of the frosting.

To make the chocolate ganache:

Step 1: Add the heavy whipping cream in a small pot. Heat until steaming.

Step 2: Meanwhile, add the chocolate chips into a heat-proof bowl.

Step 3: Then, pour the heated heavy whipping cream over the chocolate chips. Let it sit for a minute before whisking until smooth.

Step 4: Transfer the ganache into a squeeze bottle.

Step 5: Over the edge of the cake, pipe dollops of ganache.

Step 6: Then, on top of the cake pipe dollops of frosting.

Step 7: And place the strawberries into the dollops of frosting.

Step 8: Slice and serve. Enjoy!

September 23, 2020 0 comment
0 FacebookTwitterPinterestEmail
Main Dish Recipes

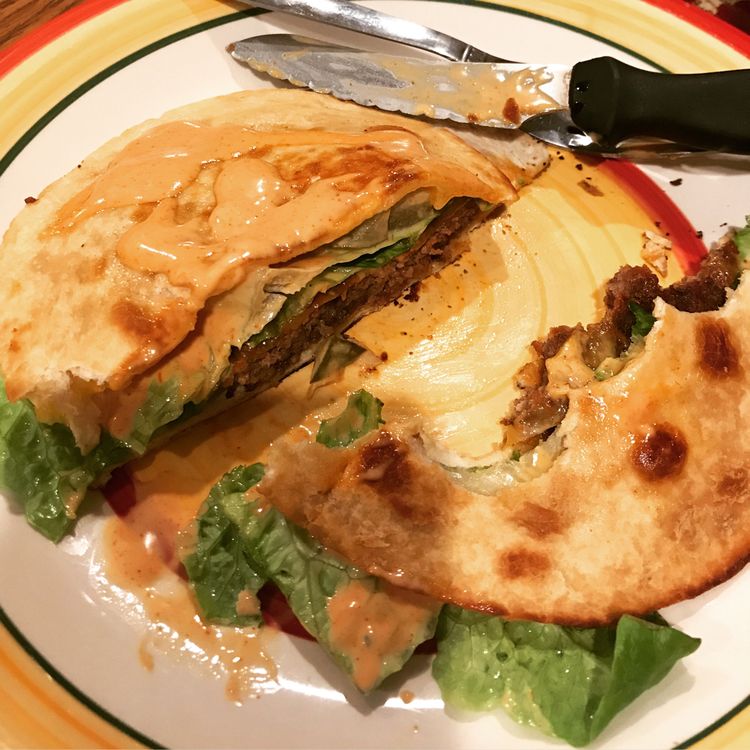
Cheeseburger Quesadillas

by Rebecca September 23, 2020
written by Rebecca

Makes: 12 wedges

I love Quesadillas because they are outrageously cheesy, mouthwatering, and darn delicious! And these Cheeseburger Quesadillas are to die for! Filled with flavorful seasoned beef, gooey cheddar cheese, and served alongside tomatoes, lettuce, pickles, and ketchup. I stash recipe always for a quick quesadilla fix.

Ingredients

2 tablespoons butter (for the pan)

1 pound ground beef

1 teaspoon Worcestershire sauce

Lawry’s Seasoned Salt

4 10-inch flour tortillas

3 1/2 cups grated sharp cheddar cheese

For serving:

Chopped tomatoes

Lettuce

Pickles (I used bread and butter chips)

Ketchup and mustard or the sauce below

Sauce (just mix all the ingredients):

1/2 cup ketchup

1/4 cup mayonnaise

1 tablespoon yellow mustard

Cayenne pepper and Paprika to taste

How to make Cheeseburger Quesadillas

Step 1: Combine the ground beef, Worcestershire sauce, and a bit of seasoned salt or regular salt and pepper in a large pan. Cook until the beef is browned. Drain excess fat and set aside.

Step 2: Wipe the grease out of the pan. Place the buttered tortilla onto the pan, then, top with half of the meat, half of the cheese, and place on the top buttered side out the other tortilla.

Step 3: Cook for several minutes on medium-high heat until browned. Flip and continue cooking the other side until browned and the cheese has melted.

Step 4: Do the same process for the rest of the quesadillas.

Step 5: Divide each quesadilla into 6 wedges, cutting using a pizza cutter.

Step 6: Serve the quesadillas with tomatoes, lettuce, pickles, and sauce. Enjoy!

NOTE:

You can use a big spatula to slip the tortilla.

Or to make it easier, you can just fold each tortilla in half after filling them. Instead of two wholes, you will have four halves of quesadillas.

Before cutting the quesadilla, I opened them up and added them to some pickles.

Cheeseburger Quesadillas

Rebecca Makes: 12 wedges I love Quesadillas because they are outrageously cheesy, mouthwatering, and darn delicious! And these Cheeseburger Quesadillas are to die for! Filled with flavorful seasoned beef, gooey cheddar… Main Dish Recipes Cheeseburger Quesadillas European Print This
Serves: 12
Nutrition facts: 200 calories 20 grams fat
Rating: 5.0/5
( 1 voted )

Ingredients

  • 2 tablespoons butter (for the pan)
  • 1 pound ground beef
  • 1 teaspoon Worcestershire sauce
  • Lawry's Seasoned Salt
  • 4 10-inch flour tortillas
  • 3 1/2 cups grated sharp cheddar cheese
  • For serving:
  • Chopped tomatoes
  • Lettuce
  • Pickles (I used bread and butter chips)
  • Ketchup and mustard or the sauce below
  • Sauce (just mix all the ingredients):
  • 1/2 cup ketchup
  • 1/4 cup mayonnaise
  • 1 tablespoon yellow mustard
  • Cayenne pepper and Paprika to taste

Instructions

Step 1: Combine the ground beef, Worcestershire sauce, and a bit of seasoned salt or regular salt and pepper in a large pan. Cook until the beef is browned. Drain excess fat and set aside.

Step 2: Wipe the grease out of the pan. Place the buttered tortilla onto the pan, then, top with half of the meat, half of the cheese, and place on the top buttered side out the other tortilla.

Step 3: Cook for several minutes on medium-high heat until browned. Flip and continue cooking the other side until browned and the cheese has melted.

Step 4: Do the same process for the rest of the quesadillas.

Step 5: Divide each quesadilla into 6 wedges, cutting using a pizza cutter.

Step 6: Serve the quesadillas with tomatoes, lettuce, pickles, and sauce. Enjoy!

NOTE:

You can use a big spatula to slip the tortilla.

Or to make it easier, you can just fold each tortilla in half after filling them. Instead of two wholes, you will have four halves of quesadillas.

Before cutting the quesadilla, I opened them up and added them to some pickles.

September 23, 2020 0 comment
0 FacebookTwitterPinterestEmail
Main Dish Recipes

Cheesy Taco Pasta Shells!

by Rebecca September 23, 2020
written by Rebecca

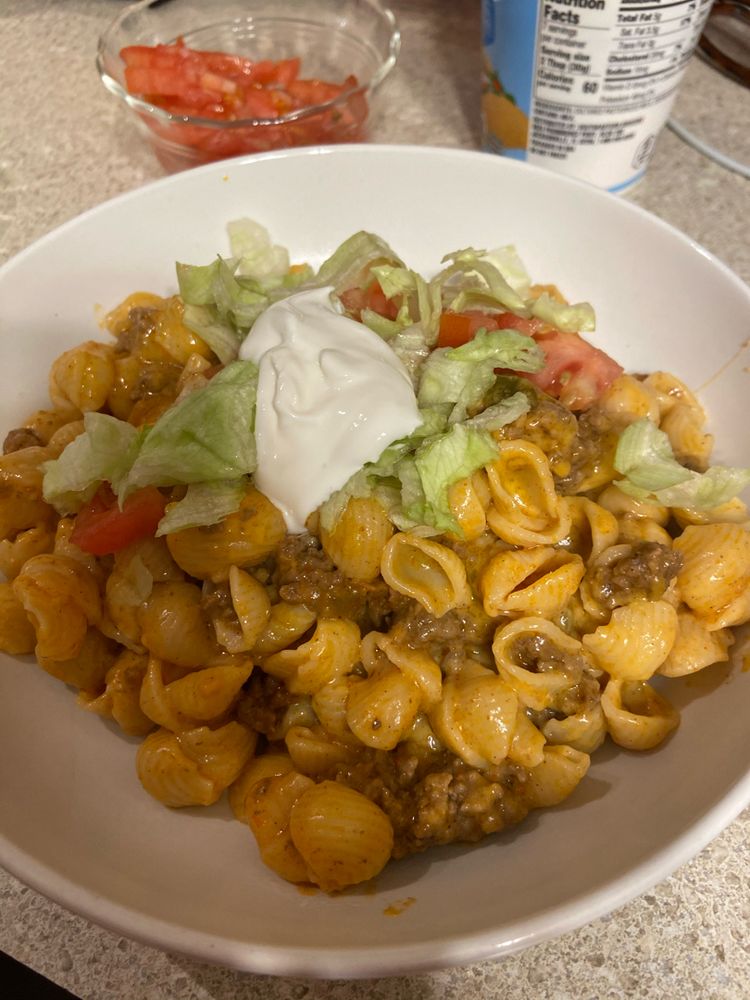
This dish is perfect for a busy weeknight. Quick and easy, one-pan meal that will up your game. It is spicy, creamy, mouthwatering, and outrageously delicious! All the amazing flavors burst in your mouth in every bite. Take taco Tuesday to the next level with this awesome Cheesy Taco Pasta Shells. A savory taco fix that you can make whenever. I highly recommended to top it up with sour cream and some chopped tomatoes for that next level scrumptiousness. This dish is one of my family’s most requested. Honestly, we can eat this every day! Have a blast always with this palate-pleasing dinner meal that your family will want over and over again. Try it now and taste for yourself. Know what everyone is raving about and I am pretty sure that you’ll rate this 5 star. Undeniably a keeper and to die for!

Ingredients

1/2 pound large or medium shells pasta

1 pound ground beef

1 medium onion, diced

1 packet taco seasoning

1/4 cup cream cheese, softened

3/4 cup water (or beef broth)

1 cup jarred salsa

1 tsp olive oil

1 cup shredded cheddar cheese

How to make Cheesy Taco Pasta Shells

Step 1: According to the package direction, cook the shelled pasta. Drain and set aside.

Step 2: Add the ground beef, oil, and diced onion in a skillet. Cook over medium heat, chop, and stir the beef until completely browned.

Step 3: Drain any excess grease before adding in the taco seasoning. Pour in 3/4 cup water or beef broth and stir until the liquid is completely gone.

Step 4: Add the pasta in the skillet. Stir until completely combined with the salsa, cheese, and cream cheese. Cook until heated through.

Step 5: Remove from the heat and top with sour cream if wanted.

Step 6: Serve and enjoy!

Cheesy Taco Pasta Shells!

Rebecca This dish is perfect for a busy weeknight. Quick and easy, one-pan meal that will up your game. It is spicy, creamy, mouthwatering, and outrageously delicious! All the amazing flavors… Main Dish Recipes Cheesy Taco Pasta Shells! European Print This
Nutrition facts: 200 calories 20 grams fat
Rating: 3.8/5
( 8 voted )

Ingredients

  • 1/2 pound large or medium shells pasta
  • 1 pound ground beef
  • 1 medium onion, diced
  • 1 packet taco seasoning
  • 1/4 cup cream cheese, softened
  • 3/4 cup water (or beef broth)
  • 1 cup jarred salsa
  • 1 tsp olive oil
  • 1 cup shredded cheddar cheese

Instructions

Step 1: According to the package direction, cook the shelled pasta. Drain and set aside.

Step 2: Add the ground beef, oil, and diced onion in a skillet. Cook over medium heat, chop, and stir the beef until completely browned.

Step 3: Drain any excess grease before adding in the taco seasoning. Pour in 3/4 cup water or beef broth and stir until the liquid is completely gone.

Step 4: Add the pasta in the skillet. Stir until completely combined with the salsa, cheese, and cream cheese. Cook until heated through.

Step 5: Remove from the heat and top with sour cream if wanted.

Step 6: Serve and enjoy!

September 23, 2020 0 comment
0 FacebookTwitterPinterestEmail
Main Dish Recipes

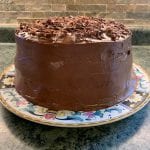
Hersheys Chocolate Cake with Cream Cheese Filling & Chocolate Cream Cheese Buttercream

by Rebecca September 23, 2020
written by Rebecca

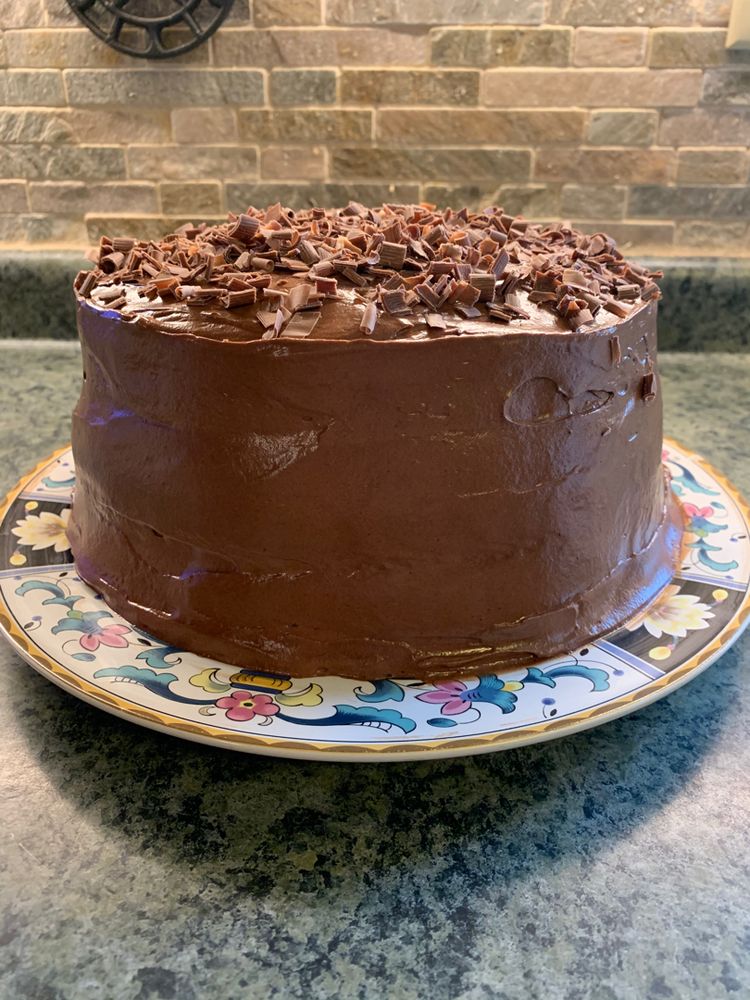
This fantasy three-layer chocolate cake is filled with whipped cream icing and dramatically frosted with Chocolate Cream Cheese Buttermilk. A made from scratch cake that does not need an incredible amount of effort.

Ingredients

Chocolate Cake:

Adapted from Hershey’s

2 cups of sugar

1 & 3/4 cups flour

3/4 cup cocoa powder

1 & 1/2 teaspoons baking powder

1 & 1/2 teaspoons baking soda

1 teaspoon salt

2 eggs

1 cup milk or heavy cream

1/2 cup vegetable oil

2 teaspoons vanilla

1 cup boiling water

For the Whipped Cream Cheese Buttercream:

1 cup cream cheese

3/4 cup butter

1/2 tablespoon vanilla extract

4 cups powdered sugar

For the Chocolate Cream Cheese Buttercream:

3/4 cup of butter

3/4 cup of cream cheese

1 & 3/4 cups Hersheys cocoa powder

5 cups powdered sugar

1/2 cup + 3 tablespoons whole Milk

2 teaspoons vanilla extract

How to make Hershey’s Chocolate Cake with Cream Cheese Filling & Chocolate Cream Cheese Buttercream

To make the Hersheys Chocolate Cake:

Step 1: Prepare the oven. Preheat it to 350 degrees F.

Step 2: Using a cooking spray, grease 3 round cake pans. Slightly dust the pans with flour and set aside.

Step 3: Combine the flour, Hershey’s cocoa, sugar, baking powder, baking soda, and salt in a large mixing bowl or a Kitchenaid mixer.

Step 4: Stir in the milk, oil, and vanilla extract until incorporated. Then, pour in the boiling water and mix to create a very thin batter.

Step 5: Divide the batter into the prepared cake pans.

Step 6: Place inside the preheated oven and bake for about 30 to 35 minutes or until a toothpick inserted in the center of the cake comes out clean.

Step 7: Remove from the oven and let the cakes cool in the pan for at least 10 to 15 minutes before transferring on wire racks to cool completely.

Step 8: To make sure the cakes are even, use a cake leveler if available or you can use a serrated knife instead.

To make the Whipped Cream Cheese Buttercream Frosting:

Step 1: Meanwhile, with a mixer, whip the cream cheese with butter on high speed for 30 seconds.

Step 2: Add in half a cup of powdered sugar at a time, making sure to mix every after each addition. Add in the vanilla extract and continue to whip for another 30 seconds on high, then, a minute more until nice and fluffy.

To make the Chocolate Cream Cheese Buttercream Frosting:

Step 1: Add the butter and cream cheese in a large bowl. Beat using an electric mixer and start adding in the powdered sugar half a cup at a time.

Step 2: Add in the cocoa, then, the milk, followed by the vanilla. Mix well.

Step 3: Beat everything together until completely combined.

Step 4: For a minute more until fluffy, beat for another minute on high.

To assemble the cake:

Step 1: To make sure a perfect stacking of the cake layers, use a leveler to level the cakes.

Step 2: On a cake plate, place the bottom layer.

Step 3: Spoon 3/4 cup cream cheese buttercream filling on top of the bottom cake layer and evenly spread.

Step 4: Place the second layer on top and do the same for the buttermilk filling.

Step 5: Then, top it off with the last cake layer.

Step 6: With the rest of the whipped cream cheese buttercream, frost just the very top of the cake. Place the frosted cake in the fridge to set for about 15 minutes.

Step 7: Once the frosting has set, remove the cake from the fridge and gently frost the top layer with the chocolate cream cheese buttermilk and all sides of the cake.

Step 8: Place in the fridge to set until ready to serve. Enjoy!

Hersheys Chocolate Cake with Cream Cheese Filling & Chocolate Cream Cheese Buttercream

Rebecca This fantasy three-layer chocolate cake is filled with whipped cream icing and dramatically frosted with Chocolate Cream Cheese Buttermilk. A made from scratch cake that does not need an incredible… Main Dish Recipes Hersheys Chocolate Cake with Cream Cheese Filling & Chocolate Cream Cheese Buttercream European Print This
Nutrition facts: 200 calories 20 grams fat
Rating: 5.0/5
( 1 voted )

Ingredients

  • Chocolate Cake:
  • Adapted from Hershey's
  • 2 cups of sugar
  • 1 & 3/4 cups flour
  • 3/4 cup cocoa powder
  • 1 & 1/2 teaspoons baking powder
  • 1 & 1/2 teaspoons baking soda
  • 1 teaspoon salt
  • 2 eggs
  • 1 cup milk or heavy cream
  • 1/2 cup vegetable oil
  • 2 teaspoons vanilla
  • 1 cup boiling water
  • For the Whipped Cream Cheese Buttercream:
  • 1 cup cream cheese
  • 3/4 cup butter
  • 1/2 tablespoon vanilla extract
  • 4 cups powdered sugar
  • For the Chocolate Cream Cheese Buttercream:
  • 3/4 cup of butter
  • 3/4 cup of cream cheese
  • 1 & 3/4 cups Hersheys cocoa powder
  • 5 cups powdered sugar
  • 1/2 cup + 3 tablespoons whole Milk
  • 2 teaspoons vanilla extract

Instructions

To make the Hersheys Chocolate Cake:

Step 1: Prepare the oven. Preheat it to 350 degrees F.

Step 2: Using a cooking spray, grease 3 round cake pans. Slightly dust the pans with flour and set aside.

Step 3: Combine the flour, Hershey's cocoa, sugar, baking powder, baking soda, and salt in a large mixing bowl or a Kitchenaid mixer.

Step 4: Stir in the milk, oil, and vanilla extract until incorporated. Then, pour in the boiling water and mix to create a very thin batter.

Step 5: Divide the batter into the prepared cake pans.

Step 6: Place inside the preheated oven and bake for about 30 to 35 minutes or until a toothpick inserted in the center of the cake comes out clean.

Step 7: Remove from the oven and let the cakes cool in the pan for at least 10 to 15 minutes before transferring on wire racks to cool completely.

Step 8: To make sure the cakes are even, use a cake leveler if available or you can use a serrated knife instead.

To make the Whipped Cream Cheese Buttercream Frosting:

Step 1: Meanwhile, with a mixer, whip the cream cheese with butter on high speed for 30 seconds.

Step 2: Add in half a cup of powdered sugar at a time, making sure to mix every after each addition. Add in the vanilla extract and continue to whip for another 30 seconds on high, then, a minute more until nice and fluffy.

To make the Chocolate Cream Cheese Buttercream Frosting:

Step 1: Add the butter and cream cheese in a large bowl. Beat using an electric mixer and start adding in the powdered sugar half a cup at a time.

Step 2: Add in the cocoa, then, the milk, followed by the vanilla. Mix well.

Step 3: Beat everything together until completely combined.

Step 4: For a minute more until fluffy, beat for another minute on high.

To assemble the cake:

Step 1: To make sure a perfect stacking of the cake layers, use a leveler to level the cakes.

Step 2: On a cake plate, place the bottom layer.

Step 3: Spoon 3/4 cup cream cheese buttercream filling on top of the bottom cake layer and evenly spread.

Step 4: Place the second layer on top and do the same for the buttermilk filling.

Step 5: Then, top it off with the last cake layer.

Step 6: With the rest of the whipped cream cheese buttercream, frost just the very top of the cake. Place the frosted cake in the fridge to set for about 15 minutes.

Step 7: Once the frosting has set, remove the cake from the fridge and gently frost the top layer with the chocolate cream cheese buttermilk and all sides of the cake.

Step 8: Place in the fridge to set until ready to serve. Enjoy!

September 23, 2020 0 comment
0 FacebookTwitterPinterestEmail
Main Dish Recipes

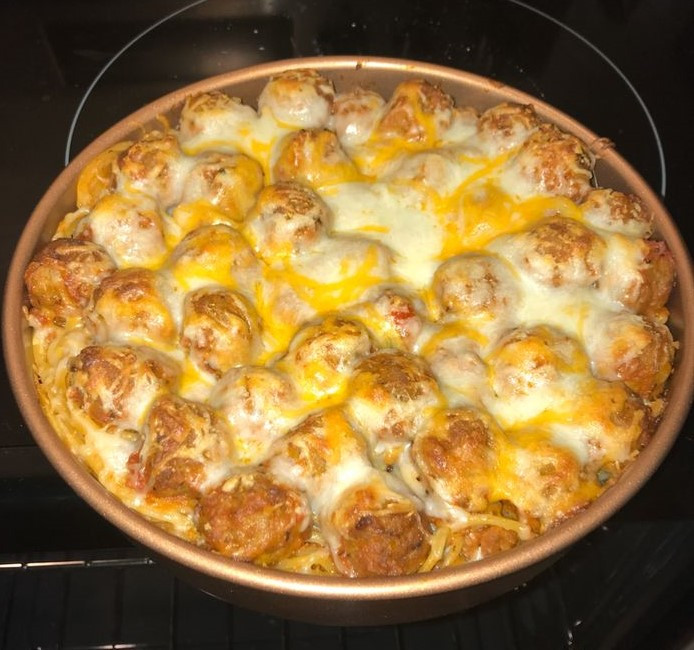
Baked Spaghetti & Meatballs

by Rebecca September 23, 2020
written by Rebecca

This family-friendly meal is cooked in one-pan and top with lots of cheese. This recipe makes your ordinary spaghetti and meatballs extraordinary. Whip it up in a heartbeat and bake until hot, bubbly, and the cheese has melted. A comforting, super satisfying, mouthwatering meal that is most loved by everyone. A perfect make-ahead dish that you pop in the oven when ready to serve. Guaranteed delicious and the best!

Ingredients

Meatballs (I used about 1½ doz homemade meatballs) **Meatballs were fully cooked

24 oz jar marinara sauce (I used San Marzano Sauce)

½ yellow onion (diced)

3 cloves garlic (crushed)

1 tsp Italian seasoning

2 tbsp olive oil

¾ # spaghetti noodles

1-2 cups grated cheese (I used half Colby-jack, half mozzarella)

½ cup grated parmesan

How to make Baked Spaghetti & Meatballs

Step 1: Add olive oil in a large cast-iron skillet. Saute the onions over medium-low heat. Add in the garlic and continue to stir until the onions are tender.

Step 2: Add in the cooked meatballs.

Step 3: Pour in the marinara sauce and a teaspoon of Italian seasoning.

Step 4: Heat the sauce and meatballs for about 20 to 30 minutes over medium-low heat.

Step 5: Cook the spaghetti noodles in another large pot according to package instruction. Don’t forget to undercook the noodles by 2 minutes.

Step 6: Scoop the meatballs with a large slotted spoon from the sauce. Set aside.

Step 7: Using a large slotted spoon, scoop the cooked spaghetti into the marinara sauce. Then, add in half a cup of pasta cooking water. Stir gently until the pasta is completely coated with the sauce.

Step 8: Place the cooked meatballs over the spaghetti.

Step 9: Sprinkle over the grated cheese and parmesan cheese.

Step 10: Place in the oven and bake for about 20 to 30 minutes at 350 degrees or until hot, bubbly, and the cheese has melted.

Baked Spaghetti & Meatballs

Rebecca This family-friendly meal is cooked in one-pan and top with lots of cheese. This recipe makes your ordinary spaghetti and meatballs extraordinary. Whip it up in a heartbeat and bake… Main Dish Recipes Baked Spaghetti & Meatballs European Print This
Nutrition facts: 200 calories 20 grams fat
Rating: 5.0/5
( 1 voted )

Ingredients

  • Meatballs (I used about 1½ doz homemade meatballs) **Meatballs were fully cooked
  • 24 oz jar marinara sauce (I used San Marzano Sauce)
  • ½ yellow onion (diced)
  • 3 cloves garlic (crushed)
  • 1 tsp Italian seasoning
  • 2 tbsp olive oil
  • ¾ # spaghetti noodles
  • 1-2 cups grated cheese (I used half Colby-jack, half mozzarella)
  • ½ cup grated parmesan

Instructions

Step 1: Add olive oil in a large cast-iron skillet. Saute the onions over medium-low heat. Add in the garlic and continue to stir until the onions are tender.

Step 2: Add in the cooked meatballs.

Step 3: Pour in the marinara sauce and a teaspoon of Italian seasoning.

Step 4: Heat the sauce and meatballs for about 20 to 30 minutes over medium-low heat.

Step 5: Cook the spaghetti noodles in another large pot according to package instruction. Don't forget to undercook the noodles by 2 minutes.

Step 6: Scoop the meatballs with a large slotted spoon from the sauce. Set aside.

Step 7: Using a large slotted spoon, scoop the cooked spaghetti into the marinara sauce. Then, add in half a cup of pasta cooking water. Stir gently until the pasta is completely coated with the sauce.

Step 8: Place the cooked meatballs over the spaghetti.

Step 9: Sprinkle over the grated cheese and parmesan cheese.

Step 10: Place in the oven and bake for about 20 to 30 minutes at 350 degrees or until hot, bubbly, and the cheese has melted.

September 23, 2020 0 comment
0 FacebookTwitterPinterestEmail
Main Dish Recipes

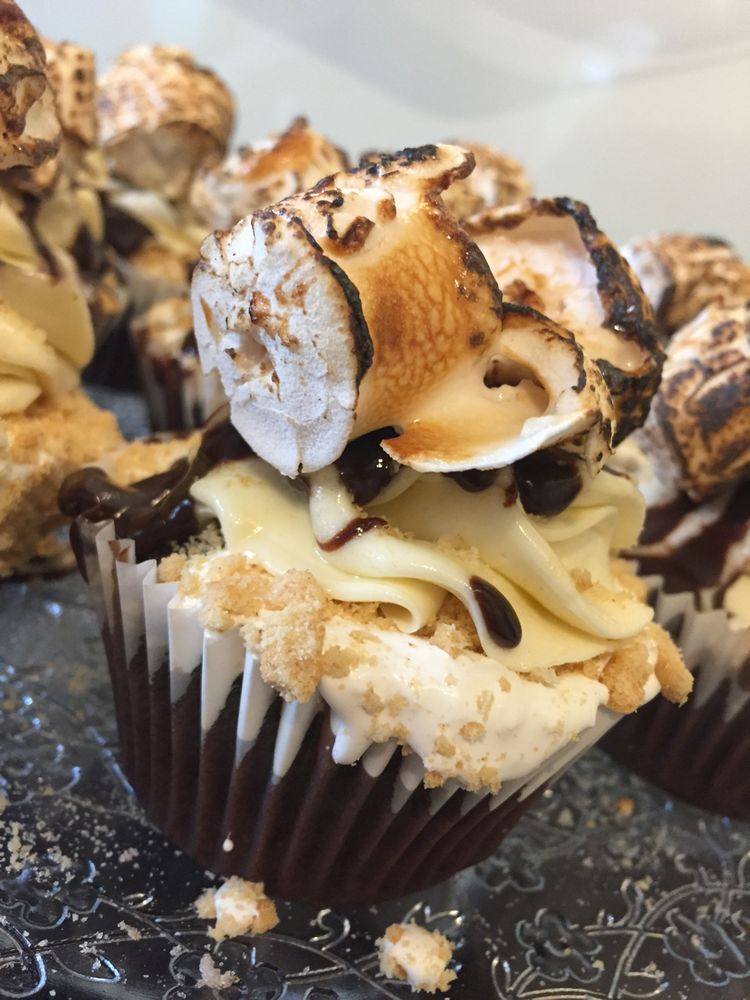
S’mores Cupcake Recipe

by Rebecca September 23, 2020
written by Rebecca

PREP TIME: 20 minutes | COOK TIME: 18 minutes | ADDITIONAL TIME: 15 minutes | TOTAL TIME: 53 minutes | YIELD: 12

Always have a reason to enjoy S’mores. These moist chocolate cupcakes are filled in the center with marshmallow cream and a drizzle of chocolate ganache. And it’ll not be S’mores without graham so threw in some graham cracker crumbs in them.

Ingredients

Chocolate Cupcake Batter:

1/3 cup chocolate chips – milk or dark (57 grams)

1/3 cup baking cocoa powder (32 grams)

3/4 cup hot water (177 grams)

1 tsp instant espresso or instant coffee (2 grams)

3/4 cup all-purpose flour (98 grams)

3/4 cup granulated sugar (150 grams)

1/2 teaspoon salt (2 grams)

1/2 tsp baking soda (3 grams)

1/3 cup vegetable oil (73 grams)

2 eggs, room temperature (114 grams)

1 tsp white vinegar (4 grams)

1 tsp vanilla bean paste or vanilla extract (4 grams)

Marshmallow Cream Filling

1 can of marshmallow fluff (7.5 oz jar)

2 Tbsp heavy cream (30 grams)

Vanilla Bean Frosting:

1 cup (or 2 sticks) unsalted butter, room temperature (226 grams)

3 cups powdered sugar (375 grams)

2 tsp vanilla bean paste or vanilla extract

1/2 tsp salt (2 grams)

1/4 cup heavy cream (60 grams)

Additional Decorations:

1 cup graham cracker crumbs

1/2 cup chocolate ganache (to drizzle)

Wilton 1M frosting tip

12 marshmallows

How to make Smores Cupcake

Chocolate Cupcake Recipe:

Step 1: Prepare the oven. Preheat it to 350 degrees F.

Step 2: Line the muffin pan with 12 cupcake liners.

Step 3: In a large bowl, add 3/4 cup of very hot water. Add in a teaspoon of instant coffee or espresso powder. Lightly stir until dissolved.

Step 4: Add in 1/3 cup chocolate chips and another 1/3 of cocoa powder. Set aside for 2 minutes to melt the chocolate chips. Once melted, stir the mixture until smooth.

Step 5: Sift 3/4 cup flour, 3/4 cup sugar, half teaspoon baking soda, and half teaspoon salt into the chocolate espresso mixture. Stir well until just combined. Using a spatula, scrape the sides and bottom of the bowl as needed.

Step 6: Add in the eggs and stir until just combined.

Step 7: Stir in 1/3 cup vegetable oil, a teaspoon of vinegar, and vanilla until the batter is smooth.

Step 8: Fill to about 3/4 full the cupcake liners.

Step 9: Place inside the preheated oven and bake for about 18 minutes or until a toothpick inserted in the center of the cupcake comes out clean or with least crumbs.

Step 10: Remove from the oven and let the cupcakes cool in the pans for at least 10 minutes before transferring them on a wire rack to cool completely.

To make the Marshmallow Cream Filling:

Step 1: In a medium-sized bowl, scoop the marshmallow fluff. Add in the heavy cream.

Step 2: Mix with a spoon until smooth.

Step 3: Transfer the filling in a small piping bag and set aside.

To make the Vanilla Bean Buttercream:

Step 1: With a paddle or whisk attachment, beat the butter for 30 seconds on medium speed until smooth.

Step 2: Adjust the speed to low and mix in the salt and vanilla bean paste or vanilla extract.

Step 3: Gradually add in the powdered sugar, a cup at a time, and alternately with small splashes of cream.

step 4: Beat on low speed until everything is incorporated and you reached your desired consistency.

Step 5: You can add an extra tablespoon of heavy cream if the frosting is too thick. Or add in half a cup of powdered sugar if it is too thin.

Step 6: Stir until the frosting is super frost either by hand or with a rubber spatula.

Step 7: Transfer the frosting in a piping bag fitted with a Wilton 1M tip. Set aside.

Time to decorate the S’mores Cupcakes:

Step 1: To remove the center of the fully cooled cupcakes, use a 1-inch circle cutter or a small knife.

Step 2: In a small bowl, add the graham cracker crumbs.

Step 3: Into the cutout center of each cupcake, add a teaspoon of graham cracker crumbs. Fill the hole til the top with marshmallow cream.

Step 4: Drizzle chocolate ganache on top of the marshmallow cream. And pipe a small swirl of frosting on top of the filling.

Step 5: To fully cover the frosting, dunk first the cupcake frosting into the graham cracker crumbs.

Step 6: On top of the graham cracker dusted base, pipe a large swirl.

Step 7: Then, drizzle again with chocolate ganache and top each ganache with toasted marshmallow.

Notes:

With this recipe, you can make 40 mini chocolate cupcakes. Just use mini muffin tins and bake for about 9 to 10 minutes.

What is best is you can make these cupcakes in advance. Store the unfrosted cupcakes in an airtight container for up to 2 days at room temperature, a week in the fridge, and 3 months when frozen.

For the leftover buttercream, store them in the fridge for up to 2 weeks.

Nutrition Information:

Amount Per Serving Calories: 436 | Total Fat: 16g | Saturated Fat: 6g | Trans Fat: 0g | Unsaturated Fat: 9g | Cholesterol: 45mg | Sodium: 322mg | Carbohydrates: 70g | Fiber: 1g | Sugar: 54g | Protein: 5g

S’mores Cupcake Recipe

Rebecca PREP TIME: 20 minutes | COOK TIME: 18 minutes | ADDITIONAL TIME: 15 minutes | TOTAL TIME: 53 minutes | YIELD: 12 Always have a reason to enjoy S’mores. These… Main Dish Recipes S’mores Cupcake Recipe European Print This
Serves: 12 Prep Time: 20 mins Cooking Time: 33 mins 33 mins
Nutrition facts: 436 calories 16 fat
Rating: 5.0/5
( 1 voted )

Ingredients

  • Chocolate Cupcake Batter:
  • 1/3 cup chocolate chips - milk or dark (57 grams)
  • 1/3 cup baking cocoa powder (32 grams)
  • 3/4 cup hot water (177 grams)
  • 1 tsp instant espresso or instant coffee (2 grams)
  • 3/4 cup all-purpose flour (98 grams)
  • 3/4 cup granulated sugar (150 grams)
  • 1/2 teaspoon salt (2 grams)
  • 1/2 tsp baking soda (3 grams)
  • 1/3 cup vegetable oil (73 grams)
  • 2 eggs, room temperature (114 grams)
  • 1 tsp white vinegar (4 grams)
  • 1 tsp vanilla bean paste or vanilla extract (4 grams)
  • Marshmallow Cream Filling
  • 1 can of marshmallow fluff (7.5 oz jar)
  • 2 Tbsp heavy cream (30 grams)
  • Vanilla Bean Frosting:
  • 1 cup (or 2 sticks) unsalted butter, room temperature (226 grams)
  • 3 cups powdered sugar (375 grams)
  • 2 tsp vanilla bean paste or vanilla extract
  • 1/2 tsp salt (2 grams)
  • 1/4 cup heavy cream (60 grams)
  • Additional Decorations:
  • 1 cup graham cracker crumbs
  • 1/2 cup chocolate ganache (to drizzle)
  • Wilton 1M frosting tip
  • 12 marshmallows

Instructions

Chocolate Cupcake Recipe:

Step 1: Prepare the oven. Preheat it to 350 degrees F.

Step 2: Line the muffin pan with 12 cupcake liners.

Step 3: In a large bowl, add 3/4 cup of very hot water. Add in a teaspoon of instant coffee or espresso powder. Lightly stir until dissolved.

Step 4: Add in 1/3 cup chocolate chips and another 1/3 of cocoa powder. Set aside for 2 minutes to melt the chocolate chips. Once melted, stir the mixture until smooth.

Step 5: Sift 3/4 cup flour, 3/4 cup sugar, half teaspoon baking soda, and half teaspoon salt into the chocolate espresso mixture. Stir well until just combined. Using a spatula, scrape the sides and bottom of the bowl as needed.

Step 6: Add in the eggs and stir until just combined.

Step 7: Stir in 1/3 cup vegetable oil, a teaspoon of vinegar, and vanilla until the batter is smooth.

Step 8: Fill to about 3/4 full the cupcake liners.

Step 9: Place inside the preheated oven and bake for about 18 minutes or until a toothpick inserted in the center of the cupcake comes out clean or with least crumbs.

Step 10: Remove from the oven and let the cupcakes cool in the pans for at least 10 minutes before transferring them on a wire rack to cool completely.

To make the Marshmallow Cream Filling:

Step 1: In a medium-sized bowl, scoop the marshmallow fluff. Add in the heavy cream.

Step 2: Mix with a spoon until smooth.

Step 3: Transfer the filling in a small piping bag and set aside.

To make the Vanilla Bean Buttercream:

Step 1: With a paddle or whisk attachment, beat the butter for 30 seconds on medium speed until smooth.

Step 2: Adjust the speed to low and mix in the salt and vanilla bean paste or vanilla extract.

Step 3: Gradually add in the powdered sugar, a cup at a time, and alternately with small splashes of cream.

step 4: Beat on low speed until everything is incorporated and you reached your desired consistency.

Step 5: You can add an extra tablespoon of heavy cream if the frosting is too thick. Or add in half a cup of powdered sugar if it is too thin.

Step 6: Stir until the frosting is super frost either by hand or with a rubber spatula.

Step 7: Transfer the frosting in a piping bag fitted with a Wilton 1M tip. Set aside.

Time to decorate the S'mores Cupcakes:

Step 1: To remove the center of the fully cooled cupcakes, use a 1-inch circle cutter or a small knife.

Step 2: In a small bowl, add the graham cracker crumbs.

Step 3: Into the cutout center of each cupcake, add a teaspoon of graham cracker crumbs. Fill the hole til the top with marshmallow cream.

Step 4: Drizzle chocolate ganache on top of the marshmallow cream. And pipe a small swirl of frosting on top of the filling.

Step 5: To fully cover the frosting, dunk first the cupcake frosting into the graham cracker crumbs.

Step 6: On top of the graham cracker dusted base, pipe a large swirl.

Step 7: Then, drizzle again with chocolate ganache and top each ganache with toasted marshmallow.

Notes:

With this recipe, you can make 40 mini chocolate cupcakes. Just use mini muffin tins and bake for about 9 to 10 minutes.

What is best is you can make these cupcakes in advance. Store the unfrosted cupcakes in an airtight container for up to 2 days at room temperature, a week in the fridge, and 3 months when frozen.

For the leftover buttercream, store them in the fridge for up to 2 weeks.

September 23, 2020 0 comment
0 FacebookTwitterPinterestEmail
Main Dish Recipes

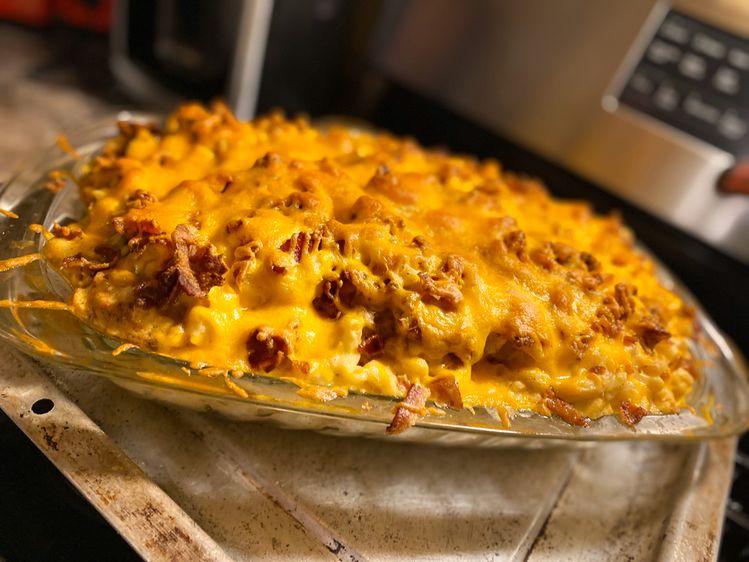
Cheesy Crack Chicken Casserole

by Rebecca September 23, 2020
written by Rebecca

Serves: 8 servings | Prep time: 30 minutes | Cook time: 30 minutes | Total time: 1 hr

This mouthwatering casserole is always a crowd favorite. Outrageously cheesy, filled with tender chicken, and topped with crunchy bacon. This is the perfect dish to feed the whole town!

Ingredients

3 cups uncooked elbow macaroni

Bacon:

2 tablespoons butter

12 slices bacon (diced into 1-2 inch pieces)

Chicken:

1.5-2 lbs uncooked chicken (cubed)

1/4 teaspoon salt

1/4 teaspoon ground black pepper

1/2 tablespoon paprika

Veggies:

1 green bell pepper (diced)

1 medium onion (diced)

2 tablespoons minced garlic

Cheesy Mixture:

3 tablespoons butter

1/3 cup all-purpose flour

3 cups of milk

1 package Dry Ranch Mix (optional)

1 package (8oz) cream cheese (room temperature)

3 cups shredded Cheddar cheese

1 can (10 3/4 oz) cream of chicken soup, condensed

Toppings:

Cooked bacon

1 cup shredded cheddar cheese

1/4 cup panko crispy bread crumbs (optional)

How to make Cheesy Crack Chicken Casserole

Step 1: Prepare the oven. Preheat it to 375 degrees F.

Step 2: As directed on the package, cook the macaroni, then, drain.

To prepare the Bacon:

Step 3: Melt two tablespoons of butter in a large skillet over medium-high heat. Once melted, add the bacon, cook, and frequently stir until crispy. Remove the cooked bacon from the skillet and set aside. Drain some of the grease leaving about 2 tablespoons of grease in the skillet.

To prepare the Chicken:

Step 4: In the skillet, add the cubed chicken pieces. Season with salt, pepper, and paprika. Cook until no longer pink in the center, stirring frequently until golden. Remove the cooked chicken from the skillet. Set aside.

To prepare the Veggies:

Step 5: Saute the diced onion, diced bell pepper, and minced garlic in the skillet for about 3 to 5 minutes until soft and tender. take them out of the skillet and set aside.

To make the Cheesy Mixture:

Step 6: Melt 3 tablespoons of butter in the same skillet on medium heat. Once melted, stir in the flour. Whisking until paste forms.

Step 7: Slowly add in the milk. Beat with a whisk until incorporated.

Step 8: Then, if using a Ranch Mix, add it in and stir.

Step 9: Add in the condensed cream of chicken soup and cream cheese. Stir until thoroughly combined.

Step 10: Lastly, stir in 3 cups of cheddar cheese before removing the skillet from the heat.

To arrange the casserole:

Step 11: In a large bowl, add the cooked pasta, chicken cubes, vegetables, and cheese mixture. Mix well until combine.

Step 12: Place into a 13 x 9-inch or 3-quart baking dish.

Step 13: Top the mixture with the cooked bacon, a cup of shredded cheese, and some bread crumbs if desired.

Let’s Bake:

Step 14: Place inside the preheated oven and bake for about 20 to 30 minutes until bubbly and the cheese has melted.

Step 15: Remove from the oven and serve warm. Enjoy!

Nutrition facts:

0 Calories: 958 Carbohydrates: 58 Protein: 40 Fat: 62 Saturated Fat: 30 Cholesterol: 188 Sodium: 1172 Potassium: 590 Fiber: 2 Sugar: 8 Vitamin A: 1710 Vitamin C: 13.6 Calcium: 577 Iron: 2.7

Cheesy Crack Chicken Casserole

Rebecca Serves: 8 servings | Prep time: 30 minutes | Cook time: 30 minutes | Total time: 1 hr This mouthwatering casserole is always a crowd favorite. Outrageously cheesy, filled with… Main Dish Recipes Cheesy Crack Chicken Casserole European Print This
Serves: 8 Prep Time: 30 mins Cooking Time: 30 mins 30 mins
Nutrition facts: 200 calories 40 fat
Rating: 4.3/5
( 4 voted )

Ingredients

  • 3 cups uncooked elbow macaroni
  • Bacon:
  • 2 tablespoons butter
  • 12 slices bacon (diced into 1-2 inch pieces)
  • Chicken:
  • 1.5-2 lbs uncooked chicken (cubed)
  • 1/4 teaspoon salt
  • 1/4 teaspoon ground black pepper
  • 1/2 tablespoon paprika
  • Veggies:
  • 1 green bell pepper (diced)
  • 1 medium onion (diced)
  • 2 tablespoons minced garlic
  • Cheesy Mixture:
  • 3 tablespoons butter
  • 1/3 cup all-purpose flour
  • 3 cups of milk
  • 1 package Dry Ranch Mix (optional)
  • 1 package (8oz) cream cheese (room temperature)
  • 3 cups shredded Cheddar cheese
  • 1 can (10 3/4 oz) cream of chicken soup, condensed
  • Toppings:
  • Cooked bacon
  • 1 cup shredded cheddar cheese
  • 1/4 cup panko crispy bread crumbs (optional)

Instructions

Step 1: Prepare the oven. Preheat it to 375 degrees F.

Step 2: As directed on the package, cook the macaroni, then, drain.

To prepare the Bacon:

Step 3: Melt two tablespoons of butter in a large skillet over medium-high heat. Once melted, add the bacon, cook, and frequently stir until crispy. Remove the cooked bacon from the skillet and set aside. Drain some of the grease leaving about 2 tablespoons of grease in the skillet.

To prepare the Chicken:

Step 4: In the skillet, add the cubed chicken pieces. Season with salt, pepper, and paprika. Cook until no longer pink in the center, stirring frequently until golden. Remove the cooked chicken from the skillet. Set aside.

To prepare the Veggies:

Step 5: Saute the diced onion, diced bell pepper, and minced garlic in the skillet for about 3 to 5 minutes until soft and tender. take them out of the skillet and set aside.

To make the Cheesy Mixture:

Step 6: Melt 3 tablespoons of butter in the same skillet on medium heat. Once melted, stir in the flour. Whisking until paste forms.

Step 7: Slowly add in the milk. Beat with a whisk until incorporated.

Step 8: Then, if using a Ranch Mix, add it in and stir.

Step 9: Add in the condensed cream of chicken soup and cream cheese. Stir until thoroughly combined.

Step 10: Lastly, stir in 3 cups of cheddar cheese before removing the skillet from the heat.

To arrange the casserole:

Step 11: In a large bowl, add the cooked pasta, chicken cubes, vegetables, and cheese mixture. Mix well until combine.

Step 12: Place into a 13 x 9-inch or 3-quart baking dish.

Step 13: Top the mixture with the cooked bacon, a cup of shredded cheese, and some bread crumbs if desired.

Let's Bake:

Step 14: Place inside the preheated oven and bake for about 20 to 30 minutes until bubbly and the cheese has melted.

Step 15: Remove from the oven and serve warm. Enjoy!

September 23, 2020 0 comment
0 FacebookTwitterPinterestEmail
Main Dish Recipes

BANANA CAKE WITH CREAM CHEESE FROSTING

by Rebecca September 23, 2020
written by Rebecca

Prep Time: 30 mins | Cook Time: 40 mins

I will always prefer this decadent banana cake with cream cheese frosting over anything. It is a super moist, flavorful cake with a heavenly frosting that will have you screaming your lungs out! This easy, simple cake you can make at the comfort of your home any time. This will easily win your heart in one bite.

Ingredients

For The Banana Cake:

2 cups all-purpose flour

1 tsp baking soda

1/4 tsp salt

1/2 cup butter, softened

1 1/3 cups sugar

2 eggs

1 cup sour cream

1 tsp vanilla extract

4 medium bananas, mashed (about 2 cups)

For The Cream Cheese Frosting:

8 oz cream cheese, room temperature

1/2 cup butter, room temperature

1 tsp vanilla extract

3 cups powdered sugar

How to make Banana Cake with Cream Cheese Frosting

Step 1: Prepare the oven. Preheat it to 350 degrees.

Step 2: Using a non-stick spray, grease two 8-inch cake pans.

To make the Banana Cake:

Step 1: Add the butter and sugar in a large bowl. Beat until creamy.

Step 2: Add in the eggs and beat until incorporated before beating in the sour cream and vanilla.

Step 3: Then, add in the flour, baking soda, and salt. Mix until just combined.

Step 4: Mix in the mashed bananas until incorporated.

Step 5: Divide the batter equally into the prepared cake pans.

Step 6: Place inside the preheated oven and bake for about 35 to 40 minutes or until a toothpick inserted in the center of the cake comes out clean.

To make the Cream Cheese Frosting:

Step 1: Place the cream cheese and butter in a medium bowl. Beat until combined, then, add in the vanilla. Mix well.

Step 2: Slowly add in the powdered sugar. Beating until smooth and creamy.

Step 3: Frost the cake once cooled. Enjoy!

BANANA CAKE WITH CREAM CHEESE FROSTING

Rebecca Prep Time: 30 mins | Cook Time: 40 mins I will always prefer this decadent banana cake with cream cheese frosting over anything. It is a super moist, flavorful cake… Main Dish Recipes BANANA CAKE WITH CREAM CHEESE FROSTING European Print This
Prep Time: 30 mins Cooking Time: 40 mins 40 mins
Nutrition facts: 200 calories 20 grams fat
Rating: 5.0/5
( 1 voted )

Ingredients

  • For The Banana Cake:
  • 2 cups all-purpose flour
  • 1 tsp baking soda
  • 1/4 tsp salt
  • 1/2 cup butter, softened
  • 1 1/3 cups sugar
  • 2 eggs
  • 1 cup sour cream
  • 1 tsp vanilla extract
  • 4 medium bananas, mashed (about 2 cups)
  • For The Cream Cheese Frosting:
  • 8 oz cream cheese, room temperature
  • 1/2 cup butter, room temperature
  • 1 tsp vanilla extract
  • 3 cups powdered sugar

Instructions

Step 1: Prepare the oven. Preheat it to 350 degrees.

Step 2: Using a non-stick spray, grease two 8-inch cake pans.

To make the Banana Cake:

Step 1: Add the butter and sugar in a large bowl. Beat until creamy.

Step 2: Add in the eggs and beat until incorporated before beating in the sour cream and vanilla.

Step 3: Then, add in the flour, baking soda, and salt. Mix until just combined.

Step 4: Mix in the mashed bananas until incorporated.

Step 5: Divide the batter equally into the prepared cake pans.

Step 6: Place inside the preheated oven and bake for about 35 to 40 minutes or until a toothpick inserted in the center of the cake comes out clean.

To make the Cream Cheese Frosting:

Step 1: Place the cream cheese and butter in a medium bowl. Beat until combined, then, add in the vanilla. Mix well.

Step 2: Slowly add in the powdered sugar. Beating until smooth and creamy.

Step 3: Frost the cake once cooled. Enjoy!

September 23, 2020 0 comment
0 FacebookTwitterPinterestEmail
Newer Posts
Older Posts

Popular Posts

  • 1

    Crispy Crunchy Parmesan Potatoes

    March 21, 2020
  • 2

    CROCK POT SMOTHERED PORK CHOPS

    March 21, 2020
  • Facebook
  • Twitter

@2019 - All Right Reserved.


Back To Top