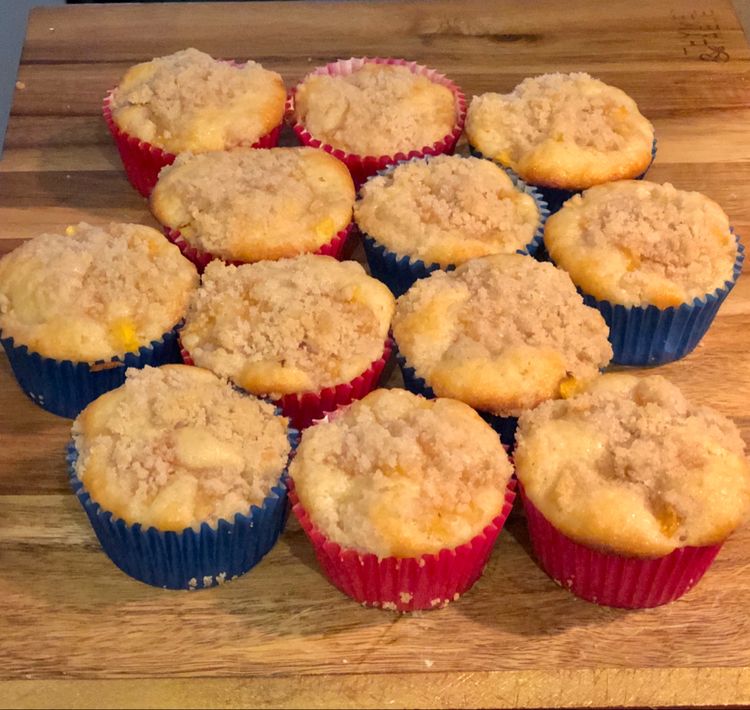
Cook it once
  • Home
  • Privacy Policy
  • Recipes
    • KETO
    • LC
    • WW
  • Tips
  • Contact
Cook it once
  • Home
  • Privacy Policy
  • Recipes
    • KETO
    • LC
    • WW
  • Tips
  • Contact
Category:

Main Dish Recipes

Main Dish Recipes

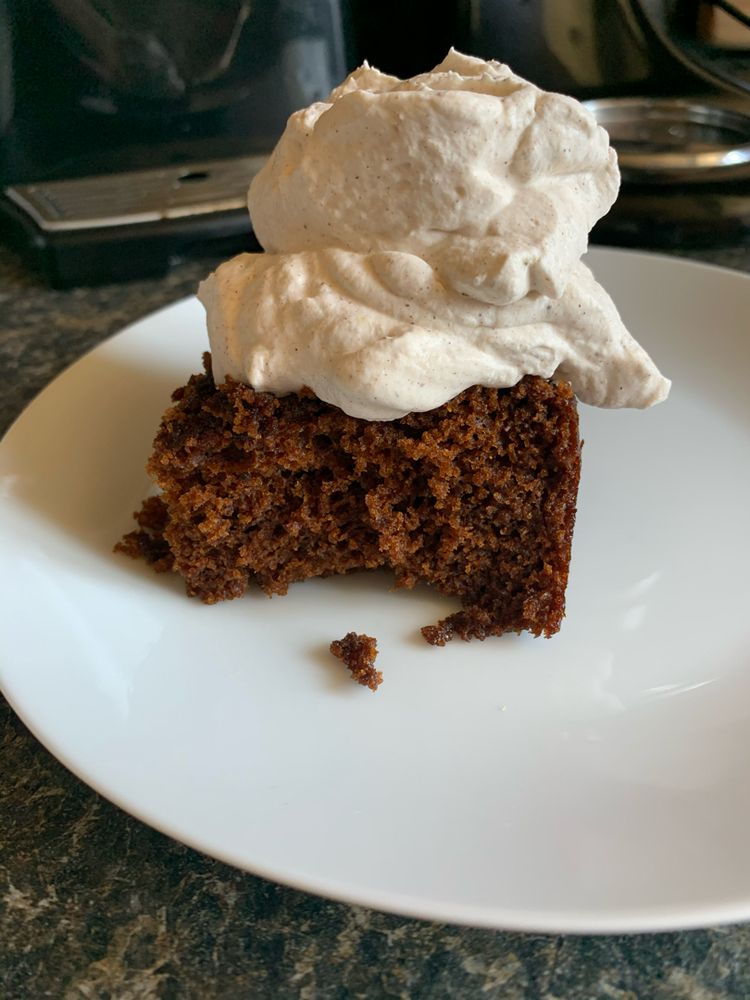
GINGERBREAD CAKE WITH MOLASSES CREAM CHEESE FROSTING

by Rebecca September 29, 2020
written by Rebecca

Jumpstart your Holiday season with this decadent Gingerbread Cake with heavenly Molasses Cream Cheese Frosting. This has a hint of molasses that compliments well with the gingerbread. Smells great and tastes divine!

Ingredients

Cake:

3 cups all-purpose flour

1 1/2 tsp cinnamon

1 1/2 tsp ground ginger

1 tsp baking powder

1 tsp baking soda

1 cup butter, 2 sticks, room temperature

3/4 cup brown sugar

1 cup molasses

2 eggs

1 cup of water

Frosting:

2 8 oz pkg cream cheese

1 stick butter

1/4 cup molasses

2 tsp. vanilla extract

8 cups powdered sugar

2 tsp milk

How to make Gingerbread Cake with Molasses Cream Cheese Frosting

Step 1: Prepare the oven. Preheat it to 350 degrees.

Step 2: Then, grease two 9-inch round cake pans and set aside.

Step 3: Add the flour, cinnamon, ginger, baking powder, and baking soda in a medium mixing bowl. Whisk until incorporated and set aside.

Step 4: Place the butter and brown sugar in a large mixing bowl. Beat until creamy.

Step 5: Beat in the molasses and eggs until mixed.

Step 6: Add the flour alternately with water into the wet ingredients. Mix on low every after each addition.

Step 7: Divide the batter into the prepared pans.

Step 8: Place inside the preheated oven and bake for about 35 minutes or until the toothpick inserted in the centre of the cake comes out clean.

Step 9: Remove from the oven and allow the cakes to cool on wire racks.

To make the Frosting:

Step 10: Add the cream cheese and butter in a medium mixing bowl. Beat until combined.

Step 11: Beat in the molasses and vanilla on low speed until incorporated.

Step 12: Stir in a small amount of powdered sugar at a time. A mix between each addition until incorporated.

Step 13: After 4 cups of powdered sugar have been added, add in a tsp of milk.

Step 14: Mix well until everything is combined.

Step 15: Frost the fully cooled cake.
GINGERBREAD CAKE WITH MOLASSES CREAM CHEESE FROSTING

Rebecca Jumpstart your Holiday season with this decadent Gingerbread Cake with heavenly Molasses Cream Cheese Frosting. This has a hint of molasses that compliments well with the gingerbread. Smells great and… Main Dish Recipes GINGERBREAD CAKE WITH MOLASSES CREAM CHEESE FROSTING European Print This
Nutrition facts: 200 calories 20 grams fat
Rating: 3.0/5
( 2 voted )

Ingredients

  • Cake:
  • 3 cups all-purpose flour
  • 1 1/2 tsp cinnamon
  • 1 1/2 tsp ground ginger
  • 1 tsp baking powder
  • 1 tsp baking soda
  • 1 cup butter, 2 sticks, room temperature
  • 3/4 cup brown sugar
  • 1 cup molasses
  • 2 eggs
  • 1 cup of water
  • Frosting:
  • 2 8 oz pkg cream cheese
  • 1 stick butter
  • 1/4 cup molasses
  • 2 tsp. vanilla extract
  • 8 cups powdered sugar
  • 2 tsp milk

Instructions

Step 1: Prepare the oven. Preheat it to 350 degrees.

Step 2: Then, grease two 9-inch round cake pans and set aside.

Step 3: Add the flour, cinnamon, ginger, baking powder, and baking soda in a medium mixing bowl. Whisk until incorporated and set aside.

Step 4: Place the butter and brown sugar in a large mixing bowl. Beat until creamy.

Step 5: Beat in the molasses and eggs until mixed.

Step 6: Add the flour alternately with water into the wet ingredients. Mix on low every after each addition.

Step 7: Divide the batter into the prepared pans.

Step 8: Place inside the preheated oven and bake for about 35 minutes or until the toothpick inserted in the centre of the cake comes out clean.

Step 9: Remove from the oven and allow the cakes to cool on wire racks.

To make the Frosting:

Step 10: Add the cream cheese and butter in a medium mixing bowl. Beat until combined.

Step 11: Beat in the molasses and vanilla on low speed until incorporated.

Step 12: Stir in a small amount of powdered sugar at a time. A mix between each addition until incorporated.

Step 13: After 4 cups of powdered sugar have been added, add in a tsp of milk.

Step 14: Mix well until everything is combined.

Step 15: Frost the fully cooled cake.
September 29, 2020 0 comment
0 FacebookTwitterPinterestEmail
Main Dish Recipes

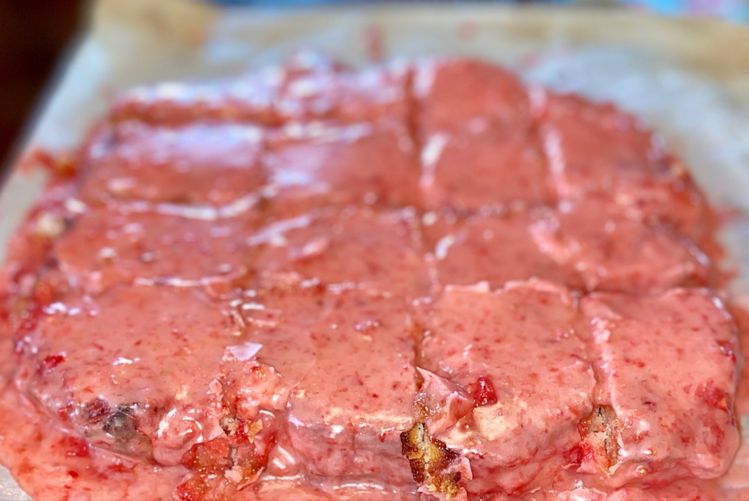
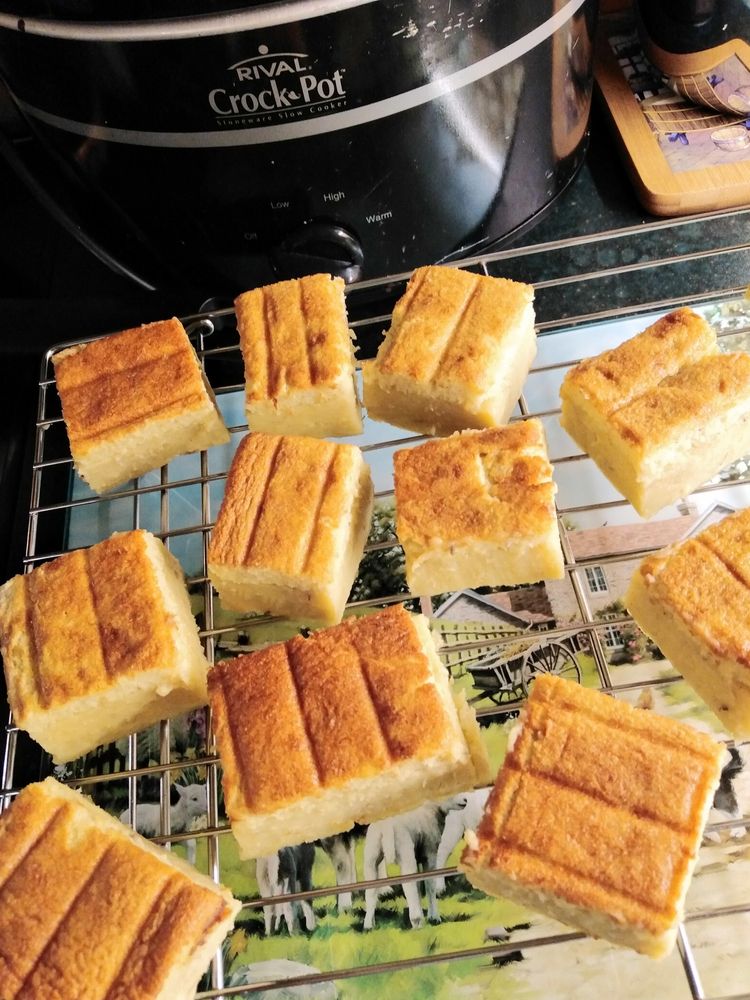
STRAWBERRY LEMON BLONDIES

by Rebecca September 29, 2020
written by Rebecca

Prep Time: 15 mins | Cook Time: 30 minutes | Yield: 12 servings

Moist, dense blondies with bits and pieces of strawberries. And thanks to the lemon for that added tangy and bright vibe. These irresistible strawberry bars are super easy to whip up. One of the most loved fruity dessert for all ages.

Ingredients

Blondies:

1 cup (2 sticks or 228 grams) unsalted butter, at room temperature

3/4 cup (164 grams) granulated sugar

1 large egg

1/4 cup (55 grams) freshly squeezed lemon juice

2 1/4 cups (306 grams) all-purpose flour (use the fluff/scoop/level method for measuring)

1/2 tsp baking powder

1/2 tsp salt

1 cup (127 grams) diced fresh strawberries

Glaze:

1 cup (112 grams) unsifted weight powdered sugar, sifted

1 Tbsp strawberry puree you’ll need about 2 large strawberries, instructions below

lemon juice about 1 Tbsp, or just enough to thin the glaze to a spreadable consistency

How to make Strawberry Lemon Blondies

Step 1: Prepare the oven. Preheat it to 350 degrees F.

Step 2: Using a parchment paper with long edges line a 9-inch square baking pan.

Step 3: Add the butter and sugar in a mixing bowl. Cream until fluffy before beating in the egg.

Step 4: Mix well until the egg is combined. Then, beat in the lemon juice.

Step 5: In another bowl, whisk the flour, baking powder, and salt.

Step 6: Whisk the wet ingredients into the dry ingredients until incorporated.

Step 7: Carefully fold in the diced strawberries into the batter.

Step 8: In the prepared pan, pour and evenly spread the mixture. You have to take your time because the dough is kind of thick.

Step 9: Place inside the preheated oven and bake for about 30 to 35 minutes or until the edges around begins to turn golden and the centre is set. To check the doneness, insert a toothpick in the centre. It should come out moist but not wet. Note to not over-bake or else it’ll be dry.

Step 10: Remove from the oven and allow to cool on a wire rack.

Step 11: To make the Glaze: In a small food processor, puree the trimmed strawberries. To get 1 tbsp of puree, the strain on a small strainer.

Step 12: Then, whisk the sugar, puree, and lemon juice until the lumps are gone. You can add a bit of sugar if the glaze turns out too thin. Or add lemon juice if too thick.

Step 13: Add the glaze on top of the cooled blondies and spread. Allow setting before slicing.

Notes:

Before glazing, I suggest doing a small test by checking the consistency of the glaze. Add more sugar if the glaze is too thin or more puree or lemon juice if too thick.

In place of strawberry puree for the icing, you can just use lemon juice.

You are welcome to use diced rhubarb or maybe a combination of strawberries and rhubarb for variation. Or blueberries or raspberries.

Nutrition Facts:

Calories: 319kcal | Carbohydrates: 42g | Protein: 3g | Fat: 16g | Saturated Fat: 10g | Cholesterol: 54mg | Sodium: 105mg | Potassium: 79mg | Fiber: 1g | Sugar: 23g | Vitamin A: 493IU | Vitamin C: 10mg | Calcium: 21mg | Iron: 1mg

STRAWBERRY LEMON BLONDIES

Rebecca Prep Time: 15 mins | Cook Time: 30 minutes | Yield: 12 servings Moist, dense blondies with bits and pieces of strawberries. And thanks to the lemon for that added… Main Dish Recipes STRAWBERRY LEMON BLONDIES European Print This
Serves: 12 Prep Time: 15 mins Cooking Time: 30 mins 30 mins
Nutrition facts: 319 calories 16 fat
Rating: 4.0/5
( 2 voted )

Ingredients

  • Blondies:
  • 1 cup (2 sticks or 228 grams) unsalted butter, at room temperature
  • 3/4 cup (164 grams) granulated sugar
  • 1 large egg
  • 1/4 cup (55 grams) freshly squeezed lemon juice
  • 2 1/4 cups (306 grams) all-purpose flour (use the fluff/scoop/level method for measuring)
  • 1/2 tsp baking powder
  • 1/2 tsp salt
  • 1 cup (127 grams) diced fresh strawberries
  • Glaze:
  • 1 cup (112 grams) unsifted weight powdered sugar, sifted
  • 1 Tbsp strawberry puree you'll need about 2 large strawberries, instructions below
  • lemon juice about 1 Tbsp, or just enough to thin the glaze to a spreadable consistency

Instructions

Step 1: Prepare the oven. Preheat it to 350 degrees F.

Step 2: Using a parchment paper with long edges line a 9-inch square baking pan.

Step 3: Add the butter and sugar in a mixing bowl. Cream until fluffy before beating in the egg.

Step 4: Mix well until the egg is combined. Then, beat in the lemon juice.

Step 5: In another bowl, whisk the flour, baking powder, and salt.

Step 6: Whisk the wet ingredients into the dry ingredients until incorporated.

Step 7: Carefully fold in the diced strawberries into the batter.

Step 8: In the prepared pan, pour and evenly spread the mixture. You have to take your time because the dough is kind of thick.

Step 9: Place inside the preheated oven and bake for about 30 to 35 minutes or until the edges around begins to turn golden and the centre is set. To check the doneness, insert a toothpick in the centre. It should come out moist but not wet. Note to not over-bake or else it'll be dry.

Step 10: Remove from the oven and allow to cool on a wire rack.

Step 11: To make the Glaze: In a small food processor, puree the trimmed strawberries. To get 1 tbsp of puree, the strain on a small strainer.

Step 12: Then, whisk the sugar, puree, and lemon juice until the lumps are gone. You can add a bit of sugar if the glaze turns out too thin. Or add lemon juice if too thick.

Step 13: Add the glaze on top of the cooled blondies and spread. Allow setting before slicing.

Notes:

Before glazing, I suggest doing a small test by checking the consistency of the glaze. Add more sugar if the glaze is too thin or more puree or lemon juice if too thick.

In place of strawberry puree for the icing, you can just use lemon juice.

You are welcome to use diced rhubarb or maybe a combination of strawberries and rhubarb for variation. Or blueberries or raspberries.

September 29, 2020 0 comment
0 FacebookTwitterPinterestEmail
Main Dish Recipes

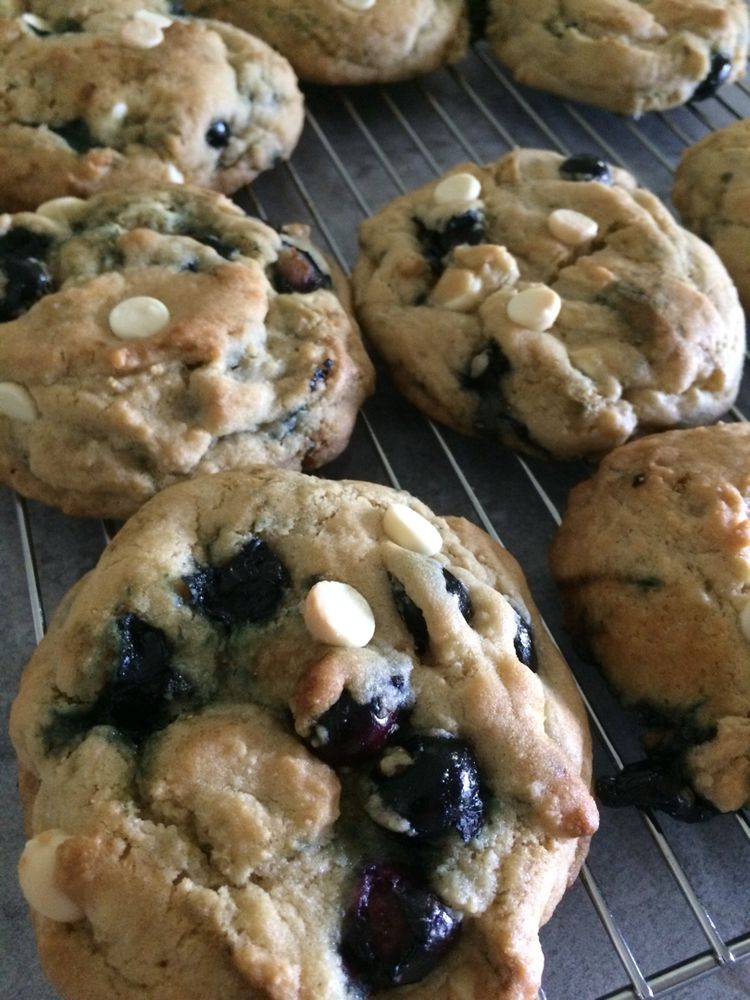
Bangin’ Blueberry Cookies

by Rebecca September 28, 2020
written by Rebecca

If you love blueberry muffin, I am pretty sure that you’ll enjoy these blueberry cookies. Christmas is almost here and I am already planning what homemade treats I can make to give as gifts. And these melt in your mouth delicious cookie is on the top of my list. Easy, simple, not fussy, and everyone’s favourite. You can never go wrong with these lovelies.

Ingredients

3 cups all-purpose flour

1 tsp. salt

1 tsp. baking soda

1½ tsp. baking powder

1 cup unsalted sweet cream butter, room temperature

1 cup of sugar

1 cup brown sugar

2 large eggs, room temperature

2 tsp. vanilla extract

1 cup fresh blueberries

1 cup white chocolate chip

How to make Bangin’ Blueberry Cookies

Step 1: Prepare the oven. Preheat it to 350 degrees.

Step 2: Use a parchment paper to cover the cookie sheet. Set aside.

Step 3: Add the flour, salt, baking soda, and baking powder in a large bowl. Whisk well and set aside.

Step 4: In a separate medium bowl, add the butter and sugars. Use an electric mixer to cream for about 3 minutes until light and creamy.

Step 5: Add the eggs to the butter mixture, a piece at a time. Mix well to incorporate.

Step 6: Add in the vanilla extract and cream for another 2 minutes.

Step 7: Gradually add the dry ingredients into the butter mixture. Mixing until incorporated.

Step 8: Fold in the blueberries and white chocolate chips.

Step 9: Scoop the dough with a large cookie scoop and transfer it on the prepared baking sheet. Repeat for the rest of the cookie dough.

Step 10: Place inside the preheated oven and bake for about 9 to 10 minutes or until the edges are lightly golden brown.

Step 11: Take the cookies out of the oven and let them cool on another tray or a cookie rack.

Step 12: Serve and enjoy!

Bangin’ Blueberry Cookies

Rebecca If you love blueberry muffin, I am pretty sure that you’ll enjoy these blueberry cookies. Christmas is almost here and I am already planning what homemade treats I can make… Main Dish Recipes Bangin’ Blueberry Cookies European Print This
Nutrition facts: 200 calories 20 grams fat
Rating: 3.3/5
( 4 voted )

Ingredients

  • 3 cups all-purpose flour
  • 1 tsp. salt
  • 1 tsp. baking soda
  • 1½ tsp. baking powder
  • 1 cup unsalted sweet cream butter, room temperature
  • 1 cup of sugar
  • 1 cup brown sugar
  • 2 large eggs, room temperature
  • 2 tsp. vanilla extract
  • 1 cup fresh blueberries
  • 1 cup white chocolate chip

Instructions

Step 1: Prepare the oven. Preheat it to 350 degrees.

Step 2: Use a parchment paper to cover the cookie sheet. Set aside.

Step 3: Add the flour, salt, baking soda, and baking powder in a large bowl. Whisk well and set aside.

Step 4: In a separate medium bowl, add the butter and sugars. Use an electric mixer to cream for about 3 minutes until light and creamy.

Step 5: Add the eggs to the butter mixture, a piece at a time. Mix well to incorporate.

Step 6: Add in the vanilla extract and cream for another 2 minutes.

Step 7: Gradually add the dry ingredients into the butter mixture. Mixing until incorporated.

Step 8: Fold in the blueberries and white chocolate chips.

Step 9: Scoop the dough with a large cookie scoop and transfer it on the prepared baking sheet. Repeat for the rest of the cookie dough.

Step 10: Place inside the preheated oven and bake for about 9 to 10 minutes or until the edges are lightly golden brown.

Step 11: Take the cookies out of the oven and let them cool on another tray or a cookie rack.

Step 12: Serve and enjoy!

September 28, 2020 0 comment
0 FacebookTwitterPinterestEmail
Main Dish Recipes

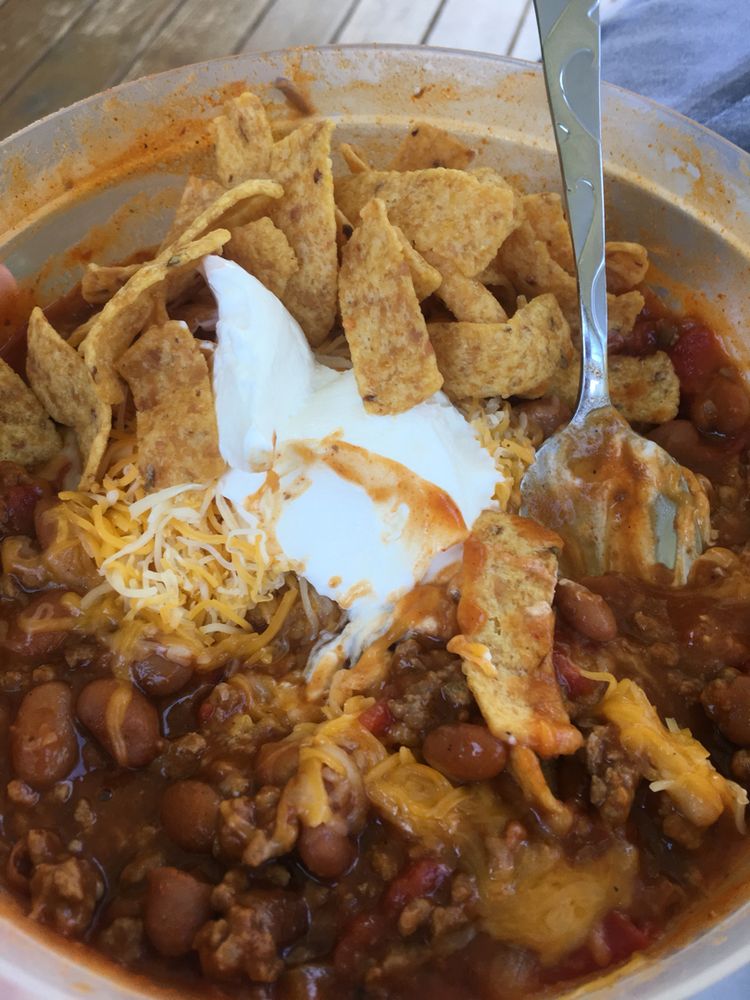
SLOW COOKER SMOTHERED FRITOS TACO BOWLS (EASY)

by Rebecca September 28, 2020
written by Rebecca

Everybody will go crazy over this mouthwatering bowls. This Slow Cooker Smothered Fritos Taco Bowls is the ultimate crowd-pleaser. With outrageous layers of all things satisfying, this one-bowl meal is your next taco night star.

INGREDIENTS

1 1/2 pounds lean ground beef

1 cup chopped onion (yellow or sweet)

2 cans (16 ounces each) Bush’s Best Chili Beans (pinto beans – mild chilli sauce) – not drained

8 ounce can Tomato sauce

1 can Original Rotel (10 ounces can) – not drained (Or use Homemade Rotel – Tomatoes and Green Chilies)

taco seasoning packet (1 ounce)

1/2 cup water

Taco Bowl Fixings

Fritos

Rice (optional)

Favourite taco toppings suggestions – cheddar cheese, lettuce, tomato, jalapenos, sour cream, hot sauce, avocado, fresh lime juice, fresh cilantro, etc.

HOW TO MAKE SLOW COOKER SMOTHERED FRITOS TACO BOWLS

Step 1: In a large skillet, cook the beef and onions over medium-high heat or until the beef is not anymore pink and the onions are translucent.

Step 2: Drain any excess fat before adding in the taco seasoning and half a cup of water. Stir well, then, remove from the heat.

Step 3: Using a non-stick spray, grease your slow cooker.

Step 4: Add the chilli beans, tomato sauce, and Rotel into the prepared slow cooker.

Step 5: Then, add in the browned beef mixture and thoroughly mix.

Step 6: Cook on high, covered, for about 3 to 4 hours or 5 to 6 hours on low.

Step 7: To serve, add handfuls of Fritos in each serving bowl. Followed by a little layer of rice (but this is optional), top with a large spoonful of the beefy taco mixture, and top it all up with your preferred taco toppings. I highly recommend a freshly squeezed lime on top with fresh cilantro. Have a mouthful. Enjoy!

NOTE:

Substitute the beef with either ground turkey or chicken.

SLOW COOKER SMOTHERED FRITOS TACO BOWLS (EASY)

Rebecca Everybody will go crazy over this mouthwatering bowls. This Slow Cooker Smothered Fritos Taco Bowls is the ultimate crowd-pleaser. With outrageous layers of all things satisfying, this one-bowl meal is… Main Dish Recipes SLOW COOKER SMOTHERED FRITOS TACO BOWLS (EASY) European Print This
Nutrition facts: 200 calories 20 grams fat
Rating: 3.6/5
( 15 voted )

Ingredients

  • 1 1/2 pounds lean ground beef
  • 1 cup chopped onion (yellow or sweet)
  • 2 cans (16 ounces each) Bush’s Best Chili Beans (pinto beans – mild chilli sauce) – not drained
  • 8 ounce can Tomato sauce
  • 1 can Original Rotel (10 ounces can) – not drained (Or use Homemade Rotel – Tomatoes and Green Chilies)
  • taco seasoning packet (1 ounce)
  • 1/2 cup water
  • Taco Bowl Fixings
  • Fritos
  • Rice (optional)
  • Favourite taco toppings suggestions – cheddar cheese, lettuce, tomato, jalapenos, sour cream, hot sauce, avocado, fresh lime juice, fresh cilantro, etc.

Instructions

Step 1: In a large skillet, cook the beef and onions over medium-high heat or until the beef is not anymore pink and the onions are translucent.

Step 2: Drain any excess fat before adding in the taco seasoning and half a cup of water. Stir well, then, remove from the heat.

Step 3: Using a non-stick spray, grease your slow cooker.

Step 4: Add the chilli beans, tomato sauce, and Rotel into the prepared slow cooker.

Step 5: Then, add in the browned beef mixture and thoroughly mix.

Step 6: Cook on high, covered, for about 3 to 4 hours or 5 to 6 hours on low.

Step 7: To serve, add handfuls of Fritos in each serving bowl. Followed by a little layer of rice (but this is optional), top with a large spoonful of the beefy taco mixture, and top it all up with your preferred taco toppings. I highly recommend a freshly squeezed lime on top with fresh cilantro. Have a mouthful. Enjoy!

NOTE:

Substitute the beef with either ground turkey or chicken.

September 28, 2020 0 comment
0 FacebookTwitterPinterestEmail
Main Dish Recipes

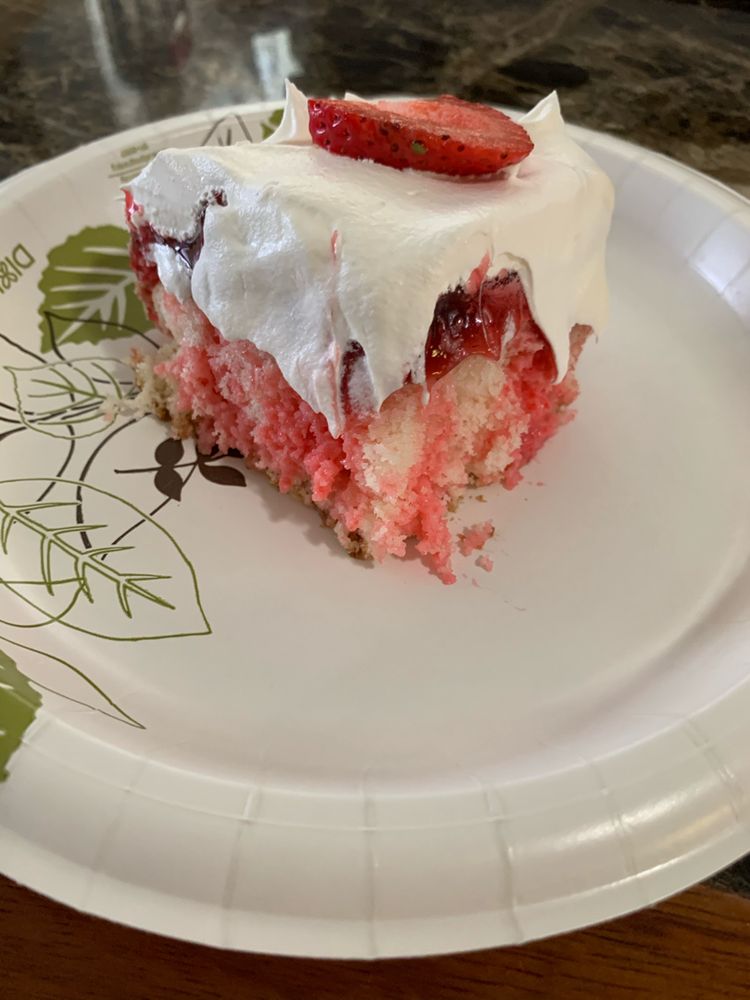
STRAWBERRY DREAM TWINKIE CAKE RECIPE

by Rebecca September 28, 2020
written by Rebecca

Whip this cake up in less than 15 minutes! Easy, quick, and what’s best is you don’t even have to turn the oven on! A light cake with a perfectly sweet creamy filling. If you love Twinkies, then, this is going to be the perfect treat for you. This Strawberry Dream Twinkie Cake is one of the many ways to use our childhood favourite. Enjoy being a child over again with every bite of this decadent treat. A simple cake with lots and lots of strawberries. Lovely to look at with a taste like no other. Introduce this to your kids and I am pretty sure that they’ll dig this. So good you’ll never want to turn your back until it is gone!

INGREDIENTS

10 Twinkies

2 lbs fresh strawberries, sliced

8 oz block of cream cheese, softened

7 oz sweetened condensed milk

1 tsp lemon extract

1 large tub of Cool Whip

HOW TO MAKE STRAWBERRY DREAM TWINKIE CAKE

Step 1: In lengthwise, slice all the Twinkies through the bottom. Across the bottom of the dish, arrange the sliced Twinkies, the cream side facing up.

Step 2: Using a mixer, beat the softened cream cheese until smooth. Add in the condensed and the lemon extract and beat on low speed until incorporated. Fold in a large spoonful of Cool Whip.

Step 3: Place spoonfuls of the mixture, smoothing to the edges over the Twinkies.

Step 4: On top of the cream cheese mixture, add the sliced strawberries across. If desired, set aside some of the sliced strawberries for garnish.

Step 5: Add the rest of the Cool Whip and spread across the top.

Step 6: If desired, garnish with the reserved sliced strawberries.

Step 7: Place in the fridge and chill for a couple of hours until firm.

Step 8: Slice into pieces before serving. Enjoy!

STRAWBERRY DREAM TWINKIE CAKE RECIPE

Rebecca Whip this cake up in less than 15 minutes! Easy, quick, and what’s best is you don’t even have to turn the oven on! A light cake with a perfectly… Main Dish Recipes STRAWBERRY DREAM TWINKIE CAKE RECIPE European Print This
Nutrition facts: 200 calories 20 grams fat
Rating: 5.0/5
( 1 voted )

Ingredients

  • 10 Twinkies
  • 2 lbs fresh strawberries, sliced
  • 8 oz block of cream cheese, softened
  • 7 oz sweetened condensed milk
  • 1 tsp lemon extract
  • 1 large tub of Cool Whip

Instructions

Step 1: In lengthwise, slice all the Twinkies through the bottom. Across the bottom of the dish, arrange the sliced Twinkies, the cream side facing up.

Step 2: Using a mixer, beat the softened cream cheese until smooth. Add in the condensed and the lemon extract and beat on low speed until incorporated. Fold in a large spoonful of Cool Whip.

Step 3: Place spoonfuls of the mixture, smoothing to the edges over the Twinkies.

Step 4: On top of the cream cheese mixture, add the sliced strawberries across. If desired, set aside some of the sliced strawberries for garnish.

Step 5: Add the rest of the Cool Whip and spread across the top.

Step 6: If desired, garnish with the reserved sliced strawberries.

Step 7: Place in the fridge and chill for a couple of hours until firm.

Step 8: Slice into pieces before serving. Enjoy!

September 28, 2020 0 comment
0 FacebookTwitterPinterestEmail
Main Dish Recipes

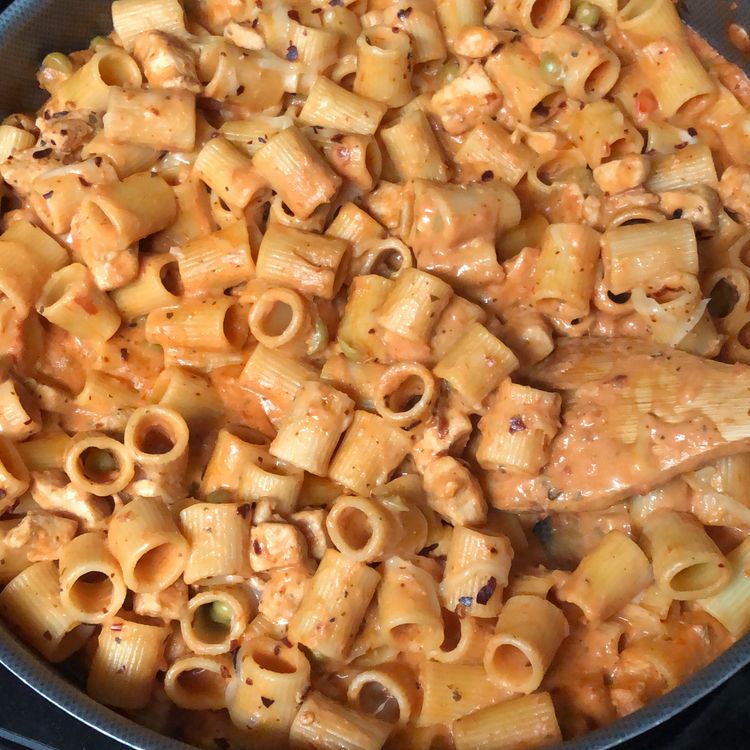
Spicy Chicken Rigatoni

by Rebecca September 28, 2020
written by Rebecca

Prep time: 20 mins | Cook time: 25 mins | Total time: 45 mins | Serves: 4

A perfect spicy Italian meal in a rich, creamy Alfredo and marinara sauce with loads of chicken and peas. My go-to comfort food with all the amazing flavours bursting in your mouth.

Ingredients

2 boneless skinless chicken breasts, cut into chunks

2 tablespoon minced garlic

1 tablespoon crushed red pepper flakes

½ teaspoon freshly ground black pepper

¼ teaspoon salt

2 tablespoons olive oil

2 cups Alfredo sauce (see recipe below or use store-bought)

2 cups Barilla® marinara sauce

Alfredo Sauce:

½ cup butter

1- 8oz package cream cheese softened and cut into cubes

1 cup heavy cream

⅓ cup fresh Parmesan cheese, grated

3 cloves of minced garlic

½ teaspoon black pepper

½ teaspoon dried parsley

½ cup peas

1 lb Barilla® rigatoni pasta, cooked al dente, drained

2 tablespoons butter

Freshly shaved Parmesan cheese, for garnish

How to make Spicy Chicken Rigatoni

Step 1: Heat olive oil in a large skillet over medium-high heat. Once the oil is heated, saute the garlic and red pepper flakes for about 2 minutes. Note to not burn the garlic.

Step 2: Stir in the chunks of chicken breast, black pepper, and salt. Cook until the chicken is no longer pink.

Step 3: Stir in the marinara sauce and add in the alfredo sauce. Simmer for about 8 to 10 minutes.

Step 4: Add 2 tbsp butter and a half cup of peas into the sauce and chicken mixture. Stir for a minute or two until the butter has melted.

Step 5: Add and combine the chicken and sauce mixture with the cooked pasta. Then, garnish with fresh parmesan cheese and 1 to 2 pinches of red pepper flakes before serving. Enjoy!

To make the Alfredo Sauce:

Step 6: Melt the butter in a saucepan over medium heat.

Step 7: Once the butter has melted, add in the softened cream cheese cubes and stir until melted.

Step 8: Gradually pour in a cup of heavy cream. Quickly whisk for several minutes to avoid clumping.

Step 9: Stir in the parmesan cheese until well combined.

Step 10: Add in the garlic, black pepper, and dried parsley. Stir well.

Step 11: Continue to stir for several minutes. Then, allow the sauce to simmer for about 2 to 3 minutes on low until the sauce has almost thickened.

Spicy Chicken Rigatoni

Rebecca Prep time: 20 mins | Cook time: 25 mins | Total time: 45 mins | Serves: 4 A perfect spicy Italian meal in a rich, creamy Alfredo and marinara sauce… Main Dish Recipes Spicy Chicken Rigatoni European Print This
Serves: 4 Prep Time: 20 mins Cooking Time: 25 mins 25 mins
Nutrition facts: 200 calories 20 grams fat
Rating: 5.0/5
( 1 voted )

Ingredients

  • 2 boneless skinless chicken breasts, cut into chunks
  • 2 tablespoon minced garlic
  • 1 tablespoon crushed red pepper flakes
  • ½ teaspoon freshly ground black pepper
  • ¼ teaspoon salt
  • 2 tablespoons olive oil
  • 2 cups Alfredo sauce (see recipe below or use store-bought)
  • 2 cups Barilla® marinara sauce
  • Alfredo Sauce:
  • ½ cup butter
  • 1- 8oz package cream cheese softened and cut into cubes
  • 1 cup heavy cream
  • ⅓ cup fresh Parmesan cheese, grated
  • 3 cloves of minced garlic
  • ½ teaspoon black pepper
  • ½ teaspoon dried parsley
  • ½ cup peas
  • 1 lb Barilla® rigatoni pasta, cooked al dente, drained
  • 2 tablespoons butter
  • Freshly shaved Parmesan cheese, for garnish

Instructions

Step 1: Heat olive oil in a large skillet over medium-high heat. Once the oil is heated, saute the garlic and red pepper flakes for about 2 minutes. Note to not burn the garlic.

Step 2: Stir in the chunks of chicken breast, black pepper, and salt. Cook until the chicken is no longer pink.

Step 3: Stir in the marinara sauce and add in the alfredo sauce. Simmer for about 8 to 10 minutes.

Step 4: Add 2 tbsp butter and a half cup of peas into the sauce and chicken mixture. Stir for a minute or two until the butter has melted.

Step 5: Add and combine the chicken and sauce mixture with the cooked pasta. Then, garnish with fresh parmesan cheese and 1 to 2 pinches of red pepper flakes before serving. Enjoy!

To make the Alfredo Sauce:

Step 6: Melt the butter in a saucepan over medium heat.

Step 7: Once the butter has melted, add in the softened cream cheese cubes and stir until melted.

Step 8: Gradually pour in a cup of heavy cream. Quickly whisk for several minutes to avoid clumping.

Step 9: Stir in the parmesan cheese until well combined.

Step 10: Add in the garlic, black pepper, and dried parsley. Stir well.

Step 11: Continue to stir for several minutes. Then, allow the sauce to simmer for about 2 to 3 minutes on low until the sauce has almost thickened.

September 28, 2020 0 comment
0 FacebookTwitterPinterestEmail
Main Dish Recipes

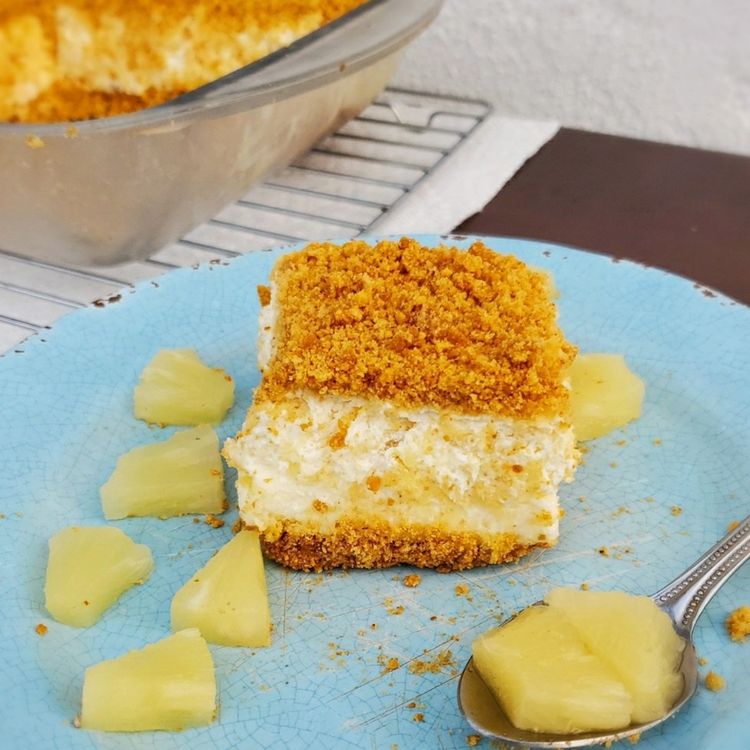
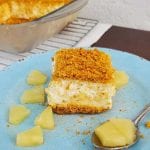
No Bake Pineapple Dream Dessert

by Rebecca September 28, 2020
written by Rebecca

A mouthwatering and effortless no-bake dessert that you’ll instantly fall madly in love with. Not too sweet, fluffy, with a refreshing taste that screams summer and bbq. This most loved dessert is great for everyone, even the kids dig this. Bursting with pineapple, super light, and has an amazing fluffy texture. Gobble on this cold dessert whenever!

Ingredients

GRAHAM CRACKER CRUST:

1 cup granulated sugar

1 cup unsalted butter melted

2 1/2 cups graham cracker crumbs

PINEAPPLE FILLING:

1 8 ounces package cream cheese softened

1 cup powdered sugar

1 cup crushed pineapple drained

1 8 ounces container of Cool Whip

WHIPPED PINEAPPLE TOPPING:

1/4 cup toasted shredded coconut for topping

1/4 cup pineapple chunks for topping

1 8 ounces Cool Whip

1 teaspoon pineapple extract

1-2 drops yellow gel food colouring

Cherries and pineapple chunks for garnish

How to make No-Bake Pineapple Dream Dessert

To make the Graham Cracker Crust:

Step 1: Add the crushed graham crackers, granulated sugar, and melted butter in a large mixing bowl. Mix until the butter has melted and everything is well incorporated.

Step 2: Transfer and press the mixture into a 9 x 9-inch baking dish. Set aside.

To make the Pineapple Filling:

Step 3: Cream the cream cheese with a standing mixer until smooth and creamy.

Step 4: Slowly add in the powdered sugar and mix until well merged.

Step 5: Add in the Cool Whip, beating until fluffy.

Step 6: Fold in the crushed pineapple using a spatula.

Step 7: Add the filling on top of the crust. Evenly smooth the filling using an angled spatula.

To make the Pineapple Topping:

Step 8: Add the Cool Whip, pineapple extract, and yellow food colouring in a medium bowl. Mix until well combined.

Step 9: Evenly spread the topping with an angled spatula over the pineapple filling.

Step 10: Sprinkle over the toasted coconut and pineapple chunks.

Step 11: Place in the fridge overnight until firm.

Step 12: Serve and enjoy!

No Bake Pineapple Dream Dessert

Rebecca A mouthwatering and effortless no-bake dessert that you’ll instantly fall madly in love with. Not too sweet, fluffy, with a refreshing taste that screams summer and bbq. This most loved… Main Dish Recipes No Bake Pineapple Dream Dessert European Print This
Nutrition facts: 200 calories 20 grams fat
Rating: 5.0/5
( 1 voted )

Ingredients

  • GRAHAM CRACKER CRUST:
  • 1 cup granulated sugar
  • 1 cup unsalted butter melted
  • 2 1/2 cups graham cracker crumbs
  • PINEAPPLE FILLING:
  • 1 8 ounces package cream cheese softened
  • 1 cup powdered sugar
  • 1 cup crushed pineapple drained
  • 1 8 ounces container of Cool Whip
  • WHIPPED PINEAPPLE TOPPING:
  • 1/4 cup toasted shredded coconut for topping
  • 1/4 cup pineapple chunks for topping
  • 1 8 ounces Cool Whip
  • 1 teaspoon pineapple extract
  • 1-2 drops yellow gel food colouring
  • Cherries and pineapple chunks for garnish

Instructions

To make the Graham Cracker Crust:

Step 1: Add the crushed graham crackers, granulated sugar, and melted butter in a large mixing bowl. Mix until the butter has melted and everything is well incorporated.

Step 2: Transfer and press the mixture into a 9 x 9-inch baking dish. Set aside.

To make the Pineapple Filling:

Step 3: Cream the cream cheese with a standing mixer until smooth and creamy.

Step 4: Slowly add in the powdered sugar and mix until well merged.

Step 5: Add in the Cool Whip, beating until fluffy.

Step 6: Fold in the crushed pineapple using a spatula.

Step 7: Add the filling on top of the crust. Evenly smooth the filling using an angled spatula.

To make the Pineapple Topping:

Step 8: Add the Cool Whip, pineapple extract, and yellow food colouring in a medium bowl. Mix until well combined.

Step 9: Evenly spread the topping with an angled spatula over the pineapple filling.

Step 10: Sprinkle over the toasted coconut and pineapple chunks.

Step 11: Place in the fridge overnight until firm.

Step 12: Serve and enjoy!

September 28, 2020 0 comment
0 FacebookTwitterPinterestEmail
Main Dish Recipes

Banana Magic Cake

by Rebecca September 28, 2020
written by Rebecca

My daughter loves bananas and you guess what her favourite cake. Yes, it’s the Banana Magic Cake. A fantastic three-layer cake in a very simple cake batter. Not fussy and plain straightforward that needs no special ingredients but is guaranteed to come out extraordinary every time! This beautiful Banana-Licious cake might look intimidating but hey, it’s one of the easiest and simplest cake you can make in a buzz. Enjoy this cakes’ unique custard-like texture that melts in your mouth.

Ingredients

1/2 cups melted butter

1 tbsp. water

2 cups warm whole milk

4 large eggs, separated

3/4 cup granulated sugar

2 tbsp. light brown sugar

1 medium overripe banana, mashed

1 cup all-purpose flour

1 tsp. pure vanilla extract

whipped cream for serving

banana slices for serving

How to make Banana Magic Cake

Step 1: Prepare the oven. Preheat it to 325 degrees F.

Step 2: Using a baking spray, lightly grease a square cake pan.

Step 3: Separate the whites and yolks of the eggs.

Step 4: In a medium bowl, add the egg whites and into a large bowl, the yolks.

Step 5: Whip the egg whites with an electric mixer until stiff peaks form.

Step 6: Into a large bowl with the yolks, add the sugars and whisk until incorporated.

Step 7: Add in the melted butter, water, and mashed bananas into the sugars and yolks. Whisk well before adding in the flour. Stir until just combined.

Step 8: Pour in the milk and add in the vanilla extract. Gently whisk before folding in the whipped egg whites.

Step 9: Transfer the batter into the prepared cake pan.

Step 10: Place inside the preheated oven and bake for about 45 minutes to 1 hour.

Step 11: Making sure that the centre of the cake is not fully set.

Step 12: Remove from the oven and allow the cake to cool completely.

Step 13: Slice the cake and serve with whipped cream and banana slices. Enjoy!

Banana Magic Cake

Rebecca My daughter loves bananas and you guess what her favourite cake. Yes, it’s the Banana Magic Cake. A fantastic three-layer cake in a very simple cake batter. Not fussy and… Main Dish Recipes Banana Magic Cake European Print This
Nutrition facts: 200 calories 20 grams fat
Rating: 5.0/5
( 1 voted )

Ingredients

  • 1/2 cups melted butter
  • 1 tbsp. water
  • 2 cups warm whole milk
  • 4 large eggs, separated
  • 3/4 cup granulated sugar
  • 2 tbsp. light brown sugar
  • 1 medium overripe banana, mashed
  • 1 cup all-purpose flour
  • 1 tsp. pure vanilla extract
  • whipped cream for serving
  • banana slices for serving

Instructions

Step 1: Prepare the oven. Preheat it to 325 degrees F.

Step 2: Using a baking spray, lightly grease a square cake pan.

Step 3: Separate the whites and yolks of the eggs.

Step 4: In a medium bowl, add the egg whites and into a large bowl, the yolks.

Step 5: Whip the egg whites with an electric mixer until stiff peaks form.

Step 6: Into a large bowl with the yolks, add the sugars and whisk until incorporated.

Step 7: Add in the melted butter, water, and mashed bananas into the sugars and yolks. Whisk well before adding in the flour. Stir until just combined.

Step 8: Pour in the milk and add in the vanilla extract. Gently whisk before folding in the whipped egg whites.

Step 9: Transfer the batter into the prepared cake pan.

Step 10: Place inside the preheated oven and bake for about 45 minutes to 1 hour.

Step 11: Making sure that the centre of the cake is not fully set.

Step 12: Remove from the oven and allow the cake to cool completely.

Step 13: Slice the cake and serve with whipped cream and banana slices. Enjoy!

September 28, 2020 0 comment
0 FacebookTwitterPinterestEmail
Main Dish Recipes

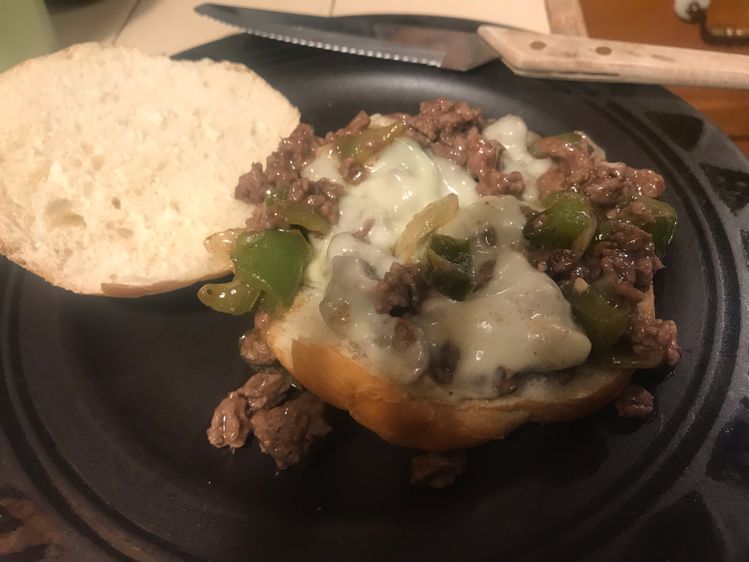
CHEESESTEAK STYLE SLOPPY JOES

by Rebecca September 28, 2020
written by Rebecca

Prep Time: 5 mins | Cook Time: 20 mins | Total Time: 25 mins | Servings: 4 sandwiches

I love anything cheesesteak! Thus, my obsession with this cheesesteak style sloppy joes. A low-cost alternative that you can enjoy whenever. Mouthwatering, super good, and to die for!

Ingredients

1 pound ground beef

1 teaspoon salt

1/2 teaspoon black pepper

2 tablespoons unsalted butter

1 small onion diced

1 green bell pepper diced

1/4 teaspoon garlic powder or 2 cloves garlic, minced

1 tablespoon Worcestershire sauce

1/2 cup beef broth

1 tablespoon cornstarch

4 slices white American or provolone cheese

4 rolls

How to make Cheesesteak Style Sloppy Joes

Step 1: Add the ground beef in a heated saute pan. Crumble and season with salt. Cook over medium heat for about 5 minutes or until browned. Once done, remove from the pan and set aside.

Step 2: Using the same pan, melt the butter. Saute the onion and bell pepper for about 4 to 5 minutes or until the veggie begins to brown and the onion is translucent.

Step 3: Adjust the heat to low and add in the ground beef.

Step 4: Put garlic powder, Worcestershire sauce, and pour in the beef broth. Scrape the bottom of the pan, stirring until everything is incorporated.

Step 5: Add in the cornstarch, stirring to dissolve until the sauce has thickened. You can add 1 to 2 tbsp water if the beef looks dry.

Step 6: Take the pan out of the heat. Top with slices of cheese and allow to sit for at about 1 to 2 minutes or until the cheese has melted.

Step 7: Take spoonfuls of the beef mixture and add to the rolls.

Step 8: Serve immediately. Enjoy!

Notes:

Add a dash of hot sauce or cayenne pepper for a spicy take. Or dice a jalapeno to add to the onions and bell pepper.

Instead of adding the cornstarch directly to the pan, you can whisk it first with the broth in a bowl, then, add to the pan.

If using mushrooms, add them in with the onions and bell pepper.

For any leftovers, keep them in a well-sealed container and store in the fridge for up to 2 to 3 days.

Nutrition Facts:

Serving: 0g | Calories: 562kcal | Carbohydrates: 28g | Protein: 28g | Fat: 36g | Saturated Fat: 16g | Cholesterol: 116mg | Sodium: 1379mg | Potassium: 516mg | Fiber: 1g | Sugar: 5g | Vitamin A: 485IU | Vitamin C: 26.3mg | Calcium: 326mg | Iron: 4.2mg

CHEESESTEAK STYLE SLOPPY JOES

Rebecca Prep Time: 5 mins | Cook Time: 20 mins | Total Time: 25 mins | Servings: 4 sandwiches I love anything cheesesteak! Thus, my obsession with this cheesesteak style sloppy… Main Dish Recipes CHEESESTEAK STYLE SLOPPY JOES European Print This
Serves: 4 Prep Time: 5 mins Cooking Time: 20 mins 20 mins
Nutrition facts: 562 calories 36 fat
Rating: 3.5/5
( 2 voted )

Ingredients

  • 1 pound ground beef
  • 1 teaspoon salt
  • 1/2 teaspoon black pepper
  • 2 tablespoons unsalted butter
  • 1 small onion diced
  • 1 green bell pepper diced
  • 1/4 teaspoon garlic powder or 2 cloves garlic, minced
  • 1 tablespoon Worcestershire sauce
  • 1/2 cup beef broth
  • 1 tablespoon cornstarch
  • 4 slices white American or provolone cheese
  • 4 rolls

Instructions

Step 1: Add the ground beef in a heated saute pan. Crumble and season with salt. Cook over medium heat for about 5 minutes or until browned. Once done, remove from the pan and set aside.

Step 2: Using the same pan, melt the butter. Saute the onion and bell pepper for about 4 to 5 minutes or until the veggie begins to brown and the onion is translucent.

Step 3: Adjust the heat to low and add in the ground beef.

Step 4: Put garlic powder, Worcestershire sauce, and pour in the beef broth. Scrape the bottom of the pan, stirring until everything is incorporated.

Step 5: Add in the cornstarch, stirring to dissolve until the sauce has thickened. You can add 1 to 2 tbsp water if the beef looks dry.

Step 6: Take the pan out of the heat. Top with slices of cheese and allow to sit for at about 1 to 2 minutes or until the cheese has melted.

Step 7: Take spoonfuls of the beef mixture and add to the rolls.

Step 8: Serve immediately. Enjoy!

Notes:

Add a dash of hot sauce or cayenne pepper for a spicy take. Or dice a jalapeno to add to the onions and bell pepper.

Instead of adding the cornstarch directly to the pan, you can whisk it first with the broth in a bowl, then, add to the pan.

If using mushrooms, add them in with the onions and bell pepper.

For any leftovers, keep them in a well-sealed container and store in the fridge for up to 2 to 3 days.

September 28, 2020 0 comment
0 FacebookTwitterPinterestEmail
Main Dish Recipes

Easy Peach Cobbler Muffins

by Rebecca September 28, 2020
written by Rebecca

Prep Time: 15 mins | Cook Time: 20 mins | Total Time: 35 mins | Servings: 12

This cinnamon-flavoured peach cobbler muffins with streusel topping and fresh peaches are perfect for all the peach lovers out there. Sweet summer treats with an excellent crumble topping and a tender, moist texture. No one can say no these lovelies, especially with that fresh juicy peaches in every bite.

Equipment

Standard Muffin Pan

Ingredients

Streusel topping:

1/3 cup all-purpose flour

1/3 cup granulated sugar

1/2 tsp cinnamon

1/4 cup unsalted butter cold

Muffins:

2 cups all-purpose flour

1 cup granulated sugar

1 tsp cinnamon

2 tsp baking powder

1 tsp baking soda

1/2 tsp salt

2 eggs

1/3 cup plain yoghurt (or vanilla yoghurt)

1/3 cup vegetable oil or olive oil, canola oil

2 large peaches, cut into 1/2-in. pieces (about 2 cups) divided

How to make Easy Peach Cobbler Muffins

To make the streusel topping:

Step 1: In a small bowl, add the flour, sugar, and cinnamon. Stir to combine.

Step 2: Add the cold butter into the flour mixture. Slather the butter and flour mixture with your hands until crumbly and set aside.

To make the muffins:

Step 3: Prepare the oven. Preheat it to 375 degrees F.

Step 4: Using 12 muffin paper liners line the large muffin pan.

Step 5: In a large bowl, add the flour, baking powder, baking soda, cinnamon, salt, and sugar. Whisk until incorporated.

Step 6: Reserve about 3/4 cup of peaches for the topping and add the rest to the flour mixture. Stir well to coat.

Step 7: In a medium bowl, whisk the eggs, yoghurt, and oil. Add this into the dry ingredients, stirring until just combined.

Step 8: Evenly divide the batter about 3/4 full into each muffin cup.

Step 9: Top the muffins with the reserved peaches and place a spoonful of the streusel topping on each.

Step 10: Place inside the preheated oven and bake for about 18 to 20 minutes or until golden brown and the toothpick inserted in the centre of the muffin comes out clean.

Step 11: Remove from the oven and place the muffins on a wire rack to cool.

Step 12: Serve the muffins warm or at room temperature. Enjoy!

Easy Peach Cobbler Muffins

Rebecca Prep Time: 15 mins | Cook Time: 20 mins | Total Time: 35 mins | Servings: 12 This cinnamon-flavoured peach cobbler muffins with streusel topping and fresh peaches are perfect… Main Dish Recipes Easy Peach Cobbler Muffins European Print This
Serves: 12 Prep Time: 15 mins Cooking Time: 20 mins 20 mins
Nutrition facts: 200 calories 20 grams fat
Rating: 5.0/5
( 1 voted )

Ingredients

  • Streusel topping:
  • 1/3 cup all-purpose flour
  • 1/3 cup granulated sugar
  • 1/2 tsp cinnamon
  • 1/4 cup unsalted butter cold
  • Muffins:
  • 2 cups all-purpose flour
  • 1 cup granulated sugar
  • 1 tsp cinnamon
  • 2 tsp baking powder
  • 1 tsp baking soda
  • 1/2 tsp salt
  • 2 eggs
  • 1/3 cup plain yoghurt (or vanilla yoghurt)
  • 1/3 cup vegetable oil or olive oil, canola oil
  • 2 large peaches, cut into 1/2-in. pieces (about 2 cups) divided

Instructions

To make the streusel topping:

Step 1: In a small bowl, add the flour, sugar, and cinnamon. Stir to combine.

Step 2: Add the cold butter into the flour mixture. Slather the butter and flour mixture with your hands until crumbly and set aside.

To make the muffins:

Step 3: Prepare the oven. Preheat it to 375 degrees F.

Step 4: Using 12 muffin paper liners line the large muffin pan.

Step 5: In a large bowl, add the flour, baking powder, baking soda, cinnamon, salt, and sugar. Whisk until incorporated.

Step 6: Reserve about 3/4 cup of peaches for the topping and add the rest to the flour mixture. Stir well to coat.

Step 7: In a medium bowl, whisk the eggs, yoghurt, and oil. Add this into the dry ingredients, stirring until just combined.

Step 8: Evenly divide the batter about 3/4 full into each muffin cup.

Step 9: Top the muffins with the reserved peaches and place a spoonful of the streusel topping on each.

Step 10: Place inside the preheated oven and bake for about 18 to 20 minutes or until golden brown and the toothpick inserted in the centre of the muffin comes out clean.

Step 11: Remove from the oven and place the muffins on a wire rack to cool.

Step 12: Serve the muffins warm or at room temperature. Enjoy!

September 28, 2020 0 comment
0 FacebookTwitterPinterestEmail
Newer Posts
Older Posts

Popular Posts

  • 1

    Crispy Crunchy Parmesan Potatoes

    March 21, 2020
  • 2

    CROCK POT SMOTHERED PORK CHOPS

    March 21, 2020
  • Facebook
  • Twitter

@2019 - All Right Reserved.


Back To Top