Cook it once
  • Home
  • Privacy Policy
  • Recipes
    • KETO
    • LC
    • WW
  • Tips
  • Contact
Cook it once
  • Home
  • Privacy Policy
  • Recipes
    • KETO
    • LC
    • WW
  • Tips
  • Contact
Category:

Main Dish Recipes

Main Dish Recipes

Volcano Potatoes

by Rebecca October 9, 2020
written by Rebecca

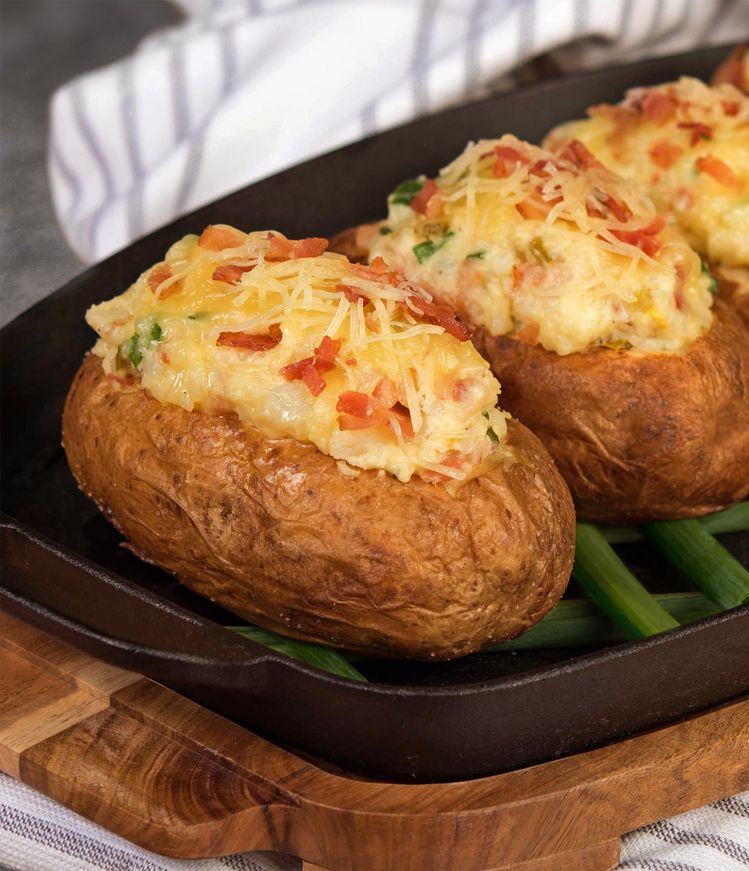
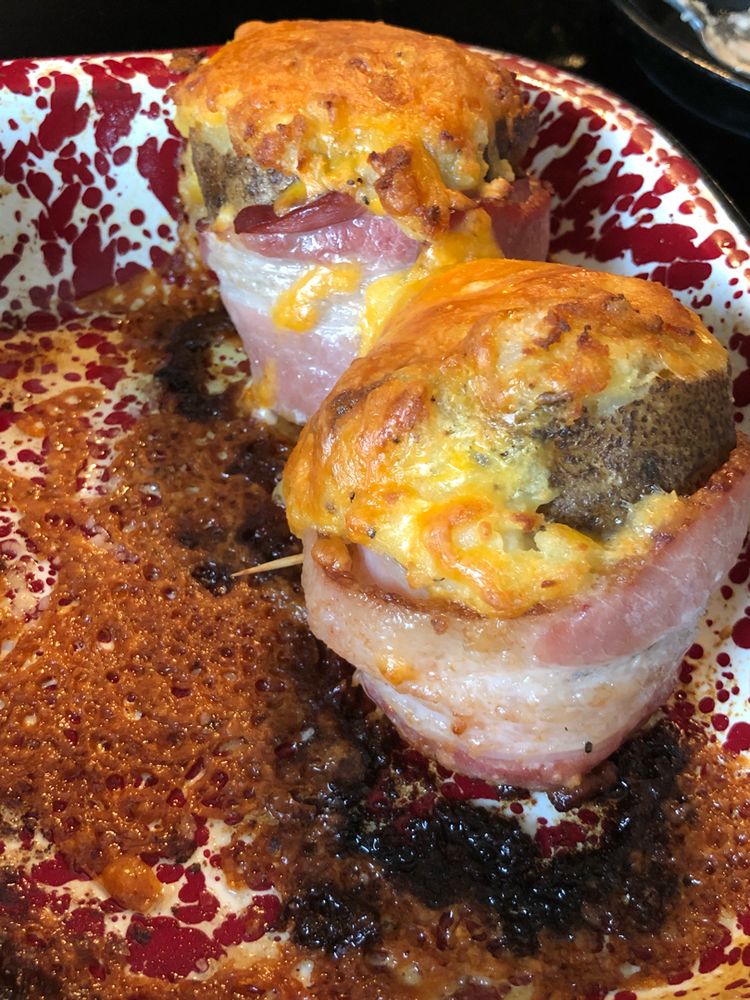
A savoury, mouthwatering snack to impress the crowd. These cheese-stuffed cheese potatoes are a dream come true! A volcano of goodness – gooey inside and out topped with your favourite toppings. Interestingly delicious! Perfect for bbq, for everybody, they certainly look amazing and taste superb!

INGREDIENTS

4 large roasting potatoes

8 slices of thin cut streaky bacon

250g grated Red Leicester/ mozzarella mix

75ml double cream, plus extra for serving if you wish

A small handful of chives, finely chopped

Salt & freshly ground black pepper

HOW TO MAKE VOLCANO POTATOES

Step 1: Prepare the oven. Preheat it to 200 degrees C.

Step 2: Coat with a drizzle of olive oil and salt the skin of the potatoes.

Step 3: Bake in the preheated oven for about 45 minutes to an hour. To ensure the crispiness, turn the potatoes half-way through cooking.

Step 4: Once done, remove from the oven and allow the potatoes to cool.

Step 5: Carve out the centre of every potato with a melon baller or a spoon. Note not to make the walls of each potato super thin and leave enough thickness at the bottom, too.

Step 6: Place the potato filling in a medium-sized bowl and mash with a ricer. Freeze the rest for later use.

Step 7: Add in the cream, 200g cheese, and chives. Mix well until incorporated and season to your liking.

Step 8: Use a teaspoon to fill the potato shells, ensure to pack the mixture down. Do this for the rest of the potato shells, ending with the reserved cheese.

Step 9: Grab 2 slices of bacon and wrap each potato with it. Secure with cocktail sticks.

Step 10: Transfer the filled bacon-wrapped potatoes on a tray, position them upright and bake for about 25 to 30 minutes or until the bacon is crisp and the tops are golden.
Volcano Potatoes

Rebecca A savoury, mouthwatering snack to impress the crowd. These cheese-stuffed cheese potatoes are a dream come true! A volcano of goodness – gooey inside and out topped with your favourite… Main Dish Recipes Volcano Potatoes European Print This
Nutrition facts: 200 calories 20 grams fat
Rating: 5.0/5
( 1 voted )

Ingredients

  • 4 large roasting potatoes
  • 8 slices of thin cut streaky bacon
  • 250g grated Red Leicester/ mozzarella mix
  • 75ml double cream, plus extra for serving if you wish
  • A small handful of chives, finely chopped
  • Salt & freshly ground black pepper

Instructions

Step 1: Prepare the oven. Preheat it to 200 degrees C.

Step 2: Coat with a drizzle of olive oil and salt the skin of the potatoes.

Step 3: Bake in the preheated oven for about 45 minutes to an hour. To ensure the crispiness, turn the potatoes half-way through cooking.

Step 4: Once done, remove from the oven and allow the potatoes to cool.

Step 5: Carve out the centre of every potato with a melon baller or a spoon. Note not to make the walls of each potato super thin and leave enough thickness at the bottom, too.

Step 6: Place the potato filling in a medium-sized bowl and mash with a ricer. Freeze the rest for later use.

Step 7: Add in the cream, 200g cheese, and chives. Mix well until incorporated and season to your liking.

Step 8: Use a teaspoon to fill the potato shells, ensure to pack the mixture down. Do this for the rest of the potato shells, ending with the reserved cheese.

Step 9: Grab 2 slices of bacon and wrap each potato with it. Secure with cocktail sticks.

Step 10: Transfer the filled bacon-wrapped potatoes on a tray, position them upright and bake for about 25 to 30 minutes or until the bacon is crisp and the tops are golden.
October 9, 2020 0 comment
0 FacebookTwitterPinterestEmail
Main Dish Recipes

CREAMY MOZZARELLA SHRIMP PASTA

by Rebecca October 8, 2020
written by Rebecca

Prep Time: 30 mins | Cook Time: 30 mins | Total Time: 1 hr | Servings: 4

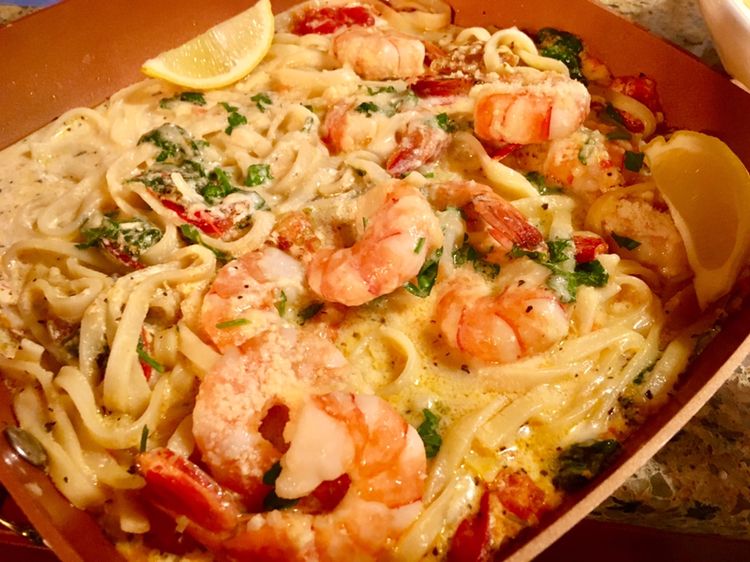
What a perfect dish! Everything about this dish is incredible. From the pasta to the sauce, and shrimp! I can’t think of any reason why you shouldn’t try this. Aside from the superb flavours, it is also very easy to make.

Ingredients

Pasta:

8 oz penne pasta (for a gluten-free version, use gluten-free brown rice pasta)

Shrimp:

2 tablespoons olive oil (drained from sun-dried tomatoes jar or just use regular olive oil)

1 pound shrimp (without shells, and deveined)

3 garlic cloves minced

1/4 teaspoon salt

Creamy Sauce:

4 oz sun-dried tomatoes (without oil)

4 garlic cloves minced

1 cup half and half

1 cup mozzarella cheese shredded (do not use fresh Mozzarella, use pre-shredded Mozzarella)

1 tablespoon dried basil (if using fresh basil you can add more)

1/4 teaspoon red pepper flakes crushed, add more to taste

1/8 teaspoon paprika

1/2 cup reserved cooked pasta water (or more)

1/4 teaspoon salt

How to make Creamy Mozzarella Shrimp Pasta

To prepare the pasta:

Step 1: Follow the package direction to cook the pasta. Note to reserve some cooked pasta before draining.

To prepare the shrimp:

Step 1: Fo the sun-dried tomatoes in a jar, drain the oil first before using, reserving 2 tbsp drained oil.

Step 2: In a large skillet, add the reserved sun-dried oil or use regular olive oil. Heat over medium-high heat.

Step 3: Once the oil is hot, saute the shrimp and minced garlic. Cook the shrimp for a minute on one side until pink and sprinkle salt on each. Make sure not to overcrowd the shrimp.

Step 4: Flip and cook the other side for a minute or until golden brown.

Step 5: Transfer the cooked shrimp on a clean plate.

To make creamy Mozzarella sauce:

Step 1: In the same skillet, add more minced garlic and sun-dried tomatoes. Saute for a minute or until the garlic is aromatic.

Step 2: Add in half-and-half. Allow the mixture to boil.

Step 3: Add in the shredded cheese and stir. Reduce the heat to low and simmer until the cheese has melted completely and the sauce is creamy.

Step 4: Add a little half-and-half if the sauce becomes too thick.

Step 5: Add the crushed red pepper flakes, basil, and paprika. Stir until well mixed.

Step 6: Sprinkle about 1/4 teaspoon of salt and stir. Taste to your preference.

To assemble shrimp pasta:

Step 1: Add the cooked pasta and reheat over medium heat.

Step 2: Add in the seared shrimp and stir until well blended.

Step 3: Add more salt if necessary.

Step 4: Add a little half-and-half or pasta water if the sauce becomes too thick.

Step 5: Simmer on low heat until the flavours are well blended.

Step 6: Do not put a lot of salt because it might overpower the taste of the sun-dried tomatoes and basil.

Step 7: Serve and enjoy!

Notes:

Half-and-half is a combination of 1/2 cup of heavy cream and 1/2 cup of milk.

Drain the sun-dried tomatoes from the oil before adding them into the mixture and set aside about 2 tbsp of the olive oil.

I do not use and shred fresh Mozzarella.

I also use a low-moisture part-skim Mozzarella cheese.

Nutrition Facts:

Amount Per Serving: Calories 632 | Fat 23g35% | Saturated Fat 9g56% | Cholesterol 330mg110% | Sodium 1449mg63% | Potassium 1335mg38% | Carbohydrates 63g21% | Fiber 5g21% | Sugar 12g13% | Protein 43g86% | Vitamin A 720IU14% | Vitamin C 18mg22% | Calcium 444mg44% | Iron 6.8mg38%

CREAMY MOZZARELLA SHRIMP PASTA

Rebecca Prep Time: 30 mins | Cook Time: 30 mins | Total Time: 1 hr | Servings: 4 What a perfect dish! Everything about this dish is incredible. From the pasta… Main Dish Recipes CREAMY MOZZARELLA SHRIMP PASTA European Print This
Serves: 4 Prep Time: 30 mins Cooking Time: 30 mins 30 mins
Nutrition facts: 632 calories 23 fat
Rating: 5.0/5
( 1 voted )

Ingredients

  • Pasta:
  • 8 oz penne pasta (for a gluten-free version, use gluten-free brown rice pasta)
  • Shrimp:
  • 2 tablespoons olive oil (drained from sun-dried tomatoes jar or just use regular olive oil)
  • 1 pound shrimp (without shells, and deveined)
  • 3 garlic cloves minced
  • 1/4 teaspoon salt
  • Creamy Sauce:
  • 4 oz sun-dried tomatoes (without oil)
  • 4 garlic cloves minced
  • 1 cup half and half
  • 1 cup mozzarella cheese shredded (do not use fresh Mozzarella, use pre-shredded Mozzarella)
  • 1 tablespoon dried basil (if using fresh basil you can add more)
  • 1/4 teaspoon red pepper flakes crushed, add more to taste
  • 1/8 teaspoon paprika
  • 1/2 cup reserved cooked pasta water (or more)
  • 1/4 teaspoon salt

Instructions

To prepare the pasta:

Step 1: Follow the package direction to cook the pasta. Note to reserve some cooked pasta before draining.

To prepare the shrimp:

Step 1: Fo the sun-dried tomatoes in a jar, drain the oil first before using, reserving 2 tbsp drained oil.

Step 2: In a large skillet, add the reserved sun-dried oil or use regular olive oil. Heat over medium-high heat.

Step 3: Once the oil is hot, saute the shrimp and minced garlic. Cook the shrimp for a minute on one side until pink and sprinkle salt on each. Make sure not to overcrowd the shrimp.

Step 4: Flip and cook the other side for a minute or until golden brown.

Step 5: Transfer the cooked shrimp on a clean plate.

To make creamy Mozzarella sauce:

Step 1: In the same skillet, add more minced garlic and sun-dried tomatoes. Saute for a minute or until the garlic is aromatic.

Step 2: Add in half-and-half. Allow the mixture to boil.

Step 3: Add in the shredded cheese and stir. Reduce the heat to low and simmer until the cheese has melted completely and the sauce is creamy.

Step 4: Add a little half-and-half if the sauce becomes too thick.

Step 5: Add the crushed red pepper flakes, basil, and paprika. Stir until well mixed.

Step 6: Sprinkle about 1/4 teaspoon of salt and stir. Taste to your preference.

To assemble shrimp pasta:

Step 1: Add the cooked pasta and reheat over medium heat.

Step 2: Add in the seared shrimp and stir until well blended.

Step 3: Add more salt if necessary.

Step 4: Add a little half-and-half or pasta water if the sauce becomes too thick.

Step 5: Simmer on low heat until the flavours are well blended.

Step 6: Do not put a lot of salt because it might overpower the taste of the sun-dried tomatoes and basil.

Step 7: Serve and enjoy!

Notes:

Half-and-half is a combination of 1/2 cup of heavy cream and 1/2 cup of milk.

Drain the sun-dried tomatoes from the oil before adding them into the mixture and set aside about 2 tbsp of the olive oil.

I do not use and shred fresh Mozzarella.

I also use a low-moisture part-skim Mozzarella cheese.

October 8, 2020 0 comment
0 FacebookTwitterPinterestEmail
Main Dish Recipes

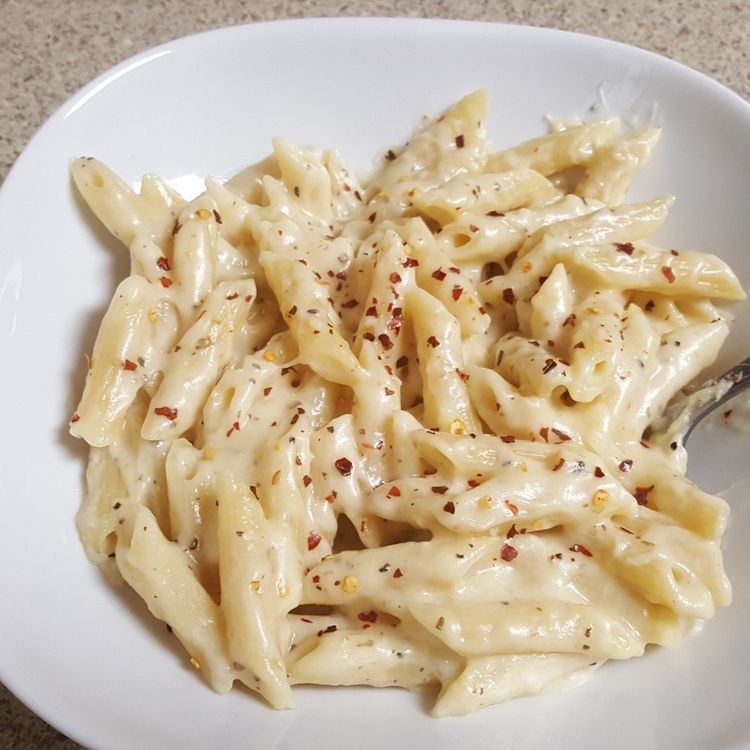
SUPER SIMPLE MAC & CHEESE ITALIAN STYLE

by Rebecca October 8, 2020
written by Rebecca

PREP TIME: 5 MINS | COOK TIME: 10 MINS | TOTAL TIME: 15 MINS | YIELD: 6

This is a fantastic dinner idea to add your weekly menu rotation. Super Simple Mac & Cheese Italian Style needs only seven ingredients and fifteen minutes to whip up. Easily come together and crazy delicious!

INGREDIENTS

4 tablespoons unsalted butter

1/4 cup all-purpose flour

2 cups whole milk (2% is good too)

1 pound dry mini penne pasta

8 ounces of Italian blend shredded cheese (*see below to make your blend)

1/3 cup fresh grated Parmesan cheese

1 tablespoon dried Italian seasoning (I prefer McCormick Tuscan Style Italian Seasoning)

HOW TO MAKE SUPER SIMPLE MAC & CHEESE ITALIAN STYLE

Step 1: Boil a large pot of salted water. Add pasta and cook following the package direction (al dente). Once cooked, drain the pasta and set aside.

Step 2: Melt the butter over medium heat in a medium saucepan. Once melted, whisk in the flour and Italian seasoning for about 2 minutes. Pour in the milk, whisking occasionally until the mixture has thickened. Then, stir in the Italian blend cheese and Parmesan until incorporated.

Step 3: Get the pasta and pour the cheese mixture over, stirring to combine. As the sauce sits in the pasta, the sauce will thicken.

Step 4: Serve immediately. Enjoy!

NOTES:

Use whatever cheese is available. What’s important is to use at least 4 ounces of mozzarella in your cheese blend.

Add veggies like peas, broccoli, and baby spinach. In the last 5 to 6 minutes of cooking your pasta, add about 2 cups of either frozen peas or broccoli. Cover the pot to quickly boil, then, uncover. The veggies will be done, the same time the pasta is cooked. For the fresh baby spinach, stir in around 3 cups once the pasta and cheese sauce is incorporated. When it is time to serve, the spinach will be perfectly wilted then.

You are welcome to add protein, too! If you have leftover turkey, chicken, or rotisserie chicken, use them! Place the pasta back in the pan after you drained them along with the chopped protein. Pour the sauce over and heat to warm the meat through. Or try leftover ground beef, burgers, rinsed, and drained beans like navy, kidney, or pinto.

SUPER SIMPLE MAC & CHEESE ITALIAN STYLE

Rebecca PREP TIME: 5 MINS | COOK TIME: 10 MINS | TOTAL TIME: 15 MINS | YIELD: 6 This is a fantastic dinner idea to add your weekly menu rotation. Super… Main Dish Recipes SUPER SIMPLE MAC & CHEESE ITALIAN STYLE European Print This
Serves: 6 Prep Time: 5 mins Cooking Time: 10 mins 10 mins
Nutrition facts: 200 calories 20 grams fat
Rating: 2.8/5
( 10 voted )

Ingredients

  • 4 tablespoons unsalted butter
  • 1/4 cup all-purpose flour
  • 2 cups whole milk (2% is good too)
  • 1 pound dry mini penne pasta
  • 8 ounces of Italian blend shredded cheese (*see below to make your blend)
  • 1/3 cup fresh grated Parmesan cheese
  • 1 tablespoon dried Italian seasoning (I prefer McCormick Tuscan Style Italian Seasoning)

Instructions

Step 1: Boil a large pot of salted water. Add pasta and cook following the package direction (al dente). Once cooked, drain the pasta and set aside.

Step 2: Melt the butter over medium heat in a medium saucepan. Once melted, whisk in the flour and Italian seasoning for about 2 minutes. Pour in the milk, whisking occasionally until the mixture has thickened. Then, stir in the Italian blend cheese and Parmesan until incorporated.

Step 3: Get the pasta and pour the cheese mixture over, stirring to combine. As the sauce sits in the pasta, the sauce will thicken.

Step 4: Serve immediately. Enjoy!

NOTES:

Use whatever cheese is available. What's important is to use at least 4 ounces of mozzarella in your cheese blend.

Add veggies like peas, broccoli, and baby spinach. In the last 5 to 6 minutes of cooking your pasta, add about 2 cups of either frozen peas or broccoli. Cover the pot to quickly boil, then, uncover. The veggies will be done, the same time the pasta is cooked. For the fresh baby spinach, stir in around 3 cups once the pasta and cheese sauce is incorporated. When it is time to serve, the spinach will be perfectly wilted then.

You are welcome to add protein, too! If you have leftover turkey, chicken, or rotisserie chicken, use them! Place the pasta back in the pan after you drained them along with the chopped protein. Pour the sauce over and heat to warm the meat through. Or try leftover ground beef, burgers, rinsed, and drained beans like navy, kidney, or pinto.

October 8, 2020 0 comment
0 FacebookTwitterPinterestEmail
Main Dish Recipes

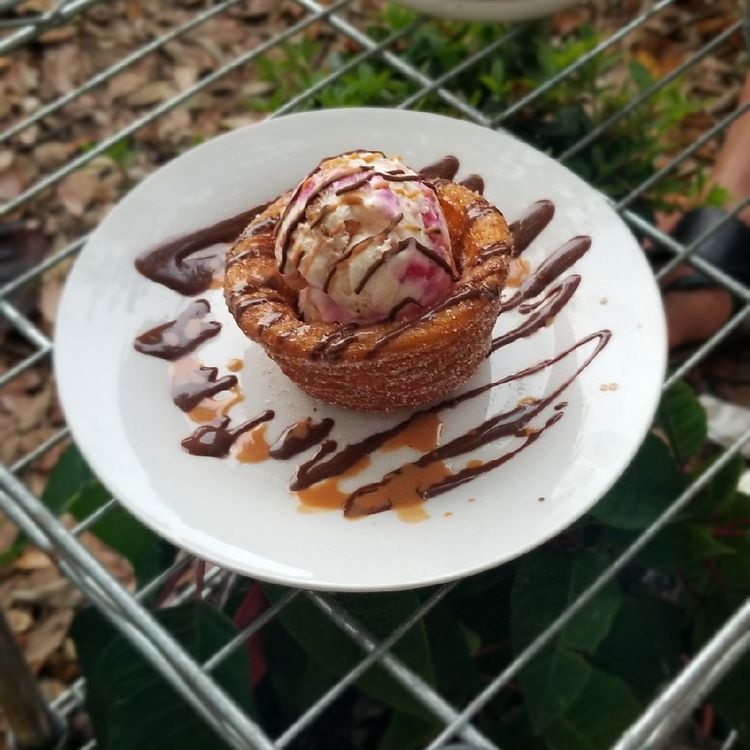
Churro Ice Cream Bowls

by Rebecca October 8, 2020
written by Rebecca

Servings: 8 bowls

I am into treats and fun desserts. I think they are lovely and delightful to make. One of my current obsession is this Churro Ice Cream Bowls. A different take to the usual churro that we dunk in our favourite dips. This time we fill these churro bowls with our fancied filling ice cream and toppings!

Ingredients

¼ cup butter(55 g)

2 tablespoons brown sugar

½ teaspoon salt

1 cup water(235 mL)

1 cup flour(125 g)

1 teaspoon vanilla

4 eggs

cooking spray

oil, for frying

cinnamon sugar

ice cream

hot fudge, optional

caramel sauce, optional

How to make Churro Ice Cream Bowls

Step 1: Add the butter, brown sugar, salt, and water in a 1.5-quart saucepan. Bring to a boil over medium-high heat.

Step 2: Once melted and the mixture starts to boil, adjust the heat to medium-low. Add in the flour and stir with a wooden spoon for about a minute until a ball is formed.

Step 3: Allow the mixture to cool for at least 5 minutes.

Step 4: Then, stir in the vanilla extract. Add in the eggs a piece at a time beating every after each addition until incorporated.

Step 5: Place the mixture into a piping bag with a small star tip.

Step 6: Using a non-stick cooking spray, generously grease the inverted muffin tin.

Step 7: Around the inverted cups, form the bowls by piping the dough in spirals. Quickly place the tray in the freezer. Freeze for about 3 hours to overnight until solid.

Step 8: In a deep pot, heat oil to 350 degrees F or 175 degrees C,

Step 9: Flex the muffin tin to loosen the churro bowls. If needed, use a butter knife under the bottom edge to unfix bowls. When frying, place the other bowls in the fridge until ready to cook.

Step 10: Fry the churros bowl in batches in not more than 3 minutes until nicely browned. To fry evenly, carefully turn the churro bowls.

Step 11: Transfer the cooked churros to a paper towel-lined plate and pat off excess oil.

Step 12: Roll each in cinnamon sugar and fill them in with your fancied ice cream and toppings. Enjoy!

Churro Ice Cream Bowls

Rebecca Servings: 8 bowls I am into treats and fun desserts. I think they are lovely and delightful to make. One of my current obsession is this Churro Ice Cream Bowls.… Main Dish Recipes Churro Ice Cream Bowls European Print This
Serves: 8
Nutrition facts: 200 calories 20 grams fat
Rating: 5.0/5
( 1 voted )

Ingredients

  • ¼ cup butter(55 g)
  • 2 tablespoons brown sugar
  • ½ teaspoon salt
  • 1 cup water(235 mL)
  • 1 cup flour(125 g)
  • 1 teaspoon vanilla
  • 4 eggs
  • cooking spray
  • oil, for frying
  • cinnamon sugar
  • ice cream
  • hot fudge, optional
  • caramel sauce, optional

Instructions

Step 1: Add the butter, brown sugar, salt, and water in a 1.5-quart saucepan. Bring to a boil over medium-high heat.

Step 2: Once melted and the mixture starts to boil, adjust the heat to medium-low. Add in the flour and stir with a wooden spoon for about a minute until a ball is formed.

Step 3: Allow the mixture to cool for at least 5 minutes.

Step 4: Then, stir in the vanilla extract. Add in the eggs a piece at a time beating every after each addition until incorporated.

Step 5: Place the mixture into a piping bag with a small star tip.

Step 6: Using a non-stick cooking spray, generously grease the inverted muffin tin.

Step 7: Around the inverted cups, form the bowls by piping the dough in spirals. Quickly place the tray in the freezer. Freeze for about 3 hours to overnight until solid.

Step 8: In a deep pot, heat oil to 350 degrees F or 175 degrees C,

Step 9: Flex the muffin tin to loosen the churro bowls. If needed, use a butter knife under the bottom edge to unfix bowls. When frying, place the other bowls in the fridge until ready to cook.

Step 10: Fry the churros bowl in batches in not more than 3 minutes until nicely browned. To fry evenly, carefully turn the churro bowls.

Step 11: Transfer the cooked churros to a paper towel-lined plate and pat off excess oil.

Step 12: Roll each in cinnamon sugar and fill them in with your fancied ice cream and toppings. Enjoy!

October 8, 2020 0 comment
0 FacebookTwitterPinterestEmail
Main Dish Recipes

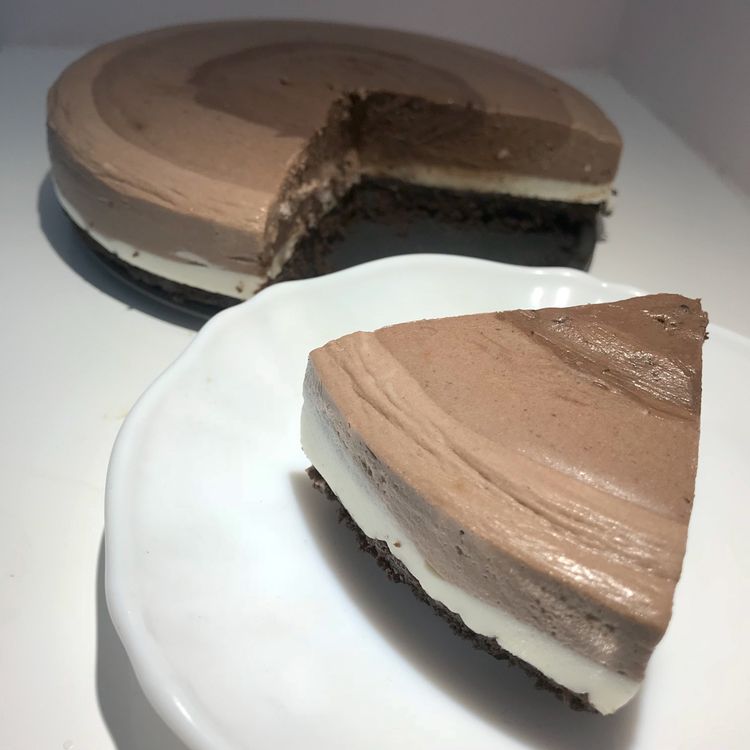
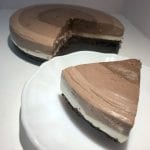
Chocolate Ripple Cheesecake

by Rebecca October 8, 2020
written by Rebecca

Servings: 8

A decadent dessert with layers of chocolate ripple. Mesmerizing and super fun to make!

Ingredients

24 chocolate sandwich cookies

4 tablespoons unsalted butter, melted

32 oz cream cheese(900 g), 4 packages

¾ cup sugar(150 g)

1 teaspoon vanilla extract

4 cups heavy cream(960 mL)

1 ½ tablespoon gelatin powder

2 cups semi-sweet chocolate(340 g), melted, divided

How to make Chocolate Ripple Cheesecake

Step 1: Add the cookies in a ziplock. With a rolling pin, crush them until fine crumbs mode.

Step 2: Transfer the crumbs in a bowl. Add in the melted butter and mix until incorporated.

Step 3: In a 9-inch or 23 cm springform cake pan, transfer the crust mixture. Evenly press on the bottom of the pan using a measuring cup. Place in the fridge to chill, covered, for at least 20 minutes.

Step 4: Meanwhile, in a large bowl, add the cream cheese, sugar, and vanilla. Whisk until smooth.

Step 5: Then, warm heavy cream until hot before adding in the gelatin. Remove from the heat and allow to sit for a minute.

Step 6: Gradually whisk the heavy cream into the cream cheese until smooth.

Step 7: Separate the cheesecake batter quickly in 4 bowls about 3 cups or 720 ml in the first bowl, 2 cups or 480 ml in another, 2 1/2 cups or 600 ml in the next, and a cup or 240 ml in the last bowl.

Step 8: Grab the second bowl and whisk in a tbsp melted chocolate.

Step 9: The third bowl with 3 tbsp melted chocolate.

Step 10: Fourth bowl, 2 tbsp chocolate. Note that individual bowls will vary in colour.

To build the cheesecake:

Step 11: In the middle of the pan, gradually pour in the contents of the first bowl. When the batter has spread, pour the contents of the rest of the bowl in order. In case the liquid is not anymore liquidy, just place in the microwave for about 30 seconds before pouring into the pan.

Step 12: Using a plastic wrap, tightly cover the top of the pan. Place inside the fridge to chill for about 4 hours or overnight.

Chocolate Ripple Cheesecake

Rebecca Servings: 8 A decadent dessert with layers of chocolate ripple. Mesmerizing and super fun to make! Ingredients 24 chocolate sandwich cookies 4 tablespoons unsalted butter, melted 32 oz cream cheese(900… Main Dish Recipes Chocolate Ripple Cheesecake European Print This
Serves: 8
Nutrition facts: 200 calories 20 grams fat
Rating: 5.0/5
( 1 voted )

Ingredients

  • 24 chocolate sandwich cookies
  • 4 tablespoons unsalted butter, melted
  • 32 oz cream cheese(900 g), 4 packages
  • ¾ cup sugar(150 g)
  • 1 teaspoon vanilla extract
  • 4 cups heavy cream(960 mL)
  • 1 ½ tablespoon gelatin powder
  • 2 cups semi-sweet chocolate(340 g), melted, divided

Instructions

Step 1: Add the cookies in a ziplock. With a rolling pin, crush them until fine crumbs mode.

Step 2: Transfer the crumbs in a bowl. Add in the melted butter and mix until incorporated.

Step 3: In a 9-inch or 23 cm springform cake pan, transfer the crust mixture. Evenly press on the bottom of the pan using a measuring cup. Place in the fridge to chill, covered, for at least 20 minutes.

Step 4: Meanwhile, in a large bowl, add the cream cheese, sugar, and vanilla. Whisk until smooth.

Step 5: Then, warm heavy cream until hot before adding in the gelatin. Remove from the heat and allow to sit for a minute.

Step 6: Gradually whisk the heavy cream into the cream cheese until smooth.

Step 7: Separate the cheesecake batter quickly in 4 bowls about 3 cups or 720 ml in the first bowl, 2 cups or 480 ml in another, 2 1/2 cups or 600 ml in the next, and a cup or 240 ml in the last bowl.

Step 8: Grab the second bowl and whisk in a tbsp melted chocolate.

Step 9: The third bowl with 3 tbsp melted chocolate.

Step 10: Fourth bowl, 2 tbsp chocolate. Note that individual bowls will vary in colour.

To build the cheesecake:

Step 11: In the middle of the pan, gradually pour in the contents of the first bowl. When the batter has spread, pour the contents of the rest of the bowl in order. In case the liquid is not anymore liquidy, just place in the microwave for about 30 seconds before pouring into the pan.

Step 12: Using a plastic wrap, tightly cover the top of the pan. Place inside the fridge to chill for about 4 hours or overnight.

October 8, 2020 0 comment
0 FacebookTwitterPinterestEmail
Main Dish Recipes

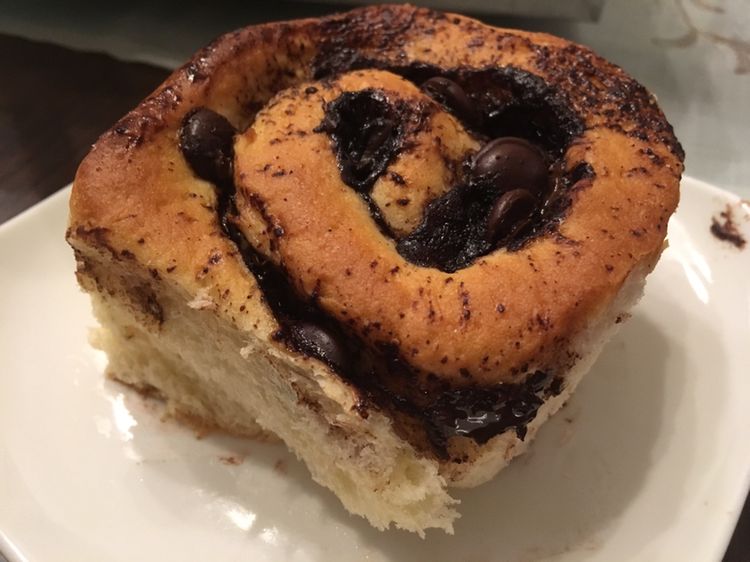
The Best Homemade Chocolate Rolls Recipe

by Rebecca October 8, 2020
written by Rebecca

Prep: 30 minutes | Cook: 20 minutes | Rising Time: 40 minutes | Total: 1 hour 30 minutes | Servings: 12 rolls

I love the taste, the aroma when baking, and the experience when making these Homemade Chocolate Rolls. You’ll never think that these delicious rolls come together that easily. They are a quick fix with only 30 minutes of prep time!

Ingredients

Dough:

1 cup milk, lukewarm (240ml)

1/4 cup granulated white sugar (50g)

1 tbsp active dry yeast (9g)

2 large eggs, room temperature

1/4 cup unsalted butter, melted (56g)

1 tsp salt

3 1/2 to 4 cups all-purpose flour, spooned and levelled (420-480g)

Filling:

1/2 cup light brown sugar, packed (100g)

2 tbsp unsweetened cocoa powder

2 tsp cinnamon

6 tbsp unsalted butter, softened (85g)

1 cup semi-sweet chocolate bars chopped or chips (175g)

Frosting:

1/8 cup unsalted butter, room temperature (28g)

1/4 cup cream cheese, softened (56g)

1 cup powdered sugar, sifted (120g)

1/4 cup unsweetened cocoa powder, spooned and levelled (21g)

1-2 tbsp milk

How to make Homemade Chocolate Rolls

To Make the dough:

Step 1: Pour the milk in a large mixing bowl along with sugar, and yeast. Combine in a stand mixer fitted with a whisk attachment. Set aside for at least 5 to 10 minutes until it gets foamy on the surface.

Step 2: Add in the egg, butter, and salt. Whisk some more until incorporated.

Step 3: Remove the whisk attachment and replace it with a dough hook.

Step 4: Stir in 3 1/2 cups flour on medium-low heat. At this point, the dough should be sticky when touch but is not sticking in the bowl. In case the dough sticks after several minutes of kneading, just add a tbsp flour at a time or up to a total of 4 cups, mixing on low speed. Careful not to add too much flour as the Chocolate Rolls will be dry.

NOTE: Knead on medium speed for about 5 minutes. Place the dough in a greased (with little oil or non-stick spray) bowl. Quietly grease the top of the oil and loosely cover with a dry towel. Set aside for at least 10 minutes at room temperature.

To Make the filling:

Step 1: Mix the brown sugar, cocoa, and cinnamon in a small bowl and set aside.

Step 2: Prepare the oven. Preheat it to 200 degrees F or 100 degrees C.

Step 3: Using parchment paper, line a baking sheet and set aside.

Step 4: Press the dough into a 20 x 18-inch or 50 x 45-cm rectangle. Smear the butter, omitting an inch or 2.5cm border at the long side. On top of the butter, evenly sprinkle the sugar mixture and chocolate.

Step 5: Tightly roll-up the long side and slice into 12 same-size roll pieces. Place on the prepared baking sheet and don’t cover.

Step 6: Before placing the rolls inside the preheated oven, turn the heat off first. Let the rolls rise for approximately 30 minutes or until the size doubled, leaving the wisket ajar.

Step 7: Take the rolls out of the oven and let them sit at room temperature.

Step 8: Then, preheat again the oven, this time to 375 degrees F or 190 degrees C.

step 9: Return the rolls into the oven and put parchment paper on top of the rolls. This will limit the rolls from substantial browning. Bake for about 10 to 15 minutes or until lightly browned.

To Make the frosting:

Step 1: Add the butter and cream cheese in a medium mixing bowl. Beat with a handheld or stand mixer fitted with a whisk until creamy. Stir in the powdered sugar until incorporated. Then, the cocoa followed by a tbsp milk at a time until you get your desired consistency.

Step 2: Allow the rolls to cool for at least 5 to 10 minutes after removing from the oven.

Step 3: While still warm, spoon the frosting on top of each roll.

NOTE: Serve the rolls while still warm or store in an airtight container for up to 3 days. When ready to serve, just reheat in the microwave for 20 seconds.

Additional Notes:

A lot is asking if these rolls can be made without milk. Yes! Use almond milk instead, or cashew milk, coconut milk, or any kind that works for you.

Use dark brown sugar if you run out of light sugar or take 3/4 tbsp molasses and mix with half a cup of white sugar.

Nutrition facts:

Calories: 329kcal | Carbohydrates: 34g | Protein: 4g | Fat: 20g | Saturated Fat: 12g | Cholesterol: 73mg | Sodium: 338mg | Potassium: 191mg | Fiber: 2gSugar: 29g | Vitamin A: 510IU | Calcium: 62mg | Iron: 1.6mg

The Best Homemade Chocolate Rolls Recipe

Rebecca Prep: 30 minutes | Cook: 20 minutes | Rising Time: 40 minutes | Total: 1 hour 30 minutes | Servings: 12 rolls I love the taste, the aroma when baking,… Main Dish Recipes The Best Homemade Chocolate Rolls Recipe European Print This
Serves: 12 Prep Time: 30 mins Cooking Time: 20 mins 20 mins
Nutrition facts: 329 calories 20 fat
Rating: 5.0/5
( 1 voted )

Ingredients

  • Dough:
  • 1 cup milk, lukewarm (240ml)
  • 1/4 cup granulated white sugar (50g)
  • 1 tbsp active dry yeast (9g)
  • 2 large eggs, room temperature
  • 1/4 cup unsalted butter, melted (56g)
  • 1 tsp salt
  • 3 1/2 to 4 cups all-purpose flour, spooned and levelled (420-480g)
  • Filling:
  • 1/2 cup light brown sugar, packed (100g)
  • 2 tbsp unsweetened cocoa powder
  • 2 tsp cinnamon
  • 6 tbsp unsalted butter, softened (85g)
  • 1 cup semi-sweet chocolate bars chopped or chips (175g)
  • Frosting:
  • 1/8 cup unsalted butter, room temperature (28g)
  • 1/4 cup cream cheese, softened (56g)
  • 1 cup powdered sugar, sifted (120g)
  • 1/4 cup unsweetened cocoa powder, spooned and levelled (21g)
  • 1-2 tbsp milk

Instructions

To Make the dough:

Step 1: Pour the milk in a large mixing bowl along with sugar, and yeast. Combine in a stand mixer fitted with a whisk attachment. Set aside for at least 5 to 10 minutes until it gets foamy on the surface.

Step 2: Add in the egg, butter, and salt. Whisk some more until incorporated.

Step 3: Remove the whisk attachment and replace it with a dough hook.

Step 4: Stir in 3 1/2 cups flour on medium-low heat. At this point, the dough should be sticky when touch but is not sticking in the bowl. In case the dough sticks after several minutes of kneading, just add a tbsp flour at a time or up to a total of 4 cups, mixing on low speed. Careful not to add too much flour as the Chocolate Rolls will be dry.

NOTE: Knead on medium speed for about 5 minutes. Place the dough in a greased (with little oil or non-stick spray) bowl. Quietly grease the top of the oil and loosely cover with a dry towel. Set aside for at least 10 minutes at room temperature.

To Make the filling:

Step 1: Mix the brown sugar, cocoa, and cinnamon in a small bowl and set aside.

Step 2: Prepare the oven. Preheat it to 200 degrees F or 100 degrees C.

Step 3: Using parchment paper, line a baking sheet and set aside.

Step 4: Press the dough into a 20 x 18-inch or 50 x 45-cm rectangle. Smear the butter, omitting an inch or 2.5cm border at the long side. On top of the butter, evenly sprinkle the sugar mixture and chocolate.

Step 5: Tightly roll-up the long side and slice into 12 same-size roll pieces. Place on the prepared baking sheet and don't cover.

Step 6: Before placing the rolls inside the preheated oven, turn the heat off first. Let the rolls rise for approximately 30 minutes or until the size doubled, leaving the wisket ajar.

Step 7: Take the rolls out of the oven and let them sit at room temperature.

Step 8: Then, preheat again the oven, this time to 375 degrees F or 190 degrees C.

step 9: Return the rolls into the oven and put parchment paper on top of the rolls. This will limit the rolls from substantial browning. Bake for about 10 to 15 minutes or until lightly browned.

To Make the frosting:

Step 1: Add the butter and cream cheese in a medium mixing bowl. Beat with a handheld or stand mixer fitted with a whisk until creamy. Stir in the powdered sugar until incorporated. Then, the cocoa followed by a tbsp milk at a time until you get your desired consistency.

Step 2: Allow the rolls to cool for at least 5 to 10 minutes after removing from the oven.

Step 3: While still warm, spoon the frosting on top of each roll.

NOTE: Serve the rolls while still warm or store in an airtight container for up to 3 days. When ready to serve, just reheat in the microwave for 20 seconds.

Additional Notes:

A lot is asking if these rolls can be made without milk. Yes! Use almond milk instead, or cashew milk, coconut milk, or any kind that works for you.

Use dark brown sugar if you run out of light sugar or take 3/4 tbsp molasses and mix with half a cup of white sugar.

Nutrition facts:

Calories: 329kcal | Carbohydrates: 34g | Protein: 4g | Fat: 20g | Saturated Fat: 12g | Cholesterol: 73mg | Sodium: 338mg | Potassium: 191mg | Fiber: 2gSugar: 29g | Vitamin A: 510IU | Calcium: 62mg | Iron: 1.6mg


October 8, 2020 0 comment
0 FacebookTwitterPinterestEmail
Main Dish Recipes

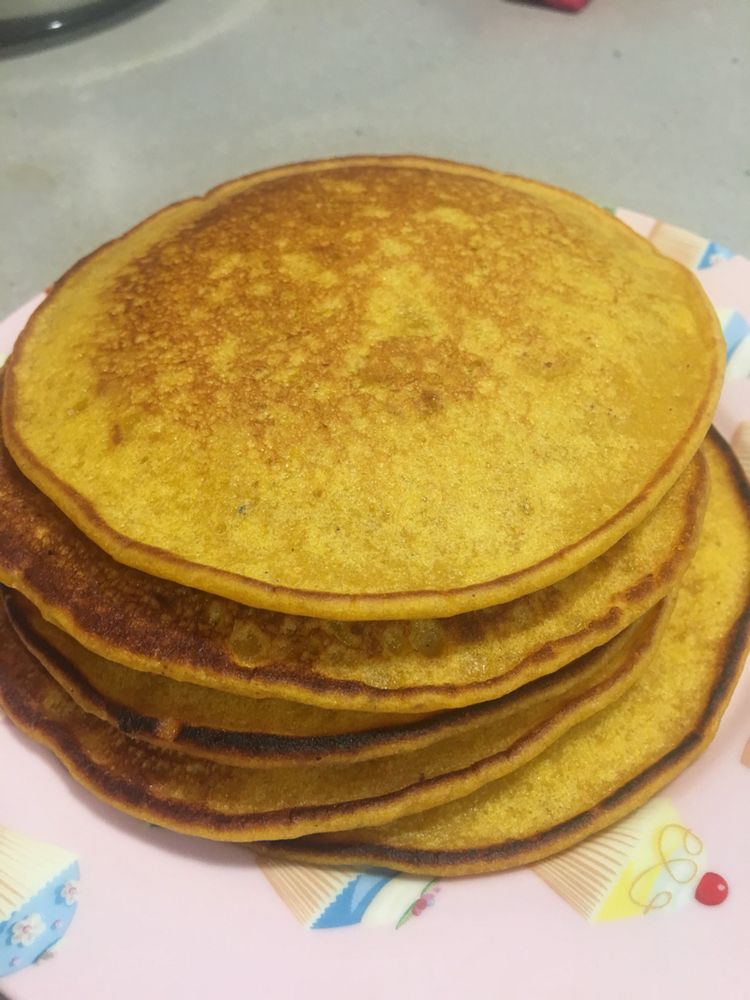
Pumpkin Pancakes Recipe

by Rebecca October 8, 2020
written by Rebecca

Prep Time: 10 mins | Cook Time: 10 mins | Total Time: 20 mins | Servings: 12 Pancakes

Light and fluffy pancakes with pumpkin spice flavour, always a favourite! A fun and delicious breakfast that everyone loves. These easy and quick pancakes are the perfect fall breakfast. Start your day right with these pumpkin pancakes. So good you’ll never quit eating them!

Ingredients

2 cups flour

1/3 cup sugar

5 teaspoons baking powder

1 teaspoon salt

1 teaspoon cinnamon

1/4 teaspoon cloves

1/4 teaspoon nutmeg

1 1/2 cups milk

2 eggs

1/2 cup oil

1 teaspoon vanilla

1 cup pumpkin puree

whipped cream, pecans, and maple syrup, for topping

How to Make Pumpkin Pancakes

Step 1: Add the flour, sugar, baking powder, salt, cinnamon, cloves, and nutmeg in a large bowl. Whisk until incorporated.

Step 2: Pour the milk and add in the eggs, oil, vanilla, and pumpkin in a medium bowl or measuring cup. Stir until combined.

Step 3: Add the wet ingredients into the dry ingredients. Stir until the batter has no to lesser lumps. Allow the batter to sit for at least 5 to 10 minutes.

Step 4: Pour the batter on a hot large skillet by 1/4 cup scoops and cook over medium heat for about 3 to 4 minutes or until large bubbles developed.

Step 5: Turn on the other side and cook for 2 to 3 minutes more.

Step 6: To serve, top with whipped cream, pecans, and maple syrup. Enjoy!

Nutrition Facts:

Serving: 1 Pancake · Calories: 219 kcal · Carbohydrates: 26 g · Protein: 4 g · Fat: 11 g · Saturated Fat: 2 g · Cholesterol: 30 mg · Sodium: 220 mg · Potassium: 283 mg · Fiber: 1 g · Sugar: 8 g · Vitamin A: 3266 IU · Vitamin C: 1 mg · Calcium: 121 mg · Iron: 2 mg

Pumpkin Pancakes Recipe

Rebecca Prep Time: 10 mins | Cook Time: 10 mins | Total Time: 20 mins | Servings: 12 Pancakes Light and fluffy pancakes with pumpkin spice flavour, always a favourite! A… Main Dish Recipes Pumpkin Pancakes Recipe European Print This
Serves: 12 Prep Time: 10 mins Cooking Time: 10 mins 10 mins
Nutrition facts: 219 calories 11 fat
Rating: 5.0/5
( 1 voted )

Ingredients

  • 2 cups flour
  • 1/3 cup sugar
  • 5 teaspoons baking powder
  • 1 teaspoon salt
  • 1 teaspoon cinnamon
  • 1/4 teaspoon cloves
  • 1/4 teaspoon nutmeg
  • 1 1/2 cups milk
  • 2 eggs
  • 1/2 cup oil
  • 1 teaspoon vanilla
  • 1 cup pumpkin puree
  • whipped cream, pecans, and maple syrup, for topping

Instructions

Step 1: Add the flour, sugar, baking powder, salt, cinnamon, cloves, and nutmeg in a large bowl. Whisk until incorporated.

Step 2: Pour the milk and add in the eggs, oil, vanilla, and pumpkin in a medium bowl or measuring cup. Stir until combined.

Step 3: Add the wet ingredients into the dry ingredients. Stir until the batter has no to lesser lumps. Allow the batter to sit for at least 5 to 10 minutes.

Step 4: Pour the batter on a hot large skillet by 1/4 cup scoops and cook over medium heat for about 3 to 4 minutes or until large bubbles developed.

Step 5: Turn on the other side and cook for 2 to 3 minutes more.

Step 6: To serve, top with whipped cream, pecans, and maple syrup. Enjoy!


October 8, 2020 0 comment
0 FacebookTwitterPinterestEmail
Main Dish Recipes

PISTACHIO BAKLAVA

by Rebecca October 8, 2020
written by Rebecca

Prep Time: 45 MINS | Cook Time: 1 HR 30 MINS | Additional Time: 8 HRS | Total Time: 10 HRS 15 MINS | Yield: MAKES ABOUT 40 PIECES

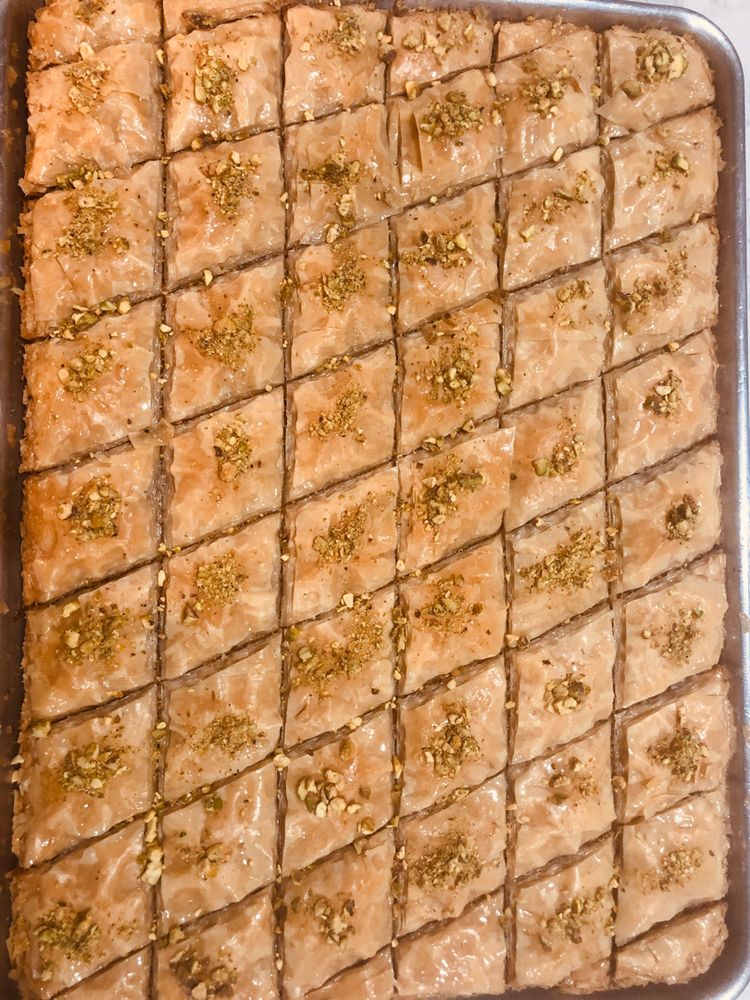
A bit intimidating and requires a lot of work but the result feels and tastes as if it came straight from a Turkish bakery. Delicious, rich, and crisp layers of buttery phyllo with fragrant pistachios – a real masterpiece!

INGREDIENTS

SUGAR SYRUP:

1¾ cups (350g) granulated sugar

¾ cup of water

1 1/2 tablespoons (28g/ 1oz) glucose syrup (optional, but recommended)

A squeeze of lemon

⅛ teaspoon table salt

1 tablespoon orange blossom water (more or less according to taste)

NUT FILLING:

3 cups (340 g/ 12oz) shelled, raw unsalted pistachios, plus more for garnish

PASTRY:

2 (500g/ 8oz each) packages phyllo dough, a total of 30 sheets thawed

1 1/8 cup (255g/ 9oz) melted ghee (or 1 ½ cups (340g/ 12oz) unsalted butter, clarified per instructions below, melted, and cooled slightly) (1 1/8 cup clarified)

HOW TO MAKE PISTACHIO BAKLAVA

TO MAKE THE SUGAR SYRUP:

Step 1: Combine the sugar, water, glucose syrup, lemon, and salt in a small saucepan. Take to a complete boil over medium-high heat while hardly stirring to make sure that the sugar dissolved. Remove from heat and quickly stir in the orange blossom water.

Step 2: In a measuring cup with a spout or a gravy boat, shift the mixture and set aside until completely cooled. Note that cooled syrup in an airtight container will last up to 4 days when chilled. And before using, set at room temperature.

TO MAKE THE PASTRY:

Step 1: Place the oven rack to the lower-middle position before preheating the oven to 150 degrees C or 300 degrees F.

Step 2: Add the pistachios in a food processor and pulse for about fifteen 1-second pulses until finely chopped. Shift to a bowl and set aside.

Step 3: With ghee or clarified butter, brush a 13 x 9-inch baking pan.

Step 4: On a large cutting board, unwrap and unfold the phyllo. Use your hands to smoothen and flatten. Adjust the size, with the pan as a guide, slice off the excess so the phyllo will fit into the pan. With plastic wrap, cover the phyllo. To prevent drying, top it with a damp kitchen towel.

Step 5: In the bottom of the prepared pan, place a sheet of phyllo and brush with ghee or clarified butter to coat. Add 7 extra phyllo sheets, brushing each with more ghee or butter. Spreading the ground pistachios evenly on top.

Step 6: Add 6 more phyllo sheets and again brush each with ghee or butter. Top if off with another cup of pistachios. Do this for the remaining phyllo sheets and pistachios.

Step 7: Put another layer by adding 10 more sheets of phyllo into the pan. Make sure to use this time the nicest and most intact sheets. Again brushing each with ghee or butter apart from the last layer.

Step 8: Compress the layers with your hands working from the middle outwards to press out any air pockets. Then, cut the baklava using a sharp knife into diamonds (5 vertical cuts and around 8 cuts diagonally). Brush the surface with the rest of the ghee or butter.

Step 9: Place inside the preheated oven and bake for about 1 1/2 to 1 1/3 hours. Halfway through baking, don’t forget to rotate the pan.

Step 10: Once done, remove from the oven and quickly pour the cooled syrup over the cut lines of the baklava. Leave about 2 tbsp syrup to drizzle over the surface. Garnish with ground pistachios the pieces with a pinch.

Step 11: Allow cooling on a wire rack for at least 3 hours at room temperature. Then, cover with foil and let the baklava rest for 8 hours before serving. Note that when tightly wrapped in foil, baklava can last up to 10 days at room temperature.

TO REFINE THE BUTTER (IF USING INSTEAD OF GHEE):

Step 1: Slowly melt 1 1/2 cups butter over medium-low heat until the butterfat is separated from the milk solids and settled on the bottom of the saucepan.

Step 2: Take the pan out of the heat and allow the butter to rest for at least 10 minutes before skimming the foam from the covering using a spoon.

Step 3: Gradually add the clear butterfat in a bowl, leaving the milk behind. This makes around 1 1/8 cup (225g or 9oz) clarified butter.

NOTES:

To decrease the chance of crystalizing, glucose syrup is added to the syrup. This leaves baklava with a greater shelf life.

Orange blossom compliments the taste of pistachios and adds a subtle floral note. It’s highly recommended but skip it if not wanted.

PISTACHIO BAKLAVA

Rebecca Prep Time: 45 MINS | Cook Time: 1 HR 30 MINS | Additional Time: 8 HRS | Total Time: 10 HRS 15 MINS | Yield: MAKES ABOUT 40 PIECES A… Main Dish Recipes PISTACHIO BAKLAVA European Print This
Serves: 40 Prep Time: 45 mins Cooking Time: 9 hrs 30 mins 9 hrs 30 mins
Nutrition facts: 200 calories 20 grams fat
Rating: 5.0/5
( 1 voted )

Ingredients

  • SUGAR SYRUP:
  • 1¾ cups (350g) granulated sugar
  • ¾ cup of water
  • 1 1/2 tablespoons (28g/ 1oz) glucose syrup (optional, but recommended)
  • A squeeze of lemon
  • ⅛ teaspoon table salt
  • 1 tablespoon orange blossom water (more or less according to taste)
  • NUT FILLING:
  • 3 cups (340 g/ 12oz) shelled, raw unsalted pistachios, plus more for garnish
  • PASTRY:
  • 2 (500g/ 8oz each) packages phyllo dough, a total of 30 sheets thawed
  • 1 1/8 cup (255g/ 9oz) melted ghee (or 1 ½ cups (340g/ 12oz) unsalted butter, clarified per instructions below, melted, and cooled slightly) (1 1/8 cup clarified)

Instructions

TO MAKE THE SUGAR SYRUP:

Step 1: Combine the sugar, water, glucose syrup, lemon, and salt in a small saucepan. Take to a complete boil over medium-high heat while hardly stirring to make sure that the sugar dissolved. Remove from heat and quickly stir in the orange blossom water.

Step 2: In a measuring cup with a spout or a gravy boat, shift the mixture and set aside until completely cooled. Note that cooled syrup in an airtight container will last up to 4 days when chilled. And before using, set at room temperature.

TO MAKE THE PASTRY:

Step 1: Place the oven rack to the lower-middle position before preheating the oven to 150 degrees C or 300 degrees F.

Step 2: Add the pistachios in a food processor and pulse for about fifteen 1-second pulses until finely chopped. Shift to a bowl and set aside.

Step 3: With ghee or clarified butter, brush a 13 x 9-inch baking pan.

Step 4: On a large cutting board, unwrap and unfold the phyllo. Use your hands to smoothen and flatten. Adjust the size, with the pan as a guide, slice off the excess so the phyllo will fit into the pan. With plastic wrap, cover the phyllo. To prevent drying, top it with a damp kitchen towel.

Step 5: In the bottom of the prepared pan, place a sheet of phyllo and brush with ghee or clarified butter to coat. Add 7 extra phyllo sheets, brushing each with more ghee or butter. Spreading the ground pistachios evenly on top.

Step 6: Add 6 more phyllo sheets and again brush each with ghee or butter. Top if off with another cup of pistachios. Do this for the remaining phyllo sheets and pistachios.

Step 7: Put another layer by adding 10 more sheets of phyllo into the pan. Make sure to use this time the nicest and most intact sheets. Again brushing each with ghee or butter apart from the last layer.

Step 8: Compress the layers with your hands working from the middle outwards to press out any air pockets. Then, cut the baklava using a sharp knife into diamonds (5 vertical cuts and around 8 cuts diagonally). Brush the surface with the rest of the ghee or butter.

Step 9: Place inside the preheated oven and bake for about 1 1/2 to 1 1/3 hours. Halfway through baking, don't forget to rotate the pan.

Step 10: Once done, remove from the oven and quickly pour the cooled syrup over the cut lines of the baklava. Leave about 2 tbsp syrup to drizzle over the surface. Garnish with ground pistachios the pieces with a pinch.

Step 11: Allow cooling on a wire rack for at least 3 hours at room temperature. Then, cover with foil and let the baklava rest for 8 hours before serving. Note that when tightly wrapped in foil, baklava can last up to 10 days at room temperature.

TO REFINE THE BUTTER (IF USING INSTEAD OF GHEE):

Step 1: Slowly melt 1 1/2 cups butter over medium-low heat until the butterfat is separated from the milk solids and settled on the bottom of the saucepan.

Step 2: Take the pan out of the heat and allow the butter to rest for at least 10 minutes before skimming the foam from the covering using a spoon.

Step 3: Gradually add the clear butterfat in a bowl, leaving the milk behind. This makes around 1 1/8 cup (225g or 9oz) clarified butter.

NOTES:

To decrease the chance of crystalizing, glucose syrup is added to the syrup. This leaves baklava with a greater shelf life.

Orange blossom compliments the taste of pistachios and adds a subtle floral note. It's highly recommended but skip it if not wanted.

October 8, 2020 0 comment
0 FacebookTwitterPinterestEmail
Main Dish Recipes

Stuffed Eggplant

by Rebecca October 8, 2020
written by Rebecca

Yield: Serves 4 | Prep Time: 20 minutes | Cook time: 35 minutes

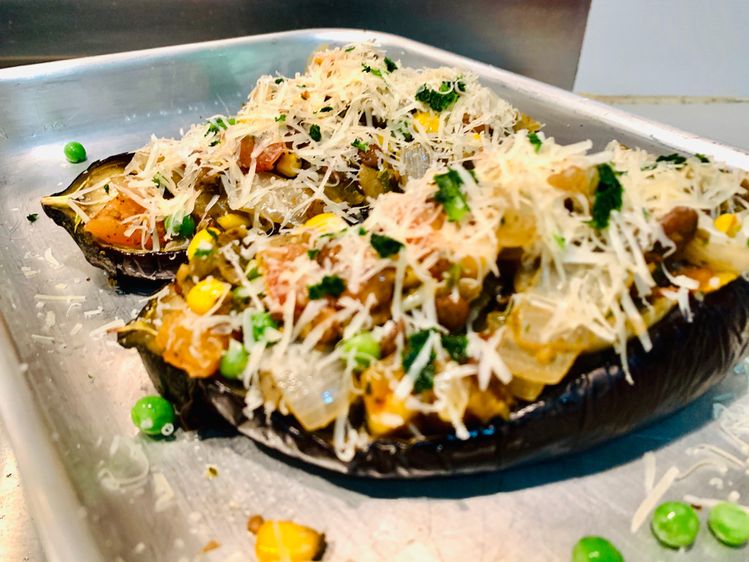
Stuffed Eggplants filled with a savoury filling. A beautiful, healthy dish with fun textures stacked with middle eastern spices and a garlic tahini sauce. Too pretty to look at and tastes exquisite, too!

Ingredients

Spicy Garlic Tahini Sauce:

1/2 cup plain, low-fat Greek yoghurt

2 tablespoons tahini paste

6 cloves garlic

1 tablespoon lemon juice

1/2 teaspoon salt

1/4 teaspoon cayenne pepper (or your desired amount)

3 tablespoons water

Stuffed Eggplant:

1 teaspoon paprika

1 teaspoon ground coriander

1 teaspoon ground cumin

1/2 teaspoon ground cinnamon

2 eggplants, cut in half length-wise and centre scooped out leaving about 1” border all around

Olive oil (about 4 tablespoons, divided use)

Salt

Black pepper

1 small onion, finely diced

1/2 pound lean ground beef (or turkey, chicken, lamb, or sausage)

4 cloves garlic, pressed through a garlic press

Pinch red pepper flakes (optional)

1 1/2 cups cooked basmati rice (you can get this from ½ cup uncooked rice cooked with ¾ cup water)

1/2 cup chopped cherry tomatoes

1 tablespoon chopped flat-leaf parsley

1 teaspoon chopped fresh mint leaves, plus a couple of extra leaves for garnish

1 tablespoon roughly chopped pistachios (optional)

How to make Stuffed Eggplant

Step 1: Prepare the oven. Preheat it to 400 degrees.

Step 2: Using parchment paper, line a baking sheet.

Step 3: To make the garlic tahini sauce, add the spicy garlic tahini sauce ingredients into a food processor. Pulse until smooth. Pour the mixture into a bowl and set aside.

Step 4: Combine the paprika, coriander, cumin, and cinnamon in a small ramekin and set aside.

Step 5: On the prepared baking sheet, flesh side-up, place 4 halves of eggplants. On the flesh side of the eggplants, drizzle around 3 tbsp oil, then, sprinkle 1/3 seasoning mix from the ramekin and pinches of salt and pepper.

Step 6: Roast in the preheated oven for about 35 minutes or until tender and the eggplants are easily pierced using a paring knife.

Step 7: Meanwhile, get the filling ready. Start by heating a pan over medium-high heat. When hot, drizzle around a tbsp oil and saute the diced onions for several minutes until tender. Adding the beef, crumbling it and cooking for some minutes more along with the onion. Stir in the rest of the seasoning mix with a few pinches of salt and pepper, garlic, and red pepper flakes. Go on cooking until the meat is thoroughly cooked.

Step 8: Add the cooked rice into the cooked ground beef along with the chopped celery, tomatoes, chopped parsley, mint, and pistachios. Fold the ingredients until incorporated and keep warm.

Step 9: Generously fill each roasted eggplant cavity with the same potions of the warm filling. Transfer them on a plate and drizzle spicy garlic tahini sauce over each stuffed eggplant. If desired, garnish with more mint or parsley.

Nutrition Info:

524 calories

Stuffed Eggplant

Rebecca Yield: Serves 4 | Prep Time: 20 minutes | Cook time: 35 minutes Stuffed Eggplants filled with a savoury filling. A beautiful, healthy dish with fun textures stacked with middle… Main Dish Recipes Stuffed Eggplant European Print This
Serves: 4 Prep Time: 20 mins Cooking Time: 35 mins 35 mins
Nutrition facts: 200 calories 20 grams fat
Rating: 5.0/5
( 1 voted )

Ingredients

  • Spicy Garlic Tahini Sauce:
  • 1/2 cup plain, low-fat Greek yoghurt
  • 2 tablespoons tahini paste
  • 6 cloves garlic
  • 1 tablespoon lemon juice
  • 1/2 teaspoon salt
  • 1/4 teaspoon cayenne pepper (or your desired amount)
  • 3 tablespoons water
  • Stuffed Eggplant:
  • 1 teaspoon paprika
  • 1 teaspoon ground coriander
  • 1 teaspoon ground cumin
  • 1/2 teaspoon ground cinnamon
  • 2 eggplants, cut in half length-wise and centre scooped out leaving about 1” border all around
  • Olive oil (about 4 tablespoons, divided use)
  • Salt
  • Black pepper
  • 1 small onion, finely diced
  • 1/2 pound lean ground beef (or turkey, chicken, lamb, or sausage)
  • 4 cloves garlic, pressed through a garlic press
  • Pinch red pepper flakes (optional)
  • 1 1/2 cups cooked basmati rice (you can get this from ½ cup uncooked rice cooked with ¾ cup water)
  • 1/2 cup chopped cherry tomatoes
  • 1 tablespoon chopped flat-leaf parsley
  • 1 teaspoon chopped fresh mint leaves, plus a couple of extra leaves for garnish
  • 1 tablespoon roughly chopped pistachios (optional)

Instructions

Step 1: Prepare the oven. Preheat it to 400 degrees.

Step 2: using parchment paper, line a baking sheet.

Step 3: To make the garlic tahini sauce, add the spicy garlic tahini sauce ingredients into a food processor. Pulse until smooth. Pour the mixture into a bowl and set aside.

Step 4: Combine the paprika, coriander, cumin, and cinnamon in a small ramekin and set aside.

Step 5: On the prepared baking sheet, flesh side-up, place 4 halves of eggplants. On the flesh side of the eggplants, drizzle around 3 tbsp oil, then, sprinkle 1/3 seasoning mix from the ramekin and pinches of salt and pepper.

Step 6: Roast in the preheated oven for about 35 minutes or until tender and the eggplants are easily pierced using a paring knife.

Step 7: Meanwhile, get the filling ready. Start by heating a pan over medium-high heat. When hot, drizzle around a tbsp oil and saute the diced onions for several minutes until tender. Adding the beef, crumbling it and cooking for some minutes more along with the onion. Stir in the rest of the seasoning mix with a few pinches of salt and pepper, garlic, and red pepper flakes. Go on cooking until the meat is thoroughly cooked.

Step 8: Add the cooked rice into the cooked ground beef along with the chopped celery, tomatoes, chopped parsley, mint, and pistachios. Fold the ingredients until incorporated and keep warm.

Step 9: Generously fill each roasted eggplant cavity with the same potions of the warm filling. Transfer them on a plate and drizzle spicy garlic tahini sauce over each stuffed eggplant. If desired, garnish with more mint or parsley.

October 8, 2020 0 comment
0 FacebookTwitterPinterestEmail
Main Dish Recipes

PALEO WHOLE30 POTATO EGG BOATS

by Rebecca October 8, 2020
written by Rebecca

SERVINGS: 8

A healthy, fun breakfast that everyone will love and enjoy. These potato egg boats are packed with staples of a complete breakfast – sausage, peppers, green onions, and eggs. This is a must-have for a filling and delicious breakfast. Serve these with some ranch for dipping for that extra flavour.

INGREDIENTS

8-10 large potatoes

1 tablespoon garlic oil

1 bell pepper, diced (not green if needing low FODMAP)

1/4 cup chopped green onion, about 1 bunch

1/2 teaspoon salt

9 oz paleo breakfast sausage

8 large eggs

HOW TO MAKE PALEO WHOLE30 POTATO EGG BOATS

Step 1: Prepare the oven. Preheat it to 375 degrees.

Step 2: Using parchment paper, line a sheet tray.

Step 3: After washing the potatoes, poke with a fork a couple of times.

Step 4: Rub them a bit with avocado oil and transfer on the prepared sheet tray.

Step 5: Place inside the preheated oven and bake for approximately 50 to 60 minutes or until tender.

Step 6: Once done, remove from the oven and allow to cool for at least 10 to 15 minutes.

Step 7: When the potatoes are cool enough to handle, scoop the insides out leaving a bit of potato lining on the sides of the skin. And transfer in a 13 x 9-inch pan.

Step 8: Meanwhile, begin making the filling. Drizzle garlic oil into a large skillet. Heat over medium heat and cook the pepper, green onion, and salt for about 5 to 7 minutes or until tender.

Step 9: Stir in the sausage and cook for 5 minutes more.

Step 10: In a large bowl, crack the eggs and stir in the pepper and sausage mixture.

Step 12: Evenly distribute the mixture on each potato and cook for about 40 minutes or until the eggs are done.

PALEO WHOLE30 POTATO EGG BOATS

Rebecca SERVINGS: 8 A healthy, fun breakfast that everyone will love and enjoy. These potato egg boats are packed with staples of a complete breakfast – sausage, peppers, green onions, and… Main Dish Recipes PALEO WHOLE30 POTATO EGG BOATS European Print This
Serves: 8
Nutrition facts: 200 calories 20 grams fat
Rating: 5.0/5
( 1 voted )

Ingredients

  • 8-10 large potatoes
  • 1 tablespoon garlic oil
  • 1 bell pepper, diced (not green if needing low FODMAP)
  • 1/4 cup chopped green onion, about 1 bunch
  • 1/2 teaspoon salt
  • 9 oz paleo breakfast sausage
  • 8 large eggs

Instructions

Step 1: Prepare the oven. Preheat it to 375 degrees.

Step 2: Using parchment paper, line a sheet tray.

Step 3: After washing the potatoes, poke with a fork a couple of times.

Step 4: Rub them a bit with avocado oil and transfer on the prepared sheet tray.

Step 5: Place inside the preheated oven and bake for approximately 50 to 60 minutes or until tender.

Step 6: Once done, remove from the oven and allow to cool for at least 10 to 15 minutes.

Step 7: When the potatoes are cool enough to handle, scoop the insides out leaving a bit of potato lining on the sides of the skin. And transfer in a 13 x 9-inch pan.

Step 8: Meanwhile, begin making the filling. Drizzle garlic oil into a large skillet. Heat over medium heat and cook the pepper, green onion, and salt for about 5 to 7 minutes or until tender.

Step 9: Stir in the sausage and cook for 5 minutes more.

Step 10: In a large bowl, crack the eggs and stir in the pepper and sausage mixture.

Step 12: Evenly distribute the mixture on each potato and cook for about 40 minutes or until the eggs are done.

October 8, 2020 0 comment
0 FacebookTwitterPinterestEmail
Newer Posts
Older Posts

Popular Posts

  • 1

    Crispy Crunchy Parmesan Potatoes

    March 21, 2020
  • 2

    CROCK POT SMOTHERED PORK CHOPS

    March 21, 2020
  • Facebook
  • Twitter

@2019 - All Right Reserved.


Back To Top