Cook it once
  • Home
  • Privacy Policy
  • Recipes
    • KETO
    • LC
    • WW
  • Tips
  • Contact
Cook it once
  • Home
  • Privacy Policy
  • Recipes
    • KETO
    • LC
    • WW
  • Tips
  • Contact
Category:

General Recipes

General Recipes

Super Easy Hawaiian Dip Recipe

by Rebecca September 12, 2022
written by Rebecca

Prep time: 10 mins | Inactive: 30 mins | Yield: 12-14 servings

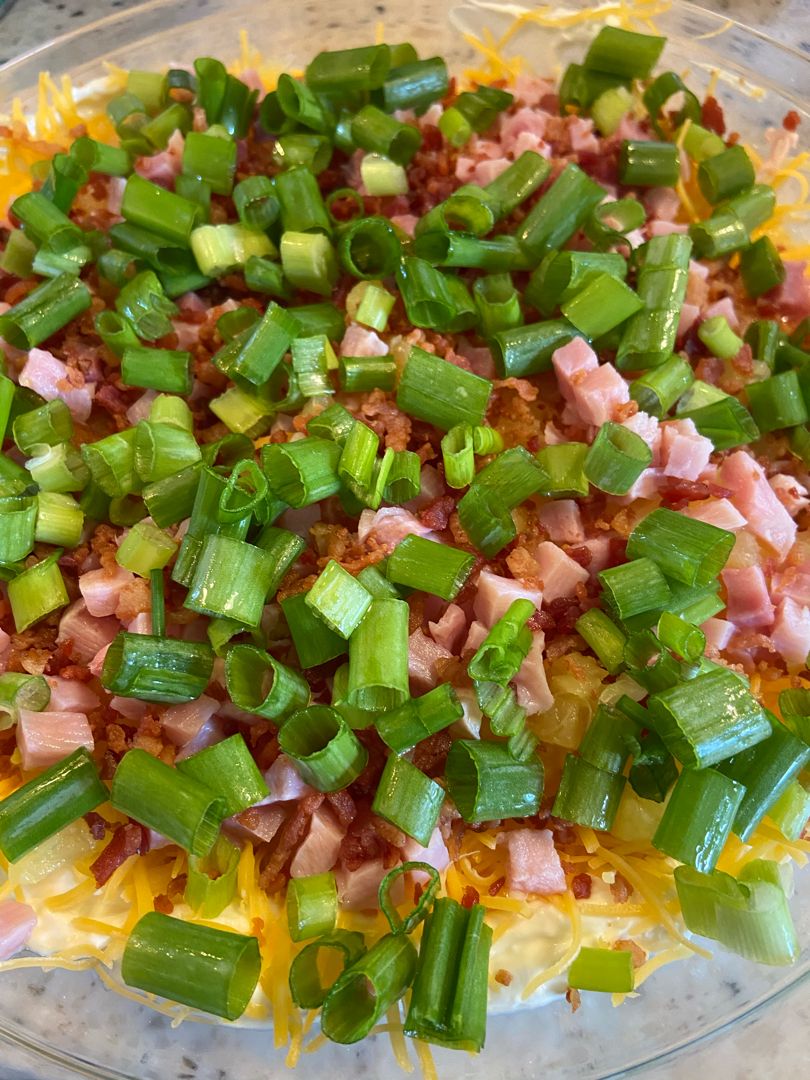
Savory and sweet – this delicious Hawaiian Dip is one of my top favorite dips! It is insanely easy and quick to make using just a few basic ingredients. The cream cheese mixture is topped with shredded cheese, crushed pineapple, chopped ham, bacon pieces, and green onion. Make sure to chill this dip for at least 30 minutes before serving. When ready to serve, enjoy this tasty Hawaiian Dip with chips, veggies, or Ritz crackers.

This Hawaiian Dip is an easy, fun summer dip recipe! Cool, creamy, delicious packed with mouthwatering sweet and savory flavor combo. I am in love with this dip, I make it all year round!

This Hawaiian Dip is a unique summer recipe. You’ll adore this dip if you love Hawaiian-style pizza. My mom is a big fan of Hawaiian pizza, thus her obsession with this dip. My dad on contrary is not a fan, but this dip captured his heart. It is the perfect dip that you can easily put together and enjoy at your next summer pool parties!

INGREDIENTS

1 c. ham, chopped

1 2.8-ounces package of bacon pieces

8 ounces cream cheese, softened

1 can crushed pineapple, drained (reserve 1/4 c. of juice, set aside)

2 tbsp sour cream

1 c. shredded cheddar cheese

2 tbsp green onions, chopped

Crackers for dipping

Salt & pepper to taste

How to make Super Easy Hawaiian Dip

Step 1: In a large bowl, place the cream cheese, sour cream, and pineapple juice. Mix well until blended, then spread this mixture into a pie pan.

Step 2: Sprinkle the shredded cheese on top of the cream cheese mixture. Top with crushed pineapple followed with the chopped ham, pieces of bacon, and green onion.

Step 3: Cover the pie pan and place it in the fridge. Allow the dip to chill for at least 30 minutes, then serve with chips, veggies, and/or Ritz crackers. Enjoy!

Super Easy Hawaiian Dip Recipe

Rebecca Prep time: 10 mins | Inactive: 30 mins | Yield: 12-14 servings Savory and sweet – this delicious Hawaiian Dip is one of my top favorite dips! It is insanely… General Recipes Super Easy Hawaiian Dip Recipe European Print This
Serves: 12-14 Prep Time: 10 mins
Nutrition facts: 200 calories 20 grams fat
Rating: 5.0/5
( 1 voted )

Ingredients

  • 1 c. ham, chopped
  • 1 2.8-ounces package of bacon pieces
  • 8 ounces cream cheese, softened
  • 1 can crushed pineapple, drained (reserve 1/4 c. of juice, set aside)
  • 2 tbsp sour cream
  • 1 c. shredded cheddar cheese
  • 2 tbsp green onions, chopped
  • Crackers for dipping
  • Salt & pepper to taste

Instructions

Step 1: In a large bowl, place the cream cheese, sour cream, and pineapple juice. Mix well until blended, then spread this mixture into a pie pan.

Step 2: Sprinkle the shredded cheese on top of the cream cheese mixture. Top with crushed pineapple followed with the chopped ham, pieces of bacon, and green onion.

Step 3: Cover the pie pan and place it in the fridge. Allow the dip to chill for at least 30 minutes, then serve with chips, veggies, and/or Ritz crackers. Enjoy!
September 12, 2022 0 comment
0 FacebookTwitterPinterestEmail
General Recipes

Easy Hawaiian Dip

by Rebecca September 9, 2022
written by Rebecca

Prep time: 10 mins | Inactive: 30 mins | Yield: 12-14 servings

I am in love with this Hawaiian Dip! It is sweet and savory. Incredibly easy and quick to make using just a few basic ingredients. Serve this dip chilled with Ritz crackers, chips, or veggies.

My family is pro-pineapple and ham. That is why they are always excited whenever I am serving their favorite dip – Hawaiian Dip! The combination of the sweet and tangy and salty and savory flavor of this dip is out of this world! This dip is great, you’ll love this even if you are on the fence about the controversial duo of pineapple and ham.

The delightful layers of this Hawaiian Dip are the first that caught my attention. The creamy base of cream cheese, tangy sour cream, and pineapple juice balance each other perfectly. The second layer is composed of shredded cheese, crushed pineapple, chopped ham, bacon pieces, and green onions. This dip surely has undoubtedly amazing layers, textures, and flavors!

So, if you are searching for the perfect potluck or grill-out, make sure to give this Hawaiian Dip a try!

INGREDIENTS

1 c. ham, chopped

2 tbsp sour cream

1 can crushed pineapple, drained (reserve 1/4 c. juice, set aside)

8 ounces cream cheese, softened

1 c. shredded cheddar cheese

1 2.8-ounces package of bacon pieces

2 tbsp green onions, chopped

Crackers for dipping

Salt & pepper to taste

How to make Easy Hawaiian Dip

Step 1: In a large bowl, place the cream cheese, sour cream, and pineapple juice. Mix well until combined. Into a pie pan, spread the mixture.

Step 2: Mix the cream cheese with the shredded cheese, crushed pineapple, chopped ham, bacon pieces, and green onion until well blended. Spread this on top of the first layer in the pie pan.

Step 3: Cover the pan and place in the fridge to chill for at least 30 minutes before serving.

Step 4: Once chilled, serve the Hawaiian Dip with Ritz crackers, chips, or veggies. Enjoy!

Easy Hawaiian Dip

Rebecca Prep time: 10 mins | Inactive: 30 mins | Yield: 12-14 servings I am in love with this Hawaiian Dip! It is sweet and savory. Incredibly easy and quick to… General Recipes Easy Hawaiian Dip European Print This
Serves: 12-14 Prep Time: 10 mins
Nutrition facts: 200 calories 20 grams fat
Rating: 5.0/5
( 1 voted )

Ingredients

  • 1 c. ham, chopped
  • 2 tbsp sour cream
  • 1 can crushed pineapple, drained (reserve 1/4 c. juice, set aside)
  • 8 ounces cream cheese, softened
  • 1 c. shredded cheddar cheese
  • 1 2.8-ounces package of bacon pieces
  • 2 tbsp green onions, chopped
  • Crackers for dipping
  • Salt & pepper to taste

Instructions

Step 1: In a large bowl, place the cream cheese, sour cream, and pineapple juice. Mix well until combined. Into a pie pan, spread the mixture.

Step 2: Mix the cream cheese with the shredded cheese, crushed pineapple, chopped ham, bacon pieces, and green onion until well blended. Spread this on top of the first layer in the pie pan.

Step 3: Cover the pan and place in the fridge to chill for at least 30 minutes before serving.

Step 4: Once chilled, serve the Hawaiian Dip with Ritz crackers, chips, or veggies. Enjoy!

September 9, 2022 0 comment
0 FacebookTwitterPinterestEmail
General Recipes

Fried Pickles & Tangy Dipping Sauce

by Rebecca September 9, 2022
written by Rebecca

Prep time: 15 mins | Cook time: 3 mins | Total time: 18 mins | Servings: 6-8

These Fried Pickles with Tangy Dipping Sauce are an amazing appetizer not only for game day but any day! They are super easy and quick to make. You can even make these fried pickles gluten-free just by substituting some ingredients.

Frying pickles are astonishingly amazing! They are a surprise appetizer and the Tangy Dipping Sauce makes these fried pickles even better! Make sure to give these fried pickles a try soon. They are game changers!

INGREDIENTS

1 egg

1 c. milk

1-2 c. Dill Pickle Chips drained

1 c. corn starch

1/2 teaspoon garlic salt

1-2 c. corn meal

1/4 teaspoon dill, dried

Hot sauce

pinch pepper

Vegetable Oil for frying

2 teaspoons chili powder

Tangy Dipping Sauce:

1/8 teaspoon dill

1 tablespoon Ketchup

1/2 c. Mayo

1 teaspoon lemon juice

1-2 shakes of Hot Sauce

1/4 teaspoon garlic salt

How to make Fried Pickles & Tangy Dipping Sauce

Step 1: In a pan, heat the vegetable oil to 350 to 375 degrees F.

Step 2: Ready three bowls. Place the cornstarch in the first bowl and season with 1 teaspoon of Chili powder. Whisk 1 egg with 1 c milk in the second bowl. For flavor, you can add a few dashes of hot sauce if desired. In the last bowl, combine 1 to 2 c cornmeal, 1/4 tsp dill, half tsp garlic salt, and 1 tsp chili powder. You can season with a pinch of pepper if preferred.

Step 3: In the cornstarch mixture, dip the pickle chips, shaking the excess off. Coat with the egg wash, then with the cornmeal mixture.

Step 4: Into the hot oil, drop the pickles and fry for about 2 to 3 minutes or until golden brown. On paper towels, transfer the fried pickles.

Step 5: To make the Tangy Dipping Sauce, combine the sauce ingredients until well blended.

Step 6: Serve the fried pickles with the Tangy Dipping Sauce. Enjoy!

NOTES:

For a gluten-free version, use gluten-free cornmeal.

You can use dairy-free milk in place of egg wash like almond, soy, or Rice milk.

Fried Pickles & Tangy Dipping Sauce

Rebecca Prep time: 15 mins | Cook time: 3 mins | Total time: 18 mins | Servings: 6-8 These Fried Pickles with Tangy Dipping Sauce are an amazing appetizer not only… General Recipes Fried Pickles & Tangy Dipping Sauce European Print This
Serves: 6-8 Prep Time: 15 mins Cooking Time: 3 mins 3 mins
Nutrition facts: 200 calories 20 grams fat
Rating: 5.0/5
( 1 voted )

Ingredients

  • 1 egg
  • 1 c. milk
  • 1-2 c. Dill Pickle Chips drained
  • 1 c. corn starch
  • 1/2 teaspoon garlic salt
  • 1-2 c. corn meal
  • 1/4 teaspoon dill, dried
  • Hot sauce
  • pinch pepper
  • Vegetable Oil for frying
  • 2 teaspoons chili powder
  • Tangy Dipping Sauce:
  • 1/8 teaspoon dill
  • 1 tablespoon Ketchup
  • 1/2 c. Mayo
  • 1 teaspoon lemon juice
  • 1-2 shakes of Hot Sauce
  • 1/4 teaspoon garlic salt

Instructions

Step 1: In a pan, heat the vegetable oil to 350 to 375 degrees F.

Step 2: Ready three bowls. Place the cornstarch in the first bowl and season with 1 teaspoon of Chili powder. Whisk 1 egg with 1 c milk in the second bowl. For flavor, you can add a few dashes of hot sauce if desired. In the last bowl, combine 1 to 2 c cornmeal, 1/4 tsp dill, half tsp garlic salt, and 1 tsp chili powder. You can season with a pinch of pepper if preferred.

Step 3: In the cornstarch mixture, dip the pickle chips, shaking the excess off. Coat with the egg wash, then with the cornmeal mixture.

Step 4: Into the hot oil, drop the pickles and fry for about 2 to 3 minutes or until golden brown. On paper towels, transfer the fried pickles.

Step 5: To make the Tangy Dipping Sauce, combine the sauce ingredients until well blended.

Step 6: Serve the fried pickles with the Tangy Dipping Sauce. Enjoy!

Notes

For a gluten-free version, use gluten-free cornmeal. You can use dairy-free milk in place of egg wash like almond, soy, or Rice milk.

September 9, 2022 0 comment
0 FacebookTwitterPinterestEmail
General Recipes

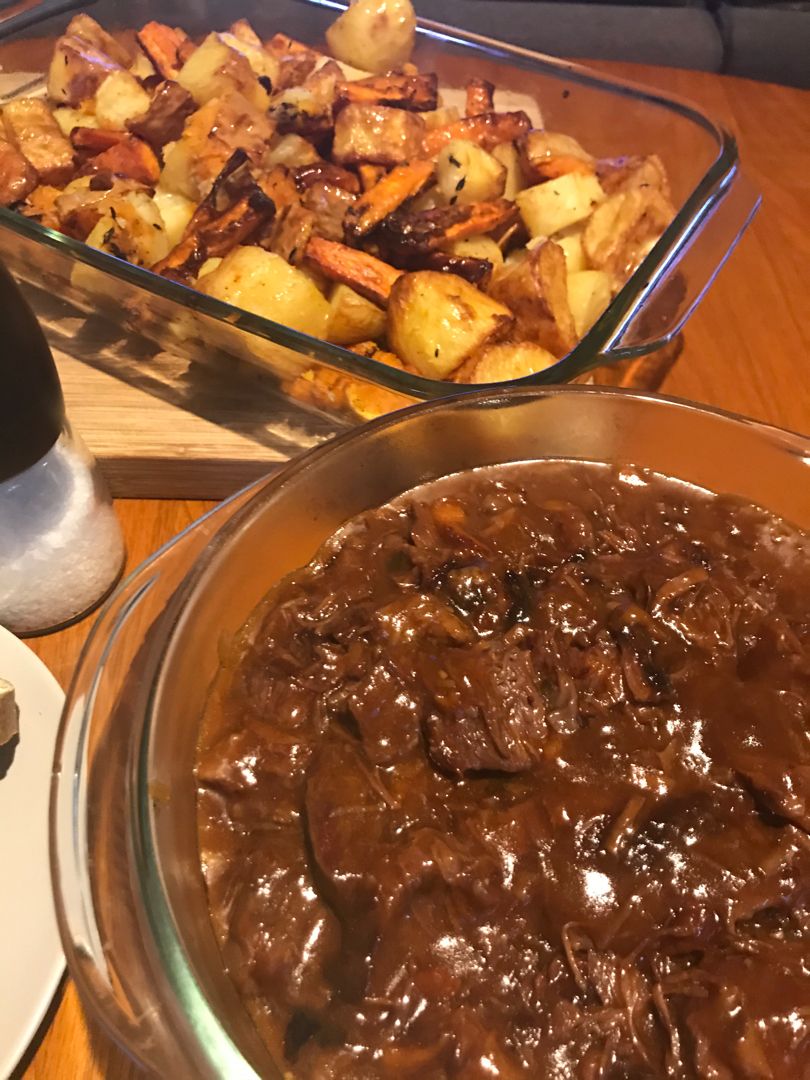
Roasted Red Pepper Beef Stew

by Rebecca September 9, 2022
written by Rebecca

Total time: 2 hrs | Serves: 8

This is not your typical beef stew. It is one of the best, super comforting, and savory stews you’ll ever make! All you need is to replace a couple of ingredients to make this delicious Rustic Beef Stew! Serve a big bowl of this stew with some crusty bread to scoop all the mouthwatering flavor.

This Rustic Beef Stew will warm your soul. It is a cozy beef stew that you can easily make in your Dutch oven. While making this stew, your kitchen will be toasty and will smell amazing as this hearty meal bubbles away on your stove. Enjoy a Rustic take on your good old-fashioned beef stew with this easy recipe.

INGREDIENTS

2 tbsp canola oil

2 lbs beef chuck, cut into 1-inch cubes

3 cloves garlic, minced

4 c. beef broth

3 tbsp flour

1 tbsp Worcestershire

1 (14 ounces) can fire roasted red bell peppers

1 (10 ounces) can cream of mushroom soup

1 shallot, diced

Kosher salt and pepper, to taste

1 (6 ounces) can of tomato paste

How to make Roasted Red Pepper Beef Stew

Step 1: In a large bowl, place the flour. Add the beef and toss until well-coated.

Step 2: In a large Dutch oven, heat 1 tbsp olive oil over medium heat. Once the oil is hot, add the beef to the pot in batches and cook until browned. Set the beef aside when done.

Step 3: In the same skillet, add the diced shallots and cook for about 2 to 3 minutes until tender. Next, add the garlic and cook for another minute, stirring until aromatic.

Step 4: To the skillet with the onion and garlic, add the fire-roasted bell peppers, tomato paste, beef broth, Worcestershire, and browned beef. Stir well and bring everything to a boil. Once boiling, decrease the heat. Put the lid on and cook for about an hour.

Step 5: Add the mushroom soup after 1 hour. Stir and continue to cook for another 30 minutes.

Step 6: Into serving bowls, ladle the stew and serve immediately with crust bread on the side. Enjoy!

Roasted Red Pepper Beef Stew

Rebecca Total time: 2 hrs | Serves: 8 This is not your typical beef stew. It is one of the best, super comforting, and savory stews you’ll ever make! All you… General Recipes Roasted Red Pepper Beef Stew European Print This
Serves: 8
Nutrition facts: 200 calories 20 grams fat
Rating: 5.0/5
( 1 voted )

Ingredients

  • 2 tbsp canola oil
  • 2 lbs beef chuck, cut into 1-inch cubes
  • 3 cloves garlic, minced
  • 4 c. beef broth
  • 3 tbsp flour
  • 1 tbsp Worcestershire
  • 1 (14 ounces) can fire roasted red bell peppers
  • 1 (10 ounces) can cream of mushroom soup
  • 1 shallot, diced
  • Kosher salt and pepper, to taste
  • 1 (6 ounces) can of tomato paste

Instructions

Step 1: In a large bowl, place the flour. Add the beef and toss until well-coated.

Step 2: In a large Dutch oven, heat 1 tbsp olive oil over medium heat. Once the oil is hot, add the beef to the pot in batches and cook until browned. Set the beef aside when done.

Step 3: In the same skillet, add the diced shallots and cook for about 2 to 3 minutes until tender. Next, add the garlic and cook for another minute, stirring until aromatic.

Step 4: To the skillet with the onion and garlic, add the fire-roasted bell peppers, tomato paste, beef broth, Worcestershire, and browned beef. Stir well and bring everything to a boil. Once boiling, decrease the heat. Put the lid on and cook for about an hour.

Step 5: Add the mushroom soup after 1 hour. Stir and continue to cook for another 30 minutes.

Step 6: Into serving bowls, ladle the stew and serve immediately with crust bread on the side. Enjoy!

September 9, 2022 0 comment
0 FacebookTwitterPinterestEmail
General Recipes

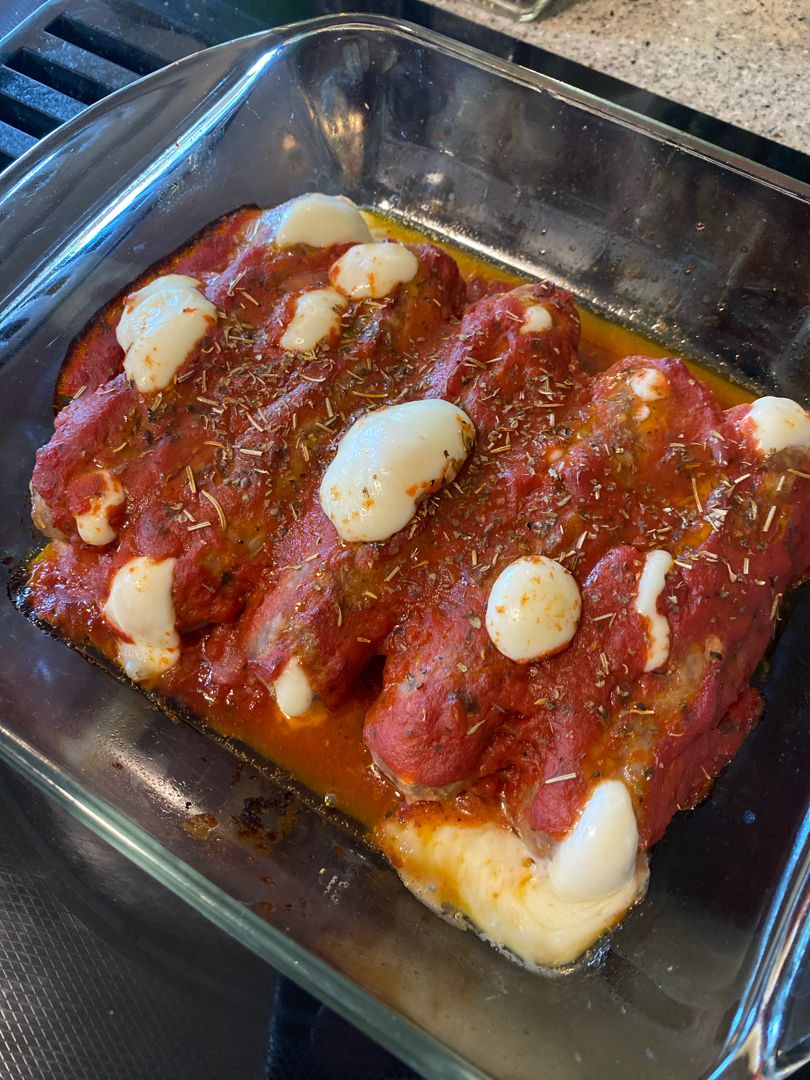
Stuffed Italian Sausage

by Rebecca September 9, 2022
written by Rebecca

Prep time: 10 mins | Cook time: 40 mins | Serves: 6

I have a brilliant family dinner idea that I am sure everyone will love! This Stuffed Italian Sausage is an amazing weeknight meal option that you can easily and quickly make at any time. It is super good, I wish I have known this sooner!

Our favorite Italian sausage stuffed with melty mozzarella cheese on a bed of zesty marinara is out-of-this-world delicious! To make this Stuffed Italian Sausage, you only need three ingredients (uncooked Italian sausage links, string cheese, and your favorite marinara sauce). Start by slicing open each link to about halfway, almost creating a pocket. Stuff each with the string cheese. On top of the stuffed sausage links, pour the marinara sauce and bake until the cheese is bubbly and melty and the sausages are juicy and plump. For the marinara sauce, you are welcome to use any of your favorite marinara sauces. To serve, enjoy this Stuffed Italian Sausage over pasta. And for a low-carb meal, pair this Stuffed Italian Sausage with veggies.

INGREDIENTS

6 mozzarella cheese sticks

1 c. marinara sauce

6 uncooked Italian sausage links

How to make Stuffed Italian Sausage

Step 1: Prepare the oven. Preheat it to 400 degrees F.

Step 2: Down on one side of each sausage, make a slice using a knife or kitchen scissors. Cut the sausage about halfway, but not all the way through.

Step 3: Into each cut, place a mozzarella stick. Gently press the sausage back into shape using your hands.

Step 4: Into the bottom of a baking dish, pour the marinara, spreading it out using a spoon or spatula.

Step 5: In the baking dish, arrange the sausages, cut side up. Then, tent with foil and place in the preheated oven. Bake for about 30 minutes. Remove the cover and continue baking for another 10 minutes or until the sausages are completely cooked, and the cheese is bubbly and lightly golden.

Step 6: Remove from the oven when done and serve the Stuffed Italian Sausage immediately. Enjoy!

Stuffed Italian Sausage

Rebecca Prep time: 10 mins | Cook time: 40 mins | Serves: 6 I have a brilliant family dinner idea that I am sure everyone will love! This Stuffed Italian Sausage… General Recipes Stuffed Italian Sausage European Print This
Serves: 6 Prep Time: 10 mins Cooking Time: 40 mins 40 mins
Nutrition facts: 200 calories 20 grams fat
Rating: 5.0/5
( 1 voted )

Ingredients

  • 6 mozzarella cheese sticks
  • 1 c. marinara sauce
  • 6 uncooked Italian sausage links

Instructions

Step 1: Prepare the oven. Preheat it to 400 degrees F.

Step 2: Down on one side of each sausage, make a slice using a knife or kitchen scissors. Cut the sausage about halfway, but not all the way through.

Step 3: Into each cut, place a mozzarella stick. Gently press the sausage back into shape using your hands.

Step 4: Into the bottom of a baking dish, pour the marinara, spreading it out using a spoon or spatula.

Step 5: In the baking dish, arrange the sausages, cut side up. Then, tent with foil and place in the preheated oven. Bake for about 30 minutes. Remove the cover and continue baking for another 10 minutes or until the sausages are completely cooked, and the cheese is bubbly and lightly golden.

Step 6: Remove from the oven when done and serve the Stuffed Italian Sausage immediately. Enjoy!

September 9, 2022 0 comment
0 FacebookTwitterPinterestEmail
General Recipes

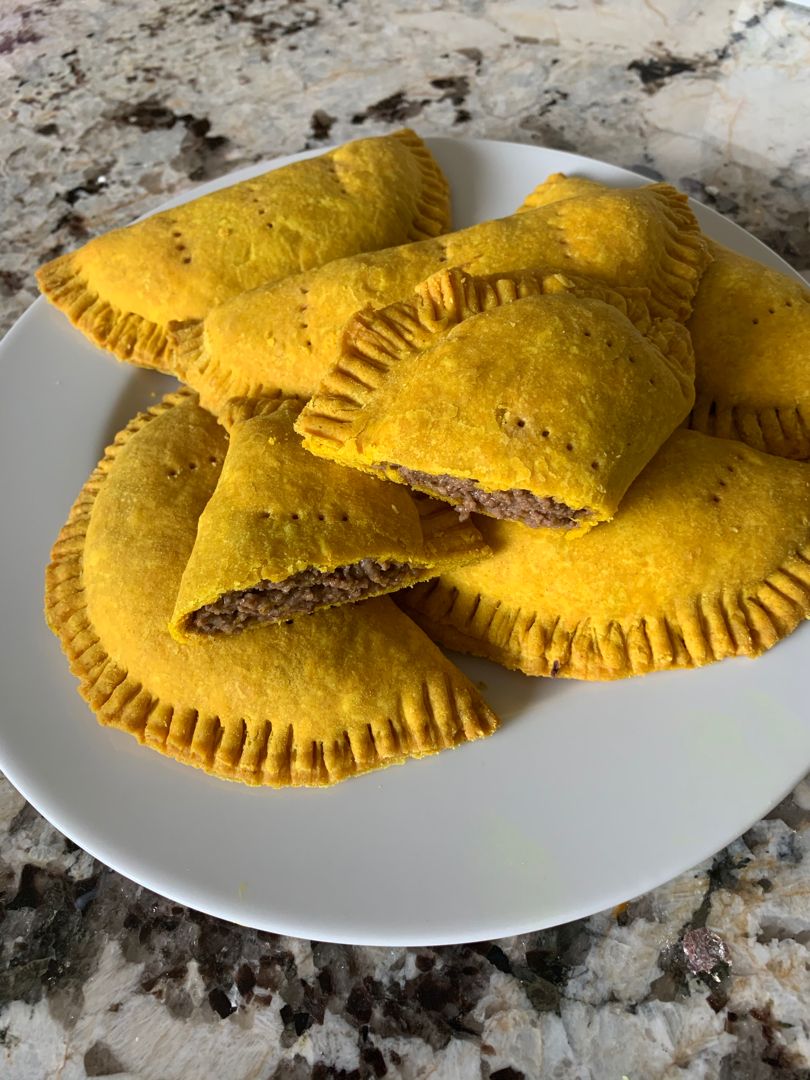
Haitian Beef Patties

by Rebecca September 9, 2022
written by Rebecca

Prep time: 30 mins | Cook time: 5 hrs 54 mins | Yield: 6 patties

These Haitian beef patties are a Caribbean legend. They are also known as pâté haïtien or Haitian patties with a flaky pastry filled with a savory spiced beef mixture. These are a great appetizer option and an amazing grab-and-go dish. The combination of the slightly browned, flaky pastry and delicious filling of these Haitian beef patties with a hint of citrus from the lemon juice is out of this world!

INGREDIENTS

1 egg, beaten

1 tsp vegetable oil

1/2 pound ground beef (75%-85% lean)

3 cloves garlic, minced

3 sprigs of fresh parsley, finely chopped

Leaves from 3 stem fresh thyme

2 tbsp finely diced bell or 2 jalapeño peppers

Dash ground cloves

2 tbsp finely diced onions

juice of 1 lemon

1 tsp beef bouillon

1 green onion

2 sheets puff pastry, thawed

1/2 tsp chili pepper flakes

1/4 tsp salt

1/4 tsp pepper

How to make Haitian Beef Patties

Step 1: Prepare the oven. Preheat it to 400 degrees F.

Step 2: Heat the oil in a large skillet over medium heat. Once the oil is hot, add the beef, chili flakes, garlic, salt, pepper, cloves, thyme, diced pepper, and onions into the skillet and cook until the meat is just browned. Then, add the bouillon. Stir and add the lemon juice. Deglaze the pan. Take the skillet off the heat and let the mixture cool for about 10 minutes.

Step 3: Cut each sheet of the rolled puff pastry into three even pieces. With beef, fill one side of the pastry rectangle. Sprinkle some parsley and green onion on top. Note not to overfill the pastry to prevent it from opening when baking.

Step 4: Spread a little amount of egg along the edges of each pastry rectangle using a pastry brush. Then, fold over the pastry. Using a fork, crimp the edges. Place in the preheated oven and bake for about 25 minutes or until the beef patties are lightly browned.

Step 5: Serve the Haitian Beef Patties right away. Enjoy!

Haitian Beef Patties

Rebecca Prep time: 30 mins | Cook time: 5 hrs 54 mins | Yield: 6 patties These Haitian beef patties are a Caribbean legend. They are also known as pâté haïtien… General Recipes Haitian Beef Patties European Print This
Serves: 6 Prep Time: 30 mins Cooking Time: 5 hrs 54 mins 5 hrs 54 mins
Nutrition facts: 200 calories 20 grams fat
Rating: 5.0/5
( 1 voted )

Ingredients

  • 1 egg, beaten
  • 1 tsp vegetable oil
  • 1/2 pound ground beef (75%-85% lean)
  • 3 cloves garlic, minced
  • 3 sprigs of fresh parsley, finely chopped
  • Leaves from 3 stem fresh thyme
  • 2 tbsp finely diced bell or 2 jalapeño peppers
  • Dash ground cloves
  • 2 tbsp finely diced onions
  • juice of 1 lemon
  • 1 tsp beef bouillon
  • 1 green onion
  • 2 sheets puff pastry, thawed
  • 1/2 tsp chili pepper flakes
  • 1/4 tsp salt
  • 1/4 tsp pepper

Instructions

Step 1: Prepare the oven. Preheat it to 400 degrees F.

Step 2: Heat the oil in a large skillet over medium heat. Once the oil is hot, add the beef, chili flakes, garlic, salt, pepper, cloves, thyme, diced pepper, and onions into the skillet and cook until the meat is just browned. Then, add the bouillon. Stir and add the lemon juice. Deglaze the pan. Take the skillet off the heat and let the mixture cool for about 10 minutes.

Step 3: Cut each sheet of the rolled puff pastry into three even pieces. With beef, fill one side of the pastry rectangle. Sprinkle some parsley and green onion on top. Note not to overfill the pastry to prevent it from opening when baking.

Step 4: Spread a little amount of egg along the edges of each pastry rectangle using a pastry brush. Then, fold over the pastry. Using a fork, crimp the edges. Place in the preheated oven and bake for about 25 minutes or until the beef patties are lightly browned.

Step 5: Serve the Haitian Beef Patties right away. Enjoy!

September 9, 2022 0 comment
0 FacebookTwitterPinterestEmail
General Recipes

Peaches and Cream Cheesecake Bars

by Rebecca September 9, 2022
written by Rebecca

Prep time: 15 mins | Cook time: 35 mins | Yield: 9-12 bars

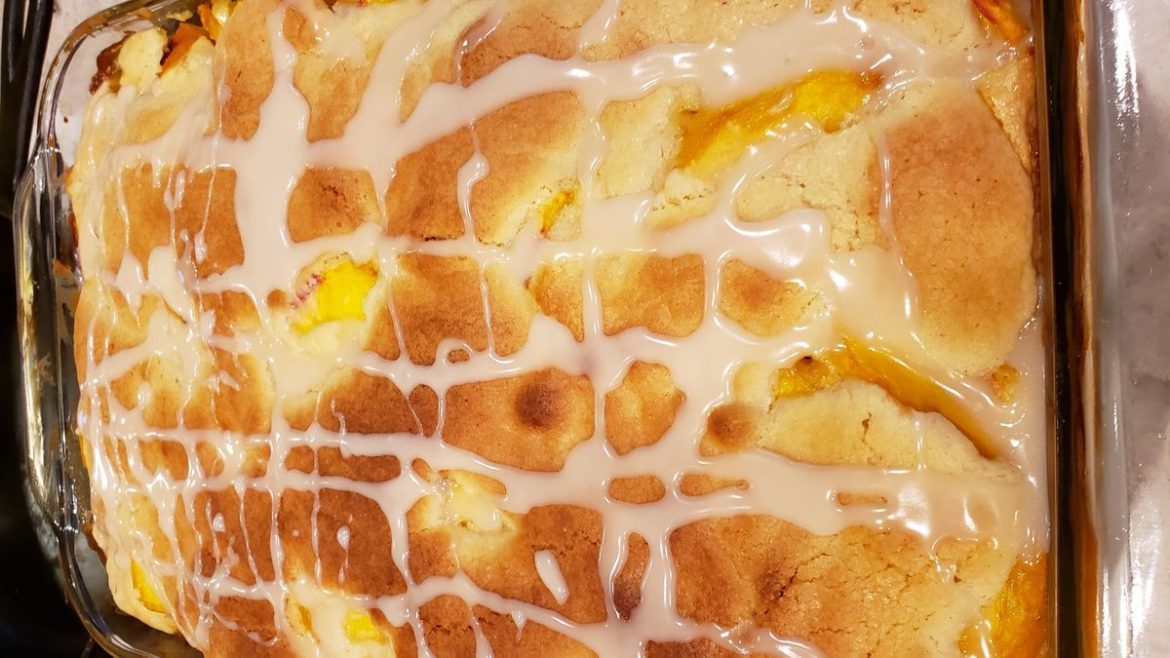
These Peaches and Cream Cheesecake Bars are the best dessert bars! They are peachy, sweet, and creamy! If you love peaches and cream desserts, I am sure that you’ll fall deep for these peaches and cream cheesecake bars! These bars are a delightful fruity dessert that you’ll crave over and over again!

Ingredients

BARS:

4 large eggs

2 c. sugar

2 tsp vanilla extract

1 c. unsalted butter, softened

3 c. all-purpose flour

1 (21 ounces) can of peach pie filling

1 tsp salt

CHEESECAKE LAYER:

1 egg

1 (8 ounces) block cream cheese, softened

1 tsp vanilla

1/2 c. sugar

GLAZE:

2 tbsp milk

1 tsp almond extract

1 c. powdered sugar

How to make Peaches and Cream Cheesecake Bars

BARS:

Step 1: Prepare the oven. Preheat it to 350 degrees F. Using cooking spray, grease a 9 x 13-inch baking pan.

Step 2: Cream the sugar and butter until light and fluffy. Then, whisk in the eggs and vanilla extract until well blended.

Step 3: In another bowl, combine the flour and salt. Gradually add the wet mixture and mix until just combined.

Step 4: Into the bottom of the prepared pan, spread half of the batter and set aside.

CHEESECAKE LAYER:

Step 5: Mix the cream cheese and sugar. Then, add the vanilla along with the egg and beat well until completely mixed.

Step 6: Over the pie batter layer, evenly spread the cheesecake mixture and top with the peach pie filling.

Step 7: On top of the pie filling, drop the rest of the pie batter.

Step 8: Place in the preheated oven and bake for about 30 to 35 minutes or until the top of the pie is light golden brown. Remove from the oven when done and allow the bar to cool fully.

GLAZE:

Step 9: Whisk the glaze ingredients, then drizzle this over the cooled bar. Then, slice into bars. Enjoy!

Peaches and Cream Cheesecake Bars

Rebecca Prep time: 15 mins | Cook time: 35 mins | Yield: 9-12 bars These Peaches and Cream Cheesecake Bars are the best dessert bars! They are peachy, sweet, and creamy!… General Recipes Peaches and Cream Cheesecake Bars European Print This
Serves: 9-12 Prep Time: 15 mins Cooking Time: 35 mins 35 mins
Nutrition facts: 200 calories 20 grams fat
Rating: 5.0/5
( 2 voted )

Ingredients

  • BARS:
  • 4 large eggs
  • 2 c. sugar
  • 2 tsp vanilla extract
  • 1 c. unsalted butter, softened
  • 3 c. all-purpose flour
  • 1 (21 ounces) can of peach pie filling
  • 1 tsp salt
  • CHEESECAKE LAYER:
  • 1 egg
  • 1 (8 ounces) block cream cheese, softened
  • 1 tsp vanilla
  • 1/2 c. sugar
  • GLAZE:
  • 2 tbsp milk
  • 1 tsp almond extract
  • 1 c. powdered sugar

Instructions

BARS:

Step 1: Prepare the oven. Preheat it to 350 degrees F. Using cooking spray, grease a 9 x 13-inch baking pan.

Step 2: Cream the sugar and butter until light and fluffy. Then, whisk in the eggs and vanilla extract until well blended.

Step 3: In another bowl, combine the flour and salt. Gradually add the wet mixture and mix until just combined.

Step 4: Into the bottom of the prepared pan, spread half of the batter and set aside.

CHEESECAKE LAYER:

Step 5: Mix the cream cheese and sugar. Then, add the vanilla along with the egg and beat well until completely mixed.

Step 6: Over the pie batter layer, evenly spread the cheesecake mixture and top with the peach pie filling.

Step 7: On top of the pie filling, drop the rest of the pie batter.

Step 8: Place in the preheated oven and bake for about 30 to 35 minutes or until the top of the pie is light golden brown. Remove from the oven when done and allow the bar to cool fully.

GLAZE:

Step 9: Whisk the glaze ingredients, then drizzle this over the cooled bar. Then, slice into bars. Enjoy!

September 9, 2022 0 comment
0 FacebookTwitterPinterestEmail
General Recipes

Wendy’s Chili

by Rebecca September 9, 2022
written by Rebecca

This copycat Wendy’s Chili recipe is a nice and easy recipe of our favorite chili from Wendy’s. It is made with different kinds of beans along with simple ingredients. A copycat of Wendy’s popular Chili that is super mouthwatering with a perfect spice and kicks!

Ingredients

1 yellow onion – diced

2 stalks of celery – chopped

2 pounds ground beef – 85/15

1 green bell pepper – chopped

29 ounces canned tomato sauce

29 ounces canned pinto beans – not drained

29 ounces canned kidney beans – not drained

28 ounces canned tomatoes – chopped and not drained

1 tablespoon cumin powder

¼ c. chili powder

1 diced jalapeño – de-seeded and de-veined

1 c. water or tomato juice

1 tablespoon Butter

1 teaspoon black pepper

2 teaspoons salt

How to make Wendy’s Chili

Step 1: Cook the ground beef in a heavy-bottomed stockpot, breaking the meat into small chunks until browned. Then, drain the excess grease before adding in the remaining ingredients, except for the butter. Bring everything to a boil.

Step 2: Decrease the heat and let everything simmer, uncovered, for about 2 hours, stirring often.

Step 3: Next, add the butter and whisk well until completely melted and blended.

Notes:

You can make this Chili in the slow cooker. After browning the ground beef, then drain the excess grease. Into the slow cooker, add the ground beef and the remaining ingredients except for the butter. Set to cook on low for 4 hours. When ready to serve, stir in the butter.

For the toppings, you can use Fritos, shredded cheese, sour cream, black olives, more jalapeno, diced red onion, or anything you like!

For a vegetarian variety, swap ground beef with vegetarian crumbles.

For the beans, you can use pinto beans with jalapeno in place of plain pinto beans.

Substitute jalapeno with a small can of green chilis if desired.

Simmer the chili on low, stirring often to prevent the chili from sticking to the bottom.

Keep any leftover chili in an airtight container and store it in the fridge for up to 5 days.

You can freeze the chili for up to 3 months. Let the chili cool completely and just place it in an airtight container.

Wendy’s Chili

Rebecca This copycat Wendy’s Chili recipe is a nice and easy recipe of our favorite chili from Wendy’s. It is made with different kinds of beans along with simple ingredients. A… General Recipes Wendy’s Chili European Print This
Nutrition facts: 200 calories 20 grams fat
Rating: 5.0/5
( 1 voted )

Ingredients

  • 1 yellow onion – diced
  • 2 stalks of celery – chopped
  • 2 pounds ground beef – 85/15
  • 1 green bell pepper – chopped
  • 29 ounces canned tomato sauce
  • 29 ounces canned pinto beans – not drained
  • 29 ounces canned kidney beans – not drained
  • 28 ounces canned tomatoes – chopped and not drained
  • 1 tablespoon cumin powder
  • ¼ c. chili powder
  • 1 diced jalapeño – de-seeded and de-veined
  • 1 c. water or tomato juice
  • 1 tablespoon Butter
  • 1 teaspoon black pepper
  • 2 teaspoons salt

Instructions

Step 1: Cook the ground beef in a heavy-bottomed stockpot, breaking the meat into small chunks until browned. Then, drain the excess grease before adding in the remaining ingredients, except for the butter. Bring everything to a boil.

Step 2: Decrease the heat and let everything simmer, uncovered, for about 2 hours, stirring often.

Step 3: Next, add the butter and whisk well until completely melted and blended.

Notes

You can make this Chili in the slow cooker. After browning the ground beef, then drain the excess grease. Into the slow cooker, add the ground beef and the remaining ingredients except for the butter. Set to cook on low for 4 hours. When ready to serve, stir in the butter. For the toppings, you can use Fritos, shredded cheese, sour cream, black olives, more jalapeno, diced red onion, or anything you like! For a vegetarian variety, swap ground beef with vegetarian crumbles. For the beans, you can use pinto beans with jalapeno in place of plain pinto beans. Substitute jalapeno with a small can of green chilis if desired. Simmer the chili on low, stirring often to prevent the chili from sticking to the bottom. Keep any leftover chili in an airtight container and store it in the fridge for up to 5 days. You can freeze the chili for up to 3 months. Let the chili cool completely and just place it in an airtight container.

September 9, 2022 0 comment
0 FacebookTwitterPinterestEmail
General Recipes

Broccoli Cheddar Stuffed Chicken Breasts

by Rebecca September 9, 2022
written by Rebecca

This Broccoli Cheddar Stuffed Chicken breast is an incredibly easy and super delicious dish that is filled with mouthwatering broccoli cheese mixture and seared chicken, then bake to perfection! These Broccoli Cheddar Stuffed Chicken Breasts have been one of our favorites for years!

Ingredients

3-4 tablespoons olive oil

4 large boneless, skinless chicken breasts

1 ½ c. shredded cheddar cheese

3 c. broccoli florets

2 ounces cream cheese – at room temp

Garlic powder, cumin, or other spices

¼ c. chicken stock

1 tablespoon chopped fresh chives or other fresh herbs

How to make Broccoli Cheddar Stuffed Chicken Breasts

Step 1: Prepare the oven. Preheat it to 400 degrees F.

Step 2: In a microwave-safe bowl, place the broccoli and add 2 tbsp water. Then, cover the bowl and heat in the microwave for about 2 minutes. Take the broccoli out of the oven and drain well. On paper towels, lay the broccoli to get rid of the excess moisture. Into small, pea-sized pieces, chop the broccoli and place them in the bowl.

Step 3: To the bowl with the broccoli, add the cheddar cheese, cream cheese, chives, ¼ teaspoon salt, and ¼ teaspoon pepper. Mix well.

Step 4: On a cutting board, arrange the chicken breasts. Cut a deep pocket lengthwise into each chicken breast using a sharp knife. Be careful not to cut all the way through.

Step 5: Among the chicken breasts, divide the broccoli mixture, firmly pressing into each pocket.

Step 6: Season both sides of the chicken breasts with garlic powder, salt, pepper, and your preferred spices.

Step 7: Heat olive oil in a heavy ovenproof skillet (preferably cast-iron) over medium heat. Then, add the chicken breast and sear for about 3 to 5 minutes per side until golden brown. Flip and sear the other side for another 2 to 3 minutes.

Step 8: Take the skillet off the heat. To the skillet, add the chicken broth. Tent the skillet with aluminum foil. Place in the preheated oven and bake for about 10 to 15 minutes or until the internal temperature of the thickest part of the chicken reaches 165 degrees F.

Step 9: Take the chicken breasts out of the oven and allow them to rest for about 5 to 10 minutes.

Step 10: Serve and enjoy!

Notes:

Make sure to drain the frozen broccoli well before steaming.

For this recipe, you can use different varieties of cheeses such as Gruyere or Parmesan.

You use cauliflower in place of the broccoli.

You can also sear the chicken in a skillet, then just transfer the seared skillet to an oven-safe dish.

Broccoli Cheddar Stuffed Chicken Breasts

Rebecca This Broccoli Cheddar Stuffed Chicken breast is an incredibly easy and super delicious dish that is filled with mouthwatering broccoli cheese mixture and seared chicken, then bake to perfection! These… General Recipes Broccoli Cheddar Stuffed Chicken Breasts European Print This
Nutrition facts: 200 calories 20 grams fat
Rating: 5.0/5
( 1 voted )

Ingredients

  • 3-4 tablespoons olive oil
  • 4 large boneless, skinless chicken breasts
  • 1 ½ c. shredded cheddar cheese
  • 3 c. broccoli florets
  • 2 ounces cream cheese – at room temp
  • Garlic powder, cumin, or other spices
  • ¼ c. chicken stock
  • 1 tablespoon chopped fresh chives or other fresh herbs

Instructions

Step 1: Prepare the oven. Preheat it to 400 degrees F.

Step 2: In a microwave-safe bowl, place the broccoli and add 2 tbsp water. Then, cover the bowl and heat in the microwave for about 2 minutes. Take the broccoli out of the oven and drain well. On paper towels, lay the broccoli to get rid of the excess moisture. Into small, pea-sized pieces, chop the broccoli and place them in the bowl.

Step 3: To the bowl with the broccoli, add the cheddar cheese, cream cheese, chives, ¼ teaspoon salt, and ¼ teaspoon pepper. Mix well.

Step 4: On a cutting board, arrange the chicken breasts. Cut a deep pocket lengthwise into each chicken breast using a sharp knife. Be careful not to cut all the way through.

Step 5: Among the chicken breasts, divide the broccoli mixture, firmly pressing into each pocket.

Step 6: Season both sides of the chicken breasts with garlic powder, salt, pepper, and your preferred spices.

Step 7: Heat olive oil in a heavy ovenproof skillet (preferably cast-iron) over medium heat. Then, add the chicken breast and sear for about 3 to 5 minutes per side until golden brown. Flip and sear the other side for another 2 to 3 minutes.

Step 8: Take the skillet off the heat. To the skillet, add the chicken broth. Tent the skillet with aluminum foil. Place in the preheated oven and bake for about 10 to 15 minutes or until the internal temperature of the thickest part of the chicken reaches 165 degrees F.

Step 9: Take the chicken breasts out of the oven and allow them to rest for about 5 to 10 minutes.

Step 10: Serve and enjoy!

Notes

Make sure to drain the frozen broccoli well before steaming. For this recipe, you can use different varieties of cheeses such as Gruyere or Parmesan. You use cauliflower in place of the broccoli. You can also sear the chicken in a skillet, then just transfer the seared skillet to an oven-safe dish.

September 9, 2022 0 comment
0 FacebookTwitterPinterestEmail
General Recipes

FRUIT EXPLOSION MUFFINS

by Rebecca September 9, 2022
written by Rebecca

Prep time: 15 mins | Cook time: 23 mins | Total time: 38 mins | Servings: 18

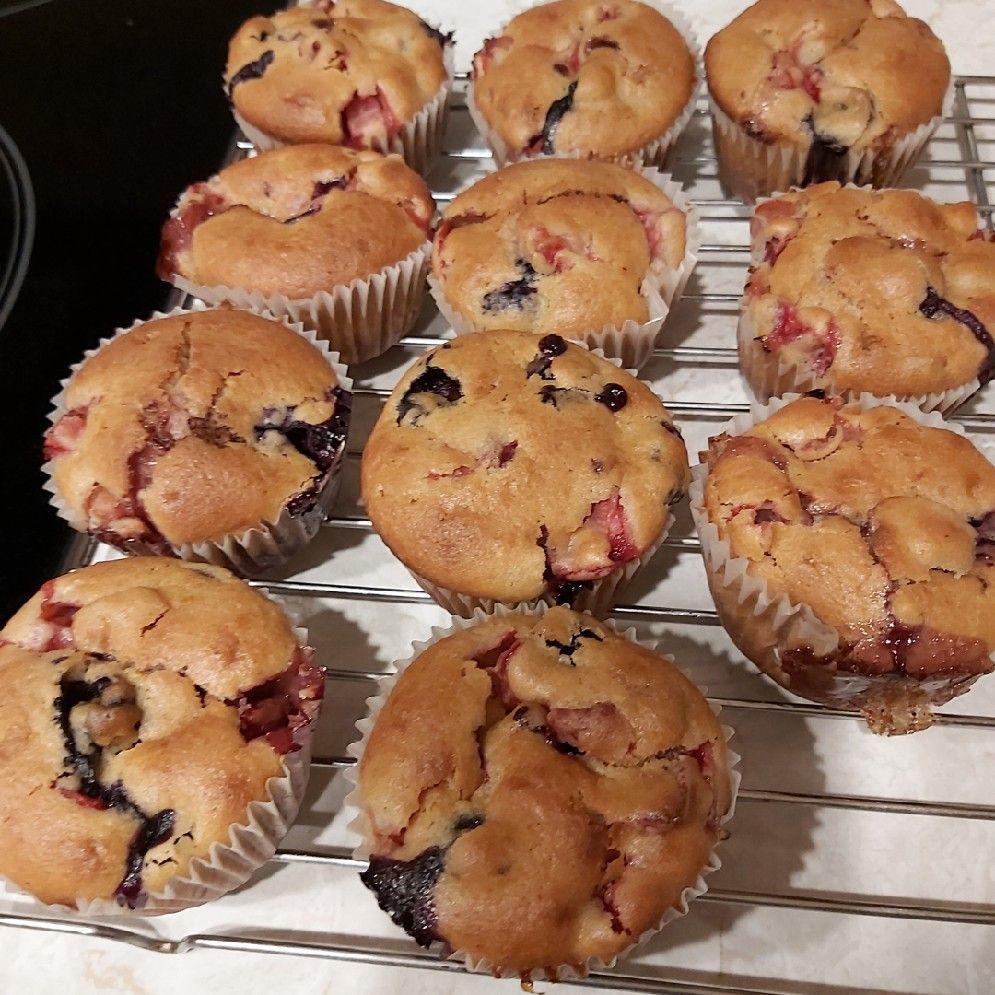
Extra moist muffins that are bursting with berries! You can fill the muffins with any berries you want such as blueberries or strawberries. These Fruit Explosion Muffins are delicious and super easy to whip up! A winner muffin recipe that you should try soon!

Ingredients

½ c. canola oil

1 c. light sour cream

½ c. unsweetened applesauce

2 eggs

½ c. granulated sugar

1 tsp vanilla

½ c. brown sugar, packed

¾ c. jam or jelly

1 ½ c. all-purpose flour

1 tsp baking powder

1 c. whole wheat flour 135 grams

½ tsp baking soda

3 c. mixed berries of choice fresh or frozen

¼ tsp salt

HOW TO MAKE FRUIT EXPLOSION MUFFINS

Step 1: Prepare the oven. Preheat it to 350 degrees F. Using paper liners, line three muffin pans.

Step 2: In a large bowl, place the sour cream, oil, applesauce, eggs, and vanilla. Mix well using a whisk, then add the sugars. Mix again until well blended.

Step 3: To the large bowl, add the flour along with the baking powder, baking soda, and salt. Mix until well combined. Then, gently fold in the berries.

Step 4: Into the bottom of each liner, spoon 1 tbsp of the batter and spread until the bottom is completely covered. Next, top with 2 tsp jam and cover with the rest of the batter.

Step 5: Place in the preheated oven and bake for about 23 to 25 minutes or until the muffins are golden brown. Remove from the oven when allowing the muffins to cool at room temperature before serving. Enjoy!

Tips:

Keep the muffins for up to 2 to 3 days at room temperature or in the freezer for up to 3 to 4 months.

Freeze the raspberries before using them to prevent them from getting squashed.

For this recipe, you are welcome to use any berries such as strawberries, blueberries, and cranberries. You can use them fresh, but I prefer to freeze them as they can be stirred in more easily.

Nutritional Facts:

Calories: 197 Kcal Carbohydrates: 29g Protein: 3g Fat: 8g Cholesterol: 22mg

FRUIT EXPLOSION MUFFINS

Rebecca Prep time: 15 mins | Cook time: 23 mins | Total time: 38 mins | Servings: 18 Extra moist muffins that are bursting with berries! You can fill the muffins… General Recipes FRUIT EXPLOSION MUFFINS European Print This
Serves: 18 Prep Time: 15 mins Cooking Time: 23 mins 23 mins
Nutrition facts: 197 calories 8 fat
Rating: 3.5/5
( 2 voted )

Ingredients

  • ½ c. canola oil
  • 1 c. light sour cream
  • ½ c. unsweetened applesauce
  • 2 eggs
  • ½ c. granulated sugar
  • 1 tsp vanilla
  • ½ c. brown sugar, packed
  • ¾ c. jam or jelly
  • 1 ½ c. all-purpose flour
  • 1 tsp baking powder
  • 1 c. whole wheat flour 135 grams
  • ½ tsp baking soda
  • 3 c. mixed berries of choice fresh or frozen
  • ¼ tsp salt

Instructions

Step 1: Prepare the oven. Preheat it to 350 degrees F. Using paper liners, line three muffin pans.

Step 2: In a large bowl, place the sour cream, oil, applesauce, eggs, and vanilla. Mix well using a whisk, then add the sugars. Mix again until well blended.

Step 3: To the large bowl, add the flour along with the baking powder, baking soda, and salt. Mix until well combined. Then, gently fold in the berries.

Step 4: Into the bottom of each liner, spoon 1 tbsp of the batter and spread until the bottom is completely covered. Next, top with 2 tsp jam and cover with the rest of the batter.

Step 5: Place in the preheated oven and bake for about 23 to 25 minutes or until the muffins are golden brown. Remove from the oven when allowing the muffins to cool at room temperature before serving. Enjoy!

Notes

Keep the muffins for up to 2 to 3 days at room temperature or in the freezer for up to 3 to 4 months. Freeze the raspberries before using them to prevent them from getting squashed. For this recipe, you are welcome to use any berries such as strawberries, blueberries, and cranberries. You can use them fresh, but I prefer to freeze them as they can be stirred in more easily.

September 9, 2022 0 comment
0 FacebookTwitterPinterestEmail
Newer Posts
Older Posts

Popular Posts

  • 1

    Crispy Crunchy Parmesan Potatoes

    March 21, 2020
  • 2

    CROCK POT SMOTHERED PORK CHOPS

    March 21, 2020
  • Facebook
  • Twitter

@2019 - All Right Reserved.


Back To Top