Cook it once
  • Home
  • Privacy Policy
  • Recipes
    • KETO
    • LC
    • WW
  • Tips
  • Contact
Cook it once
  • Home
  • Privacy Policy
  • Recipes
    • KETO
    • LC
    • WW
  • Tips
  • Contact
Category:

General Recipes

General Recipes

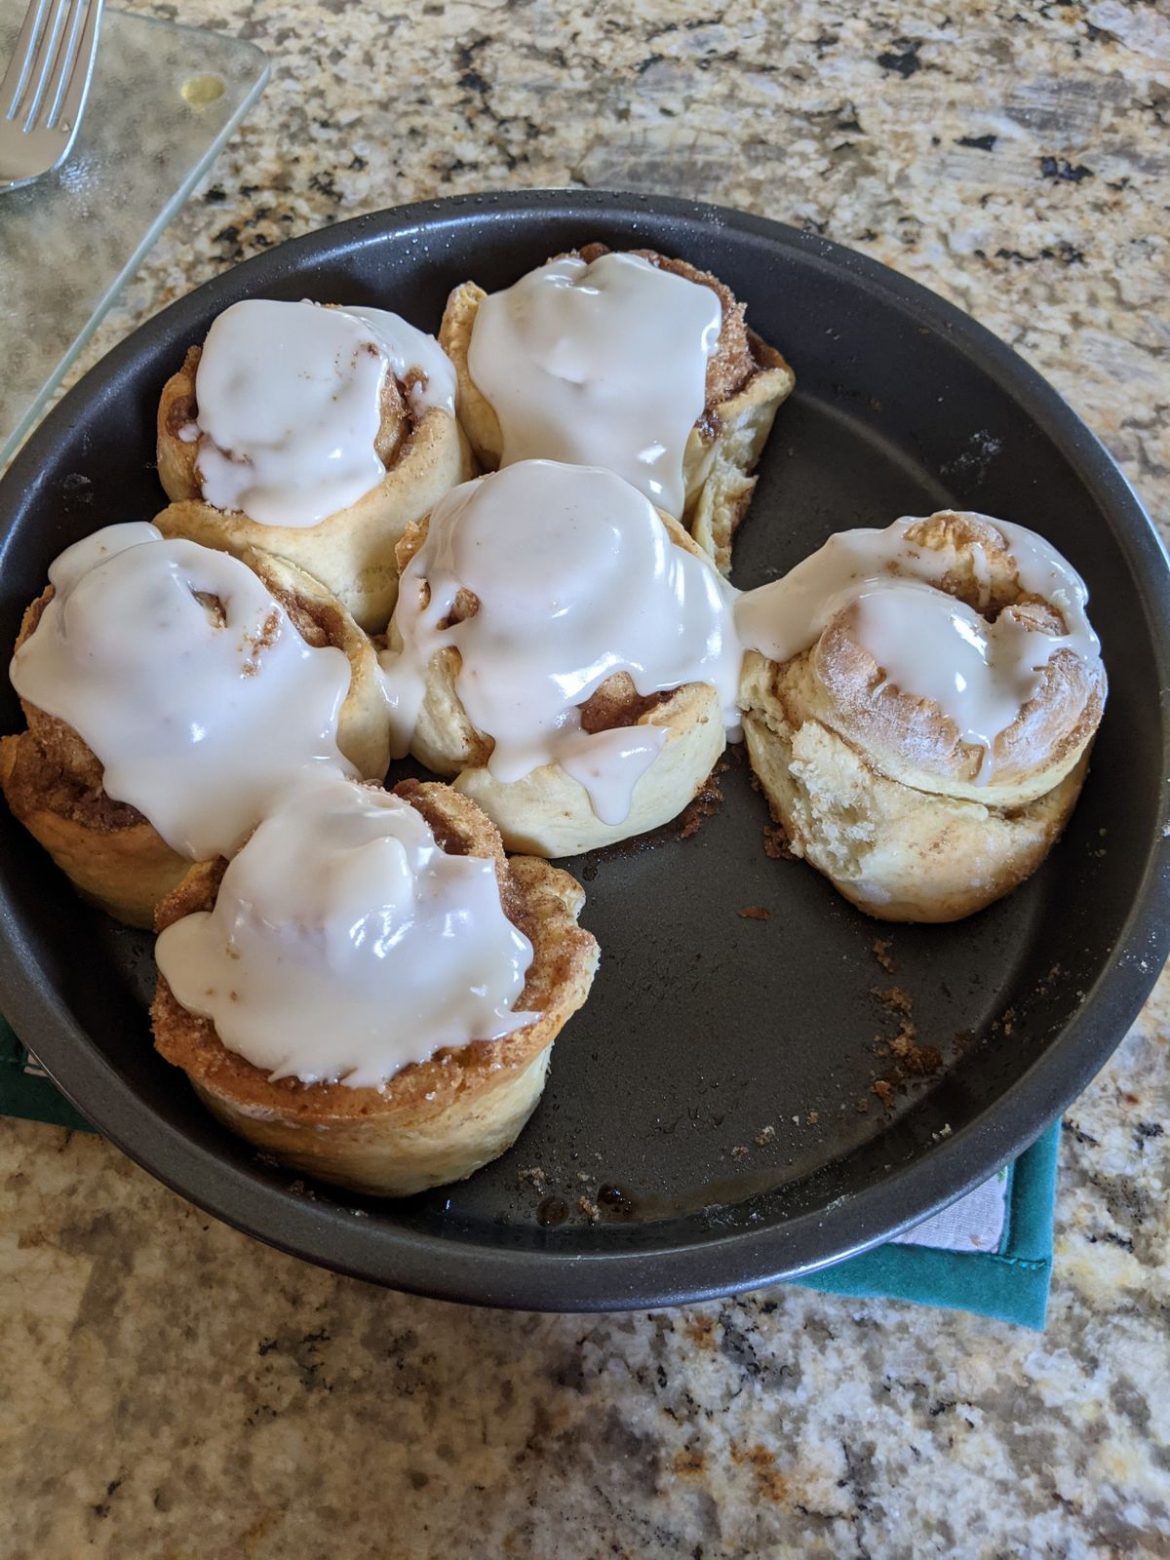
BISQUICK CINNAMON ROLLS

by Rebecca September 14, 2022
written by Rebecca

Total Time: 40 mins | Yield: 12 Servings

These Bisquick Cinnamon Rolls are covered with a delicious glaze that will surely satisfy your sweet tooth today! Try this recipe now, and I promise you that it is worth all your time and effort. These treats are ready in less than an hour. Enjoy!

Ingredients:

For the Cinnamon Roll:

2 tbsp butter, melted

2/3 c Milk

4 tbsp granulated white sugar

1 teaspoon Vanilla extract

2 1/2 c Bisquick baking mix

1 ½ tsp ground cinnamon

For the Glaze:

2.2 tbsp milk

1.1 c powdered sugar

Directions:

For the Rolls:

Prepare the oven and preheat to 190 degrees C or 375 degrees F.

Apply cooking spray to an 8×8-inch square baking pan.

In a mixing bowl, add cinnamon and granulated white sugar. Whisk until well incorporated.

In a separate large bowl, add vanilla, 2 tbsp of sugar, Bisquick mix, and milk. Whisk until it forms into a dough. Add more baking mix if the texture gets too sticky.

Sprinkle a bit of the baking mix or flour onto a flat surface, then place the dough on it. Roll it out and form it into a ball.

Knead the dough about 10 times.

Use a rolling pin to flatten the dough to about a 15×9-inch rectangular shape.

Brush the dough with melted butter and top with the cinnamon-sugar mixture. Form the dough into a log by rolling it and sealing the sides. Slice it into 12 even cuts.

Arrange the dough slices in a single layer into the prepared baking pan.

Place them in the preheated oven and bake for 25 minutes.

Remove the rolls from the oven and allow them to cool for a few minutes at room temperature.

For the Glaze:

In a mixing bowl, add the powdered sugar and milk. Whisk until well blended.

Pour the glaze on top of the rolls making sure to cover them entirely.

Serve and enjoy!

Notes:

Feel free to add pecans or walnuts to the rolls if you prefer.

Make sure not to overmix the buttermilk and Bisquick.

BISQUICK CINNAMON ROLLS

Rebecca Total Time: 40 mins | Yield: 12 Servings These Bisquick Cinnamon Rolls are covered with a delicious glaze that will surely satisfy your sweet tooth today! Try this recipe now,… General Recipes BISQUICK CINNAMON ROLLS European Print This
Serves: 12
Nutrition facts: 200 calories 20 grams fat
Rating: 5.0/5
( 1 voted )

Ingredients

  • For the Cinnamon Roll:
  • 2 tbsp butter, melted
  • 2/3 c Milk
  • 4 tbsp granulated white sugar
  • 1 teaspoon Vanilla extract
  • 2 1/2 c Bisquick baking mix
  • 1 ½ tsp ground cinnamon
  • For the Glaze:
  • 2.2 tbsp milk
  • 1.1 c powdered sugar

Instructions

For the Rolls:

Prepare the oven and preheat to 190 degrees C or 375 degrees F.

Apply cooking spray to an 8x8-inch square baking pan.

In a mixing bowl, add cinnamon and granulated white sugar. Whisk until well incorporated.

In a separate large bowl, add vanilla, 2 tbsp of sugar, Bisquick mix, and milk. Whisk until it forms into a dough. Add more baking mix if the texture gets too sticky.

Sprinkle a bit of the baking mix or flour onto a flat surface, then place the dough on it. Roll it out and form it into a ball.

Knead the dough about 10 times.

Use a rolling pin to flatten the dough to about a 15x9-inch rectangular shape.

Brush the dough with melted butter and top with the cinnamon-sugar mixture. Form the dough into a log by rolling it and sealing the sides. Slice it into 12 even cuts.

Arrange the dough slices in a single layer into the prepared baking pan.

Place them in the preheated oven and bake for 25 minutes.

Remove the rolls from the oven and allow them to cool for a few minutes at room temperature.

For the Glaze:

In a mixing bowl, add the powdered sugar and milk. Whisk until well blended.

Pour the glaze on top of the rolls making sure to cover them entirely.

Serve and enjoy!

Notes

Feel free to add pecans or walnuts to the rolls if you prefer. Make sure not to overmix the buttermilk and Bisquick.
September 14, 2022 0 comment
0 FacebookTwitterPinterestEmail
General Recipes

Easy Caramel Apple Pie Bread Pudding Recipe

by Rebecca September 13, 2022
written by Rebecca

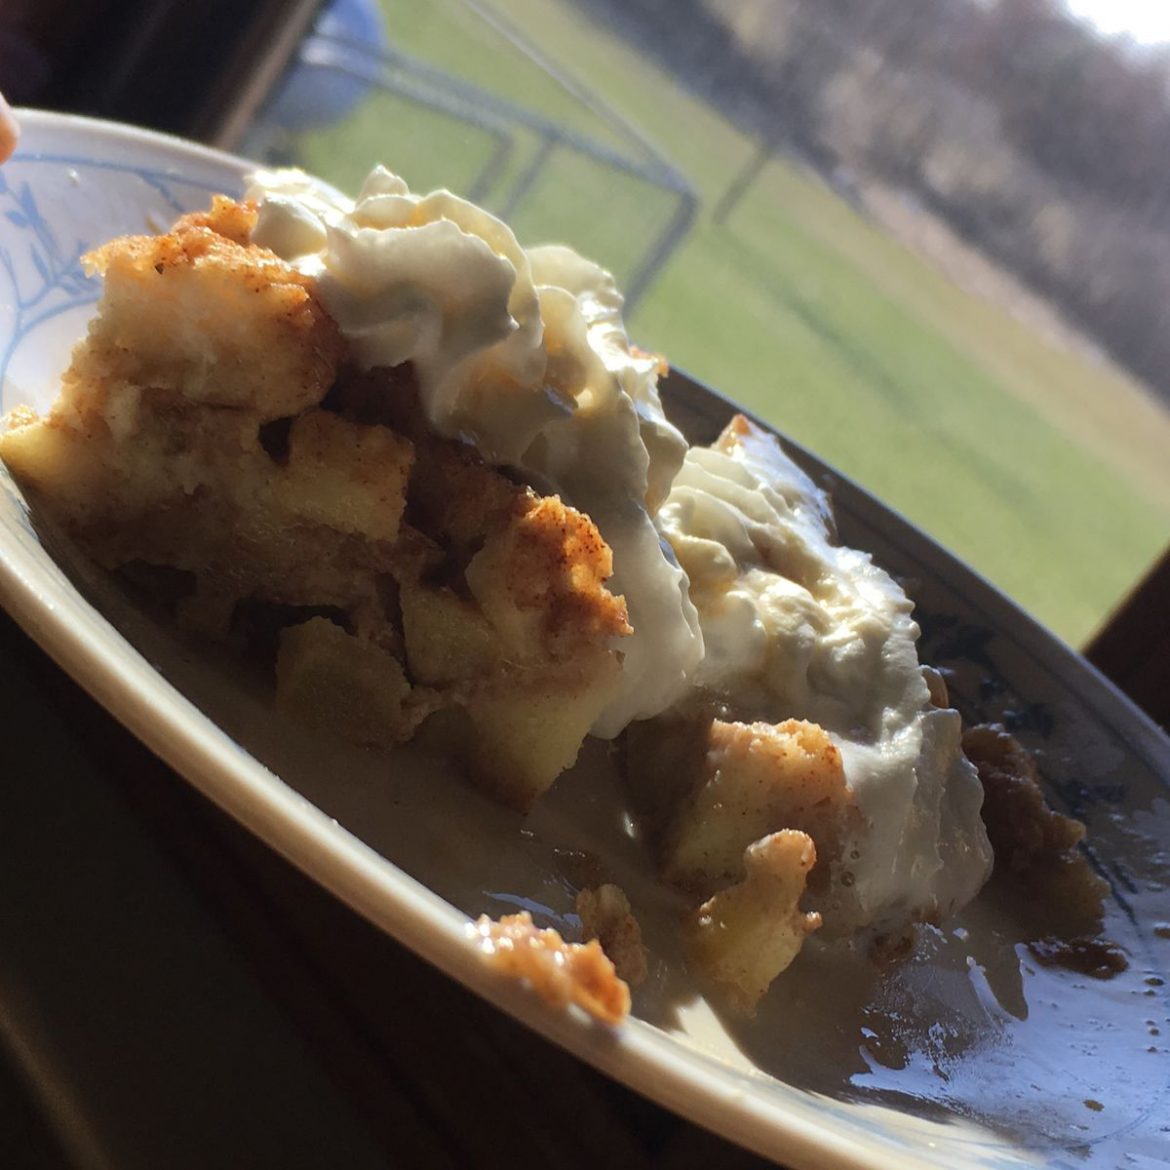
This is an amazing recipe that combined apple pie and bread pudding. You can also assemble the pudding the night before and bake it the next day for an easy and quick breakfast. This pudding is also great to enjoy as a dessert with a big scoop of vanilla ice cream on top.

Ingredients

2 eggs

8 c. bread – cubed

3 medium apples – peeled, cored, and chopped

1 c. milk

1 c. vanilla yoghurt

2 teaspoons cinnamon, divided

1/2 cup sugar, plus 2 tablespoons

1/4 c. raisins

1/2 teaspoon nutmeg

Sauce:

1 c. heavy cream

1 c. brown sugar

1 c. unsalted butter

How to make Easy Caramel Apple Pie Bread Pudding

Step 1: Prepare the oven. Preheat it to 350 degrees. Using cooking spray, grease a 9 x 13-inch baking dish.

Step 2: Place the yoghurt, milk, eggs, 1 teaspoon cinnamon, nutmeg, and half a cup of sugar in a large bowl. Mix well until combined. Next, add the apples and raisins. Mix again, then fold in the bread cubes. Into the prepared pan, pour the mixture.

Step 3: Whisk 2 tablespoons of sugar with 1 teaspoon of cinnamon in a small bowl until well blended.

Step 4: On top of the bread pudding, sprinkle the sugar-cinnamon mixture. Place the dish into the preheated oven and bake for about 30 to 40 minutes or until the pudding is puffed and golden brown.

Step 5: In the meantime, prepare the caramel sauce. Place the butter, heavy cream, and brown sugar in a heavy saucepan over medium-low heat. Mix well and bring the sauce to a boil. Once boiling, adjust the heat to low and allow the sauce to simmer for about 5 minutes or until thickened.

Step 6: Over the pudding, pour the sauce.

Step 7: Slice and serve the caramel apple pie bread pudding with a big scoop of vanilla ice cream on top. Enjoy!

Notes:

If time permits, leave the bread cubes out for a couple of hours. This will get the bread cubes nice and dry. Alternatively, you can scatter them on a baking sheet and bake for about 10 to 15 minutes at 350 degrees until dry but not toasted.

You can prep the pudding the night before and bake it in the oven the next day.

Easy Caramel Apple Pie Bread Pudding Recipe

Rebecca This is an amazing recipe that combined apple pie and bread pudding. You can also assemble the pudding the night before and bake it the next day for an easy… General Recipes Easy Caramel Apple Pie Bread Pudding Recipe European Print This
Nutrition facts: 200 calories 20 grams fat
Rating: 5.0/5
( 1 voted )

Ingredients

  • 2 eggs
  • 8 c. bread - cubed
  • 3 medium apples - peeled, cored, and chopped
  • 1 c. milk
  • 1 c. vanilla yoghurt
  • 2 teaspoons cinnamon, divided
  • 1/2 cup sugar, plus 2 tablespoons
  • 1/4 c. raisins
  • 1/2 teaspoon nutmeg
  • Sauce:
  • 1 c. heavy cream
  • 1 c. brown sugar
  • 1 c. unsalted butter

Instructions

Step 1: Prepare the oven. Preheat it to 350 degrees. Using cooking spray, grease a 9 x 13-inch baking dish.

Step 2: Place the yoghurt, milk, eggs, 1 teaspoon cinnamon, nutmeg, and half a cup of sugar in a large bowl. Mix well until combined. Next, add the apples and raisins. Mix again, then fold in the bread cubes. Into the prepared pan, pour the mixture.

Step 3: Whisk 2 tablespoons of sugar with 1 teaspoon of cinnamon in a small bowl until well blended.

Step 4: On top of the bread pudding, sprinkle the sugar-cinnamon mixture. Place the dish into the preheated oven and bake for about 30 to 40 minutes or until the pudding is puffed and golden brown.

Step 5: In the meantime, prepare the caramel sauce. Place the butter, heavy cream, and brown sugar in a heavy saucepan over medium-low heat. Mix well and bring the sauce to a boil. Once boiling, adjust the heat to low and allow the sauce to simmer for about 5 minutes or until thickened.

Step 6: Over the pudding, pour the sauce.

Step 7: Slice and serve the caramel apple pie bread pudding with a big scoop of vanilla ice cream on top. Enjoy!

Notes

If time permits, leave the bread cubes out for a couple of hours. This will get the bread cubes nice and dry. Alternatively, you can scatter them on a baking sheet and bake for about 10 to 15 minutes at 350 degrees until dry but not toasted. You can prep the pudding the night before and bake it in the oven the next day.

September 13, 2022 0 comment
0 FacebookTwitterPinterestEmail
General Recipes

OLD FASHIONED SALMON PATTIES

by Rebecca September 13, 2022
written by Rebecca

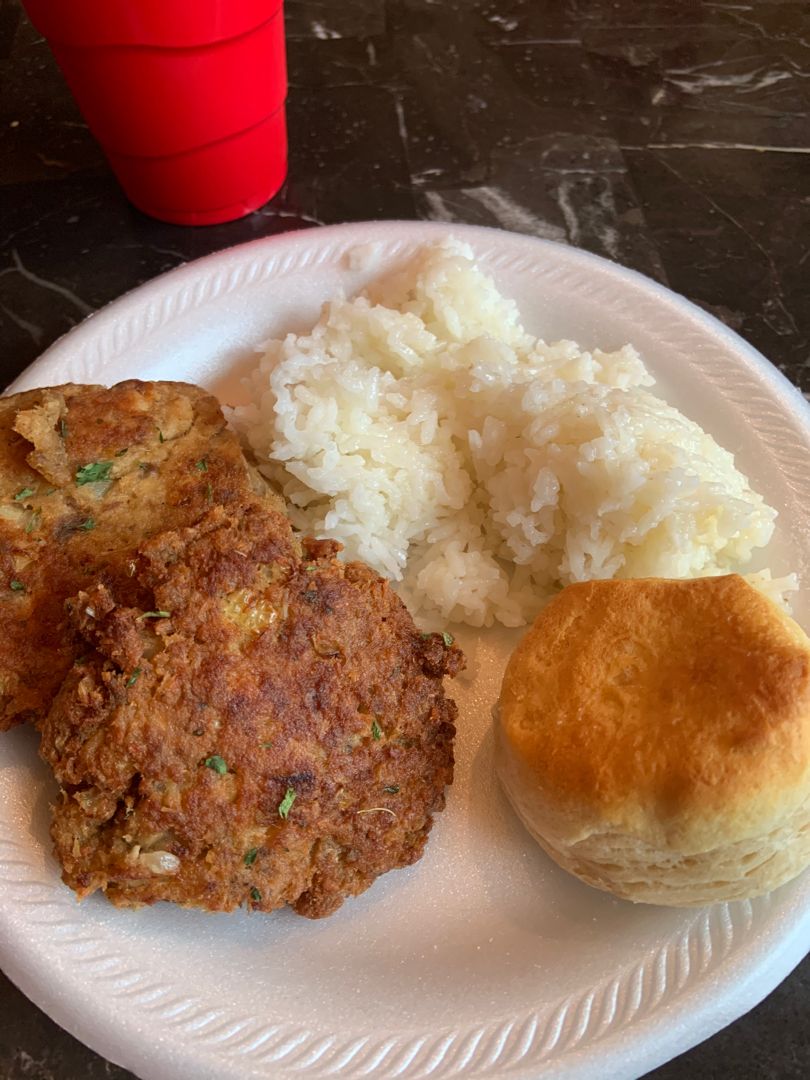
These are kid-approved salmon patties that you can easily make using just a few basic ingredients. These delicious classic salmon patties are an amazing weeknight entree that you can prep and get on the table quickly. Made with shredded pink salmon, cornmeal, egg, diced onions, buttermilk, and flour. These simple ingredients are combined, formed into patties, and then fried until the crust is browned. To serve, these salmon patties are great to pair with either creamed peas, mashed potato cakes, Grandma’s deviled eggs, buttermilk mac & cheese, or coleslaw. You can also top these salmon patties with your favorite toppings for that extra layer of deliciousness!

Ingredients

2 tbsp diced onions

6 oz. pink salmon

1 tbsp buttermilk

4 tbsp all-purpose flour

2 tbsp cornmeal

Salt and pepper

Canola oil

1 large egg

HOW TO MAKE OLD-FASHIONED SALMON PATTIES

Step 1: After draining the pink salmon, de-bone them and shred using two forks.

Step 2: In a bowl, place the shredded salmons, onions, salt, and pepper. Mix well.

Step 3: Beat the egg and milk in a different bowl, then add this to the salmon mix. Mix well until combined. Next, add the buttermilk, cornmeal, and flour. Mix again until well blended.

Step 4: In a medium-sized iron skillet, heat 1/4 c of canola oil on medium heat. Once the oil is hot, drop spoonfuls of the salmon mix, then slightly flatten them. Fry the salmon patties for about 1 minute per side until the brown crust forms. On a paper towel-lined plate, transfer the fried salmon patties.

Step 5: Serve the salmon patties right away with your favorite toppings. Enjoy!

Tips:

Avoid flipping the patties multiple times when drying them. Cook the first side, undisturbed before flipping. Doing so will keep the patties from falling apart.

Side Dishes:

Pair these salmon patties with creamed peas, mashed potato cakes, Grandma’s deviled eggs, buttermilk Mac & cheese, or coleslaw.

OLD FASHIONED SALMON PATTIES

Rebecca These are kid-approved salmon patties that you can easily make using just a few basic ingredients. These delicious classic salmon patties are an amazing weeknight entree that you can prep… General Recipes OLD FASHIONED SALMON PATTIES European Print This
Nutrition facts: 200 calories 20 grams fat
Rating: 5.0/5
( 1 voted )

Ingredients

  • 2 tbsp diced onions
  • 6 oz. pink salmon
  • 1 tbsp buttermilk
  • 4 tbsp all-purpose flour
  • 2 tbsp cornmeal
  • Salt and pepper
  • Canola oil
  • 1 large egg

Instructions

Step 1: After draining the pink salmon, de-bone them and shred using two forks.

Step 2: In a bowl, place the shredded salmons, onions, salt, and pepper. Mix well.

Step 3: Beat the egg and milk in a different bowl, then add this to the salmon mix. Mix well until combined. Next, add the buttermilk, cornmeal, and flour. Mix again until well blended.

Step 4: In a medium-sized iron skillet, heat 1/4 c of canola oil on medium heat. Once the oil is hot, drop spoonfuls of the salmon mix, then slightly flatten them. Fry the salmon patties for about 1 minute per side until the brown crust forms. On a paper towel-lined plate, transfer the fried salmon patties.

Step 5: Serve the salmon patties right away with your favorite toppings. Enjoy!

Notes

Avoid flipping the patties multiple times when drying them. Cook the first side, undisturbed before flipping. Doing so will keep the patties from falling apart. Side Dishes: Pair these salmon patties with creamed peas, mashed potato cakes, Grandma’s deviled eggs, buttermilk Mac & cheese, or coleslaw.

September 13, 2022 0 comment
0 FacebookTwitterPinterestEmail
General Recipes

BANANA DROP COOKIES

by Rebecca September 13, 2022
written by Rebecca

Prep Time: 40 mins | Yield: 50 cookies

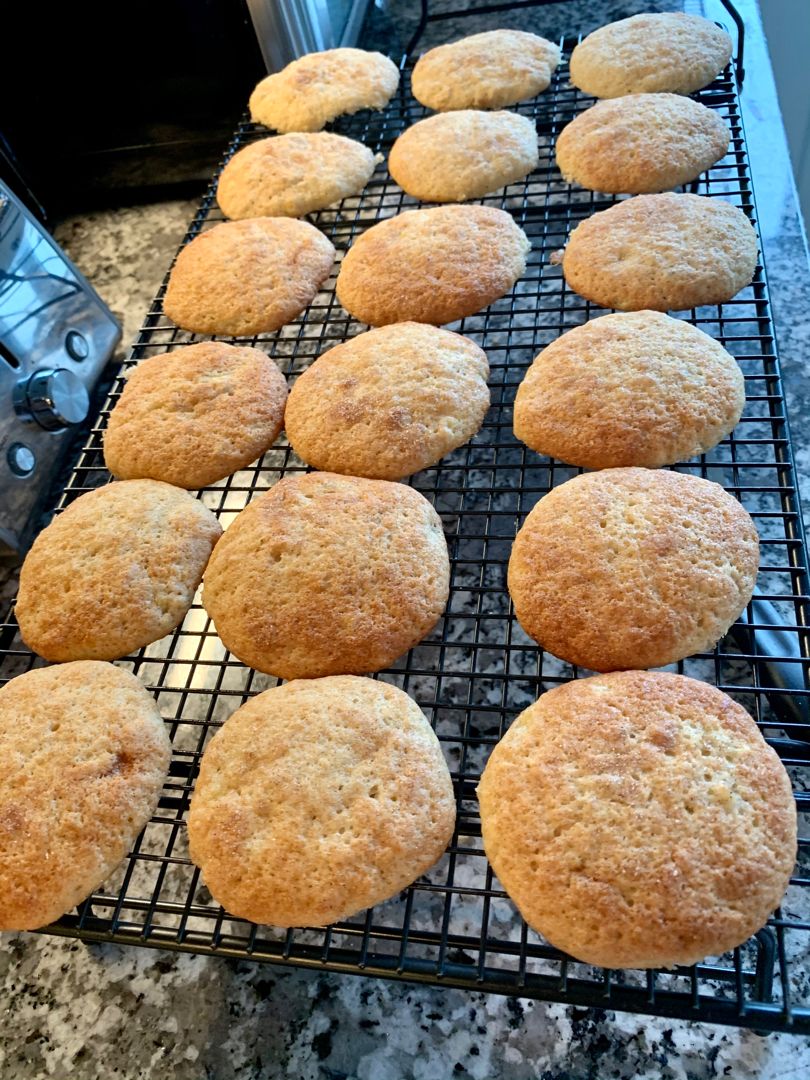
These banana drop cookies are an amazing treat perfect with a glass of warm milk or cup of tea. These delicious cookies are fluffy and soft. You can easily whip these cookies up any time in a breeze. This easy recipe is also a great option to use your extra, overripe bananas. If you love bananas and anything banana-flavoured treats, these Banana Drop Cookies are a must!

Ingredients

2/3 c. butter or margarine

2¼ c. flour

¼ tsp baking soda

½ tsp ground cinnamon

2 tsp baking powder

¼ tsp ground cloves

1 granulated sugar

1/2 vanilla

¼ tsp salt

1 banana – mashed

2 eggs, beaten

HOW TO MAKE BANANA DROP COOKIES

Step 1: In a large mixing bowl, place the flour, cinnamon, salt, baking powder, baking soda, and cloves. Mix well until combined. Set aside.

Step 2: In a mixer bowl, place the butter and sugar. Beat for 30 seconds, then add the eggs along with the vanilla. Continue beating until well blended. Then, slowly add the dry ingredients while still mixing. Next, add the bananas, one at a time, beating well after each addition.

Step 3: Onto a well-greased cookie sheet, drop a teaspoonful of the cookie batter, leaving about 2-inches space between each cookie.

Step 4: Into a preheated 400 degrees oven, place the cookie sheet and bake the cookies for about 12 minutes until brown. Remove from the oven when done and transfer the cookies to a wire rack to cool.

Step 5: Serve the banana drop cookies with a glass of warm milk or tea. Enjoy!

Tips:

Make sure not to overbake the cookies. Bake them just until brown.

If desired, you can frost the cooled cookies with Banana Butter Frosting.

To make the frosting, whisk the powdered sugar, mashed banana, butter, and vanilla until well combined. You can add extra sugar if needed until you reach spreading consistency. Frost the cookies once cooled.

BANANA DROP COOKIES

Rebecca Prep Time: 40 mins | Yield: 50 cookies These banana drop cookies are an amazing treat perfect with a glass of warm milk or cup of tea. These delicious cookies… General Recipes BANANA DROP COOKIES European Print This
Nutrition facts: 200 calories 20 grams fat
Rating: 4.3/5
( 3 voted )

Ingredients

  • 2/3 c. butter or margarine
  • 2¼ c. flour
  • ¼ tsp baking soda
  • ½ tsp ground cinnamon
  • 2 tsp baking powder
  • ¼ tsp ground cloves
  • 1 granulated sugar
  • 1/2 vanilla
  • ¼ tsp salt
  • 1 banana - mashed
  • 2 eggs, beaten

Instructions

Step 1: In a large mixing bowl, place the flour, cinnamon, salt, baking powder, baking soda, and cloves. Mix well until combined. Set aside.

Step 2: In a mixer bowl, place the butter and sugar. Beat for 30 seconds, then add the eggs along with the vanilla. Continue beating until well blended. Then, slowly add the dry ingredients while still mixing. Next, add the bananas, one at a time, beating well after each addition.

Step 3: Onto a well-greased cookie sheet, drop a teaspoonful of the cookie batter, leaving about 2-inches space between each cookie.

Step 4: Into a preheated 400 degrees oven, place the cookie sheet and bake the cookies for about 12 minutes until brown. Remove from the oven when done and transfer the cookies to a wire rack to cool.

Step 5: Serve the banana drop cookies with a glass of warm milk or tea. Enjoy!

Notes

Make sure not to overbake the cookies. Bake them just until brown. If desired, you can frost the cooled cookies with Banana Butter Frosting. To make the frosting, whisk the powdered sugar, mashed banana, butter, and vanilla until well combined. You can add extra sugar if needed until you reach spreading consistency. Frost the cookies once cooled.

September 13, 2022 0 comment
0 FacebookTwitterPinterestEmail
General Recipes

HOMEMADE PAYDAY CANDY BARS

by Rebecca September 13, 2022
written by Rebecca

Preparation Time: 12 mins | Serving: 12 bars

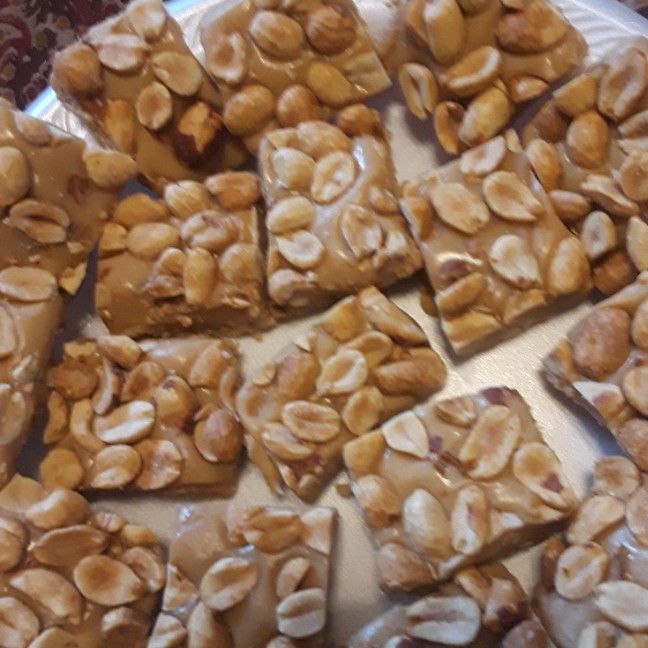
Homemade Payday Candy Bars are both salty and sweet. And they are super easy and quick to whip up. All you need are a few simple ingredients (salted peanuts, marshmallows, peanut butter chips, and sweetened condensed milk). Mix the ingredients, let them set, and viola! You have tasty, fun, made-from-scratch Payday candy bars!

I love these homemade Payday Candy Bars. In my opinion, they are a million better than the original! If PayDays are your favorite, I am pretty sure that you’ll enjoy this homemade version. This version is almost unfussy, requires little effort to make, and guarantees one of the best candy bars you’ll ever make!

To make these candy bars, we start with peanuts, then the filling, and topping it all off with the remaining peanuts. The filling is made with a combination of unsalted butter, condensed milk, and marshmallows. If desired, you can wrap these candy bars and give them as gifts.

Ingredients

3 tbsp unsalted butter

3 c. salted peanuts

1 can sweeten condensed milk

2 c. mini marshmallows

½ tsp vanilla extract

2 c. peanut butter chips

HOW TO MAKE HOMEMADE PAYDAY CANDY BARS

Step 1: In a large saucepan, place the butter and peanut butter. Allow them to melt on medium heat until the mixture is smooth.

Step 2: To the melted butter-peanut butter mixture, add the condensed milk, vanilla extract, and marshmallows. Mix well until the ingredients are well blended and smooth.

Step 3: Using nonstick- spray or butter, grease a 9 x 13-inch rectangular baking pan.

Step 4: To the bottom of the prepared pan, spread half of the peanuts. Over the peanuts, evenly pour the mixture and sprinkle with the rest of the peanuts.

Step 5: Keep in the fridge until set or at room temperature.

Step 6: Into serving bars, cut the candy, and serve. Enjoy!

Tips:

Make sure to use baking chips similar to chocolate chips.

Let the bars set in the fridge. Doing so will keep the bars holding their shape longer.

Nutritional Facts:

Per serving: Energy: 616 kcal; Carbohydrates: 49g; Protein: 20g; Total fat: 41g; Sodium: 506mg.

HOMEMADE PAYDAY CANDY BARS

Rebecca Preparation Time: 12 mins | Serving: 12 bars Homemade Payday Candy Bars are both salty and sweet. And they are super easy and quick to whip up. All you need… General Recipes HOMEMADE PAYDAY CANDY BARS European Print This
Serves: 12 Prep Time: 12 mins
Nutrition facts: 616 calories 41 fat
Rating: 5.0/5
( 1 voted )

Ingredients

  • 3 tbsp unsalted butter
  • 3 c. salted peanuts
  • 1 can sweeten condensed milk
  • 2 c. mini marshmallows
  • ½ tsp vanilla extract
  • 2 c. peanut butter chips

Instructions

Step 1: In a large saucepan, place the butter and peanut butter. Allow them to melt on medium heat until the mixture is smooth.

Step 2: To the melted butter-peanut butter mixture, add the condensed milk, vanilla extract, and marshmallows. Mix well until the ingredients are well blended and smooth.

Step 3: Using nonstick- spray or butter, grease a 9 x 13-inch rectangular baking pan.

Step 4: To the bottom of the prepared pan, spread half of the peanuts. Over the peanuts, evenly pour the mixture and sprinkle with the rest of the peanuts.

Step 5: Keep in the fridge until set or at room temperature.

Step 6: Into serving bars, cut the candy, and serve. Enjoy!

Notes

Make sure to use baking chips similar to chocolate chips. Let the bars set in the fridge. Doing so will keep the bars holding their shape longer.

September 13, 2022 0 comment
0 FacebookTwitterPinterestEmail
General Recipes

SHORTCUT CARROT CAKE

by Rebecca September 13, 2022
written by Rebecca

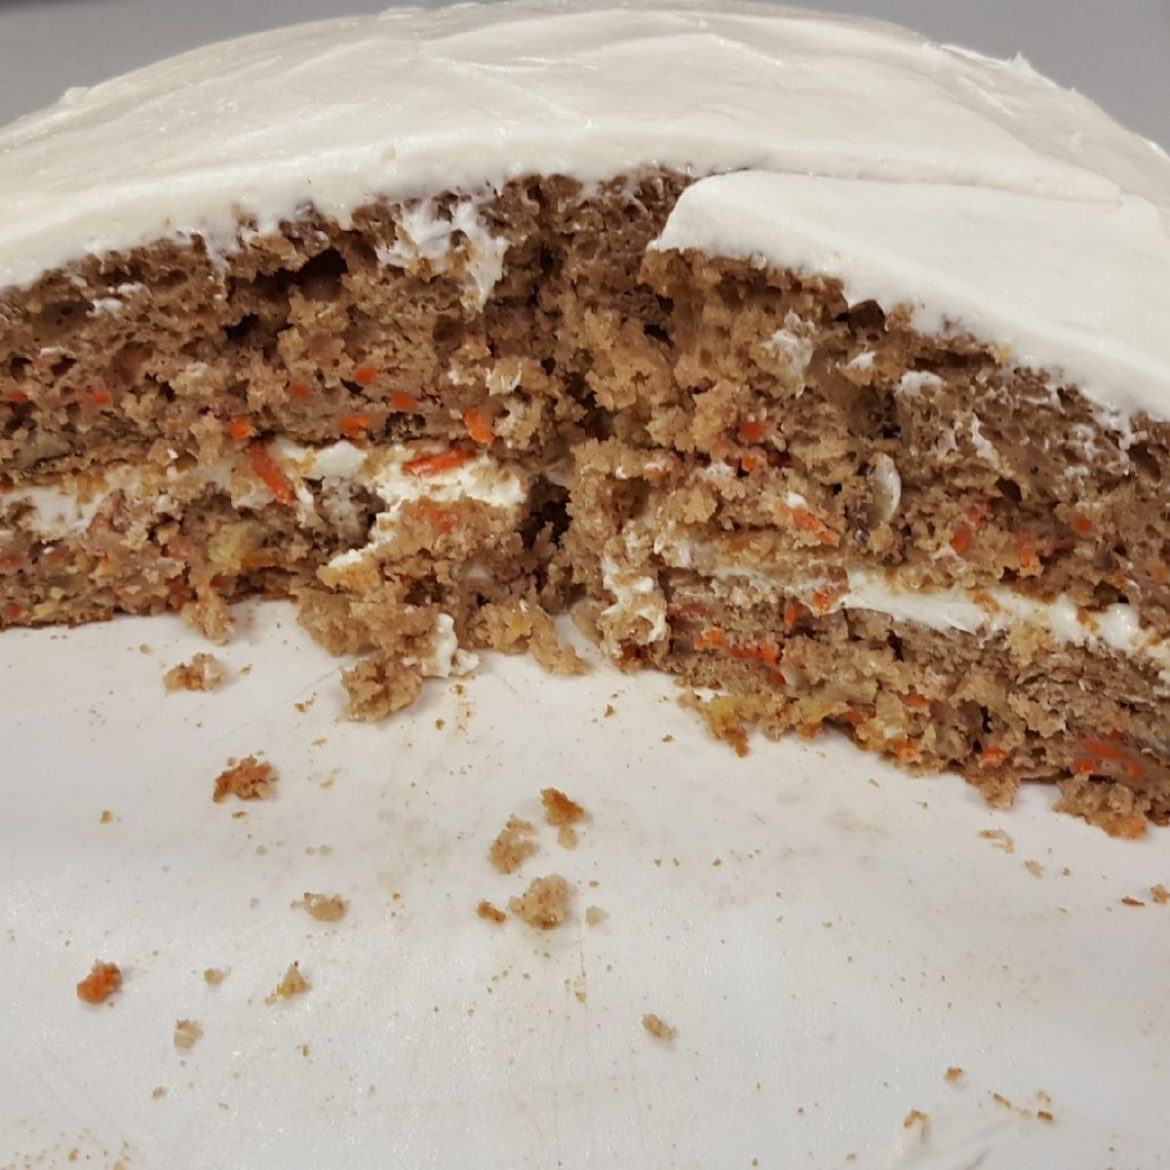
Carrot Cake has been my favorite since I was little. My mom makes the best carrot cake. My favorite version is this shortcut carrot cake recipe. This recipe guarantees a moist and fluffy carrot cake just like my mom’s. It is simple, quick, and a no-fuss making this the perfect recipe if you do not want to go through all the hassle of making this cake from scratch.

Ingredients

Cake:

1/2 c. butter – melted and cooled

1 (18 oz.) box spice cake mix (for this recipe, I use Betty Crocker’s, Super Moist)

3 eggs

1 c. chopped pecans, divided (3/4 for cake & 1/4 for the top)

1 c. water

1 c crushed pineapple, drained (8 oz. can)

1/2 c. sweetened shredded coconut

2 c. shredded carrots (freshly shredded)

Cream Cheese Frosting:

2 c. powdered sugar

1 (8 oz.) containers Cool Whip Topping, thawed

2 (8 oz.) packages of cream cheese, softened

HOW TO MAKE SHORTCUT CARROT CAKE

Step 1: Prepare the oven. Preheat it to 350 degrees F. Ready two cake pans. Grease and set aside.

Step 2: Place the spice cake mix, melted and cooled butter, eggs, and water in a mixing bowl. Beat on high until well blended. Then, fold in the shredded carrots along with the crushed pineapple, 3/4 c chopped pecans, and shredded coconut.

Step 3: Between the two cake pans, divide the batter. To release any air bubbles, lightly tap the pans on the countertop.

Step 4: Place in the preheated oven and bake for about 25 to 30 minutes or until a toothpick inserted in the center of the cake comes out clean.

Step 5: Remove from the oven and allow the cakes to cool for about 10 minutes in the pan before inverting to a cooling rack.

Frosting:

Step 6: Place the cream cheese and powdered sugar in a mixing bowl. Beat until smooth and creamy. Then, gently fold the Cool Whip.

To Assemble and Frost:

Step 7: Onto a tray or cake platter, place one of the completely cooled cakes. Spread the frosting on top of the cake. Then, place the second cake layer on top. Cover the top and sides of the cake with the remaining frosting. On top, sprinkle the rest of the pecans.

Notes:

You can substitute the pecans with walnuts if desired. Or omit the nuts if you are allergic.

You can also leave the pineapple out and just up the shredded carrots to 3 cups.

Make sure to use freshly grated carrots.

SHORTCUT CARROT CAKE

Rebecca Carrot Cake has been my favorite since I was little. My mom makes the best carrot cake. My favorite version is this shortcut carrot cake recipe. This recipe guarantees a… General Recipes SHORTCUT CARROT CAKE European Print This
Nutrition facts: 200 calories 20 grams fat
Rating: 5.0/5
( 1 voted )

Ingredients

  • Cake:
  • 1/2 c. butter – melted and cooled
  • 1 (18 oz.) box spice cake mix (for this recipe, I use Betty Crocker’s, Super Moist)
  • 3 eggs
  • 1 c. chopped pecans, divided (3/4 for cake & 1/4 for the top)
  • 1 c. water
  • 1 c crushed pineapple, drained (8 oz. can)
  • 1/2 c. sweetened shredded coconut
  • 2 c. shredded carrots (freshly shredded)
  • Cream Cheese Frosting:
  • 2 c. powdered sugar
  • 1 (8 oz.) containers Cool Whip Topping, thawed
  • 2 (8 oz.) packages of cream cheese, softened

Instructions

Step 1: Prepare the oven. Preheat it to 350 degrees F. Ready two cake pans. Grease and set aside.

Step 2: Place the spice cake mix, melted and cooled butter, eggs, and water in a mixing bowl. Beat on high until well blended. Then, fold in the shredded carrots along with the crushed pineapple, 3/4 c chopped pecans, and shredded coconut.

Step 3: Between the two cake pans, divide the batter. To release any air bubbles, lightly tap the pans on the countertop.

Step 4: Place in the preheated oven and bake for about 25 to 30 minutes or until a toothpick inserted in the center of the cake comes out clean.

Step 5: Remove from the oven and allow the cakes to cool for about 10 minutes in the pan before inverting to a cooling rack.

Frosting:

Step 6: Place the cream cheese and powdered sugar in a mixing bowl. Beat until smooth and creamy. Then, gently fold the Cool Whip.

To Assemble and Frost:

Step 7: Onto a tray or cake platter, place one of the completely cooled cakes. Spread the frosting on top of the cake. Then, place the second cake layer on top. Cover the top and sides of the cake with the remaining frosting. On top, sprinkle the rest of the pecans.

Notes

You can substitute the pecans with walnuts if desired. Or omit the nuts if you are allergic. You can also leave the pineapple out and just up the shredded carrots to 3 cups. Make sure to use freshly grated carrots.

September 13, 2022 0 comment
0 FacebookTwitterPinterestEmail
General Recipes

Danish Butter Cookies

by Rebecca September 13, 2022
written by Rebecca

Prep time: 30 mins | Cook time: 15 mins | Total time: 45 mins | Yield: 36 COOKIES

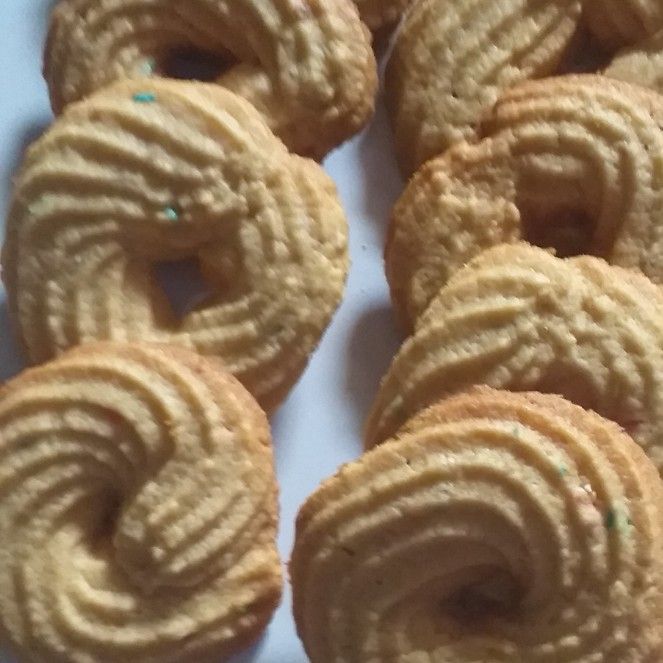
If you love the iconic Royal Dansk, I am sure that you’ll be impressed with these Danish Butter Cookies! They taste the same as the ones in the blue tin. The bonus is this recipe is super simple to make and guarantees delicious piped butter cookies!

Ingredients

1 egg

1 c. (227 grams) unsalted butter, room temperature

½ c. (100 grams) granulated sugar

Granulated sugar, for sprinkling

1 ½ tsp (1.5 tsp) vanilla extract

2 c. (284 grams) all-purpose flour

¼ tsp (0.25 tsp) salt

How to make Danish Butter Cookies

Step 1: Prepare the oven. Preheat it to 350 degrees F. Using silicone baking mats or parchment paper, line two baking sheets.

Step 2: On medium speed, beat the butter and sugar for about 1 to 2 minutes until fluffy. Then, add the salt along with the vanilla and egg. Beat again for another minute until well blended. Adjust the speed to low and slowly add in the flour, beating until mostly mixed. Then, using a rubber spatula, stir the mixture until completely combined. At this point, the dough should be thick.

Step 3: To a decorating bag fitted with a large open star tip, transfer the dough. On the parchment paper or silicone mats, pipe the dough into 2-inch circles and sprinkle them with sugar.

Step 4: Place the pan into the preheated oven, one at a time, and bake the dough for about 15 to 17 minutes until light golden brown. Remove from the oven when done and let the cookies cool completely.

Notes:

For this recipe, I recommend using good-quality butter.

In place of vanilla extract, you can use an equal amount of vanilla bean paste. This will give the cookies a hint of vanilla.

You can use Ateco #827 or Wilton 1M piping tip.

To portion out the dough, you can also use a cookie press if desired.

Before storing or consuming the cookies, let them cool completely first.

Place the cookies in an airtight container and store them for up to 1 week at room temperature or freeze for up to 3 months.

Nutrition Facts:

calories: 83 kcal, carbohydrates: 8g, fat: 5g, saturated fat: 3g, cholesterol: 18mg, sodium: 18mg, potassium: 10mg, sugar: 2g, vitamin a: 165IU, calcium: 3mg, iron: 0.3mg

Danish Butter Cookies

Rebecca Prep time: 30 mins | Cook time: 15 mins | Total time: 45 mins | Yield: 36 COOKIES If you love the iconic Royal Dansk, I am sure that you’ll… General Recipes Danish Butter Cookies European Print This
Serves: 36 Prep Time: 30 mins Cooking Time: 15 mins 15 mins
Nutrition facts: 83 calories 5 fat
Rating: 5.0/5
( 1 voted )

Ingredients

  • 1 egg
  • 1 c. (227 grams) unsalted butter, room temperature
  • ½ c. (100 grams) granulated sugar
  • Granulated sugar, for sprinkling
  • 1 ½ tsp (1.5 tsp) vanilla extract
  • 2 c. (284 grams) all-purpose flour
  • ¼ tsp (0.25 tsp) salt

Instructions

Step 1: Prepare the oven. Preheat it to 350 degrees F. Using silicone baking mats or parchment paper, line two baking sheets.

Step 2: On medium speed, beat the butter and sugar for about 1 to 2 minutes until fluffy. Then, add the salt along with the vanilla and egg. Beat again for another minute until well blended. Adjust the speed to low and slowly add in the flour, beating until mostly mixed. Then, using a rubber spatula, stir the mixture until completely combined. At this point, the dough should be thick.

Step 3: To a decorating bag fitted with a large open star tip, transfer the dough. On the parchment paper or silicone mats, pipe the dough into 2-inch circles and sprinkle them with sugar.

Step 4: Place the pan into the preheated oven, one at a time, and bake the dough for about 15 to 17 minutes until light golden brown. Remove from the oven when done and let the cookies cool completely.

Notes

For this recipe, I recommend using good-quality butter. In place of vanilla extract, you can use an equal amount of vanilla bean paste. This will give the cookies a hint of vanilla. You can use Ateco #827 or Wilton 1M piping tip. To portion out the dough, you can also use a cookie press if desired. Before storing or consuming the cookies, let them cool completely first. Place the cookies in an airtight container and store them for up to 1 week at room temperature or freeze for up to 3 months.

September 13, 2022 0 comment
0 FacebookTwitterPinterestEmail
General Recipes

Monterey Chicken Spaghetti Bake: An Easy And Delicious Dinner

by Rebecca September 13, 2022
written by Rebecca

Total time: 1 hr | Serves: 6-8

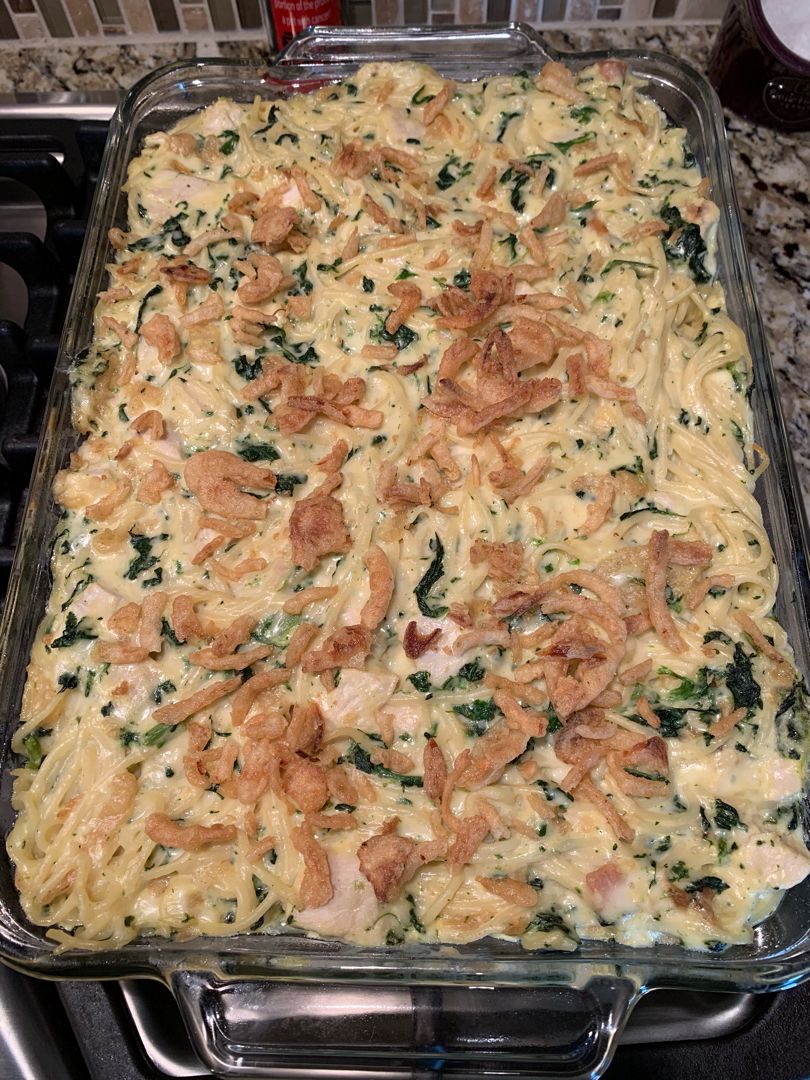
Easy and delicious – this Monterey Chicken Spaghetti Bake is the perfect dinner option excellent for everyone! It is my family’s favorite, even my pickiest eaters are crazy over this spaghetti bake. This is loaded with chicken, spaghetti, sour cream, spinach, two kinds of cheeses, and fried onions. This Monterey Chicken Spaghetti Bake also is a great freezer meal.

This Monterey Chicken Spaghetti Bake is seriously delicious! It is one of the best spaghetti dishes I’ve made. If you are searching for the ultimate spaghetti dinner that you can easily make and reheat for an even quicker meal, then you have to give this recipe a try!

INGREDIENTS

4 c. cooked chicken, shredded

1 (16 ounces) package spaghetti, cooked and drained

1 (10 ounces) package of frozen spinach, thawed and drained

1 (8 ounces) container of sour cream

1 (10.75 ounces) can condense cream of chicken soup

1 (8 ounces) package of cream cheese, room temperature

3 cloves garlic, minced

1 tsp onion powder

1/4 c. Parmesan cheese, grated

2 c. Monterey jack cheese, divided

kosher salt and freshly ground pepper, to taste

1 (6 ounces) package of fried onions, divided

How to make Monterey Chicken Spaghetti Bake

Step 1: Prepare the oven. Preheat it to 350 degrees F. Using a non-stick spray, lightly grease a 9 x 13-inch baking dish.

Step 2: Place the soup, sour cream and cream cheese, salt, pepper, garlic, and onion powder in a large bowl. Mix well until combined. Then, add the chicken along with the spinach, 1 c. Monterey Jack cheese and half of the fried onions. Mix again until blended.

Step 3: To the large bowl, add the cooked spaghetti and toss until evenly coated.

Step 4: Into the prepared baking dish, transfer the noodles, and top with the Parmesan and the rest of the Monterey Jack cheese. On top of the cheese, sprinkle the rest of the onions.

Step 5: Place the dish into the preheated oven and bake for about 40 minutes or until the cheese is golden brown and bubbly.

Monterey Chicken Spaghetti Bake: An Easy And Delicious Dinner

Rebecca Total time: 1 hr | Serves: 6-8 Easy and delicious – this Monterey Chicken Spaghetti Bake is the perfect dinner option excellent for everyone! It is my family’s favorite, even… General Recipes Monterey Chicken Spaghetti Bake: An Easy And Delicious Dinner European Print This
Serves: 6-8
Nutrition facts: 200 calories 20 grams fat
Rating: 5.0/5
( 1 voted )

Ingredients

  • 4 c. cooked chicken, shredded
  • 1 (16 ounces) package spaghetti, cooked and drained
  • 1 (10 ounces) package of frozen spinach, thawed and drained
  • 1 (8 ounces) container of sour cream
  • 1 (10.75 ounces) can condense cream of chicken soup
  • 1 (8 ounces) package of cream cheese, room temperature
  • 3 cloves garlic, minced
  • 1 tsp onion powder
  • 1/4 c. Parmesan cheese, grated
  • 2 c. Monterey jack cheese, divided
  • kosher salt and freshly ground pepper, to taste
  • 1 (6 ounces) package of fried onions, divided

Instructions

Step 1: Prepare the oven. Preheat it to 350 degrees F. Using a non-stick spray, lightly grease a 9 x 13-inch baking dish.

Step 2: Place the soup, sour cream and cream cheese, salt, pepper, garlic, and onion powder in a large bowl. Mix well until combined. Then, add the chicken along with the spinach, 1 c. Monterey Jack cheese and half of the fried onions. Mix again until blended.

Step 3: To the large bowl, add the cooked spaghetti and toss until evenly coated.

Step 4: Into the prepared baking dish, transfer the noodles, and top with the Parmesan and the rest of the Monterey Jack cheese. On top of the cheese, sprinkle the rest of the onions.

Step 5: Place the dish into the preheated oven and bake for about 40 minutes or until the cheese is golden brown and bubbly.

September 13, 2022 0 comment
0 FacebookTwitterPinterestEmail
General Recipes

Classic Shortbread Cookies

by Rebecca September 13, 2022
written by Rebecca

Prep time: 2 hrs 20 mins | Cook time: 10 mins | Inactive: 2 hrs | Yield: 24 cookies

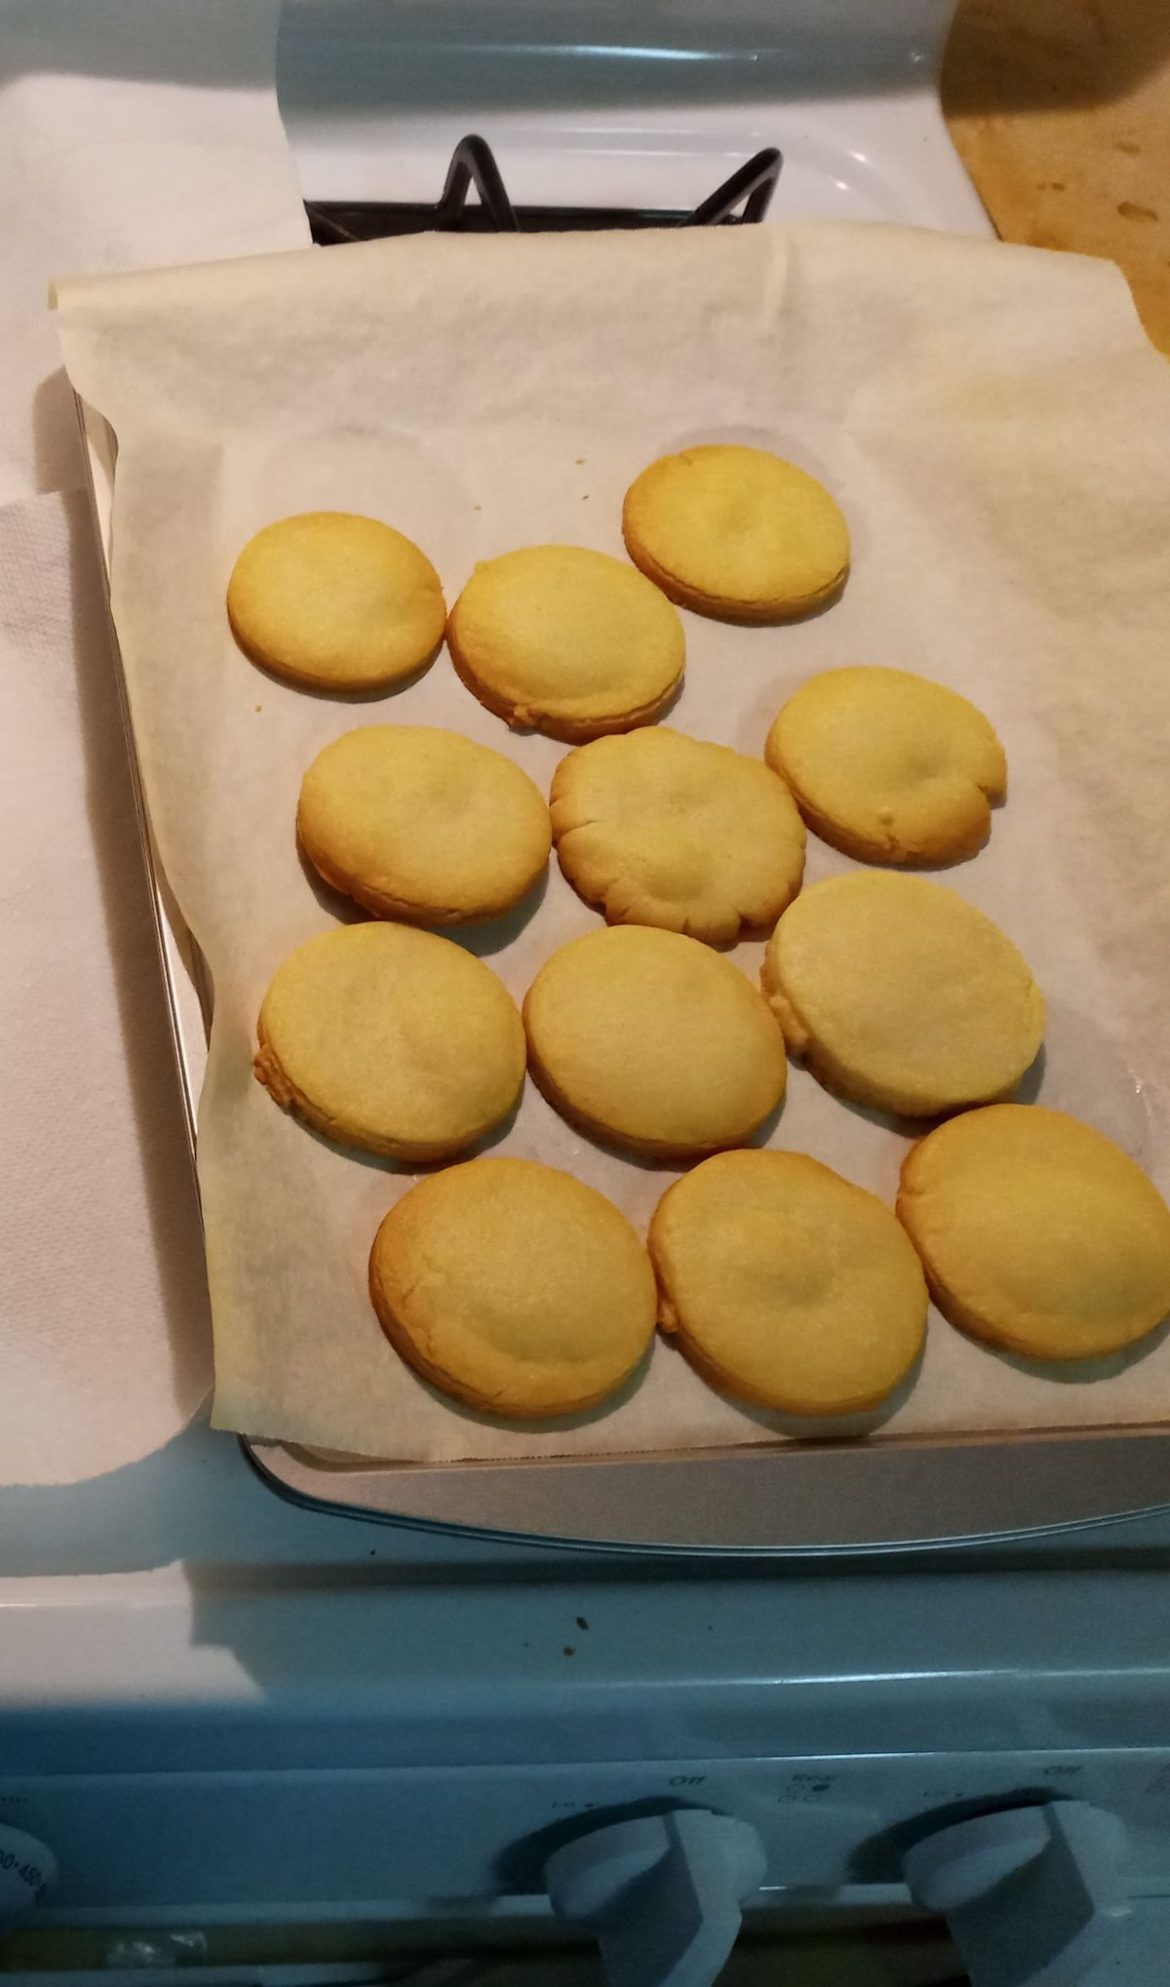
These classic shortbread cookies have a wonderful and delicious flavor that everyone loves! The play between sugar and salt is exciting. And the buttery flavor and crumbly texture of these cookies are to die for!

These crisp-crumbly cookies are incredibly easy and quick to make. You do not need any fancy ingredients. Just mix the simple ingredients, and shape them into your desired form, then bake. For great results, keep the batter in the fridge for 2 hours before baking. If desired, you can also sprinkle the cookies with large crystal sugar before baking.

INGREDIENTS

1/2 c. granulated sugar

1 c. butter, softened

2 c. all-purpose flour

Pinch of salt

1 teaspoon vanilla extract

Large crystal sugar for garnish (optional)

1/2 to 1 tablespoon milk, only if needed

How to Make Classic Shortbread Cookies

Step 1: Cream the butter and sugar in a large bowl. Then, whisk in the vanilla and salt. To the butter mixture, add the flour. If the mixture is too dry, add a couple of tablespoons of milk. At this point, the dough should have a dry Play-Doh texture.

Step 2: Roll the dough on a floured surface to half-inch thickness. Then, cut the dough into 2-inch rounds. If desired, you can cut the dough into other shapes with a cookie cutter. Or press the cookies into cookie molds. On an ungreased cookie sheet, place the cookies. Keep them in the fridge for 2 hours.

Step 3: Prepare the oven. Preheat it to 350 degrees F.

Step 4: Five minutes before baking, remove the cookies from the fridge. If desired, you can sprinkle each cookie with large crystal sugar.

Step 5: Place in the preheated oven and bake for about 10 minutes or until the bottoms of the cookies are just starting to turn golden. When done, take the cookies out of the oven and onto a cooling rack. Allow the cookies to cool for about 15 minutes.

Step 6: Serve and enjoy!

Classic Shortbread Cookies

Rebecca Prep time: 2 hrs 20 mins | Cook time: 10 mins | Inactive: 2 hrs | Yield: 24 cookies These classic shortbread cookies have a wonderful and delicious flavor that… General Recipes Classic Shortbread Cookies European Print This
Serves: 24 Prep Time: 2 hrs 20 mins Cooking Time: 10 mins 10 mins
Nutrition facts: 200 calories 20 grams fat
Rating: 5.0/5
( 1 voted )

Ingredients

  • 1/2 c. granulated sugar
  • 1 c. butter, softened
  • 2 c. all-purpose flour
  • Pinch of salt
  • 1 teaspoon vanilla extract
  • Large crystal sugar for garnish (optional)
  • 1/2 to 1 tablespoon milk, only if needed

Instructions

Step 1: Cream the butter and sugar in a large bowl. Then, whisk in the vanilla and salt. To the butter mixture, add the flour. If the mixture is too dry, add a couple of tablespoons of milk. At this point, the dough should have a dry Play-Doh texture.

Step 2: Roll the dough on a floured surface to half-inch thickness. Then, cut the dough into 2-inch rounds. If desired, you can cut the dough into other shapes with a cookie cutter. Or press the cookies into cookie molds. On an ungreased cookie sheet, place the cookies. Keep them in the fridge for 2 hours.

Step 3: Prepare the oven. Preheat it to 350 degrees F.

Step 4: Five minutes before baking, remove the cookies from the fridge. If desired, you can sprinkle each cookie with large crystal sugar.

Step 5: Place in the preheated oven and bake for about 10 minutes or until the bottoms of the cookies are just starting to turn golden. When done, take the cookies out of the oven and onto a cooling

September 13, 2022 0 comment
0 FacebookTwitterPinterestEmail
General Recipes

7-Up Pound Cake Recipe: Twist On The Classic

by Rebecca September 13, 2022
written by Rebecca

Prep time: 15 mins | Cook time: 1 hr 10 mins | Serves: 10

Moist and flavorful, this 7-Up Pound Cake is one of my favorite cake recipes. This recipe puts a fun, super tasty twist on the classic. This extra moist, smooth, and buttery pound cake with a splash of lemon and topped with simple 7-Up and powdered sugar glaze is the perfect cake for just about any occasion! Enjoy this cake on its own, or serve this cake with some fresh fruit and a big dollop of whipped cream for that extra layer of deliciousness!

INGREDIENTS

CAKE:

5 eggs, room temperature

1 c. unsalted butter, softened

1/4 c. heavy whipping cream

3 c. granulated sugar

1 1/2 tsp vanilla extract

1 tsp lemon extract

3 c. all-purpose flour, sifted

Zest of 1 lemon

Zest of 1 lime

1/2 tsp salt

1 c. 7-Up soda

1/2 c. butter-flavoured shortening

GLAZE:

2-3 tbsp 7-up

1 c. powdered sugar

How to make 7-Up Pound Cake

Step 1: Prepare the oven. Preheat it to 325 degrees. Ready a 10-inch Bundt pan or two 6-cup loaf pans. Grease, flour, and set aside.

Step 2: Place the butter, sugar, and shortening in a large bowl. Mix well until blended. Add the egg one at a time, beating every after each addition. Stir in the flavor extracts and fold in the lemon and lime zest.

Step 3: Combine the flour and salt in another bowl. To the wet ingredients, gradually add the flour mixture.

Step 4: With the remaining batter, whip the cream and 7-up until fluffy.

Step 5: Into the prepared pan, pour the batter. Place in the preheated oven and bake for about 60 to 70 minutes. The cake is done once a toothpick inserted in the center comes out clean.

Step 6: Remove from the oven when done and let the cake cool.

Step 7: In the meantime, whisk 2 tbsp 7-Up and powdered sugar to make the glaze. If needed, you can thin out the glaze by stirring in an additional tablespoon of 7-Up.

Step 8: Glaze the cooled cake. Enjoy!

7-Up Pound Cake Recipe: Twist On The Classic

Rebecca Prep time: 15 mins | Cook time: 1 hr 10 mins | Serves: 10 Moist and flavorful, this 7-Up Pound Cake is one of my favorite cake recipes. This recipe… General Recipes 7-Up Pound Cake Recipe: Twist On The Classic European Print This
Serves: 10 Prep Time: 15 mins Cooking Time: 1 hr 10 mins 1 hr 10 mins
Nutrition facts: 200 calories 20 grams fat
Rating: 5.0/5
( 1 voted )

Ingredients

  • CAKE:
  • 5 eggs, room temperature
  • 1 c. unsalted butter, softened
  • 1/4 c. heavy whipping cream
  • 3 c. granulated sugar
  • 1 1/2 tsp vanilla extract
  • 1 tsp lemon extract
  • 3 c. all-purpose flour, sifted
  • Zest of 1 lemon
  • Zest of 1 lime
  • 1/2 tsp salt
  • 1 c. 7-Up soda
  • 1/2 c. butter-flavoured shortening
  • GLAZE:
  • 2-3 tbsp 7-up
  • 1 c. powdered sugar

Instructions

Step 1: Prepare the oven. Preheat it to 325 degrees. Ready a 10-inch Bundt pan or two 6-cup loaf pans. Grease, flour, and set aside.

Step 2: Place the butter, sugar, and shortening in a large bowl. Mix well until blended. Add the egg one at a time, beating every after each addition. Stir in the flavor extracts and fold in the lemon and lime zest.

Step 3: Combine the flour and salt in another bowl. To the wet ingredients, gradually add the flour mixture.

Step 4: With the remaining batter, whip the cream and 7-up until fluffy.

Step 5: Into the prepared pan, pour the batter. Place in the preheated oven and bake for about 60 to 70 minutes. The cake is done once a toothpick inserted in the center comes out clean.

Step 6: Remove from the oven when done and let the cake cool.

Step 7: In the meantime, whisk 2 tbsp 7-Up and powdered sugar to make the glaze. If needed, you can thin out the glaze by stirring in an additional tablespoon of 7-Up.

Step 8: Glaze the cooled cake. Enjoy!

September 13, 2022 0 comment
0 FacebookTwitterPinterestEmail
Newer Posts
Older Posts

Popular Posts

  • 1

    Crispy Crunchy Parmesan Potatoes

    March 21, 2020
  • 2

    CROCK POT SMOTHERED PORK CHOPS

    March 21, 2020
  • Facebook
  • Twitter

@2019 - All Right Reserved.


Back To Top