Cook it once
  • Home
  • Privacy Policy
  • Recipes
    • KETO
    • LC
    • WW
  • Tips
  • Contact
Cook it once
  • Home
  • Privacy Policy
  • Recipes
    • KETO
    • LC
    • WW
  • Tips
  • Contact
Category:

General Recipes

General Recipes

Pepperoni Bread

by Rebecca September 20, 2022
written by Rebecca

Prep time: 30 mins | Cook time: 45 mins | Total time: 1 hr 15 mins | Yield: 6 TO 12 ROLLS

Pepperoni bread, also known as Pepperoni rolls is a staple in Western Pennsylvania. Frozen bread dough covered with sliced pepperoni and shredded mozzarella, then rolled and baked. These pepperoni rolls are a fun pizza without sauce. Super simple to make and require just three basic ingredients.

I am a huge fan of this pepperoni bread. I always whip up a big batch especially when my kids’ friends are coming over. They are super fun to make, the easiest form of pizza you can make any time without a fuss!

Ingredients

12 to 14 oz (340.2 grams) sliced pepperoni

24 oz (680.39 grams) shredded mozzarella

3 lb (1.36 kg) package Rhodes frozen bread dough

How to make Pepperoni Bread

Step 1: For thawing/rising frozen bread dough, follow the package directions.

Step 2: Prepare the oven. Preheat it to 350 degrees F. Using parchment paper or a silicone baking mat, line two baking sheets, and set aside.

Step 3: In half, cut each loaf of dough. Keep half of the dough under a plastic wrap that has been greased with non-stick cooking spray. Into a thin rectangle about 7 x 12 inches, roll the other dough. Top it with sliced pepperoni followed by sprinkles of shredded mozzarella. Tightly roll the dough, beginning with the long side, pinching the seams and ends to seal. On the prepared sheet, transfer the rolled dough and do the same with the rest of the dough.

Step 4: Place in the preheated oven and bake for about 35 to 45 minutes. When done, take the dish out of the oven and let the bread cool for a little before serving.

Notes:

These pepperoni rolls are great to serve warm or at room temperature.

For any leftovers, you can keep them in resealable plastic bags at room temperature or store them in the fridge for up to 5 days.

You can also freeze the pepperoni rolls. Wrap them in plastic wrap, then aluminium foil, and freeze for up to 1 month.

Nutrition Facts:

calories: 599 kcal, carbohydrates: 54g, protein: 25g, fat: 28g, saturated fat: 11g, cholesterol: 74mg, sodium: 1388mg, potassium: 122mg, fiber: 2g, vitamin a: 385IU, vitamin c: 0.2mg, calcium: 293mg, iron: 0.7mg

Pepperoni Bread

Rebecca Prep time: 30 mins | Cook time: 45 mins | Total time: 1 hr 15 mins | Yield: 6 TO 12 ROLLS Pepperoni bread, also known as Pepperoni rolls is… General Recipes Pepperoni Bread European Print This
Serves: 6-12 Prep Time: 30 mins Cooking Time: 45 mins 45 mins
Nutrition facts: 599 calories 28 fat
Rating: 5.0/5
( 1 voted )

Ingredients

  • 12 to 14 oz (340.2 grams) sliced pepperoni
  • 24 oz (680.39 grams) shredded mozzarella
  • 3 lb (1.36 kg) package Rhodes frozen bread dough

Instructions

Step 1: For thawing/rising frozen bread dough, follow the package directions.

Step 2: Prepare the oven. Preheat it to 350 degrees F. Using parchment paper or a silicone baking mat, line two baking sheets, and set aside.

Step 3: In half, cut each loaf of dough. Keep half of the dough under a plastic wrap that has been greased with non-stick cooking spray. Into a thin rectangle about 7 x 12 inches, roll the other dough. Top it with sliced pepperoni followed by sprinkles of shredded mozzarella. Tightly roll the dough, beginning with the long side, pinching the seams and ends to seal. On the prepared sheet, transfer the rolled dough and do the same with the rest of the dough.

Step 4: Place in the preheated oven and bake for about 35 to 45 minutes. When done, take the dish out of the oven and let the bread cool for a little before serving.

Notes

These pepperoni rolls are great to serve warm or at room temperature. For any leftovers, you can keep them in resealable plastic bags at room temperature or store them in the fridge for up to 5 days. You can also freeze the pepperoni rolls. Wrap them in plastic wrap, then aluminium foil, and freeze for up to 1 month.

September 20, 2022 0 comment
0 FacebookTwitterPinterestEmail
General Recipes

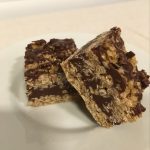
NO BAKE CHOCOLATE OAT BAR

by Rebecca September 19, 2022
written by Rebecca

Prep Time: 12 mins | Refrigerate: 2 hrs | Total Time: 2 hrs 12 mins | Servings: 9

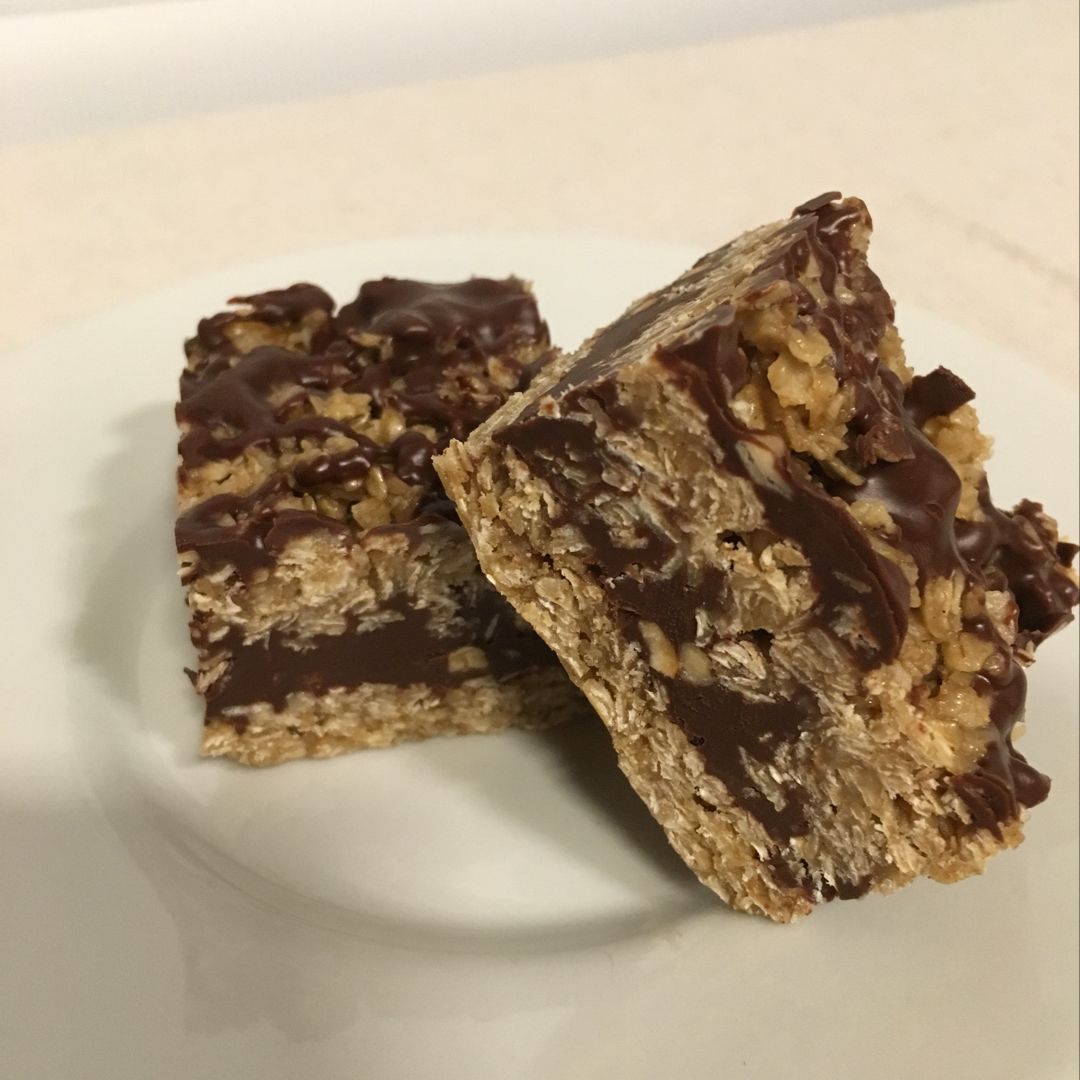
These are the best no-bake chocolate oat bars with a chocolatey peanut butter layer. Super easy to whip up using just a few simple ingredients. These bars are always a big hit and a great cookie option for holidays or any occasion! This is a very delightful treat for all ages!

Ingredients

½ c. brown sugar, packed

1 c. butter

1 teaspoon vanilla extract

1 c. semisweet chocolate chips

3 c. quick cooking oats

Chocolate chips for drizzle

½ c. peanut butter

HOW TO MAKE NO-BAKE CHOCOLATE OAT BAR

Step 1: Ready a 9-inch square pan. Grease and set aside.

Step 2: In a large saucepan, melt the butter on medium heat. Then, add the brown sugar and vanilla. Mix well. Next, stir in the oats. Put the lid on and cook for about 2 to 3 minutes over low heat.

Step 3: Into the bottom of the prepared pan, press half of the mixture. Set the rest aside for topping.

Step 4: In the meantime, place the chocolate chips and peanut butter in a small heavy saucepan. Melt over low heat, stirring often, until smooth. Over the crust, pour the chocolate mixture. Using a knife or the back of a spoon, evenly spread the chocolate mixture.

Step 5: On top of the chocolate layer, crumble the rest of the oat mixture, gently pressing the crumbles down. Tent the dish and place it in the fridge for at least 2 to 3 hours (preferably overnight).

Step 6: Remove from the fridge and bring the oat bar to room temperature before cutting into squares.

Tips:

For this recipe, you can use quick cookie oats or rolled/old-fashioned oats. Quick oats take less time to cook.

Make sure to let the layer sit before building because the oats need to be a part of the chocolate layer.

These oat bars are freezer-friendly. When ready to consume, thaw the bars before serving.

Nutritional Facts:

Calories 528Kcl Fat 37g Cholesterol 55mg Sodium 252mg Potassium 325mg Carbohydrates 44g Fiber 5g Sugar 21g

NO BAKE CHOCOLATE OAT BAR

Rebecca Prep Time: 12 mins | Refrigerate: 2 hrs | Total Time: 2 hrs 12 mins | Servings: 9 These are the best no-bake chocolate oat bars with a chocolatey peanut… General Recipes NO BAKE CHOCOLATE OAT BAR European Print This
Serves: 9 Prep Time: 12 mins
Nutrition facts: 528 calories 37 fat
Rating: 5.0/5
( 1 voted )

Ingredients

  • ½ c. brown sugar, packed
  • 1 c. butter
  • 1 teaspoon vanilla extract
  • 1 c. semisweet chocolate chips
  • 3 c. quick cooking oats
  • Chocolate chips for drizzle
  • ½ c. peanut butter

Instructions

Step 1: Ready a 9-inch square pan. Grease and set aside.

Step 2: In a large saucepan, melt the butter on medium heat. Then, add the brown sugar and vanilla. Mix well. Next, stir in the oats. Put the lid on and cook for about 2 to 3 minutes over low heat.

Step 3: Into the bottom of the prepared pan, press half of the mixture. Set the rest aside for topping.

Step 4: In the meantime, place the chocolate chips and peanut butter in a small heavy saucepan. Melt over low heat, stirring often, until smooth. Over the crust, pour the chocolate mixture. Using a knife or the back of a spoon, evenly spread the chocolate mixture.

Step 5: On top of the chocolate layer, crumble the rest of the oat mixture, gently pressing the crumbles down. Tent the dish and place it in the fridge for at least 2 to 3 hours (preferably overnight).

Step 6: Remove from the fridge and bring the oat bar to room temperature before cutting into squares.

Notes

For this recipe, you can use quick cookie oats or rolled/old-fashioned oats. Quick oats take less time to cook. Make sure to let the layer sit before building because the oats need to be a part of the chocolate layer. These oat bars are freezer-friendly. When ready to consume, thaw the bars before serving.

September 19, 2022 0 comment
0 FacebookTwitterPinterestEmail
General Recipes

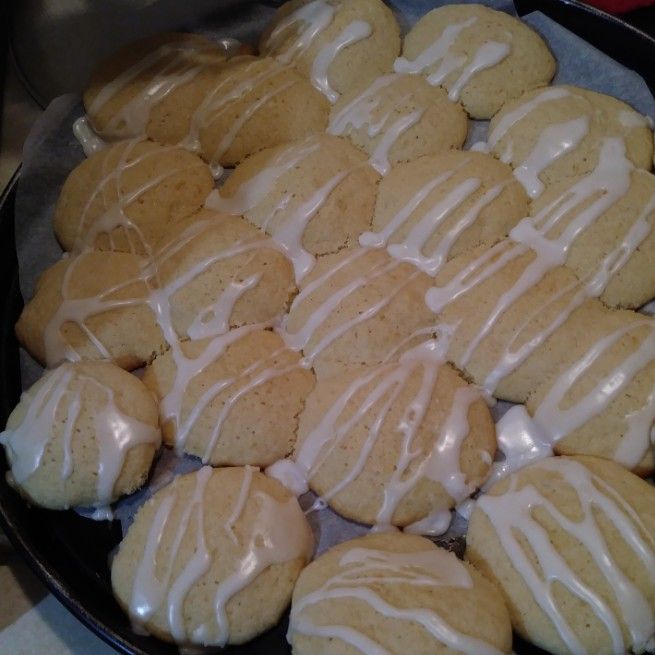
LEMON POUND CAKE COOKIES

by Rebecca September 19, 2022
written by Rebecca

Prep Time: 10 mins | Cook Time: 8 mins | Additional Time: 10 mins | Total Time: 28 minutes

I love these lemon pound cake cookies. They are so cute and taste like a pound cake just in a cookie form! These cookies are fluffy with a huge fresh lemon flavor. These lemon pound cake cookies are one of my ultimate favorite pound cake recipes. Super easy to whip up and does not have any fancy ingredients to make. In no time, you’ll have these tasty cookies ready. Do not skip the tart lemon glaze because it makes a big difference! Simple and very similar to frosting. The glaze is lighter than Lofthouse cookies, but still pretty great! Surely, these lemon pound cake cookies are a real treat for all lemon lovers!

Ingredients

Cookie:

1 large egg

1-2 tsp lemon extract

1 half stick of softened butter

1 boxed lemon pound cake mix

Glaze:

1 tsp lemon extract

2-3 tbsp water or milk

1 tsp vanilla extract

1 c. powdered sugar

HOW TO MAKE LEMON POUND CAKE COOKIES

Step 1: Prepare the oven. Preheat it to 375 degrees F. Using parchment paper, line a baking pan.

Step 2: In a bowl, place the pound cake box mix, egg, and butter. Mix well for about 1 to 2 minutes.

Step 3: Into about 1-inch balls, roll the mixture and place them on the prepared baking sheet. Into powdered sugar, dip a small glass, and press this on a dough ball to flatten.

Step 4: For the glaze, place the powdered sugar, milk, and extracts in a small bowl. Mix well until combined, then sprinkle this over the cookies.

Step 5: Place the cookies in the preheated oven and bake for about 8 minutes.

Step 6: When done, take the cookies out of the oven and onto a wire rack to cool.

Tips:

1. Make sure not to completely flatten the cookies. Press them to just about 1/4 to 22-inch thickness.

2. If you do not want to glaze the cookies that is fine. You can skip it.

Nutritional Info:

Calories: 92Kcl

LEMON POUND CAKE COOKIES

Rebecca Prep Time: 10 mins | Cook Time: 8 mins | Additional Time: 10 mins | Total Time: 28 minutes I love these lemon pound cake cookies. They are so cute… General Recipes LEMON POUND CAKE COOKIES European Print This
Prep Time: 10 mins Cooking Time: 18 mins 18 mins
Nutrition facts: 92 calories 20 grams fat
Rating: 5.0/5
( 1 voted )

Ingredients

  • Cookie:
  • 1 large egg
  • 1-2 tsp lemon extract
  • 1 half stick of softened butter
  • 1 boxed lemon pound cake mix
  • Glaze:
  • 1 tsp lemon extract
  • 2-3 tbsp water or milk
  • 1 tsp vanilla extract
  • 1 c. powdered sugar

Instructions

Step 1: Prepare the oven. Preheat it to 375 degrees F. Using parchment paper, line a baking pan.

Step 2: In a bowl, place the pound cake box mix, egg, and butter. Mix well for about 1 to 2 minutes.

Step 3: Into about 1-inch balls, roll the mixture and place them on the prepared baking sheet. Into powdered sugar, dip a small glass, and press this on a dough ball to flatten.

Step 4: For the glaze, place the powdered sugar, milk, and extracts in a small bowl. Mix well until combined, then sprinkle this over the cookies.

Step 5: Place the cookies in the preheated oven and bake for about 8 minutes.

Step 6: When done, take the cookies out of the oven and onto a wire rack to cool.

September 19, 2022 0 comment
0 FacebookTwitterPinterestEmail
General Recipes

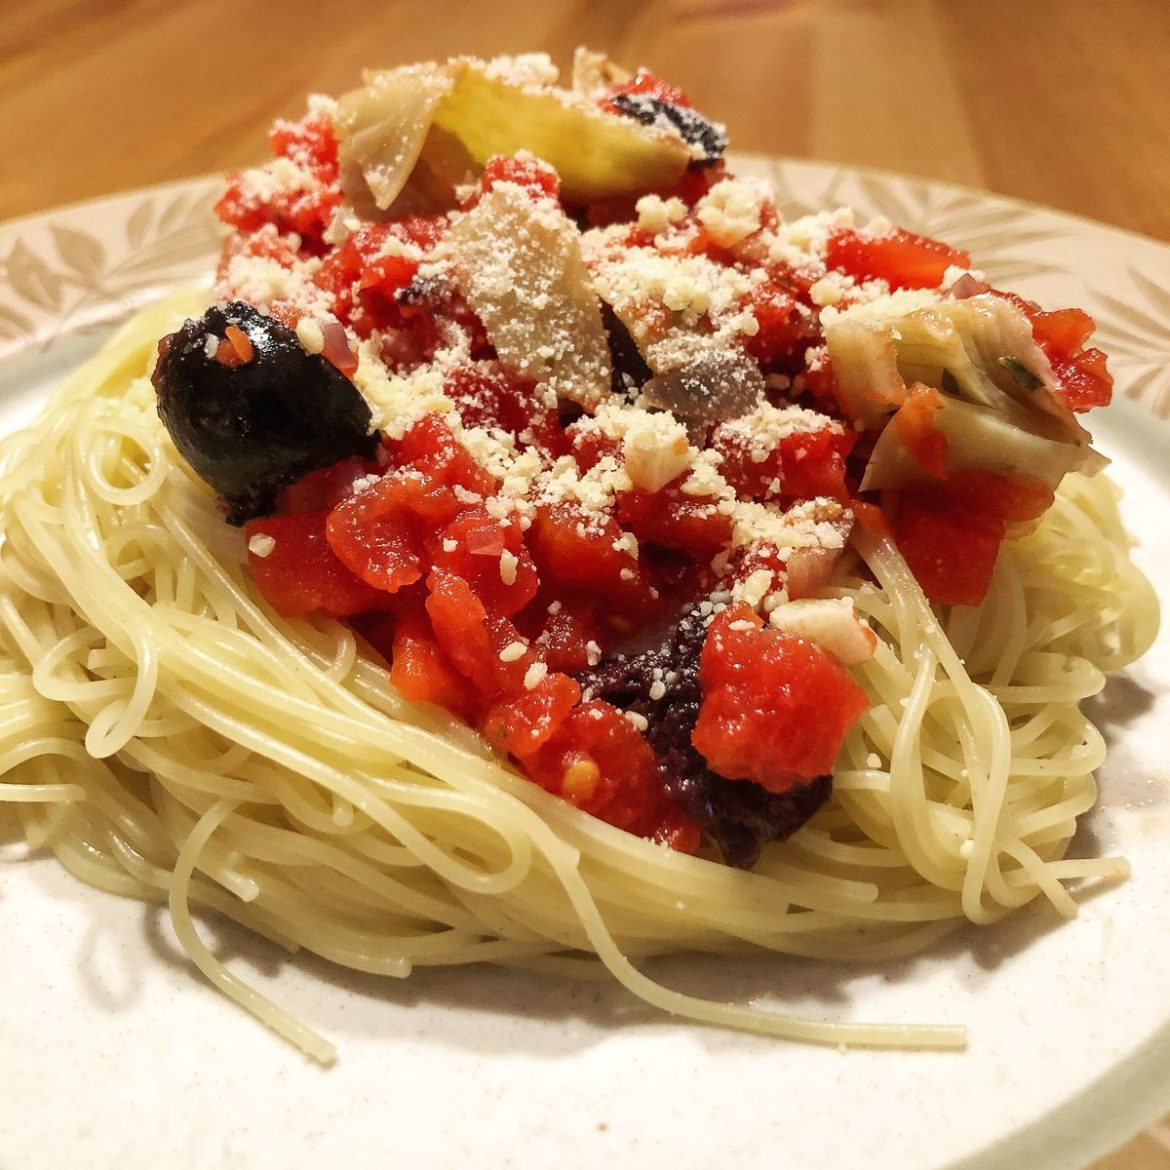
Pasta Pomodoro

by Rebecca September 19, 2022
written by Rebecca

PREP TIME: 15 mins | TOTAL TIME: 50 mins | YIELDS: 4 servings

Pasta Pomodoro is one of the easiest and quickest dinners you can make. The Pomodoro sauce is simpler than the traditional pasta sauce. It has a light sauce made with fresh tomatoes. Once cooked, there are many large tomato chunks still intact. This Pasta Pomodoro is a simple yet fancy pasta, excellent for date nights or entertaining. Before serving, top the pasta Pomodoro with some grated Parmesan and pair this with a glass of crisp white wine.

Pasta Pomodoro is a wonderful pasta dish. The addition of crushed red pepper flakes balances the tomato’s, natural sweetness. If desired, you can use different pasta for this recipe, such as bucatini or angel hair pasta. Grated Parmesan on top is recommended, but if you want to add some more sides, this pasta Pomodoro is also great paired with garlic bread.

INGREDIENTS

3 cloves garlic, minced

1 pound spaghetti

1 small yellow onion, chopped

4 medium tomatoes, chopped (about 4 c.)

Pinch crushed red pepper flakes

2 tablespoons extra-virgin olive oil

2 tablespoons thinly sliced basil, plus more for serving

Freshly grated Parmesan, for serving

Kosher salt

Freshly ground black pepper

How to make Pasta Pomodoro

Step 1: Following the package directions, cook the pasta in a large pot of salted boiling water until al dente. Set aside a half cup of the pasta water and drain the rest.

Step 2: Heat the oil in another large pot. Once the oil is hot, add the onion to the pot and cook for about 6 minutes until tender. Then, add the garlic and continue to cook for a minute more until aromatic.

Step 3: To the pot with the onion and garlic, add the tomatoes. Cook until the juices are released. To taste, season with salt and pepper, plus a pinch of red pepper flakes. Adjust the heat to low and let everything simmer for another 15 minutes before stirring in the basil.

Step 4: Then, add the pasta and 1/4 of the reserved pasta water. Mix well. If needed, add more of the pasta water.

Step 5: Remove from the heat when done and serve the Pasta Pomodoro immediately, garnished with Parmesan and more basil. Enjoy!

Pasta Pomodoro

Rebecca PREP TIME: 15 mins | TOTAL TIME: 50 mins | YIELDS: 4 servings Pasta Pomodoro is one of the easiest and quickest dinners you can make. The Pomodoro sauce is… General Recipes Pasta Pomodoro European Print This
Serves: 4 Prep Time: 15 mins
Nutrition facts: 200 calories 20 grams fat
Rating: 5.0/5
( 1 voted )

Ingredients

  • 3 cloves garlic, minced
  • 1 pound spaghetti
  • 1 small yellow onion, chopped
  • 4 medium tomatoes, chopped (about 4 c.)
  • Pinch crushed red pepper flakes
  • 2 tablespoons extra-virgin olive oil
  • 2 tablespoons thinly sliced basil, plus more for serving
  • Freshly grated Parmesan, for serving
  • Kosher salt
  • Freshly ground black pepper

Instructions

Step 1: Following the package directions, cook the pasta in a large pot of salted boiling water until al dente. Set aside a half cup of the pasta water and drain the rest.

Step 2: Heat the oil in another large pot. Once the oil is hot, add the onion to the pot and cook for about 6 minutes until tender. Then, add the garlic and continue to cook for a minute more until aromatic.

Step 3: To the pot with the onion and garlic, add the tomatoes. Cook until the juices are released. To taste, season with salt and pepper, plus a pinch of red pepper flakes. Adjust the heat to low and let everything simmer for another 15 minutes before stirring in the basil.

Step 4: Then, add the pasta and 1/4 of the reserved pasta water. Mix well. If needed, add more of the pasta water.

Step 5: Remove from the heat when done and serve the Pasta Pomodoro immediately, garnished with Parmesan and more basil. Enjoy!

September 19, 2022 0 comment
0 FacebookTwitterPinterestEmail
General Recipes

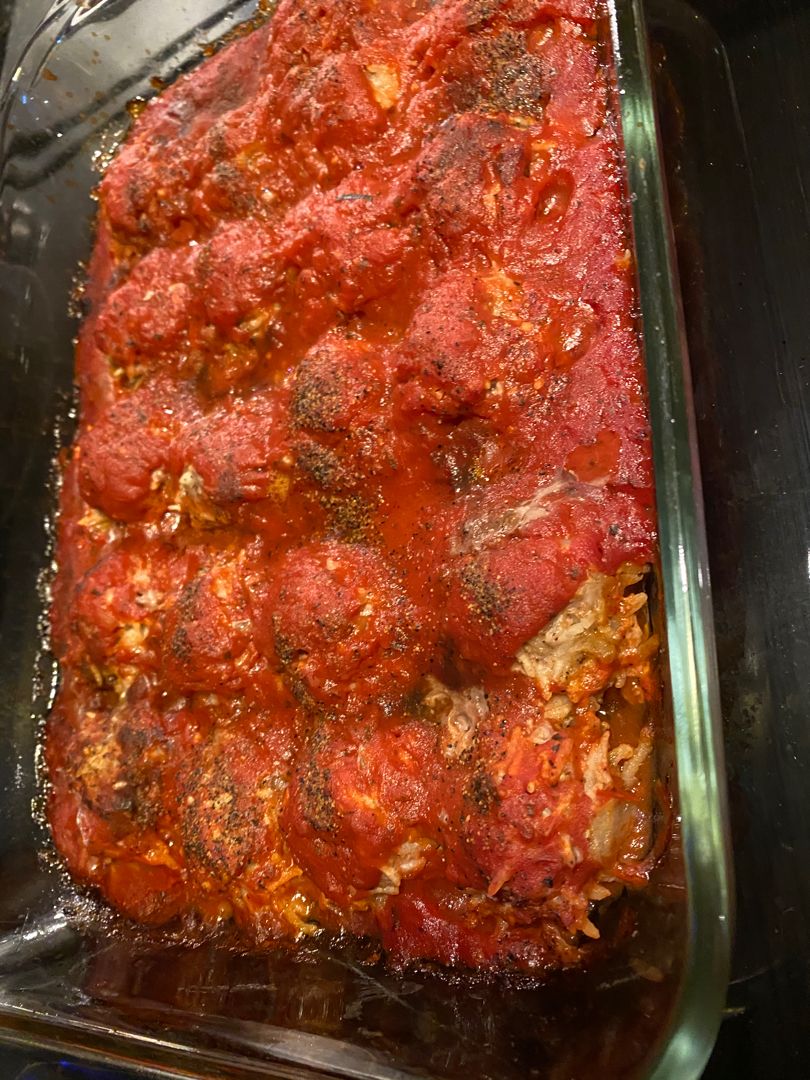
Porcupine Meatballs

by Rebecca September 19, 2022
written by Rebecca

Total time: 45 mins | Serves: 4

One of the best meatballs I’ve tried! Well-seasoned porcupine meatballs simmered in a rich tomato sauce. These porcupine meatballs are incredibly easy to make using just a handful of ingredients. A great weeknight dinner option best pair with rice or mashed potatoes with your favorite veggies on the side. These amazing porcupine meatballs are also a wonderful party appetizer.

These porcupine meatballs are a fantastic make-ahead meal. They are absolutely delicious, even your pickiest eaters will love them! A time-tested recipe, a keeper, and great for everyone!

If you love meatballs and they are a staple at your home, these easy, hearty porcupine meatballs are a must! They are pretty fancy compared to the other meatballs I’ve tried, but still simple to whip up.

INGREDIENTS

1/4 c. onion, finely chopped

2 cans (15 ounces each) of tomato sauce

1/2 c. long grain white rice, uncooked

1 pound of ground beef

1/2 c. water

1 tbsp Worcestershire sauce

1/2 tsp dried thyme

1/2 tsp garlic powder

1/2 tsp dried rosemary

1/2 tsp dried oregano

1/2 tsp dried basil

Kosher salt and freshly ground pepper, to taste

1 egg, beaten

How to make Porcupine Meatballs

Step 1: Place the ground beef, rice, beaten egg, 1/4 cup of tomato sauce, onion, basil, thyme, rosemary, oregano, garlic powder, and salt and pepper in a medium-sized bowl. Mix well until combined.

Step 2: Shape the mixture into a 1 1/2-inch meatball, making about 20 pieces of meatball.

Step 3: Into a large skillet, place the meatballs.

Step 4: Whisk the rest of the tomato sauce with half a cup of water and Worcestershire sauce in a small bowl until mixed. Then, pour this over the meatballs.

Step 5: Bring the mixture to a boil over medium-high heat. Once boiling, adjust the heat to low. Put the lid on and simmer for about 20 minutes. After twenty minutes, remove the lid and gently turn the meatballs over. Let everything simmer for another 15 to 20 minutes, covered, until the meatballs are completely cooked.

Porcupine Meatballs

Rebecca Total time: 45 mins | Serves: 4 One of the best meatballs I’ve tried! Well-seasoned porcupine meatballs simmered in a rich tomato sauce. These porcupine meatballs are incredibly easy to… General Recipes Porcupine Meatballs European Print This
Serves: 4
Nutrition facts: 200 calories 20 grams fat
Rating: 5.0/5
( 1 voted )

Ingredients

  • 1/4 c. onion, finely chopped
  • 2 cans (15 ounces each) of tomato sauce
  • 1/2 c. long grain white rice, uncooked
  • 1 pound of ground beef
  • 1/2 c. water
  • 1 tbsp Worcestershire sauce
  • 1/2 tsp dried thyme
  • 1/2 tsp garlic powder
  • 1/2 tsp dried rosemary
  • 1/2 tsp dried oregano
  • 1/2 tsp dried basil
  • Kosher salt and freshly ground pepper, to taste
  • 1 egg, beaten

Instructions

Step 1: Place the ground beef, rice, beaten egg, 1/4 cup of tomato sauce, onion, basil, thyme, rosemary, oregano, garlic powder, and salt and pepper in a medium-sized bowl. Mix well until combined.

Step 2: Shape the mixture into a 1 1/2-inch meatball, making about 20 pieces of meatball.

Step 3: Into a large skillet, place the meatballs.

Step 4: Whisk the rest of the tomato sauce with half a cup of water and Worcestershire sauce in a small bowl until mixed. Then, pour this over the meatballs.

Step 5: Bring the mixture to a boil over medium-high heat. Once boiling, adjust the heat to low. Put the lid on and simmer for about 20 minutes. After twenty minutes, remove the lid and gently turn the meatballs over. Let everything simmer for another 15 to 20 minutes, covered, until the meatballs are completely cooked.

September 19, 2022 0 comment
0 FacebookTwitterPinterestEmail
General Recipes

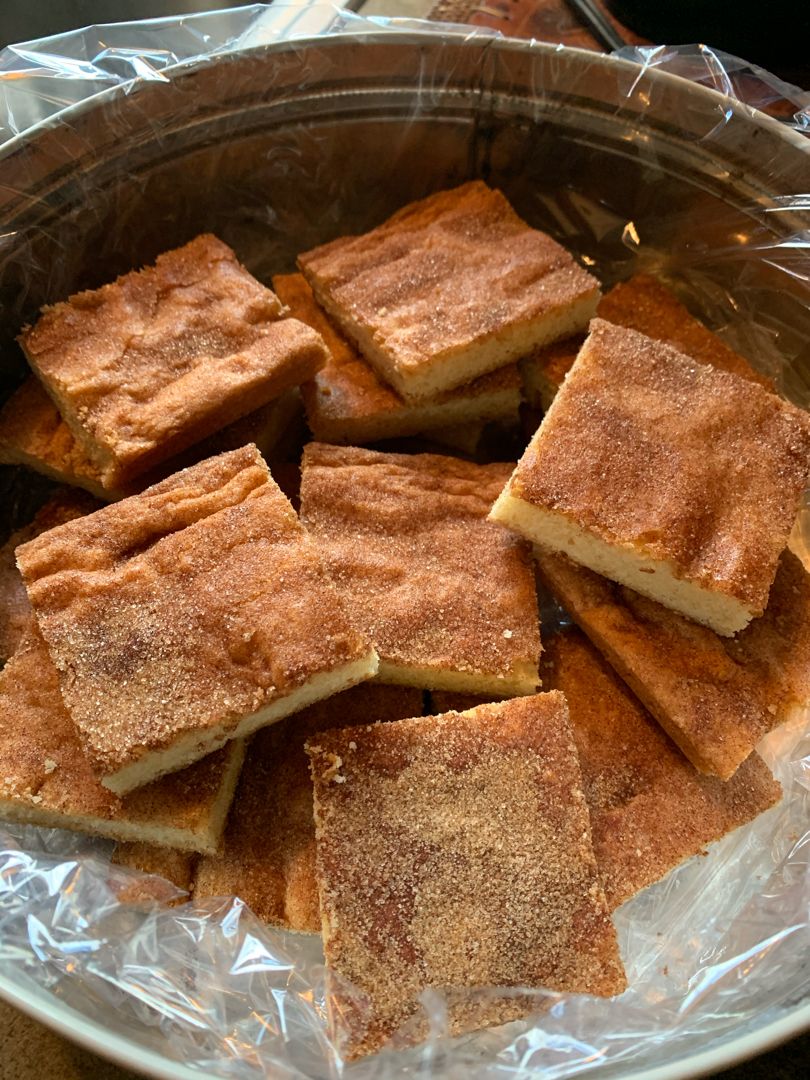
Snickerdoodle Cookie Bars

by Rebecca September 19, 2022
written by Rebecca

Prep time: 10 mins | Yield: 12 cookie bars

These Snickerdoodle Cookie Bars are my favorites! They are super soft, buttery, thick, and moist. Incredibly easy to whip up using just a few simple ingredients. Ready in minutes, you’ll be tempted to throw together another batch!

If you enjoy the cinnamon-sugar flavor, it is guaranteed that you’ll dig these Snickerdoodle Cookie Bars! I always adore homemade bars like these Snickerdoodle Cookie Bars because they taste like the classic, old-fashioned Snickerdoodle Cookies!

Ditch the time-consuming rolling and rolling process and make your favorite snickerdoodles in bar form with this fun, no-frills Snickerdoodle Cookie Bars recipe! These bars taste like the real thing, but with less effort and no time-consuming process. So, if you love easy and simple, this recipe is for you!

INGREDIENTS

DOUGH:

2 eggs

¾ c. butter, fully melted

1 c. sugar

2 tsp vanilla extract

2 c. flour

1 tsp cream of tartar

1 tsp baking powder

½ tsp salt

¾ brown sugar

TOPPING:

2 tsp cinnamon

¼ c. sugar

How to make Snickerdoodle Cookie Bars

Step 1: Prepare the oven. Preheat it to 350 degrees. Ready a 9 x 13-inch pan. Generously grease and set aside.

Step 2: In a large bowl, whisk the melted butter and sugars until smooth. Keep mixing while adding the eggs and vanilla.

Step 3: To the wet ingredients, add the flour, baking powder, cream of tartar, and salt. Mix well until blended.

Step 4: Into the prepared baking pan, pour the batter and press into an even layer.

Step 5: For the topping, place the sugar and cinnamon in a small bowl. Mix well, then sprinkle this over the batter. Place in the preheated oven and bake for about 20 to 25 minutes or until the top is just turning golden.

Step 6: Remove from the oven when done and let the cookie bar cool for about 30 minutes.

Step 7: Slice and serve. Enjoy!

Snickerdoodle Cookie Bars

Rebecca Prep time: 10 mins | Yield: 12 cookie bars These Snickerdoodle Cookie Bars are my favorites! They are super soft, buttery, thick, and moist. Incredibly easy to whip up using… General Recipes Snickerdoodle Cookie Bars European Print This
Serves: 12 Prep Time: 10 mins
Nutrition facts: 200 calories 20 grams fat
Rating: 5.0/5
( 1 voted )

Ingredients

  • DOUGH:
  • 2 eggs
  • ¾ c. butter, fully melted
  • 1 c. sugar
  • 2 tsp vanilla extract
  • 2 c. flour
  • 1 tsp cream of tartar
  • 1 tsp baking powder
  • ½ tsp salt
  • ¾ brown sugar
  • TOPPING:
  • 2 tsp cinnamon
  • ¼ c. sugar

Instructions

Step 1: Prepare the oven. Preheat it to 350 degrees. Ready a 9 x 13-inch pan. Generously grease and set aside.

Step 2: In a large bowl, whisk the melted butter and sugars until smooth. Keep mixing while adding the eggs and vanilla.

Step 3: To the wet ingredients, add the flour, baking powder, cream of tartar, and salt. Mix well until blended.

Step 4: Into the prepared baking pan, pour the batter and press into an even layer.

Step 5: For the topping, place the sugar and cinnamon in a small bowl. Mix well, then sprinkle this over the batter. Place in the preheated oven and bake for about 20 to 25 minutes or until the top is just turning golden.

Step 6: Remove from the oven when done and let the cookie bar cool for about 30 minutes.

Step 7: Slice and serve. Enjoy!

September 19, 2022 0 comment
0 FacebookTwitterPinterestEmail
General Recipes

Cowboy Stew

by Rebecca September 19, 2022
written by Rebecca

Prep time: 15 mins | Cook time: 1 hr | Serves: 6

This Cowboy Stew is a one-pot wonder! Delicious with tender meat, beans, and veggies. If you love hearty stew, I am sure you’ll fall deep for this easy Cowboy Stew. This stew tastes awesome with a hint of spice.

INGREDIENTS

1 pound 80/20 ground beef

4 slices of bacon, chopped

2 (12 ounces) packages of kielbasa sausage, sliced 1/2” thick

1 white onion, diced

2-3 cloves garlic, minced

2 (16 ounces each) cans of baked beans

1 1/2 tsp chili powder

1 (14.5 ounces) can of crushed tomatoes, undrained

1 (15 ounces) can of sweet corn, undrained

1 (7 ounces) can chop green chiles, undrained

2 large russet potatoes, peeled and chopped into 1/2” cubes

1 c. water

3 tbsp all-purpose flour

Kosher salt and freshly ground black pepper, to taste

Fresh parsley, finely chopped, for garnish

How to make Cowboy Stew

Step 1: Cook the bacon in a large pot until crisp. When done, transfer the bacon to a paper towel-lined plate.

Step 2: To the pot with the bacon drippings, add the sausage and cook until both sides are browned. If needed, decrease the heat. Transfer the sausage when done to the plate with the bacon.

Step 3: To the pot, add the beef and cook until browned. Then, add the garlic and continue to cook for another minute. To taste, season with salt and pepper. Over the beef, sprinkle the four and chili powder. Stir well and cook for a minute more.

Step 4: To the pot, add the tomatoes along with the baked beans, green chiles, corn, potatoes, bacon, sausage, and water. Bring everything to a boil. Once boiling, decrease the heat to a simmer. Put the lid on and simmer for about 1 hour, stirring often.

Step 5: As needed, adjust the seasoning. If the stew is too thick, feel free to add extra water.

Step 6: Remove from the heat when done and serve the stew immediately garnished with parsley. Enjoy!

Cowboy Stew

Rebecca Prep time: 15 mins | Cook time: 1 hr | Serves: 6 This Cowboy Stew is a one-pot wonder! Delicious with tender meat, beans, and veggies. If you love hearty… General Recipes Cowboy Stew European Print This
Serves: 6 Prep Time: 15 mins Cooking Time: 1 hr 1 hr
Nutrition facts: 200 calories 20 grams fat
Rating: 5.0/5
( 1 voted )

Ingredients

  • 1 pound 80/20 ground beef
  • 4 slices of bacon, chopped
  • 2 (12 ounces) packages of kielbasa sausage, sliced 1/2” thick
  • 1 white onion, diced
  • 2-3 cloves garlic, minced
  • 2 (16 ounces each) cans of baked beans
  • 1 1/2 tsp chili powder
  • 1 (14.5 ounces) can of crushed tomatoes, undrained
  • 1 (15 ounces) can of sweet corn, undrained
  • 1 (7 ounces) can chop green chiles, undrained
  • 2 large russet potatoes, peeled and chopped into 1/2” cubes
  • 1 c. water
  • 3 tbsp all-purpose flour
  • Kosher salt and freshly ground black pepper, to taste
  • Fresh parsley, finely chopped, for garnish

Instructions

Step 1: Cook the bacon in a large pot until crisp. When done, transfer the bacon to a paper towel-lined plate.

Step 2: To the pot with the bacon drippings, add the sausage and cook until both sides are browned. If needed, decrease the heat. Transfer the sausage when done to the plate with the bacon.

Step 3: To the pot, add the beef and cook until browned. Then, add the garlic and continue to cook for another minute. To taste, season with salt and pepper. Over the beef, sprinkle the four and chili powder. Stir well and cook for a minute more.

Step 4: To the pot, add the tomatoes along with the baked beans, green chiles, corn, potatoes, bacon, sausage, and water. Bring everything to a boil. Once boiling, decrease the heat to a simmer. Put the lid on and simmer for about 1 hour, stirring often.

Step 5: As needed, adjust the seasoning. If the stew is too thick, feel free to add extra water.

Step 6: Remove from the heat when done and serve the stew immediately garnished with parsley. Enjoy!

September 19, 2022 0 comment
0 FacebookTwitterPinterestEmail
General Recipes

Ham and Cheese Drop Biscuits

by Rebecca September 19, 2022
written by Rebecca

Total time: 30 mins | Serves: 12-16

These Ham and Cheese Drop Biscuits are incredibly easy and quick to make using just a handful of ingredients from shredded cheese, ham, and onions. You’ll never find any excuse not to whip up a batch of these tasty ham biscuits even on a busy morning!

These Ham and Cheese Drop Biscuits are the best biscuits ever! Prep these bad boys in ten minutes and bake for about fifteen. This ham biscuit recipe is not only easy, but super versatile! If desired, you can substitute ham with breakfast sausage or bacon. You can even use any kind of cheese! These no-knead biscuits come together (with less mess on the counter) easily and quickly!

INGREDIENTS

1 c. buttermilk

2 c. all-purpose flour

1/2 c. sour cream

1 tbsp honey

1/2 c. sharp cheddar cheese, grated

1/3 c. chives, finely chopped

1/2 c. deli ham, diced

1/4 c. (1/2 stick) cold, unsalted butter, grated

2 tsp baking powder

1/4 tsp baking soda

3/4 tsp salt

1/2 tsp freshly ground pepper

How to make Ham and Cheese Drop Biscuits

Step 1: Prepare the oven. Preheat it to 450 degrees F. Using parchment paper or a silicone baking mat, line a baking sheet.

Step 2: In a large bowl, place the flour, baking powder, salt, pepper, and baking soda. Mix well until combined. Cut in the cold, grated butter using two forks or a pastry cutter until you have a coarse and pebbly mixture. Then, fold in the cheese, ham, and chives until just blended. Next, add the buttermilk, sour cream, and honey. Mix again until just combined.

Step 3: On a lined baking sheet, drop spoonfuls of the biscuit dough using a large spoon or ice cream scoop. Place in the preheated oven and bake the biscuits for about 12 to 14 minutes or until just browned.

Step 4: Take the biscuits out of the oven when done and serve them warm. Enjoy!

Ham and Cheese Drop Biscuits

Rebecca Total time: 30 mins | Serves: 12-16 These Ham and Cheese Drop Biscuits are incredibly easy and quick to make using just a handful of ingredients from shredded cheese, ham,… General Recipes Ham and Cheese Drop Biscuits European Print This
Serves: 12-16
Nutrition facts: 200 calories 20 grams fat
Rating: 5.0/5
( 1 voted )

Ingredients

  • 1 c. buttermilk
  • 2 c. all-purpose flour
  • 1/2 c. sour cream
  • 1 tbsp honey
  • 1/2 c. sharp cheddar cheese, grated
  • 1/3 c. chives, finely chopped
  • 1/2 c. deli ham, diced
  • 1/4 c. (1/2 stick) cold, unsalted butter, grated
  • 2 tsp baking powder
  • 1/4 tsp baking soda
  • 3/4 tsp salt
  • 1/2 tsp freshly ground pepper

Instructions

Step 1: Prepare the oven. Preheat it to 450 degrees F. Using parchment paper or a silicone baking mat, line a baking sheet.

Step 2: In a large bowl, place the flour, baking powder, salt, pepper, and baking soda. Mix well until combined. Cut in the cold, grated butter using two forks or a pastry cutter until you have a coarse and pebbly mixture. Then, fold in the cheese, ham, and chives until just blended. Next, add the buttermilk, sour cream, and honey. Mix again until just combined.

Step 3: On a lined baking sheet, drop spoonfuls of the biscuit dough using a large spoon or ice cream scoop. Place in the preheated oven and bake the biscuits for about 12 to 14 minutes or until just browned.

Step 4: Take the biscuits out of the oven when done and serve them warm. Enjoy!

September 19, 2022 0 comment
0 FacebookTwitterPinterestEmail
General Recipes

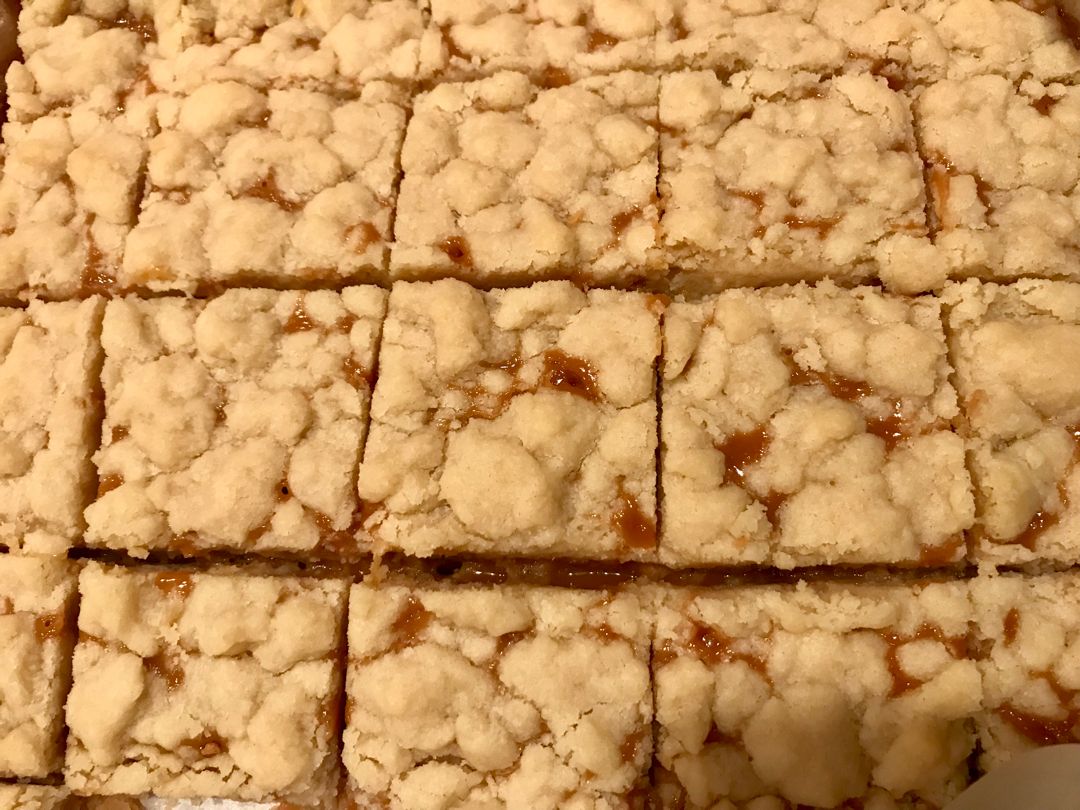
Salted Caramel Butter Bars: Easy Recipe to Make

by Rebecca September 19, 2022
written by Rebecca

Total time: 1 hr | Serves: 12-16

I am obsessed with these Salted Caramel Butter Bars! From the buttery shortbread crust and topping to the impressively rich, creamy salted caramel filling. One bite and I am hooked for life!

INGREDIENTS

Crust/Topping:

1 lb (4 sticks) salted butter, room temperature

1 1/4 c. powdered sugar

4 c. all-purpose flour

1 1/2 tbsp vanilla extract

3/4 c. sugar

Filling:

1/3 c. heavy cream

50-60 caramel candies, wrappers removed (14 oz. bag)

1/2 tsp vanilla extract

1/2 tbsp sea salt

How to make Salted Caramel Butter Bars

Step 1: Prepare the oven. Preheat it to 350 degrees F. Using a non-stick spray, lightly grease a 9 x 13-inch dish.

Step 2: To make the crust, place the butter and sugars in a large bowl. Cream for about 3 to 5 minutes or until light in color and fluffy. Stir in the vanilla, then slowly beat in the flour until just combined.

Step 3: Gently press 1/3 dough into a greased baking dish. Then, bake in the preheated oven for about 20 minutes until golden brown. Tightly wrap the rest of the dough in plastic wrap and keep it in the fridge for later.

Step 4: Take the crust out of the oven and allow it to cool.

Step 5: In a large, microwave-safe bowl, place the unwrapped caramels and heavy cream and heat in the microwave for about a minute. Vigorously stir until smooth. You can microwave in 30-second increments if the caramels are not melted after 1 minute, stirring in between, until smooth. Then, stir in the vanilla extract.

Step 6: Over the cooled crust, pour the caramel and sprinkle with some sea salt.

Step 7: Take the chilled dough out of the fridge, then evenly crumble it into pieces over the caramel-topped crust.

Step 8: Place in the preheated oven and bake for about 26 to 28 minutes or until the top crumble is light golden brown. When done, remove from the oven and allow the bar to cool fully before cutting into squares.

Salted Caramel Butter Bars: Easy Recipe to Make

Rebecca Total time: 1 hr | Serves: 12-16 I am obsessed with these Salted Caramel Butter Bars! From the buttery shortbread crust and topping to the impressively rich, creamy salted caramel… General Recipes Salted Caramel Butter Bars: Easy Recipe to Make European Print This
Serves: 12-16
Nutrition facts: 200 calories 20 grams fat
Rating: 5.0/5
( 2 voted )

Ingredients

  • Crust/Topping:
  • 1 lb (4 sticks) salted butter, room temperature
  • 1 1/4 c. powdered sugar
  • 4 c. all-purpose flour
  • 1 1/2 tbsp vanilla extract
  • 3/4 c. sugar
  • Filling:
  • 1/3 c. heavy cream
  • 50-60 caramel candies, wrappers removed (14 oz. bag)
  • 1/2 tsp vanilla extract
  • 1/2 tbsp sea salt

Instructions

Step 1: Prepare the oven. Preheat it to 350 degrees F. Using a non-stick spray, lightly grease a 9 x 13-inch dish.

Step 2: To make the crust, place the butter and sugars in a large bowl. Cream for about 3 to 5 minutes or until light in color and fluffy. Stir in the vanilla, then slowly beat in the flour until just combined.

Step 3: Gently press 1/3 dough into a greased baking dish. Then, bake in the preheated oven for about 20 minutes until golden brown. Tightly wrap the rest of the dough in plastic wrap and keep it in the fridge for later.

Step 4: Take the crust out of the oven and allow it to cool.

Step 5: In a large, microwave-safe bowl, place the unwrapped caramels and heavy cream and heat in the microwave for about a minute. Vigorously stir until smooth. You can microwave in 30-second increments if the caramels are not melted after 1 minute, stirring in between, until smooth. Then, stir in the vanilla extract.

Step 6: Over the cooled crust, pour the caramel and sprinkle with some sea salt.

Step 7: Take the chilled dough out of the fridge, then evenly crumble it into pieces over the caramel-topped crust.

Step 8: Place in the preheated oven and bake for about 26 to 28 minutes or until the top crumble is light golden brown. When done, remove from the oven and allow the bar to cool fully before cutting into squares.

September 19, 2022 0 comment
0 FacebookTwitterPinterestEmail
General Recipes

DUMP-AND-BAKE CHICKEN PARMESAN CASSEROLE

by Rebecca September 19, 2022
written by Rebecca

Prep Time: 10 mins | Cook Time: 40 mins | Resting Time: 10 mins | Total Time: 50 mins | Servings: 8 people

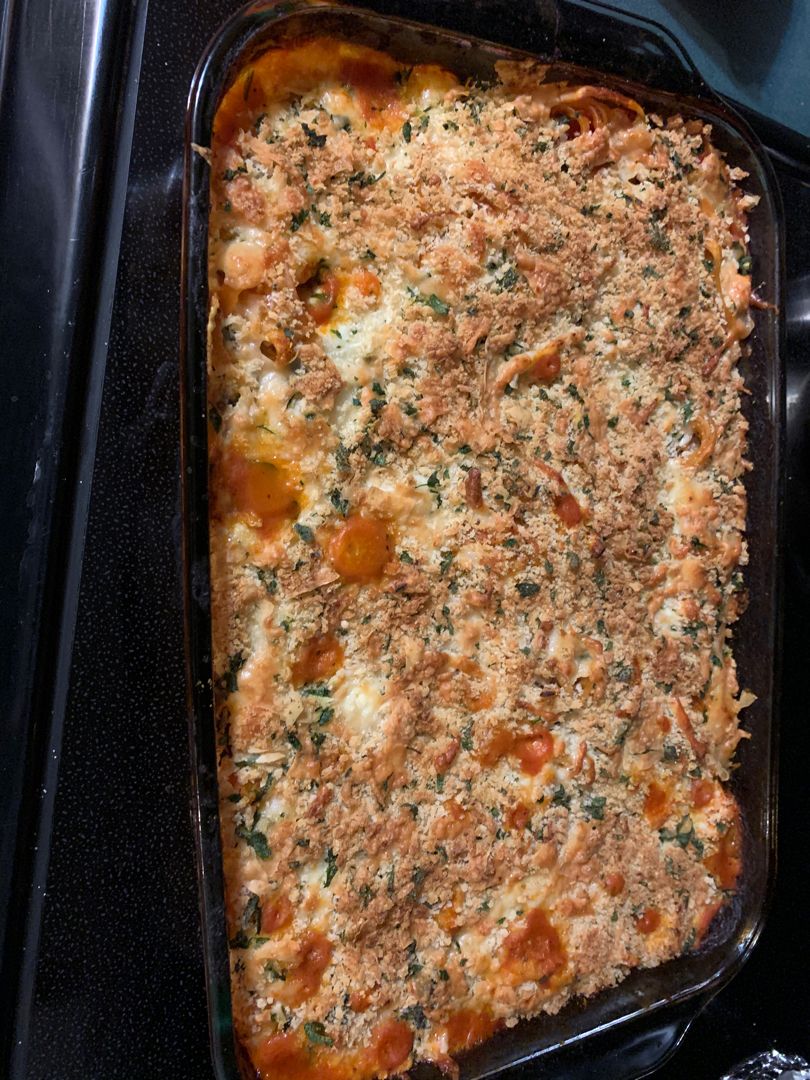
This pasta recipe is the easiest pasta meal you can make! It is made with just a few simple ingredients and is ready in a breeze. All you need to do is just dump all the ingredients in your baking dish and bake. It is a healthy dinner portion that your family will absolutely love! A one-dish meal perfect for busy days. Kid-friendly, incredibly easy, quick, and delicious!

Amazing things happen when you combine chicken with pasta, marinara sauce, and tons of melty mozzarella and Parmesan cheese. And to make things easier, you are welcome to use leftover breaded chicken or even frozen chicken tenders! If you love chicken and pasta, this simple Chicken Parmesan Casserole is a must-try!

Ingredients

1 ½ pounds raw chicken breast, diced into bite-sized pieces

1 (16 oz.) package of uncooked penne pasta (can use whole grain pasta, if preferred)

3 c. water

1 c. Panko breadcrumbs

1 c. reduced-fat shredded mozzarella

3 c. marinara sauce

½ c. grated Parmesan cheese

Optional: fresh chopped herbs like basil or parsley for garnish

1 tsp salt

HOW TO MAKE DUMP-AND-BAKE CHICKEN PARMESAN CASSEROLE

Step 1: Prepare the oven. Preheat it to 425 degrees F. Using cooking spray, grease a 13 x 9-inch baking pan.

Step 2: In a baking dish or large bowl, place the uncooked pasta, marinara, water, salt, and raw chicken. Mix well. Using aluminium foil, tightly cover the dish. Place in the preheated oven and bake for about 30 minutes.

Step 3: After 30 minutes, stir the pasta. On top, sprinkle the mozzarella, followed by the breadcrumbs and Parmesan cheese.

Step 4: Return to the oven and continue baking for additional 10 to 15 minutes or until the cheese has melted and the top of the casserole is golden brown. At this point, the pasta should be tender, and the chicken is cooked through.

Step 5: Remove from the oven when done and allow the casserole to rest for about 5 to 10 minutes. Then, serve garnished with some herbs. Enjoy!

DUMP-AND-BAKE CHICKEN PARMESAN CASSEROLE

Rebecca Prep Time: 10 mins | Cook Time: 40 mins | Resting Time: 10 mins | Total Time: 50 mins | Servings: 8 people This pasta recipe is the easiest pasta… General Recipes DUMP-AND-BAKE CHICKEN PARMESAN CASSEROLE European Print This
Serves: 8 Prep Time: 10 mins Cooking Time: 40 mins 40 mins
Nutrition facts: 200 calories 20 grams fat
Rating: 4.0/5
( 2 voted )

Ingredients

  • 1 ½ pounds raw chicken breast, diced into bite-sized pieces
  • 1 (16 oz.) package of uncooked penne pasta (can use whole grain pasta, if preferred)
  • 3 c. water
  • 1 c. Panko breadcrumbs
  • 1 c. reduced-fat shredded mozzarella
  • 3 c. marinara sauce
  • ½ c. grated Parmesan cheese
  • Optional: fresh chopped herbs like basil or parsley for garnish
  • 1 tsp salt

Instructions

Step 1: Prepare the oven. Preheat it to 425 degrees F. Using cooking spray, grease a 13 x 9-inch baking pan.

Step 2: In a baking dish or large bowl, place the uncooked pasta, marinara, water, salt, and raw chicken. Mix well. Using aluminium foil, tightly cover the dish. Place in the preheated oven and bake for about 30 minutes.

Step 3: After 30 minutes, stir the pasta. On top, sprinkle the mozzarella, followed by the breadcrumbs and Parmesan cheese.

Step 4: Return to the oven and continue baking for additional 10 to 15 minutes or until the cheese has melted and the top of the casserole is golden brown. At this point, the pasta should be tender, and the chicken is cooked through.

Step 5: Remove from the oven when done and allow the casserole to rest for about 5 to 10 minutes. Then, serve garnished with some herbs. Enjoy!

September 19, 2022 0 comment
0 FacebookTwitterPinterestEmail
Newer Posts
Older Posts

Popular Posts

  • 1

    Crispy Crunchy Parmesan Potatoes

    March 21, 2020
  • 2

    CROCK POT SMOTHERED PORK CHOPS

    March 21, 2020
  • Facebook
  • Twitter

@2019 - All Right Reserved.


Back To Top