Cook it once
  • Home
  • Privacy Policy
  • Recipes
    • KETO
    • LC
    • WW
  • Tips
  • Contact
Cook it once
  • Home
  • Privacy Policy
  • Recipes
    • KETO
    • LC
    • WW
  • Tips
  • Contact
Category:

General Recipes

General Recipes

Southern Smothered Pork Chops

by Rebecca September 23, 2022
written by Rebecca

Prep time: 10 mins | Cook time: 45 mins | Serves: 3-4

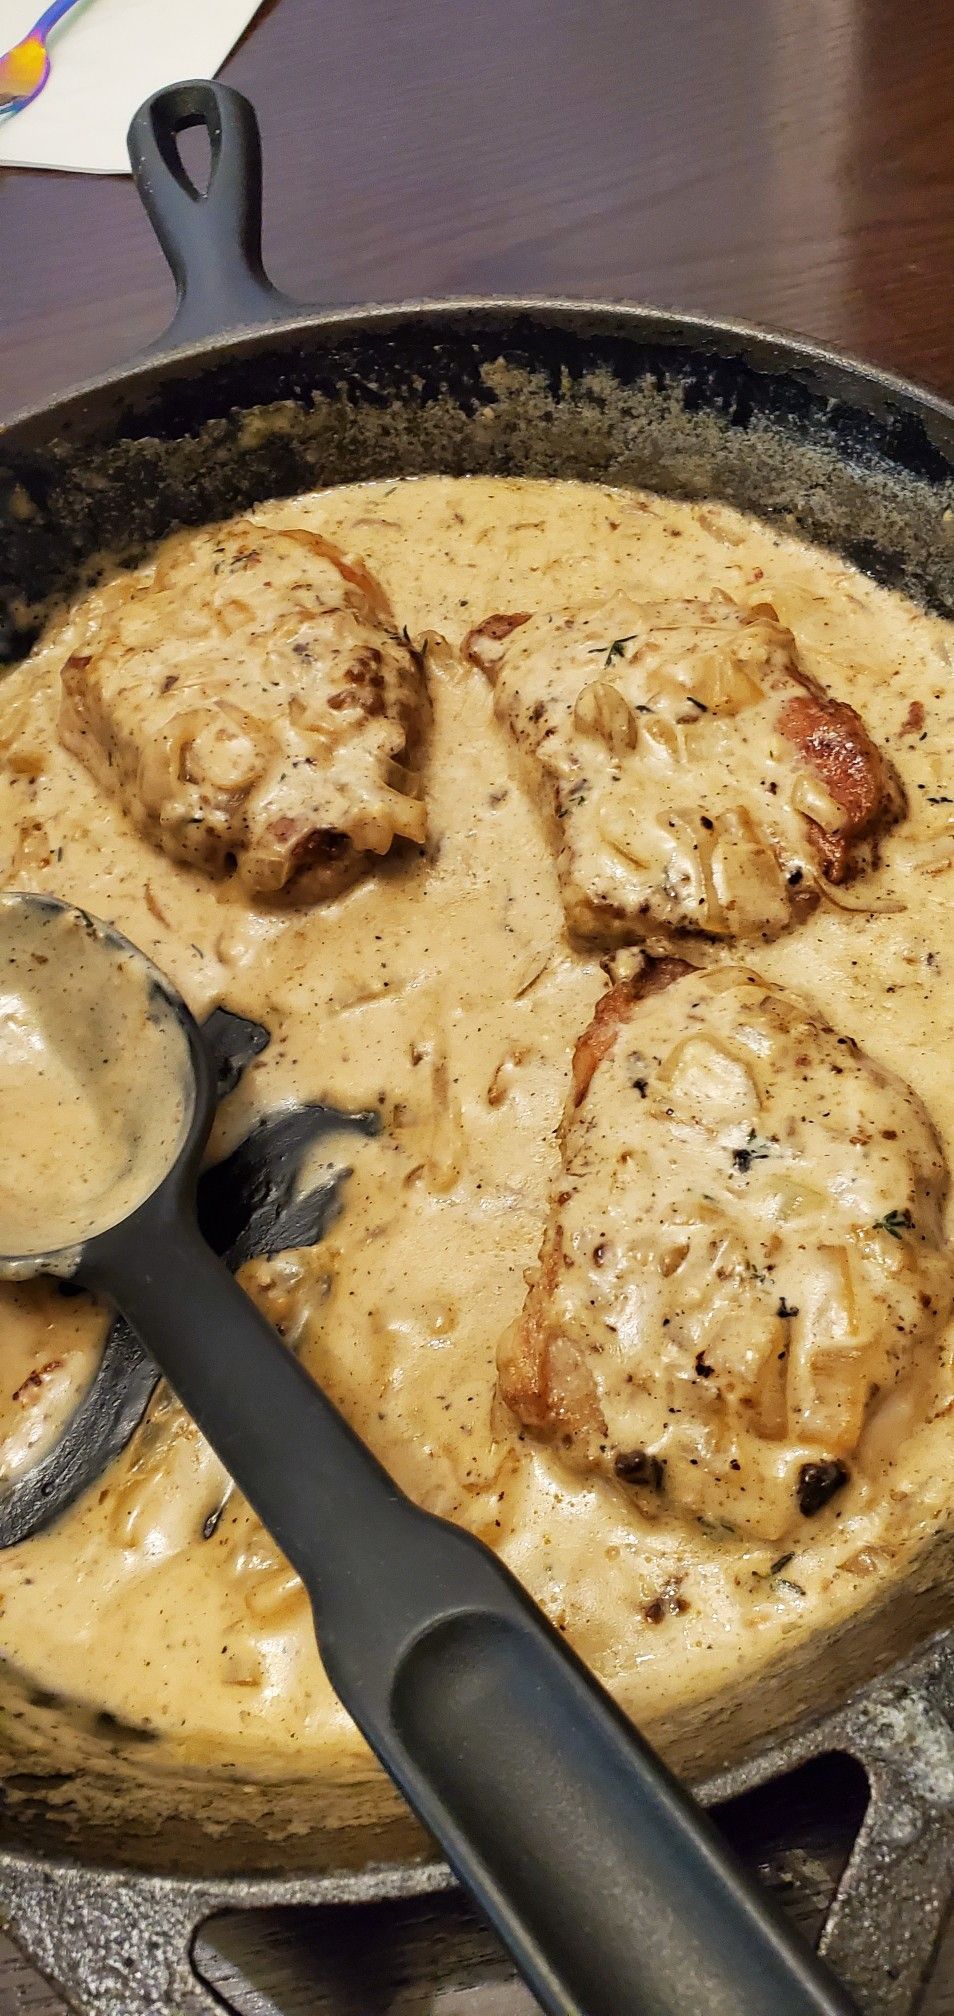
Pan-fried pork chops smothered in rich onion gravy. This mouthwatering Southern classic is flavor-filled, very comforting, and a cosy meal that you can easily whip up at any time. Serve this smothered pork chops over mashed potatoes with a side of your favorite veggies for a stick-to-the-bone dinner.

INGREDIENTS

3-4 thick-cut bone-in pork chops (1 to 1 1/2” thick)

2 tsp paprika

1/2 tsp garlic powder

1/2 tsp onion powder

1 medium yellow onion, sliced

3/4 c. all-purpose flour, divided

3 tbsp extra virgin olive oil

4 cloves garlic, minced

2 c. chicken broth

3 tbsp unsalted butter

1/3 c. heavy cream

2 tsp salt

1/2 tsp freshly ground black pepper

How to make Southern Smothered Pork Chops

Step 1: Place the salt, paprika, black pepper, garlic powder, and onion powder in a small bowl. Mix well, then sprinkle the mixture all over the chicken, coating all sides.

Step 2: On a large plate or shallow dish, spread a half cup of flour. Press each pork chop in the flour, coating both sides and shaking the excess off.

Step 3: Heat the olive oil in a large skillet over medium heat. Place the pork chops in the hot oil and sear for about 5 minutes per side until golden brown. When done, transfer the seared pork chops to a plate. Set aside.

Step 4: In the now-empty skillet, saute the onion for about 10 to 15 minutes until tender and beginning to caramelize. Add the garlic and cook for another minute.

Step 5: To one side of the pan, push the onion and garlic. To the empty side of the skillet, add the butter and allow it to melt. Once the butter has melted, stir in the rest of the flour. Cook for additional 1 to 2 minutes, stirring until golden.

Step 6: To the flour mixture, slowly add the chicken broth, stirring constantly. Then, whisk with the onions and garlic, scraping the browned bits from the bottom of the pan. Bring everything to a boil. Once boiling, decrease the heat and simmer for about 15 minutes until thick.

Step 7: Adjust the heat to low, then stir in the heavy cream. If needed, you can more cream/chicken broth to thin out the mixture.

Step 8: Return the pork chops to the skillet. Put the lid on and cook further until the internal temperature of the pork chop reaches at least 145 degrees F. Depending on the size of the chops, this takes between 15 to 25 minutes.

Step 9: To taste, season the smothered pork chops with salt and pepper.

Southern Smothered Pork Chops

Rebecca Prep time: 10 mins | Cook time: 45 mins | Serves: 3-4 Pan-fried pork chops smothered in rich onion gravy. This mouthwatering Southern classic is flavor-filled, very comforting, and a… General Recipes Southern Smothered Pork Chops European Print This
Serves: 3-4 Prep Time: 10 mins Cooking Time: 45 mins 45 mins
Nutrition facts: 200 calories 20 grams fat
Rating: 5.0/5
( 1 voted )

Ingredients

  • 3-4 thick-cut bone-in pork chops (1 to 1 1/2” thick)
  • 2 tsp paprika
  • 1/2 tsp garlic powder
  • 1/2 tsp onion powder
  • 1 medium yellow onion, sliced
  • 3/4 c. all-purpose flour, divided
  • 3 tbsp extra virgin olive oil
  • 4 cloves garlic, minced
  • 2 c. chicken broth
  • 3 tbsp unsalted butter
  • 1/3 c. heavy cream
  • 2 tsp salt
  • 1/2 tsp freshly ground black pepper

Instructions

Step 1: Place the salt, paprika, black pepper, garlic powder, and onion powder in a small bowl. Mix well, then sprinkle the mixture all over the chicken, coating all sides.

Step 2: On a large plate or shallow dish, spread a half cup of flour. Press each pork chop in the flour, coating both sides and shaking the excess off.

Step 3: Heat the olive oil in a large skillet over medium heat. Place the pork chops in the hot oil and sear for about 5 minutes per side until golden brown. When done, transfer the seared pork chops to a plate. Set aside.

Step 4: In the now-empty skillet, saute the onion for about 10 to 15 minutes until tender and beginning to caramelize. Add the garlic and cook for another minute.

Step 5: To one side of the pan, push the onion and garlic. To the empty side of the skillet, add the butter and allow it to melt. Once the butter has melted, stir in the rest of the flour. Cook for additional 1 to 2 minutes, stirring until golden.

Step 6: To the flour mixture, slowly add the chicken broth, stirring constantly. Then, whisk with the onions and garlic, scraping the browned bits from the bottom of the pan. Bring everything to a boil. Once boiling, decrease the heat and simmer for about 15 minutes until thick.

Step 7: Adjust the heat to low, then stir in the heavy cream. If needed, you can more cream/chicken broth to thin out the mixture.

Step 8: Return the pork chops to the skillet. Put the lid on and cook further until the internal temperature of the pork chop reaches at least 145 degrees F. Depending on the size of the chops, this takes between 15 to 25 minutes.

Step 9: To taste, season the smothered pork chops with salt and pepper.
September 23, 2022 0 comment
0 FacebookTwitterPinterestEmail
General Recipes

The Pioneer Woman’s Knock You Naked Brownies

by Rebecca September 22, 2022
written by Rebecca

Total time: 45 mins | Serves: 6-8

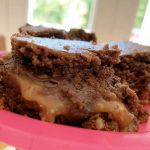
These scrumptious Naked Brownies are crazy good and surely lived up to the hype! It all starts with a box of cake mixes. This dessert has layers of moist chocolate cake, melted caramel, and chocolate chips. I am sure a big fan of these heavenly brownies!

INGREDIENTS

2 bags (11 ounces each) of caramels, unwrapped

1/3 c. plus 1/2 c. evaporated milk

1 c. pecans, chopped

1/2 c. (1 stick) unsalted butter, melted

1 box German chocolate cake mix

1/4 c. powdered sugar, for dusting (optional)

1/2 c. semisweet chocolate chips

How to make The Pioneer Woman’s Knock You Naked Brownies

Step 1: Prepare the oven. Preheat it to 350 degrees F. Ready a 9 x 9-inch baking pan. Grease, flour, and set aside.

Step 2: Place the cake mix and 1/3 c of the evaporated milk in a medium bowl. Mix well, then add the melted butter and chopped pecans. Mix until incorporated and the mixture is thick.

Step 3: In half, divide the dough. Into the bottom of the prepared pan, press one-half of the dough. Place in the preheated oven and bake for about 8 to 10 minutes or until just slightly set. Set aside when done.

Step 4: In a double boiler, add the caramels and the rest of the evaporated milk. Cook until the caramels have melted and the mixture is smooth, stirring often. Over the brownie layer, pour the caramel mixture, evenly spreading it out. Then, top with the chocolate chips.

Step 5: Press the remaining dough into a square (a bit smaller than the baking pan) on a piece of parchment or wax paper. Place this on top of the chocolate layer, then bake for about 20 to 25 minutes.

Step 6: Remove from the oven when done and allow the brownies to come to room temperature. Tent and chill for a couple of hours until the caramel layer is set.

Step 7: Before serving, dust with powdered sugar if desired. Slice and serve. Enjoy!

The Pioneer Woman’s Knock You Naked Brownies

Rebecca Total time: 45 mins | Serves: 6-8 These scrumptious Naked Brownies are crazy good and surely lived up to the hype! It all starts with a box of cake mixes.… General Recipes The Pioneer Woman’s Knock You Naked Brownies European Print This
Serves: 6-8
Nutrition facts: 200 calories 20 grams fat
Rating: 5.0/5
( 1 voted )

Ingredients

  • 2 bags (11 ounces each) of caramels, unwrapped
  • 1/3 c. plus 1/2 c. evaporated milk
  • 1 c. pecans, chopped
  • 1/2 c. (1 stick) unsalted butter, melted
  • 1 box German chocolate cake mix
  • 1/4 c. powdered sugar, for dusting (optional)
  • 1/2 c. semisweet chocolate chips

Instructions

Step 1: Prepare the oven. Preheat it to 350 degrees F. Ready a 9 x 9-inch baking pan. Grease, flour, and set aside.

Step 2: Place the cake mix and 1/3 c of the evaporated milk in a medium bowl. Mix well, then add the melted butter and chopped pecans. Mix until incorporated and the mixture is thick.

Step 3: In half, divide the dough. Into the bottom of the prepared pan, press one-half of the dough. Place in the preheated oven and bake for about 8 to 10 minutes or until just slightly set. Set aside when done.

Step 4: In a double boiler, add the caramels and the rest of the evaporated milk. Cook until the caramels have melted and the mixture is smooth, stirring often. Over the brownie layer, pour the caramel mixture, evenly spreading it out. Then, top with the chocolate chips.

Step 5: Press the remaining dough into a square (a bit smaller than the baking pan) on a piece of parchment or wax paper. Place this on top of the chocolate layer, then bake for about 20 to 25 minutes.

Step 6: Remove from the oven when done and allow the brownies to come to room temperature. Tent and chill for a couple of hours until the caramel layer is set.

Step 7: Before serving, dust with powdered sugar if desired. Slice and serve. Enjoy!

September 22, 2022 0 comment
0 FacebookTwitterPinterestEmail
General Recipes

Lazy Daisy Cake Recipe: An Old-Fashioned, Yet Full Of Joy Treat

by Rebecca September 22, 2022
written by Rebecca

Cook time: 35 mins | Prep time: 15 mins | Serves: 12–15

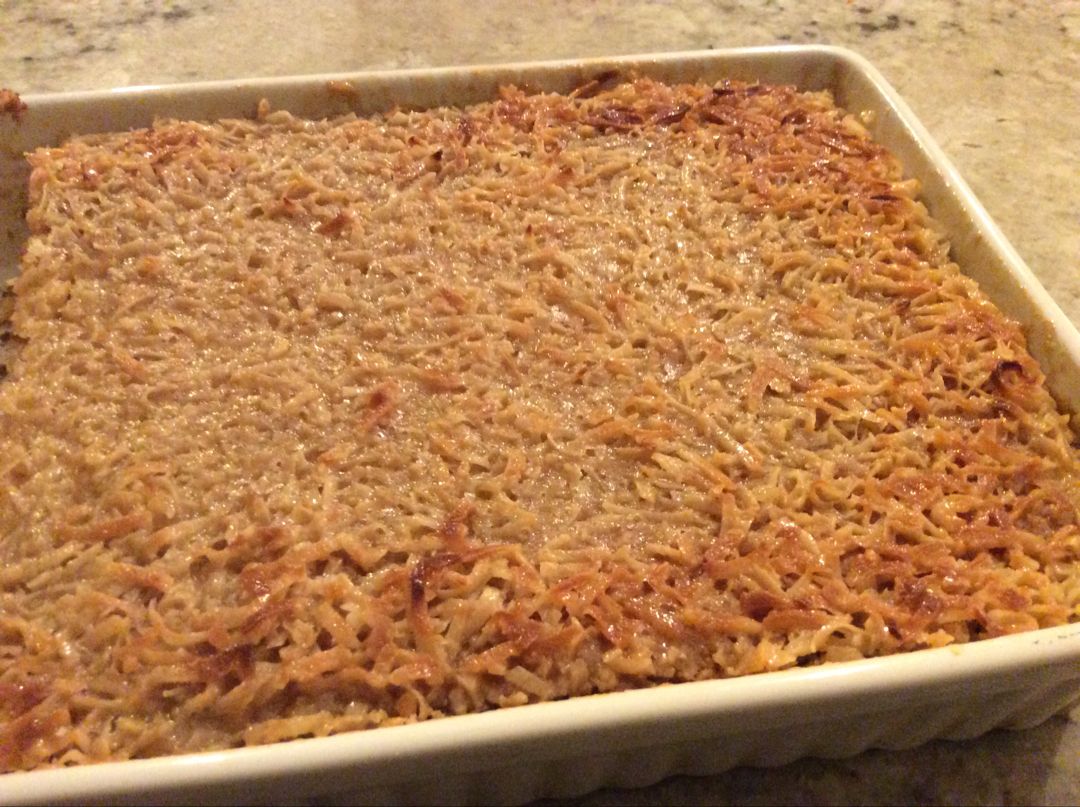
This old-fashioned moist Lazy Daisy Cake is a family-approved dessert. Incredibly easy to whip up using just a few basic ingredients. This decadent cake has been tested by time and is my old-time favorite! Slice and serve this cake with whipped cream for an extra layer of goodness!

Ingredients

4 tablespoons butter

2 cups AP flour

1 teaspoon vanilla

2 teaspoons baking powder

1 cup milk

4 eggs – room temperature

2 cups sugar

1/2 teaspoon salt

TOPPING:

3/4 cup packed, light brown sugar

9 tablespoons butter – melted

1 1/2 cups shredded coconut

6 tablespoons evaporated milk

How to make Lazy Daisy Cake

Step 1: Prepare the oven. Preheat it to 350 degrees F. Ready a 13 x 9-inch pan. Grease and set aside.

Step 2: Place the flour, baking powder, salt, and sugar in a large bowl. Mix well and set aside.

Step 3: Heat the butter and milk in a medium saucepan over medium heat until the butter has melted. Then, add the vanilla.

Step 4: Beat the eggs and sugar using an electric mixer at medium-high speed for about 6 minutes until pale and creamy. Fold this into the flour mixture using a rubber spatula.

Step 5: Transfer the batter to the prepared pan. Place into the preheated oven and bake for about 30 to 35 minutes or until a toothpick inserted in the center of the cake comes out clean. Remove from the oven when done and let the cake cool for about 10 minutes in the pan.

Step 6: To make the topping, whisk the butter, brown sugar, and evaporated milk in a medium bowl. On top of the cake, evenly sprinkle the topping. Place in the broiler for about 3 to 4 minutes or until the topping bubbles and starts to brown.

Step 7: Serve the cake warm. Enjoy!

Note:

You can store this cake for up to 4 days at room temperature. Heat in the microwave before serving.

Lazy Daisy Cake Recipe: An Old-Fashioned, Yet Full Of Joy Treat

Rebecca Cook time: 35 mins | Prep time: 15 mins | Serves: 12–15 This old-fashioned moist Lazy Daisy Cake is a family-approved dessert. Incredibly easy to whip up using just a… General Recipes Lazy Daisy Cake Recipe: An Old-Fashioned, Yet Full Of Joy Treat European Print This
Serves: 12-15 Prep Time: 35 mins Cooking Time: 15 mins 15 mins
Nutrition facts: 200 calories 20 grams fat
Rating: 5.0/5
( 1 voted )

Ingredients

  • 4 tablespoons butter
  • 2 cups AP flour
  • 1 teaspoon vanilla
  • 2 teaspoons baking powder
  • 1 cup milk
  • 4 eggs – room temperature
  • 2 cups sugar
  • 1/2 teaspoon salt
  • TOPPING:
  • 3/4 cup packed, light brown sugar
  • 9 tablespoons butter – melted
  • 1 1/2 cups shredded coconut
  • 6 tablespoons evaporated milk

Instructions

Step 1: Prepare the oven. Preheat it to 350 degrees F. Ready a 13 x 9-inch pan. Grease and set aside.

Step 2: Place the flour, baking powder, salt, and sugar in a large bowl. Mix well and set aside.

Step 3: Heat the butter and milk in a medium saucepan over medium heat until the butter has melted. Then, add the vanilla.

Step 4: Beat the eggs and sugar using an electric mixer at medium-high speed for about 6 minutes until pale and creamy. Fold this into the flour mixture using a rubber spatula.

Step 5: Transfer the batter to the prepared pan. Place into the preheated oven and bake for about 30 to 35 minutes or until a toothpick inserted in the center of the cake comes out clean. Remove from the oven when done and let the cake cool for about 10 minutes in the pan.

Step 6: To make the topping, whisk the butter, brown sugar, and evaporated milk in a medium bowl. On top of the cake, evenly sprinkle the topping. Place in the broiler for about 3 to 4 minutes or until the topping bubbles and starts to brown.

Step 7: Serve the cake warm. Enjoy!

Notes

You can store this cake for up to 4 days at room temperature. Heat in the microwave before serving.

September 22, 2022 0 comment
0 FacebookTwitterPinterestEmail
General Recipes

Cream Cheese Stuffed Mushrooms

by Rebecca September 22, 2022
written by Rebecca

Prep time: 10 mins | Cook time: 15 mins | Serves: 6

These delightful cream cheese stuffed mushrooms are the perfect appetizer and excellent for any occasion! These little bites of tender mushroom caps filled with a wonderful creamy Parmesan and cream cheese filling are a must at every party or get-together. These cream cheese-stuffed mushrooms have that impressive earthy flavor and enticing fillings. Crazy good no wonder why these disappear fast!

INGREDIENTS

2 tbsp butter

1 pound baby Bella or cremini mushrooms

1-2 cloves garlic, minced

8 ounces cream cheese

1/2 tsp dried thyme

1/4 Parmesan cheese, finely grated

Kosher salt and freshly ground black pepper, to taste

1 tbsp fresh parsley, finely chopped and divided

How to make Cream Cheese Stuffed Mushrooms

Step 1: Prepare the oven. Preheat it to 400 degrees F. Using parchment paper, line a baking sheet and set aside.

Step 2: Using a damp towel, wipe the mushrooms. Remove their stems and set them aside. On the prepared baking sheet, arrange the mushroom caps. Then, finely chop the reserved mushroom stems.

Step 3: In a medium skillet, melt the butter over medium-high heat. To the melted butter, add the mushroom stems and cook for about 5 minutes until tender. Then, add the garlic and thyme. Continue to cook for another minute before stirring in the cream cheese and half of the Parmesan cheese. To taste, season with salt and pepper.
Step 4: Take the skillet off the heat once the cheese has melted and the mixture is smooth. Add most of the parsley (setting aside some for later) and stir.

Step 5: Allow the filling to slightly cool before transferring it into a Ziptop or piping bag. Then, snip off one corner of the bag and pipe the filling into each mushroom cap. Top each cap with the rest of the Parmesan cheese.

Step 6: Place in the preheated oven and bake the stuffed mushrooms for about 15 minutes or until golden brown.

Step 7: Remove from the oven when done and serve the cream cheese stuffed mushrooms topped with the rest of the parsley. Enjoy!

Cream Cheese Stuffed Mushrooms

Rebecca Prep time: 10 mins | Cook time: 15 mins | Serves: 6 These delightful cream cheese stuffed mushrooms are the perfect appetizer and excellent for any occasion! These little bites… General Recipes Cream Cheese Stuffed Mushrooms European Print This
Serves: 6 Prep Time: 10 mins Cooking Time: 15 mins 15 mins
Nutrition facts: 200 calories 20 grams fat
Rating: 5.0/5
( 1 voted )

Ingredients

  • 2 tbsp butter
  • 1 pound baby Bella or cremini mushrooms
  • 1-2 cloves garlic, minced
  • 8 ounces cream cheese
  • 1/2 tsp dried thyme
  • 1/4 Parmesan cheese, finely grated
  • Kosher salt and freshly ground black pepper, to taste
  • 1 tbsp fresh parsley, finely chopped and divided

Instructions

Step 1: Prepare the oven. Preheat it to 400 degrees F. Using parchment paper, line a baking sheet and set aside.

Step 2: Using a damp towel, wipe the mushrooms. Remove their stems and set them aside. On the prepared baking sheet, arrange the mushroom caps. Then, finely chop the reserved mushroom stems.

Step 3: In a medium skillet, melt the butter over medium-high heat. To the melted butter, add the mushroom stems and cook for about 5 minutes until tender. Then, add the garlic and thyme. Continue to cook for another minute before stirring in the cream cheese and half of the Parmesan cheese. To taste, season with salt and pepper.

Step 4: Take the skillet off the heat once the cheese has melted and the mixture is smooth. Add most of the parsley (setting aside some for later) and stir.

Step 5: Allow the filling to slightly cool before transferring it into a Ziptop or piping bag. Then, snip off one corner of the bag and pipe the filling into each mushroom cap. Top each cap with the rest of the Parmesan cheese.

Step 6: Place in the preheated oven and bake the stuffed mushrooms for about 15 minutes or until golden brown.

Step 7: Remove from the oven when done and serve the cream cheese stuffed mushrooms topped with the rest of the parsley. Enjoy!

September 22, 2022 0 comment
0 FacebookTwitterPinterestEmail
General Recipes

Maryland Crab Cakes

by Rebecca September 22, 2022
written by Rebecca

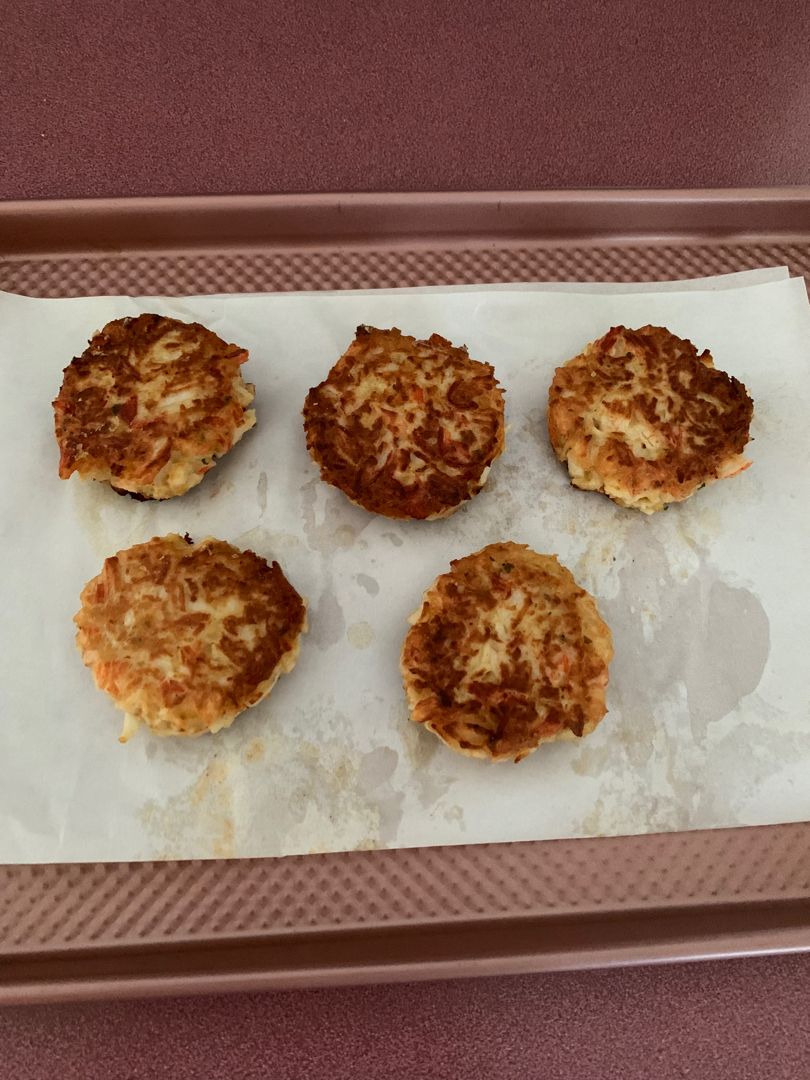
These Maryland Crab Cakes are super easy to make. Every bite is bursting with lemon, parsley, Old Bay Seasoning, and crab meat flavors. I like to squeeze some lemon on top before serving and enjoy these delectable crab cakes with a simple tartar sauce on the side.

Crab cakes are a staple at home. They are great, crowd-pleasing finger food and wonderfully easy and quick dinner. I doubt about leftovers, but if there are any, they are awesome, too!

INGREDIENTS

Canola oil

1 large egg

1½ tsp Dijon mustard

2½ tbsp mayonnaise

1 tsp Worcestershire sauce

¼ tsp salt

¼ cup finely diced celery (you’ll need one stalk)

1 pound lump crab meat

1 tsp Old Bay seasoning

½ cup panko

2 tablespoons finely chopped fresh parsley

How to make Maryland Crab Cakes

Step 1: Line a baking sheet with foil.

Step 2: Combine the mayo, egg, mustard, old bay, Worcestershire, parsley, and celery. Add the crab meat followed by the panko. Gently mix.

Step 3: Into 6 crab cakes about half an inch each, shape the mixture. Place them on the prepared baking sheet. Then, put it in the fridge for an hour.

Step 4: Heat canola oil in a skillet over medium heat. Once the oil is hot, add the crab cakes and cook for about 5 minutes per side until golden brown.

Step 5: Before serving, squeeze some lemon on top of the crab cakes. Serve them with tartar sauce if desired. Enjoy!

Note:

To make the tartar sauce, you need the ingredients below. Place them in a small bowl and mix. Cover the bowl and place it in the fridge until ready to use.

1 tsp Dijon mustard

1½ tbsp sweet pickle relish

1 tbsp minced red onion

1 c. mayonnaise

Salt and freshly ground black pepper, to taste

1-2 tbsp lemon juice, to taste

Maryland Crab Cakes

Rebecca These Maryland Crab Cakes are super easy to make. Every bite is bursting with lemon, parsley, Old Bay Seasoning, and crab meat flavors. I like to squeeze some lemon on… General Recipes Maryland Crab Cakes European Print This
Nutrition facts: 200 calories 20 grams fat
Rating: 5.0/5
( 1 voted )

Ingredients

  • Canola oil
  • 1 large egg
  • 1½ tsp Dijon mustard
  • 2½ tbsp mayonnaise
  • 1 tsp Worcestershire sauce
  • ¼ tsp salt
  • ¼ cup finely diced celery (you’ll need one stalk)
  • 1 pound lump crab meat
  • 1 tsp Old Bay seasoning
  • ½ cup panko
  • 2 tablespoons finely chopped fresh parsley

Instructions

Step 1: Line a baking sheet with foil.

Step 2: Combine the mayo, egg, mustard, old bay, Worcestershire, parsley, and celery. Add the crab meat followed by the panko. Gently mix.

Step 3: Into 6 crab cakes about half an inch each, shape the mixture. Place them on the prepared baking sheet. Then, put it in the fridge for an hour.

Step 4: Heat canola oil in a skillet over medium heat. Once the oil is hot, add the crab cakes and cook for about 5 minutes per side until golden brown.

Step 5: Before serving, squeeze some lemon on top of the crab cakes. Serve them with tartar sauce if desired. Enjoy!

Notes

To make the tartar sauce, you need the ingredients below. Place them in a small bowl and mix. Cover the bowl and place it in the fridge until ready to use. 1 tsp Dijon mustard 1½ tbsp sweet pickle relish 1 tbsp minced red onion 1 c. mayonnaise Salt and freshly ground black pepper, to taste 1-2 tbsp lemon juice, to taste

September 22, 2022 0 comment
0 FacebookTwitterPinterestEmail
General Recipes

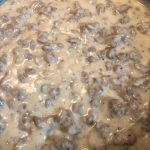
THE PIONEER WOMAN’S SAUSAGE GRAVY

by Rebecca September 22, 2022
written by Rebecca

My favorite! This sausage gravy is hands down one of the best comfort food! Pour this delicious sausage gravy over some warm biscuits. You can top them with a fried or poached egg if desired to kick off your mornings!

INGREDIENTS

SAUSAGE GRAVY:

3-4 c. Whole Milk

1 pound Breakfast Sausage (in a roll or tube) – you can use your favorite

1/3 c. All-purpose Flour

2 teaspoons Black Pepper – add more, if desired

1/2 teaspoon Seasoned Salt

BISCUITS:

2 tablespoons Baking Powder

1 1/2 stick (3/4 c.) Cold Butter, cut into pieces

1 1/4 c. Buttermilk

3 c. All-purpose Flour

1/2 teaspoon Salt

HOW TO MAKE THE PIONEER WOMAN’S SAUSAGE GRAVY

SAUSAGE GRAVY:

Step 1: Tear small pieces of sausage and place them in a single layer on a large heavy skillet (preferably cast-iron). Cook the sausage on medium-high heat until browned. Then, adjust the heat to medium-low.

Step 2: Over the sausages sprinkle half of the flour. Mix well, then sprinkle in more flour, little by little. Stir again and continue to cook for another minute before pouring in the milk, stirring regularly.

Step 3: Cook the gravy for about 10 to 12 minutes, stirring often. Season the gravy with the seasoned salt and pepper and continue to cook until the gravy has thickened. You can add small amounts of milk if the gravy has thickened so soon.

BISCUITS:

Step 4: Prepare the oven. Preheat it to 400 degrees F.

Step 5: On two baking sheets, lay parchment paper.

Step 6: In a large bowl or food processor, combine the flour, baking powder, and salt. Then, add the pieces of butter and pulse until completely incorporated. If mixing in a large bowl, use a pastry cutter or your hands to mix the butter pieces. While the mixer is still running, drizzle in the buttermilk until you have a dough that is no longer crumbly.

Step 7: On the prepared baking sheets, drop clumps of dough using 2 spoons. Place in the preheated oven and bake the biscuits for about 15 to 17 minutes or until golden. If desired, you can brush each biscuit with melted butter right after you remove them from the oven.

Step 8: Over the warm biscuits, spoon the gravy. Serve right away. Enjoy!

NOTES:

You can add finely chopped fresh herbs to the gravy, such as thyme, chives, and parsley.

Smoked paprika, paprika, rosemary, sage, and cayenne are amazing spices if you want to add a little heat to your gravy.

For this recipe, you can use sausage links (without the casings) instead of bulk sausage.

For the best consistency use 2% milk or whole milk.

You can use Gluten Free Flour in place of regular flour for a gluten-free version.

THE PIONEER WOMAN’S SAUSAGE GRAVY

Rebecca My favorite! This sausage gravy is hands down one of the best comfort food! Pour this delicious sausage gravy over some warm biscuits. You can top them with a fried… General Recipes THE PIONEER WOMAN’S SAUSAGE GRAVY European Print This
Nutrition facts: 200 calories 20 grams fat
Rating: 5.0/5
( 1 voted )

Ingredients

  • SAUSAGE GRAVY:
  • 3-4 c. Whole Milk
  • 1 pound Breakfast Sausage (in a roll or tube) - you can use your favorite
  • 1/3 c. All-purpose Flour
  • 2 teaspoons Black Pepper – add more, if desired
  • 1/2 teaspoon Seasoned Salt
  • BISCUITS:
  • 2 tablespoons Baking Powder
  • 1 1/2 stick (3/4 c.) Cold Butter, cut into pieces
  • 1 1/4 c. Buttermilk
  • 3 c. All-purpose Flour
  • 1/2 teaspoon Salt

Instructions

SAUSAGE GRAVY:

Step 1: Tear small pieces of sausage and place them in a single layer on a large heavy skillet (preferably cast-iron). Cook the sausage on medium-high heat until browned. Then, adjust the heat to medium-low.

Step 2: Over the sausages sprinkle half of the flour. Mix well, then sprinkle in more flour, little by little. Stir again and continue to cook for another minute before pouring in the milk, stirring regularly.

Step 3: Cook the gravy for about 10 to 12 minutes, stirring often. Season the gravy with the seasoned salt and pepper and continue to cook until the gravy has thickened. You can add small amounts of milk if the gravy has thickened so soon.

BISCUITS:

Step 4: Prepare the oven. Preheat it to 400 degrees F.

Step 5: On two baking sheets, lay parchment paper.

Step 6: In a large bowl or food processor, combine the flour, baking powder, and salt. Then, add the pieces of butter and pulse until completely incorporated. If mixing in a large bowl, use a pastry cutter or your hands to mix the butter pieces. While the mixer is still running, drizzle in the buttermilk until you have a dough that is no longer crumbly.

Step 7: On the prepared baking sheets, drop clumps of dough using 2 spoons. Place in the preheated oven and bake the biscuits for about 15 to 17 minutes or until golden. If desired, you can brush each biscuit with melted butter right after you remove them from the oven.

Step 8: Over the warm biscuits, spoon the gravy. Serve right away. Enjoy!

Notes

You can add finely chopped fresh herbs to the gravy, such as thyme, chives, and parsley. Smoked paprika, paprika, rosemary, sage, and cayenne are amazing spices if you want to add a little heat to your gravy. For this recipe, you can use sausage links (without the casings) instead of bulk sausage. For the best consistency use 2% milk or whole milk. You can use Gluten Free Flour in place of regular flour for a gluten-free version.

September 22, 2022 0 comment
0 FacebookTwitterPinterestEmail
General Recipes

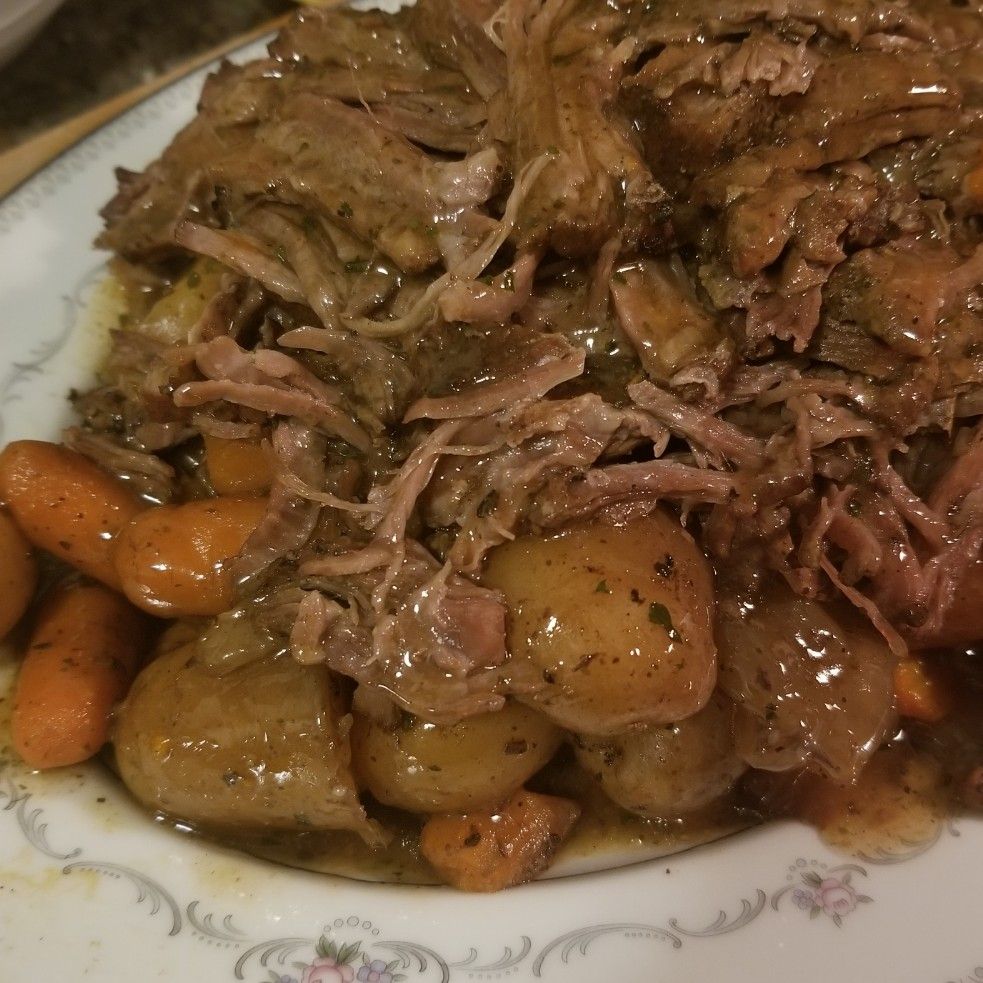
SLOW COOKER “MELT IN YOUR MOUTH” POT ROAST

by Rebecca September 22, 2022
written by Rebecca

This melt-in-your-mouth pot roast is full of amazing flavors! A complete meal with tender roast and veggies in a delicious thick gravy. Super easy to make and the perfect weeknight meal, excellent for everyone!

Ingredients

Olive oil

1 chuck roast (I use about 3 lbs)

2 lbs potatoes, peeled and cut into large chunks

1 lb carrots, peeled and cut into large chunks

1 onion, peeled and cut into large chunks

1 tbsp corn starch

1 c. beef broth

2 stalks of celery, cut into large chunks (optional)

SEASONING MIX:

1 tbsp dried thyme

1 tbsp kosher salt

1 tbsp dried rosemary

2 tbsp steak seasoning (mine is store-bought and has a blend of peppercorns, garlic, paprika, parsley, and salt)

HOW TO MAKE SLOW COOKER POT ROAST

Step 1: In a bowl, combine the seasoning mix with the other seasonings. Set aside.

Step 2: Coat both sides of the meat with olive oil and sprinkle all sides with 1/3 of the seasoning.

Step 3: Heat a skillet on medium-high. Add the meat and sear both sides. Then, transfer the seared meat into the slow cooker.

Step 4: In a large bowl, place the veggies and drizzle with olive oil. Add the remaining seasonings. Toss well until the veggies are completely coated. In the now-empty skillet, place the veggies and saute for about 5 minutes, stirring often.

Step 5:Into the slow cooker with the seared meat, and transfer the veggies. Then, pour in the beef broth. Put the lid on and set it to cook on low heat for 9 hours.

Step 6: In a saucepan, place the leftover juices from the slow cooker. Allow this to simmer on medium heat. Combine the cornstarch and water. Add this into the pan. Stir well and simmer until the mixture reached your desired thickness.

Step 7: On a platter, place the roast and veggies. Pour the thick gravy over them. Serve and enjoy!

Tips:

I like to cook the roast on a low setting as it guarantees more tender meat. But you can cook the roast in a high setting if short in time.

SLOW COOKER “MELT IN YOUR MOUTH” POT ROAST

Rebecca This melt-in-your-mouth pot roast is full of amazing flavors! A complete meal with tender roast and veggies in a delicious thick gravy. Super easy to make and the perfect weeknight… General Recipes SLOW COOKER “MELT IN YOUR MOUTH” POT ROAST European Print This
Nutrition facts: 200 calories 20 grams fat
Rating: 5.0/5
( 1 voted )

Ingredients

  • Olive oil
  • 1 chuck roast (I use about 3 lbs)
  • 2 lbs potatoes, peeled and cut into large chunks
  • 1 lb carrots, peeled and cut into large chunks
  • 1 onion, peeled and cut into large chunks
  • 1 tbsp corn starch
  • 1 c. beef broth
  • 2 stalks of celery, cut into large chunks (optional)
  • SEASONING MIX:
  • 1 tbsp dried thyme
  • 1 tbsp kosher salt
  • 1 tbsp dried rosemary
  • 2 tbsp steak seasoning (mine is store-bought and has a blend of peppercorns, garlic, paprika, parsley, and salt)

Instructions

Step 1: In a bowl, combine the seasoning mix with the other seasonings. Set aside.

Step 2: Coat both sides of the meat with olive oil and sprinkle all sides with 1/3 of the seasoning.

Step 3: Heat a skillet on medium-high. Add the meat and sear both sides. Then, transfer the seared meat into the slow cooker.

Step 4: In a large bowl, place the veggies and drizzle with olive oil. Add the remaining seasonings. Toss well until the veggies are completely coated. In the now-empty skillet, place the veggies and saute for about 5 minutes, stirring often.

Step 5:Into the slow cooker with the seared meat, and transfer the veggies. Then, pour in the beef broth. Put the lid on and set it to cook on low heat for 9 hours.

Step 6: In a saucepan, place the leftover juices from the slow cooker. Allow this to simmer on medium heat. Combine the cornstarch and water. Add this into the pan. Stir well and simmer until the mixture reached your desired thickness.

Step 7: On a platter, place the roast and veggies. Pour the thick gravy over them. Serve and enjoy!

Notes

I like to cook the roast on a low setting as it guarantees more tender meat. But you can cook the roast in a high setting if short in time.

September 22, 2022 0 comment
0 FacebookTwitterPinterestEmail
General Recipes

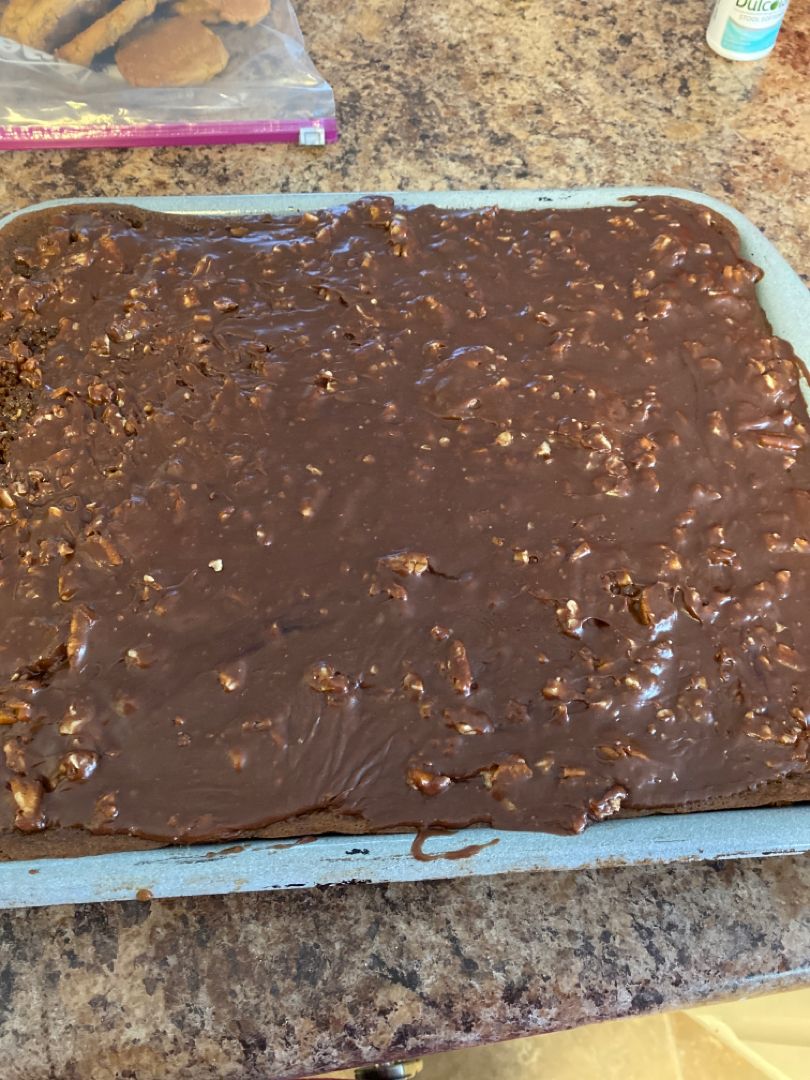
Texas Sheet Cake

by Rebecca September 22, 2022
written by Rebecca

If you are looking for an easy and quick way to whip up a chocolate cake, you have to give this Texas Sheet Cake recipe a try. Spread the simple cake batter in a jelly roll pan and cover with warm icing. You can either mix the pecans into the icing or scatter them over the icing. This Texas Sheet Cake is excellent for parties and will surely satisfy your sweet tooth!

Ingredients

Cake:

2 eggs

1 c. butter

¼ c. cocoa

2 c. flour

2 c. sugar

⅛ tsp salt

½ c. sour cream

1 tsp baking soda

1 tsp vanilla

Icing

1 c. water

Icing:

¼ c. cocoa

¼ c. plus 2 tbsp milk

½ tsp vanilla

½ c. butter

Chopped Pecans (optional)

1 box (1 lb) confectioners’ sugar (sift it first to remove lumps)

How to make Texas Sheet Cake

Step 1: Place the butter, water, and cocoa in a saucepan. Mix well and heat until the butter has completely melted.

Step 2: Whisk the flour, sugar, eggs, salt, and baking soda in a bowl until well-mixed.

Step 3: To the buttery mixture in the saucepan, add the flour mixture. Then, add the sour cream. Mix well until everything is blended.

Step 4: Transfer the mixture to a jelly roll pan or baking pan. Using a cake leveller to even out the mixture.

Step 5: Place in the oven and bake for about 30 minutes at 350 degrees.

Icing:

Step 6: In a different saucepan, place the cocoa, milk, and butter. Mix well and bring the mixture to a boil. Remove the pan from the heat once the mixture is boiling. Then, add the sugar and vanilla.

Step 7: Mix using a mixer until the lumps are gone. Pour the icing over the sheet cake right after removing the cake from the oven.

Note:

If desired, you mix the pecans into the icing. Or you can scatter them over the icing.

Texas Sheet Cake

Rebecca If you are looking for an easy and quick way to whip up a chocolate cake, you have to give this Texas Sheet Cake recipe a try. Spread the simple… General Recipes Texas Sheet Cake European Print This
Nutrition facts: 200 calories 20 grams fat
Rating: 5.0/5
( 1 voted )

Ingredients

  • Cake:
  • 2 eggs
  • 1 c. butter
  • ¼ c. cocoa
  • 2 c. flour
  • 2 c. sugar
  • ⅛ tsp salt
  • ½ c. sour cream
  • 1 tsp baking soda
  • 1 tsp vanilla
  • Icing
  • 1 c. water
  • Icing:
  • ¼ c. cocoa
  • ¼ c. plus 2 tbsp milk
  • ½ tsp vanilla
  • ½ c. butter
  • Chopped Pecans (optional)
  • 1 box (1 lb) confectioners’ sugar (sift it first to remove lumps)

Instructions

Step 1: Place the butter, water, and cocoa in a saucepan. Mix well and heat until the butter has completely melted.

Step 2: Whisk the flour, sugar, eggs, salt, and baking soda in a bowl until well-mixed.

Step 3: To the buttery mixture in the saucepan, add the flour mixture. Then, add the sour cream. Mix well until everything is blended.

Step 4: Transfer the mixture to a jelly roll pan or baking pan. Using a cake leveller to even out the mixture.

Step 5: Place in the oven and bake for about 30 minutes at 350 degrees.

Icing:

Step 6: In a different saucepan, place the cocoa, milk, and butter. Mix well and bring the mixture to a boil. Remove the pan from the heat once the mixture is boiling. Then, add the sugar and vanilla.

Step 7: Mix using a mixer until the lumps are gone. Pour the icing over the sheet cake right after removing the cake from the oven.

Notes

If desired, you mix the pecans into the icing. Or you can scatter them over the icing.

September 22, 2022 0 comment
0 FacebookTwitterPinterestEmail
General Recipes

Best Macaroni Salad

by Rebecca September 22, 2022
written by Rebecca

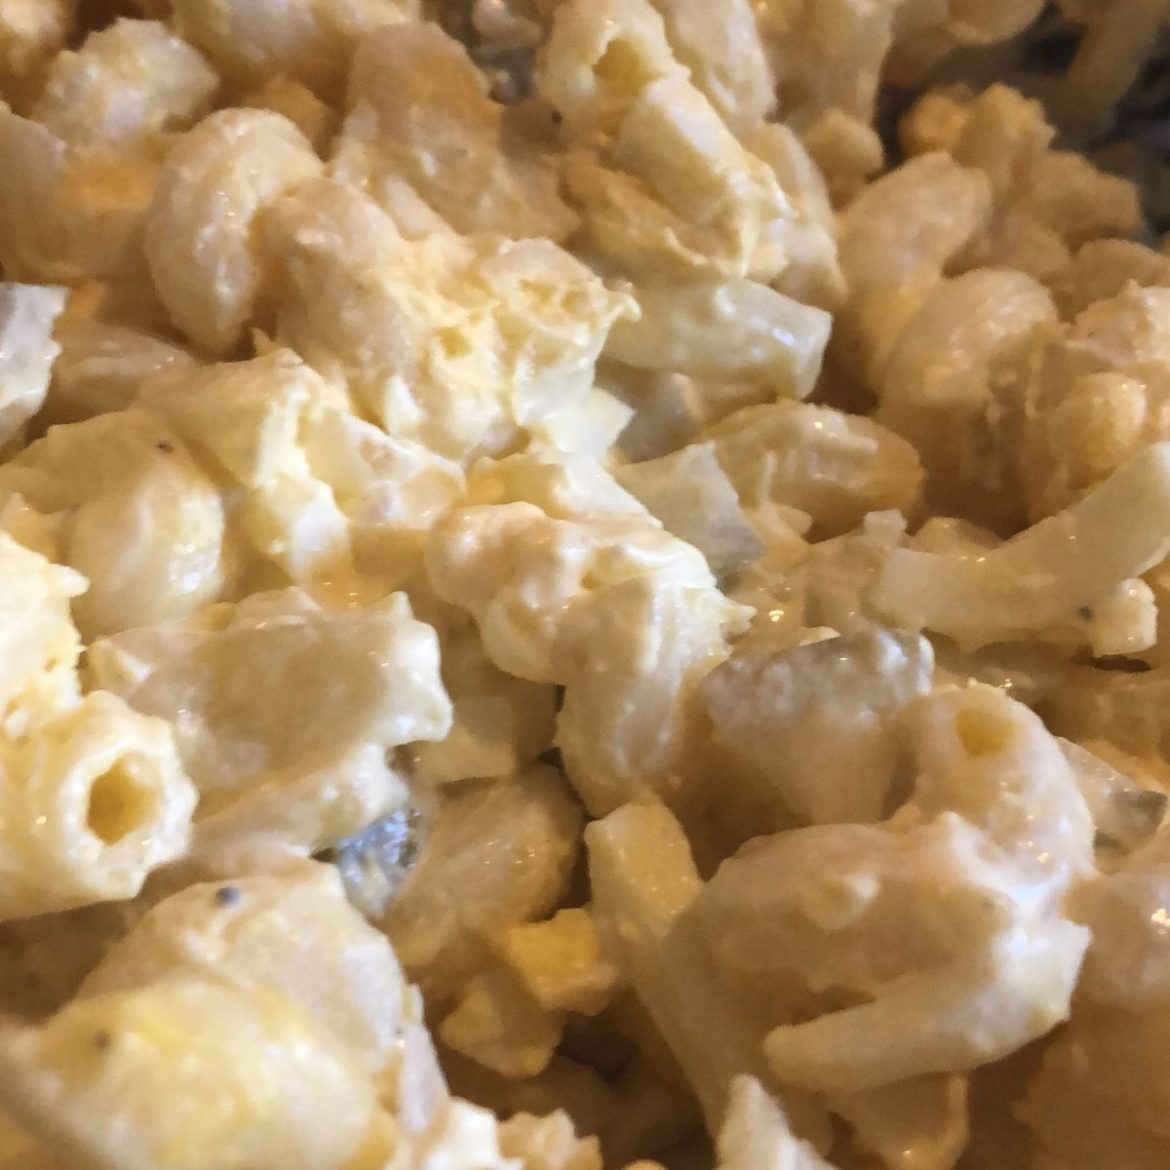
I am a big fan of macaroni salad. I’d rather choose anything else. But all that changed when I tasted this macaroni salad. This is by far the best macaroni salad I have made in years! The recipe is super easy, quick, and versatile. I can throw in extra ingredients for an additional layer of flavor and texture. Although I love this macaroni salad as is, there is nothing wrong with being creative sometimes. After I prep the salad, I chill it in the fridge for an hour or so before serving.

My kids also love this macaroni salad. They like it whenever I use tri-colored pasta. This creamy macaroni salad is super fun to make and delicious with the perfect combination of sweetness and tartness.

INGREDIENTS

1 hard-boiled egg, chopped

2 c. elbow macaroni, uncooked

1/2 c. finely chopped celery

1 c. mayonnaise

1/3 c. finely chopped carrot

2 tbsp sweet relish

1/4 c. finely minced onion, I use dehydrated onion

3/4 tsp dry ground mustard

1 dash paprika

1/4 tsp salt

1/8 tsp ground black pepper

1 1/2 tsp salt

3 quarts water

How to make the Best Macaroni Salad

Step 1: Add about 3 quarts of water to a large pot. Sprinkle in some salt. Bring the water to a rolling boil, then add the elbow macaroni and cook for about 8 minutes, uncovered, until al dente. Drain when done and rinse with cold water.

Step 2: Place the remaining ingredients in a bowl and mix. Add the cooked macaroni and toss well.

Step 3: Cover the bowl and place it in the fridge for about an hour before serving the salad.

Tips:

Rich and creamy dressing are the best to use for this recipe such as ranch dressing.

Feel free to add ingredients to the salad. You can also throw in some veggies if desired. Just remember not to add anything too bitter to the salad.

For this salad, you can use different vinaigrette.

Best Macaroni Salad

Rebecca I am a big fan of macaroni salad. I’d rather choose anything else. But all that changed when I tasted this macaroni salad. This is by far the best macaroni… General Recipes Best Macaroni Salad European Print This
Nutrition facts: 200 calories 20 grams fat
Rating: 5.0/5
( 1 voted )

Ingredients

  • 1 hard-boiled egg, chopped
  • 2 c. elbow macaroni, uncooked
  • 1/2 c. finely chopped celery
  • 1 c. mayonnaise
  • 1/3 c. finely chopped carrot
  • 2 tbsp sweet relish
  • 1/4 c. finely minced onion, I use dehydrated onion
  • 3/4 tsp dry ground mustard
  • 1 dash paprika
  • 1/4 tsp salt
  • 1/8 tsp ground black pepper
  • 1 1/2 tsp salt
  • 3 quarts water

Instructions

Step 1: Add about 3 quarts of water to a large pot. Sprinkle in some salt. Bring the water to a rolling boil, then add the elbow macaroni and cook for about 8 minutes, uncovered, until al dente. Drain when done and rinse with cold water.

Step 2: Place the remaining ingredients in a bowl and mix. Add the cooked macaroni and toss well.

Step 3: Cover the bowl and place it in the fridge for about an hour before serving the salad.

Notes

Rich and creamy dressing are the best to use for this recipe such as ranch dressing. Feel free to add ingredients to the salad. You can also throw in some veggies if desired. Just remember not to add anything too bitter to the salad. For this salad, you can use different vinaigrette.

September 22, 2022 0 comment
0 FacebookTwitterPinterestEmail
General Recipes

Philly Cheesesteak Sliders

by Rebecca September 22, 2022
written by Rebecca

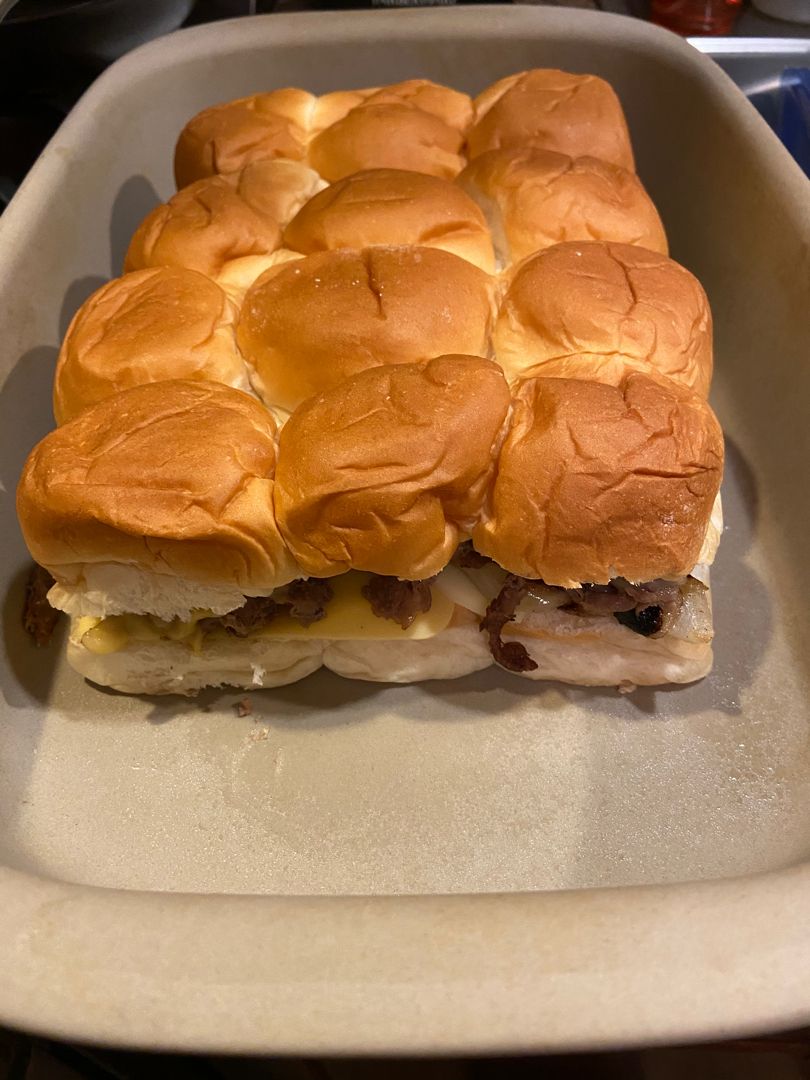
These Philly Cheesesteak Sliders are the perfect party or game-day food with thinly sliced steak, peppers, onions, and melty cheese sandwiched on soft slider buns. Enjoy these mouthwatering sliders by themselves or pair them with fries or a simple salad.

INGREDIENTS

1/2 medium yellow onion, sliced

1 clove garlic, minced

1 pound sirloin steak thinly sliced

12 Hawaiian Rolls

1/2 large green bell pepper sliced

1/2 teaspoon smoked paprika

2 ounces fresh mushrooms, minced

1 tablespoon Worcestershire sauce

1/3 cup mayonnaise

6 slices provolone cheese

3/4 cup Cheez Whiz

1/2 teaspoon salt

1/8 teaspoon ground black pepper

2 tablespoons bacon grease

Garlic Butter:

1 tablespoon Italian parsley, minced

1/4 teaspoon roasted garlic powder

3 tablespoons salted butter, melted

How to make Philly Cheesesteak Sliders

Step 1: Mince the garlic and mushrooms. Thinly slice the onions and bell peppers.

Step 2: Into small strips, slice the steak against the grain.

Step 3: Heat the olive oil/bacon grease in a skillet. Then, add the veggies and saute until tender. Set the veggies aside when done.

Step 4: In the same skillet, place the steak and season with salt and pepper. Sprinkle with paprika, then add Worcestershire sauce. Cook until the steak is done. Return the veggies into the skillet and stir. Continue to cook until done.

Step 5: Place the sliced rolls on a greased baking sheet. On top of each roll, spread the mayo. Top with cheese, then with the veggies-meat mixture.

Step 6: Mix the roasted garlic with melted butter and minced garlic. Brush the top buns with this and sprinkle with extra parsley.

Step 7: Cover the dish with foil. Place in the oven and bake for about 5 minutes at 350 degrees until the cheese has melted. Remove the foil and continue baking for additional 10 minutes.

Step 8: Remove from the oven when done and serve the Philly Cheesesteak Sliders warm with a side of salad or fries. Enjoy!

Philly Cheesesteak Sliders

Rebecca These Philly Cheesesteak Sliders are the perfect party or game-day food with thinly sliced steak, peppers, onions, and melty cheese sandwiched on soft slider buns. Enjoy these mouthwatering sliders by… General Recipes Philly Cheesesteak Sliders European Print This
Nutrition facts: 200 calories 20 grams fat
Rating: 5.0/5
( 1 voted )

Ingredients

  • 1/2 medium yellow onion, sliced
  • 1 clove garlic, minced
  • 1 pound sirloin steak thinly sliced
  • 12 Hawaiian Rolls
  • 1/2 large green bell pepper sliced
  • 1/2 teaspoon smoked paprika
  • 2 ounces fresh mushrooms, minced
  • 1 tablespoon Worcestershire sauce
  • 1/3 cup mayonnaise
  • 6 slices provolone cheese
  • 3/4 cup Cheez Whiz
  • 1/2 teaspoon salt
  • 1/8 teaspoon ground black pepper
  • 2 tablespoons bacon grease
  • Garlic Butter:
  • 1 tablespoon Italian parsley, minced
  • 1/4 teaspoon roasted garlic powder
  • 3 tablespoons salted butter, melted

Instructions

Step 1: Mince the garlic and mushrooms. Thinly slice the onions and bell peppers.

Step 2: Into small strips, slice the steak against the grain.

Step 3: Heat the olive oil/bacon grease in a skillet. Then, add the veggies and saute until tender. Set the veggies aside when done.

Step 4: In the same skillet, place the steak and season with salt and pepper. Sprinkle with paprika, then add Worcestershire sauce. Cook until the steak is done. Return the veggies into the skillet and stir. Continue to cook until done.

Step 5: Place the sliced rolls on a greased baking sheet. On top of each roll, spread the mayo. Top with cheese, then with the veggies-meat mixture.

Step 6: Mix the roasted garlic with melted butter and minced garlic. Brush the top buns with this and sprinkle with extra parsley.

Step 7: Cover the dish with foil. Place in the oven and bake for about 5 minutes at 350 degrees until the cheese has melted. Remove the foil and continue baking for additional 10 minutes.

Step 8: Remove from the oven when done and serve the Philly Cheesesteak Sliders warm with a side of salad or fries. Enjoy!

September 22, 2022 0 comment
0 FacebookTwitterPinterestEmail
Newer Posts
Older Posts

Popular Posts

  • 1

    Crispy Crunchy Parmesan Potatoes

    March 21, 2020
  • 2

    CROCK POT SMOTHERED PORK CHOPS

    March 21, 2020
  • Facebook
  • Twitter

@2019 - All Right Reserved.


Back To Top