Cook it once
  • Home
  • Privacy Policy
  • Recipes
    • KETO
    • LC
    • WW
  • Tips
  • Contact
Cook it once
  • Home
  • Privacy Policy
  • Recipes
    • KETO
    • LC
    • WW
  • Tips
  • Contact
Category:

General Recipes

General Recipes

Cranberry Waldorf Salad Recipe: Perfect For The Holidays (or any time of year)

by Rebecca September 26, 2022
written by Rebecca

Prep time: 10 mins | Serves: 6

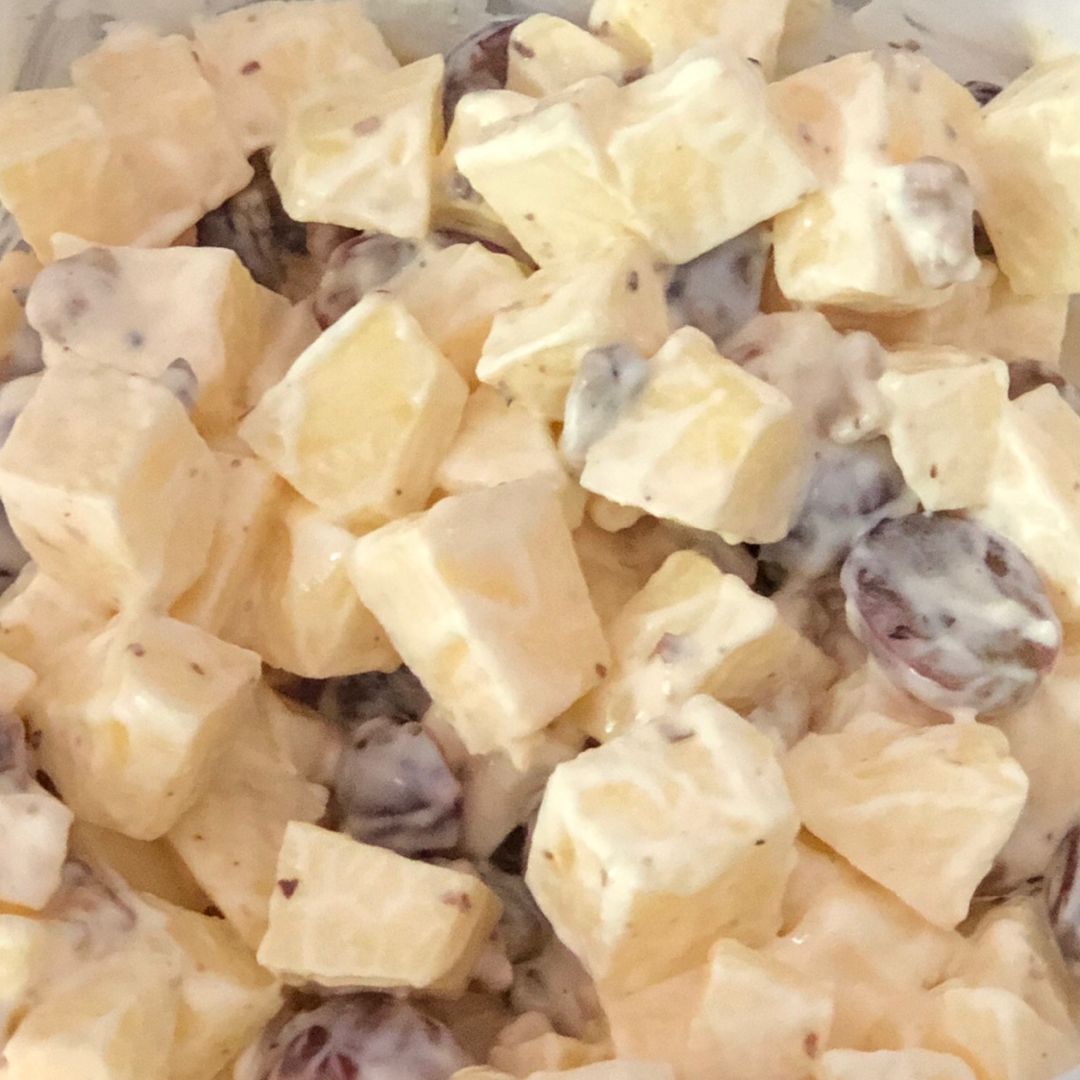
This cranberry Waldorf salad is a refreshing, creamy, and delicious salad that you can easily make using a few simple ingredients. It is incredibly easy to make. Simply mix everything and chill the salad for at least 2 hours in the fridge before serving.

This salad is full of great memories! I remembered my grandma making this whenever we visit her. This salad has become part of our family tradition. Visiting grandma would never be complete without this salad on the table. This salad is a light and delightful dessert. My granny also loves to pair this with lasagna. Either way, this salad is wonderful!

If you are looking for a “cool” salad for hot days, this cranberry Waldorf salad is the best option! It’s insanely easy and quick to put together. Creamy with a mix of nice flavors and some crunch. This salad is also amazing to bring to potlucks and picnics. I usually make this the night before. In my opinion, this cranberry Waldorf salad tastes beautifully the next day.

Enjoy a mixture of fresh tart cranberries & fried cranberries with juicy grapes, crisp, fresh apples, celery, and raisins with this delightful salad. This cranberry Waldorf salad is super good, this will surely become your newest favorite salad!

INGREDIENTS

1/2 c. chopped walnuts

1 c. seedless red grapes, halved

1 1/2 c. fresh cranberries, roughly chopped

1 c. mayonnaise

1 c. celery, chopped

1/3 c. dried cranberries

1 Granny Smith apple, diced

Zest of 1 orange

Kosher salt and freshly ground black pepper, to taste

1-2 tbsp granulated sugar, to taste

How to make Cranberry Waldorf Salad

Step 1: Place all the ingredients in a large bowl. Mix well and set aside.

Step 2: Tent the bowl and place it in the fridge to chill the salad for at least 2 hours.

Step 3: Serve and enjoy!
Cranberry Waldorf Salad Recipe: Perfect For The Holidays (or any time of year)

Rebecca Prep time: 10 mins | Serves: 6 This cranberry Waldorf salad is a refreshing, creamy, and delicious salad that you can easily make using a few simple ingredients. It is… General Recipes Cranberry Waldorf Salad Recipe: Perfect For The Holidays (or any time of year) European Print This
Serves: 6 Prep Time: 10 mins
Nutrition facts: 200 calories 20 grams fat
Rating: 5.0/5
( 1 voted )

Ingredients

  • 1/2 c. chopped walnuts
  • 1 c. seedless red grapes, halved
  • 1 1/2 c. fresh cranberries, roughly chopped
  • 1 c. mayonnaise
  • 1 c. celery, chopped
  • 1/3 c. dried cranberries
  • 1 Granny Smith apple, diced
  • Zest of 1 orange
  • Kosher salt and freshly ground black pepper, to taste
  • 1-2 tbsp granulated sugar, to taste

Instructions

Step 1: Place all the ingredients in a large bowl. Mix well and set aside.

Step 2: Tent the bowl and place it in the fridge to chill the salad for at least 2 hours.

Step 3: Serve and enjoy!
September 26, 2022 0 comment
0 FacebookTwitterPinterestEmail
General Recipes

MIllion Dollar Spaghetti

by Rebecca September 24, 2022
written by Rebecca

Prep Time: 25 mins | Cook Time: 1 hr 5 mins | Total Time: 1 hr 30 mins | Yield: 8

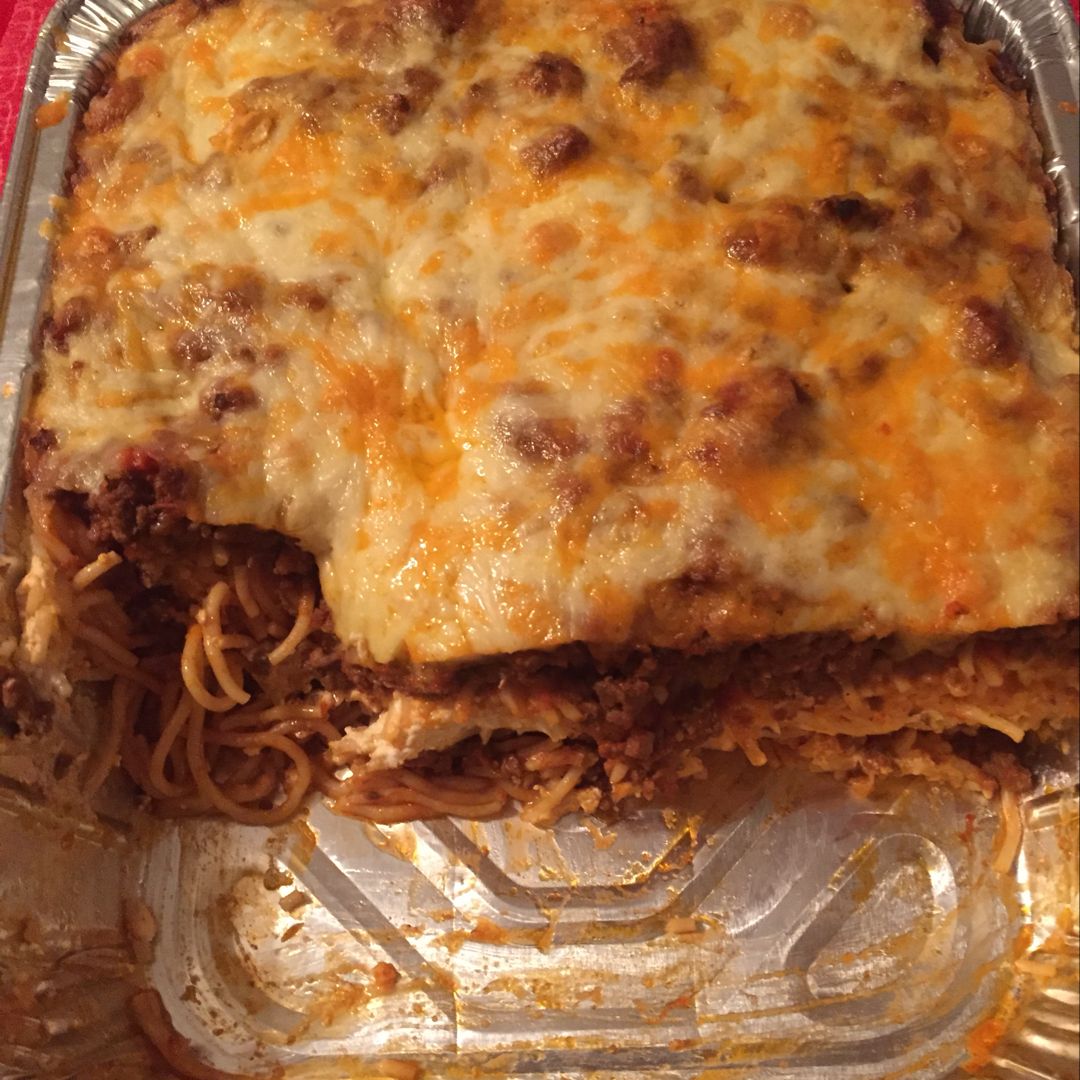
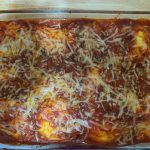
My family is obsessed with this Million Dollar Spaghetti! So simple to make with layers of spaghetti, spaghetti sauce, beef & cream cheese mixture, and melt cheese on top. No! This spaghetti does not cost a million bucks, but this tastes like a million dollars! If you love spaghetti, this recipe is a must-try and no doubt a keeper!

Ingredients

1 lb ground beef

1 (16 oz.) package of spaghetti noodles

1 (16 oz.) jar spaghetti sauce

1 c. cottage cheese

1/2 c. butter, sliced – divided

1 (8 oz.) package of cream cheese, softened

1 (8 oz.) package of shredded Cheddar cheese

1/4 c. sour cream

How to make Million Dollar Spaghetti

Step 1: Prepare the oven. Preheat it to 350 degrees F.

Step 2: Following the package directions, cook the spaghetti in a large pot of salted boiling water until al dente. Drain when done.

Step 3: On medium-high, heat a large skillet. Then, add the ground beef and cook for about 5 to 7 minutes, breaking the meat into chunks until no longer pink. When done, drain the excess grease. Into a bowl, transfer the ground beef. Add the spaghetti sauce and mix well.

Step 4: Mix the cream cheese with sour cream and cottage cheese until combined.

Step 5: Into the bottom of a 9 x 13-inch casserole dish, place half of the slices of butter. Then, half of the spaghetti. On top, place the creamy mixture, followed by the rest of the spaghetti and the rest of the pats of butter.

Step 6: Over the spaghetti, pour the ground beef mixture and evenly spread.

Step 7: Place in the preheated oven and bake for about 30 minutes.

Step 8: Over the pasta, spread the cheddar cheese. Return the spaghetti into the oven and resume baking for another 15 minutes or until the cheese has melted and lightly browned.

MIllion Dollar Spaghetti

Rebecca Prep Time: 25 mins | Cook Time: 1 hr 5 mins | Total Time: 1 hr 30 mins | Yield: 8 My family is obsessed with this Million Dollar Spaghetti!… General Recipes MIllion Dollar Spaghetti European Print This
Serves: 8 Prep Time: 25 mins Cooking Time: 1 hr 5 mins 1 hr 5 mins
Nutrition facts: 200 calories 20 grams fat
Rating: 5.0/5
( 1 voted )

Ingredients

  • 1 lb ground beef
  • 1 (16 oz.) package of spaghetti noodles
  • 1 (16 oz.) jar spaghetti sauce
  • 1 c. cottage cheese
  • 1/2 c. butter, sliced - divided
  • 1 (8 oz.) package of cream cheese, softened
  • 1 (8 oz.) package of shredded Cheddar cheese
  • 1/4 c. sour cream

Instructions

Step 1: Prepare the oven. Preheat it to 350 degrees F.

Step 2: Following the package directions, cook the spaghetti in a large pot of salted boiling water until al dente. Drain when done.

Step 3: On medium-high, heat a large skillet. Then, add the ground beef and cook for about 5 to 7 minutes, breaking the meat into chunks until no longer pink. When done, drain the excess grease. Into a bowl, transfer the ground beef. Add the spaghetti sauce and mix well.

Step 4: Mix the cream cheese with sour cream and cottage cheese until combined.

Step 5: Into the bottom of a 9 x 13-inch casserole dish, place half of the slices of butter. Then, half of the spaghetti. On top, place the creamy mixture, followed by the rest of the spaghetti and the rest of the pats of butter.

Step 6: Over the spaghetti, pour the ground beef mixture and evenly spread.

Step 7: Place in the preheated oven and bake for about 30 minutes.

Step 8: Over the pasta, spread the cheddar cheese. Return the spaghetti into the oven and resume baking for another 15 minutes or until the cheese has melted and lightly browned.

September 24, 2022 0 comment
0 FacebookTwitterPinterestEmail
General Recipes

Egg Roll Soup

by Rebecca September 24, 2022
written by Rebecca

Total time: 25 mins | Serves: 8

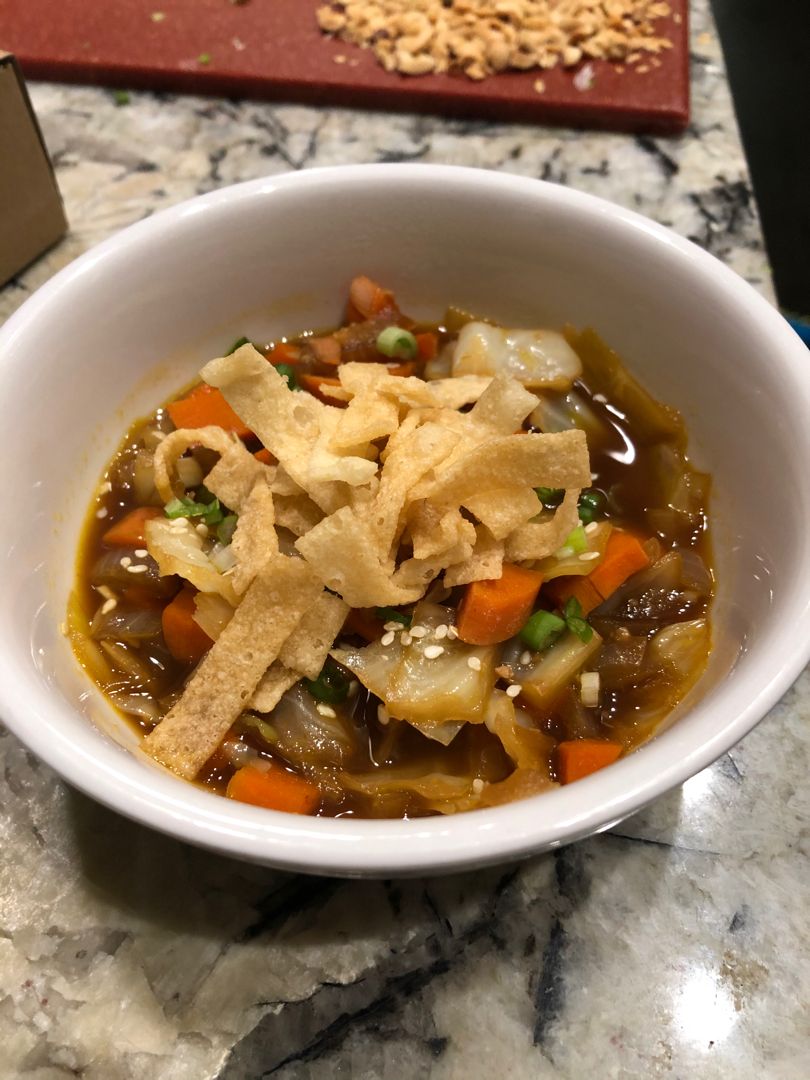
Egg rolls are a staple at home, but let us face it, we don’t normally have the luxury to whip them up due to time restraints. But this egg roll soup will absolutely do the trick! This soup has all the same flavors we love from egg rolls without the hassle. Exceptionally easy to make, quick, and scrumptious! This egg roll soup requires just ten ingredients to make. And these ingredients are all pantry staples! The cabbage slightly adds a bit of structure and flavor to the soup while the ginger adds a fresh zing! Combine them with the rest of the ingredients and you’ll have the best egg roll soup!

INGREDIENTS

2 tbsp extra-virgin olive oil

1 lb ground pork

1 yellow onion, finely chopped

4 cloves garlic, minced

2 tsp fresh ginger, grated

2 medium carrots, finely chopped

1 small green cabbage, thinly sliced

1/3 c. green onion, finely chopped, plus more for garnish

6 c. low-sodium chicken broth

1 1/2 tsp sesame oil

How to make Egg Roll Soup

Step 1: On medium-high, heat a large stock pot or Dutch oven. Once the pot is hot, add the ground beef and sear until the meat is browned.

Step 2: To the pot, add the olive oil and onion. Saute the onion for about 8 to 10 minutes or until tender and translucent. Next, add the garlic and ginger. Continue to cook for an additional 1 to 2 minutes or until aromatic.

Step 3: To taste, season with salt and pepper. Add the sesame oil and stir well.

Step 4: Add the cabbage to the pot along with the pork and chicken broth. Bring everything to a boil. Once boiling, decrease the heat and put the lid on. Allow the mixture to simmer for about 15 to 20 minutes or until the cabbage is soft.

Step 5: As needed, adjust the seasoning according to taste.

Step 6: Ladle the soup into serving bowls and serve immediately, garnished with some green onions. Enjoy!

Egg Roll Soup

Rebecca Total time: 25 mins | Serves: 8 Egg rolls are a staple at home, but let us face it, we don’t normally have the luxury to whip them up due… General Recipes Egg Roll Soup European Print This
Serves: 8
Nutrition facts: 200 calories 20 grams fat
Rating: 5.0/5
( 1 voted )

Ingredients

  • 2 tbsp extra-virgin olive oil
  • 1 lb ground pork
  • 1 yellow onion, finely chopped
  • 4 cloves garlic, minced
  • 2 tsp fresh ginger, grated
  • 2 medium carrots, finely chopped
  • 1 small green cabbage, thinly sliced
  • 1/3 c. green onion, finely chopped, plus more for garnish
  • 6 c. low-sodium chicken broth
  • 1 1/2 tsp sesame oil

Instructions

Step 1: On medium-high, heat a large stock pot or Dutch oven. Once the pot is hot, add the ground beef and sear until the meat is browned.

Step 2: To the pot, add the olive oil and onion. Saute the onion for about 8 to 10 minutes or until tender and translucent. Next, add the garlic and ginger. Continue to cook for an additional 1 to 2 minutes or until aromatic.

Step 3: To taste, season with salt and pepper. Add the sesame oil and stir well.

Step 4: Add the cabbage to the pot along with the pork and chicken broth. Bring everything to a boil. Once boiling, decrease the heat and put the lid on. Allow the mixture to simmer for about 15 to 20 minutes or until the cabbage is soft.

Step 5: As needed, adjust the seasoning according to taste.

Step 6: Ladle the soup into serving bowls and serve immediately, garnished with some green onions. Enjoy!

September 24, 2022 0 comment
0 FacebookTwitterPinterestEmail
General Recipes

DUMP AND BAKE YOUR WAY TO A FANTASTIC MEATBALL CASSEROLE

by Rebecca September 24, 2022
written by Rebecca

This is a fantastic meatball casserole that you can easily make at any time! Packed with amazing flavors, kid-friendly, and the perfect weeknight dinner!

Ingredients

1 24-25-ounces jar of Marinara sauce

1 14-ounces bag of fully cooked, frozen meatballs (thawed)

1 16-ounces package of Rotini pasta – uncooked

2 c. shredded mozzarella

3 c. water

HOW TO MAKE DUMP AND BAKE YOUR WAY TO A FANTASTIC MEATBALL CASSEROLE

Step 1: Prepare the oven. Preheat it to 425 degrees F.

Step 2: Combine the uncooked pasta, marinara sauce, water, and thawed meatballs in a 9 x 13-inch baking dish. Tightly tent the dish with foil and place it in the preheated oven. Bake for about 35 minutes. Uncover and stir the pasta. If the pasta is still undone, cover the dish again and resume baking until the pasta is al dente.

Step 3: Once the pasta is cooked, sprinkle the mozzarella cheese on top. Place the dish back into the oven and bake, uncovered, for about 5 to 10 minutes or until the cheese has melted and the pasta is tender.

Step 4: Remove the casserole from the oven when done and allow it to rest for about 5 to 10 minutes.

Step 5: Serve and enjoy!

Notes:

Pair this casserole with a simple side salad and garlic bread.

Before serving, sprinkle some chopped fresh basil on top of the casserole. You can also sprinkle extra freshly grated Parmesan cheese on top.

Do not over-bake the casserole or the pasta will be mushy.

Easily make this casserole in an 8 x 8-inch baking dish.

Into an airtight container, place any leftovers and store them in the fridge for up to 3 to 4 days. Before reheating, add a little marinara to the pasta.

For this recipe, you can use small, cocktail-sized meatballs. You can also use your desired meatballs, such as Turkey meatballs, Italian meatballs, beef, chicken, or pork meatballs. Make sure to thaw the meatballs first before adding them to the casserole.

You can use penne or elbow pasta in place of the Rotini. If using different pasta, make sure they are about the same size pasta and the cooking time indicated on the package is about 7 to 8 minutes.

DUMP AND BAKE YOUR WAY TO A FANTASTIC MEATBALL CASSEROLE

Rebecca This is a fantastic meatball casserole that you can easily make at any time! Packed with amazing flavors, kid-friendly, and the perfect weeknight dinner! Ingredients 1 24-25-ounces jar of Marinara… General Recipes DUMP AND BAKE YOUR WAY TO A FANTASTIC MEATBALL CASSEROLE European Print This
Nutrition facts: 200 calories 20 grams fat
Rating: 5.0/5
( 1 voted )

Ingredients

  • 1 24-25-ounces jar of Marinara sauce
  • 1 14-ounces bag of fully cooked, frozen meatballs (thawed)
  • 1 16-ounces package of Rotini pasta – uncooked
  • 2 c. shredded mozzarella
  • 3 c. water

Instructions

Step 1: Prepare the oven. Preheat it to 425 degrees F.

Step 2: Combine the uncooked pasta, marinara sauce, water, and thawed meatballs in a 9 x 13-inch baking dish. Tightly tent the dish with foil and place it in the preheated oven. Bake for about 35 minutes. Uncover and stir the pasta. If the pasta is still undone, cover the dish again and resume baking until the pasta is al dente.

Step 3: Once the pasta is cooked, sprinkle the mozzarella cheese on top. Place the dish back into the oven and bake, uncovered, for about 5 to 10 minutes or until the cheese has melted and the pasta is tender.

Step 4: Remove the casserole from the oven when done and allow it to rest for about 5 to 10 minutes.

Step 5: Serve and enjoy!

Notes

Pair this casserole with a simple side salad and garlic bread. Before serving, sprinkle some chopped fresh basil on top of the casserole. You can also sprinkle extra freshly grated Parmesan cheese on top. Do not over-bake the casserole or the pasta will be mushy. Easily make this casserole in an 8 x 8-inch baking dish. Into an airtight container, place any leftovers and store them in the fridge for up to 3 to 4 days. Before reheating, add a little marinara to the pasta. For this recipe, you can use small, cocktail-sized meatballs. You can also use your desired meatballs, such as Turkey meatballs, Italian meatballs, beef, chicken, or pork meatballs. Make sure to thaw the meatballs first before adding them to the casserole. You can use penne or elbow pasta in place of the Rotini. If using different pasta, make sure they are about the same size pasta and the cooking time indicated on the package is about 7 to 8 minutes.

September 24, 2022 0 comment
0 FacebookTwitterPinterestEmail
General Recipes

The Ultimate Chicken Noodle Soup

by Rebecca September 24, 2022
written by Rebecca

Prep time: 15 mins | Cook time: 45 mins | Servings: 10 (about 3-1/2 quarts)

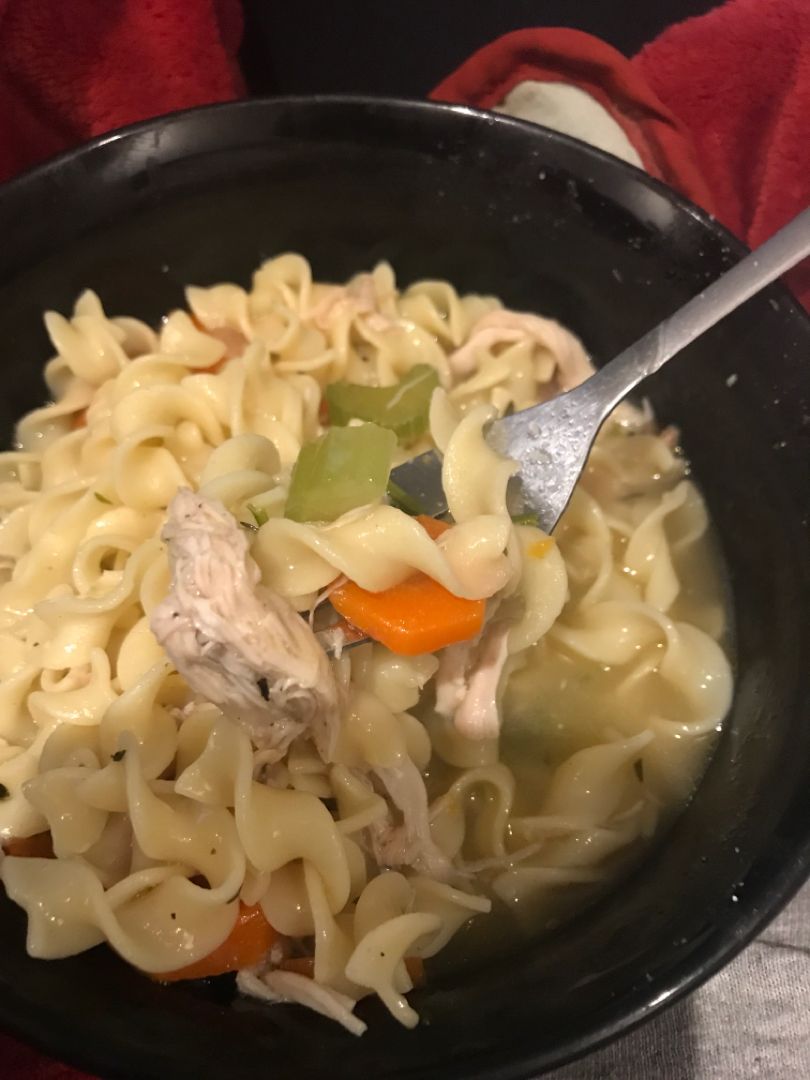
Hearty and delicious chicken noodles soup. Cozy up on chilly nights and feel better with a bowl of this high-protein soup that’s packed with veggies.

Ingredients

2-1/2 lbs bone-in chicken thighs

3 c. uncooked kluski or other egg noodles (about 8 oz.)

1 tbsp canola oil

1/2 tsp pepper

1 garlic clove, minced

4 medium carrots, chopped

1 large onion, chopped

1 tsp minced fresh thyme or 1/4 tsp dried thyme

2 bay leaves

Optional: Additional salt and pepper

1 tbsp lemon juice

4 celery ribs, chopped

1 tbsp chopped fresh parsley

1/2 tsp salt

10 c. chicken broth

How to make Chicken Noodle Soup

Step 1: Using paper towels, pat dries the chicken, then season all sides with salt and pepper.

Step 2: In a 6-quart stockpot, heat the oil over medium-high heat. Then, add the chicken, skin-side down, and sear for about 3 to 4 minutes until dark golden brown. Take the chicken out of the pot when done and discard the skin. Reserve about 2 tbsp of the drippings.

Step 3: In the same pot with the drippings, cook the onion for about 4 to 5 minutes until tender. Add the garlic and continue to cook for a minute more. Pour in the broth, stir, and deglaze the pot. Bring to a boil and return the chicken to the pan along with the celery, carrots, bay leaves, and thyme. Adjust the heat to low. Put the lid on and continue to cook for an additional 25 to 30 minutes or until the chicken is cooked through.

Step 4: On a plate, transfer the chicken. Remove the pot from the heat and replace the lid. Set the pot aside for about 20 to 22 minutes or until the noodles are cooked.

Step 5: Once the chicken is cooled enough to handle, remove the bones and discard them. Shred the meat into bite-sized pieces and return to the pot. In a mixing bowl, mix the parsley and lemon juice. Add this to the pot and season with salt and pepper according to taste. Discard the bay leaves.

Nutrition Facts:

1-1/3 cups: 239 calories, 12g fat (3g saturated fat), 68mg cholesterol, 1176mg sodium, 14g carbohydrate (3g sugars, 2g fiber), 18g protein.

The Ultimate Chicken Noodle Soup

Rebecca Prep time: 15 mins | Cook time: 45 mins | Servings: 10 (about 3-1/2 quarts) Hearty and delicious chicken noodles soup. Cozy up on chilly nights and feel better with… General Recipes The Ultimate Chicken Noodle Soup European Print This
Serves: 10 Prep Time: 15 mins Cooking Time: 45 mins 45 mins
Nutrition facts: 239 calories 12 fat
Rating: 5.0/5
( 1 voted )

Ingredients

  • 2-1/2 lbs bone-in chicken thighs
  • 3 c. uncooked kluski or other egg noodles (about 8 oz.)
  • 1 tbsp canola oil
  • 1/2 tsp pepper
  • 1 garlic clove, minced
  • 4 medium carrots, chopped
  • 1 large onion, chopped
  • 1 tsp minced fresh thyme or 1/4 tsp dried thyme
  • 2 bay leaves
  • Optional: Additional salt and pepper
  • 1 tbsp lemon juice
  • 4 celery ribs, chopped
  • 1 tbsp chopped fresh parsley
  • 1/2 tsp salt
  • 10 c. chicken broth

Instructions

Step 1: Using paper towels, pat dries the chicken, then season all sides with salt and pepper.

Step 2: In a 6-quart stockpot, heat the oil over medium-high heat. Then, add the chicken, skin-side down, and sear for about 3 to 4 minutes until dark golden brown. Take the chicken out of the pot when done and discard the skin. Reserve about 2 tbsp of the drippings.

Step 3: In the same pot with the drippings, cook the onion for about 4 to 5 minutes until tender. Add the garlic and continue to cook for a minute more. Pour in the broth, stir, and deglaze the pot. Bring to a boil and return the chicken to the pan along with the celery, carrots, bay leaves, and thyme. Adjust the heat to low. Put the lid on and continue to cook for an additional 25 to 30 minutes or until the chicken is cooked through.

Step 4: On a plate, transfer the chicken. Remove the pot from the heat and replace the lid. Set the pot aside for about 20 to 22 minutes or until the noodles are cooked.

Step 5: Once the chicken is cooled enough to handle, remove the bones and discard them. Shred the meat into bite-sized pieces and return to the pot. In a mixing bowl, mix the parsley and lemon juice. Add this to the pot and season with salt and pepper according to taste. Discard the bay leaves.

September 24, 2022 0 comment
0 FacebookTwitterPinterestEmail
General Recipes

Best French Meat Pie (Tourtiere)

by Rebecca September 24, 2022
written by Rebecca

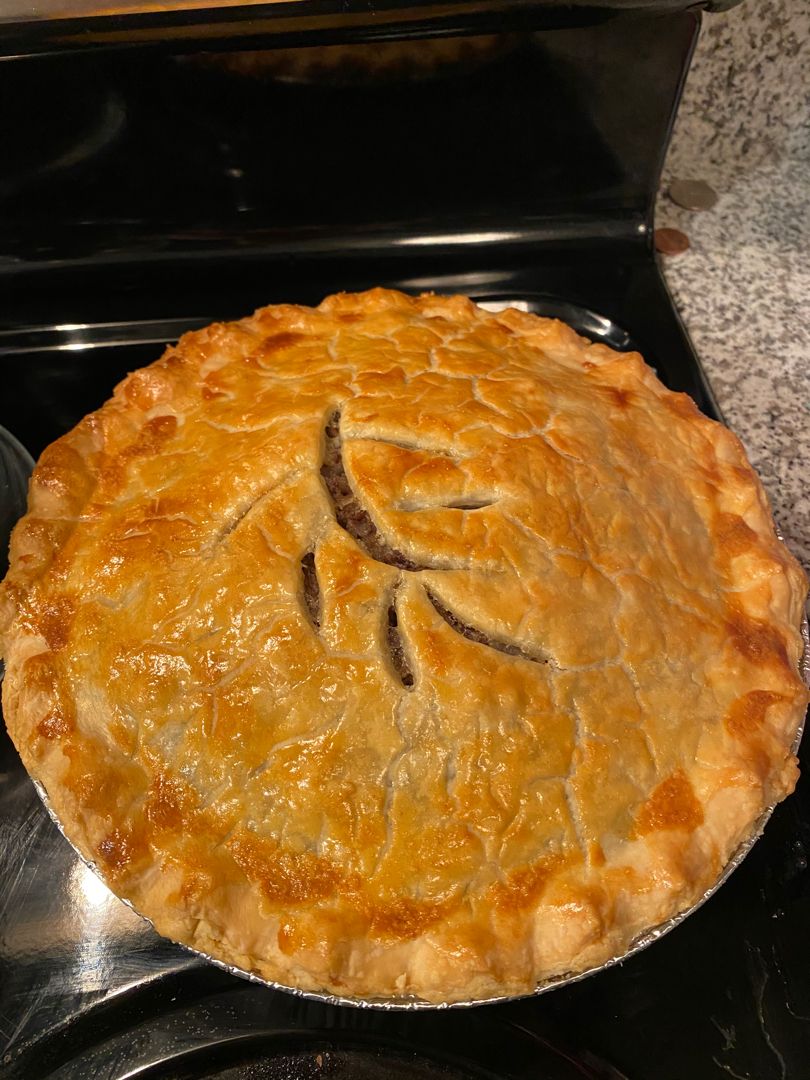
If you love meat pies you’ll certainly enjoy this Best French Meat Pie also known as Tourtiere. A savory meat pie with a unique combination of pork and beef in a flaky pie crust.

Ingredients

2 pounds ground beef (round)

2 pounds of ground pork

¾ c. finely diced celery

5 c. hot water

1 yellow onion, finely diced

2 teaspoons Better Than Bouillon chicken base

1 teaspoon poultry seasoning

½ teaspoon allspice

2 c. seasoned breadcrumbs

½ teaspoon ground nutmeg

¼ teaspoon ground cloves

1 large egg – beaten (for egg wash)

2 homemade or store-bought pie crusts (for 9” pies)

salt and black pepper to taste

How to make the Best French Meat Pie (Tourtiere)

Step 1: Prepare the oven. Preheat it to 400 degrees F.

Step 2: In hot water, dissolve the Better Than Bouillon chicken and set it aside.

Step 3: Into a large pot or Dutch oven, heat 1 tbsp olive oil over medium heat. To the hot oil, add the onion and celery. Cook for about 5 minutes until slightly tender, stirring often with a wooden spoon. Next, pour in the chicken stock mixture. Add ground pork, ground beef, and poultry seasoning. Continue to cook for another 20 minutes on medium heat until the meat is completely cooked.

Step 4: To the meat mixture, add the breadcrumbs, allspice, ground cloves, and black pepper. Stir well and cook for additional 10 minutes. When done, take the skillet off the heat. To taste, season with salt. Allow the mixture to cool fully.

Step 5: Into the unbaked pie shell, place the cooled meat mixture and top with the pie crust. Roll the edges and pinch the sides of the pie. Slice a slit at the top of the pie using a sharp knife. Then, bush the pie crust with the egg wash.

Step 6: Place in the preheated oven and bake the pie for about 30 to 40 minutes or until the crust is brown. Remove from the oven when done and allow the pie to rest for about 15 minutes, then serve. Enjoy!

Notes:

Mixture of ground chuck and pork is a tradition in French meat pie. Make sure to double grind the meat.

For this recipe, you can use homemade or store-bought pie crust.

You can freeze the unbaked pies. Assemble the pie, then wrap it in plastic wrap and store it in the freezer for up to 2 months.

Best French Meat Pie (Tourtiere)

Rebecca If you love meat pies you’ll certainly enjoy this Best French Meat Pie also known as Tourtiere. A savory meat pie with a unique combination of pork and beef in… General Recipes Best French Meat Pie (Tourtiere) European Print This
Nutrition facts: 200 calories 20 grams fat
Rating: 5.0/5
( 1 voted )

Ingredients

  • 2 pounds ground beef (round)
  • 2 pounds of ground pork
  • ¾ c. finely diced celery
  • 5 c. hot water
  • 1 yellow onion, finely diced
  • 2 teaspoons Better Than Bouillon chicken base
  • 1 teaspoon poultry seasoning
  • ½ teaspoon allspice
  • 2 c. seasoned breadcrumbs
  • ½ teaspoon ground nutmeg
  • ¼ teaspoon ground cloves
  • 1 large egg – beaten (for egg wash)
  • 2 homemade or store-bought pie crusts (for 9” pies)
  • salt and black pepper to taste

Instructions

Step 1: Prepare the oven. Preheat it to 400 degrees F.

Step 2: In hot water, dissolve the Better Than Bouillon chicken and set it aside.

Step 3: Into a large pot or Dutch oven, heat 1 tbsp olive oil over medium heat. To the hot oil, add the onion and celery. Cook for about 5 minutes until slightly tender, stirring often with a wooden spoon. Next, pour in the chicken stock mixture. Add ground pork, ground beef, and poultry seasoning. Continue to cook for another 20 minutes on medium heat until the meat is completely cooked.

Step 4: To the meat mixture, add the breadcrumbs, allspice, ground cloves, and black pepper. Stir well and cook for additional 10 minutes. When done, take the skillet off the heat. To taste, season with salt. Allow the mixture to cool fully.

Step 5: Into the unbaked pie shell, place the cooled meat mixture and top with the pie crust. Roll the edges and pinch the sides of the pie. Slice a slit at the top of the pie using a sharp knife. Then, bush the pie crust with the egg wash.

Step 6: Place in the preheated oven and bake the pie for about 30 to 40 minutes or until the crust is brown. Remove from the oven when done and allow the pie to rest for about 15 minutes, then serve. Enjoy!

Notes

Mixture of ground chuck and pork is a tradition in French meat pie. Make sure to double grind the meat. For this recipe, you can use homemade or store-bought pie crust. You can freeze the unbaked pies. Assemble the pie, then wrap it in plastic wrap and store it in the freezer for up to 2 months.

September 24, 2022 0 comment
0 FacebookTwitterPinterestEmail
General Recipes

Broiled Scallops

by Rebecca September 24, 2022
written by Rebecca

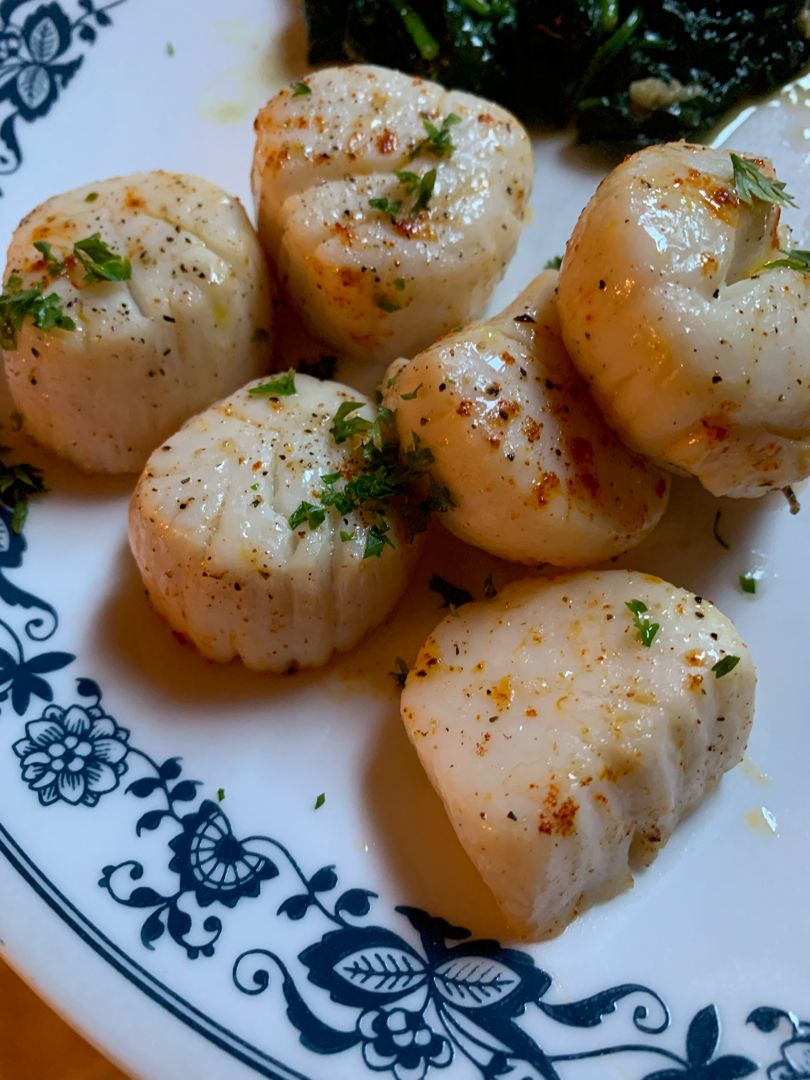
Delicious broiled scallops are clothed in butter and Parmesan. These crispy and flavorful broiled scallops are an amazing appetizer. And you can also serve these impressive broiled scallops as the main course with a simple side dish.

Ingredients

6 tablespoons unsalted butter -melted

Avocado oil spray

1 ⅓ c. grated Parmesan

1 ½ teaspoon garlic powder (not garlic salt)

¼ teaspoon cayenne pepper (optional if you do not care for spicy)

2 pounds extra-large sea scallops -12-16 per pounds

1 lemon – cut in wedges

½ teaspoon kosher salt

¼ teaspoon black pepper

How to make Broiled Scallops

Step 1: Using foil, line a rimmed broiler-safe baking sheet.

Step 2: Place a roasting rack on the baking sheet and grease the rack with avocado oil.

Step 3: Position the oven rack 6-inches below the heating element, then preheat the broiler on high (500 degrees F).

Step 4: Place the grated Parmesan with the salt (if using), black pepper, garlic powder, and cayenne pepper in a shallow bowl. Mix well until blended. In a different shallow bowl, place the melted butter.

Step 5: After rinsing the scallops, pat them dry using paper towels. If needed, remove the small, crescent-shaped muscle attached to the side of the scallops.

Step 6: In the melted butter, dip each scallop and dredge them in the Parmesan mixture until all sides are coated. On the prepared roasting rack, place the coated scallops and lightly spray using avocado oil.

Step 7: Place the baking sheet in the oven and broil the scallops for about 6 to 10 minutes until the cheese is golden brown and the scallops are completely cooked (the scallops should be white and moist in the middle). Note that the cooking time will depend on the size of the scallops. If using colossal scallops (13 scallops per pound), the cooking time is about 10 minutes. Make sure to check the scallops after 6 minutes. Halfway through broiling, rotate the baking sheet.

Step 8: Enjoy the broiled scallops right away with some lemon wedges.

Broiled Scallops

Rebecca Delicious broiled scallops are clothed in butter and Parmesan. These crispy and flavorful broiled scallops are an amazing appetizer. And you can also serve these impressive broiled scallops as the… General Recipes Broiled Scallops European Print This
Nutrition facts: 200 calories 20 grams fat
Rating: 5.0/5
( 1 voted )

Ingredients

  • 6 tablespoons unsalted butter -melted
  • Avocado oil spray
  • 1 ⅓ c. grated Parmesan
  • 1 ½ teaspoon garlic powder (not garlic salt)
  • ¼ teaspoon cayenne pepper (optional if you do not care for spicy)
  • 2 pounds extra-large sea scallops -12-16 per pounds
  • 1 lemon – cut in wedges
  • ½ teaspoon kosher salt
  • ¼ teaspoon black pepper

Instructions

Step 1: Using foil, line a rimmed broiler-safe baking sheet.

Step 2: Place a roasting rack on the baking sheet and grease the rack with avocado oil.

Step 3: Position the oven rack 6-inches below the heating element, then preheat the broiler on high (500 degrees F).

Step 4: Place the grated Parmesan with the salt (if using), black pepper, garlic powder, and cayenne pepper in a shallow bowl. Mix well until blended. In a different shallow bowl, place the melted butter.

Step 5: After rinsing the scallops, pat them dry using paper towels. If needed, remove the small, crescent-shaped muscle attached to the side of the scallops.

Step 6: In the melted butter, dip each scallop and dredge them in the Parmesan mixture until all sides are coated. On the prepared roasting rack, place the coated scallops and lightly spray using avocado oil.

Step 7: Place the baking sheet in the oven and broil the scallops for about 6 to 10 minutes until the cheese is golden brown and the scallops are completely cooked (the scallops should be white and moist in the middle). Note that the cooking time will depend on the size of the scallops. If using colossal scallops (13 scallops per pound), the cooking time is about 10 minutes. Make sure to check the scallops after 6 minutes. Halfway through broiling, rotate the baking sheet.

Step 8: Enjoy the broiled scallops right away with some lemon wedges.

September 24, 2022 0 comment
0 FacebookTwitterPinterestEmail
General Recipes

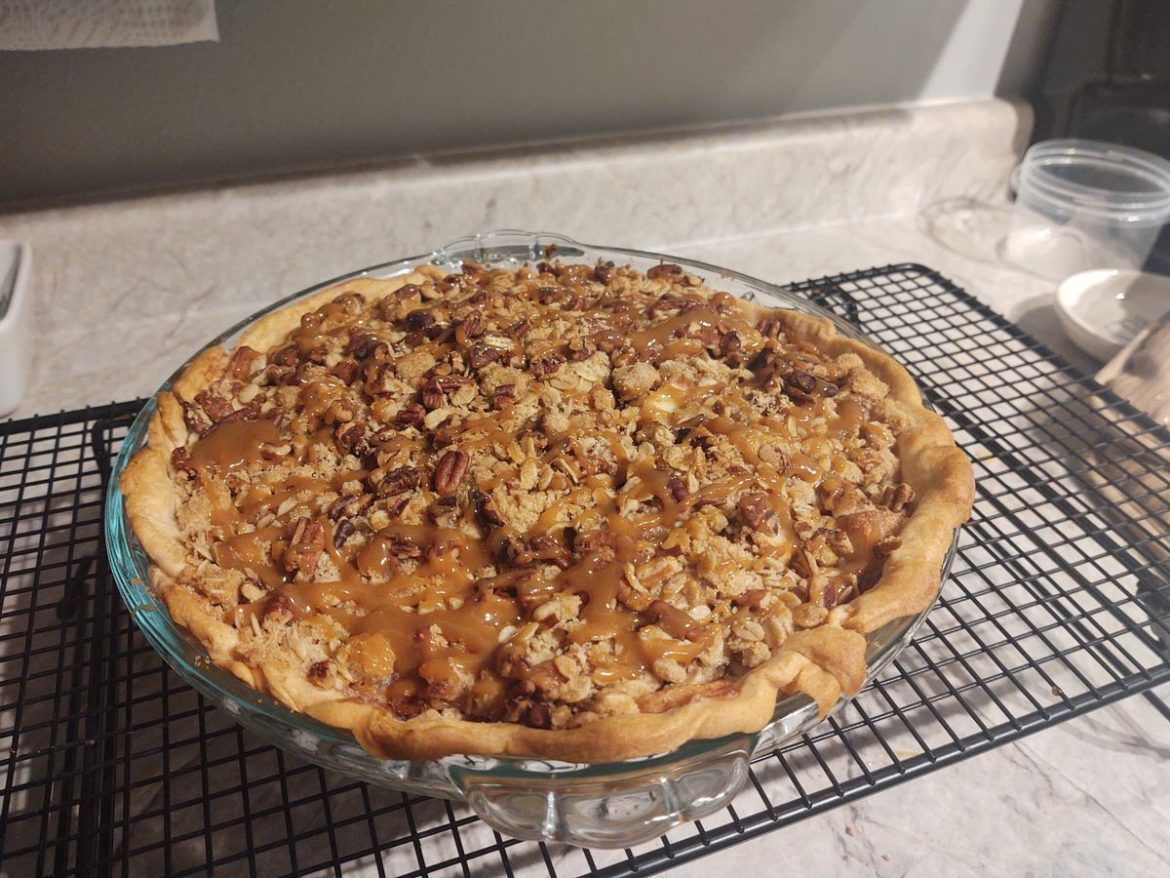
Caramel Apple Pecan Streusel Pie

by Rebecca September 24, 2022
written by Rebecca

Prep time: 45 mins | Cook time: 55 mins | Total time: 1 hr 40 mins | Yield: 8 SERVINGS

This beautiful and decadent Caramel Apple Pecan Streusel Pie is packed with fresh apples and topped with amazing crunchy peach streusel and drizzles of sweet, gooey homemade caramel sauce. This pie has been one of my ultimate favorite desserts!

Ingredients

Caramel sauce:

½ c. (164 grams) Homemade Caramel Sauce, or any store-bought variety

Crust:

1 homemade pie crust

Filling:

⅓ c. (43 grams) all-purpose flour

7 medium apples, peeled & sliced – I used Gala apples

½ c. (100 grams) granulated sugar

¼ c. (52 grams) light brown sugar, packed

1 tbsp lemon juice

⅛ tsp salt

1 ½ tsp ground cinnamon

Streusel topping:

3 tbsp unsalted butter, melted

½ c. (47 grams) old-fashioned oats

2 tbsp light brown sugar, firmly packed

⅓ c. (37 grams) pecans, chopped

⅓ c. (43 grams) all-purpose flour

How to make Caramel Apple Pecan Streusel Pie

Step 1: Following the package directions, prepare the homemade caramel sauce. Set aside when done and let it cool.

Step 2: Ready the homemade pie crust according to the instructions. To the lower third position, adjust the oven rack, then preheat the oven to 375 degrees F. In the meantime, roll the dough into a 12-inch circle. In a 9-inch pie pan, press the dough into the bottom and up the sides. As desired, fold the edges under and flute.

Step 3: To make the filling, place the apples and lemon juice in a large bowl. Toss well, then add the flour, sugars, cinnamon, and salt. Mix well to make sure the apples are completely coated. Over the prepared crust, spoon the mixture and drizzle 1/4 c. of the caramel sauce on top.

Step 4: For the Streusel topping, place the oats, flour, and brown sugar in a medium bowl. Mix well until combined, then add the melted butter. Stir well until the mixture is crumbly. Fold in the chopped pecans. Then, sprinkle this on top of the pie filling.

Step 5: Place in the preheated oven and bake for about 45 to 55 minutes or until the apples are tender and the crust is golden brown. If the crust and topping start to brown too quickly, loosely tent the pie with foil.

Step 6: Remove from the oven when done and drizzle the warm pie with the rest of the 1/4 c. caramel sauce. Before serving, let the pie cool to room temperature. You can store the pie in the fridge for up to 5 days. Make sure to tightly cover it.

Make ahead tip:

You can make the pie dough, streusel topping, and caramel sauce ahead. Store the dough in the fridge for up to 5 days or in the freezer for up to 3 months. As for the streusel topping, you can keep it in the fridge for up to 5 days. Tightly cover the streusel topping before placing it in the fridge. For the caramel sauce, store it in a sealed glass jar and keep it in the fridge for up to 1 month.

Nutrition Facts:

YIELD: 8 SERVING SIZE: 1 slice
Amount Per Serving: CALORIES: 444 | TOTAL FAT: 14g | SATURATED FAT: 5g | TRANS FAT: 0g | UNSATURATED FAT: 8g | CHOLESTEROL: 11mg | SODIUM: 197mg | CARBOHYDRATES: 81g| FIBER: 6g | SUGAR: 52g | PROTEIN: 4g

Caramel Apple Pecan Streusel Pie

Rebecca Prep time: 45 mins | Cook time: 55 mins | Total time: 1 hr 40 mins | Yield: 8 SERVINGS This beautiful and decadent Caramel Apple Pecan Streusel Pie is… General Recipes Caramel Apple Pecan Streusel Pie European Print This
Serves: 8 Prep Time: 45 mins Cooking Time: 55 mins 55 mins
Nutrition facts: 444 calories 14 fat
Rating: 5.0/5
( 1 voted )

Ingredients

  • Caramel sauce:
  • ½ c. (164 grams) Homemade Caramel Sauce, or any store-bought variety
  • Crust:
  • 1 homemade pie crust
  • Filling:
  • ⅓ c. (43 grams) all-purpose flour
  • 7 medium apples, peeled & sliced – I used Gala apples
  • ½ c. (100 grams) granulated sugar
  • ¼ c. (52 grams) light brown sugar, packed
  • 1 tbsp lemon juice
  • ⅛ tsp salt
  • 1 ½ tsp ground cinnamon
  • Streusel topping:
  • 3 tbsp unsalted butter, melted
  • ½ c. (47 grams) old-fashioned oats
  • 2 tbsp light brown sugar, firmly packed
  • ⅓ c. (37 grams) pecans, chopped
  • ⅓ c. (43 grams) all-purpose flour

Instructions

Step 1: Following the package directions, prepare the homemade caramel sauce. Set aside when done and let it cool.

Step 2: Ready the homemade pie crust according to the instructions. To the lower third position, adjust the oven rack, then preheat the oven to 375 degrees F. In the meantime, roll the dough into a 12-inch circle. In a 9-inch pie pan, press the dough into the bottom and up the sides. As desired, fold the edges under and flute.

Step 3: To make the filling, place the apples and lemon juice in a large bowl. Toss well, then add the flour, sugars, cinnamon, and salt. Mix well to make sure the apples are completely coated. Over the prepared crust, spoon the mixture and drizzle 1/4 c. of the caramel sauce on top.

Step 4: For the Streusel topping, place the oats, flour, and brown sugar in a medium bowl. Mix well until combined, then add the melted butter. Stir well until the mixture is crumbly. Fold in the chopped pecans. Then, sprinkle this on top of the pie filling.

Step 5: Place in the preheated oven and bake for about 45 to 55 minutes or until the apples are tender and the crust is golden brown. If the crust and topping start to brown too quickly, loosely tent the pie with foil.

Step 6: Remove from the oven when done and drizzle the warm pie with the rest of the 1/4 c. caramel sauce. Before serving, let the pie cool to room temperature. You can store the pie in the fridge for up to 5 days. Make sure to tightly cover it.

Make ahead tip:

You can make the pie dough, streusel topping, and caramel sauce ahead. Store the dough in the fridge for up to 5 days or in the freezer for up to 3 months. As for the streusel topping, you can keep it in the fridge for up to 5 days. Tightly cover the streusel topping before placing it in the fridge. For the caramel sauce, store it in a sealed glass jar and keep it in the fridge for up to 1 month.

September 24, 2022 0 comment
0 FacebookTwitterPinterestEmail
General Recipes

The Most Epic Mexican Street Corn Pasta Salad Recipe!

by Rebecca September 24, 2022
written by Rebecca

Total time: 20 mins | Serves: 6-8

Super easy and quick to whip – this delightful and flavor-packed Mexican Street Corn Pasta Salad is another of my ultimate favorite salad. This salad requires just a few simple ingredients that you might already have on hand. I love the creamy dressing of this salad. It is a simple dressing with the perfect amount of tangy, lime flavor, and a hint of spice. Serve this salad by itself or as an amazing side.

I enjoy recipes that use mostly pantry ingredients because they are super easy to throw together whenever I want to. Just like this epic Mexican Street Corn Pasta Salad. Surely, this salad recipe is a must-try and a keeper!

INGREDIENTS

Dressing:

2 cloves garlic, minced

1/2 c. sour cream

1 lime, zested and juiced

1/2 c. mayonnaise

1/4 tsp chili powder

kosher salt and freshly ground pepper, to taste

1/8 tsp cayenne pepper

Salad:

2 tbsp vegetable or canola oil

4 green onions, finely chopped

2 c. cooked penne pasta

1/2 c. cotija cheese or queso fresco, cubed

1 jalapeño, seeds removed, minced

1/4 c. fresh cilantro, chopped, plus more for garnish

2 (12 ounces) bags frozen corn, thawed and drained, browned and charred slightly

kosher salt and freshly ground pepper, to taste

8 pieces of bacon, cooked and crumbled

How to make Mexican Street Corn Pasta Salad

Step 1: In a large pan or skillet, heat the canola oil over medium-high heat. Add the corn once the oil is hot and cook for about 5 to 8 minutes or until dark and golden.

Step 2: Ready the dressing. Combine the mayonnaise, sour cream, garlic, lime zest and juice, chili powder, and cayenne. Adjust the seasoning according to taste.

Step 3: Place the cooked pasta, charred corn, green onion, jalapeño, cilantro, bacon, and cotija in a large bowl. Mix well until combined, then pour the dressing over. Toss well.

Step 4: Place the salad in the fridge for at least 20 minutes, then serve. Enjoy!

The Most Epic Mexican Street Corn Pasta Salad Recipe!

Rebecca Total time: 20 mins | Serves: 6-8 Super easy and quick to whip – this delightful and flavor-packed Mexican Street Corn Pasta Salad is another of my ultimate favorite salad.… General Recipes The Most Epic Mexican Street Corn Pasta Salad Recipe! European Print This
Serves: 6-8
Nutrition facts: 200 calories 20 grams fat
Rating: 5.0/5
( 1 voted )

Ingredients

  • Dressing:
  • 2 cloves garlic, minced
  • 1/2 c. sour cream
  • 1 lime, zested and juiced
  • 1/2 c. mayonnaise
  • 1/4 tsp chili powder
  • kosher salt and freshly ground pepper, to taste
  • 1/8 tsp cayenne pepper
  • Salad:
  • 2 tbsp vegetable or canola oil
  • 4 green onions, finely chopped
  • 2 c. cooked penne pasta
  • 1/2 c. cotija cheese or queso fresco, cubed
  • 1 jalapeño, seeds removed, minced
  • 1/4 c. fresh cilantro, chopped, plus more for garnish
  • 2 (12 ounces) bags frozen corn, thawed and drained, browned and charred slightly
  • kosher salt and freshly ground pepper, to taste
  • 8 pieces of bacon, cooked and crumbled

Instructions

Step 1: In a large pan or skillet, heat the canola oil over medium-high heat. Add the corn once the oil is hot and cook for about 5 to 8 minutes or until dark and golden.

Step 2: Ready the dressing. Combine the mayonnaise, sour cream, garlic, lime zest and juice, chili powder, and cayenne. Adjust the seasoning according to taste.

Step 3: Place the cooked pasta, charred corn, green onion, jalapeño, cilantro, bacon, and cotija in a large bowl. Mix well until combined, then pour the dressing over. Toss well.

Step 4: Place the salad in the fridge for at least 20 minutes, then serve. Enjoy!

September 24, 2022 0 comment
0 FacebookTwitterPinterestEmail
General Recipes

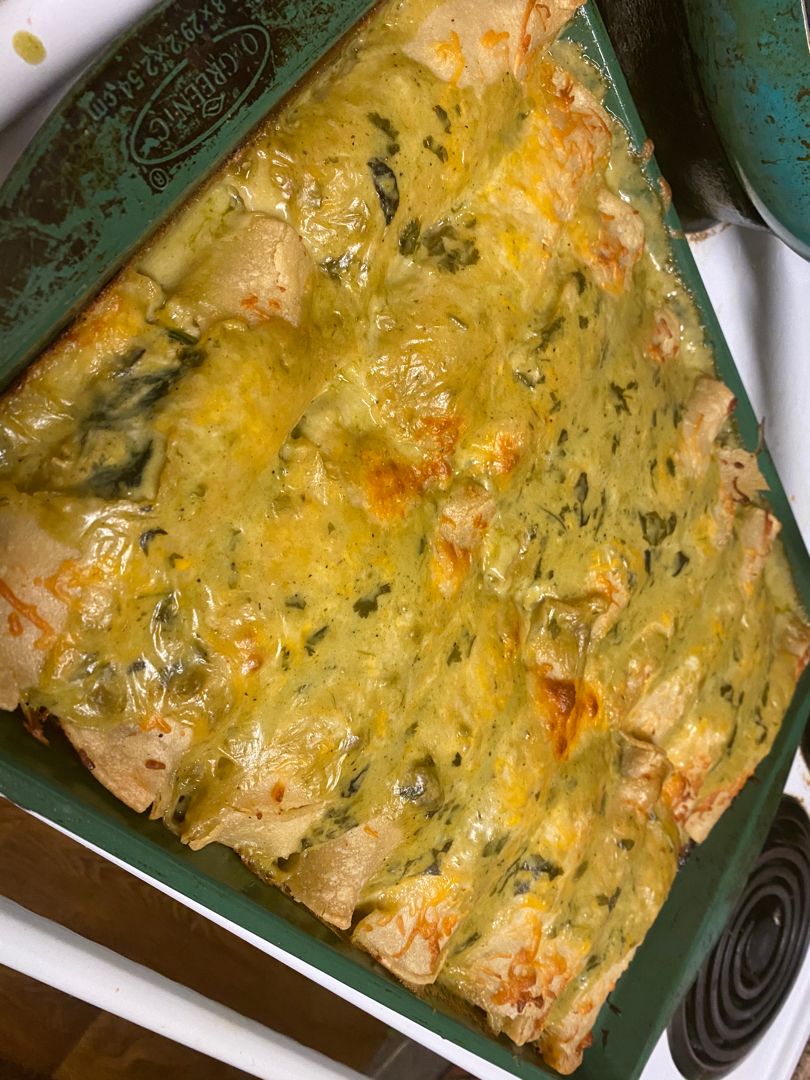
A Classic Mexican Recipe: Poblano Sour Cream Enchiladas

by Rebecca September 24, 2022
written by Rebecca

Total time: 30 mins | Serves: 6

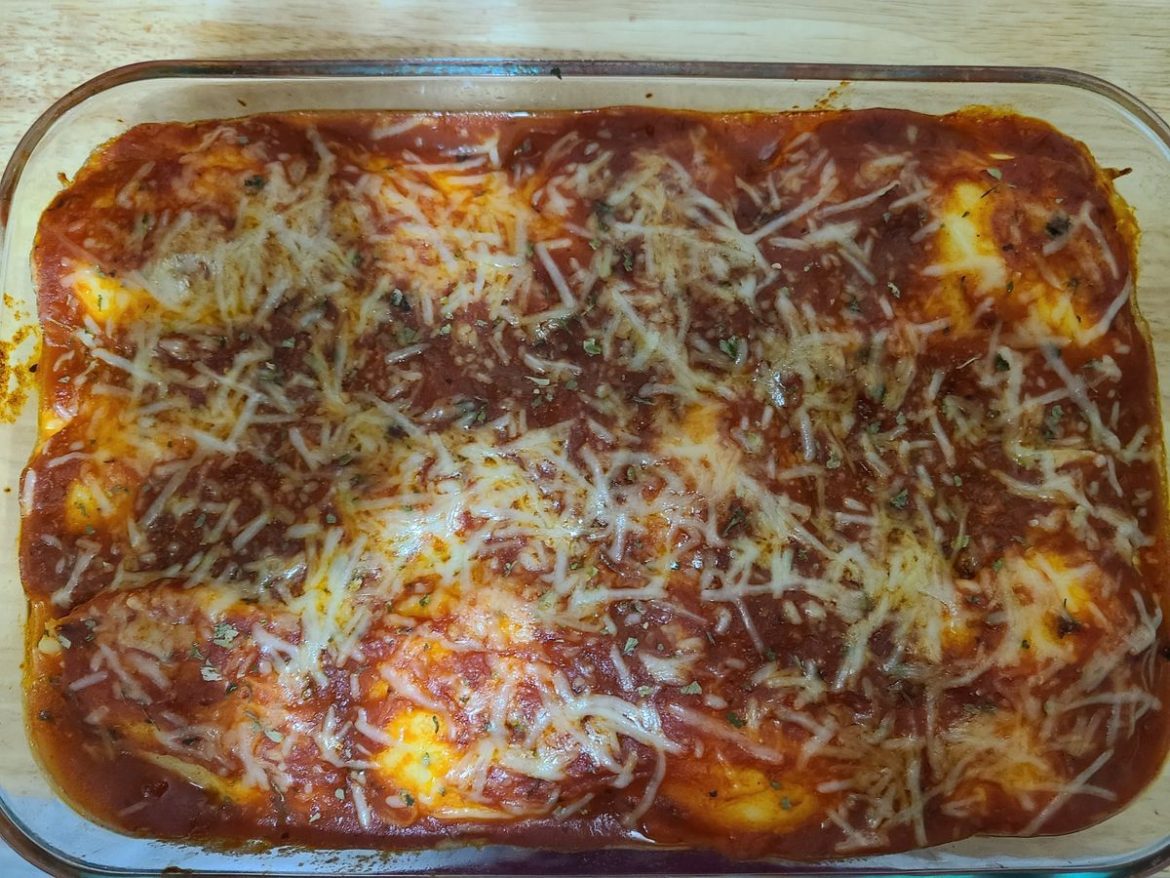
Poblano Sour Cream Enchiladas is a classic, well-loved Mexican recipe. Tortillas filled with chicken and cheese and topped with the poblano sauce and loads of melty cheese. Enjoy these creamy, mouthwatering chinchillas any time with this easy recipe!

INGREDIENTS

3 cloves garlic, peeled and smashed

3 tbsp unsalted butter, divided

2 poblano peppers, seeded and chopped

1 1/2 c. chicken broth

1 c. sour cream

1/4 c. all-purpose flour

1/2 c. cilantro, chopped

12 corn tortillas, warmed

4 c. cooked chicken, shredded

2 1/2 c. Monterey Jack cheese, grated and divided

1 tsp Kosher salt

How to make Poblano Sour Cream Enchiladas

Step 1: Prepare the oven. Preheat it to 375 degrees F.

Step 2: Melt 1 tbsp butter in a large skillet over medium heat. To the melted butter, add the garlic and peppers. Cook for about 10 minutes until the peppers are tender.

Step 3: To the skillet, melt the rest of the butter. Add the butter and cook while stirring frequently for another 2 minutes.

Step 4: Slowly add the chicken broth while stirring constantly. Using an immersion blender, puree the mixture. Alternatively, you can transfer the mixture to a food processor or blender, then return it to the pan once pureed.

Step 5: Whisk in the sour cream along with the cilantro and salt. When done, take the skillet off the heat.

Step 6: In the bottom of a 9 x 13-inch baking dish, spoon about 1 c. of the sauce into a thin layer.

Step 7: Into a warmed tortilla, place some shredded chicken and sprinkle with cheese. Set aside at least 1 c. of cheese for later. Then, roll the tortilla and put it in the baking dish, seam-side-down. Do the same for the remaining tortillas.

Step 8: Over the tortillas, pour the poblano sauce and top with the reserved cheese. Place in the preheated oven and bake for about 15 to 20 minutes or until the cheese has melted and the sauce is bubbly.

Step 9: Serve the enchiladas right away garnished with extra fresh cilantro if desired. Enjoy!

A Classic Mexican Recipe: Poblano Sour Cream Enchiladas

Rebecca Total time: 30 mins | Serves: 6 Poblano Sour Cream Enchiladas is a classic, well-loved Mexican recipe. Tortillas filled with chicken and cheese and topped with the poblano sauce and… General Recipes A Classic Mexican Recipe: Poblano Sour Cream Enchiladas European Print This
Serves: 6
Nutrition facts: 200 calories 20 grams fat
Rating: 5.0/5
( 1 voted )

Ingredients

  • 3 cloves garlic, peeled and smashed
  • 3 tbsp unsalted butter, divided
  • 2 poblano peppers, seeded and chopped
  • 1 1/2 c. chicken broth
  • 1 c. sour cream
  • 1/4 c. all-purpose flour
  • 1/2 c. cilantro, chopped
  • 12 corn tortillas, warmed
  • 4 c. cooked chicken, shredded
  • 2 1/2 c. Monterey Jack cheese, grated and divided
  • 1 tsp Kosher salt

Instructions

Step 1: Prepare the oven. Preheat it to 375 degrees F.

Step 2: Melt 1 tbsp butter in a large skillet over medium heat. To the melted butter, add the garlic and peppers. Cook for about 10 minutes until the peppers are tender.

Step 3: To the skillet, melt the rest of the butter. Add the butter and cook while stirring frequently for another 2 minutes.

Step 4: Slowly add the chicken broth while stirring constantly. Using an immersion blender, puree the mixture. Alternatively, you can transfer the mixture to a food processor or blender, then return it to the pan once pureed.

Step 5: Whisk in the sour cream along with the cilantro and salt. When done, take the skillet off the heat.

Step 6: In the bottom of a 9 x 13-inch baking dish, spoon about 1 c. of the sauce into a thin layer.

Step 7: Into a warmed tortilla, place some shredded chicken and sprinkle with cheese. Set aside at least 1 c. of cheese for later. Then, roll the tortilla and put it in the baking dish, seam-side-down. Do the same for the remaining tortillas.

Step 8: Over the tortillas, pour the poblano sauce and top with the reserved cheese. Place in the preheated oven and bake for about 15 to 20 minutes or until the cheese has melted and the sauce is bubbly.

Step 9: Serve the enchiladas right away garnished with extra fresh cilantro if desired. Enjoy!

September 24, 2022 0 comment
0 FacebookTwitterPinterestEmail
Newer Posts
Older Posts

Popular Posts

  • 1

    Crispy Crunchy Parmesan Potatoes

    March 21, 2020
  • 2

    CROCK POT SMOTHERED PORK CHOPS

    March 21, 2020
  • Facebook
  • Twitter

@2019 - All Right Reserved.


Back To Top