Cook it once
  • Home
  • Privacy Policy
  • Recipes
    • KETO
    • LC
    • WW
  • Tips
  • Contact
Cook it once
  • Home
  • Privacy Policy
  • Recipes
    • KETO
    • LC
    • WW
  • Tips
  • Contact
Category:

General Recipes

General Recipes

Italian Bake

by Rebecca September 28, 2022
written by Rebecca

Prep time: 15 mins | Cook time: 1 hr 5 mins | Total time: 1 hr 20 mins | Servings: 10

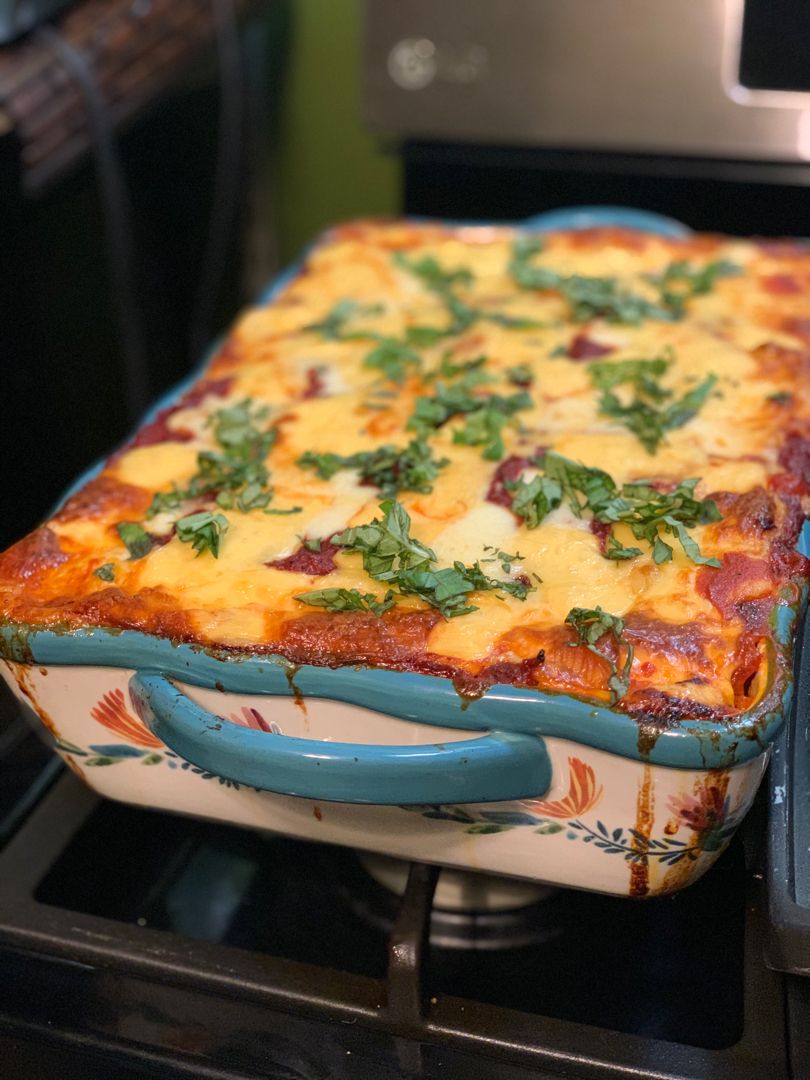
This Italian Bake is another one of my favorite pasta dishes. This is made with just five ingredients. You are welcome to add some sauteed mushrooms or browned ground beef if desired. This Italian Bake is delicious, filling, and perfect for everyone! Not to mention, super easy to make and ready in a breeze!

Ingredients

4 c. marinara sauce, homemade or purchased

½ c. grated Parmesan or Romano cheese

1 package of uncooked pasta, like penne, ziti, rotini, or rigatoni

2 c. shredded mozzarella cheese

1 container ricotta cheese

How to make Italian Bake

Step 1: In a pot with salted boiling water, cook the pasta for three minutes less than recommended on the package. When done, drain the pasta well.

Step 2: Prepare the oven. Preheat it to 350 degrees F. Using cooking spray, lightly grease a glass baking dish. Into the prepared dish, pour 2 c of the marinara and add half of the cooked pasta. Toss to coat the pasta well with the sauce.

Step 3: On top, sprinkle 1/4 c of the Parmesan cheese, then spoon in dollops half of the ricotta cheese. Next, sprinkle with mozzarella cheese. Repeat the layers, ending with mozzarella cheese. Then, lightly tent the dish, making sure the foil is not touching the cheese.

Step 4: Place in the preheated oven and bake for about 35 minutes. Remove the cover and continue baking for an additional 10 to 15 minutes or until the heated through and the center is bubbly.

Step 5: Remove the Italian Bake from the oven when done and let it cool for about 10 to 15 minutes.

Step 6: Serve and enjoy!

Tips:

To prevent the pasta from getting too soft when it bakes, make sure to cook the pasta a couple of minutes less than what is written on the package.

For this recipe, you can add sauteed mushrooms or browned ground beef if desired.

Nutritional Facts:

Calories: 410 Kcl, Total Fat: 12g, Protein: 21g, Total Carbohydrate: 54g, Sugars C: 9g

Italian Bake

Rebecca Prep time: 15 mins | Cook time: 1 hr 5 mins | Total time: 1 hr 20 mins | Servings: 10 This Italian Bake is another one of my favorite… General Recipes Italian Bake European Print This
Serves: 10 Prep Time: 15 mins Cooking Time: 1 hr 5 mins 1 hr 5 mins
Nutrition facts: 410 calories 12 fat
Rating: 4.0/5
( 3 voted )

Ingredients

  • 4 c. marinara sauce, homemade or purchased
  • ½ c. grated Parmesan or Romano cheese
  • 1 package of uncooked pasta, like penne, ziti, rotini, or rigatoni
  • 2 c. shredded mozzarella cheese
  • 1 container ricotta cheese

Instructions

Step 1: In a pot with salted boiling water, cook the pasta for three minutes less than recommended on the package. When done, drain the pasta well.

Step 2: Prepare the oven. Preheat it to 350 degrees F. Using cooking spray, lightly grease a glass baking dish. Into the prepared dish, pour 2 c of the marinara and add half of the cooked pasta. Toss to coat the pasta well with the sauce.

Step 3: On top, sprinkle 1/4 c of the Parmesan cheese, then spoon in dollops half of the ricotta cheese. Next, sprinkle with mozzarella cheese. Repeat the layers, ending with mozzarella cheese. Then, lightly tent the dish, making sure the foil is not touching the cheese.

Step 4: Place in the preheated oven and bake for about 35 minutes. Remove the cover and continue baking for an additional 10 to 15 minutes or until the heated through and the center is bubbly.

Step 5: Remove the Italian Bake from the oven when done and let it cool for about 10 to 15 minutes.

Step 6: Serve and enjoy!

Notes

To prevent the pasta from getting too soft when it bakes, make sure to cook the pasta a couple of minutes less than what is written on the package. For this recipe, you can add sauteed mushrooms or browned ground beef if desired.
September 28, 2022 0 comment
0 FacebookTwitterPinterestEmail
General Recipes

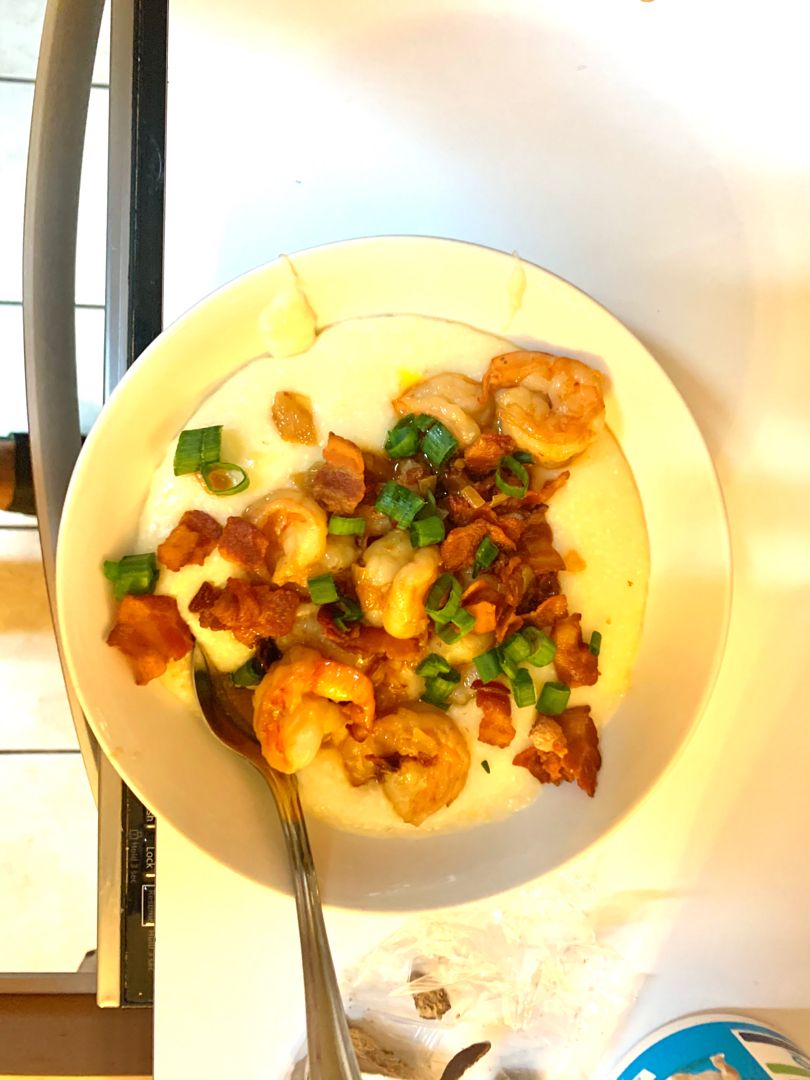
Shrimp and Gouda Grits

by Rebecca September 27, 2022
written by Rebecca

Prep time: 10 mins | Cook time: 20 mins | Total time: 30 mins | Yield: 2

This scrumptious shrimp and Gouda grits is a game changer! Serve a bowl of wonderfully creamy, tangy grits loaded with Gouda cheese and topped with plump shrimp and crispy Brussels sprouts anytime with this easy recipe. You can never resist these Shrimp and Gouda Grits especially if you love crispy sprouts and Gouda!

Ingredients

1 tsp olive oil

1/2 lb peeled and deveined shrimp

1 tsp garlic powder

1 tsp oregano

1 c. Brussels Sprouts, very thinly sliced (about 6-8 sprouts)

2 c. chicken broth

2 oz. reduced-fat cream cheese

1/3 c. Gouda cheese

2-3 tbsp chopped green onions

1/3 c. shredded sharp cheddar

1/2 c. yellow corn grits

2 slices bacon, chopped

1/4 tsp cayenne

1/4 tsp garlic salt

How to make Shrimp and Gouda Grits

Toppings:

Step 1: Cook two slices of bacon in a large skillet over medium heat until crisp. Then, roughly chop the bacon.

Step 2: After removing the bacon from the skillet, wipe the skillet clean, then add 1 tsp olive oil along with the shredded sprouts. Cook for about 3 minutes, stirring often, or until the sprouts are crispy and lightly browned.

Step 3: Take the skillet off the heat and set the sprouts aside.

Grits:

Step 4: Bring the broth to a boil in a medium to a large saucepan. Then, add the grits and adjust the heat to low. Put the lid on and allow the grits to simmer for about 7 minutes, stirring often.

Step 5: Add the cream cheese once the grits have absorbed the liquid along with the cheeses. To taste, season with salt and pepper.

Step 6: Stir well. Put the lid on and take the pan off the heat.

Shrimp:

Step 7: In a large plastic bag or mixing bowl, place the shrimp, then add the garlic powder, oregano, cayenne, and garlic salt. Mix well until the shrimp is completely coated.

Step 8: In a large pan, heat the olive oil over medium-high heat. Once the oil is hot, add the shrimp to the pan and cook for about 3 minutes per side or until the shrimp is tender and pink.

To serve:

Step 9: To two shallow bowls, add a heaping serving of grits and top with shrimp followed by the chopped green onions, chopped bacon, and extra pepper.

Nutrition Facts:

YIELD: 2 SERVING SIZE: 1
Amount Per Serving: CALORIES: 657 | TOTAL FAT: 30.9g | CHOLESTEROL: 282.2mg | SODIUM: 1995.6mg | CARBOHYDRATES: 45.1g | FIBER: 3.9g | SUGAR: 5.4g | PROTEIN: 50.3g

Shrimp and Gouda Grits

Rebecca Prep time: 10 mins | Cook time: 20 mins | Total time: 30 mins | Yield: 2 This scrumptious shrimp and Gouda grits is a game changer! Serve a bowl… General Recipes Shrimp and Gouda Grits European Print This
Serves: 2 Prep Time: 10 mins Cooking Time: 20 mins 20 mins
Nutrition facts: 657 calories 30.9 fat
Rating: 5.0/5
( 1 voted )

Ingredients

  • 1 tsp olive oil
  • 1/2 lb peeled and deveined shrimp
  • 1 tsp garlic powder
  • 1 tsp oregano
  • 1 c. Brussels Sprouts, very thinly sliced (about 6-8 sprouts)
  • 2 c. chicken broth
  • 2 oz. reduced-fat cream cheese
  • 1/3 c. Gouda cheese
  • 2-3 tbsp chopped green onions
  • 1/3 c. shredded sharp cheddar
  • 1/2 c. yellow corn grits
  • 2 slices bacon, chopped
  • 1/4 tsp cayenne
  • 1/4 tsp garlic salt

Instructions

Toppings:

Step 1: Cook two slices of bacon in a large skillet over medium heat until crisp. Then, roughly chop the bacon.

Step 2: After removing the bacon from the skillet, wipe the skillet clean, then add 1 tsp olive oil along with the shredded sprouts. Cook for about 3 minutes, stirring often, or until the sprouts are crispy and lightly browned.

Step 3: Take the skillet off the heat and set the sprouts aside.

Grits:

Step 4: Bring the broth to a boil in a medium to a large saucepan. Then, add the grits and adjust the heat to low. Put the lid on and allow the grits to simmer for about 7 minutes, stirring often.

Step 5: Add the cream cheese once the grits have absorbed the liquid along with the cheeses. To taste, season with salt and pepper.

Step 6: Stir well. Put the lid on and take the pan off the heat.

Shrimp:

Step 7: In a large plastic bag or mixing bowl, place the shrimp, then add the garlic powder, oregano, cayenne, and garlic salt. Mix well until the shrimp is completely coated.

Step 8: In a large pan, heat the olive oil over medium-high heat. Once the oil is hot, add the shrimp to the pan and cook for about 3 minutes per side or until the shrimp is tender and pink.

To serve:

Step 9: To two shallow bowls, add a heaping serving of grits and top with shrimp followed by the chopped green onions, chopped bacon, and extra pepper.

September 27, 2022 0 comment
0 FacebookTwitterPinterestEmail
General Recipes

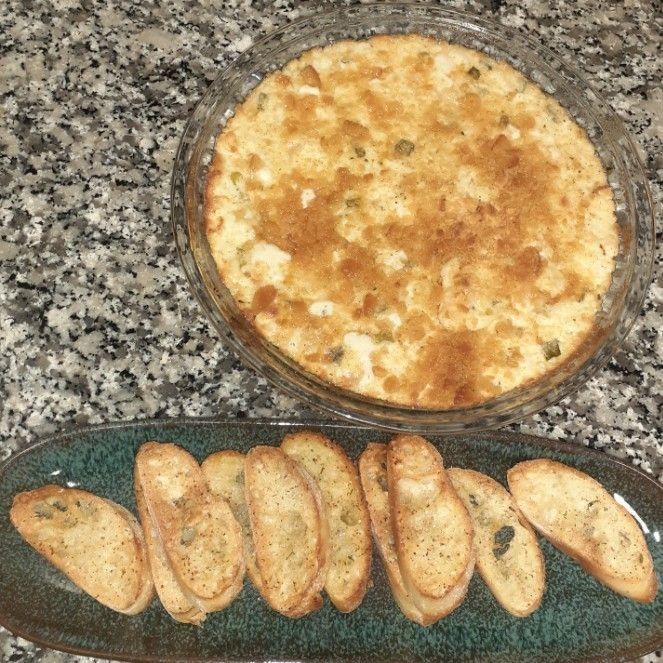
Cheesy Shrimp Dip

by Rebecca September 27, 2022
written by Rebecca

PREP TIME: 5 mins | COOK TIME: 40 mins | TOTAL TIME: 45 mins | SERVINGS: 8

If are you searching for another delicious dinner party appetizer, then you have to give this cheesy shrimp dip a go soon! Easily and quickly make this dip using just simple ingredients. You can even make this in advance and keep it in the fridge until ready to bake. Serve this scrumptious cheesy shrimp dip hot and bubbly with some sliced and toasted baguette, pita chips, or crackers.

INGREDIENTS

2 cloves garlic, minced

2 tbsp butter

1/2 lb medium fresh shrimp, peeled and deveined

2-3 green onions, sliced

2 tbsp fresh lemon juice

1/4 c. shredded Parmesan

2 tbsp mayonnaise

1/2 c. shredded mozzarella

2 tbsp sour cream

1 (8 ounces) kg. Plow-fat cream cheese, softened

Smoked paprika for garnish

Pinch salt

Pinch cracked black pepper

How to make Cheesy Shrimp Dip

Step 1: Prepare the oven. Preheat it to 350 degrees.

Step 2: While the oven is preheating, coarsely chop the shrimp. In a skillet, melt the butter. To the melted butter, add the shrimp, garlic, and green onions. Cook for about 2 to 3 minutes or until the shrimp are pink. Then, stir in the lemon juice.

Step 3: Adjust the heat to low and add the cream cheese to the skillet. Stir well until melted before adding in the sour cream, mayo, Parmesan, and mozzarella cheeses. Mix again until blended. To taste, season with salt and pepper.

Step 4: Into a 1-quart baking dish, spoon the mixture and sprinkle the paprika on top.

Step 5: Place in the preheated oven and bake for about 30 minutes until lightly browned and bubbly.

Step 6: Remove from the oven when done and serve the cheesy shrimp dip with pita chips or crackers. Enjoy!

NOTE:

To make this dip in advance, follow the stovetop steps. Cover the dip and place in the fridge. Preheat the oven when ready to bake. Place the dip in the preheated oven and bake as directed, uncovered.

NUTRITION FACTS:

Yield: 8 Servings, Calories: 172 kcal, Carbohydrates: 4g, Protein: 12g, Fat: 12g, Saturated Fat: 6g, Polyunsaturated Fat: 5g, Cholesterol: 85mg, Sodium: 276mg, Sugar: 2g

Cheesy Shrimp Dip

Rebecca PREP TIME: 5 mins | COOK TIME: 40 mins | TOTAL TIME: 45 mins | SERVINGS: 8 If are you searching for another delicious dinner party appetizer, then you have… General Recipes Cheesy Shrimp Dip European Print This
Serves: 8 Prep Time: 5 mins Cooking Time: 40 mins 40 mins
Nutrition facts: 172 calories 12 fat
Rating: 5.0/5
( 1 voted )

Ingredients

  • 2 cloves garlic, minced
  • 2 tbsp butter
  • 1/2 lb medium fresh shrimp, peeled and deveined
  • 2-3 green onions, sliced
  • 2 tbsp fresh lemon juice
  • 1/4 c. shredded Parmesan
  • 2 tbsp mayonnaise
  • 1/2 c. shredded mozzarella
  • 2 tbsp sour cream
  • 1 (8 ounces) kg. Plow-fat cream cheese, softened
  • Smoked paprika for garnish
  • Pinch salt
  • Pinch cracked black pepper

Instructions

Step 1: Prepare the oven. Preheat it to 350 degrees.

Step 2: While the oven is preheating, coarsely chop the shrimp. In a skillet, melt the butter. To the melted butter, add the shrimp, garlic, and green onions. Cook for about 2 to 3 minutes or until the shrimp are pink. Then, stir in the lemon juice.

Step 3: Adjust the heat to low and add the cream cheese to the skillet. Stir well until melted before adding in the sour cream, mayo, Parmesan, and mozzarella cheeses. Mix again until blended. To taste, season with salt and pepper.

Step 4: Into a 1-quart baking dish, spoon the mixture and sprinkle the paprika on top.

Step 5: Place in the preheated oven and bake for about 30 minutes until lightly browned and bubbly.

Step 6: Remove from the oven when done and serve the cheesy shrimp dip with pita chips or crackers. Enjoy!

Notes

To make this dip in advance, follow the stovetop steps. Cover the dip and place in the fridge. Preheat the oven when ready to bake. Place the dip in the preheated oven and bake as directed, uncovered.

September 27, 2022 0 comment
0 FacebookTwitterPinterestEmail
General Recipes

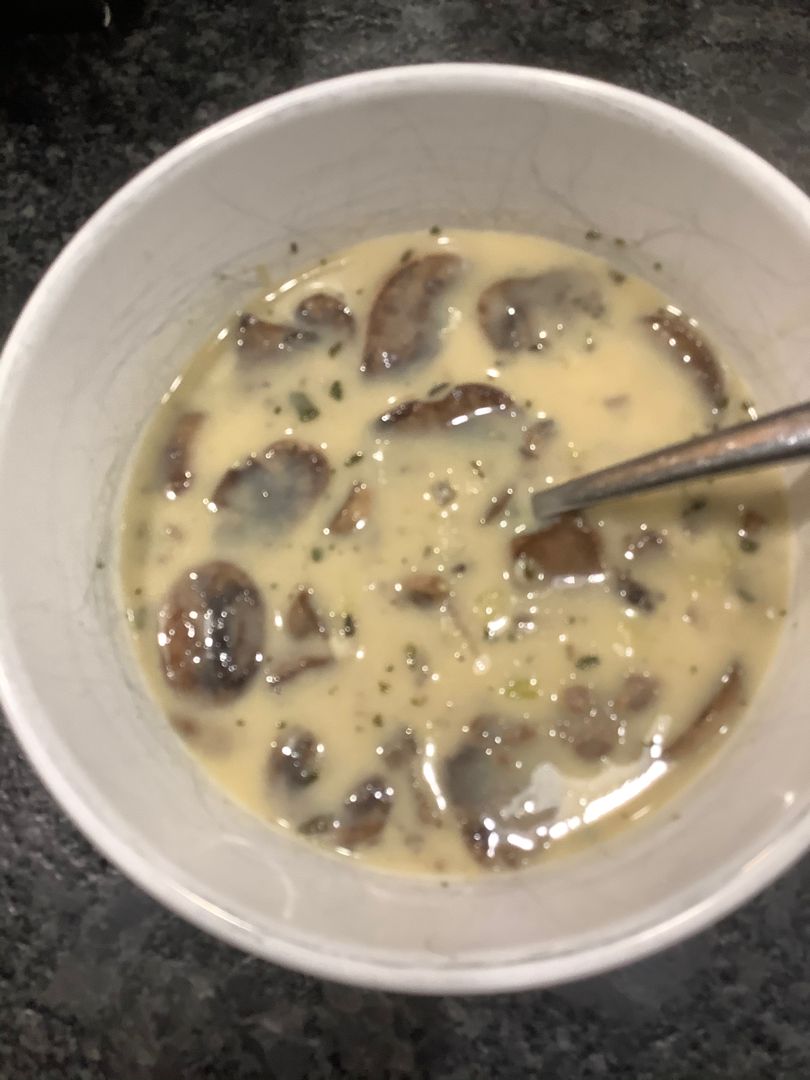
Extra Creamy Mushroom Soup

by Rebecca September 27, 2022
written by Rebecca

Total time: 40 mins | Serves: 8

Comforting and delicious with loads of flavor – this homemade extra creamy mushroom soup will not make you buy soup in a can again!

INGREDIENTS

Roux:

1 1/2 c. whole milk

3/4 c. (1 1/2 sticks) unsalted butter, cubed

1/2 c. all-purpose flour

Soup:

1 yellow onion, finely chopped

1 1/2 lbs baby Portabella or cremini mushrooms, sliced

4 cloves garlic, minced

3 ribs celery, finely chopped

3 carrots, finely chopped

1/2 tsp dried thyme

1/2 tsp dried rosemary

1/2 tsp dried sage

1/2 c. dry white wine

3 c. low-sodium vegetable or chicken broth

3 tbsp olive oil

kosher salt and freshly ground pepper, to taste

2 c. Parmesan cheese, grated

How to Make Extra Creamy Mushroom Soup

Step 1: Melt the butter in a medium saucepan over medium heat. To the melted butter, sprinkle the flour to make the Roux. Cook for about 2 to 3 minutes or until golden. Then, whisk in the whole milk and keep cooking for another 8 to 10 minutes or until the Roux has thickened. Take the pan off the heat when done and set it aside.

Step 2: In a large stock pot or Dutch oven, heat the olive oil over medium heat. Once the oil is hot, add the onion, celery, and carrot. Saute for about 6 to 8 minutes or until tender. To taste, season with salt and pepper.

Step 3: To the pot, add the mushrooms and continue to cook for an additional 5 to 7 minutes or until the mushrooms have softened. Add in the garlic, stir, and cook for 1 to 2 minutes more or until aromatic. Then, season with thyme, sage, and rosemary.

Step 4: Now, pour in the wine and scrape the bottom of the pan to release the browned bits. Next, add the vegetable or chicken broth. Bring the mixture to a boil. Once boiling, decrease the heat to a simmer and cook for another 15 minutes.

Step 5: To the mixture, stir in the cooled Roux. Cook for an additional 5 to 10 minutes.

Step 6: Serve the extra creamy mushroom soup right away with sprinkles of Parmesan cheese. Enjoy!

Extra Creamy Mushroom Soup

Rebecca Total time: 40 mins | Serves: 8 Comforting and delicious with loads of flavor – this homemade extra creamy mushroom soup will not make you buy soup in a can… General Recipes Extra Creamy Mushroom Soup European Print This
Serves: 8
Nutrition facts: 200 calories 20 grams fat
Rating: 3.7/5
( 3 voted )

Ingredients

  • Roux:
  • 1 1/2 c. whole milk
  • 3/4 c. (1 1/2 sticks) unsalted butter, cubed
  • 1/2 c. all-purpose flour
  • Soup:
  • 1 yellow onion, finely chopped
  • 1 1/2 lbs baby Portabella or cremini mushrooms, sliced
  • 4 cloves garlic, minced
  • 3 ribs celery, finely chopped
  • 3 carrots, finely chopped
  • 1/2 tsp dried thyme
  • 1/2 tsp dried rosemary
  • 1/2 tsp dried sage
  • 1/2 c. dry white wine
  • 3 c. low-sodium vegetable or chicken broth
  • 3 tbsp olive oil
  • kosher salt and freshly ground pepper, to taste
  • 2 c. Parmesan cheese, grated

Instructions

Step 1: Melt the butter in a medium saucepan over medium heat. To the melted butter, sprinkle the flour to make the Roux. Cook for about 2 to 3 minutes or until golden. Then, whisk in the whole milk and keep cooking for another 8 to 10 minutes or until the Roux has thickened. Take the pan off the heat when done and set it aside.

Step 2: In a large stock pot or Dutch oven, heat the olive oil over medium heat. Once the oil is hot, add the onion, celery, and carrot. Saute for about 6 to 8 minutes or until tender. To taste, season with salt and pepper.

Step 3: To the pot, add the mushrooms and continue to cook for an additional 5 to 7 minutes or until the mushrooms have softened. Add in the garlic, stir, and cook for 1 to 2 minutes more or until aromatic. Then, season with thyme, sage, and rosemary.

Step 4: Now, pour in the wine and scrape the bottom of the pan to release the browned bits. Next, add the vegetable or chicken broth. Bring the mixture to a boil. Once boiling, decrease the heat to a simmer and cook for another 15 minutes.

Step 5: To the mixture, stir in the cooled Roux. Cook for an additional 5 to 10 minutes.

Step 6: Serve the extra creamy mushroom soup right away with sprinkles of Parmesan cheese. Enjoy!

September 27, 2022 0 comment
0 FacebookTwitterPinterestEmail
General Recipes

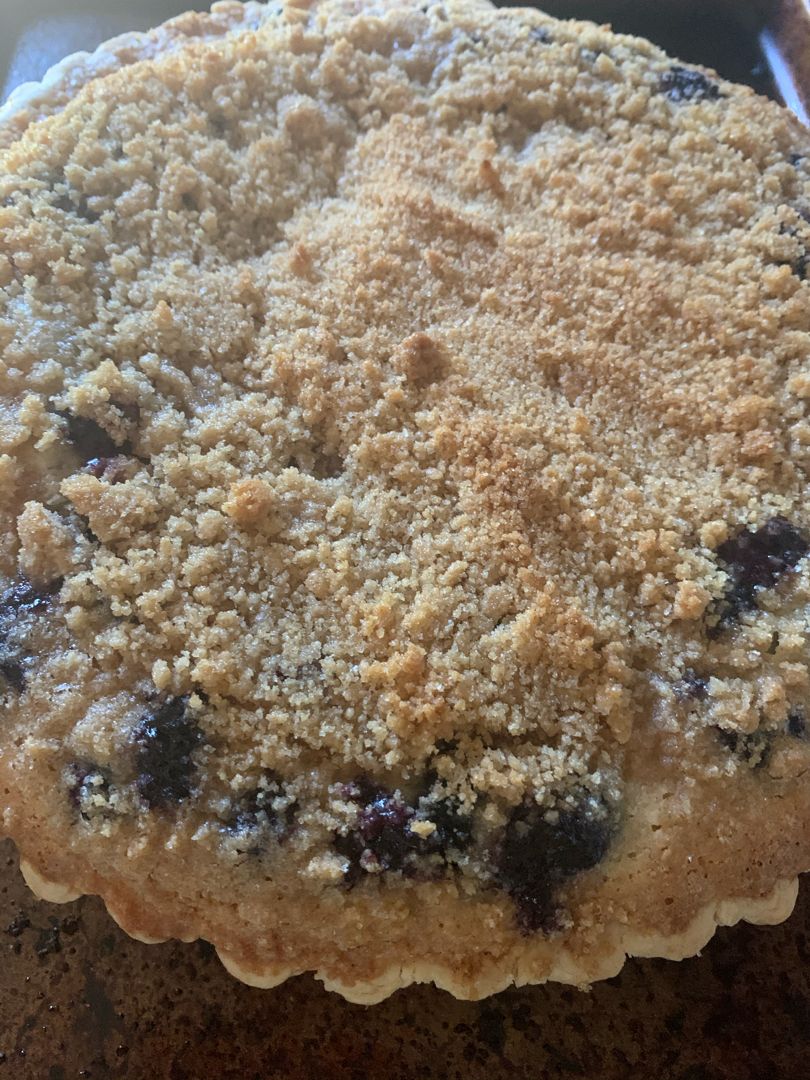
Blueberry Cream Pie: The Perfect Pie For Every Occasion

by Rebecca September 27, 2022
written by Rebecca

Cook time: 55 mins | Prep time: 20 mins | Serves: 6-8

Blueberries are my mom’s favorite. She loves desserts with blueberries. So many times I surprised her with her favorite blueberry dessert. Her ultimate fave is this Blueberry Cream Pie. It is loaded with either fresh or frozen blueberries. This pie is super easy to whip up. We love to enjoy this chill, especially during the scorching day. It’s our perfect summer dessert made with traditional pie crust (or if preferred homemade Graham cracker crust). It is a light, refreshing, and very delightful dessert that’s excellent to bring to picnics or any of your family gatherings. This recipe is also pretty versatile. You can use different fruits and berries such as peaches.

Ingredients

2 eggs, beaten

1 unbaked pie shell

1/3 cup all-purpose flour

1 cup sugar

1/8 teaspoon salt

1/2 cup sour cream

3 cups fresh or frozen blueberries

CRUMB TOPPING:

1/4 cup butter

1/2 cup sugar

1/2 cup all-purpose flour

How to make Blueberry Cream Pie

Step 1: In a pastry shell, place the fresh blueberries. If you opt to use frozen blueberries, set them out on paper towels until partially thawed before adding them into the pie shell. Set aside.

Step 2: Whisk 1 cup sugar with 1/3 cup flour and salt. Then, add the eggs and sour cream, stirring well until incorporated. Into the mixture, spoon over the berries.

Step 3: Mix the rest of the sugar and flour until combined. Using a pastry blender, cut in the butter until you have a mixture that resembles a coarse meal. You can make this earlier by mixing all the ingredients in a Tupperware bowl with a tight-fitting lid. Shake it well.

Step 4: Over the sour cream mixture, evenly sprinkle the crumble.

Step 5: Place in the oven and bake for about 55 to 65 minutes at 350 degrees F or until the pie is lightly browned.

Step 6: Slice and serve the blueberry cream pie with a scoop of ice cream. Enjoy!

Blueberry Cream Pie: The Perfect Pie For Every Occasion

Rebecca Cook time: 55 mins | Prep time: 20 mins | Serves: 6-8 Blueberries are my mom’s favorite. She loves desserts with blueberries. So many times I surprised her with her… General Recipes Blueberry Cream Pie: The Perfect Pie For Every Occasion European Print This
Serves: 6-8 Prep Time: 55 mins Cooking Time: 20 mins 20 mins
Nutrition facts: 200 calories 20 grams fat
Rating: 4.5/5
( 2 voted )

Ingredients

  • 2 eggs, beaten
  • 1 unbaked pie shell
  • 1/3 cup all-purpose flour
  • 1 cup sugar
  • 1/8 teaspoon salt
  • 1/2 cup sour cream
  • 3 cups fresh or frozen blueberries
  • CRUMB TOPPING:
  • 1/4 cup butter
  • 1/2 cup sugar
  • 1/2 cup all-purpose flour

Instructions

Step 1: In a pastry shell, place the fresh blueberries. If you opt to use frozen blueberries, set them out on paper towels until partially thawed before adding them into the pie shell. Set aside.

Step 2: Whisk 1 cup sugar with 1/3 cup flour and salt. Then, add the eggs and sour cream, stirring well until incorporated. Into the mixture, spoon over the berries.

Step 3: Mix the rest of the sugar and flour until combined. Using a pastry blender, cut in the butter until you have a mixture that resembles a coarse meal. You can make this earlier by mixing all the ingredients in a Tupperware bowl with a tight-fitting lid. Shake it well.

Step 4: Over the sour cream mixture, evenly sprinkle the crumble.

Step 5: Place in the oven and bake for about 55 to 65 minutes at 350 degrees F or until the pie is lightly browned.

Step 6: Slice and serve the blueberry cream pie with a scoop of ice cream. Enjoy!

September 27, 2022 0 comment
0 FacebookTwitterPinterestEmail
General Recipes

Ice Cream Sandwich Cake

by Rebecca September 27, 2022
written by Rebecca

Prep time: 10 mins | Inactive: 30 mins | Serves: 9

My kids are obsessed with this Ice Cream Sandwich Cake. Honestly, I am, too! This cake is so easy and quick to make. A no-bake dessert made with just four main ingredients. The Magic Shell chocolate topping and chopped peanuts are optional, but I would not dare to give them up! This ice cream sandwich cake is a no-frills dessert. All you need to do is layer the ingredients and viola! You can even ask the kids to help out. I’m pretty sure they will love to help!

My family loves dessert, but I am not so much of a baker, so I treasure recipes like this. Not only that this cake is very delightful, but this is also a star on potlucks. This cake has layers of store-bought ice cream sandwiches, whipped topping, hot fudge topping, and caramel topping. To top it all off, I sprinkled nuts and chocolates on top.

INGREDIENTS

1 (12 ounces) jar hot fudge topping, warmed

16 ounces Cool Whip, thawed

1 (12 ounces) jar caramel topping, warmed

24 vanilla ice cream sandwiches

Magic Shell chocolate topping, optional

1/2 c. chopped peanuts or other nuts, optional

How to make Ice Cream Sandwich Cake

Step 1: In the bottom of a 9 x 13-inch baking dish, arrange 12 of the ice cream sandwiches in a single layer. To fit the last sandwich, you might need to cut it. Allow the ice cream sandwiches to soften for a couple of minutes before gently pressing them down using a spoon.

Step 2: Over the ice cream sandwiches, spread one-third of the whipped topping, then drizzle with half each of the hot fudge topping and caramel topping.

Step 3: Do the same layers, one more time (ice cream sandwiches, third of Cool Whip, hot fudge topping, then caramel topping).

Step 4: On top, spread the rest of the Cool Whip and sprinkle with chopped peanuts followed by the magic shell topping.

Step 5: Using aluminium foil, cover the dish and place it in the freezer for at least 30 minutes or up to 1 week.

Step 6: Before serving, slice the cake. Enjoy!

Ice Cream Sandwich Cake

Rebecca Prep time: 10 mins | Inactive: 30 mins | Serves: 9 My kids are obsessed with this Ice Cream Sandwich Cake. Honestly, I am, too! This cake is so easy… General Recipes Ice Cream Sandwich Cake European Print This
Serves: 9 Prep Time: 10 mins
Nutrition facts: 200 calories 20 grams fat
Rating: 5.0/5
( 1 voted )

Ingredients

  • 1 (12 ounces) jar hot fudge topping, warmed
  • 16 ounces Cool Whip, thawed
  • 1 (12 ounces) jar caramel topping, warmed
  • 24 vanilla ice cream sandwiches
  • Magic Shell chocolate topping, optional
  • 1/2 c. chopped peanuts or other nuts, optional

Instructions

Step 1: In the bottom of a 9 x 13-inch baking dish, arrange 12 of the ice cream sandwiches in a single layer. To fit the last sandwich, you might need to cut it. Allow the ice cream sandwiches to soften for a couple of minutes before gently pressing them down using a spoon.

Step 2: Over the ice cream sandwiches, spread one-third of the whipped topping, then drizzle with half each of the hot fudge topping and caramel topping.

Step 3: Do the same layers, one more time (ice cream sandwiches, third of Cool Whip, hot fudge topping, then caramel topping).

Step 4: On top, spread the rest of the Cool Whip and sprinkle with chopped peanuts followed by the magic shell topping.

Step 5: Using aluminium foil, cover the dish and place it in the freezer for at least 30 minutes or up to 1 week.

Step 6: Before serving, slice the cake. Enjoy!

September 27, 2022 0 comment
0 FacebookTwitterPinterestEmail
General Recipes

Arizona Sunshine Lemon Pie

by Rebecca September 27, 2022
written by Rebecca

Prep Time: 15 mins | Cook Time: 40 mins | Total Time: 55 mins | Servings: 1 9-inch pie

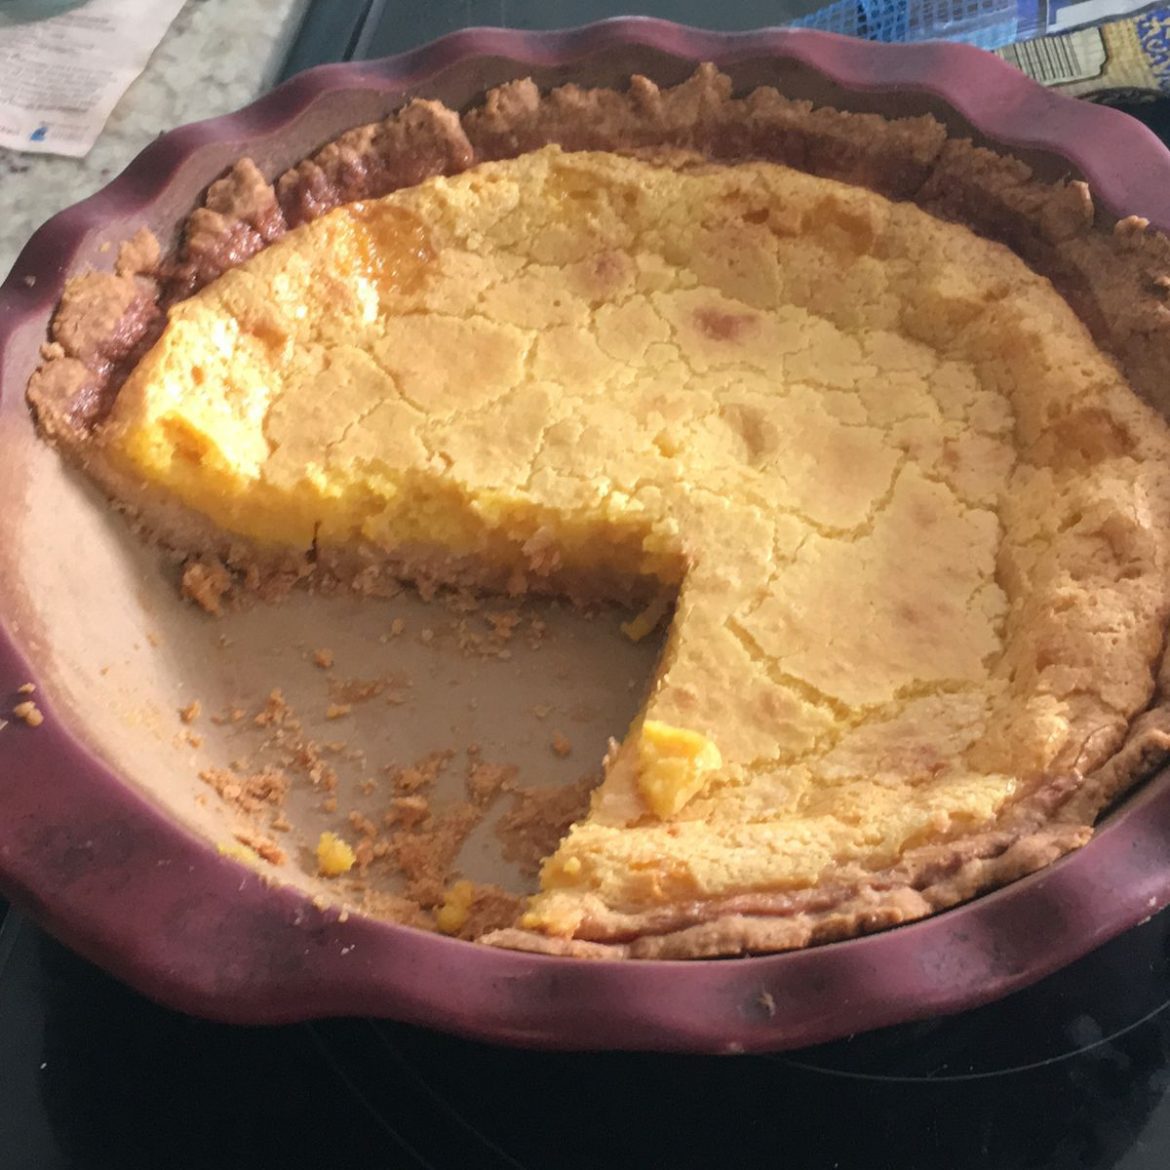
Lemons surely brighten up my day! If life is giving you lemons, make something amazing out of it! That is so true with this Arizona Sunshine Lemon Pie! It is a simple pie that you can easily make in a blender. Chopped a whole lemon (remove the seeds) and blend them with butter, sugar, and eggs. This magically creates a custard-like pie that is bursting with lemon flavor. For the whole experience, top the pie with sweetened whipped cream before serving.

Ingredients

Pie:

½ c. butter, melted

4 large eggs

1 tsp vanilla

1 large lemon

1 (9”) pie crust, unbaked (I used a frozen deep dish)

1½ c. sugar

Topping: (optional)

2 tbsp sugar

1 c. whipping cream

How to make Arizona Sunshine Lemon Pie

Step 1: Prepare the oven. Preheat it to 350 degrees F.

Step 2: After washing the lemon, slice it and remove the seeds. Do not peel the lemon. In a high-powered blender, place the lemon slices along with the eggs, butter, vanilla, and sugar. Pulse until smooth. Then, pour the mixture into the pie crust.

Step 3: Place in the preheated oven and bake for about 40 minutes or until set.

Step 4: Remove the pie from the oven when done and allow it to cool before chilling in the fridge.

Step 5: To make the topping, put the mixing bowl and beaters in the freezer for approximately 20 minutes. After about 20 minutes, remove them from the freezer. Place the whipping cream and sugar in the mixing bowl and whip until peaks form.

Step 6: Before serving, slice the pie and serve chilled with a dollop of whipped cream on top. Enjoy!

Tips:

For best results, use lemon with thin skin. If you cannot find a lemon with thin skin, just remove the whole filling of the lemon and zest only the yellow section of the outside skin.

I enjoy this pie chilled. I think the flavor and texture are at their best when the pie is chilled.

Arizona Sunshine Lemon Pie

Rebecca Prep Time: 15 mins | Cook Time: 40 mins | Total Time: 55 mins | Servings: 1 9-inch pie Lemons surely brighten up my day! If life is giving you… General Recipes Arizona Sunshine Lemon Pie European Print This
Prep Time: 15 mins Cooking Time: 40 mins 40 mins
Nutrition facts: 200 calories 20 grams fat
Rating: 5.0/5
( 1 voted )

Ingredients

  • Pie:
  • ½ c. butter, melted
  • 4 large eggs
  • 1 tsp vanilla
  • 1 large lemon
  • 1 (9”) pie crust, unbaked (I used a frozen deep dish)
  • 1½ c. sugar
  • Topping: (optional)
  • 2 tbsp sugar
  • 1 c. whipping cream

Instructions

Step 1: Prepare the oven. Preheat it to 350 degrees F.

Step 2: After washing the lemon, slice it and remove the seeds. Do not peel the lemon. In a high-powered blender, place the lemon slices along with the eggs, butter, vanilla, and sugar. Pulse until smooth. Then, pour the mixture into the pie crust.

Step 3: Place in the preheated oven and bake for about 40 minutes or until set.

Step 4: Remove the pie from the oven when done and allow it to cool before chilling in the fridge.

Step 5: To make the topping, put the mixing bowl and beaters in the freezer for approximately 20 minutes. After about 20 minutes, remove them from the freezer. Place the whipping cream and sugar in the mixing bowl and whip until peaks form.

Step 6: Before serving, slice the pie and serve chilled with a dollop of whipped cream on top. Enjoy!

Notes

For best results, use lemon with thin skin. If you cannot find a lemon with thin skin, just remove the whole filling of the lemon and zest only the yellow section of the outside skin. I enjoy this pie chilled. I think the flavor and texture are at their best when the pie is chilled.

September 27, 2022 0 comment
0 FacebookTwitterPinterestEmail
General Recipes

Moist Pumpkin Bread

by Rebecca September 27, 2022
written by Rebecca

Prep time: 15 mins | Cook time: 50 mins | Total time: 1 hr 5 mins | Serving: 36 slices

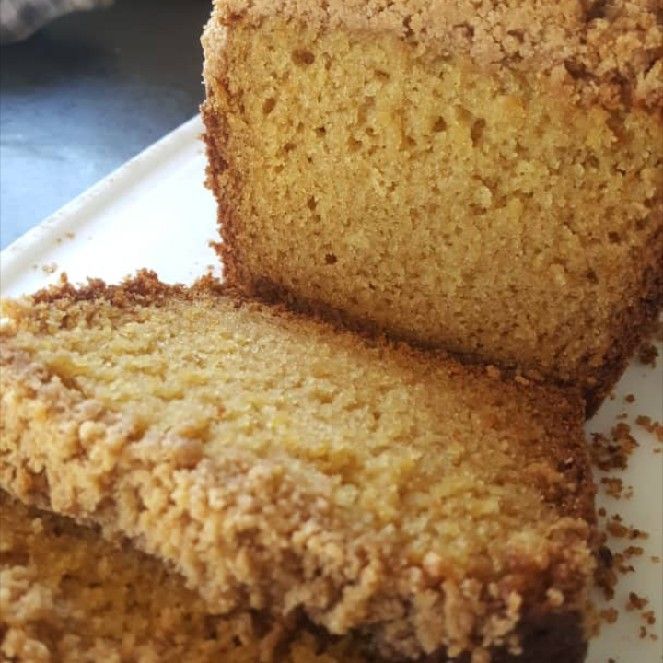
My family loves this Pumpkin Bread. This loaf is incredibly moist, delightful, and an easy & quick bread that you can whip up any time! This pumpkin bread has the flavor of Fall and your home will surely be smelling of sweet autumn spices!

Ingredients

2 eggs

1 c. brown sugar

1⁄2 c. vegetable oil

1 (15 oz.) pumpkin puree

1 tsp baking soda

1 3⁄4 c. plain flour

½ tsp baking powder

1 tsp cinnamon

1 tsp salt

¼ tsp nutmeg

1 tsp pumpkin pie spice

⅓ c. water

Topping:

3 tbsp milk

1⁄4 c. brown sugar

1⁄4 c. pecans, chopped

1 tbsp butter

How to make Moist Pumpkin Bread

Step 1: Place the eggs, sugar, oil, water, and pumpkin in a medium-sized bowl. Beat until combined. In a different bowl, whisk the flour, baking soda, baking powder, salt, nutmeg, cinnamon, and pumpkin pie spice until well blended.

Step 2: Into the dry ingredients, combine the wet ingredients until just mixed.

Step 3: Into a greased and floured loaf pan (8.5 x 4.5 inches) transfer the mixture. Place in the oven and bake for about 50 to 60 minutes at 325 degrees F.

Step 4: To make the topping, combine the butter, brown sugar, and milk in a small saucepan. Let it boil for not more than 2 ½ minutes, stirring constantly. Over the loaf, immediately drizzle the topping and sprinkle with the chopped pecans. Lightly press the pecans into the topping.

Step 5: Wrap the bread and keep it until the next day for serving. Enjoy!

Tips:

In a measuring cup, measure the liquid ingredients and the dry into a different cup.

Make sure to use high-quality ingredients when baking.

To improve the quality of the pumpkin bread, use organic whole eggs, full-fat butter, and pure vanilla extract.

Preheat the oven before baking the loaf.

Gradually drizzle the oil, butter, and vanilla into the batter while the mixer is running to include air into the batter.

Nutrition Facts:

Calories: 161 kcal, Carbohydrates: 27g, Protein: 2g, Fat: 5g, Saturated Fat: 3g, Cholesterol: 23 mg, Sodium: 168 mg, Potassium: 58mg, Sugar: 17g, Vitamin A: 1870IU, Vitamin C: 0.6mg, Calcium: 15mg, Iron: 0.9mg

Moist Pumpkin Bread

Rebecca Prep time: 15 mins | Cook time: 50 mins | Total time: 1 hr 5 mins | Serving: 36 slices My family loves this Pumpkin Bread. This loaf is incredibly… General Recipes Moist Pumpkin Bread European Print This
Serves: 36 Prep Time: 15 mins Cooking Time: 50 mins 50 mins
Nutrition facts: 161 calories 5 fat
Rating: 5.0/5
( 1 voted )

Ingredients

  • 2 eggs
  • 1 c. brown sugar
  • 1⁄2 c. vegetable oil
  • 1 (15 oz.) pumpkin puree
  • 1 tsp baking soda
  • 1 3⁄4 c. plain flour
  • ½ tsp baking powder
  • 1 tsp cinnamon
  • 1 tsp salt
  • ¼ tsp nutmeg
  • 1 tsp pumpkin pie spice
  • ⅓ c. water
  • Topping:
  • 3 tbsp milk
  • 1⁄4 c. brown sugar
  • 1⁄4 c. pecans, chopped
  • 1 tbsp butter

Instructions

Step 1: Place the eggs, sugar, oil, water, and pumpkin in a medium-sized bowl. Beat until combined. In a different bowl, whisk the flour, baking soda, baking powder, salt, nutmeg, cinnamon, and pumpkin pie spice until well blended.

Step 2: Into the dry ingredients, combine the wet ingredients until just mixed.

Step 3: Into a greased and floured loaf pan (8.5 x 4.5 inches) transfer the mixture. Place in the oven and bake for about 50 to 60 minutes at 325 degrees F.

Step 4: To make the topping, combine the butter, brown sugar, and milk in a small saucepan. Let it boil for not more than 2 ½ minutes, stirring constantly. Over the loaf, immediately drizzle the topping and sprinkle with the chopped pecans. Lightly press the pecans into the topping.

Step 5: Wrap the bread and keep it until the next day for serving. Enjoy!

Notes

In a measuring cup, measure the liquid ingredients and the dry into a different cup. Make sure to use high-quality ingredients when baking. To improve the quality of the pumpkin bread, use organic whole eggs, full-fat butter, and pure vanilla extract. Preheat the oven before baking the loaf. Gradually drizzle the oil, butter, and vanilla into the batter while the mixer is running to include air into the batter.

September 27, 2022 0 comment
0 FacebookTwitterPinterestEmail
General Recipes

PATTY MELTS WITH SECRET SAUCE

by Rebecca September 27, 2022
written by Rebecca

Prep time: 5 mins | Cook Time: 45 mins | Total time: 50 mins | Yield: 4 sandwiches

If you are craving seriously indulgent comfort food, this patty melt with secret sauce is a must-try! Layered ground patty melt, caramelized onions, gooey cheese, and a tangy secret sauce, stuffed inside a bread that has been fried to golden brown perfection!

Ingredients

Patty melts:

3 medium Vidalia onions, thinly sliced

1½ lbs ground beef

8 tbsp unsalted butter

2 tsp Worcestershire sauce

12 slices of sourdough bread

½ c. Secret Sauce

6 slices of Cheddar cheese

1 tsp kosher salt

½ tsp ground black pepper

Secret Sauce:

1 tbsp barbecue sauce

¼ c. mayonnaise

½ tsp hot sauce

¼ c. Dijon mustard

HOW TO MAKE PATTY MELTS WITH SECRET SAUCE

Secret sauce:

Step 1: In a small bowl, place the mustard, mayonnaise, barbecue sauce, and hot sauce. Mix well until combined. Cover the bowl and keep the sauce in the fridge for up to 3 days.

Patty melts:

Step 2: Into a large bowl, combine the ground beef, Worcestershire sauce, salt, and pepper until just mixed. Into six oval patties, form the ground beef mixture.

Step 3: To a medium-sized cast-iron skillet, melt 2 tbsp butter over medium heat. Then, add the onions and cook until tender and golden brown, stirring constantly.

Step 4: To a large cast-iron skillet, place the ground beef patties and cook for about 2 minutes over medium-high heat until browned and completely cooled. Set the patties aside when done, then wipe the skillet clean.

Step 5: Spread 1 tbsp of the Secret Sauce in 1 slice of bread. Top the sauce with 2 tbsp caramelized onion, 1 slice of cheese, 1 cooked patty, and another tbsp of the Secret Sauce. On top, place the other slice of bread. Do the same for the rest of the bread, Secret Sauce, caramelized onions, cheese, and patties.

Step 6: Into the same skillet, melt 2 tbsp butter over medium-high heat. Place the sandwich into the skillet with the melted butter and cook for about 3 minutes on each side until golden brown and completely heated, flipping the sandwich once.

Step 7: Serve the patty melts with secret sauce immediately. Enjoy!

Tips:

Instead of unsalted butter, you can use margarine. If using margarine, adjust the salt and butter accordingly.

Store any leftover secret sauce airtight and keep it in the fridge. Before using, let the secret sauce come to room temperature.

Nutritional Facts:

Calories: 694 kcal| Carbohydrates: 42g| Protein: 27g| Total Fat: 46g| Cholesterol: 103mg| Sodium: 1009mg| Calcium: 229mg

PATTY MELTS WITH SECRET SAUCE

Rebecca Prep time: 5 mins | Cook Time: 45 mins | Total time: 50 mins | Yield: 4 sandwiches If you are craving seriously indulgent comfort food, this patty melt with… General Recipes PATTY MELTS WITH SECRET SAUCE European Print This
Serves: 4 Prep Time: 5 mins Cooking Time: 45 mins 45 mins
Nutrition facts: 694 calories 46 fat
Rating: 5.0/5
( 1 voted )

Ingredients

  • Patty melts:
  • 3 medium Vidalia onions, thinly sliced
  • 1½ lbs ground beef
  • 8 tbsp unsalted butter
  • 2 tsp Worcestershire sauce
  • 12 slices of sourdough bread
  • ½ c. Secret Sauce
  • 6 slices of Cheddar cheese
  • 1 tsp kosher salt
  • ½ tsp ground black pepper
  • Secret Sauce:
  • 1 tbsp barbecue sauce
  • ¼ c. mayonnaise
  • ½ tsp hot sauce
  • ¼ c. Dijon mustard

Instructions

Secret sauce:

Step 1: In a small bowl, place the mustard, mayonnaise, barbecue sauce, and hot sauce. Mix well until combined. Cover the bowl and keep the sauce in the fridge for up to 3 days.

Patty melts:

Step 2: Into a large bowl, combine the ground beef, Worcestershire sauce, salt, and pepper until just mixed. Into six oval patties, form the ground beef mixture.

Step 3: To a medium-sized cast-iron skillet, melt 2 tbsp butter over medium heat. Then, add the onions and cook until tender and golden brown, stirring constantly.

Step 4: To a large cast-iron skillet, place the ground beef patties and cook for about 2 minutes over medium-high heat until browned and completely cooled. Set the patties aside when done, then wipe the skillet clean.

Step 5: Spread 1 tbsp of the Secret Sauce in 1 slice of bread. Top the sauce with 2 tbsp caramelized onion, 1 slice of cheese, 1 cooked patty, and another tbsp of the Secret Sauce. On top, place the other slice of bread. Do the same for the rest of the bread, Secret Sauce, caramelized onions, cheese, and patties.

Step 6: Into the same skillet, melt 2 tbsp butter over medium-high heat. Place the sandwich into the skillet with the melted butter and cook for about 3 minutes on each side until golden brown and completely heated, flipping the sandwich once.

Step 7: Serve the patty melts with secret sauce immediately. Enjoy!

Notes

Instead of unsalted butter, you can use margarine. If using margarine, adjust the salt and butter accordingly. Store any leftover secret sauce airtight and keep it in the fridge. Before using, let the secret sauce come to room temperature.

September 27, 2022 0 comment
0 FacebookTwitterPinterestEmail
General Recipes

MUDDY BUDDY COOKIES

by Rebecca September 27, 2022
written by Rebecca

Prep time: 20 mins | Cook time: 8 mins | Cooling time: 1 hr | Total time: 1 hr 28 mins | Servings: 24 cookies

Soft-baked peanut butter cookies with crinkly edges and a decadent, smooth milk chocolate center. Just before serving, these wonderful cookies are dusted with powdered sugar.

Ingredients

Peanut Butter Cookies:

1/2 c. creamy peanut butter

1/2 c. (1 stick) butter, softened

1/2 c. granulated sugar

1 large egg

1/2 c. light brown sugar

1½ c. all-purpose flour

¼ tsp baking soda

¾ tsp baking powder

Milk Chocolate Center:

½ tsp canola or vegetable oil

1/2 c. powdered sugar

1 c. milk chocolate chips

HOW TO MAKE MUDDY BUDDY COOKIES

Step 1: Prepare the oven. Preheat it to 375 degrees. Using the parchment paper, line a cookie sheet. Or you can grease the cookie sheet using a cooking spray.

Peanut Butter Cookies:

Step 2: Mix the butter, peanut butter, sugar, and brown sugar using a handheld blender for about 2 minutes or until light and creamy. Then, add the egg and beat until well blended.

Step 3: Place the flour, baking soda, and baking powder in a small bowl. Mix well using a wire whisk. To the wet ingredients, add the dry ingredients and beat on low speed until well combined.

Step 4: Roll 1 tbsp of dough into a ball (making 12 dough balls). On the prepared cookie sheet, place the dough balls. Put in the preheated oven and bake for about 8 minutes.

Step 5: Remove the cookies from the oven when done. Then, gently press down on the cookie using a small flat-bottomed cup. Allow the cookies to cool fully on the cookie sheet for about 1 hour.

Milk Chocolate Center:

Step 6: In a microwave-safe bowl, melt the chocolate chips for about 2 minutes, whisking every 30 seconds.

Step 7: Using a spoon, scoop a small amount of the melted chocolate and put this on the middle of the cookie, gently spreading it. Repeat with the remaining cookies.

Step 8: In the fridge, place the cookies for about 15 minutes to set.

Step 9: Once the cookies are set, dust them with powdered sugar. Serve the cookies right away. You can also keep them at room temperature until ready to serve. Enjoy!

Tips:

Use only real peanut butter with the oil, fat, and sugar. I do not recommend using all-natural peanut butter as this will make the cookies dry and crumbly.

Make sure not to press down too hard. Press the cookies, depending on how thin or thick you prefer your cookies.

MUDDY BUDDY COOKIES

Rebecca Prep time: 20 mins | Cook time: 8 mins | Cooling time: 1 hr | Total time: 1 hr 28 mins | Servings: 24 cookies Soft-baked peanut butter cookies with… General Recipes MUDDY BUDDY COOKIES European Print This
Serves: 24 Prep Time: 20 mins Cooking Time: 8 mins 8 mins
Nutrition facts: 200 calories 20 grams fat
Rating: 5.0/5
( 1 voted )

Ingredients

  • Peanut Butter Cookies:
  • 1/2 c. creamy peanut butter
  • 1/2 c. (1 stick) butter, softened
  • 1/2 c. granulated sugar
  • 1 large egg
  • 1/2 c. light brown sugar
  • 1½ c. all-purpose flour
  • ¼ tsp baking soda
  • ¾ tsp baking powder
  • Milk Chocolate Center:
  • ½ tsp canola or vegetable oil
  • 1/2 c. powdered sugar
  • 1 c. milk chocolate chips

Instructions

Step 1: Prepare the oven. Preheat it to 375 degrees. Using the parchment paper, line a cookie sheet. Or you can grease the cookie sheet using a cooking spray.

Peanut Butter Cookies:

Step 2: Mix the butter, peanut butter, sugar, and brown sugar using a handheld blender for about 2 minutes or until light and creamy. Then, add the egg and beat until well blended.

Step 3: Place the flour, baking soda, and baking powder in a small bowl. Mix well using a wire whisk. To the wet ingredients, add the dry ingredients and beat on low speed until well combined.

Step 4: Roll 1 tbsp of dough into a ball (making 12 dough balls). On the prepared cookie sheet, place the dough balls. Put in the preheated oven and bake for about 8 minutes.

Step 5: Remove the cookies from the oven when done. Then, gently press down on the cookie using a small flat-bottomed cup. Allow the cookies to cool fully on the cookie sheet for about 1 hour.

Milk Chocolate Center:

Step 6: In a microwave-safe bowl, melt the chocolate chips for about 2 minutes, whisking every 30 seconds.

Step 7: Using a spoon, scoop a small amount of the melted chocolate and put this on the middle of the cookie, gently spreading it. Repeat with the remaining cookies.

Step 8: In the fridge, place the cookies for about 15 minutes to set.

Step 9: Once the cookies are set, dust them with powdered sugar. Serve the cookies right away. You can also keep them at room temperature until ready to serve. Enjoy!

Notes

Use only real peanut butter with the oil, fat, and sugar. I do not recommend using all-natural peanut butter as this will make the cookies dry and crumbly. Make sure not to press down too hard. Press the cookies, depending on how thin or thick you prefer your cookies.

September 27, 2022 0 comment
0 FacebookTwitterPinterestEmail
Newer Posts
Older Posts

Popular Posts

  • 1

    Crispy Crunchy Parmesan Potatoes

    March 21, 2020
  • 2

    CROCK POT SMOTHERED PORK CHOPS

    March 21, 2020
  • Facebook
  • Twitter

@2019 - All Right Reserved.


Back To Top