Cook it once
  • Home
  • Privacy Policy
  • Recipes
    • KETO
    • LC
    • WW
  • Tips
  • Contact
Cook it once
  • Home
  • Privacy Policy
  • Recipes
    • KETO
    • LC
    • WW
  • Tips
  • Contact
Category:

General Recipes

General Recipes

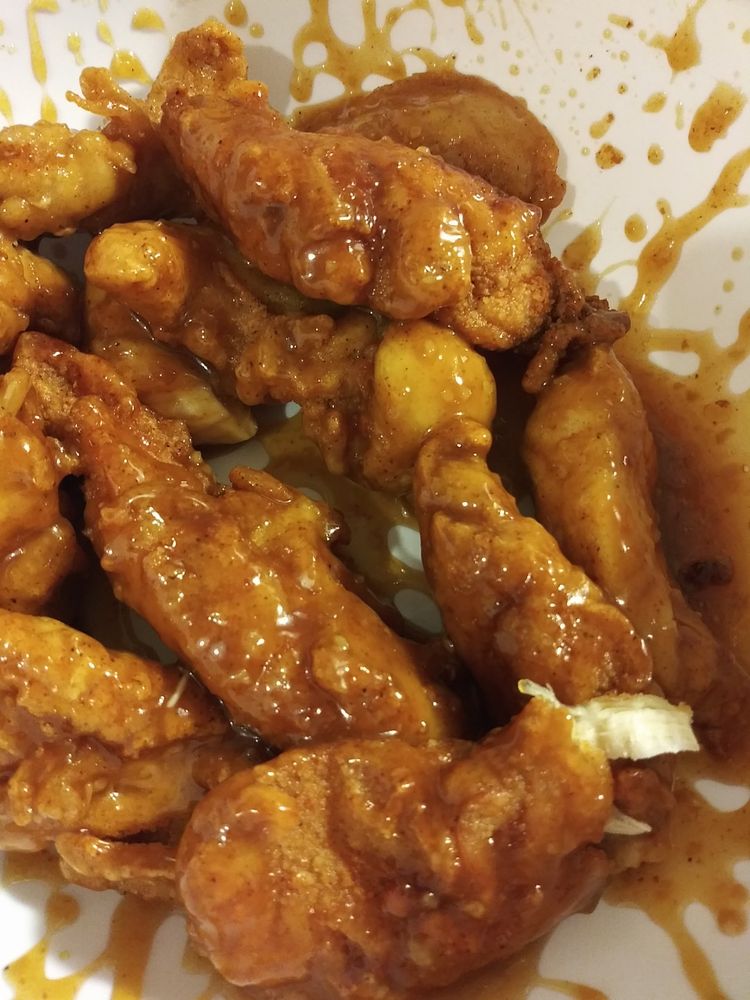
Crispy Honey Garlic Chicken

by Rebecca December 29, 2022
written by Rebecca

Prep Time: 15 mins | Cook Time: 15 mins | Total Time: 30 mins | Yield: 4 Servings

Try not to eat this Crispy Honey Garlic Chicken in one sitting! It is very addicting that you will surely eat a lot of it! Ready in just half an hour, this recipe is the best thing to try today. Enjoy!

Ingredients:

¼ c vegetable oil

2 large Eggs, beaten + 1 tbsp water

½ tsp salt

½ tsp garlic powder

¼ tsp pepper

1 c flour

1 tsp cayenne pepper

1 tsp smoked paprika – regular is fine if you don’t have smoked

2 large boneless, skinless chicken breasts – cut in half lengthwise and pounded to an even thickness to make four cutlets

honey garlic sauce

1 tbsp corn starch + 3 tbsp cold water

2 tbsp soy sauce

½ c honey

2 tsp minced garlic

Directions:

Place a saucepan on the stove and turn the heat to medium. Add garlic, honey, and soy sauce. Stir until well blended and allow it to boil.

Add the slurry, and stir until well incorporated. Simmer for a few minutes until the texture becomes thick. Remove the pan from the stove.

Add garlic powder, paprika, salt, pepper, flour, and cayenne pepper into a mixing bowl. Whisk everything until well incorporated.

In another mixing bowl, add 1 tbsp of water and eggs. Whisk until well blended.

Add each chicken slice into the bowl with the egg wash, then into the bowl with the flour mixture. Toss to coat.

Place a large skillet on the stove and turn the heat to medium. Add oil and allow it to become hot.

Add the chicken into the hot skillet, then cook each side for about 5 minutes or until they turn golden brown. Remove from the skillet.

Transfer the chicken to the pan with the honey garlic sauce, then toss to coat. Dish out!

Serve and enjoy!

Notes:

Feel free to add about 3 tbsp of buffalo sauce if you prefer.

Nutrition Facts:

Calories: 527 kcal, Carbohydrates: 60 g, Protein: 30 g, Fat: 19 g, Saturated Fat: 13 g, Trans Fat: 1 g, Cholesterol: 154 mg, Sodium: 484 mg, Potassium: 539 mg, Fiber: 1 g, Sugar: 35 g, Vitamin A: 608 IU, Vitamin C: 2 mg, Calcium: 31 mg, Iron: 3 mg

Crispy Honey Garlic Chicken

Rebecca Prep Time: 15 mins | Cook Time: 15 mins | Total Time: 30 mins | Yield: 4 Servings Try not to eat this Crispy Honey Garlic Chicken in one sitting!… General Recipes Crispy Honey Garlic Chicken European Print This
Serves: 4 Prep Time: 15 mins Cooking Time: 15 mins 15 mins
Nutrition facts: 527 calories 19 fat
Rating: 5.0/5
( 1 voted )

Ingredients

  • ¼ c vegetable oil
  • 2 large Eggs, beaten + 1 tbsp water
  • ½ tsp salt
  • ½ tsp garlic powder
  • ¼ tsp pepper
  • 1 c flour
  • 1 tsp cayenne pepper
  • 1 tsp smoked paprika - regular is fine if you don't have smoked
  • 2 large boneless, skinless chicken breasts - cut in half lengthwise and pounded to an even thickness to make four cutlets
  • honey garlic sauce
  • 1 tbsp corn starch + 3 tbsp cold water
  • 2 tbsp soy sauce
  • ½ c honey
  • 2 tsp minced garlic

Instructions

Place a saucepan on the stove and turn the heat to medium. Add garlic, honey, and soy sauce. Stir until well blended and allow it to boil.

Add the slurry, and stir until well incorporated. Simmer for a few minutes until the texture becomes thick. Remove the pan from the stove.

Add garlic powder, paprika, salt, pepper, flour, and cayenne pepper into a mixing bowl. Whisk everything until well incorporated.

In another mixing bowl, add 1 tbsp of water and eggs. Whisk until well blended.

Add each chicken slice into the bowl with the egg wash, then into the bowl with the flour mixture. Toss to coat.

Place a large skillet on the stove and turn the heat to medium. Add oil and allow it to become hot.

Add the chicken into the hot skillet, then cook each side for about 5 minutes or until they turn golden brown. Remove from the skillet.

Transfer the chicken to the pan with the honey garlic sauce, then toss to coat. Dish out!

Serve and enjoy!

Notes

Feel free to add about 3 tbsp of buffalo sauce if you prefer.
December 29, 2022 0 comment
0 FacebookTwitterPinterestEmail
General Recipes

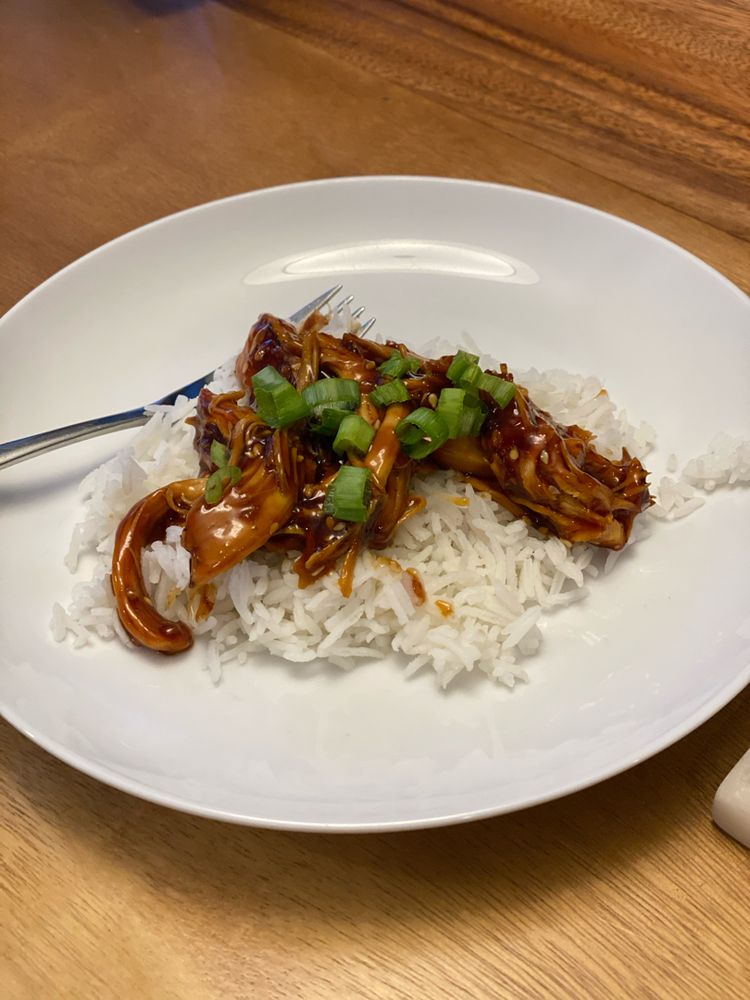
Instant Pot Honey Teriyaki Chicken

by Rebecca December 29, 2022
written by Rebecca

Prep Time: 10 mins | Cook Time: 15 mins | Total Time: 45 mins | Yield: 4 Servings

This Instant Pot Honey Teriyaki Chicken is packed with delicious Asian flavors that will satisfy your cravings! This recipe was made easy with the help of your Instant Pot. I like to serve this over steamed rice. Try this recipe, and I promise you that it is worth all your time and effort. Enjoy!

Ingredients:

½ tsp ground ginger

⅔ c honey

½ c water

2 tsp minced garlic

3 tbsp corn starch + 3 tbsp cold water

½ c rice vinegar

4 boneless, skinless chicken breasts

2 tsp sesame seeds

1/2 c soy sauce – (I use low sodium)

steamed white rice or fried rice – for serving

diced green onions – for toppings

¼-½ tsp crushed red pepper flakes – use ½ tsp for a more noticeable touch of heat

Directions:

In a mixing bowl, add ground ginger, soy sauce, garlic, water, honey, crushed red pepper flakes, and rice vinegar. Whisk everything until well blended.

Lay the chicken breasts at the bottom of the pressure cooker, then add the sauce on top and make sure to cover them well.

Cover and seal the pressure cooker, then cook for about 20 minutes. Let the pressure release naturally. Discard any fat that surfaces. Use two forks to shred the chicken into small pieces.

Press the “Soup” button and allow the mixture to boil. Add the sesame seeds and stir until well incorporated. Dish out!

Sprinkle freshly chopped green onions over each serving to garnish.

Serve and enjoy!

Notes:

Feel free to use chicken thighs for this recipe if you prefer.

Frozen chicken may take a while to cook. Just check it after 20 minutes.

Nutrition Facts:

Calories: 350 kcal, Carbohydrates: 51 g, Protein: 31 g, Fat: 4 g, Saturated Fat: 1 g, Trans Fat: 1 g, Cholesterol: 72 mg, Sodium: 3378 mg, Potassium: 588 mg, Fiber: 1 g, Sugar: 47 g, Vitamin A: 71 IU, Vitamin C: 2 mg, Calcium: 37 mg, Iron: 2 mg

Instant Pot Honey Teriyaki Chicken

Rebecca Prep Time: 10 mins | Cook Time: 15 mins | Total Time: 45 mins | Yield: 4 Servings This Instant Pot Honey Teriyaki Chicken is packed with delicious Asian flavors… General Recipes Instant Pot Honey Teriyaki Chicken European Print This
Serves: 4 Prep Time: 10 mins Cooking Time: 15 mins 15 mins
Nutrition facts: 350 calories 4 fat
Rating: 5.0/5
( 1 voted )

Ingredients

  • ½ tsp ground ginger
  • ⅔ c honey
  • ½ c water
  • 2 tsp minced garlic
  • 3 tbsp corn starch + 3 tbsp cold water
  • ½ c rice vinegar
  • 4 boneless, skinless chicken breasts
  • 2 tsp sesame seeds
  • 1/2 c soy sauce - (I use low sodium)
  • steamed white rice or fried rice - for serving
  • diced green onions - for toppings
  • ¼-½ tsp crushed red pepper flakes - use ½ tsp for a more noticeable touch of heat

Instructions

In a mixing bowl, add ground ginger, soy sauce, garlic, water, honey, crushed red pepper flakes, and rice vinegar. Whisk everything until well blended.

Lay the chicken breasts at the bottom of the pressure cooker, then add the sauce on top and make sure to cover them well.

Cover and seal the pressure cooker, then cook for about 20 minutes. Let the pressure release naturally. Discard any fat that surfaces. Use two forks to shred the chicken into small pieces.

Press the "Soup" button and allow the mixture to boil. Add the sesame seeds and stir until well incorporated. Dish out!

Sprinkle freshly chopped green onions over each serving to garnish.

Serve and enjoy!

Notes

Feel free to use chicken thighs for this recipe if you prefer. Frozen chicken may take a while to cook. Just check it after 20 minutes.

December 29, 2022 0 comment
0 FacebookTwitterPinterestEmail
General Recipes

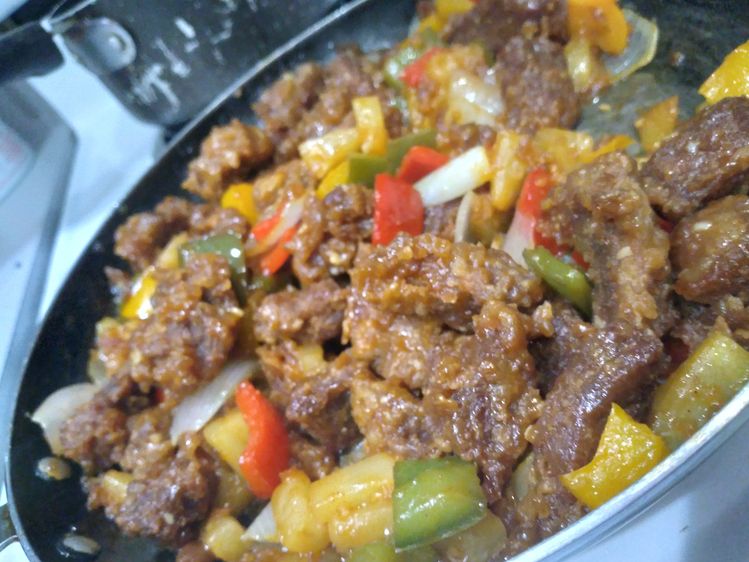
Sweet and Sour Pork Recipe

by Rebecca December 29, 2022
written by Rebecca

Prep Time: 10 mins | Cook Time: 10 mins | Total Time: 20 mins | Yield: 2 Servings

The sauce of this dish is incredibly delicious! The addition of pineapple is perfect! It gave a sweet taste that is not overpowering. You have got to taste it yourself. Enjoy!

Ingredients:

2 stalks of scallions, only the white part, cut into 2-inch length

1 piece fresh/canned pineapple ring, cut into small pieces

1 clove garlic, finely chopped

1/2 red bell pepper, about 2 ounces (56 grams) and cut into pieces

1/2 green bell pepper, about 2 ounces (56 grams) and cut into pieces

oil for frying

1/2 pound (0.2 kilograms) pork tenderloin, cut into bite-size pieces

Marinade:

1/2 tsp rice wine

1 tsp soy sauce

1/2 tsp cornstarch

Frying Batter:

1/2 Egg

1/2 c water

1 tsp cooking oil

1/2 tsp baking soda

1-ounce (30 grams) cornstarch

A pinch of salt

2 ounces (56 grams) of all-purpose flour

Sweet And Sour Sauce:

1 tsp cornstarch

1 tsp sugar

1 tsp oyster sauce

1 tsp plum sauce

2 tbsp water

1 1/2 tbsp tomato ketchup

1/8 tsp Chinese rice vinegar, transparent in color

1/2 tsp Lea & Perrins Worcestershire Sauce

Directions:

Slice the pork into small cuts. Put them into a large mixing bowl together with the marinade ingredients. Toss everything until well incorporated. Marinate the pork for at least 20 minutes.

In a mixing bowl, add all the ingredients for the sweet and sour sauce. Stir everything until well blended.

Mix all the ingredients for the batter until well incorporated.

Remove the pork from the marinade, then transfer them into the bowl with the batter. Toss to coat.

Place a deep skillet on the stove and turn the heat to medium-high. Add oil and allow it to become hot. (Add enough oil to deep fry the pork.)

Add the pork slices into the hot oil, then fry for a few minutes until they become golden brown. Move them onto a clean plate lined with paper towels to drain excess oil.

Place a wok on the stove and turn the heat to medium. Add cooking oil and allow it to become hot.

Add the garlic and sauté for about a minute or until aromatic.

Add the pineapple and bell peppers, then sauté for a few more minutes until soft and aromatic.

Add the pork into the wok, then toss until coated with the sauce. Stir in the chopped scallions. Remove from the heat.

Serve and enjoy!

Nutrition Facts:

Calories402 | Total Fat8g | Saturated Fat2g | Cholesterol115mg | Sodium758mg | Carbohydrates52g | Fiber3g | Sugar11g | Protein29g

Sweet and Sour Pork Recipe

Rebecca Prep Time: 10 mins | Cook Time: 10 mins | Total Time: 20 mins | Yield: 2 Servings The sauce of this dish is incredibly delicious! The addition of pineapple… General Recipes Sweet and Sour Pork Recipe European Print This
Serves: 2 Prep Time: 10 mins Cooking Time: 10 mins 10 mins
Nutrition facts: 402 calories 8 fat
Rating: 5.0/5
( 1 voted )

Ingredients

  • 2 stalks of scallions, only the white part, cut into 2-inch length
  • 1 piece fresh/canned pineapple ring, cut into small pieces
  • 1 clove garlic, finely chopped
  • 1/2 red bell pepper, about 2 ounces (56 grams) and cut into pieces
  • 1/2 green bell pepper, about 2 ounces (56 grams) and cut into pieces
  • oil for frying
  • 1/2 pound (0.2 kilograms) pork tenderloin, cut into bite-size pieces
  • Marinade:
  • 1/2 tsp rice wine
  • 1 tsp soy sauce
  • 1/2 tsp cornstarch
  • Frying Batter:
  • 1/2 Egg
  • 1/2 c water
  • 1 tsp cooking oil
  • 1/2 tsp baking soda
  • 1-ounce (30 grams) cornstarch
  • A pinch of salt
  • 2 ounces (56 grams) of all-purpose flour
  • Sweet And Sour Sauce:
  • 1 tsp cornstarch
  • 1 tsp sugar
  • 1 tsp oyster sauce
  • 1 tsp plum sauce
  • 2 tbsp water
  • 1 1/2 tbsp tomato ketchup
  • 1/8 tsp Chinese rice vinegar, transparent in color
  • 1/2 tsp Lea & Perrins Worcestershire Sauce

Instructions

Slice the pork into small cuts. Put them into a large mixing bowl together with the marinade ingredients. Toss everything until well incorporated. Marinate the pork for at least 20 minutes.

In a mixing bowl, add all the ingredients for the sweet and sour sauce. Stir everything until well blended.

Mix all the ingredients for the batter until well incorporated.

Remove the pork from the marinade, then transfer them into the bowl with the batter. Toss to coat.

Place a deep skillet on the stove and turn the heat to medium-high. Add oil and allow it to become hot. (Add enough oil to deep fry the pork.)

Add the pork slices into the hot oil, then fry for a few minutes until they become golden brown. Move them onto a clean plate lined with paper towels to drain excess oil.

Place a wok on the stove and turn the heat to medium. Add cooking oil and allow it to become hot.

Add the garlic and sauté for about a minute or until aromatic.

Add the pineapple and bell peppers, then sauté for a few more minutes until soft and aromatic.

Add the pork into the wok, then toss until coated with the sauce. Stir in the chopped scallions. Remove from the heat.

Serve and enjoy!

December 29, 2022 0 comment
0 FacebookTwitterPinterestEmail
General Recipes

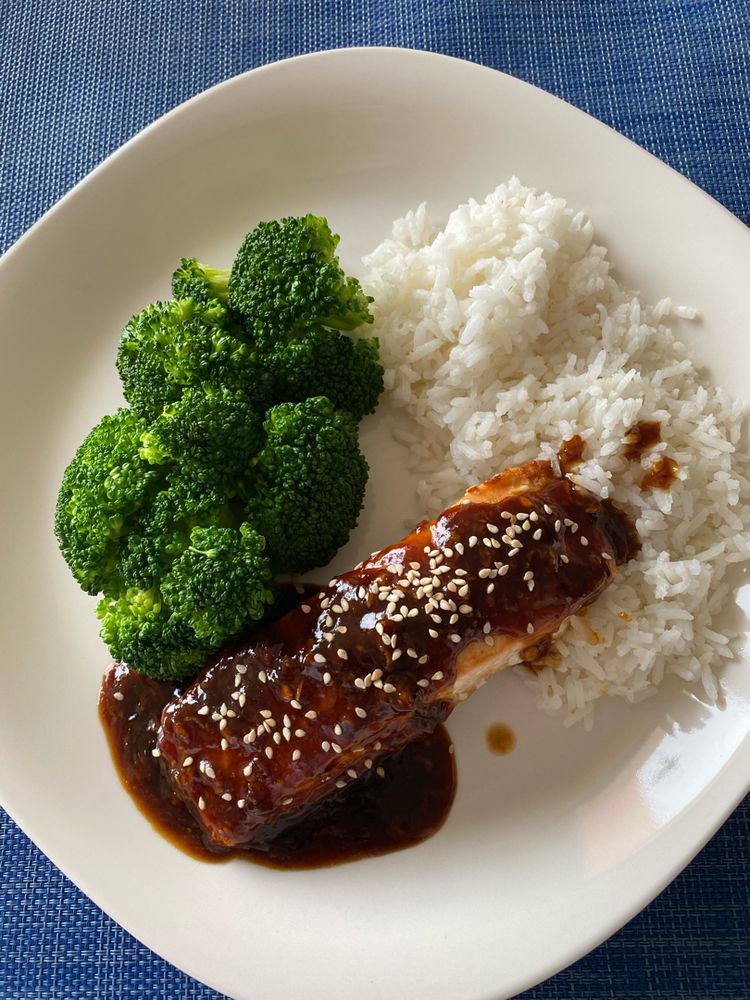
Baked Teriyaki Salmon

by Rebecca December 29, 2022
written by Rebecca

Prep Time: 10 mins | Cook Time: 15 mins | Total Time: 25 mins | Yield: 4 Servings

You can enjoy this Baked Teriyaki Salmon in just about 30 minutes! This is a simple dish that you can serve over dinner with your loved ones! Serve it over rice, and you have yourself a meal to remember. Enjoy!

Ingredients:

1 tablespoon Sesame Seeds

1 Green Onion, sliced

4 Skinless Salmon Fillets about 6 ounces each

Teriyaki Sauce:

2 tablespoons Honey

½ tablespoon Gluten-free flour

1 teaspoon Chili Flakes or to taste

2-3 tablespoons of Water

2 Garlic Cloves, minced

⅓ c Low-sodium soy sauce

½ Lemon, juiced

¼ c Fresh orange juice

1 tablespoon minced fresh ginger

Directions:

Prepare the oven and preheat it to 200 degrees C or 400 degrees F.

Apply cooking spray to the inside of a baking dish.

Add all the ingredients for the teriyaki sauce into a mixing bowl starting with garlic, water, chili flakes, ginger, flour, orange juice, juiced lemon, soy sauce, and honey. Stir everything to combine.

Lay the salmon fillets into the prepared baking dish and arrange them in a single layer.

Add the teriyaki sauce on top of the salmon fillets and spread it evenly, making sure to coat them well.

Place the baking dish in the preheated oven and bake the salmon fillets for about 15 minutes or until done.

Remove the salmon fillets from the oven, then spoon the teriyaki sauce on top. Let them rest for a few minutes before serving to incorporate all the flavors.

Sprinkle freshly chopped green onions and sesame seeds on top to garnish.

Serve and enjoy!

Notes:

Place any leftovers in an airtight container, then put them inside the fridge. Reheat for a few minutes in the microwave before serving again.

Nutrition Facts:

Calories: 316 kcal | Carbohydrates: 16g | Protein: 36g | Fat: 12g | Saturated Fat: 2g | Cholesterol: 94mg | Sodium: 794mg | Potassium: 940mg | Fiber: 1g | Sugar: 11g | Vitamin A: 277IU | Vitamin C: 16mg | Calcium: 50mg | Iron: 2mg

Baked Teriyaki Salmon

Rebecca Prep Time: 10 mins | Cook Time: 15 mins | Total Time: 25 mins | Yield: 4 Servings You can enjoy this Baked Teriyaki Salmon in just about 30 minutes!… General Recipes Baked Teriyaki Salmon European Print This
Serves: 4 Prep Time: 10 mins Cooking Time: 15 mins 15 mins
Nutrition facts: 316 calories 12 fat
Rating: 5.0/5
( 1 voted )

Ingredients

  • 1 tablespoon Sesame Seeds
  • 1 Green Onion, sliced
  • 4 Skinless Salmon Fillets about 6 ounces each
  • Teriyaki Sauce:
  • 2 tablespoons Honey
  • ½ tablespoon Gluten-free flour
  • 1 teaspoon Chili Flakes or to taste
  • 2-3 tablespoons of Water
  • 2 Garlic Cloves, minced
  • ⅓ c Low-sodium soy sauce
  • ½ Lemon, juiced
  • ¼ c Fresh orange juice
  • 1 tablespoon minced fresh ginger

Instructions

Prepare the oven and preheat it to 200 degrees C or 400 degrees F.

Apply cooking spray to the inside of a baking dish.

Add all the ingredients for the teriyaki sauce into a mixing bowl starting with garlic, water, chili flakes, ginger, flour, orange juice, juiced lemon, soy sauce, and honey. Stir everything to combine.

Lay the salmon fillets into the prepared baking dish and arrange them in a single layer.

Add the teriyaki sauce on top of the salmon fillets and spread it evenly, making sure to coat them well.

Place the baking dish in the preheated oven and bake the salmon fillets for about 15 minutes or until done.

Remove the salmon fillets from the oven, then spoon the teriyaki sauce on top. Let them rest for a few minutes before serving to incorporate all the flavors.

Sprinkle freshly chopped green onions and sesame seeds on top to garnish.

Serve and enjoy!

Notes

Place any leftovers in an airtight container, then put them inside the fridge. Reheat for a few minutes in the microwave before serving again.

December 29, 2022 0 comment
0 FacebookTwitterPinterestEmail
General Recipes

Spinach Stuffed Salmon

by Rebecca December 29, 2022
written by Rebecca

Prep Time: 10 mins | Cook Time: 20 mins | Total Time: 30 mins | Yield: 4 Servings

Easy and delicious, this Spinach Stuffed Salmon is always perfect for any occasion! It is something I can eat every day! Taste the freshness of the salmon stuffed with a delicious filling! Ready in just half an hour. Enjoy!

Ingredients:

For the Salmon

1 tablespoon olive oil

1 teaspoon Cajun seasoning or to taste

4 salmon fillets (4-6 ounces each)

For The Spinach Stuffing

3 ounces fresh baby spinach

½ c feta cheese crumbles

3 ounces cream cheese

½ c mozzarella cheese

Directions:

Prepare the oven and preheat it to 200 degrees C or 400 degrees F.

Line the inside of a baking sheet with parchment paper.

In a mixing bowl, add mozzarella cheese, cream cheese, and feta. Stir everything until well incorporated.

Chop the spinach and put it into the bowl with the cheese mixture, then use your clean hands to mix everything until well incorporated.

Make a pocket in the middle of each salmon fillet. Use a sharp knife for this step.

Brush each salmon with olive oil, then sprinkle Cajun seasoning on top and rub each to coat.

Stuff each salmon with the cheese mixture. Place them onto the prepared baking sheet and arrange them in a single layer.

Place the baking sheet in the preheated oven and bake the stuffed salmon for about 15 to 20 minutes or until done.

Remove from the oven.

Serve and enjoy!

Notes:

I highly recommend using fresh salmon fillets for this recipe.

You should mix the filling with your clean hands, but make sure not to overcook it.

Baking time will depend on the size of the salmon fillets.

Refrigerate leftovers. Reheat them for a few minutes before serving again.

Nutrition Facts:

Calories: 527 kcal | Carbohydrates: 3g | Protein: 53g | Fat: 33g | Saturated Fat: 12g | Cholesterol: 176mg | Sodium: 483mg | Potassium: 1310mg | Fiber: 1g| Sugar: 2g| Vitamin A: 3151IU | Vitamin C: 6mg | Calcium: 235mg | Iron: 3mg

Spinach Stuffed Salmon

Rebecca Prep Time: 10 mins | Cook Time: 20 mins | Total Time: 30 mins | Yield: 4 Servings Easy and delicious, this Spinach Stuffed Salmon is always perfect for any… General Recipes Spinach Stuffed Salmon European Print This
Serves: 4 Prep Time: 10 mins Cooking Time: 20 mins 20 mins
Nutrition facts: 527 calories 33 fat
Rating: 5.0/5
( 1 voted )

Ingredients

  • For the Salmon
  • 1 tablespoon olive oil
  • 1 teaspoon Cajun seasoning or to taste
  • 4 salmon fillets (4-6 ounces each)
  • For The Spinach Stuffing
  • 3 ounces fresh baby spinach
  • ½ c feta cheese crumbles
  • 3 ounces cream cheese
  • ½ c mozzarella cheese

Instructions

Prepare the oven and preheat it to 200 degrees C or 400 degrees F.

Line the inside of a baking sheet with parchment paper.

In a mixing bowl, add mozzarella cheese, cream cheese, and feta. Stir everything until well incorporated.

Chop the spinach and put it into the bowl with the cheese mixture, then use your clean hands to mix everything until well incorporated.

Make a pocket in the middle of each salmon fillet. Use a sharp knife for this step.

Brush each salmon with olive oil, then sprinkle Cajun seasoning on top and rub each to coat.

Stuff each salmon with the cheese mixture. Place them onto the prepared baking sheet and arrange them in a single layer.

Place the baking sheet in the preheated oven and bake the stuffed salmon for about 15 to 20 minutes or until done.

Remove from the oven.

Serve and enjoy!

Notes

I highly recommend using fresh salmon fillets for this recipe. You should mix the filling with your clean hands but make sure not to overcook it. Baking time will depend on the size of the salmon fillets. Refrigerate leftovers. Reheat them for a few minutes before serving again.

December 29, 2022 0 comment
0 FacebookTwitterPinterestEmail
General Recipes

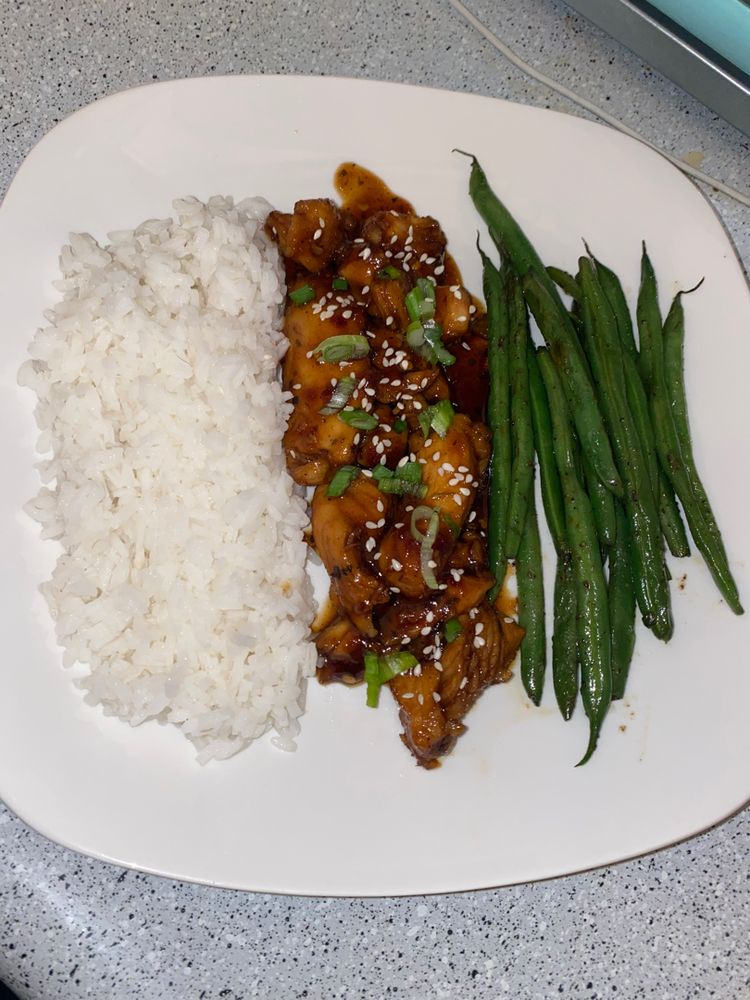
Honey Garlic Chicken Recipe

by Rebecca December 29, 2022
written by Rebecca

Prep Time: 5 mins | Cook Time: 15 mins | Total Time: 20 mins | Yield: 4 Servings

This Honey Garlic Chicken is insanely delicious! The sauce is a combination of soy sauce, garlic, butter, broth, and a lot more! In just 20 minutes, you can have the most satisfying dish today. Enjoy!

Ingredients:

2 tablespoons corn flour – (cornstarch)

⅓ c (110g) honey

2 tablespoons vegetable oil

1 tablespoon unsalted butter

4 cloves minced garlic

½ teaspoon salt

⅓ c (80ml) chicken stock

½ teaspoon pepper

8 chicken thighs – (skinless and boneless)

1 tablespoon rice vinegar

1 tablespoon light soy sauce

To Serve:

½ teaspoon chili flakes

boiled rice

1 tablespoon finely chopped fresh parsley

Directions:

In a large mixing bowl, add the chicken thighs, salt, pepper, and cornstarch. Toss the chicken until coated completely.

Place a large skillet on the stove and turn the heat to high. Add oil and allow it to become hot. Add the chicken thighs, then sear each side for 5 minutes or until they turn golden brown. Stir in the butter until melted.

Add garlic and sauté for about a minute or just until aromatic. Stir to combine.

In a mixing bowl, add stock, honey, rice vinegar, and light soy sauce. Scrape the bottom of the skillet to get the browned bits.

Stir to combine. Allow the mixture to boil, then reduce the heat to low and simmer for about 5 minutes or until the sauce becomes thick.

Remove the skillet from the heat. Sprinkle chili flakes and chopped parsley on top to garnish.

Serve over rice. Enjoy!

Notes:

Feel free to use chicken breasts or wings for this recipe.

Place any leftovers in an airtight container, then put them in the fridge. Reheat for a few minutes before serving again.

Nutrition Facts:

Calories: 472 kcal | Carbohydrates: 29g | Protein: 45g | Fat: 19g | Saturated Fat: 10g | Cholesterol: 223mg | Sodium: 804mg | Potassium: 611mg | Fiber: 1g | Sugar: 24g | Vitamin A: 300IU | Vitamin C: 2mg | Calcium: 26mg | Iron: 2mg

Honey Garlic Chicken Recipe

Rebecca Prep Time: 5 mins | Cook Time: 15 mins | Total Time: 20 mins | Yield: 4 Servings This Honey Garlic Chicken is insanely delicious! The sauce is a combination… General Recipes Honey Garlic Chicken Recipe European Print This
Serves: 4 Prep Time: 5 mins Cooking Time: 15 mins 15 mins
Nutrition facts: 472 calories 19 fat
Rating: 5.0/5
( 1 voted )

Ingredients

  • 2 tablespoons corn flour – (cornstarch)
  • ⅓ c (110g) honey
  • 2 tablespoons vegetable oil
  • 1 tablespoon unsalted butter
  • 4 cloves minced garlic
  • ½ teaspoon salt
  • ⅓ c (80ml) chicken stock
  • ½ teaspoon pepper
  • 8 chicken thighs – (skinless and boneless)
  • 1 tablespoon rice vinegar
  • 1 tablespoon light soy sauce
  • To Serve:
  • ½ teaspoon chili flakes
  • boiled rice
  • 1 tablespoon finely chopped fresh parsley

Instructions

In a large mixing bowl, add the chicken thighs, salt, pepper, and cornstarch. Toss the chicken until coated completely.

Place a large skillet on the stove and turn the heat to high. Add oil and allow it to become hot. Add the chicken thighs, then sear each side for 5 minutes or until they turn golden brown. Stir in the butter until melted.

Add garlic and sauté for about a minute or just until aromatic. Stir to combine.

In a mixing bowl, add stock, honey, rice vinegar, and light soy sauce. Scrape the bottom of the skillet to get the browned bits.

Stir to combine. Allow the mixture to boil, then reduce the heat to low and simmer for about 5 minutes or until the sauce becomes thick.

Remove the skillet from the heat. Sprinkle chili flakes and chopped parsley on top to garnish.

Serve over rice. Enjoy!

Notes

Feel free to use chicken breasts or wings for this recipe. Place any leftovers in an airtight container, then put them in the fridge. Reheat for a few minutes before serving again.

December 29, 2022 0 comment
0 FacebookTwitterPinterestEmail
General Recipes

Basic Cauliflower Fritters

by Rebecca December 29, 2022
written by Rebecca

Prep Time: 10 mins | Cook Time: 15 mins | Total Time: 25 mins | Yield: 2 Servings

These heavenly treats are incredibly delicious! They are made with simple ingredients. I’m pretty sure you already have them! In less than 30 minutes, you can have the best treats to serve today! You don’t need to worry about leftovers because I’m sure there won’t be any! Try not to eat them all in one sitting. Enjoy!

Ingredients:

2 Eggs

½ teaspoon baking powder

½ c all-purpose flour

5 c chopped cauliflower florets

salt and pepper to taste

vegetable oil for frying

Directions:

In the food processor, add the cauliflower. Pulse a few times to mince it. Transfer into a large mixing bowl.

In the same bowl with the cauliflower florets, add the eggs, baking powder, flour, salt, and pepper. Stir everything until well combined. Add more flour if the texture gets too wet.

Make 1/3-inch patties out of the cauliflower mixture.

Place a skillet on the stove and turn the heat to medium. Add vegetable oil and allow it to become hot.

Add the patties into the hot skillet, then cook each side for 2 minutes or until they turn golden brown. Move them to a plate lined with paper towels to drain excess oil.

Serve with your favorite dipping sauce. Enjoy!

Notes:

These fritters are best served hot!

Place any leftovers in an airtight container, then put them in the fridge. They can last up to 3 days. Reheat for a few minutes in the microwave before serving again.

Try serving these fritters with one of these dipping sauces:

Sour Cream

Cilantro Jalapeno Sauce

Yogurt

Copycat Outback Bloom Sauce

Tzatziki (Low Fat Yogurt & Cucumber Dip)

Nutrition Facts:

Calories: 272 kcal | Carbohydrates: 57g | Protein: 11g | Fat: 0.3g | Saturated Fat: 0.1g | Polyunsaturated Fat: 0.2g | Monounsaturated Fat: 0.04g | Sodium: 75mg | Potassium: 758mg | Fiber: 8g | Sugar: 7g | Vitamin C: 159.2mg | Calcium: 50mg | Iron: 2.9mg

Basic Cauliflower Fritters

Rebecca Prep Time: 10 mins | Cook Time: 15 mins | Total Time: 25 mins | Yield: 2 Servings These heavenly treats are incredibly delicious! They are made with simple ingredients.… General Recipes Basic Cauliflower Fritters European Print This
Serves: 2 Prep Time: 10 mins Cooking Time: 15 mins 15 mins
Nutrition facts: 272 calories 0.3 fat
Rating: 5.0/5
( 1 voted )

Ingredients

  • 2 Eggs
  • ½ teaspoon baking powder
  • ½ c all-purpose flour
  • 5 c chopped cauliflower florets
  • salt and pepper to taste
  • vegetable oil for frying

Instructions

In the food processor, add the cauliflower. Pulse a few times to mince it. Transfer into a large mixing bowl.

In the same bowl with the cauliflower florets, add the eggs, baking powder, flour, salt, and pepper. Stir everything until well combined. Add more flour if the texture gets too wet.

Make 1/3-inch patties out of the cauliflower mixture.

Place a skillet on the stove and turn the heat to medium. Add vegetable oil and allow it to become hot.

Add the patties into the hot skillet, then cook each side for 2 minutes or until they turn golden brown. Move them to a plate lined with paper towels to drain excess oil.

Serve with your favorite dipping sauce. Enjoy!

Notes

These fritters are best served hot! Place any leftovers in an airtight container, then put them in the fridge. They can last up to 3 days. Reheat for a few minutes in the microwave before serving again. Try serving these fritters with one of these dipping sauces: Sour Cream Cilantro Jalapeno Sauce Yogurt Copycat Outback Bloom Sauce Tzatziki (Low Fat Yogurt & Cucumber Dip)

December 29, 2022 0 comment
0 FacebookTwitterPinterestEmail
General Recipes

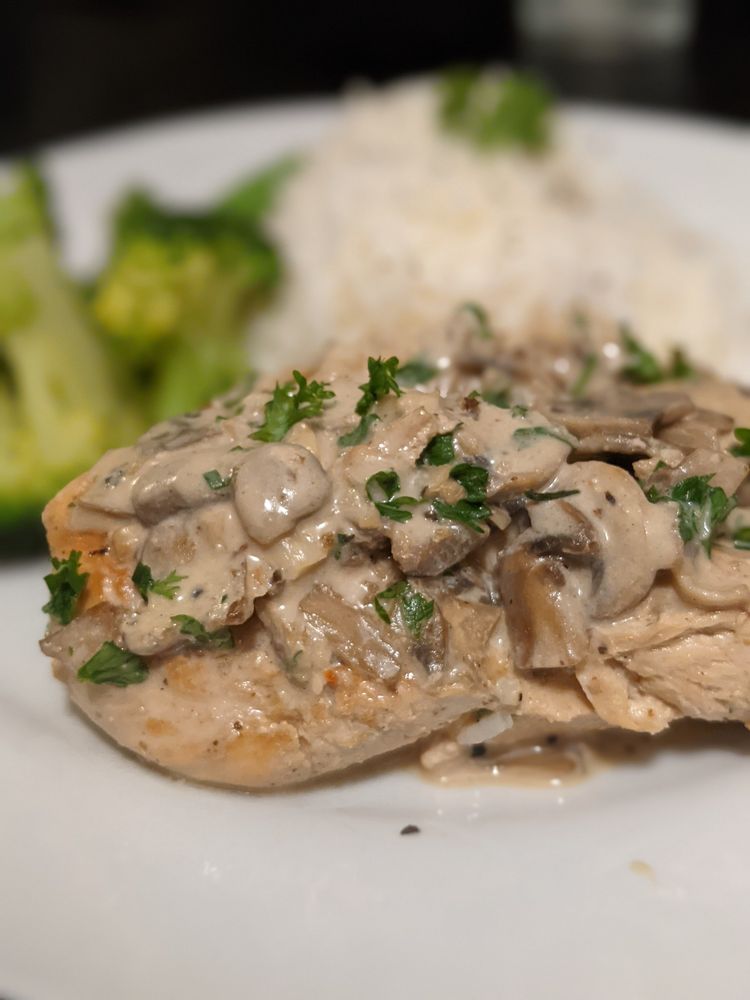
Creamy Chicken Mushroom Recipe

by Rebecca December 29, 2022
written by Rebecca

Prep Time: 10 mins | Cook Time: 20 mins | Total Time: 30 mins | Yield: 6 Servings

If you want a quick and easy recipe to try today, then this is the one for you! This Creamy Chicken Mushroom is ready for serving in just half an hour! The creamy sauce is a winner! A must-try recipe indeed!

Ingredients:

1.5 lb. chicken breasts, boneless, skinless

1/4 teaspoon pepper

1/2 teaspoon salt

1 1/4 c chicken broth

4 oz. Light cream cheese, softened

8 oz. button mushrooms, halved

1/2 teaspoon cornstarch

1 tablespoon fresh chopped curly parsley

3 garlic cloves, crushed

2 tbsp olive oil, divided

Directions:

Place a pan on the stove and turn the heat to medium-high. Add 1 tbsp of oil and allow it to become hot. Add the chicken breasts, then cook each side for about 5 minutes or until they turn golden brown. Move them to a plate and cover them to keep warm.

Add another tablespoon of olive oil to the same pan and allow it to become hot. Add the mushrooms and sauté for a few minutes until brown.

Add garlic and sauté for a minute or until aromatic.

In a mixing bowl, add 2 tbsp of water and cornstarch. Whisk to combine. Add the mixture into the pan and stir until blended. Let it simmer for a few minutes until the texture becomes thick. Season with salt and pepper.

Add the cream cheese and stir until well blended.

Bring the chicken breasts back into the pan, then toss to coat with the sauce.

Sprinkle freshly chopped parsley on top to garnish. Dish out!

Serve and enjoy!

Notes:

Place any leftovers in an airtight container, then put them in the fridge. They can last for up to 5 days or 3 months in the freezer.

Nutrition Facts:

Calories: 224 kcal | Carbohydrates: 4g | Protein: 27g | Fat: 11g | Saturated Fat: 3g | Cholesterol: 83mg | Sodium: 562mg | Potassium: 645mg | Fiber: 1g | Sugar: 2g | Vitamin A: 346IU | Vitamin C: 9mg | Calcium: 43mg | Iron: 1mg

Creamy Chicken Mushroom Recipe

Rebecca Prep Time: 10 mins | Cook Time: 20 mins | Total Time: 30 mins | Yield: 6 Servings If you want a quick and easy recipe to try today, then… General Recipes Creamy Chicken Mushroom Recipe European Print This
Serves: 6 Prep Time: 10 mins Cooking Time: 20 mins 20 mins
Nutrition facts: 224 calories 11 fat
Rating: 5.0/5
( 1 voted )

Ingredients

  • 1.5 lb. chicken breasts, boneless, skinless
  • 1/4 teaspoon pepper
  • 1/2 teaspoon salt
  • 1 1/4 c chicken broth
  • 4 oz. Light cream cheese, softened
  • 8 oz. button mushrooms, halved
  • 1/2 teaspoon cornstarch
  • 1 tablespoon fresh chopped curly parsley
  • 3 garlic cloves, crushed
  • 2 tbsp olive oil, divided

Instructions

Place a pan on the stove and turn the heat to medium-high. Add 1 tbsp of oil and allow it to become hot. Add the chicken breasts, then cook each side for about 5 minutes or until they turn golden brown. Move them to a plate and cover them to keep warm.

Add another tablespoon of olive oil to the same pan and allow it to become hot. Add the mushrooms and sauté for a few minutes until brown.

Add garlic and sauté for a minute or until aromatic.

In a mixing bowl, add 2 tbsp of water and cornstarch. Whisk to combine. Add the mixture into the pan and stir until blended. Let it simmer for a few minutes until the texture becomes thick. Season with salt and pepper.

Add the cream cheese and stir until well blended.

Bring the chicken breasts back into the pan, then toss to coat with the sauce.

Sprinkle freshly chopped parsley on top to garnish. Dish out!

Serve and enjoy!

Notes

Place any leftovers in an airtight container, then put them in the fridge. They can last for up to 5 days or 3 months in the freezer.

December 29, 2022 0 comment
0 FacebookTwitterPinterestEmail
General Recipes

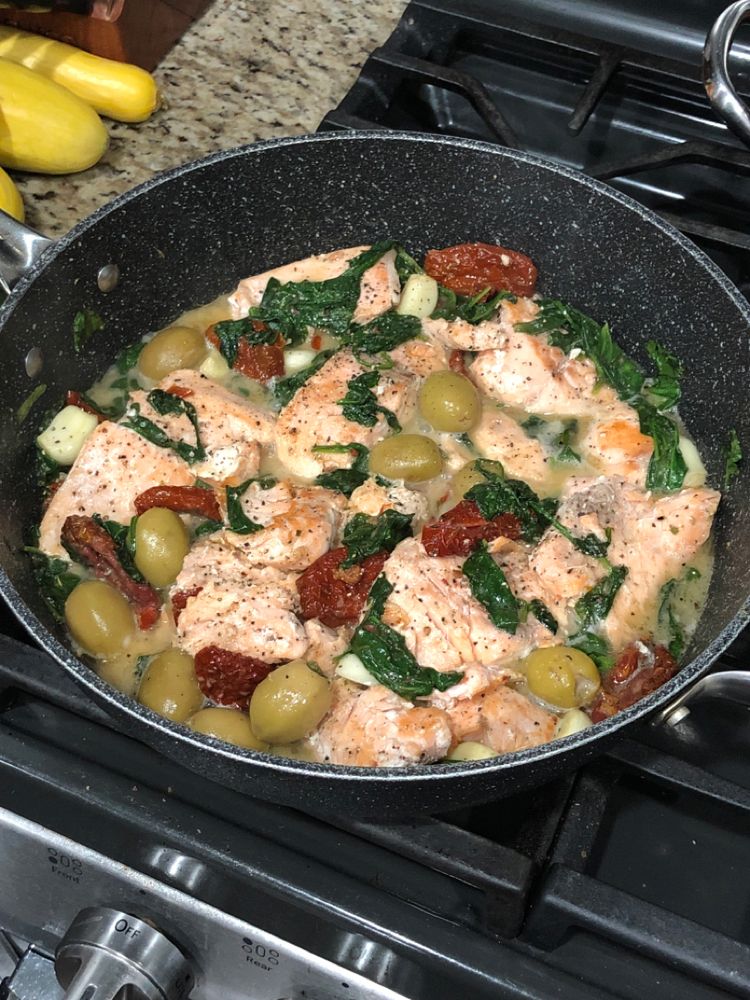
Creamy Tuscan Salmon

by Rebecca December 29, 2022
written by Rebecca

Prep Time: 5 mins | Cook Time: 20 mins | Total Time: 25 mins | Yield: 4 Servings

This Creamy Tuscan Salmon is one of my comfort foods. Its creamy sauce is very difficult to resist. You will surely eat a lot! In less than 30 minutes, this dish is ready for serving. Try it now!

Ingredients:

Salmon:

1 teaspoon Italian Seasoning

1/4 teaspoon Salt

1-pound Salmon Fillets 3 or 4 salmon fillets

1 tablespoon Olive Oil

White cream sauce:

3/4 c Coconut Cream

1 c Pitted green Italian Olives

6-8 cloves Garlic, peeled

1/4 c Vegetable broth

5 ounces of Fresh Spinach

1/4 c Sun-dried tomatoes, chopped

Directions:

Rinse the fish fillets with water to remove any dirt, then use paper towels to pat them dry.

Sprinkle salt, pepper, and Italian seasoning over the fish fillets, then toss to coat.

Place a large non-stick pan on the stove and turn the heat to medium. Add oil and allow it to become hot.

Add the fillets into the hot pan, then cook each side for 4 minutes or until they turn golden brown. Transfer them onto a clean plate.

In the empty pan, stir in the garlic and sauté for about a minute or just until aromatic.

Add the spinach, olives, broth, and tomatoes. Stir just until combined. Turn the heat down to low, then cook the spinach for about a minute until wilted.

Put the fillets back into the pan, then spoon the sauce over. Add more seasonings if needed. Dish out!

Serve the fish with the sauce on top. Enjoy!

Notes:

Make sure not to overcook the fish or else they will become flaky.

Place any leftovers in an airtight container, then put them in the fridge. They can last up to 5 days or 3 months in the freezer. Reheat for a few minutes before serving again.

You can use shrimp or chicken for this recipe if you prefer.

Nutrition Facts:

Calories: 428 kcal | Carbohydrates: 12g | Protein: 27g | Fat: 32g | Saturated Fat: 16g | Cholesterol: 62mg | Sodium: 801mg | Potassium: 1183mg | Fiber: 4g | Sugar: 3g | Vitamin A: 3613IU | Vitamin C: 15mg | Calcium: 107mg | Iron: 4mg

Creamy Tuscan Salmon

Rebecca Prep Time: 5 mins | Cook Time: 20 mins | Total Time: 25 mins | Yield: 4 Servings This Creamy Tuscan Salmon is one of my comfort foods. Its creamy… General Recipes Creamy Tuscan Salmon European Print This
Serves: 4 Prep Time: 5 mins Cooking Time: 20 mins 20 mins
Nutrition facts: 428 calories 32 fat
Rating: 5.0/5
( 1 voted )

Ingredients

  • Salmon:
  • 1 teaspoon Italian Seasoning
  • 1/4 teaspoon Salt
  • 1-pound Salmon Fillets 3 or 4 salmon fillets
  • 1 tablespoon Olive Oil
  • White cream sauce:
  • 3/4 c Coconut Cream
  • 1 c Pitted green Italian Olives
  • 6-8 cloves Garlic, peeled
  • 1/4 c Vegetable broth
  • 5 ounces of Fresh Spinach
  • 1/4 c Sun-dried tomatoes, chopped

Instructions

Rinse the fish fillets with water to remove any dirt, then use paper towels to pat them dry.

Sprinkle salt, pepper, and Italian seasoning over the fish fillets, then toss to coat.

Place a large non-stick pan on the stove and turn the heat to medium. Add oil and allow it to become hot.

Add the fillets into the hot pan, then cook each side for 4 minutes or until they turn golden brown. Transfer them onto a clean plate.

In the empty pan, stir in the garlic and sauté for about a minute or just until aromatic.

Add the spinach, olives, broth, and tomatoes. Stir just until combined. Turn the heat down to low, then cook the spinach for about a minute until wilted.

Put the fillets back into the pan, then spoon the sauce over. Add more seasonings if needed. Dish out!

Serve the fish with the sauce on top. Enjoy!

Notes

Make sure not to overcook the fish or else they will become flaky. Place any leftovers in an airtight container, then put them in the fridge. They can last up to 5 days or 3 months in the freezer. Reheat for a few minutes before serving again. You can use shrimp or chicken for this recipe if you prefer.

December 29, 2022 0 comment
0 FacebookTwitterPinterestEmail
General Recipes

Pistachio Pudding Cake

by Rebecca December 29, 2022
written by Rebecca

Prep Time: 20 mins | Cook Time: 40 mins | Total Time: 1 hr | Yield: 12 Servings

This Pistachio Pudding Cake is one to try! With simple ingredients and easy steps, you can have the most satisfying treat to serve today! This recipe can yield up to 12 pieces of cake. Prepare to fall in love in an hour!

Ingredients:

Cake:

1 c of club soda

1/2 c chopped walnuts

1 package yellow cake mix (regular size)

1/2 c canola oil

1 package (3.4 oz.) of instant pistachio pudding mix

4 large Eggs

Icing:

1 package (3.4 oz) of instant pistachio pudding mix

2 tsp confectioners’ sugar

1 c cold heavy whipping cream

3/4 c cold 2% milk

1/2 c chopped walnuts

Directions:

Prepare the oven and preheat it to 175 degrees C or 350 degrees F.

Apply cooking spray and sprinkle flour on the inside of a 10-inch fluted tube pan.

Add soda, cake mix, eggs, oil, and pudding mix into the bowl of the stand mixer. Beat everything for about 2 minutes on low speed until well incorporated.

Add the walnuts and stir to combine.

Transfer the batter to the prepared tube pan and spread it evenly.

Place the pan in the preheated oven and bake the batter for about 40 to 45 minutes or until a toothpick comes out clean after inserting it in the middle.

Remove the cake from the oven and allow it to cool for at least 10 minutes at room temperature while you prepare the icing.

Add milk, confectioners’ sugar, pudding mix, and cream into a large bowl. Beat everything until it forms stiff peaks.

Add the frosting over the warm cake and spread it evenly. Top with chopped walnuts.

Place the cake in the fridge to chill before serving.

Serve chilled. Enjoy!

Notes:

You must use cold whipping cream for this recipe.

You can use a 13×9-inch baking dish for this recipe.

Place any leftovers in an airtight container, then put them in the fridge.

Nutrition Facts:

1 slice: 482 calories, 28g fat (8g saturated fat), 99mg cholesterol, 555mg sodium, 53g carbohydrate (33g sugars, 1g fiber), 7g protein

Pistachio Pudding Cake

Rebecca Prep Time: 20 mins | Cook Time: 40 mins | Total Time: 1 hr | Yield: 12 Servings This Pistachio Pudding Cake is one to try! With simple ingredients and… General Recipes Pistachio Pudding Cake European Print This
Serves: 12 Prep Time: 20 mins Cooking Time: 40 mins 40 mins
Nutrition facts: 482 calories 28 fat
Rating: 5.0/5
( 1 voted )

Ingredients

  • Cake:
  • 1 c of club soda
  • 1/2 c chopped walnuts
  • 1 package yellow cake mix (regular size)
  • 1/2 c canola oil
  • 1 package (3.4 oz.) of instant pistachio pudding mix
  • 4 large Eggs
  • Icing:
  • 1 package (3.4 oz) of instant pistachio pudding mix
  • 2 tsp confectioners’ sugar
  • 1 c cold heavy whipping cream
  • 3/4 c cold 2% milk
  • 1/2 c chopped walnuts

Instructions

Prepare the oven and preheat it to 175 degrees C or 350 degrees F.

Apply cooking spray and sprinkle flour on the inside of a 10-inch fluted tube pan.

Add soda, cake mix, eggs, oil, and pudding mix into the bowl of the stand mixer. Beat everything for about 2 minutes on low speed until well incorporated.

Add the walnuts and stir to combine.

Transfer the batter to the prepared tube pan and spread it evenly.

Place the pan in the preheated oven and bake the batter for about 40 to 45 minutes or until a toothpick comes out clean after inserting it in the middle.

Remove the cake from the oven and allow it to cool for at least 10 minutes at room temperature while you prepare the icing.

Add milk, confectioners’ sugar, pudding mix, and cream into a large bowl. Beat everything until it forms stiff peaks.

Add the frosting over the warm cake and spread it evenly. Top with chopped walnuts.

Place the cake in the fridge to chill before serving.

Serve chilled. Enjoy!

Notes

You must use cold whipping cream for this recipe. You can use a 13×9-inch baking dish for this recipe. Place any leftovers in an airtight container, then put them in the fridge.

December 29, 2022 0 comment
0 FacebookTwitterPinterestEmail
Newer Posts
Older Posts

Popular Posts

  • 1

    Crispy Crunchy Parmesan Potatoes

    March 21, 2020
  • 2

    CROCK POT SMOTHERED PORK CHOPS

    March 21, 2020
  • Facebook
  • Twitter

@2019 - All Right Reserved.


Back To Top