Cook it once
  • Home
  • Privacy Policy
  • Recipes
    • KETO
    • LC
    • WW
  • Tips
  • Contact
Cook it once
  • Home
  • Privacy Policy
  • Recipes
    • KETO
    • LC
    • WW
  • Tips
  • Contact
Category:

General Recipes

General Recipes

Best Ever Beef Lombardi Recipe

by Rebecca October 1, 2022
written by Rebecca

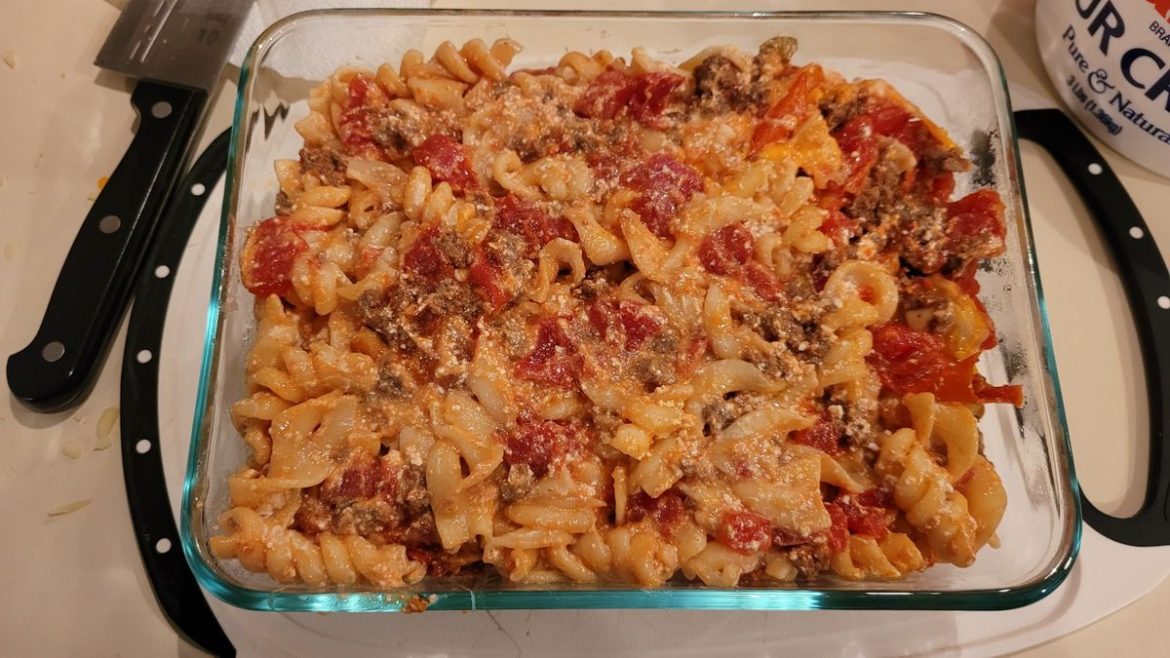
Beef Lambardi is an amazing dish with a mixture of ground beef and chopped tomatoes over a creamy noodles mixture and topped with loads of cheese. This sounds like a fancy dish, but it’s just a simple dinner made with basic ingredients.

Ingredients

1/3 c. chopped onion

1 pound of ground beef

1 28-ounces can of whole tomatoes – chopped and not drained

2 cloves garlic – minced

2 teaspoons honey

1 (6 oz.) can of tomato paste

1 bay leaf

1 c. sour cream

1 (10 oz.) can of diced tomatoes with green chiles – not drained

4 ounces cream cheese – softened

1 tablespoon cornstarch

1 c. grated Cheddar cheese

1 c. Parmesan cheese – freshly grated

1 c. grated Monterey Jack cheese

6 green onions, chopped

Sliced black olives

10-12 ounces egg noodles – cooked but 3 minutes less than the directions

Chopped parsley (optional)

1 teaspoon salt

¼ teaspoon black pepper

How to make Best Ever Beef Lombardi

Step 1: To the middle position, adjust the oven rack and preheat the oven to 350 degrees F. Ready a 9 x 13-inch baking dish. Grease and set aside.

Step 2: In a large nonstick skillet, heat the oil over medium-high heat. Once the oil is hot, add the beef and onion. Season with salt and pepper and cook for about 8 minutes, breaking the meat up using a spoon until the meat is completely cooked.

Step 3: To the skillet, add the tomato paste, honey, and garlic. Stir well and continue to cook for another 30 seconds until aromatic. Next, add the tomatoes, stir, and cook for an additional 3 to 5 minutes until most of the liquid has evaporated.

Step 4: Add the bay leaf and let everything simmer for about 30 minutes.

Step 5: In the meantime, cook the noodles in a large pot with salted boiling water for about 3 minutes, stirring occasionally. Set aside 2 c. of the pasta water before draining the noodles. Set aside.

Step 6: In the empty pot, place the sour cream, and ½ cup of the reserved cooking water. Mix well until smooth. Toss in the noodles and add the rest of the 1 ½ cups of the cooking water.

Step 7: In the bottom of the prepared baking dish, spread the noodles. On top, evenly spread the beef mixture and sprinkle with the cheeses.

Step 8: Place in the preheated oven and bake for about 25 to 30 minutes or until the edges are bubbling and the cheese is spotty brown. Take the dish out of the oven when done and allow it to cool for about 5 to 10 minutes.

Step 9: Before serving, garnish the dish with some green onions, sliced black olives, and chopped parsley. Enjoy!
Best Ever Beef Lombardi Recipe

Rebecca Beef Lambardi is an amazing dish with a mixture of ground beef and chopped tomatoes over a creamy noodles mixture and topped with loads of cheese. This sounds like a… General Recipes Best Ever Beef Lombardi Recipe European Print This
Nutrition facts: 200 calories 20 grams fat
Rating: 4.0/5
( 2 voted )

Ingredients

  • 1/3 c. chopped onion
  • 1 pound of ground beef
  • 1 28-ounces can of whole tomatoes – chopped and not drained
  • 2 cloves garlic – minced
  • 2 teaspoons honey
  • 1 (6 oz.) can of tomato paste
  • 1 bay leaf
  • 1 c. sour cream
  • 1 (10 oz.) can of diced tomatoes with green chiles – not drained
  • 4 ounces cream cheese – softened
  • 1 tablespoon cornstarch
  • 1 c. grated Cheddar cheese
  • 1 c. Parmesan cheese – freshly grated
  • 1 c. grated Monterey Jack cheese
  • 6 green onions, chopped
  • Sliced black olives
  • 10-12 ounces egg noodles – cooked but 3 minutes less than the directions
  • Chopped parsley (optional)
  • 1 teaspoon salt
  • ¼ teaspoon black pepper

Instructions

Step 1: To the middle position, adjust the oven rack and preheat the oven to 350 degrees F. Ready a 9 x 13-inch baking dish. Grease and set aside.

Step 2: In a large nonstick skillet, heat the oil over medium-high heat. Once the oil is hot, add the beef and onion. Season with salt and pepper and cook for about 8 minutes, breaking the meat up using a spoon until the meat is completely cooked.

Step 3: To the skillet, add the tomato paste, honey, and garlic. Stir well and continue to cook for another 30 seconds until aromatic. Next, add the tomatoes, stir, and cook for an additional 3 to 5 minutes until most of the liquid has evaporated.

Step 4: Add the bay leaf and let everything simmer for about 30 minutes.

Step 5: In the meantime, cook the noodles in a large pot with salted boiling water for about 3 minutes, stirring occasionally. Set aside 2 c. of the pasta water before draining the noodles. Set aside.

Step 6: In the empty pot, place the sour cream, and ½ cup of the reserved cooking water. Mix well until smooth. Toss in the noodles and add the rest of the 1 ½ cups of the cooking water.

Step 7: In the bottom of the prepared baking dish, spread the noodles. On top, evenly spread the beef mixture and sprinkle with the cheeses.

Step 8: Place in the preheated oven and bake for about 25 to 30 minutes or until the edges are bubbling and the cheese is spotty brown. Take the dish out of the oven when done and allow it to cool for about 5 to 10 minutes.

Step 9: Before serving, garnish the dish with some green onions, sliced black olives, and chopped parsley. Enjoy!
October 1, 2022 0 comment
0 FacebookTwitterPinterestEmail
General Recipes

PEACH COBBLER MUFFINS

by Rebecca October 1, 2022
written by Rebecca

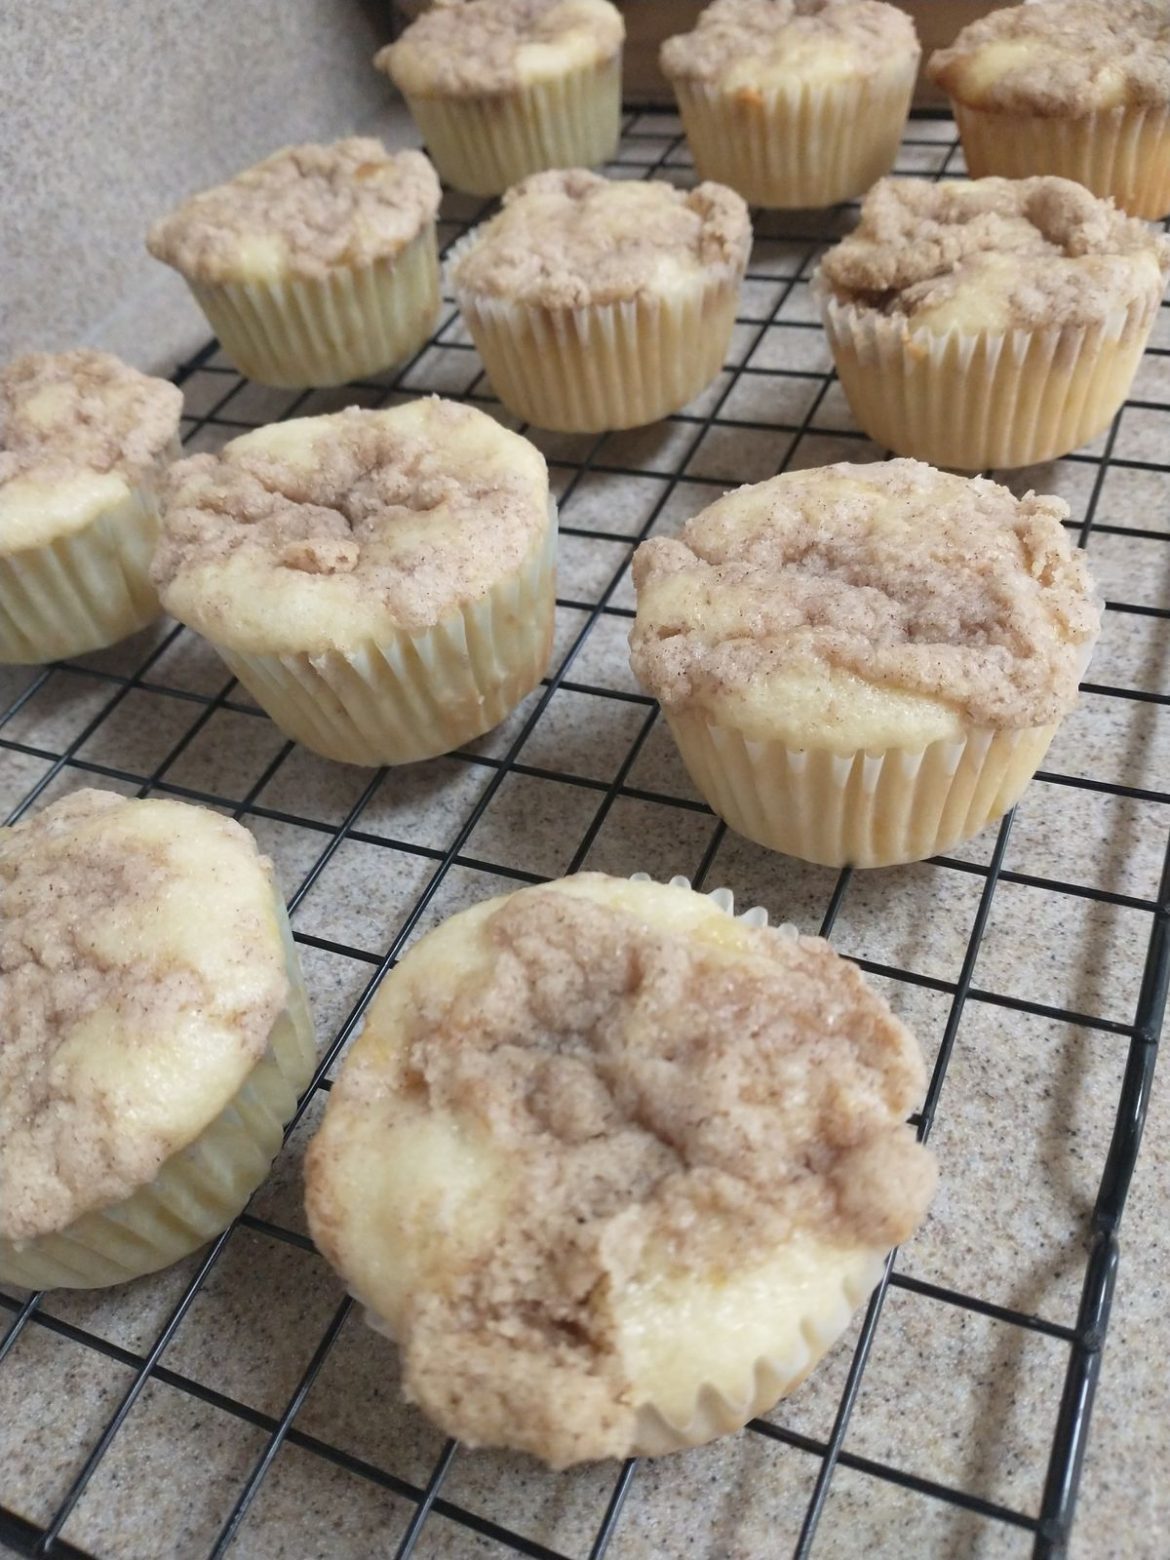
If you are looking for the perfect sweet snack, you have to give these delightful peach cobbler muffins a try soon! Easy and quick to make with an amazing crumble topping. These cobblers are filled with peaches. But you are also welcome to use any fruits you desire.

Ingredients

Muffins:

1 egg

1 ¼ c. all-purpose flour

1 ½ teaspoons baking powder

⅔ c. white sugar

½ c. whole milk

¼ c. vegetable oil

1 teaspoon vanilla extract

1 c. chopped fresh peaches -or canned and well drained

½ teaspoon salt

Streusel Topping:

½ teaspoon cinnamon

¼ c. all-purpose flour

½ teaspoon baking powder

4 tablespoons cold unsalted butter

3 tablespoons white sugar

HOW TO MAKE PEACH COBBLER MUFFINS

Streusel Topping:

Step 1: In a small bowl, whisk the flour, sugar, cinnamon, and baking powder until well combined. In chunks, add the cold butter, breaking it up using fingers until you have a mixture that resembles coarse crumbs. Set aside.

Muffins:

Step 2: Prepare the oven. Preheat it to 350 degrees F.

Step 3: Grease a large 12 cups muffin tin using butter.

Step 4: Into a large bowl, place the flour, baking powder, salt, and sugar. Mix well until blended. Then, fold in the peaches. Next, add the milk along with the egg, oil, and vanilla extract. Mix well using a rubber spatula until the flour just disappears.

Step 5: Into the prepared muffin cups, evenly portion the batter, filling each cup to about 3/4 full. On top, place spoonfuls of the streusel topping.

Step 6: Place in the preheated oven and bake for about 20 minutes or until the muffins are golden brown and a toothpick inserted into a muffin comes out clean. Remove from the oven when done and allow the muffins to cool for about 10 minutes before inverting to a cooling rack.

Step 7: Serve the Peach Cobbler Muffins warm. You can also keep the muffins once cooled in an airtight container for up to 3 days.

Notes:

To freeze the muffins, place the cooled muffins in an airtight container and store them in the freezer for up to 2 months. When ready to serve, thaw the muffins, uncovered.

If using frozen peaches, thaw, drain, and chop them into small pieces.

For this recipe, you can also use blueberries and/or raspberries.

PEACH COBBLER MUFFINS

Rebecca If you are looking for the perfect sweet snack, you have to give these delightful peach cobbler muffins a try soon! Easy and quick to make with an amazing crumble… General Recipes PEACH COBBLER MUFFINS European Print This
Nutrition facts: 200 calories 20 grams fat
Rating: 5.0/5
( 1 voted )

Ingredients

  • Muffins:
  • 1 egg
  • 1 ¼ c. all-purpose flour
  • 1 ½ teaspoons baking powder
  • ⅔ c. white sugar
  • ½ c. whole milk
  • ¼ c. vegetable oil
  • 1 teaspoon vanilla extract
  • 1 c. chopped fresh peaches -or canned and well drained
  • ½ teaspoon salt
  • Streusel Topping:
  • ½ teaspoon cinnamon
  • ¼ c. all-purpose flour
  • ½ teaspoon baking powder
  • 4 tablespoons cold unsalted butter
  • 3 tablespoons white sugar

Instructions

Streusel Topping:

Step 1: In a small bowl, whisk the flour, sugar, cinnamon, and baking powder until well combined. In chunks, add the cold butter, breaking it up using fingers until you have a mixture that resembles coarse crumbs. Set aside.

Muffins:

Step 2: Prepare the oven. Preheat it to 350 degrees F.

Step 3: Grease a large 12 cups muffin tin using butter.

Step 4: Into a large bowl, place the flour, baking powder, salt, and sugar. Mix well until blended. Then, fold in the peaches. Next, add the milk along with the egg, oil, and vanilla extract. Mix well using a rubber spatula until the flour just disappears.

Step 5: Into the prepared muffin cups, evenly portion the batter, filling each cup to about 3/4 full. On top, place spoonfuls of the streusel topping.

Step 6: Place in the preheated oven and bake for about 20 minutes or until the muffins are golden brown and a toothpick inserted into a muffin comes out clean. Remove from the oven when done and allow the muffins to cool for about 10 minutes before inverting to a cooling rack.

Step 7: Serve the Peach Cobbler Muffins warm. You can also keep the muffins once cooled in an airtight container for up to 3 days.

Notes

To freeze the muffins, place the cooled muffins in an airtight container and store them in the freezer for up to 2 months. When ready to serve, thaw the muffins, uncovered. If using frozen peaches, thaw, drain, and chop them into small pieces. For this recipe, you can also use blueberries and/or raspberries.

October 1, 2022 0 comment
0 FacebookTwitterPinterestEmail
General Recipes

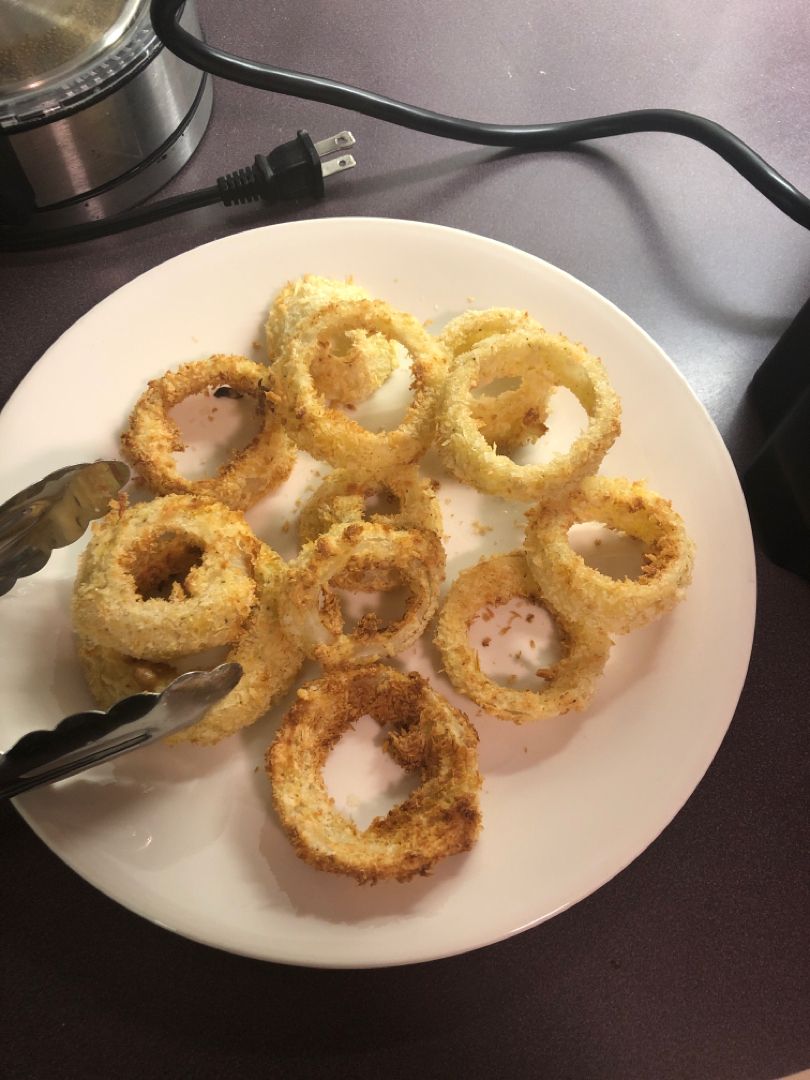
Air Fryer Onion Rings

by Rebecca September 30, 2022
written by Rebecca

Prep time: 10 mins | Cook time: 12 mins | Total time: 22 mins
Super easy and quick. These Onion Rings are the best version I’ve made so far! They are perfectly seasoned, and crispy minus the grease. Serve these onion rings as a party appetizer. They are also excellent on game day.

Ingredients

2 tablespoons olive oil

½ c. all-purpose flour

1 teaspoon salt, divided

1 egg

½ c. buttermilk

1 c. panko breadcrumbs

1 teaspoon paprika

Oil Spray, optional

1 large yellow sweet onion, sliced ½” thick and separated into rings

How to make Air Fryer Onion Rings

Step 1: Ready four shallow, deep plates. Mix the flour, paprika, and ½ tsp salt on the first plate. On the next plate, combine the buttermilk or milk and vinegar/lemon juice, and egg, with a ¼ cup of the flour mixture. Place the panko breadcrumbs, ½ tsp salt, and olive oil on the third plate and mix well using a fork. On the fourth plate, place half of the panko.

Step 2: Dry the onion rings using a paper towel, removing the excess moisture.

Step 3: in the flour mixture, dredge the onion rings using a fork, then drop them in the buttermilk mixture and coat them with panko mixture.

Step 4: Grease the fryer basket with an oil spray. In a single layer, place the onion rings in the Air Fryer basket. Inside the bigger rings, you can place the smaller rings, leaving enough space between them.

Step 5: Set the onion rings to cook for about 11 to 15 minutes at 400 degrees F or until crispy and golden brown. After about 6 minutes, spray them with cooking spray. There is no need to flip the onion rings.

Step 6: Using a cookie spatula or fork, lift the onion rings when done and serve right away. Enjoy!

Tips:

For this recipe, you can also use sweet onions. White and yellow onions don’t work well for breading.

Freeze the breaded onion rings for about 15 minutes on a baking sheet to let the panko mixture stick better.

You can swap panko bread crumbs with normal bread crumbs. But it might not be as crispy.

To coat the onion rings, make sure to use a fork.

Nutritional Facts:

Calories: 193 kcal | carbohydrates: 26g | protein: 4g | fat: 8g | cholesterol: 3mg | sodium: 1208mg | potassium: 260mg | fiber: 2g | sugar: 9g | vitamin A: 540iu | vitamin C: 7.9mg | calcium: 68mg | iron: 1.4mg

Air Fryer Onion Rings

Rebecca Prep time: 10 mins | Cook time: 12 mins | Total time: 22 mins Super easy and quick. These Onion Rings are the best version I’ve made so far! They… General Recipes Air Fryer Onion Rings European Print This
Prep Time: 10 mins Cooking Time: 12 mins 12 mins
Nutrition facts: 193 calories 8 fat
Rating: 5.0/5
( 1 voted )

Ingredients

  • 2 tablespoons olive oil
  • ½ c. all-purpose flour
  • 1 teaspoon salt, divided
  • 1 egg
  • ½ c. buttermilk
  • 1 c. panko breadcrumbs
  • 1 teaspoon paprika
  • Oil Spray, optional
  • 1 large yellow sweet onion, sliced ½” thick and separated into rings

Instructions

Step 1: Ready four shallow, deep plates. Mix the flour, paprika, and ½ tsp salt on the first plate. On the next plate, combine the buttermilk or milk and vinegar/lemon juice, and egg, with a ¼ cup of the flour mixture. Place the panko breadcrumbs, ½ tsp salt, and olive oil on the third plate and mix well using a fork. On the fourth plate, place half of the panko.

Step 2: Dry the onion rings using a paper towel, removing the excess moisture.

Step 3: in the flour mixture, dredge the onion rings using a fork, then drop them in the buttermilk mixture and coat them with panko mixture.

Step 4: Grease the fryer basket with an oil spray. In a single layer, place the onion rings in the Air Fryer basket. Inside the bigger rings, you can place the smaller rings, leaving enough space between them.

Step 5: Set the onion rings to cook for about 11 to 15 minutes at 400 degrees F or until crispy and golden brown. After about 6 minutes, spray them with cooking spray. There is no need to flip the onion rings.

Step 6: Using a cookie spatula or fork, lift the onion rings when done and serve right away. Enjoy!

Notes

For this recipe, you can also use sweet onions. White and yellow onions don’t work well for breading. Freeze the breaded onion rings for about 15 minutes on a baking sheet to let the panko mixture stick better. You can swap panko bread crumbs with normal bread crumbs. But it might not be as crispy. To coat the onion rings, make sure to use a fork.

September 30, 2022 0 comment
0 FacebookTwitterPinterestEmail
General Recipes

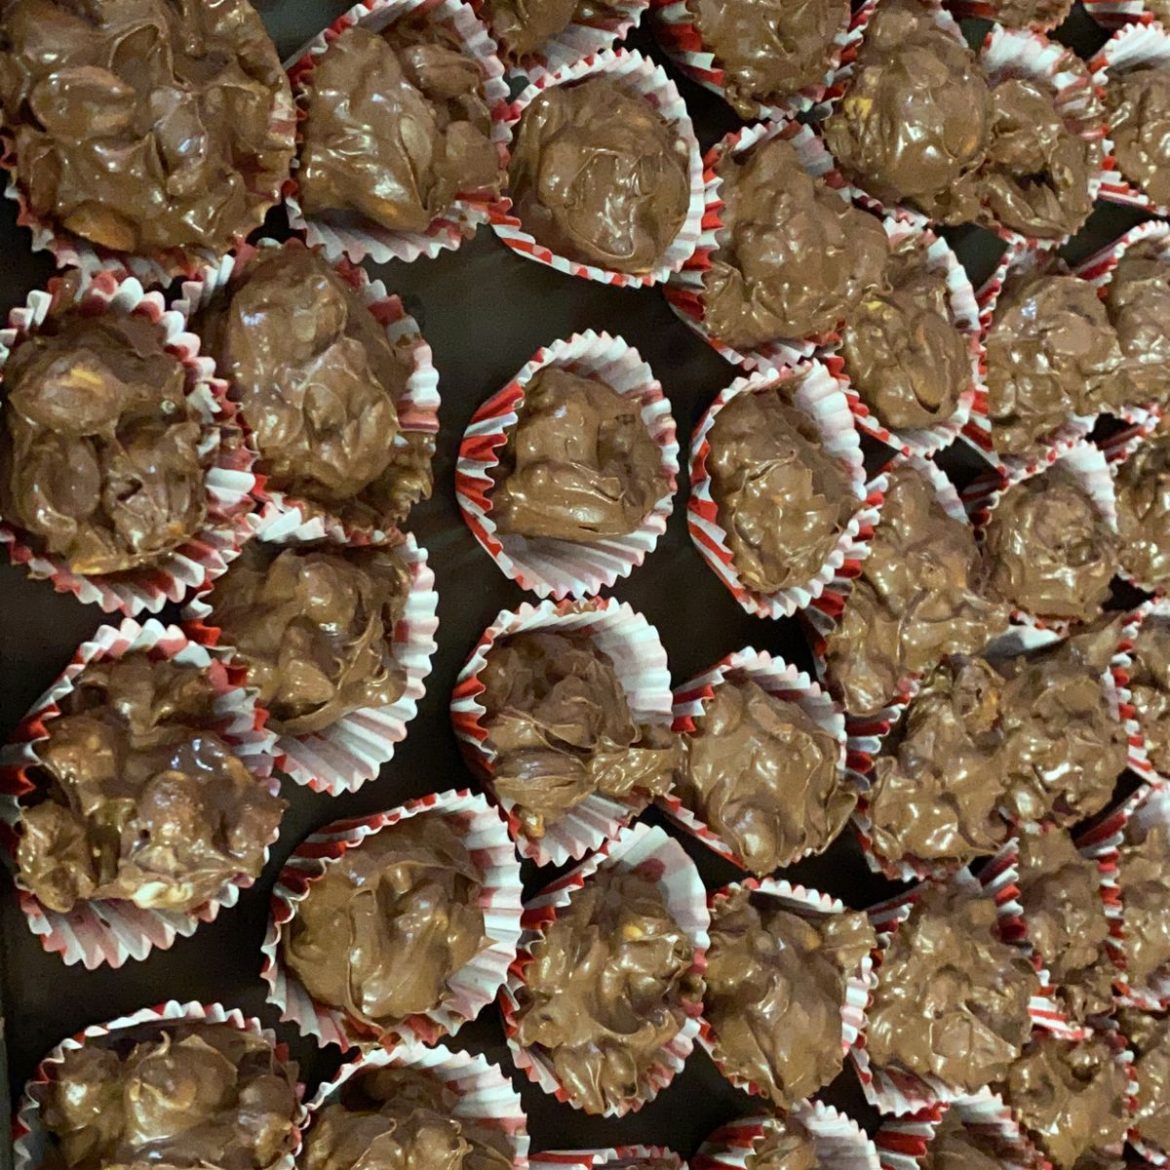
Crockpot Christmas Candy

by Rebecca September 30, 2022
written by Rebecca

Prep Time: 5 mins | Cook Time: 2 hrs | Total Time: 2 hrs 5 mins | Servings: 36 candies

This no-bake easy Crockpot Christmas Candy is an amazing holiday candy made with just a few simple ingredients. These candies are excellent if you are looking to try another treat this holiday season. If desired, you can also whip up a big batch and give these candies as presents. Simply place them in cute mini jars and stick personalized notes on each jar.

Ingredients

1 ½ c. creamy peanut butter

1 c. chopped pecans

1 pound vanilla almond bark

2 c. peanuts, dry roasted or regular salted

1 pound chocolate almond bark

¼ c. Christmas sprinkles optional

12 ounces of dark chocolate chips

How to make Crockpot Christmas Candy

Step 1: In a slow cooker, add all the ingredients except for the sprinkles. Set to cook for 2 hours on low or 1 hour on high, stirring every after 20 minutes.

Step 2: Into the cake liners in a regular-sized muffin tin, place 2 tbsp of the melted and well-combined candy, keeping the candy in shape. On top, add the Christmas sprinkles. Place in the fridge for about an hour or two until firm.

Step 3: Serve the candy once set. Enjoy!

Tips:

To stretch the recipe, you can use mini muffin liners and mini muffin tins.

In Ziploc bags or Tupperware, store any leftovers and keep them in the fridge for up to 2 weeks.

Or make this candy on the stove. To do so, place the almond bark and chocolate chips into a large pot and heat on low. Let them melt while stirring. Then, add the peanut butter, peanuts, and pecans, stirring well. Into the muffin liners, spoon the mixture.

Variations:

In place of peanuts, you can use Rice Krispies.

Or swap peanuts with Pretzels (2 cups, slight crushed)

To this recipe, you can also add crunchy chow mein noodles. Add them once the almond bark and chocolate have melted.

Nutrition Facts:

Calories: 325 kcal | Carbohydrates: 27g | Protein: 6g | Fat: 22g | Cholesterol: 1mg | Sodium: 69mg | Potassium: 202mg | Fiber: 2g | Sugar: 22g | Vitamin C: 1mg | Calcium: 44mg | Iron: 1mg

Crockpot Christmas Candy

Rebecca Prep Time: 5 mins | Cook Time: 2 hrs | Total Time: 2 hrs 5 mins | Servings: 36 candies This no-bake easy Crockpot Christmas Candy is an amazing holiday… General Recipes Crockpot Christmas Candy European Print This
Serves: 36 Prep Time: 5 mins Cooking Time: 2 hrs 2 hrs
Nutrition facts: 325 calories 22 fat
Rating: 5.0/5
( 1 voted )

Ingredients

  • 1 ½ c. creamy peanut butter
  • 1 c. chopped pecans
  • 1 pound vanilla almond bark
  • 2 c. peanuts, dry roasted or regular salted
  • 1 pound chocolate almond bark
  • ¼ c. Christmas sprinkles optional
  • 12 ounces of dark chocolate chips

Instructions

Step 1: In a slow cooker, add all the ingredients except for the sprinkles. Set to cook for 2 hours on low or 1 hour on high, stirring every after 20 minutes.

Step 2: Into the cake liners in a regular-sized muffin tin, place 2 tbsp of the melted and well-combined candy, keeping the candy in shape. On top, add the Christmas sprinkles. Place in the fridge for about an hour or two until firm.

Step 3: Serve the candy once set. Enjoy!

Notes

To stretch the recipe, you can use mini muffin liners and mini muffin tins. In Ziploc bags or Tupperware, store any leftovers and keep them in the fridge for up to 2 weeks. Or make this candy on the stove. To do so, place the almond bark and chocolate chips into a large pot and heat on low. Let them melt while stirring. Then, add the peanut butter, peanuts, and pecans, stirring well. Into the muffin liners, spoon the mixture. Variations: In place of peanuts, you can use Rice Krispies. Or swap peanuts with Pretzels (2 cups, slight crushed) To this recipe, you can also add crunchy chow mein noodles. Add them once the almond bark and chocolate have melted.

September 30, 2022 0 comment
0 FacebookTwitterPinterestEmail
General Recipes

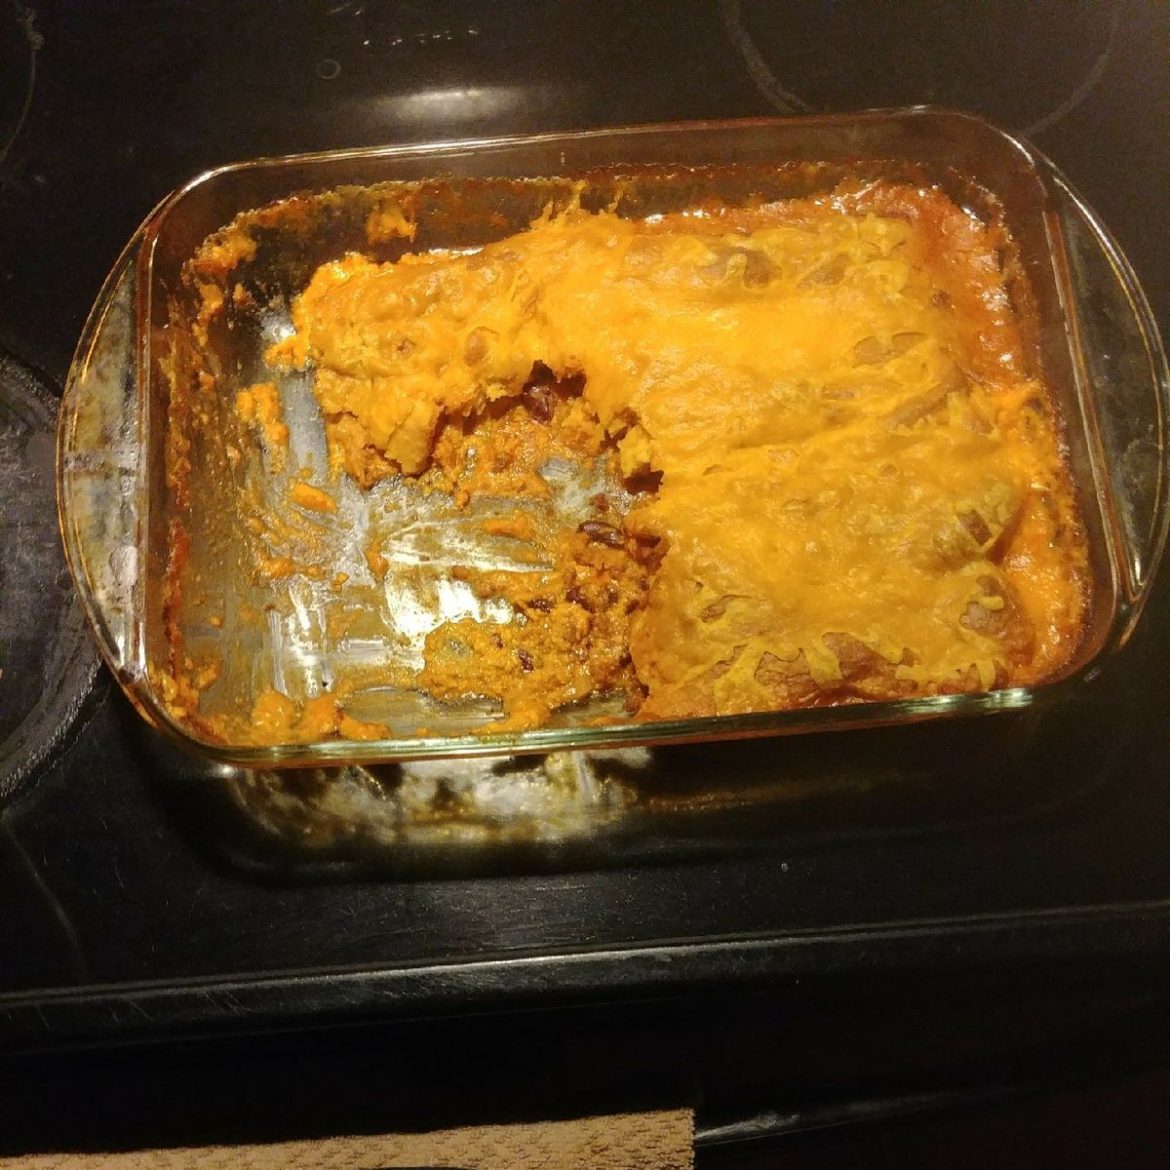
Chili Cheese Dog Casserole

by Rebecca September 30, 2022
written by Rebecca

Prep time: 20 mins | Total time: 55 mins | Servings: 8

This dish is a combination of two of my favorites – chili cheese dogs and casserole. It is an amazing dish that you can easily and quickly make at any time. For a scrumptious, kid and family-friendly meal, we love to serve this Chili Cheese Dog Casserole with a simple side salad or your preferred steamed veggies.

Ingredients

2 cans (15 ounces each) of chili with beans

8 ounces Kraft™ Velveeta™ original prepared cheese product, cut into 1/2” cubes

1/2 c. chopped red onion

1 package (16 ounces) of hot dogs, sliced

1 can (8 ounces) refrigerated Pillsbury™ Original Crescent

3/4 c. shredded Cheddar cheese (6 ounces)

Rolls (8 Count) or 1 can (8 ounces) of refrigerated Pillsbury™ Original Crescent Dough Sheet

How to make Chili Cheese Dog Casserole

Step 1: Prepare the oven. Preheat it to 375 degrees F.

Step 2: In an ungreased 13 x 9-inch pan, evenly scatter the cheese cubes.

Step 3: Place the chili and sliced hot dogs in a 2-quart saucepan. Mix well and heat for about 6 minutes over medium-high heat, stirring often, until hot.

Step 4: In the baking dish, evenly spoon over the cheese. On top, evenly scatter the red onion.

Step 5: Then, unroll a can of dough. If you plan to use crescent rolls, press the perforations to seal. Over the chili mixture, carefully lay the dough.

Step 6: Place in the preheated oven and bake for about 20 to 25 minutes or until golden brown. Remove from the oven when done and sprinkle the cheddar cheese on top. Return to the oven and continue baking for another 5 to 7 minutes or until the cheese has melted.

Tips:

If desired, substitute canned chili with 4 c homemade chili.

For a filling or family-friendly meal, serve this casserole with steamed veggies or a simple salad.

Nutrition Facts:

500 Calories, 32g Total Fat, 20g Protein, 34g Total Carbohydrate, 11g Sugars

Chili Cheese Dog Casserole

Rebecca Prep time: 20 mins | Total time: 55 mins | Servings: 8 This dish is a combination of two of my favorites – chili cheese dogs and casserole. It is… General Recipes Chili Cheese Dog Casserole European Print This
Serves: 8 Prep Time: 20 mins
Nutrition facts: 500 calories 32 fat
Rating: 5.0/5
( 1 voted )

Ingredients

  • 2 cans (15 ounces each) of chili with beans
  • 8 ounces Kraft™ Velveeta™ original prepared cheese product, cut into 1/2” cubes
  • 1/2 c. chopped red onion
  • 1 package (16 ounces) of hot dogs, sliced
  • 1 can (8 ounces) refrigerated Pillsbury™ Original Crescent
  • 3/4 c. shredded Cheddar cheese (6 ounces)
  • Rolls (8 Count) or 1 can (8 ounces) of refrigerated Pillsbury™ Original Crescent Dough Sheet

Instructions

Step 1: Prepare the oven. Preheat it to 375 degrees F.

Step 2: In an ungreased 13 x 9-inch pan, evenly scatter the cheese cubes.

Step 3: Place the chili and sliced hot dogs in a 2-quart saucepan. Mix well and heat for about 6 minutes over medium-high heat, stirring often, until hot.

Step 4: In the baking dish, evenly spoon over the cheese. On top, evenly scatter the red onion.

Step 5: Then, unroll a can of dough. If you plan to use crescent rolls, press the perforations to seal. Over the chili mixture, carefully lay the dough.

Step 6: Place in the preheated oven and bake for about 20 to 25 minutes or until golden brown. Remove from the oven when done and sprinkle the cheddar cheese on top. Return to the oven and continue baking for another 5 to 7 minutes or until the cheese has melted.

Notes

If desired, substitute canned chili with 4 c homemade chili. For a filling or family-friendly meal, serve this casserole with steamed veggies or a simple salad.

September 30, 2022 0 comment
0 FacebookTwitterPinterestEmail
General Recipes

Chicken and Waffle Sliders

by Rebecca September 30, 2022
written by Rebecca

Prep Time: 5 mins | Cook Time: 20 mins | Total Time: 25 mins | Servings: 16 sliders

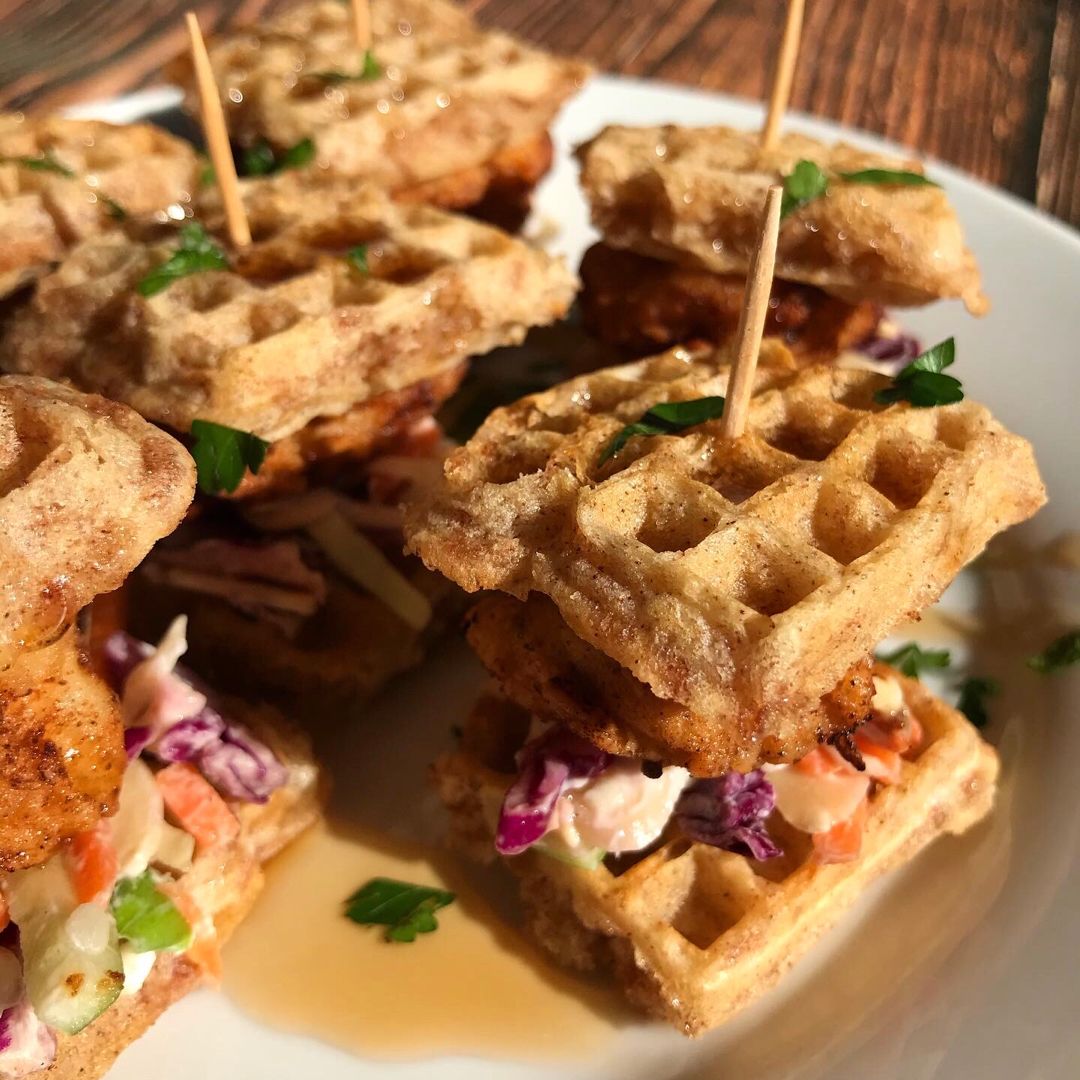
Totally a crowd-pleaser! These Chicken and Waffle Sliders are a staple at home. They are incredibly easy and quick to throw together and the perfect game day and party food recipe! A wonderful take on the classic comfort food turned into a grab-and-go appetizer. These delicious Chicken and Waffle Sliders are also excellent to serve at brunch.

My kids are obsessed with these Chicken and Waffle Sliders. These mini bad boys combined their two favorites – chicken and waffles into another delightful dish. For a full experience, drizzle some maple syrup over them before serving. You can also top them with homemade coleslaw if desired.

The combination of the savory and sweet flavor of these Chicken and Waffle Sliders is to die for! Whenever I made these, I make as many waffles and chicken fingers. If bringing these to a party, I suggest assembling them right before serving. Rewarm, put them together, and serve. Another option is to drizzle some hot sauce on these chicken and waffle sliders for some kick.

This recipe is not only easy and quick to throw together. They are also budget-friendly. Make sure to put this on your list and give this recipe a go soon!

Ingredients

32 frozen mini waffles

4 frozen chicken fingers

1 c. coleslaw

2 tbsp maple syrup

Toothpicks

How to make Chicken and Waffle Sliders

Step 1: Following the package directions, cook the chicken finger and mini frozen waffles.

Step 2: Into 3 to 4 pieces, cut the cooked chicken fingers. Then, break the toasted mini waffles apart.

Step 3: On top of the toasted mini waffle, place a scant tbsp of coleslaw and top with a piece of chicken.

Step 4: On top of the chicken, add the final mini waffle and secure using a toothpick.

Step 5: Do the same with the rest of the waffles, coleslaw, and chicken.

Step 6: On top of the waffles, drizzle the maple syrup. Enjoy!

Note:

You can cook as many waffles and chicken fingers. Remember that one chicken finger yield approximately 3 to 4 sliders.

Nutrition Facts:

Serving: 1slider | Calories: 52 kcal | Carbohydrates: 7g | Protein: 3g | Cholesterol: 11mg | Sodium: 67mg | Potassium: 70mg | Sugar: 2g | Vitamin A: 195IU | Vitamin C: 1.7mg | Calcium: 54mg | Iron: 0.9mg

Chicken and Waffle Sliders

Rebecca Prep Time: 5 mins | Cook Time: 20 mins | Total Time: 25 mins | Servings: 16 sliders Totally a crowd-pleaser! These Chicken and Waffle Sliders are a staple at… General Recipes Chicken and Waffle Sliders European Print This
Serves: 16 Prep Time: 5 mins Cooking Time: 20 mins 20 mins
Nutrition facts: 52 calories 20 grams fat
Rating: 5.0/5
( 1 voted )

Ingredients

  • 32 frozen mini waffles
  • 4 frozen chicken fingers
  • 1 c. coleslaw
  • 2 tbsp maple syrup
  • Toothpicks

Instructions

Step 1: Following the package directions, cook the chicken finger and mini frozen waffles.

Step 2: Into 3 to 4 pieces, cut the cooked chicken fingers. Then, break the toasted mini waffles apart.

Step 3: On top of the toasted mini waffle, place a scant tbsp of coleslaw and top with a piece of chicken.

Step 4: On top of the chicken, add the final mini waffle and secure using a toothpick.

Step 5: Do the same with the rest of the waffles, coleslaw, and chicken.

Step 6: On top of the waffles, drizzle the maple syrup. Enjoy!

Notes

You can cook as many waffles and chicken fingers. Remember that one chicken finger yield approximately 3 to 4 sliders.

September 30, 2022 0 comment
0 FacebookTwitterPinterestEmail
General Recipes

Deep Dish Mini Pizzas

by Rebecca September 30, 2022
written by Rebecca

PREP TIME: 10 mins | COOK TIME: 15 mins | TOTAL TIME: 25 mins | SERVINGS: 12

Taste amazing and are super easy to whip up – these Deep Dish Mini Pizzas are my ultimate favorite bite-sized pizza! Made with just four ingredients (crescent roll dough, mini pepperoni slices, mozzarella cheese, and a can of pizza sauce) and ready in less than an hour. I make sure to throw together a big batch because these Mini Pizzas are gone fast! And if you have picky kids, there is no way that they are going to resist these delightful Deep Dish Mini Pizzas!

I enjoy making these mini pizzas and serving them as appetizers. These warm, gooey, and cheesy Deep Dish Mini Pizzas are always a huge hit! Perfect if you love pizza!

Ingredients

Grated Mozzarella Cheese

1 package Crescent Roll Dough

1 small can of Pizza Sauce

Mini Pepperoni Slices OR SLICE THEM YOURSELF FROM MINI PEPPERONI STICKS

How to make Deep Dish Mini Pizzas

Step 1: Prepare the oven. Preheat it to 375 degrees F. Using cooking spray, grease a muffin tin, and set aside.

Step 2: On a cookie sheet, lay the crescent roll dough, then cut out 12 circles or 12 circles for larger pizza muffins.

Step 3: At the bottom of each muffin cup, place the dough. If you cut the dough into squares, overlap the corners to make the top edges even.

Step 4: On top of each dough, add a layer of cheese, then a spoon each of the pizza sauce, enough to cover the sauce. Next, add another layer of the cheese, followed by your preferred toppings.

Step 5: Place in the preheated oven and bake for about 15 minutes or until the cheese begins to bubble and the crust becomes golden brown.

Step 6: Remove from the oven when done and allow the mini pizzas to sit for about 5 minutes before pulling them out of the muffin tin.

Step 7: Serve the Deep Dish Mini Pizzas. Enjoy!

Deep Dish Mini Pizzas

Rebecca PREP TIME: 10 mins | COOK TIME: 15 mins | TOTAL TIME: 25 mins | SERVINGS: 12 Taste amazing and are super easy to whip up – these Deep Dish… General Recipes Deep Dish Mini Pizzas European Print This
Serves: 12 Prep Time: 10 mins Cooking Time: 15 mins 15 mins
Nutrition facts: 200 calories 20 grams fat
Rating: 5.0/5
( 1 voted )

Ingredients

  • Grated Mozzarella Cheese
  • 1 package Crescent Roll Dough
  • 1 small can of Pizza Sauce
  • Mini Pepperoni Slices OR SLICE THEM YOURSELF FROM MINI PEPPERONI STICKS

Instructions

Step 1: Prepare the oven. Preheat it to 375 degrees F. Using cooking spray, grease a muffin tin, and set aside.

Step 2: On a cookie sheet, lay the crescent roll dough, then cut out 12 circles or 12 circles for larger pizza muffins.

Step 3: At the bottom of each muffin cup, place the dough. If you cut the dough into squares, overlap the corners to make the top edges even.

Step 4: On top of each dough, add a layer of cheese, then a spoon each of the pizza sauce, enough to cover the sauce. Next, add another layer of the cheese, followed by your preferred toppings.

Step 5: Place in the preheated oven and bake for about 15 minutes or until the cheese begins to bubble and the crust becomes golden brown.

Step 6: Remove from the oven when done and allow the mini pizzas to sit for about 5 minutes before pulling them out of the muffin tin.

Step 7: Serve the Deep Dish Mini Pizzas. Enjoy!

September 30, 2022 0 comment
0 FacebookTwitterPinterestEmail
General Recipes

Lasagna Roll Ups Recipe

by Rebecca September 30, 2022
written by Rebecca

Prep Time: 30 mins | Cook Time: 42 mins | Total Time: 1 hr 12 mins | Servings: 12 lasagna roll-ups

I love lasagna and these lasagna roll-ups are the best option for an easier and quick lasagna dinner. Make these lasagna roll-ups ahead for an even faster meal. They are also freezer-friendly and reheat perfectly!

Ingredients

1 large egg

16 ounces ground beef, 85% lean

12 lasagna noodles, cooked to package instructions

24 ounces marinara sauce

3 garlic cloves, minced

1/2 c. diced onion

1/2 teaspoon dried oregano

15 ounces ricotta cheese

3 c. mozzarella cheese, shredded, divided

1/4 c. Parmesan cheese, shredded

1/4 c. parsley, chopped, plus more to garnish

1 teaspoon sea salt, or to taste for red sauce

1/2 teaspoon black pepper, or to taste

How to make Lasagna Roll-Ups

Step 1: Prepare the oven. Preheat it to 375 degrees F.

Step 2: Following the package directions, cook the noodles in a large pot of salted boiling water. When done, drain the noodles and fill the pot with cold water.

Step 3: Cook the ground beef in a deep pan or dutch oven on medium-high heat, breaking the meat apart using a spatula until the ground beef is no longer pink. Then, add the onion and cook for another 3 minutes until tender. Next, add the garlic, 1 teaspoon salt, half tsp pepper, and half tsp oregano. Saute for a minute more before adding in the marinara. Bring everything to a simmer, then turn the heat off. On the bottom of a casserole dish, spread a half cup of the meat sauce.

Step 4: Place the ricotta, 1 egg, 1/4 c. Parmesan cheese, 1 1/2 c mozzarella cheese, and 1/4 c parsley in a large bowl. Mix well until blended.

Step 5: Over a large baking sheet, arrange the noodles in a single layer. On top of each noodle, spread 1/4 c of the cheese mixture. In a strip down the middle of each noodle, add a heaping tablespoon of the meat sauce. Then, roll the noodles up and place them in the prepared casserole dish.

Step 6: On top of the roll-ups, spread the rest of the meat sauce and sprinkle with the rest of the mozzarella cheese. Tent the dish with foil, ensuring the foil is not touching the cheese.

Step 7: Place in the preheated oven and bake for about 40 minutes. Uncover and broil for about 2 to 3 minutes or until the cheese is lightly golden.

Step 8: Before serving, garnish with parsley. Enjoy!

Nutrition Facts:

Amount Per Serving: Calories 333, Calories from Fat 126, Fat 14g22%, Saturated Fat 8g50%, Cholesterol 76mg25%, Sodium 760mg33%, Potassium 457mg13%, Carbohydrates 27g9%, Fiber 2g8%, Sugar 4g4%, Protein 24g48%, Vitamin A 677IU14%, Vitamin C 6mg7%, Calcium 343mg34%, Iron 2mg11%

*Percent Daily Values are based on a 2000-calorie diet.

Lasagna Roll Ups Recipe

Rebecca Prep Time: 30 mins | Cook Time: 42 mins | Total Time: 1 hr 12 mins | Servings: 12 lasagna roll-ups I love lasagna and these lasagna roll-ups are the… General Recipes Lasagna Roll Ups Recipe European Print This
Serves: 12 Prep Time: 30 mins Cooking Time: 42 mins 42 mins
Nutrition facts: 333 calories 14 fat
Rating: 5.0/5
( 1 voted )

Ingredients

  • 1 large egg
  • 16 ounces ground beef, 85% lean
  • 12 lasagna noodles, cooked to package instructions
  • 24 ounces marinara sauce
  • 3 garlic cloves, minced
  • 1/2 c. diced onion
  • 1/2 teaspoon dried oregano
  • 15 ounces ricotta cheese
  • 3 c. mozzarella cheese, shredded, divided
  • 1/4 c. Parmesan cheese, shredded
  • 1/4 c. parsley, chopped, plus more to garnish
  • 1 teaspoon sea salt, or to taste for red sauce
  • 1/2 teaspoon black pepper, or to taste

Instructions

Step 1: Prepare the oven. Preheat it to 375 degrees F.

Step 2: Following the package directions, cook the noodles in a large pot of salted boiling water. When done, drain the noodles and fill the pot with cold water.

Step 3: Cook the ground beef in a deep pan or dutch oven on medium-high heat, breaking the meat apart using a spatula until the ground beef is no longer pink. Then, add the onion and cook for another 3 minutes until tender. Next, add the garlic, 1 teaspoon salt, half tsp pepper, and half tsp oregano. Saute for a minute more before adding in the marinara. Bring everything to a simmer, then turn the heat off. On the bottom of a casserole dish, spread a half cup of the meat sauce.

Step 4: Place the ricotta, 1 egg, 1/4 c. Parmesan cheese, 1 1/2 c mozzarella cheese, and 1/4 c parsley in a large bowl. Mix well until blended.

Step 5: Over a large baking sheet, arrange the noodles in a single layer. On top of each noodle, spread 1/4 c of the cheese mixture. In a strip down the middle of each noodle, add a heaping tablespoon of the meat sauce. Then, roll the noodles up and place them in the prepared casserole dish.

Step 6: On top of the roll-ups, spread the rest of the meat sauce and sprinkle with the rest of the mozzarella cheese. Tent the dish with foil, ensuring the foil is not touching the cheese.

Step 7: Place in the preheated oven and bake for about 40 minutes. Uncover and broil for about 2 to 3 minutes or until the cheese is lightly golden.

Step 8: Before serving, garnish with parsley. Enjoy!

September 30, 2022 0 comment
0 FacebookTwitterPinterestEmail
General Recipes

CHICKEN AND BROCCOLI STIR FRY

by Rebecca September 30, 2022
written by Rebecca

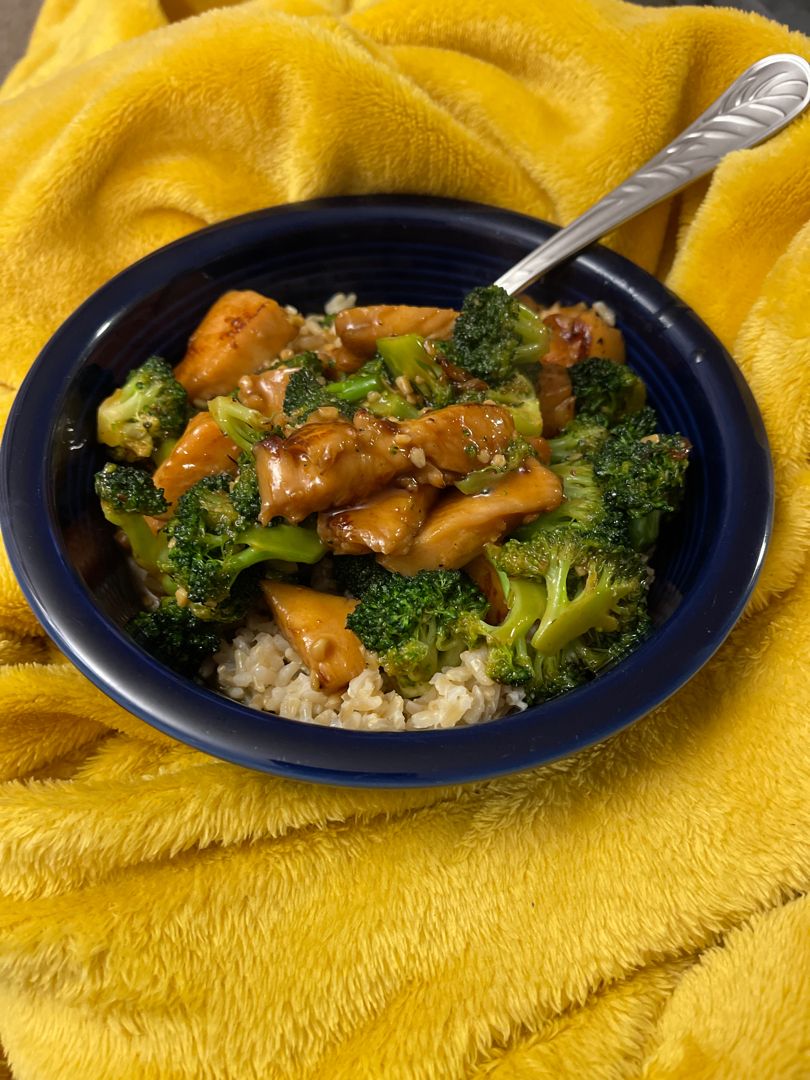
This chicken and broccoli stir fry is so easy to make. It’s a great weeknight dinner option best served over rice. If you love Chinese food, I’m sure you’ve already heard about this stir fry. And this homemade version is as great, if not better than what you get from your favorite Chinese restaurant!

Ingredients

Chicken and Broccoli:

2 tablespoons cooking oil – I use Avocado Oil – Divided

1 pound boneless, skinless chicken breast – cut into ¾-inch pieces

1 pound broccoli (about 5 c.) – cut into florets

½ pound white button mushrooms – thickly sliced

1 small yellow onion – sliced into strips

Stir Fry Sauce:

3 tablespoons low sodium soy sauce (or Tamari for gluten-free)

1 tablespoon corn starch

⅔ c. low sodium chicken broth

1 tablespoon sesame oil

2 tablespoons light brown sugar – packed (or honey if you prefer)

¼ teaspoon black pepper – plus more to season chicken

1 teaspoon fresh ginger – peeled and grated

1 teaspoon garlic (2 small cloves) – grated

HOW TO MAKE CHICKEN AND BROCCOLI STIR FRY

Step 1: To make the sauce, whisk the sauce ingredients until the sugar and cornstarch are dissolved. To help the sugar dissolve faster, slightly warm the broth. Set aside.

Step 2: Into small bite-sized pieces that are no more than 3/4-inch thickness, cut the chicken and lightly season with pepper.

Step 3: Heat 1 tbsp oil in a wok or large, heavy skillet over medium-high heat. Once the oil is hot, add the chicken to the wok in a single layer and cook for about a minute, undisturbed. Then, stir fry for additional 5 minutes or until the chicken is completely cooked and golden brown.

Step 4: To a bowl, transfer the seared chicken and loosely tent to keep them warm.

Step 5: Add another 1 tbsp of oil to the now-empty wok/skillet. Then, add the broccoli florets, sliced onion, and sliced mushrooms. Stir fry the veggies for about 3 minutes or until the broccoli is crisp-tender and the mushrooms have softened. Then, adjust the heat to medium/low.

Step 6: Stir the sauce before pouring it over the veggies. Let it simmer for about 3 to 4 minutes or until the sauce has thickened. You can add water 1 tbsp at a time if the sauce is too thick until you reached your desired consistency.

Step 7: Place the chicken back in the pan and stir for 30 seconds more or until completely heated. If needed, add more soy sauce to taste.

Step 8: Remove from the heat when done and serve the chicken and broccoli stir fry over hot white rice. Enjoy!

CHICKEN AND BROCCOLI STIR FRY

Rebecca This chicken and broccoli stir fry is so easy to make. It’s a great weeknight dinner option best served over rice. If you love Chinese food, I’m sure you’ve already… General Recipes CHICKEN AND BROCCOLI STIR FRY European Print This
Nutrition facts: 200 calories 20 grams fat
Rating: 5.0/5
( 1 voted )

Ingredients

  • Chicken and Broccoli:
  • 2 tablespoons cooking oil – I use Avocado Oil – Divided
  • 1 pound boneless, skinless chicken breast – cut into ¾-inch pieces
  • 1 pound broccoli (about 5 c.) – cut into florets
  • ½ pound white button mushrooms – thickly sliced
  • 1 small yellow onion – sliced into strips
  • Stir Fry Sauce:
  • 3 tablespoons low sodium soy sauce (or Tamari for gluten-free)
  • 1 tablespoon corn starch
  • ⅔ c. low sodium chicken broth
  • 1 tablespoon sesame oil
  • 2 tablespoons light brown sugar – packed (or honey if you prefer)
  • ¼ teaspoon black pepper – plus more to season chicken
  • 1 teaspoon fresh ginger – peeled and grated
  • 1 teaspoon garlic (2 small cloves) – grated

Instructions

Step 1: To make the sauce, whisk the sauce ingredients until the sugar and cornstarch are dissolved. To help the sugar dissolve faster, slightly warm the broth. Set aside.

Step 2: Into small bite-sized pieces that are no more than 3/4-inch thickness, cut the chicken and lightly season with pepper.

Step 3: Heat 1 tbsp oil in a wok or large, heavy skillet over medium-high heat. Once the oil is hot, add the chicken to the wok in a single layer and cook for about a minute, undisturbed. Then, stir fry for additional 5 minutes or until the chicken is completely cooked and golden brown.

Step 4: To a bowl, transfer the seared chicken and loosely tent to keep them warm.

Step 5: Add another 1 tbsp of oil to the now-empty wok/skillet. Then, add the broccoli florets, sliced onion, and sliced mushrooms. Stir fry the veggies for about 3 minutes or until the broccoli is crisp-tender and the mushrooms have softened. Then, adjust the heat to medium/low.

Step 6: Stir the sauce before pouring it over the veggies. Let it simmer for about 3 to 4 minutes or until the sauce has thickened. You can add water 1 tbsp at a time if the sauce is too thick until you reached your desired consistency.

Step 7: Place the chicken back in the pan and stir for 30 seconds more or until completely heated. If needed, add more soy sauce to taste.

Step 8: Remove from the heat when done and serve the chicken and broccoli stir fry over hot white rice. Enjoy!

September 30, 2022 0 comment
0 FacebookTwitterPinterestEmail
General Recipes

Crock Pot Ranch Chicken Tacos

by Rebecca September 30, 2022
written by Rebecca

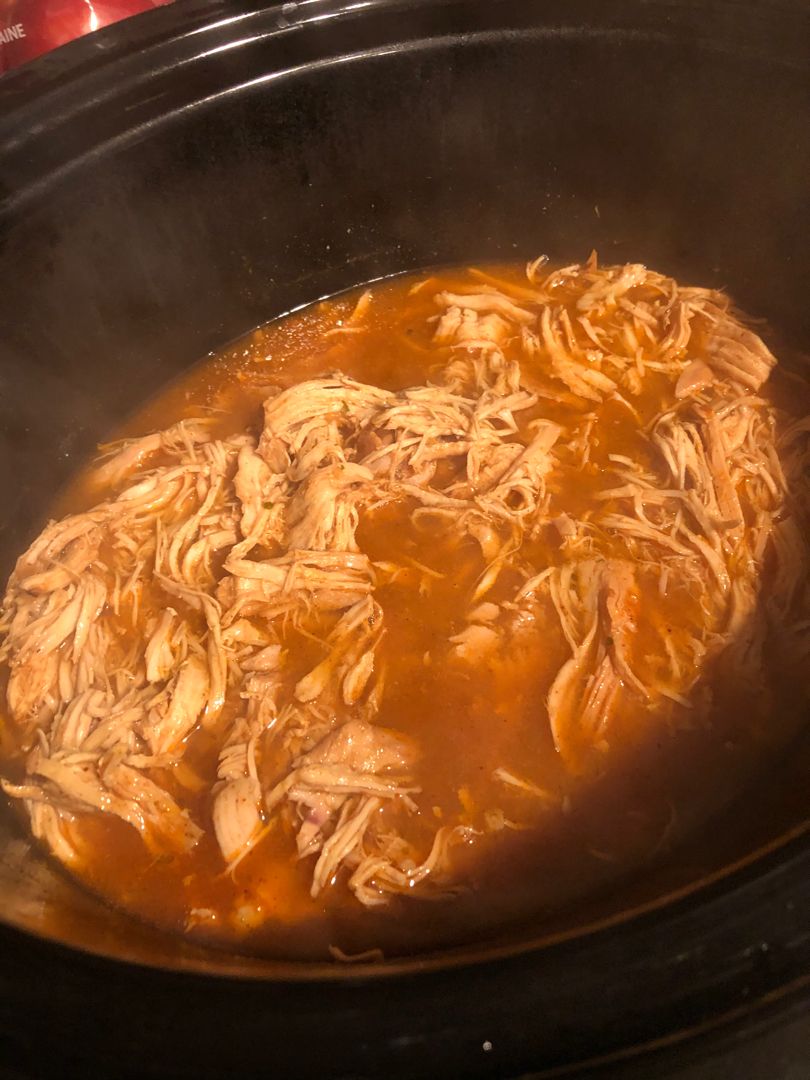
This Crock Pot Ranch Chicken Tacos recipe is an easy taco recipe that you can make any time! All the ingredients are combined in the pot and set to cook for a few hours. Once ready to serve, shred the chicken and toss them back into the pot. The best part is this recipe is easily customizable to your liking.

Ingredients

1 packet ranch seasoning

4 boneless, skinless chicken breasts

2 tbsp low sodium taco seasoning – (or 1 packet of taco seasoning)

8-10 small taco-sized flour tortillas or corn tortillas

1 c. chicken stock – low sodium if you prefer

Optional:

Diced avocado

Cilantro leaves – chopped

Shredded lettuce or Shredded cabbage

Diced tomato

Red onion – thinly sliced

Shredded cheese

How to make Crock Pot Ranch Chicken Tacos

Step 1: In the bottom of a slow cooker, place the chicken breasts. Then, pour in the chicken stock and sprinkle the taco seasoning and ranch seasoning on top. Put the lid on and set to cook for 3 to 4 hours on high or 6 to 7 hours on low.

Step 2: To a bowl, transfer the chicken about after 20 minutes before serving, and shred the chicken using two forks. Place the shredded chicken back into the slow cooker and stir well.

Step 3: To serve, fill the tortillas with the shredded chicken and top with your favorite toppings. Enjoy!

Notes:

In my opinion, iceberg lettuce is the best variety to use for tacos. You can shred the lettuce or use store-bought lettuce in a bag. If shredding the lettuce, shred it thinly.

Add cayenne pepper to the taco and ranch seasoning for spicier chicken. You can use spicy taco seasoning mix or your preferred hot pepper sauce.

In an airtight container, keep any leftovers and place them in the fridge for up to 4 days.

To double the recipe, use a 6-quart or more crockpot and increase the cooking time by an hour.

To freeze the cooked chicken, transfer the completely cooled chicken into airtight containers or freezer bags.

Crock Pot Ranch Chicken Tacos

Rebecca This Crock Pot Ranch Chicken Tacos recipe is an easy taco recipe that you can make any time! All the ingredients are combined in the pot and set to cook… General Recipes Crock Pot Ranch Chicken Tacos European Print This
Nutrition facts: 200 calories 20 grams fat
Rating: 5.0/5
( 1 voted )

Ingredients

  • 1 packet ranch seasoning
  • 4 boneless, skinless chicken breasts
  • 2 tbsp low sodium taco seasoning – (or 1 packet of taco seasoning)
  • 8-10 small taco-sized flour tortillas or corn tortillas
  • 1 c. chicken stock – low sodium if you prefer
  • Optional:
  • Diced avocado
  • Cilantro leaves – chopped
  • Shredded lettuce or Shredded cabbage
  • Diced tomato
  • Red onion – thinly sliced
  • Shredded cheese

Instructions

Step 1: In the bottom of a slow cooker, place the chicken breasts. Then, pour in the chicken stock and sprinkle the taco seasoning and ranch seasoning on top. Put the lid on and set to cook for 3 to 4 hours on high or 6 to 7 hours on low.

Step 2: To a bowl, transfer the chicken about after 20 minutes before serving, and shred the chicken using two forks. Place the shredded chicken back into the slow cooker and stir well.

Step 3: To serve, fill the tortillas with the shredded chicken and top with your favorite toppings. Enjoy!

Notes

In my opinion, iceberg lettuce is the best variety to use for tacos. You can shred the lettuce or use store-bought lettuce in a bag. If shredding the lettuce, shred it thinly. Add cayenne pepper to the taco and ranch seasoning for spicier chicken. You can use spicy taco seasoning mix or your preferred hot pepper sauce. In an airtight container, keep any leftovers and place them in the fridge for up to 4 days. To double the recipe, use a 6-quart or more crockpot and increase the cooking time by an hour. To freeze the cooked chicken, transfer the completely cooled chicken into airtight containers or freezer bags.

September 30, 2022 0 comment
0 FacebookTwitterPinterestEmail
Newer Posts
Older Posts

Popular Posts

  • 1

    Crispy Crunchy Parmesan Potatoes

    March 21, 2020
  • 2

    CROCK POT SMOTHERED PORK CHOPS

    March 21, 2020
  • Facebook
  • Twitter

@2019 - All Right Reserved.


Back To Top