Cook it once
  • Home
  • Privacy Policy
  • Recipes
    • KETO
    • LC
    • WW
  • Tips
  • Contact
Cook it once
  • Home
  • Privacy Policy
  • Recipes
    • KETO
    • LC
    • WW
  • Tips
  • Contact
Category:

General Recipes

General Recipes

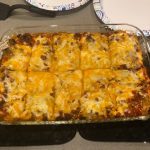
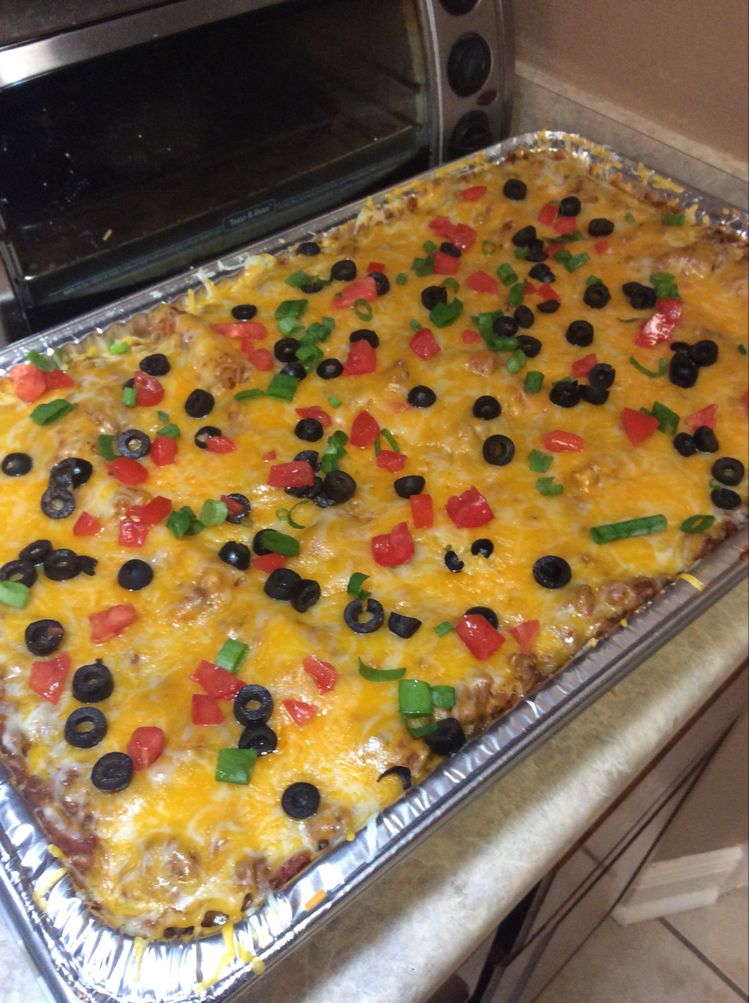
Mexican Lasagna

by Rebecca October 3, 2022
written by Rebecca

PREP TIME: 30 mins | COOK TIME: 1 min | TOTAL TIME: 31 mins | SERVINGS: 10

Lasagna with a Tex-Mex touch? I am all in! This mouthwatering Mexican Lasagna with layers of beef/refried beans/chilies mixture, lasagna noodles, sour cream, cheese, green onions, olives, and tomato toppings is the perfect weeknight/Holiday dinner!

INGREDIENTS

1 pkg. taco seasoning or Homemade Taco Seasoning

2 pounds 93% or 96% lean ground beef

16 ounces can refried beans

16-ounce box of uncooked lasagna noodles

4 ounces can chop green chilies

2 8-ounces bags Colby Jack cheese, shredded, divided use

24 ounces jar Pace mild or medium chunky salsa, divided use (or use your favorite salsa)

16 ounces ctn. sour cream

2.25 ounces can ripe olives, sliced, drained, for garnish

2 c. water see

3 small Roma tomatoes, chopped, for garnish

3 green onions, chopped, for garnish

How to make Mexican Lasagna

Step 1: Cook the beef in a skillet over medium heat or until browned. Drain when done. Then, add the beans, chilies, taco seasoning, and 2 heaping tbsp salsa. Mix well until combined and continue to cook for another 5 minutes.

Step 2: Spread at least 1 c. of the meat mixture on the bottom of a well-greased 9 x 13-inch baking dish. On top, lay four noodles. Cover the noodles with 1/3 of the beef mixture and sprinkle with 1 c. cheese. Do the same layers twice.

Step 3: Mix the rest of the salsa and water, then pour this on top.

Step 4: Place in the preheated oven and bake for about 1 1/2 hours, covered, until the noodles are tender. Remove the cover and top the lasagna with sour cream followed by cheese, olive, onions, and tomatoes. Continue to bake for another 5 to 15 minutes or until the cheese has melted.

Step 5: Remove from the oven when done and allow the lasagna to cool for about 10 to 15 minutes before slicing. Enjoy!

NOTES:

To prevent the noodles from drying out when baking, make sure to cover the noodles with the salsa/water mixture.

So the noodles won’t stick to the bottom of the pan, spread at least a cup of the beef mixture.

If desired, you can use enchilada sauce with the salsa to pour on top.

Adding more layers of (pre-cooked) noodles is not recommended because there will not be enough moisture in the casserole.

Adjust the cooking time accordingly until the noodles are fork tender.

You can also precook the lasagna noodles until al dente. Pour the salsa on top. DO NOT mix the salsa with water. Then, bake the lasagna for about 30 to 40 minutes until the casserole is bubbly. Top the lasagna with sour cream, then cheese, green onions, olives, and tomatoes. Continue baking for 5 to 10 minutes more or until the cheese has melted.

If desired, you can also make homemade taco seasoning.

Mexican Lasagna

Rebecca PREP TIME: 30 mins | COOK TIME: 1 min | TOTAL TIME: 31 mins | SERVINGS: 10 Lasagna with a Tex-Mex touch? I am all in! This mouthwatering Mexican Lasagna… General Recipes Mexican Lasagna European Print This
Serves: 10 Prep Time: 30 mins Cooking Time: 1 min 1 min
Nutrition facts: 200 calories 20 grams fat
Rating: 5.0/5
( 1 voted )

Ingredients

  • 1 pkg. taco seasoning or Homemade Taco Seasoning
  • 2 pounds 93% or 96% lean ground beef
  • 16 ounces can refried beans
  • 16-ounce box of uncooked lasagna noodles
  • 4 ounces can chop green chilies
  • 2 8-ounces bags Colby Jack cheese, shredded, divided use
  • 24 ounces jar Pace mild or medium chunky salsa, divided use (or use your favorite salsa)
  • 16 ounces ctn. sour cream
  • 2.25 ounces can ripe olives, sliced, drained, for garnish
  • 2 c. water see
  • 3 small Roma tomatoes, chopped, for garnish
  • 3 green onions, chopped, for garnish

Instructions

Step 1: Cook the beef in a skillet over medium heat or until browned. Drain when done. Then, add the beans, chilies, taco seasoning, and 2 heaping tbsp salsa. Mix well until combined and continue to cook for another 5 minutes.

Step 2: Spread at least 1 c. of the meat mixture on the bottom of a well-greased 9 x 13-inch baking dish. On top, lay four noodles. Cover the noodles with 1/3 of the beef mixture and sprinkle with 1 c. cheese. Do the same layers twice.

Step 3: Mix the rest of the salsa and water, then pour this on top.

Step 4: Place in the preheated oven and bake for about 1 1/2 hours, covered, until the noodles are tender. Remove the cover and top the lasagna with sour cream followed by cheese, olive, onions, and tomatoes. Continue to bake for another 5 to 15 minutes or until the cheese has melted.

Step 5: Remove from the oven when done and allow the lasagna to cool for about 10 to 15 minutes before slicing. Enjoy!

Notes

To prevent the noodles from drying out when baking, make sure to cover the noodles with the salsa/water mixture. So the noodles won't stick to the bottom of the pan, spread at least a cup of the beef mixture. If desired, you can use enchilada sauce with the salsa to pour on top. Adding more layers of (pre-cooked) noodles is not recommended because there will not be enough moisture in the casserole. Adjust the cooking time accordingly until the noodles are fork tender. You can also precook the lasagna noodles until al dente. Pour the salsa on top. DO NOT mix the salsa with water. Then, bake the lasagna for about 30 to 40 minutes until the casserole is bubbly. Top the lasagna with sour cream, then cheese, green onions, olives, and tomatoes. Continue baking for 5 to 10 minutes more or until the cheese has melted. If desired, you can also make homemade taco seasoning.
October 3, 2022 0 comment
0 FacebookTwitterPinterestEmail
General Recipes

Taco Lasagna

by Rebecca October 3, 2022
written by Rebecca

I am pretty sure that your entire family will love this easy taco lasagna. It has all the classic taco flavors, but in a lasagna form!

I always make sure to plan dinner ahead of time. Since school has already started, our already busy household is now chaos in a great and fun way. And we cannot resist enjoying our favorite taco, so we make it any day. But surely this taco lasagna is always a huge hit during taco Tuesdays!

I love this taco lasagna. This has been one of our favorites for years! To make this taco lasagna, all you need are just a few basic ingredients. And since we use pre-cooked lasagna noodles, throwing this together is a breeze! This taco lasagna is no doubt a mouthwatering twist on our all-time favorite classic lasagna!

Ingredients

1 egg

1 lb lean ground beef

diced tomatoes

2 packages of taco seasoning

15 oz. ricotta cheese

24 oz. mild Pace salsa

green onions

5 c. shredded Mexican-style cheese

1 package of lasagna noodles

sour cream

How to make Taco Lasagna

Step 1: Prepare the oven. Preheat it to 350 degrees. Cook the beef until browned. Drain the excess grease when done. To the browned beef, stir in the taco seasoning. Set aside.

Step 2: Place the eggs and ricotta cheese in a bowl. Mix well.

Step 3: Lay the lasagna in a baking dish. On top of the lasagna noodles, spread the ricotta mixture, followed by the beef, then 1/3 of the salsa, and cover with cheese. Feel free to use your desired amount of beef and cheese. Do the same layers twice.

Step 4: Cover the baking dish and place it in the preheated oven. Bake for about 40 minutes.

Step 5: Remove from the oven when done and allow the taco lasagna to cool.

Step 6: Slice and serve with a dollop of sour cream on top, garnished with some chopped green onions and diced tomatoes. Enjoy!

Taco Lasagna

Rebecca I am pretty sure that your entire family will love this easy taco lasagna. It has all the classic taco flavors, but in a lasagna form! I always make sure… General Recipes Taco Lasagna European Print This
Nutrition facts: 200 calories 20 grams fat
Rating: 5.0/5
( 1 voted )

Ingredients

  • 1 egg
  • 1 lb lean ground beef
  • diced tomatoes
  • 2 packages of taco seasoning
  • 15 oz. ricotta cheese
  • 24 oz. mild Pace salsa
  • green onions
  • 5 c. shredded Mexican-style cheese
  • 1 package of lasagna noodles
  • sour cream

Instructions

Step 1: Prepare the oven. Preheat it to 350 degrees. Cook the beef until browned. Drain the excess grease when done. To the browned beef, stir in the taco seasoning. Set aside.

Step 2: Place the eggs and ricotta cheese in a bowl. Mix well.

Step 3: Lay the lasagna in a baking dish. On top of the lasagna noodles, spread the ricotta mixture, followed by the beef, then 1/3 of the salsa, and cover with cheese. Feel free to use your desired amount of beef and cheese. Do the same layers twice.

Step 4: Cover the baking dish and place it in the preheated oven. Bake for about 40 minutes.

Step 5: Remove from the oven when done and allow the taco lasagna to cool.

Step 6: Slice and serve with a dollop of sour cream on top, garnished with some chopped green onions and diced tomatoes. Enjoy!

October 3, 2022 0 comment
0 FacebookTwitterPinterestEmail
General Recipes

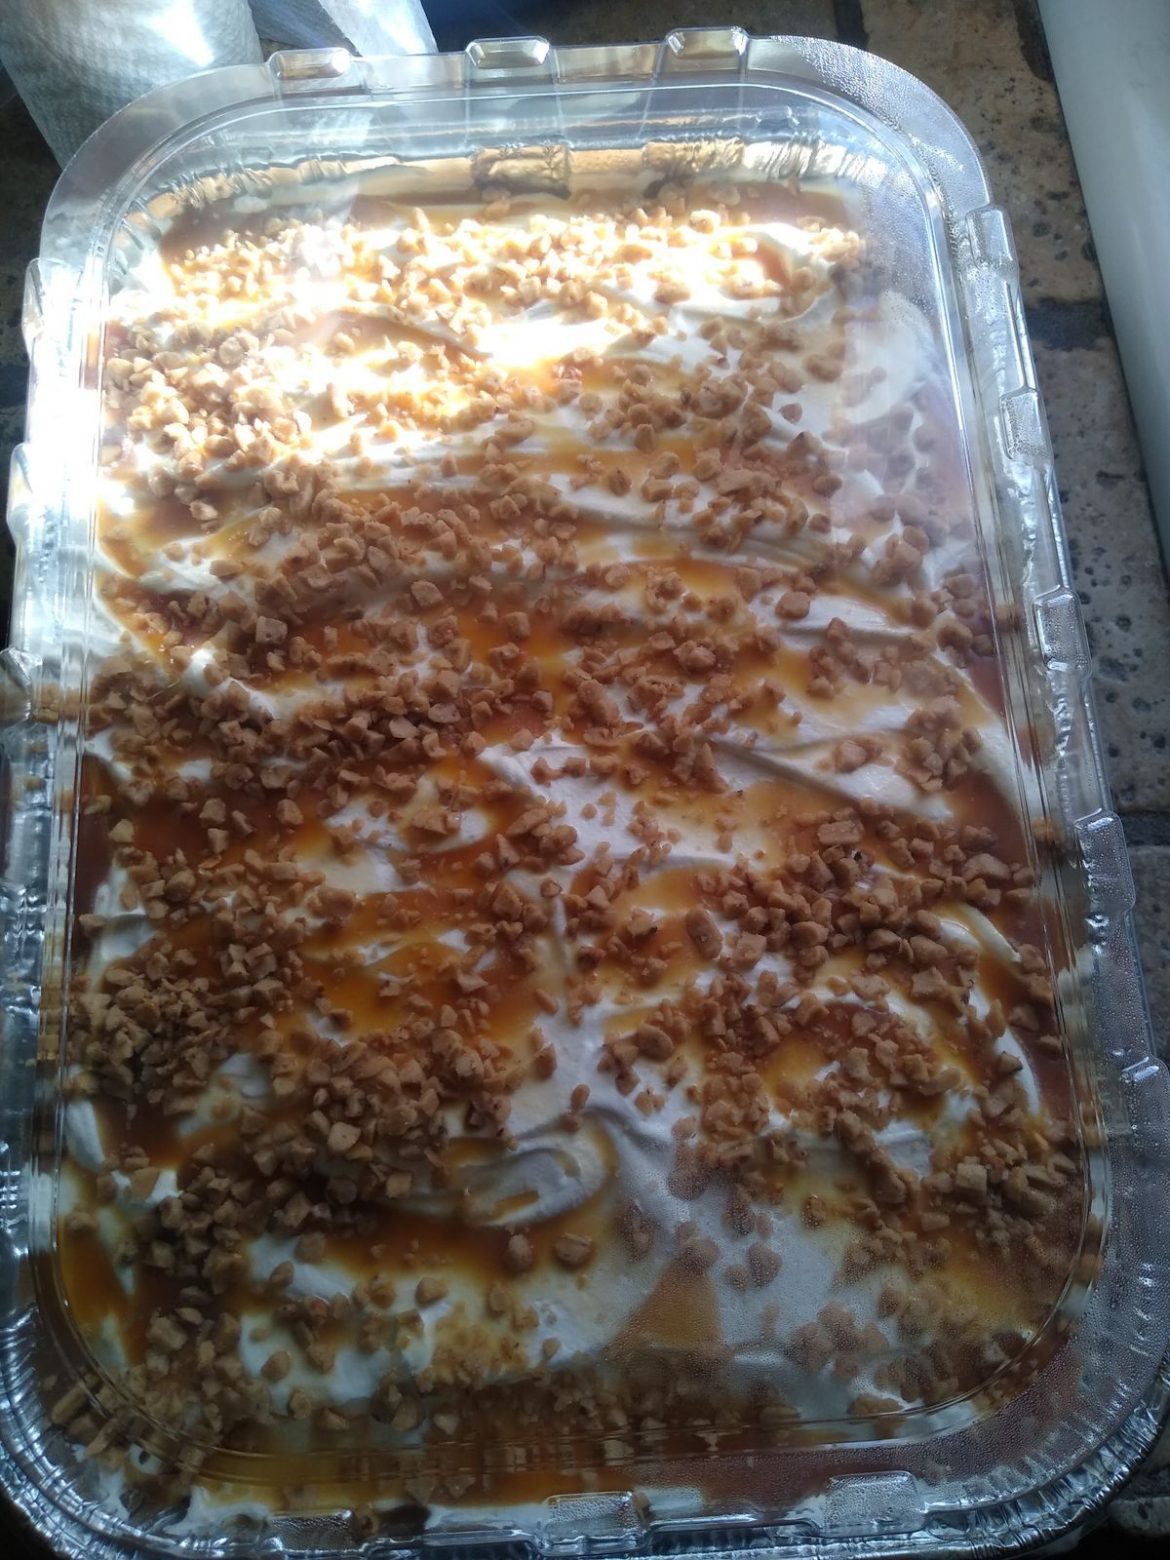
Toffee Butterscotch Poke Cake

by Rebecca October 1, 2022
written by Rebecca

Prep time: 2 hrs 30 mins | Cook time: 25 mins | Yield: 15-20 slices of cake

Decadent and delightful! This Butterscotch Toffee Poke Cake is a must-try! Who said that Butterscotch sundae is only for ice cream?

I love this awesome cake. It is drenched in butterscotch mixture topped with crunchy toffee bits and some chopped nuts. This cake is one of the best poke cakes you’ll ever make! It’s the perfect cake for parties, potlucks, or picnics. Light cake with butterscotch and whipped topping. It is like ice cream in a cake form!

INGREDIENTS

3 eggs

1 (15.25 ounces) box of yellow cake mix

1 c. water

1/3 c. vegetable oil

1 (14 ounces) can sweetened condensed milk

1/2 c. toffee bits

1 (16 ounces) tub Cool Whip (thawed)

1 (2 ounces) package honey toasted peanuts, chopped

1 (10 ounces) jar butterscotch sundae syrup or ice cream topping

How to make Toffee Butterscotch Poke Cake

Step 1: Prepare the oven. Preheat it to 350 degrees F.

Step 2: In a large mixing bowl, place the cake mix, eggs, water, and oil. Beat using an electric mixer on high until the mixture’s color is uniform. Then, pour this into a 9 x 13-inch pan.

Step 3: Place in the preheated oven and bake for about 23 to 25 minutes or until a knife inserted in the center of the cake comes out clean.

Step 4: In the meantime, whisk the butterscotch and condensed milk until smooth.

Step 5: Take the cake out of the oven when done and poke about 75 to 80 holes in the warm cake using the end of a spoon, going almost to the bottom of the pan each time.

Step 6: Over the warm cake, pour the butterscotch mixture, filling each hole with the sauce. Place the cake in the fridge for at least 2 to 4 hours until set.

Step 7: On the entire cake, evenly spread the Cool Whip and top with pieces of toffee and some chopped nuts. Then, slice the cake into 15 to 20 squares. Serve and enjoy!

Toffee Butterscotch Poke Cake

Rebecca Prep time: 2 hrs 30 mins | Cook time: 25 mins | Yield: 15-20 slices of cake Decadent and delightful! This Butterscotch Toffee Poke Cake is a must-try! Who said… General Recipes Toffee Butterscotch Poke Cake European Print This
Serves: 15-20 Prep Time: 2 hrs 30 mins Cooking Time: 25 mins 25 mins
Nutrition facts: 200 calories 20 grams fat
Rating: 5.0/5
( 1 voted )

Ingredients

  • 3 eggs
  • 1 (15.25 ounces) box of yellow cake mix
  • 1 c. water
  • 1/3 c. vegetable oil
  • 1 (14 ounces) can sweetened condensed milk
  • 1/2 c. toffee bits
  • 1 (16 ounces) tub Cool Whip (thawed)
  • 1 (2 ounces) package honey toasted peanuts, chopped
  • 1 (10 ounces) jar butterscotch sundae syrup or ice cream topping

Instructions

Step 1: Prepare the oven. Preheat it to 350 degrees F.

Step 2: In a large mixing bowl, place the cake mix, eggs, water, and oil. Beat using an electric mixer on high until the mixture’s color is uniform. Then, pour this into a 9 x 13-inch pan.

Step 3: Place in the preheated oven and bake for about 23 to 25 minutes or until a knife inserted in the center of the cake comes out clean.

Step 4: In the meantime, whisk the butterscotch and condensed milk until smooth.

Step 5: Take the cake out of the oven when done and poke about 75 to 80 holes in the warm cake using the end of a spoon, going almost to the bottom of the pan each time.

Step 6: Over the warm cake, pour the butterscotch mixture, filling each hole with the sauce. Place the cake in the fridge for at least 2 to 4 hours until set.

Step 7: On the entire cake, evenly spread the Cool Whip and top with pieces of toffee and some chopped nuts. Then, slice the cake into 15 to 20 squares. Serve and enjoy!

October 1, 2022 0 comment
0 FacebookTwitterPinterestEmail
General Recipes

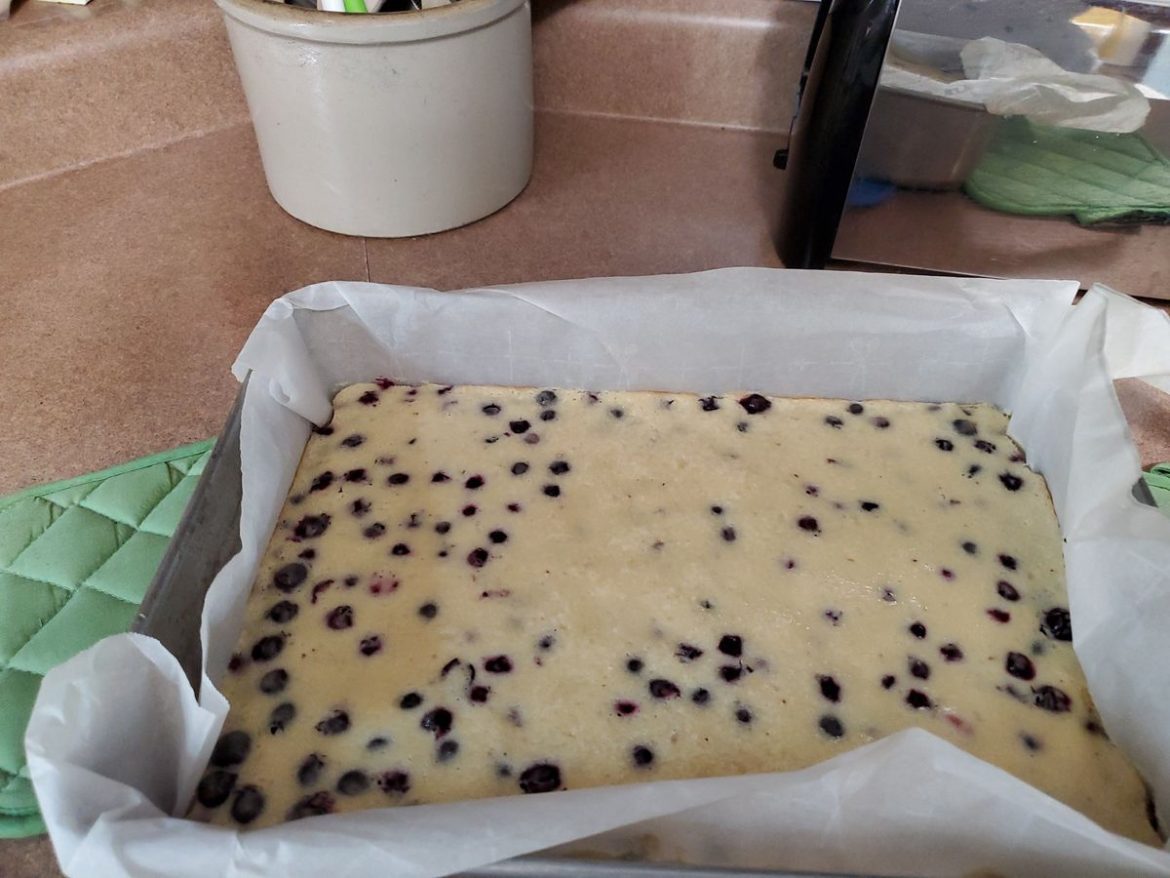
Blueberry Pie Bars: A Tasty, Mouth-Watering Recipe

by Rebecca October 1, 2022
written by Rebecca

Total time: 1 hr | Yield: 12 bars

These delightful blueberry pie bars are an amazing dessert filled with fresh blueberries. Made with a simple crust topped with a delicious filling. If you are searching for a super easy treat that everyone will love, then you have to give these blueberry pie bars a try soon!

I adore easy and quick recipes, especially when making desserts. As I am getting older, I enjoy simple joys in life. I love fresh fruits turned into dessert. And these easy one-pan blueberry pie bars are another great dessert that uses my favorite blueberries. Moist with a crumbly topping and packed with fresh blueberries.

INGREDIENTS

Crust and topping:

3/4 c. granulated sugar

1/4 tsp salt

1 1/2 c. all-purpose flour

1 tsp vanilla extract

3/4 c. (1 1/2 sticks) unsalted butter, chilled and cubed

Filling:

1/2 c. sour cream

3/4 c. granulated sugar

2 large eggs

1/3 c. all-purpose flour

3 c. fresh blueberries

1/4 tsp salt

How to make Blueberry Pie Bars

Step 1: Prepare the oven. Preheat it to 350 degrees F. Using nonstick spray or butter, grease a 9 x 13-inch baking dish and set aside.

Step 2: Place the flour, sugar, salt, chilled butter, and vanilla in a large bowl. Beat using an electric mixer until crumbly. Reserve 1 c. of the mixture and firmly press the rest into the prepared baking dish. Place in the preheated oven and bake for about 15 minutes.

Step 3: In the meantime, ready the filling. Place the eggs in a large clean bowl and beat using an electric mixer until frothy. Then, add the sugar along with the sour cream, flour, and salt. Mix again until well blended, then gently fold in the blueberries.

Step 4: Over the baked crust, evenly spoon the filling and top with the reserved filling. Return to the oven and resume baking for about 45 to 55 minutes until the top is golden brown.

Step 5: Remove from the oven when done and allow the bar to cool for about an hour before slicing. Enjoy!

Blueberry Pie Bars: A Tasty, Mouth-Watering Recipe

Rebecca Total time: 1 hr | Yield: 12 bars These delightful blueberry pie bars are an amazing dessert filled with fresh blueberries. Made with a simple crust topped with a delicious… General Recipes Blueberry Pie Bars: A Tasty, Mouth-Watering Recipe European Print This
Serves: 12
Nutrition facts: 200 calories 20 grams fat
Rating: 2.5/5
( 2 voted )

Ingredients

  • Crust and topping:
  • 3/4 c. granulated sugar
  • 1/4 tsp salt
  • 1 1/2 c. all-purpose flour
  • 1 tsp vanilla extract
  • 3/4 c. (1 1/2 sticks) unsalted butter, chilled and cubed
  • Filling:
  • 1/2 c. sour cream
  • 3/4 c. granulated sugar
  • 2 large eggs
  • 1/3 c. all-purpose flour
  • 3 c. fresh blueberries
  • 1/4 tsp salt

Instructions

Step 1: Prepare the oven. Preheat it to 350 degrees F. Using nonstick spray or butter, grease a 9 x 13-inch baking dish and set aside.

Step 2: Place the flour, sugar, salt, chilled butter, and vanilla in a large bowl. Beat using an electric mixer until crumbly. Reserve 1 c. of the mixture and firmly press the rest into the prepared baking dish. Place in the preheated oven and bake for about 15 minutes.

Step 3: In the meantime, ready the filling. Place the eggs in a large clean bowl and beat using an electric mixer until frothy. Then, add the sugar along with the sour cream, flour, and salt. Mix again until well blended, then gently fold in the blueberries.

Step 4: Over the baked crust, evenly spoon the filling and top with the reserved filling. Return to the oven and resume baking for about 45 to 55 minutes until the top is golden brown.

Step 5: Remove from the oven when done and allow the bar to cool for about an hour before slicing. Enjoy!

October 1, 2022 0 comment
0 FacebookTwitterPinterestEmail
General Recipes

The Pioneer Woman’s Lemon Cream Scones

by Rebecca October 1, 2022
written by Rebecca

Total time: 45 mins | Serves: 24

Melt-in-your-mouth, buttery, and crumbly Lemon Cream Scones. This recipe outdid itself! These Lemon Cream Scones are super easy and quick to make with a bright, lemony flavor that is to die for!

INGREDIENTS

1/2 pound (2 sticks) unsalted butter, chilled and cubed

1 large egg

3 c. all-purpose flour

5 tsp baking powder

2/3 c. granulated sugar

1 tsp vanilla extract

1 c. heavy cream

Zest of 1 lemon

1/4 tsp salt

Glaze:

Zest and juice from 1 lemon

5 c. powdered sugar, sifted

1/4 tsp salt

1/2 c. whole milk, plus more as needed

How to make The Pioneer Woman’s Lemon Cream Scones

Step 1: Prepare the oven. Preheat it to 350 degrees F. Using parchment paper, line a baking sheet and set aside.

Step 2: Sift the flour, sugar, baking powder, and salt in a medium bowl.

Step 3: Combine the egg along with the lemon zest, and vanilla. Stir well and let this sit for about 10 minutes to steep.

Step 4: Into the flour, cut the butter using a pastry cutter and two knives until you have a mixture that resembles coarse crumbs. Then, add the cream mixture and gently stir using a fork until blended. At this point, the mixture should be crumbly.

Step 5: Onto a floured surface, turn the dough, and press into a rectangle. Roll the dough to about 3/4 inch thickness and 18 x 10-inches.

Step 6: Using a knife, trim the edges before cutting them into 12 even squares or rectangles. To form two triangles, cut each piece in half diagonally.

Step 7: To the prepared baking sheet, transfer the triangles. Place in the preheated oven and bake for about 18 minutes or until the scones are just starting to turn golden brown. Remove from the oven when done and allow them to cool on the baking sheet for about 15 minutes before inverting to a wire rack to cool fully.

Step 8: In the meantime, whisk the lemon zest, lemon juice, salt, and milk to make the glaze. Let it sit for about 10 minutes.

Step 9: Into the milk, stir in the powdered sugar. If desired, add extra powdered sugar for a thicker consistency.

Step 10: Once the glaze is smooth, dip each cooled scone and let it set for approximately an hour before serving. Enjoy!

The Pioneer Woman’s Lemon Cream Scones

Rebecca Total time: 45 mins | Serves: 24 Melt-in-your-mouth, buttery, and crumbly Lemon Cream Scones. This recipe outdid itself! These Lemon Cream Scones are super easy and quick to make with… General Recipes The Pioneer Woman’s Lemon Cream Scones European Print This
Serves: 24
Nutrition facts: 200 calories 20 grams fat
Rating: 5.0/5
( 2 voted )

Ingredients

  • 1/2 pound (2 sticks) unsalted butter, chilled and cubed
  • 1 large egg
  • 3 c. all-purpose flour
  • 5 tsp baking powder
  • 2/3 c. granulated sugar
  • 1 tsp vanilla extract
  • 1 c. heavy cream
  • Zest of 1 lemon
  • 1/4 tsp salt
  • Glaze:
  • Zest and juice from 1 lemon
  • 5 c. powdered sugar, sifted
  • 1/4 tsp salt
  • 1/2 c. whole milk, plus more as needed

Instructions

Step 1: Prepare the oven. Preheat it to 350 degrees F. Using parchment paper, line a baking sheet and set aside.

Step 2: Sift the flour, sugar, baking powder, and salt in a medium bowl.

Step 3: Combine the egg along with the lemon zest, and vanilla. Stir well and let this sit for about 10 minutes to steep.

Step 4: Into the flour, cut the butter using a pastry cutter and two knives until you have a mixture that resembles coarse crumbs. Then, add the cream mixture and gently stir using a fork until blended. At this point, the mixture should be crumbly.

Step 5: Onto a floured surface, turn the dough, and press into a rectangle. Roll the dough to about 3/4 inch thickness and 18 x 10-inches.

Step 6: Using a knife, trim the edges before cutting them into 12 even squares or rectangles. To form two triangles, cut each piece in half diagonally.

Step 7: To the prepared baking sheet, transfer the triangles. Place in the preheated oven and bake for about 18 minutes or until the scones are just starting to turn golden brown. Remove from the oven when done and allow them to cool on the baking sheet for about 15 minutes before inverting to a wire rack to cool fully.

Step 8: In the meantime, whisk the lemon zest, lemon juice, salt, and milk to make the glaze. Let it sit for about 10 minutes.

Step 9: Into the milk, stir in the powdered sugar. If desired, add extra powdered sugar for a thicker consistency.

Step 10: Once the glaze is smooth, dip each cooled scone and let it set for approximately an hour before serving. Enjoy!

October 1, 2022 0 comment
0 FacebookTwitterPinterestEmail
General Recipes

Easy Tuna Casserole

by Rebecca October 1, 2022
written by Rebecca

Prep time: 15 mins | Cook time: 18 mins | Total time: 33 mins | Servings: 6

This easy tuna casserole has been one of my ultimate favorite casseroles for years! Super easy and quick to make using just a few basic ingredients. Flaky tuna and tender egg noodles tossed in a delicious cheesy creamy sauce and topped with buttery breadcrumb topping. This casserole is amazing to serve by itself, but also great to pair with a simple side salad.

I love casseroles because they are incredibly easy and quick to throw together. They are mostly very versatile, super comforting, and filling. Casseroles are also affordable. Just like this tuna casserole. You can also toss in leftovers or any kinds of veggies. Enjoy this casserole warm and bubbly anytime!

If you love casseroles as many people do, then this casserole is a gem! It’s the perfect casserole when you need a quick potluck entree or dinner. This easy tuna casserole is hands down one of the best casseroles!

Ingredients

1 c. cheddar cheese

3 c. egg noodles

1 small onion, diced

1 tbsp butter

⅔ c. frozen peas, defrosted

10 ½ oz. condensed mushroom soup

⅓ c. milk

1 can tuna 5-6 oz., drained

1 tbsp parsley

2 stalks of celery, diced

Crumb topping:

1 tbsp butter, melted

½ c. panko bread crumbs

1 tbsp parsley

½ c. cheddar

How to make Easy Tuna Casserole

Step 1: Prepare the oven. Preheat it to 425 degrees F. Mix the topping ingredients and set aside.

Step 2: Following the package directions, cook the noodles al dente. Drain when done and rinse the noodles under cold water.

Step 3: In melted butter, cook the onion and celery for about 5 to 7 minutes until tender.

Step 4: Place the noodles, onion mixture, peas, soup, milk, cheese, tuna, and parsley in a large bowl. Mix well, then spread the mixture into a 2-quart casserole dish. On top, place the crumb topping.

Step 5: Place in the preheated oven and bake for about 18 to 20 minutes or until bubbly.

Nutrition Facts:

Serving: 1.25 cup | Calories: 323 | Carbohydrates: 25g | Protein: 19g | Fat: 15g | Saturated Fat: 9g | Cholesterol: 68mg | Sodium: 689mg | Potassium: 317mg | Fiber: 2g | Sugar: 3g | Vitamin A: 750IU | Vitamin C: 10mg | Calcium: 256mg | Iron: 2mg

Easy Tuna Casserole

Rebecca Prep time: 15 mins | Cook time: 18 mins | Total time: 33 mins | Servings: 6 This easy tuna casserole has been one of my ultimate favorite casseroles for… General Recipes Easy Tuna Casserole European Print This
Serves: 6 Prep Time: 15 mins Cooking Time: 18 mins 18 mins
Nutrition facts: 323 calories 15 fat
Rating: 5.0/5
( 1 voted )

Ingredients

  • 1 c. cheddar cheese
  • 3 c. egg noodles
  • 1 small onion, diced
  • 1 tbsp butter
  • ⅔ c. frozen peas, defrosted
  • 10 ½ oz. condensed mushroom soup
  • ⅓ c. milk
  • 1 can tuna 5-6 oz., drained
  • 1 tbsp parsley
  • 2 stalks of celery, diced
  • Crumb topping:
  • 1 tbsp butter, melted
  • ½ c. panko bread crumbs
  • 1 tbsp parsley
  • ½ c. cheddar

Instructions

Step 1: Prepare the oven. Preheat it to 425 degrees F. Mix the topping ingredients and set aside.

Step 2: Following the package directions, cook the noodles al dente. Drain when done and rinse the noodles under cold water.

Step 3: In melted butter, cook the onion and celery for about 5 to 7 minutes until tender.

Step 4: Place the noodles, onion mixture, peas, soup, milk, cheese, tuna, and parsley in a large bowl. Mix well, then spread the mixture into a 2-quart casserole dish. On top, place the crumb topping.

Step 5: Place in the preheated oven and bake for about 18 to 20 minutes or until bubbly.

October 1, 2022 0 comment
0 FacebookTwitterPinterestEmail
General Recipes

COOL WHIP COOKIES

by Rebecca October 1, 2022
written by Rebecca

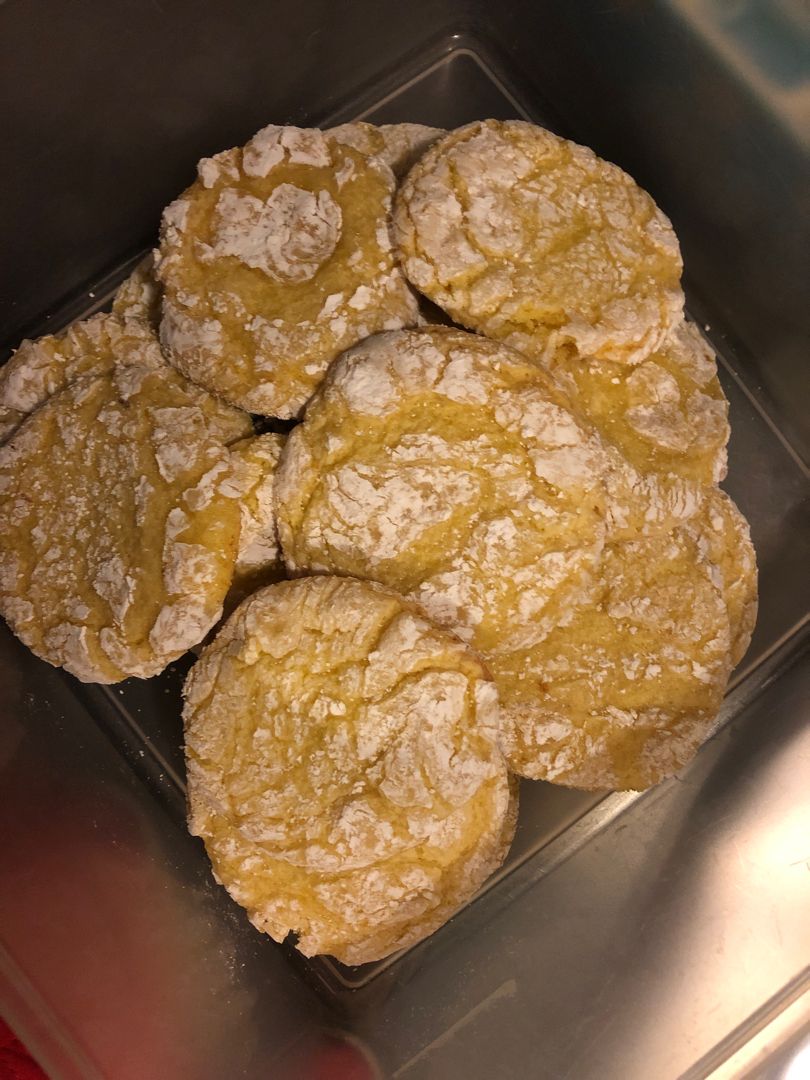
Why wait for the Holidays when you can make these Cool Whip Cookies now? Made with just four basic ingredients and ready in a breeze, these cookies are the best cookies you’ll ever make!

Ingredients

1 egg

1 (18.25 ounces) box of cake mix (any flavor you prefer)

Confectioners’ sugar

1 (8 ounces) container Cool Whip (you can use any variety you prefer) – thawed

HOW TO MAKE COOL WHIP COOKIES

Step 1: Prepare the oven. Preheat it to 350 degrees F.

Step 2: Place the cake mix powder, the Cool Whip, and the egg in a mixing bowl. Mix well until combined. Then, shape the mixture into balls.

Step 3: Roll each ball in the confectioners’ sugar.

Step 4: Place in the preheated oven and bake for about 10 to 12 minutes. Remove from the oven when done and allow the cookies to cool for about 5 minutes in the pan before inverting them onto a cooling rack.

Notes:

For this recipe, use only powdered cake mix.

This recipe calls for an 18.25 ounces box of cake mix. For the exact portion, add more cake mix from another box or add all-purpose flour to the mix. This measurement will give you the exact cake mix portion; 15.25 ounces box of cake mix plus 11 tablespoons of cake mix or all-purpose flour and ¼ teaspoon of baking soda. Or 16.5 ounces box of cake mix plus 6 tablespoons of cake mix or all-purpose flour.

Use parchment paper or a Silpat baking mat to prevent the cookies from sticking when baking.

Cake Mix Variations:

For the chocolate, you can use crushed peppermint candies or candy canes, mint chocolate chips, or roll in finely crushed nuts or coconut.

As for the funfetti, add almond extract, then roll in finely crushed almonds. Or add coconut extract, then roll in coconut.

To the lemon cake mix, add lemon zest or a few teaspoons of lemon juice before rolling in the confectioners’ sugar.

If using an orange cake mix, you can also add a bit of orange zest.

Allspice, cardamom, and cinnamon are a great addition, too.

Butter pecan is amazing to use, too! Then, roll in finely crushed pecans.

For red velvet, I recommend making a cream cheese glaze to drizzle on top of the cooled cookies.

Cool Whip Variations:

Peppermint Cool Whip pairs well with chocolate or vanilla cake mix.

French Vanilla is amazing with Funfetti cake mix.

For deeper chocolate flavor, chocolate is awesome with chocolate or red velvet cake mix.

Strawberry is perfect with strawberry, white, or Funfetti cake mix.

COOL WHIP COOKIES

Rebecca Why wait for the Holidays when you can make these Cool Whip Cookies now? Made with just four basic ingredients and ready in a breeze, these cookies are the best… General Recipes COOL WHIP COOKIES European Print This
Nutrition facts: 200 calories 20 grams fat
Rating: 5.0/5
( 1 voted )

Ingredients

  • 1 egg
  • 1 (18.25 ounces) box of cake mix (any flavor you prefer)
  • Confectioners’ sugar
  • 1 (8 ounces) container Cool Whip (you can use any variety you prefer) – thawed

Instructions

Step 1: Prepare the oven. Preheat it to 350 degrees F.

Step 2: Place the cake mix powder, the Cool Whip, and the egg in a mixing bowl. Mix well until combined. Then, shape the mixture into balls.

Step 3: Roll each ball in the confectioners’ sugar.

Step 4: Place in the preheated oven and bake for about 10 to 12 minutes. Remove from the oven when done and allow the cookies to cool for about 5 minutes in the pan before inverting them onto a cooling rack.

Notes

For this recipe, use only powdered cake mix. This recipe calls for an 18.25 ounces box of cake mix. For the exact portion, add more cake mix from another box or add all-purpose flour to the mix. This measurement will give you the exact cake mix portion; 15.25 ounces box of cake mix plus 11 tablespoons of cake mix or all-purpose flour and ¼ teaspoon of baking soda. Or 16.5 ounces box of cake mix plus 6 tablespoons of cake mix or all-purpose flour. Use parchment paper or a Silpat baking mat to prevent the cookies from sticking when baking. Cake Mix Variations: For the chocolate, you can use crushed peppermint candies or candy canes, mint chocolate chips, or roll in finely crushed nuts or coconut. As for the funfetti, add almond extract, then roll in finely crushed almonds. Or add coconut extract, then roll in coconut. To the lemon cake mix, add lemon zest or a few teaspoons of lemon juice before rolling in the confectioners’ sugar. If using an orange cake mix, you can also add a bit of orange zest. Allspice, cardamom, and cinnamon are a great addition, too. Butter pecan is amazing to use, too! Then, roll in finely crushed pecans. For red velvet, I recommend making a cream cheese glaze to drizzle on top of the cooled cookies. Cool Whip Variations: Peppermint Cool Whip pairs well with chocolate or vanilla cake mix. French Vanilla is amazing with Funfetti cake mix. For deeper chocolate flavor, chocolate is awesome with chocolate or red velvet cake mix. Strawberry is perfect with strawberry, white, or Funfetti cake mix.

October 1, 2022 0 comment
0 FacebookTwitterPinterestEmail
General Recipes

Crockpot Sausage and Potatoes Recipe! (Slow Cooker Casserole)

by Rebecca October 1, 2022
written by Rebecca

Prep Time: 10 mins | Cook Time: 3 hrs | Total Time: 3 hrs 10 mins | Servings: 8

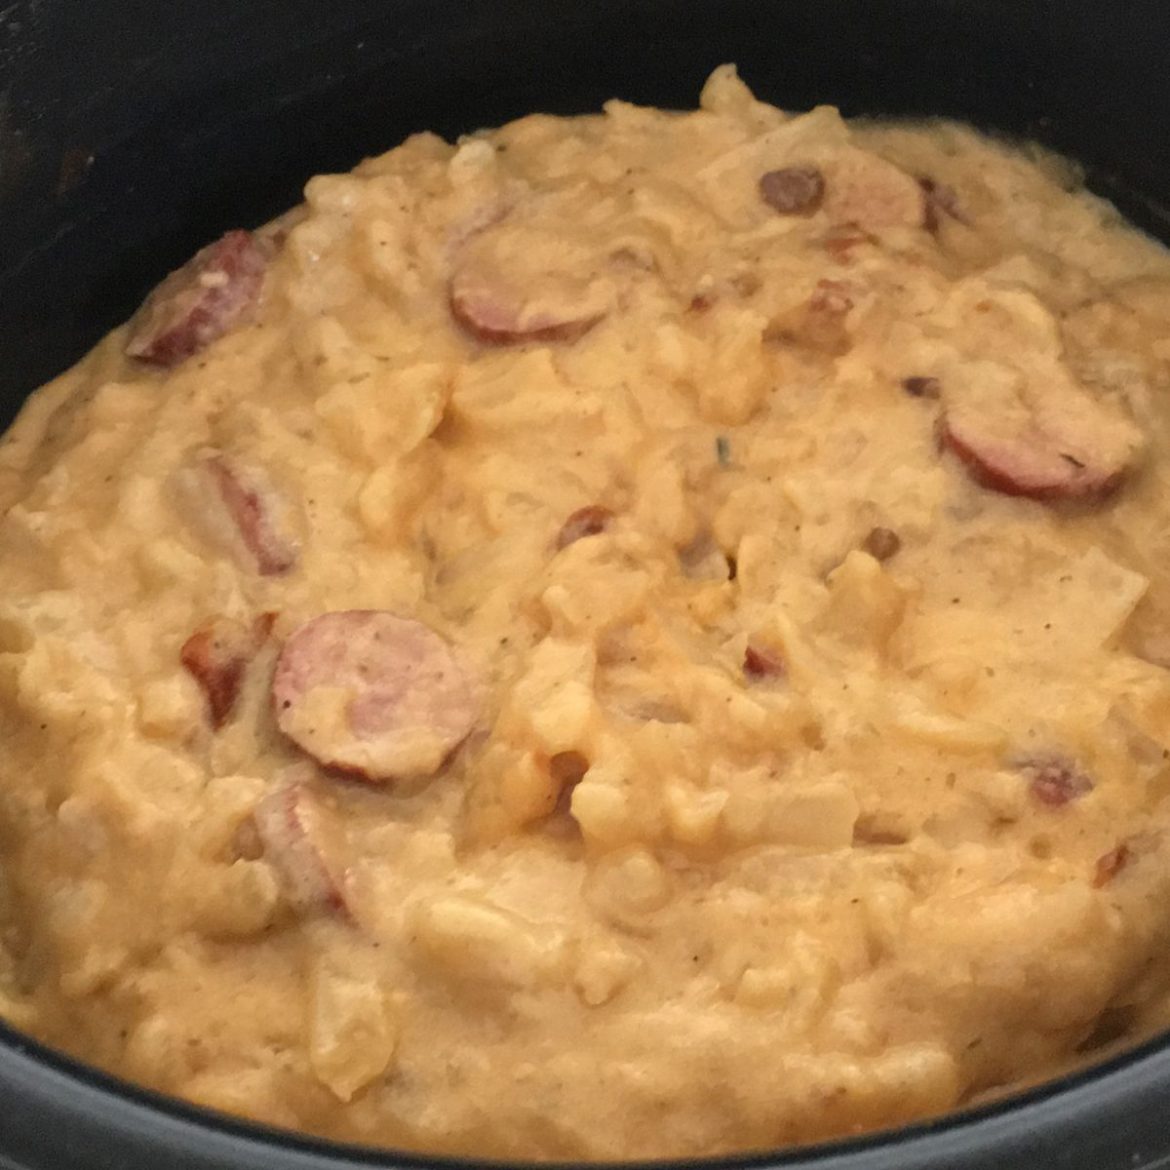
Easy and incredibly good! This casserole is always a big hit! My entire family loves it and I have shared this casserole with my neighbors and they feel exactly the same! This casserole is highly recommended, especially if you are searching for another slow cooker or crockpot recipe. It’s delicious, super flavorful, and a great dinner option to serve to family and guests.

I love this Crockpot Sausage and Potatoes recipe. It’s one of my favorite comfort food cravings fix. This has pleasing flavors, is very hearty, and is delicious! This casserole is an amazing weeknight dinner option and also wonderful for brunch. This creamy and rich casserole is quite cozy and incredibly comforting. I’m sure everyone will give this a five-star rating! Make sure to give this Crockpot Sausage and Potatoes recipe a go very soon. This is worth the try and no doubt a keeper!

Ingredients

30 oz. Frozen Shredded Hash Browns

2 Hilshire Polska Kielbasa Links (14 oz. each sliced 1/4-inch thick)

1 can Campbell’s Cheddar Cheese Soup (10 3/4 oz.)

4 cloves Garlic, minced

1 1/4 c. Evaporated Milk

Optional: top with sliced Green Onions

Optional: Salt & Pepper to taste

How to make Crockpot Sausage and Potatoes

Step 1: Thaw the frozen hash browns for 2 hours at room temperature.

Step 2: Place the hash browns, soup, milk, and garlic in a large mixing bowl. Mix well until combined. Add the pieces of Kielbasa and mix again.

Step 3: Using nonstick cooking spray, grease the inside of a 5 to 6-quart Crock Pot.

Step 4: Into the prepared crock pot, add the potato/sausage mixture. Put the lid on and set to cook for 2 1/2-3 hours on high or 5-6 hours on high, stirring once halfway through cooking.

Step 5: Before serving, stir the sausage and potatoes one last time, then top it with some green onions if desired. Enjoy!

Crockpot Sausage and Potatoes Recipe! (Slow Cooker Casserole)

Rebecca Prep Time: 10 mins | Cook Time: 3 hrs | Total Time: 3 hrs 10 mins | Servings: 8 Easy and incredibly good! This casserole is always a big hit!… General Recipes Crockpot Sausage and Potatoes Recipe! (Slow Cooker Casserole) European Print This
Serves: 8 Prep Time: 10 mins Cooking Time: 3 hrs 3 hrs
Nutrition facts: 200 calories 20 grams fat
Rating: 5.0/5
( 1 voted )

Ingredients

  • 30 oz. Frozen Shredded Hash Browns
  • 2 Hilshire Polska Kielbasa Links (14 oz. each sliced 1/4-inch thick)
  • 1 can Campbell's Cheddar Cheese Soup (10 3/4 oz.)
  • 4 cloves Garlic, minced
  • 1 1/4 c. Evaporated Milk
  • Optional: top with sliced Green Onions
  • Optional: Salt & Pepper to taste

Instructions

Step 1: Thaw the frozen hash browns for 2 hours at room temperature.

Step 2: Place the hash browns, soup, milk, and garlic in a large mixing bowl. Mix well until combined. Add the pieces of Kielbasa and mix again.

Step 3: Using nonstick cooking spray, grease the inside of a 5 to 6-quart Crock Pot.

Step 4: Into the prepared crock pot, add the potato/sausage mixture. Put the lid on and set to cook for 2 1/2-3 hours on high or 5-6 hours on high, stirring once halfway through cooking.

Step 5: Before serving, stir the sausage and potatoes one last time, then top it with some green onions if desired. Enjoy!


October 1, 2022 0 comment
0 FacebookTwitterPinterestEmail
General Recipes

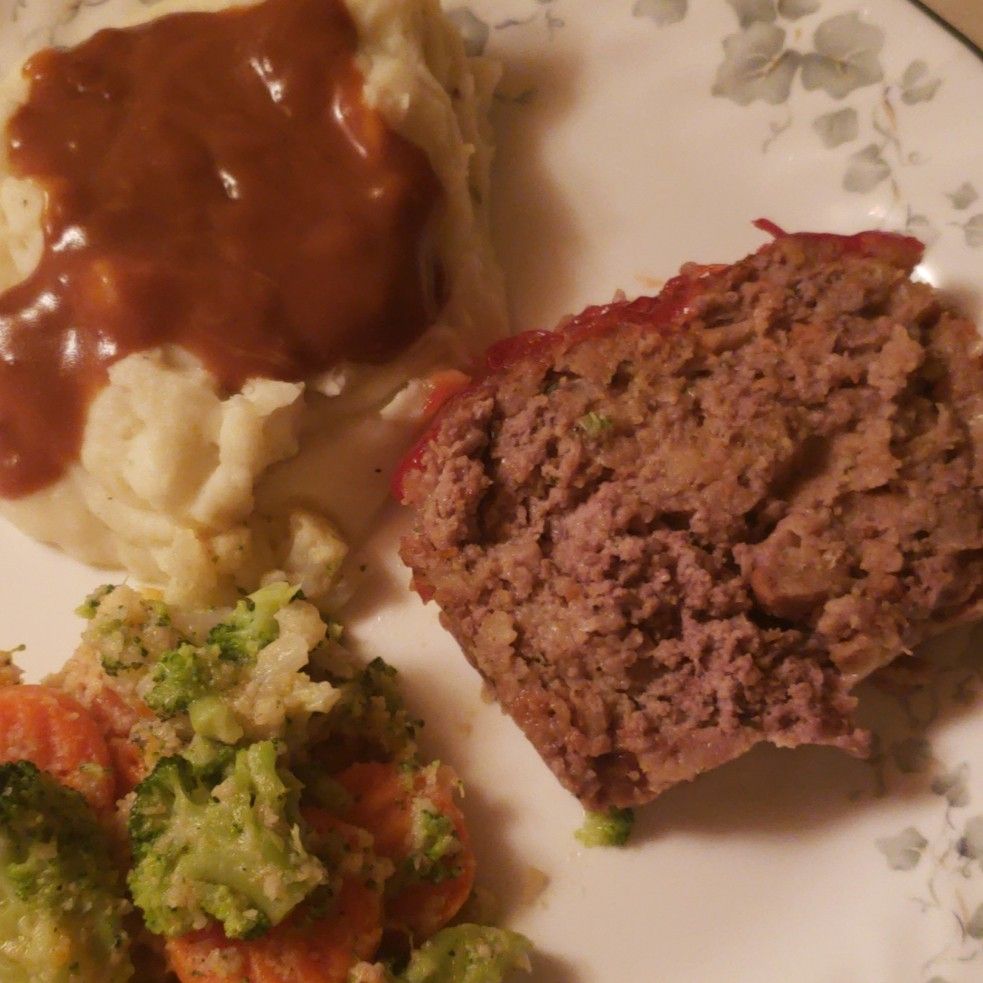
4 Ingredient Meatloaf

by Rebecca October 1, 2022
written by Rebecca

Meatloaf is a staple at home. I have tried different meatloaf recipes, but nothing beats this 4-ingredient meatloaf. This is made with a box of stuffing (you can use your favorite) along with other basic ingredients. This recipe is also very versatile to fit your taste. This delicious meatloaf is the perfect quick and easy weeknight dinner.

Ingredients

2 eggs

1 pound of ground beef

¾ c. Chili Sauce or ketchup

1 4-ounces box of stuffing – chicken flavored

How to make 4 Ingredient Meatloaf

Step 1: Prepare the oven. Preheat it to 350 degrees F. Ready and loaf pan. Grease and set aside.

Step 2: Place the ground beef and the stuffing mix in a large bowl. Mix well until combined. Then, add the eggs along with 1/4 c. of the chili sauce. Mix again. If desired, season with salt and pepper.

Step 3: Into the prepared pan, transfer the meat mixture. Place in the preheated oven and bake for about 40 to 45 minutes or until the internal temperature of the meatloaf reaches 160 degrees F.

Step 4: On top of the meatloaf, spread the rest of the chili sauce. Return to the oven and broil for about 2 to 3 minutes or until the top of the meatloaf starts to bubble and caramelize.

Step 5: Allow the meatloaf to rest for about 5 minutes. Slice and serve. Enjoy!

Notes:

If you like, you can also add some finely minced onion, carrots, and celery to the meat mixture.

You can swap chili sauce with ketchup or BBQ.

For this recipe, you can use any flavor stuffing.

If using a muffin tin, bake the meatloaf for about 20 minutes at 350 degrees F. Then, add the chili sauce and bake for another 5 to 10 minutes. But do not broil.

Use a gluten-free stuffing mix to make the meatloaf gluten-free.

I suggest using a meat thermometer if making meatloaf to ensure the meatloaf is completely cooked with an internal temperature of 160 degrees F.

4 Ingredient Meatloaf

Rebecca Meatloaf is a staple at home. I have tried different meatloaf recipes, but nothing beats this 4-ingredient meatloaf. This is made with a box of stuffing (you can use your… General Recipes 4 Ingredient Meatloaf European Print This
Nutrition facts: 200 calories 20 grams fat
Rating: 5.0/5
( 1 voted )

Ingredients

  • 2 eggs
  • 1 pound of ground beef
  • ¾ c. Chili Sauce or ketchup
  • 1 4-ounces box of stuffing – chicken flavored

Instructions

Step 1: Prepare the oven. Preheat it to 350 degrees F. Ready and loaf pan. Grease and set aside.

Step 2: Place the ground beef and the stuffing mix in a large bowl. Mix well until combined. Then, add the eggs along with 1/4 c. of the chili sauce. Mix again. If desired, season with salt and pepper.

Step 3: Into the prepared pan, transfer the meat mixture. Place in the preheated oven and bake for about 40 to 45 minutes or until the internal temperature of the meatloaf reaches 160 degrees F.

Step 4: On top of the meatloaf, spread the rest of the chili sauce. Return to the oven and broil for about 2 to 3 minutes or until the top of the meatloaf starts to bubble and caramelize.

Step 5: Allow the meatloaf to rest for about 5 minutes. Slice and serve. Enjoy!

Notes

If you like, you can also add some finely minced onion, carrots, and celery to the meat mixture. You can swap chili sauce with ketchup or BBQ. For this recipe, you can use any flavor stuffing. If using a muffin tin, bake the meatloaf for about 20 minutes at 350 degrees F. Then, add the chili sauce and bake for another 5 to 10 minutes. But do not broil. Use a gluten-free stuffing mix to make the meatloaf gluten-free. I suggest using a meat thermometer if making meatloaf to ensure the meatloaf is completely cooked with an internal temperature of 160 degrees F.

October 1, 2022 0 comment
0 FacebookTwitterPinterestEmail
General Recipes

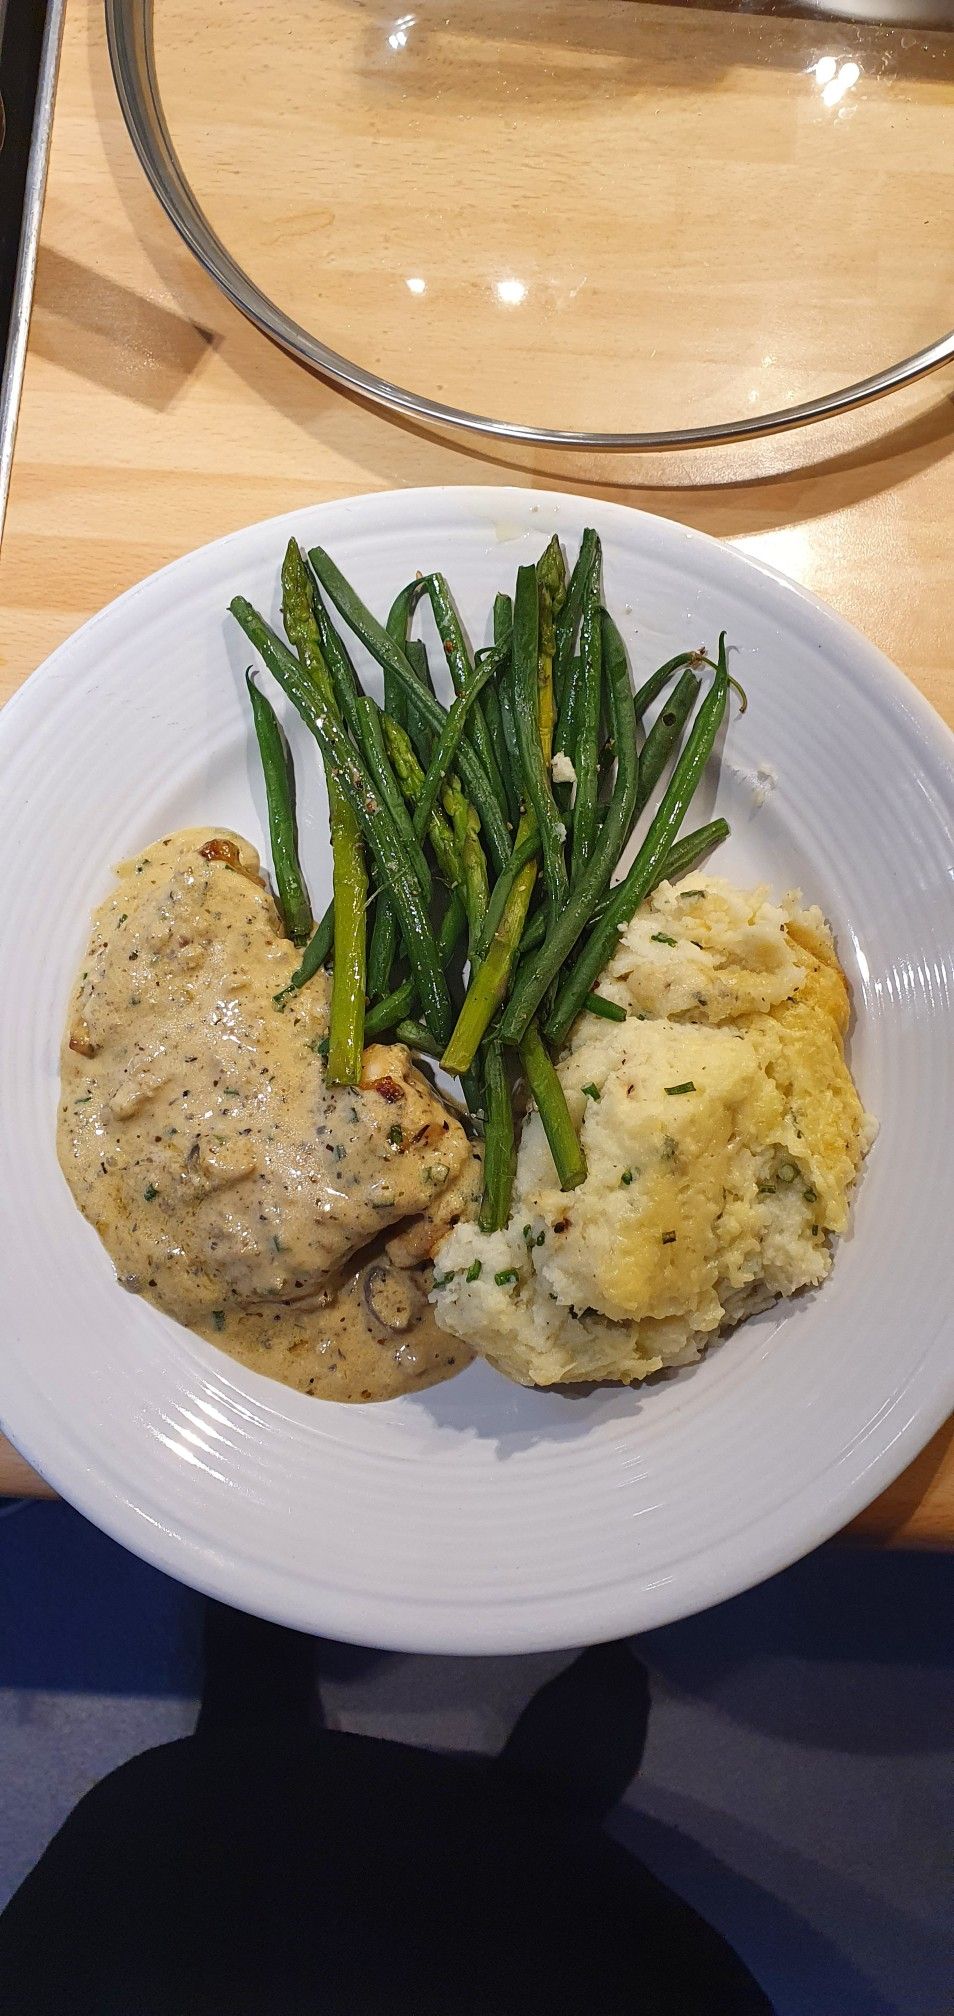
CREAMY GARLIC MUSHROOM CHICKEN THIGHS

by Rebecca October 1, 2022
written by Rebecca

These mouthwatering creamy garlic mushroom chicken thighs are a great weeknight dinner best served over pasta, rice, mashed potatoes, or even zucchini noodles. For a more filling meal, enjoy this with a side of simple salad. Whip this dish up easily and quickly any time!

INGREDIENTS

Chicken:

2 tablespoons olive oil

1 ½ pounds boneless, skinless chicken thighs (around 6-8 fillets)

1 teaspoon garlic powder

1 teaspoon onion powder

½ teaspoon dried rosemary

½ teaspoon dried thyme

½ teaspoon salt

¼ teaspoon cracked black pepper

Sauce:

8 ounces sliced brown mushrooms

1 tablespoon butter

1 tablespoon fresh chopped parsley

4 cloves garlic, minced (or 1 tablespoon minced garlic)

½ – 1 teaspoon dried rosemary (adjust to your taste)

½ – 1 teaspoon dried thyme (adjust to your taste)

½ c. fresh shredded Parmesan cheese

1 ½ c. heavy cream/half and half

HOW TO MAKE CREAMY GARLIC MUSHROOM CHICKEN THIGHS

Step 1: Using a paper towel, pat the chicken thighs dry, then trim the excess fat off.

Step 2: Mix the onion powder with garlic powder, herbs, salt, and pepper. Evenly coat both sides of the chicken with the seasoning.

Step 3: In a large pan or skillet, heat 1 tablespoon of oil over medium-high heat. Once the oil is hot, add the chicken thighs and sear for about 8 minutes per side until both sides are browned and the internal temperature of the chicken reaches about 165 degrees F. If needed, add the rest of the oil into the pan/skillet if cooking the chicken thighs in batches.

Step 4: To a plate, transfer the seared chicken thighs. Set them aside and keep them warm.

Step 5: Melt the butter in the same pan or skillet. Then, add the mushrooms and season with salt and pepper. Cook the mushrooms for about 3 minutes or until tender. Next, add the garlic, parsley, thyme, and rosemary. Saute for another minute until aromatic.

Step 6: To the pan/skillet, add the cream and stir. Bring everything to a simmer, then decrease the heat and cook further until the sauce has slightly thickened.

Step 7: Whisk in the Parmesan cheese and let it melt through the sauce for another 2 minutes, stirring often.

Step 8: Place the chicken back in the pan and adjust the seasoning according to taste.

Step 9: Before serving, garnish the creamy garlic mushroom chicken thighs with fresh parsley. Enjoy!

CREAMY GARLIC MUSHROOM CHICKEN THIGHS

Rebecca These mouthwatering creamy garlic mushroom chicken thighs are a great weeknight dinner best served over pasta, rice, mashed potatoes, or even zucchini noodles. For a more filling meal, enjoy this… General Recipes CREAMY GARLIC MUSHROOM CHICKEN THIGHS European Print This
Nutrition facts: 200 calories 20 grams fat
Rating: 5.0/5
( 1 voted )

Ingredients

  • Chicken:
  • 2 tablespoons olive oil
  • 1 ½ pounds boneless, skinless chicken thighs (around 6-8 fillets)
  • 1 teaspoon garlic powder
  • 1 teaspoon onion powder
  • ½ teaspoon dried rosemary
  • ½ teaspoon dried thyme
  • ½ teaspoon salt
  • ¼ teaspoon cracked black pepper
  • Sauce:
  • 8 ounces sliced brown mushrooms
  • 1 tablespoon butter
  • 1 tablespoon fresh chopped parsley
  • 4 cloves garlic, minced (or 1 tablespoon minced garlic)
  • ½ – 1 teaspoon dried rosemary (adjust to your taste)
  • ½ – 1 teaspoon dried thyme (adjust to your taste)
  • ½ c. fresh shredded Parmesan cheese
  • 1 ½ c. heavy cream/half and half

Instructions

Step 1: Using a paper towel, pat the chicken thighs dry, then trim the excess fat off.

Step 2: Mix the onion powder with garlic powder, herbs, salt, and pepper. Evenly coat both sides of the chicken with the seasoning.

Step 3: In a large pan or skillet, heat 1 tablespoon of oil over medium-high heat. Once the oil is hot, add the chicken thighs and sear for about 8 minutes per side until both sides are browned and the internal temperature of the chicken reaches about 165 degrees F. If needed, add the rest of the oil into the pan/skillet if cooking the chicken thighs in batches.

Step 4: To a plate, transfer the seared chicken thighs. Set them aside and keep them warm.

Step 5: Melt the butter in the same pan or skillet. Then, add the mushrooms and season with salt and pepper. Cook the mushrooms for about 3 minutes or until tender. Next, add the garlic, parsley, thyme, and rosemary. Saute for another minute until aromatic.

Step 6: To the pan/skillet, add the cream and stir. Bring everything to a simmer, then decrease the heat and cook further until the sauce has slightly thickened.

Step 7: Whisk in the Parmesan cheese and let it melt through the sauce for another 2 minutes, stirring often.

Step 8: Place the chicken back in the pan and adjust the seasoning according to taste.

Step 9: Before serving, garnish the creamy garlic mushroom chicken thighs with fresh parsley. Enjoy!

October 1, 2022 0 comment
0 FacebookTwitterPinterestEmail
Newer Posts
Older Posts

Popular Posts

  • 1

    Crispy Crunchy Parmesan Potatoes

    March 21, 2020
  • 2

    CROCK POT SMOTHERED PORK CHOPS

    March 21, 2020
  • Facebook
  • Twitter

@2019 - All Right Reserved.


Back To Top