Cook it once
  • Home
  • Privacy Policy
  • Recipes
    • KETO
    • LC
    • WW
  • Tips
  • Contact
Cook it once
  • Home
  • Privacy Policy
  • Recipes
    • KETO
    • LC
    • WW
  • Tips
  • Contact
Category:

General Recipes

General Recipes

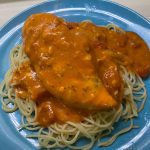
Slow Cooker Creamy Tomato Basil Chicken

by Rebecca October 11, 2022
written by Rebecca

PREP TIME: 5 mins | COOK TIME: 4 hrs | TOTAL TIME: 4 hrs 5 mins | SERVINGS: 4

Super easy and packed with wonderful flavors – this Slow Cooker Creamy Tomato Basil Chicken is a must! You would not believe that this chicken dish requires just a couple of ingredients! So if you are searching for another easy dinner recipe, you should not miss this Slow Cooker Creamy Tomato Basil Chicken recipe! It’s a pretty straightforward dish. A dump-and-go recipe that is a great addition to your weekly menu rotation!

I love the perfect consistency of the sauce, and the flavor is superb! This dish is undoubtedly comforting, and super creamy with just a small amount of evaporated milk/cream. For a family-friendly meal, serve this Creamy Tomato Basil Chicken over a plate of spaghetti. Or enjoy this by itself with a simple side salad. Either way, I am sure that your entire family will love this scrumptious Creamy Tomato Basil Chicken!

Ingredients

4 boneless, skinless chicken breasts

14 ounces can of diced tomatoes with Italian herbs

3/4 c. evaporated milk or heavy cream

2 tbsp cornstarch

3/4 c. tomato pasta sauce

2 tsp minced garlic

1/2 tsp dried basil

2 tbsp finely chopped fresh basil

1 tsp salt

1/4 tsp black pepper

How to make Slow Cooker Creamy Tomato Basil Chicken

Step 1: Into a 3-6-quart slow cooker, add the tomatoes and pasta sauce.

Step 2: Combine the cream and cornstarch, then add this to the slow cooker. Next, add the garlic, salt, basil, and pepper. Stir well.

Step 3: Place the chicken breasts on top and press them down into the sauce.

Step 4: Set to cook for 3 to 5 hours on low or until the internal temperature of the chicken breast reaches 165 degrees F. Note that the exact time of cooking varies depending on your slow cooker.

Step 5: Before serving, stir in the fresh basil. Enjoy the creamy tomato basil chicken over rice, pasta, or with veggies and salad.

Nutrition Facts:

Calories: 210cal | Carbohydrates: 16g | Protein: 29g | Fat: 3g | Saturated Fat: 1g | Cholesterol: 74mg | Sodium: 1099mg | Potassium: 977mg | Fiber: 2g | Sugar: 10g | Vitamin A: 657IU | Vitamin C: 16mg | Calcium: 191mg | Iron: 2mg
Slow Cooker Creamy Tomato Basil Chicken

Rebecca PREP TIME: 5 mins | COOK TIME: 4 hrs | TOTAL TIME: 4 hrs 5 mins | SERVINGS: 4 Super easy and packed with wonderful flavors – this Slow Cooker… General Recipes Slow Cooker Creamy Tomato Basil Chicken European Print This
Serves: 4 Prep Time: 5 mins Cooking Time: 4 hrs 4 hrs
Nutrition facts: 210 calories 3 fat
Rating: 5.0/5
( 1 voted )

Ingredients

  • 4 boneless, skinless chicken breasts
  • 14 ounces can of diced tomatoes with Italian herbs
  • 3/4 c. evaporated milk or heavy cream
  • 2 tbsp cornstarch
  • 3/4 c. tomato pasta sauce
  • 2 tsp minced garlic
  • 1/2 tsp dried basil
  • 2 tbsp finely chopped fresh basil
  • 1 tsp salt
  • 1/4 tsp black pepper

Instructions

Step 1: Into a 3-6-quart slow cooker, add the tomatoes and pasta sauce.

Step 2: Combine the cream and cornstarch, then add this to the slow cooker. Next, add the garlic, salt, basil, and pepper. Stir well.

Step 3: Place the chicken breasts on top and press them down into the sauce.

Step 4: Set to cook for 3 to 5 hours on low or until the internal temperature of the chicken breast reaches 165 degrees F. Note that the exact time of cooking varies depending on your slow cooker.

Step 5: Before serving, stir in the fresh basil. Enjoy the creamy tomato basil chicken over rice, pasta, or with veggies and salad.

October 11, 2022 0 comment
0 FacebookTwitterPinterestEmail
General Recipes

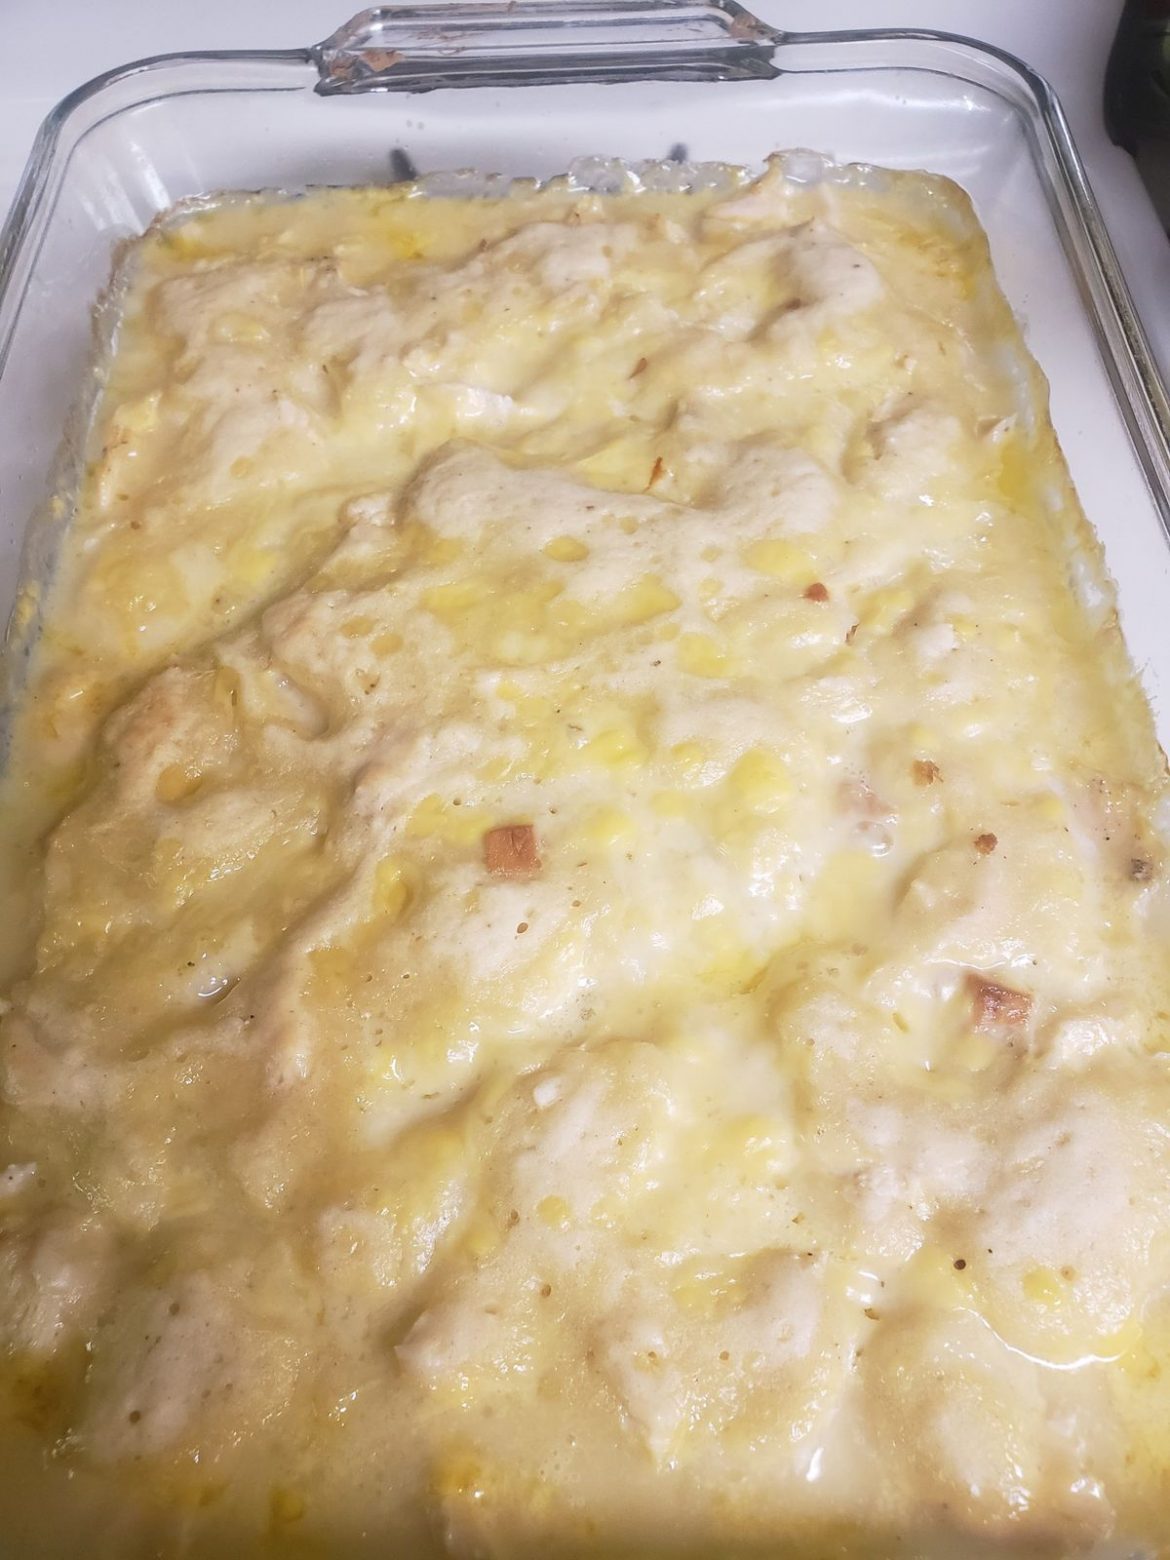
Chicken and Dumplings Casserole

by Rebecca October 10, 2022
written by Rebecca

Prep time: 10 mins | Cook time: 1 hr | Serves: 6

Enjoy all your favorite dumplings and classic chicken flavor with this easy and quick-to-make casserole. This casserole has tender chicken topped with savory gravy that I am super sure everyone will love! Get two of our favorites in one incredibly comforting and filling dish! Throw this Chicken and Dumplings Casserole together with just a little effort and expect great results!

INGREDIENTS

3 c. cooked and shredded chicken

1/2 c. (1 stick) butter

2 ribs celery, chopped

1 1/2 c. Bisquick

1 small white onion, chopped

1 c. whole milk

1 (10.75 ounces) can cream of chicken soup

2 c. chicken broth

1/2 tsp dried thyme

Fresh parsley, minced, for serving (optional)

Kosher salt and freshly ground black pepper, to taste

How to make Chicken and Dumplings Casserole

Step 1: Prepare the oven. Preheat it to 350 degrees F. Using a nonstick spray, grease a 9 x 13-inch baking dish.

Step 2: Melt the butter in a skillet over medium heat. Once the butter has melted, add the onion and celery to the skillet and cook for about 10 minutes until tender. To taste, season with salt and pepper.

Step 3: Into the bottom of the prepared baking dish, pour the veggies along with any melted butter. On top, evenly arrange the chicken.

Step 4: Place the Bisquick and milk in a medium bowl. Mix well until combined, then pour this over the chicken. DO NOT STIR.

Step 5: Whisk the chicken broth and cream of chicken soup in the same bowl. Sprinkle with salt, pepper, and thyme, then pour this on top of the Bisquick layer. DO NOT STIR.

Step 6: Place in the preheated oven and bake for about 45 minutes, uncovered. When done, take the casserole out of the oven and allow it to rest for about 5 minutes.

Step 7: Before serving, garnish with some fresh parsley. Enjoy!

Chicken and Dumplings Casserole

Rebecca Prep time: 10 mins | Cook time: 1 hr | Serves: 6 Enjoy all your favorite dumplings and classic chicken flavor with this easy and quick-to-make casserole. This casserole has… General Recipes Chicken and Dumplings Casserole European Print This
Serves: 6 Prep Time: 10 mins Cooking Time: 1 hr 1 hr
Nutrition facts: 200 calories 20 grams fat
Rating: 5.0/5
( 1 voted )

Ingredients

  • 3 c. cooked and shredded chicken
  • 1/2 c. (1 stick) butter
  • 2 ribs celery, chopped
  • 1 1/2 c. Bisquick
  • 1 small white onion, chopped
  • 1 c. whole milk
  • 1 (10.75 ounces) can cream of chicken soup
  • 2 c. chicken broth
  • 1/2 tsp dried thyme
  • Fresh parsley, minced, for serving (optional)
  • Kosher salt and freshly ground black pepper, to taste

Instructions

Step 1: Prepare the oven. Preheat it to 350 degrees F. Using a nonstick spray, grease a 9 x 13-inch baking dish.

Step 2: Melt the butter in a skillet over medium heat. Once the butter has melted, add the onion and celery to the skillet and cook for about 10 minutes until tender. To taste, season with salt and pepper.

Step 3: Into the bottom of the prepared baking dish, pour the veggies along with any melted butter. On top, evenly arrange the chicken.

Step 4: Place the Bisquick and milk in a medium bowl. Mix well until combined, then pour this over the chicken. DO NOT STIR.

Step 5: Whisk the chicken broth and cream of chicken soup in the same bowl. Sprinkle with salt, pepper, and thyme, then pour this on top of the Bisquick layer. DO NOT STIR.

Step 6: Place in the preheated oven and bake for about 45 minutes, uncovered. When done, take the casserole out of the oven and allow it to rest for about 5 minutes.

Step 7: Before serving, garnish with some fresh parsley. Enjoy!

October 10, 2022 0 comment
0 FacebookTwitterPinterestEmail
General Recipes

Slow Cooker Dr Pepper Pulled Pork

by Rebecca October 10, 2022
written by Rebecca

Prep time: 10 mins | Cook time: 5 hrs | Serves: 6-8

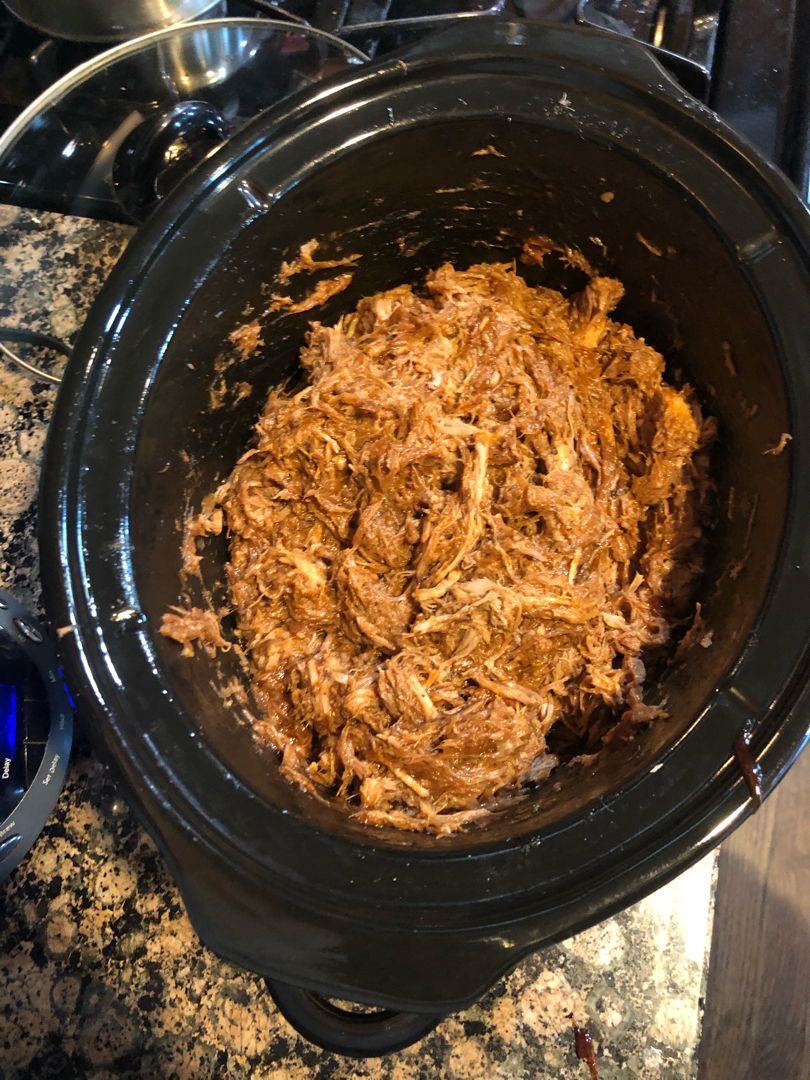
Nothing beats this mouthwatering pulled pork. It’s one of the most requested, crowd-pleasing dinners you can make. Serve this pulled pork on a bun or baked sweet potatoes for an easy dinner any time.

If you love slow cooker recipes, this Slow Cooker Dr. Pepper Pulled Pork recipe is a must! It is a no-fuss, pretty straightforward with one secret ingredient – a can of Dr. Pepper. This little can of soda magically transforms this Pulled Pork and makes the meat super tender and more flavorful! But it is not only Dr. Pepper, who makes this Pulled Pork extra special. The pork before placing it in the slow cooker is coated in a simple spice rub.

INGREDIENTS

1 white onion, sliced

1 pork roast, about 4 pounds

1 can Dr. Pepper soda

2 tsp paprika

3/4 c. barbecue sauce

1/2 tsp onion powder

1 tsp garlic powder

Buns, for serving

Kosher salt and freshly ground black pepper, to taste

How to make Slow Cooker Dr. Pepper Pulled Pork

Step 1: Place the paprika, garlic powder, onion powder, and salt and pepper (around 1 tsp salt, 1/2 tsp pepper) in a small bowl. Mix well, then rub this on the entire pork roast.

Step 2: In a slow cooker, place the onions. On top, lay the pork roast.

Step 3: Whisk the barbecue sauce and Dr. Pepper until well combined, then pour this into the slow cooker.

Step 4: Put the lid on and set it to cook for 8 to 10 hours on low or 4 to 5 hours on high.

Step 5: When done, take the meat out of the slow cooker and shred using two forks.

Step 6: You can remove some of the cooking liquid from the slow cooker if there is too much liquid, then place the shredded meat back into the slow cooker and stir into the juices.

Step 7: Serve Dr. Pepper Pulled Pork on buns. Enjoy!

Slow Cooker Dr Pepper Pulled Pork

Rebecca Prep time: 10 mins | Cook time: 5 hrs | Serves: 6-8 Nothing beats this mouthwatering pulled pork. It’s one of the most requested, crowd-pleasing dinners you can make. Serve… General Recipes Slow Cooker Dr Pepper Pulled Pork European Print This
Serves: 6-8 Prep Time: 10 mins Cooking Time: 5 hrs 5 hrs
Nutrition facts: 200 calories 20 grams fat
Rating: 5.0/5
( 1 voted )

Ingredients

  • 1 white onion, sliced
  • 1 pork roast, about 4 pounds
  • 1 can Dr. Pepper soda
  • 2 tsp paprika
  • 3/4 c. barbecue sauce
  • 1/2 tsp onion powder
  • 1 tsp garlic powder
  • Buns, for serving
  • Kosher salt and freshly ground black pepper, to taste

Instructions

Step 1: Place the paprika, garlic powder, onion powder, and salt and pepper (around 1 tsp salt, 1/2 tsp pepper) in a small bowl. Mix well, then rub this on the entire pork roast.

Step 2: In a slow cooker, place the onions. On top, lay the pork roast.

Step 3: Whisk the barbecue sauce and Dr. Pepper until well combined, then pour this into the slow cooker.

Step 4: Put the lid on and set it to cook for 8 to 10 hours on low or 4 to 5 hours on high.

Step 5: When done, take the meat out of the slow cooker and shred using two forks.

Step 6: You can remove some of the cooking liquid from the slow cooker if there is too much liquid, then place the shredded meat back into the slow cooker and stir into the juices.

Step 7: Serve Dr. Pepper Pulled Pork on buns. Enjoy!

October 10, 2022 0 comment
0 FacebookTwitterPinterestEmail
General Recipes

CHEESY CHICKEN RIGATONI: The Best And Tastiest Recipe

by Rebecca October 10, 2022
written by Rebecca

Prep Time: 15 mins | Cook Time: 45 mins | Total Time: 1 hr | Yield: 8 people

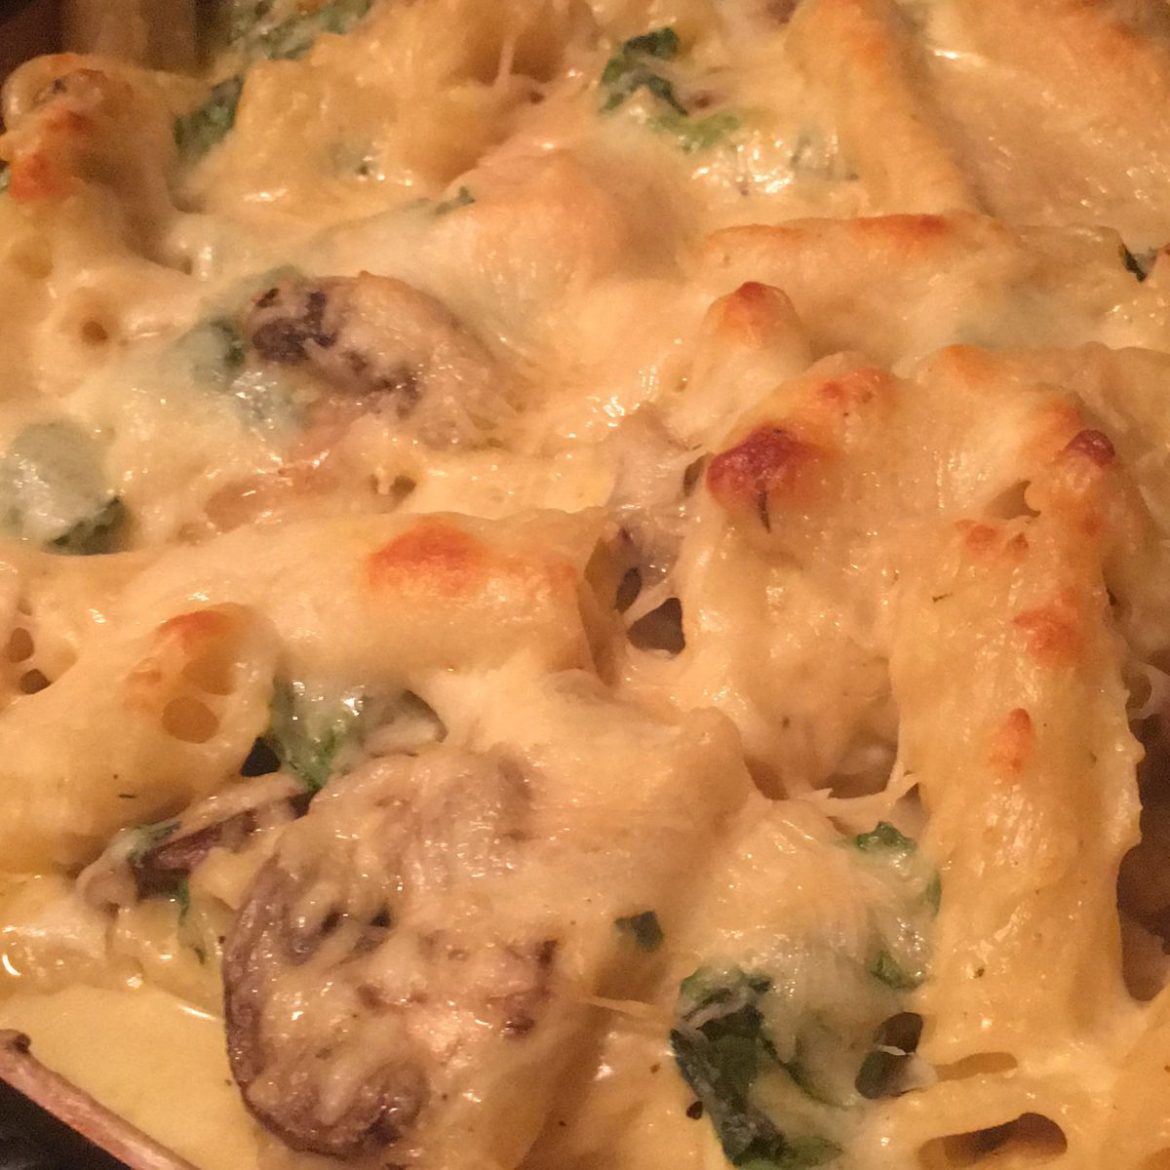
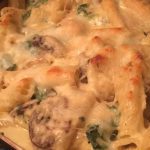
This cheesy chicken rigatoni is one the best and tastiest dishes you’ll ever make! This dish is crazy good, even your picky eaters will want more of this delicious, cheesy chicken dish. This is also perfect for an easy weeknight meal. I love that I can make this in advance and store it in the fridge or freezer for later. This casserole is made with a couple of simple ingredients and is ready in less than an hour. My family enjoys this dish, they always cleaned their plates and come back for seconds! Pair this cheesy chicken rigatoni with a simple salad or bread for a restaurant-quality meal at home!

Ingredients

1 c. shredded mozzarella cheese

1 (10.75 ounces) can cream of chicken soup

4 c. cooked chopped chicken

¼ c. Parmesan cheese

12 ounces Rigatoni (4½ c. dry)

Cheese Sauce:

1¼ c. heavy cream

1 (5 ounces) can evaporated milk

2 teaspoons minced garlic

½ c. Parmesan cheese

1 c. shredded mozzarella cheese

¼ teaspoon black pepper

1 (10.75 ounces) can of cheese soup

HOW TO MAKE CHEESY CHICKEN RIGATONI

Step 1: Prepare the oven. Preheat it to 350 degrees F. Using cooking spray, lightly grease a 9 x 13-inch pan.

Step 2: Following the package directions, cook the pasta until al dente. Drain when done.

Step 3: Place the cheese soup, evaporated milk, heavy cream, and garlic in a large saucepan. Mix well and cook on medium-high heat until the sauce comes to a boil. Once boiling, decrease the heat and let the sauce simmer for about 5 to 7 minutes or until thickened. Take the pan off the heat, then whisk in the mozzarella cheese along with the Parmesan and pepper.

Step 4: Place the cooked pasta, cooked chicken, cream of chicken soup, and cheese sauce in a large bowl. Mix well until combined.

Step 5: Into the prepared dish, spoon the pasta and sprinkle with the rest of the 1 c. mozzarella and 1/4 c. Parmesan cheese.

Step 6: Place in the preheated oven and bake for about 45 minutes, uncovered, until the casserole is bubbly and the cheese is golden brown.

CHEESY CHICKEN RIGATONI: The Best And Tastiest Recipe

Rebecca Prep Time: 15 mins | Cook Time: 45 mins | Total Time: 1 hr | Yield: 8 people This cheesy chicken rigatoni is one the best and tastiest dishes you’ll… General Recipes CHEESY CHICKEN RIGATONI: The Best And Tastiest Recipe European Print This
Serves: 8 Prep Time: 15 mins Cooking Time: 45 mins 45 mins
Nutrition facts: 200 calories 20 grams fat
Rating: 5.0/5
( 1 voted )

Ingredients

  • 1 c. shredded mozzarella cheese
  • 1 (10.75 ounces) can cream of chicken soup
  • 4 c. cooked chopped chicken
  • ¼ c. Parmesan cheese
  • 12 ounces Rigatoni (4½ c. dry)
  • Cheese Sauce:
  • 1¼ c. heavy cream
  • 1 (5 ounces) can evaporated milk
  • 2 teaspoons minced garlic
  • ½ c. Parmesan cheese
  • 1 c. shredded mozzarella cheese
  • ¼ teaspoon black pepper
  • 1 (10.75 ounces) can of cheese soup

Instructions

Step 1: Prepare the oven. Preheat it to 350 degrees F. Using cooking spray, lightly grease a 9 x 13-inch pan.

Step 2: Following the package directions, cook the pasta until al dente. Drain when done.

Step 3: Place the cheese soup, evaporated milk, heavy cream, and garlic in a large saucepan. Mix well and cook on medium-high heat until the sauce comes to a boil. Once boiling, decrease the heat and let the sauce simmer for about 5 to 7 minutes or until thickened. Take the pan off the heat, then whisk in the mozzarella cheese along with the Parmesan and pepper.

Step 4: Place the cooked pasta, cooked chicken, cream of chicken soup, and cheese sauce in a large bowl. Mix well until combined.

Step 5: Into the prepared dish, spoon the pasta and sprinkle with the rest of the 1 c. mozzarella and 1/4 c. Parmesan cheese.

Step 6: Place in the preheated oven and bake for about 45 minutes, uncovered, until the casserole is bubbly and the cheese is golden brown.

October 10, 2022 0 comment
0 FacebookTwitterPinterestEmail
General Recipes

GRILLED GARLIC AND HERB SHRIMP

by Rebecca October 10, 2022
written by Rebecca

Prep time: 15 mins | Cook time: 15 mins | Total time: 30 mins | Yield: 6 serving

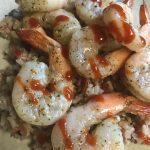
This Garlic Herb Shrimp recipe has been one of my favorite and go-to. My family loves shrimp, and I am always looking for shrimp recipes to surprise them. This Garlic Herb Shrimp has a punch of amazing flavors. Super easy to make using garlic, onion, and fresh herbs. Cook the shrimp on the grill, stovetop, or even in the oven, and expect the same great results!

For this recipe, I prefer fresh herbs to dried ones. The secret is to let the shrimp marinate for a couple of hours so the flavors will coat the shrimp inside and out. For the best meal, serve this Garlic Herb Shrimp with mashed potatoes, roasted veggies, or even roasted asparagus.

Ingredients

¼ c. Olive oil

2 pounds Large shrimp tails on, peeled, and deveined

2 teaspoons Italian seasoning

2 tablespoons Lemon juice

2 tablespoons Minced garlic

2 teaspoons Dried basil

2 tablespoons Brown sugar

½ teaspoon Pepper

Salt to taste

2 teaspoons Paprika

HOW TO MAKE GRILLED GARLIC AND HERB SHRIMP

Step 1: Place all the ingredients except the shrimp in a large mixing basin. Mix well until combined.

Step 2: To the basin, add the shrimp and toss well to coat. Set the shrimp aside to marinate for a few hours.

Step 3: Once the shrimp is ready, a thread about 5 to 6 pieces of shrimp onto each wooden skewer.

Step 4: Place the shrimp on the grill (indoor or outdoor grill) and cook until both sides are equally cooked.

Step 5: Serve the grilled garlic and herb shrimp immediately. Enjoy!

Tips:

The shrimp cooked quickly at high temperatures.

Make sure to defrost the shrimp overnight in the fridge for a couple of hours.

You can also cook the shrimp in a pan on the stovetop or in the oven instead of grilling. To cook on the stovetop, you do not need skewers anymore. If cooking in the oven, bake the shrimp at 450 degrees for about 5 to 7 minutes, flipping once.

For this recipe, I prefer to use fresh herbs.

Nutrition Facts:

Per Serving: Calories: 208kcl, Total fat: 3g, Cholesterol: 319mg, Sodium: 1532mg, Carbohydrates: 8g, Protein: 35g

GRILLED GARLIC AND HERB SHRIMP

Rebecca Prep time: 15 mins | Cook time: 15 mins | Total time: 30 mins | Yield: 6 serving This Garlic Herb Shrimp recipe has been one of my favorite and… General Recipes GRILLED GARLIC AND HERB SHRIMP European Print This
Serves: 6 Prep Time: 15 mins Cooking Time: 15 mins 15 mins
Nutrition facts: 208 calories 3 fat
Rating: 5.0/5
( 1 voted )

Ingredients

  • ¼ c. Olive oil
  • 2 pounds Large shrimp tails on, peeled, and deveined
  • 2 teaspoons Italian seasoning
  • 2 tablespoons Lemon juice
  • 2 tablespoons Minced garlic
  • 2 teaspoons Dried basil
  • 2 tablespoons Brown sugar
  • ½ teaspoon Pepper
  • Salt to taste
  • 2 teaspoons Paprika

Instructions

Step 1: Place all the ingredients except the shrimp in a large mixing basin. Mix well until combined.

Step 2: To the basin, add the shrimp and toss well to coat. Set the shrimp aside to marinate for a few hours.

Step 3: Once the shrimp is ready, a thread about 5 to 6 pieces of shrimp onto each wooden skewer.

Step 4: Place the shrimp on the grill (indoor or outdoor grill) and cook until both sides are equally cooked.

Step 5: Serve the grilled garlic and herb shrimp immediately. Enjoy!

Notes

The shrimp cooked quickly at high temperatures. Make sure to defrost the shrimp overnight in the fridge for a couple of hours. You can also cook the shrimp in a pan on the stovetop or in the oven instead of grilling. To cook on the stovetop, you do not need skewers anymore. If cooking in the oven, bake the shrimp at 450 degrees for about 5 to 7 minutes, flipping once. For this recipe, I prefer to use fresh herbs.

October 10, 2022 0 comment
0 FacebookTwitterPinterestEmail
General Recipes

HEARTY CROCKPOT COWBOY SOUP

by Rebecca October 10, 2022
written by Rebecca

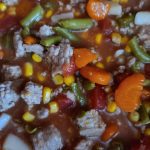
This Crockpot Cowboy Soup is an amazing winter meal. It is hearty, very comforting, and filling. This delicious soup will surely keep you warm on cold days. If you are looking for an easy, dump-and-forget kind of meal that can also feed a crowd, this Crockpot Cowboy Soup is the perfect option!

Ingredients

1 Can Condensed Tomato Soup (10.75 ounces)

2 pounds of Ground beef

4 Yukon Gold Potatoes – Peeled and cut into small cubes

1. can Whole Sweet Corn (15.25 ounces) – Not drained

1 Can Petite Diced Tomatoes (15.25 ounces) – Not drained

1 Can Cut Green Beans (15.25 ounces) – Not drained

2 Cans Mixed Vegetables (15.25 ounces each) – Not drained

2 tbsp Sugar

Pinch Salt

Dash Pepper

HOW TO MAKE HEARTY CROCKPOT COWBOY SOUP

Step 1: Add the ground beef to a hot skillet and lightly season with salt and pepper. Cook the ground beef until no longer pink. When done, drain the excess grease.

Step 2: In a large, slow cooker, place the beef and potatoes along with all the cans of vegetables and tomato soup. Add the sugar and stir well. Put the lid on and set it to cook for 2 to 3 hours on low.

Step 3: If desired, season with salt and pepper.

Step 4: Once done, serve the soup hot with crackers or crusty bread. Enjoy!

Notes:

For this recipe, you can use any variety of ground beef. You can pick a higher fat-content ground beef, just make sure to drain all the grease off.

If using fresh or frozen veggies, simply swap the equivalent amount of vegetables and add 1 to 2 cans of beef broth or stock (14.5 ounces).

You can also use chicken broth or stock.

For a stew-like consistency, you can use less broth or stock. Feel free to add more if you prefer a soup consistency.

HEARTY CROCKPOT COWBOY SOUP

Rebecca This Crockpot Cowboy Soup is an amazing winter meal. It is hearty, very comforting, and filling. This delicious soup will surely keep you warm on cold days. If you are… General Recipes HEARTY CROCKPOT COWBOY SOUP European Print This
Nutrition facts: 200 calories 20 grams fat
Rating: 5.0/5
( 1 voted )

Ingredients

  • 1 Can Condensed Tomato Soup (10.75 ounces)
  • 2 pounds of Ground beef
  • 4 Yukon Gold Potatoes – Peeled and cut into small cubes
  • 1. can Whole Sweet Corn (15.25 ounces) – Not drained
  • 1 Can Petite Diced Tomatoes (15.25 ounces) – Not drained
  • 1 Can Cut Green Beans (15.25 ounces) – Not drained
  • 2 Cans Mixed Vegetables (15.25 ounces each) – Not drained
  • 2 tbsp Sugar
  • Pinch Salt
  • Dash Pepper

Instructions

Step 1: Add the ground beef to a hot skillet and lightly season with salt and pepper. Cook the ground beef until no longer pink. When done, drain the excess grease.

Step 2: In a large, slow cooker, place the beef and potatoes along with all the cans of vegetables and tomato soup. Add the sugar and stir well. Put the lid on and set it to cook for 2 to 3 hours on low.

Step 3: If desired, season with salt and pepper.

Step 4: Once done, serve the soup hot with crackers or crusty bread. Enjoy!

Notes

For this recipe, you can use any variety of ground beef. You can pick a higher fat-content ground beef, just make sure to drain all the grease off. If using fresh or frozen veggies, simply swap the equivalent amount of vegetables and add 1 to 2 cans of beef broth or stock (14.5 ounces). You can also use chicken broth or stock. For a stew-like consistency, you can use less broth or stock. Feel free to add more if you prefer a soup consistency.

October 10, 2022 0 comment
0 FacebookTwitterPinterestEmail
General Recipes

Creamy Butter Baked Chicken

by Rebecca October 10, 2022
written by Rebecca

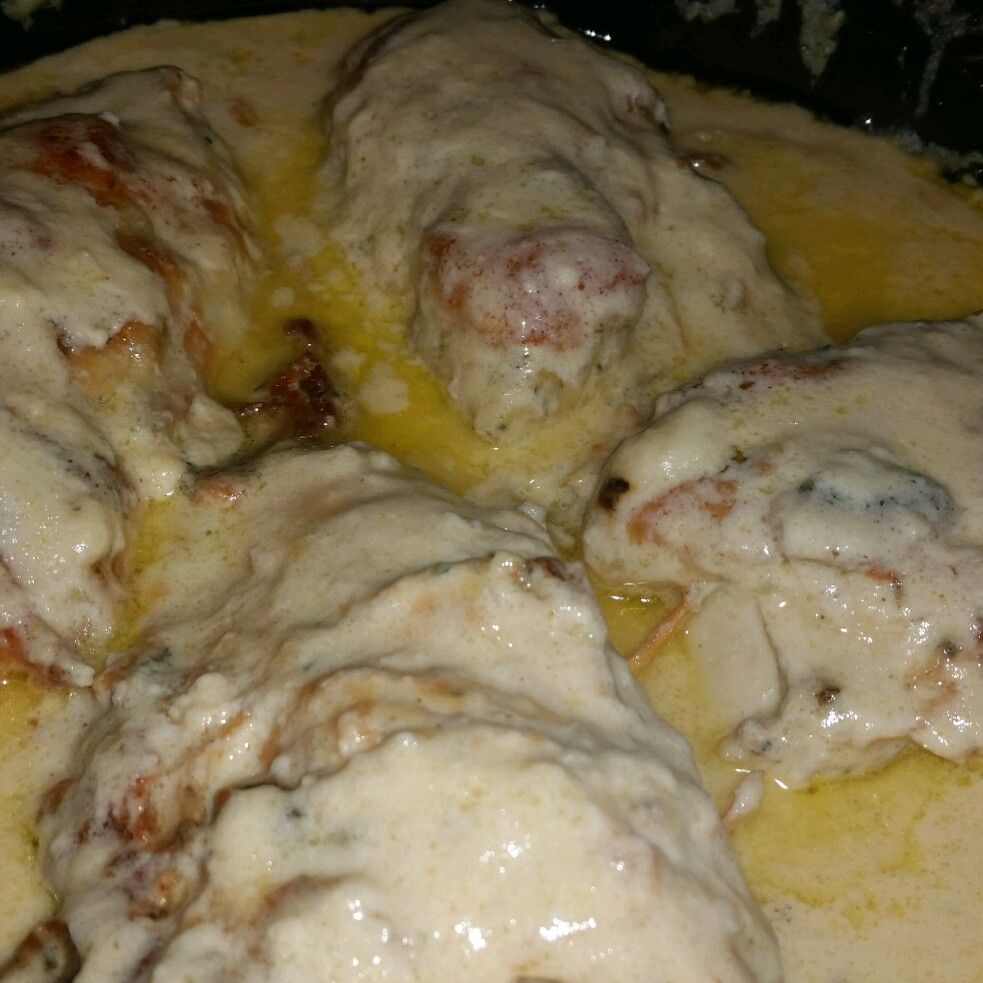
If you are searching for another easy meal that your entire family will absolutely love, you have to give this Creamy Butter Baked Chicken a try. It is packed with a savory flavor that you’ll surely love! For a complete meal, pair this dish with potatoes, rice, or asparagus.

Ingredients

1 can evaporated milk (12 ounces)

4 boneless, skinless chicken breasts

1 c. flour

1 can cream of chicken soup (condensed 10.5 ounces)

1/4 c. butter

Lemon wedges (optional)

1 ½ teaspoon salt

1/8 teaspoon freshly ground pepper

How to make Creamy Butter Baked Chicken

Step 1: Prepare the oven. Preheat it to 425 degrees F.

Step 2: Into pieces, cut the butter and put the pieces of butter in a 9 x 13-inch baking dish, then melt the butter in the oven.

Step 3: In the meantime, whisk the flour, salt, and pepper in a bowl.

Step 4: Pour around 4 ounces of evaporated milk into another bowl.

Step 5: Carefully take the pan out of the oven once the butter has melted.

Step 6: In the milk, dip the pieces of chicken one at a time, then dredge in the seasoned flour and place the chicken in the baking dish. Bake the chicken in the preheated oven for about 30 minutes.

Step 7: Meanwhile, whisk the rest of the evaporated milk with the can of soup.

Step 8: After 30 minutes, remove the chicken from the oven and turn each chicken piece over. Over the chicken, pour the milk and soup mixture.

Step 9: Return the chicken to the oven and resume baking for another 30 minutes until the top is golden brown and the sauce has thickened. The chicken is done once its internal temperature reaches 165 degrees F.

Step 10: Before serving, squeeze the lemon juice over the chicken if desired. Or serve the lemon on the side. Enjoy!

Notes:

You can swap regular flour with gluten-free flour. For this, I used the cup-for-cup or 1:1 types of gluten-free flour.

You can also use gluten-free cream of chicken soup.

Make sure to use a meat thermometer to check the doneness of the chicken.

Creamy Butter Baked Chicken

Rebecca If you are searching for another easy meal that your entire family will absolutely love, you have to give this Creamy Butter Baked Chicken a try. It is packed with… General Recipes Creamy Butter Baked Chicken European Print This
Nutrition facts: 200 calories 20 grams fat
Rating: 5.0/5
( 1 voted )

Ingredients

  • 1 can evaporated milk (12 ounces)
  • 4 boneless, skinless chicken breasts
  • 1 c. flour
  • 1 can cream of chicken soup (condensed 10.5 ounces)
  • 1/4 c. butter
  • Lemon wedges (optional)
  • 1 ½ teaspoon salt
  • 1/8 teaspoon freshly ground pepper

Instructions

Step 1: Prepare the oven. Preheat it to 425 degrees F.

Step 2: Into pieces, cut the butter and put the pieces of butter in a 9 x 13-inch baking dish, then melt the butter in the oven.

Step 3: In the meantime, whisk the flour, salt, and pepper in a bowl.

Step 4: Pour around 4 ounces of evaporated milk into another bowl.

Step 5: Carefully take the pan out of the oven once the butter has melted.

Step 6: In the milk, dip the pieces of chicken one at a time, then dredge in the seasoned flour and place the chicken in the baking dish. Bake the chicken in the preheated oven for about 30 minutes.

Step 7: Meanwhile, whisk the rest of the evaporated milk with the can of soup.

Step 8: After 30 minutes, remove the chicken from the oven and turn each chicken piece over. Over the chicken, pour the milk and soup mixture.

Step 9: Return the chicken to the oven and resume baking for another 30 minutes until the top is golden brown and the sauce has thickened. The chicken is done once its internal temperature reaches 165 degrees F.

Step 10: Before serving, squeeze the lemon juice over the chicken if desired. Or serve the lemon on the side. Enjoy!

Notes

You can swap regular flour with gluten-free flour. For this, I used the cup-for-cup or 1:1 types of gluten-free flour. You can also use gluten-free cream of chicken soup. Make sure to use a meat thermometer to check the doneness of the chicken.

October 10, 2022 0 comment
0 FacebookTwitterPinterestEmail
General Recipes

Butter Chicken Recipe (aka Murgh Makhani)

by Rebecca October 10, 2022
written by Rebecca

Prep Time: 10 mins | Cook Time: 20 mins | Marinating Time: 30 mins | Total Time: 30 mins | Servings: 6

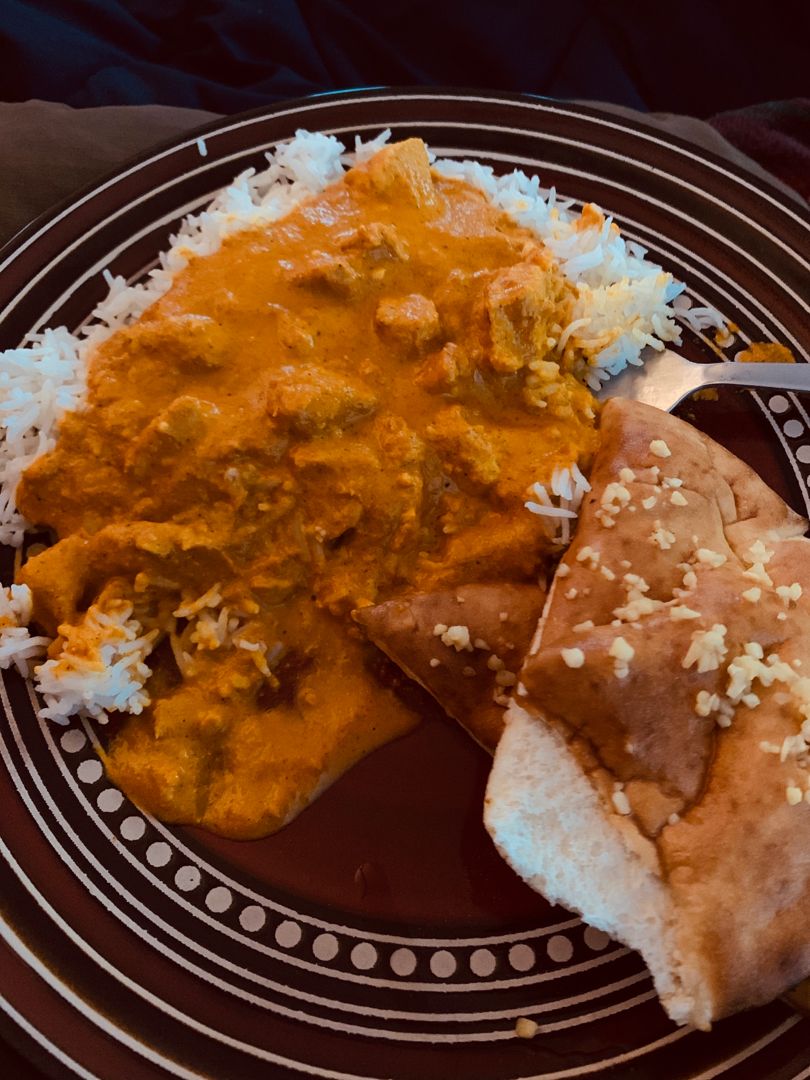
Enjoy this popular Indian curry at home with this easy recipe. This flavor-packed Butter Chicken aka Murgh Makhani with super rich and creamy gravy that is almost buttery will surely make your mouth water!

Ingredients

CHICKEN MARINADE:

2 tbsp grated garlic

2 lbs boneless chicken thighs chopped into bite-sized pieces (or use chicken breast)

1 tbsp grated fresh ginger

1 tsp red chili powder Kashmeri chili powder is traditional, but paprika is good

1 tsp garam masala

1 tsp turmeric

½ tsp cumin

½ c. plain yoghurt

1 tbsp lemon juice

Salt and pepper to taste

BUTTER CHICKEN:

1 medium onion, chopped

2 tbsp olive oil (or use butter)

1 red pepper, chopped (I used a long red cayenne, but use your favorite)

1 tbsp grated fresh ginger

1 tsp cumin

1 tsp garam masala

1 tsp red chili powder

3 cloves garlic, minced

14 oz. diced tomatoes, fresh or canned, or use tomato sauce

1 c. heavy cream or use ½ cup milk and ½ cup cream for a lighter version

Salt and pepper to taste

1 tbsp spicy red chili flakes, optional

FOR SERVING:

Fresh chopped herbs, extra hot pepper flakes, cooked rice, warmed naan

How to make Butter Chicken (aka Murgh Makhani)

CHICKEN MARINADE:

Step 1: To a medium bowl, add the chopped chicken, garlic, ginger, garam masala, chili powder, turmeric, cumin, salt, pepper yoghurt, and lemon juice. Mix well until the chicken is completely covered. Then, tent the bowl and place it in the fridge for at least 30 minutes. You can also marinate the chicken overnight for greater flavor.

BUTTER CHICKEN:

Step 2: Heat the olive oil in a large pan over medium-high heat. Then, add the chicken and sear for about 5 minutes until the chicken is browned, stirring. Set the chicken aside when done.

Step 3: In the now-empty pan, melt the butter. Once the butter has melted, add the onion and peppers to the pan and cook for about 5 minutes until tender. Then, add the garlic and ginger and continue to cook for a minute more until aromatic.

Step 4: To the pan, add the garam masala along with the cumin, red chili powder, salt and pepper, and red chili flakes (if using). Stir well and continue to cook for another minute. Next, stir in the diced tomatoes and bring everything to a quick boil. Once boiling, decrease the heat and let everything simmer for about 15 minutes.

Step 5: To a blender or food processor, transfer the sauce and blend until smooth. If desired, you can add a bit of water to thin out the sauce. Then, strain the sauce into the pan.

Step 6: To the pan, add the cream and stir. Return the chicken to the pan. Let everything simmer for about 10 minutes or until the chicken is completely cooked and the sauce has slightly thickened.

Step 7: When done, serve the Butter Chicken with cooked white rice, garnished with some fresh chopped herbs such as cilantro or parsley and spicy red chili flakes. For extra goodness, swirl on a little extra cream. Enjoy!

Nutrition Facts: Calories: 558 kcal Carbohydrates: 11g Protein: 27g Fat: 45g Saturated Fat: 18g Cholesterol: 215mg Sodium: 217mg Potassium: 634mg Fiber: 2g Sugar: 4g Vitamin A: 2130IU Vitamin C: 35.3mg Calcium: 102mg Iron: 2.6mg

Butter Chicken Recipe (aka Murgh Makhani)

Rebecca Prep Time: 10 mins | Cook Time: 20 mins | Marinating Time: 30 mins | Total Time: 30 mins | Servings: 6 Enjoy this popular Indian curry at home with… General Recipes Butter Chicken Recipe (aka Murgh Makhani) European Print This
Serves: 6 Prep Time: 10 mins Cooking Time: 20 mins 20 mins
Nutrition facts: 558 calories 18 fat
Rating: 5.0/5
( 1 voted )

Ingredients

  • CHICKEN MARINADE:
  • 2 tbsp grated garlic
  • 2 lbs boneless chicken thighs chopped into bite-sized pieces (or use chicken breast)
  • 1 tbsp grated fresh ginger
  • 1 tsp red chili powder Kashmeri chili powder is traditional, but paprika is good
  • 1 tsp garam masala
  • 1 tsp turmeric
  • ½ tsp cumin
  • ½ c. plain yoghurt
  • 1 tbsp lemon juice
  • Salt and pepper to taste
  • BUTTER CHICKEN:
  • 1 medium onion, chopped
  • 2 tbsp olive oil (or use butter)
  • 1 red pepper, chopped (I used a long red cayenne, but use your favorite)
  • 1 tbsp grated fresh ginger
  • 1 tsp cumin
  • 1 tsp garam masala
  • 1 tsp red chili powder
  • 3 cloves garlic, minced
  • 14 oz. diced tomatoes, fresh or canned, or use tomato sauce
  • 1 c. heavy cream or use ½ cup milk and ½ cup cream for a lighter version
  • Salt and pepper to taste
  • 1 tbsp spicy red chili flakes, optional
  • FOR SERVING:
  • Fresh chopped herbs, extra hot pepper flakes, cooked rice, warmed naan

Instructions

CHICKEN MARINADE:

Step 1: To a medium bowl, add the chopped chicken, garlic, ginger, garam masala, chili powder, turmeric, cumin, salt, pepper yoghurt, and lemon juice. Mix well until the chicken is completely covered. Then, tent the bowl and place it in the fridge for at least 30 minutes. You can also marinate the chicken overnight for greater flavor.

BUTTER CHICKEN:

Step 2: Heat the olive oil in a large pan over medium-high heat. Then, add the chicken and sear for about 5 minutes until the chicken is browned, stirring. Set the chicken aside when done.

Step 3: In the now-empty pan, melt the butter. Once the butter has melted, add the onion and peppers to the pan and cook for about 5 minutes until tender. Then, add the garlic and ginger and continue to cook for a minute more until aromatic.

Step 4: To the pan, add the garam masala along with the cumin, red chili powder, salt and pepper, and red chili flakes (if using). Stir well and continue to cook for another minute. Next, stir in the diced tomatoes and bring everything to a quick boil. Once boiling, decrease the heat and let everything simmer for about 15 minutes.

Step 5: To a blender or food processor, transfer the sauce and blend until smooth. If desired, you can add a bit of water to thin out the sauce. Then, strain the sauce into the pan.

Step 6: To the pan, add the cream and stir. Return the chicken to the pan. Let everything simmer for about 10 minutes or until the chicken is completely cooked and the sauce has slightly thickened.

Step 7: When done, serve the Butter Chicken with cooked white rice, garnished with some fresh chopped herbs such as cilantro or parsley and spicy red chili flakes. For extra goodness, swirl on a little extra cream. Enjoy!

October 10, 2022 0 comment
0 FacebookTwitterPinterestEmail
General Recipes

Make-Ahead Salad

by Rebecca October 10, 2022
written by Rebecca

Prep time: 15 mins | Serves: 6-8

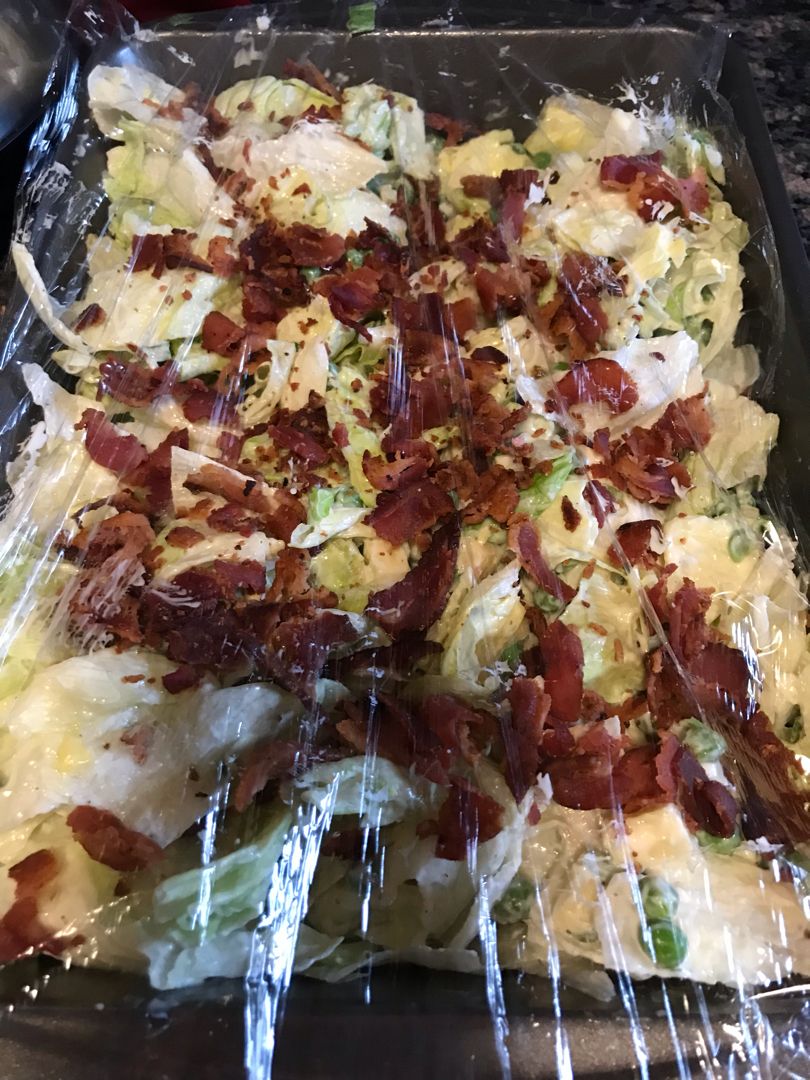
This is a fun, make-ahead salad recipe with lettuce, Swiss cheese, peas, green onions, and bacon bits tossed in a simple mayo salad. This salad is incredibly easy to throw together. Assemble the salad in advance and just throw the dressing over the salad before serving. I love the simplicity of this salad. All the ingredients I need I already have on hand. Whenever I plan on bringing this salad to parties, picnics, or potlucks, I make this ahead, then just grab it on our way out. This salad is like a casserole-type of salad. Just like any other salad or casserole, this salad recipe is very versatile. You can easily swap the ingredients with what you have or want. This salad is also an amazing dish to balance out a meal!

INGREDIENTS

Salad:

1 c. Swiss cheese, cut into cubes

1 head iceberg lettuce, chopped

1 (8 ounces) package of frozen peas, thawed and drained

1/2 c. bacon bits

3 green onions, finely chopped

Sauce:

1/2 c. miracle whip

1/2 c. mayonnaise

kosher salt and freshly ground pepper, to taste

1-2 tbsp sugar

How to make Make-Ahead Salad

Step 1: Place the mayonnaise, miracle whip, and sugar in a medium bowl. Mix well until combined. Then, season with salt and black pepper to taste.

Step 2: On the counter, smash the stem of the lettuce to loosen it. Into the lettuce, push the stem until it releases. Remove and discard the stem, then chop the lettuce. Place the chopped lettuce in a 9 x 13-inch baking dish.

Step 3: To the baking dish, add the thawed and drained peas along with the diced Swiss cheese and green onions. On top, pour the dressing. Toss well until everything is evenly coated.

Step 4: On top, sprinkle the bacon bits. Place in the fridge until serving. If serving later, tent the salad with aluminum foil or plastic wrap.

Make-Ahead Salad

Rebecca Prep time: 15 mins | Serves: 6-8 This is a fun, make-ahead salad recipe with lettuce, Swiss cheese, peas, green onions, and bacon bits tossed in a simple mayo salad.… General Recipes Make-Ahead Salad European Print This
Serves: 6*8 Prep Time: 15 mins
Nutrition facts: 200 calories 20 grams fat
Rating: 5.0/5
( 1 voted )

Ingredients

  • Salad:
  • 1 c. Swiss cheese, cut into cubes
  • 1 head iceberg lettuce, chopped
  • 1 (8 ounces) package of frozen peas, thawed and drained
  • 1/2 c. bacon bits
  • 3 green onions, finely chopped
  • Sauce:
  • 1/2 c. miracle whip
  • 1/2 c. mayonnaise
  • kosher salt and freshly ground pepper, to taste
  • 1-2 tbsp sugar

Instructions

Step 1: Place the mayonnaise, miracle whip, and sugar in a medium bowl. Mix well until combined. Then, season with salt and black pepper to taste.

Step 2: On the counter, smash the stem of the lettuce to loosen it. Into the lettuce, push the stem until it releases. Remove and discard the stem, then chop the lettuce. Place the chopped lettuce in a 9 x 13-inch baking dish.

Step 3: To the baking dish, add the thawed and drained peas along with the diced Swiss cheese and green onions. On top, pour the dressing. Toss well until everything is evenly coated.

Step 4: On top, sprinkle the bacon bits. Place in the fridge until serving. If serving later, tent the salad with aluminum foil or plastic wrap.

October 10, 2022 0 comment
0 FacebookTwitterPinterestEmail
General Recipes

Make Ahead Creamy Vegetable Casserole

by Rebecca October 10, 2022
written by Rebecca

Prep Time: 10 mins | Cook Time: 50 mins | Total Time: 1 hr | Servings: 8

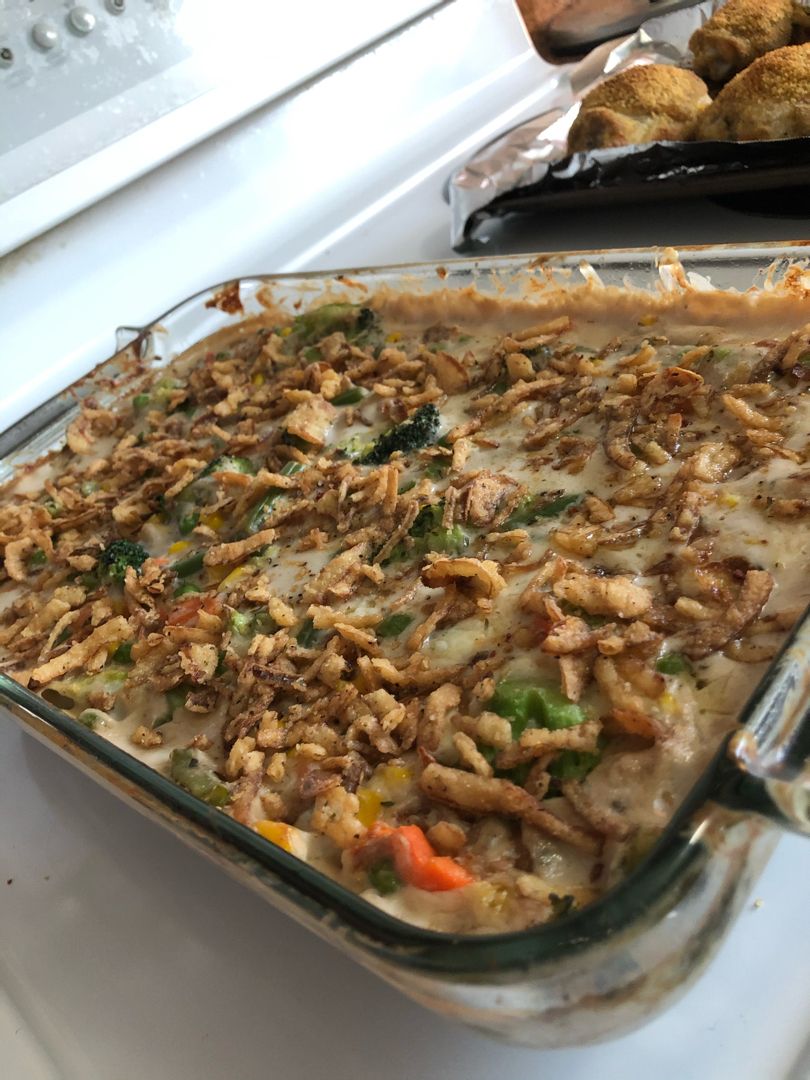
This creamy vegetable casserole is another one of my go-to make-ahead dishes. It is filled with vegetables in a delightfully creamy sauce. Serve this casserole either as the main dish or as a side. This casserole is incredibly good, even your picky eaters will love this!

This casserole is the perfect make-ahead dish. This will stay fresh in the freezer for up to 3 weeks. Once ready to serve, thaw in the fridge, then reheat in the oven until hot and bubbly.

This creamy vegetable casserole is an easy and budget-friendly meal that’s perfect for the family!

Ingredients

20 oz. canned cream of mushroom soup

1 c. light sour cream

4 c. cauliflower florets, frozen

2 c. white cheddar cheese, shredded

1 c. french fried onions

parsley for garnish, optional

4 c. mixed vegetables, frozen (carrots, corn, peas, etc.)

1/2 tsp ground black pepper

1/2 tsp salt

How to make Make Ahead Creamy Vegetable Casserole

Step 1: Prepare the oven. Preheat it to 350 degrees.

Step 2: Place all the ingredients in a large bowl. Mix well until combined. Set aside a half cup of french-fried onions. To a large casserole dish, transfer the rest. Place in the preheated oven and bake for about 50 minutes.

Step 3: When done, take the casserole out of the oven and top it with the fresh chopped parsley and the reserved french fried onions.

Step 4: Serve the creamy vegetable casserole immediately or let it cool fully before freezing.

Note:

Make this casserole in advance and let it cool completely after baking. Place the casserole in a freezer-friendly container and freezer for up to 3 weeks. When ready to serve, thaw in the fridge for at least 12 hours. Gently stir and transfer to a baking dish, then reheat for about 15 to 20 minutes at 350 degrees until hot and bubbly.

Make Ahead Creamy Vegetable Casserole

Rebecca Prep Time: 10 mins | Cook Time: 50 mins | Total Time: 1 hr | Servings: 8 This creamy vegetable casserole is another one of my go-to make-ahead dishes. It… General Recipes Make Ahead Creamy Vegetable Casserole European Print This
Serves: 8 Prep Time: 10 mins Cooking Time: 50 mins 50 mins
Nutrition facts: 200 calories 20 grams fat
Rating: 5.0/5
( 1 voted )

Ingredients

  • 20 oz. canned cream of mushroom soup
  • 1 c. light sour cream
  • 4 c. cauliflower florets, frozen
  • 2 c. white cheddar cheese, shredded
  • 1 c. french fried onions
  • parsley for garnish, optional
  • 4 c. mixed vegetables, frozen (carrots, corn, peas, etc.)
  • 1/2 tsp ground black pepper
  • 1/2 tsp salt

Instructions

Step 1: Prepare the oven. Preheat it to 350 degrees.

Step 2: Place all the ingredients in a large bowl. Mix well until combined. Set aside a half cup of french-fried onions. To a large casserole dish, transfer the rest. Place in the preheated oven and bake for about 50 minutes.

Step 3: When done, take the casserole out of the oven and top it with the fresh chopped parsley and the reserved french fried onions.

Step 4: Serve the creamy vegetable casserole immediately or let it cool fully before freezing.

Notes

Make this casserole in advance and let it cool completely after baking. Place the casserole in a freezer-friendly container and freezer for up to 3 weeks. When ready to serve, thaw in the fridge for at least 12 hours. Gently stir and transfer to a baking dish, then reheat for about 15 to 20 minutes at 350 degrees until hot and bubbly.

October 10, 2022 0 comment
0 FacebookTwitterPinterestEmail
Newer Posts
Older Posts

Popular Posts

  • 1

    Crispy Crunchy Parmesan Potatoes

    March 21, 2020
  • 2

    CROCK POT SMOTHERED PORK CHOPS

    March 21, 2020
  • Facebook
  • Twitter

@2019 - All Right Reserved.


Back To Top