Cook it once
  • Home
  • Privacy Policy
  • Recipes
    • KETO
    • LC
    • WW
  • Tips
  • Contact
Cook it once
  • Home
  • Privacy Policy
  • Recipes
    • KETO
    • LC
    • WW
  • Tips
  • Contact
Category:

General Recipes

General Recipes

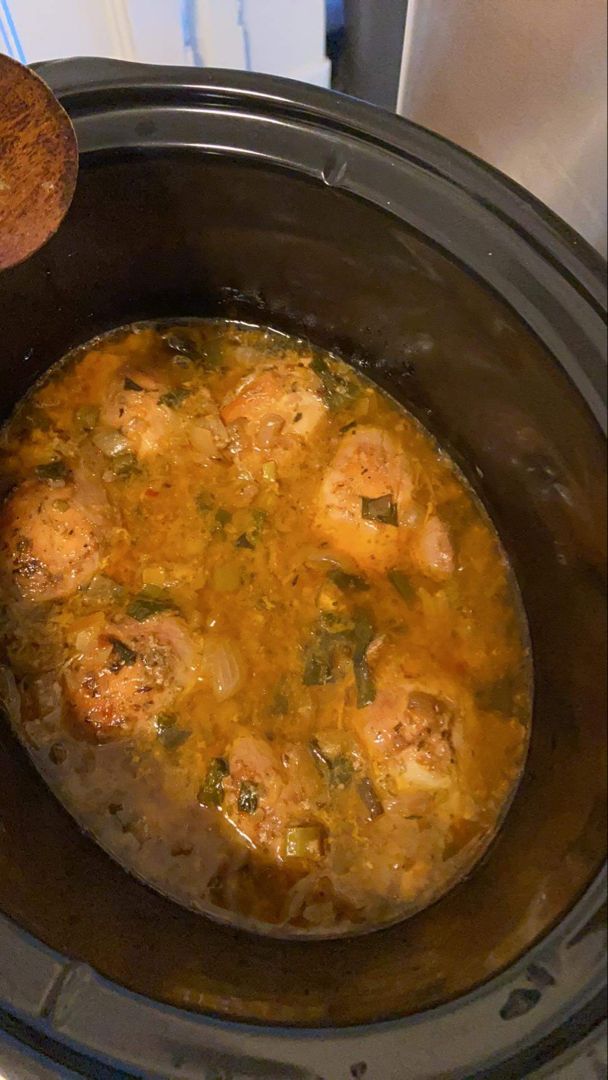
CROCK POT LEMON GARLIC BUTTER CHICKEN THIGHS

by Rebecca October 24, 2022
written by Rebecca

Prep Time: 10 mins | Cook Time: 4 hrs | Total Time: 4 hrs 10 mins | Yield: 6 Servings

Packed with scrumptious flavors, these Crockpot Lemon Garlic Butter Chicken Thighs are one to try! This recipe was made easy with the use of the crockpot. Slow-cooked for about 4 hours to perfection! Try this recipe now!

Ingredients:

4 garlic cloves, sliced or minced

1 tsp Italian seasoning

1/2 stick butter, diced

1/3 c low sodium chicken broth

1 tsp onion powder

Zest half a lemon

Juice of one lemon

1 tsp garlic powder

1/2 tsp paprika

6-8 boneless chicken thighs, skinless or with skin

Salt and pepper, to taste

Chopped fresh parsley and lemon slices, for garnish

1/2 tsp crushed red chili pepper flakes, or Cayenne (optional)

Directions:

Lay the chicken thighs at the bottom of the slow cooker and arrange them in a single layer.

In a mixing bowl, add lemon zest, lemon juice, and 1/3 cup of chicken broth. Stir until well blended. Add the mixture on top of the chicken thighs.

In another mixing bowl, add salt, pepper, Italian seasoning, crushed red chili pepper flakes, paprika, onion powder, and garlic powder. Whisk everything until well incorporated. Sprinkle the mixture on top of the chicken in the slow cooker. Stir everything until well incorporated.

Add the butter and minced garlic over the chicken thighs.

Cover and seal the slow cooker, then cook the chicken thighs for about 3 to 4 hours on a high setting or 6 to 8 hours on a low setting.

Top each serving with freshly chopped parsley and lemon slices on the side.

Serve right away with rice, quinoa, zucchini noodles, or pasta!

Notes:

Place any leftovers in an airtight container, then put them in the fridge. Reheat for a few minutes before serving again.
CROCK POT LEMON GARLIC BUTTER CHICKEN THIGHS

Rebecca Prep Time: 10 mins | Cook Time: 4 hrs | Total Time: 4 hrs 10 mins | Yield: 6 Servings Packed with scrumptious flavors, these Crockpot Lemon Garlic Butter Chicken… General Recipes CROCK POT LEMON GARLIC BUTTER CHICKEN THIGHS European Print This
Serves: 6 Prep Time: 10 mins Cooking Time: 4 hrs 4 hrs
Nutrition facts: 200 calories 20 grams fat
Rating: 4.5/5
( 2 voted )

Ingredients

  • 4 garlic cloves, sliced or minced
  • 1 tsp Italian seasoning
  • 1/2 stick butter, diced
  • 1/3 c low sodium chicken broth
  • 1 tsp onion powder
  • Zest half a lemon
  • Juice of one lemon
  • 1 tsp garlic powder
  • 1/2 tsp paprika
  • 6-8 boneless chicken thighs, skinless or with skin
  • Salt and pepper, to taste
  • Chopped fresh parsley and lemon slices, for garnish
  • 1/2 tsp crushed red chili pepper flakes, or Cayenne (optional)

Instructions

Lay the chicken thighs at the bottom of the slow cooker and arrange them in a single layer.

In a mixing bowl, add lemon zest, lemon juice, and 1/3 cup of chicken broth. Stir until well blended. Add the mixture on top of the chicken thighs.

In another mixing bowl, add salt, pepper, Italian seasoning, crushed red chili pepper flakes, paprika, onion powder, and garlic powder. Whisk everything until well incorporated. Sprinkle the mixture on top of the chicken in the slow cooker. Stir everything until well incorporated.

Add the butter and minced garlic over the chicken thighs.

Cover and seal the slow cooker, then cook the chicken thighs for about 3 to 4 hours on a high setting or 6 to 8 hours on a low setting.

Top each serving with freshly chopped parsley and lemon slices on the side.

Serve right away with rice, quinoa, zucchini noodles, or pasta!

Notes

Place any leftovers in an airtight container, then put them in the fridge. Reheat for a few minutes before serving again.
October 24, 2022 0 comment
0 FacebookTwitterPinterestEmail
General Recipes

Sausage and Rice Skillet Recipe

by Rebecca October 24, 2022
written by Rebecca

Prep Time: 8 mins | Cook Time: 22 mins | Total Time: 30 mins | Yield: 6 Servings

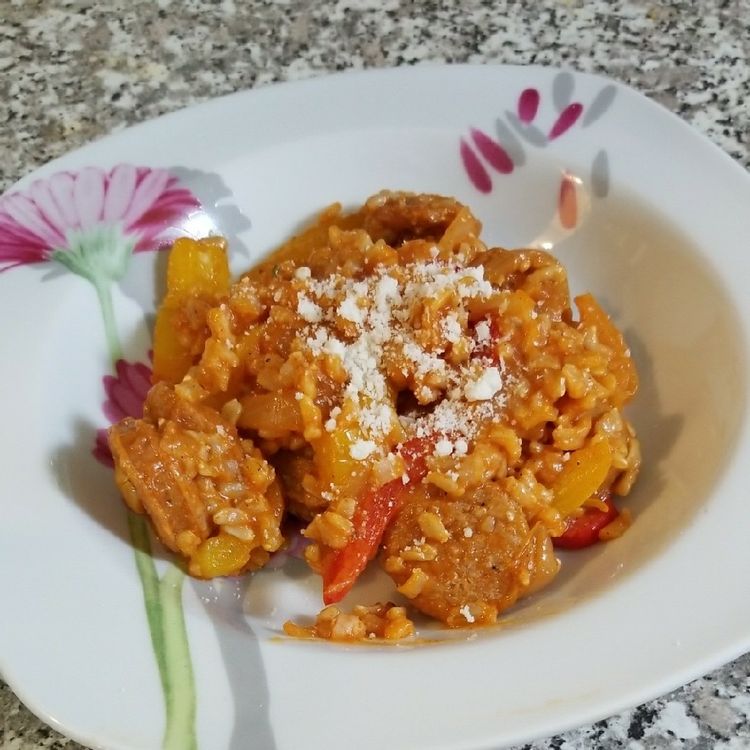
What a complete meal! This Sausage and Rice Skillet is what you just need to make your day! It will only take you 30 minutes to cook this. You can serve this any time of the day! A must-try recipe indeed. Enjoy!

Ingredients:

4 cloves garlic – minced

1/2 red bell pepper – sliced

5 tablespoons tomato paste

1 teaspoon paprika

1 small white onion – quartered and sliced

2 teaspoons olive oil

1 1/4 c low-sodium chicken broth – divided

1/2 teaspoon kosher sea salt

1 1/2 tablespoons parsley – chopped

1 1/4 c white rice

1/2 teaspoon ground black pepper

1/8 teaspoon cayenne pepper

12 ounces package of smoked sausage

1/2 yellow bell pepper – sliced

Directions:

Refer to the directions provided on the package of rice on how to cook it.

Place a large cast-iron skillet on the stove and turn the heat to medium-high. Add oil and allow it to become hot.

Add the sausage into the hot skillet, then cook all sides for a few minutes until they turn brown. Transfer the sausage onto a clean plate.

In the same skillet, add the onion and peppers. Sauté for a few minutes until soft.

Add the garlic, then sauté for about a minute or until aromatic. Season with salt and pepper.

Remove the sauteed veggies from the skillet and put them onto the plate with the sausage.

In the empty skillet, add 3/4 cup of chicken broth and tomato paste. Scrape the bottom of the skillet to get the browned bits.

Stir until well incorporated. Stir in cayenne and paprika. Simmer the mixture for about a minute.

Put the cooked sausage, sauteed veggies, rice, chicken broth, and pepper back into the skillet. Toss everything until well combined.

Remove the skillet from the heat, then sprinkle freshly chopped parsley on top to garnish.

Serve right away. Enjoy!

Notes:

Place any leftovers in an airtight container, then put them in the fridge. They can last up to 5 days or 3 months in the freezer. Reheat for a few minutes before serving again.

Nutrition Facts:

Calories359 Fat17g 26% Saturated Fat6g 38% Cholesterol 40mg 13% Sodium799mg 35%Potassium405mg 12% Carbohydrates 38g 13% Fiber 2g8% Sugar 3g3% Protein12g 24% Vitamin A818IU16% Vitamin C 37mg45 % Calcium28mg 3% Iron2mg11%

Sausage and Rice Skillet Recipe

Rebecca Prep Time: 8 mins | Cook Time: 22 mins | Total Time: 30 mins | Yield: 6 Servings What a complete meal! This Sausage and Rice Skillet is what you… General Recipes Sausage and Rice Skillet Recipe European Print This
Serves: 6 Prep Time: 8 mins Cooking Time: 22 mins 22 mins
Nutrition facts: 359 calories 17 fat
Rating: 5.0/5
( 1 voted )

Ingredients

  • 4 cloves garlic – minced
  • 1/2 red bell pepper – sliced
  • 5 tablespoons tomato paste
  • 1 teaspoon paprika
  • 1 small white onion – quartered and sliced
  • 2 teaspoons olive oil
  • 1 1/4 c low-sodium chicken broth – divided
  • 1/2 teaspoon kosher sea salt
  • 1 1/2 tablespoons parsley – chopped
  • 1 1/4 c white rice
  • 1/2 teaspoon ground black pepper
  • 1/8 teaspoon cayenne pepper
  • 12 ounces package of smoked sausage
  • 1/2 yellow bell pepper – sliced

Instructions

Refer to the directions provided on the package of rice on how to cook it.

Place a large cast-iron skillet on the stove and turn the heat to medium-high. Add oil and allow it to become hot.

Add the sausage into the hot skillet, then cook all sides for a few minutes until they turn brown. Transfer the sausage onto a clean plate.

In the same skillet, add the onion and peppers. Sauté for a few minutes until soft.

Add the garlic, then sauté for about a minute or until aromatic. Season with salt and pepper.

Remove the sauteed veggies from the skillet and put them onto the plate with the sausage.

In the empty skillet, add 3/4 cup of chicken broth and tomato paste. Scrape the bottom of the skillet to get the browned bits.

Stir until well incorporated. Stir in cayenne and paprika. Simmer the mixture for about a minute.

Put the cooked sausage, sauteed veggies, rice, chicken broth, and pepper back into the skillet. Toss everything until well combined.

Remove the skillet from the heat, then sprinkle freshly chopped parsley on top to garnish.

Serve right away. Enjoy!

Notes

Place any leftovers in an airtight container, then put them in the fridge. They can last up to 5 days or 3 months in the freezer. Reheat for a few minutes before serving again.

October 24, 2022 0 comment
0 FacebookTwitterPinterestEmail
General Recipes

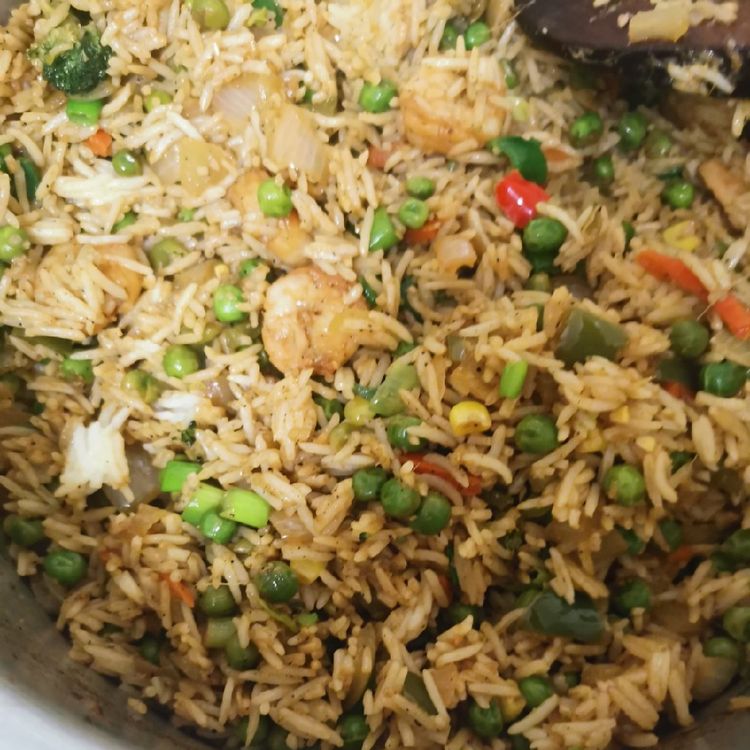
Prawn Fried Rice Recipe / Shrimp Fried Rice Recipe

by Rebecca October 24, 2022
written by Rebecca

Prep Time: 10 mins | Cook Time: 30 mins | Total Time: 40 mins | Yield: 2 Servings

Enjoy the best Shrimp Fried Rice in the comfort of your home! Just follow these easy steps for they will guide you to perfection! It will take you less than an hour to prepare and cook this. You are so in for a treat!

Ingredients:

½ chopped finely Capsicum / Green Bell Pepper

1 teaspoon to taste

5 fat cloves, chopped finely Garlic

1 tablespoon chopped finely Ginger

Salt to taste

2 tablespoons Oil

1 teaspoon Sugar

1 chopped finely Green Chili

1 teaspoon or to taste Black Pepper Powder

2 c Basmati Rice cooked

a handful of finely chopped Spring Onion

1 teaspoon vinegar to taste

1 medium size chopped finely Onion

For Marinating Prawns:

1 teaspoon vinegar to taste

12 Prawns

1 teaspoon soy sauce to taste

Salt to taste

1 teaspoon Chili Powder

Directions:

Refer to the directions provided on the package of the Basmati rice on how to cook it. Make sure to add the spices yet.

Put the prawns into a mixing bowl together with 1 tsp vinegar, 1 tsp soy sauce, salt, and 1 tsp chili powder. Toss everything until the prawns are coated.

Place a frying pan on the stove and turn the heat to medium. Add oil and allow it to become hot.

Add the prawns into the hot skillet, then cook each side for about 3 minutes or until done. Transfer them onto a clean plate.

In the same pan with a bit of oil, add ginger, capsicum, garlic, green chilis, and onions. Sauté for a few minutes until aromatic and soft.

Add salt, pepper, soy sauce, sugar, and vinegar. Stir everything until well blended. a

Put the prawns back into the skillet, then toss until completely coated with the delicious sauce.

Add the rice, then toss and cook for another 2 minutes. Remove from the heat.

Scatter freshly chopped spring onions, then toss until combined.

Serve right away. Enjoy!

Notes:

Make sure not to overcook the prawns because they will become rubbery.

Taste and add more seasonings according to your preference.

Nutrition Facts:

Calories 814 Calories from Fat 135 Fat 15g23% Saturated Fat 1g6% Trans Fat 0.1g Polyunsaturated Fat 4g Monounsaturated Fat 9g Cholesterol 8mg3% Sodium 60mg3% Potassium 239mg7% Carbohydrates 150g50% Fiber 3g13% Sugar 2g2% Protein 14g28% Vitamin A 307IU6% Vitamin C 0.01mg0% Calcium 58mg6% Iron 2mg11%

Prawn Fried Rice Recipe / Shrimp Fried Rice Recipe

Rebecca Prep Time: 10 mins | Cook Time: 30 mins | Total Time: 40 mins | Yield: 2 Servings Enjoy the best Shrimp Fried Rice in the comfort of your home!… General Recipes Prawn Fried Rice Recipe / Shrimp Fried Rice Recipe European Print This
Serves: 2 Prep Time: 10 mins Cooking Time: 30 mins 30 mins
Nutrition facts: 814 calories 15 fat
Rating: 5.0/5
( 1 voted )

Ingredients

  • ½ chopped finely Capsicum / Green Bell Pepper
  • 1 teaspoon to taste
  • 5 fat cloves, chopped finely Garlic
  • 1 tablespoon chopped finely Ginger
  • Salt to taste
  • 2 tablespoons Oil
  • 1 teaspoon Sugar
  • 1 chopped finely Green Chili
  • 1 teaspoon or to taste Black Pepper Powder
  • 2 c Basmati Rice cooked
  • a handful of finely chopped Spring Onion
  • 1 teaspoon vinegar to taste
  • 1 medium size chopped finely Onion
  • For Marinating Prawns:
  • 1 teaspoon vinegar to taste
  • 12 Prawns
  • 1 teaspoon soy sauce to taste
  • Salt to taste
  • 1 teaspoon Chili Powder

Instructions

Refer to the directions provided on the package of the Basmati rice on how to cook it. Make sure to add the spices yet.

Put the prawns into a mixing bowl together with 1 tsp vinegar, 1 tsp soy sauce, salt, and 1 tsp chili powder. Toss everything until the prawns are coated.

Place a frying pan on the stove and turn the heat to medium. Add oil and allow it to become hot.

Add the prawns into the hot skillet, then cook each side for about 3 minutes or until done. Transfer them onto a clean plate.

In the same pan with a bit of oil, add ginger, capsicum, garlic, green chilis, and onions. Sauté for a few minutes until aromatic and soft.

Add salt, pepper, soy sauce, sugar, and vinegar. Stir everything until well blended. a

Put the prawns back into the skillet, then toss until completely coated with the delicious sauce.

Add the rice, then toss and cook for another 2 minutes. Remove from the heat.

Scatter freshly chopped spring onions, then toss until combined.

Serve right away. Enjoy!

Notes

Make sure not to overcook the prawns because they will become rubbery. Taste and add more seasonings according to your preference.

October 24, 2022 0 comment
0 FacebookTwitterPinterestEmail
General Recipes

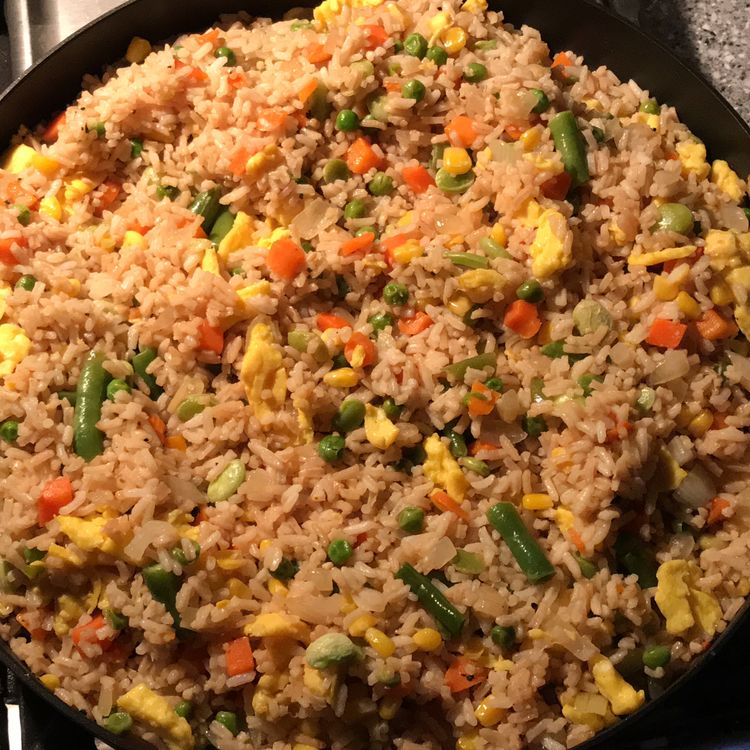
FRIED RICE

by Rebecca October 24, 2022
written by Rebecca

Prep Time: 5 mins | Cook Time: 10 mins | Total Time: 15 mins | Yield: 4 to 6 Servings

Simple, easy, and super delicious! This Fried Rice recipe is all you need today! Ready in just 15 minutes, this recipe will be the best decision you will ever make today. Enjoy!

Ingredients:

1/2 c frozen peas

3 cloves garlic, minced

3 green onions, thinly sliced

4 c cooked and chilled rice (I prefer short-grain white rice)

3 tbsp butter, divided

salt and black pepper

3–4 tbsp soy sauce, or more to taste

2 tsp oyster sauce (optional)

1 small white onion, diced

1/2 tsp toasted sesame oil

2 medium carrots, peeled and diced

2 large Eggs, whisked

Directions:

Place a large nonstick skillet on the stove and turn the heat to medium-high. Add 1/2 tbsp of butter and allow it to melt.

Whisk in the egg and scramble it for a few minutes. Move it onto a clean plate.

In the same empty skillet, add 1 tbsp of butter and allow it to melt. Add garlic, carrots, and peas. Sauté for a few minutes until soft and aromatic. Sprinkle salt and pepper to taste.

Turn the heat up to high, then add the rest of the butter and allow it to melt.

Add green onions, rice, oyster sauce, and soy sauce. Toss everything until well incorporated. Cook for 3 more minutes or until rice is a bit fried. Make sure to stir from time to time.

Put the scrambled eggs back into the skillet on top of the fried rice together with sesame oil, then toss everything until well incorporated. Add more seasonings if you wish.

Serve right away. Enjoy!

Notes:

Place any leftovers in an airtight container, then put them in the fridge. They can last up to 3 days. Reheat for a few minutes before serving again.

I highly suggest using a nonstick pan for this recipe.

Feel free to add your preferred meat to this fried rice to turn it into a complete meal.

FRIED RICE

Rebecca Prep Time: 5 mins | Cook Time: 10 mins | Total Time: 15 mins | Yield: 4 to 6 Servings Simple, easy, and super delicious! This Fried Rice recipe is… General Recipes FRIED RICE European Print This
Serves: 4-6 Prep Time: 5 mins Cooking Time: 10 mins 10 mins
Nutrition facts: 200 calories 20 grams fat
Rating: 5.0/5
( 1 voted )

Ingredients

  • 1/2 c frozen peas
  • 3 cloves garlic, minced
  • 3 green onions, thinly sliced
  • 4 c cooked and chilled rice (I prefer short-grain white rice)
  • 3 tbsp butter, divided
  • salt and black pepper
  • 3–4 tbsp soy sauce, or more to taste
  • 2 tsp oyster sauce (optional)
  • 1 small white onion, diced
  • 1/2 tsp toasted sesame oil
  • 2 medium carrots, peeled and diced
  • 2 large Eggs, whisked

Instructions

Place a large nonstick skillet on the stove and turn the heat to medium-high. Add 1/2 tbsp of butter and allow it to melt.

Whisk in the egg and scramble it for a few minutes. Move it onto a clean plate.

In the same empty skillet, add 1 tbsp of butter and allow it to melt. Add garlic, carrots, and peas. Sauté for a few minutes until soft and aromatic. Sprinkle salt and pepper to taste.

Turn the heat up to high, then add the rest of the butter and allow it to melt.

Add green onions, rice, oyster sauce, and soy sauce. Toss everything until well incorporated. Cook for 3 more minutes or until rice is a bit fried. Make sure to stir from time to time.

Put the scrambled eggs back into the skillet on top of the fried rice together with sesame oil, then toss everything until well incorporated. Add more seasonings if you wish.

Serve right away. Enjoy!

Notes

Place any leftovers in an airtight container, then put them in the fridge. They can last up to 3 days. Reheat for a few minutes before serving again. I highly suggest using a nonstick pan for this recipe. Feel free to add your preferred meat to this fried rice to turn it into a complete meal.

October 24, 2022 0 comment
0 FacebookTwitterPinterestEmail
General Recipes

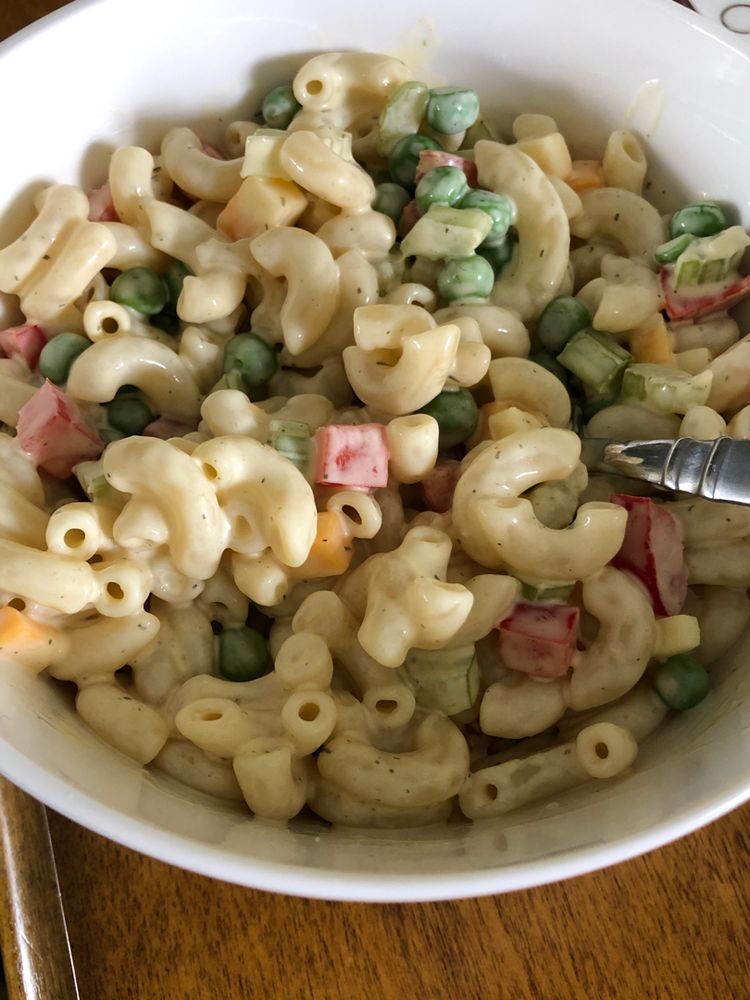
THE BEST MACARONI SALAD

by Rebecca October 24, 2022
written by Rebecca

Prep Time: 10 mins | Cook Time: 10 mins | Total Time: 20 mins | Yield: 8 Servings

I know you probably have a macaroni salad recipe, but I’m telling you that this one is the best! The combination of all the ingredients, mainly, macaroni, dressing, and veggies are very difficult to resist! Perfect for any meal with your loved ones!

Ingredients:

1/2 c mayonnaise

¼ c minced fresh dill

¼ c cider vinegar

1 lb. elbow noodles

1 tsp salt

1 c frozen peas, thawed

½ tsp pepper

4 ribs celery, diced

1 tbsp Dijon mustard

½ red onion minced

1 red bell pepper, minced

2 tbsp sweet pickle relish

2 tbsp sugar

4 oz cheddar cheese, cubed or shredded

Directions:

Place a large pot with water on the stove and turn the heat to high. Allow the water to boil.

Add the elbow macaroni with a bit of salt into the boiling water, then cook for a few minutes until al dente. Drain and rinse the macaroni to stop the cooking process.

Put the drained macaroni into a large bowl. Top it with celery, peas, cheese, bell pepper, and onion. Toss everything until well incorporated.

Add Dijon mustard, mayonnaise, salt, pepper, apple cider vinegar, relish, dill, and sugar into a separate mixing bowl. Stir everything until well blended.

Add the sauce on top of the pasta, then toss everything until completely coated.

Wrap the bowl with plastic, then place it in the fridge to chill for an hour.

Serve chilled and enjoy!

Notes:

Keep leftovers chilled in the fridge. Make sure to put them in an airtight container. They can last up to 3 to 5 days.

This macaroni can last up to 2 hours at room temperature. Make sure to consume it right away!

Nutrition Facts:

Calories: 408 kcal | Carbohydrates: 52g | Protein: 12g | Fat: 16g | Saturated Fat: 4g | Cholesterol: 20mg | Sodium: 541mg | Potassium: 294mg | Fiber: 3g | Sugar: 8g | Vitamin A: 1005IU | Vitamin C: 28.6mg | Calcium: 131mg | Iron: 1.4mg

THE BEST MACARONI SALAD

Rebecca Prep Time: 10 mins | Cook Time: 10 mins | Total Time: 20 mins | Yield: 8 Servings I know you probably have a macaroni salad recipe, but I’m telling… General Recipes THE BEST MACARONI SALAD European Print This
Serves: 8 Prep Time: 10 mins Cooking Time: 10 mins 10 mins
Nutrition facts: 408 calories 16 fat
Rating: 5.0/5
( 1 voted )

Ingredients

  • 1/2 c mayonnaise
  • ¼ c minced fresh dill
  • ¼ c cider vinegar
  • 1 lb. elbow noodles
  • 1 tsp salt
  • 1 c frozen peas, thawed
  • ½ tsp pepper
  • 4 ribs celery, diced
  • 1 tbsp Dijon mustard
  • ½ red onion minced
  • 1 red bell pepper, minced
  • 2 tbsp sweet pickle relish
  • 2 tbsp sugar
  • 4 oz cheddar cheese, cubed or shredded

Instructions

Place a large pot with water on the stove and turn the heat to high. Allow the water to boil.

Add the elbow macaroni with a bit of salt into the boiling water, then cook for a few minutes until al dente. Drain and rinse the macaroni to stop the cooking process.

Put the drained macaroni into a large bowl. Top it with celery, peas, cheese, bell pepper, and onion. Toss everything until well incorporated.

Add Dijon mustard, mayonnaise, salt, pepper, apple cider vinegar, relish, dill, and sugar into a separate mixing bowl. Stir everything until well blended.

Add the sauce on top of the pasta, then toss everything until completely coated.

Wrap the bowl with plastic, then place it in the fridge to chill for an hour.

Serve chilled and enjoy!

Notes

Keep leftovers chilled in the fridge. Make sure to put them in an airtight container. They can last up to 3 to 5 days. This macaroni can last up to 2 hours at room temperature. Make sure to consume it right away!

October 24, 2022 0 comment
0 FacebookTwitterPinterestEmail
General Recipes

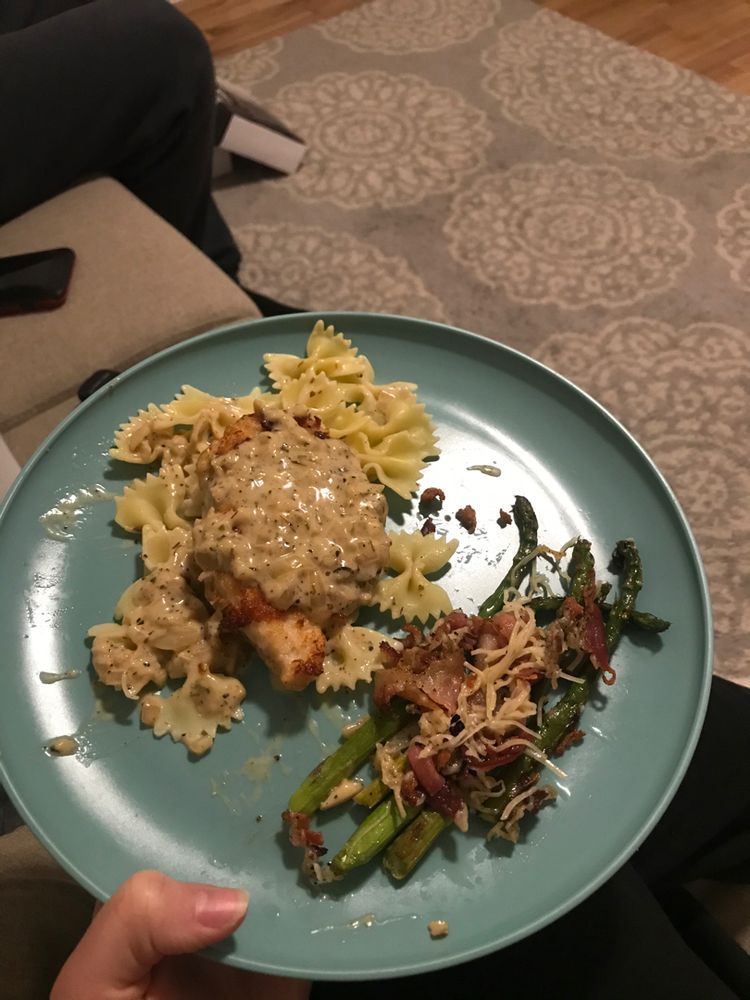
LEMON CHICKEN SCALLOPINI WITH LEMON GARLIC CREAM SAUCE

by Rebecca October 22, 2022
written by Rebecca

Prep Time: 10 mins | Cook Time: 30 mins | Total Time: 40 mins | Yield: 4 Servings

You are so in for a treat! This Lemon Chicken Scallopini with Lemon Garlic Cream Sauce never fails to make our every meal complete! The rich and creamy sauce is paired perfectly well with the chicken. Ready in just 40 minutes. Enjoy!

Ingredients:

For The Chicken:

1 tsp salt

1 tsp garlic powder

Juice half a lemon

4 tbsp flour (all-purpose or tapioca)

Cracked pepper

2 large boneless and skinless chicken breasts, halved horizontally to make 4

For The Sauce:

1 tbsp butter

2 tbsp fresh parsley

2-3 tbsp lemon juice (adjust to your tastes)

2 tsp oil

2 tsp dried Italian mixed herbs

2/3 c light cooking cream

Lemon slices or wedges, to serve

1¼ c chicken broth (stock)

1 tsp cornstarch (corn flour) mixed with 1 tbsp of water

2 tbsp minced garlic (or 6-8 cloves garlic, minced)

Directions:

Sprinkle garlic powder, pepper, and salt over the chicken breasts. Rub each until fully coated.

Squeeze half the lemon juice on top of each fillet.

Sprinkle flour over the chicken pieces, then toss them again until fully coated. Remove any excess by shaking them.

Place a large skillet on the stove and turn the heat to medium-high. Add butter and oil, then allow them to become hot.

Add the coated chicken breasts into the hot skillet, then cook each side for about 5 minutes or until they turn golden brown.

Place them onto a clean plate.

In the same empty skillet, add garlic and onion. Sauté for a few minutes until aromatic and soft.

Turn the heat down to low, then add broth, salt, and pepper. Stir everything until well blended. Deglaze the skillet by scraping the bottom to get the browned bits. Stir in the cream and simmer everything for about 5 minutes until thick.

Stir in lemon juice and Italian herbs, then simmer for one minute.

Put the chicken breasts back into the skillet, then toss until fully coated with the sauce. Remove the skillet from the heat.

Serve over mixed veggies or rice. Enjoy!

Nutrition Facts:

Calories: 228 kcal | Carbohydrates: 14g | Protein: 14g | Fat: 12g | Saturated Fat: 6g | Cholesterol: 65mg | Sodium: 951mg | Potassium: 390mg | Fiber: 1g | Sugar: 1g | Vitamin A: 495IU | Vitamin C: 15.8mg | Calcium: 60mg | Iron: 1.4mg

LEMON CHICKEN SCALLOPINI WITH LEMON GARLIC CREAM SAUCE

Rebecca Prep Time: 10 mins | Cook Time: 30 mins | Total Time: 40 mins | Yield: 4 Servings You are so in for a treat! This Lemon Chicken Scallopini with… General Recipes LEMON CHICKEN SCALLOPINI WITH LEMON GARLIC CREAM SAUCE European Print This
Serves: 4 Prep Time: 10 mins Cooking Time: 30 mins 30 mins
Nutrition facts: 228 calories 12 fat
Rating: 5.0/5
( 1 voted )

Ingredients

  • For The Chicken:
  • 1 tsp salt
  • 1 tsp garlic powder
  • Juice half a lemon
  • 4 tbsp flour (all-purpose or tapioca)
  • Cracked pepper
  • 2 large boneless and skinless chicken breasts, halved horizontally to make 4
  • For The Sauce:
  • 1 tbsp butter
  • 2 tbsp fresh parsley
  • 2-3 tbsp lemon juice (adjust to your tastes)
  • 2 tsp oil
  • 2 tsp dried Italian mixed herbs
  • 2/3 c light cooking cream
  • Lemon slices or wedges, to serve
  • 1¼ c chicken broth (stock)
  • 1 tsp cornstarch (corn flour) mixed with 1 tbsp of water
  • 2 tbsp minced garlic (or 6-8 cloves garlic, minced)

Instructions

Sprinkle garlic powder, pepper, and salt over the chicken breasts. Rub each until fully coated.

Squeeze half the lemon juice on top of each fillet.

Sprinkle flour over the chicken pieces, then toss them again until fully coated. Remove any excess by shaking them.

Place a large skillet on the stove and turn the heat to medium-high. Add butter and oil, then allow them to become hot.

Add the coated chicken breasts into the hot skillet, then cook each side for about 5 minutes or until they turn golden brown.

Place them onto a clean plate.

In the same empty skillet, add garlic and onion. Sauté for a few minutes until aromatic and soft.

Turn the heat down to low, then add broth, salt, and pepper. Stir everything until well blended. Deglaze the skillet by scraping the bottom to get the browned bits. Stir in the cream and simmer everything for about 5 minutes until thick.

Stir in lemon juice and Italian herbs, then simmer for one minute.

Put the chicken breasts back into the skillet, then toss until fully coated with the sauce. Remove the skillet from the heat.

Serve over mixed veggies or rice. Enjoy!

Notes

Sprinkle garlic powder, pepper, and salt over the chicken breasts. Rub each until fully coated. Squeeze half the lemon juice on top of each fillet. Sprinkle flour over the chicken pieces, then toss them again until fully coated. Remove any excess by shaking them. Place a large skillet on the stove and turn the heat to medium-high. Add butter and oil, then allow them to become hot. Add the coated chicken breasts into the hot skillet, then cook each side for about 5 minutes or until they turn golden brown. Place them onto a clean plate. In the same empty skillet, add garlic and onion. Sauté for a few minutes until aromatic and soft. Turn the heat down to low, then add broth, salt, and pepper. Stir everything until well blended. Deglaze the skillet by scraping the bottom to get the browned bits. Stir in the cream and simmer everything for about 5 minutes until thick. Stir in lemon juice and Italian herbs, then simmer for one minute. Put the chicken breasts back into the skillet, then toss until fully coated with the sauce. Remove the skillet from the heat. Serve over mixed veggies or rice. Enjoy!

October 22, 2022 0 comment
0 FacebookTwitterPinterestEmail
General Recipes

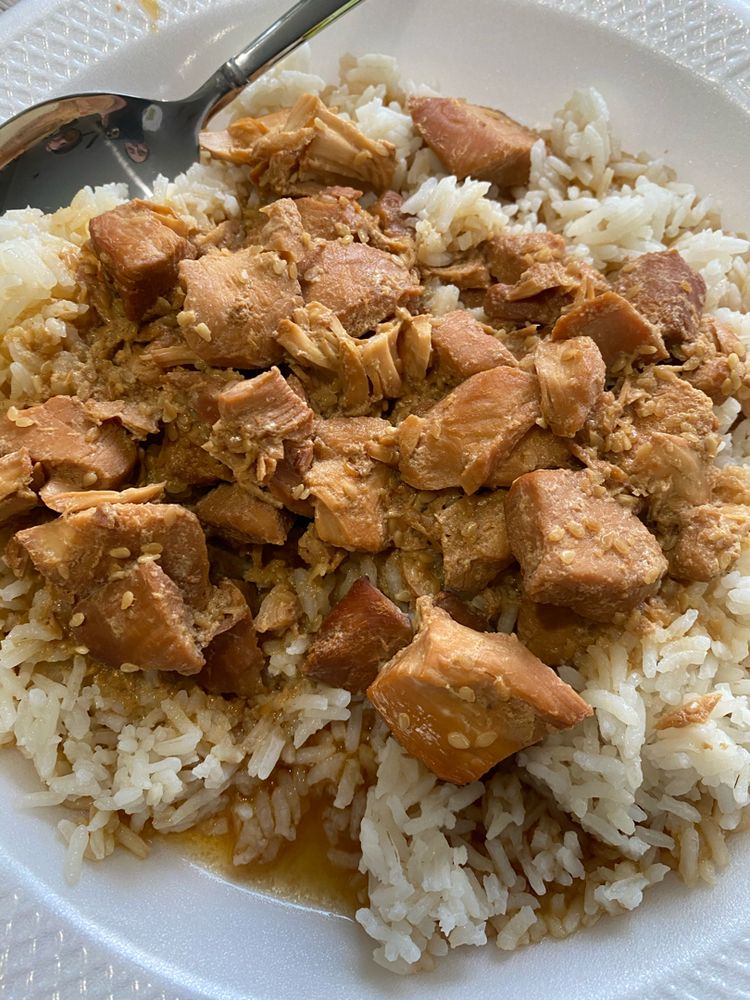
Slow-Cooker Chicken Teriyaki

by Rebecca October 22, 2022
written by Rebecca

Prep Time: 15 mins | Cook Time: 4 hrs | Total Time: 4 hrs 15 mins | Yield: 4 Servings

All you need for this recipe are these simple ingredients and a slow cooker! This Chicken Teriyaki is perfect for a simple dinner with your constants! Serve this with any cooked rice, and you have yourself a meal to remember! From the chicken to the sauce ingredients, this recipe is very hassle-free to prepare. It may take you about 4 hours to cook this but I promise you that it is worth all your time and effort! It is slow-cooked to perfection! Give this recipe a try now, and don’t forget to share it with your peers as well. I’m sure that they’re going to love it as much as we do. You will not be disappointed at all!

Ingredients:

1 c chicken broth

3 garlic cloves, minced

1/2 c teriyaki sauce

2 tbsp sesame seeds

1 lb. chicken breasts, boneless, skinless, diced

1/3 c brown sugar

Directions:

In a mixing bowl, add brown sugar, sesame seeds, chicken broth, teriyaki sauce, and garlic. Whisk everything until well incorporated.

Put the chicken breasts into the bowl with the sauce, then toss them until fully coated.

Transfer chicken breasts with the sauce into the crockpot.

Cover and seal the crockpot, then cook everything for about 4 to 6 hours on a low setting or until the chicken breasts are fork-tender.

Sprinkle freshly chopped herbs on top to garnish.

Serve the chicken right away over rice with the delicious sauce. Enjoy!

Notes:

Place any leftovers in an airtight container, then put them in the fridge. Reheat for a few minutes before serving again.
Lessen the amount of broth if you want the dish to have less sauce.

Try adding chili powder for the spicy version!

Slow-Cooker Chicken Teriyaki

Rebecca Prep Time: 15 mins | Cook Time: 4 hrs | Total Time: 4 hrs 15 mins | Yield: 4 Servings All you need for this recipe are these simple ingredients… General Recipes Slow-Cooker Chicken Teriyaki European Print This
Serves: 4 Prep Time: 15 mins Cooking Time: 4 hrs 4 hrs
Nutrition facts: 200 calories 20 grams fat
Rating: 5.0/5
( 1 voted )

Ingredients

  • 1 c chicken broth
  • 3 garlic cloves, minced
  • 1/2 c teriyaki sauce
  • 2 tbsp sesame seeds
  • 1 lb. chicken breasts, boneless, skinless, diced
  • 1/3 c brown sugar

Instructions

In a mixing bowl, add brown sugar, sesame seeds, chicken broth, teriyaki sauce, and garlic. Whisk everything until well incorporated.

Put the chicken breasts into the bowl with the sauce, then toss them until fully coated.

Transfer chicken breasts with the sauce into the crockpot.

Cover and seal the crockpot, then cook everything for about 4 to 6 hours on a low setting or until the chicken breasts are fork-tender.

Sprinkle freshly chopped herbs on top to garnish.

Serve the chicken right away over rice with the delicious sauce. Enjoy!

Notes

Place any leftovers in an airtight container, then put them in the fridge. Reheat for a few minutes before serving again. Lessen the amount of broth if you want the dish to have less sauce. Try adding chili powder for the spicy version!
October 22, 2022 0 comment
0 FacebookTwitterPinterestEmail
General Recipes

Filet Mignon in Mushroom Wine Sauce

by Rebecca October 22, 2022
written by Rebecca

Prep Time: 15 mins | Cook Time: 30 mins | Total Time: 45 mins | Yield: 4 Servings

This Filet Mignon in Mushroom Wine Sauce is going to satisfy all your cravings today! The savory sauce of this dish is just too perfect! This recipe will only take you less than an hour to prepare and cook. A must-try indeed!

Ingredients:

1 tablespoon chopped fresh thyme, or 1 teaspoon dry thyme if you must

4 medium garlic cloves, minced

1 small or 1/2 medium yellow onion, finely diced

4 tablespoons unsalted butter, divided

1 1/2 c low-sodium beef broth

1/2 c heavy whipping cream

1/2 c Barefoot Merlot

Salt and Pepper to taste

16 ounces baby Bella mushrooms, thickly sliced

2 tablespoons olive oil, divided

4 6 ounces each filet mignon steaks (about 1 1/2-inch-thick)

Directions:

Put a large pan on the stove and turn the heat to medium-high. Add 2 tbsp of oil and 1 tbsp of oil, then allow them to become hot.

Add the mushroom slices into the hot skillet, then sauté for about 5 minutes or until soft.

Add the onion, then sauté for a few more minutes until translucent.

Add the garlic cloves, then sauté for about a minute or until aromatic. Stir in salt, thyme, and pepper. Transfer the veggies onto a clean plate.

Use paper towels to pat dry the steaks, then sprinkle salt and pepper on top. Rub each until fully coated.

In the empty pan, add 2 tbsp of butter and 1 tbsp of oil. Allow them to become hot.

Add the steaks, then cook each side for a few minutes until cooked to your preference. Transfer the steaks to the plate with the veggies.

In the same pan, add ½ cup of Merlot. Deglaze it by scraping the bottom to get the browned bits. Simmer everything for about 3 minutes or until it reduces to half.

Add ½ up of cream, then stir until well blended. Simmer everything for about additional 2 minutes.

Taste, then add salt and pepper if needed.

Serve right away. Enjoy!

Filet Mignon in Mushroom Wine Sauce

Rebecca Prep Time: 15 mins | Cook Time: 30 mins | Total Time: 45 mins | Yield: 4 Servings This Filet Mignon in Mushroom Wine Sauce is going to satisfy all… General Recipes Filet Mignon in Mushroom Wine Sauce European Print This
Serves: 4 Prep Time: 15 mins Cooking Time: 30 mins 30 mins
Nutrition facts: 200 calories 20 grams fat
Rating: 5.0/5
( 1 voted )

Ingredients

  • 1 tablespoon chopped fresh thyme, or 1 teaspoon dry thyme if you must
  • 4 medium garlic cloves, minced
  • 1 small or 1/2 medium yellow onion, finely diced
  • 4 tablespoons unsalted butter, divided
  • 1 1/2 c low-sodium beef broth
  • 1/2 c heavy whipping cream
  • 1/2 c Barefoot Merlot
  • Salt and Pepper to taste
  • 16 ounces baby Bella mushrooms, thickly sliced
  • 2 tablespoons olive oil, divided
  • 4 6 ounces each filet mignon steaks (about 1 1/2-inch-thick)

Instructions

Put a large pan on the stove and turn the heat to medium-high. Add 2 tbsp of oil and 1 tbsp of oil, then allow them to become hot.

Add the mushroom slices into the hot skillet, then sauté for about 5 minutes or until soft.

Add the onion, then sauté for a few more minutes until translucent.

Add the garlic cloves, then sauté for about a minute or until aromatic. Stir in salt, thyme, and pepper. Transfer the veggies onto a clean plate.

Use paper towels to pat dry the steaks, then sprinkle salt and pepper on top. Rub each until fully coated.

In the empty pan, add 2 tbsp of butter and 1 tbsp of oil. Allow them to become hot.

Add the steaks, then cook each side for a few minutes until cooked to your preference. Transfer the steaks to the plate with the veggies.

In the same pan, add ½ cup of Merlot. Deglaze it by scraping the bottom to get the browned bits. Simmer everything for about 3 minutes or until it reduces to half.

Add ½ up of cream, then stir until well blended. Simmer everything for about additional 2 minutes.

Taste, then add salt and pepper if needed.

Serve right away. Enjoy!

October 22, 2022 0 comment
0 FacebookTwitterPinterestEmail
General Recipes

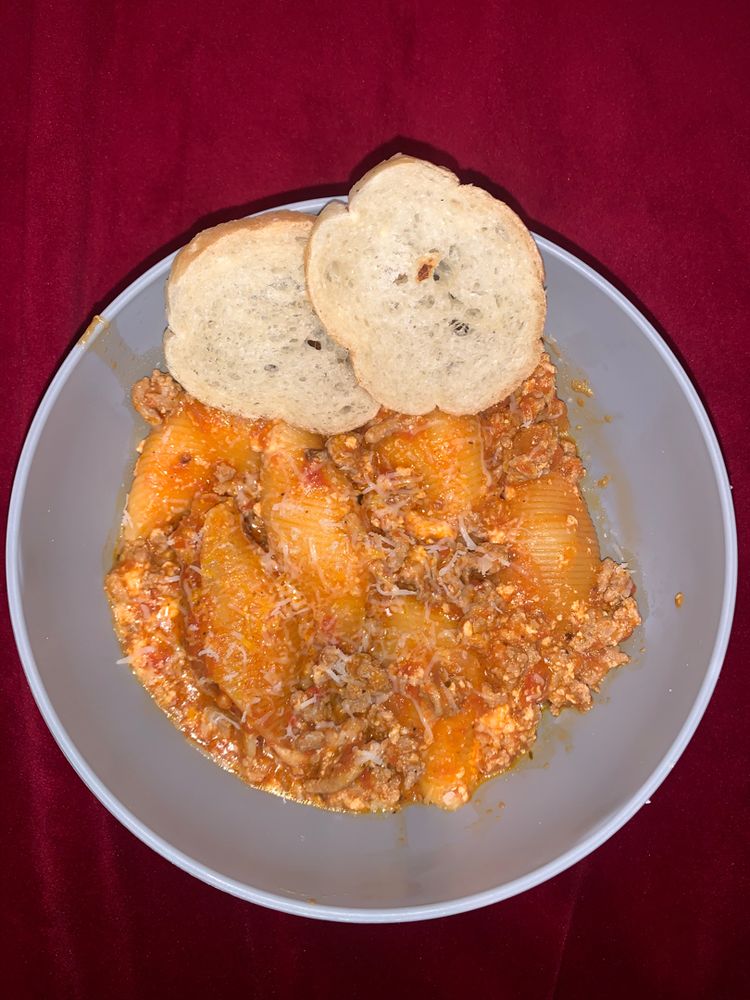
Instant Pot Stuffed Shells with Meat Sauce

by Rebecca October 22, 2022
written by Rebecca

Prep Time: 20 mins | Cook Time: 8 mins | Total Time: 50 mins | Yield: 8 Servings

This dish was made easy with the help of the Instant Pot! In less than an hour, these Stuffed Shells with Meat Sauce will surely take you to flavor-town! Packed with delicious ingredients, this recipe will be the best decision you will ever make today. Enjoy!

Ingredients:

1 tbsp Italian seasoning

1 Egg

1 tsp salt

1 tsp garlic powder

2 c water

8 ounces conchiglie pasta/ jumbo pasta shells

24 ounces pasta sauce

4 c mozzarella cheese, shredded, divided (about 1lb)

1/2 c Parmesan cheese

15 ounces of ricotta cheese

1-pound lean ground beef

Directions:

Press the “Sauté” button on the Instant Pot. Add the ground beef, then cook for a few minutes until crumbly and brown. Stir in the seasonings into the ground beef to taste.

For the Cheese Filling:

In a mixing bowl, add 3 cups of mozzarella cheese, egg, ricotta cheese, and Parmesan cheese. Whisk everything until well incorporated. Transfer it inside a piping bag. Stuff each pasta shell with the cheese filling.

Transfer the beef mixture to the prepared pan and spread it evenly.

Add about 1/4 cup of water into the pan, then deglaze it by scraping the bottom to get the browned bits.

To Assemble:

Put the pasta shells on top of the meat mixture and arrange them in a single layer.

Add water and pasta on top of the pasta. Make sure not to stir.

Cover the pot, then press the “Pressure Cook” button and cook everything for about 8 minutes on a high setting.

Open and sprinkle 1 cup of mozzarella cheese on top, then stir until well blended. Allow the cheese to melt completely.

Serve and enjoy!

Notes:

Place any leftovers in an airtight container, then place put in the fridge. They can last up to 3 days or 3 months in the freezer. Reheat for a few minutes before serving again.

Nutrition Facts:

Serving: 1serving Calories: 499 kcal | Carbohydrates: 30g | Protein: 38g | Fat: 25g | Saturated Fat: 14g | Cholesterol: 131mg | Sodium: 1283mg | Potassium: 665mg | Fiber: 2g | Sugar: 5g | Vitamin A: 1073IU | Vitamin C: 6mg | Calcium: 504mg | Iron: 3mg

Instant Pot Stuffed Shells with Meat Sauce

Rebecca Prep Time: 20 mins | Cook Time: 8 mins | Total Time: 50 mins | Yield: 8 Servings This dish was made easy with the help of the Instant Pot!… General Recipes Instant Pot Stuffed Shells with Meat Sauce European Print This
Serves: 8 Prep Time: 20 mins Cooking Time: 8 mins 8 mins
Nutrition facts: 499 calories 25 fat
Rating: 5.0/5
( 1 voted )

Ingredients

  • 1 tbsp Italian seasoning
  • 1 Egg
  • 1 tsp salt
  • 1 tsp garlic powder
  • 2 c water
  • 8 ounces conchiglie pasta/ jumbo pasta shells
  • 24 ounces pasta sauce
  • 4 c mozzarella cheese, shredded, divided (about 1lb)
  • 1/2 c Parmesan cheese
  • 15 ounces of ricotta cheese
  • 1-pound lean ground beef

Instructions

Press the “Sauté” button on the Instant Pot. Add the ground beef, then cook for a few minutes until crumbly and brown. Stir in the seasonings into the ground beef to taste.

For the Cheese Filling:

In a mixing bowl, add 3 cups of mozzarella cheese, egg, ricotta cheese, and Parmesan cheese. Whisk everything until well incorporated. Transfer it inside a piping bag. Stuff each pasta shell with the cheese filling.

Transfer the beef mixture to the prepared pan and spread it evenly.

Add about 1/4 cup of water into the pan, then deglaze it by scraping the bottom to get the browned bits.

To Assemble:

Put the pasta shells on top of the meat mixture and arrange them in a single layer.

Add water and pasta on top of the pasta. Make sure not to stir.

Cover the pot, then press the “Pressure Cook” button and cook everything for about 8 minutes on a high setting.

Open and sprinkle 1 cup of mozzarella cheese on top, then stir until well blended. Allow the cheese to melt completely.

Serve and enjoy!

Notes

Place any leftovers in an airtight container, then place put in the fridge. They can last up to 3 days or 3 months in the freezer. Reheat for a few minutes before serving again.
October 22, 2022 0 comment
0 FacebookTwitterPinterestEmail
General Recipes

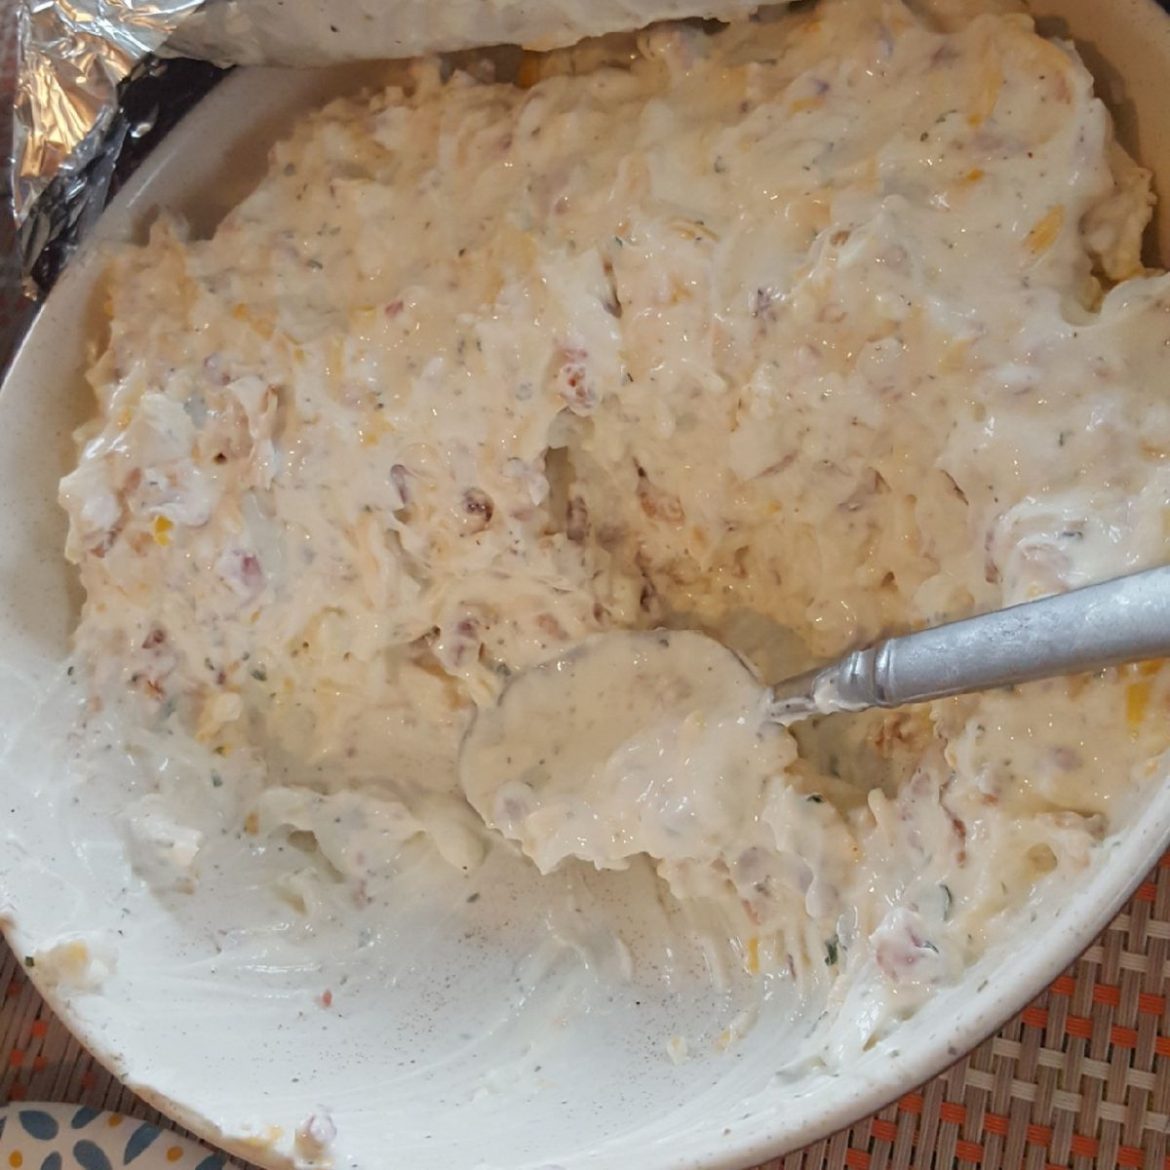
CRACK DIP: CHEDDAR BACON DIP

by Rebecca October 22, 2022
written by Rebecca

Prep Time: 5 mins | Total Time: 5 mins | Yield: 4 Cups

This Cheddar Bacon Dip recipe has always been a part of my family for generations! I can say that it’s kind of a family recipe. I am very proud to say that this is the best of the best! With just four simple ingredients, you can have the most satisfying dip ever! I highly suggest serving this with some chips or veggies for the best experience! This recipe can yield up to 4 cups of dip. Next time you have friends over for a party, don’t forget to make this dip. I am sure that everyone is going to love it! Each bite is very addicting. Ready in just 5 minutes, this dip is super easy and fast to make! I can’t think of any reason why you shouldn’t give this recipe a try. It is something very simple yet it can make your day complete! I have listed all the ingredients and directions so all you need to do is to follow them step by step, and you are good to go! Don’t forget to share this recipe with your peers as well. I am sure that they are going to love it as much as we do. Enjoy!

Ingredients:

¾ c chopped cooked bacon

1 c shredded cheddar cheese

1 packet Ranch dressing mix

16 ounces sour cream

Directions:

In a large mixing bowl, add cooked bacon, cheddar cheese, Ranch dressing mix, and sour cream. Stir everything until well incorporated.

Place the bowl in the fridge and allow the dip to chill for about 24 hours.

Serve with some veggies or chips. Enjoy!

Notes:

Place any leftovers in an airtight container, then put them in the fridge.

CRACK DIP: CHEDDAR BACON DIP

Rebecca Prep Time: 5 mins | Total Time: 5 mins | Yield: 4 Cups This Cheddar Bacon Dip recipe has always been a part of my family for generations! I can… General Recipes CRACK DIP: CHEDDAR BACON DIP European Print This
Serves: 4 Prep Time: 5 mins
Nutrition facts: 200 calories 20 grams fat
Rating: 5.0/5
( 1 voted )

Ingredients

  • ¾ c chopped cooked bacon
  • 1 c shredded cheddar cheese
  • 1 packet Ranch dressing mix
  • 16 ounces sour cream

Instructions

In a large mixing bowl, add cooked bacon, cheddar cheese, Ranch dressing mix, and sour cream. Stir everything until well incorporated.

Place the bowl in the fridge and allow the dip to chill for about 24 hours.

Serve with some veggies or chips. Enjoy!

Notes

Place any leftovers in an airtight container, then put them in the fridge.

October 22, 2022 0 comment
0 FacebookTwitterPinterestEmail
Newer Posts
Older Posts

Popular Posts

  • 1

    Crispy Crunchy Parmesan Potatoes

    March 21, 2020
  • 2

    CROCK POT SMOTHERED PORK CHOPS

    March 21, 2020
  • Facebook
  • Twitter

@2019 - All Right Reserved.


Back To Top