Cook it once
  • Home
  • Privacy Policy
  • Recipes
    • KETO
    • LC
    • WW
  • Tips
  • Contact
Cook it once
  • Home
  • Privacy Policy
  • Recipes
    • KETO
    • LC
    • WW
  • Tips
  • Contact
Category:

General Recipes

General Recipes

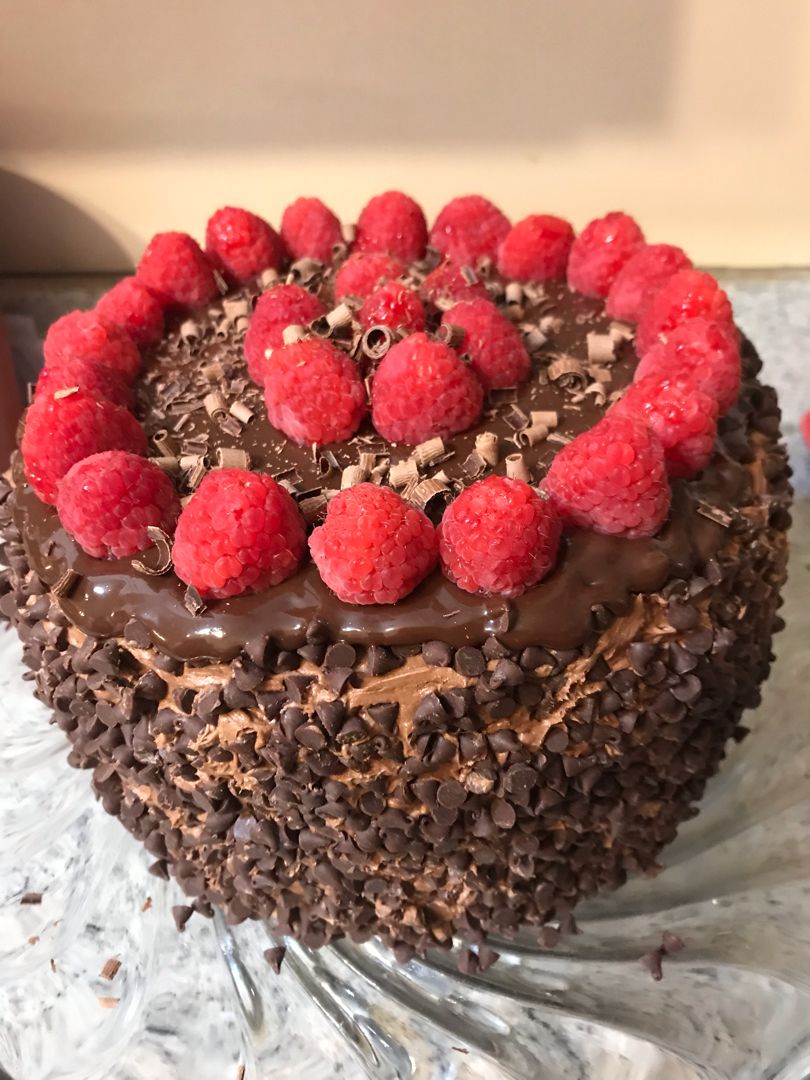
Death by Chocolate Cake

by Rebecca April 28, 2022
written by Rebecca

PREP TIME: 1 HR | COOK TIME: 30 MINS | TOTAL TIME: 1 HR 30 MINS | SERVINGS: 1 – 9-inch Cake

If you are a serious chocolate lover, I’m pretty sure that you’ll never miss out on this chocolate cake. Enjoy a triple layer of moist cake, chocolate fudge sauce, chocolate frosting, and chocolate chips. This decadent cake is simply heaven!

Ingredients

Chocolate cake:

3 large eggs + 2 large egg yolks, at room temperature

1 1/2 c. light brown sugar, packed

1 1/2 c. granulated sugar

1 1/2 tsp baking powder

1 1/4 tsp salt

1 3/4 c. unsweetened cocoa powder, sifted

3 tsp baking soda

2 1/2 c. all-purpose flour (not packed)

1 1/2 c. whole milk

1 c. chocolate chips

1/3 c. full-fat sour cream

2 tsp vanilla extract

3/4 c. vegetable oil (or swap with melted coconut oil)

1 1/2 c. hot water

Chocolate frosting:

4 1/2 c. confectioners’ sugar, sifted

2 c. unsalted butter (4 sticks, 16 oz.), VERY soft

3/4 c. unsweetened cocoa powder, sifted

1/2 tsp salt

1 tsp vanilla extract

2 tbsp hot fudge sauce

3 tbsp heavy cream (or more if needed)

Garnish:

1 1/2 c. chocolate chips

1 c. hot fudge sauce sauce

4 oz. semi-sweet or dark chocolate shaved

How to make Death by Chocolate Cake

Chocolate cake:

Step 1: Prepare the oven. Preheat it to 350 degrees F. Generously grease the sides and bottoms of 9-inch round cake pans using nonstick cooking spray and line with parchment paper. Grease the parchment paper and set the pans aside.

Step 2: Beat both sugar, flour, cocoa powder, baking soda, baking powder, and salt in the bowl of a stand mixer fitted with the paddle attachment on low speed until well blended. Alternately, you can place the ingredients in a large bowl and mix with a handheld electric mixer. If needed, break the large clumps using your hands.

Step 3: Place the eggs, egg yolks, milk, sour cream, oil, and vanilla extract in another bowl. Mix well until completely blended.

Step 4: Into the dry ingredients, pour the mixture and mix on low until just combined. Add in the hot water and mix for a minute more until well incorporated. Then, immediately fold in the mini chocolate chips.

Step 5: Evenly divide the batter among the prepared pans. Place in the preheated oven and bake for about 28 to 30 minutes or until a toothpick inserted in the middle of the cake comes out clean.

Step 6: Remove from the oven when done and let the cakes cool in the pan for about 10 minutes. Invert the cakes to a cooling rack to cool fully.

Chocolate frosting:

Step 7: Place the softened butter in a stand mixer fitted with the paddle attachment, or in a large bowl using a handheld electric beater. Cream for about 3 minutes on medium speed until smooth. Then, turn the mixer off.

Step 8: Into the mixing bowl, sift the powdered sugar and cocoa. Beat on the lowest speed for about 2 minutes until fully absorbed. Then, adjust the speed to medium and add the vanilla extract, salt, heavy cream, and hot fudge. Beat for another 3 minutes. You can add a bit more confectioners’ sugar if the frosting ends up slightly thin. Or 1 tbsp heavy cream at a time to thin out the frosting.

To assemble:

Step 9: Gently trim the raised top of each cake using a serrated knife to make even levels. To a large plate or cake stand, transfer the first layer.

Step 10: Over the first cake layer, spread a thin layer of the frosting and half a cup of hot fudge sauce. Place the other layer on top and do the same (lightly spread with frosting, then a half cup of the hot fudge sauce). Add the third cake layer on top and keep it in the fridge for an hour to set.

Step 11: Take the cake from the fridge once set and frost the top and sides, then sprinkle with chocolate shavings. Around the sides and on top of the cake, gently press the mini chocolate chips.

Step 12: Slice the cake and serve. Enjoy! Or store in the fridge for up to a week.

Death by Chocolate Cake

Rebecca PREP TIME: 1 HR | COOK TIME: 30 MINS | TOTAL TIME: 1 HR 30 MINS | SERVINGS: 1 – 9-inch Cake If you are a serious chocolate lover, I’m… General Recipes Death by Chocolate Cake European Print This
Prep Time: 1 hr Cooking Time: 30 mins 30 mins
Nutrition facts: 200 calories 20 grams fat
Rating: 5.0/5
( 1 voted )

Ingredients

  • Chocolate cake:
  • 3 large eggs + 2 large egg yolks, at room temperature
  • 1 1/2 c. light brown sugar, packed
  • 1 1/2 c. granulated sugar
  • 1 1/2 tsp baking powder
  • 1 1/4 tsp salt
  • 1 3/4 c. unsweetened cocoa powder, sifted
  • 3 tsp baking soda
  • 2 1/2 c. all-purpose flour (not packed)
  • 1 1/2 c. whole milk
  • 1 c. chocolate chips
  • 1/3 c. full-fat sour cream
  • 2 tsp vanilla extract
  • 3/4 c. vegetable oil (or swap with melted coconut oil)
  • 1 1/2 c. hot water
  • Chocolate frosting:
  • 4 1/2 c. confectioners' sugar, sifted
  • 2 c. unsalted butter (4 sticks, 16 oz.), VERY soft
  • 3/4 c. unsweetened cocoa powder, sifted
  • 1/2 tsp salt
  • 1 tsp vanilla extract
  • 2 tbsp hot fudge sauce
  • 3 tbsp heavy cream (or more if needed)
  • Garnish:
  • 1 1/2 c. chocolate chips
  • 1 c. hot fudge sauce sauce
  • 4 oz. semi-sweet or dark chocolate shaved

Instructions

Chocolate cake:

Step 1: Prepare the oven. Preheat it to 350 degrees F. Generously grease the sides and bottoms of 9-inch round cake pans using nonstick cooking spray and line with parchment paper. Grease the parchment paper and set the pans aside.

Step 2: Beat both sugar, flour, cocoa powder, baking soda, baking powder, and salt in the bowl of a stand mixer fitted with the paddle attachment on low speed until well blended. Alternately, you can place the ingredients in a large bowl and mix with a handheld electric mixer. If needed, break the large clumps using your hands.

Step 3: Place the eggs, egg yolks, milk, sour cream, oil, and vanilla extract in another bowl. Mix well until completely blended.

Step 4: Into the dry ingredients, pour the mixture and mix on low until just combined. Add in the hot water and mix for a minute more until well incorporated. Then, immediately fold in the mini chocolate chips.

Step 5: Evenly divide the batter among the prepared pans. Place in the preheated oven and bake for about 28 to 30 minutes or until a toothpick inserted in the middle of the cake comes out clean.

Step 6: Remove from the oven when done and let the cakes cool in the pan for about 10 minutes. Invert the cakes to a cooling rack to cool fully.

Chocolate frosting:

Step 7: Place the softened butter in a stand mixer fitted with the paddle attachment, or in a large bowl using a handheld electric beater. Cream for about 3 minutes on medium speed until smooth. Then, turn the mixer off.

Step 8: Into the mixing bowl, sift the powdered sugar and cocoa. Beat on the lowest speed for about 2 minutes until fully absorbed. Then, adjust the speed to medium and add the vanilla extract, salt, heavy cream, and hot fudge. Beat for another 3 minutes. You can add a bit more confectioners' sugar if the frosting ends up slightly thin. Or 1 tbsp heavy cream at a time to thin out the frosting.

To assemble:

Step 9: Gently trim the raised top of each cake using a serrated knife to make even levels. To a large plate or cake stand, transfer the first layer.

Step 10: Over the first cake layer, spread a thin layer of the frosting and half a cup of hot fudge sauce. Place the other layer on top and do the same (lightly spread with frosting, then a half cup of the hot fudge sauce). Add the third cake layer on top and keep it in the fridge for an hour to set.

Step 11: Take the cake from the fridge once set and frost the top and sides, then sprinkle with chocolate shavings. Around the sides and on top of the cake, gently press the mini chocolate chips.

Step 12: Slice the cake and serve. Enjoy! Or store in the fridge for up to a week.
April 28, 2022 0 comment
0 FacebookTwitterPinterestEmail
General Recipes

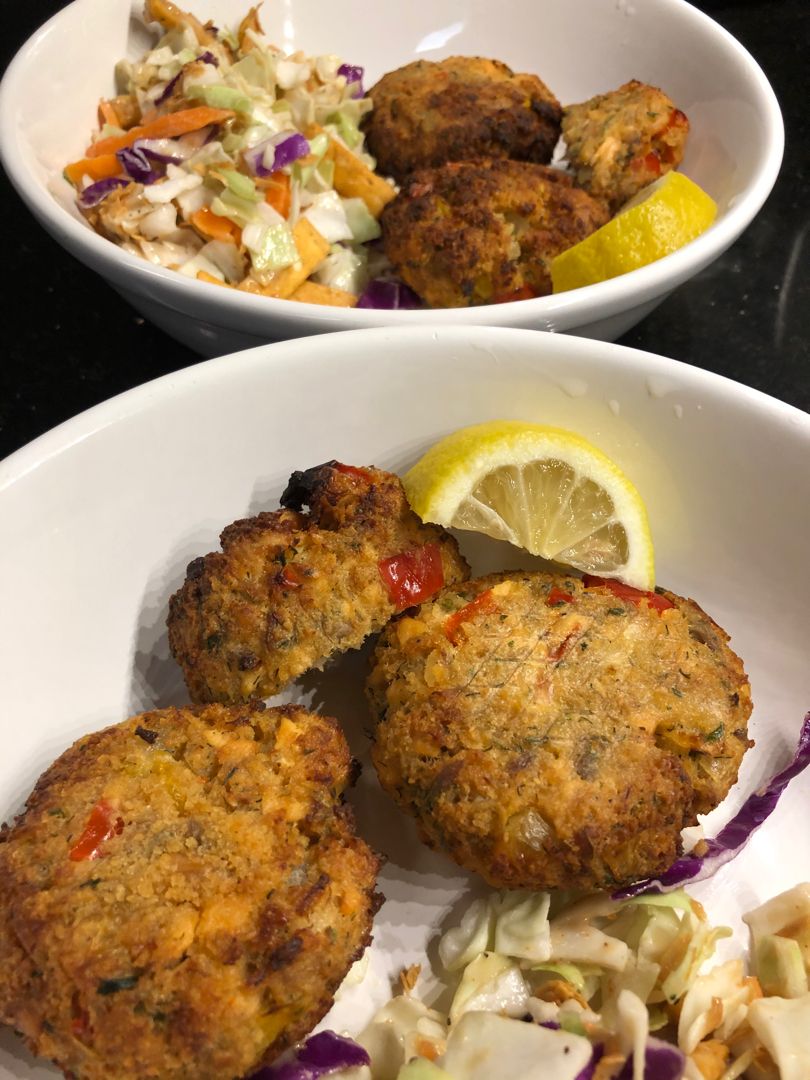
OLD BAY SALMON CAKES

by Rebecca April 28, 2022
written by Rebecca

PREP TIME: 5 MINS | COOK TIME: 10 MINS | TOTAL TIME: 15 MINS | YIELD: 4 servings

These delicious old bay salmon cakes are my family’s favorite! Made with only a few simple ingredients that you probably have on hand and ready in minutes. We enjoy these salmon cakes with a simple lemon green salad for a light weeknight meal that everyone loves.

Growing up, I watched my mom make these salmon patties. These salmon patties have been a big part of my childhood. I always asked my mom to make these for me, and I even have some packed for lunch. These tasty salmon patties are made with cans of skinless and boneless wild salmon, old bay seasoning, eggs, mayonnaise, panko, green peppers, and fresh chives. Mix them and shape them into big patties. This recipe is a no-fuss, easy, and whip up fast!

If you have not tried old bay salmon patties before, you should soon. These are a family favorite. Crazy good, even your fussiest eaters will love these!

INGREDIENTS

2 eggs

2 6-ounces cans of wild salmon, skinless and boneless

2 tsp Old Bay seasoning

light olive oil for frying

2 tbsp mayonnaise

1 small green pepper, finely chopped

3/4 c. panko

2 tbsp chopped fresh chives

HOW TO MAKE OLD BAY SALMON CAKES

Step 1: Place all the ingredients in a large bowl. Gently mix until well combined and shape into about 6 to 8 small patties.

Step 2: In a hot nonstick pan, drizzle 2 tbsp of oil over medium heat and spread it around. Then, carefully lay each patty into the hot pan and cook for about 2 to 3 minutes until the first side is golden brown. Gently flip the patty and continue to cook the other side for 3 to 4 minutes more until browned.

Step 3: To a serving plate, transfer the cooked salmon cakes and sprinkle them with coarse salt. Enjoy them with a squeeze of lemon.

NUTRITION FACTS:

Serving Size: 2 patties Calories: 260 | Fat: 16 g | Carbohydrates: 6 g | Fiber: 1 g | Protein: 24 g

April 28, 2022 0 comment
0 FacebookTwitterPinterestEmail
General Recipes

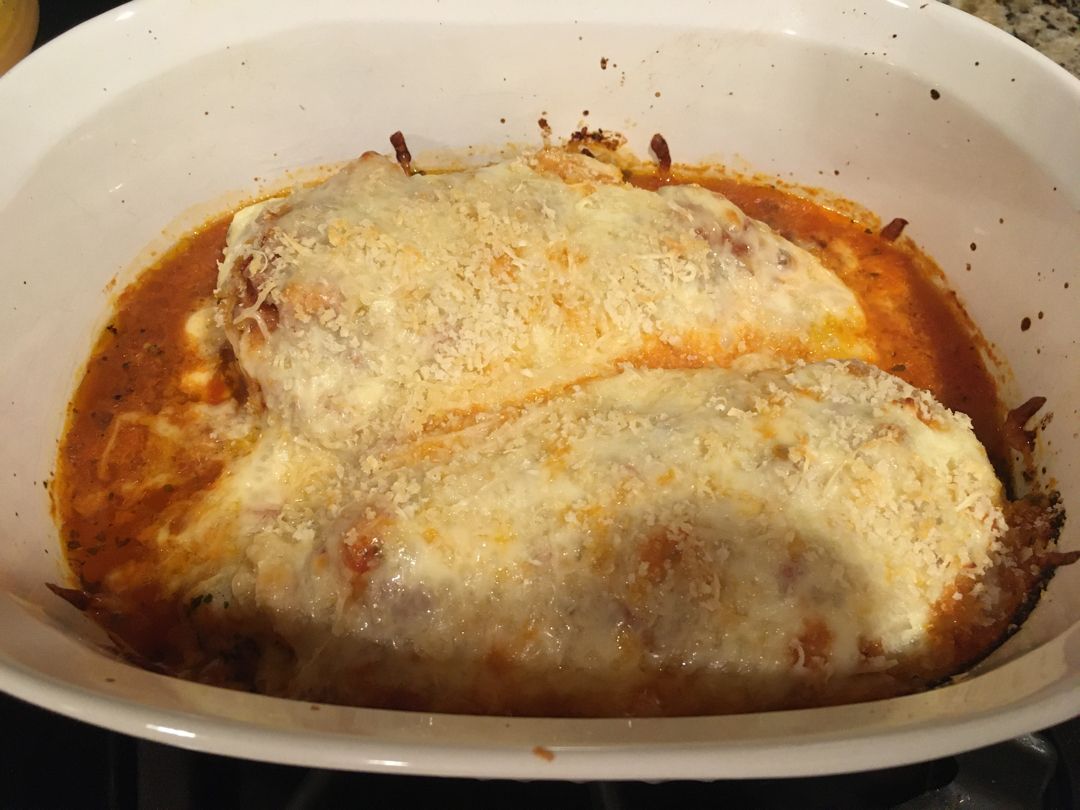
CRISPY CHICKEN PARMESAN CASSEROLE

by Rebecca April 28, 2022
written by Rebecca

PREP TIME: 5 MINS | COOK TIME: 25 MINS | YIELD: 4 servings

This is one of the best chicken Parmesan dishes that you can make using only a few simple ingredients. A super easy recipe that you can throw together in less than twenty-five minutes. Enjoy tender, juicy, and crisp chicken smothered in a rich tomato sauce and melted mozzarella cheese any time with this simple recipe.

This amazing casserole is a total crowd-pleaser, not to mention Paleo, gluten-free, and whole30 compliant! A must-try recipe that no one should ever miss! Serve this crispy chicken Parmesan casserole with a simple side salad or your favorite veggies for a complete weeknight meal that your entire family will love!

INGREDIENTS

1 tbsp olive oil

2 boneless, skinless chicken breasts, cut lengthwise

1 tsp Italian seasoning

1 c. marinara (or any tomato sauce, make sure it’s no sugar added)

1 tsp garlic powder

1/2 tsp crushed red pepper flakes, optional

1 c. Parmesan, grated

1 1/2 c. mozzarella, shredded

1/2 tsp salt and fresh cracked pepper

1 tbsp freshly chopped basil, for garnish

1/2 c. pork rind, crushed, optional

HOW TO MAKE CRISPY CHICKEN PARMESAN CASSEROLE

Step 1: Place the olive oil, garlic powder, salt, pepper, Italian seasoning, and crushed chili pepper flakes on a shallow plate. Add the chicken breasts and marinate for about 5 minutes.

Step 2: While the chicken is marinating, prepare the oven and preheat it to 400 degrees F or 200 degrees C. Using oil, cooking spray, or butter, lightly grease a baking dish.

Step 3: After marinating the chicken, lay them in the greased baking dish. On top, pour the tomato sauce and sprinkle over the Parmesan and shredded mozzarella. Lastly, lightly sprinkle with crushed pork rinds.

Step 4: Place in the preheated oven and bake for about 25 minutes or until the chicken is completely cooked and the cheese has melted and bubbly.

Step 5: Remove from the oven when done and garnish the casserole with some chopped basil. Serve right away. Enjoy!

Nutrition Facts:

Energy 599.48 kcal, Fat 38.86 g, Protein 52.49 g, Carbs 8.74 g, Saturated Fat 16.51 g, Polyunsat Fat 4.33 g, Monounsat Fat 14.84 g, Sugars 0.31 g, Cholesterol 164.95 mg, Sodium 1113.41 mg, Potassium 572.02 mg, Fiber 1.62 g

CRISPY CHICKEN PARMESAN CASSEROLE

Rebecca PREP TIME: 5 MINS | COOK TIME: 25 MINS | YIELD: 4 servings This is one of the best chicken Parmesan dishes that you can make using only a few… General Recipes CRISPY CHICKEN PARMESAN CASSEROLE European Print This
Serves: 4 Prep Time: 5 mins Cooking Time: 25 mins 25 mins
Nutrition facts: 599.48 calories 38.6 fat
Rating: 5.0/5
( 1 voted )

Ingredients

  • 1 tbsp olive oil
  • 2 boneless, skinless chicken breasts, cut lengthwise
  • 1 tsp Italian seasoning
  • 1 c. marinara (or any tomato sauce, make sure it’s no sugar added)
  • 1 tsp garlic powder
  • 1/2 tsp crushed red pepper flakes, optional
  • 1 c. Parmesan, grated
  • 1 1/2 c. mozzarella, shredded
  • 1/2 tsp salt and fresh cracked pepper
  • 1 tbsp freshly chopped basil, for garnish
  • 1/2 c. pork rind, crushed, optional

Instructions

Step 1: Place the olive oil, garlic powder, salt, pepper, Italian seasoning, and crushed chili pepper flakes on a shallow plate. Add the chicken breasts and marinate for about 5 minutes.

Step 2: While the chicken is marinating, prepare the oven and preheat it to 400 degrees F or 200 degrees C. Using oil, cooking spray, or butter, lightly grease a baking dish.

Step 3: After marinating the chicken, lay them in the greased baking dish. On top, pour the tomato sauce and sprinkle over the Parmesan and shredded mozzarella. Lastly, lightly sprinkle with crushed pork rinds.

Step 4: Place in the preheated oven and bake for about 25 minutes or until the chicken is completely cooked and the cheese has melted and bubbly.

Step 5: Remove from the oven when done and garnish the casserole with some chopped basil. Serve right away. Enjoy!

April 28, 2022 0 comment
0 FacebookTwitterPinterestEmail
General Recipes

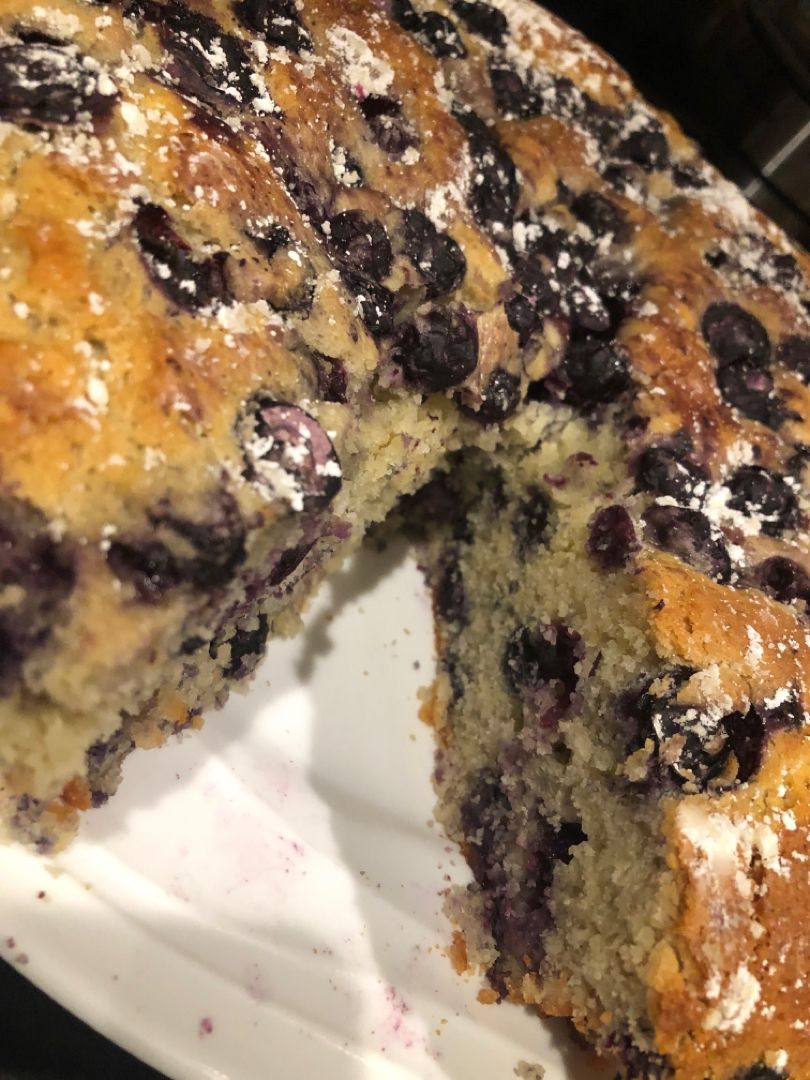
Blueberry Lemon Ricotta Tea Cake

by Rebecca April 28, 2022
written by Rebecca

Prep time: 20 mins | Cook time: 1 hr 30 mins | Total time: 1 hr 50 mins | Yield: 8-10 SLICES

This cake is the best cake you’ll make this summer! Enjoy the light, refreshing flavor of lemon in this soft cake that’s bursting with a fresh blueberry. Serve this warm or cool for breakfast, snack, or entertaining.

Ingredients

1 cup butter, softened (227 grams)

4 large eggs, room temperature

3 tablespoons cornstarch (28 grams)

1 teaspoon vanilla extract

1 cup sugar (200 grams)

zest from 2 lemons (about 1 1/2 teaspoons)

1 cup small curd cottage cheese (or ricotta) (250 grams)

4 teaspoons baking powder (16 grams)

2 1/2 cups all-purpose flour (312 grams)

1/4 teaspoon salt (1.5 grams)

3 cups fresh blueberries (300 grams)

powdered sugar, for dusting

1 teaspoon fresh lemon juice (optional)

How to make Blueberry Lemon Ricotta Tea Cake

Step 1: Prepare the oven. Preheat it to 335 degrees. Using the parchment paper, line a 9-inch springform pan and grease the sides.

Step 2: Toss the washed and dried blueberries cornstarch in a large mixing bowl until the berries are well coated and set aside.

Step 3: Cream the butter, sugar, vanilla, and lemon zest in a large mixing bowl for about 3 minutes until light and fluffy. Then, add the eggs, one piece at a time, mixing well after each addition.

Step 4: Through a sieve, press the cup of cottage cheese, scraping the bottom of the sieve. To the creamed ingredients, mix in the cottage cheese until you have a mostly creamy batter. You can also use ricotta cheese instead of cottage cheese. If so, just add the ricotta cheese directly to the butter mixture.

Step 5: Place the flour, baking powder, and salt in another bowl. Mix well.

Step 6: Take the creamed mixture bowl of the stand mixer, then sift the dry ingredients into the batter. Using a spatula, fold the mixture until just mixed.

Step 7: If using, stir in the lemon juice. Next, fold in 2 1/2 c of blueberries to the batter.

Step 8: Into the prepared pan, pour the batter and evenly spread it to the edges. On top, add the rest of the half c blueberries, lightly pressing the berries down.

Step 9: Place in the preheated oven and bake for about 1 hour and 10 minutes to 1 hour and 30 minutes. To check the doneness of the cake, insert a toothpick in the center of the cake. Once it comes out clean the cake is done. Take the cake out of the oven and let it cool in the pan for about 10 minutes. Then, invert the cake onto a cooling rack, peel the parchment off, and allow the cake to cool completely.

Step 10: After the cake cooled, dust around 1 tablespoon of powdered sugar on top. Slice and serve the cake warm or cool. Enjoy!

Nutrition Facts:

YIELD: 10 slices SERVING SIZE: 1 slice
Amount Per Serving: CALORIES: 492 | TOTAL FAT: 22g | SATURATED FAT: 13g | TRANS FAT: 1g | UNSATURATED FAT: 7g | CHOLESTEROL: 127mg | SODIUM: 477mg | CARBOHYDRATES: 68g | FIBER: 2g | SUGAR: 38g | PROTEIN: 8g

Blueberry Lemon Ricotta Tea Cake

Rebecca Prep time: 20 mins | Cook time: 1 hr 30 mins | Total time: 1 hr 50 mins | Yield: 8-10 SLICES This cake is the best cake you’ll make… General Recipes Blueberry Lemon Ricotta Tea Cake European Print This
Serves: 8-10 Prep Time: 20 mins Cooking Time: 1 hr 30 mins 1 hr 30 mins
Nutrition facts: 492 calories 22 fat
Rating: 5.0/5
( 1 voted )

Ingredients

  • 1 cup butter, softened (227 grams)
  • 4 large eggs, room temperature
  • 3 tablespoons cornstarch (28 grams)
  • 1 teaspoon vanilla extract
  • 1 cup sugar (200 grams)
  • zest from 2 lemons (about 1 1/2 teaspoons)
  • 1 cup small curd cottage cheese (or ricotta) (250 grams)
  • 4 teaspoons baking powder (16 grams)
  • 2 1/2 cups all-purpose flour (312 grams)
  • 1/4 teaspoon salt (1.5 grams)
  • 3 cups fresh blueberries (300 grams)
  • powdered sugar, for dusting
  • 1 teaspoon fresh lemon juice (optional)

Instructions

Step 1: Prepare the oven. Preheat it to 335 degrees. Using the parchment paper, line a 9-inch springform pan and grease the sides.

Step 2: Toss the washed and dried blueberries cornstarch in a large mixing bowl until the berries are well coated and set aside.

Step 3: Cream the butter, sugar, vanilla, and lemon zest in a large mixing bowl for about 3 minutes until light and fluffy. Then, add the eggs, one piece at a time, mixing well after each addition.

Step 4: Through a sieve, press the cup of cottage cheese, scraping the bottom of the sieve. To the creamed ingredients, mix in the cottage cheese until you have a mostly creamy batter. You can also use ricotta cheese instead of cottage cheese. If so, just add the ricotta cheese directly to the butter mixture.

Step 5: Place the flour, baking powder, and salt in another bowl. Mix well.

Step 6: Take the creamed mixture bowl of the stand mixer, then sift the dry ingredients into the batter. Using a spatula, fold the mixture until just mixed.

Step 7: If using, stir in the lemon juice. Next, fold in 2 1/2 c of blueberries to the batter.

Step 8: Into the prepared pan, pour the batter and evenly spread it to the edges. On top, add the rest of the half c blueberries, lightly pressing the berries down.

Step 9: Place in the preheated oven and bake for about 1 hour and 10 minutes to 1 hour and 30 minutes. To check the doneness of the cake, insert a toothpick in the center of the cake. Once it comes out clean the cake is done. Take the cake out of the oven and let it cool in the pan for about 10 minutes. Then, invert the cake onto a cooling rack, peel the parchment off, and allow the cake to cool completely.

Step 10: After the cake cooled, dust around 1 tablespoon of powdered sugar on top. Slice and serve the cake warm or cool. Enjoy!

April 28, 2022 0 comment
0 FacebookTwitterPinterestEmail
General Recipes

Easy Tuna Burgers (Patties)

by Rebecca April 28, 2022
written by Rebecca

Prep Time: 10 mins | Cook Time: 10 mins | Total Time: 20 mins | Servings: 5 burgers

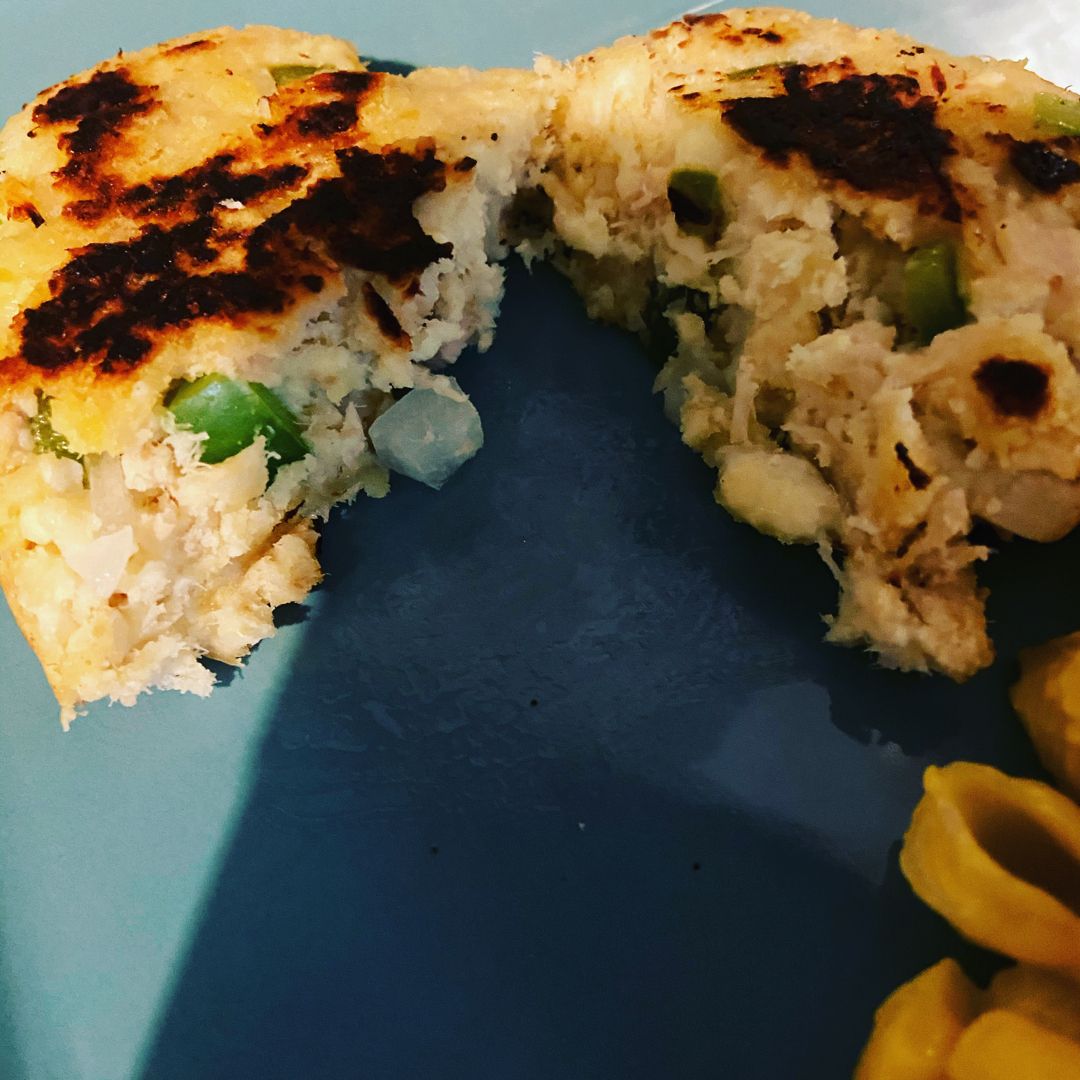
Whenever I find myself craving burgers, these tuna burgers are my go-to. It’s not your usual meat patties, but who needs meat when these tuna patties are great!

These tuna burgers (patties) are incredibly easy to throw together. These patties are made with canned tuna among the other simple pantry ingredients. This is one of my favorite recipes because this takes very little effort to make, is ready in less than twenty minutes, and guarantee the best tuna burgers you’ll ever make! These delicious tuna burgers are perfect for breakfast, lunch, and even dinner. They are your best option if you are looking for a meatless meal, excellent for even your fussiest eaters!

Ingredients

TUNA BURGERS:

1 egg, slightly beaten

2 cans tuna (in water) drain well (2 x 6 oz. cans) (250 g. after draining)

1-2 stalks of celery, finely chopped

1/2 c. light or regular mayonnaise (or more if needed) (125 g.)

1 1/2 c. cracker crumbs (I use saltine crackers using a blender to mash them) (105 g.)

DILL MAYO SAUCE:

1/2-1 tsp dried dill (or 1-2 tbsp fresh chopped)

1 tbsp lemon juice

1/2 c. light or regular mayo (125 g.)

How to make Easy Tuna Burgers (Patties)

TUNA BURGERS:

Step 1: Add the tuna to a medium bowl and flake using a fork. Then, add the cracker crumbs along with the egg, celery, and mayonnaise. Mix well until everything is blended.

Step 2: Shape the mixture into patties. Cook the patties in a lightly greased frying pan for about 3 to 4 minutes per side over low-medium heat until golden brown and cooked through.

Step 3: Serve the tuna burgers right away. If desired, top with dill mayo sauce. Enjoy!

DILL MAYO SAUCE:

Step 4: Place the mayonnaise, lemon juice, and dill in a small bowl. Mix well until combined.

Nutrition Facts:

Calories: 268 kcal | Carbohydrates: 20g | Protein: 17g | Fat: 13g | Saturated Fat: 2g | Cholesterol: 64mg | Sodium: 735mg | Potassium: 188mg | Fiber: 1g | Sugar: 2g | Vitamin A: 155IU | Vitamin C: 1.4mg | Calcium: 24mg | Iron: 2.3mg

Easy Tuna Burgers (Patties)

Rebecca Prep Time: 10 mins | Cook Time: 10 mins | Total Time: 20 mins | Servings: 5 burgers Whenever I find myself craving burgers, these tuna burgers are my go-to.… General Recipes Easy Tuna Burgers (Patties) European Print This
Serves: 5 Prep Time: 10 mins Cooking Time: 10 mins 10 mins
Nutrition facts: 268 calories 13 fat
Rating: 5.0/5
( 1 voted )

Ingredients

  • TUNA BURGERS:
  • 1 egg, slightly beaten
  • 2 cans tuna (in water) drain well (2 x 6 oz. cans) (250 g. after draining)
  • 1-2 stalks of celery, finely chopped
  • 1/2 c. light or regular mayonnaise (or more if needed) (125 g.)
  • 1 1/2 c. cracker crumbs (I use saltine crackers using a blender to mash them) (105 g.)
  • DILL MAYO SAUCE:
  • 1/2-1 tsp dried dill (or 1-2 tbsp fresh chopped)
  • 1 tbsp lemon juice
  • 1/2 c. light or regular mayo (125 g.)

Instructions

TUNA BURGERS:

Step 1: Add the tuna to a medium bowl and flake using a fork. Then, add the cracker crumbs along with the egg, celery, and mayonnaise. Mix well until everything is blended.

Step 2: Shape the mixture into patties. Cook the patties in a lightly greased frying pan for about 3 to 4 minutes per side over low-medium heat until golden brown and cooked through.

Step 3: Serve the tuna burgers right away. If desired, top with dill mayo sauce. Enjoy!

DILL MAYO SAUCE:

Step 4: Place the mayonnaise, lemon juice, and dill in a small bowl. Mix well until combined.

April 28, 2022 0 comment
0 FacebookTwitterPinterestEmail
General Recipes

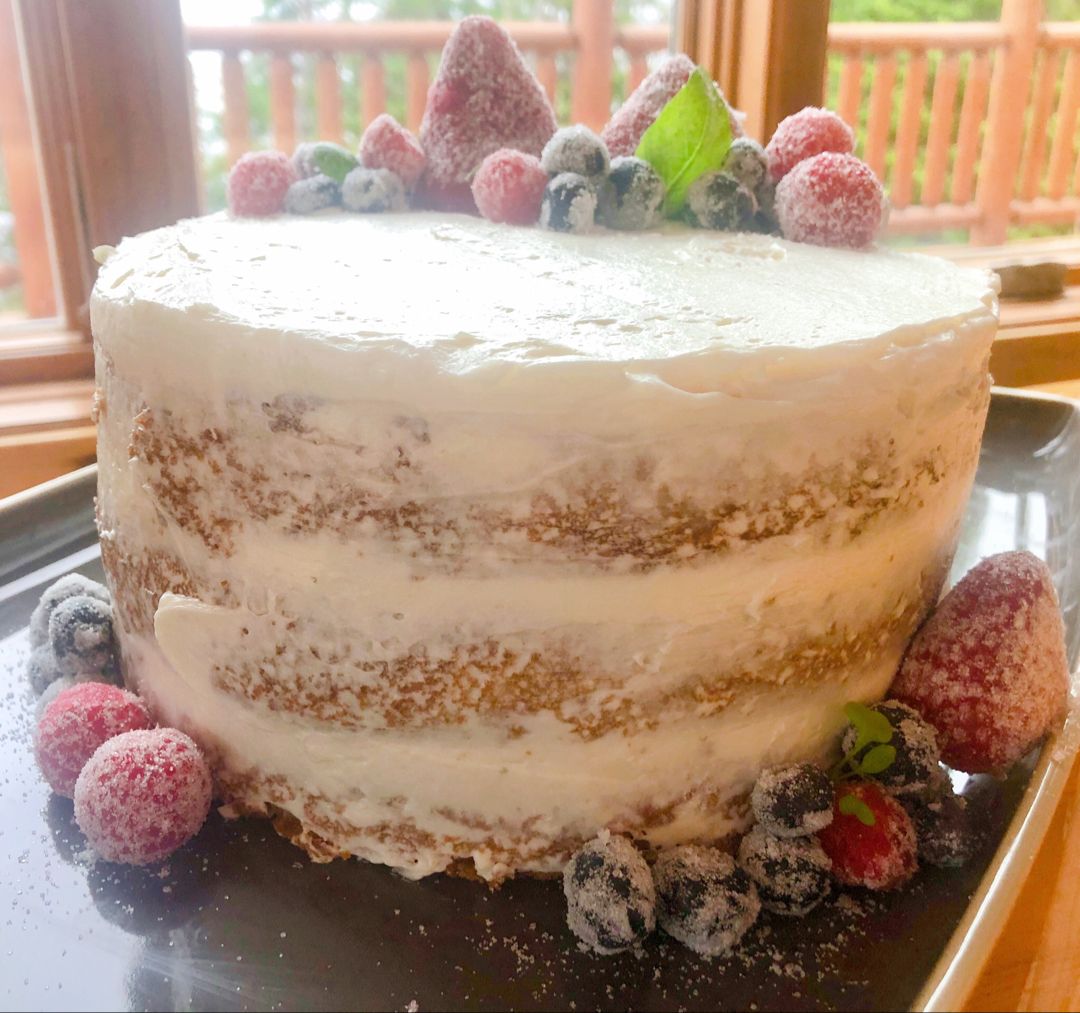
White velvet buttermilk cake recipe

by Rebecca April 27, 2022
written by Rebecca

Prep Time: 10 mins | Cook Time: 40 mins | Total Time: 40 mins | Serves: 8 cups

This white velvet buttermilk cake is the ultimate dream cake. A velvety, moist cake that’s perfect for every occasion!

Ingredients

White Velvet Cake:

6 ounces (170 grams) butter, unsalted and softened

14 ounces (396 grams) of cake flour

5 ounces (142 grams) of egg whites at room temperature

13 ounces (368 grams) of granulated sugar

1 tablespoon baking powder

10 ounces (284 grams) of buttermilk at room temperature or slightly warm

1/2 teaspoon baking soda

1 teaspoon salt

2 teaspoons vanilla

4 ounces (113 grams) of vegetable oil

Ermine Frosting:

16 ounces (454 grams) of unsalted butter at room temperature

14 ounces (396 grams) of granulated sugar

16 ounces (454 grams) of whole milk

3 ounces (85 grams) of flour

1/4 teaspoon salt

2 teaspoons vanilla extract

How to make a White velvet buttermilk cake

Step 1: Prepare the oven. Preheat it to 335 degrees F (168 degrees C)/ 350 degrees F (177 degrees C). Make sure to prep everything you need. All the ingredients should be at room temperature and correctly measured before starting the recipe.

Step 2: Grease pan spray and flour two 8 x 2-inch (or three 6 inches) cake pans. Fill the pans around 3/4 of the way full of batter.

Step 3: In the bowl of a stand mixer with a paddle attachment, mix the flour, sugar, baking powder, baking soda, and salt for about 10 seconds until well combined.

Step 4: Whisk a half cup of milk with oil. Set aside.

Step 5: Mix the rest of the milk with egg whites and vanilla, breaking the eggs up. Set aside.

Step 6: To the dry ingredients, add the softened butter and beat for about 30 seconds on low speed until you have a mixture that resembles coarse sand. Pour in the milk/oil mixture and mix to moisten the dry ingredients. Adjust the speed to medium and beat for another 2 minutes.

Step 7: After scraping the bowl, adjust the speed to low. In three batches, add the egg white mixture, mixing the batter for about 15 seconds between each addition.

Step 8: To ensure everything has been incorporated, scrape down the sides again. Then, evenly pour the batter into the prepared pans. Place in the preheated oven and bake for about 35 to 40 minutes or until a toothpick inserted in the center of the cakes comes out clean. To release the steam of the cake, quickly and firmly tap the pan once on your countertop. This step will prevent the cake from shrinking.

Step 9: Allow the cakes to cool in the pan for about 10 minutes. Then, flip the cakes out onto a cooling rack to cool completely.

Ermine Frosting:

Step 10: In a medium saucepan, stir the flour and sugar over medium heat. Toast the flour for approximately 2 minutes.

Step 11: Gradually stir in the milk and adjust the heat to medium-high. Keep stirring until the mixture has thickened. Tent using a plastic wrap and allow the mixture to cool fully.

Step 12: To the bowl of a stand mixer, add the butter. Beat on high speed until light and fluffy. Then, gradually add in the cooled flour mixture, one spoon at a time as you whip.

Step 13: Lastly, stir in the vanilla and salt until creamy.

Step 14: Now, you are ready to frost your cooled cake.

Nutrition Facts:

Serving: 1serving | Calories: 208 kcal (10%) | Carbohydrates: 21g (7%) | Protein: 1g (2%) | Fat: 13g (20%) | Saturated Fat: 8g (40%) | Cholesterol: 28mg (9%) | Sodium: 111mg (5%) | Potassium: 60mg (2%) | Sugar: 15g (17%) | Vitamin A: 335IU (7%) | Calcium: 31mg (3%) | Iron: 0.2mg (1%)

White velvet buttermilk cake recipe

Rebecca Prep Time: 10 mins | Cook Time: 40 mins | Total Time: 40 mins | Serves: 8 cups This white velvet buttermilk cake is the ultimate dream cake. A velvety,… General Recipes White velvet buttermilk cake recipe European Print This
Serves: 8 Prep Time: 10 mins Cooking Time: 40 mins 40 mins
Nutrition facts: 208 calories 13 fat
Rating: 5.0/5
( 1 voted )

Ingredients

  • White Velvet Cake:
  • 6 ounces (170 grams) butter, unsalted and softened
  • 14 ounces (396 grams) of cake flour
  • 5 ounces (142 grams) of egg whites at room temperature
  • 13 ounces (368 grams) of granulated sugar
  • 1 tablespoon baking powder
  • 10 ounces (284 grams) of buttermilk at room temperature or slightly warm
  • 1/2 teaspoon baking soda
  • 1 teaspoon salt
  • 2 teaspoons vanilla
  • 4 ounces (113 grams) of vegetable oil
  • Ermine Frosting:
  • 16 ounces (454 grams) of unsalted butter at room temperature
  • 14 ounces (396 grams) of granulated sugar
  • 16 ounces (454 grams) of whole milk
  • 3 ounces (85 grams) of flour
  • 1/4 teaspoon salt
  • 2 teaspoons vanilla extract

Instructions

Step 1: Prepare the oven. Preheat it to 335 degrees F (168 degrees C)/ 350 degrees F (177 degrees C). Make sure to prep everything you need. All the ingredients should be at room temperature and correctly measured before starting the recipe.

Step 2: Grease pan spray and flour two 8 x 2-inch (or three 6 inches) cake pans. Fill the pans around 3/4 of the way full of batter.

Step 3: In the bowl of a stand mixer with a paddle attachment, mix the flour, sugar, baking powder, baking soda, and salt for about 10 seconds until well combined.

Step 4: Whisk a half cup of milk with oil. Set aside.

Step 5: Mix the rest of the milk with egg whites and vanilla, breaking the eggs up. Set aside.

Step 6: To the dry ingredients, add the softened butter and beat for about 30 seconds on low speed until you have a mixture that resembles coarse sand. Pour in the milk/oil mixture and mix to moisten the dry ingredients. Adjust the speed to medium and beat for another 2 minutes.

Step 7: After scraping the bowl, adjust the speed to low. In three batches, add the egg white mixture, mixing the batter for about 15 seconds between each addition.

Step 8: To ensure everything has been incorporated, scrape down the sides again. Then, evenly pour the batter into the prepared pans. Place in the preheated oven and bake for about 35 to 40 minutes or until a toothpick inserted in the center of the cakes comes out clean. To release the steam of the cake, quickly and firmly tap the pan once on your countertop. This step will prevent the cake from shrinking.

Step 9: Allow the cakes to cool in the pan for about 10 minutes. Then, flip the cakes out onto a cooling rack to cool completely.

Ermine Frosting:

Step 10: In a medium saucepan, stir the flour and sugar over medium heat. Toast the flour for approximately 2 minutes.

Step 11: Gradually stir in the milk and adjust the heat to medium-high. Keep stirring until the mixture has thickened. Tent using a plastic wrap and allow the mixture to cool fully.

Step 12: To the bowl of a stand mixer, add the butter. Beat on high speed until light and fluffy. Then, gradually add in the cooled flour mixture, one spoon at a time as you whip.

Step 13: Lastly, stir in the vanilla and salt until creamy.

Step 14: Now, you are ready to frost your cooled cake.

April 27, 2022 0 comment
0 FacebookTwitterPinterestEmail
General Recipes

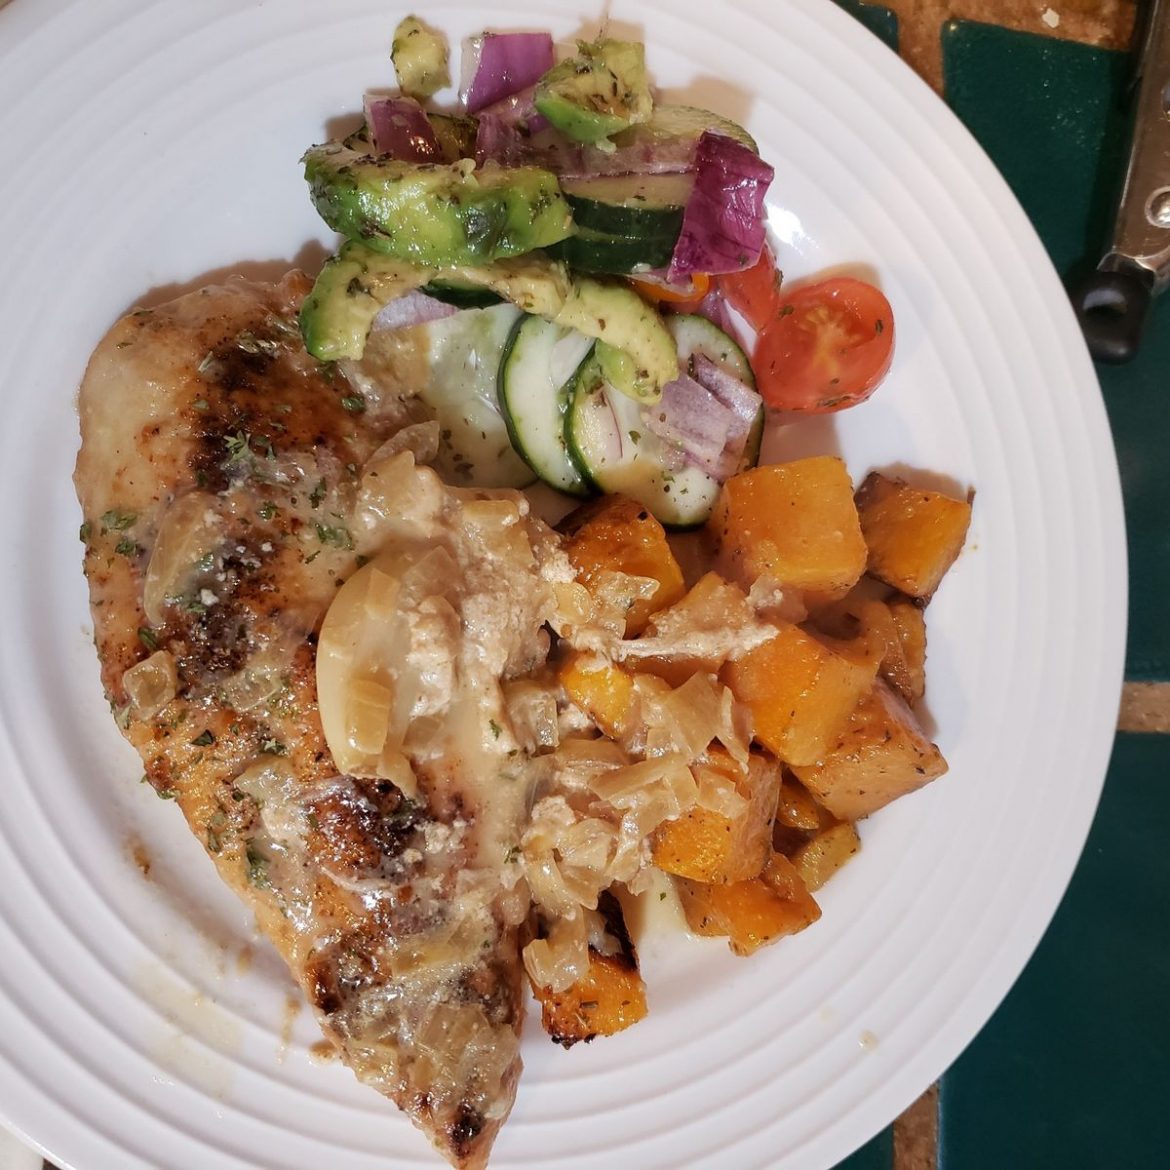
CREAMY GARLIC CHICKEN BREAST RECIPE

by Rebecca April 27, 2022
written by Rebecca

PREP TIME: 15 MINS | COOK TIME: 20 MINS | TOTAL TIME: 35 MINS | SERVES: 4 people

Pan-fried, golden, and crispy chicken breast smothered in a mouthwatering garlic cream sauce! Serve this lush chicken over cauliflower mash, pasta, rice, zucchini noodles, or mashed potatoes for a filling weeknight meal perfect for your entire family. And never forget the scrumptious sauce!

INGREDIENTS

Chicken:

1 tsp garlic powder

2-3 large boneless and skinless chicken breasts, halved horizontally to make 4

4 tbsp finely grated fresh Parmesan cheese

2 tsp salt

1/2 tsp Black cracked pepper

4 tbsp flour (all-purpose or plain)

Sauce:

1 small onion, finely chopped

5 tbsp olive oil

1 whole head of garlic, peeled and divided into 10-12 cloves

2 tbsp butter

1 1/4 c. chicken broth (stock)

2 tbsp fresh parsley, to serve

1/2 c. finely grated fresh Parmesan cheese

1 1/4 c. half and a half or heavy cream (or evaporated milk)

HOW TO MAKE CREAMY GARLIC CHICKEN BREAST

Step 1: Sprinkle the chicken with salt, garlic powder, and pepper.

Step 2: Place the flour and Parmesan cheese in a shallow bowl. Mix well. Dredge the chicken, shaking the excess off.

Step 3: In a large skillet, heat 2 tbsp oil and 1 tbsp butter over medium-high heat. To evenly coat the bottom, swirl the pan. Then, add about 2 to 3 chicken breasts and fry for about 4 to 5 minutes per side until both sides are golden and no longer pink. On a warm plate, transfer the cooked chicken breasts and set them aside. Note that the cooking time of the chicken breasts varies depending on the thickness of the chicken.

Step 4: Using a sheet of paper towel, wipe the pan clean. Then, add the rest of the oil, butter, and chicken breasts. Onto the same plate, transfer the cooked chicken.

Step 5: Adjust the heat to medium and add the onion and saute with the remaining oil/juices in the pan until the onion has softened.

Step 6: Using the blunt edge of the back of a knife, smash 6 whole cloves of garlic.

Step 7: To the pan, heat the rest of the oil, stirring it through the onions. Then, add the smashed garlic cloves and whole garlic cloves. Saute for about 2 to 3 minutes or until aromatic. Pour in the broth and scrape the browned bits to deglaze the pan. Allow the mixture to simmer for about 5 minutes until it is reduced to half.

Step 8: Adjust the heat to medium-low, then add the cream. Gently simmer the sauce for about 2 to 3 minutes before stirring in the Parmesan cheese. Cook further until the cheese has melted, stirring often. This takes 2 to 3 minutes more. To taste, season with salt and pepper.

Step 9: Return the chicken to the pan and allow the sauce to simmer for another 2 to 3 minutes until the sauce has thickened to your liking. Lastly, garnish with a bit of black cracked pepper and parsley.

Step 10: Serve this creamy garlic chicken breast over cauliflower mash, pasta, rice, zucchini noodles, or mashed potatoes. Enjoy!

NUTRITION FACTS:

Calories: 458 kcal | Carbohydrates: 11g | Protein: 21g | Fat: 36g | Saturated Fat: 13g | Cholesterol: 85mg | Sodium: 1205mg | Potassium: 403mg | Sugar: 1g | Vitamin A: 710IU | Vitamin C: 10.3mg | Calcium: 285mg | Iron: 1mg

CREAMY GARLIC CHICKEN BREAST RECIPE

Rebecca PREP TIME: 15 MINS | COOK TIME: 20 MINS | TOTAL TIME: 35 MINS | SERVES: 4 people Pan-fried, golden, and crispy chicken breast smothered in a mouthwatering garlic cream… General Recipes CREAMY GARLIC CHICKEN BREAST RECIPE European Print This
Serves: 4 Prep Time: 15 mins Cooking Time: 20 mins 20 mins
Nutrition facts: 458 calories 36 fat
Rating: 5.0/5
( 1 voted )

Ingredients

  • Chicken:
  • 1 tsp garlic powder
  • 2-3 large boneless and skinless chicken breasts, halved horizontally to make 4
  • 4 tbsp finely grated fresh Parmesan cheese
  • 2 tsp salt
  • 1/2 tsp Black cracked pepper
  • 4 tbsp flour (all-purpose or plain)
  • Sauce:
  • 1 small onion, finely chopped
  • 5 tbsp olive oil
  • 1 whole head of garlic, peeled and divided into 10-12 cloves
  • 2 tbsp butter
  • 1 1/4 c. chicken broth (stock)
  • 2 tbsp fresh parsley, to serve
  • 1/2 c. finely grated fresh Parmesan cheese
  • 1 1/4 c. half and a half or heavy cream (or evaporated milk)

Instructions

Step 1: Sprinkle the chicken with salt, garlic powder, and pepper.

Step 2: Place the flour and Parmesan cheese in a shallow bowl. Mix well. Dredge the chicken, shaking the excess off.

Step 3: In a large skillet, heat 2 tbsp oil and 1 tbsp butter over medium-high heat. To evenly coat the bottom, swirl the pan. Then, add about 2 to 3 chicken breasts and fry for about 4 to 5 minutes per side until both sides are golden and no longer pink. On a warm plate, transfer the cooked chicken breasts and set them aside. Note that the cooking time of the chicken breasts varies depending on the thickness of the chicken.

Step 4: Using a sheet of paper towel, wipe the pan clean. Then, add the rest of the oil, butter, and chicken breasts. Onto the same plate, transfer the cooked chicken.

Step 5: Adjust the heat to medium and add the onion and saute with the remaining oil/juices in the pan until the onion has softened.

Step 6: Using the blunt edge of the back of a knife, smash 6 whole cloves of garlic.

Step 7: To the pan, heat the rest of the oil, stirring it through the onions. Then, add the smashed garlic cloves and whole garlic cloves. Saute for about 2 to 3 minutes or until aromatic. Pour in the broth and scrape the browned bits to deglaze the pan. Allow the mixture to simmer for about 5 minutes until it is reduced to half.

Step 8: Adjust the heat to medium-low, then add the cream. Gently simmer the sauce for about 2 to 3 minutes before stirring in the Parmesan cheese. Cook further until the cheese has melted, stirring often. This takes 2 to 3 minutes more. To taste, season with salt and pepper.

Step 9: Return the chicken to the pan and allow the sauce to simmer for another 2 to 3 minutes until the sauce has thickened to your liking. Lastly, garnish with a bit of black cracked pepper and parsley.

Step 10: Serve this creamy garlic chicken breast over cauliflower mash, pasta, rice, zucchini noodles, or mashed potatoes. Enjoy!

April 27, 2022 0 comment
0 FacebookTwitterPinterestEmail
General Recipes

Salmon Patties Recipe

by Rebecca April 27, 2022
written by Rebecca

Prep Time: 10 mins | Cook Time: 30 mins | Total Time: 40 mins | Servings: 14 salmon patties

Tender, flaky, and delicious with crisp edges – these amazing salmon patties are sure to impress even your fussiest eaters! Make sure to whip up a big batch because these salmon patties disappear super fast! Enjoy these with tartar sauce on the side.

Ingredients

2 large eggs, lightly beaten

3 tablespoons Olive oil, divided

1 pound fresh salmon filet

1 teaspoon Worcestershire sauce

1 medium yellow onion, 1 cup, finely diced

3 tablespoons unsalted butter, divided

1/2 red bell pepper, seeded and diced

1 c. Panko bread crumbs

3 tablespoons mayonnaise

1/4 c. parsley, finely minced

1 1/2 teaspoons Garlic salt, I used Lawry’s Brand, to taste

1/2 teaspoon Black pepper, or to taste

How to make Salmon Patties

Step 1: Prepare the oven. Preheat it to 425 degrees F. Using parchment or silicone liner, line a rimmed baking sheet.

Step 2: In the middle of the prepared baking sheet, place the salmon, skin-side-down. Drizzle with olive oil and sprinkle with garlic salt and black pepper.

Step 3: Place in the preheated oven and bake for about 10 to 15 minutes or until the salmon is just cooked through. Note that the baking time of the salmon varies depending on its thickness. Take the salmon out of the oven and tent it with foil. Let the salmon rest for about 10 minutes, then flake it using two forks. Discard the skin and bones. Keep the flaked salmon aside and cool at room temperature.

Step 4: Heat 1 tbsp of each olive oil and butter in a medium skillet over medium heat. To the hot skillet, add the diced onion, along with the bell pepper. Saute for about 7 to 9 minutes or until golden and tender. When done, remove the skillet from the heat.

Step 5: Place the flaked salmon, sauteed pepper and onion, 1 c bread crumbs, 2 beaten eggs, 3 tablespoons mayonnaise, 1 teaspoon Worcestershire sauce, 1 teaspoon garlic salt, 1/4 teaspoon black pepper, and 1/4 c chopped parsley in a large mixing bowl. Mix well. Take a heaping tablespoonful of the mixture and shape it into a 2-inch wide, 1/3 to 1/2-inch thickness patty. Repeat until you have used up the entire mixture.

Step 4: Heat 1 tbsp of each oil and butter in a clean non-stick pan. Then, add the salmon patties in one layer and saute for about 3 to 4 minutes on each side until golden brown and completely cooked. Decrease the heat if the salmon patties are browning too fast.

Step 5: To a paper-towel-lined plate, transfer the cooked patties.

Notes:

For this recipe, you can also use leftover salmon. Or swap the salmon fillets, olive oil, garlic salt, and black pepper with 15 ounces of well-drained canned salmon or salmon packets.

Add an extra tbsp of mayo if the salmon mixture is too dry to hold a patty shape. Or more bread crumbs if the mixture is too moist.

Nutrition Facts:

Amount Per Serving: Calories 145, Calories from Fat 90, Fat 10g15%, Saturated Fat 2g13%, Cholesterol 48mg16%, Sodium 328mg14%, Potassium 205mg6%, Carbohydrates 4g1%, Protein 8g16%, Vitamin A 345IU7%, Vitamin C 7.4mg9%, Calcium 19mg2%, Iron 0.7 mg4%

Salmon Patties Recipe

Rebecca Prep Time: 10 mins | Cook Time: 30 mins | Total Time: 40 mins | Servings: 14 salmon patties Tender, flaky, and delicious with crisp edges – these amazing salmon… General Recipes Salmon Patties Recipe European Print This
Serves: 14 Prep Time: 10 mins Cooking Time: 30 mins 30 mins
Nutrition facts: 145 calories 10 fat
Rating: 5.0/5
( 1 voted )

Ingredients

  • 2 large eggs, lightly beaten
  • 3 tablespoons Olive oil, divided
  • 1 pound fresh salmon filet
  • 1 teaspoon Worcestershire sauce
  • 1 medium yellow onion, 1 cup, finely diced
  • 3 tablespoons unsalted butter, divided
  • 1/2 red bell pepper, seeded and diced
  • 1 c. Panko bread crumbs
  • 3 tablespoons mayonnaise
  • 1/4 c. parsley, finely minced
  • 1 1/2 teaspoons Garlic salt, I used Lawry's Brand, to taste
  • 1/2 teaspoon Black pepper, or to taste

Instructions

Step 1: Prepare the oven. Preheat it to 425 degrees F. Using parchment or silicone liner, line a rimmed baking sheet.

Step 2: In the middle of the prepared baking sheet, place the salmon, skin-side-down. Drizzle with olive oil and sprinkle with garlic salt and black pepper.

Step 3: Place in the preheated oven and bake for about 10 to 15 minutes or until the salmon is just cooked through. Note that the baking time of the salmon varies depending on its thickness. Take the salmon out of the oven and tent it with foil. Let the salmon rest for about 10 minutes, then flake it using two forks. Discard the skin and bones. Keep the flaked salmon aside and cool at room temperature.

Step 4: Heat 1 tbsp of each olive oil and butter in a medium skillet over medium heat. To the hot skillet, add the diced onion, along with the bell pepper. Saute for about 7 to 9 minutes or until golden and tender. When done, remove the skillet from the heat.

Step 5: Place the flaked salmon, sauteed pepper and onion, 1 c bread crumbs, 2 beaten eggs, 3 tablespoons mayonnaise, 1 teaspoon Worcestershire sauce, 1 teaspoon garlic salt, 1/4 teaspoon black pepper, and 1/4 c chopped parsley in a large mixing bowl. Mix well. Take a heaping tablespoonful of the mixture and shape it into a 2-inch wide, 1/3 to 1/2-inch thickness patty. Repeat until you have used up the entire mixture.

Step 4: Heat 1 tbsp of each oil and butter in a clean non-stick pan. Then, add the salmon patties in one layer and saute for about 3 to 4 minutes on each side until golden brown and completely cooked. Decrease the heat if the salmon patties are browning too fast.

Step 5: To a paper-towel-lined plate, transfer the cooked patties.

Notes

For this recipe, you can also use leftover salmon. Or swap the salmon fillets, olive oil, garlic salt, and black pepper with 15 ounces of well-drained canned salmon or salmon packets. Add an extra tbsp of mayo if the salmon mixture is too dry to hold a patty shape. Or more bread crumbs if the mixture is too moist.

April 27, 2022 0 comment
0 FacebookTwitterPinterestEmail
General Recipes

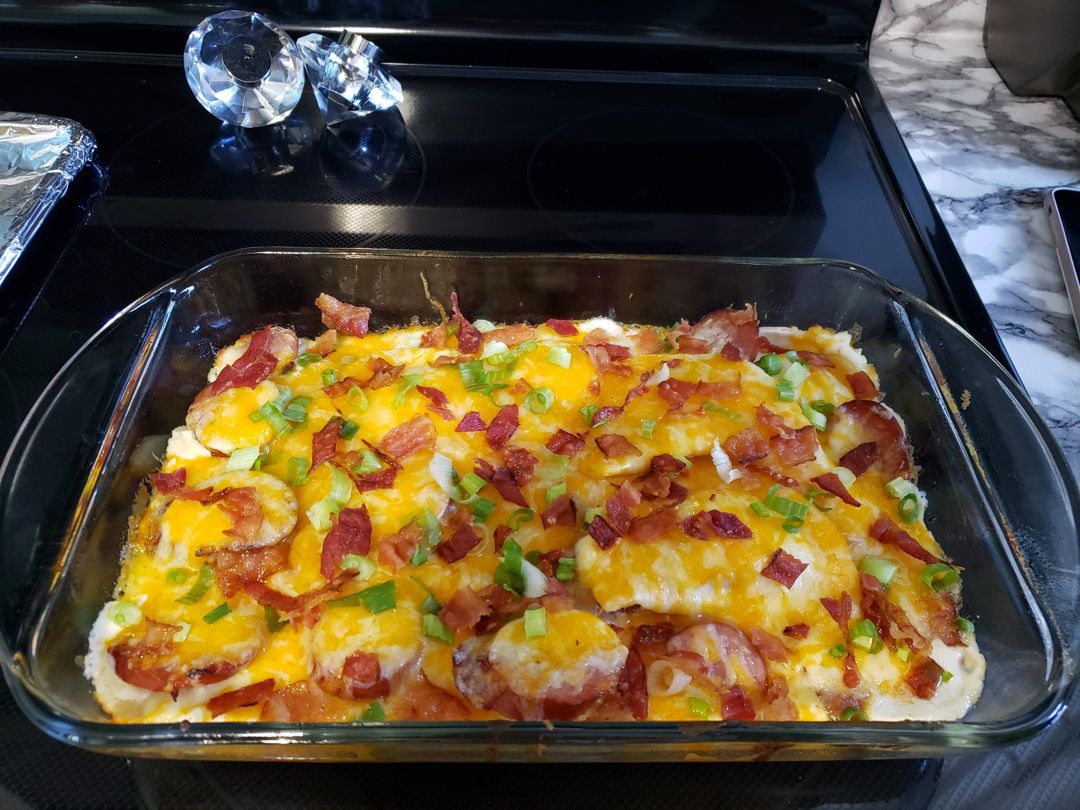
BACON PIEROGI BAKE

by Rebecca April 27, 2022
written by Rebecca

Prep time: 15 mins | Cook time: 20 mins | Total time: 35 mins | Yield: 6 SERVINGS

I recently tried bacon pierogi bake and it was more than amazing! I never realized what I was missing until a few weeks ago. I have been skipping on this recipe for no reason at all. Until one day when I was looking for a new dish to try. My family instantly loves this pierogi. It is topped with melty cheese, crisp bacon, and green onions. I will be sure to make this again and again!

INGREDIENTS

4 slices of bacon, chopped

1 (16 ounces) package of frozen potato and cheddar pierogies

2 cloves garlic, minced

1/2 c. chicken broth

2-3 green onions, chopped

1 c. cheddar cheese

1 (8 ounces) package of cream cheese, softened and cubed

1/4 c. chopped seeded plum tomato (optional)

Salt and pepper to taste

HOW TO MAKE BACON PIEROGI BAKE

Step 1: Prepare the oven. Preheat it to 400 degrees. In a lightly greased 9 x 9-inch baking dish, arrange the pierogies.

Step 2: Cook the bacon in a medium skillet until crispy. With a paper towel-lined plate, transfer the cooked bacon.

Step 3: In the same pan with the bacon drippings, saute the garlic for about 30 seconds. Then, add the cream cheese and continue to cook while stirring often, until the cream cheese starts to melt.

Step 4: Slowly, stir in the chicken broth until smooth. To taste, season the sauce with salt and pepper.

Step 5: Evenly cover the pierogies, and pour the cream cheese mixture. Place in the preheated oven and bake for about 15 minutes or until heated through and bubbly.

Step 6: Take the dish out of the oven and top with cheese. Return to the oven and continue to bake for another 5 minutes or until the cheese has melted.

Step 7: Before serving, top the bacon pierogi bake with the cooked bacon, some green onions, and tomato. Enjoy!

NUTRITION FACTS:

YIELD: 6 SERVING SIZE: 1
Amount Per Serving: CALORIES: 257 | TOTAL FAT: 17g | SATURATED FAT: 9g | TRANS FAT: 0g | UNSATURATED FAT: 7g | CHOLESTEROL: 48mg | SODIUM: 559mg | CARBOHYDRATES: 15g | FIBER: 1g | SUGAR: 2g | PROTEIN: 11g

BACON PIEROGI BAKE

Rebecca Prep time: 15 mins | Cook time: 20 mins | Total time: 35 mins | Yield: 6 SERVINGS I recently tried bacon pierogi bake and it was more than amazing!… General Recipes BACON PIEROGI BAKE European Print This
Serves: 6 Prep Time: 15 mins Cooking Time: 20 mins 20 mins
Nutrition facts: 257 calories 17 fat
Rating: 5.0/5
( 1 voted )

Ingredients

  • 4 slices of bacon, chopped
  • 1 (16 ounces) package of frozen potato and cheddar pierogies
  • 2 cloves garlic, minced
  • 1/2 c. chicken broth
  • 2-3 green onions, chopped
  • 1 c. cheddar cheese
  • 1 (8 ounces) package of cream cheese, softened and cubed
  • 1/4 c. chopped seeded plum tomato (optional)
  • Salt and pepper to taste

Instructions

Step 1: Prepare the oven. Preheat it to 400 degrees. In a lightly greased 9 x 9-inch baking dish, arrange the pierogies.

Step 2: Cook the bacon in a medium skillet until crispy. With a paper towel-lined plate, transfer the cooked bacon.

Step 3: In the same pan with the bacon drippings, saute the garlic for about 30 seconds. Then, add the cream cheese and continue to cook while stirring often, until the cream cheese starts to melt.

Step 4: Slowly, stir in the chicken broth until smooth. To taste, season the sauce with salt and pepper.

Step 5: Evenly cover the pierogies, and pour the cream cheese mixture. Place in the preheated oven and bake for about 15 minutes or until heated through and bubbly.

Step 6: Take the dish out of the oven and top with cheese. Return to the oven and continue to bake for another 5 minutes or until the cheese has melted.

Step 7: Before serving, top the bacon pierogi bake with the cooked bacon, some green onions, and tomato. Enjoy!

April 27, 2022 0 comment
0 FacebookTwitterPinterestEmail
General Recipes

The BEST Chocolate Texas Sheet Cake

by Rebecca April 27, 2022
written by Rebecca

Prep Time: 20 mins | Cook Time: 20 mins | Total Time: 40 mins | Yield: 15-24 Servings

You haven’t had the best chocolate cake if you have not tried this chocolate Texas sheet cake. It’s the best dessert for entertaining or if you are just craving a perfectly sweet chocolate cake. Tender, velvets, and a must for every occasion!

INGREDIENTS

Cake:

2 eggs

2 c. all-purpose flour

1 tsp baking soda

2 sticks of butter (real, salted)

2 c. sugar

1/2 c. cocoa powder

1/2 c. buttermilk

1/2 tsp salt

2 tsp vanilla extract

1 c. water or black coffee

Icing:

1 1-pound box of powdered sugar

1/2 c. milk

1 1/2 sticks of butter (real, salted)

1 tsp vanilla extract

1/2 c. cocoa powder

Dash of salt

How to make The BEST Chocolate Texas Sheet Cake

Cake:

Step 1: Using cooking spray, grease a 10 x 15-inch baking pan. Prepare the oven. Preheat it to 350 degrees.

Step 2: In a large mixing bowl, place the flour, sugar, baking soda, and salt. Mix well until combined and set aside.

Step 3: In a small saucepan, melt the butter. To the melted butter, stir in the cocoa powder and water (or black coffee) until smooth. Mix well and heat until boiling over medium-high heat. Then, take off from the heat.

Step 4: In a small bowl, whisk the buttermilk along with the eggs and vanilla extract. Set aside.

Step 5: Into the bowl with the flour mixture, pour the hot cocoa powder mixture and mix well until blended. Then, add the buttermilk mixture and stir well for about a minute until everything is incorporated.

Step 6: Into the prepared pan, pour the batter. Place in the preheated oven and bake for about 20 to 22 minutes or until a toothpick inserted in the center of the cake comes out clean.

Step 7: When done, remove the cake from the oven.

Icing:

Step 8: In a small saucepan, whisk the milk, butter, and salt. Then, heat until simmering. Take the pan off the heat and stir in the vanilla extract.

Step 9: In the meantime, sift both powdered sugar and cocoa into a large mixing bowl. This step is optional, but this prevents lumps from forming. Into the bowl with the powdered sugar and cocoa powder, pour in the hot milk/butter mixture, and stir well until smooth.

Step 10: Over the warm cake, pour the icing. Allow the cake to rest for a couple of hours. This will give the icing time to set. Then, slice the cake and serve.

Step 11: You can keep the completely cooled cake at room temperature, covered.

NOTES:

If using an 18 x 13-inch sheet pan-cake, decrease the baking time to 15 to 17 minutes. Check the doneness by inserting a toothpick in the center of the cake.

If using a very shallow pan (10 x 15-inch is a traditional jelly roll pan), the icing may not be able to fit so pour in as much and allow it to cool before adding to the cake. This way the icing pours thicker.

If buttermilk is not available, you can use 1 1/2 tsp vinegar. Place it in a small measuring pitcher, and add milk (you have to have a total volume that measures 1/2 c.). Set this aside for about 10 minutes before using.

If desired, you can top the icing with chopped pecans or sprinkles.

The BEST Chocolate Texas Sheet Cake

Rebecca Prep Time: 20 mins | Cook Time: 20 mins | Total Time: 40 mins | Yield: 15-24 Servings You haven’t had the best chocolate cake if you have not tried… General Recipes The BEST Chocolate Texas Sheet Cake European Print This
Serves: 15-24 Prep Time: 20 mins Cooking Time: 20 mins 20 mins
Nutrition facts: 200 calories 20 grams fat
Rating: 5.0/5
( 1 voted )

Ingredients

  • Cake:
  • 2 eggs
  • 2 c. all-purpose flour
  • 1 tsp baking soda
  • 2 sticks of butter (real, salted)
  • 2 c. sugar
  • 1/2 c. cocoa powder
  • 1/2 c. buttermilk
  • 1/2 tsp salt
  • 2 tsp vanilla extract
  • 1 c. water or black coffee
  • Icing:
  • 1 1-pound box of powdered sugar
  • 1/2 c. milk
  • 1 1/2 sticks of butter (real, salted)
  • 1 tsp vanilla extract
  • 1/2 c. cocoa powder
  • Dash of salt

Instructions

Cake:

Step 1: Using cooking spray, grease a 10 x 15-inch baking pan. Prepare the oven. Preheat it to 350 degrees.

Step 2: In a large mixing bowl, place the flour, sugar, baking soda, and salt. Mix well until combined and set aside.

Step 3: In a small saucepan, melt the butter. To the melted butter, stir in the cocoa powder and water (or black coffee) until smooth. Mix well and heat until boiling over medium-high heat. Then, take off from the heat.

Step 4: In a small bowl, whisk the buttermilk along with the eggs and vanilla extract. Set aside.

Step 5: Into the bowl with the flour mixture, pour the hot cocoa powder mixture and mix well until blended. Then, add the buttermilk mixture and stir well for about a minute until everything is incorporated.

Step 6: Into the prepared pan, pour the batter. Place in the preheated oven and bake for about 20 to 22 minutes or until a toothpick inserted in the center of the cake comes out clean.

Step 7: When done, remove the cake from the oven.

Icing:

Step 8: In a small saucepan, whisk the milk, butter, and salt. Then, heat until simmering. Take the pan off the heat and stir in the vanilla extract.

Step 9: In the meantime, sift both powdered sugar and cocoa into a large mixing bowl. This step is optional, but this prevents lumps from forming. Into the bowl with the powdered sugar and cocoa powder, pour in the hot milk/butter mixture, and stir well until smooth.

Step 10: Over the warm cake, pour the icing. Allow the cake to rest for a couple of hours. This will give the icing time to set. Then, slice the cake and serve.

Step 11: You can keep the completely cooled cake at room temperature, covered.

Notes

If using an 18 x 13-inch sheet pan-cake, decrease the baking time to 15 to 17 minutes. Check the doneness by inserting a toothpick in the center of the cake. If using a very shallow pan (10 x 15-inch is a traditional jelly roll pan), the icing may not be able to fit so pour in as much and allow it to cool before adding to the cake. This way the icing pours thicker. If buttermilk is not available, you can use 1 1/2 tsp vinegar. Place it in a small measuring pitcher, and add milk (you have to have a total volume that measures 1/2 c.). Set this aside for about 10 minutes before using. If desired, you can top the icing with chopped pecans or sprinkles.

April 27, 2022 0 comment
0 FacebookTwitterPinterestEmail
Newer Posts
Older Posts

Popular Posts

  • 1

    Crispy Crunchy Parmesan Potatoes

    March 21, 2020
  • 2

    CROCK POT SMOTHERED PORK CHOPS

    March 21, 2020
  • Facebook
  • Twitter

@2019 - All Right Reserved.


Back To Top