Cook it once
  • Home
  • Privacy Policy
  • Recipes
    • KETO
    • LC
    • WW
  • Tips
  • Contact
Cook it once
  • Home
  • Privacy Policy
  • Recipes
    • KETO
    • LC
    • WW
  • Tips
  • Contact
Category:

General Recipes

General Recipes

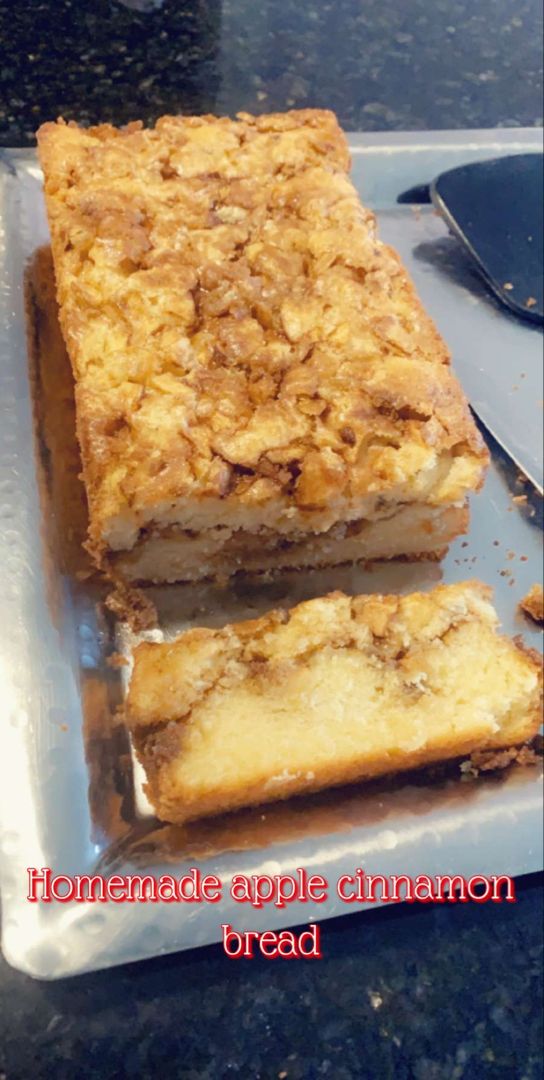
APPLE CINNAMON BREAD

by Rebecca April 30, 2022
written by Rebecca

Prep Time: 10 mins | Cook Time: 50 mins | Total Time: 1 hr | Yield: 8

Cinnamon and apples are one of my favorite combos but not the only reason why I super love this apple cinnamon bread. Moist bread with the most amazing cinnamon sugar swirls and loaded with fresh apples. Make sure to give this a try very soon. It’s the perfect apple cinnamon bread that you can easily whip up whenever!

INGREDIENTS

2 eggs

2 tsp vanilla extract

1 ½ tsp ground cinnamon

½ c. unsalted butter, softened

½ c. packed light brown sugar

1 ½ c. all-purpose flour

½ c. milk

1 ½ tsp baking powder

1 large apple, peeled and finely chopped

⅔ c. white sugar

HOW TO MAKE APPLE CINNAMON BREAD

Step 1: Prepare the oven. Preheat it to 350 degrees.

Step 2: Ready your 9 x 5-inch loaf pan. Grease, flour, and set aside.

Step 3: In a bowl, place the sugar and cinnamon. Mix well and set aside.

Step 4: Beat the white sugar and butter in a stand mixer until smooth. Then, add the eggs and vanilla and beat further over medium speed until well blended. Next, add the flour along with the baking powder and milk.

Step 5: Into the prepared pan, pour half of the batter and place half of the apples on top, covering the batter. Using the back of a spoon, gently pat the apples into the batter. On top, sprinkle half of the sugar and cinnamon mixture.

Step 6: Over the apple layer, pours the rest of the batter and top with the rest of the apples. On top, sprinkle the remaining brown sugar and cinnamon mixture. Using the same spoon, pat the topping into the batter.

Step 7: Place in the preheated oven and bake for about 50 minutes or until a toothpick inserted in the middle of the loaf comes out clean.

Step 8: Remove from the oven when done and let the bread cool for about 10 minutes in the pan. Then, invert onto a cooling rack.

Nutrition Facts:

Serving Size: 1-inch slice, Serves: 8
Amount Per Serving: Calories 327, Total Fat 13g 17%. Cholesterol 77.3mg 26%, Sodium 31mg 1%, Total Carbohydrate 48.9g 18%, Sugars 28.8g, Protein 4.7g 9%, Vitamin A13%, Vitamin C1%
APPLE CINNAMON BREAD

Rebecca Prep Time: 10 mins | Cook Time: 50 mins | Total Time: 1 hr | Yield: 8 Cinnamon and apples are one of my favorite combos but not the only reason… General Recipes APPLE CINNAMON BREAD European Print This
Serves: 8 Prep Time: 10 mins Cooking Time: 50 mins 50 mins
Nutrition facts: 327 calories 13 fat
Rating: 5.0/5
( 1 voted )

Ingredients

  • 2 eggs
  • 2 tsp vanilla extract
  • 1 ½ tsp ground cinnamon
  • ½ c. unsalted butter, softened
  • ½ c. packed light brown sugar
  • 1 ½ c. all-purpose flour
  • ½ c. milk
  • 1 ½ tsp baking powder
  • 1 large apple, peeled and finely chopped
  • ⅔ c. white sugar

Instructions

Step 1: Prepare the oven. Preheat it to 350 degrees.

Step 2: Ready your 9 x 5-inch loaf pan. Grease, flour, and set aside.

Step 3: In a bowl, place the sugar and cinnamon. Mix well and set aside.

Step 4: Beat the white sugar and butter in a stand mixer until smooth. Then, add the eggs and vanilla and beat further over medium speed until well blended. Next, add the flour along with the baking powder and milk.

Step 5: Into the prepared pan, pour half of the batter and place half of the apples on top, covering the batter. Using the back of a spoon, gently pat the apples into the batter. On top, sprinkle half of the sugar and cinnamon mixture.

Step 6: Over the apple layer, pours the rest of the batter and top with the rest of the apples. On top, sprinkle the remaining brown sugar and cinnamon mixture. Using the same spoon, pat the topping into the batter.

Step 7: Place in the preheated oven and bake for about 50 minutes or until a toothpick inserted in the middle of the loaf comes out clean.

Step 8: Remove from the oven when done and let the bread cool for about 10 minutes in the pan. Then, invert onto a cooling rack.
April 30, 2022 0 comment
0 FacebookTwitterPinterestEmail
General Recipes

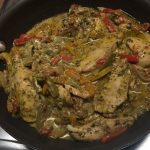
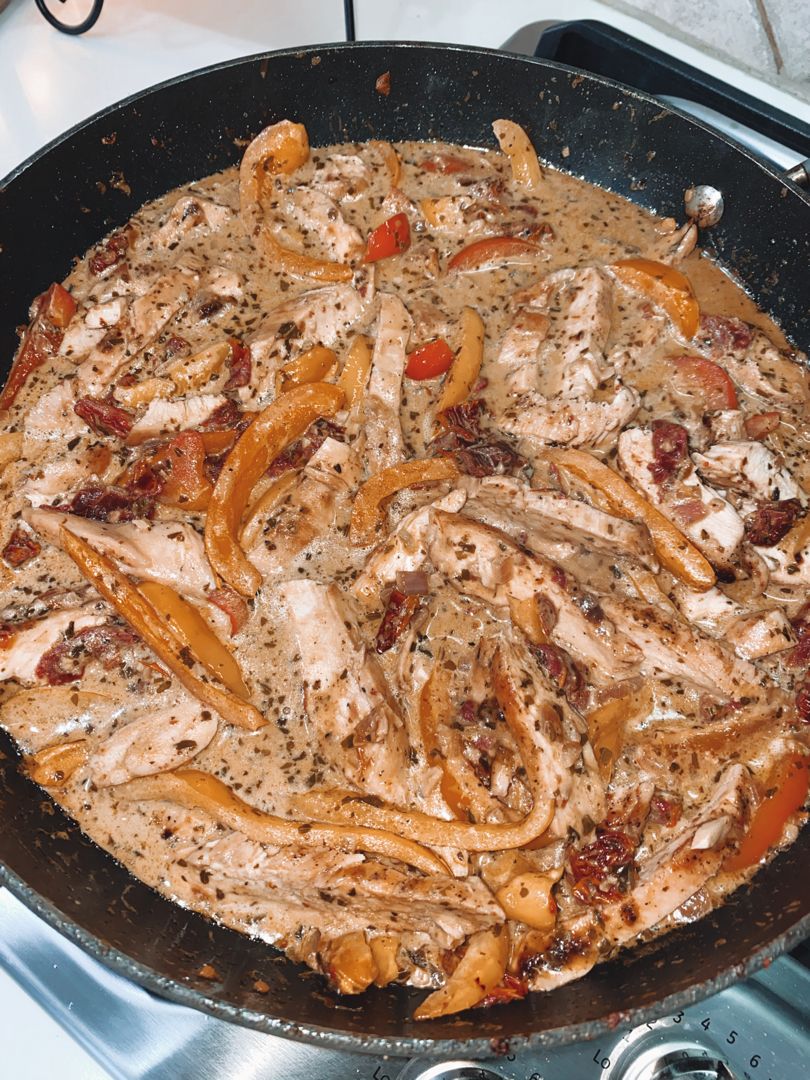
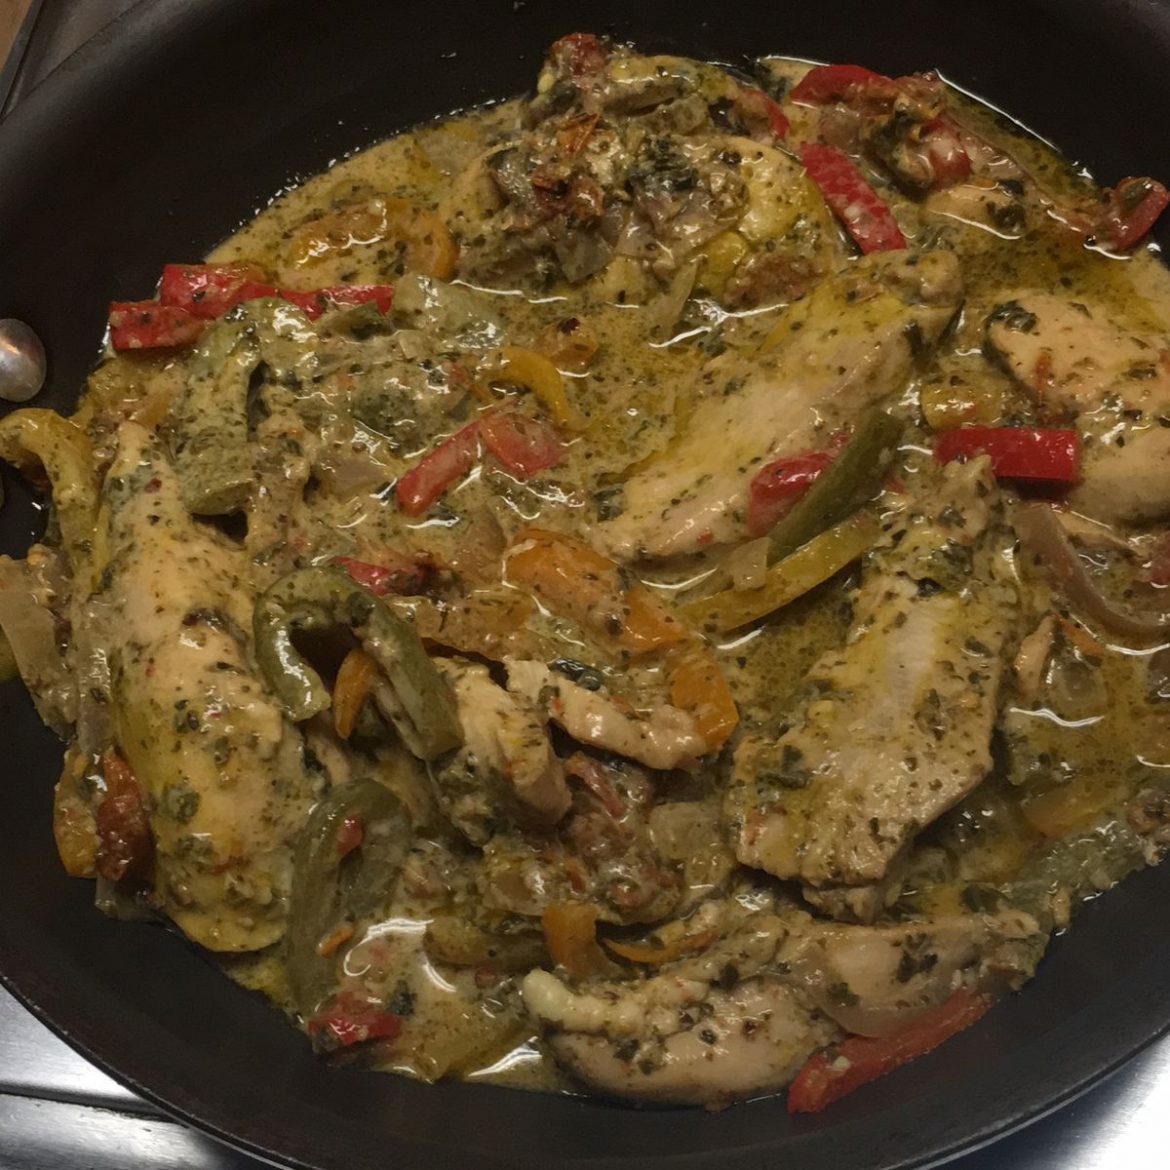
Creamy Garlic Pesto Chicken

by Rebecca April 30, 2022
written by Rebecca

PREP TIME: 15 MINS | COOK TIME: 20 MINS | YIELD: 4 servings

Deliciously creamy and super impressive! This creamy garlic pesto chicken is a must, especially if you love chicken and pesto. Incredibly easy to throw together and ready in less than twenty minutes. This amazing dish will surely be a big hit always!

INGREDIENTS

3 bell peppers (1 red, 1/2 yellow, and 1/2 green)

3-4 chicken breasts, boneless, skinless

1/2 tsp Italian seasoning

1/4 tsp red pepper flakes

1/2 red onion

3 garlic cloves, minced

1/2 c. sun-dried tomatoes, drained of most oil, chopped (keep the drained oil for cooking)

1/2 c. heavy whipping cream

1/2 c. basil pesto

1/2 c. chicken stock

Salt and fresh cracked pepper

Parmesan, for garnish

Chopped fresh basil, for garnish

How to make Creamy Garlic Pesto Chicken

Step 1: In a large nonstick skillet, heat 1 tbsp of the drained tomato oil with Italian seasoning and crushed chili pepper. Add the chicken breasts and cook for about 4 to 5 minutes per side over medium heat until cooked through. Decrease the heat if the chicken begins browning too much. Set the cooked chicken aside when done.

Step 2: In a mixing bowl or cup, place the basil pesto, cream, and chicken stock. Mix well until blended. Set the sauce aside.

Step 3: In the same skillet, add the onion, garlic, and sun-dried tomato. Then, cook for about 1 minute over medium-high heat or until just aromatic. Note that you can add a little more oil if the skillet is too dry. Next, add the bell pepper and cook further until slightly cooked but still crisp.

Step 4: To the skillet, pour in the prepared sauce and let it simmer. Meanwhile, slice the chicken breasts into strips. Place the strips of chicken in the skillet and cook for another 2 to 3 minutes or until heated.

Step 5: Before serving, garnish with Parmesan and basil. Enjoy the creamy garlic pesto chicken right away over pasta, rice, zucchini noodles, or bulgur.

Nutrition Facts:

Energy 610.51 kcal, Fat 32.43 g, Protein 67.98 g, Carbs 11.48 g, Saturated Fat 10.68 g, Polyunsat Fat 6.02 g, Monounsat Fat 12.59 g, Sugars 2.17 g, Cholesterol 199.73 mg, Sodium 360 mg, Potassium 1190.69 mg, Fiber 6.38 g

Creamy Garlic Pesto Chicken

Rebecca PREP TIME: 15 MINS | COOK TIME: 20 MINS | YIELD: 4 servings Deliciously creamy and super impressive! This creamy garlic pesto chicken is a must, especially if you love… General Recipes Creamy Garlic Pesto Chicken European Print This
Serves: 4 Prep Time: 15 mins Cooking Time: 20 mins 20 mins
Nutrition facts: 610.51 calories 32.43 fat
Rating: 5.0/5
( 1 voted )

Ingredients

  • 3 bell peppers (1 red, 1/2 yellow, and 1/2 green)
  • 3-4 chicken breasts, boneless, skinless
  • 1/2 tsp Italian seasoning
  • 1/4 tsp red pepper flakes
  • 1/2 red onion
  • 3 garlic cloves, minced
  • 1/2 c. sun-dried tomatoes, drained of most oil, chopped (keep the drained oil for cooking)
  • 1/2 c. heavy whipping cream
  • 1/2 c. basil pesto
  • 1/2 c. chicken stock
  • Salt and fresh cracked pepper
  • Parmesan, for garnish
  • Chopped fresh basil, for garnish

Instructions

Step 1: In a large nonstick skillet, heat 1 tbsp of the drained tomato oil with Italian seasoning and crushed chili pepper. Add the chicken breasts and cook for about 4 to 5 minutes per side over medium heat until cooked through. Decrease the heat if the chicken begins browning too much. Set the cooked chicken aside when done.

Step 2: In a mixing bowl or cup, place the basil pesto, cream, and chicken stock. Mix well until blended. Set the sauce aside.

Step 3: In the same skillet, add the onion, garlic, and sun-dried tomato. Then, cook for about 1 minute over medium-high heat or until just aromatic. Note that you can add a little more oil if the skillet is too dry. Next, add the bell pepper and cook further until slightly cooked but still crisp.

Step 4: To the skillet, pour in the prepared sauce and let it simmer. Meanwhile, slice the chicken breasts into strips. Place the strips of chicken in the skillet and cook for another 2 to 3 minutes or until heated.

Step 5: Before serving, garnish with Parmesan and basil. Enjoy the creamy garlic pesto chicken right away over pasta, rice, zucchini noodles, or bulgur.

April 30, 2022 0 comment
0 FacebookTwitterPinterestEmail
General Recipes

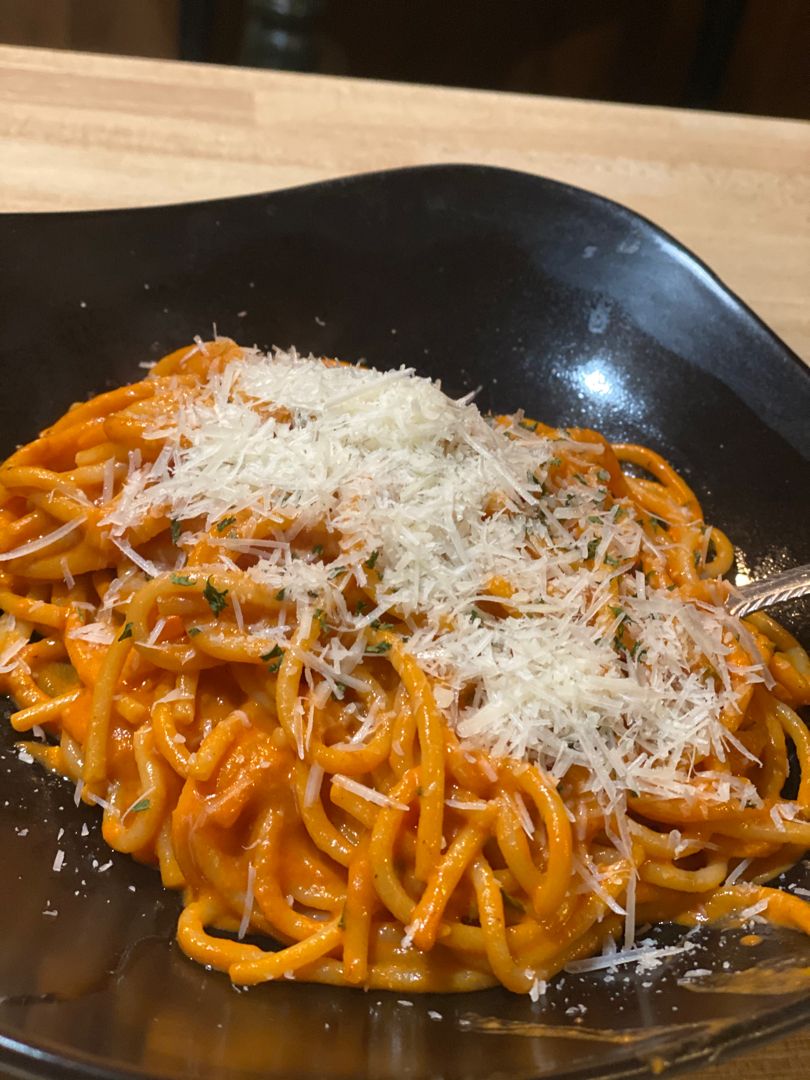
Pasta with Tomato Cream Sauce

by Rebecca April 30, 2022
written by Rebecca

Prep Time: 10 mins | Cook Time: 20 mins | Total Time: 30 mins | Servings: 8

This pasta with tomato cream sauce is a must! It’s a family favorite that you can easily and quickly make any time. Serve this by itself or with bread or a simple side salad on the side for a simple, yet delicious meal that your entire family will ask for over and over again!

Ingredients

2 tbsp olive oil

2 tbsp butter

4 cloves garlic, minced

1/2 c. onion, minced

1 c. heavy cream

2 15-ounces cans of tomato sauce

1/2 c. grated Parmesan, plus extra for garnish

1 lb linguine (or your preferred pasta)

salt and pepper to taste

How to make Pasta with Tomato Cream Sauce

Step 1: In a hot large skillet, add olive oil and butter. Melt the butter over medium heat. Once the butter has melted, add the onion and cook for about 2 to 3 minutes until translucent. Next, add the garlic and cook for an additional 1 to 2 minutes until aromatic.

Step 2: To the skillet, pour in the tomato sauce. Let it simmer for approximately 20 minutes until thickened.

Step 3: In the meantime, cook the pasta following the package directions in a large pot of salted boiling water until al dente. Drain when done and reserve about 2 c of pasta water.

Step 4: To the tomato cream sauce, add half c. Parmesan cheese. Add the pasta and toss to coat. Then, drizzle over around 1/4 c of the reserved pasta water. Let everything simmer for about 1 to 2 minutes. If needed, add more pasta water until you reached your preferred consistency.

Step 5: Serve the pasta with tomato cream sauce right away with more grated Parmesan. Enjoy the pasta with a simple side salad or bread.

Tips:

For this recipe, you are welcome to use any pasta varieties (Penne, bow tie, wagon wheels, etc.).

If preferred, you can add cooked chicken or sausage to the pasta.

Nutrition Facts:

Amount Per Serving: Calories 389, Calories from Fat 171, Fat 19g29%, Saturated Fat 10g50%, Cholesterol 52mg17%, Sodium 141mg6%, Potassium 175mg5%, Carbohydrates 44g15%, Fiber 2g8%, Sugar 2g2%, Protein 10g20%, Vitamin A 575IU12%, Vitamin C 1.4 mg2%, Calcium 110mg11%, Iron 0.8 mg4%

Pasta with Tomato Cream Sauce

Rebecca Prep Time: 10 mins | Cook Time: 20 mins | Total Time: 30 mins | Servings: 8 This pasta with tomato cream sauce is a must! It’s a family favorite… General Recipes Pasta with Tomato Cream Sauce European Print This
Serves: 8 Prep Time: 10 mins Cooking Time: 20 mins 20 mins
Nutrition facts: 389 calories 19 fat
Rating: 5.0/5
( 1 voted )

Ingredients

  • 2 tbsp olive oil
  • 2 tbsp butter
  • 4 cloves garlic, minced
  • 1/2 c. onion, minced
  • 1 c. heavy cream
  • 2 15-ounces cans of tomato sauce
  • 1/2 c. grated Parmesan, plus extra for garnish
  • 1 lb linguine (or your preferred pasta)
  • salt and pepper to taste

Instructions

Step 1: In a hot large skillet, add olive oil and butter. Melt the butter over medium heat. Once the butter has melted, add the onion and cook for about 2 to 3 minutes until translucent. Next, add the garlic and cook for an additional 1 to 2 minutes until aromatic.

Step 2: To the skillet, pour in the tomato sauce. Let it simmer for approximately 20 minutes until thickened.

Step 3: In the meantime, cook the pasta following the package directions in a large pot of salted boiling water until al dente. Drain when done and reserve about 2 c of pasta water.

Step 4: To the tomato cream sauce, add half c. Parmesan cheese. Add the pasta and toss to coat. Then, drizzle over around 1/4 c of the reserved pasta water. Let everything simmer for about 1 to 2 minutes. If needed, add more pasta water until you reached your preferred consistency.

Step 5: Serve the pasta with tomato cream sauce right away with more grated Parmesan. Enjoy the pasta with a simple side salad or bread.

Notes

For this recipe, you are welcome to use any pasta varieties (Penne, bow tie, wagon wheels, etc.). If preferred, you can add cooked chicken or sausage to the pasta.

April 30, 2022 0 comment
0 FacebookTwitterPinterestEmail
General Recipes

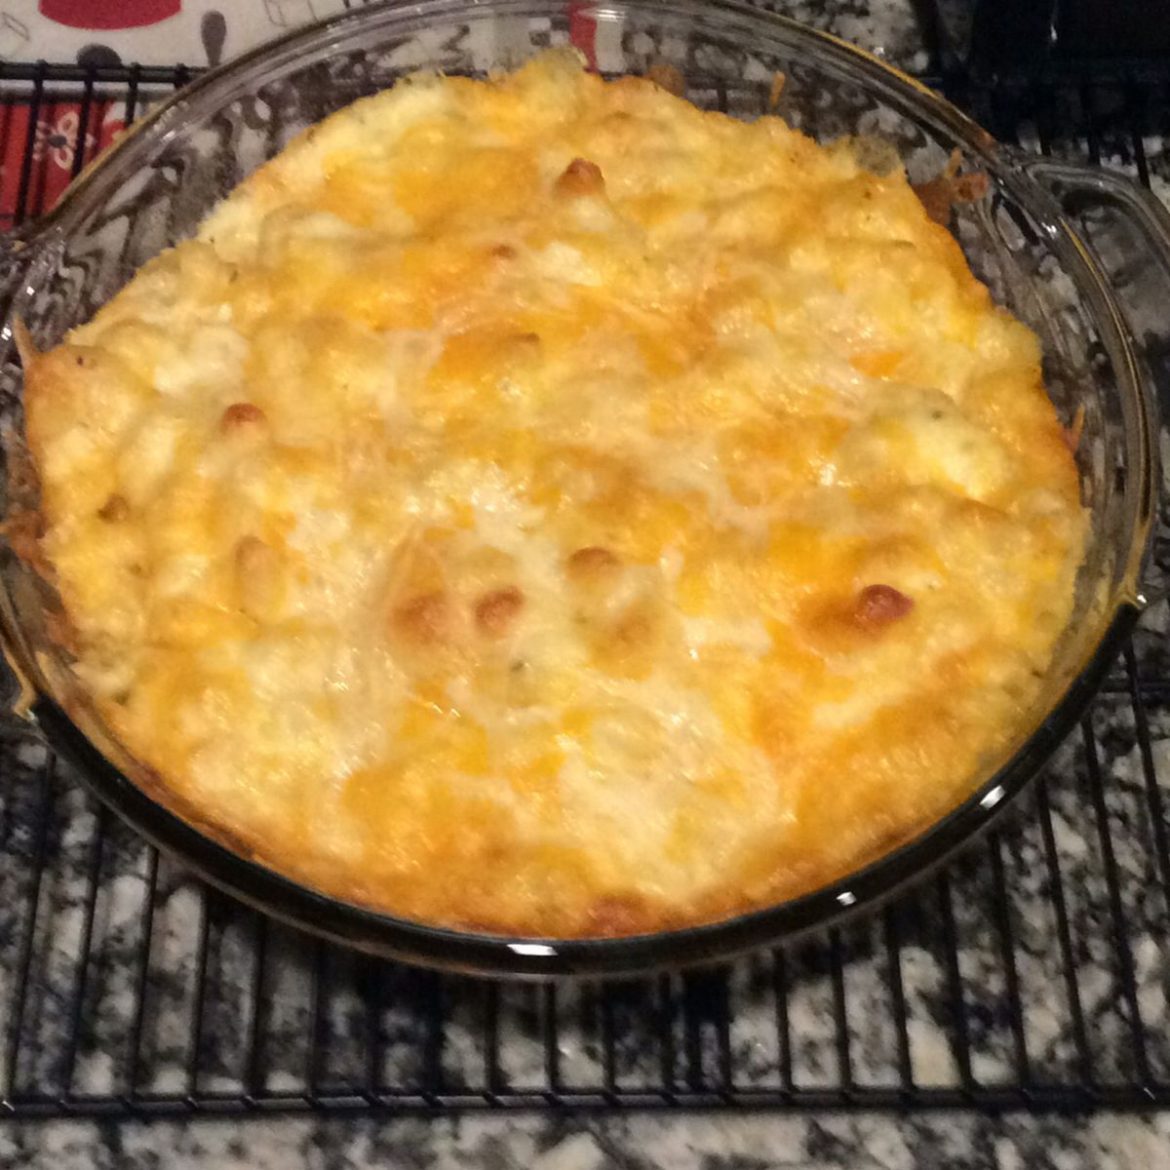
Creamy Homemade Baked Mac and Cheese

by Rebecca April 30, 2022
written by Rebecca

Prep Time: 20 mins | Cook Time: 15 mins | Total Time: 35 mins | Servings: 8

Comforting and the perfect meal for every occasion and all ages. This amazing creamy homemade baked Mac and cheese is a gem!

Ingredients

1/2 c. unsalted butter

1 pound dried elbow pasta

1/2 c. all-purpose flour

2 1/2 c. half and half

1 1/2 c. whole milk

2 c. shredded Gruyere cheese, divided (measured after shredding)

4 c. shredded medium sharp cheddar cheese, divided (measured after shredding)

1/4 teaspoon Paprika

1/2 tablespoon salt

1/2 teaspoon black pepper

How to make Creamy Homemade Baked Mac and Cheese

Step 1: Prepare the oven. Preheat it to 325 degrees F. Ready a 3-quart (9 x 13-inch) baking dish. Grease and set aside.

Step 2: Cook the dried pasta in a large pot of salted boiling water a minute shy of what the package directs. Drain when done and to keep the pasta from sticking, drizzle a little bit of olive oil.

Step 3: In the meantime, shred the Gruyere and medium sharp cheddar cheese. Mix well and separate into three piles (about 3 c for the sauce, 1 1/2 c for the inner layer, and another 1 1/2 c for the topping).

Step 4: In a large saucepan, melt the butter over medium heat. Sprinkle the flour over the melted butter and whisk well until you have a mixture that resembles very wet sand. Cook for about a minute, stirring occasionally. Then, gradually pour in around 2 c of the milk/half&half while constantly stirring until smooth. While still stirring, slowly pour in the rest of the milk/half&half until well mixed and smooth. Heat further while stirring very often over medium heat until you get a very thick consistency.

Step 5: Take the pan off the heat and stir in the spices and 1 1/2 c of cheese, stirring constantly to melt the cheese. Then, whisk in another 1 1/2 c of cheese until well melted and smooth.

Step 6: Place the drained pasta and cheese sauce in a large mixing bowl. Toss until well combined.

Step 7: Into the prepared baking sheet, pour half of the pasta mixture and top with 1 1/2 c of the shredded cheeses. Over the cheeses, add the rest of the pasta mixture. Lastly, sprinkle the final 1 1/2 c of cheese.

Step 8: Place in the preheated oven and bake for about 15 minutes or until the cheese is bubbly and slightly golden brown.

Notes:

To make ahead:

Prepare as instructed, transfer to a baking dish, and let the unbaked Mac and cheese cool fully. Then, tightly tent with foil and keep in the fridge for up to 1 to 2 days.

Remove from the fridge and let the dish rest on the counter for about 30 minutes before baking for about 25 to 35 minutes at 325 degrees F until hot and bubbly.

FIVE CHEESE VARIANCE (you can swap the amount of cheese with the following):

2 c. shredded cheddar cheese

1 c. shredded Colby cheese

1 c. shredded Muenster cheese

1 1/2 c. shredded Gruyere cheese

1/2 c. shredded mozzarella cheese

CRUNCHIER TOPPING AND FIRMER CONSISTENCY:

Ready the recipe as instructed and bake for about 20 to 30 minutes at 350 or 375 degrees F. At the end of baking, set your oven to broil for about 2 to 3 minutes until the dish is crunchy and golden brown.

Creamy Homemade Baked Mac and Cheese

Rebecca Prep Time: 20 mins | Cook Time: 15 mins | Total Time: 35 mins | Servings: 8 Comforting and the perfect meal for every occasion and all ages. This amazing… General Recipes Creamy Homemade Baked Mac and Cheese European Print This
Serves: 8 Prep Time: 20 mins Cooking Time: 15 mins 15 mins
Nutrition facts: 200 calories 20 grams fat
Rating: 5.0/5
( 1 voted )

Ingredients

  • 1/2 c. unsalted butter
  • 1 pound dried elbow pasta
  • 1/2 c. all-purpose flour
  • 2 1/2 c. half and half
  • 1 1/2 c. whole milk
  • 2 c. shredded Gruyere cheese, divided (measured after shredding)
  • 4 c. shredded medium sharp cheddar cheese, divided (measured after shredding)
  • 1/4 teaspoon Paprika
  • 1/2 tablespoon salt
  • 1/2 teaspoon black pepper

Instructions

Step 1: Prepare the oven. Preheat it to 325 degrees F. Ready a 3-quart (9 x 13-inch) baking dish. Grease and set aside.

Step 2: Cook the dried pasta in a large pot of salted boiling water a minute shy of what the package directs. Drain when done and to keep the pasta from sticking, drizzle a little bit of olive oil.

Step 3: In the meantime, shred the Gruyere and medium sharp cheddar cheese. Mix well and separate into three piles (about 3 c for the sauce, 1 1/2 c for the inner layer, and another 1 1/2 c for the topping).

Step 4: In a large saucepan, melt the butter over medium heat. Sprinkle the flour over the melted butter and whisk well until you have a mixture that resembles very wet sand. Cook for about a minute, stirring occasionally. Then, gradually pour in around 2 c of the milk/half&half while constantly stirring until smooth. While still stirring, slowly pour in the rest of the milk/half&half until well mixed and smooth. Heat further while stirring very often over medium heat until you get a very thick consistency.

Step 5: Take the pan off the heat and stir in the spices and 1 1/2 c of cheese, stirring constantly to melt the cheese. Then, whisk in another 1 1/2 c of cheese until well melted and smooth.

Step 6: Place the drained pasta and cheese sauce in a large mixing bowl. Toss until well combined.

Step 7: Into the prepared baking sheet, pour half of the pasta mixture and top with 1 1/2 c of the shredded cheeses. Over the cheeses, add the rest of the pasta mixture. Lastly, sprinkle the final 1 1/2 c of cheese.

Step 8: Place in the preheated oven and bake for about 15 minutes or until the cheese is bubbly and slightly golden brown.

Notes

To make ahead: Prepare as instructed, transfer to a baking dish, and let the unbaked Mac and cheese cool fully. Then, tightly tent with foil and keep in the fridge for up to 1 to 2 days. Remove from the fridge and let the dish rest on the counter for about 30 minutes before baking for about 25 to 35 minutes at 325 degrees F until hot and bubbly. FIVE CHEESE VARIANCE (you can swap the amount of cheese with the following): 2 c. shredded cheddar cheese 1 c. shredded Colby cheese 1 c. shredded Muenster cheese 1 1/2 c. shredded Gruyere cheese 1/2 c. shredded mozzarella cheese CRUNCHIER TOPPING AND FIRMER CONSISTENCY: Ready the recipe as instructed and bake for about 20 to 30 minutes at 350 or 375 degrees F. At the end of baking, set your oven to broil for about 2 to 3 minutes until the dish is crunchy and golden brown.

April 30, 2022 0 comment
0 FacebookTwitterPinterestEmail
General Recipes

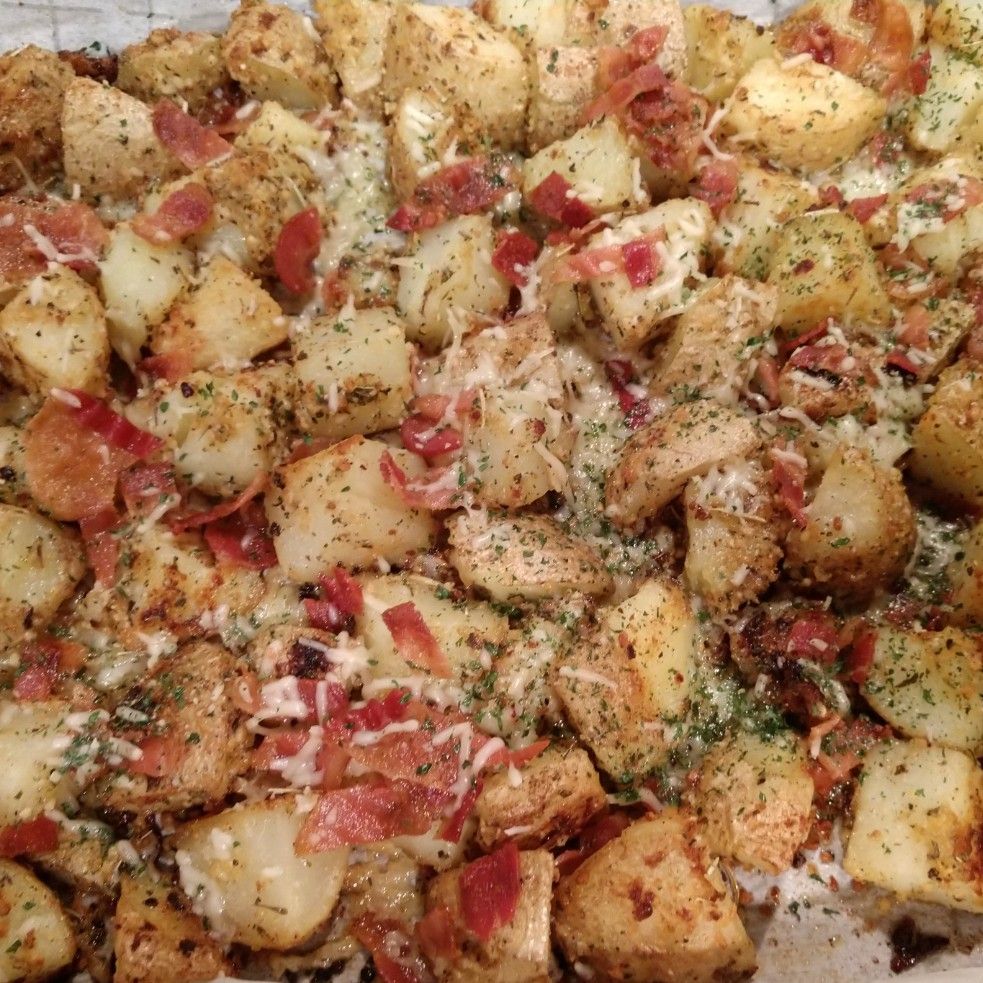
Roasted Garlic Butter Parmesan Potatoes

by Rebecca April 30, 2022
written by Rebecca

PREP TIME: 10 MINS | COOK TIME: 25 MINS | YIELD: 4 servings

If you are looking for the perfect side dish to pair with any meal, then you are in the right place. These crispy roasted garlic butter Parmesan potatoes are your best option. Incredibly easy to make using simple ingredients and ready in no time. I’m pretty sure everyone will be captivated with these crispy, fluffy, and baked to golden brown perfection roasted potatoes!

INGREDIENTS

1/4 c. (60ml) olive oil

3 lbs (1.5 kg) baby red potatoes, washed and quartered

3/4 c. fresh grated Parmesan cheese

6 large cloves of garlic, finely chopped or minced

1 tbsp Italian seasoning

1/2 c. unsalted butter

Salt and fresh cracked black pepper

1/2 c. crispy bacon bits (optional)

Fresh chopped parsley, for garnish

How to make Roasted Garlic Butter, Parmesan Potatoes

Step 1: Prepare the oven. Preheat it to 400 degrees F or 200 degrees C. Using a nonstick spray or olive oil, grease a large baking sheet. Set aside.

Step 2: In boiling water, parboil the baby red potatoes for about 5 to 8 minutes.

Step 3: Place 1/4 cup of olive oil, garlic, salt, herbs, pepper, and Parmesan cheese in a large mixing bowl. Mix well until blended. If the Parmesan cheese has absorbed most of the oil, you can add a little bit more oil. Add the parboiled potatoes and toss well to coat evenly.

Step 4: Onto the prepared baking sheet, arrange the coated potatoes in a single layer, cut-side-down. Place on the bottom rack of the preheated oven and bake for about 25 minutes, flipping the potatoes using tongs or spatula after 15 minutes. Continue baking the potatoes until browned and the edges is crisp.

Step 5: While the potatoes are baking, gently melt the butter in the microwave. Stir in the fresh chopped parsley. Drizzle this over the roasted potatoes and top with some bacon bits. Toss well and serve the roasted potatoes right away with the garlic butter Parmesan. Enjoy!

Nutrition Facts:

Energy 580.12 cal, Fat 32.1 g, Protein 15.6 g, Carbs 60.12 g, Saturated Fat 14.1 g, Polyunsat Fat 2.68 g, Monounsat Fat 13.01 g, Sugar 4.65 g, Cholesterol 61.5 mg, Sodium 643.94 mg, Potassium 1634.37 mg, Fiber 5.93 g

Roasted Garlic Butter Parmesan Potatoes

Rebecca PREP TIME: 10 MINS | COOK TIME: 25 MINS | YIELD: 4 servings If you are looking for the perfect side dish to pair with any meal, then you are… General Recipes Roasted Garlic Butter Parmesan Potatoes European Print This
Serves: 4 Prep Time: 10 mins Cooking Time: 25 mins 25 mins
Nutrition facts: 580.12 calories 32.1 fat
Rating: 5.0/5
( 1 voted )

Ingredients

  • 1/4 c. (60ml) olive oil
  • 3 lbs (1.5 kg) baby red potatoes, washed and quartered
  • 3/4 c. fresh grated Parmesan cheese
  • 6 large cloves of garlic, finely chopped or minced
  • 1 tbsp Italian seasoning
  • 1/2 c. unsalted butter
  • Salt and fresh cracked black pepper
  • 1/2 c. crispy bacon bits (optional)
  • Fresh chopped parsley, for garnish

Instructions

Step 1: Prepare the oven. Preheat it to 400 degrees F or 200 degrees C. Using a nonstick spray or olive oil, grease a large baking sheet. Set aside.

Step 2: In boiling water, parboil the baby red potatoes for about 5 to 8 minutes.

Step 3: Place 1/4 cup of olive oil, garlic, salt, herbs, pepper, and Parmesan cheese in a large mixing bowl. Mix well until blended. If the Parmesan cheese has absorbed most of the oil, you can add a little bit more oil. Add the parboiled potatoes and toss well to coat evenly.

Step 4: Onto the prepared baking sheet, arrange the coated potatoes in a single layer, cut-side-down. Place on the bottom rack of the preheated oven and bake for about 25 minutes, flipping the potatoes using tongs or spatula after 15 minutes. Continue baking the potatoes until browned and the edges is crisp.

Step 5: While the potatoes are baking, gently melt the butter in the microwave. Stir in the fresh chopped parsley. Drizzle this over the roasted potatoes and top with some bacon bits. Toss well and serve the roasted potatoes right away with the garlic butter Parmesan. Enjoy!

April 30, 2022 0 comment
0 FacebookTwitterPinterestEmail
General Recipes

Creamy Garlic Pesto Chicken

by Rebecca April 29, 2022
written by Rebecca

PREP TIME: 15 MINS | COOK TIME: 20 MINS | YIELD: 4 servings

I love this easy and delicious creamy garlic pesto chicken. It’s incredibly easy to whip up and ready in no time. Such an amazing weeknight meal, excellent over pasta, rice, noodles, zucchini, or bulgur.

INGREDIENTS

3 bell peppers (1 red, 1/2 yellow, and 1/2 green)

3-4 chicken breasts, boneless, skinless

1/2 tsp Italian seasoning

1/2 red onion

1/4 tsp red pepper flakes

3 garlic cloves, minced

1/2 c. basil pesto

1/2 c. chicken stock

1/2 c. heavy whipping cream

1/2 c. sun-dried tomatoes, drained of most oil, chopped (keep the drained oil for cooking)

Parmesan, for garnish

Chopped fresh basil, for garnish

Salt and fresh cracked pepper

How to make Creamy Garlic Pesto Chicken

Step 1: In a large nonstick skillet, heat 1 tbsp of drained tomato oil with Italian seasoning and crushed chili pepper. Then, add the chicken breasts and cook for about 4 to 5 minutes per side or until cooked through. Decrease the heat once the chicken begins to brown too much. Set the chicken aside when done.

Step 2: In a mixing cup or bowl, place the basil pesto, cream, and chicken stock. Mix well until well blended. Set the sauce aside.

Step 3: Place the skillet back to the heat and add a bit more oil from the sun-dried tomato jar. Then, stir in the onion, garlic, and sun-dried tomato. Cook for about 1 minute over medium-high heat or until just aromatic. Next, add the bell peppers and cook further until the bell peppers are slightly cooked but still crisp.

Step 4: To the skillet, add the pesto sauce and bring to a simmer. Into strips, slice the chicken breasts and place them back in the skillet. Cook for another 2 to 3 minutes or until heated. Before serving, garnish with Parmesan and basil. Enjoy the creamy pesto chicken over pasta, rice, noodles, zucchini, or bulgur right away.

Nutrition Facts:

Energy 610.51 kcal, Fat 32.43 g, Protein 67.98 g, Carbs 11.48 g, Saturated Fat 10.68 g, Polyunsat Fat 6.02 g, Monounsat Fat 12.59 g, Sugars 2.17 g, Cholesterol 199.73 mg, Sodium 360 mg, Potassium 1190.69 mg, Fiber 6.38 g

Creamy Garlic Pesto Chicken

Rebecca PREP TIME: 15 MINS | COOK TIME: 20 MINS | YIELD: 4 servings I love this easy and delicious creamy garlic pesto chicken. It’s incredibly easy to whip up and… General Recipes Creamy Garlic Pesto Chicken European Print This
Serves: 4 Prep Time: 15 mins Cooking Time: 20 mins 20 mins
Nutrition facts: 610.51 calories 32.43 fat
Rating: 5.0/5
( 1 voted )

Ingredients

  • 3 bell peppers (1 red, 1/2 yellow, and 1/2 green)
  • 3-4 chicken breasts, boneless, skinless
  • 1/2 tsp Italian seasoning
  • 1/2 red onion
  • 1/4 tsp red pepper flakes
  • 3 garlic cloves, minced
  • 1/2 c. basil pesto
  • 1/2 c. chicken stock
  • 1/2 c. heavy whipping cream
  • 1/2 c. sun-dried tomatoes, drained of most oil, chopped (keep the drained oil for cooking)
  • Parmesan, for garnish
  • Chopped fresh basil, for garnish
  • Salt and fresh cracked pepper

Instructions

Step 1: In a large nonstick skillet, heat 1 tbsp of drained tomato oil with Italian seasoning and crushed chili pepper. Then, add the chicken breasts and cook for about 4 to 5 minutes per side or until cooked through. Decrease the heat once the chicken begins to brown too much. Set the chicken aside when done.

Step 2: In a mixing cup or bowl, place the basil pesto, cream, and chicken stock. Mix well until well blended. Set the sauce aside.

Step 3: Place the skillet back to the heat and add a bit more oil from the sun-dried tomato jar. Then, stir in the onion, garlic, and sun-dried tomato. Cook for about 1 minute over medium-high heat or until just aromatic. Next, add the bell peppers and cook further until the bell peppers are slightly cooked but still crisp.

Step 4: To the skillet, add the pesto sauce and bring to a simmer. Into strips, slice the chicken breasts and place them back in the skillet. Cook for another 2 to 3 minutes or until heated. Before serving, garnish with Parmesan and basil. Enjoy the creamy pesto chicken over pasta, rice, noodles, zucchini, or bulgur right away.

April 29, 2022 0 comment
0 FacebookTwitterPinterestEmail
General Recipes

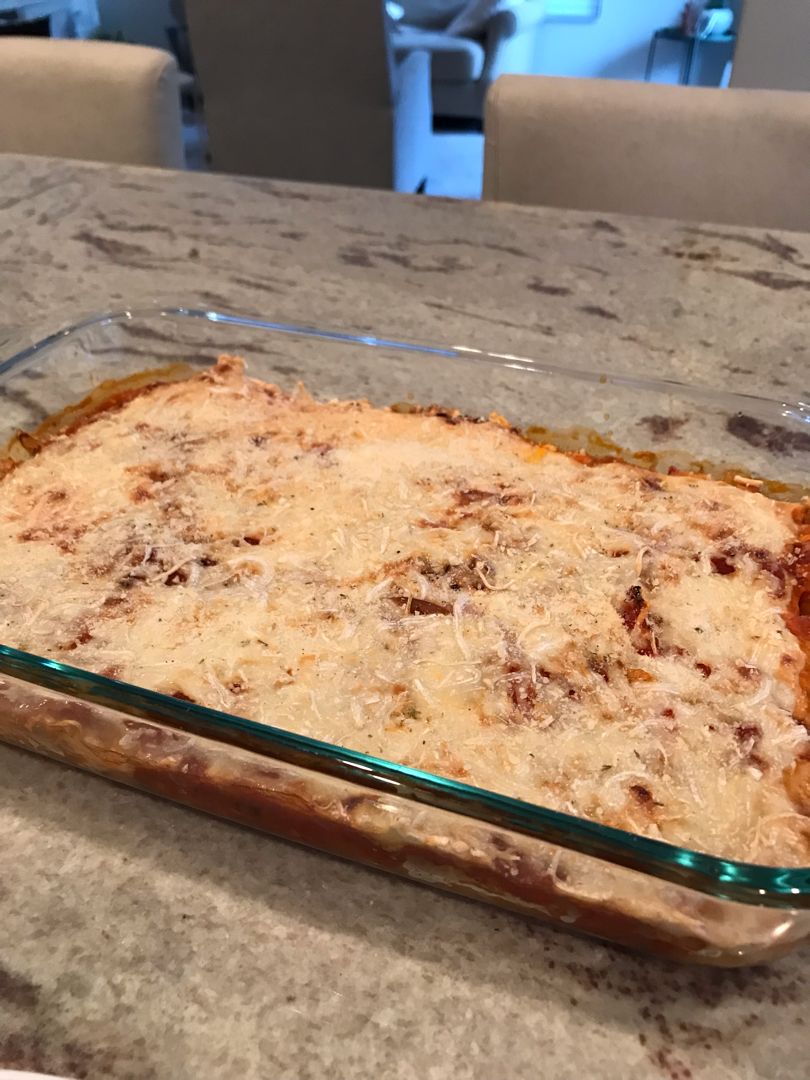
SPAGHETTI SQUASH PIZZA CASSEROLE

by Rebecca April 29, 2022
written by Rebecca

If you are looking for another kid-friendly meal that is not only delicious, but grain-free and low-carb, then you have to try this spaghetti squash pizza casserole right away! All you need are three main ingredients and some optional add-ins like veggies, cheese, Italian seasoning, and more. This casserole is incredibly easy to throw together and ready in no time, making this perfect for even the busiest days.

My kids never like squash (I have the fussiest eaters!). But they always make an exception for this mouthwatering spaghetti squash pizza casserole. They fell in love with this the first time they tasted it. This has been part of our favorite menu rotation for years!

For the squash, I use my Instant Pot to prep it. You can also do this in the oven by slicing the squash in half lengthwise, removing the seeds, and baking for 45 to 50 minutes at 400 degrees, up-side-down. Once done, scrape the squash noodles. Although, I prefer doing this in my Instant Pot because it is easier.

INGREDIENTS

mozzarella cheese

pasta sauce (use whatever kind you prefer)

pre-cooked spaghetti squash (I use Instant Pot)

OPTIONAL ADD-INS:

sliced olives

pre-cooked meat

chopped veggies

chopped mushrooms

Parmesan cheese

Italian seasoning

HOW TO MAKE SPAGHETTI SQUASH PIZZA CASSEROLE

Step 1: Prepare the oven. Preheat it to 350 degrees.

Step 2: In a 9 x 9-inch baking dish, place the pre-cooked squash. You can also use a bigger baking dish to accommodate enough pre-cooked squash. Then, stir in the pasta sauce and the optional add-ins (if desired). On top, sprinkle the cheese.

Step 3: Place in the preheated oven and bake for about 30 minutes or until the cheese has melted and bubbly and the squash is completely heated. You can turn the oven to broil for about 3 to 5 minutes if you want the cheese to be nice and crispy brown.

SPAGHETTI SQUASH PIZZA CASSEROLE

Rebecca If you are looking for another kid-friendly meal that is not only delicious, but grain-free and low-carb, then you have to try this spaghetti squash pizza casserole right away! All… General Recipes SPAGHETTI SQUASH PIZZA CASSEROLE European Print This
Nutrition facts: 200 calories 20 grams fat
Rating: 5.0/5
( 1 voted )

Ingredients

  • mozzarella cheese
  • pasta sauce (use whatever kind you prefer)
  • pre-cooked spaghetti squash (I use Instant Pot)
  • OPTIONAL ADD-INS:
  • sliced olives
  • pre-cooked meat
  • chopped veggies
  • chopped mushrooms
  • Parmesan cheese
  • Italian seasoning

Instructions

Step 1: Prepare the oven. Preheat it to 350 degrees.

Step 2: In a 9 x 9-inch baking dish, place the pre-cooked squash. You can also use a bigger baking dish to accommodate enough pre-cooked squash. Then, stir in the pasta sauce and the optional add-ins (if desired). On top, sprinkle the cheese.

Step 3: Place in the preheated oven and bake for about 30 minutes or until the cheese has melted and bubbly and the squash is completely heated. You can turn the oven to broil for about 3 to 5 minutes if you want the cheese to be nice and crispy brown.

April 29, 2022 0 comment
0 FacebookTwitterPinterestEmail
General Recipes

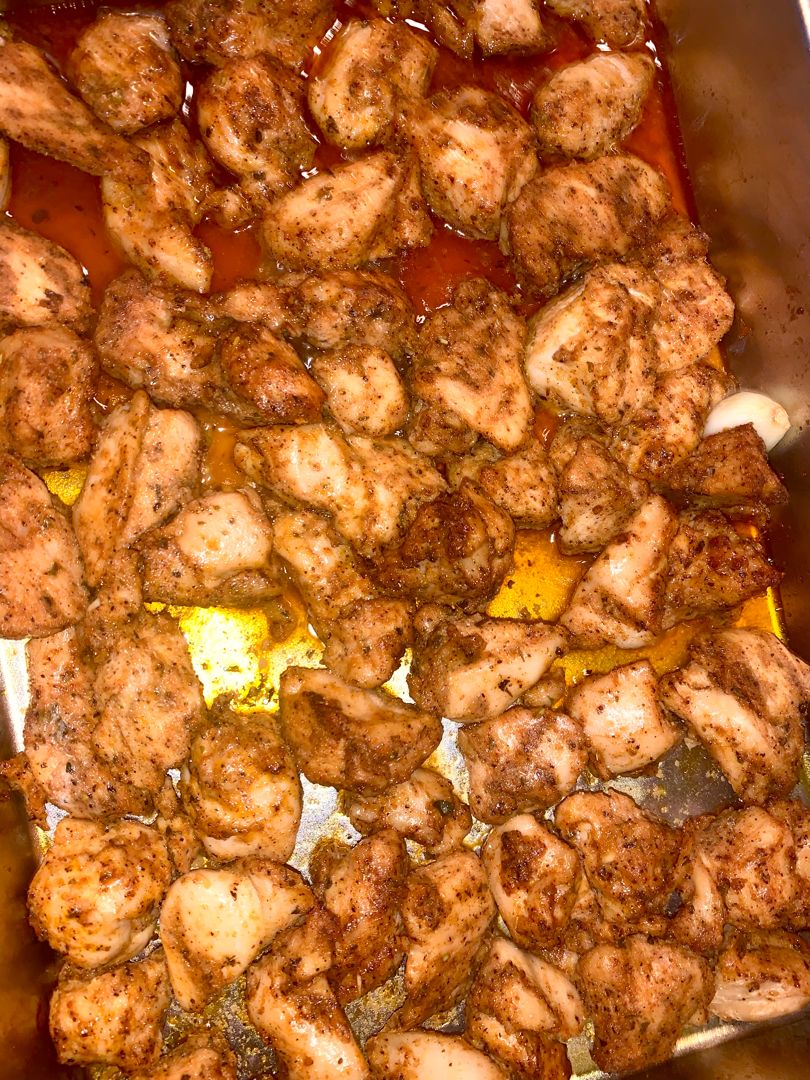
EASY OVEN BAKED CHICKEN BITES

by Rebecca April 29, 2022
written by Rebecca

PREP TIME: 10 MINS | COOK TIME: 15 MINS | YIELD: 4 servings

Small bites and perfectly seasoned, tender, and juicy chicken that are baked to crisp, golden-brown perfection with the most amazing garlic butter sauce. Super easy and quick to make using simple pantry ingredients. Enjoy these delicious oven-baked chicken bites over cauliflower rice, and do not forget to spoon the pan sauces on top.

INGREDIENTS

2 tbsp unsalted butter, diced

1 tbsp olive oil

1 lb (450 grams) chicken breasts, skinless and boneless

1/2 tsp paprika

1/4 tsp fresh ground pepper

1/2 tsp garlic powder

1/8 tsp cayenne pepper

1/2 tsp onion powder

1 tsp Italian seasoning

Fresh chopped parsley, for garnish

1 tsp salt

1 tsp instant chicken stock, optional (lower amount of salt if using)

HOW TO MAKE EASY OVEN BAKED CHICKEN BITES

Step 1: Prepare the oven. Preheat it to 420 degrees F or 220 degrees C conventional. Meanwhile, slice the chicken 1-inch bites.

Step 2: Place all seasonings (salt, pepper, paprika, cayenne pepper, garlic powder, onion powder, chicken stock, and Italian seasoning) in a small bowl. Mix well.

Step 3: In a baking dish, arrange the chicken and sprinkle over the seasoning mix. Drizzle the chicken with 1 tbsp olive oil, then toss the chicken cubes to coat. Lastly, dot the chicken with butter cubes.

Step 4: Place in the preheated oven and bake for about 16 to 18 minutes or until the chicken bites are golden with crisp edges and the internal temperature of the chicken reads 165 degrees F or 75 degrees C. Using a spoon, stir the chicken bites after 8 to 10 minutes for even baking. Set the oven to broil (high) if desired in the last 2 minutes, or bake for crispier chicken bites.

Step 5: When done, take the baking dish out of the oven and sprinkle over some fresh chopped parsley. Allow them to rest for about 5 minutes, then serve the chicken bites over cauliflower rice. Drizzle over some of the pan juices and a slice of lemon. Enjoy!

Nutrition Facts:

Energy 290.74 kcal, Fat 20.41 g, Protein 23.96 g, Carbs 2.06 g, Saturated Fat 7.33 g, Polyunsat Fat 2.91 g, Monounsat Fat 8.82 g, Sugars 0.24 g, Cholesterol 88.16 mg, Sodium 567.22 mg, Potassium 285.35 mg, Fiber 0.45 g

EASY OVEN BAKED CHICKEN BITES

Rebecca PREP TIME: 10 MINS | COOK TIME: 15 MINS | YIELD: 4 servings Small bites and perfectly seasoned, tender, and juicy chicken that are baked to crisp, golden-brown perfection with… General Recipes EASY OVEN BAKED CHICKEN BITES European Print This
Serves: 4 Prep Time: 10 mins Cooking Time: 15 mins 15 mins
Nutrition facts: 290.74 calories 20.41 fat
Rating: 5.0/5
( 1 voted )

Ingredients

  • 2 tbsp unsalted butter, diced
  • 1 tbsp olive oil
  • 1 lb (450 grams) chicken breasts, skinless and boneless
  • 1/2 tsp paprika
  • 1/4 tsp fresh ground pepper
  • 1/2 tsp garlic powder
  • 1/8 tsp cayenne pepper
  • 1/2 tsp onion powder
  • 1 tsp Italian seasoning
  • Fresh chopped parsley, for garnish
  • 1 tsp salt
  • 1 tsp instant chicken stock, optional (lower amount of salt if using)

Instructions

Step 1: Prepare the oven. Preheat it to 420 degrees F or 220 degrees C conventional. Meanwhile, slice the chicken 1-inch bites.

Step 2: Place all seasonings (salt, pepper, paprika, cayenne pepper, garlic powder, onion powder, chicken stock, and Italian seasoning) in a small bowl. Mix well.

Step 3: In a baking dish, arrange the chicken and sprinkle over the seasoning mix. Drizzle the chicken with 1 tbsp olive oil, then toss the chicken cubes to coat. Lastly, dot the chicken with butter cubes.

Step 4: Place in the preheated oven and bake for about 16 to 18 minutes or until the chicken bites are golden with crisp edges and the internal temperature of the chicken reads 165 degrees F or 75 degrees C. Using a spoon, stir the chicken bites after 8 to 10 minutes for even baking. Set the oven to broil (high) if desired in the last 2 minutes, or bake for crispier chicken bites.

Step 5: When done, take the baking dish out of the oven and sprinkle over some fresh chopped parsley. Allow them to rest for about 5 minutes, then serve the chicken bites over cauliflower rice. Drizzle over some of the pan juices and a slice of lemon. Enjoy!

April 29, 2022 0 comment
0 FacebookTwitterPinterestEmail
General Recipes

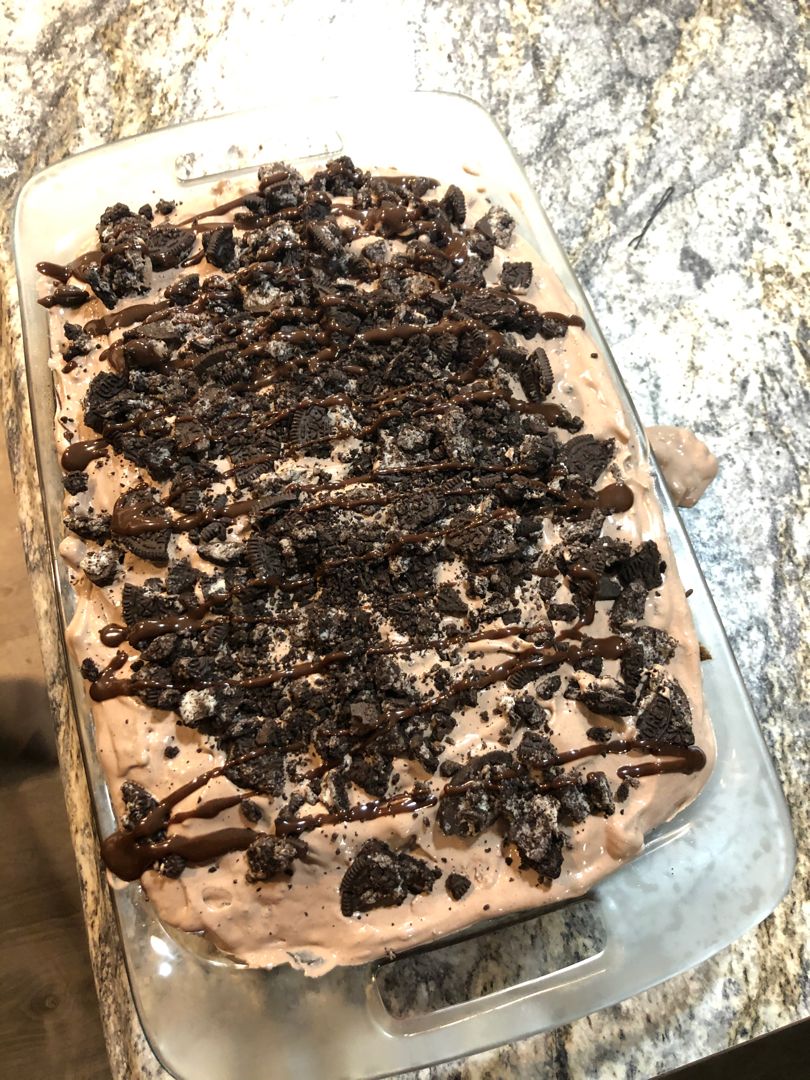
Oreo Dirt Pie

by Rebecca April 29, 2022
written by Rebecca

PREP TIME: 15 mins | COOK TIME: 28 mins | SET TIME: 20 mins | TOTAL TIME: 1 hour 3 mins | YIELD: 15

My kid is obsessed with this Oreo Dirt Pie! Everything she loves, she enjoys in a single dessert – Oreos, cake, pudding, and chocolate. Enjoy a slice with a big scoop of ice cream. It makes everything amazing!

Ingredients

1 Box Chocolate Fudge Cake Mix (use all ingredients from the box)

Topping:

1 ¾ cups Milk

12.8 ounces Hot Fudge

14.3 ounces Oreos

3.4 ounces Hersey’s Dark Chocolate Instant Pudding Mix

Dirt:

1 Cool Whip

1 ¾ cups Milk

Hot Fudge & Oreos (optional toppings)

3.4 ounces Hersey’s Dark Chocolate Instant Pudding Mix

How to make Oreo Dirt Pie

Step 1: Following the package directions, prepare the cake mix. Mix well until blended. Pour the batter into a 9 x 13-inch pan and bake as directed for about 22 to 28 minutes or until a toothpick inserted in the center of the cake comes out clean. Remove from the oven when done and let the cake cool for about 10 minutes.

Step 2: Using the end of a wooden spoon or another round object, poke the top of the cake while still warm.

Step 3: In the microwave, heat the jar of hot fudge for about 30 to 60 seconds until you can stir it. On top of the cake, pour the whole jar of the hot fudge sauce and let it absorb into the cake. Make sure to set aside a little for topping.

Step 4: To make the pudding layer, whisk a package of Instant dark chocolate pudding and 1 3/4 c of cold milk. Quickly pour this over the cake before the pudding sets. Keep the cake in the fridge for about 15 minutes for the pudding to set.

Step 5: In the cold milk, mix the other box of the Instant dark chocolate pudding. Let the pudding set in the fridge.

Step 6: Place 3/4 of the bag of Oreos in a large ziplock bag. Using a rolling pin, smash the Oreos into smaller pieces. To do this, you can also use other large, heavy objects.

Step 7: Mix the pudding (once set) in a container of Cool Whip until combined. Add the crushed Oreos and pudding mixture. Mix well and spread this on top of the cake.

Step 8: With the rest of the hot fudge and Oreos, top the cake. Slice and serve the cake cold. If you have any leftovers, simply keep them in the fridge.

Nutrition Facts:

Serving Size: 1 gram, Amount Per Serving: Calories 418, Total Fat 14g, Saturated Fat 4g, Unsaturated Fat 0g, Cholesterol 5mg, Sodium 653mg, Carbohydrates 69g, Fiber 2g, Sugars 42g, Protein 6g

Oreo Dirt Pie

Rebecca PREP TIME: 15 mins | COOK TIME: 28 mins | SET TIME: 20 mins | TOTAL TIME: 1 hour 3 mins | YIELD: 15 My kid is obsessed with this… General Recipes Oreo Dirt Pie European Print This
Serves: 15 Prep Time: 15 mins Cooking Time: 28 mins 28 mins
Nutrition facts: 418 calories 14 fat
Rating: 5.0/5
( 1 voted )

Ingredients

  • 1 Box Chocolate Fudge Cake Mix (use all ingredients from the box)
  • Topping:
  • 1 ¾ cups Milk
  • 12.8 ounces Hot Fudge
  • 14.3 ounces Oreos
  • 3.4 ounces Hersey’s Dark Chocolate Instant Pudding Mix
  • Dirt:
  • 1 Cool Whip
  • 1 ¾ cups Milk
  • Hot Fudge & Oreos (optional toppings)
  • 3.4 ounces Hersey’s Dark Chocolate Instant Pudding Mix

Instructions

Step 1: Following the package directions, prepare the cake mix. Mix well until blended. Pour the batter into a 9 x 13-inch pan and bake as directed for about 22 to 28 minutes or until a toothpick inserted in the center of the cake comes out clean. Remove from the oven when done and let the cake cool for about 10 minutes.

Step 2: Using the end of a wooden spoon or another round object, poke the top of the cake while still warm.

Step 3: In the microwave, heat the jar of hot fudge for about 30 to 60 seconds until you can stir it. On top of the cake, pour the whole jar of the hot fudge sauce and let it absorb into the cake. Make sure to set aside a little for topping.

Step 4: To make the pudding layer, whisk a package of Instant dark chocolate pudding and 1 3/4 c of cold milk. Quickly pour this over the cake before the pudding sets. Keep the cake in the fridge for about 15 minutes for the pudding to set.

Step 5: In the cold milk, mix the other box of the Instant dark chocolate pudding. Let the pudding set in the fridge.

Step 6: Place 3/4 of the bag of Oreos in a large ziplock bag. Using a rolling pin, smash the Oreos into smaller pieces. To do this, you can also use other large, heavy objects.

Step 7: Mix the pudding (once set) in a container of Cool Whip until combined. Add the crushed Oreos and pudding mixture. Mix well and spread this on top of the cake.

Step 8: With the rest of the hot fudge and Oreos, top the cake. Slice and serve the cake cold. If you have any leftovers, simply keep them in the fridge.

April 29, 2022 0 comment
0 FacebookTwitterPinterestEmail
General Recipes

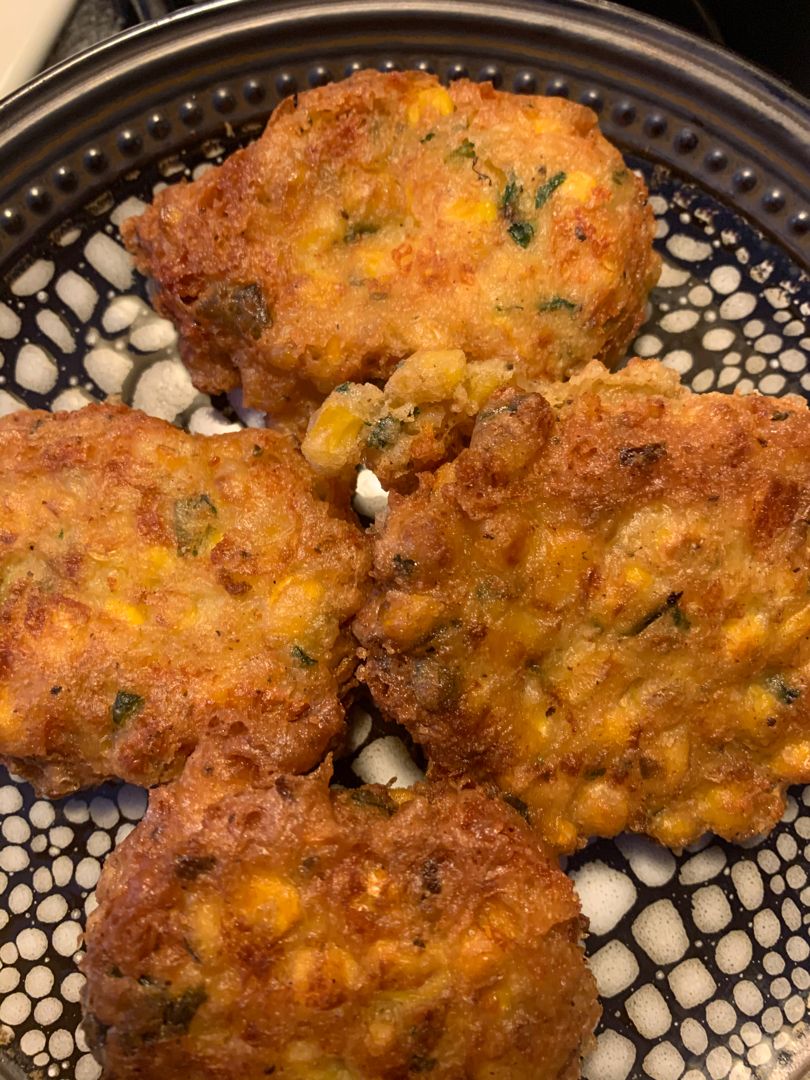
CHEESY CORN FRITTERS

by Rebecca April 29, 2022
written by Rebecca

Prep time: 10 mins | Cook time: 15 MINUTES | Total time: 25 mins | Servings: 12 FRITTERS

These fritters are loaded with fresh corn and cheese. A vegetable side dish that is packed with flavor that even your little ones will love! You can serve these delicious fritters as a light meal, too.

INGREDIENTS

2 large eggs, beaten

2 tablespoons extra virgin olive oil

3 c. corn kernels, fresh is best (you can use frozen or canned)

¼ c. green onion, chopped

¼ c. cilantro, chopped

juice from 1/2 a lime, 1 tbsp

1 teaspoon baking powder

1 c. all-purpose flour

¼ teaspoon chili powder

¼ c. milk

1½ c. Monterey Jack Cheese, shredded

1 jalapeno, deseeded, membranes removed, diced

½ teaspoon salt

¼ teaspoon ground black pepper

HOW TO MAKE CHEESY CORN FRITTERS

Step 1: In a large bowl, add the corn (you can use fresh corn and simply cut the kernels off the cob), diced green cilantro, green onion, and diced jalapeno. Then, squeeze in the lime juice from 1/2 of a lime.

Step 2: Add the flour to a small bowl along with the baking powder, salt, black pepper, and chili powder. Mix well until.

Step 3: Into the bowl with the corn, pour the dry ingredients and mix well until combined. Then, stir in the beaten eggs, milk, and cheese until you have a thick batter.

Step 4: In a hot pan over medium-high heat, drizzle the olive oil and swirl the pan to coat the bottom.

Step 5: Into the hot oil, place about 1/4 amount of the corn fritter batter (I use a scoop). Using a spatula, press the batter down, then press the sides to form a patty. Cook the patty for approximately 2 to 3 minutes until you see the edges beginning to turn golden. Using the same spatula, flip the patty and continue to cook the other side. On a tray lined with a paper towel, transfer the fritter once all sides are golden brown.

Step 6: If desired, sprinkle the fritters with more salt and pepper. Serve the cheesy corn fritters warm. Enjoy!

NOTES:

You can use canned corn. Simply strain the corn and dry the kernels using paper towels.

If using frozen corn, thaw, and pat dry with paper towels.

Place any leftovers in a sealed container and keep them in the fridge for up to 2 to 3 days.

Place the leftovers in a pan with a little bit of oil or butter and reheat.

Set the frozen fritters on the counter and bring them to room temperature for about an hour or thaw in the fridge overnight. In a small pan, reheat the fritters with a little bit of oil or butter.

NUTRITION FACTS:

Serving: 1fritter, calories: 159 kcal, carbohydrates: 16g, protein: 7g, fat: 8g, saturated fat: 3g, polyunsaturated fat: 1g, monounsaturated fat: 3g, trans fat: 1g, cholesterol: 40mg, sodium: 298mg, potassium: 108mg, fiber: 1g, sugar: 2g, vitamin a: 243iu, vitamin c: 3mg, calcium: 140mg, iron: 1mg

CHEESY CORN FRITTERS

Rebecca Prep time: 10 mins | Cook time: 15 MINUTES | Total time: 25 mins | Servings: 12 FRITTERS These fritters are loaded with fresh corn and cheese. A vegetable side… General Recipes CHEESY CORN FRITTERS European Print This
Serves: 12 Prep Time: 10 mins Cooking Time: 15 mins 15 mins
Nutrition facts: 159 calories 8 fat
Rating: 5.0/5
( 1 voted )

Ingredients

  • 2 large eggs, beaten
  • 2 tablespoons extra virgin olive oil
  • 3 c. corn kernels, fresh is best (you can use frozen or canned)
  • ¼ c. green onion, chopped
  • ¼ c. cilantro, chopped
  • juice from 1/2 a lime, 1 tbsp
  • 1 teaspoon baking powder
  • 1 c. all-purpose flour
  • ¼ teaspoon chili powder
  • ¼ c. milk
  • 1½ c. Monterey Jack Cheese, shredded
  • 1 jalapeno, deseeded, membranes removed, diced
  • ½ teaspoon salt
  • ¼ teaspoon ground black pepper

Instructions

Step 1: In a large bowl, add the corn (you can use fresh corn and simply cut the kernels off the cob), diced green cilantro, green onion, and diced jalapeno. Then, squeeze in the lime juice from 1/2 of a lime.

Step 2: Add the flour to a small bowl along with the baking powder, salt, black pepper, and chili powder. Mix well until.

Step 3: Into the bowl with the corn, pour the dry ingredients and mix well until combined. Then, stir in the beaten eggs, milk, and cheese until you have a thick batter.

Step 4: In a hot pan over medium-high heat, drizzle the olive oil and swirl the pan to coat the bottom.

Step 5: Into the hot oil, place about 1/4 amount of the corn fritter batter (I use a scoop). Using a spatula, press the batter down, then press the sides to form a patty. Cook the patty for approximately 2 to 3 minutes until you see the edges beginning to turn golden. Using the same spatula, flip the patty and continue to cook the other side. On a tray lined with a paper towel, transfer the fritter once all sides are golden brown.

Step 6: If desired, sprinkle the fritters with more salt and pepper. Serve the cheesy corn fritters warm. Enjoy!

Notes

You can use canned corn. Simply strain the corn and dry the kernels using paper towels. If using frozen corn, thaw, and pat dry with paper towels. Place any leftovers in a sealed container and keep them in the fridge for up to 2 to 3 days. Place the leftovers in a pan with a little bit of oil or butter and reheat. Set the frozen fritters on the counter and bring them to room temperature for about an hour or thaw in the fridge overnight. In a small pan, reheat the fritters with a little bit of oil or butter.

April 29, 2022 0 comment
0 FacebookTwitterPinterestEmail
Newer Posts
Older Posts

Popular Posts

  • 1

    Crispy Crunchy Parmesan Potatoes

    March 21, 2020
  • 2

    CROCK POT SMOTHERED PORK CHOPS

    March 21, 2020
  • Facebook
  • Twitter

@2019 - All Right Reserved.


Back To Top