Cook it once
  • Home
  • Privacy Policy
  • Recipes
    • KETO
    • LC
    • WW
  • Tips
  • Contact
Cook it once
  • Home
  • Privacy Policy
  • Recipes
    • KETO
    • LC
    • WW
  • Tips
  • Contact
Category:

General Recipes

General Recipes

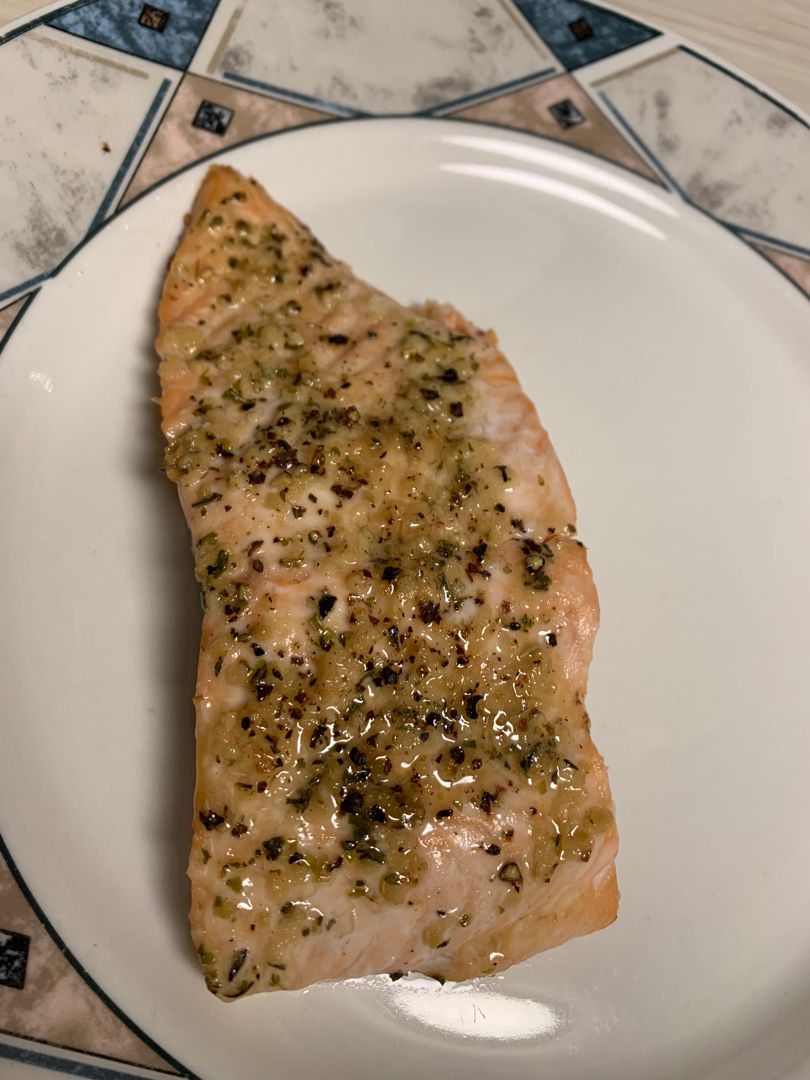
Garlic Butter Baked Salmon Recipe

by Rebecca May 7, 2022
written by Rebecca

Prep Time: 10 mins | Cook Time: 20 mins | Total Time: 30 mins | Servings: 4

Whenever I want an amazing fish dish, this garlic butter-baked salmon is my go-to. Perfectly baked salmon coated with garlic butter sauce. It’s a filling and delicious dish with broccoli florets excellent for an easy and quick weeknight meal!

Ingredients

SALMON AND VEGETABLES:

4 to 6 c. broccoli florets

4 (6 oz. each) salmon fillets

GARLIC BUTTER SAUCE:

6 tbsp unsalted butter, melted

4 cloves garlic, minced

1 tbsp light brown sugar

1/2 tsp dried rosemary

1/2 tsp dried thyme

1 lemon, halved, divided

1/2 tsp dried oregano

chopped fresh parsley, for garnish

salt and fresh ground pepper, to taste

How to make Garlic Butter Baked Salmon

Step 1: Prepare the oven. Preheat it to 400 degrees F. Using cooking spray, grease a sheet pan.

Step 2: On the prepared sheet pan, arrange the broccoli florets and salmon fillets. On each fillet, rub the minced garlic and set it aside.

Step 3: Place the melted butter, brown sugar, oregano, thyme, and rosemary in a mixing bowl. Mix well until combined. Pour this over the salmon and veggies.

Step 4: Squeeze half of the lemon juice over everything and season with salt and pepper.

Step 5: Bake the salmon and veggies in the preheated oven for about 15 minutes or until the fish flakes easily using a fork and the internal temperature reaches 145 degrees F.

Step 6: Take the sheet pan out of the oven and serve the garlic bitter baked salmon right away garnished with some parsley and lemon slices. Enjoy!

Notes:

TO STORE COOKED SALMON:

In an airtight container, place the cooked salmon and keep it in the fridge for up to 3 to 4 days.

Or freeze the cooked salmon for up to 4 months. Make sure to completely cool the salmon before placing them in covered airtight containers or heavy-duty freezer bags.

WW FREESTYLE POINTS: 8

Nutrition Facts:

Amount Per Serving: Calories 447, Calories from Fat 252, Fat 28g43%, Saturated Fat 12g60%, Cholesterol 138mg46%, Sodium 838mg35%, Potassium 1170mg33%, Carbohydrates 12g4%, Fiber 3g12%, Sugar 5g6%, Protein 37g74%, Vitamin A 1160IU23%, Vitamin C 96.4 mg117%, Calcium 85mg9%, Iron 2.5 mg14%

Garlic Butter Baked Salmon Recipe

Rebecca Prep Time: 10 mins | Cook Time: 20 mins | Total Time: 30 mins | Servings: 4 Whenever I want an amazing fish dish, this garlic butter-baked salmon is my… General Recipes Garlic Butter Baked Salmon Recipe European Print This
Serves: 4 Prep Time: 10 mins Cooking Time: 20 mins 20 mins
Nutrition facts: 447 calories 28 fat
Rating: 5.0/5
( 1 voted )

Ingredients

  • SALMON AND VEGETABLES:
  • 4 to 6 c. broccoli florets
  • 4 (6 oz. each) salmon fillets
  • GARLIC BUTTER SAUCE:
  • 6 tbsp unsalted butter, melted
  • 4 cloves garlic, minced
  • 1 tbsp light brown sugar
  • 1/2 tsp dried rosemary
  • 1/2 tsp dried thyme
  • 1 lemon, halved, divided
  • 1/2 tsp dried oregano
  • chopped fresh parsley, for garnish
  • salt and fresh ground pepper, to taste

Instructions

Step 1: Prepare the oven. Preheat it to 400 degrees F. Using cooking spray, grease a sheet pan.

Step 2: On the prepared sheet pan, arrange the broccoli florets and salmon fillets. On each fillet, rub the minced garlic and set it aside.

Step 3: Place the melted butter, brown sugar, oregano, thyme, and rosemary in a mixing bowl. Mix well until combined. Pour this over the salmon and veggies.

Step 4: Squeeze half of the lemon juice over everything and season with salt and pepper.

Step 5: Bake the salmon and veggies in the preheated oven for about 15 minutes or until the fish flakes easily using a fork and the internal temperature reaches 145 degrees F.

Step 6: Take the sheet pan out of the oven and serve the garlic bitter baked salmon right away garnished with some parsley and lemon slices. Enjoy!

Notes

TO STORE COOKED SALMON: In an airtight container, place the cooked salmon and keep it in the fridge for up to 3 to 4 days. Or freeze the cooked salmon for up to 4 months. Make sure to completely cool the salmon before placing them in covered airtight containers or heavy-duty freezer bags. WW FREESTYLE POINTS: 8
May 7, 2022 0 comment
0 FacebookTwitterPinterestEmail
General Recipes

Peach Tart

by Rebecca May 7, 2022
written by Rebecca

PREP TIME: 20 MINS | COOK TIME: 35 MINS | YIELD: one 11-inch tart; Serves 8

This peach tart never fails to impress everyone. It’s the perfect tart to serve to a crowd. Delicious with a captivating presentation. For extra goodness, make sure to serve this with a big dollop of whipping cream.

Ingredients

1/4 c. mild olive oil

1 1/2 c. plus 2 tbsp all-purpose flour

3/4 c. plus 1 teaspoon sugar

1/2 tsp almond extract

1/4 c. vegetable or canola oil

2 tbsp whole milk

3 small ripe peaches (up to 5), pitted and thickly sliced (about 1/2” wide)

2 tbsp cold, unsalted butter

3/4 tsp kosher salt

How to make Peach Tart

Step 1: Prepare the oven. Preheat it to 425 degrees.

Step 2: Whisk 1 1/2 c flour, 1/2 tsp salt, and 1 tsp sugar in a mixing bowl until well mixed.

Step 3: Place the oils, milk, and almond extract in a small bowl. Mix well and pour this into the flour mixture. Using a fork, gently mix until just dampen. Into an 11-inch tart pan, transfer the dough and pat it out with your hands, making sure the dough covers the bottom of the pan and at the same time pushing the dough up the sides to meet the edge. The dough should be around 1/8-inch thick all around. Lastly, trim the excess dough and discard.

Step 4: Place 3/4 c sugar, 2 tbsp flour, 1/4 tsp salt, and the butter in a bowl. Mix well until combined. You can add 1 tbsp more flour if your peaches are particularly juicy. Into the dry ingredients, pinch the butter using your fingers until crumbly with fine granules and tiny pebbles.

Step 5: Arrange the peaches, beginning on the outside, overlapping the peaches in a concentric circle over the pastry. You can fill in the middle with your desired pattern. Then, sprinkle the pebbly butter on top.

Step 6: Place in the preheated oven and bake for about 35 to 45 minutes or until the tart is shiny, thick bubbles start closing the fruit, and the crust is lightly brown. Remove from the oven when done and transfer on a rack to cool.

Step 7: Serve the peach tart warm or at room temperature with a big dollop of whipped cream. Enjoy!

Peach Tart

Rebecca PREP TIME: 20 MINS | COOK TIME: 35 MINS | YIELD: one 11-inch tart; Serves 8 This peach tart never fails to impress everyone. It’s the perfect tart to serve… General Recipes Peach Tart European Print This
Serves: 8 Prep Time: 20 mins Cooking Time: 35 mins 35 mins
Nutrition facts: 200 calories 20 grams fat
Rating: 5.0/5
( 1 voted )

Ingredients

  • 1/4 c. mild olive oil
  • 1 1/2 c. plus 2 tbsp all-purpose flour
  • 3/4 c. plus 1 teaspoon sugar
  • 1/2 tsp almond extract
  • 1/4 c. vegetable or canola oil
  • 2 tbsp whole milk
  • 3 small ripe peaches (up to 5), pitted and thickly sliced (about 1/2” wide)
  • 2 tbsp cold, unsalted butter
  • 3/4 tsp kosher salt

Instructions

Step 1: Prepare the oven. Preheat it to 425 degrees.

Step 2: Whisk 1 1/2 c flour, 1/2 tsp salt, and 1 tsp sugar in a mixing bowl until well mixed.

Step 3: Place the oils, milk, and almond extract in a small bowl. Mix well and pour this into the flour mixture. Using a fork, gently mix until just dampen. Into an 11-inch tart pan, transfer the dough and pat it out with your hands, making sure the dough covers the bottom of the pan and at the same time pushing the dough up the sides to meet the edge. The dough should be around 1/8-inch thick all around. Lastly, trim the excess dough and discard.

Step 4: Place 3/4 c sugar, 2 tbsp flour, 1/4 tsp salt, and the butter in a bowl. Mix well until combined. You can add 1 tbsp more flour if your peaches are particularly juicy. Into the dry ingredients, pinch the butter using your fingers until crumbly with fine granules and tiny pebbles.

Step 5: Arrange the peaches, beginning on the outside, overlapping the peaches in a concentric circle over the pastry. You can fill in the middle with your desired pattern. Then, sprinkle the pebbly butter on top.

Step 6: Place in the preheated oven and bake for about 35 to 45 minutes or until the tart is shiny, thick bubbles start closing the fruit, and the crust is lightly brown. Remove from the oven when done and transfer on a rack to cool.

Step 7: Serve the peach tart warm or at room temperature with a big dollop of whipped cream. Enjoy!

May 7, 2022 0 comment
0 FacebookTwitterPinterestEmail
General Recipes

Oatmeal Lemon Creme Bars

by Rebecca May 7, 2022
written by Rebecca

PREP TIME: 10 MINS | COOK TIME: 25 MINS | TOTAL TIME: 35 MINS | SERVINGS: 16 BARS

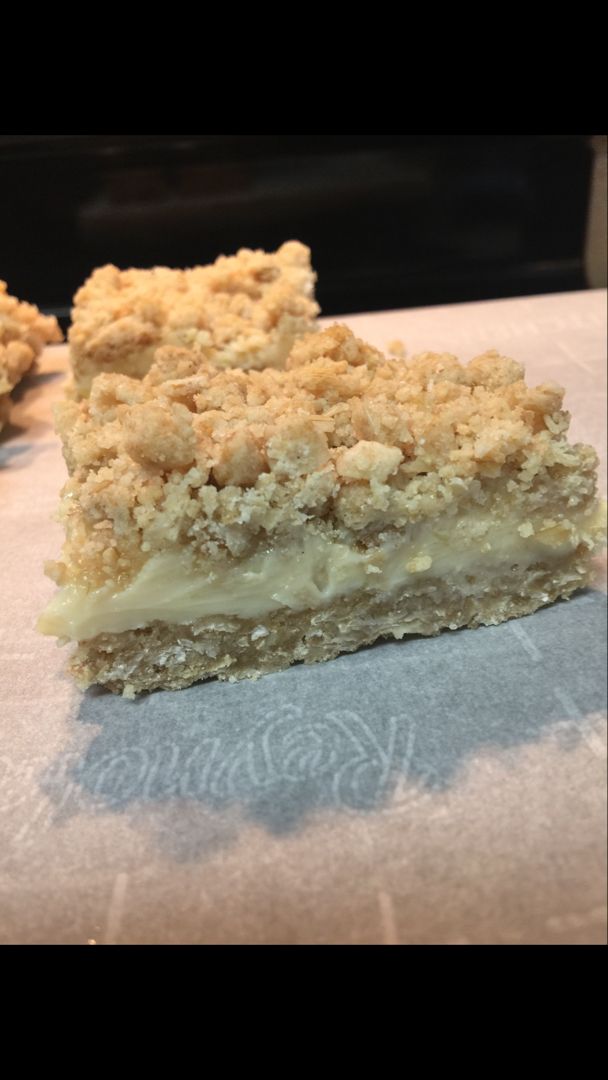
These oatmeal lemon creme bars are hands down the best! The combination of tart, yet sweet lemon filling and a streusel oatmeal topping is to die for! These oatmeal lemon creme bars are insanely good, I am pretty confident that these bars would be your new favorite. Try this simple recipe soon and make sure to whip up a big batch as these go very fast!

Ingredients

1 1/3 c. all-purpose flour

½ c. butter – softened

½ tsp salt

1 c. packed dark brown sugar

1 tsp baking powder

1 (14 ounces) can sweeten condensed milk (not evaporated)

1 c. old-fashioned oats

¼ tsp lemon extract

2 tsp lemon zest

¼ c. lemon juice

How to make Oatmeal, Lemon Creme Bars

Step 1: Prepare the oven. Preheat it to 350 degrees. Ready an 8 x 8-inch baking pan. Grease and set aside.

Step 2: Place the butter and brown sugar in a large mixing bowl. Cream using an electric mixer on medium speed until crumbly.

Step 3: Combine the flour, salt, and baking powder in another smaller mixing bowl. To the dry ingredients, add the oats and mix well until blended. And to the butter mixture, add the dry ingredients and beat until incorporated.

Step 4: Into the prepared pan, press 3/4 of the oat mixture.

Step 5: Add the sweetened condensed milk, lemon juice, lemon zest, and lemon extract to a small bowl. Whisk well until combined, then evenly spread this over the oat mixture in the pan. Lastly, top everything with the rest of the pat mixture.

Step 6: Place in the preheated oven and bake for about 20 to 25 minutes or until the top is golden brown.

Step 7: Remove from the oven when done and allow the bars to cool. Then, transfer it to the fridge and let it sit for about 30 minutes until set. Before serving, cut into bars. Enjoy!

Nutrition Facts:

Calories: 241 kcal | Carbohydrates: 38g | Protein: 3g | Fat: 8g | Saturated Fat: 5g | Cholesterol: 23mg | Sodium: 159mg | Potassium: 168mg | Sugar: 27g | Vitamin A: 245IU | Vitamin C: 2.5mg | Calcium: 99mg | Iron: 0.9mg

Oatmeal Lemon Creme Bars

Rebecca PREP TIME: 10 MINS | COOK TIME: 25 MINS | TOTAL TIME: 35 MINS | SERVINGS: 16 BARS These oatmeal lemon creme bars are hands down the best! The combination… General Recipes Oatmeal Lemon Creme Bars European Print This
Serves: 16 Prep Time: 10 mins Cooking Time: 25 mins 25 mins
Nutrition facts: 241 calories 8 fat
Rating: 5.0/5
( 1 voted )

Ingredients

  • 1 1/3 c. all-purpose flour
  • ½ c. butter - softened
  • ½ tsp salt
  • 1 c. packed dark brown sugar
  • 1 tsp baking powder
  • 1 (14 ounces) can sweeten condensed milk (not evaporated)
  • 1 c. old-fashioned oats
  • ¼ tsp lemon extract
  • 2 tsp lemon zest
  • ¼ c. lemon juice

Instructions

Step 1: Prepare the oven. Preheat it to 350 degrees. Ready an 8 x 8-inch baking pan. Grease and set aside.

Step 2: Place the butter and brown sugar in a large mixing bowl. Cream using an electric mixer on medium speed until crumbly.

Step 3: Combine the flour, salt, and baking powder in another smaller mixing bowl. To the dry ingredients, add the oats and mix well until blended. And to the butter mixture, add the dry ingredients and beat until incorporated.

Step 4: Into the prepared pan, press 3/4 of the oat mixture.

Step 5: Add the sweetened condensed milk, lemon juice, lemon zest, and lemon extract to a small bowl. Whisk well until combined, then evenly spread this over the oat mixture in the pan. Lastly, top everything with the rest of the pat mixture.

Step 6: Place in the preheated oven and bake for about 20 to 25 minutes or until the top is golden brown.

Step 7: Remove from the oven when done and allow the bars to cool. Then, transfer it to the fridge and let it sit for about 30 minutes until set. Before serving, cut into bars. Enjoy!

May 7, 2022 0 comment
0 FacebookTwitterPinterestEmail
General Recipes

Lemon Icebox Delight

by Rebecca May 7, 2022
written by Rebecca

Prep Time: 30 mins | Cook Time: 15 mins | Total Time: 45 mins | Servings: 10

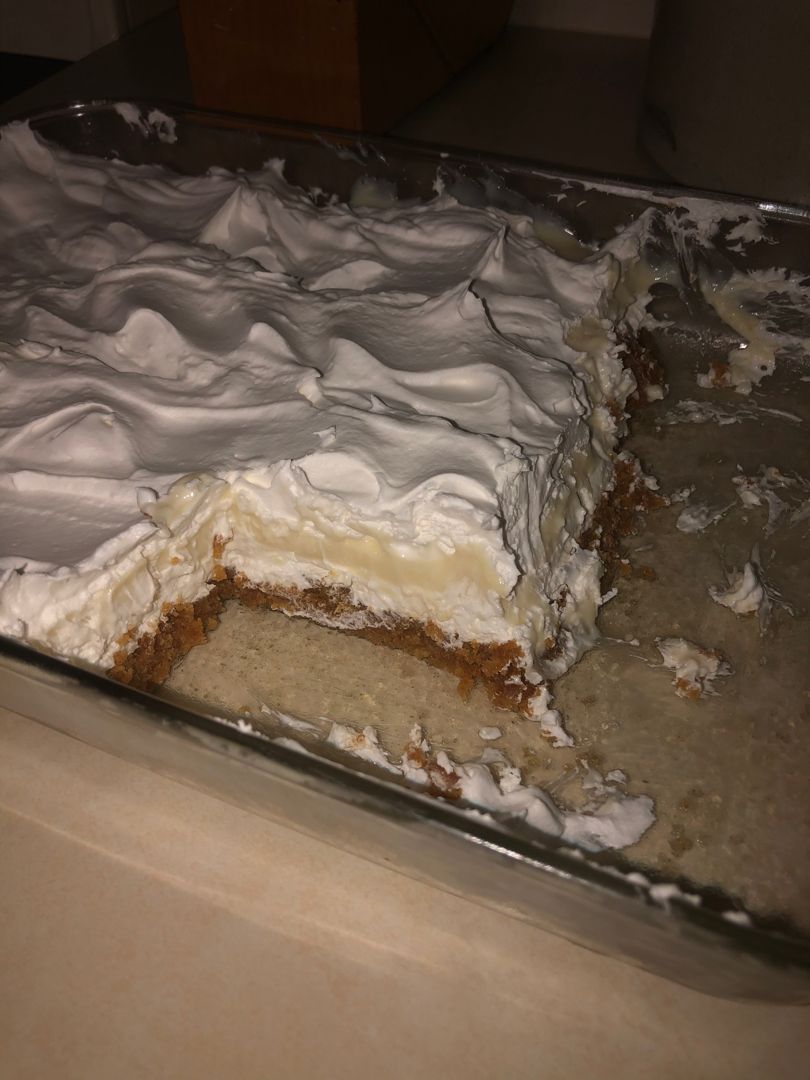
I enjoy searching for new quick and easy recipes online. I love trying out new cuisines/desserts. Every time I found a great recipe, I sure to keep them and include them on my list of favorites and go-to. This lemon icebox delight has been my favorite all-year-round treat. The coffee-like crust is what makes this dessert stands out the most. This is a special dessert that anyone can whip up in minutes using only a few simple ingredients. Chill this lemon icebox delight in the fridge for at least 4 hours or preferably overnight before serving.

Ingredients

2 egg yolks

1/2 c (1 stick) butter, melted

2 (14 oz) cans of sweetened condensed milk

1/2 c. sugar

2 (8 oz) containers of frozen whipped topping, thawed

1 c Graham cracker crumbs

1 c. lemon juice (fresh is best, but bottled is fine)

1 (8 oz) package of cream cheese, softened

1 1/2 c. powdered sugar

How to make Lemon Icebox Delight

Step 1: Prepare the oven. Preheat it to 350 degrees F.

Step 2: In a medium bowl, add the Graham cracker crumbs, butter, and sugar. Mix well until combined. Into the bottom of a lightly greased 9 x 13-inch glass baking dish, press the mixture. Place in the preheated oven and bake for about 10 minutes or until just golden. Remove from the oven when done and let the crust cool fully.

Step 3: Beat the cream cheese, powdered sugar, and 1 container of the whipped topping until well mixed. Spread this on the cooled crust.

Step 4: Stir the sweetened condensed milk with the egg yolk and lemon juice until well mixed and the mixture is a little thick. Over the cream cheese layer, pour the mixture, spreading it to the edges.

Step 5: On top, spread the rest of the container of whipped topping to the edges of the crust.

Step 6: Keep in the fridge to chill for at least 4 hours preferably overnight.

Lemon Icebox Delight

Rebecca Prep Time: 30 mins | Cook Time: 15 mins | Total Time: 45 mins | Servings: 10 I enjoy searching for new quick and easy recipes online. I love trying… General Recipes Lemon Icebox Delight European Print This
Serves: 10 Prep Time: 30 mins Cooking Time: 15 mins 15 mins
Nutrition facts: 200 calories 20 grams fat
Rating: 5.0/5
( 1 voted )

Ingredients

  • 2 egg yolks
  • 1/2 c (1 stick) butter, melted
  • 2 (14 oz) cans of sweetened condensed milk
  • 1/2 c. sugar
  • 2 (8 oz) containers of frozen whipped topping, thawed
  • 1 c Graham cracker crumbs
  • 1 c. lemon juice (fresh is best, but bottled is fine)
  • 1 (8 oz) package of cream cheese, softened
  • 1 1/2 c. powdered sugar

Instructions

Step 1: Prepare the oven. Preheat it to 350 degrees F.

Step 2: In a medium bowl, add the Graham cracker crumbs, butter, and sugar. Mix well until combined. Into the bottom of a lightly greased 9 x 13-inch glass baking dish, press the mixture. Place in the preheated oven and bake for about 10 minutes or until just golden. Remove from the oven when done and let the crust cool fully.

Step 3: Beat the cream cheese, powdered sugar, and 1 container of the whipped topping until well mixed. Spread this on the cooled crust.

Step 4: Stir the sweetened condensed milk with the egg yolk and lemon juice until well mixed and the mixture is a little thick. Over the cream cheese layer, pour the mixture, spreading it to the edges.

Step 5: On top, spread the rest of the container of whipped topping to the edges of the crust.

Step 6: Keep in the fridge to chill for at least 4 hours preferably overnight.

May 7, 2022 0 comment
0 FacebookTwitterPinterestEmail
General Recipes

Greek Stuffed Eggplant

by Rebecca May 7, 2022
written by Rebecca

PREP TIME: 10 MINS | COOK TIME: 1 HR 10 MINS

This Greek Stuffed Eggplant is an amazing Mediterranean cuisine with Greek stuffed eggplant with meat sauce topped with incredibly rich Bechamel sauce. It’s a hearty and filling dish perfect for entertaining.

INGREDIENTS

3 tbsp olive oil

4 medium eggplants

Salt, pepper, and oregano to taste

GROUND MEAT SAUCE:

3 tbsp olive oil

1 lb (500 grams) beef and/or lamb ground

2 cloves garlic, minced

1 onion minced

3 medium fresh tomatoes, chopped

1 pinch of sugar

⅔ c (55 grams) Parmesan or pecorino or kefalotyri cheese grated

2 tbsp parsley or/and mint

1 can (400 grams) of chopped tomatoes

Salt, and pepper to taste

1 stick cinnamon or 1/2 tsp ground cinnamon optional

BECHAMEL SAUCE:

2 egg yolks, beaten

1 ⅛ c (300ml) lukewarm milk

⅛ c (30 grams) butter

⅛ c (30 grams) all-purpose flour

⅔ c (55 grams) Parmesan or pecorino or kefalotyri cheese grated

Salt & pepper to taste

1 punch of nutmeg, optional

How to make Greek Stuffed Eggplant

Step 1: Prepare the oven. Preheat it to 392 degrees F or 200 degrees C.

EGGPLANT:

Step 2: This step is optional, but you can trim the ends of the eggplant if desired before cutting the eggplant in half lengthwise.

Step 3: In a colander, place the eggplant and lightly sprinkle it with salt. Let it sit for at least 30 minutes to an hour. Then, rinse the slices of eggplant and pat dry with paper towels.

Step 4: Criss-cross and score the flesh of the eggplant slices using a sharp knife. Be very careful not to puncture the flesh. Then, brush the skin and the flesh of the eggplant with olive oil. Sprinkle the eggplants with salt, pepper, and oregano.

Step 5: On a parchment-lined baking pan, lay the eggplant halves, cut-side down. Place in the preheated oven and bake for about 30 to 40 minutes or until lightly golden and tender. Set the eggplants aside when done.

GROUND MEAT SAUCE:

Step 6: Heat the olive oil in a large pan or deep skillet over medium heat. Once the oil is hot, add the onion to the pan and saute for about 5 minutes. Add the garlic, stir, and saute for 3 minutes more. Next, add the ground meat, lightly stir, and continue to cook for another 10 minutes.

Step 7: To the skillet, add the tomatoes along with the sugar and cinnamon (optional). Adjust the heat to medium-high and let everything simmer for about 20 minutes or until most of the liquid is cooked off. Take the skillet off the heat and add the cheese, parsley, and/or mint. If you used a cinnamon stick, take it out and discard it. Set the ground meal sauce aside to cool.

BECHAMEL:

Step 8: In a small pot, melt the butter over medium-low heat. Add the flour to the melted butter along with salt and pepper. Stir well for a couple of minutes. Then, slowly add in the lukewarm milk, stirring vigorously after each addition and waiting until the milk is fully blended. Take off the heat and add the nutmeg (optional) along with cheese, egg yolks, salt, and pepper. Keep stirring until the sauce has thickened.

TO ASSEMBLE:

Step 9: Fill the eggplant halves with the meat sauce using a spoon and top with Bechamel. Place in the oven and bake for about 20 minutes at 356 degrees F or 180 degrees C until browned.

Step 10: Serve the stuffed eggplant garnished with some chopped parsley. Enjoy!

Greek Stuffed Eggplant

Rebecca PREP TIME: 10 MINS | COOK TIME: 1 HR 10 MINS This Greek Stuffed Eggplant is an amazing Mediterranean cuisine with Greek stuffed eggplant with meat sauce topped with incredibly… General Recipes Greek Stuffed Eggplant European Print This
Prep Time: 10 mins Cooking Time: 1 hr 10 mins 1 hr 10 mins
Nutrition facts: 200 calories 20 grams fat
Rating: 5.0/5
( 1 voted )

Ingredients

  • 3 tbsp olive oil
  • 4 medium eggplants
  • Salt, pepper, and oregano to taste
  • GROUND MEAT SAUCE:
  • 3 tbsp olive oil
  • 1 lb (500 grams) beef and/or lamb ground
  • 2 cloves garlic, minced
  • 1 onion minced
  • 3 medium fresh tomatoes, chopped
  • 1 pinch of sugar
  • ⅔ c (55 grams) Parmesan or pecorino or kefalotyri cheese grated
  • 2 tbsp parsley or/and mint
  • 1 can (400 grams) of chopped tomatoes
  • Salt, and pepper to taste
  • 1 stick cinnamon or 1/2 tsp ground cinnamon optional
  • BECHAMEL SAUCE:
  • 2 egg yolks, beaten
  • 1 ⅛ c (300ml) lukewarm milk
  • ⅛ c (30 grams) butter
  • ⅛ c (30 grams) all-purpose flour
  • ⅔ c (55 grams) Parmesan or pecorino or kefalotyri cheese grated
  • Salt & pepper to taste
  • 1 punch of nutmeg, optional

Instructions

Step 1: Prepare the oven. Preheat it to 392 degrees F or 200 degrees C.

EGGPLANT:

Step 2: This step is optional, but you can trim the ends of the eggplant if desired before cutting the eggplant in half lengthwise.

Step 3: In a colander, place the eggplant and lightly sprinkle it with salt. Let it sit for at least 30 minutes to an hour. Then, rinse the slices of eggplant and pat dry with paper towels.

Step 4: Criss-cross and score the flesh of the eggplant slices using a sharp knife. Be very careful not to puncture the flesh. Then, brush the skin and the flesh of the eggplant with olive oil. Sprinkle the eggplants with salt, pepper, and oregano.

Step 5: On a parchment-lined baking pan, lay the eggplant halves, cut-side down. Place in the preheated oven and bake for about 30 to 40 minutes or until lightly golden and tender. Set the eggplants aside when done.

GROUND MEAT SAUCE:

Step 6: Heat the olive oil in a large pan or deep skillet over medium heat. Once the oil is hot, add the onion to the pan and saute for about 5 minutes. Add the garlic, stir, and saute for 3 minutes more. Next, add the ground meat, lightly stir, and continue to cook for another 10 minutes.

Step 7: To the skillet, add the tomatoes along with the sugar and cinnamon (optional). Adjust the heat to medium-high and let everything simmer for about 20 minutes or until most of the liquid is cooked off. Take the skillet off the heat and add the cheese, parsley, and/or mint. If you used a cinnamon stick, take it out and discard it. Set the ground meal sauce aside to cool.

BECHAMEL:

Step 8: In a small pot, melt the butter over medium-low heat. Add the flour to the melted butter along with salt and pepper. Stir well for a couple of minutes. Then, slowly add in the lukewarm milk, stirring vigorously after each addition and waiting until the milk is fully blended. Take off the heat and add the nutmeg (optional) along with cheese, egg yolks, salt, and pepper. Keep stirring until the sauce has thickened.

TO ASSEMBLE:

Step 9: Fill the eggplant halves with the meat sauce using a spoon and top with Bechamel. Place in the oven and bake for about 20 minutes at 356 degrees F or 180 degrees C until browned.

Step 10: Serve the stuffed eggplant garnished with some chopped parsley. Enjoy!

May 7, 2022 0 comment
0 FacebookTwitterPinterestEmail
General Recipes

CHICKEN POT PIE QUICHE

by Rebecca May 7, 2022
written by Rebecca

Prep Time: 10 mins | Cook Time: 1 hr | Total Time: 1 hr 10 mins | Yield: 6 people

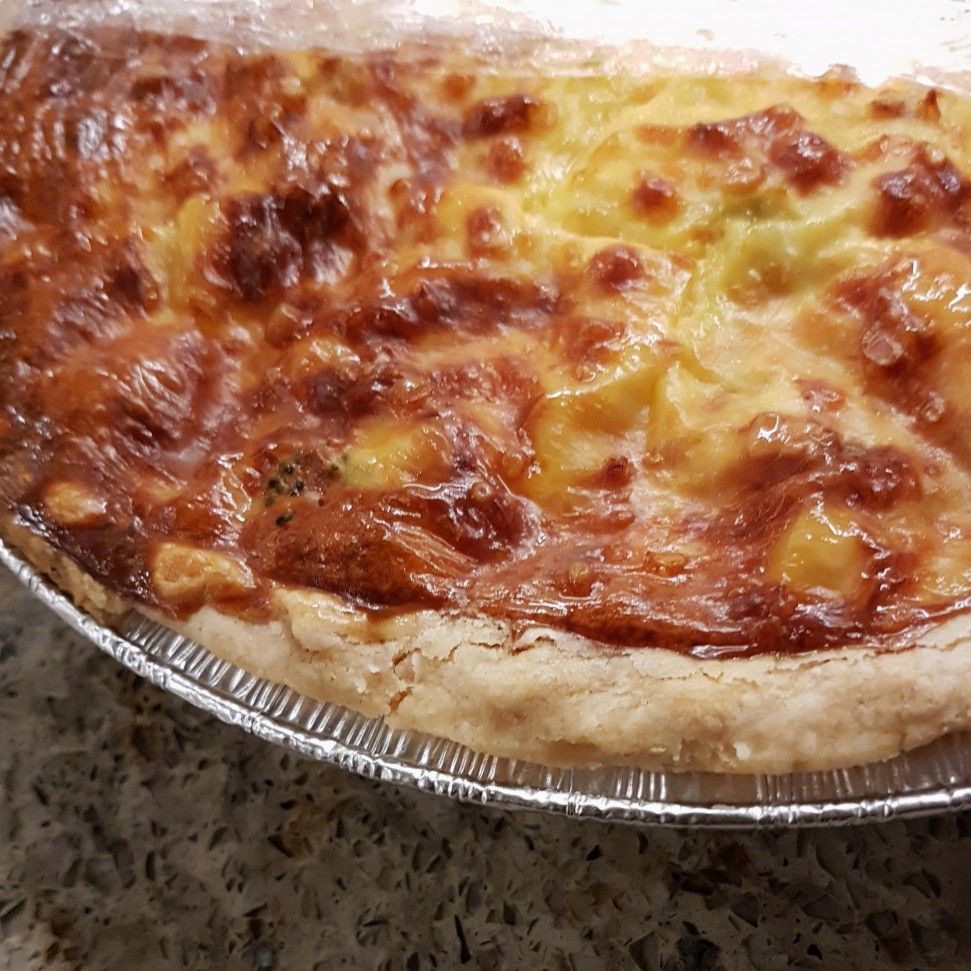
Creamy and delicious chicken pot pie, quiche made with Chicken, vegetables, cheddar cheese, eggs, milk, and cream of chicken soup. Perfect for brunch, lunch, and even dinner. This quiche has been one of my favorite comfort food. Feel free to easily make this ahead and freeze it for an easy and quick meal anytime.

Ingredients

4 large eggs

1 c. cooked chopped chicken

1/2 c. milk

3/4 c. frozen mixed veggies

1 (9”) frozen deep-dish pie crust

1 c. shredded cheddar cheese

1 (10.75 ounces) can cream of chicken soup

HOW TO MAKE CHICKEN POT PIE QUICHE

Step 1: Prepare the oven. Preheat it to 350 degrees F.

Step 2: In the bottom of a frozen pie crust, spread the chicken and vegetables. On top, sprinkle the cheese.

Step 3: Mix the eggs with cream of chicken soup and milk until well blended. Pour this over the cheese.

Step 4: Place in the preheated oven and bake for about 50 to 60 minutes or until the center of the pie is set.

Step 5: Remove from the oven when done and serve with a simple side salad or some grits. Enjoy!

Notes:

For this recipe, I used rotisserie chicken.

You do not need to thaw the frozen mixed veggies. Just add them directly to the quiche.

There is no need to thaw or pre-cook the frozen pie crust before filling it.

Use either frozen or homemade pie crust.

Feel free to assemble the quiche the night before and just keep it in the fridge overnight. Or freeze unbaked.

When ready to serve, thaw the unbaked frozen quiche in the fridge and bake as instructed.

Completely cool the baked quiche before wrapping the pie plate with plastic wrap and aluminium foil. Freeze until ready to serve. Before reheating, thaw and heat in the microwave or oven.

Store the quiche in the fridge for up to 3 to 4 days, covered.

CHICKEN POT PIE QUICHE

Rebecca Prep Time: 10 mins | Cook Time: 1 hr | Total Time: 1 hr 10 mins | Yield: 6 people Creamy and delicious chicken pot pie, quiche made with Chicken,… General Recipes CHICKEN POT PIE QUICHE European Print This
Serves: 6 Prep Time: 10 mins Cooking Time: 1 hr 1 hr
Nutrition facts: 200 calories 20 grams fat
Rating: 4.5/5
( 2 voted )

Ingredients

  • 4 large eggs
  • 1 c. cooked chopped chicken
  • 1/2 c. milk
  • 3/4 c. frozen mixed veggies
  • 1 (9”) frozen deep-dish pie crust
  • 1 c. shredded cheddar cheese
  • 1 (10.75 ounces) can cream of chicken soup

Instructions

Step 1: Prepare the oven. Preheat it to 350 degrees F.

Step 2: In the bottom of a frozen pie crust, spread the chicken and vegetables. On top, sprinkle the cheese.

Step 3: Mix the eggs with cream of chicken soup and milk until well blended. Pour this over the cheese.

Step 4: Place in the preheated oven and bake for about 50 to 60 minutes or until the center of the pie is set.

Step 5: Remove from the oven when done and serve with a simple side salad or some grits. Enjoy!

Notes

For this recipe, I used rotisserie chicken. You do not need to thaw the frozen mixed veggies. Just add them directly to the quiche. There is no need to thaw or pre-cook the frozen pie crust before filling it. Use either frozen or homemade pie crust. Feel free to assemble the quiche the night before and just keep it in the fridge overnight. Or freeze unbaked. When ready to serve, thaw the unbaked frozen quiche in the fridge and bake as instructed. Completely cool the baked quiche before wrapping the pie plate with plastic wrap and aluminium foil. Freeze until ready to serve. Before reheating, thaw and heat in the microwave or oven. Store the quiche in the fridge for up to 3 to 4 days, covered.

May 7, 2022 0 comment
0 FacebookTwitterPinterestEmail
General Recipes

Pasta alla Norma

by Rebecca May 7, 2022
written by Rebecca

Servings: 4 people

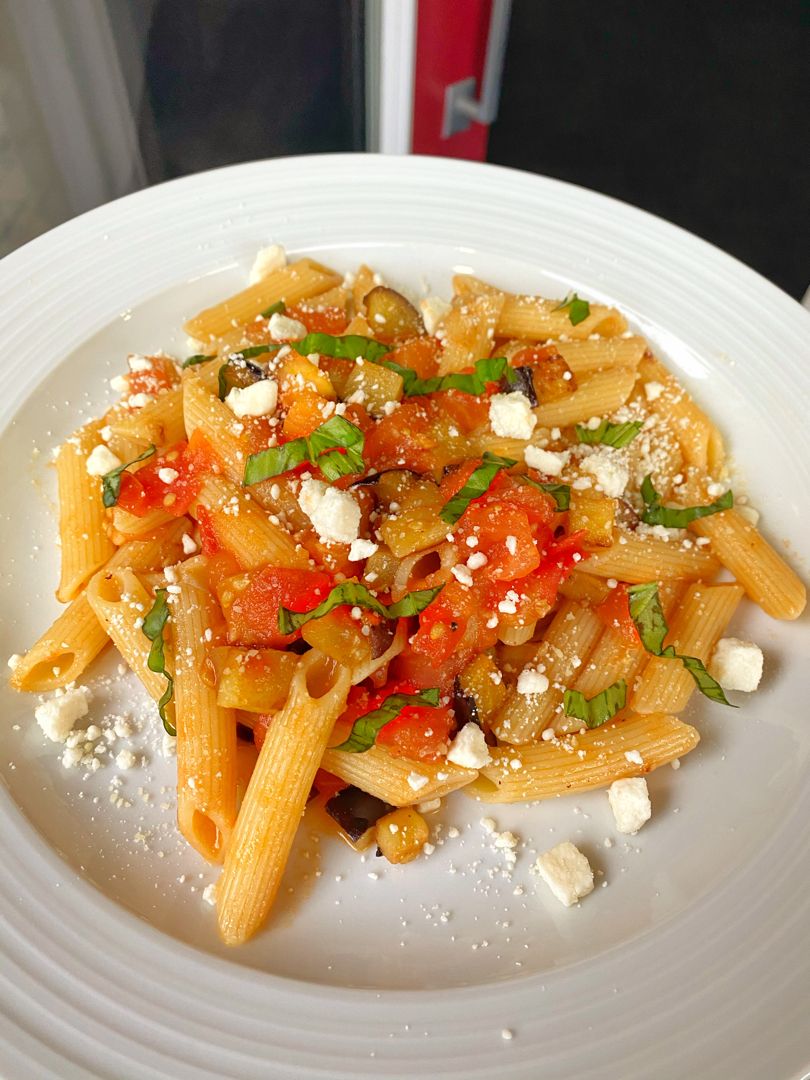
If you are looking for another exciting recipe to try, then you have to give this Pasta Alla Norma a go soon! Cooked pasta topped with fried eggplant in tomato sauce, cheeses, and fresh basil. It’s a quick and easy weeknight meal that even your fussiest eaters will adore! If you cannot find ricotta Salata, you can easily replace it with a combination of feta and Parmesan.

Ingredients

3 chopped cloves of garlic

26.6 ounces (1 box) Organic chopped tomatoes

26.6 ounces (1 box) Organic chopped tomatoes

1/4 c. Basil, sliced or torn (optional)

5 tbsp Olive oil

1 medium Eggplant – cut into 1″ cubes

6 oz. Pasta (like rigatoni)

1/3 c. Feta – crumbled

1/4 c. Parmigiano Reggiano (Parmesan cheese), grated

Salt and pepper to taste

1 pinch of Red pepper flakes

How to make Pasta alla Norma

Step 1: Following the package directions, cook the pasta until al dente.

Step 2: In the meantime, heat 4 tbsp oil in a heavy bottom skillet. Then, add the eggplant and cook over medium heat for about 2 to 3 minutes on each side until lightly golden brown and tender. Set aside when done.

Step 3: In the same pan, heat the rest of the oil. Add the garlic and red pepper flakes and cook for about a minute until aromatic. Then, add the Organic Chopped Tomatoes. Bring everything to a boil, then decrease the heat. Simmer for about a minute. To taste, season with salt and pepper. Return the eggplant to the pan and toss well.

Step 4: Between 4 dishes, divide the cooked pasta and top each with the eggplant sauce, cheeses, and fresh basil. Serve and enjoy!

Notes:

A single medium eggplant is around 4 cups.

If Ricotta Salata is available, use half c of it in place of feta and Parmesan.

If desired, serve this pasta all Norma with 1 tbsp basil pesto.

Pasta alla Norma

Rebecca Servings: 4 people If you are looking for another exciting recipe to try, then you have to give this Pasta Alla Norma a go soon! Cooked pasta topped with fried… General Recipes Pasta alla Norma European Print This
Serves: 4
Nutrition facts: 200 calories 20 grams fat
Rating: 5.0/5
( 1 voted )

Ingredients

  • 3 chopped cloves of garlic
  • 26.6 ounces (1 box) Organic chopped tomatoes
  • 26.6 ounces (1 box) Organic chopped tomatoes
  • 1/4 c. Basil, sliced or torn (optional)
  • 5 tbsp Olive oil
  • 1 medium Eggplant - cut into 1" cubes
  • 6 oz. Pasta (like rigatoni)
  • 1/3 c. Feta - crumbled
  • 1/4 c. Parmigiano Reggiano (Parmesan cheese), grated
  • Salt and pepper to taste
  • 1 pinch of Red pepper flakes

Instructions

Step 1: Following the package directions, cook the pasta until al dente.

Step 2: In the meantime, heat 4 tbsp oil in a heavy bottom skillet. Then, add the eggplant and cook over medium heat for about 2 to 3 minutes on each side until lightly golden brown and tender. Set aside when done.

Step 3: In the same pan, heat the rest of the oil. Add the garlic and red pepper flakes and cook for about a minute until aromatic. Then, add the Organic Chopped Tomatoes. Bring everything to a boil, then decrease the heat. Simmer for about a minute. To taste, season with salt and pepper. Return the eggplant to the pan and toss well.

Step 4: Between 4 dishes, divide the cooked pasta and top each with the eggplant sauce, cheeses, and fresh basil. Serve and enjoy!

Notes

A single medium eggplant is around 4 cups. If Ricotta Salata is available, use half c of it in place of feta and Parmesan. If desired, serve this pasta all Norma with 1 tbsp basil pesto.

May 7, 2022 0 comment
0 FacebookTwitterPinterestEmail
General Recipes

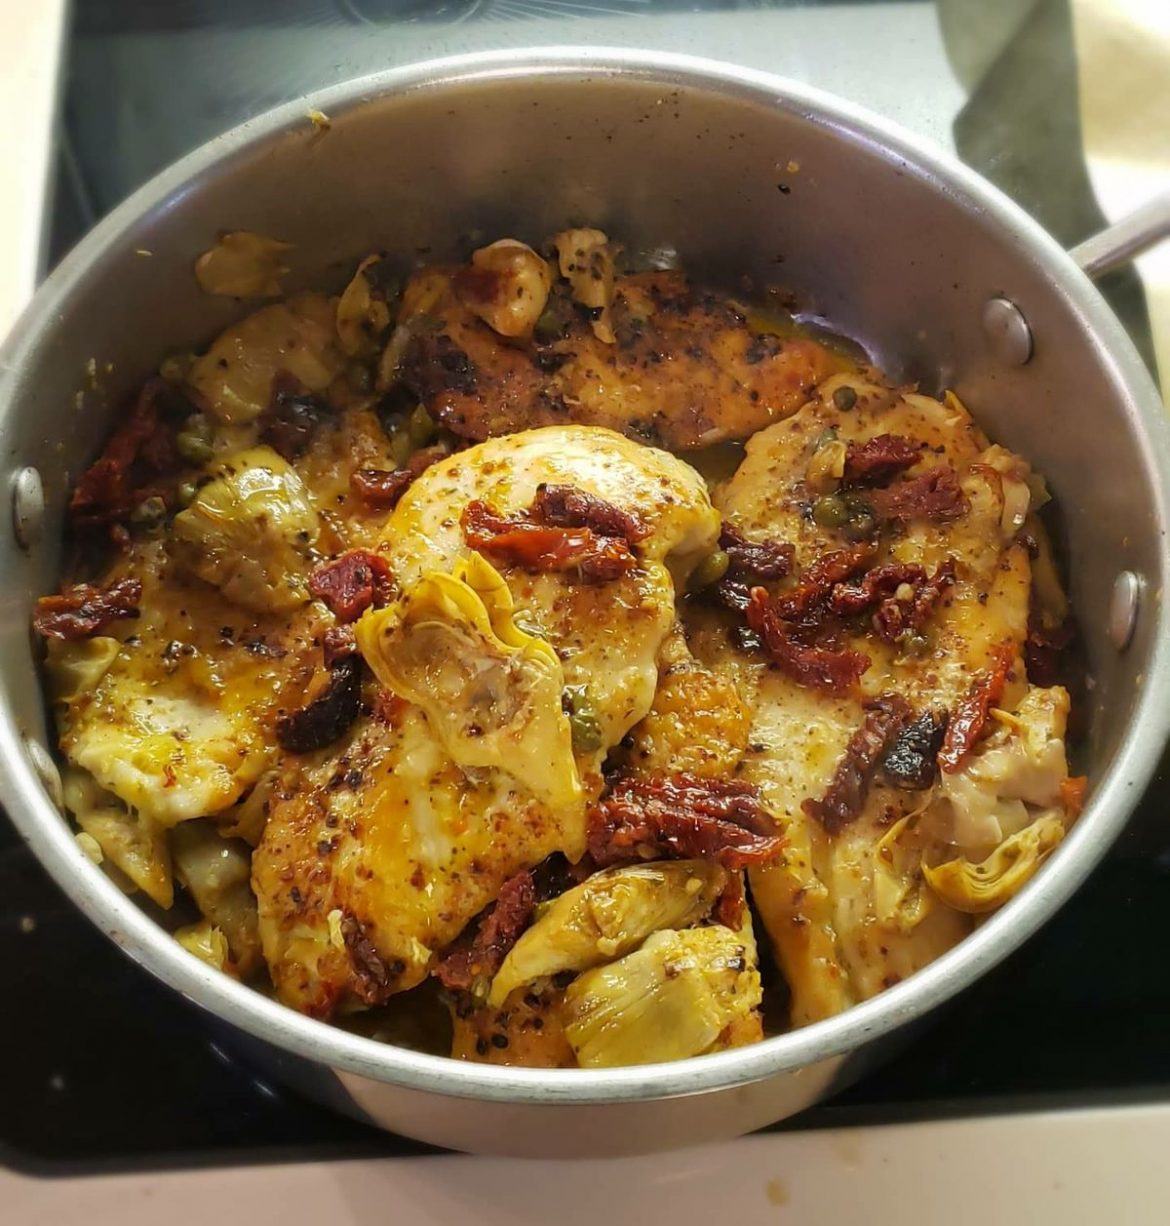
Mediterranean Chicken with Sun-Dried Tomatoes, Artichokes, and Capers

by Rebecca May 6, 2022
written by Rebecca

PREP TIME: 10 MINS | COOK TIME: 20 MINS | TOTAL TIME: 30 MINS | SERVINGS: 4 people

This easy chicken recipe is perfect if you love Mediterranean dishes. It is an amazing skillet chicken with Sun-Dried Tomatoes, Artichokes, and Capers that I’m pretty sure everyone will love and ask for again and again!

Throw this wonderful Mediterranean dish together easily using only a few simple ingredients, and this is ready in under thirty minutes! Enjoy moist, tender, and flavorful packed chicken for an easy and fast weeknight meal perfect for your entire family!

Ingredients

3 tbsp olive oil

1.5 pounds of chicken breast (thinly sliced)

¼ c. flour (you can use gluten-free flour)

6 ounces sun-dried tomatoes

8 ounces roasted artichoke hearts (drained)

3 tbsp capers (drained)

2 tbsp olive oil

2 tbsp lemon juice, freshly squeezed

½ tsp salt

¼ tsp ground black pepper

How to make Mediterranean Chicken with Sun-Dried Tomatoes, Artichokes, and Capers

Step 1: Sprinkle the chicken with salt and pepper, then dredge in flour.

Step 2: In a large skillet, heat 2 tbsp olive oil over medium-high heat. Once the oil is hot, add the chicken to the skillet and cook for about 4 minutes until nicely golden. Turn the chicken on the other side and cook for another 4 minutes over medium heat until brown. To a plate, transfer the cooked chicken.

Step 3: In the now-empty skillet, add the artichokes, sun-dried tomatoes, capers, and lemon juice. Stir well and cook over medium heat. Then, adjust the heat to medium-low and drizzle in 2 to 3 tbsp olive oil. Stir well.

Step 4: To the sides of the skillet, push the veggies. Return the chicken to the pan and continue to cook for an additional 5 to 10 minutes over low-medium heat, covered, until the chicken is fully cooked and no longer pink in the middle.

Step 5: Remove from the heat when done and serve the dish right away. Do not forget to spoon the olive oil mixture of the veggies over the chicken. Enjoy!

Nutrition Facts:

Amount per Serving: Calories 552, Fat 28g 43%, Saturated Fat 4g 25%, Cholesterol 108mg 36%, Sodium 975mg 42%, Potassium 2086mg 60%, Carbohydrates 33g 11%, Fiber 6g 25%, Sugars 16g 18%, Protein 43g 86%, Vitamin A 990IU 20%, Vitamin C 33.7mg 41%, Calcium 67mg 7%, Iron 5.4mg 30%

Mediterranean Chicken with Sun-Dried Tomatoes, Artichokes, and Capers

Rebecca PREP TIME: 10 MINS | COOK TIME: 20 MINS | TOTAL TIME: 30 MINS | SERVINGS: 4 people This easy chicken recipe is perfect if you love Mediterranean dishes. It… General Recipes Mediterranean Chicken with Sun-Dried Tomatoes, Artichokes, and Capers European Print This
Serves: 4 Prep Time: 10 mins Cooking Time: 20 mins 20 mins
Nutrition facts: 552 calories 28 fat
Rating: 5.0/5
( 1 voted )

Ingredients

  • 3 tbsp olive oil
  • 1.5 pounds of chicken breast (thinly sliced)
  • ¼ c. flour (you can use gluten-free flour)
  • 6 ounces sun-dried tomatoes
  • 8 ounces roasted artichoke hearts (drained)
  • 3 tbsp capers (drained)
  • 2 tbsp olive oil
  • 2 tbsp lemon juice, freshly squeezed
  • ½ tsp salt
  • ¼ tsp ground black pepper

Instructions

Step 1: Sprinkle the chicken with salt and pepper, then dredge in flour.

Step 2: In a large skillet, heat 2 tbsp olive oil over medium-high heat. Once the oil is hot, add the chicken to the skillet and cook for about 4 minutes until nicely golden. Turn the chicken on the other side and cook for another 4 minutes over medium heat until brown. To a plate, transfer the cooked chicken.

Step 3: In the now-empty skillet, add the artichokes, sun-dried tomatoes, capers, and lemon juice. Stir well and cook over medium heat. Then, adjust the heat to medium-low and drizzle in 2 to 3 tbsp olive oil. Stir well.

Step 4: To the sides of the skillet, push the veggies. Return the chicken to the pan and continue to cook for an additional 5 to 10 minutes over low-medium heat, covered, until the chicken is fully cooked and no longer pink in the middle.

Step 5: Remove from the heat when done and serve the dish right away. Do not forget to spoon the olive oil mixture of the veggies over the chicken. Enjoy!

May 6, 2022 0 comment
0 FacebookTwitterPinterestEmail
General Recipes

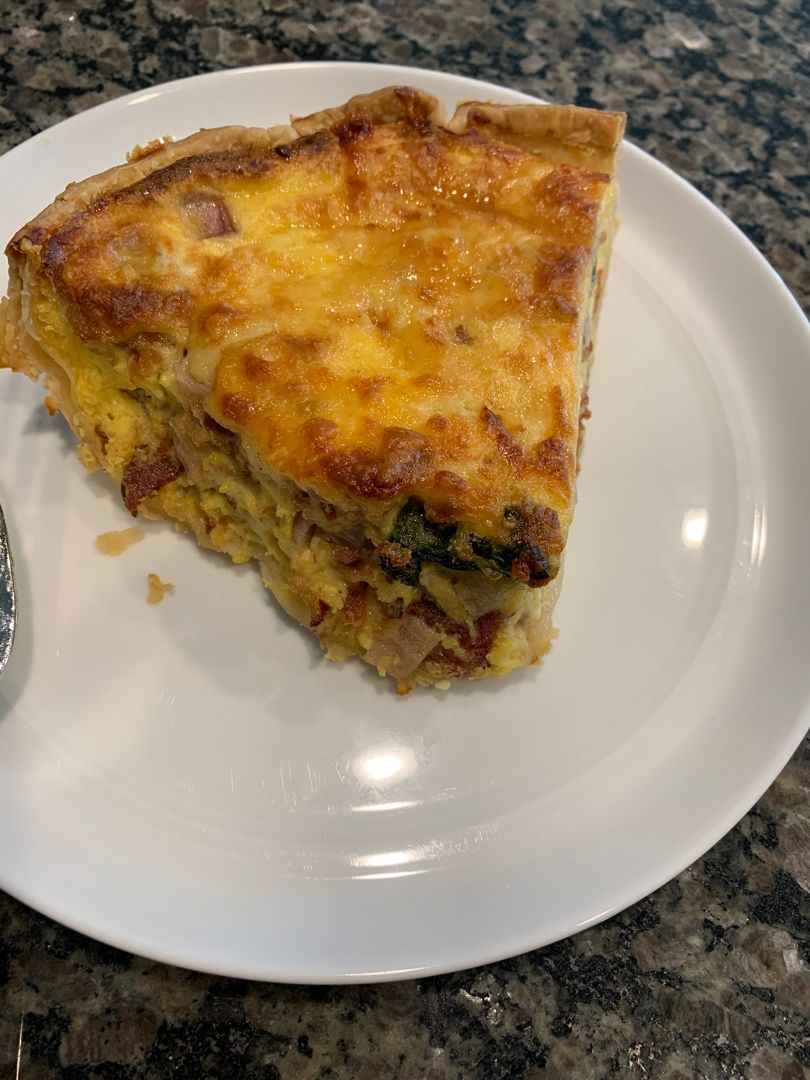
QUICHE LORRAINE RECIPE

by Rebecca May 6, 2022
written by Rebecca

This quiche is a great dish perfect to serve for breakfast, brunch, or even lunch. Crispy bacon, sauteed onions, and cheeses in a heavenly creamy custard baked in a flaky crust. This classic quiche recipe is incredibly easy to throw together. It is a must-try and keeper recipe!

INGREDIENTS

4 extra-large eggs, room temperature

1 disc pie dough

6 rashers of bacon, sliced into ¼” pieces

1 c. whole milk

1 c. 35% cream

pinch kosher salt

dash of grated nutmeg

pinch of black pepper

1 medium sweet onion, finely chopped

¼ c. Parmesan cheese, grated

1 c. Gruyère cheese, cubed

HOW TO MKE QUICHE LORRAINE

Step 1: To prep, the dough, roll the pie dough into a 12-inch round onto a floured surface. Then, place it on a 9-inch pie plate. Crimp the edges and prick them using a fork. Chill in the fridge for 30 minutes.

Step 2: In the meantime, prepare the oven. Place the rack in the middle position and preheat it to 400 degrees F.

Step 3: Using foil, line the pie shell. Make sure to fit it tight against the shell. Place a pie weights or around 2 c of dry beans or rice. Place in the preheated oven and bake for about 15 minutes. Uncover and remove the weights. Return to the oven and resume baking for 10 minutes more. When done, place the pie shell on a wire rack to cool and adjust the oven temperature to 375 degrees F.

Step 4: Beat the eggs, cream, milk, nutmeg, salt, and pepper in a medium-sized bowl until well combined. Set the quiche filling aside.

Step 5: Cook the bacon in a medium-sized skillet over medium-high heat until almost crispy. Place the cooked bacon on a plate lined with a paper towel. Drain the grease from the pan, leaving only 1 tbsp of bacon fat. Adjust the heat to medium and place the pan back on the stovetop. Add the onions to the pan and cook until tender and translucent.

Step 6: To assemble the quiche, evenly distribute the lightly chopped bacon along the bottom of the pie shell. Next, add the onion followed by the Gruyere cheese and grated Parmesan. Into the shell, gradually pour the egg mixture.

Step 7: Onto a baking sheet, place the pie plate. Place in the preheated oven and bake for about 35 to 40 minutes or until a knife inserted in the crust comes out clean and the quiche is almost firm when jiggled.

Step 8: Take the quiche out of the oven when done and allow it to cool for about 45 minutes before slicing it into wedges. Serve the quiche with tossed or fresh fruit salad. Enjoy!

QUICHE LORRAINE RECIPE

Rebecca This quiche is a great dish perfect to serve for breakfast, brunch, or even lunch. Crispy bacon, sauteed onions, and cheeses in a heavenly creamy custard baked in a flaky… General Recipes QUICHE LORRAINE RECIPE European Print This
Nutrition facts: 200 calories 20 grams fat
Rating: 5.0/5
( 1 voted )

Ingredients

  • 4 extra-large eggs, room temperature
  • 1 disc pie dough
  • 6 rashers of bacon, sliced into ¼” pieces
  • 1 c. whole milk
  • 1 c. 35% cream
  • pinch kosher salt
  • dash of grated nutmeg
  • pinch of black pepper
  • 1 medium sweet onion, finely chopped
  • ¼ c. Parmesan cheese, grated
  • 1 c. Gruyère cheese, cubed

Instructions

Step 1: To prep, the dough, roll the pie dough into a 12-inch round onto a floured surface. Then, place it on a 9-inch pie plate. Crimp the edges and prick them using a fork. Chill in the fridge for 30 minutes.

Step 2: In the meantime, prepare the oven. Place the rack in the middle position and preheat it to 400 degrees F.

Step 3: Using foil, line the pie shell. Make sure to fit it tight against the shell. Place a pie weights or around 2 c of dry beans or rice. Place in the preheated oven and bake for about 15 minutes. Uncover and remove the weights. Return to the oven and resume baking for 10 minutes more. When done, place the pie shell on a wire rack to cool and adjust the oven temperature to 375 degrees F.

Step 4: Beat the eggs, cream, milk, nutmeg, salt, and pepper in a medium-sized bowl until well combined. Set the quiche filling aside.

Step 5: Cook the bacon in a medium-sized skillet over medium-high heat until almost crispy. Place the cooked bacon on a plate lined with a paper towel. Drain the grease from the pan, leaving only 1 tbsp of bacon fat. Adjust the heat to medium and place the pan back on the stovetop. Add the onions to the pan and cook until tender and translucent.

Step 6: To assemble the quiche, evenly distribute the lightly chopped bacon along the bottom of the pie shell. Next, add the onion followed by the Gruyere cheese and grated Parmesan. Into the shell, gradually pour the egg mixture.

Step 7: Onto a baking sheet, place the pie plate. Place in the preheated oven and bake for about 35 to 40 minutes or until a knife inserted in the crust comes out clean and the quiche is almost firm when jiggled.

Step 8: Take the quiche out of the oven when done and allow it to cool for about 45 minutes before slicing it into wedges. Serve the quiche with tossed or fresh fruit salad. Enjoy!

May 6, 2022 0 comment
0 FacebookTwitterPinterestEmail
General Recipes

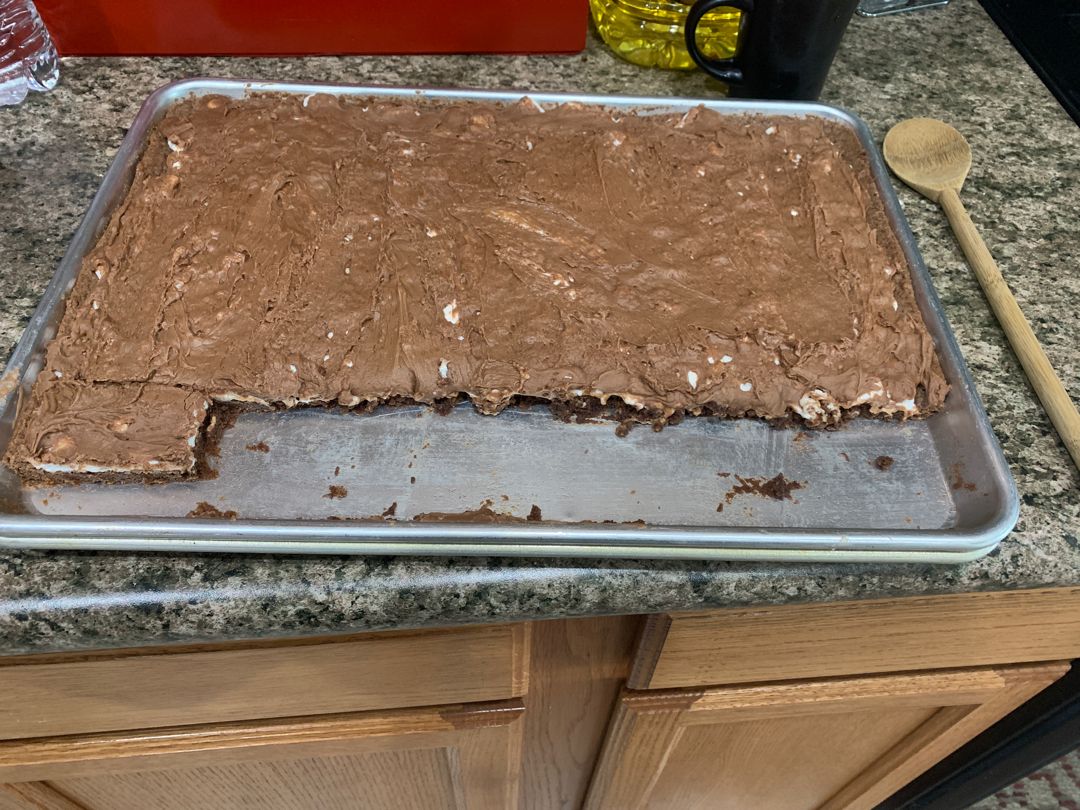
Mom’s Famous Chocolate Marshmallow Brownies Recipe

by Rebecca May 6, 2022
written by Rebecca

PREP TIME: 40 MINS | COOK TIME: 22 MINS | TOTAL TIME: 1 HR 2 MINS | SERVINGS: 35

Gooey and insanely delicious! These brownies are the ultimate winner with melted marshmallows over a chocolate base and topped with heavenly creamy homemade frosting. These brownies are credibly the World’s best brownies you’ll ever make! Tickle your taste buds with this wonderful and addicting dessert. If you will, whip up a huge batch and keep them in cute boxes or jars for DIY giveaways.

These chocolate marshmallow brownies are seriously famous! Every time I make these brownies, they are gone like a flash! It’s a special treat that is perfect for entertaining, potlucks, and gifts.

Ingredients

Brownie:

4 eggs

⅓ c. cocoa

2 c. sugar

1 ½ c. flour

1 c. butter, softened to room temp

2 tsp vanilla

10 oz. miniature marshmallows

1 tsp salt

Frosting:

2 tbsp milk

½ c. butter, softened

3 c. powdered sugar

4 tbsp cocoa powder

1 tsp vanilla

How to make Mom’s Famous Chocolate Marshmallow Brownies

Brownies:

Step 1: Combine the softened butter with sugar and cocoa until well blended. Add the four eggs, one at a time, beating well after each addition. Next, add the flour along with the salt and vanilla. Beat well until well combined.

Step 2: On a lightly greased large half sheet baking pan (about 18 x 13 x 1-inch), pour this mixture and spread. Place in the oven and bake for about 22 to 25 minutes at 350 degrees.

Step 3: Take the brownies from the oven when done and completely cover the top with a package of miniature marshmallows. Resume baking for another 3 minutes or until the marshmallows are soft and fluffy.

Step 4: Before frosting, let the brownies cool completely first.

Frosting:

Step 5: Using a hand mixer, mix the frosting ingredients until smooth.

Step 6: To the frosting, add extra powdered sugar or milk until you have your preferred consistency.

Step 7: Spread the frosting onto the cooled brownies.

Nutrition Facts:

Calories: 211 kcal · Carbohydrates: 33 g · Protein: 2 g · Fat: 9 g · Saturated Fat: 5 g · Trans Fat: 1 g · Cholesterol: 40 mg · Sodium: 151 mg · Potassium: 39 mg · Fiber: 1 g · Sugar: 26 g · Vitamin A: 272 IU · Calcium: 9 mg · Iron: 1 mg

Mom's Famous Chocolate Marshmallow Brownies Recipe

Rebecca PREP TIME: 40 MINS | COOK TIME: 22 MINS | TOTAL TIME: 1 HR 2 MINS | SERVINGS: 35 Gooey and insanely delicious! These brownies are the ultimate winner with… General Recipes Mom’s Famous Chocolate Marshmallow Brownies Recipe European Print This
Serves: 35 Prep Time: 40 mins Cooking Time: 22 mins 22 mins
Nutrition facts: 211 calories 9 fat
Rating: 5.0/5
( 1 voted )

Ingredients

  • Brownie:
  • 4 eggs
  • ⅓ c. cocoa
  • 2 c. sugar
  • 1 ½ c. flour
  • 1 c. butter, softened to room temp
  • 2 tsp vanilla
  • 10 oz. miniature marshmallows
  • 1 tsp salt
  • Frosting:
  • 2 tbsp milk
  • ½ c. butter, softened
  • 3 c. powdered sugar
  • 4 tbsp cocoa powder
  • 1 tsp vanilla

Instructions

Brownies:

Step 1: Combine the softened butter with sugar and cocoa until well blended. Add the four eggs, one at a time, beating well after each addition. Next, add the flour along with the salt and vanilla. Beat well until well combined.

Step 2: On a lightly greased large half sheet baking pan (about 18 x 13 x 1-inch), pour this mixture and spread. Place in the oven and bake for about 22 to 25 minutes at 350 degrees.

Step 3: Take the brownies from the oven when done and completely cover the top with a package of miniature marshmallows. Resume baking for another 3 minutes or until the marshmallows are soft and fluffy.

Step 4: Before frosting, let the brownies cool completely first.

Frosting:

Step 5: Using a hand mixer, mix the frosting ingredients until smooth.

Step 6: To the frosting, add extra powdered sugar or milk until you have your preferred consistency.

Step 7: Spread the frosting onto the cooled brownies.

May 6, 2022 0 comment
0 FacebookTwitterPinterestEmail
Newer Posts
Older Posts

Popular Posts

  • 1

    Crispy Crunchy Parmesan Potatoes

    March 21, 2020
  • 2

    CROCK POT SMOTHERED PORK CHOPS

    March 21, 2020
  • Facebook
  • Twitter

@2019 - All Right Reserved.


Back To Top