Cook it once
  • Home
  • Privacy Policy
  • Recipes
    • KETO
    • LC
    • WW
  • Tips
  • Contact
Cook it once
  • Home
  • Privacy Policy
  • Recipes
    • KETO
    • LC
    • WW
  • Tips
  • Contact
Category:

General Recipes

General Recipes

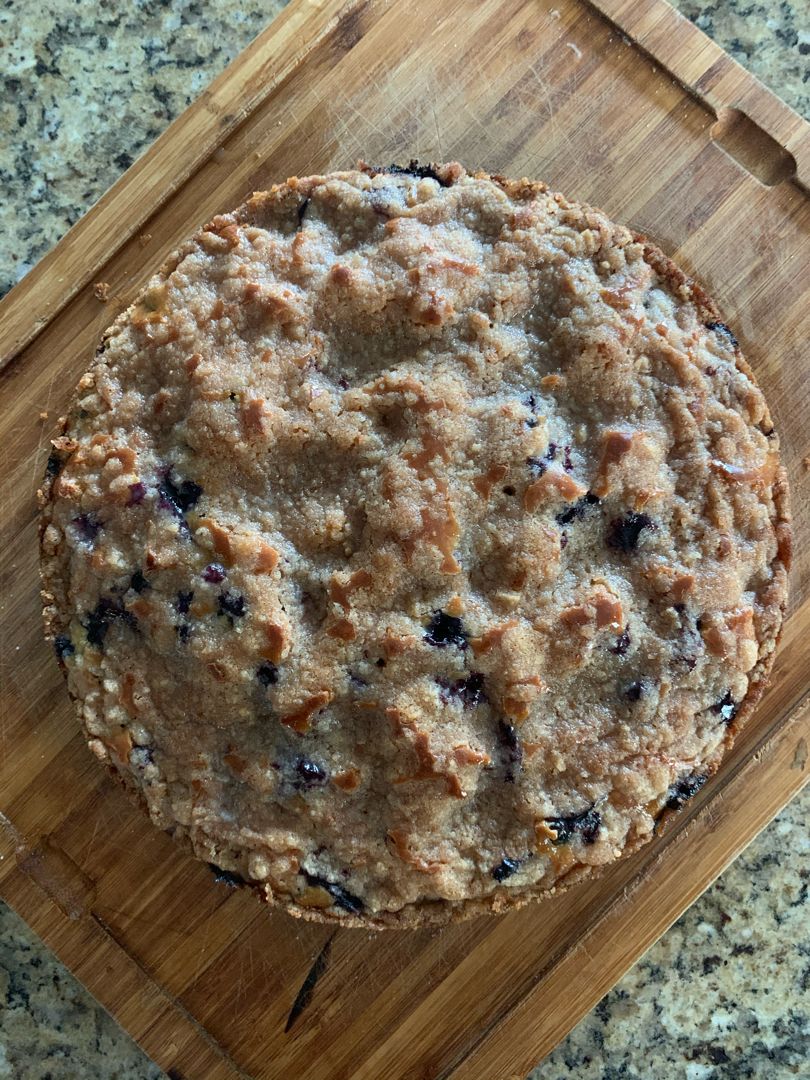
Blueberry Muffin Cake

by Rebecca May 20, 2022
written by Rebecca

Prep Time: 30 mins | Cook Time: 45 mins | Total Time: 1 hr 15 mins | Yield: serves 8-10

What is your all-time favorite cake? Mine is this blueberry muffin cake. It is soft, filled with fresh blueberries, and topped with the most amazing crunchy crumble! The best cake to serve for breakfast or brunch, and excellent for every occasion!

Ingredients

Crumb Topping:

3/4 tsp ground cinnamon

1/4 c. plus 2 tbsp butter, room temperature

3/4 c. granulated sugar

1/3 c. plus 3 tablespoons all-purpose flour

Cake:

1 egg

3/4 tsp salt

3/4 c. granulated sugar

3/4 c. milk

1/4 c. butter, room temperature

2 1/2 tsp baking powder

2 c. fresh blueberries

2 c. all-purpose flour

Glaze:

2 tsp milk

1/4 tsp vanilla

1/2 c. powdered sugar

How to make Blueberry Muffin Cake

Step 1: Prepare the oven. Preheat it to 375 degrees F or 190 degrees C. Using a nonstick spray, grease a 9-inch springform pan and set aside.

Step 2: Place the crumb ingredients in a medium bowl. Mix well using a fork or pastry cutter until incorporated and set aside.

Step 3: Combine the cake ingredients in a large bowl except for the blueberries until the mixture is mostly smooth. Then, fold in the blueberries.

Step 4: Into the prepared pan, spread the cake batter and evenly top with the crumb topping. Place in the preheated oven and bake for about 40 to 50 minutes or until a toothpick inserted in the middle of the cake comes out clean.

Step 5: Remove the cake from the oven when done and let the cake cool in the pan for 10 minutes. Using a knife, loosen the edges of the cake and remove the sides of the pan.

Step 6: To make the glaze, whisk the glaze ingredients until smooth. Over the cake, drizzle the glaze. Slice and serve the blueberry muffin cake warm or at room temperature. Enjoy!

Note:

You can store the cake for up to 3 days, airtight.

Nutrition Facts:

Calories: 365, Sugar: 38.9 g, Sodium: 194.7 mg, Fat: 12.4 g, Carbohydrates: 61.3 g, Protein: 4.3 g, Cholesterol: 49.5 mg
Blueberry Muffin Cake

Rebecca Prep Time: 30 mins | Cook Time: 45 mins | Total Time: 1 hr 15 mins | Yield: serves 8-10 What is your all-time favorite cake? Mine is this blueberry… General Recipes Blueberry Muffin Cake European Print This
Serves: 8-10 Prep Time: 30 mins Cooking Time: 45 mins 45 mins
Nutrition facts: 365 calories 12.4 fat
Rating: 5.0/5
( 1 voted )

Ingredients

  • Crumb Topping:
  • 3/4 tsp ground cinnamon
  • 1/4 c. plus 2 tbsp butter, room temperature
  • 3/4 c. granulated sugar
  • 1/3 c. plus 3 tablespoons all-purpose flour
  • Cake:
  • 1 egg
  • 3/4 tsp salt
  • 3/4 c. granulated sugar
  • 3/4 c. milk
  • 1/4 c. butter, room temperature
  • 2 1/2 tsp baking powder
  • 2 c. fresh blueberries
  • 2 c. all-purpose flour
  • Glaze:
  • 2 tsp milk
  • 1/4 tsp vanilla
  • 1/2 c. powdered sugar

Instructions

Step 1: Prepare the oven. Preheat it to 375 degrees F or 190 degrees C. Using a nonstick spray, grease a 9-inch springform pan and set aside.

Step 2: Place the crumb ingredients in a medium bowl. Mix well using a fork or pastry cutter until incorporated and set aside.

Step 3: Combine the cake ingredients in a large bowl except for the blueberries until the mixture is mostly smooth. Then, fold in the blueberries.

Step 4: Into the prepared pan, spread the cake batter and evenly top with the crumb topping. Place in the preheated oven and bake for about 40 to 50 minutes or until a toothpick inserted in the middle of the cake comes out clean.

Step 5: Remove the cake from the oven when done and let the cake cool in the pan for 10 minutes. Using a knife, loosen the edges of the cake and remove the sides of the pan.

Step 6: To make the glaze, whisk the glaze ingredients until smooth. Over the cake, drizzle the glaze. Slice and serve the blueberry muffin cake warm or at room temperature. Enjoy!

Notes

You can store the cake for up to 3 days, airtight.
May 20, 2022 0 comment
0 FacebookTwitterPinterestEmail
General Recipes

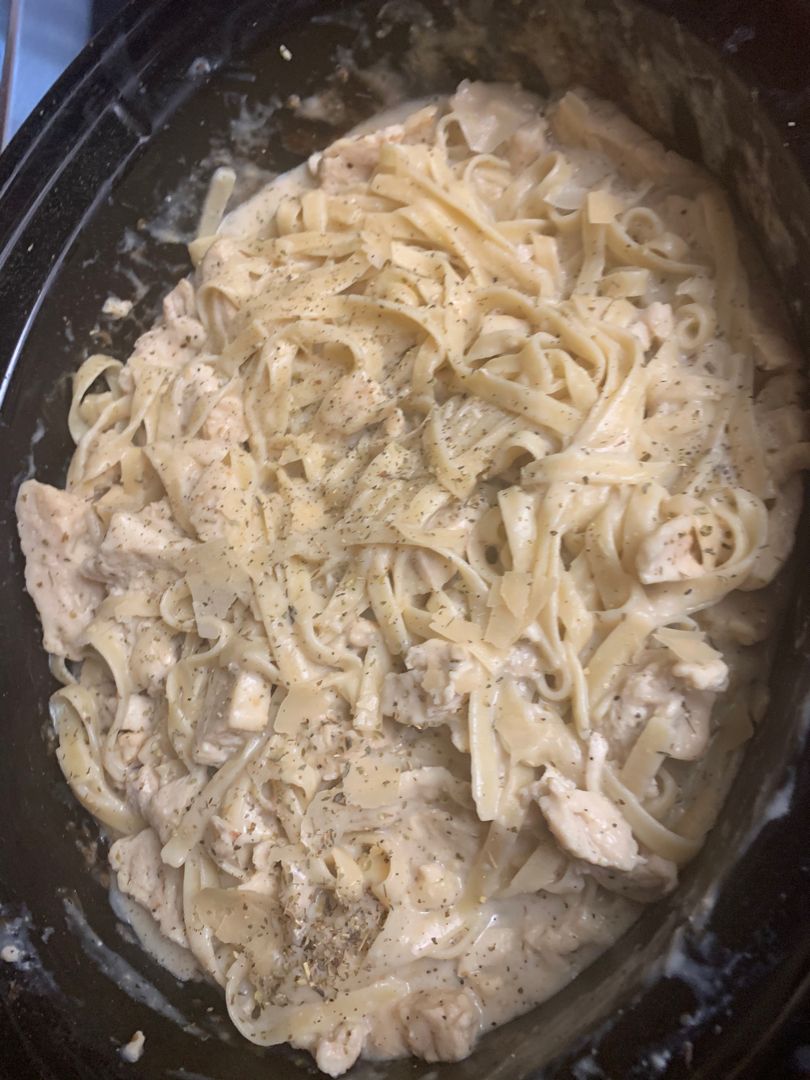
SLOW COOKER EASY CHICKEN ALFREDO

by Rebecca May 20, 2022
written by Rebecca

Prep time: 10 mins | Cook time: 3 hrs | Total time: 3 hrs 10 mins | Yield: 4 PEOPLE

Ready for your next slow cooker recipe? This easy chicken Alfredo is another amazing slow cooker gem that you should not miss. This requires only five ingredients and some optional garnishes (but recommended). Prep this in five minutes and throw everything in your slow cooker. Set to cook low and slow and go home to an amazing slow cooker version of your old-time favorite, rich, and creamy chicken Alfredo.

This slow cooker easy chicken Alfredo is a versatile, easy weeknight dinner. For the pasta, I use fettuccine, but you can swap it with penne pasta or bowtie pasta. You can also add broccoli if desired. Simply throw the broccoli in the last thirty minutes of cooking. For leftovers, keep them in a sealed container for up to 2 days in the fridge. Although, I recommend serving this right away/fresh.

Make sure to give this easy slow cooker chicken Alfredo a try very soon. I am pretty sure that this will be your next favorite!

INGREDIENTS

1 teaspoon Italian seasoning

2 large chicken breasts

2 jars (16 ounces each) of Alfredo sauce

½ lb. cooked fettuccine pasta

Salt and pepper to taste

Garnish (optional):

Pinch of pepper

½ teaspoon Italian seasoning

¼ c. freshly grated Parmesan cheese

HOW TO MAKE SLOW COOKER EASY CHICKEN ALFREDO

Step 1: Thoroughly massage the Italian seasoning, salt, and pepper on the chicken breasts. Then, place the chicken in a greased slow cooker. Over the chicken, pour the Alfredo sauce and toss well.

Step 2: Put the lid on and set to cook on low for 2 1/2 hours or until the chicken is completely cooked.

Step 3: When done, take the chicken breasts out of the slow cooker and cut them into small cubes using a sharp knife. Or shred the chicken instead. Return the cubed/shredded chicken to the slow cooker. Next, add the cooked pasta and toss well.

Step 4: Serve the chicken Alfredo right immediately, garnished with Parmesan cheese, pepper, and Italian seasoning. Enjoy!

Nutrition Facts:

Calories: 172 kcal, carbohydrates: 15g, protein: 17g, fat: 4g, saturated fat: 1g, cholesterol: 58mg, sodium: 167mg, potassium: 230mg, vitamin a: 70IU, vitamin c: 0.7mg, calcium: 90mg, iron: 0.8mg

SLOW COOKER EASY CHICKEN ALFREDO

Rebecca Prep time: 10 mins | Cook time: 3 hrs | Total time: 3 hrs 10 mins | Yield: 4 PEOPLE Ready for your next slow cooker recipe? This easy chicken… General Recipes SLOW COOKER EASY CHICKEN ALFREDO European Print This
Serves: 4 Prep Time: 10 mins Cooking Time: 3 hrs 3 hrs
Nutrition facts: 172 calories 4 fat
Rating: 5.0/5
( 1 voted )

Ingredients

  • 1 teaspoon Italian seasoning
  • 2 large chicken breasts
  • 2 jars (16 ounces each) of Alfredo sauce
  • ½ lb. cooked fettuccine pasta
  • Salt and pepper to taste
  • Garnish (optional):
  • Pinch of pepper
  • ½ teaspoon Italian seasoning
  • ¼ c. freshly grated Parmesan cheese

Instructions

Step 1: Thoroughly massage the Italian seasoning, salt, and pepper on the chicken breasts. Then, place the chicken in a greased slow cooker. Over the chicken, pour the Alfredo sauce and toss well.

Step 2: Put the lid on and set to cook on low for 2 1/2 hours or until the chicken is completely cooked.

Step 3: When done, take the chicken breasts out of the slow cooker and cut them into small cubes using a sharp knife. Or shred the chicken instead. Return the cubed/shredded chicken to the slow cooker. Next, add the cooked pasta and toss well.

Step 4: Serve the chicken Alfredo right immediately, garnished with Parmesan cheese, pepper, and Italian seasoning. Enjoy!

May 20, 2022 0 comment
0 FacebookTwitterPinterestEmail
General Recipes

Peanut Butter Stuffed Brownies

by Rebecca May 20, 2022
written by Rebecca

PREP TIME: 20 mins | COOK TIME: 30 mins | FREEZING TIME: 1 hr | TOTAL TIME: 1 hr 50 mins | YIELD: 9 large or 16 small brownies

Fudgy chocolate brownies filled with a thick layer of pure peanut butter. These indulgent peanut butter stuffed brownies are moist, rich, and the best dessert to delight everyone! If you seriously love peanut butter like me, I am pretty sure that you’ll fall head over heels with these heavenly brownies!

Ingredients

Peanut butter filling:

1 1/4 c. (336 g.) creamy conventional peanut butter (NOT ‘natural’)

Brownies:

2 large eggs plus 1 egg yolk

10 tbsp (142 g.) unsalted butter

1 c. (200 g.) granulated sugar

1 tsp vanilla extract

4 oz. (113 g.) semisweet baking chocolate, chopped

1/2 c. (64 g.) all-purpose flour

1/4 tsp fine salt

1/4 c. (25 g.) unsweetened cocoa powder, sifted

How to make Peanut Butter Stuffed Brownies

Peanut butter filling:

Step 1: In a heat-safe bowl, place the peanut butter and heat in the microwave for 20 to 30 seconds or until pourable but not very hot.

Step 2: Using the parchment paper, line a metal 8-inch square pan, making sure to leave an overhang. Into an even layer in the pan, spread the peanut butter. Place in the freezer for 1 hour or so until solid. Take the peanut butter sheet out of the pan and return it to the freezer until ready to use.

Brownies:

Step 3: Prepare the oven. Preheat it to 350 degrees. Using the parchment paper, line a square pan, leaving an overhang.

Step 4: Whisk the butter and chocolate in a large microwave-safe bowl. Heat in the microwave in 30-second bursts, stirring in between, until melted and smooth.

Step 5: To the hot butter mixture, add the sugar and whisk vigorously until blended. Let this cool until just barely warm. Then, add in the eggs, yolks, and vanilla extract. Stir for a minute or until well incorporated.

Step 6: Stir in the flour using a rubber spatula along with the cocoa powder, and salt until just mixed.

Step 7: Into the prepared pan, pour half of the batter and smooth it out. Over the batter, carefully place the frozen peanut butter sheet. On top, pour the rest of the batter, covering the top fully.

Step 8: Place in the preheated oven and bake for about 30 minutes or until completely cooked but still slightly gooey in the middle. Remove from the oven when done and allow the brownie to cool for 30 minutes on the pan. Then, take the brownie out of the pan and let it cool for additional 30 minutes.

Step 9: Slice the brownies and serve right away. Or store them in an airtight container for up to 3 days at room temperature or up to 5 days in the fridge.

Peanut Butter Stuffed Brownies

Rebecca PREP TIME: 20 mins | COOK TIME: 30 mins | FREEZING TIME: 1 hr | TOTAL TIME: 1 hr 50 mins | YIELD: 9 large or 16 small brownies Fudgy… General Recipes Peanut Butter Stuffed Brownies European Print This
Serves: 9-16 Prep Time: 20 mins Cooking Time: 30 mins 30 mins
Nutrition facts: 200 calories 20 grams fat
Rating: 5.0/5
( 1 voted )

Ingredients

  • Peanut butter filling:
  • 1 1/4 c. (336 g.) creamy conventional peanut butter (NOT 'natural')
  • Brownies:
  • 2 large eggs plus 1 egg yolk
  • 10 tbsp (142 g.) unsalted butter
  • 1 c. (200 g.) granulated sugar
  • 1 tsp vanilla extract
  • 4 oz. (113 g.) semisweet baking chocolate, chopped
  • 1/2 c. (64 g.) all-purpose flour
  • 1/4 tsp fine salt
  • 1/4 c. (25 g.) unsweetened cocoa powder, sifted

Instructions

Peanut butter filling:

Step 1: In a heat-safe bowl, place the peanut butter and heat in the microwave for 20 to 30 seconds or until pourable but not very hot.

Step 2: Using the parchment paper, line a metal 8-inch square pan, making sure to leave an overhang. Into an even layer in the pan, spread the peanut butter. Place in the freezer for 1 hour or so until solid. Take the peanut butter sheet out of the pan and return it to the freezer until ready to use.

Brownies:

Step 3: Prepare the oven. Preheat it to 350 degrees. Using the parchment paper, line a square pan, leaving an overhang.

Step 4: Whisk the butter and chocolate in a large microwave-safe bowl. Heat in the microwave in 30-second bursts, stirring in between, until melted and smooth.

Step 5: To the hot butter mixture, add the sugar and whisk vigorously until blended. Let this cool until just barely warm. Then, add in the eggs, yolks, and vanilla extract. Stir for a minute or until well incorporated.

Step 6: Stir in the flour using a rubber spatula along with the cocoa powder, and salt until just mixed.

Step 7: Into the prepared pan, pour half of the batter and smooth it out. Over the batter, carefully place the frozen peanut butter sheet. On top, pour the rest of the batter, covering the top fully.

Step 8: Place in the preheated oven and bake for about 30 minutes or until completely cooked but still slightly gooey in the middle. Remove from the oven when done and allow the brownie to cool for 30 minutes on the pan. Then, take the brownie out of the pan and let it cool for additional 30 minutes.

Step 9: Slice the brownies and serve right away. Or store them in an airtight container for up to 3 days at room temperature or up to 5 days in the fridge.

May 20, 2022 0 comment
0 FacebookTwitterPinterestEmail
General Recipes

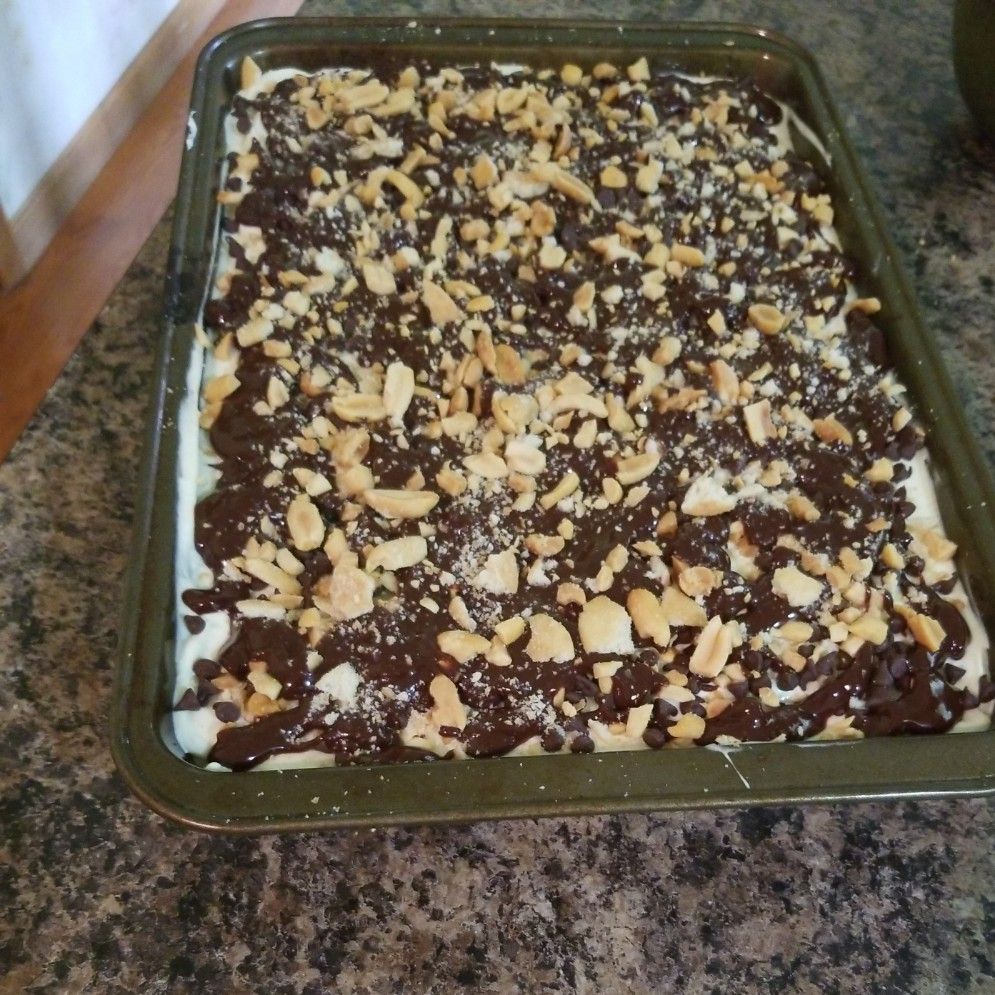
Drumstick Layered Dessert

by Rebecca May 20, 2022
written by Rebecca

Prep Time: 20 mins | Chill time: 4 hrs | Total Time: 4 hrs 20 mins | Servings: 16 pieces

This drumsticks layered dessert is heaven on earth! It is loaded with everything we love from the crust, filling, ganache, and garnishes. A layered dessert that everyone loves!

Ingredients

½ c. butter, melted

2 c. vanilla wafer crumbs (OR Sugar Cone Crumbs)

¼ c. granulated sugar

2 3.4-ounce box white chocolate instant pudding (like Hershey’s)

1 16-ounces whipped cream cheese, softened

4 c. cold half & half

2 c. sweetened fresh whipped cream or one 8 ounces frozen whipped topping thawed

½ c. heavy cream for the ganache

1 c. chopped peanuts divided

5 sugar cones roughly crushed

2 c. mini chocolate chips, divided (reserve 1 cup total for the ganache)

How to make Drumstick Layered Dessert

Step 1: Prepare the oven. Preheat it to 350 degrees F. Using cooking spray, grease the bottom of a 13 x 9-inch baking dish.

Step 2: Place the vanilla wafer crumbs, ½ cup chopped peanuts, melted butter, and granulated sugar in a small mixing bowl. Mix well until combined, then pour the mixture into the prepared baking dish, pressing it onto the bottom. Place in the preheated oven and bake for about 15 to 20 minutes or until lightly golden and set. Remove from the oven when done and let it cool completely.

Step 3: Whip both boxes of the Instant pudding in a medium mixing bowl with 4 cups of half-and-half for about 2 minutes or until the mixture starts to thicken. Next, add the whipped cream cheese and whip again until smooth and blended. By hand, fold in the fresh whipped cream.

Step 4: Onto the cooled crust, evenly spread the filling, and sprinkle with half of the reserved mini chocolate chips, half of the chopped spinach, and half of the crushed sugar cones.

Step 5: For the ganache, start melting 1 c. mini chocolate chips and half c heavy cream in the microwave in 20-second increments, making sure to stir each time. Do this until you have a smooth mixture. Then, slightly cool the melted chocolate. Once cool enough, drizzle this on the first layer of chocolate chips, sugar cone pieces, and peanuts.

Step 6: Garnish the top with the reserved peanuts while the chocolate is still soft along with chocolate chips, and sugar cone pieces.

Step 7: Before slicing, chill the dessert for at least 4 hours or overnight.

Note:

Layer the mini chocolate chips, peanuts, and crushed sugar cone pieces first over the filling, then for garnish over the chocolate ganache.

Nutrition Facts:

Serving: 1piece | Calories: 523 kcal | Carbohydrates: 49g | Protein: 7g | Fat: 34g | Saturated Fat: 19g | Trans Fat: 1g | Cholesterol: 74mg | Sodium: 359mg | Potassium: 213mg | Fiber: 2g | Sugar: 33g | Vitamin A: 755IU | Vitamin C: 1mg | Calcium: 136mg | Iron: 1mg

Drumstick Layered Dessert

Rebecca Prep Time: 20 mins | Chill time: 4 hrs | Total Time: 4 hrs 20 mins | Servings: 16 pieces This drumsticks layered dessert is heaven on earth! It is… General Recipes Drumstick Layered Dessert European Print This
Serves: 16 Prep Time: 20 mins
Nutrition facts: 523 calories 34 fat
Rating: 5.0/5
( 1 voted )

Ingredients

  • ½ c. butter, melted
  • 2 c. vanilla wafer crumbs (OR Sugar Cone Crumbs)
  • ¼ c. granulated sugar
  • 2 3.4-ounce box white chocolate instant pudding (like Hershey's)
  • 1 16-ounces whipped cream cheese, softened
  • 4 c. cold half & half
  • 2 c. sweetened fresh whipped cream or one 8 ounces frozen whipped topping thawed
  • ½ c. heavy cream for the ganache
  • 1 c. chopped peanuts divided
  • 5 sugar cones roughly crushed
  • 2 c. mini chocolate chips, divided (reserve 1 cup total for the ganache)

Instructions

Step 1: Prepare the oven. Preheat it to 350 degrees F. Using cooking spray, grease the bottom of a 13 x 9-inch baking dish.

Step 2: Place the vanilla wafer crumbs, ½ cup chopped peanuts, melted butter, and granulated sugar in a small mixing bowl. Mix well until combined, then pour the mixture into the prepared baking dish, pressing it onto the bottom. Place in the preheated oven and bake for about 15 to 20 minutes or until lightly golden and set. Remove from the oven when done and let it cool completely.

Step 3: Whip both boxes of the Instant pudding in a medium mixing bowl with 4 cups of half-and-half for about 2 minutes or until the mixture starts to thicken. Next, add the whipped cream cheese and whip again until smooth and blended. By hand, fold in the fresh whipped cream.

Step 4: Onto the cooled crust, evenly spread the filling, and sprinkle with half of the reserved mini chocolate chips, half of the chopped spinach, and half of the crushed sugar cones.

Step 5: For the ganache, start melting 1 c. mini chocolate chips and half c heavy cream in the microwave in 20-second increments, making sure to stir each time. Do this until you have a smooth mixture. Then, slightly cool the melted chocolate. Once cool enough, drizzle this on the first layer of chocolate chips, sugar cone pieces, and peanuts.

Step 6: Garnish the top with the reserved peanuts while the chocolate is still soft along with chocolate chips, and sugar cone pieces.

Step 7: Before slicing, chill the dessert for at least 4 hours or overnight.

Notes

Layer the mini chocolate chips, peanuts, and crushed sugar cone pieces first over the filling, then for garnish over the chocolate ganache.

May 20, 2022 0 comment
0 FacebookTwitterPinterestEmail
General Recipes

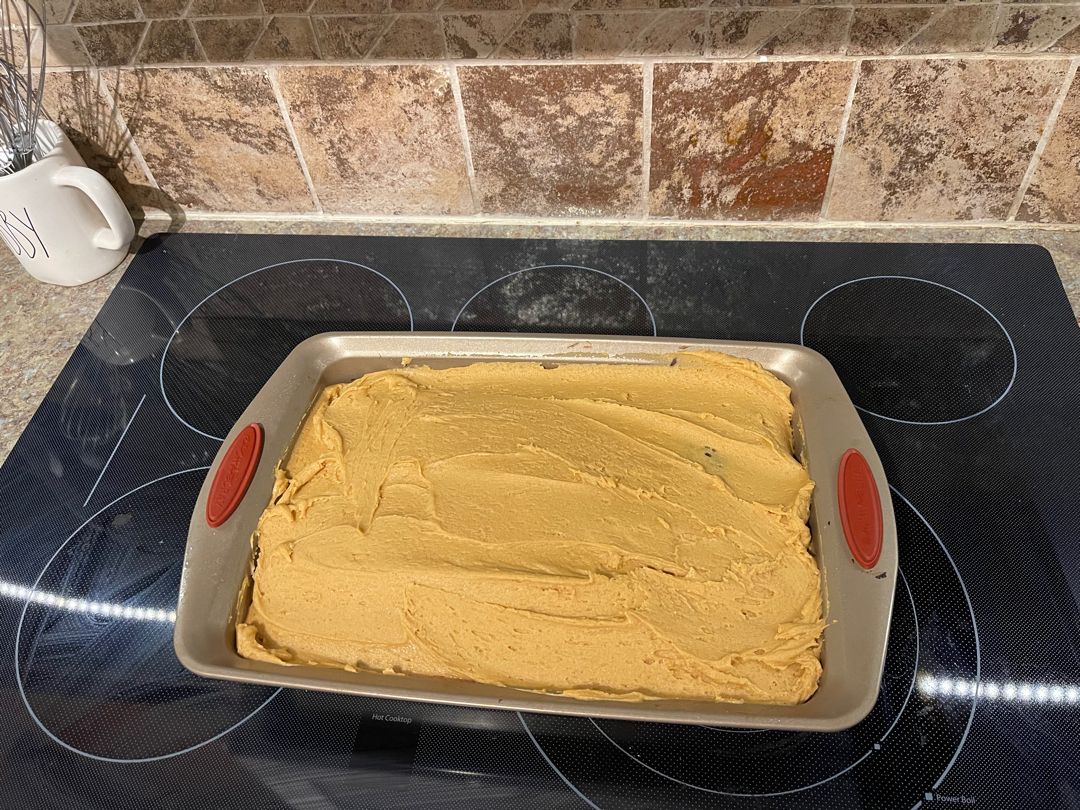
Chocolate Cake With Peanut Butter Frosting

by Rebecca May 20, 2022
written by Rebecca

Prep Time: 15 mins | Cook Time: 1 hr | Total Time: 1 hr 15 mins | Servings: 12

This is my all-time favorite cake! I am head over heels for the combination of chocolate and coffee. This instantly gives this cake a striking mocha flavor which I enjoy so much. Enjoy a slice or two of this moist and soft cake with the most amazing frosting anytime with this easy recipe.

Ingredients

2 large eggs

2 c. flour

3/4 c. Hershey’s cocoa

2 c. sugar

1 1/2 teaspoons baking soda

1 1/2 teaspoons vanilla

1/2 teaspoon baking powder

1 c. vegetable oil

1 c. buttermilk

1 c. brewed coffee (instant coffee is okay, too)

1 teaspoon salt

Peanut Butter Frosting:

1 c. creamy peanut butter

1/2 c. butter, softened

2 c. confectioners sugar

3 tablespoons milk or as needed

How to make Chocolate Cake With Peanut Butter Frosting

Cake:

Step 1: Prepare the oven. Preheat it to 300 degrees. Ready a 13 x 9-inch baking pan and grease the bottom and sides.

Step 2: In a large bowl, place the flour, sugar, cocoa, salt, baking powder, and baking soda. Mix well until blended.

Step 3: Using an electric mixer, beat the eggs until bright yellow and slightly thick. Next, add the oil, coffee, and vanilla. Beat again until blended. Then, add the flour alternately with the buttermilk, mixing every after each addition until just combined (flour, buttermilk, flour, buttermilk, and end with flour).

Step 4: Into the prepared baking pan, pour the batter. Place in the preheated oven and bake for about 1 hour or until a toothpick inserted in the center of the cake comes out clean.

Frosting:

Step 5: Into a medium bowl, beat the butter and peanut butter using an electric mixer. Slowly stir in the sugar. Add the milk, 1 tablespoon at a time once the mixture begins to thicken. Mix well for about 3 minutes until you have a mixture that is thick and spreadable.

Step 6: Frost the completely cooled cake.

Chocolate Cake With Peanut Butter Frosting

Rebecca Prep Time: 15 mins | Cook Time: 1 hr | Total Time: 1 hr 15 mins | Servings: 12 This is my all-time favorite cake! I am head over heels… General Recipes Chocolate Cake With Peanut Butter Frosting European Print This
Serves: 12 Prep Time: 15 mins Cooking Time: 1 hr 1 hr
Nutrition facts: 200 calories 20 grams fat
Rating: 5.0/5
( 1 voted )

Ingredients

  • 2 large eggs
  • 2 c. flour
  • 3/4 c. Hershey's cocoa
  • 2 c. sugar
  • 1 1/2 teaspoons baking soda
  • 1 1/2 teaspoons vanilla
  • 1/2 teaspoon baking powder
  • 1 c. vegetable oil
  • 1 c. buttermilk
  • 1 c. brewed coffee (instant coffee is okay, too)
  • 1 teaspoon salt
  • Peanut Butter Frosting:
  • 1 c. creamy peanut butter
  • 1/2 c. butter, softened
  • 2 c. confectioners sugar
  • 3 tablespoons milk or as needed

Instructions

Cake:

Step 1: Prepare the oven. Preheat it to 300 degrees. Ready a 13 x 9-inch baking pan and grease the bottom and sides.

Step 2: In a large bowl, place the flour, sugar, cocoa, salt, baking powder, and baking soda. Mix well until blended.

Step 3: Using an electric mixer, beat the eggs until bright yellow and slightly thick. Next, add the oil, coffee, and vanilla. Beat again until blended. Then, add the flour alternately with the buttermilk, mixing every after each addition until just combined (flour, buttermilk, flour, buttermilk, and end with flour).

Step 4: Into the prepared baking pan, pour the batter. Place in the preheated oven and bake for about 1 hour or until a toothpick inserted in the center of the cake comes out clean.

Frosting:

Step 5: Into a medium bowl, beat the butter and peanut butter using an electric mixer. Slowly stir in the sugar. Add the milk, 1 tablespoon at a time once the mixture begins to thicken. Mix well for about 3 minutes until you have a mixture that is thick and spreadable.

Step 6: Frost the completely cooled cake.

May 20, 2022 0 comment
0 FacebookTwitterPinterestEmail
General Recipes

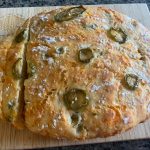
Easy No Knead Jalapeno Cheese Artisan Bread

by Rebecca May 20, 2022
written by Rebecca

Prep Time: 15 mins | Cook Time: 45 mins | Total Time: 1 hr | Servings: 6

This no-knead jalapeno cheese, Artisan bread is a staple at my house. We are obsessed with this savory bread that’s filled with spicy pickled jalapenos and real cheddar cheese. You can pull this off even if you have not made bread before.

Ingredients

1 1/2 c. sharp cheddar cheese, grated

1/2 tsp instant yeast

1/2 c. sliced pickled jalapenos (or more, if desired)

3 c. all-purpose flour

1 1/2 c. water at room temperature

2 tsp sea salt

How to make Easy No-Knead Jalapeno Cheese Artisan Bread

Step 1: In a large bowl, place the flour. Measure the yeast and place it on one side of the bowl. Next, add the salt to the other side. Stir the yeast into the flour using a wooden spoon, then into the salt. Mix everything well until well blended.

Step 2: To the flour mixture, add the sharp cheddar cheese and the sliced jalapenos. Mix well.

Step 3: Pour the room temperature water into the bowl and stir using a wooden spoon until you have a rough and slightly sticky dough.

Step 4: Tent the bowl with plastic wrap and allow the dough to rise in a warm, draft-free place for 12 to 18 hours.

Step 5: Preheat the oven to 450 degrees F after the dough has risen. In the cold oven, place a Dutch oven and allow it to heat up while the oven is preheating.

Step 6: On a counter, lay a piece of parchment paper and dust it with flour. With your floured hands, scrape the dough away from the sides of the bowl, making sure to gather the dough as best as you can. On the parchment paper, shape the dough into a circular loaf. On top, sprinkle some flour and loosely tent the dough with plastic wrap. Allow the dough to rise for approximately 45 minutes.

Step 7: Take the plastic wrap off the dough. Into a circle, trim the parchment paper closely around the dough.

Step 8: Into the preheated pot, carefully transfer the dough. Put the lid on and pop it in the oven for about 30 minutes.

Step 9: Remove the lid after 30 minutes and resume baking for additional 15 minutes. Take the pot out of the oven after 15 minutes and transfer it to a wire rack to cool the bread.

Step 10: Make sure to let the bread completely cool before slicing.

Nutrition Facts:

Serving: 1serving | Calories: 348 kcal | Carbohydrates: 49g | Protein: 14g | Fat: 10g | Saturated Fat: 6g | Cholesterol: 30mg | Sodium: 1142mg | Potassium: 126mg | Fiber: 2g | Sugar: 1g | Vitamin A: 476IU | Vitamin C: 1mg | Calcium: 216mg | Iron: 3mg

Easy No Knead Jalapeno Cheese Artisan Bread

Rebecca Prep Time: 15 mins | Cook Time: 45 mins | Total Time: 1 hr | Servings: 6 This no-knead jalapeno cheese, Artisan bread is a staple at my house. We… General Recipes Easy No Knead Jalapeno Cheese Artisan Bread European Print This
Serves: 6 Prep Time: 15 mins Cooking Time: 45 mins 45 mins
Nutrition facts: 348 calories 10 fat
Rating: 5.0/5
( 1 voted )

Ingredients

  • 1 1/2 c. sharp cheddar cheese, grated
  • 1/2 tsp instant yeast
  • 1/2 c. sliced pickled jalapenos (or more, if desired)
  • 3 c. all-purpose flour
  • 1 1/2 c. water at room temperature
  • 2 tsp sea salt

Instructions

Step 1: In a large bowl, place the flour. Measure the yeast and place it on one side of the bowl. Next, add the salt to the other side. Stir the yeast into the flour using a wooden spoon, then into the salt. Mix everything well until well blended.

Step 2: To the flour mixture, add the sharp cheddar cheese and the sliced jalapenos. Mix well.

Step 3: Pour the room temperature water into the bowl and stir using a wooden spoon until you have a rough and slightly sticky dough.

Step 4: Tent the bowl with plastic wrap and allow the dough to rise in a warm, draft-free place for 12 to 18 hours.

Step 5: Preheat the oven to 450 degrees F after the dough has risen. In the cold oven, place a Dutch oven and allow it to heat up while the oven is preheating.

Step 6: On a counter, lay a piece of parchment paper and dust it with flour. With your floured hands, scrape the dough away from the sides of the bowl, making sure to gather the dough as best as you can. On the parchment paper, shape the dough into a circular loaf. On top, sprinkle some flour and loosely tent the dough with plastic wrap. Allow the dough to rise for approximately 45 minutes.

Step 7: Take the plastic wrap off the dough. Into a circle, trim the parchment paper closely around the dough.

Step 8: Into the preheated pot, carefully transfer the dough. Put the lid on and pop it in the oven for about 30 minutes.

Step 9: Remove the lid after 30 minutes and resume baking for additional 15 minutes. Take the pot out of the oven after 15 minutes and transfer it to a wire rack to cool the bread.

Step 10: Make sure to let the bread completely cool before slicing.

May 20, 2022 0 comment
0 FacebookTwitterPinterestEmail
General Recipes

Pulled Pork Recipe

by Rebecca May 20, 2022
written by Rebecca

Prep Time: 15 mins | Cook Time: 8 hrs | Total Time: 8 hrs 15 mins | Servings: 8 people for pulled pork sandwiches

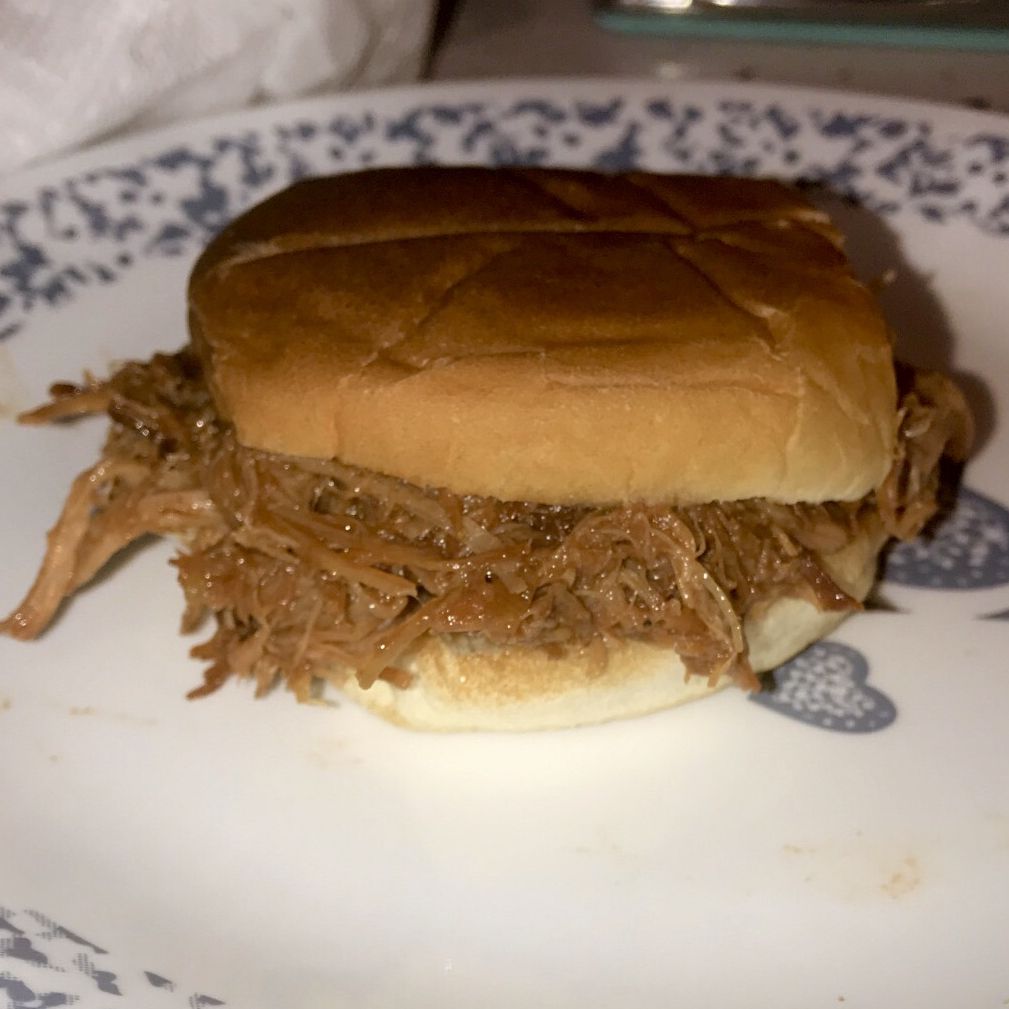
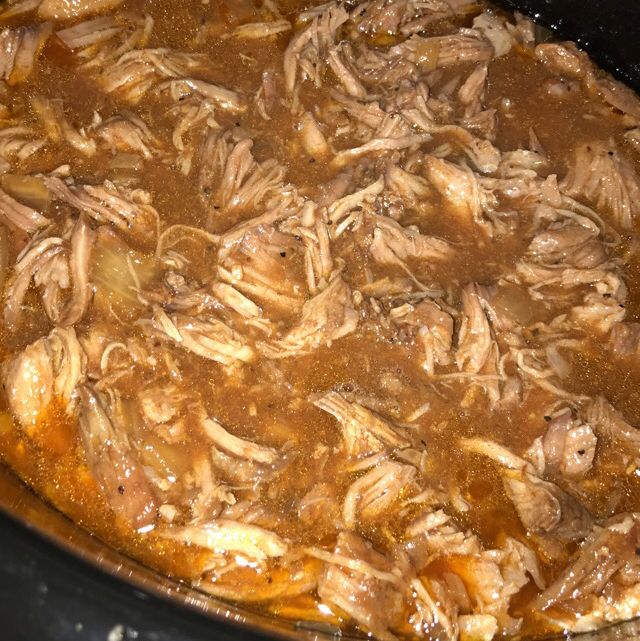
Fall-apart-tender pulled pork is cooked low and slow in a simple marinade that enhances the natural flavors of the pork. It is a mouthwatering dish that is excellent on sandwiches, wraps, or salads. We like to pair it with coleslaw or with mashed potatoes, or crispy baked potato wedges.

Sweet, smoky, and crowd-pleasing – this crockpot pulled pork recipe is the best you’ll ever make! It is a staple at home, and everyone loves it! The best part is you can freeze any leftover pulled pork for an easy and quick weeknight dinner.

Ingredients

6 pounds boneless Pork Shoulder Chuck Roast, (or 2 smaller roasts totalling 6-7 pounds)

1 teaspoon paprika

1 large onion

1 c. chicken broth

1 tablespoon liquid smoke, optional, but nice

3 large garlic cloves, pressed

2 tablespoons Worcestershire sauce

2 tablespoons brown sugar

1 c. your favorite BBQ Sauce, we used Stubb’s Sticky Sweet

1 tablespoon salt

1 teaspoon black pepper

How to make Pulled Pork

Step 1: Into the bottom of a slow cooker, add one large chopped onion.

Step 2: Mix 1 tablespoon salt, 1 teaspoon pepper, and 1 teaspoon paprika and sprinkle the mixture generously on the pork roast. Massage the mixture to the pork roast to coat. On top of the onions, nestle the meat.

Step 3: To make the marinade, whisk 1 c. chicken broth, 1 c. BBQ sauce, 1 tablespoon liquid smoke, 2 tablespoons Worcestershire sauce, 2 tablespoons brown sugar, and 3 pressed garlic cloves until well combined. Then, pour this over the pork.

Step 4: Cover the slow cooker and set it on low for 8 hours. When done, transfer the meat to a large bowl and discard any fat. Using two forks, shred the meat. Over the meat, pour any drippings from the pot. Lastly, brush the pork with the warm barbecue sauce

Step 5: Serve and enjoy!

Nutrition Facts:

Amount Per Serving: Calories 397, Calories from Fat 135, Fat 15g23%, Saturated Fat 5g31%, Cholesterol 139mg46%, Sodium 1453mg63%, Potassium 880mg25%, Carbohydrates 21g7%, Fiber 1g4%, Sugar 16g18%, Protein 42g84%, Vitamin A 216IU4%, Vitamin C 4mg5%, Calcium 53mg5%, Iron 3mg17%

May 20, 2022 0 comment
0 FacebookTwitterPinterestEmail
General Recipes

Pulled Pork Recipe

by Rebecca May 20, 2022
written by Rebecca

Prep Time: 15 mins | Cook Time: 8 hrs | Total Time: 8 hrs 15 mins | Servings: 8 people for pulled pork sandwiches

This fall-apart-tender pulled pork is packed with mouthwatering flavors. Thanks to the simple marinade, the natural flavors of the pork enhance. This delicious pulled pork is perfect for sandwiches, salads, and even wraps. A staple and must try if you have not tried this easy recipe yet.

My family has been enjoying this pulled pork for years! We love it on soft potato buns. This is also great if you are looking for a fun twist to Taco Tuesday. If you are expecting guests, serve this with tortilla chips, cheese, and your favorite fixings. There are tons of ways to enjoy this amazing pulled pork. You can also try this in wraps, salad, or if you are making some pork sliders.

Ingredients

6 pounds boneless Pork Shoulder Chuck Roast, (or 2 smaller roasts totalling 6-7 pounds)

1 large onion

3 large garlic cloves, pressed

1 teaspoon paprika

1 c. your favorite BBQ Sauce, we used Stubb’s Sticky Sweet

1 tablespoon liquid smoke, optional, but nice

2 tablespoons brown sugar

2 tablespoons Worcestershire sauce

1 c. chicken broth

1 tablespoon salt

1 teaspoon black pepper

How to make Pulled Pork

Step 1: Into the bottom of a slow cooker, place 1 large chopped onion.

Step 2: Mix 1 tablespoon salt with 1 teaspoon pepper and 1 teaspoon paprika. Generously sprinkle this on the pork roast. Massage the rub into the meat. On top of the onions, place the pork roast.

Step 3: To make the marinade, whisk 1 c. chicken broth, 1 c. BBQ sauce, 1 tablespoon liquid smoke, 2 tablespoons Worcestershire sauce, 2 tablespoons brown sugar, and 3 pressed garlic cloves until well blended. Pour this over the pork.

Step 4: Put the lid on and set it to cook for 8 hours on low. To a large bowl, transfer the meat when done and remove any fat. Using two forks, shred the pork. Over the meat, pour any drippings from the crockpot and brush the meat with the warm barbecue sauce. Enjoy!

Nutrition Facts:

Amount Per Serving: Calories 397, Calories from Fat 135, Fat 15g23%, Saturated Fat 5g31%, Cholesterol 139mg46%, Sodium 1453mg63%, Potassium 880mg25%, Carbohydrates 21g7%, Fiber 1g4%, Sugar 16g18%, Protein 42g84%, Vitamin A 216IU4%, Vitamin C 4mg5%, Calcium 53mg5%, Iron 3mg17%

*Percent Daily Values are based on a 2000 calorie diet

Pulled Pork Recipe

Rebecca Prep Time: 15 mins | Cook Time: 8 hrs | Total Time: 8 hrs 15 mins | Servings: 8 people for pulled pork sandwiches This fall-apart-tender pulled pork is packed… General Recipes Pulled Pork Recipe European Print This
Serves: 8 Prep Time: 15 mins Cooking Time: 8 hrs 8 hrs
Nutrition facts: 397 calories 15 fat
Rating: 5.0/5
( 1 voted )

Ingredients

  • 6 pounds boneless Pork Shoulder Chuck Roast, (or 2 smaller roasts totalling 6-7 pounds)
  • 1 large onion
  • 3 large garlic cloves, pressed
  • 1 teaspoon paprika
  • 1 c. your favorite BBQ Sauce, we used Stubb's Sticky Sweet
  • 1 tablespoon liquid smoke, optional, but nice
  • 2 tablespoons brown sugar
  • 2 tablespoons Worcestershire sauce
  • 1 c. chicken broth
  • 1 tablespoon salt
  • 1 teaspoon black pepper

Instructions

Step 1: Into the bottom of a slow cooker, place 1 large chopped onion.

Step 2: Mix 1 tablespoon salt with 1 teaspoon pepper and 1 teaspoon paprika. Generously sprinkle this on the pork roast. Massage the rub into the meat. On top of the onions, place the pork roast.

Step 3: To make the marinade, whisk 1 c. chicken broth, 1 c. BBQ sauce, 1 tablespoon liquid smoke, 2 tablespoons Worcestershire sauce, 2 tablespoons brown sugar, and 3 pressed garlic cloves until well blended. Pour this over the pork.

Step 4: Put the lid on and set it to cook for 8 hours on low. To a large bowl, transfer the meat when done and remove any fat. Using two forks, shred the pork. Over the meat, pour any drippings from the crockpot and brush the meat with the warm barbecue sauce. Enjoy!

May 20, 2022 0 comment
0 FacebookTwitterPinterestEmail
General Recipes

Italian Drunken Noodles

by Rebecca May 20, 2022
written by Rebecca

Prep Time: 20 mins | Cook time: 25 mins | Total time: 45 mins | Yield: 4 servings

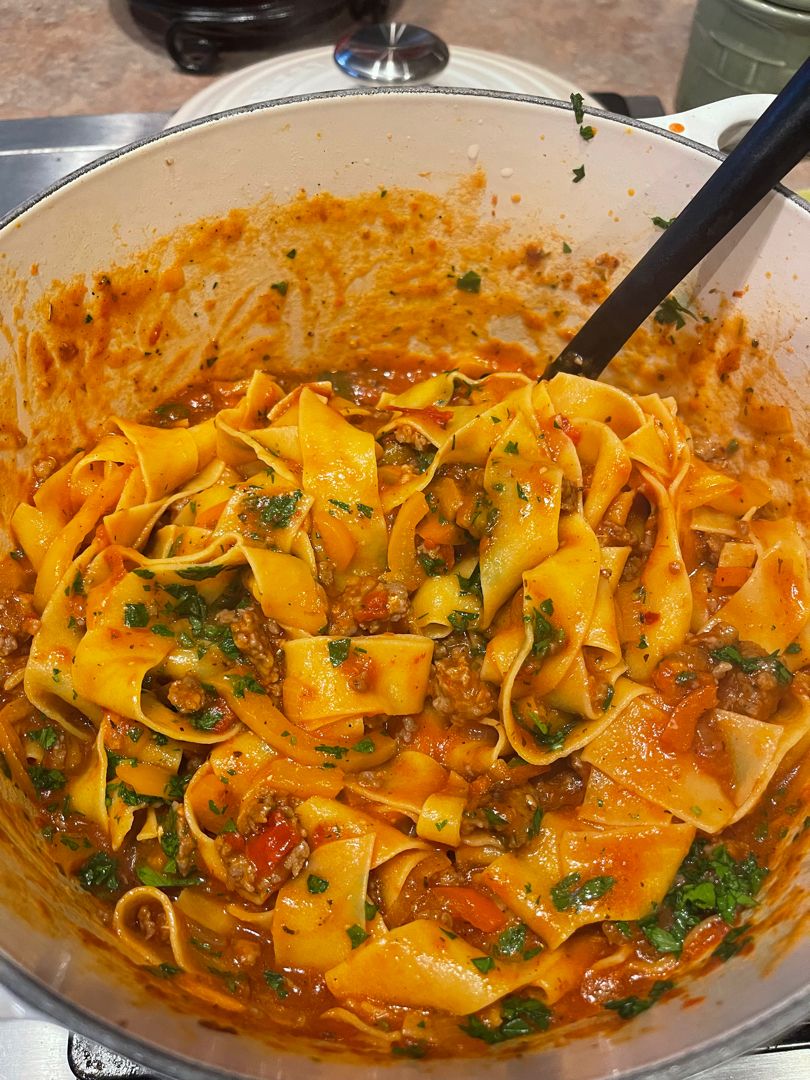
This is an amazing fusion of Italian and Thai with spicy sausage, peppers, onions, basil, and a touch of wine. A scrumptious noodles dish with huge flavors. This is excellent if you find yourself craving some Thai cuisine.

Ingredients

Olive oil

8 oz. pappardelle noodles, uncooked

2 tbsp flat-leaf parsley, chopped

4 spicy Italian sausage links, casings removed

1 large onion, quartered and sliced thinly

1 red bell pepper, cored and thinly sliced

1 orange bell pepper, cored and thinly sliced

1 yellow bell pepper, cored and thinly sliced

4 cloves of garlic, pressed through a garlic press

1 (28 oz) can of diced tomatoes, with juice

¼ c. fresh basil leaves, julienned, divided use

½ c. white (I used Chardonnay)

1 tsp Italian seasoning

1 ½ tsp salt

½ tsp cracked black pepper

How to make Italian Drunken Noodles

Step 1: Following the package directions, cook the pappardelle noodles. Drain when done and keep warm.

Step 2: Drizzle about 2 tbsp olive oil in a hot, large, heavy-bottomed pan or braising pot. Into the pan, add the spicy Italian sausage and cook while breaking into small chunks until no longer pink. Into a small bowl, transfer the browned, crumble sausage and set aside.

Step 3: Into the now-empty pan, add the sliced onion. Cook with the sausage drippings for about 5 minutes until caramelized, stirring constantly to prevent the onions from burning. If needed, add extra olive oil as the onion cooks. Then, stir the salt, Italian seasoning, and cracked black pepper once the onion begins to become golden.

Step 4: To the pan, add the sliced bell peppers and saute with the onion for about 2 minutes or until the bell peppers are a little tender and golden. Then, add the garlic and continue to cook until fragrant. Next, pour in the wine and cook further until it is almost fully reduced.

Step 5: Add the diced tomatoes to the pan with their juice along with the browned spicy Italian sausage. Gently stir and simmer for approximately 3 to 4 minutes. When done, turn off the heat.

Step 6: To make a silky and rich flavor, drizzle around 2 to 3 tbsp of olive oil into the sauce. Add the chopped parsley and around half of the julienned basil. Stir well.

Step 7: Directly into the sauce, and add the cooked pappardelle noodles. Gently toss using tongs and season with extra salt and pepper if needed.

Step 8: To bowls, ladle equal portions of the Italian drunken noodles and serve right away garnished with a sprinkle of the rest of the julienned basil. If desired, top each serving with shaved Parmesan and a drizzle of olive oil. Enjoy!

Italian Drunken Noodles

Rebecca Prep Time: 20 mins | Cook time: 25 mins | Total time: 45 mins | Yield: 4 servings This is an amazing fusion of Italian and Thai with spicy sausage,… General Recipes Italian Drunken Noodles European Print This
Serves: 4 Prep Time: 20 mins Cooking Time: 25 mins 25 mins
Nutrition facts: 200 calories 20 grams fat
Rating: 5.0/5
( 1 voted )

Ingredients

  • Olive oil
  • 8 oz. pappardelle noodles, uncooked
  • 2 tbsp flat-leaf parsley, chopped
  • 4 spicy Italian sausage links, casings removed
  • 1 large onion, quartered and sliced thinly
  • 1 red bell pepper, cored and thinly sliced
  • 1 orange bell pepper, cored and thinly sliced
  • 1 yellow bell pepper, cored and thinly sliced
  • 4 cloves of garlic, pressed through a garlic press
  • 1 (28 oz) can of diced tomatoes, with juice
  • ¼ c. fresh basil leaves, julienned, divided use
  • ½ c. white (I used Chardonnay)
  • 1 tsp Italian seasoning
  • 1 ½ tsp salt
  • ½ tsp cracked black pepper

Instructions

Step 1: Following the package directions, cook the pappardelle noodles. Drain when done and keep warm.

Step 2: Drizzle about 2 tbsp olive oil in a hot, large, heavy-bottomed pan or braising pot. Into the pan, add the spicy Italian sausage and cook while breaking into small chunks until no longer pink. Into a small bowl, transfer the browned, crumble sausage and set aside.

Step 3: Into the now-empty pan, add the sliced onion. Cook with the sausage drippings for about 5 minutes until caramelized, stirring constantly to prevent the onions from burning. If needed, add extra olive oil as the onion cooks. Then, stir the salt, Italian seasoning, and cracked black pepper once the onion begins to become golden.

Step 4: To the pan, add the sliced bell peppers and saute with the onion for about 2 minutes or until the bell peppers are a little tender and golden. Then, add the garlic and continue to cook until fragrant. Next, pour in the wine and cook further until it is almost fully reduced.

Step 5: Add the diced tomatoes to the pan with their juice along with the browned spicy Italian sausage. Gently stir and simmer for approximately 3 to 4 minutes. When done, turn off the heat.

Step 6: To make a silky and rich flavor, drizzle around 2 to 3 tbsp of olive oil into the sauce. Add the chopped parsley and around half of the julienned basil. Stir well.

Step 7: Directly into the sauce, and add the cooked pappardelle noodles. Gently toss using tongs and season with extra salt and pepper if needed.

Step 8: To bowls, ladle equal portions of the Italian drunken noodles and serve right away garnished with a sprinkle of the rest of the julienned basil. If desired, top each serving with shaved Parmesan and a drizzle of olive oil. Enjoy!

May 20, 2022 0 comment
0 FacebookTwitterPinterestEmail
General Recipes

Slow Cooker Indian Butter Chicken

by Rebecca May 20, 2022
written by Rebecca

Prep Time: 20 mins | Cook Time: 5 hrs | Total Time: 5 hrs 20 mins | Yield: 4 Servings

This Indian Butter Chicken is a restaurant-quality meal that everyone loves. Incredibly easy to make using ingredients you might already have on hand. It has impressive creamy deep flavors that rival that of your favorite Indian restaurant.

Ingredients

3 boneless, skinless chicken breasts

1 c. plain yoghurt

1 tsp ground cinnamon

2 tsp ground cumin

1 tsp cayenne pepper

1 tsp ground ginger

1 tbsp lemon juice

3/4 tsp black pepper

1 tsp salt

SAUCE:

1 clove of garlic, minced

1 tbsp butter

2 tsp ground cumin

1 jalapeno pepper, finely chopped

2 tsp paprika

1 c. heavy cream

1 8-oz. can of tomato sauce

2 tbsp cornstarch

1/4 c. chopped fresh cilantro

1 tbsp water

1 tsp salt or to taste

How to make Slow Cooker Indian Butter Chicken

Step 1: The night before cooking, add the yoghurt, lemon juice, cumin, cinnamon, cayenne, black pepper, ginger, salt, and chicken in a large Ziplock bag. At this point, you can leave the chicken breasts whole.

Step 2: Seal the bag and work the mixture into the chicken. Place in the fridge overnight.

Step 3: Remove the Ziploc bag from the fridge and take the chicken off, scraping off the majority of the marinade. Into 2-inch pieces, cut the chicken.

Step 4: In the bottom of a slow cooker, add butter, garlic, and jalapeno.

Step 5: Add 2 tsp each cumin and paprika in a small bowl along with 1 tsp salt, tomato sauce, and heavy cream. Mix well until combined.

Step 6: Over the chicken, pour the sauce. Cover the slow cooker and set to cook the chicken for 4 to 5 hours on low.

Step 7: Whisk the cornstarch with 1 tbsp water until the lumps are gone. Stir this into the slow cooker and continue to cook for another 20 minutes on high.

Step 8: Serve the Indian butter chicken garnished with some cilantro. Enjoy!

Nutrition Facts:

Calories: 413 kcal | Carbohydrates: 15g | Protein: 22g | Fat: 29g | Saturated Fat: 17g | Cholesterol: 151mg | Sodium: 1676mg | Potassium: 732mg | Fiber: 2g | Sugar: 6g | Vitamin A: 2090IU | Vitamin C: 12.4mg | Calcium: 149mg | Iron: 2.6mg

Slow Cooker Indian Butter Chicken

Rebecca Prep Time: 20 mins | Cook Time: 5 hrs | Total Time: 5 hrs 20 mins | Yield: 4 Servings This Indian Butter Chicken is a restaurant-quality meal that everyone… General Recipes Slow Cooker Indian Butter Chicken European Print This
Serves: 4 Prep Time: 20 mins Cooking Time: 5 hrs 5 hrs
Nutrition facts: 413 calories 29 fat
Rating: 5.0/5
( 1 voted )

Ingredients

  • 3 boneless, skinless chicken breasts
  • 1 c. plain yoghurt
  • 1 tsp ground cinnamon
  • 2 tsp ground cumin
  • 1 tsp cayenne pepper
  • 1 tsp ground ginger
  • 1 tbsp lemon juice
  • 3/4 tsp black pepper
  • 1 tsp salt
  • SAUCE:
  • 1 clove of garlic, minced
  • 1 tbsp butter
  • 2 tsp ground cumin
  • 1 jalapeno pepper, finely chopped
  • 2 tsp paprika
  • 1 c. heavy cream
  • 1 8-oz. can of tomato sauce
  • 2 tbsp cornstarch
  • 1/4 c. chopped fresh cilantro
  • 1 tbsp water
  • 1 tsp salt or to taste

Instructions

Step 1: The night before cooking, add the yoghurt, lemon juice, cumin, cinnamon, cayenne, black pepper, ginger, salt, and chicken in a large Ziplock bag. At this point, you can leave the chicken breasts whole.

Step 2: Seal the bag and work the mixture into the chicken. Place in the fridge overnight.

Step 3: Remove the Ziploc bag from the fridge and take the chicken off, scraping off the majority of the marinade. Into 2-inch pieces, cut the chicken.

Step 4: In the bottom of a slow cooker, add butter, garlic, and jalapeno.

Step 5: Add 2 tsp each cumin and paprika in a small bowl along with 1 tsp salt, tomato sauce, and heavy cream. Mix well until combined.

Step 6: Over the chicken, pour the sauce. Cover the slow cooker and set to cook the chicken for 4 to 5 hours on low.

Step 7: Whisk the cornstarch with 1 tbsp water until the lumps are gone. Stir this into the slow cooker and continue to cook for another 20 minutes on high.

Step 8: Serve the Indian butter chicken garnished with some cilantro. Enjoy!

May 20, 2022 0 comment
0 FacebookTwitterPinterestEmail
Newer Posts
Older Posts

Popular Posts

  • 1

    Crispy Crunchy Parmesan Potatoes

    March 21, 2020
  • 2

    CROCK POT SMOTHERED PORK CHOPS

    March 21, 2020
  • Facebook
  • Twitter

@2019 - All Right Reserved.


Back To Top