Cook it once
  • Home
  • Privacy Policy
  • Recipes
    • KETO
    • LC
    • WW
  • Tips
  • Contact
Cook it once
  • Home
  • Privacy Policy
  • Recipes
    • KETO
    • LC
    • WW
  • Tips
  • Contact
Category:

General Recipes

General Recipes

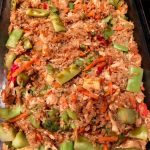
Teriyaki Chicken Casserole

by Rebecca May 24, 2022
written by Rebecca

Prep Time: 35 mins | Cook Time: 15 mins | Total Time: 50 mins | Servings: 4 to 6

This is a savory casserole loaded with chicken, rice, and veggies baked in teriyaki sauce. It is the perfect weeknight meal if you are searching for a healthy and incredibly delicious dish to feed your family. So good, even your fussiest eaters will enjoy every inch of this Teriyaki chicken casserole!

Ingredients

1 lb. boneless, skinless chicken breasts

1/2 tsp minced garlic

3/4 c. low-sodium soy sauce

1/2 c. water

1/2 tsp ground ginger

2 tbsp cornstarch + 2 tbsp water

1/4 c. brown sugar

3 c. cooked brown or white rice

1 bag (12 oz.) stir-fry vegetables (broccoli, carrots, snow peas, etc.)

How to make Teriyaki Chicken Casserole

Step 1: Prepare the oven. Preheat it to 350 degrees F. Using a non-stick spray, grease a 9 x 13-inch baking pan.

Step 2: In a small saucepan, whisk the soy sauce, ½ c water, brown sugar, ginger, and garlic. Put the lid on and bring everything to a boil over medium heat. Uncover and continue to cook for another minute once boiling.

Step 3: In another dish, whisk the cornstarch with 2 tbsp water. Add this to the pan once the sauce is boiling and stir well until blended. Continue to cook the sauce further until the sauce begins to thicken. Then, take the pan off the heat.

Step 4: In the prepared baking pan, lay the chicken breasts and pour over 1 c. of the sauce. Bake in the preheated oven for about 35 minutes or until the chicken is completely cooked. Take the pan out of the oven and shred the chicken with two forks.

Step 5: In the meantime, cook or steam the vegetables following the package directions.

Step 6: To the casserole dish with the shredded chicken, add the cooked vegetables and cooked rice. Then, add the rest of the sauce, and set aside a little for later. Toss everything gently until well combined. Resume baking in the oven for another 15 minutes. Take the pan out of the oven when done and allow the casserole to stand for about 5 minutes.

Step 7: Drizzle each serving with the reserved sauce before serving. Enjoy!

Note:

If planning to freeze, prep the casserole until the baking point, but do not bake. Tightly cover the pan with foil and store in the freezer for up to 2 months. When ready to bake, thaw the casserole in the fridge overnight and bake as instructed.
Teriyaki Chicken Casserole

Rebecca Prep Time: 35 mins | Cook Time: 15 mins | Total Time: 50 mins | Servings: 4 to 6 This is a savory casserole loaded with chicken, rice, and veggies… General Recipes Teriyaki Chicken Casserole European Print This
Serves: 4-6 Prep Time: 35 mins Cooking Time: 15 mins 15 mins
Nutrition facts: 200 calories 20 grams fat
Rating: 5.0/5
( 1 voted )

Ingredients

  • 1 lb. boneless, skinless chicken breasts
  • 1/2 tsp minced garlic
  • 3/4 c. low-sodium soy sauce
  • 1/2 c. water
  • 1/2 tsp ground ginger
  • 2 tbsp cornstarch + 2 tbsp water
  • 1/4 c. brown sugar
  • 3 c. cooked brown or white rice
  • 1 bag (12 oz.) stir-fry vegetables (broccoli, carrots, snow peas, etc.)

Instructions

Step 1: Prepare the oven. Preheat it to 350 degrees F. Using a non-stick spray, grease a 9 x 13-inch baking pan.

Step 2: In a small saucepan, whisk the soy sauce, ½ c water, brown sugar, ginger, and garlic. Put the lid on and bring everything to a boil over medium heat. Uncover and continue to cook for another minute once boiling.

Step 3: In another dish, whisk the cornstarch with 2 tbsp water. Add this to the pan once the sauce is boiling and stir well until blended. Continue to cook the sauce further until the sauce begins to thicken. Then, take the pan off the heat.

Step 4: In the prepared baking pan, lay the chicken breasts and pour over 1 c. of the sauce. Bake in the preheated oven for about 35 minutes or until the chicken is completely cooked. Take the pan out of the oven and shred the chicken with two forks.

Step 5: In the meantime, cook or steam the vegetables following the package directions.

Step 6: To the casserole dish with the shredded chicken, add the cooked vegetables and cooked rice. Then, add the rest of the sauce, and set aside a little for later. Toss everything gently until well combined. Resume baking in the oven for another 15 minutes. Take the pan out of the oven when done and allow the casserole to stand for about 5 minutes.

Step 7: Drizzle each serving with the reserved sauce before serving. Enjoy!

Notes

If planning to freeze, prep the casserole until the baking point, but do not bake. Tightly cover the pan with foil and store in the freezer for up to 2 months. When ready to bake, thaw the casserole in the fridge overnight and bake as instructed.

May 24, 2022 0 comment
0 FacebookTwitterPinterestEmail
General Recipes

FRENCH ONION CHICKEN AND RICE BAKE

by Rebecca May 24, 2022
written by Rebecca

Prep Time: 10 mins | Cook Time: 20 mins | Total Time: 30 mins | Yield: 6 people

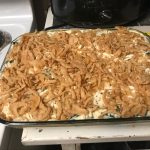
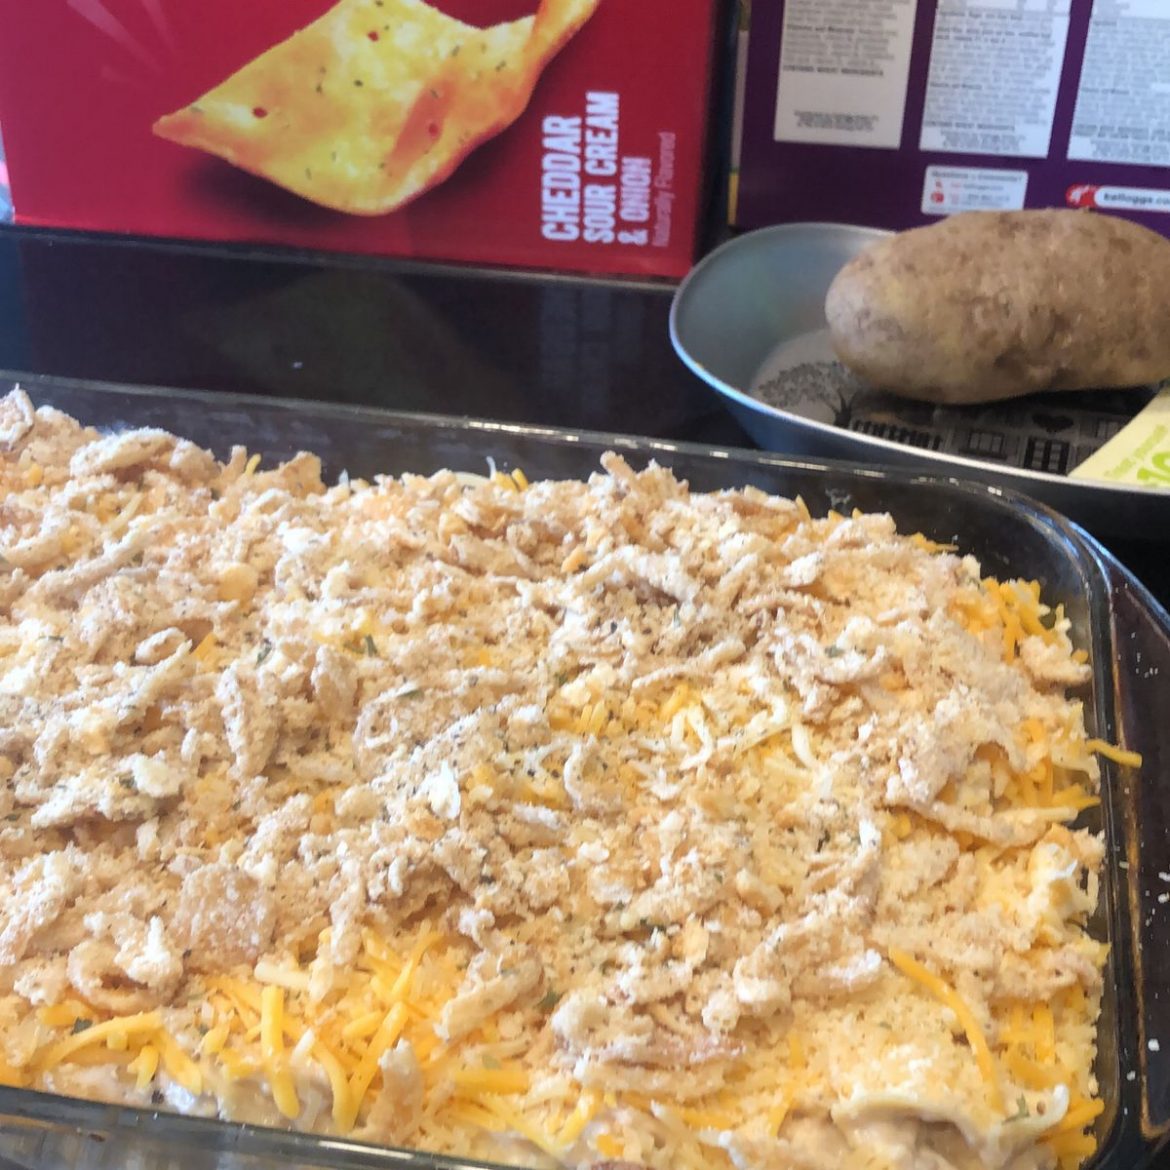
This French onion, chicken and rice bake have been a favourite and a staple at my house for years! It’s made with chicken, French onion dip, cream of chicken soup, cheddar cheese, rice, and French fried onions. For this recipe, I use rotisserie chicken. You can use leftover cooked chicken, simply chop it. This is another easy meal that you can make in less than thirty minutes. It’s a simple, quick, and delicious weeknight dinner that your entire family will love! Leftovers are also amazing the next day. Make sure to give this filling French onion, chicken and rice bake a try very soon. This will surely make your day!

Ingredients

2 c. cooked chopped chicken, about half of a rotisserie chicken

2 c. instant white rice

1 c. refrigerated sour cream French onion dip

1 c. shredded cheddar cheese

½ c. chicken broth

½ c. French Fried Onions

1 (10.75 ounces) can cream of chicken soup

2 c. water

HOW TO MAKE FRENCH ONION CHICKEN AND RICE BAKE

Step 1: Prepare the oven. Preheat it to 350 degrees F. Using cooking spray, grease a 9 x 13-inch pan, and set aside.

Step 2: Bring the water to a boil in a medium saucepan. Then, add the instant rice, cover the pan, and turn the heat off. Let it stand for about 5 minutes or until the water is absorbed.

Step 3: Place the chicken, chicken soup, French onion dip, cheddar cheese, chicken broth, and cooked rice in a large bowl. Mix well until combined, then spread the mixture into the prepared pan. On top, sprinkle the French fried onions.

Step 4: Place in the preheated oven and bake for about 20 to 25 minutes or until the cheese has melted and bubbly.

Notes:

Swap the minute rice and water with 4 cups of any cooked rice.

You can make this ahead and simply keep it in the fridge or freeze it for later.

Thaw completely in the fridge before baking as instructed.

Feel free to substitute the dip with sour cream and 1 tbsp onion mix.

FRENCH ONION CHICKEN AND RICE BAKE

Rebecca Prep Time: 10 mins | Cook Time: 20 mins | Total Time: 30 mins | Yield: 6 people This French onion, chicken and rice bake have been a favourite and… General Recipes FRENCH ONION CHICKEN AND RICE BAKE European Print This
Serves: 6 Prep Time: 10 mins Cooking Time: 20 mins 20 mins
Nutrition facts: 200 calories 20 grams fat
Rating: 5.0/5
( 1 voted )

Ingredients

  • 2 c. cooked chopped chicken, about half of a rotisserie chicken
  • 2 c. instant white rice
  • 1 c. refrigerated sour cream French onion dip
  • 1 c. shredded cheddar cheese
  • ½ c. chicken broth
  • ½ c. French Fried Onions
  • 1 (10.75 ounces) can cream of chicken soup
  • 2 c. water

Instructions

Step 1: Prepare the oven. Preheat it to 350 degrees F. Using cooking spray, grease a 9 x 13-inch pan, and set aside.

Step 2: Bring the water to a boil in a medium saucepan. Then, add the instant rice, cover the pan, and turn the heat off. Let it stand for about 5 minutes or until the water is absorbed.

Step 3: Place the chicken, chicken soup, French onion dip, cheddar cheese, chicken broth, and cooked rice in a large bowl. Mix well until combined, then spread the mixture into the prepared pan. On top, sprinkle the French fried onions.

Step 4: Place in the preheated oven and bake for about 20 to 25 minutes or until the cheese has melted and bubbly.

May 24, 2022 0 comment
0 FacebookTwitterPinterestEmail
General Recipes

Ina Garten’s Chocolate Cake

by Rebecca May 24, 2022
written by Rebecca

Prep Time: 20 mins | Cook Time: 35 mins | Total Time: 55 mins | Yield: 16 servings

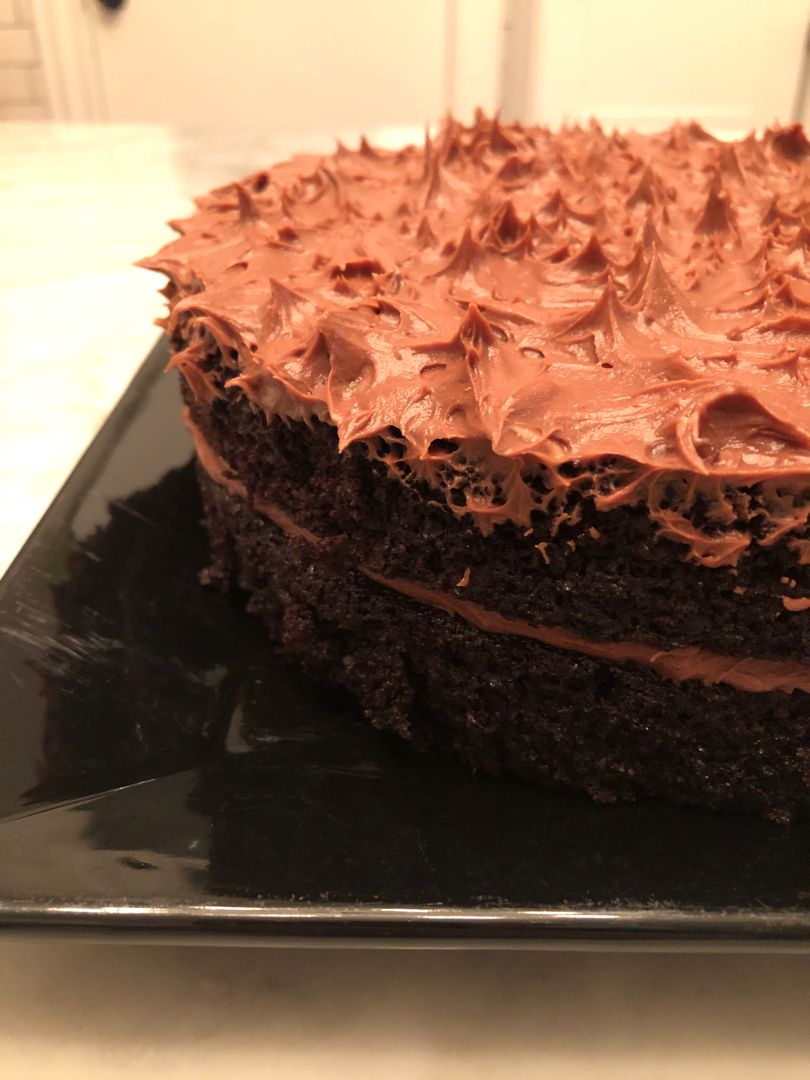
This Chocolate cake is a classic that is perfect for every occasion! Rich, homey, chocolatey, and moist – this cake has it all!

Dry Ingredients:

3/4 c. cocoa powder

1 teaspoon baking powder

2 teaspoons baking soda

2 c. granulated sugar

1 teaspoon salt

1 3/4 c. all-purpose flour

Wet Ingredients:

2 large eggs

1 c. buttermilk (I used half-and-half, which worked fine, too!)

1 c. hot coffee

1/2 c. vegetable oil

1 teaspoon vanilla extract

Frosting:

1 c. unsalted butter (2 sticks), room temperature

6 oz. semisweet chocolate, chopped

1/2 c. sour cream

3 c. powdered sugar, sifted

1 teaspoon vanilla extract

1 pinch salt

How to make Ina Garten’s Chocolate Cake

Cake:

Step 1: Prepare the oven. Preheat it to 350 degrees F. Grease two 8-inch round cake pans and line the bottoms using parchment paper discs.

Step 2: In a large bowl, place the dry ingredients and whisk well until combined.

Step 3: Place the wet ingredients except for the coffee in another bowl. Mix well.

Step 4: To the dry ingredients, gradually add the wet ingredients, stirring as you go. Then, add the hot coffee and stir well until the lumps are gone and you have a very thin batter.

Step 5: Between the prepared cake pans, divide the batter. Place in the preheated oven and bake for about 35 minutes or until the cake has risen and a toothpick inserted in the center of the cake comes out clean.

Step 6: Remove from the oven when done and let the cakes cool in the pans partially before inverting them onto a cooling rack to cool fully. You can make the cake about a day or two in advance and simply keep them in the fridge before frosting.

Frosting:

Step 7: In a double boiler, melt the chocolate. You can also do this in the microwave using short bursts. Stir well until smooth, and let it cool a little.

Step 8: In the bowl of a stand mixer with the paddle attachment, beat the room temperature butter for a few minutes until smooth and paler. Gradually add the powdered sugar, salt, and vanilla, mixing on low-medium speed until you have a smooth mixture.

Step 9: Into the partially cooled melted chocolate, whisk the sour cream. Add this to the mixer bowl and beat until smooth and blend on low speed.

Step 10: Place the frosting in the fridge for about 10 to 15 minutes if it seems a bit too loose let it slightly firm up. Before frosting the cake, give the frosting a final stir.

Nutrition Facts:

Calories: 498 kcal | Carbohydrates: 67g | Protein: 4g | Fat: 26g | Saturated Fat: 17g | Trans Fat: 1g | Cholesterol: 57mg | Sodium: 316mg | Potassium: 205mg | Fiber: 3g | Sugar: 52g | Vitamin A: 459IU | Vitamin C: 1mg | Calcium: 57mg | Iron: 2mg

Ina Garten’s Chocolate Cake

Rebecca Prep Time: 20 mins | Cook Time: 35 mins | Total Time: 55 mins | Yield: 16 servings This Chocolate cake is a classic that is perfect for every occasion!… General Recipes Ina Garten’s Chocolate Cake European Print This
Serves: 16 Prep Time: 20 mins Cooking Time: 35 mins 35 mins
Nutrition facts: 498 calories 26 fat
Rating: 5.0/5
( 1 voted )

Ingredients

  • Dry Ingredients:
  • 3/4 c. cocoa powder
  • 1 teaspoon baking powder
  • 2 teaspoons baking soda
  • 2 c. granulated sugar
  • 1 teaspoon salt
  • 1 3/4 c. all-purpose flour
  • Wet Ingredients:
  • 2 large eggs
  • 1 c. buttermilk (I used half-and-half, which worked fine, too!)
  • 1 c. hot coffee
  • 1/2 c. vegetable oil
  • 1 teaspoon vanilla extract
  • Frosting:
  • 1 c. unsalted butter (2 sticks), room temperature
  • 6 oz. semisweet chocolate, chopped
  • 1/2 c. sour cream
  • 3 c. powdered sugar, sifted
  • 1 teaspoon vanilla extract
  • 1 pinch salt

Instructions

Cake:

Step 1: Prepare the oven. Preheat it to 350 degrees F. Grease two 8-inch round cake pans and line the bottoms using parchment paper discs.

Step 2: In a large bowl, place the dry ingredients and whisk well until combined.

Step 3: Place the wet ingredients except for the coffee in another bowl. Mix well.

Step 4: To the dry ingredients, gradually add the wet ingredients, stirring as you go. Then, add the hot coffee and stir well until the lumps are gone and you have a very thin batter.

Step 5: Between the prepared cake pans, divide the batter. Place in the preheated oven and bake for about 35 minutes or until the cake has risen and a toothpick inserted in the center of the cake comes out clean.

Step 6: Remove from the oven when done and let the cakes cool in the pans partially before inverting them onto a cooling rack to cool fully. You can make the cake about a day or two in advance and simply keep them in the fridge before frosting.

Frosting:

Step 7: In a double boiler, melt the chocolate. You can also do this in the microwave using short bursts. Stir well until smooth, and let it cool a little.

Step 8: In the bowl of a stand mixer with the paddle attachment, beat the room temperature butter for a few minutes until smooth and paler. Gradually add the powdered sugar, salt, and vanilla, mixing on low-medium speed until you have a smooth mixture.

Step 9: Into the partially cooled melted chocolate, whisk the sour cream. Add this to the mixer bowl and beat until smooth and blend on low speed.

Step 10: Place the frosting in the fridge for about 10 to 15 minutes if it seems a bit too loose let it slightly firm up. Before frosting the cake, give the frosting a final stir.

May 24, 2022 0 comment
0 FacebookTwitterPinterestEmail
General Recipes

Chicken Barley Soup

by Rebecca May 24, 2022
written by Rebecca

PREP TIME: 10 MINS | COOK TIME: 1 HR | TOTAL TIME: 1 HR 10 MINS | SERVINGS: 4

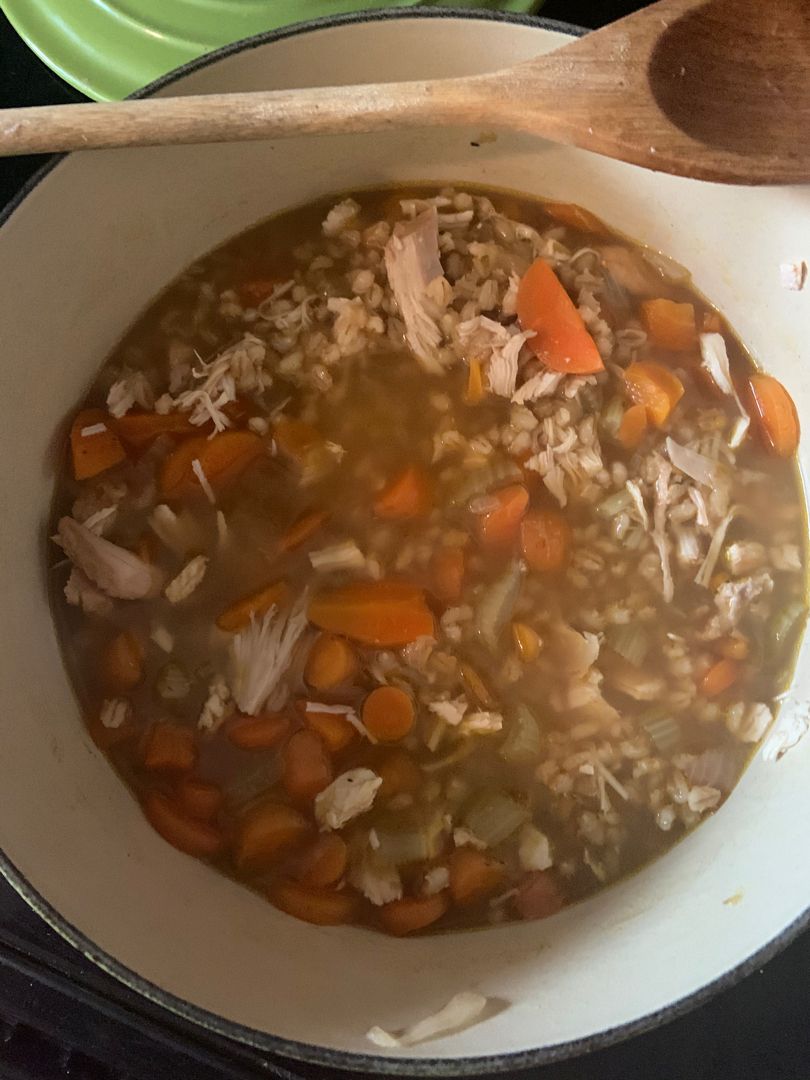
This healthy chicken barley soup is easily modifiable. An easy, hearty soup that you can make on your stovetop or slow cooker. And this requires only six simple ingredients to make. If desired, you can add a few extras like some spice and herbs to bring this soup to the next level! For the veggies, you can use your favorites or throw in some extras if you’d like. You can also easily make it vegetarian by substituting chicken broth with vegetable broth and swapping chicken with mushrooms. Simply ensure to saute the mushrooms with the onions. I like thin soup, but if you like your soup thick, stir in 1/2-1 cup of cream combined with 1-2 tbsp of corn starch. Last but not the least, you can also use cooked ground beef or smoked sausage instead of chicken or even add in cooked, chopped bacon. You see, the possibility are endless with this heartwarming chicken barley soup recipe!

Ingredients

1/2 medium onion, finely chopped

1 tbsp oil

2 ribs celery, finely chopped

5 c. low sodium chicken broth

3 large carrots, peeled and chopped

2 chicken breasts (about 300 grams total)

1/2 tsp salt

1/4 tsp pepper

2/3 c. pearl or pot barley rinsed (120 grams)

How to make Chicken Barley Soup

Step 1: Heat the oil in a large Dutch oven or soup pot over medium-high heat. Once the oil is hot, add the carrots to the pot along with the celery and onion. Cook for about 5 minutes, stirring occasionally, until the onion is translucent.

Step 2: Next, pour in the broth and add the raw & whole chicken breasts, barley, salt, and pepper. Bring everything to a simmer, put the lid on, and adjust the heat to medium-low. Continue to cook for another 45 to 60 minutes, stirring often, until the barley is tender.

Step 3: Take the chicken out of the pot and shred using two forks. Return the shredded chicken into the soup. Adjust the salt and pepper according to taste.

Nutrition Facts:

Calories: 352.06cal | Carbohydrates: 35.79g | Protein: 33.92g | Fat: 8.75g | Saturated Fat: 1.54g | Cholesterol: 72.32mg | Sodium: 561.41mg | Potassium: 983.61mg | Fiber: 7.04g | Sugar: 3.76g | Vitamin A: 7766.69IU | Vitamin C: 5.69mg | Calcium: 53.38mg | Iron: 2.01mg

Chicken Barley Soup

Rebecca PREP TIME: 10 MINS | COOK TIME: 1 HR | TOTAL TIME: 1 HR 10 MINS | SERVINGS: 4 This healthy chicken barley soup is easily modifiable. An easy, hearty… General Recipes Chicken Barley Soup European Print This
Serves: 4 Prep Time: 10 mins Cooking Time: 1 hr 1 hr
Nutrition facts: 352.06 calories 8.75 fat
Rating: 5.0/5
( 1 voted )

Ingredients

  • 1/2 medium onion, finely chopped
  • 1 tbsp oil
  • 2 ribs celery, finely chopped
  • 5 c. low sodium chicken broth
  • 3 large carrots, peeled and chopped
  • 2 chicken breasts (about 300 grams total)
  • 1/2 tsp salt
  • 1/4 tsp pepper
  • 2/3 c. pearl or pot barley rinsed (120 grams)

Instructions

Step 1: Heat the oil in a large Dutch oven or soup pot over medium-high heat. Once the oil is hot, add the carrots to the pot along with the celery and onion. Cook for about 5 minutes, stirring occasionally, until the onion is translucent.

Step 2: Next, pour in the broth and add the raw & whole chicken breasts, barley, salt, and pepper. Bring everything to a simmer, put the lid on, and adjust the heat to medium-low. Continue to cook for another 45 to 60 minutes, stirring often, until the barley is tender.

Step 3: Take the chicken out of the pot and shred using two forks. Return the shredded chicken into the soup. Adjust the salt and pepper according to taste.

May 24, 2022 0 comment
0 FacebookTwitterPinterestEmail
General Recipes

Grown Up Tuna Noodle Casserole Recipe

by Rebecca May 24, 2022
written by Rebecca

Prep Time: 30 mins | Cook Time: 10 mins | Total Time: 40 mins | Servings: 4

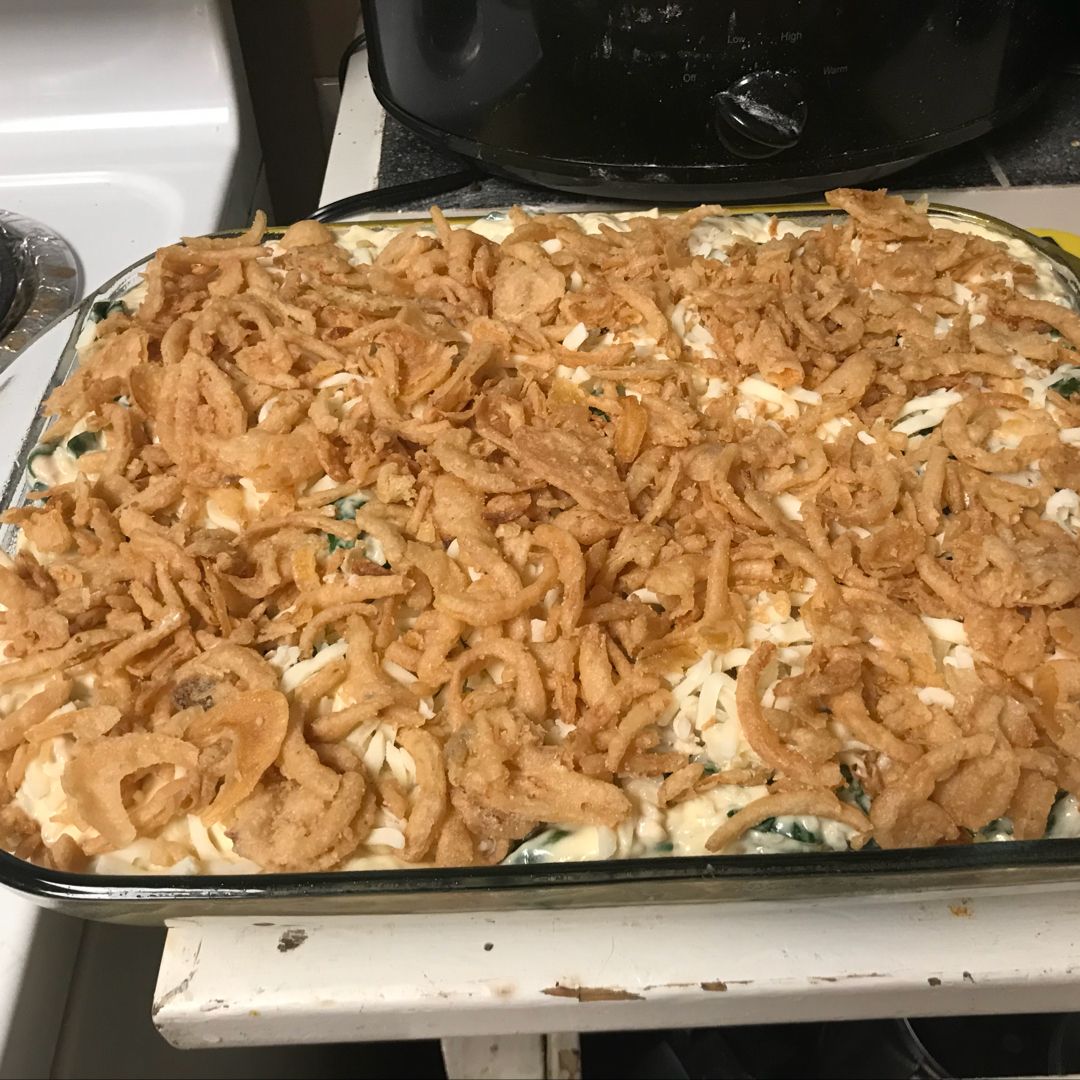
If you love casseroles, then this Grown-Up Tuna Noodle Casserole is a must-try! It is packed with sauteed mushrooms, Colby jack cheese, fried onions, and more and baked to perfection. The best part is this recipe is freezer-friendly, too!

Ingredients

3 tablespoons olive oil

1-2 cans tuna, drained or 3 c. shredded chicken or turkey breast

½ large white onion, diced

½ cup sour cream

1 teaspoon garlic powder

3-4 mini Bella mushrooms, washed and sliced

4 ounces cream cheese

1 cup Colby jack cheese, shredded

1 can mushroom soup 10.5 ounces

8 ounces of any pasta your preference

1 cup French fried onions

¾ cup milk

Salt and pepper to taste

How to make Grown-Up Tuna Noodle Casserole

Step 1: Prepare the oven. Preheat it to 375 degrees. Meanwhile, slice the mushrooms and dice the onion. Using cooking spray, lightly grease your baking dish.

Step 2: In a large frying pan, heat the olive oil over medium heat. Add the onions and mushrooms to the hot oil and saute for a few minutes until the onions are translucent.

Step 3: Following the package directions, cook the pasta until al dente.

Step 4: To the frying pan, add the mushroom soup, cream cheese, sour cream, milk, and garlic powder, and cook until hot. Once everything is all warmed up, season with salt and pepper.

Step 5: When the pasta is done, drain well and add to the pan. Toss to coat.

Step 6: On top, add the shredded cheese and sprinkle with the french fried onions. Transfer the pan to the preheated oven and bake for about 10 minutes at 375 degrees F or until the onions are golden brown.

Step 7: Remove from the oven when done and serve the casserole immediately. Enjoy!

Note:

When planning to the freezer, stop just before adding the onions. Keep in the freezer. Thaw in the fridge completely, then top with onions and bake as instructed.
Nutrition Info.

Calories: 650 kcal

Grown Up Tuna Noodle Casserole Recipe

Rebecca Prep Time: 30 mins | Cook Time: 10 mins | Total Time: 40 mins | Servings: 4 If you love casseroles, then this Grown-Up Tuna Noodle Casserole is a must-try!… General Recipes Grown Up Tuna Noodle Casserole Recipe European Print This
Serves: 4 Prep Time: 30 mins Cooking Time: 10 mins 10 mins
Nutrition facts: 650 calories 20 grams fat
Rating: 5.0/5
( 1 voted )

Ingredients

  • 3 tablespoons olive oil
  • 1-2 cans tuna, drained or 3 c. shredded chicken or turkey breast
  • ½ large white onion, diced
  • ½ cup sour cream
  • 1 teaspoon garlic powder
  • 3-4 mini Bella mushrooms, washed and sliced
  • 4 ounces cream cheese
  • 1 cup Colby jack cheese, shredded
  • 1 can mushroom soup 10.5 ounces
  • 8 ounces of any pasta your preference
  • 1 cup French fried onions
  • ¾ cup milk
  • Salt and pepper to taste

Instructions

Step 1: Prepare the oven. Preheat it to 375 degrees. Meanwhile, slice the mushrooms and dice the onion. Using cooking spray, lightly grease your baking dish.

Step 2: In a large frying pan, heat the olive oil over medium heat. Add the onions and mushrooms to the hot oil and saute for a few minutes until the onions are translucent.

Step 3: Following the package directions, cook the pasta until al dente.

Step 4: To the frying pan, add the mushroom soup, cream cheese, sour cream, milk, and garlic powder, and cook until hot. Once everything is all warmed up, season with salt and pepper.

Step 5: When the pasta is done, drain well and add to the pan. Toss to coat.

Step 6: On top, add the shredded cheese and sprinkle with the french fried onions. Transfer the pan to the preheated oven and bake for about 10 minutes at 375 degrees F or until the onions are golden brown.

Step 7: Remove from the oven when done and serve the casserole immediately. Enjoy!

Notes

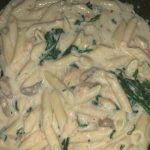
When planning to the freezer, stop just before adding the onions. Keep in the freezer. Thaw in the fridge completely, then top with onions and bake as instructed.
May 24, 2022 0 comment
0 FacebookTwitterPinterestEmail
General Recipes

Pesto Shrimp Fettuccine in Mushroom Garlic Sauce

by Rebecca May 24, 2022
written by Rebecca

Prep Time: 10 mins | Cook Time: 20 mins | Total Time: 30 mins | Servings: 4

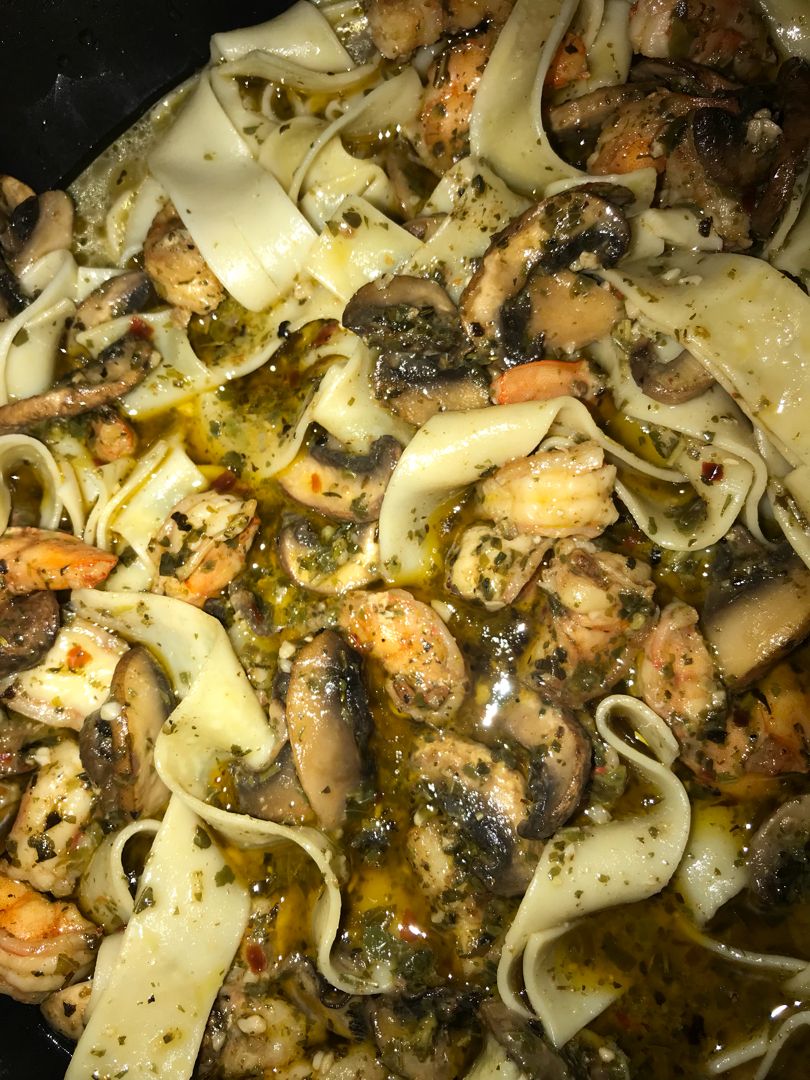
Enjoy the amazing flavor combination of zesty pesto, wine, garlic, and mushrooms in this pesto shrimp fettuccine. It’s a very delicious dish that you can easily whip up in under thirty minutes. A great addition to your weekly menu rotation that your entire family will love!

Ingredients

Main Ingredients:

1 pound shrimp (peeled and deveined)

2 tbsp olive oil

10 ounces white mushrooms (sliced)

4 garlic cloves (minced)

⅓ c. basil pesto

¼ c. dry white wine (plus more if needed)

¼ tsp salt

½ c. sodium-free chicken broth (adjust salt if not sodium-free)

Seasoning Mixture:

¼ tsp red pepper flakes

1 tsp Italian Seasoning (thyme, oregano, basil – combined)

1 tsp paprika

chopped fresh basil

½ tsp salt

Pasta:

10 ounces fettuccine pasta (use gluten-free for gluten-free version)

How to make Pesto Shrimp Fettuccine in Mushroom Garlic Sauce

Step 1: In a large skillet, heat 1 tbsp olive oil over medium heat. In a mixing bowl, place the shrimp and rub in the seasoning mixture until coated well. Once the oil is hot, add the shrimp to the pan and cook on each side for about 2 to 3 minutes, turning once midway, until the shrimp are cooked through and pink. Set the cooked shrimp aside when done.

Step 2: In the same skillet, add the second tbsp of olive oil. Add the sliced mushrooms and 1/4 tsp salt once the oil is hot. Cook for about a minute or two, stirring until the mushrooms release liquid, reduce in volume, and softened.

Step 3: In the last few minutes, add the minced garlic. Then, pour in the wine and continue to cook for another 1 to 2 minutes before returning the shrimps to the skillet.

Step 4: Stir in the pesto and lastly, pour in the stock. Cook for 2 to 3 minutes more until reduced.

Step 5: Meanwhile, cook the pasta following the package directions in a large pot of boiling water. Drain when done, but do not rinse the pasta.

Step 6: To the skillet, add the pasta and toss until completely coated. Let everything warm up for 2 minutes.

Step 7: Remove from the heat when done and serve right away. If desired, season with extra salt and more red pepper flakes. Enjoy!

Nutrition Facts:

Amount Per Serving: Calories 563, Calories from Fat 171, Fat 19g29%, Saturated Fat 3g19%, Cholesterol 346mg115%, Sodium 932mg41%, Potassium 511mg15%, Carbohydrates 56g19%, Fiber 3g13%, Sugar 3g3%, Protein 36g72%, Vitamin A 620IU12%, Vitamin C 7.1mg9%, Calcium 236mg24%, Iron 4.5mg25%

Pesto Shrimp Fettuccine in Mushroom Garlic Sauce

Rebecca Prep Time: 10 mins | Cook Time: 20 mins | Total Time: 30 mins | Servings: 4 Enjoy the amazing flavor combination of zesty pesto, wine, garlic, and mushrooms in… General Recipes Pesto Shrimp Fettuccine in Mushroom Garlic Sauce European Print This
Serves: 4 Prep Time: 10 mins Cooking Time: 20 mins 20 mins
Nutrition facts: 563 calories 19 fat
Rating: 5.0/5
( 1 voted )

Ingredients

  • Main Ingredients:
  • 1 pound shrimp (peeled and deveined)
  • 2 tbsp olive oil
  • 10 ounces white mushrooms (sliced)
  • 4 garlic cloves (minced)
  • ⅓ c. basil pesto
  • ¼ c. dry white wine (plus more if needed)
  • ¼ tsp salt
  • ½ c. sodium-free chicken broth (adjust salt if not sodium-free)
  • Seasoning Mixture:
  • ¼ tsp red pepper flakes
  • 1 tsp Italian Seasoning (thyme, oregano, basil – combined)
  • 1 tsp paprika
  • chopped fresh basil
  • ½ tsp salt
  • Pasta:
  • 10 ounces fettuccine pasta (use gluten-free for gluten-free version)

Instructions

Step 1: In a large skillet, heat 1 tbsp olive oil over medium heat. In a mixing bowl, place the shrimp and rub in the seasoning mixture until coated well. Once the oil is hot, add the shrimp to the pan and cook on each side for about 2 to 3 minutes, turning once midway, until the shrimp are cooked through and pink. Set the cooked shrimp aside when done.

Step 2: In the same skillet, add the second tbsp of olive oil. Add the sliced mushrooms and 1/4 tsp salt once the oil is hot. Cook for about a minute or two, stirring until the mushrooms release liquid, reduce in volume, and softened.

Step 3: In the last few minutes, add the minced garlic. Then, pour in the wine and continue to cook for another 1 to 2 minutes before returning the shrimps to the skillet.

Step 4: Stir in the pesto and lastly, pour in the stock. Cook for 2 to 3 minutes more until reduced.

Step 5: Meanwhile, cook the pasta following the package directions in a large pot of boiling water. Drain when done, but do not rinse the pasta.

Step 6: To the skillet, add the pasta and toss until completely coated. Let everything warm up for 2 minutes.

Step 7: Remove from the heat when done and serve right away. If desired, season with extra salt and more red pepper flakes. Enjoy!

May 24, 2022 0 comment
0 FacebookTwitterPinterestEmail
General Recipes

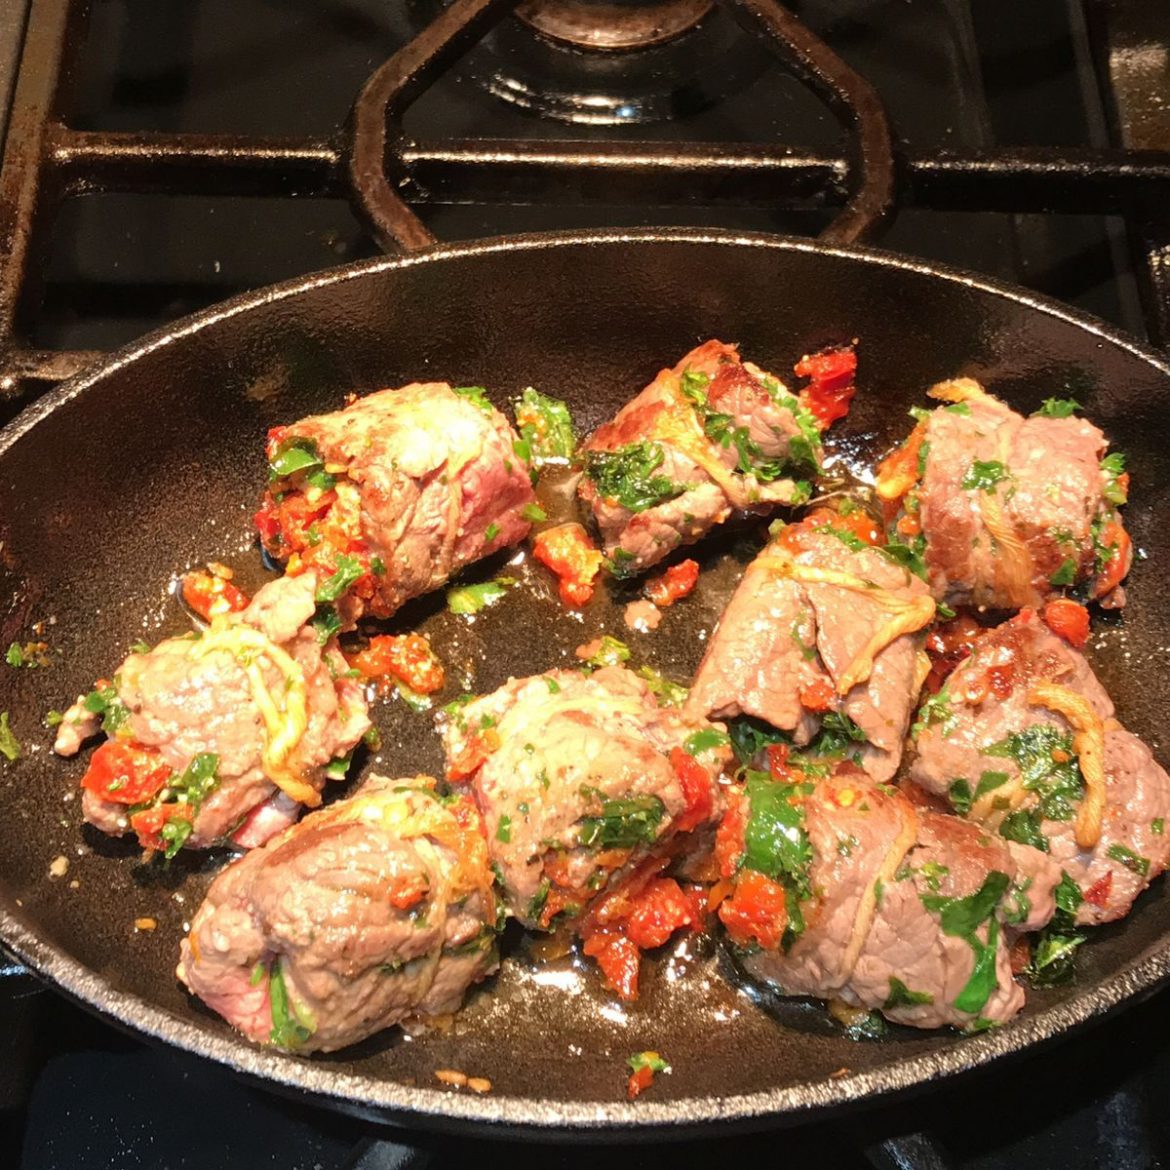
Italian Stuffed Flank Steak

by Rebecca May 24, 2022
written by Rebecca

Prep Time: 20 mins | Cook Time: 15 mins | Total Time: 35 mins | Servings: 4

Tastes amazing and looks very appetizing – these Italian stuffed flank steaks will surely impress everyone around your dinner table! Tender flank steak stuffed with garlic, herbs, prosciutto ham, and provolone cheese. Enjoy these flavor-packed rolled-up flank steaks for a fancy weeknight meal any time with this easy and quick recipe.

Ingredients

2-2 1/2 lbs flank steak

1 small shallot, minced

3-4 cloves of garlic, minced or pressed through a garlic press

2 tablespoons fresh parsley, finely minced

4 oz. thinly sliced prosciutto

1 teaspoon basil, minced

2 tablespoons olive oil

4 oz. thinly sliced provolone cheese

1 teaspoon sage leaves, finely minced

Salt and pepper to taste

toothpicks soaked in water for 10 minutes

How to make Italian Stuffed Flank Steak

Step 1: In a small bowl, whisk the garlic, shallot, parsley, basil, sage, and olive oil.

Step 2: Slice the steak across horizontally, then butterfly the steak. Into 2 thin rectangles, pour the flank steak. Lay the steak, grain parallel to the edges of the counter. Evenly over the steak, spread the herb mixture.

Step 3: Over the steak, evenly lay the prosciutto, keeping a 1-inch border along the top edge. With a layer of cheese, evenly cover the prosciutto. Make sure to leave a 1-inch border on the edge.

Step 4: Tightly roll the steak beginning from the bottom edge and rolling up away from you and towards the top. Then, on a cutting board, place the log, seam-side down.

Step 5: Tie a piece of kitchen twine beginning in the middle of the steak roll to secure the steak. Place more ties of kitchen twine, working outward the center in 1-inch intervals until the entire steak roll is tied up.

Step 6: Between the pieces of twine, slice the roll using a sharp knife into 1-inch thick pinwheels. Then, lightly season with salt and black pepper. Next, skewer each pinwheel using a toothpick.

Step 7: Prepare the oven. Preheat it to 350 degrees.

Step 8: In a hot cast-iron skillet, place the pinwheels and cook over medium-high heat for about 3 minutes or so until brown. Flip the pinwheels and continue to cook the other side for another 2 minutes.

Step 9: Transfer the skillet into the preheated oven and bake for about 8 to 10 minutes or until the steak is done. Take the skillet out of the oven and cover with aluminium foil and allow to rest for about 5 minutes. Then, remove the twine and toothpicks.

Step 10: Serve and enjoy!

Nutrition Facts:

Calories: 599 | Carbohydrates: 2g | Protein: 59g | Fat: 37g | Saturated Fat: 14g | Cholesterol: 174mg | Sodium: 558mg | Potassium: 909mg | Sugar: 0g | Fiber: 0g | Vitamin A: 8.2% | Vitamin C: 4.5% | Calcium: 27.2% | Iron: 22.2%

Italian Stuffed Flank Steak

Rebecca Prep Time: 20 mins | Cook Time: 15 mins | Total Time: 35 mins | Servings: 4 Tastes amazing and looks very appetizing – these Italian stuffed flank steaks will… General Recipes Italian Stuffed Flank Steak European Print This
Serves: 4 Prep Time: 20 mins Cooking Time: 15 mins 15 mins
Nutrition facts: 599 calories 37 fat
Rating: 5.0/5
( 1 voted )

Ingredients

  • 2-2 1/2 lbs flank steak
  • 1 small shallot, minced
  • 3-4 cloves of garlic, minced or pressed through a garlic press
  • 2 tablespoons fresh parsley, finely minced
  • 4 oz. thinly sliced prosciutto
  • 1 teaspoon basil, minced
  • 2 tablespoons olive oil
  • 4 oz. thinly sliced provolone cheese
  • 1 teaspoon sage leaves, finely minced
  • Salt and pepper to taste
  • toothpicks soaked in water for 10 minutes

Instructions

Step 1: In a small bowl, whisk the garlic, shallot, parsley, basil, sage, and olive oil.

Step 2: Slice the steak across horizontally, then butterfly the steak. Into 2 thin rectangles, pour the flank steak. Lay the steak, grain parallel to the edges of the counter. Evenly over the steak, spread the herb mixture.

Step 3: Over the steak, evenly lay the prosciutto, keeping a 1-inch border along the top edge. With a layer of cheese, evenly cover the prosciutto. Make sure to leave a 1-inch border on the edge.

Step 4: Tightly roll the steak beginning from the bottom edge and rolling up away from you and towards the top. Then, on a cutting board, place the log, seam-side down.

Step 5: Tie a piece of kitchen twine beginning in the middle of the steak roll to secure the steak. Place more ties of kitchen twine, working outward the center in 1-inch intervals until the entire steak roll is tied up.

Step 6: Between the pieces of twine, slice the roll using a sharp knife into 1-inch thick pinwheels. Then, lightly season with salt and black pepper. Next, skewer each pinwheel using a toothpick.

Step 7: Prepare the oven. Preheat it to 350 degrees.

Step 8: In a hot cast-iron skillet, place the pinwheels and cook over medium-high heat for about 3 minutes or so until brown. Flip the pinwheels and continue to cook the other side for another 2 minutes.

Step 9: Transfer the skillet into the preheated oven and bake for about 8 to 10 minutes or until the steak is done. Take the skillet out of the oven and cover with aluminium foil and allow to rest for about 5 minutes. Then, remove the twine and toothpicks.

Step 10: Serve and enjoy!

May 24, 2022 0 comment
0 FacebookTwitterPinterestEmail
General Recipes

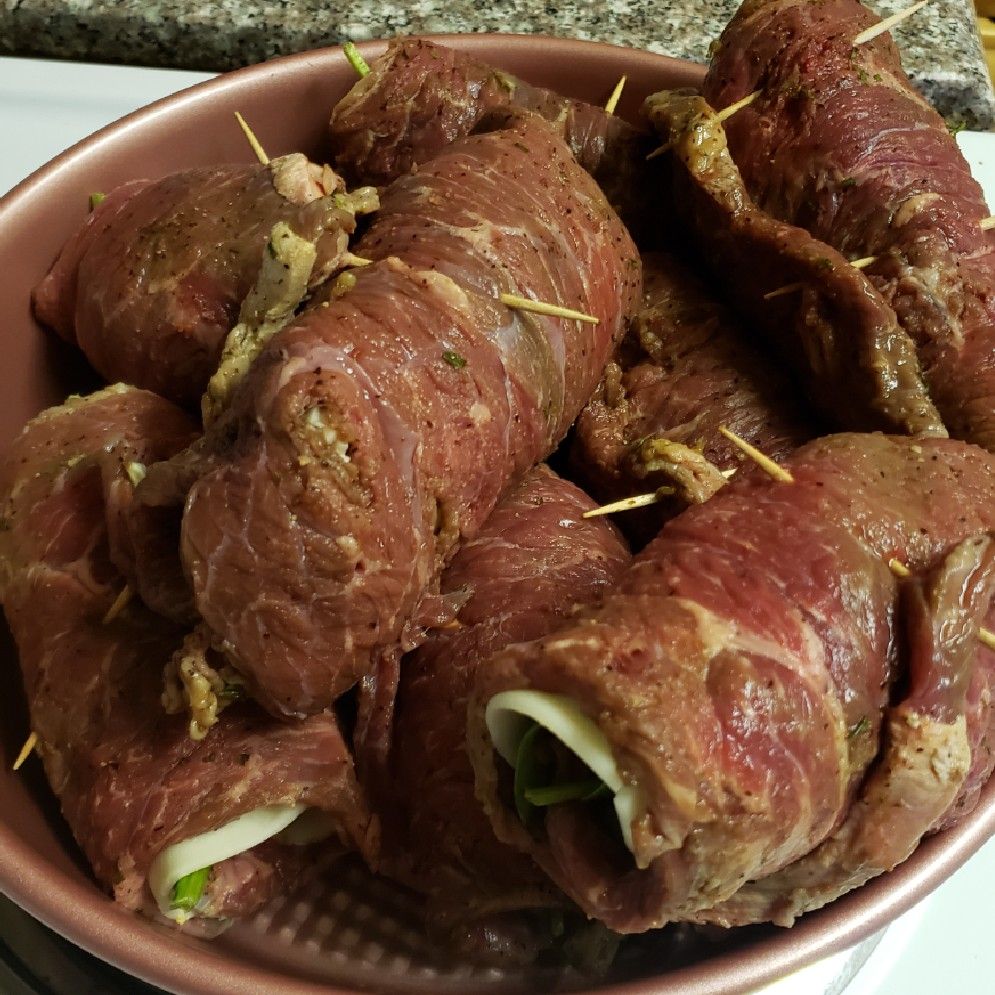
Beef Braciole Recipe

by Rebecca May 23, 2022
written by Rebecca

PREP TIME: 30 MINS | COOK TIME: 2 HRS | TOTAL TIME: 2 HRS 30 MINS | SERVINGS: 6

This beef braciole is a classic Southern Italian dish that will impress everyone around the dinner table. A hearty homemade dish with thin beef slices simmered in a wine-infused sauce. Make this ahead and simply keep it in the fridge. When ready to serve, cook as directed, either in the oven, on the stovetop, or in a slow cooker. You can also store this in the freezer for up to 1 to 2 months for an easy and quick weeknight meal.

INGREDIENTS

2 tbsp olive oil

6 thin slices boneless top round (about 2 lbs.)

12 cloves garlic

2 tbsp seasoned dry bread crumbs

1 c. shredded Parmesan or Romano cheese – plus more for serving if desired

12 thin slices prosciutto

2 c. beef broth

2 c. dry red wine

2 tsp dried Italian seasoning

salt and freshly ground black pepper – to taste

2 heaping tbsp all-purpose flour

1 can (28 oz.) crushed tomatoes – preferably a good imported Italian brand

½ c. finely chopped Italian parsley – (flat-leaf parsley), plus more for garnish

How to make Beef Braciole

Step 1: In half widthwise, cut top-round slices of the beef to make 12 equal pieces. Between 2 plastic wraps, lay the beef and gently pound to about ¼ to ⅛-inch thickness.

Step 2: Grab 4 cloves of garlic and mince, then slice the rest of the 8 cloves.

Step 3: In a small bowl, mix the minced garlic with parsley, cheese, breadcrumbs, salt, and black pepper.

Step 4: Over the beef, place a slice of prosciutto and evenly sprinkle with the garlic mixture. Then, roll the beef into a cylinder and tuck. While rolling, tuck the sides to hold in the filling and secure with toothpicks.

Step 5: In a Dutch oven or large pot, heat the olive oil over medium-high heat. Once hot, add the beef rolls, seam-side down. Cook the first side until brown, then occasionally turn the meat until all sides of each roll are nicely browned. To a plate, transfer the beef rolls when done.

Step 6: To the same pot, pour in the wine and add the sliced garlic. Bring to a boil, scraping the browned bits from the bottom of the pot. Next, pour in the beef broth and add the tomatoes along with the Italian seasoning. Return the beef rolls to the pot and bring everything to a simmer.

Step 7: Put the lid on and adjust the heat to low. Continue to cook while turning the beef rolls often, until tender and easily pierced using a fork. This takes about 1 1/2 hours. Or bake in the oven for 1 ½-2 hours at 325 degrees, covered. You can also do this in a slow cooker set on high for 3 to 4 hours or 5 to 6 hours on medium, or on low for 7 to 8 hours.

Step 8: If cooking in the oven, return the pot to the stove and ladle some of the cooking liquid into a bowl. To create a slurry, add the flour to the bowl and mix well until smooth. Gradually add this to the pot and bring to a slow simmer until thickened.

Step 9: To taste, season with salt and black pepper. Take the toothpicks off and serve the beef braciole over pasta with more grated cheese. Enjoy!

NOTES:

TO MAKE AHEAD:

Prep and place in the pot with the sauce. Place in the fridge. When ready to cook, proceed as directed.

Or cook and allow to cool completely. Then, store it in the fridge. Before serving, reheat in the oven, on the stovetop, or in your slow cooker.

FREEZER-FRIENDLY: Once cooked, let it cool completely before keeping it in an airtight container. Then, store in the freezer for 1 to 2 months. When ready to serve, thaw in the fridge before reheating in the oven at 350 degrees.

NUTRITION FACTS:

Serving: 2 | Calories: 570 kcal | Carbohydrates: 8g | Protein: 63g | Fat: 24g | Saturated Fat: 8g | Polyunsaturated Fat: 2g | Monounsaturated Fat: 11g | Trans Fat: 1g | Cholesterol: 163mg | Sodium: 832mg | Potassium: 1006mg | Fiber: 1g | Sugar: 1g | Vitamin A: 584IU | Vitamin C: 9mg | Calcium: 275mg | Iron: 6mg

Beef Braciole Recipe

Rebecca PREP TIME: 30 MINS | COOK TIME: 2 HRS | TOTAL TIME: 2 HRS 30 MINS | SERVINGS: 6 This beef braciole is a classic Southern Italian dish that will… General Recipes Beef Braciole Recipe European Print This
Serves: 6 Prep Time: 30 mins Cooking Time: 2 hrs 2 hrs
Nutrition facts: 570 calories 24 fat
Rating: 5.0/5
( 1 voted )

Ingredients

  • 2 tbsp olive oil
  • 6 thin slices boneless top round (about 2 lbs.)
  • 12 cloves garlic
  • 2 tbsp seasoned dry bread crumbs
  • 1 c. shredded Parmesan or Romano cheese - plus more for serving if desired
  • 12 thin slices prosciutto
  • 2 c. beef broth
  • 2 c. dry red wine
  • 2 tsp dried Italian seasoning
  • salt and freshly ground black pepper - to taste
  • 2 heaping tbsp all-purpose flour
  • 1 can (28 oz.) crushed tomatoes - preferably a good imported Italian brand
  • ½ c. finely chopped Italian parsley - (flat-leaf parsley), plus more for garnish

Instructions

Step 1: In half widthwise, cut top-round slices of the beef to make 12 equal pieces. Between 2 plastic wraps, lay the beef and gently pound to about ¼ to ⅛-inch thickness.

Step 2: Grab 4 cloves of garlic and mince, then slice the rest of the 8 cloves.

Step 3: In a small bowl, mix the minced garlic with parsley, cheese, breadcrumbs, salt, and black pepper.

Step 4: Over the beef, place a slice of prosciutto and evenly sprinkle with the garlic mixture. Then, roll the beef into a cylinder and tuck. While rolling, tuck the sides to hold in the filling and secure with toothpicks.

Step 5: In a Dutch oven or large pot, heat the olive oil over medium-high heat. Once hot, add the beef rolls, seam-side down. Cook the first side until brown, then occasionally turn the meat until all sides of each roll are nicely browned. To a plate, transfer the beef rolls when done.

Step 6: To the same pot, pour in the wine and add the sliced garlic. Bring to a boil, scraping the browned bits from the bottom of the pot. Next, pour in the beef broth and add the tomatoes along with the Italian seasoning. Return the beef rolls to the pot and bring everything to a simmer.

Step 7: Put the lid on and adjust the heat to low. Continue to cook while turning the beef rolls often, until tender and easily pierced using a fork. This takes about 1 1/2 hours. Or bake in the oven for 1 ½-2 hours at 325 degrees, covered. You can also do this in a slow cooker set on high for 3 to 4 hours or 5 to 6 hours on medium, or on low for 7 to 8 hours.

Step 8: If cooking in the oven, return the pot to the stove and ladle some of the cooking liquid into a bowl. To create a slurry, add the flour to the bowl and mix well until smooth. Gradually add this to the pot and bring to a slow simmer until thickened.

Step 9: To taste, season with salt and black pepper. Take the toothpicks off and serve the beef braciole over pasta with more grated cheese. Enjoy!

Notes

TO MAKE AHEAD: Prep and place in the pot with the sauce. Place in the fridge. When ready to cook, proceed as directed. Or cook and allow to cool completely. Then, store it in the fridge. Before serving, reheat in the oven, on the stovetop, or in your slow cooker. FREEZER-FRIENDLY: Once cooked, let it cool completely before keeping it in an airtight container. Then, store in the freezer for 1 to 2 months. When ready to serve, thaw in the fridge before reheating in the oven at 350 degrees.

May 23, 2022 0 comment
0 FacebookTwitterPinterestEmail
General Recipes

SALMON PASTA WITH SPINACH

by Rebecca May 23, 2022
written by Rebecca

PREP TIME: 10 MINS | COOK TIME: 20 MINS | TOTAL TIME: 30 MINS | SERVINGS: 4

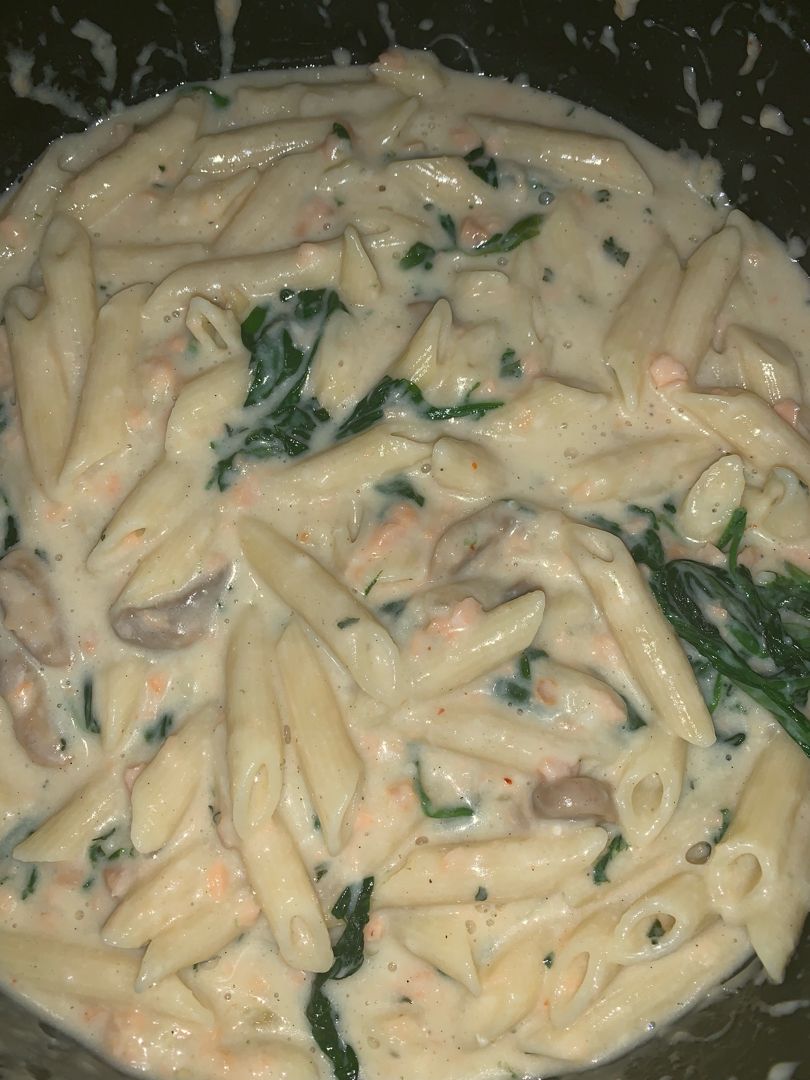
If you are searching for another easy pasta recipe, then you hit the jackpot. This salmon pasta with spinach is incredibly easy to throw together using only a few simple ingredients. Whip this up in under thirty minutes and enjoy a filling and a delicious pasta meal that even your fussiest eaters will ask for again and again!

This pasta dish is packed with tender salmon and spinach in an amazing creamy Parmesan sauce! Serve this any time for an easy and quick weeknight meal or pop a bottle of wine for an intimate dinner date with your husband.

I am pretty sure that you’ll love this one-pot pasta dish. This has been a favorite at my house for years! For this recipe, you can use your desired pasta such as penne, fettuccine, Campanelle, Ziti, or even rigatoni. Although, I suggest not to use very small pasta varieties.

INGREDIENTS

3 tablespoons butter

1 pound salmon skinless and boneless – one piece or multiple pieces

1 medium onion, chopped

8 ounces uncooked pasta – I use Campanelle

1 c. Parmesan cheese, grated

1 c. heavy cream

2 tablespoons parsley, chopped

2 garlic cloves, minced

salt and pepper to taste

6 ounces of baby spinach

HOW TO MAKE SALMON PASTA WITH SPINACH

Step 1: Following the package directions, cook the pasta until al dente.

Step 2: In butter, saute the onion for about 4 to 5 minutes over medium heat. Then, add the salmon and continue to cook for 5 to 7 minutes more, breaking the salmon into flakes. Next, add the spinach and cook for another 1 to 2 minutes until wilted.

Step 3: To the salmon, add the heavy cream along with Parmesan, garlic, salt, and pepper. Stir well and bring everything to a gentle simmer before adding the cooked pasta and chopped parsley. Mix well until incorporated.

Step 4: Serve the salmon pasta with spinach right away garnished with some parsley and grated Parmesan. Enjoy!

NUTRITION FACTS:

Calories: 729 kcal, Carbohydrates: 49g, Protein: 41g, Fat: 45g, Saturated Fat: 24g, Cholesterol: 184mg, Sodium: 594mg, Potassium: 1068mg, Fiber: 3g, Sugar: 3g, Vitamin A: 6000IU, Vitamin C: 24.7mg, Calcium: 424mg, Iron: 3.5mg

SALMON PASTA WITH SPINACH

Rebecca PREP TIME: 10 MINS | COOK TIME: 20 MINS | TOTAL TIME: 30 MINS | SERVINGS: 4 If you are searching for another easy pasta recipe, then you hit the… General Recipes SALMON PASTA WITH SPINACH European Print This
Serves: 4 Prep Time: 10 mins Cooking Time: 20 mins 20 mins
Nutrition facts: 729 calories 45 fat
Rating: 5.0/5
( 1 voted )

Ingredients

  • 3 tablespoons butter
  • 1 pound salmon skinless and boneless – one piece or multiple pieces
  • 1 medium onion, chopped
  • 8 ounces uncooked pasta - I use Campanelle
  • 1 c. Parmesan cheese, grated
  • 1 c. heavy cream
  • 2 tablespoons parsley, chopped
  • 2 garlic cloves, minced
  • salt and pepper to taste
  • 6 ounces of baby spinach

Instructions

Step 1: Following the package directions, cook the pasta until al dente.

Step 2: In butter, saute the onion for about 4 to 5 minutes over medium heat. Then, add the salmon and continue to cook for 5 to 7 minutes more, breaking the salmon into flakes. Next, add the spinach and cook for another 1 to 2 minutes until wilted.

Step 3: To the salmon, add the heavy cream along with Parmesan, garlic, salt, and pepper. Stir well and bring everything to a gentle simmer before adding the cooked pasta and chopped parsley. Mix well until incorporated.

Step 4: Serve the salmon pasta with spinach right away garnished with some parsley and grated Parmesan. Enjoy!

May 23, 2022 0 comment
0 FacebookTwitterPinterestEmail
General Recipes

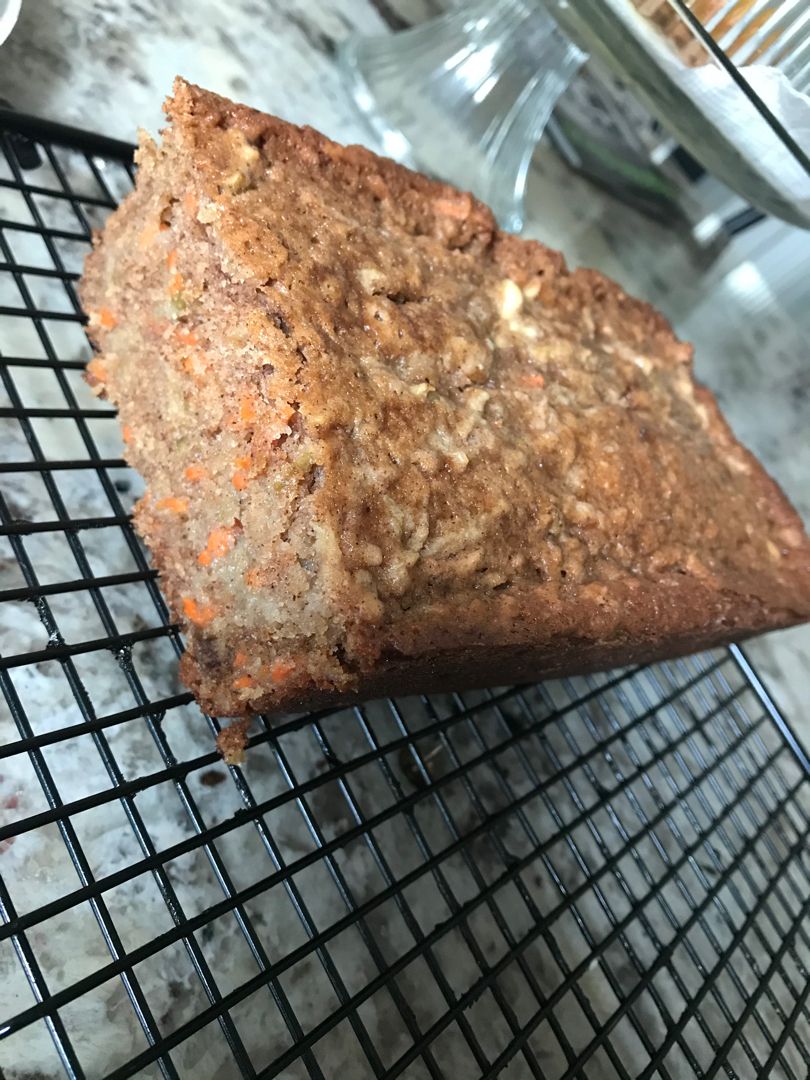
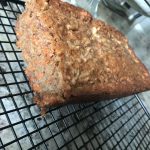
Carrot Apple Bread

by Rebecca May 23, 2022
written by Rebecca

Prep time: 10 mins | Cook time: 45 mins | Cooling time: 15 mins | Total time: 1 hr 10 mins | Yield: ONE 9X5-INCH LOAF

This is a very easy bread recipe that you can make without a mixer. A moist carrot, apple bread with the same goodness of a carrot cake infused with apples. A cake-like bread that’s excellent for breakfast with your favorite cup of coffee.

INGREDIENTS

1/3 c. liquid-state, coconut oil (or use canola or vegetable)

1 large egg

1/2 c. light brown sugar, packed

1/4 c. granulated sugar

2 tsp vanilla extract

1/4 c. sour cream (lite is okay, or Greek yoghurt)

2 tsp cinnamon

1 c. all-purpose flour

1/2 tsp baking soda

1/2 tsp baking powder

3/4 c. grated apples (I used 1 medium unpeeled Fuji; you can try Gala, Honeycrisp, or similar)

1/2 tsp ground nutmeg

3/4 c. grated carrots (around 1 large peeled and trimmed carrot)

pinch salt, optional, and to taste

How to make Carrot Apple Bread

Step 1: Prepare the oven. Preheat it to 350 degrees F. Using a floured cooking spray, spray a 9 x 5-inch loaf pan. Alternately, you can grease and flour the pan. Set aside. If you prefer a taller loaf, use an 8 x 4-inch loaf pan.

Step 2: Add the egg, light brown sugar, liquid-state, coconut oil, granulated sugar, sour cream, vanilla extract, cinnamon, and nutmeg in a large bowl. Mix well until blended. Next, fold the flour, baking powder, baking soda, and optional salt using a spatula or gently stir using a spoon until mixed. Make sure not to over mix. Then, gently stir in the carrots and apples.

Step 3: Into the prepared pan, pour the batter, and lightly smooth the top using a spatula. Place in the preheated oven and bake for about 45 to 25 minutes or until the center is set, the top is golden, and a toothpick inserted in the loaf comes out clean.

Tips:

If the top and sides are browning too quickly before the center is cool, loosely cover the pan using a sheet of foil at the 35-minute mark.

Keep in mind that the baking times vary depending on the moisture content of carrots, apples, climate, and oven variances.

When done, let the loaf cool for about 15 minutes in the pan before inverting it onto a wire rack to cool fully. Then, slice.

NUTRITION FACTS:

YIELD: 10 SERVING SIZE: 1
Amount Per Serving: CALORIES: 195 | TOTAL FAT: 9g | SATURATED FAT: 7g | TRANS FAT: 0g | UNSATURATED FAT: 1g | CHOLESTEROL: 22mg | SODIUM: 118mg | CARBOHYDRATES: 26g | FIBER: 1g | SUGAR: 16g | PROTEIN: 2g

Carrot Apple Bread

Rebecca Prep time: 10 mins | Cook time: 45 mins | Cooling time: 15 mins | Total time: 1 hr 10 mins | Yield: ONE 9X5-INCH LOAF This is a very… General Recipes Carrot Apple Bread European Print This
Prep Time: 10 mins Cooking Time: 45 mins 45 mins
Nutrition facts: 195 calories 9 fat
Rating: 5.0/5
( 1 voted )

Ingredients

  • 1/3 c. liquid-state, coconut oil (or use canola or vegetable)
  • 1 large egg
  • 1/2 c. light brown sugar, packed
  • 1/4 c. granulated sugar
  • 2 tsp vanilla extract
  • 1/4 c. sour cream (lite is okay, or Greek yoghurt)
  • 2 tsp cinnamon
  • 1 c. all-purpose flour
  • 1/2 tsp baking soda
  • 1/2 tsp baking powder
  • 3/4 c. grated apples (I used 1 medium unpeeled Fuji; you can try Gala, Honeycrisp, or similar)
  • 1/2 tsp ground nutmeg
  • 3/4 c. grated carrots (around 1 large peeled and trimmed carrot)
  • pinch salt, optional, and to taste

Instructions

Step 1: Prepare the oven. Preheat it to 350 degrees F. Using a floured cooking spray, spray a 9 x 5-inch loaf pan. Alternately, you can grease and flour the pan. Set aside. If you prefer a taller loaf, use an 8 x 4-inch loaf pan.

Step 2: Add the egg, light brown sugar, liquid-state, coconut oil, granulated sugar, sour cream, vanilla extract, cinnamon, and nutmeg in a large bowl. Mix well until blended. Next, fold the flour, baking powder, baking soda, and optional salt using a spatula or gently stir using a spoon until mixed. Make sure not to over mix. Then, gently stir in the carrots and apples.

Step 3: Into the prepared pan, pour the batter, and lightly smooth the top using a spatula. Place in the preheated oven and bake for about 45 to 25 minutes or until the center is set, the top is golden, and a toothpick inserted in the loaf comes out clean.

Notes

If the top and sides are browning too quickly before the center is cool, loosely cover the pan using a sheet of foil at the 35-minute mark. Keep in mind that the baking times vary depending on the moisture content of carrots, apples, climate, and oven variances. When done, let the loaf cool for about 15 minutes in the pan before inverting it onto a wire rack to cool fully. Then, slice.

May 23, 2022 0 comment
0 FacebookTwitterPinterestEmail
Newer Posts
Older Posts

Popular Posts

  • 1

    Crispy Crunchy Parmesan Potatoes

    March 21, 2020
  • 2

    CROCK POT SMOTHERED PORK CHOPS

    March 21, 2020
  • Facebook
  • Twitter

@2019 - All Right Reserved.


Back To Top