Cook it once
  • Home
  • Privacy Policy
  • Recipes
    • KETO
    • LC
    • WW
  • Tips
  • Contact
Cook it once
  • Home
  • Privacy Policy
  • Recipes
    • KETO
    • LC
    • WW
  • Tips
  • Contact
Category:

General Recipes

General Recipes

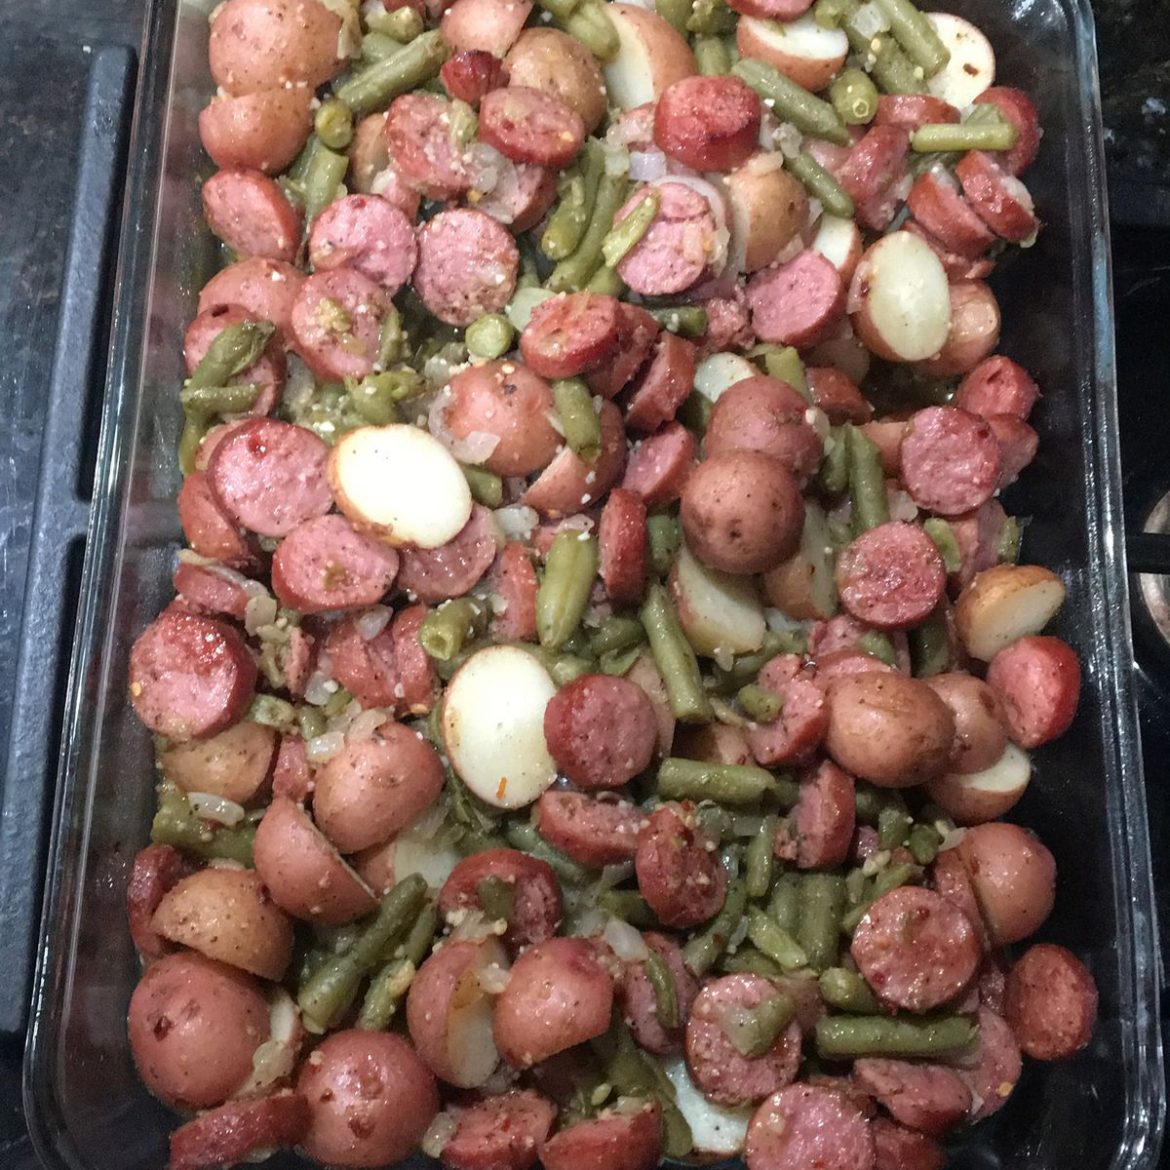
Sausage Green Bean Potato Casserole

by Rebecca June 3, 2022
written by Rebecca

PREP TIME: 30 MINS | COOK TIME: 40 MINS | TOTAL TIME: 1 HR 10 MINS | SERVINGS: 8

This casserole has been part of our regular rotation for years! It’s packed with kielbasa sausage, tender baby creamer potatoes, and green beans that are seasoned perfectly. It’s a very hearty casserole, seriously delicious, and always a huge hit!

INGREDIENTS

¼ c. butter

⅛ c. vegetable oil

2 pounds of baby creamer potatoes, washed, sliced in half

1½ pounds sausage, kielbasa or smoked sausage, sliced ¼-inch thick

2 15-ounces cans of green beans, drained

1 c. onions, chopped

½ teaspoon red pepper flakes

3 cloves garlic, minced

1 teaspoon garlic powder

1 teaspoon pepper

¼ c. water

1 teaspoon Slap Ya Mama® seasoning

How to make Sausage, Green Bean Potato Casserole

Step 1: Prepare the oven. Preheat it to 400 degrees. Using a nonstick spray, grease a 9 x 13-inch baking dish.

Step 2: After washing the creamer potatoes, cut them in half and place them in a sealable gallon size baggie. Then, add the oil, seasonings, pepper, and red pepper flakes. Seal the bag and shake to coat.

Step 3: Add the sausage and water to a large frying pan and cook over medium-high heat or until the sausages have browned and most of the water is gone. Set the sausage aside to cool before adding it to the baggie.

Step 4: In a frying pan, melt the butter. Once the butter has melted, add the onions and garlic. Cook the onions for a few minutes until translucent. When done, allow the onions to cool for a couple of minutes before adding them to the baggie. Then, seal the bag and shake it to coat.

Step 5: To the baggie, add the green beans. Seal and shake well. Into the prepared dish, pour the contents of the baggie. Tent with foil and bake in the preheated oven for about 40 minutes or until the potatoes have softened.

Step 6: When done, take the dish out of the oven and serve the sausage green bean potato casserole immediately. Enjoy!

NUTRITION FACTS:

Serving: 1 serving, Sodium: 783mg, Calcium: 31mg, Vitamin C: 24mg, Vitamin A: 343IU, Sugar: 2g, Fiber: 3g, Potassium: 690mg, Cholesterol: 76mg, Calories: 437 kcal, Trans Fat: 1g, Monounsaturated Fat: 13g, Polyunsaturated Fat: 5g, Saturated Fat: 12g, Fat: 32g, Protein: 13g, Carbohydrates: 24g, Iron: 2mg

Sausage Green Bean Potato Casserole

Rebecca PREP TIME: 30 MINS | COOK TIME: 40 MINS | TOTAL TIME: 1 HR 10 MINS | SERVINGS: 8 This casserole has been part of our regular rotation for years!… General Recipes Sausage Green Bean Potato Casserole European Print This
Serves: 8 Prep Time: 30 mins Cooking Time: 40 mins 40 mins
Nutrition facts: 437 calories 32 fat
Rating: 5.0/5
( 1 voted )

Ingredients

  • ¼ c. butter
  • ⅛ c. vegetable oil
  • 2 pounds of baby creamer potatoes, washed, sliced in half
  • 1½ pounds sausage, kielbasa or smoked sausage, sliced ¼-inch thick
  • 2 15-ounces cans of green beans, drained
  • 1 c. onions, chopped
  • ½ teaspoon red pepper flakes
  • 3 cloves garlic, minced
  • 1 teaspoon garlic powder
  • 1 teaspoon pepper
  • ¼ c. water
  • 1 teaspoon Slap Ya Mama® seasoning

Instructions

Step 1: Prepare the oven. Preheat it to 400 degrees. Using a nonstick spray, grease a 9 x 13-inch baking dish.

Step 2: After washing the creamer potatoes, cut them in half and place them in a sealable gallon size baggie. Then, add the oil, seasonings, pepper, and red pepper flakes. Seal the bag and shake to coat.

Step 3: Add the sausage and water to a large frying pan and cook over medium-high heat or until the sausages have browned and most of the water is gone. Set the sausage aside to cool before adding it to the baggie.

Step 4: In a frying pan, melt the butter. Once the butter has melted, add the onions and garlic. Cook the onions for a few minutes until translucent. When done, allow the onions to cool for a couple of minutes before adding them to the baggie. Then, seal the bag and shake it to coat.

Step 5: To the baggie, add the green beans. Seal and shake well. Into the prepared dish, pour the contents of the baggie. Tent with foil and bake in the preheated oven for about 40 minutes or until the potatoes have softened.

Step 6: When done, take the dish out of the oven and serve the sausage green bean potato casserole immediately. Enjoy!
June 3, 2022 0 comment
0 FacebookTwitterPinterestEmail
General Recipes

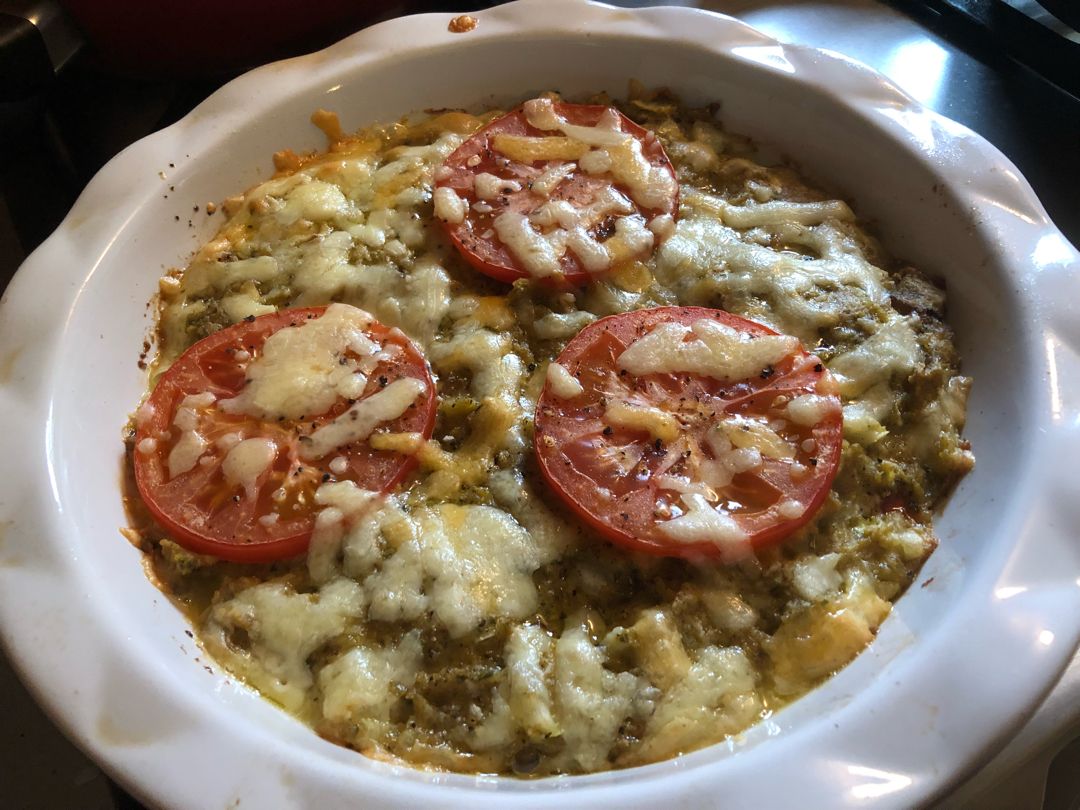
Eggplant Tomato Pie

by Rebecca June 3, 2022
written by Rebecca

Servings: 4

This eggplant, tomato pie is very easy to throw together using simple pantry ingredients. It is a brilliant recipe that you can wring out and adjust according to your preference.

I have been enjoying this eggplant, tomato pie for years! It’s one of my family’s favorite summer dishes we love to have this on our dinner table all year round! This eggplant, tomato pie is a healthy dish that’s perfect for everybody.

Eggplant, tomatoes, herbs, and cheese – are the main ingredients you need to make this pie. You can easily find them in your local grocery store or backyard if you enjoy gardening like mu husband. This recipe is pretty customizable so feel free to adjust it depending on your preference. I love this as is with the tomato slices as the crust is topped with eggplant mixture, cheese, and fresh herbs. Just the perfect balance of everything which suits my taste. Make sure not to be shy with the seasoning as eggplants have proven to be a little bland. Alternately, you can roast it to wring out even more flavor.

INGREDIENTS

1 egg

1 tbsp butter, melted

1 eggplant

2 tomatoes, sliced

2 cloves garlic

1 onion, diced

Breadcrumbs

1 tbsp pesto

Fresh parsley

Cheddar cheese, shredded

How to make Eggplant, Tomato Pie

Step 1: After peeling the eggplant, slice them into cubes. Boil the eggplant cubes until tender. When done, drain and mash.

Step 2: To the eggplant mash, add the diced onion, garlic, breadcrumbs, egg, and melted butter. Mix well until combined.

Step 3: On the bottom of a greased pan, lay the sliced tomato (one tomato). Add the eggplant mixture. On top, sprinkle the rest of the tomato and top with shredded cheddar and fresh parsley.

Step 4: Place in the oven and bake for about 30 minutes at 350 degrees F until golden brown.

Nutrition Facts:

Amount per serving: Calories 111, Total Fat 6g 8%, Saturated Fat 2.5g 12%, Cholesterol 49mg 16%, Sodium 66mg 3%, Total Carbohydrate 12.5g 5%, Dietary Fiber 5.5g 20%, Total Sugars 6.6g, Protein 3.9g, Vitamin D 6mcg 29%, Calcium 45mg 3%, Iron 1mg 4%, Potassium 470mg

Eggplant Tomato Pie

Rebecca Servings: 4 This eggplant, tomato pie is very easy to throw together using simple pantry ingredients. It is a brilliant recipe that you can wring out and adjust according to… General Recipes Eggplant Tomato Pie European Print This
Serves: 4
Nutrition facts: 111 calories 6 fat
Rating: 5.0/5
( 1 voted )

Ingredients

  • 1 egg
  • 1 tbsp butter, melted
  • 1 eggplant
  • 2 tomatoes, sliced
  • 2 cloves garlic
  • 1 onion, diced
  • Breadcrumbs
  • 1 tbsp pesto
  • Fresh parsley
  • Cheddar cheese, shredded

Instructions

Step 1: After peeling the eggplant, slice them into cubes. Boil the eggplant cubes until tender. When done, drain and mash.

Step 2: To the eggplant mash, add the diced onion, garlic, breadcrumbs, egg, and melted butter. Mix well until combined.

Step 3: On the bottom of a greased pan, lay the sliced tomato (one tomato). Add the eggplant mixture. On top, sprinkle the rest of the tomato and top with shredded cheddar and fresh parsley.

Step 4: Place in the oven and bake for about 30 minutes at 350 degrees F until golden brown.

June 3, 2022 0 comment
0 FacebookTwitterPinterestEmail
General Recipes

Skillet Chicken with Cilantro Lime Sauce

by Rebecca June 3, 2022
written by Rebecca

Prep Time: 30 mins | Cook Time: 10 mins | Total Time: 40 mins | Yield: 4

This is an amazing one-pan dish with lush chicken smothered in an impressive cilantro lime sauce. A gluten-free dinner that you can easily whip up in less than forty minutes!

Ingredients

2 tbsp unsalted butter, cubed

1 tbsp olive oil

4 skinless, boneless chicken breasts

1 c. chicken broth (I recommend reduced sodium)

1/4 c. finely chopped onion

1/2 tsp red pepper flakes

1 tbsp chopped cilantro

3 tbsp heavy cream

1 tbsp fresh lime juice (I use closer to 1.5 tablespoons)

optional: lime wedges and more cilantro for garnish, steamed asparagus for serving

1/4 tsp salt

1/4 tsp freshly ground black pepper

How to make Skillet Chicken with Cilantro Lime Sauce

Step 1: Prepare the oven. Preheat it to 375 degrees F or 190 degrees C.

Step 2: make sure that the chicken breasts are all of even thickness. Pound them if needed. Then, sprinkle with salt and pepper.

Step 3: Heat the oil in a large oven-proof skillet over medium-high heat. Once the oil is hot, add the chicken to the skillet and cook for about 6 to 7 minutes, flipping once until the chicken is nice and browned. At this point, the chicken does not have to be cooked all the way. On a plate, transfer the chicken and tightly cover it with foil.

Step 4: Take the skillet off the heat and pour it into the broth. Add the lime juice, onion, cilantro, and red pepper. Place the skillet back to the heat and cook while stirring to scrape the brown bits from the bottom of the pan. Bring everything to a boil. Gently boil for about 10 minutes, uncovered, until the liquid has decreased to about 1/4 cup. Adjust the heat to medium-low before adding the cream and butter. Stir well until the butter has melted.

Step 5: To the sauce, add the chicken. Bake in the preheated oven for about 5 to 10 minutes, uncovered until the chicken is fully cooked.

Step 6: Remove from the oven when done and serve the chicken immediately. Spoon the sauce on top and garnish with lime wedges and more cilantro. If you have any leftovers, store them in the fridge for a couple of days. Reheat before serving.

Notes:

Feel free to adjust the number of red pepper flakes. This dish is mildly spicy, you can add more if you want an extra kick.

You can swap heavy cream with whole milk. But if you prefer the richest, thickest, do not skip the heavy cream. Or if using whole milk, ensure that it is at room temperature. This way you’ll prevent curdling.

This dish has around 300 calories, 14g fat, 2g carbs, and 33g protein per serving. This includes the extra sauce.

Skillet Chicken with Cilantro Lime Sauce

Rebecca Prep Time: 30 mins | Cook Time: 10 mins | Total Time: 40 mins | Yield: 4 This is an amazing one-pan dish with lush chicken smothered in an impressive… General Recipes Skillet Chicken with Cilantro Lime Sauce European Print This
Serves: 4 Prep Time: 30 mins Cooking Time: 10 mins 10 mins
Nutrition facts: 200 calories 20 grams fat
Rating: 5.0/5
( 1 voted )

Ingredients

  • 2 tbsp unsalted butter, cubed
  • 1 tbsp olive oil
  • 4 skinless, boneless chicken breasts
  • 1 c. chicken broth (I recommend reduced sodium)
  • 1/4 c. finely chopped onion
  • 1/2 tsp red pepper flakes
  • 1 tbsp chopped cilantro
  • 3 tbsp heavy cream
  • 1 tbsp fresh lime juice (I use closer to 1.5 tablespoons)
  • optional: lime wedges and more cilantro for garnish, steamed asparagus for serving
  • 1/4 tsp salt
  • 1/4 tsp freshly ground black pepper

Instructions

Step 1: Prepare the oven. Preheat it to 375 degrees F or 190 degrees C.

Step 2: make sure that the chicken breasts are all of even thickness. Pound them if needed. Then, sprinkle with salt and pepper.

Step 3: Heat the oil in a large oven-proof skillet over medium-high heat. Once the oil is hot, add the chicken to the skillet and cook for about 6 to 7 minutes, flipping once until the chicken is nice and browned. At this point, the chicken does not have to be cooked all the way. On a plate, transfer the chicken and tightly cover it with foil.

Step 4: Take the skillet off the heat and pour it into the broth. Add the lime juice, onion, cilantro, and red pepper. Place the skillet back to the heat and cook while stirring to scrape the brown bits from the bottom of the pan. Bring everything to a boil. Gently boil for about 10 minutes, uncovered, until the liquid has decreased to about 1/4 cup. Adjust the heat to medium-low before adding the cream and butter. Stir well until the butter has melted.

Step 5: To the sauce, add the chicken. Bake in the preheated oven for about 5 to 10 minutes, uncovered until the chicken is fully cooked.

Step 6: Remove from the oven when done and serve the chicken immediately. Spoon the sauce on top and garnish with lime wedges and more cilantro. If you have any leftovers, store them in the fridge for a couple of days. Reheat before serving.

June 3, 2022 0 comment
0 FacebookTwitterPinterestEmail
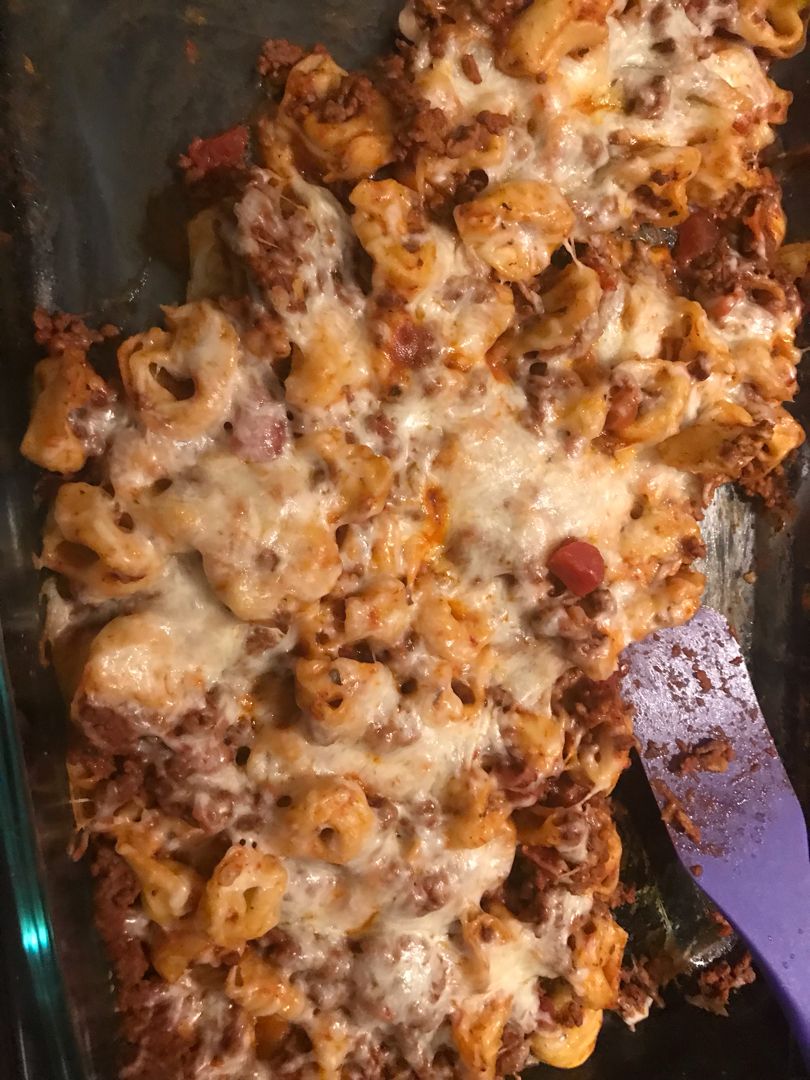
General Recipes

Baked Tortellini with Meat Sauce

by Rebecca June 3, 2022
written by Rebecca

Prep Time: 15 mins | Cook Time: 20 mins | Total Time: 35 mins | Servings: 6

Are you looking for another amazing dinner that you can easily and quickly throw together? Then, this baked tortellini in a hearty meat sauce topped with melty cheese hits the spot! Make this using only a few very simple ingredients in less than thirty-five minutes, and enjoy a filling meal that your entire family will surely love!

INGREDIENTS

1 lb. ground beef, I use 90% lean

18 oz. Three Bridges Triple Cheese Tortellini (2 9-oz. packages or 1 family size package)

2 c. shredded mozzarella cheese

1 15-oz. container Three Bridges Heirloom Marinara Sauce

1/2 c. diced white onion

2 tsp olive oil

2 tbsp chopped parsley

cooking spray

salt and pepper to taste

How to make Baked Tortellini with Meat Sauce

Step 1: Prepare the oven. Preheat it to 400 degrees F. Using cooking spray, grease a 6 cup or larger baking dish.

Step 2: Following the package directions cook the tortellini in a large pot of boiling water.

Step 3: In the meantime, heat the olive oil in a large pan over medium-high heat. Once the oil is hot, add the onion to the pan and cook for about 4 to 5 minutes or until tender. Next, add the ground beef and season with salt & pepper. Continue to cook for another 4 to 5 minutes, breaking the meat into small pieces using a spatula until done.

Step 4: Into the pan with the beef, add the marinara sauce, and heat until warmed through. Once the pasta is done, drain and return it to the pot. Pour the sauce over and toss to coat well.

Step 5: Into the prepared baking dish, spoon the pasta, and sprinkle with cheese. Place in the preheated oven and bake for about 20 minutes or until the cheese has melted and begun to brown.

Step 6: Remove from the oven when done and serve the baked tortellini with meat sauce right away garnished with some parsley. Enjoy!

NUTRITION FACTS:

Calories: 521 kcal | Carbohydrates: 37g | Protein: 36g | Fat: 24g | Saturated Fat: 10g | Cholesterol: 110mg | Sodium: 653mg | Potassium: 271mg | Fiber: 3g | Sugar: 2g | Vitamin A: 250IU | Calcium: 318mg | Iron: 4mg

Baked Tortellini with Meat Sauce

Rebecca Prep Time: 15 mins | Cook Time: 20 mins | Total Time: 35 mins | Servings: 6 Are you looking for another amazing dinner that you can easily and quickly… General Recipes Baked Tortellini with Meat Sauce European Print This
Serves: 6 Prep Time: 15 mins Cooking Time: 20 mins 20 mins
Nutrition facts: 521 calories 24 fat
Rating: 5.0/5
( 1 voted )

Ingredients

  • 1 lb. ground beef, I use 90% lean
  • 18 oz. Three Bridges Triple Cheese Tortellini (2 9-oz. packages or 1 family size package)
  • 2 c. shredded mozzarella cheese
  • 1 15-oz. container Three Bridges Heirloom Marinara Sauce
  • 1/2 c. diced white onion
  • 2 tsp olive oil
  • 2 tbsp chopped parsley
  • cooking spray
  • salt and pepper to taste

Instructions

Step 1: Prepare the oven. Preheat it to 400 degrees F. Using cooking spray, grease a 6 cup or larger baking dish.

Step 2: Following the package directions cook the tortellini in a large pot of boiling water.

Step 3: In the meantime, heat the olive oil in a large pan over medium-high heat. Once the oil is hot, add the onion to the pan and cook for about 4 to 5 minutes or until tender. Next, add the ground beef and season with salt & pepper. Continue to cook for another 4 to 5 minutes, breaking the meat into small pieces using a spatula until done.

Step 4: Into the pan with the beef, add the marinara sauce, and heat until warmed through. Once the pasta is done, drain and return it to the pot. Pour the sauce over and toss to coat well.

Step 5: Into the prepared baking dish, spoon the pasta, and sprinkle with cheese. Place in the preheated oven and bake for about 20 minutes or until the cheese has melted and begun to brown.

Step 6: Remove from the oven when done and serve the baked tortellini with meat sauce right away garnished with some parsley. Enjoy!

June 3, 2022 0 comment
0 FacebookTwitterPinterestEmail
General Recipes

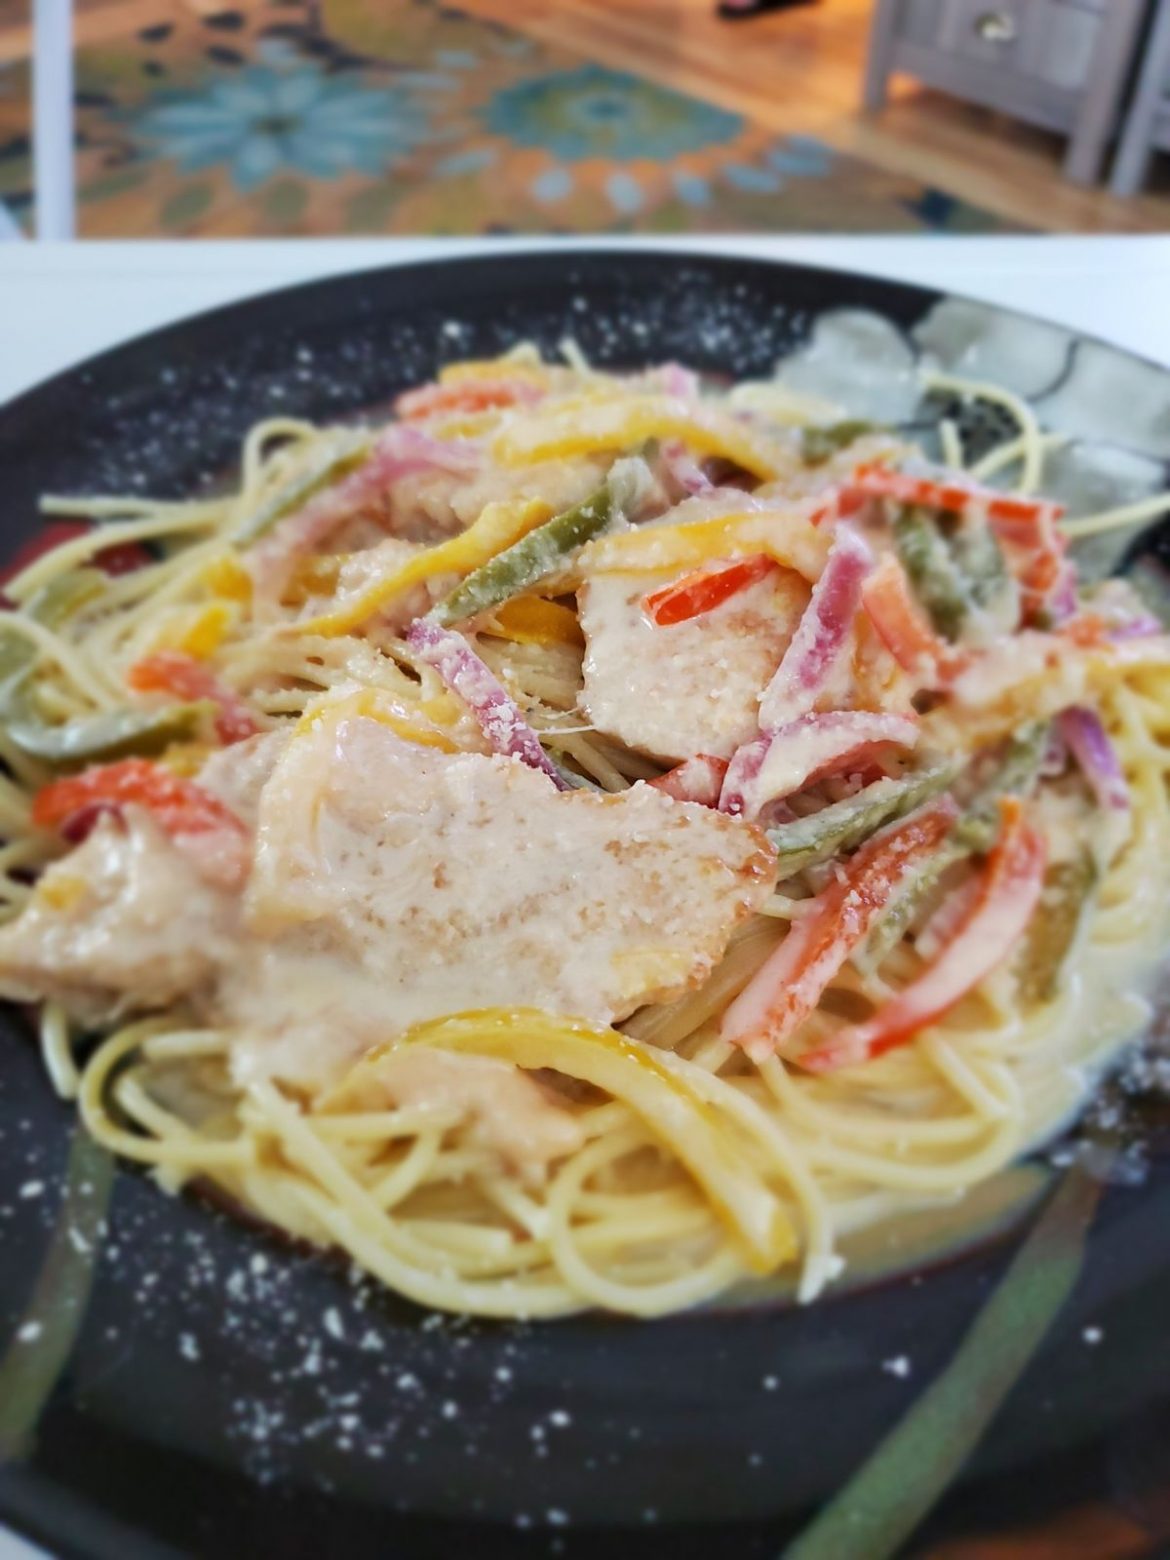
Chicken Scampi

by Rebecca June 3, 2022
written by Rebecca

Prep Time: 10 mins | Cook Time: 15 mins | Total Time: 25 mins | Servings: 4

Easy, quick, and delicious – this chicken scampi is a must! A restaurant-quality meal with juicy and flavorful chicken tenders in a simple buttery garlic sauce with a touch of white wine and cream. This chicken scampi will surely grab everyone’s attention and is an excellent addition to your regular menu rotation!

Ingredients

2 tbsp olive oil

2 tbsp butter

1 and ½ lb (650 grams) chicken tenderloins (in the UK they’re called mini chicken fillets)

8 oz (225 grams) angel hair pasta

½ c (60 grams) all-purpose flour

¼ tsp Italian seasoning

¼ tsp ground black pepper

1 red onion, sliced into half-moons

½ red bell pepper, sliced thinly

½ green bell pepper, sliced thinly

½ yellow bell pepper, sliced thinly

4 cloves garlic, crushed

½ c. (120ml) whipping cream

½ c. (120ml) dry white wine

½ c. Parmesan cheese, grated

1 tsp fresh parsley, chopped

2 tsp salt, divided

¼ tsp red chili flakes, optional

How to make Chicken Scampi

Step 1: Following the package directions, cook the pasta in a medium-sized sauce pot with salted boiling water. Drain when done, reserving 1 cup of the pasta water.

Step 2: In flour seasoned with Italian seasoning, 1 tsp salt, and pepper, dredge the chicken tenders.

Step 3: In a skillet, heat the olive oil. Add the breaded chicken tender to the hot oil and cook for about 3 minutes per side or until the chicken is completely cooked. Set the chicken aside when done and cover to keep warm.

Step 4: In the now-empty skillet, melt the butter. Once the butter has melted, add the onions and bell peppers. Cook for a few minutes or until the peppers are a little tender. Add the garlic and continue to cook for another minute. Pour in the wine and deglaze the pan. Cook for 4 minutes more until the liquid has slightly reduced.

Step 5: To the pan, add the reserved pasta water, followed by the whipping cream. Add the Parmesan cheese, 1 tsp salt, chili flakes (optional), and pasta once the sauce begins to simmer. Toss well and return the chicken tenders.

Step 6: Serve warm, garnished with some chopped parsley. Enjoy!

Notes:

For this recipe, you can use shrimp in place of chicken.

Wine is a must, but you can always swap it with 1/4 c. chicken stock and 1/4 c. white grape juice or apple juice.

For cooking savory dishes, always use dry white wine such as pinot grigio, chardonnay, pinto blanc, sauvignon blanc, or Semillon.

To make this chicken scampi a low-carb meal, serve this over zucchini noodles or cauliflower rice.

Nutrition Facts:

Calories: 778 kcal, Carbohydrates: 63g, Protein: 51g, Fat: 33g, Saturated Fat: 15g, Cholesterol: 173mg, Sodium: 1632mg, Potassium: 969mg, Fiber: 3g, Sugar: 4g, Vitamin A: 1348IU, Vitamin C: 63mg, Calcium: 202mg, Iron: 3mg

Chicken Scampi

Rebecca Prep Time: 10 mins | Cook Time: 15 mins | Total Time: 25 mins | Servings: 4 Easy, quick, and delicious – this chicken scampi is a must! A restaurant-quality… General Recipes Chicken Scampi European Print This
Serves: 4 Prep Time: 10 mins Cooking Time: 15 mins 15 mins
Nutrition facts: 778 calories 33 fat
Rating: 5.0/5
( 1 voted )

Ingredients

  • 2 tbsp olive oil
  • 2 tbsp butter
  • 1 and ½ lb (650 grams) chicken tenderloins (in the UK they're called mini chicken fillets)
  • 8 oz (225 grams) angel hair pasta
  • ½ c (60 grams) all-purpose flour
  • ¼ tsp Italian seasoning
  • ¼ tsp ground black pepper
  • 1 red onion, sliced into half-moons
  • ½ red bell pepper, sliced thinly
  • ½ green bell pepper, sliced thinly
  • ½ yellow bell pepper, sliced thinly
  • 4 cloves garlic, crushed
  • ½ c. (120ml) whipping cream
  • ½ c. (120ml) dry white wine
  • ½ c. Parmesan cheese, grated
  • 1 tsp fresh parsley, chopped
  • 2 tsp salt, divided
  • ¼ tsp red chili flakes, optional

Instructions

Step 1: Following the package directions, cook the pasta in a medium-sized sauce pot with salted boiling water. Drain when done, reserving 1 cup of the pasta water.

Step 2: In flour seasoned with Italian seasoning, 1 tsp salt, and pepper, dredge the chicken tenders.

Step 3: In a skillet, heat the olive oil. Add the breaded chicken tender to the hot oil and cook for about 3 minutes per side or until the chicken is completely cooked. Set the chicken aside when done and cover to keep warm.

Step 4: In the now-empty skillet, melt the butter. Once the butter has melted, add the onions and bell peppers. Cook for a few minutes or until the peppers are a little tender. Add the garlic and continue to cook for another minute. Pour in the wine and deglaze the pan. Cook for 4 minutes more until the liquid has slightly reduced.

Step 5: To the pan, add the reserved pasta water, followed by the whipping cream. Add the Parmesan cheese, 1 tsp salt, chili flakes (optional), and pasta once the sauce begins to simmer. Toss well and return the chicken tenders.

Step 6: Serve warm, garnished with some chopped parsley. Enjoy!

Notes

For this recipe, you can use shrimp in place of chicken. Wine is a must, but you can always swap it with 1/4 c. chicken stock and 1/4 c. white grape juice or apple juice. For cooking savory dishes, always use dry white wine such as pinot grigio, chardonnay, pinto blanc, sauvignon blanc, or Semillon. To make this chicken scampi a low-carb meal, serve this over zucchini noodles or cauliflower rice.

June 3, 2022 0 comment
0 FacebookTwitterPinterestEmail
General Recipes

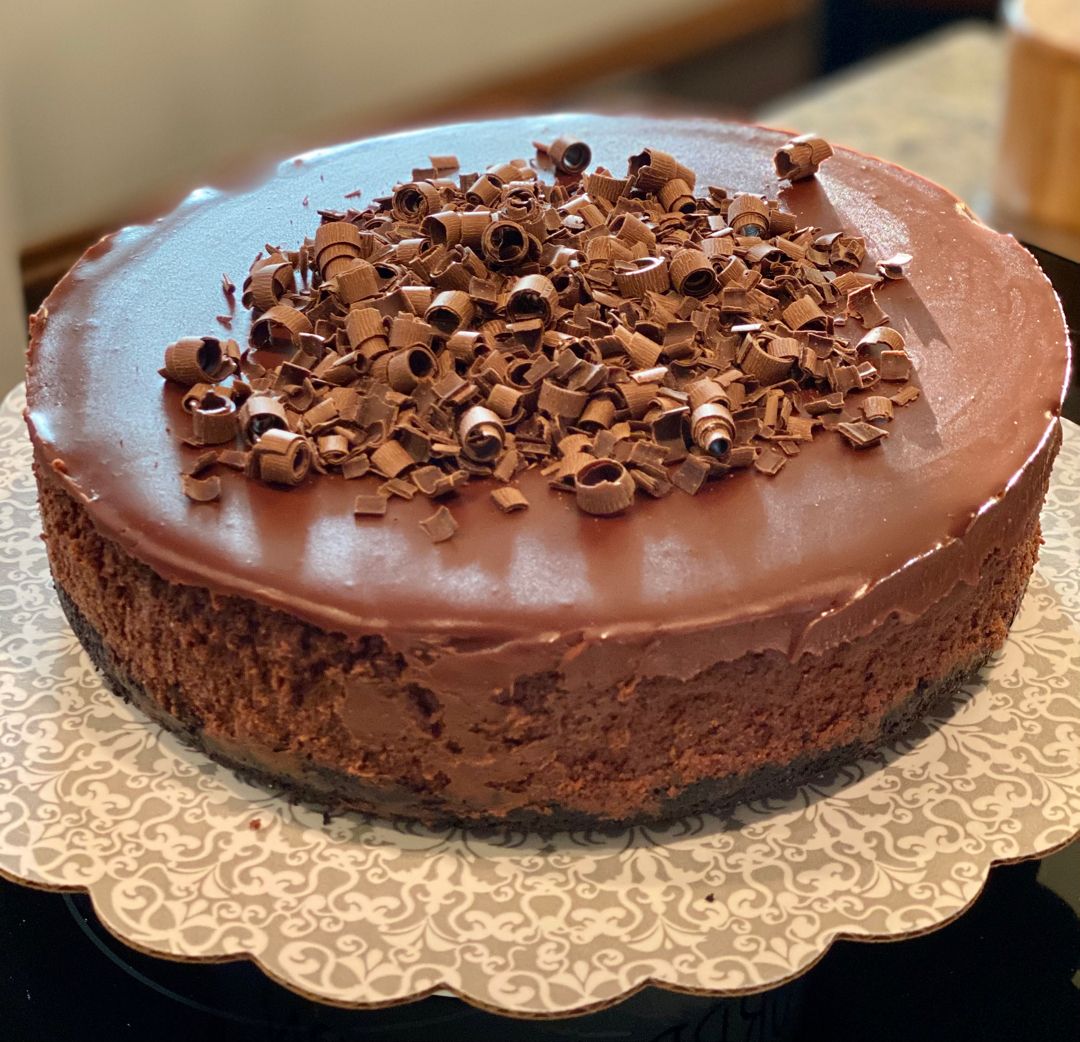
Triple Chocolate Cheesecake With Oreo Crust

by Rebecca June 3, 2022
written by Rebecca

Prep Time: 30 mins | Cook Time: 70 mins | Yield: 12

Rich and decadent – this triple chocolate cheesecake with oreo crust is the ultimate dessert! Soft and fudgy with two layers of chocolate cake and cheesecake in between.

Ingredients

Crust:

1/4 c. unsalted butter-melted

24 Oreo cookies-finely crushed

Cheesecake Filling:

4 eggs, room temperature

2 pounds cream cheese- room temperature

3 tbsp cocoa powder

10 oz. bittersweet chocolate-chopped

1 ½ c. powdered sugar

Chocolate Topping:

1 tbsp granulated sugar

3/4 c. heavy cream

6 ounces bittersweet chocolate-finely chopped

How to make Triple Chocolate Cheesecake With Oreo Crust

Crust:

Step 1: Prepare the oven. Preheat it to 350 degrees F. Ready a 9-inch springform pan. Grease and set aside.

Step 2: In a food processor, finely crush the cookies. Then, add the melted butter and process until moistened.

Step 3: Onto the bottom of the prepared pan, press the crumb mixture. Place in the preheated oven and bake for about 6 minutes. When done, transfer on a wire rack to cool.

Filling:

Step 4: Set aside 10 ounces of melted bittersweet chocolate and set aside to cool.

Step 5: Combine the cream cheese with sugar until smooth, then stir in the cocoa powder. Add in the eggs, one at a time, beating on low speed, making sure not to over mix. Next, add the melted chocolate and beat on low speed until blended.

Step 6: Over the crust, pour the filling, and smooth the top. Place in the preheated oven and bake for an hour to 1 hour and 10 minutes until the center is set. Remove from the oven when done and transfer on a wire rack to cool for about 5 minutes. Around the sides of the pan, run a thin knife. Place the cake in the fridge for at least 8 hours or overnight, uncovered.

Topping:

Step 7: Place the cream, chocolate, and sugar in a medium saucepan over low heat. Stir until the chocolate is fully melted and you have a smooth mixture. Let this cool, then pour on top of the cheesecake.

Step 8: Around the sides run a thin knife once the topping is set and cooled, then remove the sides of the springform pan. If desired, garnish with some chocolate curls. Enjoy!

Note:

Feel free to prep this cheesecake about 2 to 3 days ahead and simply cover and keep it in the fridge.

Triple Chocolate Cheesecake With Oreo Crust

Rebecca Prep Time: 30 mins | Cook Time: 70 mins | Yield: 12 Rich and decadent – this triple chocolate cheesecake with oreo crust is the ultimate dessert! Soft and fudgy… General Recipes Triple Chocolate Cheesecake With Oreo Crust European Print This
Serves: 12 Prep Time: 30 mins Cooking Time: 70 mins 70 mins
Nutrition facts: 200 calories 20 grams fat
Rating: 5.0/5
( 1 voted )

Ingredients

  • Crust:
  • 1/4 c. unsalted butter-melted
  • 24 Oreo cookies-finely crushed
  • Cheesecake Filling:
  • 4 eggs, room temperature
  • 2 pounds cream cheese- room temperature
  • 3 tbsp cocoa powder
  • 10 oz. bittersweet chocolate-chopped
  • 1 ½ c. powdered sugar
  • Chocolate Topping:
  • 1 tbsp granulated sugar
  • 3/4 c. heavy cream
  • 6 ounces bittersweet chocolate-finely chopped

Instructions

Crust:

Step 1: Prepare the oven. Preheat it to 350 degrees F. Ready a 9-inch springform pan. Grease and set aside.

Step 2: In a food processor, finely crush the cookies. Then, add the melted butter and process until moistened.

Step 3: Onto the bottom of the prepared pan, press the crumb mixture. Place in the preheated oven and bake for about 6 minutes. When done, transfer on a wire rack to cool.

Filling:

Step 4: Set aside 10 ounces of melted bittersweet chocolate and set aside to cool.

Step 5: Combine the cream cheese with sugar until smooth, then stir in the cocoa powder. Add in the eggs, one at a time, beating on low speed, making sure not to over mix. Next, add the melted chocolate and beat on low speed until blended.

Step 6: Over the crust, pour the filling, and smooth the top. Place in the preheated oven and bake for an hour to 1 hour and 10 minutes until the center is set. Remove from the oven when done and transfer on a wire rack to cool for about 5 minutes. Around the sides of the pan, run a thin knife. Place the cake in the fridge for at least 8 hours or overnight, uncovered.

Topping:

Step 7: Place the cream, chocolate, and sugar in a medium saucepan over low heat. Stir until the chocolate is fully melted and you have a smooth mixture. Let this cool, then pour on top of the cheesecake.

Step 8: Around the sides run a thin knife once the topping is set and cooled, then remove the sides of the springform pan. If desired, garnish with some chocolate curls. Enjoy!

Notes

Feel free to prep this cheesecake about 2 to 3 days ahead and simply cover and keep it in the fridge.

June 3, 2022 0 comment
0 FacebookTwitterPinterestEmail
General Recipes

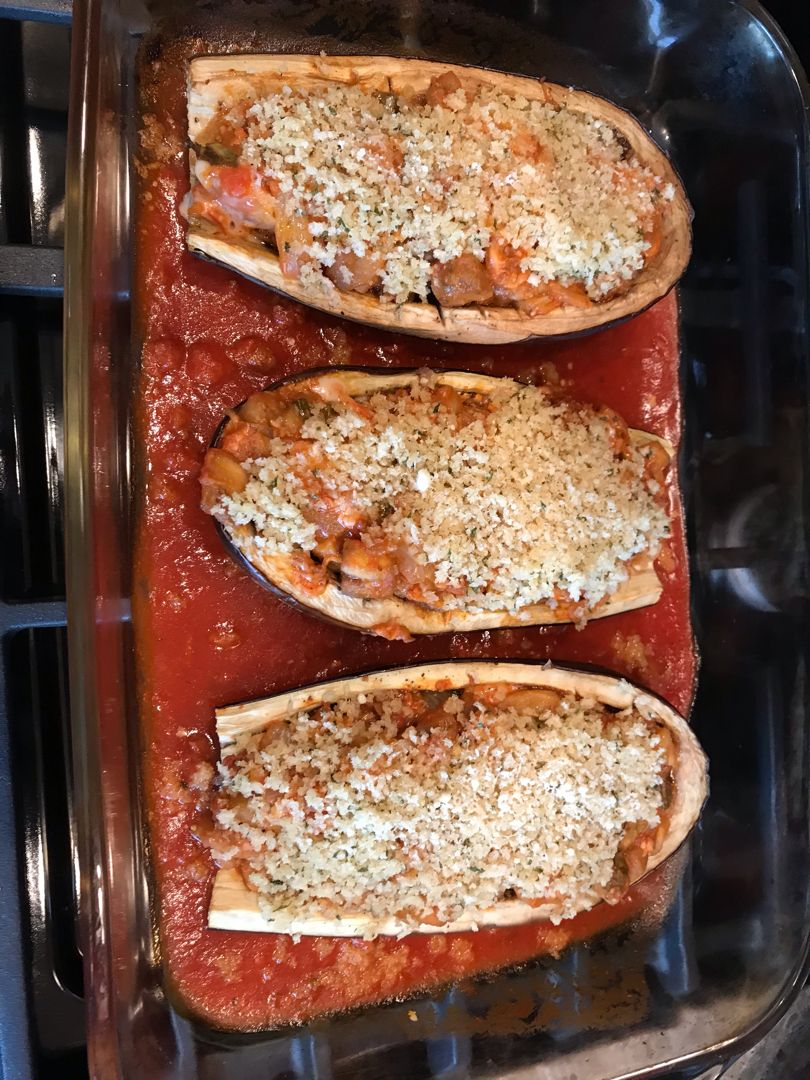
Stuffed Eggplant Parm

by Rebecca June 3, 2022
written by Rebecca

YIELD: 4 servings

This stuffed eggplant Parm is my ultimate favorite eggplant recipe! A classic and guarantee to deliver the best eggplant dish. Eggplant boats stuffed with eggplant Parm and topped with melted mozzarella. The perfect comfort food for all our vegetarian friends!

INGREDIENTS

3 tbsp plus 1 tsp olive oil, divided

2 medium eggplants (about 2 1/2 lbs total)

1 medium yellow onion, finely chopped

1/4 c. Panko breadcrumbs

3 cloves garlic, minced

1/4 c. torn fresh basil leaves, plus more for topping

2 c. marinara sauce, divided

1/2 c. finely grated Parmesan cheese (about 2 oz.), divided

1 1/2 c. whole-milk, low-moisture shredded mozzarella, divided

3/4 tsp kosher salt, divided

1/2 tsp freshly ground black pepper, divided

How to make Stuffed Eggplant Parm

Step 1: In the middle, arrange the oven rack and preheat the oven to 400 degrees F.

Step 2: In half lengthwise, slice each eggplant, making sure to leave about a 2-inch border. Cut around the insides of each half using a paring knife. Using a spoon, scoop out the flesh, making boats out of the shells. Then, roughly chop the flesh. Set aside.

Step 3: With 1 tbsp oil, rub the insides of the hollowed eggplant shells and sprinkle each with 1/4 tsp salt and pepper. In a 13 x 9-inch baking dish, place the shells, cut-side up. Place in the preheated oven and roast for about 20 to 30 minutes. Note that the roasting time varies depending on the size of the eggplant. It is done when the is no resistance when the eggplant is pierced with a tip of a paring knife. Set aside.

Step 4: In a small bowl, place the breadcrumbs, 1 teaspoon of the oil, and a pinch of salt. Mix well and set aside.

Step 5: In a large skillet, heat the rest of the 2 tbsp oil over medium heat. Once the oil is shimmering, add the onion and cook for about 4 to 5 minutes, stirring often until tender. Then, add the chopped flesh along with the garlic, the rest of the half tsp salt, and 1/4 tsp pepper. Continue to cook for another 7 to 9 minutes or until the eggplant is tender, stirring often. Next, stir in 1 c of marinara and cook for 2 minutes more until heated through. Take the pan off the heat and stir in the basil, 1 c mozzarella, and 1/4 c. Parmesan cheese.

Step 6: Set the broiler to high. Then, take the baking dish out of the oven. Onto a work surface, transfer the eggplant shells. Into the baking dish, pour the rest of the 1 c marinara sauce and evenly spread into a single layer. Place the eggplant shells back into the baking dish. Into each shell, evenly spoon the filling and top with the rest of the half c. mozzarella, 1/4 c. Parmesan, and the reserved breadcrumb mixture. Place in the broiler for about 2 to 4 minutes or until the cheese has melted and bubbled and the breadcrumbs are browned.

Step 7: Before serving, top the eggplant shells with marinara sauce from the baking dish and garnish with more basil. Enjoy!

Storage:

Place any leftovers in an airtight container and store them in the fridge for up to 4 days.

Nutrition Facts:

Calories 443, Fat 26.9 g (41.4%), Saturated 9.7 g (48.7%), Carbs 33.6 g (11.2%), Fiber 11.3 g (45.3%), Sugars 18.8 g, Protein 19.8 g (39.6%), Sodium 1183.0 mg (49.3%)

Stuffed Eggplant Parm

Rebecca YIELD: 4 servings This stuffed eggplant Parm is my ultimate favorite eggplant recipe! A classic and guarantee to deliver the best eggplant dish. Eggplant boats stuffed with eggplant Parm and… General Recipes Stuffed Eggplant Parm European Print This
Serves: 4
Nutrition facts: 443 calories 26.9 fat
Rating: 5.0/5
( 1 voted )

Ingredients

  • 3 tbsp plus 1 tsp olive oil, divided
  • 2 medium eggplants (about 2 1/2 lbs total)
  • 1 medium yellow onion, finely chopped
  • 1/4 c. Panko breadcrumbs
  • 3 cloves garlic, minced
  • 1/4 c. torn fresh basil leaves, plus more for topping
  • 2 c. marinara sauce, divided
  • 1/2 c. finely grated Parmesan cheese (about 2 oz.), divided
  • 1 1/2 c. whole-milk, low-moisture shredded mozzarella, divided
  • 3/4 tsp kosher salt, divided
  • 1/2 tsp freshly ground black pepper, divided

Instructions

Step 1: In the middle, arrange the oven rack and preheat the oven to 400 degrees F.

Step 2: In half lengthwise, slice each eggplant, making sure to leave about a 2-inch border. Cut around the insides of each half using a paring knife. Using a spoon, scoop out the flesh, making boats out of the shells. Then, roughly chop the flesh. Set aside.

Step 3: With 1 tbsp oil, rub the insides of the hollowed eggplant shells and sprinkle each with 1/4 tsp salt and pepper. In a 13 x 9-inch baking dish, place the shells, cut-side up. Place in the preheated oven and roast for about 20 to 30 minutes. Note that the roasting time varies depending on the size of the eggplant. It is done when the is no resistance when the eggplant is pierced with a tip of a paring knife. Set aside.

Step 4: In a small bowl, place the breadcrumbs, 1 teaspoon of the oil, and a pinch of salt. Mix well and set aside.

Step 5: In a large skillet, heat the rest of the 2 tbsp oil over medium heat. Once the oil is shimmering, add the onion and cook for about 4 to 5 minutes, stirring often until tender. Then, add the chopped flesh along with the garlic, the rest of the half tsp salt, and 1/4 tsp pepper. Continue to cook for another 7 to 9 minutes or until the eggplant is tender, stirring often. Next, stir in 1 c of marinara and cook for 2 minutes more until heated through. Take the pan off the heat and stir in the basil, 1 c mozzarella, and 1/4 c. Parmesan cheese.

Step 6: Set the broiler to high. Then, take the baking dish out of the oven. Onto a work surface, transfer the eggplant shells. Into the baking dish, pour the rest of the 1 c marinara sauce and evenly spread into a single layer. Place the eggplant shells back into the baking dish. Into each shell, evenly spoon the filling and top with the rest of the half c. mozzarella, 1/4 c. Parmesan, and the reserved breadcrumb mixture. Place in the broiler for about 2 to 4 minutes or until the cheese has melted and bubbled and the breadcrumbs are browned.

Step 7: Before serving, top the eggplant shells with marinara sauce from the baking dish and garnish with more basil. Enjoy!

Notes

Storage: Place any leftovers in an airtight container and store them in the fridge for up to 4 days.

June 3, 2022 0 comment
0 FacebookTwitterPinterestEmail
General Recipes

Pasta with Tomato Cream Sauce

by Rebecca June 3, 2022
written by Rebecca

Prep Time: 10 mins | Cook Time: 20 mins | Total Time: 30 mins | Servings: 8

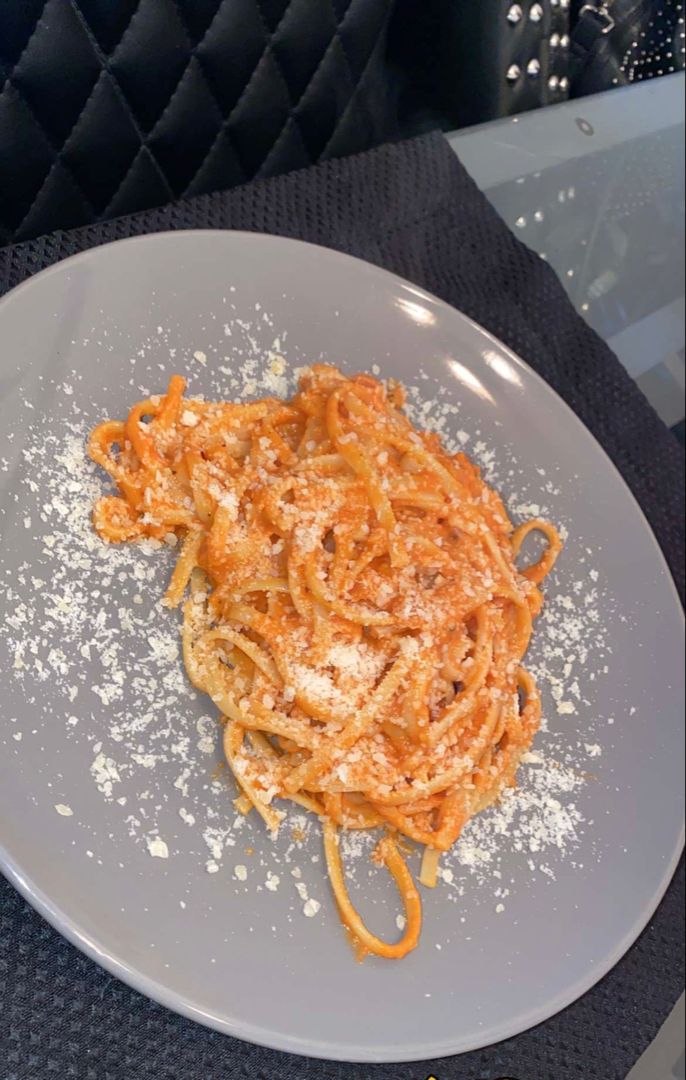
Enjoy a restaurant-quality meal at home with this delicious pasta with tomato cream sauce. A simple meal that you can easily and quickly whip up using simple ingredients. Pair this up with a simple salad or bread and savor that impressive and huge tomato and cream flavors of this pasta dish!

Ingredients

2 tbsp olive oil

2 tbsp butter

4 cloves garlic, minced

1/2 c. onion, minced

1 c. heavy cream

2 15-ounces cans of tomato sauce

1/2 c. grated Parmesan, plus extra for garnish

1 lb. linguine or pasta of your choice

salt and pepper to taste

How to make Pasta with Tomato Cream Sauce

Step 1: Add the olive oil and butter to a hot large skillet. Once the butter has melted, add the onions to the skillet and cook for about 2 to 3 minutes or until translucent. Next, add the garlic and cook for a minute or two more or until aromatic.

Step 2: To the pan, add the tomato sauce and cream. Let everything simmer for about 20 minutes or until the sauce has thickened.

Step 3: In the meantime, cook the pasta following the package direction in a large pot of salted boiling water until al dente. When done, drain the pasta but make sure to reserve a half cup of the pasta water.

Step 4: To the tomato cream sauce, add half a cup of Parmesan cheese. Add the pasta and toss to coat. Then, drizzle in around 1/4 c of the reserved pasta water. Let everything simmer for about a minute or two. To reach your preferred consistency, add the extra pasta water.

Step 5: When done, serve the Pasta with Tomato Cream Sauce with extra grated Parmesan on top. If desired, enjoy with a simple side salad or bread.

Tips to make Pasta in Tomato Cream Sauce:

To help the sauce adhere to the pasta, make sure to reserve a half cup of pasta water before draining the pasta.

For this recipe, you are welcome to use any variety of pasta such as penne, bow tie, or wagon wheels.

If you need protein, add cooked chicken and sausage.

Nutrition Facts:

Amount Per Serving: Calories 389, Calories from Fat 171, Fat 19g29%, Saturated Fat 10g50%, Cholesterol 52mg17%, Sodium 141mg6%, Potassium 175mg5%, Carbohydrates 44g15%, Fiber 2g8%, Sugar 2g2%, Protein 10g20%, Vitamin A 575IU12%, Vitamin C 1.4 mg2%, Calcium 110mg11%, Iron 0.8 mg4%

Pasta with Tomato Cream Sauce

Rebecca Prep Time: 10 mins | Cook Time: 20 mins | Total Time: 30 mins | Servings: 8 Enjoy a restaurant-quality meal at home with this delicious pasta with tomato cream… General Recipes Pasta with Tomato Cream Sauce European Print This
Serves: 8 Prep Time: 10 mins Cooking Time: 20 mins 20 mins
Nutrition facts: 389 calories 19 fat
Rating: 5.0/5
( 1 voted )

Ingredients

  • 2 tbsp olive oil
  • 2 tbsp butter
  • 4 cloves garlic, minced
  • 1/2 c. onion, minced
  • 1 c. heavy cream
  • 2 15-ounces cans of tomato sauce
  • 1/2 c. grated Parmesan, plus extra for garnish
  • 1 lb. linguine or pasta of your choice
  • salt and pepper to taste

Instructions

Step 1: Add the olive oil and butter to a hot large skillet. Once the butter has melted, add the onions to the skillet and cook for about 2 to 3 minutes or until translucent. Next, add the garlic and cook for a minute or two more or until aromatic.

Step 2: To the pan, add the tomato sauce and cream. Let everything simmer for about 20 minutes or until the sauce has thickened.

Step 3: In the meantime, cook the pasta following the package direction in a large pot of salted boiling water until al dente. When done, drain the pasta but make sure to reserve a half cup of the pasta water.

Step 4: To the tomato cream sauce, add half a cup of Parmesan cheese. Add the pasta and toss to coat. Then, drizzle in around 1/4 c of the reserved pasta water. Let everything simmer for about a minute or two. To reach your preferred consistency, add the extra pasta water.

Step 5: When done, serve the Pasta with Tomato Cream Sauce with extra grated Parmesan on top. If desired, enjoy with a simple side salad or bread.

Notes

To help the sauce adhere to the pasta, make sure to reserve a half cup of pasta water before draining the pasta. For this recipe, you are welcome to use any variety of pasta such as penne, bow tie, or wagon wheels. If you need protein, add cooked chicken and sausage.

June 3, 2022 0 comment
0 FacebookTwitterPinterestEmail
General Recipes

Easy Fresh Strawberry Mousse

by Rebecca June 3, 2022
written by Rebecca

Prep Time: 10 mins | Chilling time: 1 hr | Total Time: 10 mins | Servings: 4

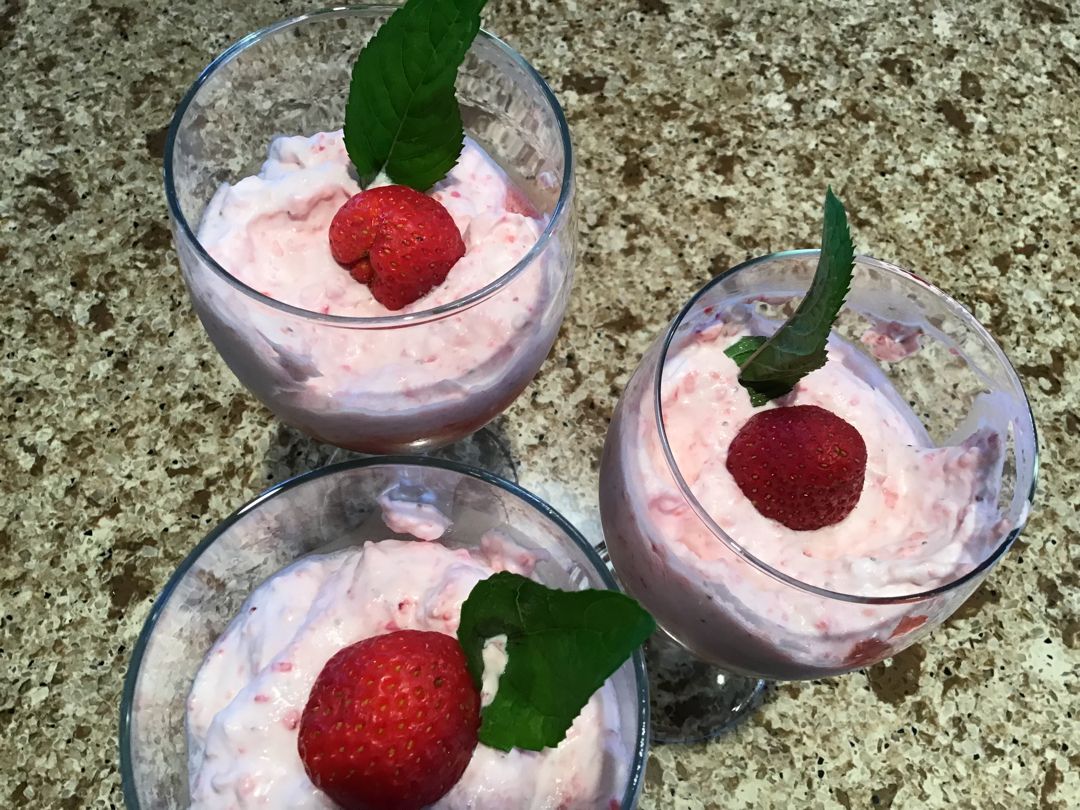
This is my daughter’s ultimate favorite treat! Fresh Strawberry Mousse is an insanely easy and quick dessert that you can whip up any time using just three ingredients (whole or whipping cream, sugar, and fresh strawberries). Creamy, fluffy, and beautiful – this easy fresh strawberry mousse is the perfect dessert for every occasion!

I love no-bake desserts as they are incredibly easy to throw together. I have quite a list of no-bake dessert recipes. And this fresh strawberry mousse is one of my top favorites. It’s no-bake, require only three simple ingredients, no gelatin needed, and proves to impress everyone with its perfectly creamy and fluffy texture.

I have to admit that I love strawberry desserts. And mousse is my daughter’s weakness. If you are a mousse lover, I’m pretty sure that you’ll love this, too! This fresh strawberry mousse is my most requested dessert. I first made this on my daughter’s birthday. And everyone was so impressed with my dessert set-up! From then on, this strawberry mousse never misses any occasion. It is so easy to make so we can enjoy this whenever!

Ingredients

1 c. whole or whipping cream (cold)

12 1/2 oz. strawberries (3/4 lb)

extra strawberries for topping

1/2 c. granulated sugar

How to make Easy Fresh Strawberry Mousse

Step 1: After cleaning the strawberries, slice them and place them in a blender and food processor. Add the sugar and puree. When done, set aside a half cup of puree.

Step 2: Add the bream to a cold bowl and beat until stiff peaks form. Next, add the remaining puree and gently mix.

Step 3: Between 4 small/medium glasses, divide the reserved half cup of the puree and top with the strawberry mousse. Place in the fridge for about an hour or overnight. Before serving, top with some sliced fresh strawberries. Enjoy!

Nutrition Facts:

Calories: 330 kcal | Carbohydrates: 33g | Protein: 1g | Fat: 22g | Saturated Fat: 13g | Cholesterol: 81mg | Sodium: 23mg | Potassium: 180mg | Fiber: 1g | Sugar: 29g | Vitamin A: 875IU | Vitamin C: 52.5mg | Calcium: 53mg | Iron: 0.4mg

Easy Fresh Strawberry Mousse

Rebecca Prep Time: 10 mins | Chilling time: 1 hr | Total Time: 10 mins | Servings: 4 This is my daughter’s ultimate favorite treat! Fresh Strawberry Mousse is an insanely… General Recipes Easy Fresh Strawberry Mousse European Print This
Serves: 4 Prep Time: 10 mins
Nutrition facts: 330 calories 22 fat
Rating: 5.0/5
( 1 voted )

Ingredients

  • 1 c. whole or whipping cream (cold)
  • 12 1/2 oz. strawberries (3/4 lb)
  • extra strawberries for topping
  • 1/2 c. granulated sugar

Instructions

Step 1: After cleaning the strawberries, slice them and place them in a blender and food processor. Add the sugar and puree. When done, set aside a half cup of puree.

Step 2: Add the bream to a cold bowl and beat until stiff peaks form. Next, add the remaining puree and gently mix.

Step 3: Between 4 small/medium glasses, divide the reserved half cup of the puree and top with the strawberry mousse. Place in the fridge for about an hour or overnight. Before serving, top with some sliced fresh strawberries. Enjoy!

June 3, 2022 0 comment
0 FacebookTwitterPinterestEmail
General Recipes

Swedish Apple Pie – The easiest pie you’ll ever make!

by Rebecca June 2, 2022
written by Rebecca

Prep Time: 20 mins | Cook Time: 1 hr | Total Time: 1 hr 20 mins | Servings: 8

This Swedish Apple Pie is the easiest pie you’ll ever make! All you need are a few simple and readily available ingredients to whip this up. It’s a no-fuss pie that is excellent for the beginner baker. An amazing Swedish Apple Pie to end every meal. A popular dessert and a staple that everyone needs. For best results, make sure to slice the apples to about 1/4 to 1/2 thickness and lay them uniformly on your pie plate. Also, you do not want the eggs to get scrambled, so make sure to slightly cool the melted butter first before you stir them into the eggs. Make sure to give this delicious, easy, and quick no-crust apple pie a try very soon!

Ingredients

Pie Filling:

1 tablespoon sugar

1 teaspoon ground cinnamon

5 Granny Smith apples or enough to fill a pie plate 2/3 full

Topping:

1 egg

1 c. flour

3/4 c. butter, melted

1/8 teaspoon salt (a pinch)

1 c. sugar

How to make Swedish Apple Pie

Step 1: Prepare the oven. Preheat it to 325 degrees F.

Step 2: After peeling and coring the apples, slice them into about 1/4-inch thickness. Fill the pie plate to about 2/3 full and sprinkle with 1 tbsp sugar and 1 tsp ground cinnamon.

Step 3: Place the topping ingredients (egg, flour, melted butter, salt, and sugar) in a medium-sized bowl. Mix well until blended, then spread on top of the apples.

Step 4: Place in the preheated oven and bake for about 1 hour or until the crust is lightly browned.

Step 5: Remove from the oven when done and serve. Using aluminium foil, cover any leftovers and store them in the fridge.

Tips:

Make sure to slice the apples in the same thickness and keep the pieces to around 1/4 to 1/2-inch thickness. Then, lay the pieces of apple uniformly on the pie plate.

Make sure to slightly cool the melted butter before whisking it into the egg.

Nutrition Facts:

Sodium: 197mg | Calcium: 21mg | Vitamin C: 5.2mg | Vitamin A: 625IU | Sugar: 38g | Fiber: 3g | Potassium: 151mg | Cholesterol: 66mg | Calories: 379 kcal | Saturated Fat: 11g | Fat: 18g | Protein: 2g | Carbohydrates: 54g | Iron: 1mg

Swedish Apple Pie – The easiest pie you’ll ever make!

Rebecca Prep Time: 20 mins | Cook Time: 1 hr | Total Time: 1 hr 20 mins | Servings: 8 This Swedish Apple Pie is the easiest pie you’ll ever make!… General Recipes Swedish Apple Pie – The easiest pie you’ll ever make! European Print This
Serves: 8 Prep Time: 20 mins Cooking Time: 1 hr 1 hr
Nutrition facts: 197 calories 18 fat
Rating: 5.0/5
( 1 voted )

Ingredients

  • Pie Filling:
  • 1 tablespoon sugar
  • 1 teaspoon ground cinnamon
  • 5 Granny Smith apples or enough to fill a pie plate 2/3 full
  • Topping:
  • 1 egg
  • 1 c. flour
  • 3/4 c. butter, melted
  • 1/8 teaspoon salt (a pinch)
  • 1 c. sugar

Instructions

Step 1: Prepare the oven. Preheat it to 325 degrees F.

Step 2: After peeling and coring the apples, slice them into about 1/4-inch thickness. Fill the pie plate to about 2/3 full and sprinkle with 1 tbsp sugar and 1 tsp ground cinnamon.

Step 3: Place the topping ingredients (egg, flour, melted butter, salt, and sugar) in a medium-sized bowl. Mix well until blended, then spread on top of the apples.

Step 4: Place in the preheated oven and bake for about 1 hour or until the crust is lightly browned.

Step 5: Remove from the oven when done and serve. Using aluminium foil, cover any leftovers and store them in the fridge.

Notes

Make sure to slice the apples in the same thickness and keep the pieces to around 1/4 to 1/2-inch thickness. Then, lay the pieces of apple uniformly on the pie plate. Make sure to slightly cool the melted butter before whisking it into the egg.

June 2, 2022 0 comment
0 FacebookTwitterPinterestEmail
Newer Posts
Older Posts

Popular Posts

  • 1

    Crispy Crunchy Parmesan Potatoes

    March 21, 2020
  • 2

    CROCK POT SMOTHERED PORK CHOPS

    March 21, 2020
  • Facebook
  • Twitter

@2019 - All Right Reserved.


Back To Top