Cook it once
  • Home
  • Privacy Policy
  • Recipes
    • KETO
    • LC
    • WW
  • Tips
  • Contact
Cook it once
  • Home
  • Privacy Policy
  • Recipes
    • KETO
    • LC
    • WW
  • Tips
  • Contact
Category:

General Recipes

General Recipes

Bacon Ranch Cheese Ball

by Rebecca June 9, 2022
written by Rebecca

PREP TIME: 5 MINS | ADDITIONAL TIME: 1 HR | TOTAL TIME: 1 HR 5 MINS | YIELD: 20

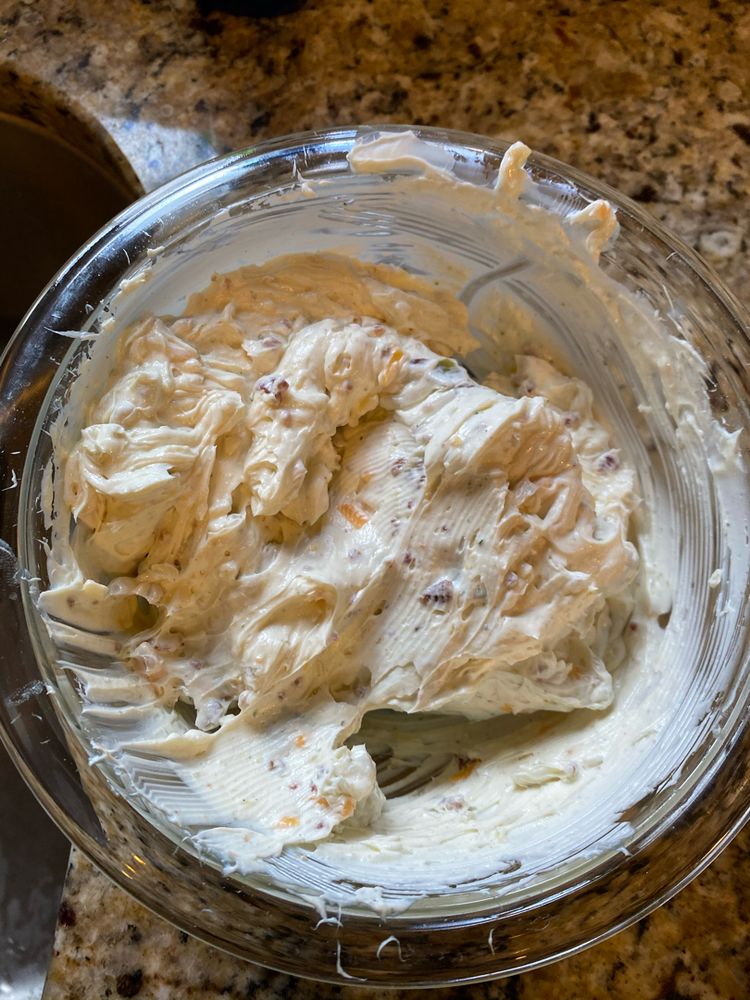
If you are searching for amazing party food that everyone will surely enjoy, then you have to try this bacon ranch cheese ball. Make this using only five ingredients plus fresh veggies for serving. It’s an amazing spread perfect to serve with so many things! If you love entertaining, good food, and company, then you should not miss this bacon ranch cheese ball. It is an excellent and fun snack idea that you can make without too much fuss.

This Bacon Ranch Cheese Ball never fails to impress everyone. It makes low-carb peeps happy and the carb eaters static! If you are keeping the menu completely low carb, serve this with celery and mini sweet peppers. This cheese ball also is amazing to pair with cucumber rounds. If desired, you can whip up low-carb crackers or even bake up some sliced cheese to throw together tiny cheese crackers. Just last weekend I had a small company come over to the house, and they were very ecstatic with the menu. This Bacon Ranch Cheese Ball as expected was a hit!

Ingredients

1 c. crumbled cooked bacon

1 c. grated cheddar

1 packet ranch dip powder

16 oz. cream cheese, softened

fresh veggies, for serving

1 tbsp chopped chives

How to make Bacon Ranch Cheese Ball

Step 1: To a medium mixing bowl, add the cream cheese, cheddar, bacon, ranch, and chives. Mix using a wooden spoon or a mixer until well blended.

Step 2: On a large sheet of plastic wrap, spoon the mixture. To form a ball, wrap and fold the plastic up and over the cheese mixture. Keep in the fridge for about an hour.

Step 3: Before serving, remove the plastic wrap. Enjoy!

Note:

Pair this cheese ball with some fresh celery, mini sweet peppers, cucumbers, and low-carb crackers.

Nutrition Facts:

YIELD: 20 SERVING SIZE: 1
Amount Per Serving: Calories: 161 | Total Fat: 14g | Saturated Fat: 7g | Trans Fat: 0g | Unsaturated Fat: 6g | Cholesterol: 40mg | Sodium: 308mg | Carbohydrates: 2g | Net Carbohydrates: 2g | Fiber: 0g | Sugar: 1g | Protein: 7g
Bacon Ranch Cheese Ball

Rebecca PREP TIME: 5 MINS | ADDITIONAL TIME: 1 HR | TOTAL TIME: 1 HR 5 MINS | YIELD: 20 If you are searching for amazing party food that everyone will… General Recipes Bacon Ranch Cheese Ball European Print This
Serves: 20 Prep Time: 1 hr 5 mins
Nutrition facts: 161 calories 14 fat
Rating: 5.0/5
( 1 voted )

Ingredients

  • 1 c. crumbled cooked bacon
  • 1 c. grated cheddar
  • 1 packet ranch dip powder
  • 16 oz. cream cheese, softened
  • fresh veggies, for serving
  • 1 tbsp chopped chives

Instructions

Step 1: To a medium mixing bowl, add the cream cheese, cheddar, bacon, ranch, and chives. Mix using a wooden spoon or a mixer until well blended.

Step 2: On a large sheet of plastic wrap, spoon the mixture. To form a ball, wrap and fold the plastic up and over the cheese mixture. Keep in the fridge for about an hour.

Step 3: Before serving, remove the plastic wrap. Enjoy!

Notes

Pair this cheese ball with some fresh celery, mini sweet peppers, cucumbers, and low-carb crackers.
June 9, 2022 0 comment
0 FacebookTwitterPinterestEmail
General Recipes

Layered Taco Dip with Ground Beef

by Rebecca June 9, 2022
written by Rebecca

Prep Time: 15 mins | Total Time: 15 mins | Servings: 24

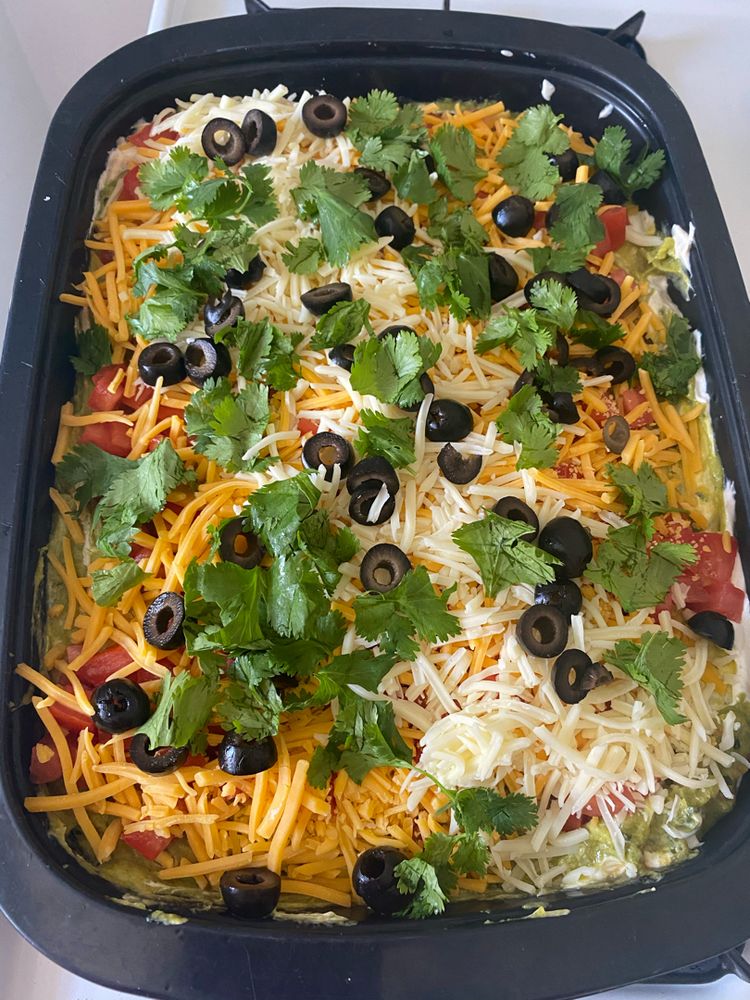
This layered taco dip with ground beef is an amazing dish excellent to serve on top of a salad or for dipping. It is a delicious keto dish made with ground beef and soybeans. If desired, you can use ground beef alone and omit the low-carb black soybeans.

Ingredients

Refried Soy Beans (Optional):

1 tbsp olive oil extra virgin

15 oz. black soybeans

1 ½ tsp chili powder

1 ½ tsp minced garlic

1 tbsp unsweetened almond milk or coconut milk

½ tsp salt

Taco Seasoned Ground Beef:

1 small onion, diced

1 ½ lb. ground beef

1 tbsp chili powder

½ tsp garlic powder

3 cloves garlic, minced

½ tsp onion powder

½ tsp paprika

1 tsp cumin

1 ½ tsp sea salt

1 tsp black pepper

¼ tsp crushed red pepper flakes

How to make Layered Taco Dip with Ground Beef

Refried Soy Beans (if using):

Step 1: After draining a can of soybean, rinse the beans. In a blender or food processor, place the beans and pulse until smooth. Add in the rest of the ingredients and blend until incorporated.

Step 2: In a medium skillet, heat the olive oil. Then, add the bean mixture and cook until softened.

Taco Seasoned Ground Beef:

Step 3: Cook the ground beef in a large skillet along with the onion and garlic until the meat is no longer pink. Drain the grease, then stir in the rest of the seasonings.

Layers:

Step 4: Place the sour cream and cream cheese in a small bowl. Mix well and set aside.

Step 5: In the following order, layer the refried soybeans, taco seasoned ground beef, sour cream mixture, guacamole, tomatoes, and shredded cheese in a 13 x 9-inch baking pan and top with the sliced black olives (optional).

Step 6: Serve the layered taco dip with ground beef over some lettuce for a salad or as a dip for low-carb tortilla chips.

Notes:

1. You can omit the bean layer and simply add additional 0.5 lbs of ground beef with extra seasonings.

2. Swap the mixed spice blend with low-carb taco seasoning for the seasoned ground beef.

3. Before spreading the avocado layer, sprinkle it with some lemon or lime to prevent the avocado layer from browning.

4. Store any leftovers in an airtight container in the fridge for up to 3 days.

Nutrition Facts:

Calories: 171 | Carbohydrates: 3.9g | Protein: 7.8g | Fat: 12.9g | Sodium: 316mg | Fiber: 1.9g

Additional Info.

Net Carbs: 2 g | % Carbs: 5.2 % | % Protein: 20.1 % | % Fat: 74.8 % | SmartPoints: 4

Layered Taco Dip with Ground Beef

Rebecca Prep Time: 15 mins | Total Time: 15 mins | Servings: 24 This layered taco dip with ground beef is an amazing dish excellent to serve on top of a… General Recipes Layered Taco Dip with Ground Beef European Print This
Serves: 24 Prep Time: 15 mins
Nutrition facts: 171 calories 12.9 fat
Rating: 5.0/5
( 1 voted )

Ingredients

  • Refried Soy Beans (Optional):
  • 1 tbsp olive oil extra virgin
  • 15 oz. black soybeans
  • 1 ½ tsp chili powder
  • 1 ½ tsp minced garlic
  • 1 tbsp unsweetened almond milk or coconut milk
  • ½ tsp salt
  • Taco Seasoned Ground Beef:
  • 1 small onion, diced
  • 1 ½ lb. ground beef
  • 1 tbsp chili powder
  • ½ tsp garlic powder
  • 3 cloves garlic, minced
  • ½ tsp onion powder
  • ½ tsp paprika
  • 1 tsp cumin
  • 1 ½ tsp sea salt
  • 1 tsp black pepper
  • ¼ tsp crushed red pepper flakes

Instructions

Refried Soy Beans (if using):

Step 1: After draining a can of soybean, rinse the beans. In a blender or food processor, place the beans and pulse until smooth. Add in the rest of the ingredients and blend until incorporated.

Step 2: In a medium skillet, heat the olive oil. Then, add the bean mixture and cook until softened.

Taco Seasoned Ground Beef:

Step 3: Cook the ground beef in a large skillet along with the onion and garlic until the meat is no longer pink. Drain the grease, then stir in the rest of the seasonings.

Layers:

Step 4: Place the sour cream and cream cheese in a small bowl. Mix well and set aside.

Step 5: In the following order, layer the refried soybeans, taco seasoned ground beef, sour cream mixture, guacamole, tomatoes, and shredded cheese in a 13 x 9-inch baking pan and top with the sliced black olives (optional).

Step 6: Serve the layered taco dip with ground beef over some lettuce for a salad or as a dip for low-carb tortilla chips.

Notes:

1. You can omit the bean layer and simply add additional 0.5 lbs of ground beef with extra seasonings.

2. Swap the mixed spice blend with low-carb taco seasoning for the seasoned ground beef.

3. Before spreading the avocado layer, sprinkle it with some lemon or lime to prevent the avocado layer from browning.

4. Store any leftovers in an airtight container in the fridge for up to 3 days.

June 9, 2022 0 comment
0 FacebookTwitterPinterestEmail
General Recipes

Garlicky Shrimp Zucchini Boats

by Rebecca June 9, 2022
written by Rebecca

PREP TIME: 10 MINS | TOTAL TIME: 1 HR | YIELDS: 4 servings

These garlicky shrimp zucchini boats are the ultimate dream! They are insanely good with an easy shrimp filling that tastes similar to creamy shrimp scampi. This is one of my favorite seafood dishes that are also excellent whenever I am craving pasta.

INGREDIENTS

2 tablespoons butter

3/4 pound large shrimp, peeled and deveined

4 large zucchini, halved lengthwise

1 teaspoon fresh thyme leaves

1/4 cup freshly grated Parmesan

2 tomatoes, chopped

1/4 cup heavy cream

3 cloves garlic, minced

1 cup shredded mozzarella

1 tablespoon extra-virgin olive oil

Freshly chopped parsley, for garnish (optional)

Juice of 1/2 lemon

How to make Garlicky Shrimp Zucchini Boats

Step 1: Prepare the oven. Preheat it to 350 degrees. In the meantime, score the zucchini. Using a small spoon, scoop out the insides of the zucchini, making sure to leave about a 1/4-inch thick border intact. Then, chop the zucchini pulp and set it aside.

Step 2: In a large baking dish, place the zucchini boats. Drizzle with oil, season with salt & pepper, and sprinkle with thyme. Place in the preheated oven and bake for about 20 minutes until tender.

Step 3: Melt the butter in a large skillet over medium heat. To the hot oil, add the shrimp and season with salt & pepper. Cook for about 3 to 4 minutes until pink and completely cooked. Remove the cooked shrimp from the heat, then chop them into bite-size pieces.

Step 4: Melt the rest of the 1 tbsp butter in the same skillet over medium heat. Then, add the reserved zucchini pulp along with the tomatoes and garlic. Season with salt & pepper and cook for a minute more until aromatic. Next, add the cream, Parmesan, and lemon juice. Continue to cook for another 3 minutes until the mixture has slightly reduced. Take off the heat when done and fold in the cooled shrimp.

Step 5: Spoon the shrimp mixture into the zucchini boats and top with mozzarella. Return to the oven and bake for about 10 minutes until the cheese is bubbly.

Step 6: Remove from the oven when done and serve right away garnished with extra Parmesan and parsley. Enjoy!

Garlicky Shrimp Zucchini Boats

Rebecca PREP TIME: 10 MINS | TOTAL TIME: 1 HR | YIELDS: 4 servings These garlicky shrimp zucchini boats are the ultimate dream! They are insanely good with an easy shrimp… General Recipes Garlicky Shrimp Zucchini Boats European Print This
Serves: 4 Prep Time: 10 mins
Nutrition facts: 200 calories 20 grams fat
Rating: 3.5/5
( 2 voted )

Ingredients

  • 2 tablespoons butter
  • 3/4 pound large shrimp, peeled and deveined
  • 4 large zucchini, halved lengthwise
  • 1 teaspoon fresh thyme leaves
  • 1/4 cup freshly grated Parmesan
  • 2 tomatoes, chopped
  • 1/4 cup heavy cream
  • 3 cloves garlic, minced
  • 1 cup shredded mozzarella
  • 1 tablespoon extra-virgin olive oil
  • Freshly chopped parsley, for garnish (optional)
  • Juice of 1/2 lemon

Instructions

Step 1: Prepare the oven. Preheat it to 350 degrees. In the meantime, score the zucchini. Using a small spoon, scoop out the insides of the zucchini, making sure to leave about a 1/4-inch thick border intact. Then, chop the zucchini pulp and set it aside.

Step 2: In a large baking dish, place the zucchini boats. Drizzle with oil, season with salt & pepper, and sprinkle with thyme. Place in the preheated oven and bake for about 20 minutes until tender.

Step 3: Melt the butter in a large skillet over medium heat. To the hot oil, add the shrimp and season with salt & pepper. Cook for about 3 to 4 minutes until pink and completely cooked. Remove the cooked shrimp from the heat, then chop them into bite-size pieces.

Step 4: Melt the rest of the 1 tbsp butter in the same skillet over medium heat. Then, add the reserved zucchini pulp along with the tomatoes and garlic. Season with salt & pepper and cook for a minute more until aromatic. Next, add the cream, Parmesan, and lemon juice. Continue to cook for another 3 minutes until the mixture has slightly reduced. Take off the heat when done and fold in the cooled shrimp.

Step 5: Spoon the shrimp mixture into the zucchini boats and top with mozzarella. Return to the oven and bake for about 10 minutes until the cheese is bubbly.

Step 6: Remove from the oven when

June 9, 2022 0 comment
0 FacebookTwitterPinterestEmail
General Recipes

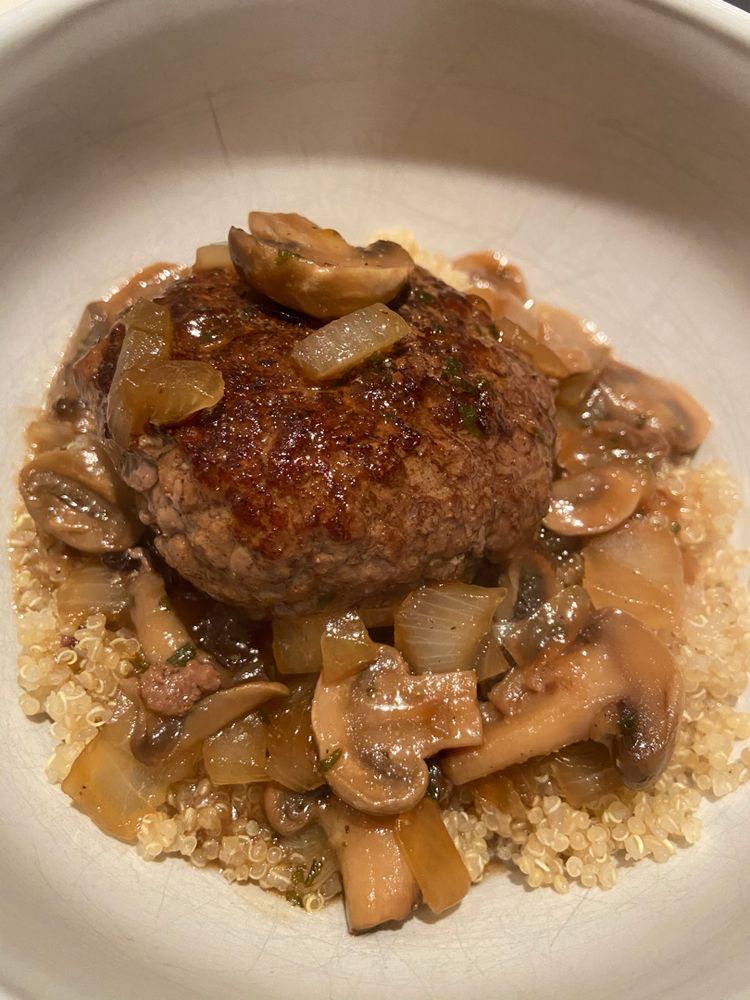
HAMBURGER STEAK

by Rebecca June 9, 2022
written by Rebecca

Prep time: 10 mins | Cook time: 25 mins | Total time: 35 mins | Yield: 3 SERVINGS

I love the classics and this hamburger steak is a favorite Southern comfort food classic. The best part is this is paleo, whole30, and AIP. An amazing one-pan meal that you can serve by itself or with your favorite green, such as broccoli, asparagus, or a green salad. For a well-rounded meal, this hamburger steak also pairs well with mashed sweet potato.

INGREDIENTS

Hamburger:

1 tablespoon avocado oil

1 pound of ground beef

1 teaspoon sea salt

1/4 teaspoon black pepper (omit for AIP)

Gravy:

1 yellow onion, thinly sliced

2 tablespoons avocado oil

2 c. mushrooms, sliced

1 c. beef broth

2 teaspoons mustard (omit for AIP)

1 tablespoon coconut aminos

2 teaspoons apple cider vinegar

1 teaspoon dried thyme

1/4 teaspoon black pepper (omit for AIP)

2 teaspoons arrowroot starch

2 teaspoons garlic powder

1 tablespoon chopped parsley, for topping

1/2 teaspoon sea salt

HOW TO MAKE HAMBURGER STEAK

Step 1: Into 3 to 4 burgers, shape the ground beef and sprinkle with salt and pepper.

Step 2: In a large pan, heat the avocado oil over medium heat. Once the oil is hot, add the burgers to the pan and sear for about 4 to 5 minutes per side until the internal temperature of the burgers reaches 160 degrees F. Set them aside when done.

Step 3: Add more oil to the same pan. Then, add the onion slices and saute for about 5 to 6 minutes until tender. Next, add the mushrooms and cook for an additional 3 to 4 minutes until soft.

Step 4: To the pan, pour in the broth, coconut aminos, mustard, and apple cider vinegar, and add the seasonings. Stir well, then whisk in the arrowroot starch. Decrease the heat and cook for 2 to 3 minutes more until the mixture has thickened.

Step 5: Return the burgers to the pan once the gravy has thickened, and spoon the sauce on top.

Step 6: Serve the hamburger steak immediately topped with some chopped parsley. Enjoy!

NOTE:

For keto/low carb, omit the arrowroot and decrease the sauce further.

NUTRITION FACTS:

Serving size: 1 SERVING Calories: 414 | fat: 26.6G | carbohydrates: 6.8G | protein: 36.4G

HAMBURGER STEAK

Rebecca Prep time: 10 mins | Cook time: 25 mins | Total time: 35 mins | Yield: 3 SERVINGS I love the classics and this hamburger steak is a favorite Southern… General Recipes HAMBURGER STEAK European Print This
Serves: 3 Prep Time: 10 mins Cooking Time: 25 mins 25 mins
Nutrition facts: 414 calories 26.6 fat
Rating: 5.0/5
( 1 voted )

Ingredients

  • Hamburger:
  • 1 tablespoon avocado oil
  • 1 pound of ground beef
  • 1 teaspoon sea salt
  • 1/4 teaspoon black pepper (omit for AIP)
  • Gravy:
  • 1 yellow onion, thinly sliced
  • 2 tablespoons avocado oil
  • 2 c. mushrooms, sliced
  • 1 c. beef broth
  • 2 teaspoons mustard (omit for AIP)
  • 1 tablespoon coconut aminos
  • 2 teaspoons apple cider vinegar
  • 1 teaspoon dried thyme
  • 1/4 teaspoon black pepper (omit for AIP)
  • 2 teaspoons arrowroot starch
  • 2 teaspoons garlic powder
  • 1 tablespoon chopped parsley, for topping
  • 1/2 teaspoon sea salt

Instructions

Step 1: Into 3 to 4 burgers, shape the ground beef and sprinkle with salt and pepper.

Step 2: In a large pan, heat the avocado oil over medium heat. Once the oil is hot, add the burgers to the pan and sear for about 4 to 5 minutes per side until the internal temperature of the burgers reaches 160 degrees F. Set them aside when done.

Step 3: Add more oil to the same pan. Then, add the onion slices and saute for about 5 to 6 minutes until tender. Next, add the mushrooms and cook for an additional 3 to 4 minutes until soft.

Step 4: To the pan, pour in the broth, coconut aminos, mustard, and apple cider vinegar, and add the seasonings. Stir well, then whisk in the arrowroot starch. Decrease the heat and cook for 2 to 3 minutes more until the mixture has thickened.

Step 5: Return the burgers to the pan once the gravy has thickened, and spoon the sauce on top.

Step 6: Serve the hamburger steak immediately topped with some chopped parsley. Enjoy!

Notes

For keto/low carb, omit the arrowroot and decrease the sauce further.

June 9, 2022 0 comment
0 FacebookTwitterPinterestEmail
General Recipes

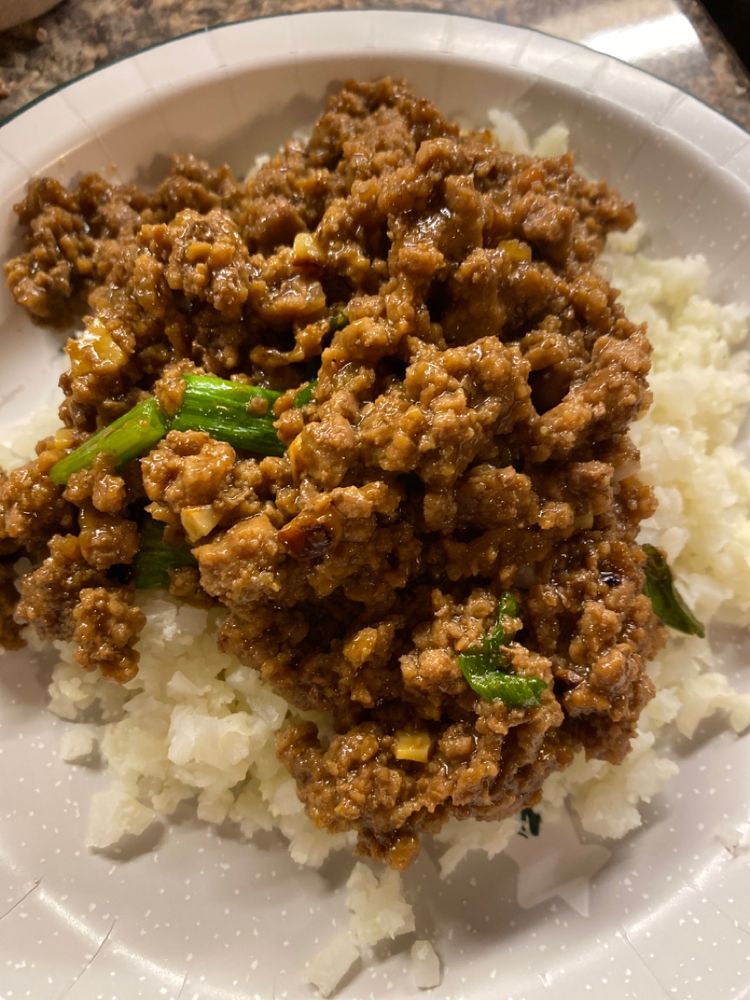
MONGOLIAN GROUND BEEF

by Rebecca June 9, 2022
written by Rebecca

Prep time: 10 mins | Cook time: 15 mins | Total time: 25 mins | Yield: 4 SERVINGS

I always enjoy Mongolian ground beef. It’s one of my favorite takeaway dishes from one of the best Chinese restaurants in the city. This easy and quick recipe is a great hack if you are looking for a healthier soy-free alternative that’s paleo, whole30, and AIP friendly. A cost-efficient and very savory dish perfect to serve over rice or cauliflower rice or alongside your preferred veggies (such as bok choy, stir-fried vegetables, etc.) for a complete, filling meal any time!

INGREDIENTS

1/3 c. coconut aminos

1 pound of ground beef

1 teaspoon apple cider vinegar

1/4 c. broth

2 teaspoons coconut sugar (omit for whole30)

3 cloves garlic, minced

1 thumb ginger, grated

4 green onions, sliced into 1-inch slices

1 tablespoon + 1 teaspoon arrowroot starch

1 teaspoon sea salt

1/4 teaspoon black pepper (omit for AIP)

HOW TO MAKE MONGOLIAN GROUND BEEF

Step 1: Add the ground beef to a large skillet over medium heat. Season the meat with salt and pepper. Cook until the meat is browned. Set the ground beef aside when done, reserving around 2 tbsp of grease in the pan.

Step 2: Place the coconut aminos, broth, apple cider vinegar, coconut sugar, and arrowroot starch in another bowl. Mix well until combined and set aside.

Step 3: Add the garlic and ginger to the same pan and cook for about 2 to 3 minutes over low-medium heat until aromatic. Pour in the sauce and cook for another 1 to 2 minutes until the sauce has thickened.

Step 4: Return the ground beef into the pan and toss well to coat with the sauce. Then, add the green onions and cook further until softened. This takes another 2 to 3 minutes.

Step 5: Remove from the heat when done and serve the Mongolian ground beef immediately over cauliflower rice or alongside your favorite vegetables. Enjoy!

NUTRITION FACTS:

Serving size: 1 SERVING Calories: 166 | fat: 3.6G | Carbohydrates: 4.9G | fiber: 0.4G | protein: 27.3G

MONGOLIAN GROUND BEEF

Rebecca Prep time: 10 mins | Cook time: 15 mins | Total time: 25 mins | Yield: 4 SERVINGS I always enjoy Mongolian ground beef. It’s one of my favorite takeaway… General Recipes MONGOLIAN GROUND BEEF European Print This
Serves: 4 Prep Time: 10 mins Cooking Time: 15 mins 15 mins
Nutrition facts: 166 calories 3.6 fat
Rating: 5.0/5
( 1 voted )

Ingredients

  • 1/3 c. coconut aminos
  • 1 pound of ground beef
  • 1 teaspoon apple cider vinegar
  • 1/4 c. broth
  • 2 teaspoons coconut sugar (omit for whole30)
  • 3 cloves garlic, minced
  • 1 thumb ginger, grated
  • 4 green onions, sliced into 1-inch slices
  • 1 tablespoon + 1 teaspoon arrowroot starch
  • 1 teaspoon sea salt
  • 1/4 teaspoon black pepper (omit for AIP)

Instructions

Step 1: Add the ground beef to a large skillet over medium heat. Season the meat with salt and pepper. Cook until the meat is browned. Set the ground beef aside when done, reserving around 2 tbsp of grease in the pan.

Step 2: Place the coconut aminos, broth, apple cider vinegar, coconut sugar, and arrowroot starch in another bowl. Mix well until combined and set aside.

Step 3: Add the garlic and ginger to the same pan and cook for about 2 to 3 minutes over low-medium heat until aromatic. Pour in the sauce and cook for another 1 to 2 minutes until the sauce has thickened.

Step 4: Return the ground beef into the pan and toss well to coat with the sauce. Then, add the green onions and cook further until softened. This takes another 2 to 3 minutes.

Step 5: Remove from the heat when done and serve the Mongolian ground beef immediately over cauliflower rice or alongside your favorite vegetables. Enjoy!

June 9, 2022 0 comment
0 FacebookTwitterPinterestEmail
General Recipes

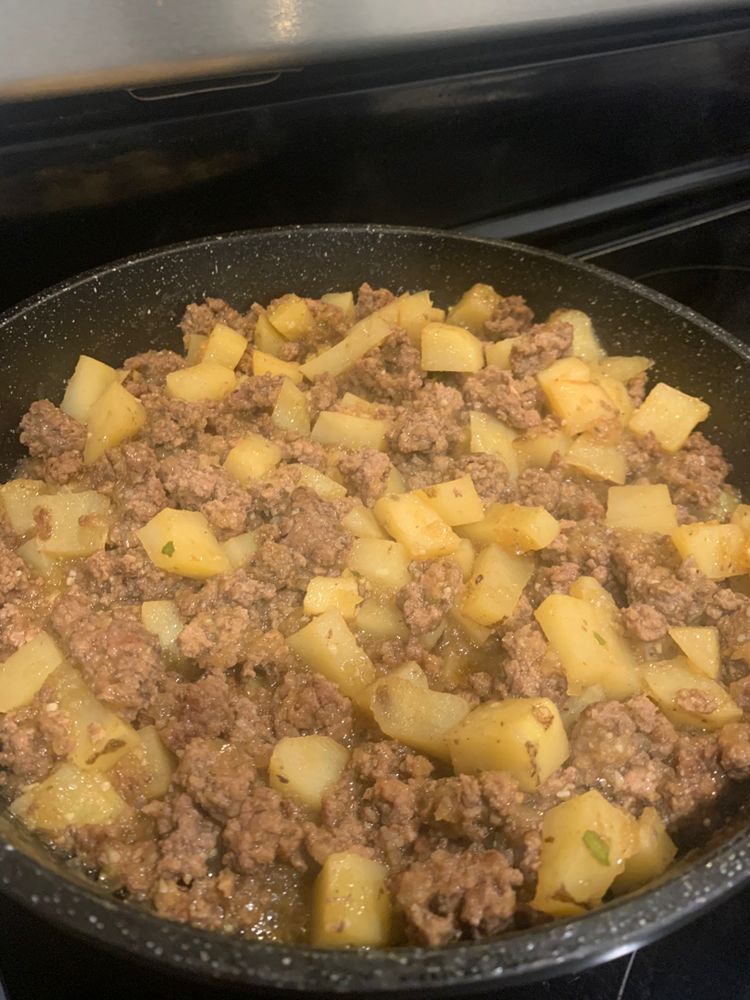
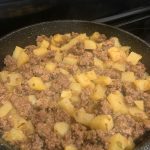
MEXICAN PICADILLO

by Rebecca June 9, 2022
written by Rebecca

Prep time: 10 mins | Cook time: 30 mins | Servings: 6

Throw this easy dinner recipe in under thirty minutes using just minimal ingredients. Serve this with rice or flour tortillas for a full meal, excellent for an easy and quick weeknight dinner!

INGREDIENTS

4 cloves garlic, minced

½ c. onion, diced

1 pound of ground beef

2 c. potato, peeled and diced

1½ c. beef broth

8 oz. tomato sauce

1 green bell pepper, diced

1 teaspoon ground coriander

1 teaspoon ground cumin

1 bay leaf

1 teaspoon salt

¼ teaspoon ground black pepper

HOW TO MAKE MEXICAN PICADILLO

Step 1: Cook the ground beef in a large skillet over medium heat until mostly browned, breaking the meat up as it cooks. Then, drain the grease and bring it back to heat. At this point, add the diced onion, green bell pepper, and potatoes. Cook further until the onion and peppers have softened. Add the garlic and continue to cook for 30 seconds more.

Step 2: To the skillet, pour in the tomato sauce and beef broth. Stir in the salt, pepper, cumin, and coriander. Then, add the bay leaf. Bring everything to a simmer, put the lid on, and cook for additional 10 minutes.

Step 3: Uncover and stir. Cook for 10 minutes more, lid off, until the potatoes are tender and most of the liquid is gone.

Step 4: Remove from the heat when done and serve the Mexican Picadillo right away with some tortillas and rice. Enjoy!

NOTES:

You can add other veggies such as peas, carrots, and more. Add them along with tomato sauce and beef broth. Allow everything to simmer.

Instead of tomato sauce, you can use fresh Roma tomatoes. You can dice them finely and saute them with the potatoes, onion, and pepper to release juices. Alternately, you can blend the tomatoes and add them with the beef broth.

For this recipe, you can use gold or russet potatoes.

NUTRITION FACTS:

Serving: 1, calories: 220 kcal, carbohydrates: 5g, protein: 15g, fat: 16g, saturated fat: 6g, cholesterol: 54mg, sodium: 862mg, potassium: 430mg, fiber: 1g, sugar: 3g, vitamin a: 237iu, vitamin c: 20mg, calcium: 36mg, iron: 2mg

MEXICAN PICADILLO

Rebecca Prep time: 10 mins | Cook time: 30 mins | Servings: 6 Throw this easy dinner recipe in under thirty minutes using just minimal ingredients. Serve this with rice or… General Recipes MEXICAN PICADILLO European Print This
Serves: 6 Prep Time: 10 mins Cooking Time: 30 mins 30 mins
Nutrition facts: 220 calories 16 fat
Rating: 5.0/5
( 1 voted )

Ingredients

  • 4 cloves garlic, minced
  • ½ c. onion, diced
  • 1 pound of ground beef
  • 2 c. potato, peeled and diced
  • 1½ c. beef broth
  • 8 oz. tomato sauce
  • 1 green bell pepper, diced
  • 1 teaspoon ground coriander
  • 1 teaspoon ground cumin
  • 1 bay leaf
  • 1 teaspoon salt
  • ¼ teaspoon ground black pepper

Instructions

Step 1: Cook the ground beef in a large skillet over medium heat until mostly browned, breaking the meat up as it cooks. Then, drain the grease and bring it back to heat. At this point, add the diced onion, green bell pepper, and potatoes. Cook further until the onion and peppers have softened. Add the garlic and continue to cook for 30 seconds more.

Step 2: To the skillet, pour in the tomato sauce and beef broth. Stir in the salt, pepper, cumin, and coriander. Then, add the bay leaf. Bring everything to a simmer, put the lid on, and cook for additional 10 minutes.

Step 3: Uncover and stir. Cook for 10 minutes more, lid off, until the potatoes are tender and most of the liquid is gone.

Step 4: Remove from the heat when done and serve the Mexican Picadillo right away with some tortillas and rice. Enjoy!

Notes

You can add other veggies such as peas, carrots, and more. Add them along with tomato sauce and beef broth. Allow everything to simmer. Instead of tomato sauce, you can use fresh Roma tomatoes. You can dice them finely and saute them with the potatoes, onion, and pepper to release juices. Alternately, you can blend the tomatoes and add them with the beef broth. For this recipe, you can use gold or russet potatoes.

June 9, 2022 0 comment
0 FacebookTwitterPinterestEmail
General Recipes

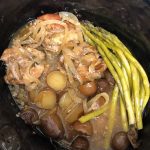
SLOW-COOKER LEMON CHICKEN

by Rebecca June 9, 2022
written by Rebecca

PREP TIME: 10 MINS | COOK TIME: 3 HRS | TOTAL TIME: 3 H HRS 5 MINS | SERVINGS: 4 PEOPLE

This easy slow cooker chicken dish has tons of lemon flavor and loads of scrumptious garlic. Made with a few simple ingredients and in your trusty slow cooker, this simple chicken recipe is no doubt a must and for keeps! This is a complete meal in one with lush chicken and veggies. Broiling the chicken (and potatoes) is optional but highly recommended if you want golden, crispy chicken.

This recipe is already tried and tested by many. It’s the perfect recipe if a chicken is a staple at your house. It’s a no-fuss and a dump-and-go dish that guarantee one of the best chicken dinners!

INGREDIENTS

2 tablespoons olive oil

6-8 chicken thighs – bone-in, skin on

1 red onion

1-1.5 pounds of baby potatoes

1 lemon

2 tablespoons honey

1/2 tablespoon fresh thyme leaves

4 cloves garlic

bunch thin green asparagus

sea salt

Pepper

HOW TO MAKE SLOW-COOKER LEMON CHICKEN

Step 1: After peeling the red onions, slice them and add them to the bottom of a slow cooker in a single layer. On top, add the chicken thighs. Then, add the washed and halved baby potatoes.

Step 2: Whisk the zest of 1 lemon, lemon juice, olive oil, honey, thyme, sea salt, pepper, and finely chopped garlic in a small bowl. Pour this over the ingredients in the slow cooker.

Step 3: Cover the slow cooker with the lid and set to cook for 3 to 4 hours on high or 6 to 8 hours on low. About 15 to 20 minutes before the cooking time is over, adjust the setting to high and add the asparagus. Replace the lid and continue to cook.

Step 4: Take the chicken out of the slow cooker for the last 5 minutes and transfer it to a baking sheet. Broil the chicken for about 3 to 4 minutes on high or until the skin of the chicken is golden. This step is optional but recommended.

NUTRITION FACTS:

Calories: 679 kcal | Carbohydrates: 35g | Protein: 38g | Fat: 43g | Saturated Fat: 10g | Cholesterol: 212mg | Sodium: 176mg | Potassium: 1011mg | Fiber: 3g | Sugar: 11g | Vitamin A: 210IU | Vitamin C: 41mg | Calcium: 53mg | Iron: 2.8mg

SLOW-COOKER LEMON CHICKEN

Rebecca PREP TIME: 10 MINS | COOK TIME: 3 HRS | TOTAL TIME: 3 H HRS 5 MINS | SERVINGS: 4 PEOPLE This easy slow cooker chicken dish has tons of… General Recipes SLOW-COOKER LEMON CHICKEN European Print This
Serves: 4 Prep Time: 10 mins Cooking Time: 3 hrs 3 hrs
Nutrition facts: 679 calories 43 fat
Rating: 5.0/5
( 1 voted )

Ingredients

  • 2 tablespoons olive oil
  • 6-8 chicken thighs - bone-in, skin on
  • 1 red onion
  • 1-1.5 pounds of baby potatoes
  • 1 lemon
  • 2 tablespoons honey
  • 1/2 tablespoon fresh thyme leaves
  • 4 cloves garlic
  • bunch thin green asparagus
  • sea salt
  • Pepper

Instructions

Step 1: After peeling the red onions, slice them and add them to the bottom of a slow cooker in a single layer. On top, add the chicken thighs. Then, add the washed and halved baby potatoes.

Step 2: Whisk the zest of 1 lemon, lemon juice, olive oil, honey, thyme, sea salt, pepper, and finely chopped garlic in a small bowl. Pour this over the ingredients in the slow cooker.

Step 3: Cover the slow cooker with the lid and set to cook for 3 to 4 hours on high or 6 to 8 hours on low. About 15 to 20 minutes before the cooking time is over, adjust the setting to high and add the asparagus. Replace the lid and continue to cook.

Step 4: Take the chicken out of the slow cooker for the last 5 minutes and transfer it to a baking sheet. Broil the chicken for about 3 to 4 minutes on high or until the skin of the chicken is golden. This step is optional but recommended.

June 9, 2022 0 comment
0 FacebookTwitterPinterestEmail
General Recipes

Bacon Wrapped Chicken

by Rebecca June 9, 2022
written by Rebecca

Prep Time: 10 mins | Cook Time: 25 mins | Servings: 4

This is an amazing chicken dish that you can easily make in no time! Crispy bacon wrapped around a lush chicken that has been lightly seasoned with a simple brown sugar mix. Serve this over a bed of mashed potatoes or alongside your favorite roasted veggies for a quick and filling meal perfect any time!

Ingredients

Seasoning:

1 ½ tsp smoked paprika

1 tsp garlic powder – I used garlic granules, feel free to use fresh minced garlic too

1 tsp pepper, freshly ground

1 ½ tsp onion powder

½ tsp salt

1 tsp cayenne pepper or use chili flakes or substitute with more smoked paprika

Chicken:

8 strips of bacon, thick ⅛” strips are best, regular ones can be used too

¼ c. brown sugar (adjust the quantity to suit your taste)

4 chicken breast or use thin chicken tender cuts or large chicken thighs

Garnish:

Fresh parsley

How to make Bacon Wrapped Chicken

Step 1: Place the rub ingredients (brown sugar, smoked paprika, cayenne pepper, garlic powder (or granules), onion powder, freshly ground pepper, and salt) in a small bowl. Mix well until combined.

Step 2: Sprinkle half of the brown sugar, spice mix on both sides of the chicken breasts, evenly rubbing/spreading it on all sides of the chicken.

Step 3: Around the chicken breast, wrap the bacon. Note that the length of the bacon depends on the size of the chicken breast. Gently wrap the bacon, but not as tight to prevent the bacon from tearing. In a baking dish, arrange the bacon-wrapped chicken breast and evenly sprinkle with the rest of the brown sugar spice mix. Place in a 375 degrees F or 185 degrees C preheated oven and bake for about 25 to 30 minutes. For juicy chicken with extra flavor, spoon the pan drippings over the chicken every 10 minutes. Once the temperature of the thickest part of the chicken reaches 165 degrees F the chicken is done. Also, once the chicken is through white it is done. If desired, you can broil the chicken for about 2 minutes to make the bacon crispy.

Step 4: Take the chicken out of the oven when done and serve hot garnished with some fresh chopped parsley. Over the chicken, generously spoon the pan drippings. Enjoy the bacon-wrapped chicken over mashed potatoes or alongside your preferred veggies such as roasted potatoes.

Nutrition Facts:

Calories: 503 kcal | Carbohydrates: 16g | Protein: 54g | Fat: 24g | Saturated Fat: 7g | Cholesterol: 174mg | Sodium: 850mg | Potassium: 978mg | Fiber: 1g | Sugar: 14g | Vitamin A: 662IU | Vitamin C: 3mg | Calcium: 26mg | Iron: 1mg

Bacon Wrapped Chicken

Rebecca Prep Time: 10 mins | Cook Time: 25 mins | Servings: 4 This is an amazing chicken dish that you can easily make in no time! Crispy bacon wrapped around… General Recipes Bacon Wrapped Chicken European Print This
Serves: 4 Prep Time: 10 mins Cooking Time: 25 mins 25 mins
Nutrition facts: 503 calories 24 fat
Rating: 5.0/5
( 1 voted )

Ingredients

  • Seasoning:
  • 1 ½ tsp smoked paprika
  • 1 tsp garlic powder - I used garlic granules, feel free to use fresh minced garlic too
  • 1 tsp pepper, freshly ground
  • 1 ½ tsp onion powder
  • ½ tsp salt
  • 1 tsp cayenne pepper or use chili flakes or substitute with more smoked paprika
  • Chicken:
  • 8 strips of bacon, thick ⅛” strips are best, regular ones can be used too
  • ¼ c. brown sugar (adjust the quantity to suit your taste)
  • 4 chicken breast or use thin chicken tender cuts or large chicken thighs
  • Garnish:
  • Fresh parsley

Instructions

Step 1: Place the rub ingredients (brown sugar, smoked paprika, cayenne pepper, garlic powder (or granules), onion powder, freshly ground pepper, and salt) in a small bowl. Mix well until combined.

Step 2: Sprinkle half of the brown sugar, spice mix on both sides of the chicken breasts, evenly rubbing/spreading it on all sides of the chicken.

Step 3: Around the chicken breast, wrap the bacon. Note that the length of the bacon depends on the size of the chicken breast. Gently wrap the bacon, but not as tight to prevent the bacon from tearing. In a baking dish, arrange the bacon-wrapped chicken breast and evenly sprinkle with the rest of the brown sugar spice mix. Place in a 375 degrees F or 185 degrees C preheated oven and bake for about 25 to 30 minutes. For juicy chicken with extra flavor, spoon the pan drippings over the chicken every 10 minutes. Once the temperature of the thickest part of the chicken reaches 165 degrees F the chicken is done. Also, once the chicken is through white it is done. If desired, you can broil the chicken for about 2 minutes to make the bacon crispy.

Step 4: Take the chicken out of the oven when done and serve hot garnished with some fresh chopped parsley. Over the chicken, generously spoon the pan drippings. Enjoy the bacon-wrapped chicken over mashed potatoes or alongside your preferred veggies such as roasted potatoes.

June 9, 2022 0 comment
0 FacebookTwitterPinterestEmail
General Recipes

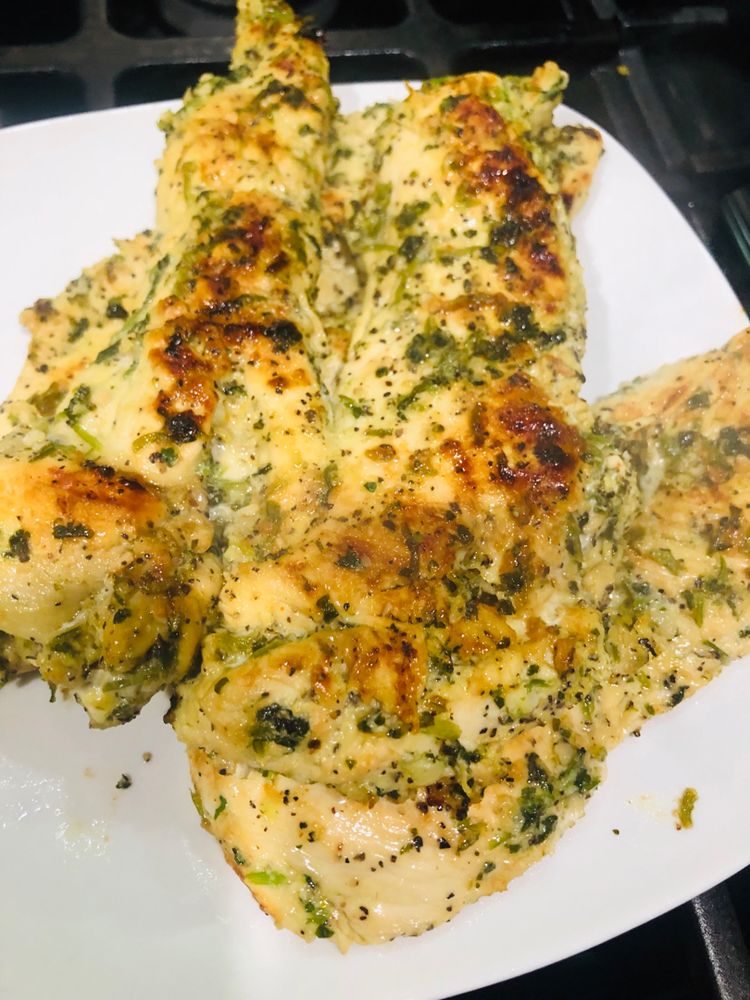
Grilled Cilantro Lime Chicken

by Rebecca June 9, 2022
written by Rebecca

Prep Time: 5 mins | Cook Time: 10 mins | Marinade: 1 hr | Total Time: 15 mins | Servings: 8

Lush and flavorful grilled chicken marinated in simple yet delicious cilantro and lime marinade. For an easy and filling weeknight meal, serve this with your favorite sides, such as potato salad. This grilled cilantro lime chicken is also great to use in a wrap, pita, or sandwich.

Ingredients

8 Boneless, skinless chicken breasts about 2 pounds

Marinade:

2 tablespoons olive oil

2/3 bunch fresh cilantro

3 tablespoons lime juice, about 2 limes

zest of 1 lime

3 cloves garlic, chopped

1 teaspoon salt

1 teaspoon black pepper

1 teaspoon ground coriander

Optional Garnishes:

Lime wedges

Cilantro leaves

How to make Grilled Cilantro Lime Chicken

Step 1: In a blender or food processor, place the marinade ingredients. Pulse until smooth.

Step 2: To a large freezer-safe sealable bag, add the chicken breast and pour the marinade over the chicken. Make sure to press the air out before tightly sealing the bag. Press the marinade gently around the chicken cutlets. Place the bag in the fridge to marinate the chicken for at least 1 hour or overnight.

Step 3: With some oil, grease your grill or a heavy-bottomed pan over medium-high heat. Onto the hot grill, place the marinated chicken breast and grill for about 5 minutes per side, undisturbed, until the chicken is charred and completely cooked.

Step 4: Serve the grilled cilantro lime chicken right away garnished with some fresh cilantro leaves. If desired, serve with lime wedges. Enjoy!

Notes:

For this recipe, feel free to use thin-sliced boneless, skinless chicken breasts to make things quicker.

To help the meat to cook evenly, pound the chicken to an even thickness.

To let the flavor seep in and tenderize the chicken breast, allow the chicken to marinate for at least an hour. Make sure to place the marinating meat in the fridge to keep it at a safe temperature.

You can cook the chicken on the grill or in a heavy-bottomed pan.

To prevent the chicken from getting overcooked, cook the chicken straight from the fridge.

Lightly brush the grill using oil before cooking the chicken to prevent the chicken from tearing when flipped.

Feel free to set some of the marinades aside to drizzle over the chicken when done.

You can use shallow containers made of non-reactive materials such as stainless steel, glass, or ceramic if sealable bags are not available.

Nutrition Facts:

Calories: 165 kcal | Carbohydrates: 1g | Protein: 24g | Fat: 7g | Saturated Fat: 1g | Cholesterol: 72mg | Sodium: 423mg | Potassium: 440mg | Fiber: 1g | Sugar: 1g | Vitamin A: 169IU | Vitamin C: 5mg | Calcium: 11mg | Iron: 1mg

Grilled Cilantro Lime Chicken

Rebecca Prep Time: 5 mins | Cook Time: 10 mins | Marinade: 1 hr | Total Time: 15 mins | Servings: 8 Lush and flavorful grilled chicken marinated in simple yet… General Recipes Grilled Cilantro Lime Chicken European Print This
Serves: 8 Prep Time: 5 mins Cooking Time: 10 mins 10 mins
Nutrition facts: 165 calories 7 fat
Rating: 5.0/5
( 1 voted )

Ingredients

  • 8 Boneless, skinless chicken breasts about 2 pounds
  • Marinade:
  • 2 tablespoons olive oil
  • 2/3 bunch fresh cilantro
  • 3 tablespoons lime juice, about 2 limes
  • zest of 1 lime
  • 3 cloves garlic, chopped
  • 1 teaspoon salt
  • 1 teaspoon black pepper
  • 1 teaspoon ground coriander
  • Optional Garnishes:
  • Lime wedges
  • Cilantro leaves

Instructions

Step 1: In a blender or food processor, place the marinade ingredients. Pulse until smooth.

Step 2: To a large freezer-safe sealable bag, add the chicken breast and pour the marinade over the chicken. Make sure to press the air out before tightly sealing the bag. Press the marinade gently around the chicken cutlets. Place the bag in the fridge to marinate the chicken for at least 1 hour or overnight.

Step 3: With some oil, grease your grill or a heavy-bottomed pan over medium-high heat. Onto the hot grill, place the marinated chicken breast and grill for about 5 minutes per side, undisturbed, until the chicken is charred and completely cooked.

Step 4: Serve the grilled cilantro lime chicken right away garnished with some fresh cilantro leaves. If desired, serve with lime wedges. Enjoy!

June 9, 2022 0 comment
0 FacebookTwitterPinterestEmail
General Recipes

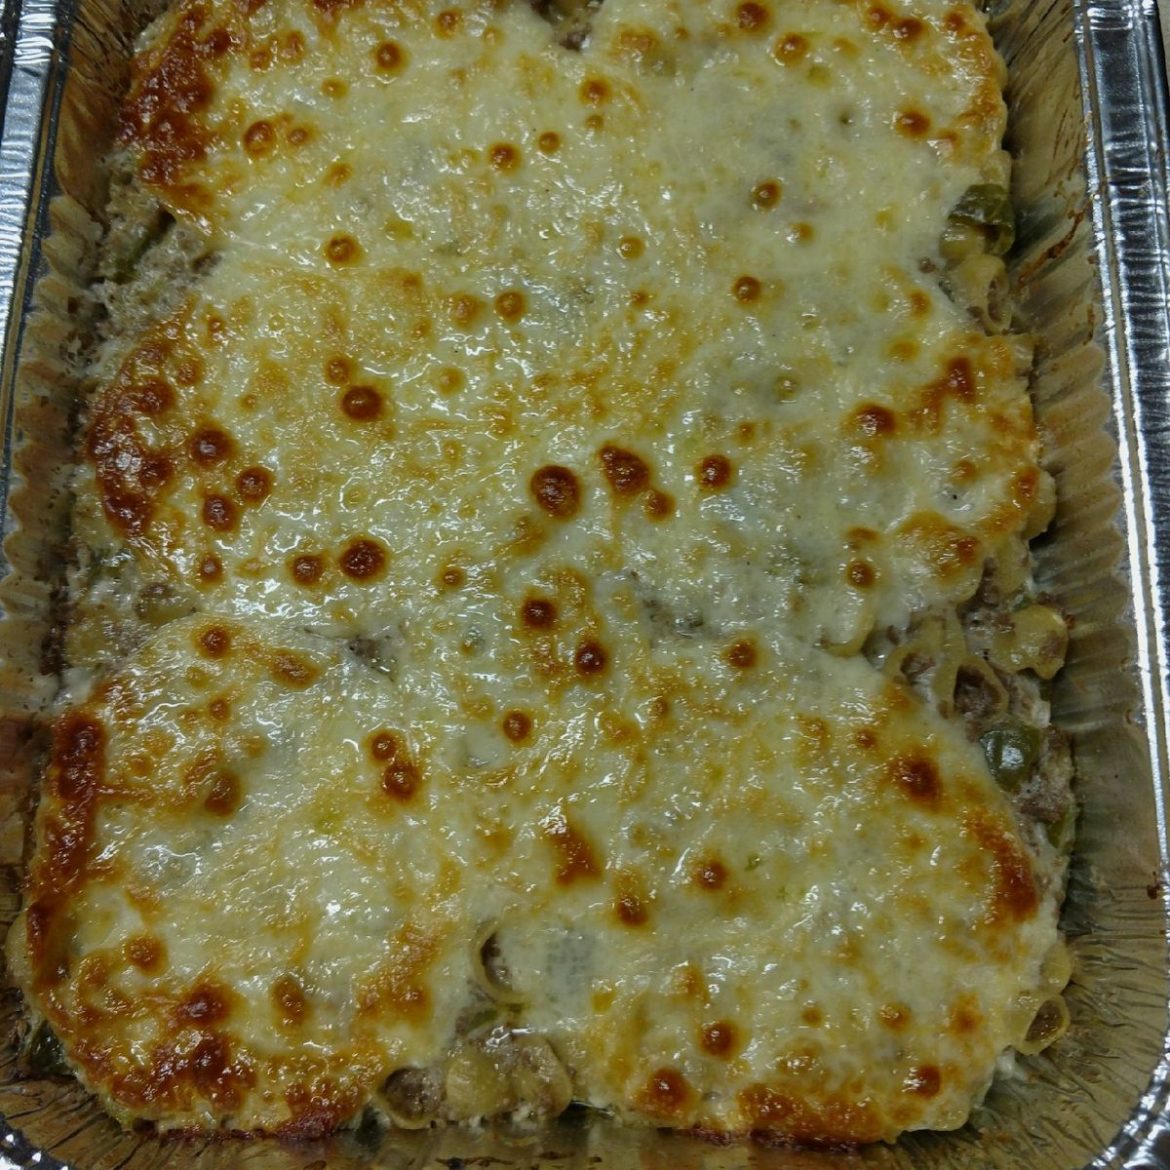
Philly Cheese Steak Casserole

by Rebecca June 8, 2022
written by Rebecca

Prep time: 20 mins | Cook time: 20 mins | Total time: 40 mins | Serves: 6 people

Are you looking for another wonderful weeknight meal that your entire family will love? Then, you have to give this Philly Cheese Steak Casserole a try soon! Enjoy everything you love about Philly Cheesesteak baked up in this delicious noodle casserole. Incredibly easy to whip up in less than an hour. This casserole is a staple at home and my favorite go-to when I am expecting guests. I’m pretty sure that you’ll hit the jackpot with this simple recipe!

Ingredients

2 tbsp butter

1 lb ground beef

1/2 lb. small shells

2 garlic cloves, minced

1 green pepper, diced

8 oz. cream cheese

1/2 yellow onion, diced

6 slices provolone cheese

1 c. shredded mozzarella

1/2 c. reserved pasta water

32 oz beef stock, plus 32 oz. Water

How to make Philly Cheese Steak Casserole

Step 1: Prepare the oven. Preheat it to 350 degrees.

Step 2: Mix the beef stock with 32 ounces of water and cook the shells following the package directions. Set aside half a c. of the reserved pasta water.

Step 3: Melt the butter in an oven-proof skillet. Then, add the garlic clove and cook for about 35 seconds before adding the bell pepper and onion. Continue to cook for 5 minutes more until tender.

Step 4: To the skillet, add the ground beef and sprinkle with salt and pepper. Continue to cook until done. Then, drain the grease and bring it back to heat. Next, stir in the cream cheese until melted. Pour in the reserved pasta water and add the noodles followed by the shredded mozzarella. Mix well.

Step 5: On top, lay the sliced provolone. Place in the preheated oven and bake for about 20 to 25 minutes or until the provolone has completely melted.

Note:

You can transfer the mixture into a greased 9 x 13-inch baking dish if using a not oven-proof skillet before you top everything with provolone and bake.

Nutrition Facts:

Calories: 534 kcal (27%) | Carbohydrates: 31g (10%) | Protein: 32g (64%) | Fat: 32g (49%) | Saturated Fat: 18g (113%) | Monounsaturated Fat: 1g | Cholesterol: 127mg (42%) | Sodium: 474mg (21%) | Potassium: 33mg (1%) | Fiber: 2g (8%) | Sugar: 3g (3%) | Vitamin A: 800IU (16%) | Vitamin C: 15.7mg (19%) | Calcium: 260mg (26%) | Iron: 3.1mg (17%)

Philly Cheese Steak Casserole

Rebecca Prep time: 20 mins | Cook time: 20 mins | Total time: 40 mins | Serves: 6 people Are you looking for another wonderful weeknight meal that your entire family… General Recipes Philly Cheese Steak Casserole European Print This
Serves: 6 Prep Time: 20 mins Cooking Time: 20 mins 20 mins
Nutrition facts: 534 calories 32 fat
Rating: 5.0/5
( 1 voted )

Ingredients

  • 2 tbsp butter
  • 1 lb ground beef
  • 1/2 lb. small shells
  • 2 garlic cloves, minced
  • 1 green pepper, diced
  • 8 oz. cream cheese
  • 1/2 yellow onion, diced
  • 6 slices provolone cheese
  • 1 c. shredded mozzarella
  • 1/2 c. reserved pasta water
  • 32 oz beef stock, plus 32 oz. Water

Instructions

Step 1: Prepare the oven. Preheat it to 350 degrees.

Step 2: Mix the beef stock with 32 ounces of water and cook the shells following the package directions. Set aside half a c. of the reserved pasta water.

Step 3: Melt the butter in an oven-proof skillet. Then, add the garlic clove and cook for about 35 seconds before adding the bell pepper and onion. Continue to cook for 5 minutes more until tender.

Step 4: To the skillet, add the ground beef and sprinkle with salt and pepper. Continue to cook until done. Then, drain the grease and bring it back to heat. Next, stir in the cream cheese until melted. Pour in the reserved pasta water and add the noodles followed by the shredded mozzarella. Mix well.

Step 5: On top, lay the sliced provolone. Place in the preheated oven and bake for about 20 to 25 minutes or until the provolone has completely melted.

Notes

You can transfer the mixture into a greased 9 x 13-inch baking dish if using a not oven-proof skillet before you top everything with provolone and bake.

June 8, 2022 0 comment
0 FacebookTwitterPinterestEmail
Newer Posts
Older Posts

Popular Posts

  • 1

    Crispy Crunchy Parmesan Potatoes

    March 21, 2020
  • 2

    CROCK POT SMOTHERED PORK CHOPS

    March 21, 2020
  • Facebook
  • Twitter

@2019 - All Right Reserved.


Back To Top