Cook it once
  • Home
  • Privacy Policy
  • Recipes
    • KETO
    • LC
    • WW
  • Tips
  • Contact
Cook it once
  • Home
  • Privacy Policy
  • Recipes
    • KETO
    • LC
    • WW
  • Tips
  • Contact
Category:

General Recipes

General Recipes

OVEN BAKED BBQ BEEF RIBS

by Rebecca June 29, 2022
written by Rebecca

Prep Time: 10 mins | Cook Time: 4 hrs | Marinate: 2 hrs | Total Time: 6 hrs 10 mins | Servings: 4 people

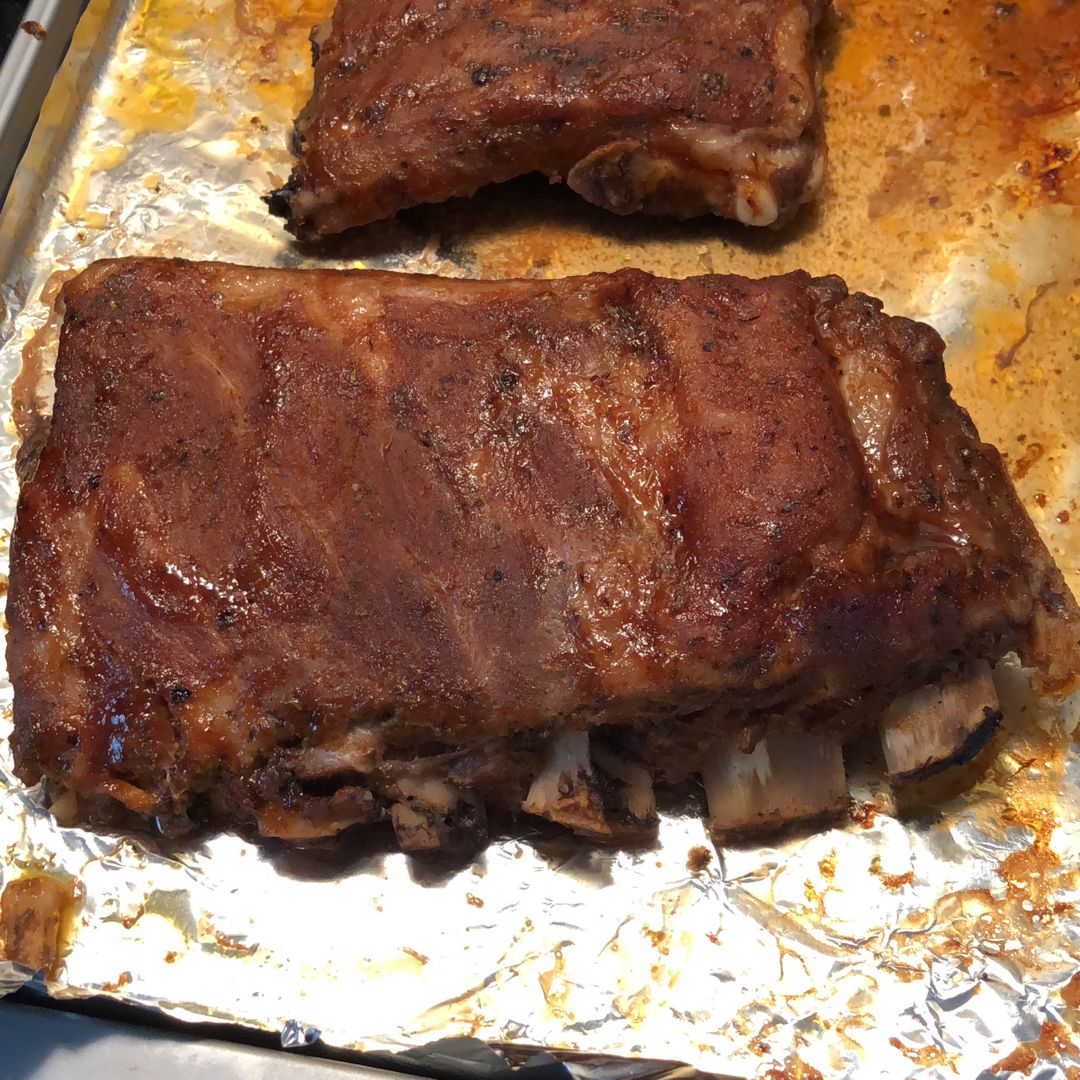
Well-seasoned beef ribs that are slowly baked until juicy and fall-apart tender. These oven-baked BBQ beef ribs are loaded with amazing flavor and are the perfect dish to serve for entertaining.

Ingredients

2-4 tbsp olive oil

3 pounds of meaty beef ribs (grass-fed)

Liquid smoke, optional

1 tbsp garlic powder

1 tbsp Cajun seasoning

1 tbsp onion powder

2 tbsp dark brown sugar, packed

1 tsp paprika

1 tsp chili powder

2 tsp oregano

Favorite BBQ Sauce – I only used a few tbsp of Sweet Baby Ray’s

1 tsp salt can use smoked salt as well. (I used 1 ½ tsp because we prefer our ribs a little salty)

HOW TO MAKE OVEN-BAKED BBQ BEEF RIBS

Step 1: After rinsing the ribs, completely dry them with paper towels. If using, douse the ribs with liquid smoke, rubbing it in. Then, coat the ribs lightly with olive oil.

Step 2: Combine the seasonings and generously sprinkle them over the ribs (both front and back). Into the ribs, massage the spices, adding extra olive oil to assist distribute the spices well if needed.

Step 3: In a large ziplock bag or covered bowl, place the ribs. Put in the fridge to marinate the ribs for an hour or two.

Step 4: Prepare the oven. Preheat it to 250 degrees F.

Step 5: On a foil-lined baking tray, place the ribs in one layer. On top, add another piece of foil, creating a pouch for the ribs to cook in. Tightly seal the edges. On the middle rack of the preheated oven, place the baking tray and bake the ribs for about 3 1/2 -4 hours. Make sure to check on the ribs after the 3 1/2 hour mark. Drain the excess fat once the ribs are done and brush with BBQ sauce.

Step 6: For a sticky sauce, broil the ribs.

Step 7: Serve immediately. Enjoy!
OVEN BAKED BBQ BEEF RIBS

Rebecca Prep Time: 10 mins | Cook Time: 4 hrs | Marinate: 2 hrs | Total Time: 6 hrs 10 mins | Servings: 4 people Well-seasoned beef ribs that are slowly… General Recipes OVEN BAKED BBQ BEEF RIBS European Print This
Serves: 4 Prep Time: 10 mins Cooking Time: 4 hrs 4 hrs
Nutrition facts: 200 calories 20 grams fat
Rating: 5.0/5
( 1 voted )

Ingredients

  • 2-4 tbsp olive oil
  • 3 pounds of meaty beef ribs (grass-fed)
  • Liquid smoke, optional
  • 1 tbsp garlic powder
  • 1 tbsp Cajun seasoning
  • 1 tbsp onion powder
  • 2 tbsp dark brown sugar, packed
  • 1 tsp paprika
  • 1 tsp chili powder
  • 2 tsp oregano
  • Favorite BBQ Sauce - I only used a few tbsp of Sweet Baby Ray's
  • 1 tsp salt can use smoked salt as well. (I used 1 ½ tsp because we prefer our ribs a little salty)

Instructions

Step 1: After rinsing the ribs, completely dry them with paper towels. If using, douse the ribs with liquid smoke, rubbing it in. Then, coat the ribs lightly with olive oil.

Step 2: Combine the seasonings and generously sprinkle them over the ribs (both front and back). Into the ribs, massage the spices, adding extra olive oil to assist distribute the spices well if needed.

Step 3: In a large ziplock bag or covered bowl, place the ribs. Put in the fridge to marinate the ribs for an hour or two.

Step 4: Prepare the oven. Preheat it to 250 degrees F.

Step 5: On a foil-lined baking tray, place the ribs in one layer. On top, add another piece of foil, creating a pouch for the ribs to cook in. Tightly seal the edges. On the middle rack of the preheated oven, place the baking tray and bake the ribs for about 3 1/2 -4 hours. Make sure to check on the ribs after the 3 1/2 hour mark. Drain the excess fat once the ribs are done and brush with BBQ sauce.

Step 6: For a sticky sauce, broil the ribs.

Step 7: Serve immediately. Enjoy!
June 29, 2022 0 comment
0 FacebookTwitterPinterestEmail
General Recipes

Creamy and Cheesy Chicken and Rice

by Rebecca June 29, 2022
written by Rebecca

Prep Time: 10 mins | Cook Time: 45 mins | Total Time: 55 mins | Servings: 8

Easily made this creamy and cheesy chicken and rice from scratch using only a few simple ingredients in less than an hour, and enjoy an irresistibly delicious weeknight dinner that your entire family will love!

Ingredients

½ tbsp fresh minced garlic

4 c. cooked rice

4 tablespoons butter

¼ c. white wine or additional chicken stock

2 c. low-sodium chicken broth

2 c. shredded cooked chicken breast

¼ c. all-purpose unbleached flour

3 ½ c. shredded cheddar cheese divided

½ tbsp fresh chopped thyme, optional

1 teaspoon kosher salt

1 teaspoon black pepper

How to make Creamy and Cheesy Chicken and Rice

Step 1: Prepare the oven. Preheat it to 350 degrees F. Lightly grease a 9 x 13-inch or 2-quart baking sheet.

Step 2: In a medium saucepan, melt the butter over medium-high heat. Once the butter has melted, whisk in the flour and cook for about a minute until the raw flour taste is gone. Then, gradually stir in the wine and garlic, stirring until thickened.

Step 3: Stir in the chicken broth, about 1/4 c at a time. Then, add the salt, pepper, and thyme. Bring everything to a simmer, stirring often, until the sauce has thickened enough to coat the back of a spoon.

Step 4: Adjust the heat to medium-low and add 2 cups of cheese. Stir well until melted. Turn the heat off and add the cooked rice and chicken. Stir again.

Step 5: Into the prepared baking dish, transfer the mixture, and top with the rest of the cheddar cheese. Place in the preheated oven and bake for about 25 to 30 minutes or until the cheese has melted.

Notes:

Thyme Leaves: You can omit the thyme leaves if desired or swap them with half tsp dried thyme leaves. I do not recommend ground thyme as the flavor is overwhelming.

Wine: It is optional but highly recommended for a rich depth flavor. You can also sub it with 1/4 c chicken stock if desired. For this recipe, I suggest a dry chardonnay or pinot grigio.

Garlic: If desired, you can cut the amount of garlic in half.

In a covered container, keep any leftovers and store them in the fridge for up to 3 days or freeze them for up to 3 months.

Make-Ahead:

Prep this casserole up for baking. Tightly tent with 2 layers of foil and store in the fridge for up to 3 days or in the freezer for up to 3 months.

Take the casserole out of the fridge and remove 1 layer of foil. Let the casserole sit on the counter while preheating the oven to 350 degrees. Then, bake for about 30 to 40 minutes or until warm.

If baking from the freezer, take 1 layer of foil off and bake for about 60 minutes at 350 degrees. Remove the cover and resume baking for 15 minutes more.

Nutrition Facts:

Calories: 485 kcal | Carbohydrates: 76g | Protein: 21g | Fat: 24g | Saturated Fat: 13g | Cholesterol: 67mg | Sodium: 911mg | Potassium: 355mg | Fiber: 3g | Vitamin A: 650IU | Vitamin C: 4.1mg | Calcium: 382mg | Iron: 2.3mg

Creamy and Cheesy Chicken and Rice

Rebecca Prep Time: 10 mins | Cook Time: 45 mins | Total Time: 55 mins | Servings: 8 Easily made this creamy and cheesy chicken and rice from scratch using only… General Recipes Creamy and Cheesy Chicken and Rice European Print This
Serves: 8 Prep Time: 10 mins Cooking Time: 45 mins 45 mins
Nutrition facts: 485 calories 24 fat
Rating: 5.0/5
( 1 voted )

Ingredients

  • ½ tbsp fresh minced garlic
  • 4 c. cooked rice
  • 4 tablespoons butter
  • ¼ c. white wine or additional chicken stock
  • 2 c. low-sodium chicken broth
  • 2 c. shredded cooked chicken breast
  • ¼ c. all-purpose unbleached flour
  • 3 ½ c. shredded cheddar cheese divided
  • ½ tbsp fresh chopped thyme, optional
  • 1 teaspoon kosher salt
  • 1 teaspoon black pepper

Instructions

Step 1: Prepare the oven. Preheat it to 350 degrees F. Lightly grease a 9 x 13-inch or 2-quart baking sheet.

Step 2: In a medium saucepan, melt the butter over medium-high heat. Once the butter has melted, whisk in the flour and cook for about a minute until the raw flour taste is gone. Then, gradually stir in the wine and garlic, stirring until thickened.

Step 3: Stir in the chicken broth, about 1/4 c at a time. Then, add the salt, pepper, and thyme. Bring everything to a simmer, stirring often, until the sauce has thickened enough to coat the back of a spoon.

Step 4: Adjust the heat to medium-low and add 2 cups of cheese. Stir well until melted. Turn the heat off and add the cooked rice and chicken. Stir again.

Step 5: Into the prepared baking dish, transfer the mixture, and top with the rest of the cheddar cheese. Place in the preheated oven and bake for about 25 to 30 minutes or until the cheese has melted.

Notes

Thyme Leaves: You can omit the thyme leaves if desired or swap them with half tsp dried thyme leaves. I do not recommend ground thyme as the flavor is overwhelming. Wine: It is optional but highly recommended for a rich depth flavor. You can also sub it with 1/4 c chicken stock if desired. For this recipe, I suggest a dry chardonnay or pinot grigio. Garlic: If desired, you can cut the amount of garlic in half. In a covered container, keep any leftovers and store them in the fridge for up to 3 days or freeze them for up to 3 months. Make-Ahead: Prep this casserole up for baking. Tightly tent with 2 layers of foil and store in the fridge for up to 3 days or in the freezer for up to 3 months. Take the casserole out of the fridge and remove 1 layer of foil. Let the casserole sit on the counter while preheating the oven to 350 degrees. Then, bake for about 30 to 40 minutes or until warm. If baking from the freezer, take 1 layer of foil off and bake for about 60 minutes at 350 degrees. Remove the cover and resume baking for 15 minutes more.

June 29, 2022 0 comment
0 FacebookTwitterPinterestEmail
General Recipes

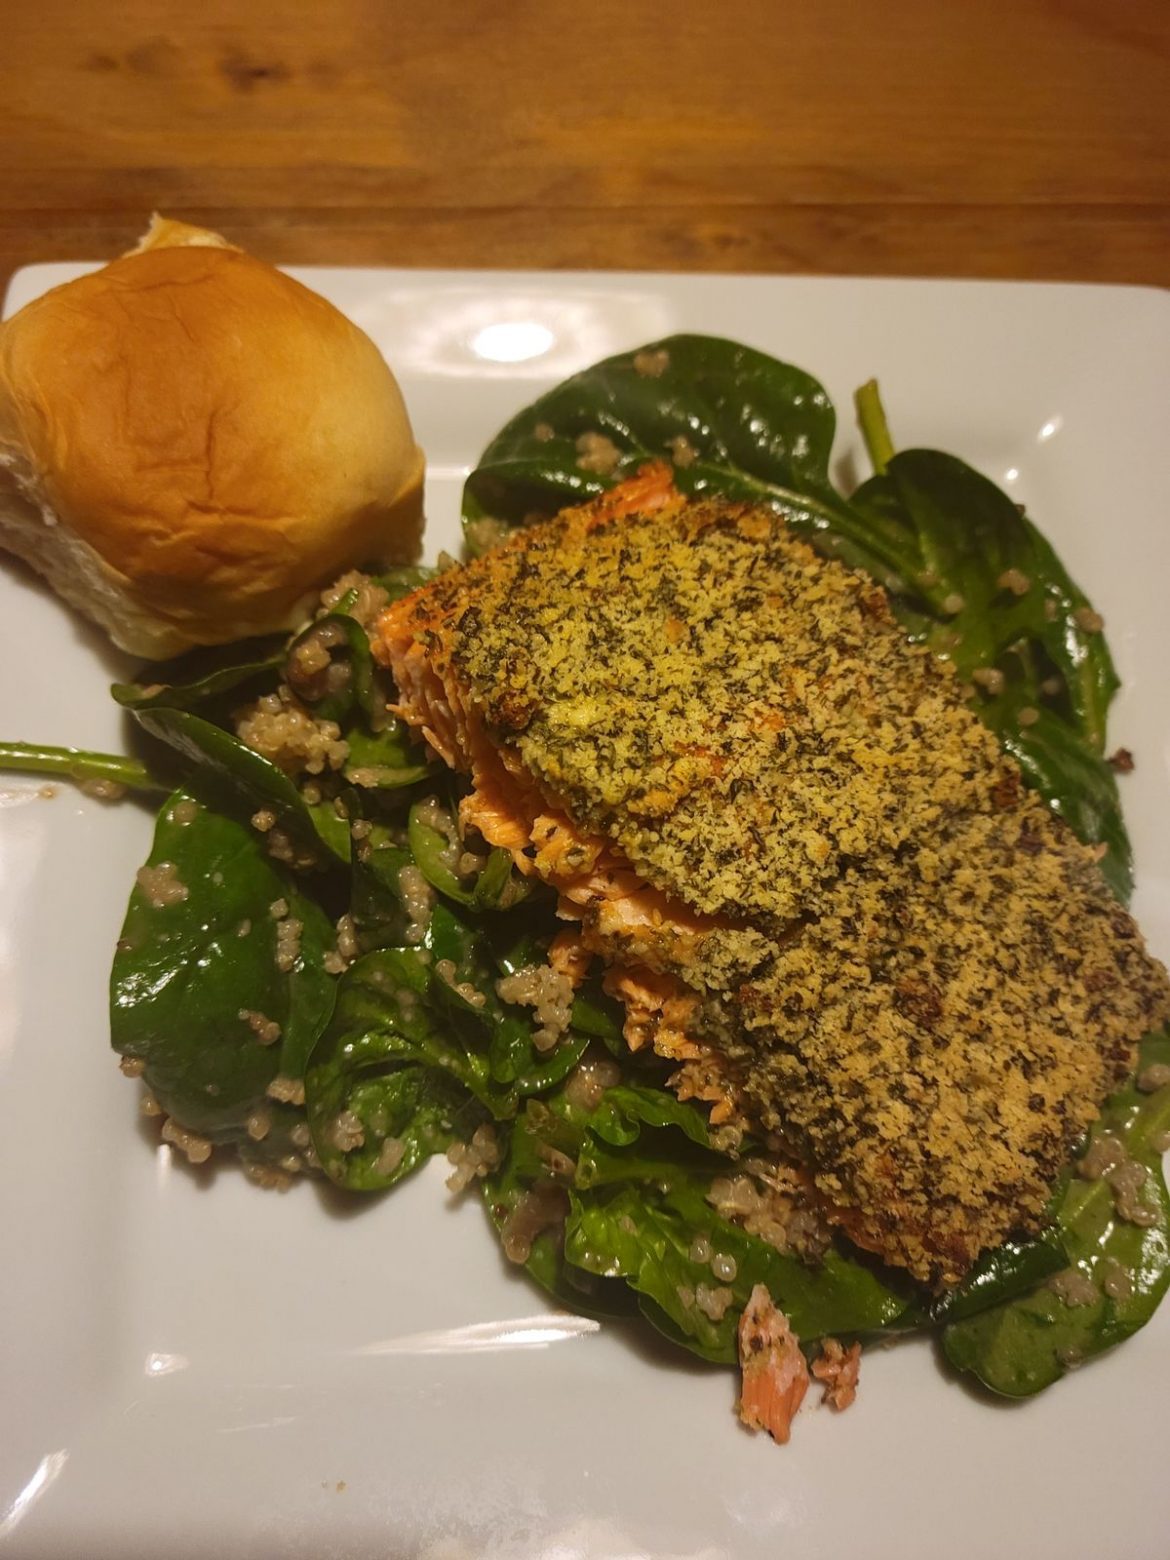
Baked Salmon with Parmesan Herb Crust Recipe

by Rebecca June 29, 2022
written by Rebecca

PREP TIME: 2 MINS | COOK TIME: 15 MINS | SERVINGS: 4

This baked salmon with Parmesan herb crust is the best salmon recipe that requires only four ingredients to make in less than fifteen minutes. A staple at home and excellent to serve any time!

I always love salmon dishes. They are one of the easiest and quickest recipes to make. It’s a pretty simple meal that is elegant enough to serve to guests. This easy salmon recipe is a must-try and for keeps. The Parmesan herb crust brings this salmon dish to a whole new level! I can understand why everyone is always raving about this. You can serve this baked salmon for brunch, lunch, or even dinner.

Dinner is made easy with this quickly baked salmon. It’s the perfect dish to make on busy days. It is also decadent enough to serve when you are expecting a company. Enjoy a restaurant-quality salmon at home with this simple recipe all year round!

Ingredients

1 salmon filet about 2 lbs., left whole

PARMESAN HERB CRUST:

1/2 c. chopped Parmesan cheese

3 cloves garlic, finely minced

1/4 c. chopped parsley

How to make Baked Salmon with Parmesan Herb Crust

Step 1: Prepare the oven. Preheat it to 425 degrees F. Using parchment paper or aluminium foil, line a rimmed baking sheet.

Step 2: Onto the prepared baking sheet, place the salmon, skin side down. Using a piece of parchment paper, tent the salmon. Place in the preheated oven and bake for about 10 minutes. Take the baking sheet out of the oven when done and remove the cover. Top the salmon with garlic, Parmesan, and parsley mixture. Resume baking for another 5 minutes, uncovered, until the cheese has melted, the salmon easily flakes using a fork and then the internal temperature of the salmon reaches 135 degrees F. At this point, the Parmesan cheese should have melted and turned lightly browned.

Step 3: Remove from the oven when done and let the baked salmon rest for about 5 minutes before serving. Enjoy!

Nutritional Facts:

Calories: 424 kcal | Carbohydrates: 1g | Protein: 68g | Fat: 14g | Saturated Fat: 2g | Cholesterol: 9mg | Sodium: 417mg | Potassium: 41mg | Fiber: 1g | Sugar: 1g | Vitamin A: 414IU | Vitamin C: 6mg | Calcium: 157mg | Iron: 1mg

Baked Salmon with Parmesan Herb Crust Recipe

Rebecca PREP TIME: 2 MINS | COOK TIME: 15 MINS | SERVINGS: 4 This baked salmon with Parmesan herb crust is the best salmon recipe that requires only four ingredients to… General Recipes Baked Salmon with Parmesan Herb Crust Recipe European Print This
Serves: 4 Prep Time: 2 mins Cooking Time: 15 mins 15 mins
Nutrition facts: 424 calories 14 fat
Rating: 5.0/5
( 1 voted )

Ingredients

  • 1 salmon filet about 2 lbs., left whole
  • PARMESAN HERB CRUST:
  • 1/2 c. chopped Parmesan cheese
  • 3 cloves garlic, finely minced
  • 1/4 c. chopped parsley

Instructions

Step 1: Prepare the oven. Preheat it to 425 degrees F. Using parchment paper or aluminium foil, line a rimmed baking sheet.

Step 2: Onto the prepared baking sheet, place the salmon, skin side down. Using a piece of parchment paper, tent the salmon. Place in the preheated oven and bake for about 10 minutes. Take the baking sheet out of the oven when done and remove the cover. Top the salmon with garlic, Parmesan, and parsley mixture. Resume baking for another 5 minutes, uncovered, until the cheese has melted, the salmon easily flakes using a fork and then the internal temperature of the salmon reaches 135 degrees F. At this point, the Parmesan cheese should have melted and turned lightly browned.

Step 3: Remove from the oven when done and let the baked salmon rest for about 5 minutes before serving. Enjoy!

June 29, 2022 0 comment
0 FacebookTwitterPinterestEmail
General Recipes

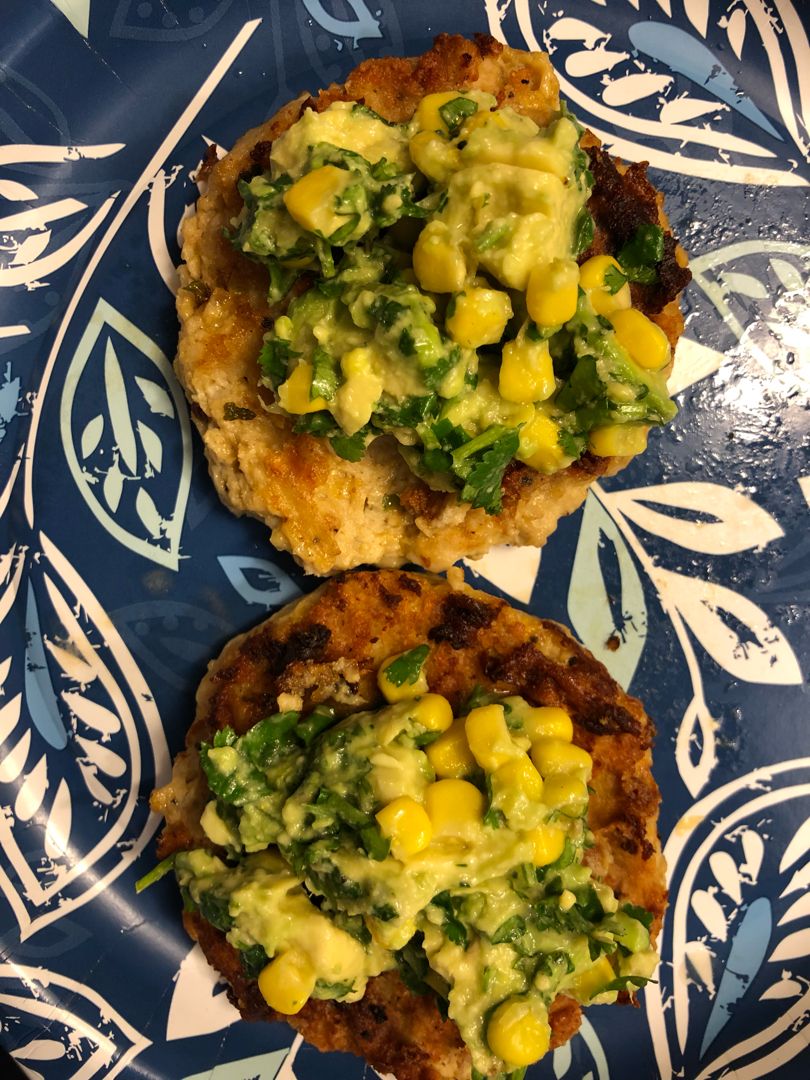
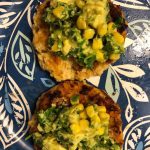
Chicken Burgers with Avocado Corn Salsa

by Rebecca June 29, 2022
written by Rebecca

PREP TIME: 5 mins | COOK TIME: 20 mins | TOTAL TIME: 25 mins | SERVINGS: 8 patties

These chicken burgers with the most amazing avocado, corn salsa are the best chicken burgers you’ll ever make! You can cook these burgers either using a nonstick grill pan or an outdoor grill for optimum results. These chicken burgers are incredibly easy to make and ready in a breeze. A must and staple summer dish that is perfect all year round!

These flavorful chicken burgers with avocado, corn salsa are one of my favorite summer weeknight dinners. They come together pretty quickly using only a few simple ingredients. Super good, these chicken burgers will surely be loved by everyone!

INGREDIENTS

Chicken Burgers:

2 scallions, chopped

1 ½ pounds ground chicken meat (I prefer thighs)

1 c. shredded cheese (Cheddar, Gouda, provolone)

½ teaspoon salt

½ teaspoon pepper

¼ c. mayo

Avocado Corn Salsa:

½ tablespoon olive oil

1 ear of fresh corn, husks, and silks removed

1 large avocado, sliced

⅛ c. chopped fresh cilantro

½ lime, juiced

salt and pepper to taste

How to make Chicken Burgers with Avocado Corn Salsa

Chicken Burgers:

Step 1: Into a medium mixing bowl, place the chicken along with the shredded cheese, chopped scallions, mayo, salt, and pepper. Mix well until combined.

Step 2: Scoop the chicken mixture using a 1/2 measuring cup and shape it into round patties.

Step 3: Place the patties on a grill pan or outdoor grill and cook the patties for about 5 minutes per side until completely cooked.

Step 4: In the meantime, ready the Avocado Corn Salsa.

Avocado Corn Salsa:

Step 5: Remove the kernels from the corn cob using a sharp knife. Into a medium mixing bowl, place the corn kernels, sliced avocado, and cilantro. Then, drizzle with olive oil and lime juice. To taste, season with salt and pepper. Mix well until blended.

Step 6: Serve this Avocado Corn Salsa over the chicken burgers. Enjoy!

NUTRITION FACTS:

Calories: 342 kcal, Carbohydrates: 2g, Protein: 31g, Fat: 23g, Saturated Fat: 9g, Polyunsaturated Fat: 4g, Monounsaturated Fat: 8g, Cholesterol: 96mg, Sodium: 800mg, Potassium: 229mg, Sugar: 1g, Vitamin A: 400IU, Calcium: 240mg, Iron: 1.3mg

Chicken Burgers with Avocado Corn Salsa

Rebecca PREP TIME: 5 mins | COOK TIME: 20 mins | TOTAL TIME: 25 mins | SERVINGS: 8 patties These chicken burgers with the most amazing avocado, corn salsa are the… General Recipes Chicken Burgers with Avocado Corn Salsa European Print This
Serves: 8 Prep Time: 5 mins Cooking Time: 20 mins 20 mins
Nutrition facts: 342 calories 23 fat
Rating: 5.0/5
( 1 voted )

Ingredients

  • Chicken Burgers:
  • 2 scallions, chopped
  • 1 ½ pounds ground chicken meat (I prefer thighs)
  • 1 c. shredded cheese (Cheddar, Gouda, provolone)
  • ½ teaspoon salt
  • ½ teaspoon pepper
  • ¼ c. mayo
  • Avocado Corn Salsa:
  • ½ tablespoon olive oil
  • 1 ear of fresh corn, husks, and silks removed
  • 1 large avocado, sliced
  • ⅛ c. chopped fresh cilantro
  • ½ lime, juiced
  • salt and pepper to taste

Instructions

Chicken Burgers:

Step 1: Into a medium mixing bowl, place the chicken along with the shredded cheese, chopped scallions, mayo, salt, and pepper. Mix well until combined.

Step 2: Scoop the chicken mixture using a 1/2 measuring cup and shape it into round patties.

Step 3: Place the patties on a grill pan or outdoor grill and cook the patties for about 5 minutes per side until completely cooked.

Step 4: In the meantime, ready the Avocado Corn Salsa.

Avocado Corn Salsa:

Step 5: Remove the kernels from the corn cob using a sharp knife. Into a medium mixing bowl, place the corn kernels, sliced avocado, and cilantro. Then, drizzle with olive oil and lime juice. To taste, season with salt and pepper. Mix well until blended.

Step 6: Serve this Avocado Corn Salsa over the chicken burgers. Enjoy!

June 29, 2022 0 comment
0 FacebookTwitterPinterestEmail
General Recipes

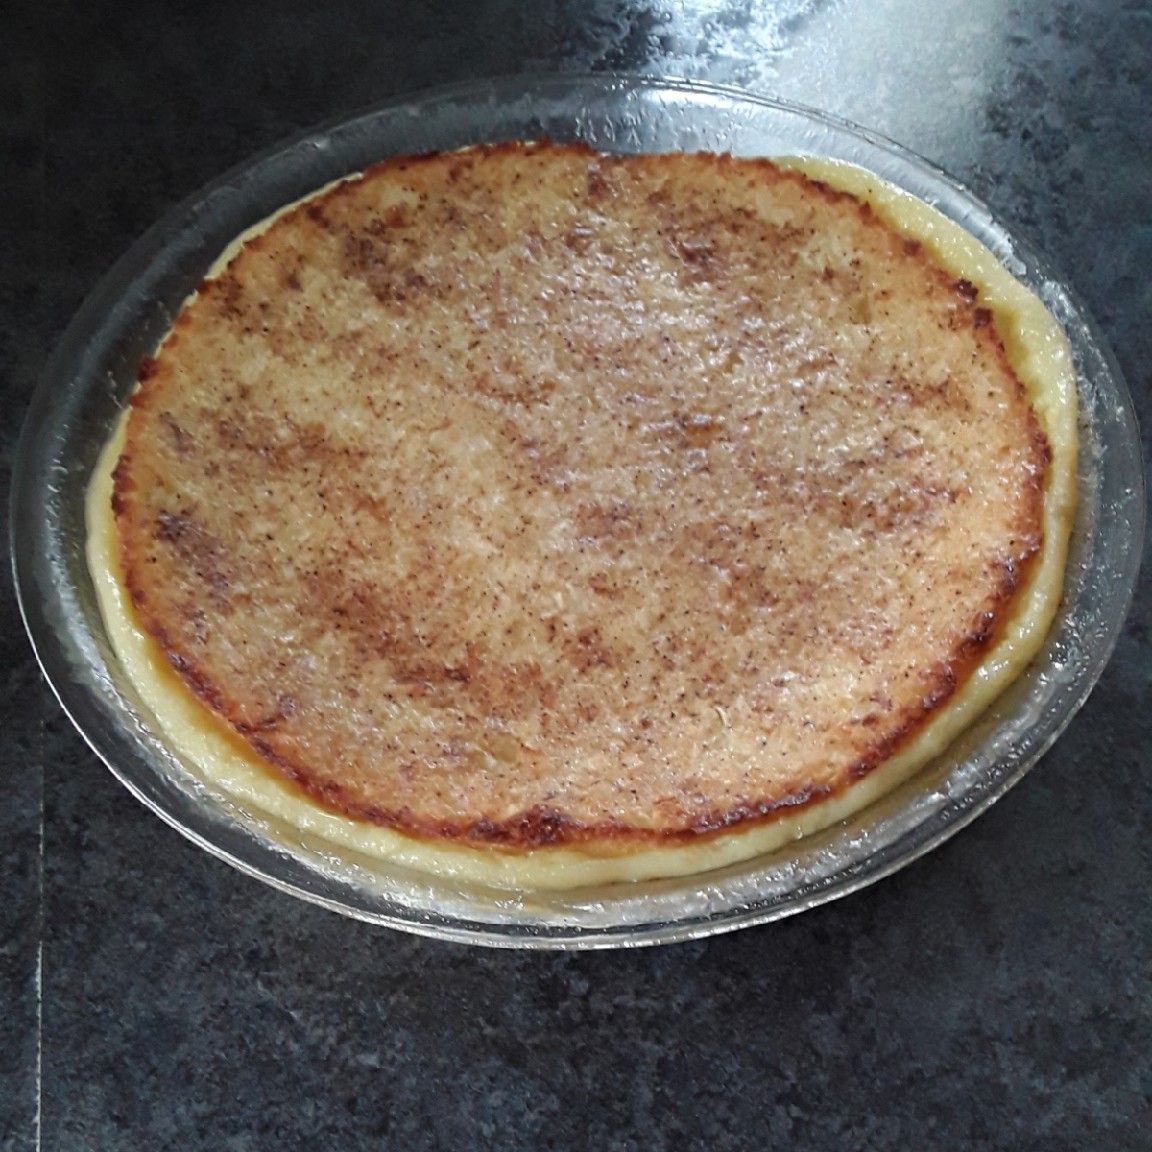
Impossible Pie

by Rebecca June 29, 2022
written by Rebecca

Prep time: 5 mins | Cook time: 45 mins | Total time: 50 mins | Yield: 6

This Impossible Pie is a very easy recipe that requires only a few simple ingredients. It’s a delicious pie that makes its own crust and tastes exactly like a coconut cream pie. If you are constantly searching for an easy dessert, then you have to give this Impossible pie a try very soon. It’s one of the best, easiest pies you’ll ever make!

My love for pies goes way back. My grandma made the best pies. Instead of cake for my birthday, I always request pies. I found this impossible pie recipe years ago, and I have been making this since. It’s a no-fuss recipe that guarantees one of the best-tasting of pies. This is also pretty impressive as it forms its own crust. The crust of this tasty pie resembles a pie dough crust. This pie is indeed one impossible pie!

Ingredients

4 eggs

1 c./110 grams Flaked coconut

2 c./470ml milk

1 teaspoon vanilla

8 tablespoons butter, melted

1/2 c./60 grams flour

1/4 tsp nutmeg for top

3/4 c./ 150 grams sugar

How to Make Impossible Pie

Step 1: Prepare the oven. Preheat it to 350 degrees F or 180 degrees C or Gas 4. Ready an 8 to 9-inch pie plate. Grease, flour, and set aside.

Step 2: Place all the ingredients in a blender or mixing bowl. Roughly mix using a whisk or on (if using a blender) on a short pulse until just combined. Make sure not to over-mix the batter.

Step 3: To the prepared pie dish, transfer the batter and sprinkle with ground nutmeg if desired. Bake in the preheated oven for about 45 minutes or until the pie has a little wobble on the surface.

Step 4: Remove from the oven when done and let the pie cool. Then, place in the fridge until fully chilled. I recommended chilling the pie overnight for the best results.

Step 5: Slice and serve. Enjoy!

Nutrition Facts:

Yield: 6 Serving Size: 1
Amount Per Serving: Calories: 444 | Total Fat: 25g | Saturated Fat: 17g | Trans Fat: 1g | Unsaturated Fat: 7g | Cholesterol: 171mg | Sodium: 264mg | Carbohydrates: 47g | Fiber: 2g | Sugar: 32g | Protein: 9g

Impossible Pie

Rebecca Prep time: 5 mins | Cook time: 45 mins | Total time: 50 mins | Yield: 6 This Impossible Pie is a very easy recipe that requires only a few… General Recipes Impossible Pie European Print This
Serves: 6 Prep Time: 5 mins Cooking Time: 45 mins 45 mins
Nutrition facts: 444 calories 25 fat
Rating: 5.0/5
( 1 voted )

Ingredients

  • 4 eggs
  • 1 c./110 grams Flaked coconut
  • 2 c./470ml milk
  • 1 teaspoon vanilla
  • 8 tablespoons butter, melted
  • 1/2 c./60 grams flour
  • 1/4 tsp nutmeg for top
  • 3/4 c./ 150 grams sugar

Instructions

Step 1: Prepare the oven. Preheat it to 350 degrees F or 180 degrees C or Gas 4. Ready an 8 to 9-inch pie plate. Grease, flour, and set aside.

Step 2: Place all the ingredients in a blender or mixing bowl. Roughly mix using a whisk or on (if using a blender) on a short pulse until just combined. Make sure not to over-mix the batter.

Step 3: To the prepared pie dish, transfer the batter and sprinkle with ground nutmeg if desired. Bake in the preheated oven for about 45 minutes or until the pie has a little wobble on the surface.

Step 4: Remove from the oven when done and let the pie cool. Then, place in the fridge until fully chilled. I recommended chilling the pie overnight for the best results.

Step 5: Slice and serve. Enjoy!

June 29, 2022 0 comment
0 FacebookTwitterPinterestEmail
General Recipes

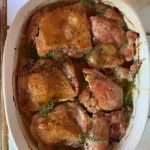
Herb Roasted Chicken Thighs in Creamy White Wine Sauce

by Rebecca June 29, 2022
written by Rebecca

Prep Time: 5 mins | Cook Time: 45 mins | Total Time: 50 mins | Servings: 8

Deliciously tender chicken thighs smothered in a silky, smooth, and incredibly addictive creamy white wine sauce. This chicken dish is a one-skillet meal that you can easily make in less than an hour. The perfect weeknight dinner for busy days and your entire family!

Ingredients

2 tbsp butter

3 pounds chicken thighs, bone-in, skin-on

1 tbsp olive oil

3 garlic cloves, chopped

Italian seasoning (divided)

1 medium onion, diced

3-4 thyme sprigs (leaves only)

½ c. white wine

1 c. chicken stock

Salt and pepper to taste

½ c. heavy cream

1 tbsp flour for thickening the sauce

Salt and pepper

How to make Herb Roasted Chicken Thighs in Creamy White Wine Sauce

Step 1: Prepare the oven. Preheat it to 400 degrees F.

Step 2: In a large skillet, heat 1 tbsp olive oil over medium-high heat. In the meantime, season the chicken thighs with salt, pepper, and Italian seasoning. Place the chicken in the hot skillet, skin-side down, and sear for about 4 to 5 minutes until browned. Flip and continue to cook the other side for another 4 minutes. Set the chicken aside when done.

Step 3: In the now-empty skillet, melt 2 tbsp butter. Then, add the onion and saute for about 3 to 4 minutes or until the onion has browned. Add the chopped garlic along with thyme and 1 tsp Italian seasoning. Continue to cook for a minute more.

Step 4: Stir in the flour and cook for only 1 minute until no longer white. Then, gradually pour in the wine, adjusting the heat to high. Cook for a couple of minutes more.

Step 5: Pour in the chicken stock and heavy cream. Mix well and cook for additional 5 minutes until the mixture has slightly reduced. To taste, season with salt and pepper. Place the chicken back into the skillet.

Step 6: Place the skillet in the preheated oven for about 35 minutes. Remove the pan from the oven when done, and serve the chicken thighs right away garnished with some fresh thyme. Enjoy with rice, mashed potatoes, or roasted veggies.

Nutrition Facts:

Amount Per Serving: Calories 500, Calories from Fat 342, Fat 38g58%, Saturated Fat 13g81%, Cholesterol 195mg65%, Sodium 497mg22%, Potassium 426mg12%, Carbohydrates 5g2%, Sugar 1g1%, Protein 29g58%, Vitamin A 460IU9%, Vitamin C 2mg2%, Calcium 39mg4%, Iron 1.6 mg9%

Herb Roasted Chicken Thighs in Creamy White Wine Sauce

Rebecca Prep Time: 5 mins | Cook Time: 45 mins | Total Time: 50 mins | Servings: 8 Deliciously tender chicken thighs smothered in a silky, smooth, and incredibly addictive creamy… General Recipes Herb Roasted Chicken Thighs in Creamy White Wine Sauce European Print This
Serves: 8 Prep Time: 5 mins Cooking Time: 45 mins 45 mins
Nutrition facts: 500 calories 38 fat
Rating: 5.0/5
( 1 voted )

Ingredients

  • 2 tbsp butter
  • 3 pounds chicken thighs, bone-in, skin-on
  • 1 tbsp olive oil
  • 3 garlic cloves, chopped
  • Italian seasoning (divided)
  • 1 medium onion, diced
  • 3-4 thyme sprigs (leaves only)
  • ½ c. white wine
  • 1 c. chicken stock
  • Salt and pepper to taste
  • ½ c. heavy cream
  • 1 tbsp flour for thickening the sauce
  • Salt and pepper

Instructions

Step 1: Prepare the oven. Preheat it to 400 degrees F.

Step 2: In a large skillet, heat 1 tbsp olive oil over medium-high heat. In the meantime, season the chicken thighs with salt, pepper, and Italian seasoning. Place the chicken in the hot skillet, skin-side down, and sear for about 4 to 5 minutes until browned. Flip and continue to cook the other side for another 4 minutes. Set the chicken aside when done.

Step 3: In the now-empty skillet, melt 2 tbsp butter. Then, add the onion and saute for about 3 to 4 minutes or until the onion has browned. Add the chopped garlic along with thyme and 1 tsp Italian seasoning. Continue to cook for a minute more.

Step 4: Stir in the flour and cook for only 1 minute until no longer white. Then, gradually pour in the wine, adjusting the heat to high. Cook for a couple of minutes more.

Step 5: Pour in the chicken stock and heavy cream. Mix well and cook for additional 5 minutes until the mixture has slightly reduced. To taste, season with salt and pepper. Place the chicken back into the skillet.

Step 6: Place the skillet in the preheated oven for about 35 minutes. Remove the pan from the oven when done, and serve the chicken thighs right away garnished with some fresh thyme. Enjoy with rice, mashed potatoes, or roasted veggies.

June 29, 2022 0 comment
0 FacebookTwitterPinterestEmail
General Recipes

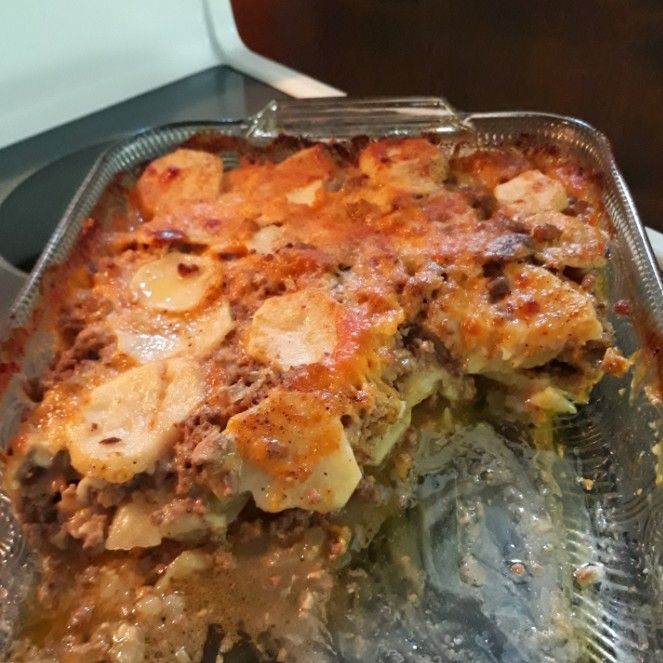
Meat and Potato Casserole

by Rebecca June 29, 2022
written by Rebecca

This meat and potato casserole is one filling meal that you can throw together as a last-minute dinner. A very comforting casserole that is made with only a few simple ingredients and ready in a breeze. It’s meaty, cheesy, and loaded with flavor. This casserole has been one of my favorites for years, and I will never get tired of this incredible casserole. It’s a staple and a no-fuss to make!

Ingredients

1 onion, chopped

1 pound lean ground beef or venison

1/4 c. milk or cream

1 1/2 c. cream of mushroom soup (I had leftover homemade soup in the fridge), or 1 can of cream of mushroom soup (which might make it not gluten-free)

1/2 c. stock (any kind)

3 c. thinly sliced potatoes (about 5 potatoes)

1 1/2 c. shredded cheese

1 teaspoon each of any of these: garlic powder, paprika, or go more savory with rosemary (optional)

Salt and pepper to taste

How to make Meat and Potato Casserole

Step 1: Prepare the oven. Preheat it to 350 degrees F. Ready an 11 x 7-inch glass baking dish. Lightly grease and set aside.

Step 2: Cook the onions and ground meat in a medium frying pan. Add the seasoning (optional) and season with pepper. Cook until done and drain the excess grease.

Step 3: Place the soup, stock, milk, salt, and pepper in a medium bowl. Mix well until combined.

Step 4: Into the prepared baking dish, layer half of the potatoes. On top, pour some soup and sprinkle with half of the meat, then cheese. Do the same with the rest of the potatoes, soup, meat, and cheese.

Step 5: Using a lightly greased aluminium foil, tent the dish and place it in the preheated oven. Bake the casserole for about 1 to 1 1/2 hours until the potatoes are tender.

Meat and Potato Casserole

Rebecca This meat and potato casserole is one filling meal that you can throw together as a last-minute dinner. A very comforting casserole that is made with only a few simple… General Recipes Meat and Potato Casserole European Print This
Nutrition facts: 200 calories 20 grams fat
Rating: 5.0/5
( 1 voted )

Ingredients

  • 1 onion, chopped
  • 1 pound lean ground beef or venison
  • 1/4 c. milk or cream
  • 1 1/2 c. cream of mushroom soup (I had leftover homemade soup in the fridge), or 1 can of cream of mushroom soup (which might make it not gluten-free)
  • 1/2 c. stock (any kind)
  • 3 c. thinly sliced potatoes (about 5 potatoes)
  • 1 1/2 c. shredded cheese
  • 1 teaspoon each of any of these: garlic powder, paprika, or go more savory with rosemary (optional)
  • Salt and pepper to taste

Instructions

Step 1: Prepare the oven. Preheat it to 350 degrees F. Ready an 11 x 7-inch glass baking dish. Lightly grease and set aside.

Step 2: Cook the onions and ground meat in a medium frying pan. Add the seasoning (optional) and season with pepper. Cook until done and drain the excess grease.

Step 3: Place the soup, stock, milk, salt, and pepper in a medium bowl. Mix well until combined.

Step 4: Into the prepared baking dish, layer half of the potatoes. On top, pour some soup and sprinkle with half of the meat, then cheese. Do the same with the rest of the potatoes, soup, meat, and cheese.

Step 5: Using a lightly greased aluminium foil, tent the dish and place it in the preheated oven. Bake the casserole for about 1 to 1 1/2 hours until the potatoes are tender.

June 29, 2022 0 comment
0 FacebookTwitterPinterestEmail
General Recipes

TACO CASSEROLE RECIPE

by Rebecca June 29, 2022
written by Rebecca

Prep Time: 5 mins | Cook Time: 35 mins | Total Time: 40 mins | Servings: 8

Enjoy taco salad in a casserole form with this easy taco casserole recipe. It’s made with ground beef and biscuit base, topped with layers of sour cream, lettuce, tomatoes, cheese, and olives. This taco casserole is another great dinner option perfect for busy weeknights.

This taco casserole is not only great for a filling weeknight dinner but also amazing for potlucks. If you love casserole and are always searching for an ultimate solution for an easy dinner, then you have to give this taco casserole a try. It’s an incredible dinner/potluck idea that everyone will surely enjoy! Put a fun twist to the classic taco salad with this simple taco casserole recipe.

Ingredients

4 large eggs

olives

2 pounds of ground beef

2 packets of taco seasoning

3/4 c. milk

2 c. chopped lettuce

1/2 c. sour cream

¾ – 1 c. chopped tomato

1 1/4 c. biscuit/baking mix

2 c. shredded cheddar cheese

dash pepper

HOW TO MAKE TACO CASSEROLE

Step 1: Prepare the oven. Preheat it to 400 degrees.

Step 2: In a large skillet, cook the beef over medium heat until browned. Drain the excess grease when done. To the meat, add the taco seasoning and prepare following the package directions.

Step 3: Into a greased 9 x 13-inch pan, add the meat and set aside.

Step 4: In a large bowl, whisk the eggs and milk. Add one and a quarter cup biscuit mix and pepper. Mix well until blended. Pour this over the meat. Place in the preheated oven and bake the casserole for about 20 to 25 minutes or until golden brown.

Step 5: Remove from the oven when done and allow the casserole to cool for a couple of minutes. On top of the casserole, spread the sour cream and top with lettuce, tomato, cheese, and olives.

Step 6: Serve the taco casserole warm. Enjoy!

Nutrition Facts:

Amount Per Serving: Calories 562, Calories from Fat 360, Fat 40g62%, Saturated Fat 18g113%, Cholesterol 213mg71%, Sodium 569mg25%, Potassium 474mg14%, Carbohydrates 14g5%, Sugar 4g4%, Protein 32g64%, Vitamin A 660IU13%, Vitamin C 0.7 mg1%, Calcium 317mg32%, Iron 3.4 mg19%

TACO CASSEROLE RECIPE

Rebecca Prep Time: 5 mins | Cook Time: 35 mins | Total Time: 40 mins | Servings: 8 Enjoy taco salad in a casserole form with this easy taco casserole recipe.… General Recipes TACO CASSEROLE RECIPE European Print This
Serves: 8 Prep Time: 5 mins Cooking Time: 35 mins 35 mins
Nutrition facts: 562 calories 40 fat
Rating: 5.0/5
( 1 voted )

Ingredients

  • 4 large eggs
  • olives
  • 2 pounds of ground beef
  • 2 packets of taco seasoning
  • 3/4 c. milk
  • 2 c. chopped lettuce
  • 1/2 c. sour cream
  • ¾ - 1 c. chopped tomato
  • 1 1/4 c. biscuit/baking mix
  • 2 c. shredded cheddar cheese
  • dash pepper

Instructions

Step 1: Prepare the oven. Preheat it to 400 degrees.

Step 2: In a large skillet, cook the beef over medium heat until browned. Drain the excess grease when done. To the meat, add the taco seasoning and prepare following the package directions.

Step 3: Into a greased 9 x 13-inch pan, add the meat and set aside.

Step 4: In a large bowl, whisk the eggs and milk. Add one and a quarter cup biscuit mix and pepper. Mix well until blended. Pour this over the meat. Place in the preheated oven and bake the casserole for about 20 to 25 minutes or until golden brown.

Step 5: Remove from the oven when done and allow the casserole to cool for a couple of minutes. On top of the casserole, spread the sour cream and top with lettuce, tomato, cheese, and olives.

Step 6: Serve the taco casserole warm. Enjoy!

June 29, 2022 0 comment
0 FacebookTwitterPinterestEmail
General Recipes

Crispy Chicken Burger with Honey Mustard Coleslaw

by Rebecca June 29, 2022
written by Rebecca

PREP TIME: 20 MINS | COOK TIME: 15 MINS | TOTAL TIME: 35 MINS | SERVINGS: 4 burgers

This chicken burger is a million better than takeout with crispy chicken, Honey Mustard Coleslaw, cheese, jalapenos, and crunchy lettuce on a toasted brioche bun. Do not be afraid to get creative. These burgers will guarantee the best burgers, no matter what!

INGREDIENTS

Chicken Marinade:

240 ml (1 c.) buttermilk

¼ teaspoon white pepper

½ teaspoon salt

3 large chicken breasts – sliced into long, thick strips

¼ teaspoon garlic salt

Crispy Chicken Coating:

½ teaspoon garlic salt

180 grams (1 ½ c.) plain (all-purpose) flour

½ teaspoon celery salt

1 teaspoon dried thyme

1 teaspoon baking powder

1 teaspoon paprika

1 teaspoon chili flakes

1 teaspoon salt

1 teaspoon ground black pepper

Honey Mustard Coleslaw:

4 tablespoons mayonnaise

1 medium carrot – peeled

1 tablespoon Dijon mustard

2 teaspoons lemon juice

1 tablespoon honey

pinch black pepper

⅓ white cabbage

Other Ingredients:

4 slices of Gouda cheese – I used the ready-sliced kind, or you can slice it yourself

vegetable oil – for deep frying

8 pieces of crunchy lettuce – I used the ‘O’ so sweet’ variety – but Romaine or Little Gem is great too

4 brioche buns – toasted

½ red onion – peeled and thinly sliced

1-2 jalapenos – sliced

How to make Crispy Chicken Burger with Honey Mustard Coleslaw

Step 1: In a bowl, place the chicken along with the buttermilk, salt, pepper, and garlic salt. Mix well. Cover the bowl and place in the fridge for at least 1 hour up to overnight.

Step 2: Prepare the oven. Preheat it to low heat.

Step 3: Heat the vegetable oil (at least 1 liter or 4 cups) in a large pan (or a preheated deep fat fryer).

Step 4: In the meantime, combine the crisping coating ingredients in a small bowl. Remove the chicken from the fridge and lift the chicken one at a time, letting the excess drip off. In the crispy coating mixture, dredge the chicken, making sure it is completely coated. On a tray, place the coated chicken and repeat with the remaining chicken.

Step 5: To the hot oil, add about 5 to 6 chicken tenders and cook for about 3 to 5 minutes until cooked in the middle and golden brown. Make sure not to overcrowd the pan.

Step 6: On a tray, place the cooked chicken and keep them warm in the oven while cooking the remaining chicken.

Step 7: Using a mandoline, julienne the cabbage and carrot. Alternately, you can thinly slice them by hand. Place the thinly sliced cabbage and carrot in a bowl along with the mayonnaise, mustard, honey, lemon juice, and black pepper. Mix well until combined. Tent the bowl and place it in the fridge until ready to use.

Step 8: To assemble, arrange the chicken tenders into four piles. On top, place the Gouda. Place inside the oven or grill for a few minutes until the cheese has melted.

Step 9: On four plates, place the bottom of the brioche buns and top with lettuce leaves and cheesy chicken pieces. On top, spoon the coleslaw and sprinkle with slices of red onion and jalapeno. Then, put the tops of the buns on top. Enjoy!

NUTRITION FACTS:

Calories: 791 kcal, Carbohydrates: 73g, Protein: 38g, Fat: 38g, Saturated Fat: 20g, Cholesterol: 100mg, Sodium: 2387mg, Potassium: 880mg, Fiber: 5g, Sugar: 15g, Vitamin A: 3560IU, Vitamin C: 36.3mg, Calcium: 462mg, Iron: 5.1mg

Crispy Chicken Burger with Honey Mustard Coleslaw

Rebecca PREP TIME: 20 MINS | COOK TIME: 15 MINS | TOTAL TIME: 35 MINS | SERVINGS: 4 burgers This chicken burger is a million better than takeout with crispy chicken,… General Recipes Crispy Chicken Burger with Honey Mustard Coleslaw European Print This
Serves: 4 Prep Time: 20 mins Cooking Time: 15 mins 15 mins
Nutrition facts: 791 calories 38 fat
Rating: 5.0/5
( 1 voted )

Ingredients

  • Chicken Marinade:
  • 240 ml (1 c.) buttermilk
  • ¼ teaspoon white pepper
  • ½ teaspoon salt
  • 3 large chicken breasts - sliced into long, thick strips
  • ¼ teaspoon garlic salt
  • Crispy Chicken Coating:
  • ½ teaspoon garlic salt
  • 180 grams (1 ½ c.) plain (all-purpose) flour
  • ½ teaspoon celery salt
  • 1 teaspoon dried thyme
  • 1 teaspoon baking powder
  • 1 teaspoon paprika
  • 1 teaspoon chili flakes
  • 1 teaspoon salt
  • 1 teaspoon ground black pepper
  • Honey Mustard Coleslaw:
  • 4 tablespoons mayonnaise
  • 1 medium carrot - peeled
  • 1 tablespoon Dijon mustard
  • 2 teaspoons lemon juice
  • 1 tablespoon honey
  • pinch black pepper
  • ⅓ white cabbage
  • Other Ingredients:
  • 4 slices of Gouda cheese - I used the ready-sliced kind, or you can slice it yourself
  • vegetable oil - for deep frying
  • 8 pieces of crunchy lettuce - I used the 'O' so sweet' variety - but Romaine or Little Gem is great too
  • 4 brioche buns - toasted
  • ½ red onion - peeled and thinly sliced
  • 1-2 jalapenos - sliced

Instructions

Step 1: In a bowl, place the chicken along with the buttermilk, salt, pepper, and garlic salt. Mix well. Cover the bowl and place in the fridge for at least 1 hour up to overnight.

Step 2: Prepare the oven. Preheat it to low heat.

Step 3: Heat the vegetable oil (at least 1 liter or 4 cups) in a large pan (or a preheated deep fat fryer).

Step 4: In the meantime, combine the crisping coating ingredients in a small bowl. Remove the chicken from the fridge and lift the chicken one at a time, letting the excess drip off. In the crispy coating mixture, dredge the chicken, making sure it is completely coated. On a tray, place the coated chicken and repeat with the remaining chicken.

Step 5: To the hot oil, add about 5 to 6 chicken tenders and cook for about 3 to 5 minutes until cooked in the middle and golden brown. Make sure not to overcrowd the pan.

Step 6: On a tray, place the cooked chicken and keep them warm in the oven while cooking the remaining chicken.

Step 7: Using a mandoline, julienne the cabbage and carrot. Alternately, you can thinly slice them by hand. Place the thinly sliced cabbage and carrot in a bowl along with the mayonnaise, mustard, honey, lemon juice, and black pepper. Mix well until combined. Tent the bowl and place it in the fridge until ready to use.

Step 8: To assemble, arrange the chicken tenders into four piles. On top, place the Gouda. Place inside the oven or grill for a few minutes until the cheese has melted.

Step 9: On four plates, place the bottom of the brioche buns and top with lettuce leaves and cheesy chicken pieces. On top, spoon the coleslaw and sprinkle with slices of red onion and jalapeno. Then, put the tops of the buns on top. Enjoy!

June 29, 2022 0 comment
0 FacebookTwitterPinterestEmail
General Recipes

Garlic Butter Baked Salmon Recipe

by Rebecca June 29, 2022
written by Rebecca

Prep Time: 10 mins | Cook Time: 20 mins | Total Time: 30 mins | Servings: 4

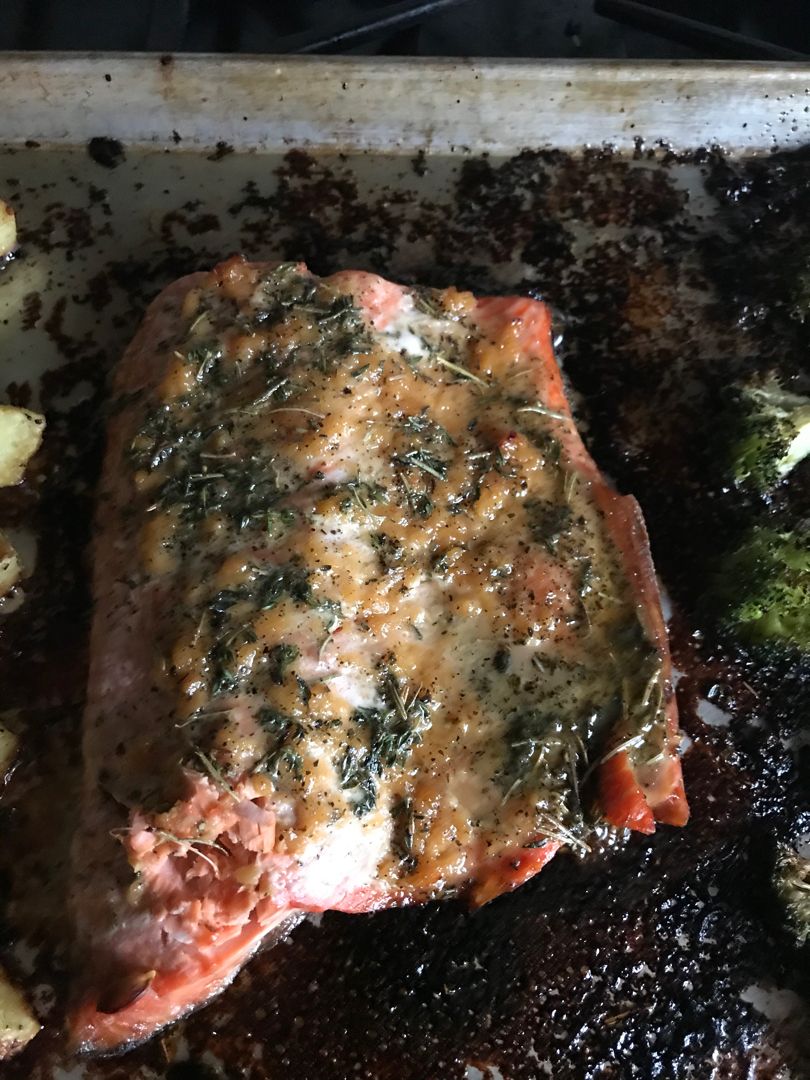
This garlic butter-baked salmon is an amazing sheet pan dinner that you can easily make in under thirty minutes. The salmon is brushed with a simple garlic butter sauce an baked with broccoli florets. A very easy, quick, and versatile recipe. Missing some ingredients, that’s okay. You can always replace butter with olive oil. If desired, you can also skip the broccoli or throw in some asparagus instead. Either way, this garlic butter-baked salmon is incredibly delicious!

Ingredients

SALMON AND VEGETABLES:

4 to 6 c. broccoli florets

4 (6 oz. each) salmon fillets

GARLIC BUTTER SAUCE:

6 tbsp unsalted butter, melted

4 cloves garlic, minced

1 tbsp light brown sugar

1/2 tsp dried thyme

1/2 tsp dried rosemary

1 lemon, halved, divided

1/2 tsp dried oregano

chopped fresh parsley, for garnish

salt and fresh ground pepper, to taste

How to make Garlic Butter Baked Salmon

Step 1: Prepare the oven. Preheat it to 400 degrees F. Using cooking spray, grease a sheet pan.

Step 2: On the prepared sheet pan, arrange the broccoli florets and salmon fillets. On each fillet, rub the minced garlic and set it aside.

Step 3: Place the melted butter, brown sugar, oregano, thyme, and rosemary in a mixing bowl. Mix well until combined. Then, pour this over the salmon and veggies. Squeeze half of the lemon over everything and sprinkle with salt and pepper. Bake in the preheated oven for about 15 minutes or until the fish flakes easily using a fork and the internal temperature of the salmon reaches 145 degrees.

Step 4: Serve the garlic butter, baked salmon right away garnished with parsley and lemon slices. Enjoy!

Notes:

TO STORE COOKED SALMON:

In an airtight container, keep the completely cooled salmon and store it in the fridge for up to 3 to 4 days.

To freeze, completely cooled the cooked salmon and place it in covered airtight containers or heavy-duty freezer bags. Then, freeze for up to 4 months.

WW FREESTYLE POINTS: 8

Nutrition Facts:

Amount Per Serving: Calories 447, Calories from Fat 252, Fat 28g43%, Saturated Fat 12g60%, Cholesterol 138mg46%, Sodium 838mg35%, Potassium 1170mg33%, Carbohydrates 12g4%, Fiber 3g12%, Sugar 5g6%, Protein 37g74%, Vitamin A 1160IU23%, Vitamin C 96.4 mg117%, Calcium 85mg9%, Iron 2.5 mg14%

Garlic Butter Baked Salmon Recipe

Rebecca Prep Time: 10 mins | Cook Time: 20 mins | Total Time: 30 mins | Servings: 4 This garlic butter-baked salmon is an amazing sheet pan dinner that you can… General Recipes Garlic Butter Baked Salmon Recipe European Print This
Serves: 4 Prep Time: 10 mins Cooking Time: 20 mins 20 mins
Nutrition facts: 447 calories 28 fat
Rating: 5.0/5
( 1 voted )

Ingredients

  • SALMON AND VEGETABLES:
  • 4 to 6 c. broccoli florets
  • 4 (6 oz. each) salmon fillets
  • GARLIC BUTTER SAUCE:
  • 6 tbsp unsalted butter, melted
  • 4 cloves garlic, minced
  • 1 tbsp light brown sugar
  • 1/2 tsp dried thyme
  • 1/2 tsp dried rosemary
  • 1 lemon, halved, divided
  • 1/2 tsp dried oregano
  • chopped fresh parsley, for garnish
  • salt and fresh ground pepper, to taste

Instructions

Step 1: Prepare the oven. Preheat it to 400 degrees F. Using cooking spray, grease a sheet pan.

Step 2: On the prepared sheet pan, arrange the broccoli florets and salmon fillets. On each fillet, rub the minced garlic and set it aside.

Step 3: Place the melted butter, brown sugar, oregano, thyme, and rosemary in a mixing bowl. Mix well until combined. Then, pour this over the salmon and veggies. Squeeze half of the lemon over everything and sprinkle with salt and pepper. Bake in the preheated oven for about 15 minutes or until the fish flakes easily using a fork and the internal temperature of the salmon reaches 145 degrees.

Step 4: Serve the garlic butter, baked salmon right away garnished with parsley and lemon slices. Enjoy!

Notes

TO STORE COOKED SALMON: In an airtight container, keep the completely cooled salmon and store it in the fridge for up to 3 to 4 days. To freeze, completely cooled the cooked salmon and place it in covered airtight containers or heavy-duty freezer bags. Then, freeze for up to 4 months. WW FREESTYLE POINTS: 8

June 29, 2022 0 comment
0 FacebookTwitterPinterestEmail
Newer Posts
Older Posts

Popular Posts

  • 1

    Crispy Crunchy Parmesan Potatoes

    March 21, 2020
  • 2

    CROCK POT SMOTHERED PORK CHOPS

    March 21, 2020
  • Facebook
  • Twitter

@2019 - All Right Reserved.


Back To Top