Cook it once
  • Home
  • Privacy Policy
  • Recipes
    • KETO
    • LC
    • WW
  • Tips
  • Contact
Cook it once
  • Home
  • Privacy Policy
  • Recipes
    • KETO
    • LC
    • WW
  • Tips
  • Contact
Category:

General Recipes

General Recipes

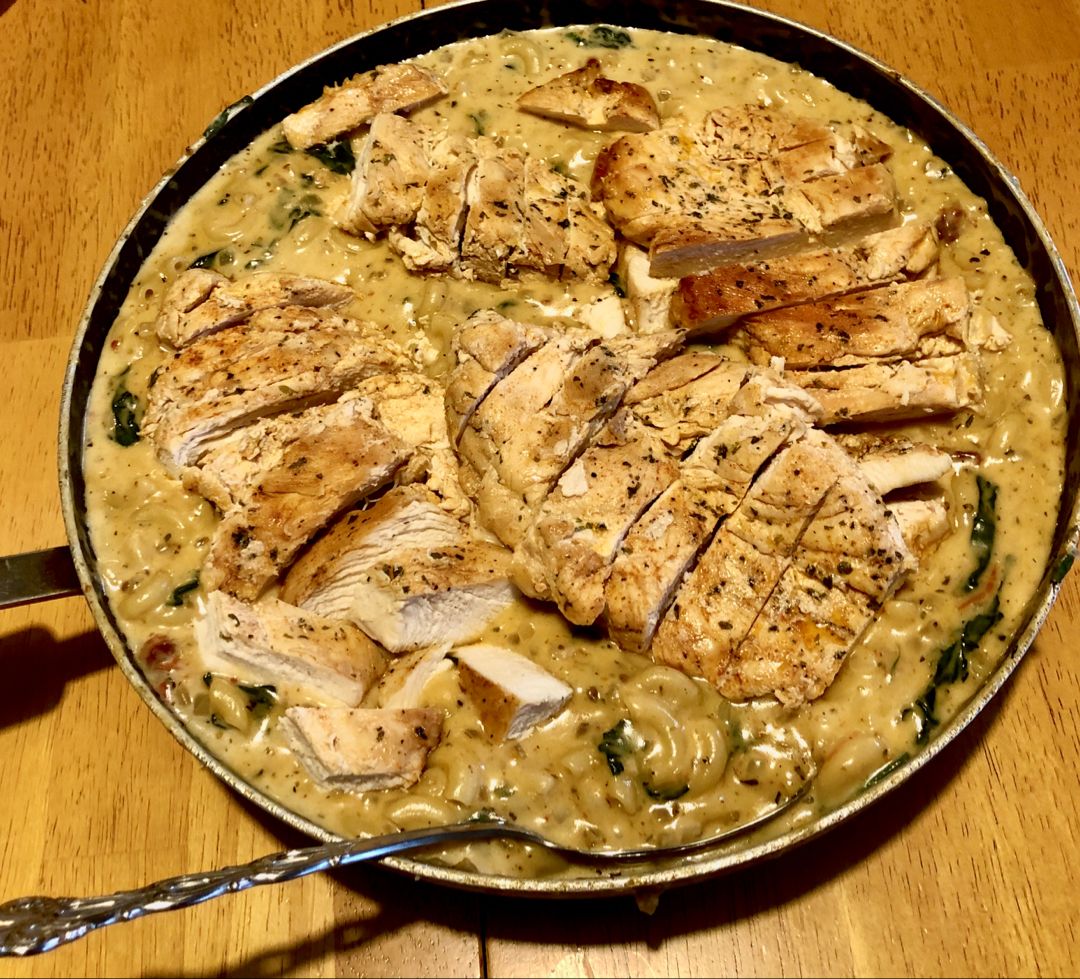
TUSCAN CHICKEN MAC AND CHEESE (ONE POT, STOVE TOP)

by Rebecca June 30, 2022
written by Rebecca

PREP TIME: 10 MINS | COOK TIME: 30 MINS | TOTAL TIME: 40 MINS | SERVES: 6 people

This Tuscan Chicken Mac and Cheese is a great one-pot meal that you can easily make on your stovetop in a breeze. Insanely good I’ll bet you’ll never go back to your traditional mac and cheese!

INGREDIENTS

2 tbsp butter

1 tbsp oil, divided (use olive or canola oil)

2 large skinless, boneless chicken breasts, pounded to 1” thickness (or 4 boneless and skinless chicken thigh fillets)

1/2 tsp paprika (sweet or smoky)

1/2 tsp dried parsley

1 small yellow onion, chopped

6 cloves garlic, finely diced

9 ounces (250 grams) jarred sun-dried tomato strips in oil (reserve 2 tbsp of oil and drain the rest)

1/3 c. white wine OPTIONAL (use chicken broth instead if you wish)

3 level tbsp flour

3 c. milk OR light cream or half and half, divided

2 c. chicken broth

2 tsp dried Italian herbs

3 c. baby spinach leaves

1 c. fresh grated Parmesan cheese

1/2 c. grated cheese, Cheddar or Gruyere

3/4 c. mozzarella cheese, shredded

10 oz (300 grams) elbow macaroni, uncooked (3 c.)

2 tbsp fresh parsley, chopped

Salt and pepper, to season

HOW TO MAKE TUSCAN CHICKEN MAC AND CHEESE (ONE POT, STOVETOP)

Step 1: Sprinkle the chicken with salt, pepper, paprika, and dried parsley. Then, drizzle the chicken with 2 tsp oil.

Step 2: In a large (30cm or 12-inch) pot or pan, heat the rest of the oil over medium-high heat. Once the oil is hot, add the chicken and sear until both sides are golden brown, completely cooked, and no longer pink in the center. To a warm plate, transfer the chicken and cover with foil. Set aside.

Step 3: Add the butter to the now-empty pan. Then, add the onion and garlic and fry for about 2 minutes, stirring often, until the onion is translucent. Next, pour in the white wine and let everything simmer for about 5 minutes or until reduced.

Step 4: To the pan, add the sun-dried tomatoes with 2 tbsp of the sun-dried tomato oil from the jar. Continue to cook for another 1 to 2 minutes.

Step 5: Add the flour, stir, and cook for a minute more. Pour in the broth, 2 1/2 cups of milk (or cream/half and a half), and add the herbs, salt, and pepper. Bring everything to a very low simmer.

Step 6: To the pot, add the dry macaroni. Stir often until the mixture comes to a simmer. Adjust the heat to medium-low while stirring regularly. Cook for additional 9 to 10 minutes or until the macaroni is al dente and the sauce has thickened. Stir in the spinach and cook until wilted.

Step 7: Remove the pot from the heat and quickly stir in all the cheese. To taste, season with more salt and pepper. You can add the rest of the half cup milk or cream in 1/4 c increments if the sauce is too thick until you reached your preferred thickness.

Step 8: Into strips, slice the chicken and add them to the pasta along with any juices left from the chicken. Stir well. Add the parsley and stir again.

Step 9: Serve right away. Enjoy!

NOTES:

For maximum flavor, don’t skip the full-fat milk. If not available, you can swap it with low-fat milk, light cream, heavy cream, or evaporated milk.

Feel free to add half a cup of light cream or heavy cream for an extra layer of flavor. Add this right before adding the spinach.

NUTRITION FACTS:

Calories: 586 kcal | Carbohydrates: 51g | Protein: 33g | Fat: 25g | Saturated Fat: 11g | Cholesterol: 79mg | Sodium: 950mg | Potassium: 1318mg | Fiber: 4g | Sugar: 8g | Vitamin A: 2735IU | Vitamin C: 58mg | Calcium: 531mg | Iron: 3mg
TUSCAN CHICKEN MAC AND CHEESE (ONE POT, STOVE TOP)

Rebecca PREP TIME: 10 MINS | COOK TIME: 30 MINS | TOTAL TIME: 40 MINS | SERVES: 6 people This Tuscan Chicken Mac and Cheese is a great one-pot meal that… General Recipes TUSCAN CHICKEN MAC AND CHEESE (ONE POT, STOVE TOP) European Print This
Serves: 6 Prep Time: 10 mins Cooking Time: 30 mins 30 mins
Nutrition facts: 586 calories 25 fat
Rating: 5.0/5
( 1 voted )

Ingredients

  • 2 tbsp butter
  • 1 tbsp oil, divided (use olive or canola oil)
  • 2 large skinless, boneless chicken breasts, pounded to 1” thickness (or 4 boneless and skinless chicken thigh fillets)
  • 1/2 tsp paprika (sweet or smoky)
  • 1/2 tsp dried parsley
  • 1 small yellow onion, chopped
  • 6 cloves garlic, finely diced
  • 9 ounces (250 grams) jarred sun-dried tomato strips in oil (reserve 2 tbsp of oil and drain the rest)
  • 1/3 c. white wine OPTIONAL (use chicken broth instead if you wish)
  • 3 level tbsp flour
  • 3 c. milk OR light cream or half and half, divided
  • 2 c. chicken broth
  • 2 tsp dried Italian herbs
  • 3 c. baby spinach leaves
  • 1 c. fresh grated Parmesan cheese
  • 1/2 c. grated cheese, Cheddar or Gruyere
  • 3/4 c. mozzarella cheese, shredded
  • 10 oz (300 grams) elbow macaroni, uncooked (3 c.)
  • 2 tbsp fresh parsley, chopped
  • Salt and pepper, to season

Instructions

Step 1: Sprinkle the chicken with salt, pepper, paprika, and dried parsley. Then, drizzle the chicken with 2 tsp oil.

Step 2: In a large (30cm or 12-inch) pot or pan, heat the rest of the oil over medium-high heat. Once the oil is hot, add the chicken and sear until both sides are golden brown, completely cooked, and no longer pink in the center. To a warm plate, transfer the chicken and cover with foil. Set aside.

Step 3: Add the butter to the now-empty pan. Then, add the onion and garlic and fry for about 2 minutes, stirring often, until the onion is translucent. Next, pour in the white wine and let everything simmer for about 5 minutes or until reduced.

Step 4: To the pan, add the sun-dried tomatoes with 2 tbsp of the sun-dried tomato oil from the jar. Continue to cook for another 1 to 2 minutes.

Step 5: Add the flour, stir, and cook for a minute more. Pour in the broth, 2 1/2 cups of milk (or cream/half and a half), and add the herbs, salt, and pepper. Bring everything to a very low simmer.

Step 6: To the pot, add the dry macaroni. Stir often until the mixture comes to a simmer. Adjust the heat to medium-low while stirring regularly. Cook for additional 9 to 10 minutes or until the macaroni is al dente and the sauce has thickened. Stir in the spinach and cook until wilted.

Step 7: Remove the pot from the heat and quickly stir in all the cheese. To taste, season with more salt and pepper. You can add the rest of the half cup milk or cream in 1/4 c increments if the sauce is too thick until you reached your preferred thickness.

Step 8: Into strips, slice the chicken and add them to the pasta along with any juices left from the chicken. Stir well. Add the parsley and stir again.

Step 9: Serve right away. Enjoy!

Notes

For maximum flavor, don’t skip the full-fat milk. If not available, you can swap it with low-fat milk, light cream, heavy cream, or evaporated milk. Feel free to add half a cup of light cream or heavy cream for an extra layer of flavor. Add this right before adding the spinach.
June 30, 2022 0 comment
0 FacebookTwitterPinterestEmail
General Recipes

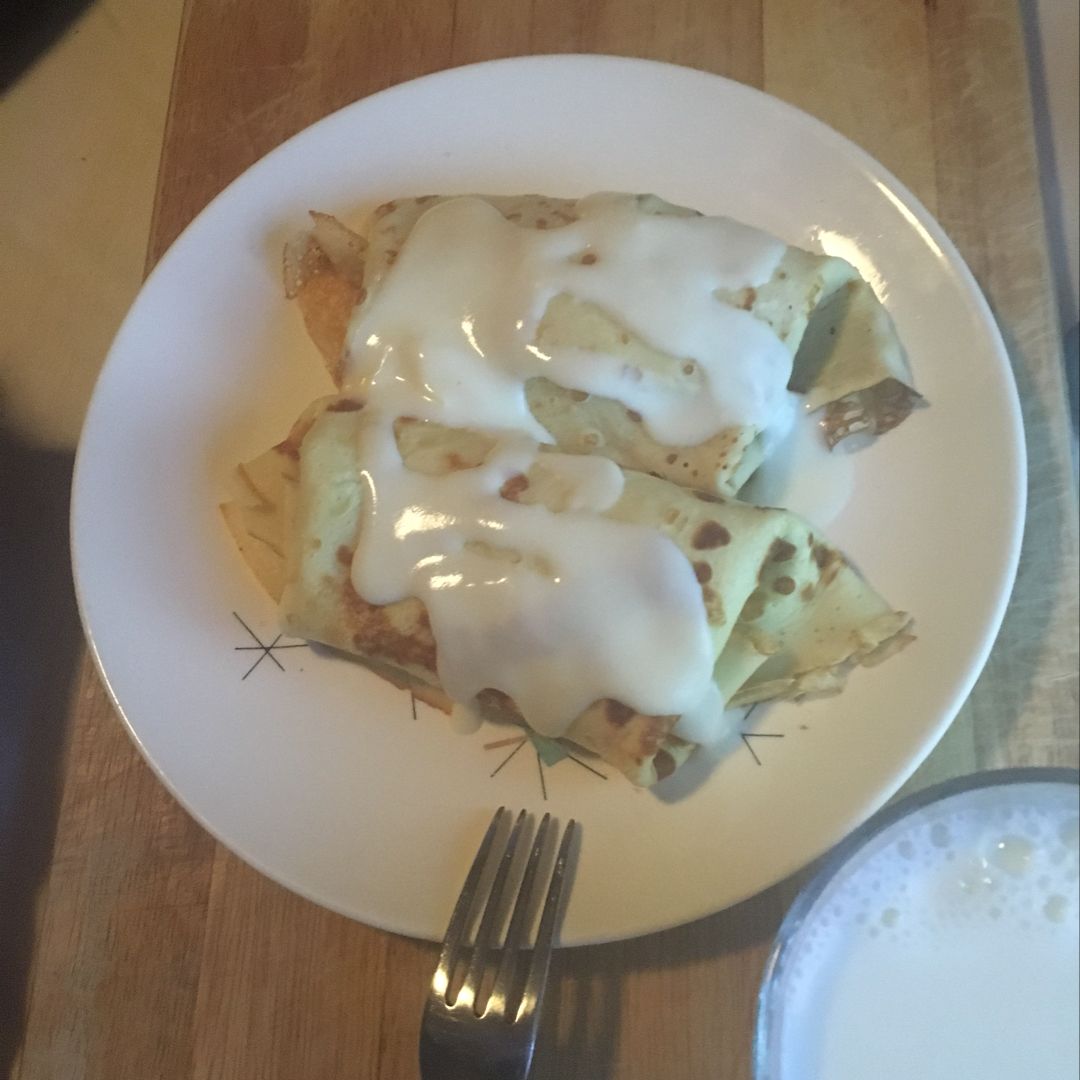
CHICKEN AND MUSHROOM CREPES WITH BECHAMEL

by Rebecca June 30, 2022
written by Rebecca

Crepes are amazing. Either dessert or savory. One of my favorite crepe recipes is this easy chicken and mushroom crepes with Bechamel. Delicious, incredibly easy to whip up, and perfect for parties!

Ingredients

CREPES:

2 tbsp melted butter

3 large eggs

1 c. milk

2/3 c. flour

Chicken- Mushroom Bechamel Filling:

3 tbsp flour

4 tbsp butter, divided

2 c. milk

1 garlic clove, pressed

¼ c. white wine

1 ½ c. mushroom sliced

1 ½ c. chicken cooked and cubed

½ tsp fresh thyme

½ tsp salt

¼ tsp pepper

HOW TO MAKE CHICKEN AND MUSHROOM CREPES WITH BECHAMEL

CREPES:

Step 1: In a blender, place the eggs, flour, and milk and process until mixed. Allow the crepe batter to rest for at least 20 minutes.

Step 2: Brush a hot crepe pan with melted butter and pour scant 1/3 c of batter into the pan. Tilt the pan to coat and cook the butter over medium heat for about 1 to 2 minutes until the top of the crepe looks dull and the edges are easily pulled up. Under the crepe, run a wide metal spatula and carefully flip the crepe. Continue to cook the crepe for another minute. Repeat with the rest of the crepe batter.

Step 3: Stake the crepes and set them aside.

Chicken- Mushroom Bechamel Filling:

Step 4: In a chef’s pan, melt 1 tbsp butter over medium heat. Then, add the mushrooms, garlic, and thyme. Cook for about 8 minutes until the mushrooms are tender and any liquid has evaporated.

Step 5: Melt the rest of the 3 tbsp butter in a saucepan over medium heat. Once the butter has melted, add the flour to the pan and cook for approximately 2 minutes until you have a mixture that resembles a paste. Pour in the milk, stirring constantly until blended. Continue to cook for another 3 to 4 minutes or until the mixture has thickened. Next, pour in the wine and season with salt and pepper. Add the chicken and mushrooms and cook for an additional 2 to 3 minutes.

To assemble:

Step 6: Down the middle of each crepe, ladle about a half cup of the mixture. Fold each edge of the crepe and roll.

CHICKEN AND MUSHROOM CREPES WITH BECHAMEL

Rebecca Crepes are amazing. Either dessert or savory. One of my favorite crepe recipes is this easy chicken and mushroom crepes with Bechamel. Delicious, incredibly easy to whip up, and perfect… General Recipes CHICKEN AND MUSHROOM CREPES WITH BECHAMEL European Print This
Nutrition facts: 200 calories 20 grams fat
Rating: 5.0/5
( 1 voted )

Ingredients

  • CREPES:
  • 2 tbsp melted butter
  • 3 large eggs
  • 1 c. milk
  • 2/3 c. flour
  • Chicken- Mushroom Bechamel Filling:
  • 3 tbsp flour
  • 4 tbsp butter, divided
  • 2 c. milk
  • 1 garlic clove, pressed
  • ¼ c. white wine
  • 1 ½ c. mushroom sliced
  • 1 ½ c. chicken cooked and cubed
  • ½ tsp fresh thyme
  • ½ tsp salt
  • ¼ tsp pepper

Instructions

CREPES:

Step 1: In a blender, place the eggs, flour, and milk and process until mixed. Allow the crepe batter to rest for at least 20 minutes.

Step 2: Brush a hot crepe pan with melted butter and pour scant 1/3 c of batter into the pan. Tilt the pan to coat and cook the butter over medium heat for about 1 to 2 minutes until the top of the crepe looks dull and the edges are easily pulled up. Under the crepe, run a wide metal spatula and carefully flip the crepe. Continue to cook the crepe for another minute. Repeat with the rest of the crepe batter.

Step 3: Stake the crepes and set them aside.

Chicken- Mushroom Bechamel Filling:

Step 4: In a chef’s pan, melt 1 tbsp butter over medium heat. Then, add the mushrooms, garlic, and thyme. Cook for about 8 minutes until the mushrooms are tender and any liquid has evaporated.

Step 5: Melt the rest of the 3 tbsp butter in a saucepan over medium heat. Once the butter has melted, add the flour to the pan and cook for approximately 2 minutes until you have a mixture that resembles a paste. Pour in the milk, stirring constantly until blended. Continue to cook for another 3 to 4 minutes or until the mixture has thickened. Next, pour in the wine and season with salt and pepper. Add the chicken and mushrooms and cook for an additional 2 to 3 minutes.

To assemble:

Step 6: Down the middle of each crepe, ladle about a half cup of the mixture. Fold each edge of the crepe and roll.

June 30, 2022 0 comment
0 FacebookTwitterPinterestEmail
General Recipes

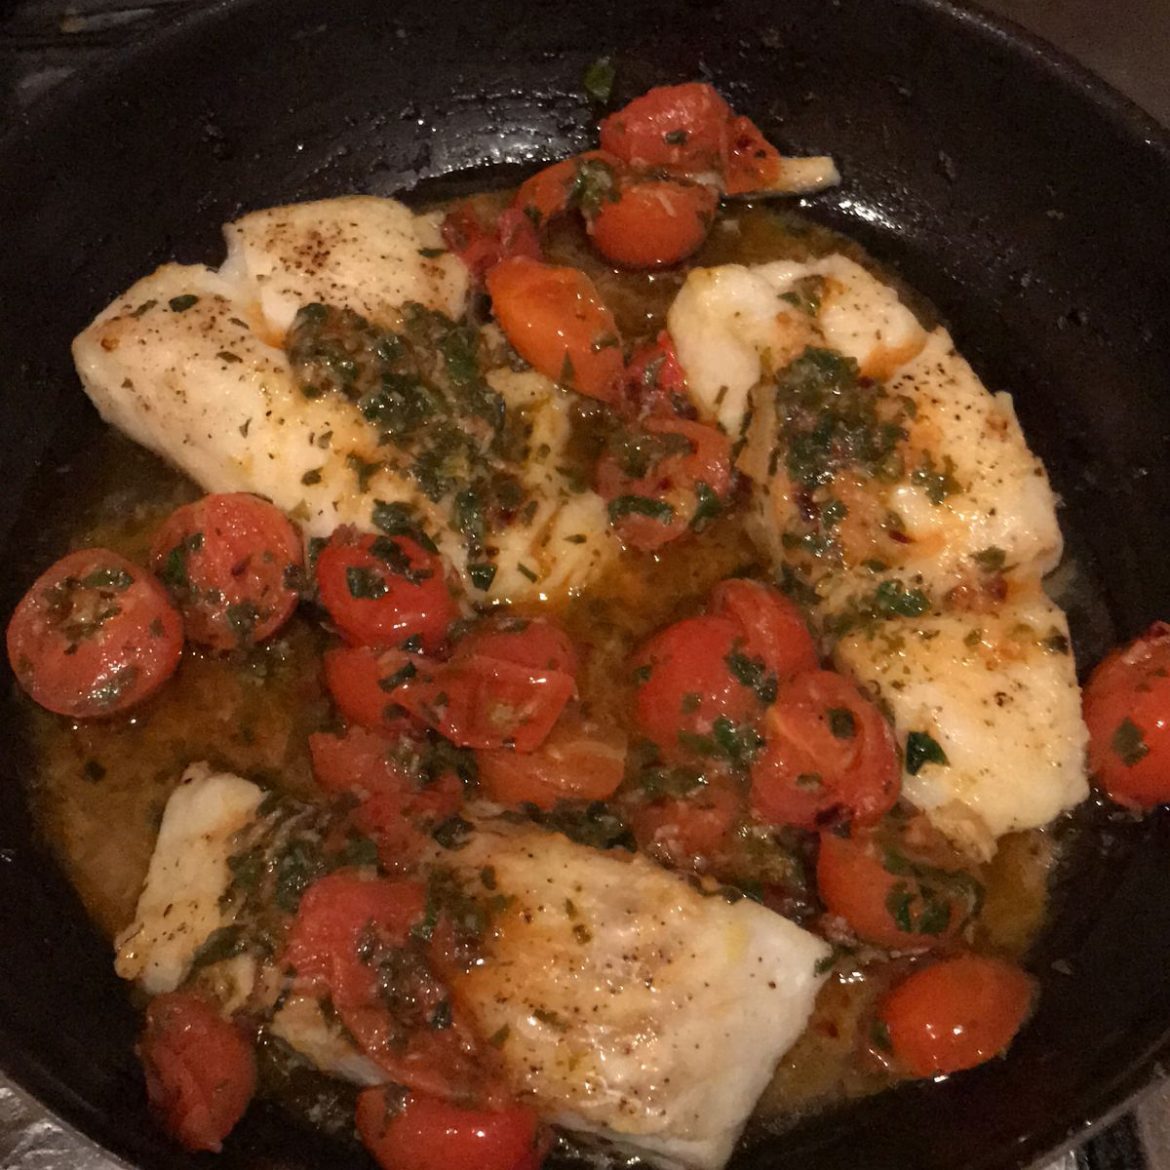
Pan-Seared Cod in White Wine Tomato Basil Sauce

by Rebecca June 30, 2022
written by Rebecca

PREP TIME: 15 MINS | COOK TIME: 25 MINS | TOTAL TIME: 40 MINS | SERVINGS: 4

Pan-seared cod in a scrumptious white wine, tomato basil sauce. This cod dish is another excellent dinner option that you can easily make in no time. If you love seafood, I’m pretty sure that you’ll enjoy this flaky and tender cod!

Ingredients

White Wine Tomato Basil Sauce:

1-pint cherry tomatoes, sliced in half

1/4 tsp crushed red pepper flakes

2 tbsp olive oil

3 large cloves garlic, finely minced

1/4 c. dry white wine

2 tbsp fresh lemon juice

1/2 tsp fresh lemon zest

1 tsp granulated sugar

1/2 c. fresh basil, finely chopped

1/4 tsp fresh ground black pepper (more to taste)

1/2 tsp salt (more to taste)

Cod:

1 and 1/2 lbs fresh cod, cut into 4 fillets (or four 6-oz. fillets)

Salt and pepper

2 tbsp olive oil

How to make Pan-Seared Cod in White Wine Tomato Basil Sauce

White Wine Tomato Basil Sauce:

Step 1: In a large saute pan, heat the oil over medium heat. Once the oil is hot, add the crushed red pepper flakes and garlic to the pan and saute for about a minute or until the garlic is aromatic. Next, add the cherry tomatoes and continue to cook for another 9 to 12 minutes, stirring often, until soft and blistering, but still hold their form. Then, pour in the white wine, stir, and let everything come to a gentle simmer before stirring in the basil, lemon juice, lemon zest, salt, sugar, and pepper. Cook for additional 2 minutes. Into a bowl, transfer the sauce when done, and set aside.

Cod:

Step 2: In a large saute pan, heat the oil over medium heat. In the meantime, pat the cod dry using paper towels and season both sides with salt and pepper. Once the oil is hot, add the cod to the pan and cook for about 3 minutes or until golden brown. Flip and cook the other side for additional 3 to 4 minutes or until completely cooked.

Step 3: Over the cod, pour the white wine, tomato basil sauce and allow the sauce to warm up for about 1 minute.

Step 4: Take the pan off the heat and serve the cod immediately. Enjoy!

Pan-Seared Cod in White Wine Tomato Basil Sauce

Rebecca PREP TIME: 15 MINS | COOK TIME: 25 MINS | TOTAL TIME: 40 MINS | SERVINGS: 4 Pan-seared cod in a scrumptious white wine, tomato basil sauce. This cod dish… General Recipes Pan-Seared Cod in White Wine Tomato Basil Sauce European Print This
Serves: 4 Prep Time: 15 mins Cooking Time: 25 mins 25 mins
Nutrition facts: 200 calories 20 grams fat
Rating: 5.0/5
( 1 voted )

Ingredients

  • White Wine Tomato Basil Sauce:
  • 1-pint cherry tomatoes, sliced in half
  • 1/4 tsp crushed red pepper flakes
  • 2 tbsp olive oil
  • 3 large cloves garlic, finely minced
  • 1/4 c. dry white wine
  • 2 tbsp fresh lemon juice
  • 1/2 tsp fresh lemon zest
  • 1 tsp granulated sugar
  • 1/2 c. fresh basil, finely chopped
  • 1/4 tsp fresh ground black pepper (more to taste)
  • 1/2 tsp salt (more to taste)
  • Cod:
  • 1 and 1/2 lbs fresh cod, cut into 4 fillets (or four 6-oz. fillets)
  • Salt and pepper
  • 2 tbsp olive oil

Instructions

White Wine Tomato Basil Sauce:

Step 1: In a large saute pan, heat the oil over medium heat. Once the oil is hot, add the crushed red pepper flakes and garlic to the pan and saute for about a minute or until the garlic is aromatic. Next, add the cherry tomatoes and continue to cook for another 9 to 12 minutes, stirring often, until soft and blistering, but still hold their form. Then, pour in the white wine, stir, and let everything come to a gentle simmer before stirring in the basil, lemon juice, lemon zest, salt, sugar, and pepper. Cook for additional 2 minutes. Into a bowl, transfer the sauce when done, and set aside.

Cod:

Step 2: In a large saute pan, heat the oil over medium heat. In the meantime, pat the cod dry using paper towels and season both sides with salt and pepper. Once the oil is hot, add the cod to the pan and cook for about 3 minutes or until golden brown. Flip and cook the other side for additional 3 to 4 minutes or until completely cooked.

Step 3: Over the cod, pour the white wine, tomato basil sauce and allow the sauce to warm up for about 1 minute.

Step 4: Take the pan off the heat and serve the cod immediately. Enjoy!

June 30, 2022 0 comment
0 FacebookTwitterPinterestEmail
General Recipes

Puff-Pastry Baked Hotdogs

by Rebecca June 30, 2022
written by Rebecca

Prep Time: 10 mins | Cook Time: 25 mins | Total Time: 35 mins | Servings: 12

These amazing puff-pastry-baked hotdogs are a delicious treat for all ages! Sausages wrapped around flaky crust with gooey cheese. To make these hotdogs, you only need three main ingredients. These tasty hotdogs are perfect for lunch, light dinner, or even snacks.

Whenever I am craving a lighter lunch or dinner, one of my go-to is this puff-pastry-baked hotdog. They are not only delicious, but incredibly easy to make using simple ingredients. My kids are always very excited whenever I make these hotdogs. During the weekend, and I have guests coming over, I make sure to throw together a big batch as these puff-pastry baked hotdogs are quickly gone! The sesame seeds are optional, but are highly recommended! Also, you are welcome to use your favorite hotdog sausage or easy-melt cheese.

Ingredients

1 egg, lightly beaten

2 rolls of Frozen Puff-Pastry defrosted

12 slices Processed Gouda Cheese (or use any easy melt varieties)

Sesame Seeds to sprinkle (optional)

12 Frankfurter Sausages (or your favorite Hotdog Sausage)

How to make Puff-Pastry Baked Hotdogs

Step 1: Prepare the oven. Preheat it to 200 degrees C or 400 degrees F. Using the baking paper, line 2 baking sheets.

Step 2: After unrolling the puff pastry, cut them into 6 rectangular pieces.

Step 3: Slice each sausage lengthwise. Be very careful not to cut all the way through. Into the slits of the sausages, press the processed cheese, then pinch the slits close.

Step 4: In the middle of a puff pastry, place a sausage, open-side down. Then, fold over the sides and lightly brush with water. Seal the pastry and lay them down on the baking sheet, seam-side down. Do the same with the remaining ingredients. Make sure to leave a little gap between each hotdog.

Step 5: With egg, brush each hotdog and sprinkle with sesame seeds (optional). Place in the preheated oven and bake for about 25 minutes or until the hotdogs are puffed and golden.

Puff-Pastry Baked Hotdogs

Rebecca Prep Time: 10 mins | Cook Time: 25 mins | Total Time: 35 mins | Servings: 12 These amazing puff-pastry-baked hotdogs are a delicious treat for all ages! Sausages wrapped… General Recipes Puff-Pastry Baked Hotdogs European Print This
Serves: 12 Prep Time: 10 mins Cooking Time: 25 mins 25 mins
Nutrition facts: 200 calories 20 grams fat
Rating: 5.0/5
( 1 voted )

Ingredients

  • 1 egg, lightly beaten
  • 2 rolls of Frozen Puff-Pastry defrosted
  • 12 slices Processed Gouda Cheese (or use any easy melt varieties)
  • Sesame Seeds to sprinkle (optional)
  • 12 Frankfurter Sausages (or your favorite Hotdog Sausage)

Instructions

Step 1: Prepare the oven. Preheat it to 200 degrees C or 400 degrees F. Using the baking paper, line 2 baking sheets.

Step 2: After unrolling the puff pastry, cut them into 6 rectangular pieces.

Step 3: Slice each sausage lengthwise. Be very careful not to cut all the way through. Into the slits of the sausages, press the processed cheese, then pinch the slits close.

Step 4: In the middle of a puff pastry, place a sausage, open-side down. Then, fold over the sides and lightly brush with water. Seal the pastry and lay them down on the baking sheet, seam-side down. Do the same with the remaining ingredients. Make sure to leave a little gap between each hotdog.

Step 5: With egg, brush each hotdog and sprinkle with sesame seeds (optional). Place in the preheated oven and bake for about 25 minutes or until the hotdogs are puffed and golden.

June 30, 2022 0 comment
0 FacebookTwitterPinterestEmail
General Recipes

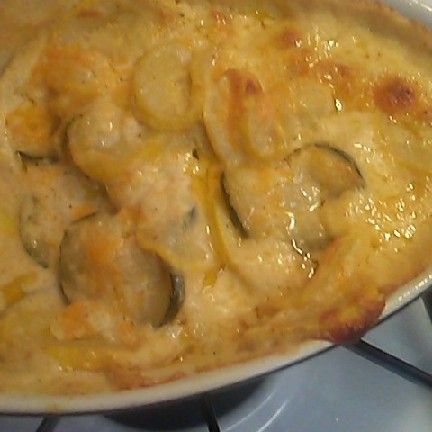
ZUCCHINI AND YELLOW SQUASH AU GRATIN

by Rebecca June 30, 2022
written by Rebecca

Prep Time: 10 mins | Cook Time: 35 mins | Total Time: 45 mins | Yield: 4

This is a very delicious, easy one-skillet vegetable that you can make in less than an hour. This Au Gratin is loaded with tender pieces of zucchini and yellow squash in a delectable creamy cheese sauce.

No one can say no to this mouthwatering dish. The veggies are baked in a bath of cream and cheese and topped with smoked Gouda. And never forget the garlic! This Au Gratin is perfect for everyone. Insanely good, even your fussiest eaters will love every bit of this vegetarian dish!

INGREDIENTS

1/2 onion, thinly sliced

2 tbsp butter

2 large cloves of garlic, minced

1 small yellow squash, sliced in rounds 1/8 to 1/4” thick

1 small zucchini, sliced in rounds 1/8 to 1/4” thick

1 c. shredded smoked Gouda

1/2 c. heavy cream

1/4 c. grated Parmesan

HOW TO MAKE ZUCCHINI AND YELLOW SQUASH AU GRATIN

Step 1: Prepare the oven. Preheat it to 450 degrees.

Step 2: In an oven-proof skillet, melt the butter over medium heat. Once the butter has melted, add the onion and cook for about 5 minutes or until the edges of the onion begin to brown. Next, add the garlic and continue to cook for a minute more. Pour in the cream and let everything simmer until bubbly and beginning to thicken. Gradually stir in the Parmesan. Then, add the zucchini and yellow squash. Continue to cook for another 4 to 5 minutes.

Step 3: Take off the heat and sprinkle the smoked Gouda on top. Transfer the skillet to the preheated oven and bake the Au Gratin for about 15 to 20 minutes or until the cheese is golden brown.

NOTE:

For this recipe, I used a smaller zucchini. If using a much larger zucchini, just double the cream and Parmesan. Keep in mind that larger zucchini are mostly slightly tougher and might need extra simmering and/or baking.

ZUCCHINI AND YELLOW SQUASH AU GRATIN

Rebecca Prep Time: 10 mins | Cook Time: 35 mins | Total Time: 45 mins | Yield: 4 This is a very delicious, easy one-skillet vegetable that you can make in… General Recipes ZUCCHINI AND YELLOW SQUASH AU GRATIN European Print This
Serves: 4 Prep Time: 10 mins Cooking Time: 35 mins 35 mins
Nutrition facts: 200 calories 20 grams fat
Rating: 5.0/5
( 1 voted )

Ingredients

  • 1/2 onion, thinly sliced
  • 2 tbsp butter
  • 2 large cloves of garlic, minced
  • 1 small yellow squash, sliced in rounds 1/8 to 1/4” thick
  • 1 small zucchini, sliced in rounds 1/8 to 1/4” thick
  • 1 c. shredded smoked Gouda
  • 1/2 c. heavy cream
  • 1/4 c. grated Parmesan

Instructions

Step 1: Prepare the oven. Preheat it to 450 degrees.

Step 2: In an oven-proof skillet, melt the butter over medium heat. Once the butter has melted, add the onion and cook for about 5 minutes or until the edges of the onion begin to brown. Next, add the garlic and continue to cook for a minute more. Pour in the cream and let everything simmer until bubbly and beginning to thicken. Gradually stir in the Parmesan. Then, add the zucchini and yellow squash. Continue to cook for another 4 to 5 minutes.

Step 3: Take off the heat and sprinkle the smoked Gouda on top. Transfer the skillet to the preheated oven and bake the Au Gratin for about 15 to 20 minutes or until the cheese is golden brown.

Notes

For this recipe, I used a smaller zucchini. If using a much larger zucchini, just double the cream and Parmesan. Keep in mind that larger zucchini are mostly slightly tougher and might need extra simmering and/or baking.

June 30, 2022 0 comment
0 FacebookTwitterPinterestEmail
General Recipes

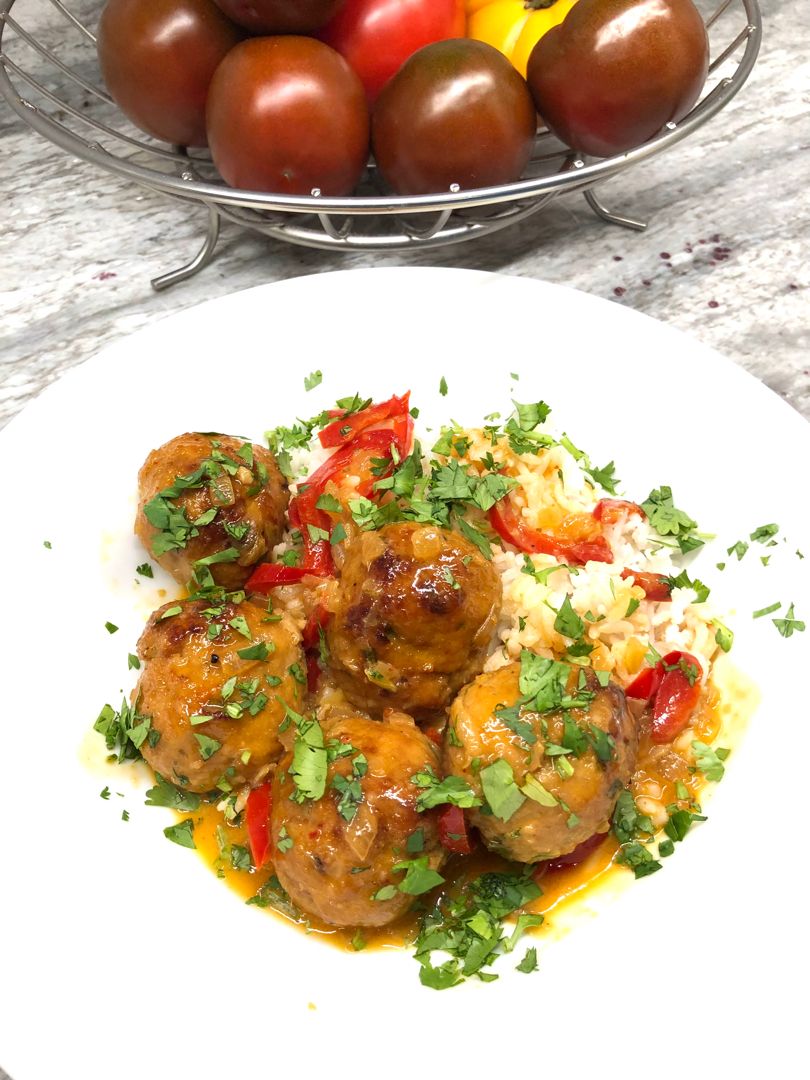
Thai Turkey Meatballs In Coconut Curry Sauce

by Rebecca June 30, 2022
written by Rebecca

Prep Time: 15 mins | Cook Time: 30 mins | Refrigerate meatball mix: 15 mins | Total Time: 1-hr | Servings: 6

Place a delicious Thai twist on your favorite meatballs with this easy recipe. Fluffy, light and moist meatballs smothered in a mouthwatering coconut curry sauce. These scrumptious meatballs are an easy and filling dinner option perfect for your entire family!

Ingredients

Thai Meatballs:

1 egg

½ c. minced green onion

1 lb ground chicken or turkey

1 c. panko

3 cloves, pressed garlic

1 tbsp soy sauce or fish sauce

1 1/2 tbsp grated ginger or ginger paste

1 tbsp red curry paste

1 tsp freshly ground black pepper

1 tsp kosher salt

Coconut Curry Sauce:

1 tbsp ginger

1 tbsp canola oil

½ yellow onion, sliced

½ red bell pepper, sliced

1 tbsp red curry paste

2 tbsp brown sugar

1 tbsp fish sauce or soy sauce

chopped cilantro, for garnish

1 13.5 oz. can unsweetened coconut milk

How to make Thai Turkey Meatballs In Coconut Curry Sauce

Baked Turkey Meatballs:

Step 1: Prepare the oven. Preheat it to 400 degrees F. Using cooking spray, grease a baking sheet, and set aside.

Step 2: Place the ground turkey or chicken, egg, panko breadcrumbs, green onion, garlic, fish sauce, ginger, red curry paste, and salt and pepper in a large bowl. Using a whisk, break the egg yolk, then lightly fold the ingredients together. With your damp hands, gently knead the mixture until combined. Tent the bowl and place it in the fridge for at least 15 minutes or up to overnight to soften the breadcrumbs.

Step 3: Scoop a small amount of the mixture and shape it into a 1-inch ball and place it on a cutting board. Repeat for the remaining mixture. Dampen your hands, and between your palms, lightly form, and roll the meatballs. Place the meatballs on the baking sheet, evenly spacing them out. Place in the preheated oven and bake for about 20 minutes until the meatballs are no longer pink. Then, broil for an additional 5 to 10 minutes on high until the crust is crispy.

Step 4: Take the meatballs out of the oven when done and transfer them to the coconut curry sauce. Enjoy!

Curry Coconut Sauce:

Step 5: Prepare the coconut curry sauce while baking the meatballs. Start by heating the oil in a large skillet over medium-high heat. Then, add the onions and red bell pepper. Cook for about 3 to 4 minutes, stirring occasionally. Next, add the ginger and red curry paste. Stir and continue to cook for 2 to 3 minutes more or until the veggies have softened and aromatic, stirring occasionally.

Step 6: Pour in the coconut milk and add the brown sugar along with the fish sauce or soy sauce. Stir and cook for additional 5 minutes. Add the meatballs and cook for 5 minutes more, stirring often. To taste, season with extra salt and fish sauce or soy sauce.

Step 7: Before serving, garnish with some chopped cilantro leaves. Enjoy the Thai turkey meatballs over noodles or rice.

Nutrition Facts:

Calories: 351 kcal | Carbohydrates: 19g | Protein: 23g | Fat: 22g | Saturated Fat: 16g | Cholesterol: 69mg | Sodium: 995mg | Potassium: 521mg | Fiber: 3g | Sugar: 8g | Vitamin A: 1240IU | Vitamin C: 18mg | Calcium: 57mg | Iron: 3mg

Thai Turkey Meatballs In Coconut Curry Sauce

Rebecca Prep Time: 15 mins | Cook Time: 30 mins | Refrigerate meatball mix: 15 mins | Total Time: 1-hr | Servings: 6 Place a delicious Thai twist on your favorite… General Recipes Thai Turkey Meatballs In Coconut Curry Sauce European Print This
Serves: 6 Prep Time: 15 mins Cooking Time: 30 mins 30 mins
Nutrition facts: 351 calories 22 fat
Rating: 5.0/5
( 1 voted )

Ingredients

  • Thai Meatballs:
  • 1 egg
  • ½ c. minced green onion
  • 1 lb ground chicken or turkey
  • 1 c. panko
  • 3 cloves, pressed garlic
  • 1 tbsp soy sauce or fish sauce
  • 1 1/2 tbsp grated ginger or ginger paste
  • 1 tbsp red curry paste
  • 1 tsp freshly ground black pepper
  • 1 tsp kosher salt
  • Coconut Curry Sauce:
  • 1 tbsp ginger
  • 1 tbsp canola oil
  • ½ yellow onion, sliced
  • ½ red bell pepper, sliced
  • 1 tbsp red curry paste
  • 2 tbsp brown sugar
  • 1 tbsp fish sauce or soy sauce
  • chopped cilantro, for garnish
  • 1 13.5 oz. can unsweetened coconut milk

Instructions

Baked Turkey Meatballs:

Step 1: Prepare the oven. Preheat it to 400 degrees F. Using cooking spray, grease a baking sheet, and set aside.

Step 2: Place the ground turkey or chicken, egg, panko breadcrumbs, green onion, garlic, fish sauce, ginger, red curry paste, and salt and pepper in a large bowl. Using a whisk, break the egg yolk, then lightly fold the ingredients together. With your damp hands, gently knead the mixture until combined. Tent the bowl and place it in the fridge for at least 15 minutes or up to overnight to soften the breadcrumbs.

Step 3: Scoop a small amount of the mixture and shape it into a 1-inch ball and place it on a cutting board. Repeat for the remaining mixture. Dampen your hands, and between your palms, lightly form, and roll the meatballs. Place the meatballs on the baking sheet, evenly spacing them out. Place in the preheated oven and bake for about 20 minutes until the meatballs are no longer pink. Then, broil for an additional 5 to 10 minutes on high until the crust is crispy.

Step 4: Take the meatballs out of the oven when done and transfer them to the coconut curry sauce. Enjoy!

Curry Coconut Sauce:

Step 5: Prepare the coconut curry sauce while baking the meatballs. Start by heating the oil in a large skillet over medium-high heat. Then, add the onions and red bell pepper. Cook for about 3 to 4 minutes, stirring occasionally. Next, add the ginger and red curry paste. Stir and continue to cook for 2 to 3 minutes more or until the veggies have softened and aromatic, stirring occasionally.

Step 6: Pour in the coconut milk and add the brown sugar along with the fish sauce or soy sauce. Stir and cook for additional 5 minutes. Add the meatballs and cook for 5 minutes more, stirring often. To taste, season with extra salt and fish sauce or soy sauce.

Step 7: Before serving, garnish with some chopped cilantro leaves. Enjoy the Thai turkey meatballs over noodles or rice.

June 30, 2022 0 comment
0 FacebookTwitterPinterestEmail
General Recipes

MANNA SANDWICHES

by Rebecca June 30, 2022
written by Rebecca

Prep Time: 15 mins | Cook Time: 10 mins | Total Time: 25 mins | Yield: 6 sandwiches

These Manna Sandwiches are hands down the best sandwich! It is made with ground beef, onion, soy sauce, parsley, basil, and garlic. The star of the show is the sauce that places this sandwich on the map! The sauce is pretty simple to make, and it is made with ingredients we already have on hand – mayonnaise, Catalina dressing, ketchup, spicy brown mustard, and sugar. Mouthwatering meat filling with melty cheese served on hoagie buns that are slathered with the most delicious sauce. My heart just stop a beat!

Ingredients

Sauce:

2½ tablespoons ketchup

2 tablespoons spicy brown mustard

½ c. mayonnaise

2 tablespoons sugar

¼ c. Catalina or French dressing

Sandwiches:

2 tablespoons dried minced onion

2½ pounds ground chuck

2 tablespoons water

1 tablespoon dried parsley

½ teaspoon garlic powder

1½ teaspoons dried basil

¼ pound Swiss cheese slices

6 (6”) hoagie rolls

¼ c. soy sauce

HOW TO MAKE MANNA SANDWICHES

Step 1: In a bowl, mix the sauce ingredients and set them aside.

Step 2: Cook the ground beef in a large skillet until browned. Drain the excess grease off before adding the onion, water, soy sauce, parsley, basil, and garlic powder. Let everything simmer for about 10 minutes or until the liquid has evaporated.

Step 3: In the meantime, split the hoagie rolls. Slather each roll with the sauce and top with cheese. Pop in the broiler for about 1 to 2 minutes until the cheese has melted. Between each bun, divide the ground beef.

Step 4: Serve and enjoy!

Notes:

Throw the sauce together ahead and simply keep it in the fridge until ready to serve.

You can store the sauce in the fridge for up to 1 week.

Feel free to substitute ground beef with ground turkey.

You can whip the meat filling up in advance and just reheat it when ready to assemble the sandwiches.

MANNA SANDWICHES

Rebecca Prep Time: 15 mins | Cook Time: 10 mins | Total Time: 25 mins | Yield: 6 sandwiches These Manna Sandwiches are hands down the best sandwich! It is made… General Recipes MANNA SANDWICHES European Print This
Serves: 6 Prep Time: 15 mins Cooking Time: 10 mins 10 mins
Nutrition facts: 200 calories 20 grams fat
Rating: 5.0/5
( 1 voted )

Ingredients

  • Sauce:
  • 2½ tablespoons ketchup
  • 2 tablespoons spicy brown mustard
  • ½ c. mayonnaise
  • 2 tablespoons sugar
  • ¼ c. Catalina or French dressing
  • Sandwiches:
  • 2 tablespoons dried minced onion
  • 2½ pounds ground chuck
  • 2 tablespoons water
  • 1 tablespoon dried parsley
  • ½ teaspoon garlic powder
  • 1½ teaspoons dried basil
  • ¼ pound Swiss cheese slices
  • 6 (6”) hoagie rolls
  • ¼ c. soy sauce

Instructions

Step 1: In a bowl, mix the sauce ingredients and set them aside.

Step 2: Cook the ground beef in a large skillet until browned. Drain the excess grease off before adding the onion, water, soy sauce, parsley, basil, and garlic powder. Let everything simmer for about 10 minutes or until the liquid has evaporated.

Step 3: In the meantime, split the hoagie rolls. Slather each roll with the sauce and top with cheese. Pop in the broiler for about 1 to 2 minutes until the cheese has melted. Between each bun, divide the ground beef.

Step 4: Serve and enjoy!

Notes

Throw the sauce together ahead and simply keep it in the fridge until ready to serve. You can store the sauce in the fridge for up to 1 week. Feel free to substitute ground beef with ground turkey. You can whip the meat filling up in advance and just reheat it when ready to assemble the sandwiches.

June 30, 2022 0 comment
0 FacebookTwitterPinterestEmail
General Recipes

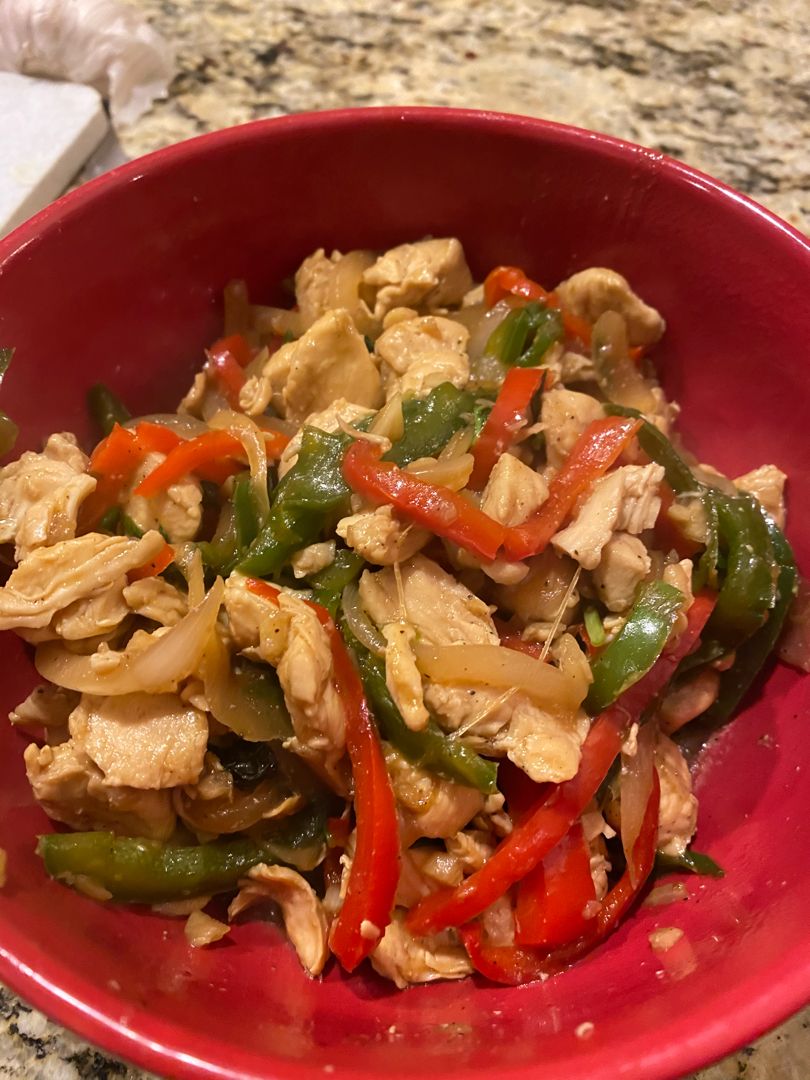
Thai Basil Chicken

by Rebecca June 30, 2022
written by Rebecca

Prep time: 12 mins | Cook time: 8 mins | Total time: 20 mins | Servings: 4

Make this popular Thai chicken recipe anytime with this easy recipe. Throw this together in minutes and enjoy a plate of authentic Thai Basil Chicken in the comfort of your home.

Ingredients

Sauce:

2 tbsp oyster sauce

3 tbsp sweet soy sauce

1 tbsp fish sauce

1/4 tsp ground black pepper

1/4 c. chicken broth

Stir Fry:

1 lb ground chicken

4 garlic cloves, finely chopped or minced

2 tbsp vegetable, canola, or peanut oil

1–2 Thai or Serrano chiles, seeded and thinly sliced

1 small red onion, sliced

1 c. Thai basil leaves, stem removed, loosely packed

1 red bell pepper, sliced

How to make Thai Basil Chicken

Step 1: Combine the sauce ingredients in a small bowl. Set aside.

Step 2: In a wok or large skillet, heat the oil over high heat. Once the oil is hot, add the garlic and chiles to the wok and cook for about 20 seconds, stirring continuously. Then, add the ground chicken and continue to cook for an additional 3 to 4 minutes, breaking the meat up into small chunks. Drain the excess liquid once the chicken is no longer pink.

Step 3: To the wok, add the onions and red bell peppers. Stir fry for about a minute before pouring in the sauce. Continue to cook for another 2 minutes, stirring, until the sauce has thickened. Lastly, add the basil, stir, and cook further until wilted and the chicken is completely cooked.

Tips:

You can use a mixture of 3 tbsp regular, low sodium, or lite soy sauce with a pinch of granulated or brown sugar if the sweet soy sauce is not available.

For this recipe, you can use regular basil (Italian basil) in place of Thai Holy Basil or sweet basil (aka Thai basil).

Feel free to chop the basil if desired or leave them whole.

For presentation, garnish the dish with some fresh basil leaves.

Nutrition Facts:

Calories: 311 kcal (16%) | Carbohydrates: 20g (7%) | Protein: 21g (42%) | Fat: 16g (25%) | Saturated Fat: 8g (50%) | Cholesterol: 98mg (33%) | Sodium: 967mg (42%) | Potassium: 749mg (21%) | Fiber: 1g (4%) | Sugar: 13g (14%) | Vitamin A: 1275IU (26%) | Vitamin C: 48.5mg (59%) | Calcium: 32mg (3%) | Iron: 1.4mg (8%)

Thai Basil Chicken

Rebecca Prep time: 12 mins | Cook time: 8 mins | Total time: 20 mins | Servings: 4 Make this popular Thai chicken recipe anytime with this easy recipe. Throw this… General Recipes Thai Basil Chicken European Print This
Serves: 4 Prep Time: 12 mins Cooking Time: 8 mins 8 mins
Nutrition facts: 311 calories 16 fat
Rating: 5.0/5
( 1 voted )

Ingredients

  • Sauce:
  • 2 tbsp oyster sauce
  • 3 tbsp sweet soy sauce
  • 1 tbsp fish sauce
  • 1/4 tsp ground black pepper
  • 1/4 c. chicken broth
  • Stir Fry:
  • 1 lb ground chicken
  • 4 garlic cloves, finely chopped or minced
  • 2 tbsp vegetable, canola, or peanut oil
  • 1–2 Thai or Serrano chiles, seeded and thinly sliced
  • 1 small red onion, sliced
  • 1 c. Thai basil leaves, stem removed, loosely packed
  • 1 red bell pepper, sliced

Instructions

Step 1: Combine the sauce ingredients in a small bowl. Set aside.

Step 2: In a wok or large skillet, heat the oil over high heat. Once the oil is hot, add the garlic and chiles to the wok and cook for about 20 seconds, stirring continuously. Then, add the ground chicken and continue to cook for an additional 3 to 4 minutes, breaking the meat up into small chunks. Drain the excess liquid once the chicken is no longer pink.

Step 3: To the wok, add the onions and red bell peppers. Stir fry for about a minute before pouring in the sauce. Continue to cook for another 2 minutes, stirring, until the sauce has thickened. Lastly, add the basil, stir, and cook further until wilted and the chicken is completely cooked.

Notes

You can use a mixture of 3 tbsp regular, low sodium, or lite soy sauce with a pinch of granulated or brown sugar if the sweet soy sauce is not available. For this recipe, you can use regular basil (Italian basil) in place of Thai Holy Basil or sweet basil (aka Thai basil). Feel free to chop the basil if desired or leave them whole. For presentation, garnish the dish with some fresh basil leaves.

June 30, 2022 0 comment
0 FacebookTwitterPinterestEmail
General Recipes

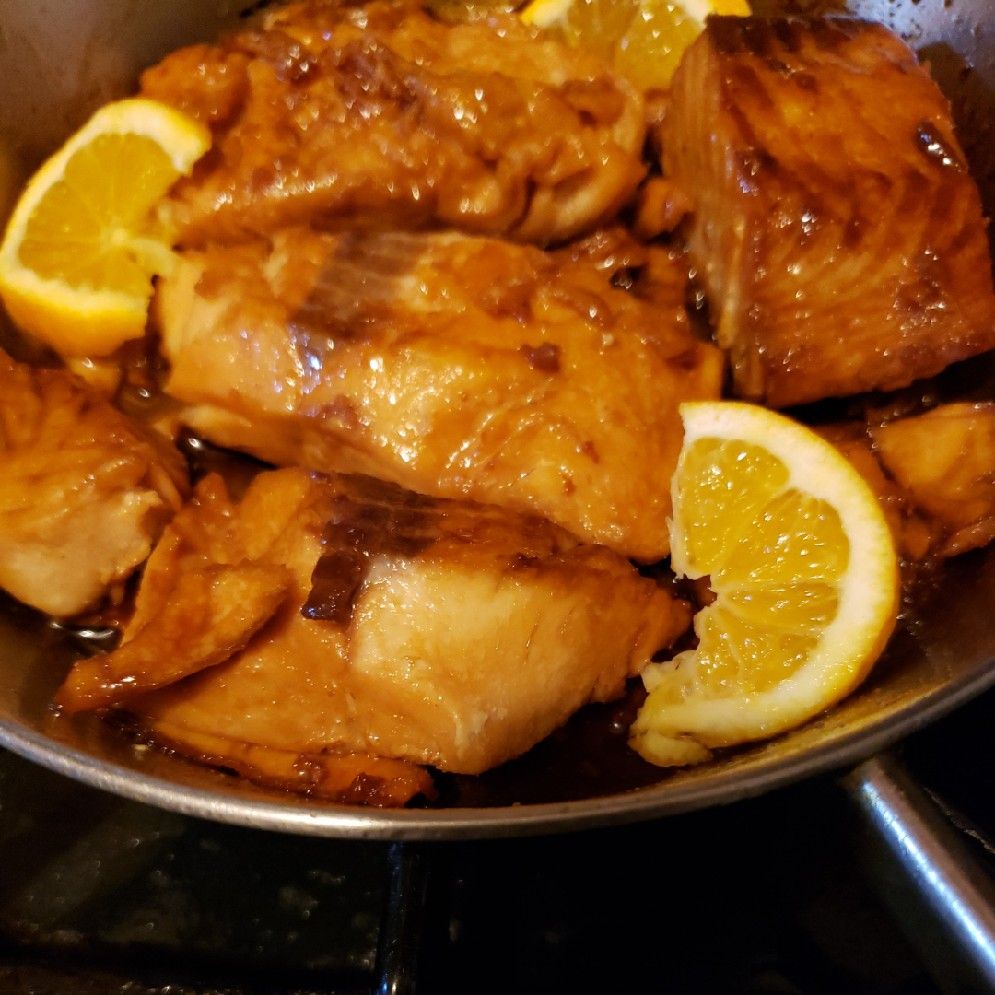
CRISPY HONEY ORANGE GLAZED SALMON

by Rebecca June 30, 2022
written by Rebecca

PREP TIME: 10 MINS | COOK TIME: 10 MINS | TOTAL TIME: 20 MINS | SERVES: 4 people

Pan-fried crispy salmon with honey, and orange glaze. An amazing salmon dish that you can easily make using simple pantry ingredients in less than twenty minutes. Serve these delicious salmon with beautiful honey-orange-garlic sauce over noodles or rice for an easy and a quick filling meal any time. For a light meal, enjoy the salmon with steamed vegetables or salad on the side.

INGREDIENTS

4 (6 oz.) skinless salmon fillets, (170 g. each)

1 tbsp olive oil

3 tbsp honey

2 tsp butter

1/4 c. fresh orange juice, (about 1/2 an orange)

4 cloves garlic, crushed or minced

2 tbsp low-sodium soy sauce

1/2 an orange, sliced to serve

salt and cracked black pepper, to taste

HOW TO MAKE CRISPY HONEY ORANGE GLAZED SALMON

Step 1: In a pan or skillet, melt the butter (or oil) over medium-high heat. Once the butter has melted, place the salmon in the pan, skin-side down, and sear for about 3 to 4 minutes. Flip and continue to sear the other side for another 2 minutes.

Step 2: To the pan, pour in the orange juice. Let it decrease to half for about a minute. Then, add the garlic and continue to cook for 30 seconds more until aromatic. To the sides of the pan, move the salmon. Pour in the honey and soy sauce. Stir well.

Step 3: Bring everything to a simmer for additional 30 seconds to 1 minute until the mixture has reduced to a nice syrup. To evenly coat the salmon, move it around the pan. Take the salmon out of the pan when done and season with salt and pepper. Before serving, drizzle with the sauce. Enjoy the crispy honey, orange glazed salmon over rice, noodles, steamed vegetables, or with a salad. Enjoy!

OPTIONAL: In the last 2 minutes of cooking, grill or broil (preheat the broiler first) the salon to get those charred and crispy edges.

NUTRITION FACTS:

Calories: 349 kcal | Carbohydrates: 14g | Protein: 34g | Fat: 16g | Saturated Fat: 5g | Cholesterol: 108mg | Sodium: 579mg | Potassium: 864mg | Sugar: 13g | Vitamin A: 245IU | Vitamin C: 0.9mg | Calcium: 26mg | Iron: 1.7mg

CRISPY HONEY ORANGE GLAZED SALMON

Rebecca PREP TIME: 10 MINS | COOK TIME: 10 MINS | TOTAL TIME: 20 MINS | SERVES: 4 people Pan-fried crispy salmon with honey, and orange glaze. An amazing salmon dish… General Recipes CRISPY HONEY ORANGE GLAZED SALMON European Print This
Serves: 4 Prep Time: 10 mins Cooking Time: 10 mins 10 mins
Nutrition facts: 349 calories 16 fat
Rating: 5.0/5
( 1 voted )

Ingredients

  • 4 (6 oz.) skinless salmon fillets, (170 g. each)
  • 1 tbsp olive oil
  • 3 tbsp honey
  • 2 tsp butter
  • 1/4 c. fresh orange juice, (about 1/2 an orange)
  • 4 cloves garlic, crushed or minced
  • 2 tbsp low-sodium soy sauce
  • 1/2 an orange, sliced to serve
  • salt and cracked black pepper, to taste

Instructions

Step 1: In a pan or skillet, melt the butter (or oil) over medium-high heat. Once the butter has melted, place the salmon in the pan, skin-side down, and sear for about 3 to 4 minutes. Flip and continue to sear the other side for another 2 minutes.

Step 2: To the pan, pour in the orange juice. Let it decrease to half for about a minute. Then, add the garlic and continue to cook for 30 seconds more until aromatic. To the sides of the pan, move the salmon. Pour in the honey and soy sauce. Stir well.

Step 3: Bring everything to a simmer for additional 30 seconds to 1 minute until the mixture has reduced to a nice syrup. To evenly coat the salmon, move it around the pan. Take the salmon out of the pan when done and season with salt and pepper. Before serving, drizzle with the sauce. Enjoy the crispy honey, orange glazed salmon over rice, noodles, steamed vegetables, or with a salad. Enjoy!

OPTIONAL: In the last 2 minutes of cooking, grill or broil (preheat the broiler first) the salon to get those charred and crispy edges.

June 30, 2022 0 comment
0 FacebookTwitterPinterestEmail
General Recipes

SOUTH CAROLINA BIRD DOGS

by Rebecca June 30, 2022
written by Rebecca

Prep Time: 10 mins | Cook Time: 5 mins | Total Time: 15 mins | Yield: 8 sandwiches

Whenever someone asks me what is my favorite sandwich, only one thing comes to my mind – South Carolina Bird Dogs! Hot dog buns loaded with chicken fingers, bacon, cheese, and drizzles of honey mustard. This is excellent for a quick lunch and dinner. These South Carolina Bird Dogs are also perfect for parties or tailgating! Assemble the sandwich and serve these warm-hot.

All you need are a few simple ingredients to make the best sandwich. These ingredients I bet you already have in your pantry. From the chicken fingers, bacon, cheese, and mustard dressing. These are also very easy to assemble and quick to make.

I love these South Carolina Bird Dogs, especially for parties and even for tailgating. For tailgating, I usually buy some chicken fingers and assemble the sandwich then and there. The only equipment I use is a kitchen blow torch that I use to melt the cheese and heat the sandwich and chicken. Alternately, you can assemble the sandwich at home and just heat them on the grill.

If you are searching for another way to enjoy chicken fingers, then this easy recipe is a must! It’s a no-fuss, excellent for a grab-and-go lunch, and perfect for a quick dinner any time!

Ingredients

8 slices of cooked bacon

8 breaded chicken fingers cooked

½ c. honey mustard dressing

8 hot dog buns

1 c. shredded cheddar cheese

HOW TO MAKE SOUTH CAROLINA BIRD DOGS

Step 1: Chop chicken fingers for each bird dog and place them in a hot hotdog bun.

Step 2: On top of each chicken finger, place 1 slice of crumbled bacon followed by 2 tablespoons of cheese. Using a kitchen blowtorch, melt the cheese. You can also do this under the oven broiler.

Step 3: Before serving, top each bird dog with 1 tablespoon of honey mustard dressing. Enjoy!

SOUTH CAROLINA BIRD DOGS

Rebecca Prep Time: 10 mins | Cook Time: 5 mins | Total Time: 15 mins | Yield: 8 sandwiches Whenever someone asks me what is my favorite sandwich, only one thing… General Recipes SOUTH CAROLINA BIRD DOGS European Print This
Serves: 8 Prep Time: 10 mins Cooking Time: 5 mins 5 mins
Nutrition facts: 200 calories 20 grams fat
Rating: 5.0/5
( 1 voted )

Ingredients

  • 8 slices of cooked bacon
  • 8 breaded chicken fingers cooked
  • ½ c. honey mustard dressing
  • 8 hot dog buns
  • 1 c. shredded cheddar cheese

Instructions

Step 1: Chop chicken fingers for each bird dog and place them in a hot hotdog bun.

Step 2: On top of each chicken finger, place 1 slice of crumbled bacon followed by 2 tablespoons of cheese. Using a kitchen blowtorch, melt the cheese. You can also do this under the oven broiler.

Step 3: Before serving, top each bird dog with 1 tablespoon of honey mustard dressing. Enjoy!

June 30, 2022 0 comment
0 FacebookTwitterPinterestEmail
Newer Posts
Older Posts

Popular Posts

  • 1

    Crispy Crunchy Parmesan Potatoes

    March 21, 2020
  • 2

    CROCK POT SMOTHERED PORK CHOPS

    March 21, 2020
  • Facebook
  • Twitter

@2019 - All Right Reserved.


Back To Top