Cook it once
  • Home
  • Privacy Policy
  • Recipes
    • KETO
    • LC
    • WW
  • Tips
  • Contact
Cook it once
  • Home
  • Privacy Policy
  • Recipes
    • KETO
    • LC
    • WW
  • Tips
  • Contact
Category:

General Recipes

General Recipes

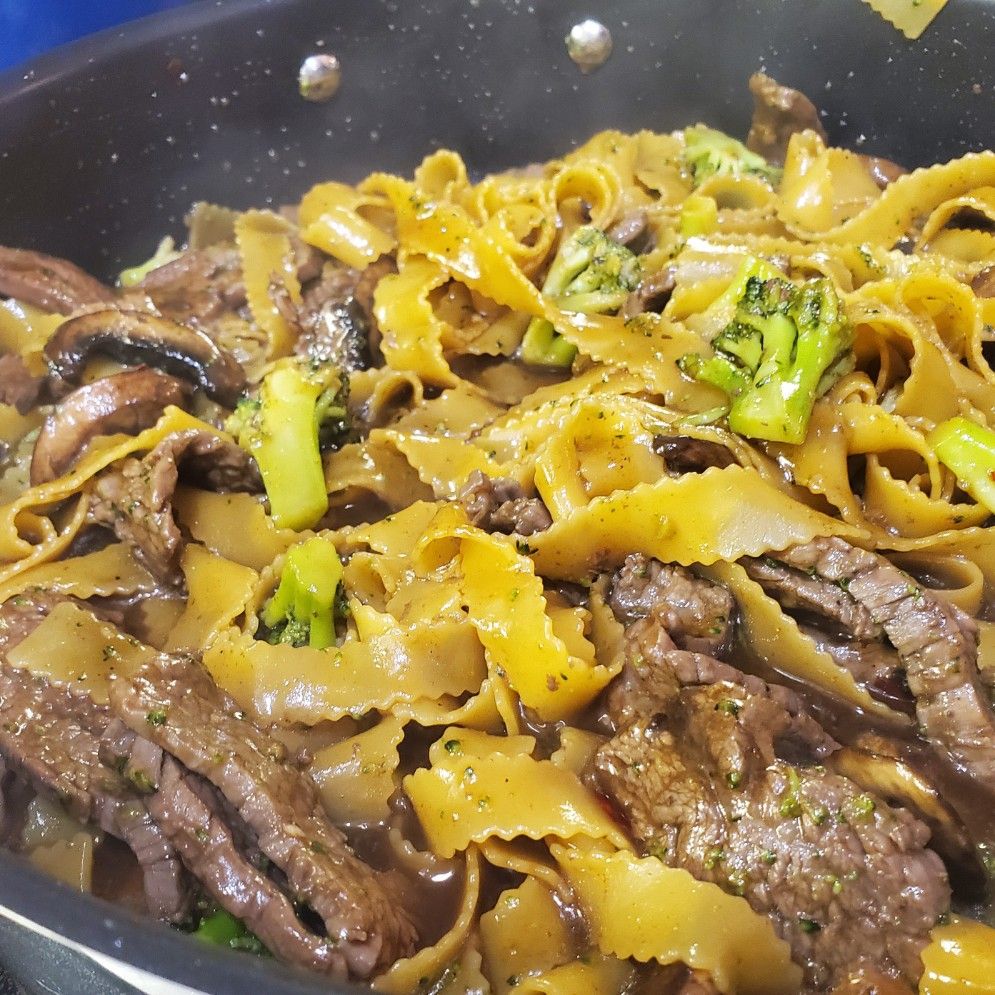
GARLIC BEEF AND BROCCOLI NOODLES

by Rebecca July 1, 2022
written by Rebecca

PREP TIME: 5 MINS | COOK TIME: 20 MINS

Melt in your mouth beef smothered in a very delightful garlic sauce. It’s an amazing meal in one with mushrooms, broccoli, and noodles. A great dinner option perfect for busy days and your entire family!

To make this mouthwatering garlic beef and broccoli noodles, all you need are a few simple ingredients that you might already have on hand. In under twenty-five minutes, you’ll have this scrumptious meal ready to be devoured.

I am seriously obsessed with beef and broccoli. It’s a favorite and staple at my house. It’s insanely easy and fast to make and guarantees the best dinner you’ll ever make! A complete meal with tender, melt-in-your-mouth beef, mushrooms, broccoli, and wide egg noodles. Super good you’ll want to make this again and again!

Ingredients

1 tbsp olive oil

8 oz. flank steak, sliced against the grain

3 c. broccoli florets

8 oz. wide rice noodles

3 garlic cloves, minced

¼ c. packed brown sugar

8 oz. mushrooms, sliced

1/2 c. reduced-sodium soy sauce

¼ tsp ground ginger

2 tsp sesame oil

¼ tsp crushed red pepper flakes

2 tbsp hoisin sauce

1 tbsp cornstarch

¼ tsp pepper

HOW TO MAKE GARLIC BEEF AND BROCCOLI NOODLES

Step 1: Following the package directions, cook the noodles in a large pot of boiling water. In the last 5 minutes of cooking, add the broccoli and cook until tender. Drain when done.

Step 2: In the meantime, heat the olive oil in a medium-sized skillet. Once the oil is hot, add the steak to the skillet and cook until no longer pink. Then, add the garlic and mushrooms. Continue to cook for another minute.

Step 3: Place the brown sugar soy sauce, hoisin sauce, sesame oil, ginger, red pepper, pepper, and cornstarch in a small bowl. Mix well until blended.

Step 4: To the skillet with the sauce, add the noodles and toss to coat.

Nutrition Facts:

Calories762kcal (38%), Carbohydrates47g (16%), Protein71g (142%), Fat35g (54%), Saturated Fat8g (40%), Cholesterol136mg (45%), Sodium4474mg (186%), Potassium2623mg (75%), Fiber10g (40%), Sugar11g (12%), Vitamin A1700IU (34%), Vitamin C251mg (304%), Calcium214mg (21%), Iron9.2mg (51%)
GARLIC BEEF AND BROCCOLI NOODLES

Rebecca PREP TIME: 5 MINS | COOK TIME: 20 MINS Melt in your mouth beef smothered in a very delightful garlic sauce. It’s an amazing meal in one with mushrooms, broccoli,… General Recipes GARLIC BEEF AND BROCCOLI NOODLES European Print This
Prep Time: 20 mins Cooking Time: 5 mins 5 mins
Nutrition facts: 762 calories 35 fat
Rating: 5.0/5
( 1 voted )

Ingredients

  • 1 tbsp olive oil
  • 8 oz. flank steak, sliced against the grain
  • 3 c. broccoli florets
  • 8 oz. wide rice noodles
  • 3 garlic cloves, minced
  • ¼ c. packed brown sugar
  • 8 oz. mushrooms, sliced
  • 1/2 c. reduced-sodium soy sauce
  • ¼ tsp ground ginger
  • 2 tsp sesame oil
  • ¼ tsp crushed red pepper flakes
  • 2 tbsp hoisin sauce
  • 1 tbsp cornstarch
  • ¼ tsp pepper

Instructions

Step 1: Following the package directions, cook the noodles in a large pot of boiling water. In the last 5 minutes of cooking, add the broccoli and cook until tender. Drain when done.

Step 2: In the meantime, heat the olive oil in a medium-sized skillet. Once the oil is hot, add the steak to the skillet and cook until no longer pink. Then, add the garlic and mushrooms. Continue to cook for another minute.

Step 3: Place the brown sugar soy sauce, hoisin sauce, sesame oil, ginger, red pepper, pepper, and cornstarch in a small bowl. Mix well until blended.

Step 4: To the skillet with the sauce, add the noodles and toss to coat.
July 1, 2022 0 comment
0 FacebookTwitterPinterestEmail
General Recipes

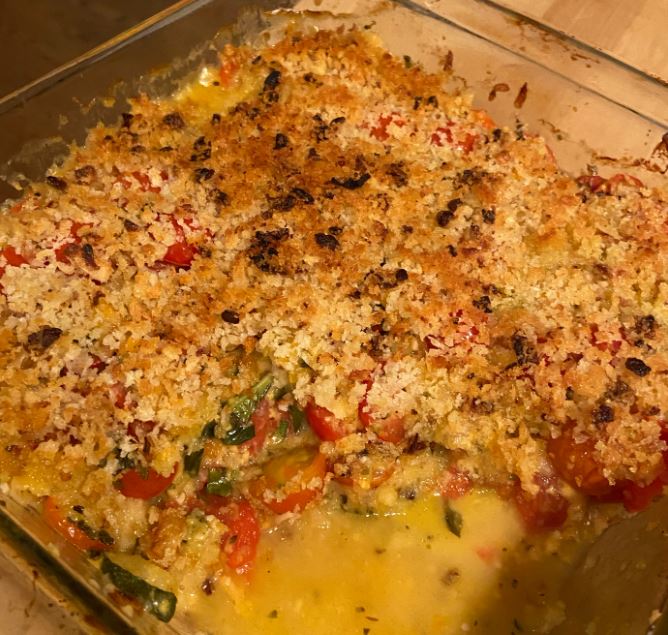
Baked Tomatoes and Zucchini with Cheddar Parmesan Panko Topping

by Rebecca July 1, 2022
written by Rebecca

PREP TIME: 30 MINS | COOK TIME: 40 MINS | TOTAL TIME: 1 HR 10 MINS | YIELD: 8 servings

Meatless dinner is never boring because of this scrumptious baked tomatoes and zucchini with a delightful cheddar Parmesan panko topping. It’s a great side dish option that even your fussiest eaters will love!

INGREDIENTS

4 tbsp butter

2 tbsp extra virgin olive oil

1 ½ tbsp fresh garlic

2 c. large dice Vidalia onion

1 tsp dry oregano

1 ½ lb. fresh garden tomatoes, sliced into quarter-inch thick circles (we used Big Beef and Early Girls)

1 ½ c. panko bread crumbs, divided

2 c. extra sharp cheddar cheese, shredded and divided (we use Cracker Barrel)

1 ½ c. fresh grated Parmesan cheese

2 lbs fresh zucchini, trimmed and cut into quarter-inch thick circles

¼ c. fresh basil, chopped

1 tsp kosher salt

½ tsp freshly grated black pepper

How to make Baked Tomatoes and Zucchini with Cheddar, Parmesan Panko Topping

Step 1: Prepare the oven. Preheat it to 400 degrees F.

Step 2: Heat the oil in a medium saute pan over medium heat. Add the onions once the oil is hot and saute for about 3 minutes. Then, add the garlic along with the butter and oregano. Continue to cook for 2 minutes more.

Step 3: Take the skillet off the heat and stir in the salt, pepper, 1 c Panko, a c. Parmesan and 1 c cheddar cheese. Set aside.

Step 4: Using pan spray, grease a 9 x 9 or 8 x 10-inch pan or dish.

Step 5: Add the rest of the half cup of Panko. Over each other in rows, layer the slices of zucchini, making sure to cover the bottom of the pan. On top, sprinkle the rest of the Parmesan. Over the zucchini and Parmesan, layer the tomatoes in the same manner. On top, sprinkle the rest of the 1 c shredded cheddar cheese.

Step 6: At this point, take the reserved topping, chop the fresh basil, and stir this into the topping. Spread this on top of the tomatoes and cheese. Place in the preheated oven and bake for about 35 minutes, uncovered. Tent the dish with foil if it is getting too browned. Using a fork, poke the center to gauge the doneness of the zucchini on the bottom layer. If the zucchini is tender and the top is browned, the dish is done.

Step 7: Remove from the oven when done and allow it to sit for about 10 minutes before slicing it into eight or more portions. Enjoy as a side dish.

Nutrition Facts:

Amount Per Serving: Calories 413, Total Fat 27g 35%, Saturated Fat 14.1g, Trans Fat 0.3g, Polyunsaturated Fat 1.7g, Monounsaturated Fat 9.2g 0%, Cholesterol 61.6mg 21%, Sodium 1062.6mg 46%, Total Carbohydrate 23.4g 9%, Dietary Fiber 2.7g 10%, Sugars 5.1g, Protein 20.2g 40%

Baked Tomatoes and Zucchini with Cheddar Parmesan Panko Topping

Rebecca PREP TIME: 30 MINS | COOK TIME: 40 MINS | TOTAL TIME: 1 HR 10 MINS | YIELD: 8 servings Meatless dinner is never boring because of this scrumptious baked… General Recipes Baked Tomatoes and Zucchini with Cheddar Parmesan Panko Topping European Print This
Serves: 8 Prep Time: 30 mins Cooking Time: 40 mins 40 mins
Nutrition facts: 413 calories 27 fat
Rating: 5.0/5
( 1 voted )

Ingredients

  • 4 tbsp butter
  • 2 tbsp extra virgin olive oil
  • 1 ½ tbsp fresh garlic
  • 2 c. large dice Vidalia onion
  • 1 tsp dry oregano
  • 1 ½ lb. fresh garden tomatoes, sliced into quarter-inch thick circles (we used Big Beef and Early Girls)
  • 1 ½ c. panko bread crumbs, divided
  • 2 c. extra sharp cheddar cheese, shredded and divided (we use Cracker Barrel)
  • 1 ½ c. fresh grated Parmesan cheese
  • 2 lbs fresh zucchini, trimmed and cut into quarter-inch thick circles
  • ¼ c. fresh basil, chopped
  • 1 tsp kosher salt
  • ½ tsp freshly grated black pepper

Instructions

Step 1: Prepare the oven. Preheat it to 400 degrees F.

Step 2: Heat the oil in a medium saute pan over medium heat. Add the onions once the oil is hot and saute for about 3 minutes. Then, add the garlic along with the butter and oregano. Continue to cook for 2 minutes more.

Step 3: Take the skillet off the heat and stir in the salt, pepper, 1 c Panko, a c. Parmesan and 1 c cheddar cheese. Set aside.

Step 4: Using pan spray, grease a 9 x 9 or 8 x 10-inch pan or dish.

Step 5: Add the rest of the half cup of Panko. Over each other in rows, layer the slices of zucchini, making sure to cover the bottom of the pan. On top, sprinkle the rest of the Parmesan. Over the zucchini and Parmesan, layer the tomatoes in the same manner. On top, sprinkle the rest of the 1 c shredded cheddar cheese.

Step 6: At this point, take the reserved topping, chop the fresh basil, and stir this into the topping. Spread this on top of the tomatoes and cheese. Place in the preheated oven and bake for about 35 minutes, uncovered. Tent the dish with foil if it is getting too browned. Using a fork, poke the center to gauge the doneness of the zucchini on the bottom layer. If the zucchini is tender and the top is browned, the dish is done.

Step 7: Remove from the oven when done and allow it to sit for about 10 minutes before slicing it into eight or more portions. Enjoy as a side dish.

July 1, 2022 0 comment
0 FacebookTwitterPinterestEmail
General Recipes

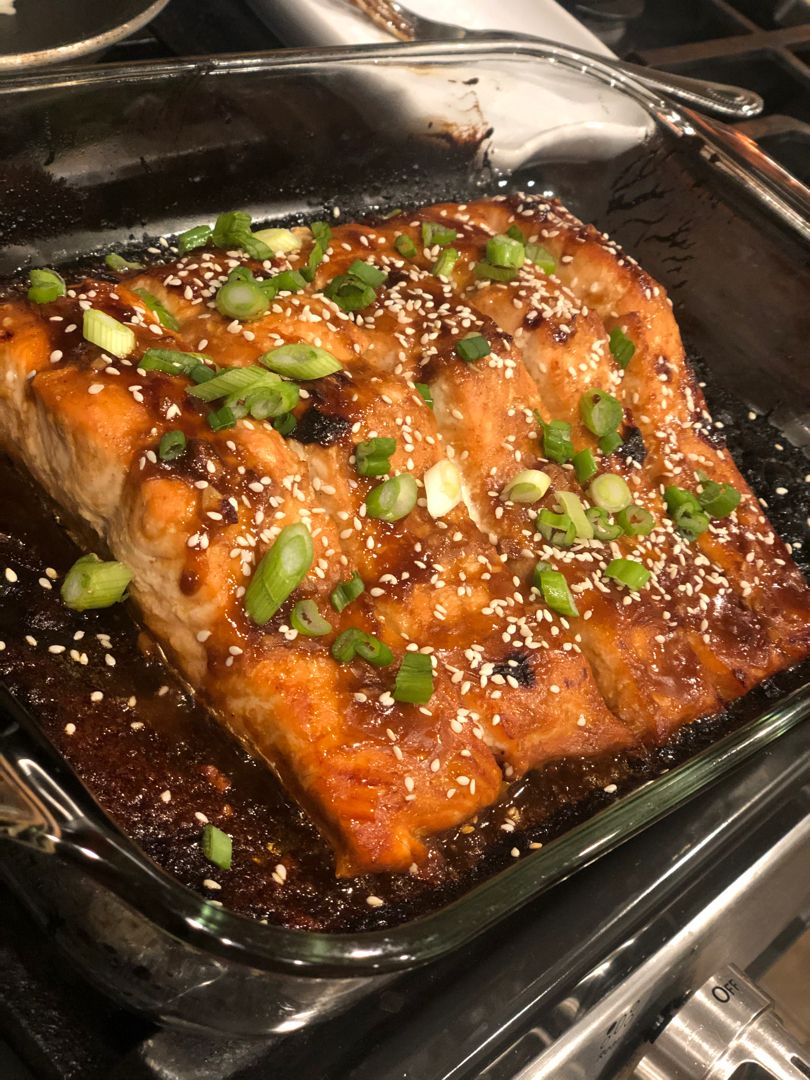
Baked Teriyaki Salmon

by Rebecca July 1, 2022
written by Rebecca

Prep Time: 10 mins | Cook Time: 15 mins | Total Time: 25 mins | Servings: 4

It’s fish day, and what better way to enjoy a fish day than with this delicious baked teriyaki salmon! Tender and flaky salmon baked in the most amazing homemade teriyaki sauce. This baked teriyaki salmon is a great healthy dinner option perfect for everybody! Serve this with a variety of sides such as white/brown rice, quinoa, cauliflower rice, baked or roasted potatoes, roasted veggies, or even over salads.

This baked teriyaki salmon is another easy and quick weeknight dinner that everyone will surely crave over and over again! I use soy sauce for the teriyaki sauce, which has gluten from wheat and soybeans. If you want a gluten-free option, look for a gluten-free teriyaki sauce. If you prefer a thicker teriyaki sauce as I do, you could try adding a little more flour or simply use thickeners such as cornstarch, arrowroot powder, Tapioca Flour, or rice flour. In a small amount of water, dissolve the thickener of your choice and stir this into the sauce.

Ingredients

1 Tablespoon Sesame Seeds

1 Green Onion, sliced

4 Skinless Salmon Fillets about 6 ounces each

Teriyaki Sauce:

2 Garlic Cloves, minced

⅓ c. Low-sodium soy sauce

2-3 Tablespoons of Water

¼ c. Fresh orange juice

2 Tablespoons Honey

1 Tablespoon Minced fresh ginger

½ Lemon, juiced

½ Tablespoon Gluten-free flour

1 Teaspoon Chili Flakes or to taste

How to make Baked Teriyaki Salmon

Step 1: Prepare the oven. Preheat it to 400 degrees F. Using non-stick cooking spray, grease a baking dish.

Step 2: Place the Teriyaki sauce ingredients in a small bowl. Mix well until combined.

Step 3: Into the prepared baking dish, place the salmon and pour the sauce over it. Place in the preheated oven and bake for about 12 to 15 minutes or until completely cooked and flaky.

Step 4: Take the baking dish out of the oven when done and spoon the thickened sauce from the baking dish over the salmon.

Step 5: Before serving, garnish the baked teriyaki salmon with sesame seeds and green onions. Enjoy!

Nutrition Facts:

Calories: 316 kcal | Carbohydrates: 16g | Protein: 36g | Fat: 12g | Saturated Fat: 2g | Cholesterol: 94mg | Sodium: 794mg | Potassium: 940mg | Fiber: 1g | Sugar: 11g | Vitamin A: 277IU | Vitamin C: 16mg | Calcium: 50mg | Iron: 2mg

Baked Teriyaki Salmon

Rebecca Prep Time: 10 mins | Cook Time: 15 mins | Total Time: 25 mins | Servings: 4 It’s fish day, and what better way to enjoy a fish day than… General Recipes Baked Teriyaki Salmon European Print This
Serves: 4 Prep Time: 10 mins Cooking Time: 15 mins 15 mins
Nutrition facts: 316 calories 12 fat
Rating: 5.0/5
( 1 voted )

Ingredients

  • 1 Tablespoon Sesame Seeds
  • 1 Green Onion, sliced
  • 4 Skinless Salmon Fillets about 6 ounces each
  • Teriyaki Sauce:
  • 2 Garlic Cloves, minced
  • ⅓ c. Low-sodium soy sauce
  • 2-3 Tablespoons of Water
  • ¼ c. Fresh orange juice
  • 2 Tablespoons Honey
  • 1 Tablespoon Minced fresh ginger
  • ½ Lemon, juiced
  • ½ Tablespoon Gluten-free flour
  • 1 Teaspoon Chili Flakes or to taste

Instructions

Step 1: Prepare the oven. Preheat it to 400 degrees F. Using non-stick cooking spray, grease a baking dish.

Step 2: Place the Teriyaki sauce ingredients in a small bowl. Mix well until combined.

Step 3: Into the prepared baking dish, place the salmon and pour the sauce over it. Place in the preheated oven and bake for about 12 to 15 minutes or until completely cooked and flaky.

Step 4: Take the baking dish out of the oven when done and spoon the thickened sauce from the baking dish over the salmon.

Step 5: Before serving, garnish the baked teriyaki salmon with sesame seeds and green onions. Enjoy!

July 1, 2022 0 comment
0 FacebookTwitterPinterestEmail
General Recipes

Chicken Broccoli Pasta with Bacon

by Rebecca July 1, 2022
written by Rebecca

PREP TIME: 20 MINS | COOK TIME: 30 MINS | TOTAL TIME: 50 MINS | SERVINGS: 4

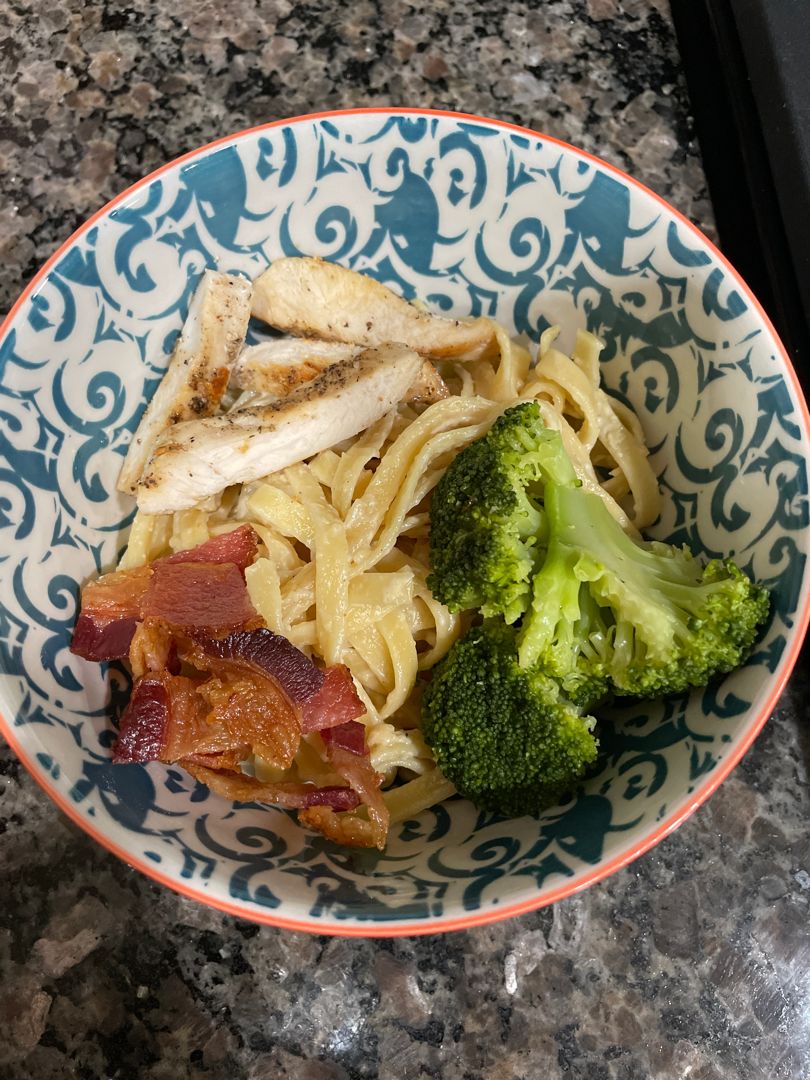
This chicken broccoli pasta with bacon is a great dinner option that you can easily throw together in under an hour. It’s an amazing pasta and chicken recipe. A protein-packed meal complete with pasta, chicken, broccoli, and bacon in a scrumptious creamy sauce!

This recipe is not only easy but also very versatile. You are welcome to use any type of long pasta such as fettuccine, spaghetti, or linguine. You can even replace broccoli with asparagus or spinach.

Ingredients

1 pound chicken breast, boneless and skinless

1 tbsp olive oil

3 cloves garlic, minced

1 c. Parmesan cheese, shredded

⅔ c. heavy cream

⅔ c. milk

8 oz. fettuccine pasta (use gluten-free brown rice fettuccine, for a gluten-free version)

7 strips bacon

2 c. broccoli florets, blanched

¼ tsp salt

¼ tsp pepper

How to make Chicken Broccoli Pasta with Bacon

Step 1: In a large skillet, heat the olive oil over medium-high heat. In the meantime, season the chicken breasts with salt and pepper. Once the oil is hot, add the chicken to the skillet and cook for about 2 to 4 minutes per side over high heat until browned. Take the skillet off the heat when done. Set the chicken aside, covered. For this recipe, you can also use pre-cooked chicken. Just slice them into thin pieces.

Step 2: To the now-empty pan, add the minced garlic. Cook the garlic in the remaining oil in the skillet. Then, pour in the heavy cream and milk. Bring the mixture to a boil and decrease the heat to a simmer. Next, add the cheese and stir well until melted.

Step 3: Following the package directions, cook the pasta until al dente. Drain the pasta when done and add it to the creamy sauce along with the cooked bacon and broccoli. Stir well. To taste, season with salt and pepper. Then, place the cooked chicken on top. Enjoy!

Nutrition Facts:

Amount per Serving: Calories 809, Fat 45g 69%, Saturated Fat 20g 125%, Cholesterol 173mg 58%, Sodium 983mg 43%, Potassium 881mg 25%, Carbohydrates 50g 17%, Fiber 2g 8%, Sugar 4g 4%, Protein 48g 96%, Vitamin A 1175IU 24%, Vitamin C 42.9mg 52%, Calcium 411mg 41%, Iron 1.9mg 11%

Chicken Broccoli Pasta with Bacon

Rebecca PREP TIME: 20 MINS | COOK TIME: 30 MINS | TOTAL TIME: 50 MINS | SERVINGS: 4 This chicken broccoli pasta with bacon is a great dinner option that you… General Recipes Chicken Broccoli Pasta with Bacon European Print This
Serves: 4 Prep Time: 20 mins Cooking Time: 30 mins 30 mins
Nutrition facts: 809 calories 45 fat
Rating: 5.0/5
( 1 voted )

Ingredients

  • 1 pound chicken breast, boneless and skinless
  • 1 tbsp olive oil
  • 3 cloves garlic, minced
  • 1 c. Parmesan cheese, shredded
  • ⅔ c. heavy cream
  • ⅔ c. milk
  • 8 oz. fettuccine pasta (use gluten-free brown rice fettuccine, for a gluten-free version)
  • 7 strips bacon
  • 2 c. broccoli florets, blanched
  • ¼ tsp salt
  • ¼ tsp pepper

Instructions

Step 1: In a large skillet, heat the olive oil over medium-high heat. In the meantime, season the chicken breasts with salt and pepper. Once the oil is hot, add the chicken to the skillet and cook for about 2 to 4 minutes per side over high heat until browned. Take the skillet off the heat when done. Set the chicken aside, covered. For this recipe, you can also use pre-cooked chicken. Just slice them into thin pieces.

Step 2: To the now-empty pan, add the minced garlic. Cook the garlic in the remaining oil in the skillet. Then, pour in the heavy cream and milk. Bring the mixture to a boil and decrease the heat to a simmer. Next, add the cheese and stir well until melted.

Step 3: Following the package directions, cook the pasta until al dente. Drain the pasta when done and add it to the creamy sauce along with the cooked bacon and broccoli. Stir well. To taste, season with salt and pepper. Then, place the cooked chicken on top. Enjoy!

July 1, 2022 0 comment
0 FacebookTwitterPinterestEmail
General Recipes

Low Carb Yellow Squash Casserole with Taco Flavor

by Rebecca July 1, 2022
written by Rebecca

Prep Time: 10 mins | Cook Time: 35 mins | Total Time: 45 mins | Servings: 10 people

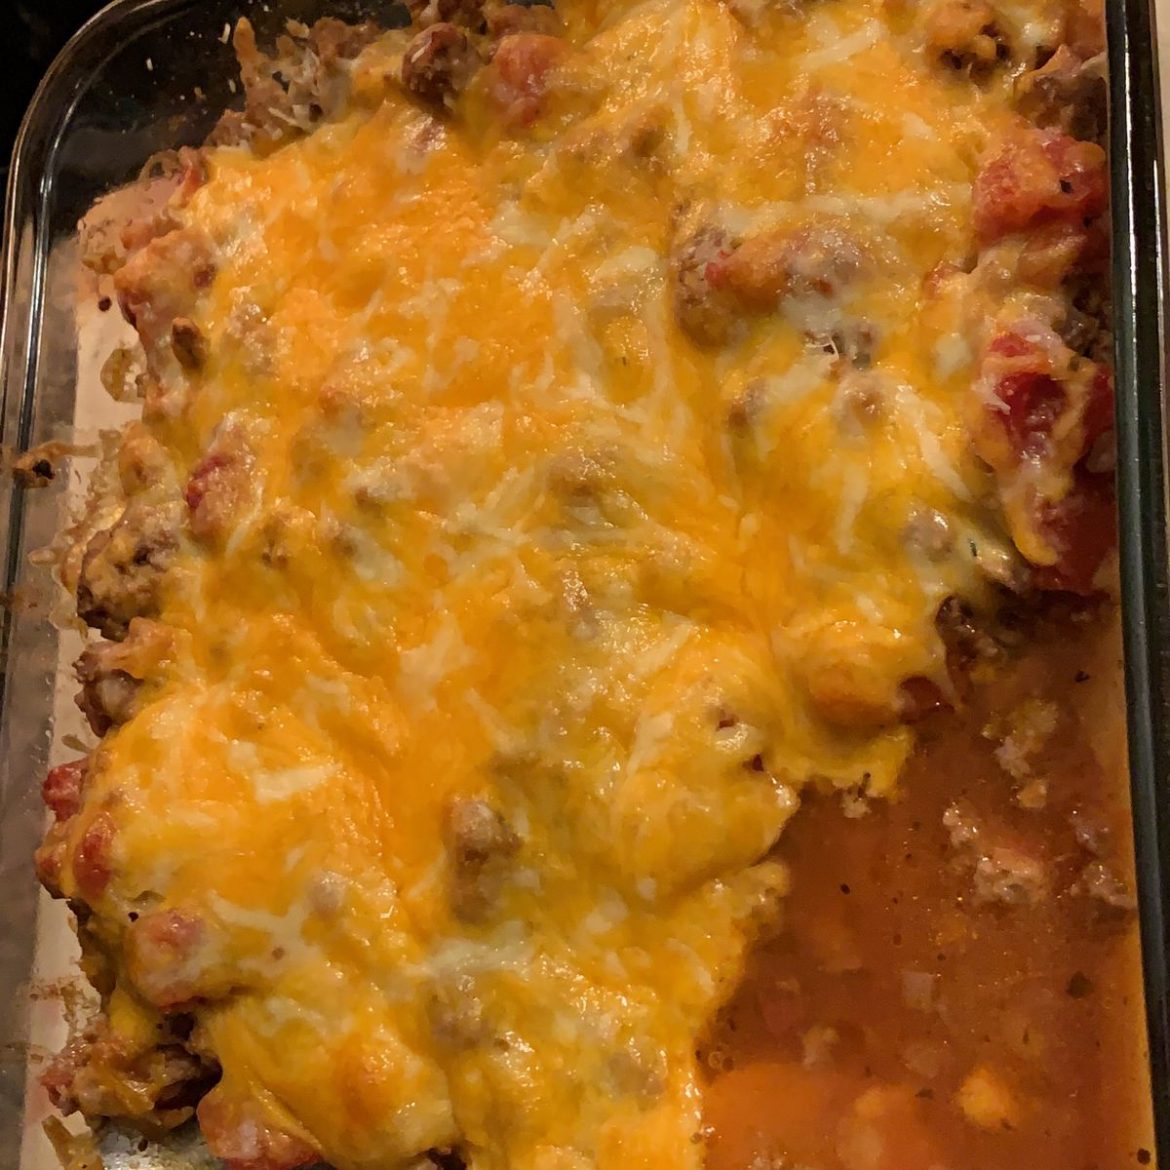
I have quite a stash of summer squash from my lovely neighbor. I even gave some to my friends, but I still have a lot! One of my favorite and go-to summer squash recipes is this low-carb casserole. It’s incredibly easy and quick to make and perfect to use up a bumper crop of summer squash.

This marvelous dish is excellent for feeding a crowd. This is also great if you are into a low-carb diet as each serving has only around 200 calories. This low-carb yellow squash casserole with taco flavor is filling as is but you can always add your preferred toppings if desired. As you already figured, I use summer squash instead of tortillas to keep this casserole keto-friendly. For the cheese, you are welcome to use a Mexican cheese blend or even pepper jack. If you love some extra kick, you can add about 2 to 3 freshly chopped green chilis to the ground beef mixture.

Put a fun twist to your usual Mexican casserole with this amazing low-carb yellow squash casserole with taco flavor. Try this soon. I’m pretty sure you’ll love every inch of this!

Ingredients

1 lb ground beef cooked and drained

2 c. summer squash, thinly sliced

2 tsp chili powder

1½ tsp paprika

14 ounces canned diced tomato

1½ tsp cumin

¾ tsp garlic salt

⅛ tsp cayenne

1 tsp onion powder

2 c. cheddar cheese, grated

½ tsp salt

How to make Low Carb Yellow Squash Casserole with Taco Flavor

Step 1: Prepare the oven. Preheat it to 350 degrees.

Step 2: To the cooked meat, add the canned tomato and seasonings. Let it simmer for approximately 5 minutes.

Step 3: To the bottom of a 9 x 13-inch baking pan, place the sliced squash and top with the meat mixture, and sprinkle with grated cheese.

Step 4: Place in the preheated oven and bake for about 25 minutes.

Notes:

To spice things up, you are welcome to add green chilis. If desired, you can sprinkle around 2 to 3 sliced green chilis.

To release some of the water from the sliced squash, salt them before cooking. Alternately, you can grill it first.

Nutrition Facts:

Serving: 1slice | Calories: 204 | Carbohydrates: 3g | Protein: 16g | Fat: 14g | Saturated Fat: 7g | Monounsaturated Fat: 2g | Cholesterol: 55mg | Sodium: 399mg | Potassium: 187mg | Fiber: 1g | Sugar: 2g | Vitamin A: 750IU | Vitamin C: 13.2mg | Calcium: 190mg | Iron: 1.4mg

Additional Info:

Net Carbs: 2 g | % Carbs: 4 % | % Protein: 32.3 % | % Fat: 63.6 % | SmartPoints: 7

Low Carb Yellow Squash Casserole with Taco Flavor

Rebecca Prep Time: 10 mins | Cook Time: 35 mins | Total Time: 45 mins | Servings: 10 people I have quite a stash of summer squash from my lovely neighbor.… General Recipes Low Carb Yellow Squash Casserole with Taco Flavor European Print This
Serves: 10 Prep Time: 10 mins Cooking Time: 35 mins 35 mins
Nutrition facts: 204 calories 14 fat
Rating: 5.0/5
( 1 voted )

Ingredients

  • 1 lb ground beef cooked and drained
  • 2 c. summer squash, thinly sliced
  • 2 tsp chili powder
  • 1½ tsp paprika
  • 14 ounces canned diced tomato
  • 1½ tsp cumin
  • ¾ tsp garlic salt
  • ⅛ tsp cayenne
  • 1 tsp onion powder
  • 2 c. cheddar cheese, grated
  • ½ tsp salt

Instructions

Step 1: Prepare the oven. Preheat it to 350 degrees.

Step 2: To the cooked meat, add the canned tomato and seasonings. Let it simmer for approximately 5 minutes.

Step 3: To the bottom of a 9 x 13-inch baking pan, place the sliced squash and top with the meat mixture, and sprinkle with grated cheese.

Step 4: Place in the preheated oven and bake for about 25 minutes.

Notes

To spice things up, you are welcome to add green chilis. If desired, you can sprinkle around 2 to 3 sliced green chilis. To release some of the water from the sliced squash, salt them before cooking. Alternately, you can grill it first.

July 1, 2022 0 comment
0 FacebookTwitterPinterestEmail
General Recipes

WEEKNIGHT PEPPER STEAK

by Rebecca July 1, 2022
written by Rebecca

PREP TIME: 15 MINS | COOK TIME: 12 MINS | SERVINGS: 4

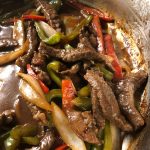
Tickle your taste buds with this easy and quick weeknight pepper steak in a scrumptious ginger sauce. My family’s favorite and the best pepper steak I’ve ever tasted! This is made with only a few simple ingredients and ready in no time. For a delicious, filling meal, serve this pepper steak over rice.

This weeknight pepper steak is a very impressive dish. It looks and tastes like you spent forever making this, but the truth is this is incredibly easy and fast to make. I love the tasty sauce over rice. It’s so savory and never fails to excite my taste goblet!

INGREDIENTS

1 lb boneless beef sirloin steak, cut into thin strips

1 tbsp vegetable oil

1 package McCormick® Brown Gravy Mix

1 tbsp soy sauce

3/4 c. cold water

1/2 tsp McCormick® Ground Ginger

1 medium green or red bell pepper (or 1/2 of each), cut into thin strips

1 small onion, cut into thin wedges

HOW TO MAKE WEEKNIGHT PEPPER STEAK

Step 1: In a small bowl, place the Gravy Mix, water, soy sauce, and ginger. Mix well until combined.

Step 2: In a large skillet, heat the oil over medium-high heat. Once the oil is hot, add the steak to the skillet and cook for about 2 minutes, stirring, until no longer pink. Then, pour in the gravy and add the onion and bell pepper. Stir well.

Step 3: Bring everything to a boil, then adjust the heat to low. Let the sauce simmer for about 6 to 8 minutes, stirring often, until the sauce has thickened.

Step 4: Take the skillet off the heat when done and serve the pepper steak right away over cooked rice. Enjoy!

Tips: You can swap ground ginger with 1/4 tsp McCormick® Ground Red Pepper and prep as instructed. You can also sub the onion and bell pepper with 1 bag (16 ounces) of frozen pepper stir-fry blend.

NUTRITION FACTS (per Serving):

Calories 231, Total Fat 11g, Cholesterol 57mg, Sodium 587mg, Carbohydrates 8g, Fiber 1g, Protein 25g

WEEKNIGHT PEPPER STEAK

Rebecca PREP TIME: 15 MINS | COOK TIME: 12 MINS | SERVINGS: 4 Tickle your taste buds with this easy and quick weeknight pepper steak in a scrumptious ginger sauce. My… General Recipes WEEKNIGHT PEPPER STEAK European Print This
Serves: 4 Prep Time: 15 mins Cooking Time: 12 mins 12 mins
Nutrition facts: 231 calories 11 fat
Rating: 5.0/5
( 1 voted )

Ingredients

  • 1 lb boneless beef sirloin steak, cut into thin strips
  • 1 tbsp vegetable oil
  • 1 package McCormick® Brown Gravy Mix
  • 1 tbsp soy sauce
  • 3/4 c. cold water
  • 1/2 tsp McCormick® Ground Ginger
  • 1 medium green or red bell pepper (or 1/2 of each), cut into thin strips
  • 1 small onion, cut into thin wedges

Instructions

Step 1: In a small bowl, place the Gravy Mix, water, soy sauce, and ginger. Mix well until combined.

Step 2: In a large skillet, heat the oil over medium-high heat. Once the oil is hot, add the steak to the skillet and cook for about 2 minutes, stirring, until no longer pink. Then, pour in the gravy and add the onion and bell pepper. Stir well.

Step 3: Bring everything to a boil, then adjust the heat to low. Let the sauce simmer for about 6 to 8 minutes, stirring often, until the sauce has thickened.

Step 4: Take the skillet off the heat when done and serve the pepper steak right away over cooked rice. Enjoy!

Notes

You can swap ground ginger with 1/4 tsp McCormick® Ground Red Pepper and prep as instructed. You can also sub the onion and bell pepper with 1 bag (16 ounces) of frozen pepper stir-fry blend.

July 1, 2022 0 comment
0 FacebookTwitterPinterestEmail
General Recipes

Cheater Sesame Chicken

by Rebecca July 1, 2022
written by Rebecca

PREP TIME: 5 MINS | COOK TIME: 15 MINS | TOTAL TIME: 20 MINS | SERVINGS: 6

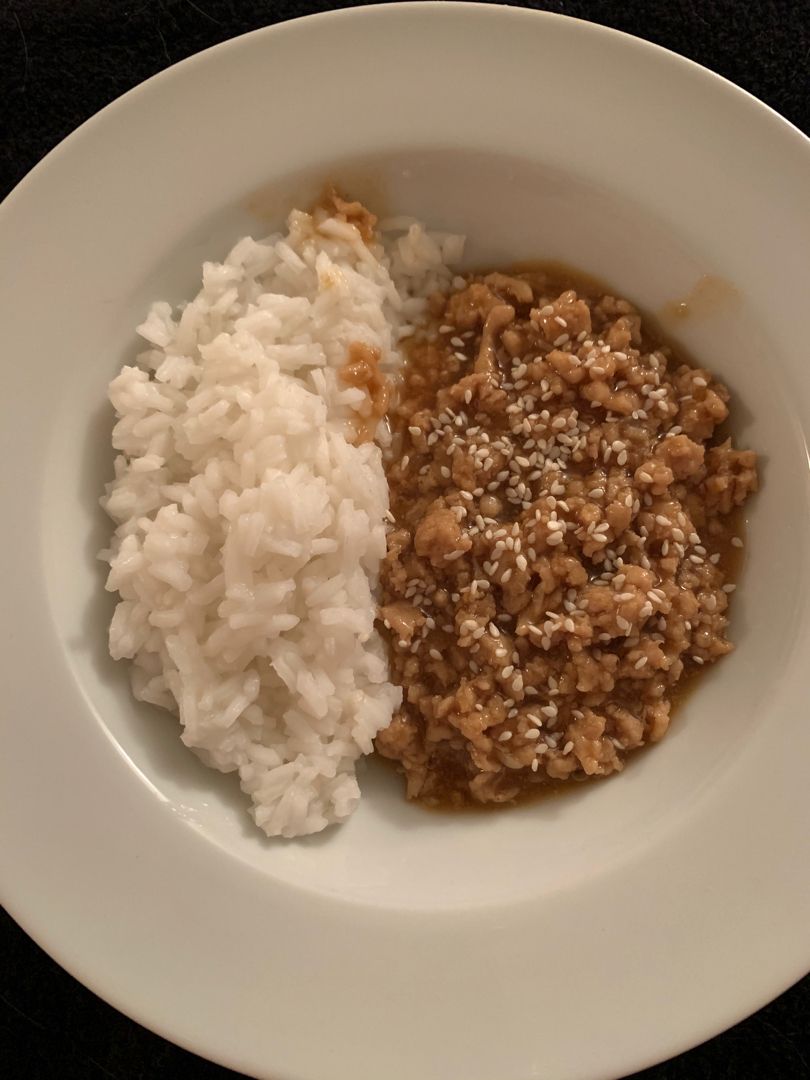
Enjoy your favorite Chinese sesame chicken takeout in the comfort of your home with this easy cheater sesame chicken recipe. No deep frying is required. The best part is this is a million better and quicker than takeout!

Ingredients

6 cloves garlic, minced

2 lbs ground chicken

1 tbsp sunflower or refined coconut oil

2 tbsp grated ginger or ginger paste

3/4 c. brown sugar

1/4 c. toasted sesame oil

1/2 c. low sodium soy sauce

2 tbsp cornstarch

2 tbsp toasted sesame seeds

1-2 tbsp chili garlic sauce

8 green onions, thinly sliced

1 tsp kosher salt

1 1/4 c. low sodium chicken broth or stock, plus 1/4 c., separated

How to make Cheater Sesame Chicken

Step 1: Into a stainless steel everyday pan or cast-iron skillet with high sides heat the sunflower oil or coconut oil over medium heat. Once hot, add the ground chicken and season with salt. Using a bamboo wooden spoon, break the chicken as it cooks until opaque and no longer pink. Next, stir in the minced garlic and ginger. Adjust the heat to medium-high and continue to cook for another minute until aromatic. Add the chili garlic paste and brown sugar. Stir and cook for additional 30 seconds. In a small bowl, whisk the soy sauce, sesame oil, and 1 1/4 cups of chicken stock until well blended. Pour this over the chicken and bring the mixture to a simmer.

Step 2: Combine the rest of the 1/4 c chicken stock and cornstarch until smooth. Pout this into the skillet while the sauce is simmering, stirring vigorously until blended. Return the mixture to a simmer, then adjust the heat to medium-low and allow it to bubble for about 3 minutes until thickened. If the sauce starts to get too thick, add 1 tbsp chicken stock at a time.

Step 3: Take the skillet off the heat and stir in the sesame seeds and green onions. Serve the sesame chicken immediately over rice, or warm on lettuce leaves. You can also enjoy this cold on salads.

Nutrition Facts:

Calories: 480 kcal, Carbohydrates: 35g, Protein: 29g, Fat: 25g, Saturated Fat: 5g, Cholesterol: 130mg, Sodium: 1352mg, Potassium: 984mg, Fiber: 1g, Sugar: 28g, Vitamin A: 160IU, Vitamin C: 4mg, Calcium: 80mg, Iron: 2.6mg

Cheater Sesame Chicken

Rebecca PREP TIME: 5 MINS | COOK TIME: 15 MINS | TOTAL TIME: 20 MINS | SERVINGS: 6 Enjoy your favorite Chinese sesame chicken takeout in the comfort of your home… General Recipes Cheater Sesame Chicken European Print This
Serves: 6 Prep Time: 5 mins Cooking Time: 15 mins1 15 mins1
Nutrition facts: 480 calories 25 fat
Rating: 5.0/5
( 1 voted )

Ingredients

  • 6 cloves garlic, minced
  • 2 lbs ground chicken
  • 1 tbsp sunflower or refined coconut oil
  • 2 tbsp grated ginger or ginger paste
  • 3/4 c. brown sugar
  • 1/4 c. toasted sesame oil
  • 1/2 c. low sodium soy sauce
  • 2 tbsp cornstarch
  • 2 tbsp toasted sesame seeds
  • 1-2 tbsp chili garlic sauce
  • 8 green onions, thinly sliced
  • 1 tsp kosher salt
  • 1 1/4 c. low sodium chicken broth or stock, plus 1/4 c., separated

Instructions

Step 1: Into a stainless steel everyday pan or cast-iron skillet with high sides heat the sunflower oil or coconut oil over medium heat. Once hot, add the ground chicken and season with salt. Using a bamboo wooden spoon, break the chicken as it cooks until opaque and no longer pink. Next, stir in the minced garlic and ginger. Adjust the heat to medium-high and continue to cook for another minute until aromatic. Add the chili garlic paste and brown sugar. Stir and cook for additional 30 seconds. In a small bowl, whisk the soy sauce, sesame oil, and 1 1/4 cups of chicken stock until well blended. Pour this over the chicken and bring the mixture to a simmer.

Step 2: Combine the rest of the 1/4 c chicken stock and cornstarch until smooth. Pout this into the skillet while the sauce is simmering, stirring vigorously until blended. Return the mixture to a simmer, then adjust the heat to medium-low and allow it to bubble for about 3 minutes until thickened. If the sauce starts to get too thick, add 1 tbsp chicken stock at a time.

Step 3: Take the skillet off the heat and stir in the sesame seeds and green onions. Serve the sesame chicken immediately over rice, or warm on lettuce leaves. You can also enjoy this cold on salads.

July 1, 2022 0 comment
0 FacebookTwitterPinterestEmail
General Recipes

TOMATO FRITTERS

by Rebecca July 1, 2022
written by Rebecca

Prep Time: 10 mins | Cook Time: 10 mins | Total Time: 20 mins | Yield: 4

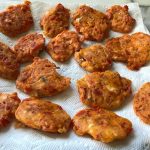
Summer is never over with these tasty tomato fritters! These summer fritters are made with tomatoes, feta, and fresh dill. I love how these fritters are bursting with flavor. They are slightly crisp outside and moist inside. I make sure to always whip up a big batch as these delicious tomato fritters are gone in a blink! Enjoy these fritters by themselves or with yoghurt.

If you are searching for an easy and quick appetizer or side dish, then you have to give these tomato fritters a try. They are very easy and quick to make. These fritters are loaded with real tomato flavors. In the middle of winter, and you found yourself craving these tomato fritters, simply use sun-dried tomatoes and make a little different recipe with a very special flavor!

INGREDIENTS

4 and ½ tbsp flour

2 eggs

1 tbsp tomato paste

4 tomatoes, 1 and ½ c. when chopped

¼ c. crumbled feta

2 tbsp chopped fresh dill

¼ c. olive oil to fry

¼ tsp salt

¼ tsp ground black pepper

HOW TO MAKE TOMATO FRITTERS

Step 1: Beat the eggs. Take the seeds off the tomatoes and gently squeeze to get rid of the excess juice. Chop the tomatoes into tiny chunks and toss in the beaten eggs. Then, stir in the tomato paste. Fold in the crumbled feta and whisk in the flour. Note that you might need to add a bit more flour as the tomatoes might still release some juices when combined with other ingredients. At this point, you should have a slightly thicker batter than a cake batter.

Step 2: To the batter, stir in the chopped fresh dill, salt, and black pepper.

Step 3: In a large skillet, heat the olive oil. Once the oil is hot, drop a teaspoon of the batter into the skillet and fry for about 30 seconds per side until done. On a paper towel, transfer the fritter. Repeat with the remaining batter.

Step 4: Serve the tomato fritters warm. Enjoy!

Nutrition Facts:

Serving Size: 4 fritters | Calories: 221 | Sugar: 4.9 g | Sodium: 280 mg | Fat: 18.8 g | Carbohydrates: 9.5 g | Protein: 6.5 g | Cholesterol: 101.3 mg

TOMATO FRITTERS

Rebecca Prep Time: 10 mins | Cook Time: 10 mins | Total Time: 20 mins | Yield: 4 Summer is never over with these tasty tomato fritters! These summer fritters are… General Recipes TOMATO FRITTERS European Print This
Serves: 4 Prep Time: 10 mins Cooking Time: 10 mins 10 mins
Nutrition facts: 221 calories 4.9 fat
Rating: 4.5/5
( 2 voted )

Ingredients

  • 4 and ½ tbsp flour
  • 2 eggs
  • 1 tbsp tomato paste
  • 4 tomatoes, 1 and ½ c. when chopped
  • ¼ c. crumbled feta
  • 2 tbsp chopped fresh dill
  • ¼ c. olive oil to fry
  • ¼ tsp salt
  • ¼ tsp ground black pepper

Instructions

Step 1: Beat the eggs. Take the seeds off the tomatoes and gently squeeze to get rid of the excess juice. Chop the tomatoes into tiny chunks and toss in the beaten eggs. Then, stir in the tomato paste. Fold in the crumbled feta and whisk in the flour. Note that you might need to add a bit more flour as the tomatoes might still release some juices when combined with other ingredients. At this point, you should have a slightly thicker batter than a cake batter.

Step 2: To the batter, stir in the chopped fresh dill, salt, and black pepper.

Step 3: In a large skillet, heat the olive oil. Once the oil is hot, drop a teaspoon of the batter into the skillet and fry for about 30 seconds per side until done. On a paper towel, transfer the fritter. Repeat with the remaining batter.

Step 4: Serve the tomato fritters warm. Enjoy!

July 1, 2022 0 comment
0 FacebookTwitterPinterestEmail
General Recipes

GARLIC BUTTER SHRIMP SCAMPI

by Rebecca July 1, 2022
written by Rebecca

PREP TIME: 5 MINS | COOK TIME: 5 MINS | TOTAL TIME: 10 MINS | SERVES: 4 people

This delicious garlic butter shrimp scampi is one of my favorites rotation. It’s not perfect for an easy and quick weeknight dinner but as a tasty appetizer. This shrimp scampi is incredibly easy to make using only a few readily available ingredients. And you can throw this together in less than 10 minutes. I love to serve this shrimp scampi over pasta or with garlic bread on the side. If you are following a strict low-carb diet, this garlic butter shrimp scampi is also great over zucchini noodles or with steamed cauliflower.

INGREDIENTS

4-5 large garlic cloves, minced (or 1 1/2 tbsp minced garlic)

4 tbsp butter

1 1/4 lbs (600 g.) large shrimp, prawns, shelled with tails on or off

1/4 c. dry white wine or broth

2 tbsp lemon juice

2 tbsp olive oil

1/4 c. chopped parsley

Salt and fresh ground black pepper to taste

1/2 tsp crushed red pepper flakes, or to taste (optional)

HOW TO MAKE GARLIC BUTTER SHRIMP SCAMPI

Step 1: In a large pan or skillet, heat the olive oil and 2 tbsp butter. Then, add the garlic and cook for about 30 seconds to 1 minute, stirring often, until aromatic. Next, add the shrimp and sprinkle with salt and pepper. Continue to cook until one side of the shrimp is starting to turn pink. This takes about 1 to 2 minutes. Flip the shrimp.

Step 2: To the skillet, pour in the wine or broth and add the red pepper flakes (optional). Let it simmer for about 2 minutes or until the wine reduces by about half and the shrimp is done.

Step 3: Add the rest of the butter, lemon juice, and parsley. Stir and immediately take the pan off the heat.

Step 4: Serve the garlic butter shrimp scampi right away over pasta and rice with garlic bread or steamed veggies on the side. Enjoy!

NUTRITION FACTS:

Calories: 291 kcal | Carbohydrates: 2g | Protein: 35g | Fat: 13g | Saturated Fat: 7g | Cholesterol: 458mg | Sodium: 1427mg | Potassium: 186mg | Vitamin A: 810IU | Vitamin C: 17.5mg | Calcium: 262mg | Iron: 4mg

GARLIC BUTTER SHRIMP SCAMPI

Rebecca PREP TIME: 5 MINS | COOK TIME: 5 MINS | TOTAL TIME: 10 MINS | SERVES: 4 people This delicious garlic butter shrimp scampi is one of my favorites rotation.… General Recipes GARLIC BUTTER SHRIMP SCAMPI European Print This
Serves: 4 Prep Time: 5 mins Cooking Time: 5 mins 5 mins
Nutrition facts: 291 calories 13 fat
Rating: 5.0/5
( 1 voted )

Ingredients

  • 4-5 large garlic cloves, minced (or 1 1/2 tbsp minced garlic)
  • 4 tbsp butter
  • 1 1/4 lbs (600 g.) large shrimp, prawns, shelled with tails on or off
  • 1/4 c. dry white wine or broth
  • 2 tbsp lemon juice
  • 2 tbsp olive oil
  • 1/4 c. chopped parsley
  • Salt and fresh ground black pepper to taste
  • 1/2 tsp crushed red pepper flakes, or to taste (optional)

Instructions

Step 1: In a large pan or skillet, heat the olive oil and 2 tbsp butter. Then, add the garlic and cook for about 30 seconds to 1 minute, stirring often, until aromatic. Next, add the shrimp and sprinkle with salt and pepper. Continue to cook until one side of the shrimp is starting to turn pink. This takes about 1 to 2 minutes. Flip the shrimp.

Step 2: To the skillet, pour in the wine or broth and add the red pepper flakes (optional). Let it simmer for about 2 minutes or until the wine reduces by about half and the shrimp is done.

Step 3: Add the rest of the butter, lemon juice, and parsley. Stir and immediately take the pan off the heat.

Step 4: Serve the garlic butter shrimp scampi right away over pasta and rice with garlic bread or steamed veggies on the side. Enjoy!

July 1, 2022 0 comment
0 FacebookTwitterPinterestEmail
General Recipes

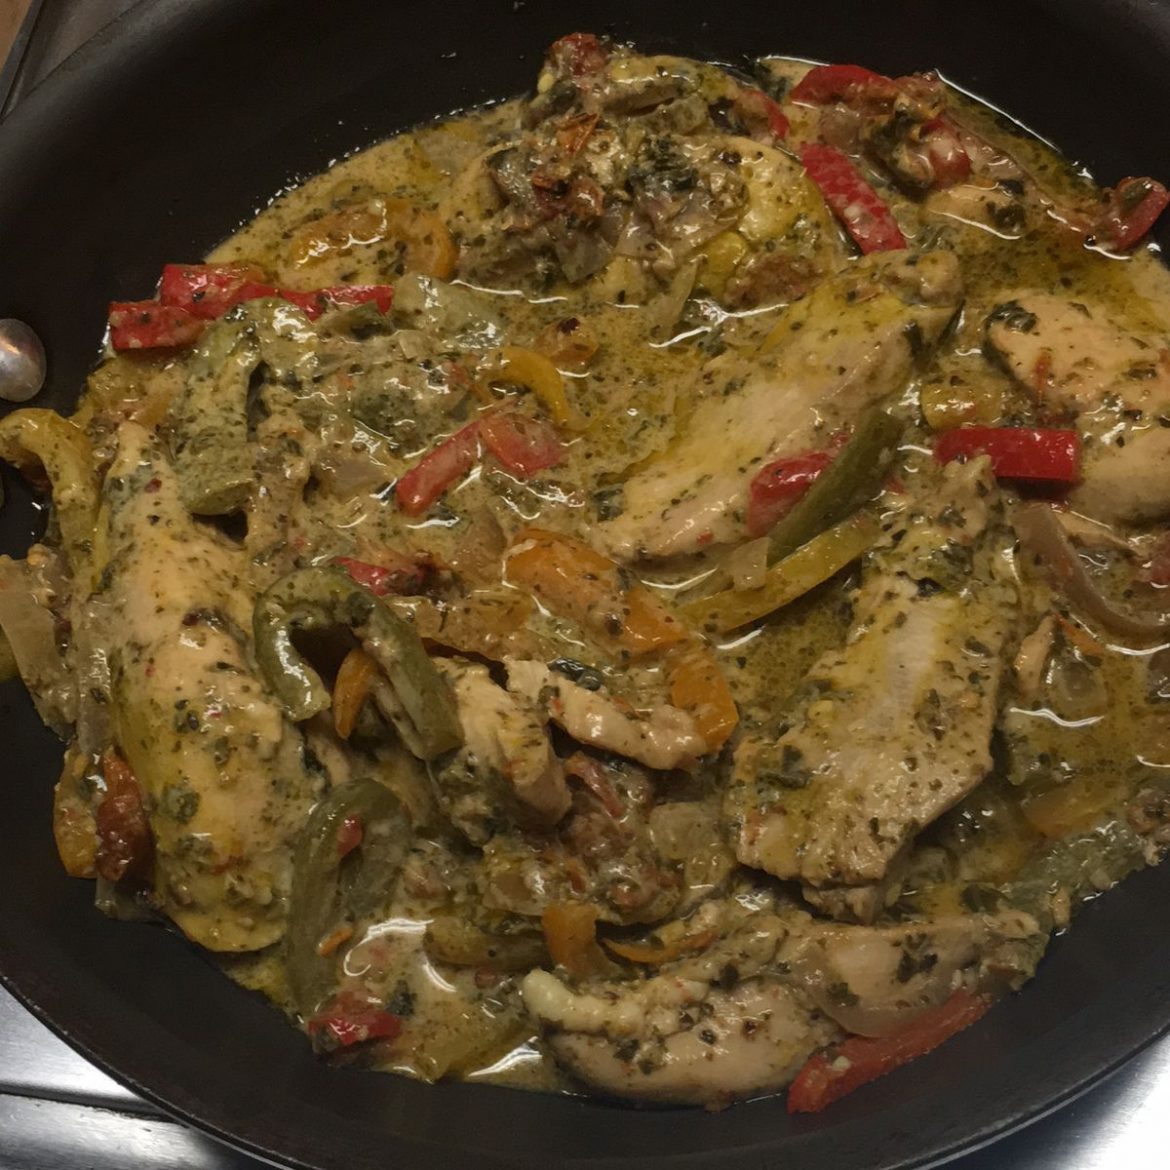
Creamy Garlic Pesto Chicken

by Rebecca July 1, 2022
written by Rebecca

PREP TIME: 15 MINS | COOK TIME: 20 MINS | YIELD: 4 servings

Creamy, delicious, and very impressive – this easy creamy garlic pesto chicken is a must! The chicken is pan-fried in tomato oil with Italian seasoning and crushed chili pepper and smothered in a mouthwatering pesto sauce with sun-dried tomato and bell peppers. And do not forget the garlic! For a quick, filling weeknight meal, serve this dish over rice, zucchini noodles, pasta, or bulgur.

INGREDIENTS

3 garlic cloves, minced

3-4 chicken breasts, boneless, skinless

1/2 tsp Italian seasoning

1/4 tsp red pepper flakes

1/2 red onion

3 bell peppers (1 red, 1/2 yellow, and 1/2 green)

1/2 c. sun-dried tomatoes, drained of most oil, chopped (keep the drained oil for cooking)

1/2 c. basil pesto

1/2 c. chicken stock

1/2 c. heavy whipping cream

Salt and fresh cracked pepper

Parmesan, for garnish

Chopped fresh basil, for garnish

How to make Creamy Garlic Pesto Chicken

Step 1: In a large nonstick skillet, heat 1 tbsp of the drained tomato oil along with Italian seasoning and crushed chili pepper. Then, add the chicken breasts and cook for about 4 to 5 minutes per side. Decrease the heat if the chicken begins to brown too quickly. Set the chicken aside when done.

Step 2: In a mixing cup or bowl, place the sauce ingredients (basil pesto, cream, and chicken stock). Mix well until combined. Set aside.

Step 3: In the now-empty skillet, add the onion, garlic, and sun-dried tomato. You can add a bit more oil from the sun-dried tomato jar if the skillet is dry. Cook for about 1 minute over medium-high heat or until just aromatic. Next, add the bell peppers and cook further until the bell peppers are a little bit cooked but still crisp.

Step 4: To the skillet, pour in the prepared pesto sauce. Bring everything to a simmer. In the meantime, slice each chicken breast into strips and add them back to the skillet. Cook for another 2 to 3 minutes or until heated through.

Step 5: Remove from the heat when done and garnish the creamy garlic pesto chicken with some Parmesan and basil. Serve right away over rice, pasta, zucchini noodles, or bulgur. Enjoy!

Nutrition Facts:

Energy 610.51 cal, Fat 32.43 g, Protein 67.98 g, Carbs 11.48 g, Saturated Fat 10.68 g, Polyunsat Fat 6.02 g, Monounsat Fat 12.59 g, Sugar 2.17 g, Cholesterol 199.73 mg, Sodium 360 mg, Potassium 1190.69 mg, Fiber 6.38 g

Creamy Garlic Pesto Chicken

Rebecca PREP TIME: 15 MINS | COOK TIME: 20 MINS | YIELD: 4 servings Creamy, delicious, and very impressive – this easy creamy garlic pesto chicken is a must! The chicken… General Recipes Creamy Garlic Pesto Chicken European Print This
Serves: 4 Prep Time: 15 mins Cooking Time: 20 mins 20 mins
Nutrition facts: 610.51 calories 32.43 fat
Rating: 5.0/5
( 1 voted )

Ingredients

  • 3 garlic cloves, minced
  • 3-4 chicken breasts, boneless, skinless
  • 1/2 tsp Italian seasoning
  • 1/4 tsp red pepper flakes
  • 1/2 red onion
  • 3 bell peppers (1 red, 1/2 yellow, and 1/2 green)
  • 1/2 c. sun-dried tomatoes, drained of most oil, chopped (keep the drained oil for cooking)
  • 1/2 c. basil pesto
  • 1/2 c. chicken stock
  • 1/2 c. heavy whipping cream
  • Salt and fresh cracked pepper
  • Parmesan, for garnish
  • Chopped fresh basil, for garnish

Instructions

Step 1: In a large nonstick skillet, heat 1 tbsp of the drained tomato oil along with Italian seasoning and crushed chili pepper. Then, add the chicken breasts and cook for about 4 to 5 minutes per side. Decrease the heat if the chicken begins to brown too quickly. Set the chicken aside when done.

Step 2: In a mixing cup or bowl, place the sauce ingredients (basil pesto, cream, and chicken stock). Mix well until combined. Set aside.

Step 3: In the now-empty skillet, add the onion, garlic, and sun-dried tomato. You can add a bit more oil from the sun-dried tomato jar if the skillet is dry. Cook for about 1 minute over medium-high heat or until just aromatic. Next, add the bell peppers and cook further until the bell peppers are a little bit cooked but still crisp.

Step 4: To the skillet, pour in the prepared pesto sauce. Bring everything to a simmer. In the meantime, slice each chicken breast into strips and add them back to the skillet. Cook for another 2 to 3 minutes or until heated through.

Step 5: Remove from the heat when done and garnish the creamy garlic pesto chicken with some Parmesan and basil. Serve right away over rice, pasta, zucchini noodles, or bulgur. Enjoy!

July 1, 2022 0 comment
0 FacebookTwitterPinterestEmail
Newer Posts
Older Posts

Popular Posts

  • 1

    Crispy Crunchy Parmesan Potatoes

    March 21, 2020
  • 2

    CROCK POT SMOTHERED PORK CHOPS

    March 21, 2020
  • Facebook
  • Twitter

@2019 - All Right Reserved.


Back To Top