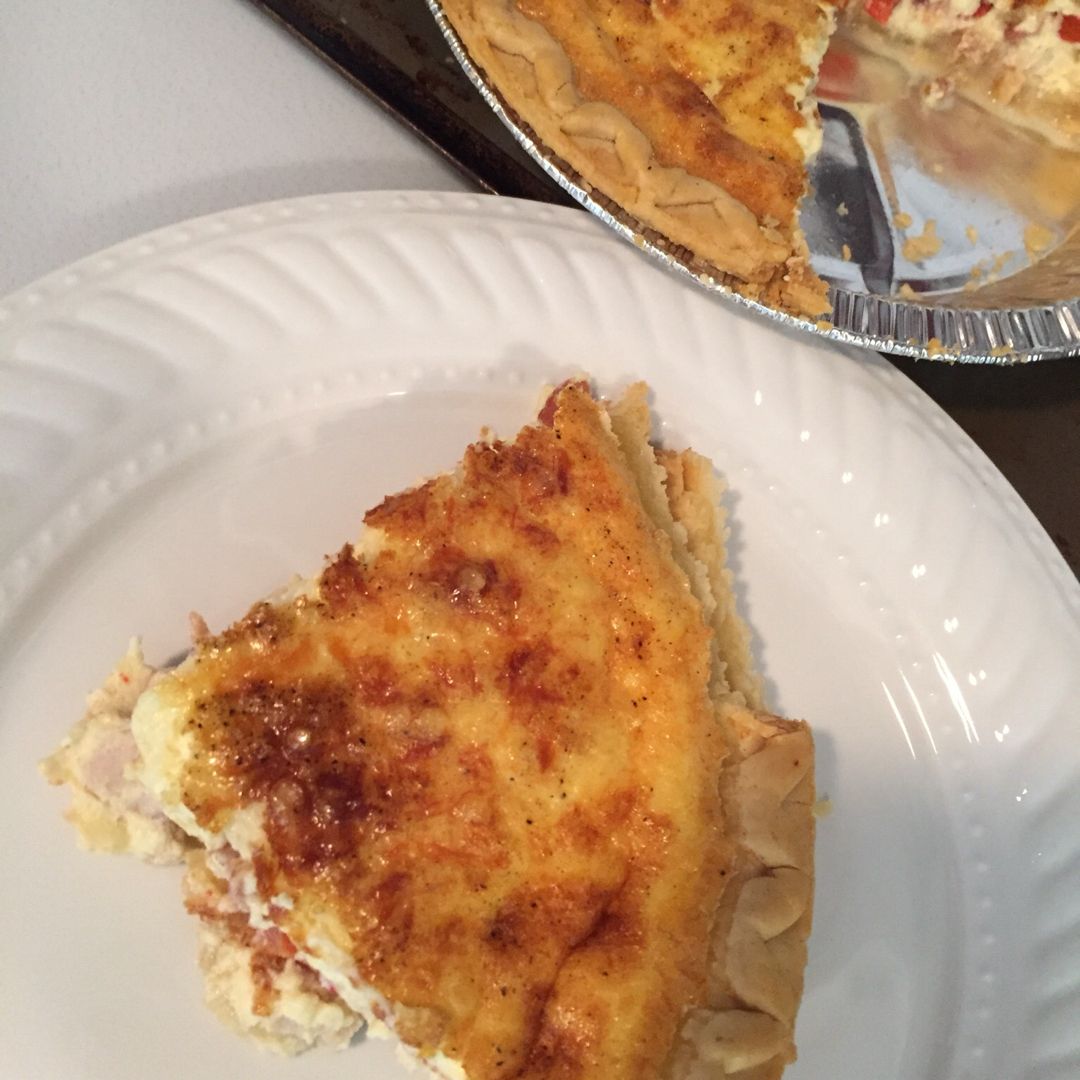
Cook it once
  • Home
  • Privacy Policy
  • Recipes
    • KETO
    • LC
    • WW
  • Tips
  • Contact
Cook it once
  • Home
  • Privacy Policy
  • Recipes
    • KETO
    • LC
    • WW
  • Tips
  • Contact
Category:

General Recipes

General Recipes

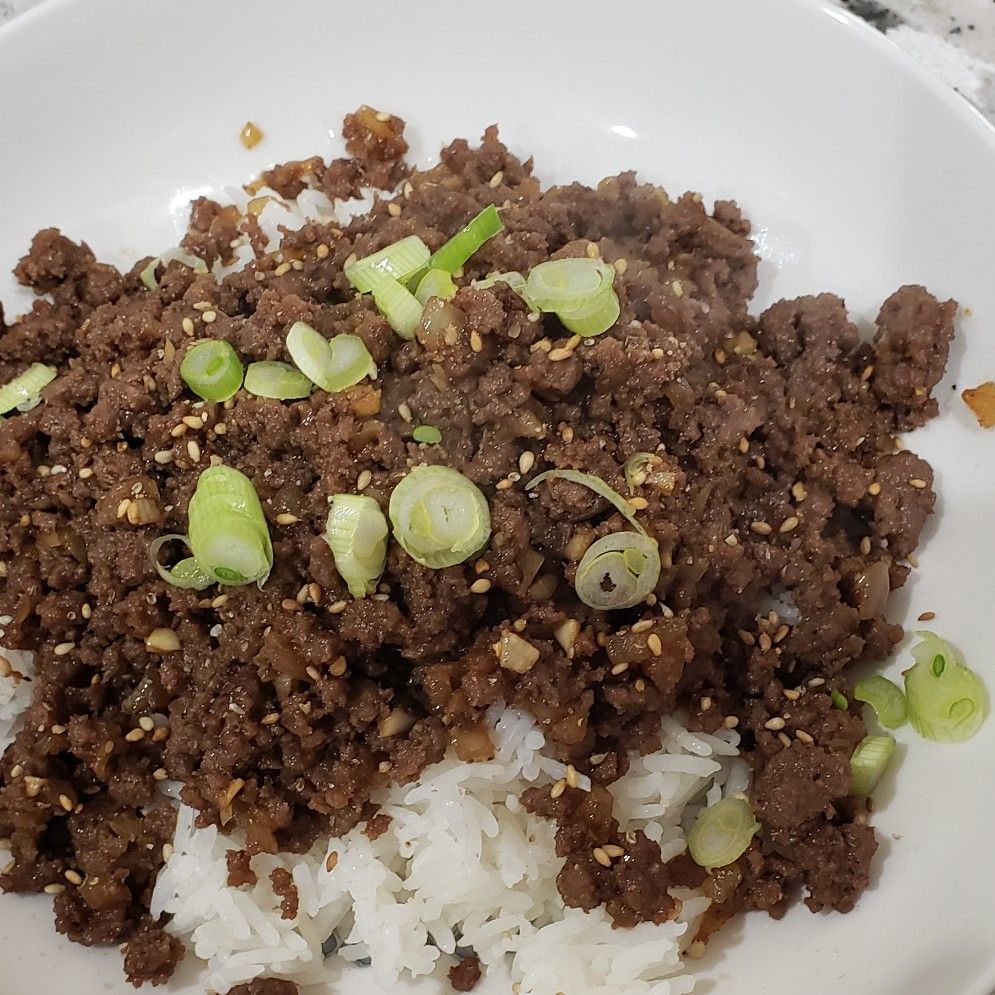
ground beef bulgogi

by Rebecca July 5, 2022
written by Rebecca

Cook Time: 10 mins | Total Time: 10 mins | Yield: 4

This ground beef bulgogi is an amazing dinner option that is great by itself or with any vegetable side dish. It’s a very easy dish to make using only a few simple ingredients and ready in less than ten minutes. A Korean signature bbq that you can easily throw together in the comfort of your home. Serve this delicious ground beef bulgogi over warm cooked rice, cauliflower rice, quinoa, or your preferred starch for a filling meal any time!

INGREDIENTS

1 tablespoon cooking oil

1 pound grass-fed or lean ground beef

10 cloves garlic, chopped

4 tablespoons soy sauce

2 tablespoons sugar

2 tablespoons mirin

1 tablespoon plum extract(you can substitute it apricot jam)

1 medium-size onion, small diced

1 teaspoon sesame seeds

3 to 5 green onions, chopped

1 teaspoon sesame oil

1/2 teaspoon black pepper

How to make ground beef bulgogi

Step 1: In a large mixing bowl, place the beef, garlic, onion, soy sauce, mirin, sugar, plum extract, and black pepper. Mix well until combined. Marinate the beef for about 30 minutes. This step is optional as we are using ground beef.

Step 2: Drizzle cooking oil in a hot wok or large skillet over high heat. Swirl the oil to coat the bottom of the skillet. Then, add the ground beef mixture and stir fry, breaking the meat into small chunks. Continue to cook for about 8 to 10 minutes until the moisture has evaporated and the meat is completely cooked, stirring often.

Step 3: Toss in the chopped green onions once you hear the sizzling sound, and the moisture from the beef is gone. Add the sesame seeds and oil, and stir well.

Step 4: Remove from the heat when done and serve the ground beef bulgogi right away over warm cooked rice, cauliflower rice, quinoa, or your preferred starch. If desired, garnish the bulgogi with sesame seeds and green onions. Enjoy!

Nutrition Facts:

Serves: 4, Calories Per Serving: 177, Total Fat 7.9g 10%, Trans Fat 0.2g, Sodium 1070.9mg 47%, Total Carbohydrate 19.9g 7%, Dietary Fiber 1.1g 4%, Sugars 13.6g, Protein 7.1g 14%, Vitamin A 18.6µg 2%, Vitamin C 6mg 7%
ground beef bulgogi

Rebecca Cook Time: 10 mins | Total Time: 10 mins | Yield: 4 This ground beef bulgogi is an amazing dinner option that is great by itself or with any vegetable… General Recipes ground beef bulgogi European Print This
Serves: 4 Cooking Time: 10 mins 10 mins
Nutrition facts: 177 calories 7.9 fat
Rating: 5.0/5
( 1 voted )

Ingredients

  • 1 tablespoon cooking oil
  • 1 pound grass-fed or lean ground beef
  • 10 cloves garlic, chopped
  • 4 tablespoons soy sauce
  • 2 tablespoons sugar
  • 2 tablespoons mirin
  • 1 tablespoon plum extract(you can substitute it apricot jam)
  • 1 medium-size onion, small diced
  • 1 teaspoon sesame seeds
  • 3 to 5 green onions, chopped
  • 1 teaspoon sesame oil
  • 1/2 teaspoon black pepper

Instructions

Step 1: In a large mixing bowl, place the beef, garlic, onion, soy sauce, mirin, sugar, plum extract, and black pepper. Mix well until combined. Marinate the beef for about 30 minutes. This step is optional as we are using ground beef.

Step 2: Drizzle cooking oil in a hot wok or large skillet over high heat. Swirl the oil to coat the bottom of the skillet. Then, add the ground beef mixture and stir fry, breaking the meat into small chunks. Continue to cook for about 8 to 10 minutes until the moisture has evaporated and the meat is completely cooked, stirring often.

Step 3: Toss in the chopped green onions once you hear the sizzling sound, and the moisture from the beef is gone. Add the sesame seeds and oil, and stir well.

Step 4: Remove from the heat when done and serve the ground beef bulgogi right away over warm cooked rice, cauliflower rice, quinoa, or your preferred starch. If desired, garnish the bulgogi with sesame seeds and green onions. Enjoy!
July 5, 2022 0 comment
0 FacebookTwitterPinterestEmail
General Recipes

Creamy Coconut Lime Chicken

by Rebecca July 4, 2022
written by Rebecca

Prep Time: 10 mins | Cook Time: 20 mins | Total Time: 30 mins | Servings: 4

This creamy coconut lime chicken is a very delicious one-pan meal that you can easily make in less than thirty minutes. Pan-seared chicken smothered in a mouthwatering creamy coconut milk sauce. This impressive dish is guaranteed one of the best chicken dinners!

Ingredients

1 tbsp olive oil

2 pounds boneless, skinless chicken breasts about 4 total chicken breasts

¼ c. cilantro, chopped, plus more for topping

2 tbsp coconut oil

1 garlic clove, minced

⅔ c. chicken broth

1 c. coconut milk

1 tbsp brown sugar or sub coconut sugar

2 limes

¼ c. all-purpose flour

salt and pepper to taste

1 green onion, chopped, for garnish

How to make Creamy Coconut Lime Chicken

Step 1: Prepare the oven. Preheat it to 375 degrees.

Step 2: In a hot, large, oven-safe skillet or Dutch oven over medium heat, add the coconut oil and olive oil.

Step 3: In a bowl, place the flour and cilantro. Mix well until combined. Dredge the chicken into the mixture, coating well. Into the hot skillet, directly place the breaded chicken and sear for about 3 to 4 minutes on each side until slightly browned. Add the minced garlic once the chicken is almost done and cook the garlic down for about 30 seconds or so.

Step 4: In the meantime, whisk the coconut milk, broth, sugar, and juice from 1 lime in a bowl.

Step 5: Take the skillet off the heat and pour the coconut milk mixture on top of the chicken. Place in the preheated oven and bake for about 10 to 15 minutes or until the internal temperature of the chicken reaches 165 degrees.

Step 6: When done, take the skillet out of the oven and drizzle the rest of the lime juice (juice from 1 lime) over the chicken. Sprinkle the chicken with salt, pepper, some chopped cilantro, and green onions. Serve right away. Enjoy!

Notes:

Cooking time varies depending on the thickness of the chicken.

If serving more people, slice the chicken breasts in half length-ways to make 8 breasts in total.

Instead of all-purpose flour use arrowroot starch to make this dish gluten-free/Paleo.

Omit the sugar and use arrowroot starch to make this Whole30.

Nutrition Facts:

Calories: 464 kcal | Carbohydrates: 14g | Protein: 51g | Fat: 28g | Saturated Fat: 18g | Cholesterol: 145mg | Sodium: 416mg | Potassium: 1029mg | Fiber: 1g | Sugar: 4g | Vitamin A: 152IU | Vitamin C: 16mg | Calcium: 33mg | Iron: 3mg

Creamy Coconut Lime Chicken

Rebecca Prep Time: 10 mins | Cook Time: 20 mins | Total Time: 30 mins | Servings: 4 This creamy coconut lime chicken is a very delicious one-pan meal that you… General Recipes Creamy Coconut Lime Chicken European Print This
Serves: 4 Prep Time: 10 mins Cooking Time: 20 mins 20 mins
Nutrition facts: 464 calories 28 fat
Rating: 5.0/5
( 1 voted )

Ingredients

  • 1 tbsp olive oil
  • 2 pounds boneless, skinless chicken breasts about 4 total chicken breasts
  • ¼ c. cilantro, chopped, plus more for topping
  • 2 tbsp coconut oil
  • 1 garlic clove, minced
  • ⅔ c. chicken broth
  • 1 c. coconut milk
  • 1 tbsp brown sugar or sub coconut sugar
  • 2 limes
  • ¼ c. all-purpose flour
  • salt and pepper to taste
  • 1 green onion, chopped, for garnish

Instructions

Step 1: Prepare the oven. Preheat it to 375 degrees.

Step 2: In a hot, large, oven-safe skillet or Dutch oven over medium heat, add the coconut oil and olive oil.

Step 3: In a bowl, place the flour and cilantro. Mix well until combined. Dredge the chicken into the mixture, coating well. Into the hot skillet, directly place the breaded chicken and sear for about 3 to 4 minutes on each side until slightly browned. Add the minced garlic once the chicken is almost done and cook the garlic down for about 30 seconds or so.

Step 4: In the meantime, whisk the coconut milk, broth, sugar, and juice from 1 lime in a bowl.

Step 5: Take the skillet off the heat and pour the coconut milk mixture on top of the chicken. Place in the preheated oven and bake for about 10 to 15 minutes or until the internal temperature of the chicken reaches 165 degrees.

Step 6: When done, take the skillet out of the oven and drizzle the rest of the lime juice (juice from 1 lime) over the chicken. Sprinkle the chicken with salt, pepper, some chopped cilantro, and green onions. Serve right away. Enjoy!

Notes

Cooking time varies depending on the thickness of the chicken. If serving more people, slice the chicken breasts in half length-ways to make 8 breasts in total. Instead of all-purpose flour use arrowroot starch to make this dish gluten-free/Paleo. Omit the sugar and use arrowroot starch to make this Whole30.

July 4, 2022 0 comment
0 FacebookTwitterPinterestEmail
General Recipes

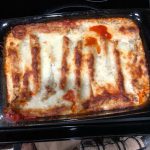
Creamy Ricotta Spinach and Chicken Cannelloni

by Rebecca July 4, 2022
written by Rebecca

Prep Time: 15 mins | Cook Time: 30 mins | Resting Time: 5 mins | Total Time: 45 mins | Servings: 6

This creamy ricotta, spinach and chicken cannelloni is a classic recipe and a crowd favorite. This mouthwatering cannelloni is made with some fresh spinach, chicken, and ricotta cheese topped with a simple yet super impressive creamy sauce.

Ingredients

1 tbsp olive oil

12 cannelloni tubes

2 cloves garlic, minced

1 yellow onion, diced

3 cooked chicken breasts, finely chopped

1 c. part-skim Ricotta cheese

salt and fresh ground pepper, to taste

1 c. pasta sauce

1/2 c. milk

1/4 c. grated Parmesan cheese

1/2 tsp dried basil

1/8 tsp ground nutmeg

1/4 tsp dried oregano

1 1/2 c. half & half

salt and fresh ground pepper, to taste

1 bag (8 to 10 oz.) of baby spinach

How to make Creamy Ricotta Spinach and Chicken Cannelloni

Step 1: In boiling water, cook the cannelloni tubes for about 5 minutes. Rinse when done and set aside to cool for a couple of minutes or until cool enough to handle.

Step 2: Prepare the oven. Preheat it to 400 degrees F.

Step 3: In a large skillet, heat the oil over medium-high heat. Once the oil is hot, add the onions and cook for about 2 minutes. Add the garlic and chicken, stir, and continue to cook for additional 4 minutes.

Step 4: Pour in the milk and simmer everything for about 2 minutes or until most of the liquid has evaporated. Then, add the ricotta cheese. Stir well until incorporated. Next, add the spinach and cook for 2 minutes more until wilted.

Step 5: Take the skillet off the heat and allow it to stand for a couple of minutes. Once cool enough to handle, stuff the prepared chicken mixture into the cannelloni tubes using a spoon, your hands, or a piping bag.

Step 6: On the bottom of a 9 x 13-inch baking dish, spoon the pasta sauce. In a single layer, arrange the stuffed cannelloni. Set aside.

Step 7: Place the half & half, Parmesan, basil, oregano, nutmeg, salt, and pepper in a mixing bowl. Mix well until blended, then pour this over the cannelloni. Place in the preheated oven and bake for about 18 to 20 minutes or until golden brown and the cream has reduced. Take the dish out of the oven when done and allow it to stand for about 3 minutes or until the sauce has slightly thickened.

Step 8: Before serving, spoon the sauce over the cannelloni. Enjoy!

Notes:

WW FREESTYLE POINTS: 14

To cut down the points to 11, try using fat-free half&half and fat-free Ricotta Cheese.

Nutrition Facts:

Amount Per Serving (2 Cannelloni Tubes plus Sauce), Calories 434, Calories from Fat 171, Fat 19g29%, Saturated Fat 10g50%, Cholesterol 122mg41%, Sodium 411mg17%, Potassium 545mg16%, Carbohydrates 25g8%, Fiber 2g8%, Sugar 4g4%, Protein 38g76%, Vitamin A 675IU14%, Vitamin C 5mg6%, Calcium 248mg25%, Iron 2.5mg14%

Creamy Ricotta Spinach and Chicken Cannelloni

Rebecca Prep Time: 15 mins | Cook Time: 30 mins | Resting Time: 5 mins | Total Time: 45 mins | Servings: 6 This creamy ricotta, spinach and chicken cannelloni is… General Recipes Creamy Ricotta Spinach and Chicken Cannelloni European Print This
Serves: 6 Prep Time: 15 mins Cooking Time: 30 mins 30 mins
Nutrition facts: 434 calories 19 fat
Rating: 5.0/5
( 1 voted )

Ingredients

  • 1 tbsp olive oil
  • 12 cannelloni tubes
  • 2 cloves garlic, minced
  • 1 yellow onion, diced
  • 3 cooked chicken breasts, finely chopped
  • 1 c. part-skim Ricotta cheese
  • salt and fresh ground pepper, to taste
  • 1 c. pasta sauce
  • 1/2 c. milk
  • 1/4 c. grated Parmesan cheese
  • 1/2 tsp dried basil
  • 1/8 tsp ground nutmeg
  • 1/4 tsp dried oregano
  • 1 1/2 c. half & half
  • salt and fresh ground pepper, to taste
  • 1 bag (8 to 10 oz.) of baby spinach

Instructions

Step 1: In boiling water, cook the cannelloni tubes for about 5 minutes. Rinse when done and set aside to cool for a couple of minutes or until cool enough to handle.

Step 2: Prepare the oven. Preheat it to 400 degrees F.

Step 3: In a large skillet, heat the oil over medium-high heat. Once the oil is hot, add the onions and cook for about 2 minutes. Add the garlic and chicken, stir, and continue to cook for additional 4 minutes.

Step 4: Pour in the milk and simmer everything for about 2 minutes or until most of the liquid has evaporated. Then, add the ricotta cheese. Stir well until incorporated. Next, add the spinach and cook for 2 minutes more until wilted.

Step 5: Take the skillet off the heat and allow it to stand for a couple of minutes. Once cool enough to handle, stuff the prepared chicken mixture into the cannelloni tubes using a spoon, your hands, or a piping bag.

Step 6: On the bottom of a 9 x 13-inch baking dish, spoon the pasta sauce. In a single layer, arrange the stuffed cannelloni. Set aside.

Step 7: Place the half & half, Parmesan, basil, oregano, nutmeg, salt, and pepper in a mixing bowl. Mix well until blended, then pour this over the cannelloni. Place in the preheated oven and bake for about 18 to 20 minutes or until golden brown and the cream has reduced. Take the dish out of the oven when done and allow it to stand for about 3 minutes or until the sauce has slightly thickened.

Step 8: Before serving, spoon the sauce over the cannelloni. Enjoy!

Notes

WW FREESTYLE POINTS: 14 To cut down the points to 11, try using fat-free half&half and fat-free Ricotta Cheese.

July 4, 2022 0 comment
0 FacebookTwitterPinterestEmail
General Recipes

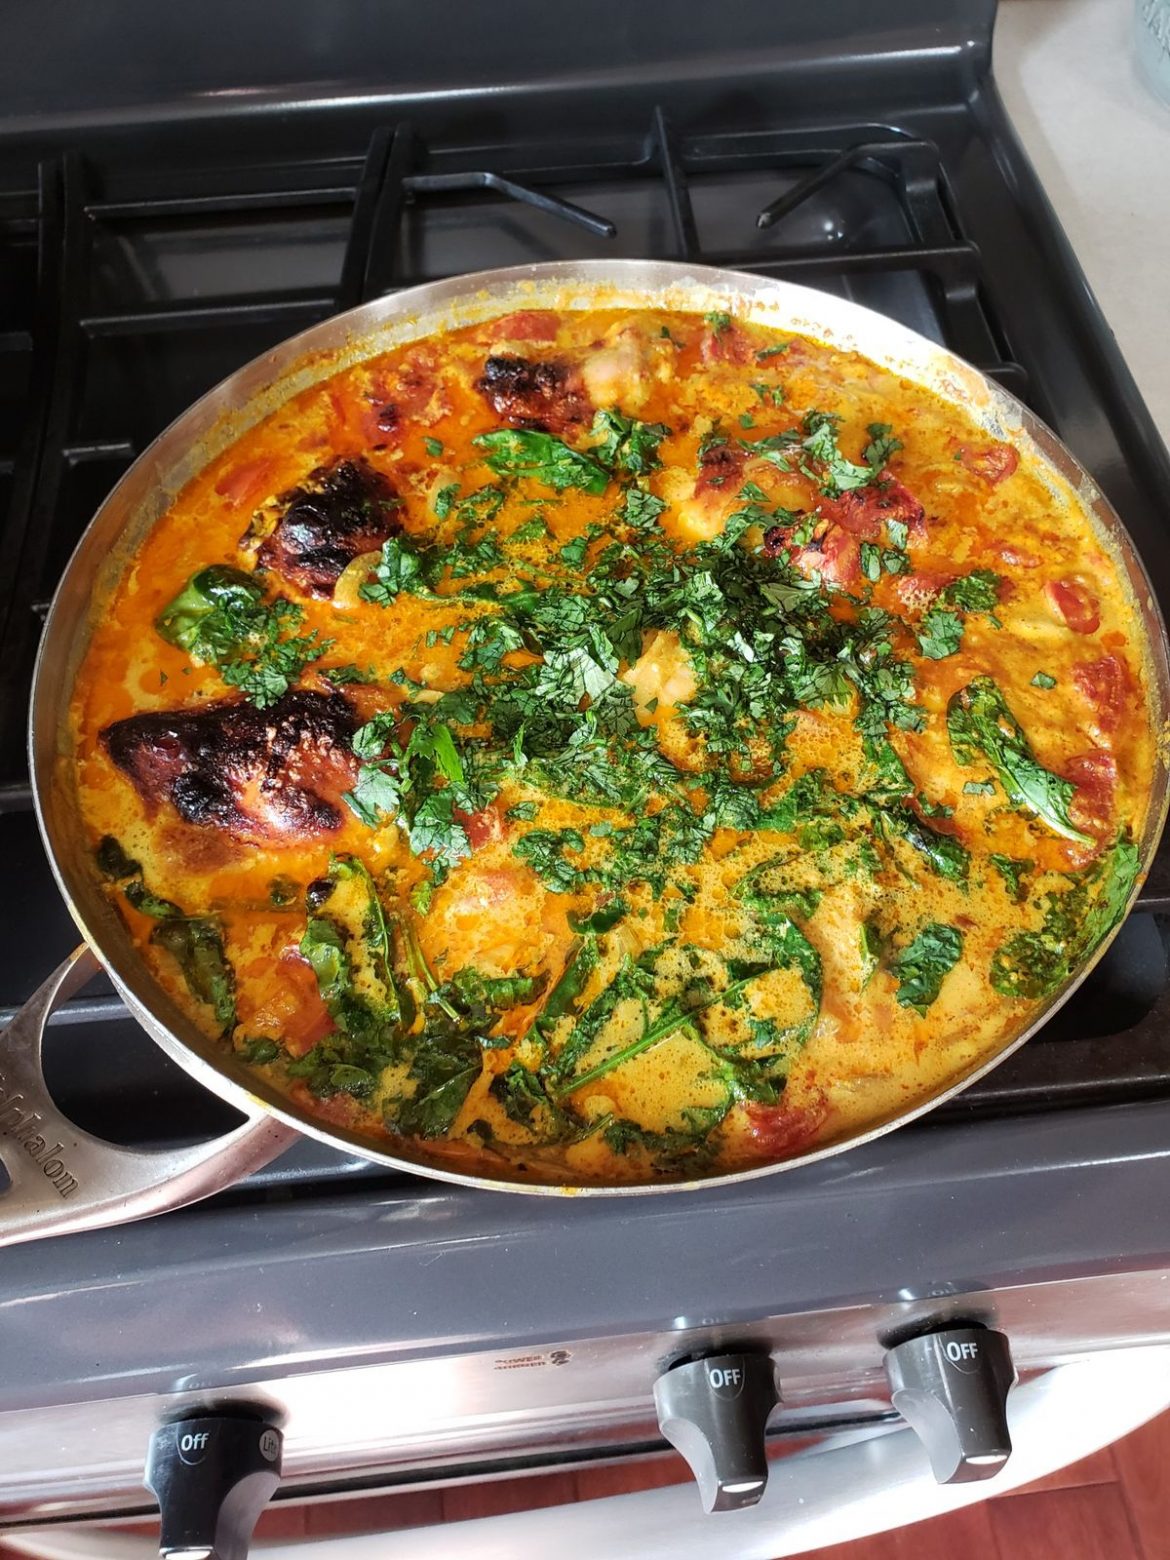
Easy, One-Pot Coconut Thai Chicken Curry

by Rebecca July 4, 2022
written by Rebecca

Prep Time: 10 mins | Cook Time: 1 hr | Total time: 1 hr 10 mins | Yield: 6 to 8 servings

This Coconut Thai Chicken Curry is a scrumptious dish that you can easily make in a single pot. Serve this over rice or with some flatbread for a filling meal that everyone around the dinner table will surely enjoy!

INGREDIENTS

8 bone-in, skin-on chicken thighs or drumsticks, or a combination of both

1 tbsp olive oil

1 onion, sliced

2 tsp curry powder

2 tsp turmeric

1 to 3 tbsp Thai red curry paste (see notes above)

1 can (13.5 ounces) of unsweetened coconut milk

3 to 4 plum tomatoes, chopped

2 tsp brown sugar

kosher salt

1 tbsp fish sauce

3 to 5 oz. spinach, optional

1/2 c. cilantro, roughly chopped, or more or less to taste

FOR SERVING:

cooked Jasmine or Basmati rice (or any rice you like)

How to make Easy, One-Pot Coconut Thai Chicken Curry

Step 1: Prepare the oven. Preheat it to 400 degrees F.

Step 2: Heat 1 tbsp olive oil in a large saute pan over high heat. Once the oil is hot, add the onions and season with a pinch of salt. Quickly adjust the heat to medium-low. Cook for about 5 minutes, stirring occasionally, until the onions have softened and the edges start to brown.

Step 3: In a large bowl, place the chicken and sprinkle with kosher salt (1 tsp of salt per pound).

Step 4: To the pan, add the curry powder, turmeric, and Thai red curry paste. Stir and continue to cook for another minute. Then, add the tomatoes, stir, and cook for a minute more until just starting to soften. Pour in a can of coconut milk. Fill the empty can with water and pour this into the pan. Add the fish sauce along with the brown sugar. Bring everything to a simmer.

Step 5: Place the pieces of chicken in the pan and toss to coat well. Into the preheated oven, transfer the pan and bake for about 1 hour, uncovered, or until the liquid has reduced considerably, the chicken skin is brown, and the meat is fall-apart tender. Add extra liquid by the quarter cup of the liquid has reduced too much. Or if you make it in advance, add more water upon reheating.

Step 6: Stir in the cilantro and spinach, if using. To serve, spoon this curry into bowls and place the chicken and sauce on top. Enjoy right away.

Easy, One-Pot Coconut Thai Chicken Curry

Rebecca Prep Time: 10 mins | Cook Time: 1 hr | Total time: 1 hr 10 mins | Yield: 6 to 8 servings This Coconut Thai Chicken Curry is a scrumptious… General Recipes Easy, One-Pot Coconut Thai Chicken Curry European Print This
Serves: 6-8 Prep Time: 10 mins Cooking Time: 1 hr 1 hr
Nutrition facts: 200 calories 20 grams fat
Rating: 5.0/5
( 1 voted )

Ingredients

  • 8 bone-in, skin-on chicken thighs or drumsticks, or a combination of both
  • 1 tbsp olive oil
  • 1 onion, sliced
  • 2 tsp curry powder
  • 2 tsp turmeric
  • 1 to 3 tbsp Thai red curry paste (see notes above)
  • 1 can (13.5 ounces) of unsweetened coconut milk
  • 3 to 4 plum tomatoes, chopped
  • 2 tsp brown sugar
  • kosher salt
  • 1 tbsp fish sauce
  • 3 to 5 oz. spinach, optional
  • 1/2 c. cilantro, roughly chopped, or more or less to taste
  • FOR SERVING:
  • cooked Jasmine or Basmati rice (or any rice you like)

Instructions

Step 1: Prepare the oven. Preheat it to 400 degrees F.

Step 2: Heat 1 tbsp olive oil in a large saute pan over high heat. Once the oil is hot, add the onions and season with a pinch of salt. Quickly adjust the heat to medium-low. Cook for about 5 minutes, stirring occasionally, until the onions have softened and the edges start to brown.

Step 3: In a large bowl, place the chicken and sprinkle with kosher salt (1 tsp of salt per pound).

Step 4: To the pan, add the curry powder, turmeric, and Thai red curry paste. Stir and continue to cook for another minute. Then, add the tomatoes, stir, and cook for a minute more until just starting to soften. Pour in a can of coconut milk. Fill the empty can with water and pour this into the pan. Add the fish sauce along with the brown sugar. Bring everything to a simmer.

Step 5: Place the pieces of chicken in the pan and toss to coat well. Into the preheated oven, transfer the pan and bake for about 1 hour, uncovered, or until the liquid has reduced considerably, the chicken skin is brown, and the meat is fall-apart tender. Add extra liquid by the quarter cup of the liquid has reduced too much. Or if you make it in advance, add more water upon reheating.

Step 6: Stir in the cilantro and spinach, if using. To serve, spoon this curry into bowls and place the chicken and sauce on top. Enjoy right away.

July 4, 2022 0 comment
0 FacebookTwitterPinterestEmail
General Recipes

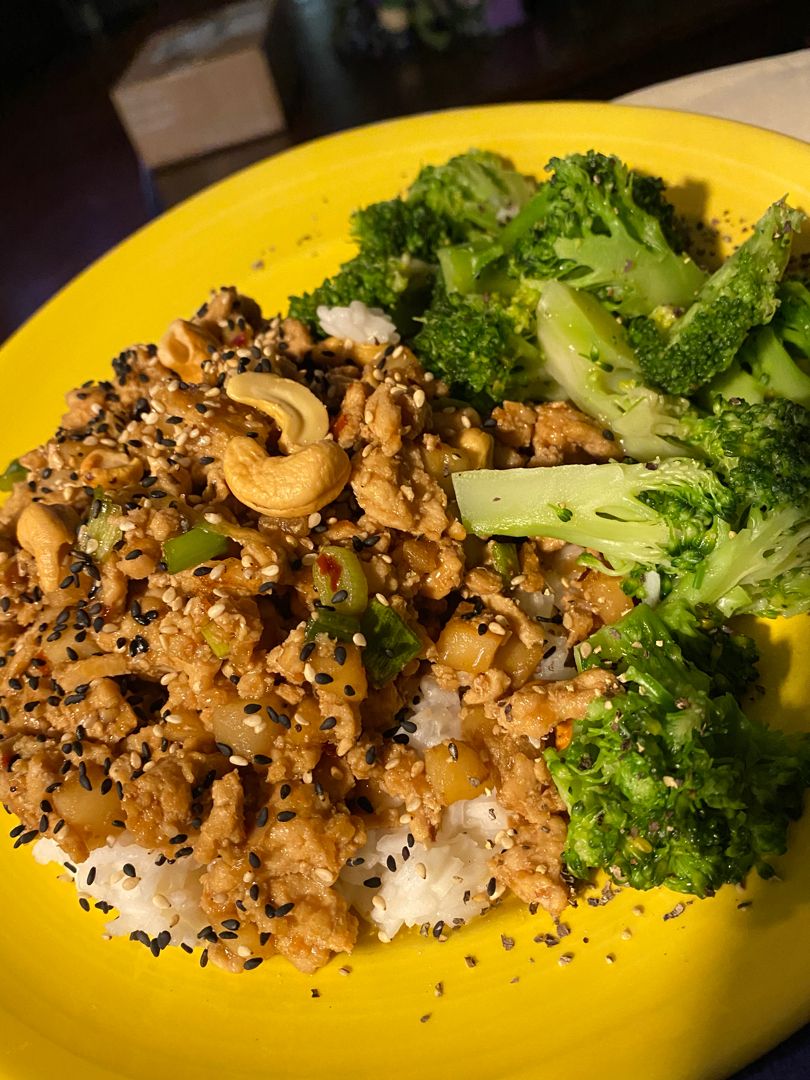
Ground General Tso’s Chicken

by Rebecca July 4, 2022
written by Rebecca

Prep Time: 5 mins | Cook Time: 15 mins | Total Time: 20 mins | Yield: 4 servings

This Ground General’s Tso’s Chicken is a delicious, healthy chicken dish that you can easily throw together in less than twenty minutes. Put a healthy and fun twist on a popular takeout dish with this simple recipe. Serve this Ground General’s Tso’s Chicken with hot steamed rice for a filling meal any time.

The sweet, spicy, and garlicky flavors of this scrumptious Ground General’s Tso’s Chicken are to die for! It’s a great option for busy days as this is super easy and quick to whip up. This is also a great freezer meal. Place Ground General’s Tso’s Chicken in a freezer bag or sealed container and freeze for up to 3 months.

Ingredients

1 tbsp vegetable oil

1 lb ground chicken

1/2 tsp crushed red pepper flakes

1 tbsp minced ginger

2 cloves garlic, minced

8 oz. canned water chestnuts, diced

General Tso’s Sauce:

3 tbsp sugar

2 tsp hoisin sauce

3 tbsp soy sauce

1/4 c. water

1 tbsp cornstarch

3 tbsp rice vinegar

How to make Ground General Tso’s Chicken

Step 1: Heat 1 tbsp oil in a large pan. Then, add the ground chicken and diced water chestnuts. Cook until a good crust forms. Break it apart and continue to cook for another 2 to 3 minutes, breaking the ground chicken apart using a spatula.

Step 2: Add the ginger along with the garlic and crushed red pepper flakes once the chicken is cooked. Continue to cook for additional 10 seconds.

Step 3: To make the sauce, whisk the rice vinegar, soy sauce, hoisin sauce, water, sugar, and a tablespoon of cornstarch in a small bowl until well combined. To the pan, pour in the sauce and bring to a boil. Cook for a couple of seconds more, stirring until the sauce has thickened.

Nutrition Facts:

Calories: 254 kcal | Carbohydrates: 13g | Protein: 21g | Fat: 13g | Saturated Fat: 5g | Cholesterol: 98mg | Sodium: 860mg | Potassium: 621mg | Fiber: 1g | Sugar: 10g | Vitamin A: 74IU | Vitamin C: 1mg | Calcium: 12mg | Iron: 1mg

Ground General Tso’s Chicken

Rebecca Prep Time: 5 mins | Cook Time: 15 mins | Total Time: 20 mins | Yield: 4 servings This Ground General’s Tso’s Chicken is a delicious, healthy chicken dish that… General Recipes Ground General Tso’s Chicken European Print This
Serves: 4 Prep Time: 5 mins Cooking Time: 15 mins 15 mins
Nutrition facts: 254 calories 13 fat
Rating: 5.0/5
( 1 voted )

Ingredients

  • 1 tbsp vegetable oil
  • 1 lb ground chicken
  • 1/2 tsp crushed red pepper flakes
  • 1 tbsp minced ginger
  • 2 cloves garlic, minced
  • 8 oz. canned water chestnuts, diced
  • General Tso's Sauce:
  • 3 tbsp sugar
  • 2 tsp hoisin sauce
  • 3 tbsp soy sauce
  • 1/4 c. water
  • 1 tbsp cornstarch
  • 3 tbsp rice vinegar

Instructions

Step 1: Heat 1 tbsp oil in a large pan. Then, add the ground chicken and diced water chestnuts. Cook until a good crust forms. Break it apart and continue to cook for another 2 to 3 minutes, breaking the ground chicken apart using a spatula.

Step 2: Add the ginger along with the garlic and crushed red pepper flakes once the chicken is cooked. Continue to cook for additional 10 seconds.

Step 3: To make the sauce, whisk the rice vinegar, soy sauce, hoisin sauce, water, sugar, and a tablespoon of cornstarch in a small bowl until well combined. To the pan, pour in the sauce and bring to a boil. Cook for a couple of seconds more, stirring until the sauce has thickened.

July 4, 2022 0 comment
0 FacebookTwitterPinterestEmail
General Recipes

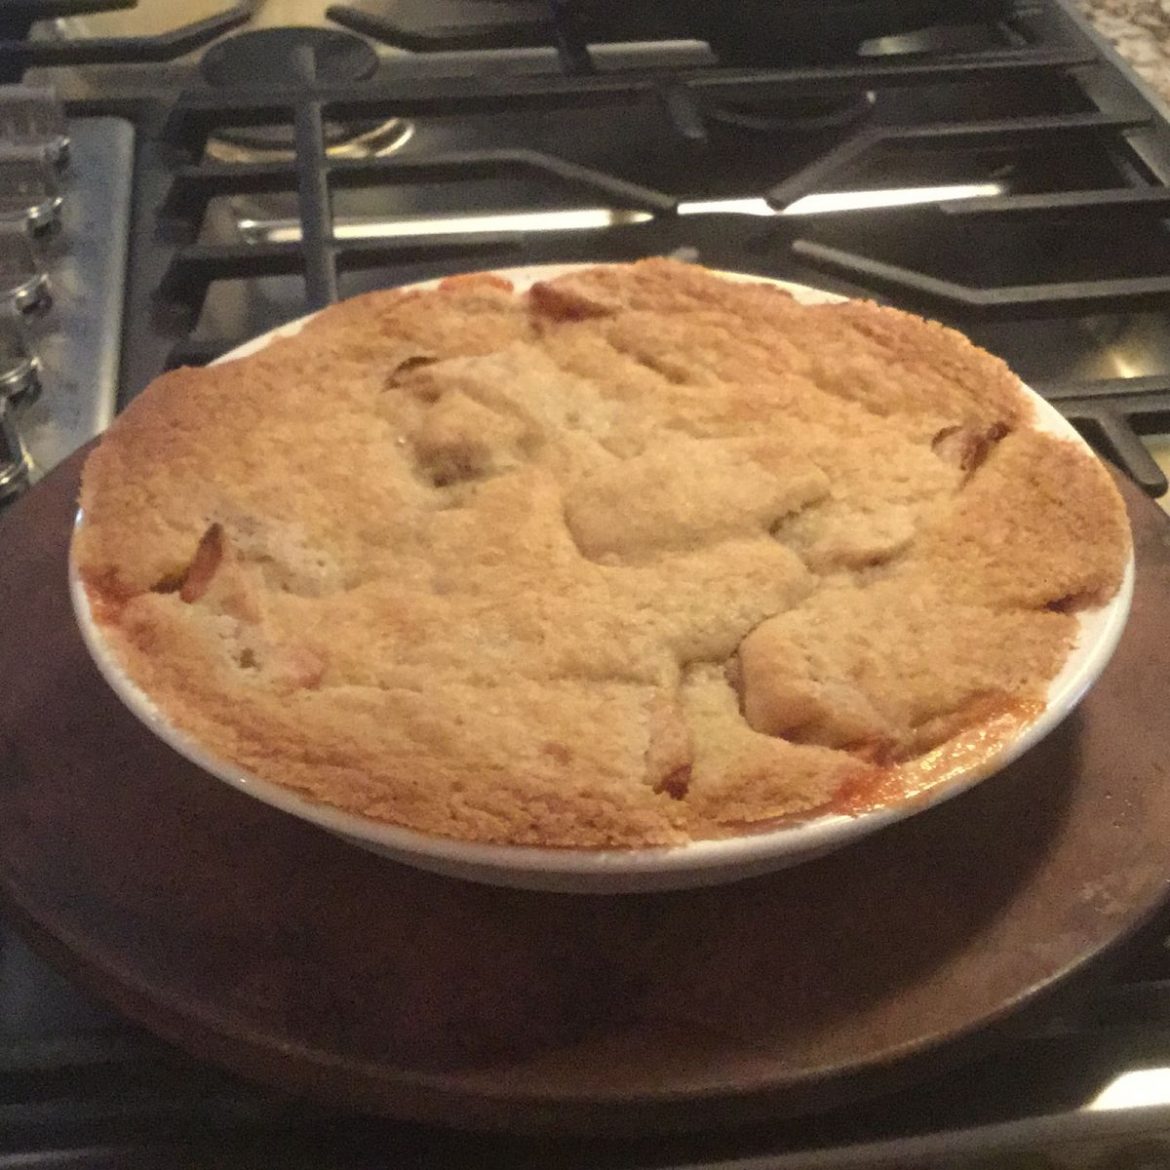
Swedish Apple Pie – The easiest pie you’ll ever make!

by Rebecca July 4, 2022
written by Rebecca

Prep Time: 20 mins | Cook Time: 1 hr | Total Time: 1 hr 20 mins | Servings: 8

This Swedish Apple Pie is the easiest pie you’ll ever make! It is made with a few simple ingredients that might already have on hand. A no-fuss pie recipe is excellent for beginner bakers and an easy dessert!

This Swedish Apple Pie guarantees the best easy dessert. It has never failed to impress everyone around the dinner table. A no-crust apple pie that you can easily and quickly make at any time. For best results, use varieties of apples that will keep their shape. I love Granny Smith or Braeburn, Honeycrisp, and Winesap apples are a great option if you want something slightly sweeter.

This pie never fails to amaze me as it turned out great always. The sweet, thick filling is surrounded by cinnamon-flavored baked apples over a flaky crust. If you want something extra, serve a slice with a big scoop of vanilla ice cream.

Ingredients

Pie Filling:

1 teaspoon ground cinnamon

1 tablespoon sugar

5 Granny Smith apples or enough to fill a pie plate 2/3 full

Topping:

1 egg

1 c. flour

3/4 c butter, melted

1/8 teaspoon salt (pinch)

1 c. sugar

How to make Swedish Apple Pie

Step 1: Prepare the oven. Preheat it to 325 degrees F.

Step 2: After peeling and coring the apples, slice them into about 1/4-inch thickness. Fill the pie plate with 2/3 full apple slices and sprinkle with 1 tbsp sugar and 1 tsp ground cinnamon.

Step 3: Place the topping ingredients in a medium-sized bowl. Mix well until combined and spread this over the apples.

Step 4: Place in the preheated oven and bake for about 1 hour or until the pie crust is lightly browned.

Step 5: Remove from the oven when done and serve. Using foil, tent any leftovers and place them in the fridge.

Tips:

Make sure to slice the apples to about the same thickness. Keep the apple slices to around 1/4 to 1/2 thickness.

Let the melted butter, slightly cool before mixing with the egg so you do not end up with scrambled eggs.

Nutrition Facts:

Sodium: 197mg | Calcium: 21mg | Vitamin C: 5.2mg | Vitamin A: 625IU | Sugar: 38g | Fiber: 3g | Potassium: 151mg | Cholesterol: 66mg | Calories: 379 kcal | Saturated Fat: 11g | Fat: 18g | Protein: 2g | Carbohydrates: 54g | Iron: 1mg

Swedish Apple Pie – The easiest pie you’ll ever make!

Rebecca Prep Time: 20 mins | Cook Time: 1 hr | Total Time: 1 hr 20 mins | Servings: 8 This Swedish Apple Pie is the easiest pie you’ll ever make!… General Recipes Swedish Apple Pie – The easiest pie you’ll ever make! European Print This
Serves: 8 Prep Time: 20 mins Cooking Time: 1 hr 1 hr
Nutrition facts: 379 calories 18 fat
Rating: 5.0/5
( 1 voted )

Ingredients

  • Pie Filling:
  • 1 teaspoon ground cinnamon
  • 1 tablespoon sugar
  • 5 Granny Smith apples or enough to fill a pie plate 2/3 full
  • Topping:
  • 1 egg
  • 1 c. flour
  • 3/4 c butter, melted
  • 1/8 teaspoon salt (pinch)
  • 1 c. sugar

Instructions

Step 1: Prepare the oven. Preheat it to 325 degrees F.

Step 2: After peeling and coring the apples, slice them into about 1/4-inch thickness. Fill the pie plate with 2/3 full apple slices and sprinkle with 1 tbsp sugar and 1 tsp ground cinnamon.

Step 3: Place the topping ingredients in a medium-sized bowl. Mix well until combined and spread this over the apples.

Step 4: Place in the preheated oven and bake for about 1 hour or until the pie crust is lightly browned.

Step 5: Remove from the oven when done and serve. Using foil, tent any leftovers and place them in the fridge.

Notes

Make sure to slice the apples to about the same thickness. Keep the apple slices to around 1/4 to 1/2 thickness. Let the melted butter, slightly cool before mixing with the egg so you do not end up with scrambled eggs.

July 4, 2022 0 comment
0 FacebookTwitterPinterestEmail
General Recipes

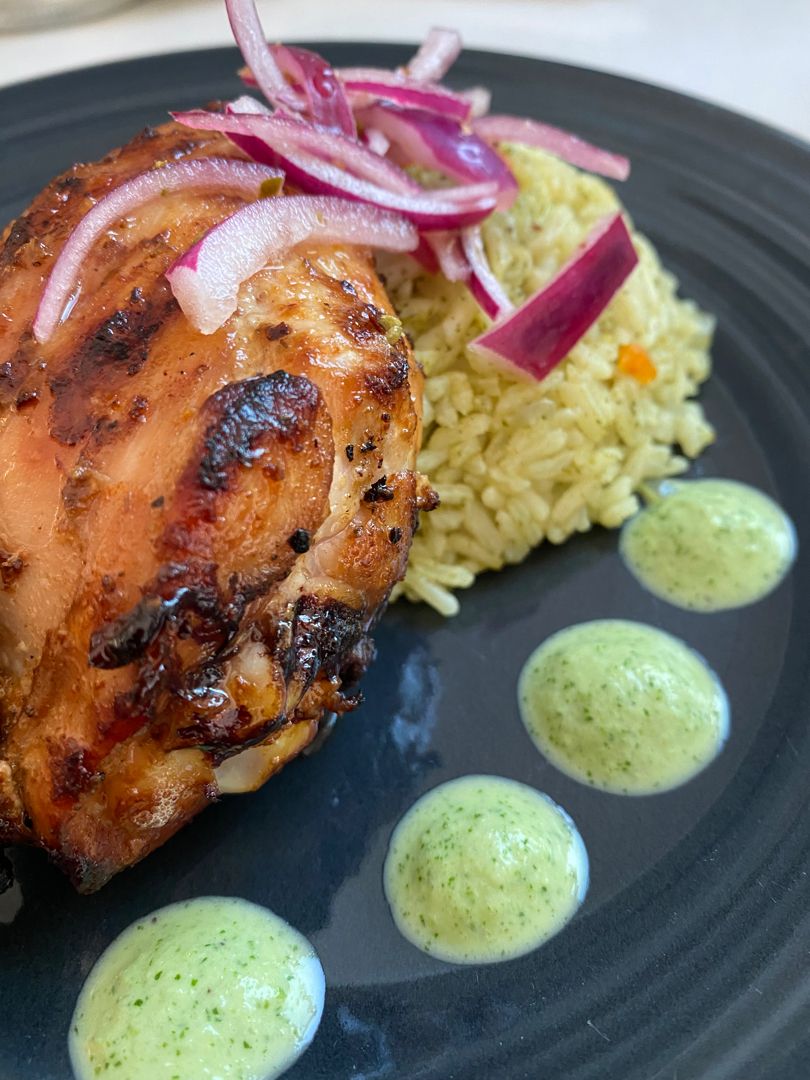
Peruvian Chicken Recipe

by Rebecca July 4, 2022
written by Rebecca

Prep Time: 15 mins | Cook Time: 35 mins | Total Time: 50 mins | Servings: 4-6

Your next BBQ will never be boring because of this easy Peruvian Chicken recipe. Enjoy an international twist to your chicken bbq with this juicy, packed with flavor Peruvian chicken!

Ingredients

Chicken:

5 cloves garlic (peeled)

2 lbs chicken thighs (boneless, skinless)

1/3 c. soy sauce

2 tbsp lime juice

2 tsp cumin

1 tbsp extra virgin olive oil

1 tsp paprika

Black pepper

1/2 tsp dried oregano

Green Sauce:

2 tbsp extra virgin olive oil

3 jalapenos (seeded, ribs removed and roughly chopped)

2 cloves garlic (peeled)

1/4 c. Greek yoghurt

1/2 c. mayonnaise

1 tbsp lime juice

1 c. fresh cilantro leaves

2 green onions (chopped (green parts only)

1/2 tsp salt

1/4 tsp black pepper

How to make Peruvian Chicken

Chicken:

Step 1: In a blender, puree the garlic, soy sauce, lime juice, oil, cumin, paprika, oregano, and a pinch of black pepper.

Step 2: In a large Ziplock bag, place the chicken and pour it into the marinade. Keep in the fridge to marinate for at least 8 hours up to overnight.

Green Sauce:

Step 3: In a blender, place all the Green Sauce ingredients except for the olive oil. Process until smooth. Gradually drizzle in the olive oil while the motor is still running. In a bowl, transfer the mixture and place it in the fridge until ready to serve.

Grill chicken:

Step 4: Ready the grill. Preheat it to medium-high heat (about 350 degrees).

Step 5: Take the chicken out of the marinade, shaking any excess off. Lay the chicken on the grill grates. Close the lid and cook for about 5 to 6 minutes. Then, flip the chicken thighs using tongs and continue to cook for another 5 to 6 minutes. The chicken is done once its internal temperature reaches 165 degrees F.

Note:

You can also roast the chicken in the oven. In a 13 x 9-inch roasting pan with 1 cup of water, place the chicken and roast in 500 degrees preheated oven for about 30 minutes, uncovered. Using foil, cover the pan and cook for another 15 minutes or until the chicken is completely cooked and browned.

Nutrition Facts:

Calories: 731 kcal | Carbohydrates: 5g | Protein: 39g | Fat: 60g | Saturated Fat: 12g | Cholesterol: 155mg | Sodium: 1691mg | Potassium: 509mg | Sugar: 2g | Vitamin A: 925IU | Vitamin C: 21.6mg | Calcium: 60mg | Iron: 3.1mg

Peruvian Chicken Recipe

Rebecca Prep Time: 15 mins | Cook Time: 35 mins | Total Time: 50 mins | Servings: 4-6 Your next BBQ will never be boring because of this easy Peruvian Chicken… General Recipes Peruvian Chicken Recipe European Print This
Serves: 4-6 Prep Time: 15 mins Cooking Time: 35 mins 35 mins
Nutrition facts: 731 calories 60 fat
Rating: 5.0/5
( 1 voted )

Ingredients

  • Chicken:
  • 5 cloves garlic (peeled)
  • 2 lbs chicken thighs (boneless, skinless)
  • 1/3 c. soy sauce
  • 2 tbsp lime juice
  • 2 tsp cumin
  • 1 tbsp extra virgin olive oil
  • 1 tsp paprika
  • Black pepper
  • 1/2 tsp dried oregano
  • Green Sauce:
  • 2 tbsp extra virgin olive oil
  • 3 jalapenos (seeded, ribs removed and roughly chopped)
  • 2 cloves garlic (peeled)
  • 1/4 c. Greek yoghurt
  • 1/2 c. mayonnaise
  • 1 tbsp lime juice
  • 1 c. fresh cilantro leaves
  • 2 green onions (chopped (green parts only)
  • 1/2 tsp salt
  • 1/4 tsp black pepper

Instructions

Chicken:

Step 1: In a blender, puree the garlic, soy sauce, lime juice, oil, cumin, paprika, oregano, and a pinch of black pepper.

Step 2: In a large Ziplock bag, place the chicken and pour it into the marinade. Keep in the fridge to marinate for at least 8 hours up to overnight.

Green Sauce:

Step 3: In a blender, place all the Green Sauce ingredients except for the olive oil. Process until smooth. Gradually drizzle in the olive oil while the motor is still running. In a bowl, transfer the mixture and place it in the fridge until ready to serve.

Grill chicken:

Step 4: Ready the grill. Preheat it to medium-high heat (about 350 degrees).

Step 5: Take the chicken out of the marinade, shaking any excess off. Lay the chicken on the grill grates. Close the lid and cook for about 5 to 6 minutes. Then, flip the chicken thighs using tongs and continue to cook for another 5 to 6 minutes. The chicken is done once its internal temperature reaches 165 degrees F.

Notes

You can also roast the chicken in the oven. In a 13 x 9-inch roasting pan with 1 cup of water, place the chicken and roast in 500 degrees preheated oven for about 30 minutes, uncovered. Using foil, cover the pan and cook for another 15 minutes or until the chicken is completely cooked and browned.

July 4, 2022 0 comment
0 FacebookTwitterPinterestEmail
General Recipes

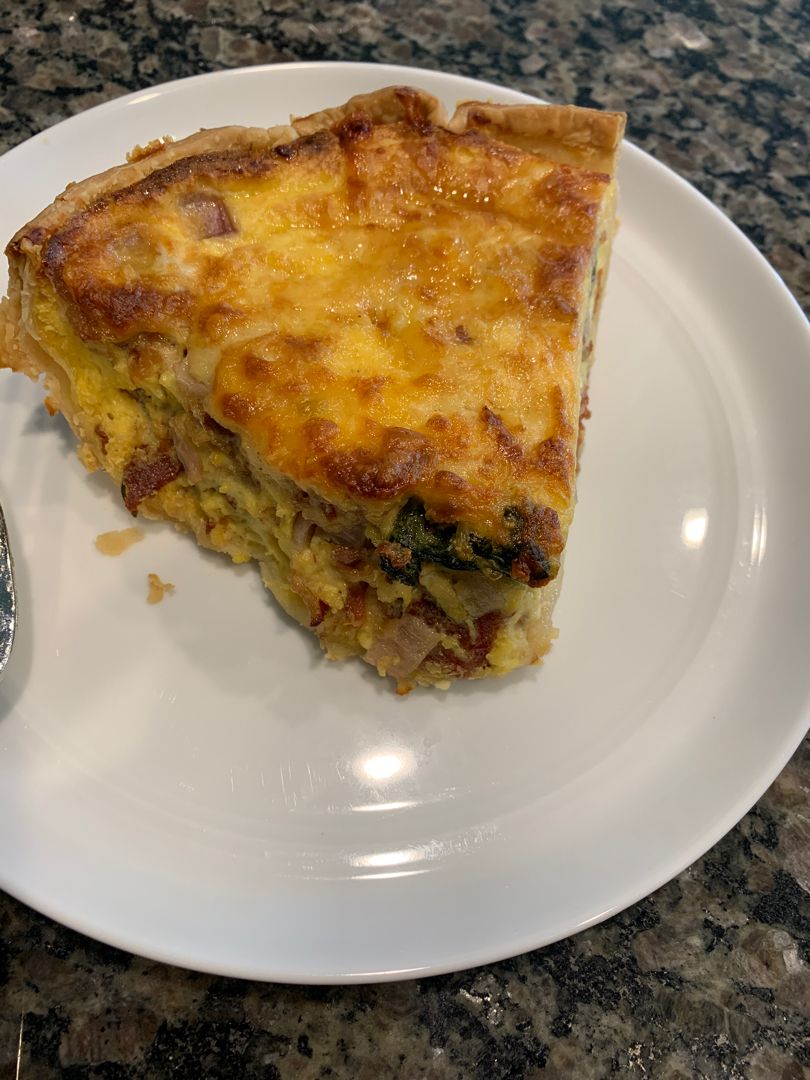
QUICHE LORRAINE RECIPE

by Rebecca July 4, 2022
written by Rebecca

This delicious Quiche Lorraine is classic French cuisine. This homemade version is an easy option and the closest to what France offers.

INGREDIENTS

1 c. 35% cream

1 c. whole milk

dash of grated nutmeg

1 medium sweet onion, finely chopped

6 rashers of bacon, sliced into ¼” pieces

4 extra-large eggs, room temperature

1 c. Gruyere cheese, cubed

¼ c. Parmesan cheese, grated

1 disc pie dough

pinch kosher salt

pinch of black pepper

HOW TO MAKE QUICHE LORRAINE

Step 1: Chill the prepared pie dough in the fridge overnight.

Step 2: Onto a floured surface, place the pie dough, and roll into a 12-inch round. Then, transfer to a 9-inch pie plate. Crimp the edges of the pie dough. Using a fork, prick the entire pie dough and place it in the fridge to chill for about 30 minutes.

Step 3: Prepare the oven. Position the oven rack in the middle and preheat it to 400 degrees F. Using foil, line a pie shell, tightly fitting it against the shell. Then, add pie weights (or around 2 cups of dry beans/rice). Place in the preheated oven and bake for about 15 minutes. Uncover and remove the weights. Resume baking for another 10 minutes. When done, remove from the oven and transfer to a wire rack to cool. Adjust the oven temperature to 375 degrees F.

Step 4: To make the filling, beat the eggs, cream, milk, nutmeg, salt, and pepper in a medium-sized bowl. Set aside.

Step 5: Cook the bacon in a medium-sized skillet over medium-high heat until almost crispy. To a paper-towel-lined plate, transfer the cooked bacon. Reserve 1 tbsp of bacon grease from the skillet and drain the rest. Adjust the heat to medium and place the skillet back on the stovetop. Then, add the onions and cook until softened and translucent.

Step 6: To assemble, evenly distribute the lightly chopped bacon along the bottom of the pie shell. Then, add the onion and Gruyere cheese. Sprinkle with grated Parmesan on top. Into the shell, gradually pour the egg mixture.

Step 7: Onto a baking sheet, place the pie plate. Bake the quiche in the preheated oven for about 35 to 40 minutes or until a knife inserted about 1-inch from the crust comes out clean. At this point, the quiche should be almost firm when jiggled.

Step 8: Take the quiche out of the oven when done and let it cool for about 45 minutes before slicing it into wedges. Serve with some tossed or fresh fruit salad. Enjoy!

QUICHE LORRAINE RECIPE

Rebecca This delicious Quiche Lorraine is classic French cuisine. This homemade version is an easy option and the closest to what France offers. INGREDIENTS 1 c. 35% cream 1 c. whole… General Recipes QUICHE LORRAINE RECIPE European Print This
Nutrition facts: 200 calories 20 grams fat
Rating: 5.0/5
( 1 voted )

Ingredients

  • 1 c. 35% cream
  • 1 c. whole milk
  • dash of grated nutmeg
  • 1 medium sweet onion, finely chopped
  • 6 rashers of bacon, sliced into ¼” pieces
  • 4 extra-large eggs, room temperature
  • 1 c. Gruyere cheese, cubed
  • ¼ c. Parmesan cheese, grated
  • 1 disc pie dough
  • pinch kosher salt
  • pinch of black pepper

Instructions

Step 1: Chill the prepared pie dough in the fridge overnight.

Step 2: Onto a floured surface, place the pie dough, and roll into a 12-inch round. Then, transfer to a 9-inch pie plate. Crimp the edges of the pie dough. Using a fork, prick the entire pie dough and place it in the fridge to chill for about 30 minutes.

Step 3: Prepare the oven. Position the oven rack in the middle and preheat it to 400 degrees F. Using foil, line a pie shell, tightly fitting it against the shell. Then, add pie weights (or around 2 cups of dry beans/rice). Place in the preheated oven and bake for about 15 minutes. Uncover and remove the weights. Resume baking for another 10 minutes. When done, remove from the oven and transfer to a wire rack to cool. Adjust the oven temperature to 375 degrees F.

Step 4: To make the filling, beat the eggs, cream, milk, nutmeg, salt, and pepper in a medium-sized bowl. Set aside.

Step 5: Cook the bacon in a medium-sized skillet over medium-high heat until almost crispy. To a paper-towel-lined plate, transfer the cooked bacon. Reserve 1 tbsp of bacon grease from the skillet and drain the rest. Adjust the heat to medium and place the skillet back on the stovetop. Then, add the onions and cook until softened and translucent.

Step 6: To assemble, evenly distribute the lightly chopped bacon along the bottom of the pie shell. Then, add the onion and Gruyere cheese. Sprinkle with grated Parmesan on top. Into the shell, gradually pour the egg mixture.

Step 7: Onto a baking sheet, place the pie plate. Bake the quiche in the preheated oven for about 35 to 40 minutes or until a knife inserted about 1-inch from the crust comes out clean. At this point, the quiche should be almost firm when jiggled.

Step 8: Take the quiche out of the oven when done and let it cool for about 45 minutes before slicing it into wedges. Serve with some tossed or fresh fruit salad. Enjoy!

July 4, 2022 0 comment
0 FacebookTwitterPinterestEmail
General Recipes

KENTUCKY HOT BROWN QUICHE

by Rebecca July 4, 2022
written by Rebecca

Prep Time: 10 mins | Cook Time: 1 hr | Total Time: 1 hr 10 mins | Yield: 4 people

I always love Kentucky Hot Brown Sandwich. And to enjoy it in a quiche form is even better! This quiche is made with turkey, bacon, tomatoes, Swiss cheese, eggs, heavy cream, sour cream, and pie crust. You can assemble this quiche and freeze, unbaked, for later. Even the baked quiche is freezer-friendly. You can serve this delicious Kentucky Hot Brown Quiche for breakfast, lunch, or even dinner.

This Kentucky Hot Brown Quiche is a popular Derby-themed food. My husband has always been a fan of this quiche. It’s like eating our fave sandwich, but in a quiche form. And instead of the mornay sauce, I just used Swiss cheese instead.

Ingredients

3 eggs

1 c. cooked chopped turkey

1 (9”) frozen deep-dish pie crust

1 c. shredded Swiss cheese

⅓ c. diced tomatoes

⅓ c. cooked chopped bacon

1 c. heavy cream or milk

salt & pepper to taste

3 tablespoons sour cream

HOW TO MAKE KENTUCKY HOT BROWN QUICHE

Step 1: Prepare the oven. Preheat it to 350 degrees F.

Step 2: In the bottom of a pie crust, spread the chopped turkey, bacon, tomatoes, and Swiss cheese.

Step 3: Beat the eggs, heavy cream, sour cream, salt, and pepper until well combined. Into the prepared pie crust, pour the egg mixture. Place in the preheated oven and bake for about an hour.

Step 4: Remove the quiche when done and let it rest for about 5 to 10 minutes.

Step 5: Serve and enjoy!

Notes:

For this recipe, there is no need to thaw the quiche.

Feel free to assemble the quiche and freeze it unbaked. Make sure to thaw the quiche completely before baking as directed.

Baked quiche is also freezer-friendly. When ready to serve, thaw completely and reheat for about 30 to 40 minutes at 350 degrees F, covered. Or reheat in the microwave.

KENTUCKY HOT BROWN QUICHE

Rebecca Prep Time: 10 mins | Cook Time: 1 hr | Total Time: 1 hr 10 mins | Yield: 4 people I always love Kentucky Hot Brown Sandwich. And to enjoy… General Recipes KENTUCKY HOT BROWN QUICHE European Print This
Serves: 4 Prep Time: 10 mins Cooking Time: 1 hr 1 hr
Nutrition facts: 200 calories 20 grams fat
Rating: 5.0/5
( 1 voted )

Ingredients

  • 3 eggs
  • 1 c. cooked chopped turkey
  • 1 (9”) frozen deep-dish pie crust
  • 1 c. shredded Swiss cheese
  • ⅓ c. diced tomatoes
  • ⅓ c. cooked chopped bacon
  • 1 c. heavy cream or milk
  • salt & pepper to taste
  • 3 tablespoons sour cream

Instructions

Step 1: Prepare the oven. Preheat it to 350 degrees F.

Step 2: In the bottom of a pie crust, spread the chopped turkey, bacon, tomatoes, and Swiss cheese.

Step 3: Beat the eggs, heavy cream, sour cream, salt, and pepper until well combined. Into the prepared pie crust, pour the egg mixture. Place in the preheated oven and bake for about an hour.

Step 4: Remove the quiche when done and let it rest for about 5 to 10 minutes.

Step 5: Serve and enjoy!

Notes

For this recipe, there is no need to thaw the quiche. Feel free to assemble the quiche and freeze it unbaked. Make sure to thaw the quiche completely before baking as directed. Baked quiche is also freezer-friendly. When ready to serve, thaw completely and reheat for about 30 to 40 minutes at 350 degrees F, covered. Or reheat in the microwave.

July 4, 2022 0 comment
0 FacebookTwitterPinterestEmail
General Recipes

MISSISSIPPI SIN QUICHE

by Rebecca July 4, 2022
written by Rebecca

Prep Time: 10 mins | Cook Time: 1 hr | Total Time: 1 hr 10 mins | Yield: 6 people

This Mississippi Sin Quiche is a delicious quiche that is loved by everybody. It is made with ham, cream cheese, cheddar cheese, Worcestershire sauce, green onion, hot sauce, sour cream, eggs, milk, and pie crust. If desired, you can assemble this quiche in advance and freeze it for later. Baked quiche is also freezer-friendly. Whenever I make this scrumptious quiche, I always double the recipe because this goes out very fast!

Enjoy all your favorite dip in a quiche form with this easy Mississippi Sin Quiche recipe. This quiche is excellent for breakfast, lunch, and even dinner. For an easy meal, pair this up with a side salad, fruit salad, and/or bread. You can serve this for tailgating and potlucks.

Ingredients

3 eggs

1 c. diced ham

½ c. cheddar cheese

2 ounces cream cheese

1 green onion, chopped

3 tablespoons sour cream

¼ teaspoon hot sauce

1 c. heavy cream

1 (9”) deep-dish pie crust

½ teaspoon Worcestershire sauce

HOW TO MAKE MISSISSIPPI SIN QUICHE

Step 1: Prepare the oven. Preheat it to 350 degrees F.

Step 2: In a skillet, cook the ham for about 3 to 5 minutes. Take off the heat when done.

Step 3: Mix the ham with cream cheese, hot sauce, and Worcestershire sauce until combined. In the bottom of a pie crust, place the ham mixture and sprinkle with cheddar cheese and green onions on top.

Step 4: Beat the eggs, sour cream, and heavy cream until blended. Then, pour this over the ham mixture. Place in the preheated oven and bake for about 60 minutes until set.

Notes:

You can assemble this quiche ahead and just freeze it for later.

When ready to bake, thaw the frozen quiche completely first.

You can also freeze the baked quiche. Before serving, thaw completely. Bake for about 30 to 40 minutes, covered with aluminium foil, at 350 degrees F.

MISSISSIPPI SIN QUICHE

Rebecca Prep Time: 10 mins | Cook Time: 1 hr | Total Time: 1 hr 10 mins | Yield: 6 people This Mississippi Sin Quiche is a delicious quiche that is… General Recipes MISSISSIPPI SIN QUICHE European Print This
Serves: 6 Prep Time: 10 mins Cooking Time: 1 hr 1 hr
Nutrition facts: 200 calories 20 grams fat
Rating: 5.0/5
( 1 voted )

Ingredients

  • 3 eggs
  • 1 c. diced ham
  • ½ c. cheddar cheese
  • 2 ounces cream cheese
  • 1 green onion, chopped
  • 3 tablespoons sour cream
  • ¼ teaspoon hot sauce
  • 1 c. heavy cream
  • 1 (9”) deep-dish pie crust
  • ½ teaspoon Worcestershire sauce

Instructions

Step 1: Prepare the oven. Preheat it to 350 degrees F.

Step 2: In a skillet, cook the ham for about 3 to 5 minutes. Take off the heat when done.

Step 3: Mix the ham with cream cheese, hot sauce, and Worcestershire sauce until combined. In the bottom of a pie crust, place the ham mixture and sprinkle with cheddar cheese and green onions on top.

Step 4: Beat the eggs, sour cream, and heavy cream until blended. Then, pour this over the ham mixture. Place in the preheated oven and bake for about 60 minutes until set.

Notes

You can assemble this quiche ahead and just freeze it for later. When ready to bake, thaw the frozen quiche completely first. You can also freeze the baked quiche. Before serving, thaw completely. Bake for about 30 to 40 minutes, covered with aluminium foil, at 350 degrees F.

July 4, 2022 0 comment
0 FacebookTwitterPinterestEmail
Newer Posts
Older Posts

Popular Posts

  • 1

    Crispy Crunchy Parmesan Potatoes

    March 21, 2020
  • 2

    CROCK POT SMOTHERED PORK CHOPS

    March 21, 2020
  • Facebook
  • Twitter

@2019 - All Right Reserved.


Back To Top