Cook it once
  • Home
  • Privacy Policy
  • Recipes
    • KETO
    • LC
    • WW
  • Tips
  • Contact
Cook it once
  • Home
  • Privacy Policy
  • Recipes
    • KETO
    • LC
    • WW
  • Tips
  • Contact
Category:

General Recipes

General Recipes

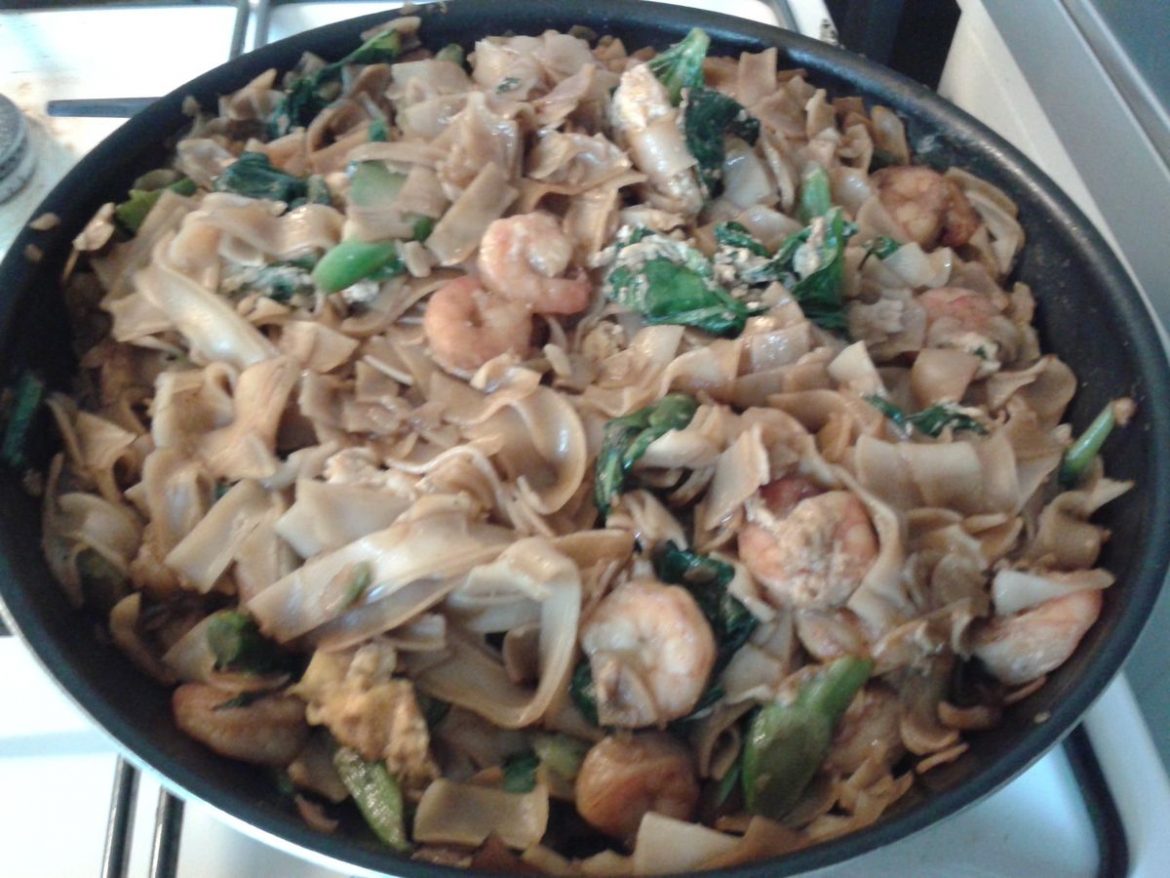
Pad See Ew – Thai Stir Fried Noodles

by Rebecca July 8, 2022
written by Rebecca

Prep time: 8 mins | Cook time: 10 mins | Total time: 18 mins | Servings: 2–3 people

This is one of the best stir-fries I’ve ever tasted! It’s a very savory dish that is great by itself or with a fresh side, such as Asian Slaw. If you are searching for amazing Asian food, you should never miss this Pad See Ew (Thai Stir-Fried Noodles)!

Ingredients

NOODLES:

200 grams/7 ounces dried wide rice stick noodles, or 15 ounces/450 grams fresh wide flat rice noodles (Sen Yai)

SAUCE:

2 teaspoon soy sauce (all-purpose or light)

2 tablespoons oyster sauce

2 teaspoon white vinegar (plain white vinegar)

2 tablespoons dark soy sauce

2 tablespoons water

2 teaspoon sugar (any type)

STIR FRY:

1 large egg

1 c/150 grams/5 ounces chicken thighs (boneless, skinless), sliced

3 tablespoons peanut or vegetable oil, separated

4 stems of Chinese broccoli

2 cloves garlic cloves, very finely chopped

How to make Pad See Ew – Thai Stir-Fried Noodles

PREPARATION:

Step 1: After trimming the ends of the Chinese Broccoli, cut them into 7.5 cm/3-inches pieces. Then, separate leaves from the stems. In half vertically no wider than 0.8 cm/0.3-inch thick, cut the stems.

Step 2: Following the package directions, cook the noodles. Drain when done.

Step 3: Whisk the sauce ingredients until the sugar has dissolved.

COOKING:

Step 4: In a very large, heavy basket skillet or wok, heat 1 tablespoon oil over high heat. Once the oil is hot, add the garlic to the wok and cook for about 15 seconds. Then, add the chicken and continue to cook until mostly white.

Step 5: To the wok, add the Chinese broccoli stems. Cook further until the chicken is almost cooked through. Next, add the Chinese broccoli leaves and cook until just wilted. To one side of the wok, push everything. Crack the egg into the wok and scramble.

Step 6: Onto a plate, transfer everything, scraping the wok clean.

Step 7: In the same wok, heat 2 tablespoons of oil over high heat. Once the oil begins to smoke, add the noodles and sauce to the wok. Toss a couple of times and cook for about 1-1 1/2 minutes to disperse the sauce and caramelize the edges of the noodles. Then, add the chicken and veggies and toss well.

Step 8: Serve the Thai Stir-Fried Noodles right away. Enjoy!

Nutrition Facts:

Serving: 260g , Calories: 510cal (26%) | Carbohydrates: 73.4g (24%) | Protein: 25.1g (50%) | Fat: 13.2g (20%) | Saturated Fat: 2g (13%) | Cholesterol: 105mg (35%) | Sodium: 406mg (18%) | Potassium: 169mg (5%) | Fiber: 1.6g (7%) | Sugar: 2.9g (3%) | Vitamin A: 9600IU (192%) | Vitamin C: 75.1mg (91%) | Calcium: 40mg (4%) | Iron: 1.4mg (8%)

Pad See Ew – Thai Stir Fried Noodles

Rebecca Prep time: 8 mins | Cook time: 10 mins | Total time: 18 mins | Servings: 2–3 people This is one of the best stir-fries I’ve ever tasted! It’s a… General Recipes Pad See Ew – Thai Stir Fried Noodles European Print This
Serves: 2-3 Prep Time: 8 mins Cooking Time: 10 mins 10 mins
Nutrition facts: 510 calories 13.2 fat
Rating: 5.0/5
( 1 voted )

Ingredients

  • NOODLES:
  • 200 grams/7 ounces dried wide rice stick noodles, or 15 ounces/450 grams fresh wide flat rice noodles (Sen Yai)
  • SAUCE:
  • 2 teaspoon soy sauce (all-purpose or light)
  • 2 tablespoons oyster sauce
  • 2 teaspoon white vinegar (plain white vinegar)
  • 2 tablespoons dark soy sauce
  • 2 tablespoons water
  • 2 teaspoon sugar (any type)
  • STIR FRY:
  • 1 large egg
  • 1 c/150 grams/5 ounces chicken thighs (boneless, skinless), sliced
  • 3 tablespoons peanut or vegetable oil, separated
  • 4 stems of Chinese broccoli
  • 2 cloves garlic cloves, very finely chopped

Instructions

PREPARATION:

Step 1: After trimming the ends of the Chinese Broccoli, cut them into 7.5 cm/3-inches pieces. Then, separate leaves from the stems. In half vertically no wider than 0.8 cm/0.3-inch thick, cut the stems.

Step 2: Following the package directions, cook the noodles. Drain when done.

Step 3: Whisk the sauce ingredients until the sugar has dissolved.

COOKING:

Step 4: In a very large, heavy basket skillet or wok, heat 1 tablespoon oil over high heat. Once the oil is hot, add the garlic to the wok and cook for about 15 seconds. Then, add the chicken and continue to cook until mostly white.

Step 5: To the wok, add the Chinese broccoli stems. Cook further until the chicken is almost cooked through. Next, add the Chinese broccoli leaves and cook until just wilted. To one side of the wok, push everything. Crack the egg into the wok and scramble.

Step 6: Onto a plate, transfer everything, scraping the wok clean.

Step 7: In the same wok, heat 2 tablespoons of oil over high heat. Once the oil begins to smoke, add the noodles and sauce to the wok. Toss a couple of times and cook for about 1-1 1/2 minutes to disperse the sauce and caramelize the edges of the noodles. Then, add the chicken and veggies and toss well.

Step 8: Serve the Thai Stir-Fried Noodles right away. Enjoy!
July 8, 2022 0 comment
0 FacebookTwitterPinterestEmail
General Recipes

Wine Braised Chicken (Drunken Chicken)

by Rebecca July 8, 2022
written by Rebecca

PREP TIME: 10 MINS | COOK TIME: 1 HR 7 MINS | TOTAL TIME: 1 HR 17 MINS | SERVINGS: 4

Enjoy a savory and mouthwatering chicken dinner with this wine-braised chicken recipe. Fall-apart tender chicken simmered in red wine. This amazing chicken dish is another great option for an easy dinner that everyone will surely love! Pair this with roasted veggies, mashed potatoes, or a simple veggie salad.

INGREDIENTS

3 large chicken breasts fillet into 6 thin cuts of chicken breast

2-3 tbsp olive oil, divided

2-3 cloves of fresh garlic, smashed

1 medium onion, sliced into thin rings

1 14.5 oz. can chicken broth (or use beef broth)

1 c. red wine

Water (optional)

2 tbsp tomato paste

Kosher salt to taste

Ground black pepper to taste

How to make Wine Braised Chicken (Drunken Chicken)

Step 1: Heat 2 tbsp olive oil in a large skillet over medium-high heat. In the meantime, pat the pieces of chicken dry using paper towels and season both sides with salt and pepper. Once the oil is hot, add the chicken to the skillet in batches and sear for about 2 minutes on each side until browned. On a side plate, transfer the chicken when done. Repeat until you have seared all the chicken pieces.

Step 2: If needed, add the rest of the olive oil to the now-empty pan. Add the sliced onion and smashed garlic and sprinkle with salt and pepper. Cook for about 2 minutes, stirring.

Step 3: Pour in the wine and deglaze the pan.

Step 4: Pour in the broth and add the tomato paste once the wine has simmered for about 2 minutes. Stir well and return the chicken to the pan. Bring everything to a boil. Adjust the heat to medium once boiling and put the lid on. Let everything simmer for an hour, stirring often. Add a little water if the mixture begins to dry out.

Step 5: Remove from the heat when done and serve the chicken right away. Enjoy!

Wine Braised Chicken (Drunken Chicken)

Rebecca PREP TIME: 10 MINS | COOK TIME: 1 HR 7 MINS | TOTAL TIME: 1 HR 17 MINS | SERVINGS: 4 Enjoy a savory and mouthwatering chicken dinner with this… General Recipes Wine Braised Chicken (Drunken Chicken) European Print This
Serves: 4 Prep Time: 10 mins Cooking Time: 1 hr 7 mins 1 hr 7 mins
Nutrition facts: 200 calories 20 grams fat
Rating: 5.0/5
( 1 voted )

Ingredients

  • 3 large chicken breasts fillet into 6 thin cuts of chicken breast
  • 2-3 tbsp olive oil, divided
  • 2-3 cloves of fresh garlic, smashed
  • 1 medium onion, sliced into thin rings
  • 1 14.5 oz. can chicken broth (or use beef broth)
  • 1 c. red wine
  • Water (optional)
  • 2 tbsp tomato paste
  • Kosher salt to taste
  • Ground black pepper to taste

Instructions

Step 1: Heat 2 tbsp olive oil in a large skillet over medium-high heat. In the meantime, pat the pieces of chicken dry using paper towels and season both sides with salt and pepper. Once the oil is hot, add the chicken to the skillet in batches and sear for about 2 minutes on each side until browned. On a side plate, transfer the chicken when done. Repeat until you have seared all the chicken pieces.

Step 2: If needed, add the rest of the olive oil to the now-empty pan. Add the sliced onion and smashed garlic and sprinkle with salt and pepper. Cook for about 2 minutes, stirring.

Step 3: Pour in the wine and deglaze the pan.

Step 4: Pour in the broth and add the tomato paste once the wine has simmered for about 2 minutes. Stir well and return the chicken to the pan. Bring everything to a boil. Adjust the heat to medium once boiling and put the lid on. Let everything simmer for an hour, stirring often. Add a little water if the mixture begins to dry out.

Step 5: Remove from the heat when done and serve the chicken right away. Enjoy!

July 8, 2022 0 comment
0 FacebookTwitterPinterestEmail
General Recipes

Garlic Sriracha Chicken

by Rebecca July 7, 2022
written by Rebecca

PREP TIME: 10 MINS | COOK TIME: 20 MINS | TOTAL TIME: 30 MINS | YIELD: 4 people

This Garlic Sriracha Chicken is one of the best chicken dishes I’ve tried! Juicy chicken thighs baked in a mouthwatering Garlic Sriracha marinade. This delicious chicken dish is very hard to miss!

Enjoy the amazing combination of garlicky, spicy, sweet, and savory flavors with this amazing garlic sriracha chicken. One bite, and you’ll fall head over heels! The chicken ends up super moist and juicy. All the flavors of the simple yet impressively delicious sauce coated inside and out of the chicken. This garlic sriracha chicken is a great healthy and family-friendly dinner option that everyone around the table will no doubt enjoy until the very last bite!

Ingredients

1 tbsp chopped scallion

2 pounds (1 kg) of skinless and boneless chicken thighs

1/4 tsp white sesame

Marinade:

1 tsp sesame oil

3 cloves garlic, minced

1 1/2 tbsp honey

1 tsp sugar

2 1/2 tbsp soy sauce

1 pinch salt

3 tsp sriracha

How to make Garlic Sriracha Chicken

Step 1: Prepare the oven. Preheat it to 400 degrees F or 207 degrees C.

Step 2: With water, rinse the chicken thighs and pat them dry using paper towels. Whisk the marinade ingredients until well combined and set aside.

Step 3: Toss the chicken thighs in the marinade and marinate for about 15 minutes. After 15 minutes, shift the chicken and the garlic Sriracha marinade to a parchment paper (aluminium foil) lined baking sheet. To prevent burning, tent the chicken with aluminium foil.

Step 4: Place in the preheated oven and bake for about 20 minutes or until the chicken is cooked through. Uncover and spoon the drippings over the chicken. To char, the surface of the chicken, broil for about a minute.

Step 5: When done, take the chicken out of the oven and slice it into pieces. Serve right away garnished with some white sesame and scallions. Enjoy!

NUTRITION FACTS:

Yield: 4, Serving Size: 4 people
Amount Per Serving: Calories 311, Total Fat 10.2g, Saturated Fat 2.2g, Unsaturated Fat 0g, Cholesterol 191mg, Sodium 791mg, Carbohydrates 9.7g, Fiber 0.2g, Sugar 7.7g, Protein 45g

Garlic Sriracha Chicken

Rebecca PREP TIME: 10 MINS | COOK TIME: 20 MINS | TOTAL TIME: 30 MINS | YIELD: 4 people This Garlic Sriracha Chicken is one of the best chicken dishes I’ve… General Recipes Garlic Sriracha Chicken European Print This
Serves: 4 Prep Time: 10 mins Cooking Time: 20 mins 20 mins
Nutrition facts: 311 calories 10.2 fat
Rating: 5.0/5
( 1 voted )

Ingredients

  • 1 tbsp chopped scallion
  • 2 pounds (1 kg) of skinless and boneless chicken thighs
  • 1/4 tsp white sesame
  • Marinade:
  • 1 tsp sesame oil
  • 3 cloves garlic, minced
  • 1 1/2 tbsp honey
  • 1 tsp sugar
  • 2 1/2 tbsp soy sauce
  • 1 pinch salt
  • 3 tsp sriracha

Instructions

Step 1: Prepare the oven. Preheat it to 400 degrees F or 207 degrees C.

Step 2: With water, rinse the chicken thighs and pat them dry using paper towels. Whisk the marinade ingredients until well combined and set aside.

Step 3: Toss the chicken thighs in the marinade and marinate for about 15 minutes. After 15 minutes, shift the chicken and the garlic Sriracha marinade to a parchment paper (aluminium foil) lined baking sheet. To prevent burning, tent the chicken with aluminium foil.

Step 4: Place in the preheated oven and bake for about 20 minutes or until the chicken is cooked through. Uncover and spoon the drippings over the chicken. To char, the surface of the chicken, broil for about a minute.

Step 5: When done, take the chicken out of the oven and slice it into pieces. Serve right away garnished with some white sesame and scallions. Enjoy!

July 7, 2022 0 comment
0 FacebookTwitterPinterestEmail
General Recipes

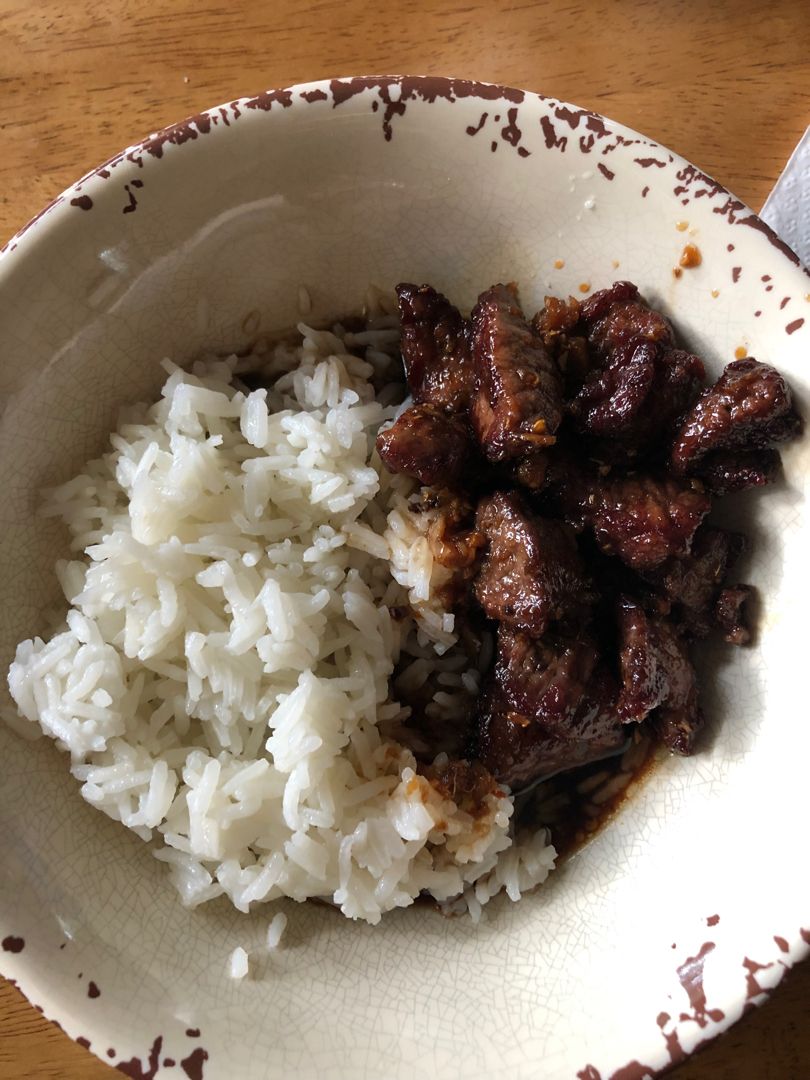
PF Chang’s Mongolian Beef (Copycat Recipe)

by Rebecca July 7, 2022
written by Rebecca

Prep Time: 15 mins | Cook Time: 30 mins | Total Time: 45 mins | Servings: 6

I love this PF Chang’s Mongolian Beef. This simple copycat is so easy to make and tastes exactly like our favorite takeout!

Ingredients

Beef:

½ c. vegetable oil

2 lbs NY strip steak (ribeye steak or flank steak)

½ c. cornstarch

Sauce:

4 cloves garlic (minced)

2 tbsp vegetable oil

1 c. brown sugar

1 c. low-sodium soy sauce

2 tbsp ginger (minced)

1/2 tsp red pepper flakes

3 green onions (thinly sliced)

1 c. water

1 tbsp rice wine vinegar

How to make PF Chang’s Mongolian Beef (Copycat Recipe)

Step 1: In the freezer, place the beef for about 15 minutes before starting to firm the beef up before slicing. Against the grain, slice the beef into thin, bite-sized strips (around 1/4-inch thickness).

Step 2: To a Ziploc bag, add the cornstarch followed by the meat. Seal the bag and shake until the meat is well coated in flour. Into a strainer or colander, pour the beef and shake the excess cornstarch off.

Step 3: Add 2 tablespoons of oil, soy sauce, brown sugar, garlic, ginger, water, rice wine vinegar, and red pepper flakes in a small saucepan. Stir well and cook for about 15 to 20 minutes over medium-high heat until the sauce has thickened. Remove from the heat and set aside when done.

Step 4: In the meantime, heat half a cup of oil in a large skillet over medium-high heat. Add some of the beef in a single layer in the skillet once the oil is hot and cook until no longer pink. Do this in batches to prevent overcrowding the pan. On a plate lined with a paper towel, transfer browned beef and cover with foil.

Step 5: To the skillet, place all the browned beef and pour the sauce over it. Stir well and continue to cook for a few minutes more.

Step 6: Remove from the heat when done and serve the Mongolian beef right away over rice garnished with some green onions. Enjoy!

Nutrition Facts:

Calories: 745 kcal | Carbohydrates: 50g | Protein: 33g | Fat: 45g | Saturated Fat: 27g | Cholesterol: 120mg | Sodium: 1512mg | Potassium: 632mg | Sugar: 36g | Vitamin A: 110IU | Vitamin C: 1.7mg | Calcium: 80mg | Iron: 3.5mg

PF Chang’s Mongolian Beef (Copycat Recipe)

Rebecca Prep Time: 15 mins | Cook Time: 30 mins | Total Time: 45 mins | Servings: 6 I love this PF Chang’s Mongolian Beef. This simple copycat is so easy… General Recipes PF Chang’s Mongolian Beef (Copycat Recipe) European Print This
Serves: 6 Prep Time: 15 mins Cooking Time: 30 mins 30 mins
Nutrition facts: 745 calories 45 fat
Rating: 5.0/5
( 1 voted )

Ingredients

  • Beef:
  • ½ c. vegetable oil
  • 2 lbs NY strip steak (ribeye steak or flank steak)
  • ½ c. cornstarch
  • Sauce:
  • 4 cloves garlic (minced)
  • 2 tbsp vegetable oil
  • 1 c. brown sugar
  • 1 c. low-sodium soy sauce
  • 2 tbsp ginger (minced)
  • 1/2 tsp red pepper flakes
  • 3 green onions (thinly sliced)
  • 1 c. water
  • 1 tbsp rice wine vinegar

Instructions

Step 1: In the freezer, place the beef for about 15 minutes before starting to firm the beef up before slicing. Against the grain, slice the beef into thin, bite-sized strips (around 1/4-inch thickness).

Step 2: To a Ziploc bag, add the cornstarch followed by the meat. Seal the bag and shake until the meat is well coated in flour. Into a strainer or colander, pour the beef and shake the excess cornstarch off.

Step 3: Add 2 tablespoons of oil, soy sauce, brown sugar, garlic, ginger, water, rice wine vinegar, and red pepper flakes in a small saucepan. Stir well and cook for about 15 to 20 minutes over medium-high heat until the sauce has thickened. Remove from the heat and set aside when done.

Step 4: In the meantime, heat half a cup of oil in a large skillet over medium-high heat. Add some of the beef in a single layer in the skillet once the oil is hot and cook until no longer pink. Do this in batches to prevent overcrowding the pan. On a plate lined with a paper towel, transfer browned beef and cover with foil.

Step 5: To the skillet, place all the browned beef and pour the sauce over it. Stir well and continue to cook for a few minutes more.

Step 6: Remove from the heat when done and serve the Mongolian beef right away over rice garnished with some green onions. Enjoy!

July 7, 2022 0 comment
0 FacebookTwitterPinterestEmail
General Recipes

HOMEMADE ITALIAN MEATBALLS

by Rebecca July 7, 2022
written by Rebecca

PREP TIME: 15 MINS | COOK TIME: 25 MINS | TOTAL TIME: 40 MINS | YIELD: 45 meatballs

These homemade Italian meatballs are super delicious! The meatballs are made with a mixture of Italian sausage, lean ground beef, and spices. Serve these delicious homemade Italian meatballs by themselves or as an appetizer covered in sauce. These meatballs are also perfect on a sub sandwich, or as a topping for pasta. Either way, these mouthwatering Italian meatballs are a must-try!

You have to give these homemade Italian meatballs a try very soon. Every bite is punch-packed with amazing flavors. The first time I made these Italian meatballs, I knew that they will be a huge hit. My family instantly loves these, and these meatballs have been part of our favorite menu rotation. The last time I made these meatballs, I smothered them in marinara sauce and served them over spaghetti. Whatever way you want to enjoy these Italian meatballs is entirely up to you. As I said, these mouthwatering meatballs are great either way! Beware, these Italian meatballs are super addicting, you might want to whip up a big batch!

INGREDIENTS

3 eggs

1 lb lean ground beef

1 lb ground Italian sausage

1/2 c. onion, chopped

3 cloves garlic, minced

1/2 c. Parmesan cheese

1 tsp of each: basil, oregano, parsley, and salt

1 c. Italian seasoned breadcrumbs

HOW TO MAKE HOMEMADE ITALIAN MEATBALLS

Step 1: Prepare the oven. Preheat it to 375 degrees. Using heavy-duty foil, line a large cookie sheet and place the wire rack on top.

Step 2: In a bowl, whisk all the ingredients and shape into about 1 tablespoon-sized meatball. Then, place the meatballs on a wire rack.

Step 3: Place in the preheated oven and bake for about 20 to 25 minutes or until the internal temperature of the meatballs reaches 160 degrees F.

Step 4: Remove from the oven when done and serve the homemade Italian meatballs by themselves or with sauce. Enjoy!

NUTRITION FACTS:

YIELD: 9 SERVING SIZE: 5 meatballs
Amount Per Serving: CALORIES: 395 | TOTAL FAT: 24g | SATURATED FAT: 9g | TRANS FAT: 0g | UNSATURATED FAT: 15g | CHOLESTEROL: 141mg | SODIUM: 786mg | CARBOHYDRATES: 14g | FIBER: 1g | SUGAR: 2g | PROTEIN: 30g

HOMEMADE ITALIAN MEATBALLS

Rebecca PREP TIME: 15 MINS | COOK TIME: 25 MINS | TOTAL TIME: 40 MINS | YIELD: 45 meatballs These homemade Italian meatballs are super delicious! The meatballs are made with… General Recipes HOMEMADE ITALIAN MEATBALLS European Print This
Serves: 45 Prep Time: 15 mins Cooking Time: 25 mins 25 mins
Nutrition facts: 395 calories 24 fat
Rating: 5.0/5
( 1 voted )

Ingredients

  • 3 eggs
  • 1 lb lean ground beef
  • 1 lb ground Italian sausage
  • 1/2 c. onion, chopped
  • 3 cloves garlic, minced
  • 1/2 c. Parmesan cheese
  • 1 tsp of each: basil, oregano, parsley, and salt
  • 1 c. Italian seasoned breadcrumbs

Instructions

Step 1: Prepare the oven. Preheat it to 375 degrees. Using heavy-duty foil, line a large cookie sheet and place the wire rack on top.

Step 2: In a bowl, whisk all the ingredients and shape into about 1 tablespoon-sized meatball. Then, place the meatballs on a wire rack.

Step 3: Place in the preheated oven and bake for about 20 to 25 minutes or until the internal temperature of the meatballs reaches 160 degrees F.

Step 4: Remove from the oven when done and serve the homemade Italian meatballs by themselves or with sauce. Enjoy!

July 7, 2022 0 comment
0 FacebookTwitterPinterestEmail
General Recipes

CHUNKY BEEF, CABBAGE AND TOMATO SOUP (INSTANT POT OR STOVE TOP)

by Rebecca July 7, 2022
written by Rebecca

PREP TIME: 10 mins | COOK TIME: 30 mins | TOTAL TIME: 40 mins | YIELD: 7 servings

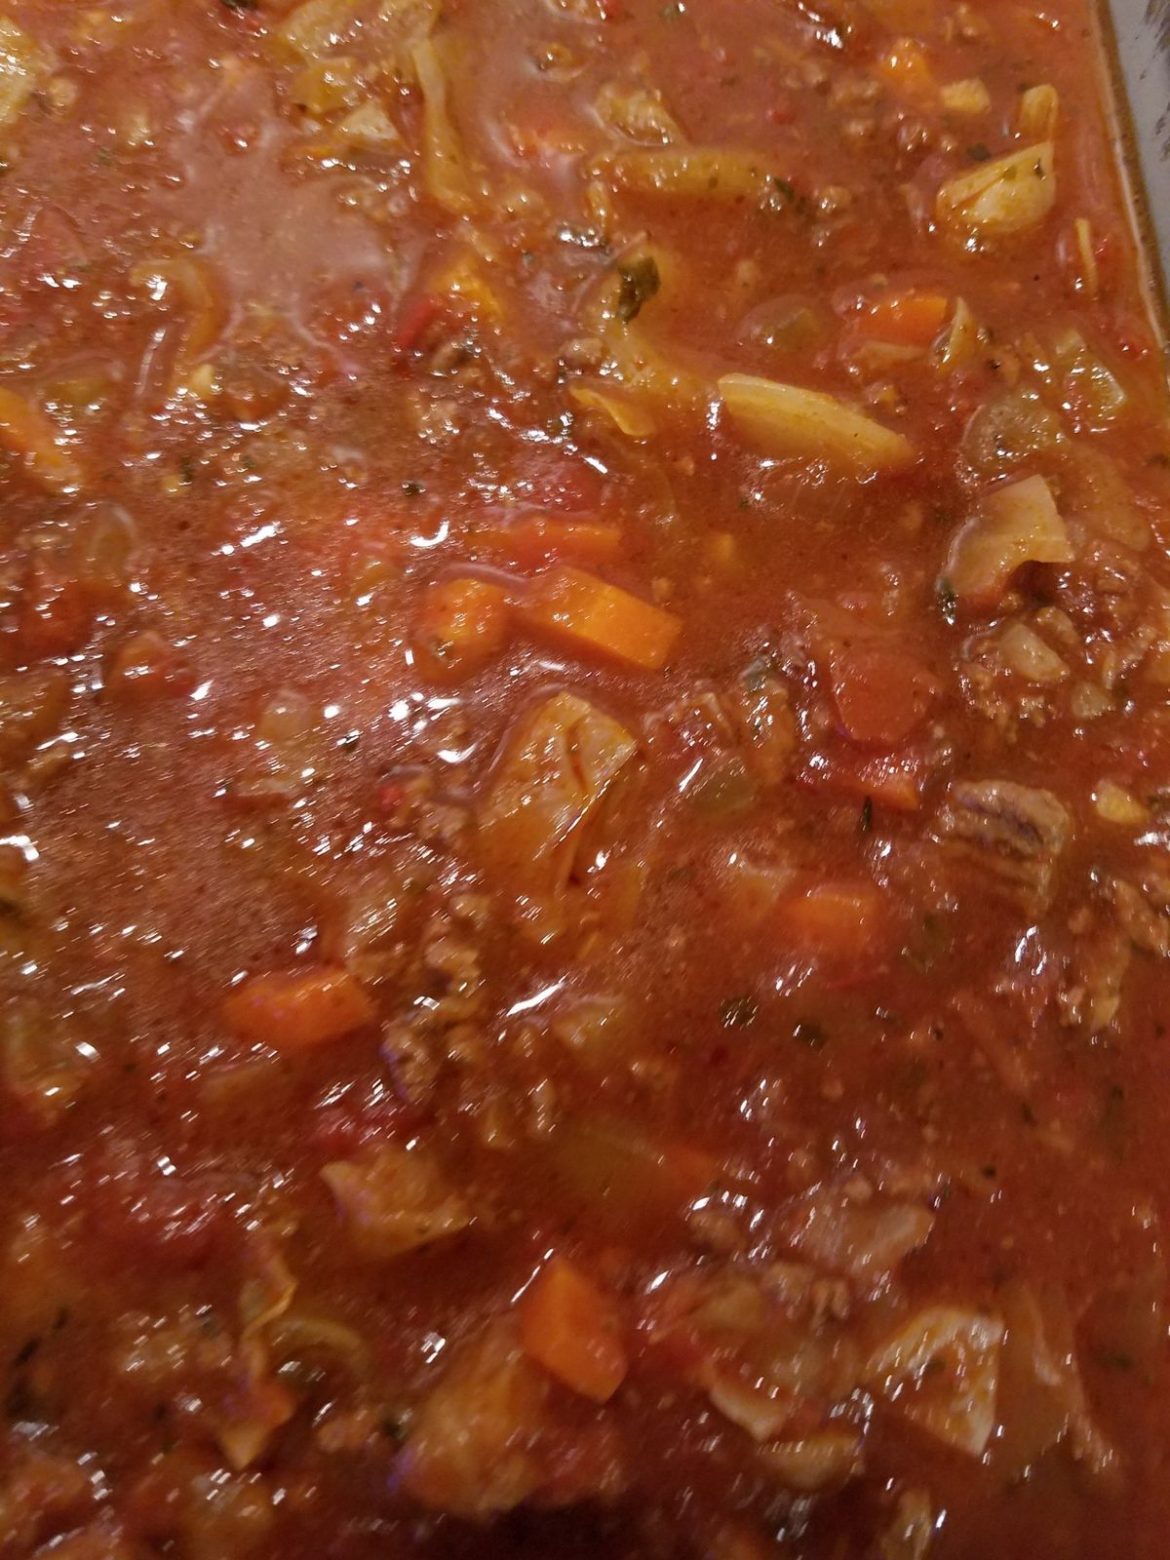
This chunky beef, cabbage, and tomato soup is a great cold-weather soup that you can make either on a stovetop or Instant pot. This soup is made with a few simple ingredients and ready in a cinch. Ladle this soup into bowls and serve.

This simple soup recipe is very versatile. You can use crushed or diced tomatoes. You can also add extra veggies if you prefer. This soup is so delicious, even my fussiest eaters love this! This chunky beef, cabbage, and tomato soup is the perfect soup recipe to clean out the fridge. Not to mention incredibly easy and quick to make!

Cozy up with a bowl of this scrumptious soup during the cold days. Serve this with some crusty bread to scoop up all the goodness!

INGREDIENTS

1/2 c. diced onion

1 pound 90% lean ground beef

1/2 c. diced carrot

1/2 c. diced celery

28 ounces can (diced or crushed tomatoes)

5 c. chopped green cabbage

1-1/2 tsp kosher salt

2 bay leaves

4 c. beef stock, canned or homemade

HOW TO MAKE CHUNKY BEEF, CABBAGE, AND TOMATO SOUP

Instant Pot:

Step 1: Add the ground beef to an electric pressure cooker or Instant Pot and sprinkle it with salt. Make sure to grease the pot with oil. Set to Saute and cook the ground beef for about 3 to 4 minutes, breaking the meat up into small chunks. Add the onion, celery, and carrots to the pot once the meat has browned, and continue to saute for another 4 to 5 minutes. Next, add the tomatoes along with the cabbage, beef stock, and bay leaves. Lock the lid and cook for 20 minutes on high pressure.

Step 2: When done, allow the steam to naturally release. Discard the bay leaves.

Stovetop:

Step 1: To make on the stovetop, simply follow the steps above and cook for about 40 minutes over low heat, covered.

Nutrition Facts:

Serving: 11/2 cups, Calories: 181 kcal, Carbohydrates: 14g, Protein: 15.5g, Fat: 6g, Saturated Fat: 2.3g, Cholesterol: 40mg, Sodium: 592mg, Fiber: 2g, Sugar: 4.5g WW Points Plus:4

CHUNKY BEEF, CABBAGE AND TOMATO SOUP (INSTANT POT OR STOVE TOP)

Rebecca PREP TIME: 10 mins | COOK TIME: 30 mins | TOTAL TIME: 40 mins | YIELD: 7 servings This chunky beef, cabbage, and tomato soup is a great cold-weather soup… General Recipes CHUNKY BEEF, CABBAGE AND TOMATO SOUP (INSTANT POT OR STOVE TOP) European Print This
Serves: 7 Prep Time: 10 mins Cooking Time: 30 mins 30 mins
Nutrition facts: 181 calories 6 fat
Rating: 5.0/5
( 1 voted )

Ingredients

  • 1/2 c. diced onion
  • 1 pound 90% lean ground beef
  • 1/2 c. diced carrot
  • 1/2 c. diced celery
  • 28 ounces can (diced or crushed tomatoes)
  • 5 c. chopped green cabbage
  • 1-1/2 tsp kosher salt
  • 2 bay leaves
  • 4 c. beef stock, canned or homemade

Instructions

Instant Pot:

Step 1: Add the ground beef to an electric pressure cooker or Instant Pot and sprinkle it with salt. Make sure to grease the pot with oil. Set to Saute and cook the ground beef for about 3 to 4 minutes, breaking the meat up into small chunks. Add the onion, celery, and carrots to the pot once the meat has browned, and continue to saute for another 4 to 5 minutes. Next, add the tomatoes along with the cabbage, beef stock, and bay leaves. Lock the lid and cook for 20 minutes on high pressure.

Step 2: When done, allow the steam to naturally release. Discard the bay leaves.

Stovetop:

Step 1: To make on the stovetop, simply follow the steps above and cook for about 40 minutes over low heat, covered.

July 7, 2022 0 comment
0 FacebookTwitterPinterestEmail
General Recipes

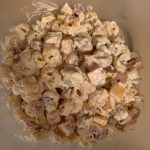
Cheddar Bacon Ranch Tortellini Salad

by Rebecca July 7, 2022
written by Rebecca

Prep Time: 15 mins | Cook Time: 15 mins | Total Time: 30 mins | Servings: 5-6 cups

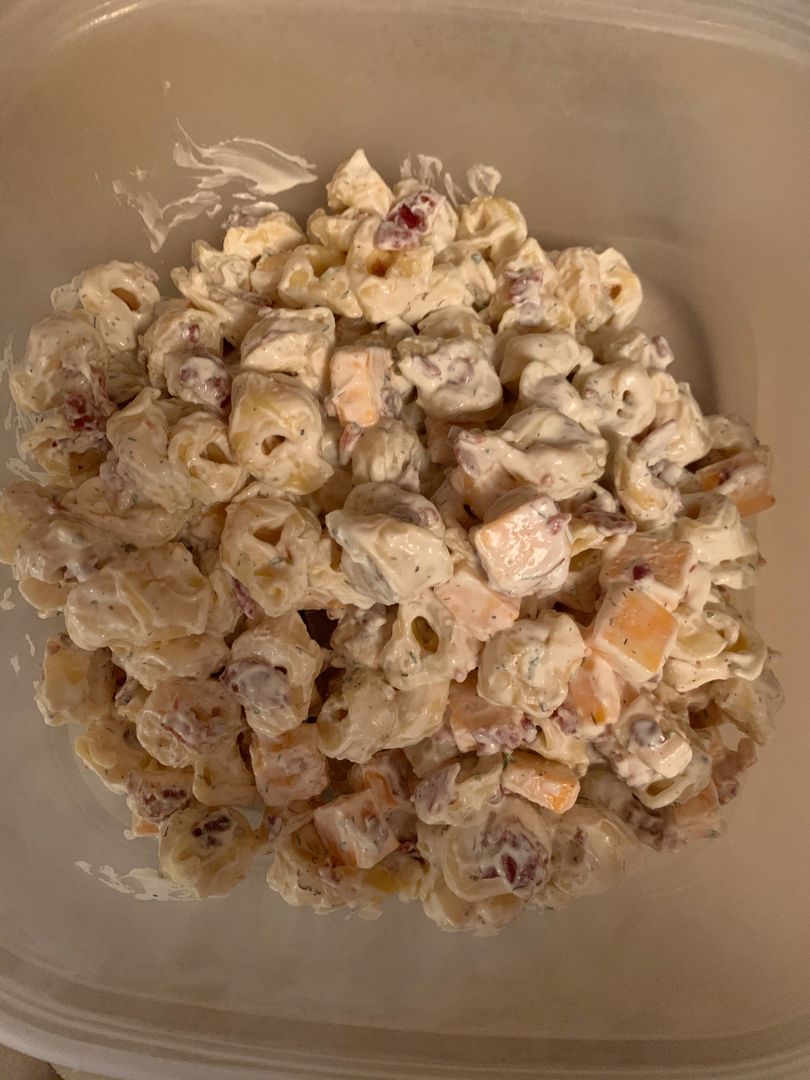
This salad is one of my top favorites salad with crispy bacon, sharp cheddar cheese, and tossed in a creamy ranch sauce. This salad recipe like many of my faves is super easy and quick to whip up. It is made with easy-to-find ingredients (most of them I already have in my pantry). Backyard BBQ is never boring because of this cheddar bacon ranch tortellini salad. Super good everyone is fighting over this salad!

I super love this pasta. Instead of regular pasta, I use four-cheese tortellini. My husband loves tortellini in a pasta salad so it’s a huge plus! Also, all his fave flavors are in this amazing salad. From the crispy bacon, ranch, and cheddar cheese. Who can resist the cheddar-bacon-ranch flavor combination? No one!

For this recipe, you are welcome to use your favorite tortellini. As for the cheese, the perfect to use for this salad is sharp cheddar. And do not forget the bacon! Everything with bacon is a must! Lastly, the ranch as it brings everything together.

If you plan on making this salad in advance, you can. I usually whip this up ahead as it gives the flavors time to mix.

Ingredients

10-12 crispy bacon strips

6 ounces sharp cheddar cheese

1 tablespoon Fresh herbs for garnish more or less to taste

18-20 ounces, four-cheese tortellini

Ranch Sauce:

1/4 c. mayo

1/2 c. sour cream

0.4 ounces Ranch mix

3 tablespoons buttermilk

How to make Cheddar Bacon Ranch Tortellini Salad

Step 1: Following the package directions cook the tortellini. Drain when done and place in a mixing bowl. Set aside.

Step 2: Whisk the ranch sauce ingredients until well blended.

Step 3: In the meantime, dice the cheese and cooked bacon strips. Then, add them to the pasta followed by the ranch mixture. Mix well until evenly coated.

Step 4: Keep the salad in the fridge until ready to serve. Before serving, garnish with some fresh herbs. Enjoy!

Nutrition Facts:

Calories: 642 kcal | Carbohydrates: 40g | Protein: 25g | Fat: 42g | Saturated Fat: 17g | Cholesterol: 101mg | Sodium: 1012mg | Potassium: 138mg | Fiber: 3g | Sugar: 4g | Vitamin A: 429IU | Vitamin C: 1mg | Calcium: 356mg | Iron: 3mg

Cheddar Bacon Ranch Tortellini Salad

Rebecca Prep Time: 15 mins | Cook Time: 15 mins | Total Time: 30 mins | Servings: 5-6 cups This salad is one of my top favorites salad with crispy bacon,… General Recipes Cheddar Bacon Ranch Tortellini Salad European Print This
Serves: 5-6 Prep Time: 15 mins Cooking Time: 15 mins1 15 mins1
Nutrition facts: 642 calories 42 fat
Rating: 5.0/5
( 1 voted )

Ingredients

  • 10-12 crispy bacon strips
  • 6 ounces sharp cheddar cheese
  • 1 tablespoon Fresh herbs for garnish more or less to taste
  • 18-20 ounces, four-cheese tortellini
  • Ranch Sauce:
  • 1/4 c. mayo
  • 1/2 c. sour cream
  • 0.4 ounces Ranch mix
  • 3 tablespoons buttermilk

Instructions

Step 1: Following the package directions cook the tortellini. Drain when done and place in a mixing bowl. Set aside.

Step 2: Whisk the ranch sauce ingredients until well blended.

Step 3: In the meantime, dice the cheese and cooked bacon strips. Then, add them to the pasta followed by the ranch mixture. Mix well until evenly coated.

Step 4: Keep the salad in the fridge until ready to serve. Before serving, garnish with some fresh herbs. Enjoy!

July 7, 2022 0 comment
0 FacebookTwitterPinterestEmail
General Recipes

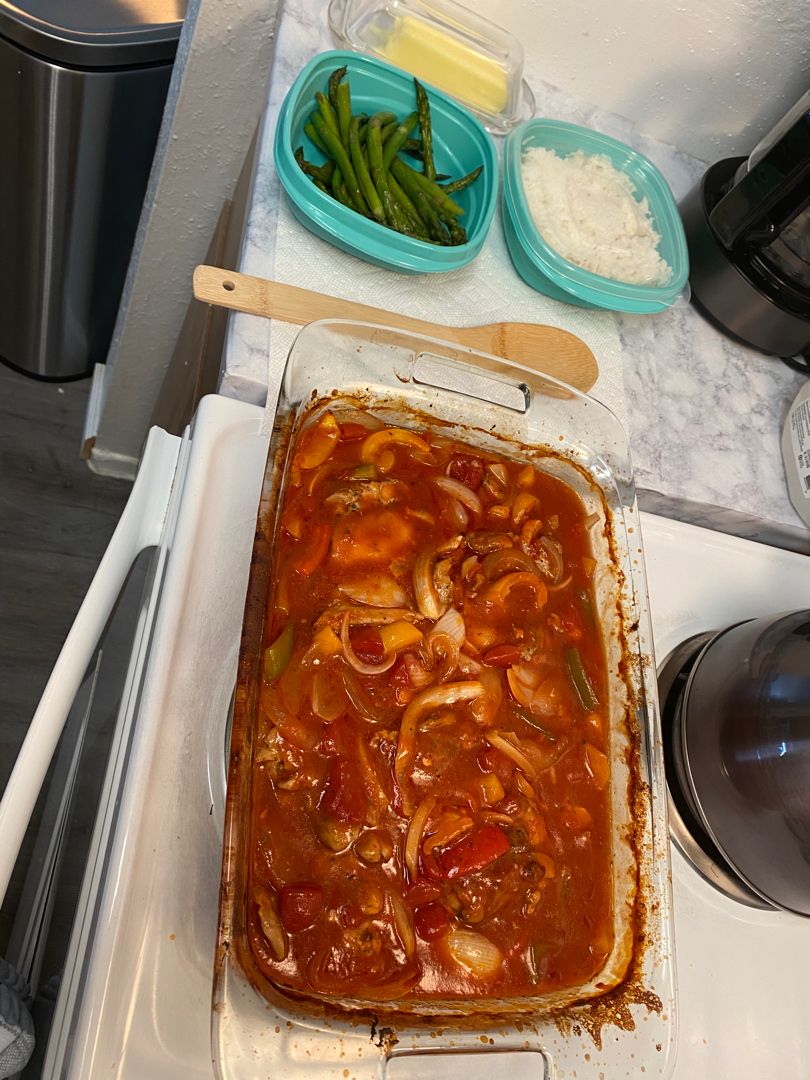
Baked Chicken Cacciatore

by Rebecca July 7, 2022
written by Rebecca

Prep Time: 25 mins | Cook Time: 35 mins | Total Time: 1-hr | Yield: 6 servings

If you are searching for an easy weeknight dinner that you can make in no time, then this Baked Chicken Cacciatore is a must-try. Juicy chicken thighs smothered in a thick homemade tomato sauce with garlic, bell peppers, and celery. Serve this mouthwatering chicken cacciatore with grains and pasta for a filling meal. My family loves to pair this with mashed potatoes, lightly buttered pasta, or even white rice.

Ingredients

6 chicken thighs, bone-in, skin-on

3 cloves garlic, minced

2 tbsp olive oil, divided

1/2 green bell pepper, thinly sliced

1/2 yellow bell pepper, thinly sliced

1/2 red bell pepper, thinly sliced

2 stalks of celery, thinly sliced

1/2 yellow onion, thinly sliced

15 oz. diced tomatoes

1 tsp Italian seasoning

15 oz. crushed tomatoes

1 1/2 tsp Kosher salt

1 tsp coarse ground black pepper

1 c. white wine

How to make Baked Chicken Cacciatore

Step 1: Prepare the oven. Preheat it to 375 degrees.

Step 2: In a large saucepan, heat the olive oil over medium-high heat. In the meantime, season the chicken with salt and pepper. Once the oil is hot, add the chicken to the pan, skin-side down, and sear for about 5 to 6 minutes. Flip and continue to cook the chicken for another 5 to 6 minutes.

Step 3: Into a 9 x 13-inch baking dish, transfer the chicken when done. Around the chicken, scatter the bell peppers, celery, onion, and garlic.

Step 4: Whisk the wine, diced tomatoes, crushed tomatoes, Italian seasoning, salt, and pepper in a large bowl. Mix well until combined. Then, pour this over the chicken and veggies.

Step 5: Using aluminium foil, tent the dish and place it in the preheated oven. Bake for about 25 to 30 minutes. Remove the cover and continue to bake for another 25 to 30 minutes.

Nutrition Facts:

Calories: 420 kcal | Carbohydrates: 13g | Protein: 26g | Fat: 27g | Saturated Fat: 7g | Cholesterol: 142mg | Sodium: 885mg | Potassium: 733mg | Fiber: 3g | Sugar: 6g | Vitamin A: 707IU | Vitamin C: 53mg | Calcium: 70mg | Iron: 3mg

Baked Chicken Cacciatore

Rebecca Prep Time: 25 mins | Cook Time: 35 mins | Total Time: 1-hr | Yield: 6 servings If you are searching for an easy weeknight dinner that you can make… General Recipes Baked Chicken Cacciatore European Print This
Serves: 6 Prep Time: 25 mins Cooking Time: 35 mins 35 mins
Nutrition facts: 420 calories 27 fat
Rating: 5.0/5
( 1 voted )

Ingredients

  • 6 chicken thighs, bone-in, skin-on
  • 3 cloves garlic, minced
  • 2 tbsp olive oil, divided
  • 1/2 green bell pepper, thinly sliced
  • 1/2 yellow bell pepper, thinly sliced
  • 1/2 red bell pepper, thinly sliced
  • 2 stalks of celery, thinly sliced
  • 1/2 yellow onion, thinly sliced
  • 15 oz. diced tomatoes
  • 1 tsp Italian seasoning
  • 15 oz. crushed tomatoes
  • 1 1/2 tsp Kosher salt
  • 1 tsp coarse ground black pepper
  • 1 c. white wine

Instructions

Step 1: Prepare the oven. Preheat it to 375 degrees.

Step 2: In a large saucepan, heat the olive oil over medium-high heat. In the meantime, season the chicken with salt and pepper. Once the oil is hot, add the chicken to the pan, skin-side down, and sear for about 5 to 6 minutes. Flip and continue to cook the chicken for another 5 to 6 minutes.

Step 3: Into a 9 x 13-inch baking dish, transfer the chicken when done. Around the chicken, scatter the bell peppers, celery, onion, and garlic.

Step 4: Whisk the wine, diced tomatoes, crushed tomatoes, Italian seasoning, salt, and pepper in a large bowl. Mix well until combined. Then, pour this over the chicken and veggies.

Step 5: Using aluminium foil, tent the dish and place it in the preheated oven. Bake for about 25 to 30 minutes. Remove the cover and continue to bake for another 25 to 30 minutes.

July 7, 2022 0 comment
0 FacebookTwitterPinterestEmail
General Recipes

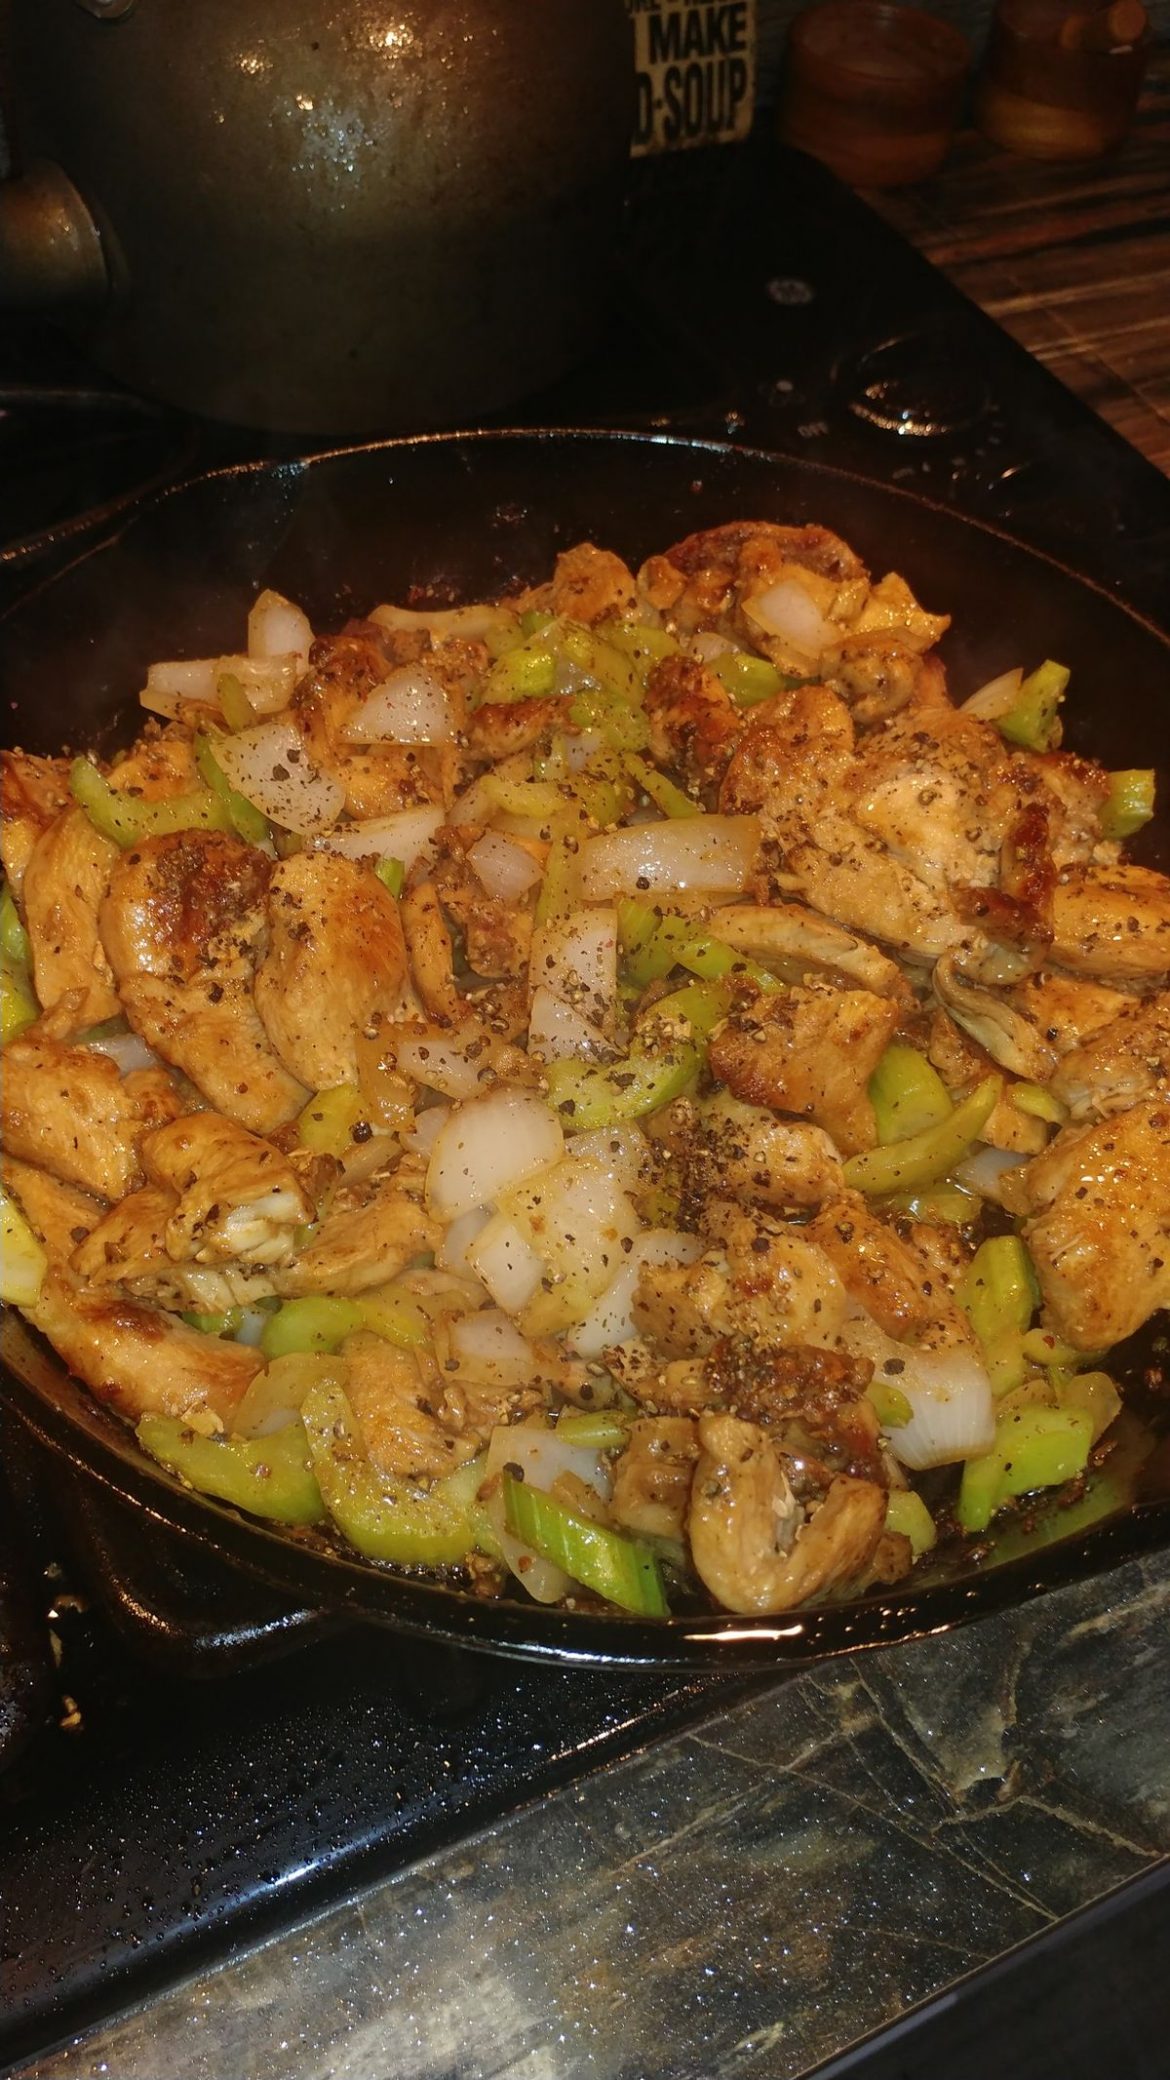
Chinese Black Pepper Chicken Stir Fry

by Rebecca July 7, 2022
written by Rebecca

Prep Time: 10 mins | Cook Time: 15 mins | Total Time: 25 mins

This is a delicious stir fry that is packed with amazing flavors, An easy and quick weeknight dinner option that tastes a million better than Panda Express Black Pepper Chicken! Pair this delicious stir fry with a bowl of crisp veggies. Or enjoy with some extra veggies on the side such as eggplant, broccoli, bok choy, snow peas, or even Chinese cabbage.

I used to order black pepper chicken stir fry from Panda Express until I found this simple copycat. I get to enjoy my favorite stir fry any time with this easy recipe. I do not need any fancy ingredients, just simple ones that I already have on hand. Give this a try very soon. One bite, and you’ll never order take-out anymore!

INGREDIENTS

5 tbsp vegetable oil

2 lbs (1 kilogram) skinless and boneless chicken breasts, cut into thin strips

2 tbsp toasted sesame oil

3 tbsp low sodium soy sauce

2-3 tbsp cornstarch

2 tbsp rice vinegar

1 ½ tbsp fresh ginger, minced

Salt as needed

1 ½ tbsp fresh ground black pepper

How to make Chinese Black Pepper Chicken Stir Fry

Step 1: Place the soy sauce, fresh ginger, rice vinegar, cornstarch, and sesame oil in a small bowl. Mix well until combined. Let the chicken marinate for about 10 minutes.

Step 2: Heat 5 tablespoons vegetable oil in a large non-stick skillet over high heat. Once the oil is hot, add the chicken to the skillet and sear for about 6 minutes, stirring often. If needed, cook the chicken in batches.

Step 3: Add the celery and onion to the skillet once the chicken is completely cooked and cook for about a minute over high heat. Sprinkle with black pepper and stir well.

Step 4: Remove from the heat when done and serve the Chinese Black Pepper Chicken Stir Fry right away over jasmine rice. Enjoy!

Tip:

I do not recommend using black pepper powder as it will overpower this dish.

NUTRITION FACTS:

Serving Size: 100 gm Calories: 62 kcal | Sugar: 80 mg | Fat: 2.67 g | Carbohydrates: 6.22 g | Fiber: 1.8 g | Protein: 4.89 g | Cholesterol: 13 mg

Chinese Black Pepper Chicken Stir Fry

Rebecca Prep Time: 10 mins | Cook Time: 15 mins | Total Time: 25 mins This is a delicious stir fry that is packed with amazing flavors, An easy and quick… General Recipes Chinese Black Pepper Chicken Stir Fry European Print This
Prep Time: 10 mins Cooking Time: 15 mins 15 mins
Nutrition facts: 62 calories 2.67 fat
Rating: 5.0/5
( 1 voted )

Ingredients

  • 5 tbsp vegetable oil
  • 2 lbs (1 kilogram) skinless and boneless chicken breasts, cut into thin strips
  • 2 tbsp toasted sesame oil
  • 3 tbsp low sodium soy sauce
  • 2-3 tbsp cornstarch
  • 2 tbsp rice vinegar
  • 1 ½ tbsp fresh ginger, minced
  • Salt as needed
  • 1 ½ tbsp fresh ground black pepper

Instructions

Step 1: Place the soy sauce, fresh ginger, rice vinegar, cornstarch, and sesame oil in a small bowl. Mix well until combined. Let the chicken marinate for about 10 minutes.

Step 2: Heat 5 tablespoons vegetable oil in a large non-stick skillet over high heat. Once the oil is hot, add the chicken to the skillet and sear for about 6 minutes, stirring often. If needed, cook the chicken in batches.

Step 3: Add the celery and onion to the skillet once the chicken is completely cooked and cook for about a minute over high heat. Sprinkle with black pepper and stir well.

Step 4: Remove from the heat when done and serve the Chinese Black Pepper Chicken Stir Fry right away over jasmine rice. Enjoy!

Notes

I do not recommend using black pepper powder as it will overpower this dish.

July 7, 2022 0 comment
0 FacebookTwitterPinterestEmail
General Recipes

Texas Hash

by Rebecca July 7, 2022
written by Rebecca

PREP TIME: 5 mins | COOK TIME: 25 mins | TOTAL TIME: 30 mins | YIELD: 4 servings

This Texas High is an amazing one-skillet meal that I’m pretty sure everyone will love. Made with ground beef, peppers, rice, tomatoes, and chili powder and ready in less than thirty minutes. A very savory dish that is perfect for an easy and quick weeknight dinner excellent for everyone!

If you love simple recipes that you can throw together easily and in no time, then you have to give this delicious Texas Hash a try. A no-fuss, hearty, and filling meal in a skillet!

INGREDIENTS

1 c. diced green bell pepper

1 lb ground beef, 80/20

2 tbsp olive oil

1 c. diced onion

1 tbsp minced fresh garlic

½ tsp dry mustard

2 tsp chili powder

½ c. uncooked long-grain white rice

2 tbsp tomato paste

1 c. water

1 14.5-oz. can of diced tomatoes with juice

1 tsp Worcestershire sauce

1 c. shredded cheddar cheese, optional

2 tsp kosher salt

¼ tsp freshly ground black pepper

How to make Texas Hash

Step 1: Heat the olive oil in a skillet with a tight-fitting cover over medium-high heat. Once the oil is hot, add the onion, peppers, garlic, ground beef, dry mustard, chili powder, salt, and pepper to the skillet. Saute until the ground beef has browned, breaking the meat into small pieces as it cooks.

Step 2: Then, add the rice and continue to cook for another 2 minutes to allow the rice to absorb the liquid. Next, add the tomato paste and cook for a minute more.

Step 3: To the pan, add the canned tomatoes with the juice along with the water and Worcestershire sauce. Stir well, put the lid on, and let everything simmer for about 20 minutes, covered.

Step 4: Take the lid off after 20 minutes, then fluff the mixture. Cook for a couple of minutes more (uncovered) if the mixture is still too wet.

Step 5: In the last few minutes of cooking, sprinkle the cheese (optional). Cover and continue to cook until done.

Texas Hash

Rebecca PREP TIME: 5 mins | COOK TIME: 25 mins | TOTAL TIME: 30 mins | YIELD: 4 servings This Texas High is an amazing one-skillet meal that I’m pretty sure… General Recipes Texas Hash European Print This
Serves: 4 Prep Time: 5 mins Cooking Time: 25 mins 25 mins
Nutrition facts: 200 calories 20 grams fat
Rating: 5.0/5
( 1 voted )

Ingredients

  • 1 c. diced green bell pepper
  • 1 lb ground beef, 80/20
  • 2 tbsp olive oil
  • 1 c. diced onion
  • 1 tbsp minced fresh garlic
  • ½ tsp dry mustard
  • 2 tsp chili powder
  • ½ c. uncooked long-grain white rice
  • 2 tbsp tomato paste
  • 1 c. water
  • 1 14.5-oz. can of diced tomatoes with juice
  • 1 tsp Worcestershire sauce
  • 1 c. shredded cheddar cheese, optional
  • 2 tsp kosher salt
  • ¼ tsp freshly ground black pepper

Instructions

Step 1: Heat the olive oil in a skillet with a tight-fitting cover over medium-high heat. Once the oil is hot, add the onion, peppers, garlic, ground beef, dry mustard, chili powder, salt, and pepper to the skillet. Saute until the ground beef has browned, breaking the meat into small pieces as it cooks.

Step 2: Then, add the rice and continue to cook for another 2 minutes to allow the rice to absorb the liquid. Next, add the tomato paste and cook for a minute more.

Step 3: To the pan, add the canned tomatoes with the juice along with the water and Worcestershire sauce. Stir well, put the lid on, and let everything simmer for about 20 minutes, covered.

Step 4: Take the lid off after 20 minutes, then fluff the mixture. Cook for a couple of minutes more (uncovered) if the mixture is still too wet.

Step 5: In the last few minutes of cooking, sprinkle the cheese (optional). Cover and continue to cook until done.

July 7, 2022 0 comment
0 FacebookTwitterPinterestEmail
Newer Posts
Older Posts

Popular Posts

  • 1

    Crispy Crunchy Parmesan Potatoes

    March 21, 2020
  • 2

    CROCK POT SMOTHERED PORK CHOPS

    March 21, 2020
  • Facebook
  • Twitter

@2019 - All Right Reserved.


Back To Top