Cook it once
  • Home
  • Privacy Policy
  • Recipes
    • KETO
    • LC
    • WW
  • Tips
  • Contact
Cook it once
  • Home
  • Privacy Policy
  • Recipes
    • KETO
    • LC
    • WW
  • Tips
  • Contact
Category:

General Recipes

General Recipes

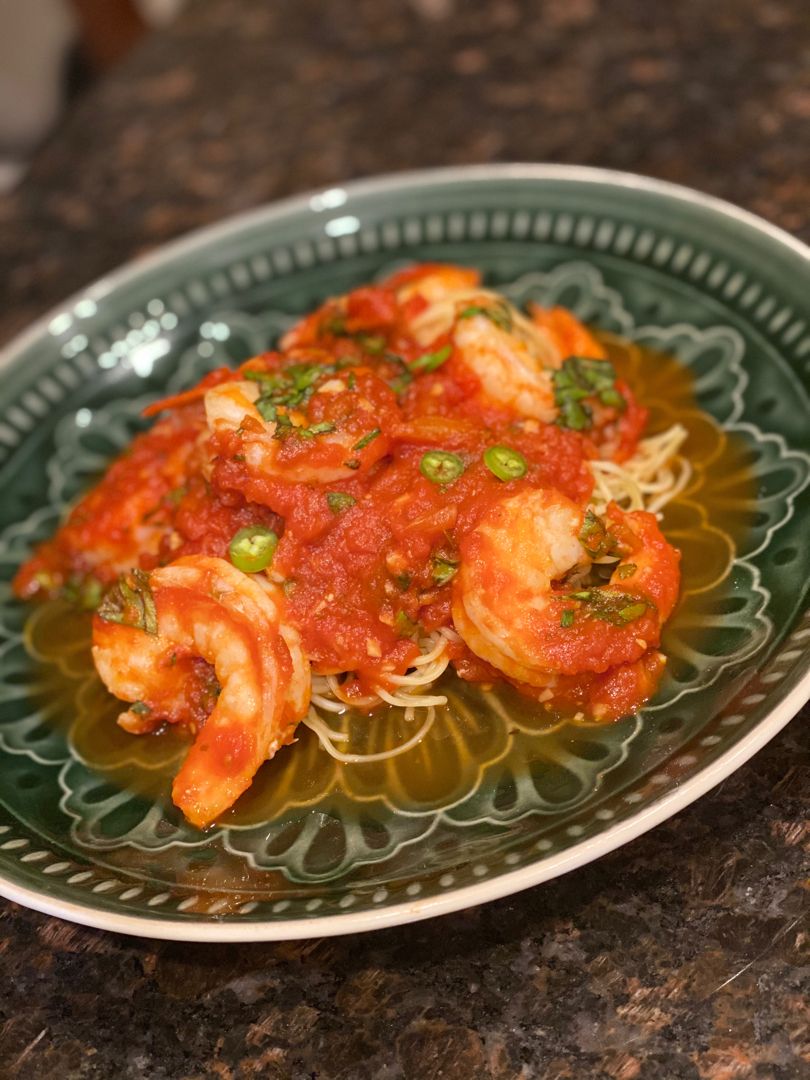
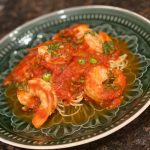
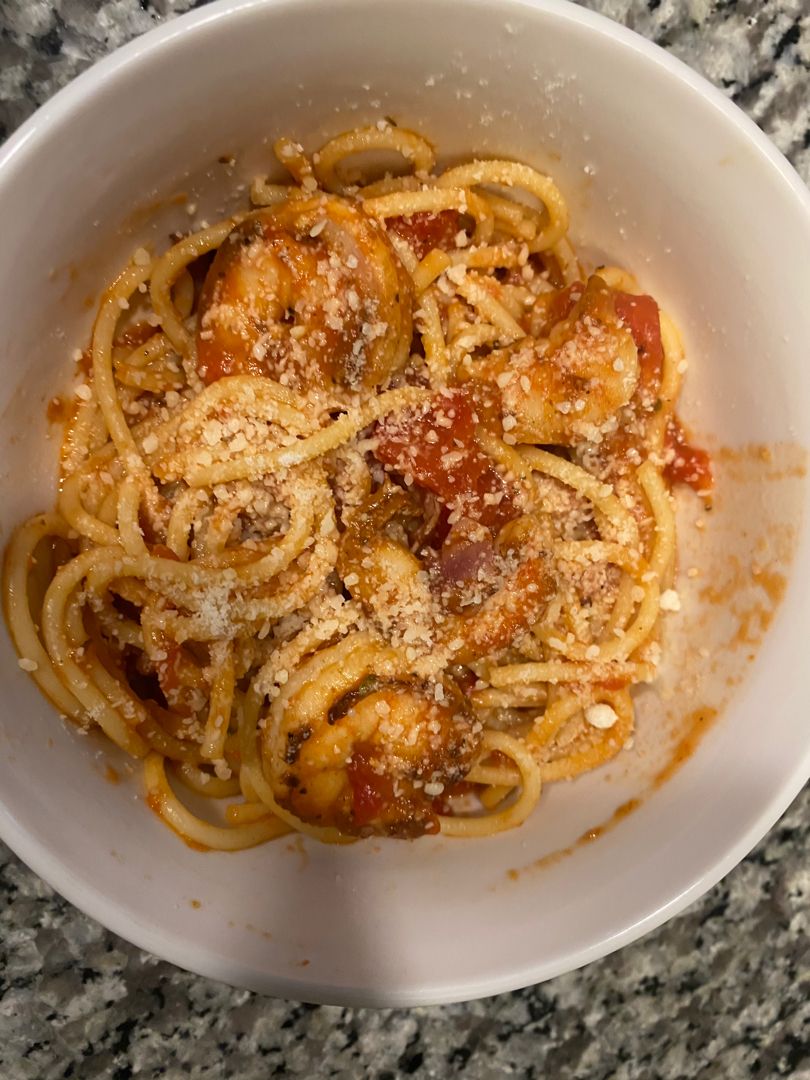
Shrimp Fra Diavolo

by Rebecca July 9, 2022
written by Rebecca

Prep Time: 10 mins | Cook Time: 35 mins | Total Time: 45 mins | Yield: 4-6 servings

Fire up your pasta night with this delicious Shrimp Fra Diavolo with devilish shrimp and linguine tossed in juicy tomatoes, aged Asiago cheese, and lemon zest!

INGREDIENTS

1 lb shrimp, deveined with tails on

1 lb linguine (or pasta of your choice)

2 tbsp olive oil, divided

4 oz. pancetta, roughly chopped into 1/4” cubes

1 1/2 tsp coarse salt, divided, plus more to taste

4 medium cloves garlic, minced

1 tsp crushed red pepper flakes, divided

1 medium shallot, chopped

1 28-oz can of whole peeled tomatoes, crushed

1/2 c. dry white wine

1/4 c. packed fresh basil leaves, gently torn

8 tbsp freshly grated aged Asiago cheese, divided

2 tbsp chopped fresh parsley

Zest of 1 lemon

1/2 tsp freshly ground black pepper

How to make Shrimp Fra Diavolo

Step 1: Following the package directions, cook the linguine in a large pot of salted boiling water until al dente. Reserve 1/4 c of the pasta water and drain the rest.

Step 2: Saute the pancetta in a large skillet or cast-iron pan over medium-low heat for about 5 minutes or until crisp or golden brown. On a paper towel-lined plate, transfer the cooked pancetta and set it aside. Set aside the rendered grease in the pan and adjust the heat to medium. Drizzle 1 tbsp olive oil and swirl to coat the pan.

Step 3: In the meantime, sprinkle the shrimp with 1 tsp salt, black pepper, and 3/4 tsp red pepper flakes. To the pan, add the shrimps and cook for about 2 minutes on each side until opaque and the shrimps form a golden-brown crust. Note that the cooking time of the shrimps varies depending on their sizes. Set the shrimps aside when done.

Step 4: To the same pan, add the rest of the olive oil and swirl to coat the pan. Then, add the shallot and garlic. Sprinkle with the rest of the salt and pepper. Saute for about 2 minutes or until the shallots are translucent.

Step 5: Pour in the white wine and deglaze the pan. Next, add the tomatoes. Put the lid on and let everything simmer for about 10 minutes or until the sauce starts to thicken.

Step 6: To the pan, add the cooked linguine along with the reserved pasta water, shrimp, pancetta, basil, lemon zest, and 6 tbsp grated Asiago cheese. Mix well and season with extra salt.

Step 7: Into serving bowls, divide the pasta. Serve right away garnished with the rest of the Asiago cheese and parsley. Enjoy!

Nutrition Facts:

Serves: 6, Serving Size: 1 small plate
Calories Per Serving: 533, Total Fat 14.4g 18%, Saturated Fat 5.2g, Trans Fat 0g, Polyunsaturated Fat 1.2g, Monounsaturated Fat 4.2g 0%, Cholesterol 139.8mg 47%, Sodium 1382.9mg 60%, Total Carbohydrate 67.9g 25%, Dietary Fiber 4.2g 15%, Sugars 7.2g, Protein 31.9g 64%, Vitamin A 41.4µg 5%, Vitamin C 14.4mg 16%, Calcium 204.3mg 16%, Iron 5mg 28%
Shrimp Fra Diavolo

Rebecca Prep Time: 10 mins | Cook Time: 35 mins | Total Time: 45 mins | Yield: 4-6 servings Fire up your pasta night with this delicious Shrimp Fra Diavolo with… General Recipes Shrimp Fra Diavolo European Print This
Serves: 4-6 Prep Time: 10 mins Cooking Time: 35 mins 35 mins
Nutrition facts: 533 calories 14.4 fat
Rating: 5.0/5
( 1 voted )

Ingredients

  • 1 lb shrimp, deveined with tails on
  • 1 lb linguine (or pasta of your choice)
  • 2 tbsp olive oil, divided
  • 4 oz. pancetta, roughly chopped into 1/4” cubes
  • 1 1/2 tsp coarse salt, divided, plus more to taste
  • 4 medium cloves garlic, minced
  • 1 tsp crushed red pepper flakes, divided
  • 1 medium shallot, chopped
  • 1 28-oz can of whole peeled tomatoes, crushed
  • 1/2 c. dry white wine
  • 1/4 c. packed fresh basil leaves, gently torn
  • 8 tbsp freshly grated aged Asiago cheese, divided
  • 2 tbsp chopped fresh parsley
  • Zest of 1 lemon
  • 1/2 tsp freshly ground black pepper

Instructions

Step 1: Following the package directions, cook the linguine in a large pot of salted boiling water until al dente. Reserve 1/4 c of the pasta water and drain the rest.

Step 2: Saute the pancetta in a large skillet or cast-iron pan over medium-low heat for about 5 minutes or until crisp or golden brown. On a paper towel-lined plate, transfer the cooked pancetta and set it aside. Set aside the rendered grease in the pan and adjust the heat to medium. Drizzle 1 tbsp olive oil and swirl to coat the pan.

Step 3: In the meantime, sprinkle the shrimp with 1 tsp salt, black pepper, and 3/4 tsp red pepper flakes. To the pan, add the shrimps and cook for about 2 minutes on each side until opaque and the shrimps form a golden-brown crust. Note that the cooking time of the shrimps varies depending on their sizes. Set the shrimps aside when done.

Step 4: To the same pan, add the rest of the olive oil and swirl to coat the pan. Then, add the shallot and garlic. Sprinkle with the rest of the salt and pepper. Saute for about 2 minutes or until the shallots are translucent.

Step 5: Pour in the white wine and deglaze the pan. Next, add the tomatoes. Put the lid on and let everything simmer for about 10 minutes or until the sauce starts to thicken.

Step 6: To the pan, add the cooked linguine along with the reserved pasta water, shrimp, pancetta, basil, lemon zest, and 6 tbsp grated Asiago cheese. Mix well and season with extra salt.

Step 7: Into serving bowls, divide the pasta. Serve right away garnished with the rest of the Asiago cheese and parsley. Enjoy!
July 9, 2022 0 comment
0 FacebookTwitterPinterestEmail
General Recipes

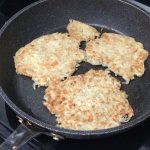
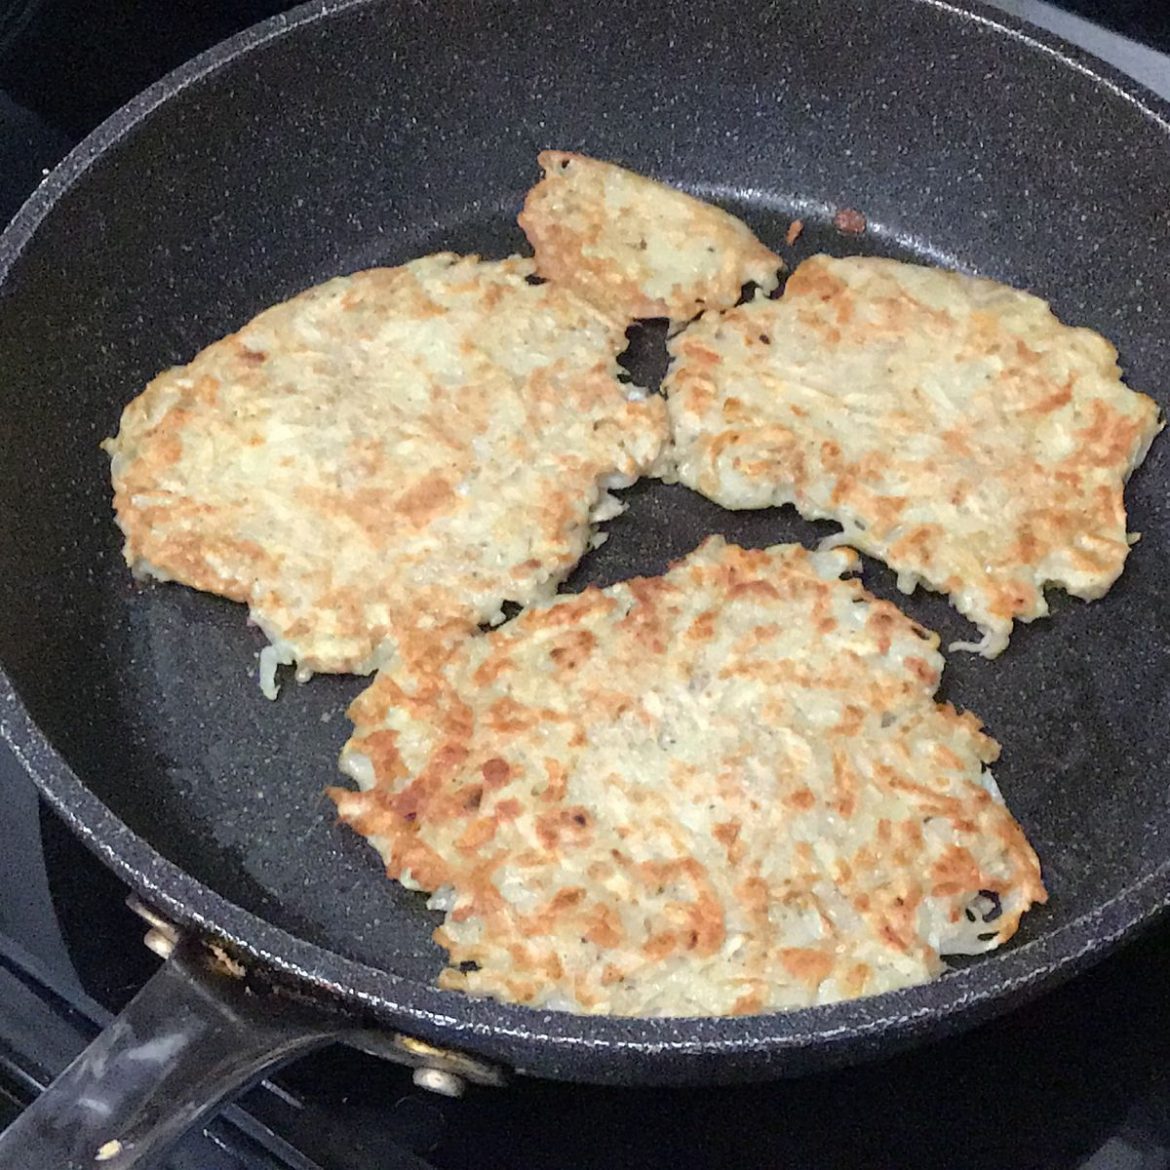
German Potato Pancakes

by Rebecca July 9, 2022
written by Rebecca

Prep Time: 10 mins | Cook Time: 20 mins | Total Time: 30 mins | Servings: 8 pancakes

If you love pancakes, I am very sure that you’ll enjoy these German Potato Pancakes. These delicious pancakes are incredibly easy to whip up using just a few simple ingredients. Serve these pancakes hot out of the pan with your choice of sweet apple sauce. If you prefer savory pancakes, these are also great with sour cream, a garlicky yoghurt sauce, or even a quark (a soft cheese).

Ingredients

1 medium-sized egg

1 small onion

1 lb of potatoes

3 tbsp flour

oil for frying

pinch of salt

pinch of pepper, for savory pancakes

How to make German Potato Pancakes

Step 1: After washing 1 lb potatoes, peel them along with 1 small onion.

Step 2: Using the grating side of a four-sided grater, grate the potatoes into a bowl. Then, grate 1 onion or finely chop using a knife.

Step 3: Drain the excess water from the potatoes. Sprinkle the potatoes with a pinch of salt and pepper for savory pancakes, and add the flour and egg. Mix well using your hands until the batter is well mixed.

Step 4: In a pan, heat 2 tbsp oil. Once hot, add 2 tbsp pancake batter and cook for about 3 to 4 minutes on each side. Make sure the pancake is not too thick or too large for even cooking. On a paper towel or similar, transfer the pancake. To keep the pancake warm, you can place them in a preheated oven. Cook the rest of the pancake batter, adding more oil as needed.

Step 5: Serve the German Potato Pancakes right away with apple, sauce if you prefer a sweet taste or with sour cream, yoghurt, or quark for savory pancakes. Enjoy!

Notes:

Enjoy the pancakes hot out of the pan.

If you prefer savory pancakes, add extra salt, pepper, and other spices like garlic powder to the batter.

Nutrition Facts:

Serving: 1g | Calories: 198 kcal | Carbohydrates: 15g | Protein: 3g | Fat: 15g | Saturated Fat: 1g | Polyunsaturated Fat: 13g | Cholesterol: 20mg | Sodium: 30mg | Fiber: 1g | Sugar: 1g

German Potato Pancakes

Rebecca Prep Time: 10 mins | Cook Time: 20 mins | Total Time: 30 mins | Servings: 8 pancakes If you love pancakes, I am very sure that you’ll enjoy these… General Recipes German Potato Pancakes European Print This
Serves: 8 Prep Time: 10 mins Cooking Time: 20 mins 20 mins
Nutrition facts: 198 calories 15 fat
Rating: 5.0/5
( 1 voted )

Ingredients

  • 1 medium-sized egg
  • 1 small onion
  • 1 lb of potatoes
  • 3 tbsp flour
  • oil for frying
  • pinch of salt
  • pinch of pepper, for savory pancakes

Instructions

Step 1: After washing 1 lb potatoes, peel them along with 1 small onion.

Step 2: Using the grating side of a four-sided grater, grate the potatoes into a bowl. Then, grate 1 onion or finely chop using a knife.

Step 3: Drain the excess water from the potatoes. Sprinkle the potatoes with a pinch of salt and pepper for savory pancakes, and add the flour and egg. Mix well using your hands until the batter is well mixed.

Step 4: In a pan, heat 2 tbsp oil. Once hot, add 2 tbsp pancake batter and cook for about 3 to 4 minutes on each side. Make sure the pancake is not too thick or too large for even cooking. On a paper towel or similar, transfer the pancake. To keep the pancake warm, you can place them in a preheated oven. Cook the rest of the pancake batter, adding more oil as needed.

Step 5: Serve the German Potato Pancakes right away with apple, sauce if you prefer a sweet taste or with sour cream, yoghurt, or quark for savory pancakes. Enjoy!

Notes

Enjoy the pancakes hot out of the pan. If you prefer savory pancakes, add extra salt, pepper, and other spices like garlic powder to the batter.

July 9, 2022 0 comment
0 FacebookTwitterPinterestEmail
General Recipes

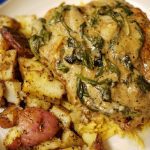
Chicken Florentine

by Rebecca July 8, 2022
written by Rebecca

PREP TIME: 10 MINS | COOK TIME: 20 MINS | THAWING TIME: 12 HRS | TOTAL TIME: 30 MINS | SERVINGS: 4

This is an amazing chicken dish that your entire family will love! Tender and juicy chicken laying over a bed of spinach with delicious creamy white sauce. This Chicken Florentine is undeniably scrumptious!

Ingredients

6 tablespoons 3/4 stick unsalted butter, divided

4 boneless, skinless chicken breasts

1/2 c. all-purpose flour, for dredging

2 tablespoons onion, finely diced

1 1/2 c. dry white wine

1 tablespoon finely chopped garlic

1 c. heavy whipping cream

1 tablespoon chopped fresh parsley

2 10-oz. packages frozen cut-leaf spinach, thawed, drained

Salt and freshly ground black pepper to taste

How to make Chicken Florentine

Step 1: Season the chicken with salt and pepper. In the flour, dredge the chicken to lightly coat, shaking the excess off.

Step 2: Melt 2 tbsp butter in a large skillet over medium heat. Add the chicken to the skillet once the butter has melted and cooked for about 5 minutes on each side until browned.

Step 3: To a plate, transfer the chicken and tent with foil.

Step 4: In the bow-empty skillet, melt 2 tbsp butter over medium heat. Cleaning the skillet is not required. Then, add the onions and garlic. Cook for about 1 minute until the onions are translucent, scraping the brown bits from the bottom of the skillet using a wooden spoon or spatula.

Step 5: Take the pan off the heat and pour in the wine. Then, place the pan back on the stove and adjust the heat to medium-high. Let everything boil for about 3 minutes or until the liquid has reduced by half. Next, add the cream and boil for another 3 minutes or until the sauce has reduced by half, stirring occasionally.

Step 6: Add the parsley and season with salt and pepper.

Step 7: Add the chicken back to the pan along with any accumulated juices. Toss the chicken to coat in the sauce. Then, adjust the heat to low/warming.

Step 8: In the meantime, melt the rest of the 2 tbsp butter in a different large skillet over medium heat. Add the spinach, stir, and cook until heated through. To taste, season with salt and pepper.

Step 9: Over a platter, arrange the spinach and add the chicken on top. Pour the sauce over the chicken and spinach. Serve and enjoy!

Nutrition Info.

Serving: 4g | Calories: 533 kcal

Chicken Florentine

Rebecca PREP TIME: 10 MINS | COOK TIME: 20 MINS | THAWING TIME: 12 HRS | TOTAL TIME: 30 MINS | SERVINGS: 4 This is an amazing chicken dish that your… General Recipes Chicken Florentine European Print This
Serves: 4 Prep Time: 10 mins Cooking Time: 20 mins 20 mins
Nutrition facts: 533 calories 20 grams fat
Rating: 5.0/5
( 1 voted )

Ingredients

  • 6 tablespoons 3/4 stick unsalted butter, divided
  • 4 boneless, skinless chicken breasts
  • 1/2 c. all-purpose flour, for dredging
  • 2 tablespoons onion, finely diced
  • 1 1/2 c. dry white wine
  • 1 tablespoon finely chopped garlic
  • 1 c. heavy whipping cream
  • 1 tablespoon chopped fresh parsley
  • 2 10-oz. packages frozen cut-leaf spinach, thawed, drained
  • Salt and freshly ground black pepper to taste

Instructions

Step 1: Season the chicken with salt and pepper. In the flour, dredge the chicken to lightly coat, shaking the excess off.

Step 2: Melt 2 tbsp butter in a large skillet over medium heat. Add the chicken to the skillet once the butter has melted and cooked for about 5 minutes on each side until browned.

Step 3: To a plate, transfer the chicken and tent with foil.

Step 4: In the bow-empty skillet, melt 2 tbsp butter over medium heat. Cleaning the skillet is not required. Then, add the onions and garlic. Cook for about 1 minute until the onions are translucent, scraping the brown bits from the bottom of the skillet using a wooden spoon or spatula.

Step 5: Take the pan off the heat and pour in the wine. Then, place the pan back on the stove and adjust the heat to medium-high. Let everything boil for about 3 minutes or until the liquid has reduced by half. Next, add the cream and boil for another 3 minutes or until the sauce has reduced by half, stirring occasionally.

Step 6: Add the parsley and season with salt and pepper.

Step 7: Add the chicken back to the pan along with any accumulated juices. Toss the chicken to coat in the sauce. Then, adjust the heat to low/warming.

Step 8: In the meantime, melt the rest of the 2 tbsp butter in a different large skillet over medium heat. Add the spinach, stir, and cook until heated through. To taste, season with salt and pepper.

Step 9: Over a platter, arrange the spinach and add the chicken on top. Pour the sauce over the chicken and spinach. Serve and enjoy!

July 8, 2022 0 comment
0 FacebookTwitterPinterestEmail
General Recipes

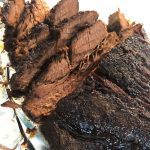
SLOW COOKER BEEF BRISKET

by Rebecca July 8, 2022
written by Rebecca

TOTAL TIME: 8 hrs 15 mins | PREP TIME: 15 mins | COOK TIME: 8 hrs | SERVINGS: 8-10 people

Melt-in-your-mouth beef brisket that is exploding in mouthwatering flavors! This slow cooker beef brisket is insanely delicious and a million better than any restaurant.

INGREDIENTS

SLOW COOKER:

2 tbsp Worcestershire sauce

4-5 lbs beef brisket, trimmed of excess fat

1/2 c. homemade barbecue sauce

1 tbsp beef bouillon

1 tbsp reduced-sodium soy sauce

1 c. water

SPICE RUB:

2 tbsp packed brown sugar

2 tbsp paprika

1 tbsp chili powder

1 teaspoon EACH onion powder, chipotle powder, pepper

2 teaspoons EACH garlic powder, salt

1/4 tsp cayenne pepper is optional for more heat

1/2 tsp dried thyme

BARBECUE SAUCE:

1/3 c. molasses

1 1/2 c. ketchup

1/3 c. packed brown sugar

1/4 c. apple cider vinegar

1 tbsp mesquite liquid smoke, optional but recommended

1 tbsp reserved Spice Rub (from above)

1/4 c. seedless blackberry preserves

HOW TO MAKE SLOW COOKER BEEF BRISKET

Step 1: Prepare the oven. Preheat it to 425 degrees F. Using parchment paper or foil, line a large baking sheet with sides or a jelly roll pan. Set aside.

Step 2: using nonstick cooking spray, grease a 6-quart or larger slow cooker.

Step 3: Remove the excess fat from the brisket, rinse, and pat the brisket dry. Slice the brisket in half if using an extra-long brisket.

Step 4: Place the Spice Rub ingredients in a medium bowl. Mix well. Into a medium bowl, place 1 tbsp Spice Rub to use in your barbecue sauce. Evenly cover the entire meat, and rub the rest of the spice rub. Allow the meat to sit for about 30 minutes at room temperature or in the fridge for up to 24 hours.

Step 5: When ready, bake the meat in the preheated oven, uncovered, for about 30 minutes.

Step 6: To the bowl with 1 tbsp reserved spice rub, add the barbecue sauce ingredients. Mix well. Add half a cup of the barbecue sauce to a slow cooker. Pour in 1 cup water and add 2 tbsp Worcestershire, 1 tbsp reduced-sodium soy sauce, and 1 tbsp beef bouillon. Stir well.

Step 7: To the slow cooker, carefully transfer the brisket. Put the lid on and set to cook for 8 to 10 hours on low or until the brisket is very tender, flipping the brisket halfway through cooking. Cook the brisket longer if the brisket is still tough.

Step 8: Transfer the brisket to a foil-lined baking sheet and brush with the barbecue sauce. Broil for about 5 to 10 minutes, or until the brisket is slightly caramelized. In the meantime, reheat the barbecue sauce in the microwave or simmer until warmed through.

Step 9: Remove the brisket from the broiler and brush again with the barbecue sauce. If desired, cut the brisket across the grain or chop. Serve plain with the rest of the barbecue sauce or in sandwiches.

Note:

To make the brisket in advance, cook until tender and store in the fridge. When ready to serve, skip off all the hardened fat and cook in the slow cooker for 1 to 2 hours on low setting until warmed through, then continue with the recipe.

SLOW COOKER BEEF BRISKET

Rebecca TOTAL TIME: 8 hrs 15 mins | PREP TIME: 15 mins | COOK TIME: 8 hrs | SERVINGS: 8-10 people Melt-in-your-mouth beef brisket that is exploding in mouthwatering flavors! This… General Recipes SLOW COOKER BEEF BRISKET European Print This
Serves: 8-10 Prep Time: 15 mins Cooking Time: 8 hrs 8 hrs
Nutrition facts: 200 calories 20 grams fat
Rating: 5.0/5
( 1 voted )

Ingredients

  • SLOW COOKER:
  • 2 tbsp Worcestershire sauce
  • 4-5 lbs beef brisket, trimmed of excess fat
  • 1/2 c. homemade barbecue sauce
  • 1 tbsp beef bouillon
  • 1 tbsp reduced-sodium soy sauce
  • 1 c. water
  • SPICE RUB:
  • 2 tbsp packed brown sugar
  • 2 tbsp paprika
  • 1 tbsp chili powder
  • 1 teaspoon EACH onion powder, chipotle powder, pepper
  • 2 teaspoons EACH garlic powder, salt
  • 1/4 tsp cayenne pepper is optional for more heat
  • 1/2 tsp dried thyme
  • BARBECUE SAUCE:
  • 1/3 c. molasses
  • 1 1/2 c. ketchup
  • 1/3 c. packed brown sugar
  • 1/4 c. apple cider vinegar
  • 1 tbsp mesquite liquid smoke, optional but recommended
  • 1 tbsp reserved Spice Rub (from above)
  • 1/4 c. seedless blackberry preserves

Instructions

Step 1: Prepare the oven. Preheat it to 425 degrees F. Using parchment paper or foil, line a large baking sheet with sides or a jelly roll pan. Set aside.

Step 2: using nonstick cooking spray, grease a 6-quart or larger slow cooker.

Step 3: Remove the excess fat from the brisket, rinse, and pat the brisket dry. Slice the brisket in half if using an extra-long brisket.

Step 4: Place the Spice Rub ingredients in a medium bowl. Mix well. Into a medium bowl, place 1 tbsp Spice Rub to use in your barbecue sauce. Evenly cover the entire meat, and rub the rest of the spice rub. Allow the meat to sit for about 30 minutes at room temperature or in the fridge for up to 24 hours.

Step 5: When ready, bake the meat in the preheated oven, uncovered, for about 30 minutes.

Step 6: To the bowl with 1 tbsp reserved spice rub, add the barbecue sauce ingredients. Mix well. Add half a cup of the barbecue sauce to a slow cooker. Pour in 1 cup water and add 2 tbsp Worcestershire, 1 tbsp reduced-sodium soy sauce, and 1 tbsp beef bouillon. Stir well.

Step 7: To the slow cooker, carefully transfer the brisket. Put the lid on and set to cook for 8 to 10 hours on low or until the brisket is very tender, flipping the brisket halfway through cooking. Cook the brisket longer if the brisket is still tough.

Step 8: Transfer the brisket to a foil-lined baking sheet and brush with the barbecue sauce. Broil for about 5 to 10 minutes, or until the brisket is slightly caramelized. In the meantime, reheat the barbecue sauce in the microwave or simmer until warmed through.

Step 9: Remove the brisket from the broiler and brush again with the barbecue sauce. If desired, cut the brisket across the grain or chop. Serve plain with the rest of the barbecue sauce or in sandwiches.

Notes

To make the brisket in advance, cook until tender and store in the fridge. When ready to serve, skip off all the hardened fat and cook in the slow cooker for 1 to 2 hours on low setting until warmed through, then continue with the recipe.

July 8, 2022 0 comment
0 FacebookTwitterPinterestEmail
General Recipes

Ham Egg and Cheese Hash Brown Breakfast Muffins

by Rebecca July 8, 2022
written by Rebecca

Prep Time: 10 mins | Cook Time: 35 mins | Total Time: 45 mins

Enjoy all your breakfast favorites in these perfect little breakfast muffins. A pre-baked hash brown basket filled with ham, egg, and cheese mixture. These delicious breakfast muffins are a great grab-and-go breakfast.

These ham, egg and cheese, and brown breakfast muffins have been my go-to for years now. Easily make these muffins using only a few ingredients in under an hour. You can even make these muffins ahead and simply pop them in the oven the next day and bake until the eggs are set. These muffins freeze well, too! Simply thaw them before reheating in the microwave.

Ingredients

5 eggs

About 2 1/2 c. hash browns frozen or refrigerated

Salt

1 c. shredded sharp Cheddar cheese

2 tablespoons heavy whipping cream

1/4 pound ham, diced

Salt

1 teaspoon garlic powder

Fresh cracked black pepper

How to make Ham Egg and Cheese Hash Brown Breakfast Muffins

Step 1: Prepare the oven. Preheat it to 425 degrees. Ready a 6-cup muffin pan. Grease and set aside.

Step 2: Into the prepared muffin pan, divide the hash browns, pressing them in and shaping kind of a cup at the bottom and up the sides. Each portion measures around 1/4-1/3 cup of hash browns. Then, sprinkle with salt.

Step 3: Place the muffin pan in the preheated oven and pre-bake the muffins for about 15 to 17 minutes or until the muffins begin to get slightly crispy and golden.

Step 4: Remove the muffin pan when done and adjust the oven temperature to 350 degrees.

Step 5: Place the eggs, heavy cream, salt, garlic powder, and pepper in a mixing bowl. Whisk well until smooth. Then, stir in the shredded cheese and diced ham.

Step 6: Into each hash brown cup, spoon the egg mixture and fill them up almost all the way. Place in the oven and bake for about 15 to 18 minutes.

Ham Egg and Cheese Hash Brown Breakfast Muffins

Rebecca Prep Time: 10 mins | Cook Time: 35 mins | Total Time: 45 mins Enjoy all your breakfast favorites in these perfect little breakfast muffins. A pre-baked hash brown basket… General Recipes Ham Egg and Cheese Hash Brown Breakfast Muffins European Print This
Prep Time: 10 mins Cooking Time: 35 mins 35 mins
Nutrition facts: 200 calories 20 grams fat
Rating: 5.0/5
( 1 voted )

Ingredients

  • 5 eggs
  • About 2 1/2 c. hash browns frozen or refrigerated
  • Salt
  • 1 c. shredded sharp Cheddar cheese
  • 2 tablespoons heavy whipping cream
  • 1/4 pound ham, diced
  • Salt
  • 1 teaspoon garlic powder
  • Fresh cracked black pepper

Instructions

Step 1: Prepare the oven. Preheat it to 425 degrees. Ready a 6-cup muffin pan. Grease and set aside.

Step 2: Into the prepared muffin pan, divide the hash browns, pressing them in and shaping kind of a cup at the bottom and up the sides. Each portion measures around 1/4-1/3 cup of hash browns. Then, sprinkle with salt.

Step 3: Place the muffin pan in the preheated oven and pre-bake the muffins for about 15 to 17 minutes or until the muffins begin to get slightly crispy and golden.

Step 4: Remove the muffin pan when done and adjust the oven temperature to 350 degrees.

Step 5: Place the eggs, heavy cream, salt, garlic powder, and pepper in a mixing bowl. Whisk well until smooth. Then, stir in the shredded cheese and diced ham.

Step 6: Into each hash brown cup, spoon the egg mixture and fill them up almost all the way. Place in the oven and bake for about 15 to 18 minutes.

July 8, 2022 0 comment
0 FacebookTwitterPinterestEmail
General Recipes

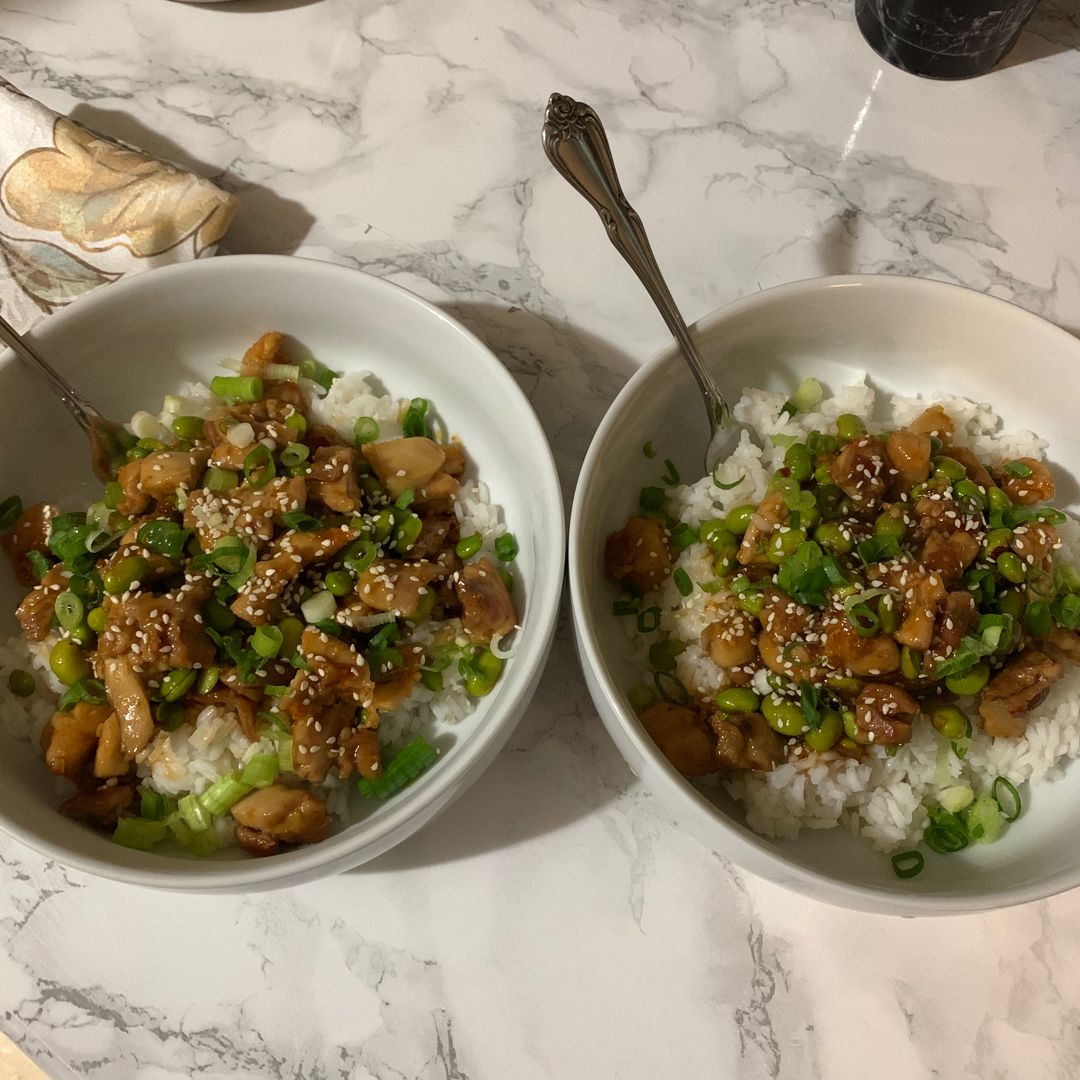
Korean Sticky Chicken

by Rebecca July 8, 2022
written by Rebecca

Servings: 4

The combination of sweet and spicy flavors in this mouthwatering Korean Sticky Chicken is to die for! This recipe is incredibly easy to throw together and ready in under thirty minutes. It is a no-fuss dish that everyone will be asking for again and again! This Korean Sticky Chicken has been one of the most requested dishes at home. We like to serve this with rice and our favorite veggies on the side for an easy and fast weeknight meal any time. If you are searching for another simple meal that you can whip up even on the busiest days, this delicious Korean Sticky Chicken is a great option. It is super good and guarantees to not disappoint!

Ingredients

1 pound boneless chicken thighs or breasts, thinly sliced into bite-sized pieces

salt and pepper

1-2 tbsp neutral oil (vegetable, canola, peanut, grapeseed)

SAUCE:

sesame oil

honey

soy sauce

rice vinegar

ketchup

brown sugar

garlic

Gochujang (Korean chili paste)–adjust the amount to suit your heat tolerance; may substitute Sriracha or other hot sauce

salt and pepper

Ginger

FOR GARNISH:

roasted sesame seeds

scallions (green onions)

How to make Korean Sticky Chicken

Step 1: Heat 1 tbsp oil in a large non-stick skillet over medium-high heat. Once the oil is hot, add half of the chicken to the skillet, spreading them out in a single layer. Season the chicken with salt and pepper. Cook the chicken until browned. Flip and continue to cook the other side. To a plate, transfer the chicken. Cook the rest of the chicken. If needed, add more oil to the pan.

Step 2: In the meantime, place the sauce ingredients in a small bowl. Mix well until blended.

Step 3: In the same skillet, add all the cooked chicken and pour the sauce over. Toss well to evenly coat the chicken. Let the sauce simmer for about 2 to 4 minutes or until thickened.

Step 4: To a serving plate or bowl, transfer the Korean Sticky Chicken. Serve garnished with some sesame seeds and chopped scallions. Enjoy!

Korean Sticky Chicken

Rebecca Servings: 4 The combination of sweet and spicy flavors in this mouthwatering Korean Sticky Chicken is to die for! This recipe is incredibly easy to throw together and ready in… General Recipes Korean Sticky Chicken European Print This
Serves: 4
Nutrition facts: 200 calories 20 grams fat
Rating: 5.0/5
( 1 voted )

Ingredients

  • 1 pound boneless chicken thighs or breasts, thinly sliced into bite-sized pieces
  • salt and pepper
  • 1-2 tbsp neutral oil (vegetable, canola, peanut, grapeseed)
  • SAUCE:
  • sesame oil
  • honey
  • soy sauce
  • rice vinegar
  • ketchup
  • brown sugar
  • garlic
  • Gochujang (Korean chili paste)--adjust the amount to suit your heat tolerance; may substitute Sriracha or other hot sauce
  • salt and pepper
  • Ginger
  • FOR GARNISH:
  • roasted sesame seeds
  • scallions (green onions)

Instructions

Step 1: Heat 1 tbsp oil in a large non-stick skillet over medium-high heat. Once the oil is hot, add half of the chicken to the skillet, spreading them out in a single layer. Season the chicken with salt and pepper. Cook the chicken until browned. Flip and continue to cook the other side. To a plate, transfer the chicken. Cook the rest of the chicken. If needed, add more oil to the pan.

Step 2: In the meantime, place the sauce ingredients in a small bowl. Mix well until blended.

Step 3: In the same skillet, add all the cooked chicken and pour the sauce over. Toss well to evenly coat the chicken. Let the sauce simmer for about 2 to 4 minutes or until thickened.

Step 4: To a serving plate or bowl, transfer the Korean Sticky Chicken. Serve garnished with some sesame seeds and chopped scallions. Enjoy!

July 8, 2022 0 comment
0 FacebookTwitterPinterestEmail
General Recipes

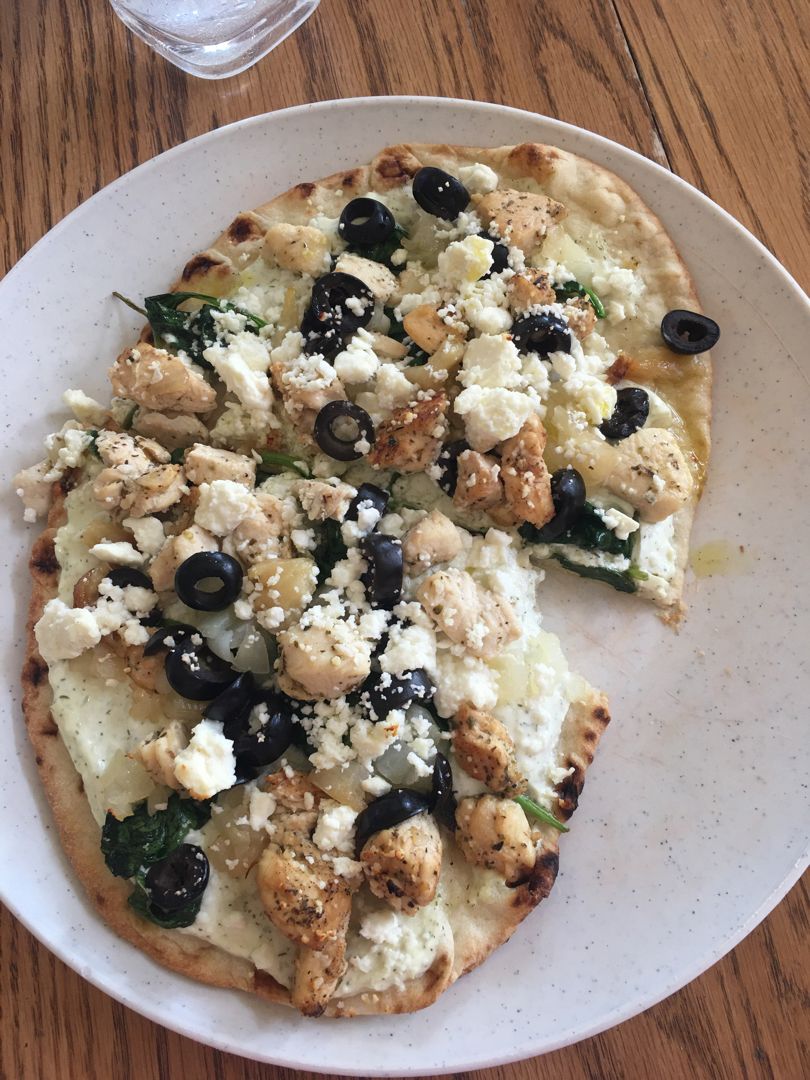
Greek Flatbread Recipe with Homemade Tzatziki

by Rebecca July 8, 2022
written by Rebecca

Prep Time: 1 hr | Cook Time: 35 mins | Rising time: 1 hr | Total Time: 2 hrs 35 mins | Servings: 2 flatbreads

Enjoy all the flavors of Spanikopita, and chicken Souvlaki in this Greek Flatbread topped with a palate-pleasing garlicky homemade Tzatziki.

Ingredients

MARINADED CHICKEN:

2 tablespoons olive oil

2 boneless, skinless chicken breasts or you can use 4-5 thighs

1 lemon, juiced

1 teaspoon oregano

1/2 teaspoon salt

2 garlic cloves, minced

TZATZIKI:

⅓ c. olive oil

1/2 a seedless English cucumber, peeled

2 c. plain Greek yoghurt

1 tablespoon red or white wine vinegar

3 cloves garlic, peeled and smashed into a paste

1 tablespoon fresh dill, minced

1 teaspoon sea salt or more to taste

FLATBREAD:

1 teaspoon active dry yeast (from one 1/4 oz. envelope)

1 c. warm water (about 110 degrees)

3 tablespoons extra-virgin olive oil, plus more for a bowl

3 c. all-purpose flour, plus more for surface and hands

oil to brush on the dough before cooking

2 teaspoons coarse salt

ROASTED GARLIC:

1 teaspoon sea salt

2 heads garlic

1 tablespoon olive oil

OTHER TOPPINGS:

1 large onion, sliced

1 c. feta

1 tablespoon olive oil

salt and pepper to taste

300 grams of baby spinach in a small rectangle container

FOR EACH FLATBREAD:

1 chicken breast, cut up, marinated, and cooked

1/2 c Tzatziki

1 flatbread

150 grams of baby spinach sauteed

2 tablespoons olive oil to drizzle after cooking

1/2 c. feta

1/2 onions sauteed

1 head of roasted garlic

How to make Greek Flatbread Recipe with Homemade Tzatziki

TZATZIKI:

Step 1: Using a box grater or food processor, grate the cucumber and toss it with half a teaspoon of salt. In a fine-mesh sieve over a bowl, place the cucumber and drain for about 10 minutes.

Step 2: Squeeze as much water from the cucumber. In a bowl, place the squeezed cucumber. Repeat with the remaining cucumber.

Step 3: To the bowl with the squeezed cucumber, add the remaining ingredients, and the rest of the salt. Mix well and allow it to sit for at least an hour in the fridge. This will allow the flavors to come together.

MARINADE and CHICKEN:

Step 4: To a medium Tupperware or bowl, add the lemon, garlic, oregano, olive oil, and salt. Mix well.

Step 5: Remove any fat from the chicken breasts, then slice the chicken into pieces. In a bowl, place the pieces of chicken and drizzle the marinade over them. Toss well to coat. Tent the bowl and set aside for at least 30 minutes or until ready to cook the chicken.

Step 6: Add the chicken to a hot cast-iron pan over medium-high heat and sear for about 3 to 4 minutes on each side until no longer pink in the center. Remove from the heat when done and let the chicken cool. If needed, cook the chicken in batches to avoid over-crowding the pan.

FLATBREAD:

Step 7: In a medium bowl, add the water and sprinkle with the yeast. Allow it to stand for about 5 minutes until nice and foamy. Stir in the flour, oil, and coarse salt once the yeast is bubbling. Mix well until you have formed a ball. Onto a lightly floured surface, turn the dough out, and knead using your floured hands for about 5 minutes until smooth. Add 1 tbsp of flour at a time if the dough is sticky. Or 1 tbsp water at a time if the dough is too stiff. Alternately, you can use a mixer with a dough hook. To do so, add water to a bowl or measuring cup. Sprinkle with the yeast and allow it to stand for about 5 minutes until nice and foamy. To the mixer, add the flour and salt. Add the yeast once bubbling along with the olive oil. Mix well for about 5 to 8 minutes on medium speed until well blended and the dough looks nice and silky smooth. Add 1 tbsp of flour at a time if the dough is sticky. Or 1 tbsp water at a time if the dough is too stiff.

Step 8: To a lightly greased bowl, transfer the dough and tent with a tea towel. Allow the dough to stand for about an hour in a warm, dry place until it doubles in volume.

Step 9: Heat over medium-high heat a large flat cast iron griddle. In the meantime, divide the dough into 4 equal pieces and tent with a tea towel. On a lightly floured surface, roll 1 piece of dough to roughly 8 x 15-inches. Cook the flatbread dough for about 2 to 3 minutes per side. Do the same with all the 4 flatbreads. To do this in the oven, preheat the oven to 400 degrees. On a parchment-lined baking sheet, place the flatbread dough. Bake in the preheated oven for about 12 to 15 minutes. When done, remove from the oven and allow the flatbreads to cool before topping.

Step 10: For the unused dough, wrap them in plastic wrap and store in the fridge for a few days or freezer for a few months. You can do the same with unused flatbreads.

TOPPINGS:

Step 11: Preheat the oven or toaster oven to 400 degrees. In the meantime, cut the tops off the heads of garlic. In the middle of a piece of tin foil, place the garlic and drizzle with oil, and sprinkle with salt. Wrap the garlic in the foil and place it in the preheated oven. Bake for about 45 minutes. Allow the garlic to cool, then squeeze the heat out. Set aside.

Step 12: Drizzle the olive oil in a hot large skillet over medium-low heat. Add the spinach and cook until just wilted. Then, set the spinach aside to cool.

Step 13: In the same pan, add the onions and saute until they begin to get translucent. Set the onions aside to cool when done.

GREEK FLATBREADS:

Step 14: Prepare the oven. Preheat it to 350 degrees.

Step 15: On top of 1 flatbread, spread a half cup of Tzatziki followed by half of the spinach and half of the onion. On top, add half of the cooked chicken pieces and sprinkle with roasted garlic and feta.

Step 16: On a baking tray, place the assembled flatbread and bake for about 10 minutes until nice and hot. Before serving, drizzle with some olive oil. Enjoy with more Tzatziki on the side.

Nutrition Facts:

Serving: 1flatbread | Calories: 1260 kcal | Carbohydrates: 105g | Protein: 88g | Fat: 34g | Saturated Fat: 10g

Greek Flatbread Recipe with Homemade Tzatziki

Rebecca Prep Time: 1 hr | Cook Time: 35 mins | Rising time: 1 hr | Total Time: 2 hrs 35 mins | Servings: 2 flatbreads Enjoy all the flavors of… General Recipes Greek Flatbread Recipe with Homemade Tzatziki European Print This
Serves: 2 Prep Time: 1 hr Cooking Time: 35 mins 35 mins
Nutrition facts: 1260 calories 34 fat
Rating: 5.0/5
( 1 voted )

Ingredients

  • MARINADED CHICKEN:
  • 2 tablespoons olive oil
  • 2 boneless, skinless chicken breasts or you can use 4-5 thighs
  • 1 lemon, juiced
  • 1 teaspoon oregano
  • 1/2 teaspoon salt
  • 2 garlic cloves, minced
  • TZATZIKI:
  • ⅓ c. olive oil
  • 1/2 a seedless English cucumber, peeled
  • 2 c. plain Greek yoghurt
  • 1 tablespoon red or white wine vinegar
  • 3 cloves garlic, peeled and smashed into a paste
  • 1 tablespoon fresh dill, minced
  • 1 teaspoon sea salt or more to taste
  • FLATBREAD:
  • 1 teaspoon active dry yeast (from one 1/4 oz. envelope)
  • 1 c. warm water (about 110 degrees)
  • 3 tablespoons extra-virgin olive oil, plus more for a bowl
  • 3 c. all-purpose flour, plus more for surface and hands
  • oil to brush on the dough before cooking
  • 2 teaspoons coarse salt
  • ROASTED GARLIC:
  • 1 teaspoon sea salt
  • 2 heads garlic
  • 1 tablespoon olive oil
  • OTHER TOPPINGS:
  • 1 large onion, sliced
  • 1 c. feta
  • 1 tablespoon olive oil
  • salt and pepper to taste
  • 300 grams of baby spinach in a small rectangle container
  • FOR EACH FLATBREAD:
  • 1 chicken breast, cut up, marinated, and cooked
  • 1/2 c Tzatziki
  • 1 flatbread
  • 150 grams of baby spinach sauteed
  • 2 tablespoons olive oil to drizzle after cooking
  • 1/2 c. feta
  • 1/2 onions sauteed
  • 1 head of roasted garlic

Instructions

TZATZIKI:

Step 1: Using a box grater or food processor, grate the cucumber and toss it with half a teaspoon of salt. In a fine-mesh sieve over a bowl, place the cucumber and drain for about 10 minutes.

Step 2: Squeeze as much water from the cucumber. In a bowl, place the squeezed cucumber. Repeat with the remaining cucumber.

Step 3: To the bowl with the squeezed cucumber, add the remaining ingredients, and the rest of the salt. Mix well and allow it to sit for at least an hour in the fridge. This will allow the flavors to come together.

MARINADE and CHICKEN:

Step 4: To a medium Tupperware or bowl, add the lemon, garlic, oregano, olive oil, and salt. Mix well.

Step 5: Remove any fat from the chicken breasts, then slice the chicken into pieces. In a bowl, place the pieces of chicken and drizzle the marinade over them. Toss well to coat. Tent the bowl and set aside for at least 30 minutes or until ready to cook the chicken.

Step 6: Add the chicken to a hot cast-iron pan over medium-high heat and sear for about 3 to 4 minutes on each side until no longer pink in the center. Remove from the heat when done and let the chicken cool. If needed, cook the chicken in batches to avoid over-crowding the pan.

FLATBREAD:

Step 7: In a medium bowl, add the water and sprinkle with the yeast. Allow it to stand for about 5 minutes until nice and foamy. Stir in the flour, oil, and coarse salt once the yeast is bubbling. Mix well until you have formed a ball. Onto a lightly floured surface, turn the dough out, and knead using your floured hands for about 5 minutes until smooth. Add 1 tbsp of flour at a time if the dough is sticky. Or 1 tbsp water at a time if the dough is too stiff. Alternately, you can use a mixer with a dough hook. To do so, add water to a bowl or measuring cup. Sprinkle with the yeast and allow it to stand for about 5 minutes until nice and foamy. To the mixer, add the flour and salt. Add the yeast once bubbling along with the olive oil. Mix well for about 5 to 8 minutes on medium speed until well blended and the dough looks nice and silky smooth. Add 1 tbsp of flour at a time if the dough is sticky. Or 1 tbsp water at a time if the dough is too stiff.

Step 8: To a lightly greased bowl, transfer the dough and tent with a tea towel. Allow the dough to stand for about an hour in a warm, dry place until it doubles in volume.

Step 9: Heat over medium-high heat a large flat cast iron griddle. In the meantime, divide the dough into 4 equal pieces and tent with a tea towel. On a lightly floured surface, roll 1 piece of dough to roughly 8 x 15-inches. Cook the flatbread dough for about 2 to 3 minutes per side. Do the same with all the 4 flatbreads. To do this in the oven, preheat the oven to 400 degrees. On a parchment-lined baking sheet, place the flatbread dough. Bake in the preheated oven for about 12 to 15 minutes. When done, remove from the oven and allow the flatbreads to cool before topping.

Step 10: For the unused dough, wrap them in plastic wrap and store in the fridge for a few days or freezer for a few months. You can do the same with unused flatbreads.

TOPPINGS:

Step 11: Preheat the oven or toaster oven to 400 degrees. In the meantime, cut the tops off the heads of garlic. In the middle of a piece of tin foil, place the garlic and drizzle with oil, and sprinkle with salt. Wrap the garlic in the foil and place it in the preheated oven. Bake for about 45 minutes. Allow the garlic to cool, then squeeze the heat out. Set aside.

Step 12: Drizzle the olive oil in a hot large skillet over medium-low heat. Add the spinach and cook until just wilted. Then, set the spinach aside to cool.

Step 13: In the same pan, add the onions and saute until they begin to get translucent. Set the onions aside to cool when done.

GREEK FLATBREADS:

Step 14: Prepare the oven. Preheat it to 350 degrees.

Step 15: On top of 1 flatbread, spread a half cup of Tzatziki followed by half of the spinach and half of the onion. On top, add half of the cooked chicken pieces and sprinkle with roasted garlic and feta.

Step 16: On a baking tray, place the assembled flatbread and bake for about 10 minutes until nice and hot. Before serving, drizzle with some olive oil. Enjoy with more Tzatziki on the side.

July 8, 2022 0 comment
0 FacebookTwitterPinterestEmail
General Recipes

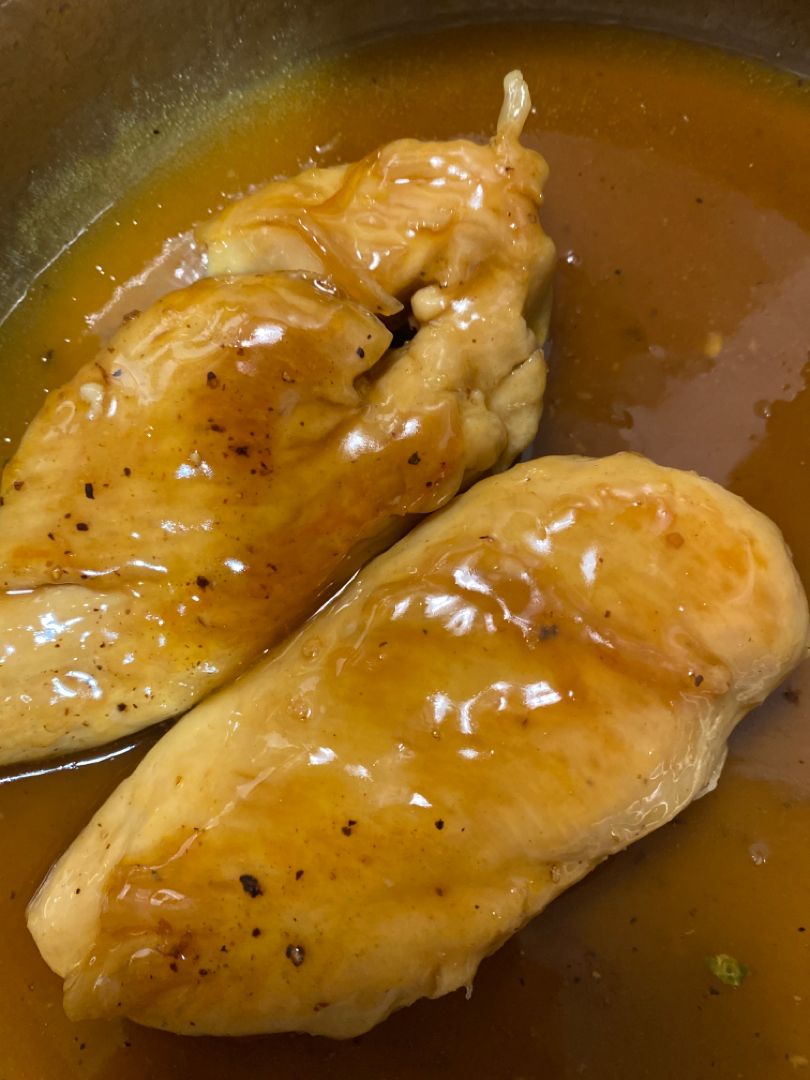
Maple Glazed Chicken

by Rebecca July 8, 2022
written by Rebecca

Prep Time: 5 mins | Cook Time: 10 mins | Total Time: 15 mins | Servings: 4

If you are searching for another easy and quick chicken recipe, then you are in luck! This maple glazed chicken is not only packed with amazing flavors, but incredibly easy to throw together in a snap! Pan-fried chicken smothered in a simple yet impressive maple and garlic sauce. Serve this delicious maple glazed chicken with roasted sweet potatoes, mashed potatoes, or pasta.

Ingredients

2 tbsp olive oil, divided

16 oz. boneless, skinless chicken breasts

3 tbsp maple syrup

1 tsp cornstarch

2 tbsp water

2 cloves garlic, minced

2 tbsp lemon juice

½ tsp ground ginger

½ tsp salt

¼ tsp pepper

How to make Maple Glazed Chicken

Step 1: in half lengthwise, slice the chicken breasts to about the 1-inch thickness and sprinkle both sides with salt and pepper.

Step 2: Drizzle 1 tbsp olive oil in a saute pan over medium heat. Add the chicken breasts to the pan once the oil is hot and sear for about 4 minutes on each side or until completely cooked and the juices run clear. Set the chicken aside when done.

Step 3: To the same pan, add the rest of the olive oil along with the maple syrup, lemon juice, cornstarch, garlic, ground ginger, and water. Stir well until the cornstarch has dissolved and everything is mixed. Cook for about 1 to 2 minutes or until the sauce has slightly thickened.

Step 4: Add the chicken back to the pan and toss to coat in the sauce. Take the pan off the heat and serve the maple glazed chicken right away. Enjoy!

Notes:

I suggest weighing the chicken or using 2 large chicken breasts and slicing them in half to make 4 servings. Make sure you sliced the chicken to about 1-inch or a little less in thickness.

Feel free to swap the lemon juice with apple cider vinegar.

If you prefer more sauce, simply double the sauce ingredients.

Nutrition Facts:

Calories: 239 kcal | Carbohydrates: 12g | Protein: 24g | Fat: 10g | Saturated Fat: 2g | Cholesterol: 73mg | Sodium: 425mg | Potassium: 453mg | Sugar: 9g | Vitamin A: 34IU | Vitamin C: 5mg | Calcium: 25mg | Iron: 1mg

Maple Glazed Chicken

Rebecca Prep Time: 5 mins | Cook Time: 10 mins | Total Time: 15 mins | Servings: 4 If you are searching for another easy and quick chicken recipe, then you… General Recipes Maple Glazed Chicken European Print This
Serves: 4 Prep Time: 5 mins Cooking Time: 10 mins 10 mins
Nutrition facts: 239 calories 10 fat
Rating: 5.0/5
( 1 voted )

Ingredients

  • 2 tbsp olive oil, divided
  • 16 oz. boneless, skinless chicken breasts
  • 3 tbsp maple syrup
  • 1 tsp cornstarch
  • 2 tbsp water
  • 2 cloves garlic, minced
  • 2 tbsp lemon juice
  • ½ tsp ground ginger
  • ½ tsp salt
  • ¼ tsp pepper

Instructions

Step 1: in half lengthwise, slice the chicken breasts to about the 1-inch thickness and sprinkle both sides with salt and pepper.

Step 2: Drizzle 1 tbsp olive oil in a saute pan over medium heat. Add the chicken breasts to the pan once the oil is hot and sear for about 4 minutes on each side or until completely cooked and the juices run clear. Set the chicken aside when done.

Step 3: To the same pan, add the rest of the olive oil along with the maple syrup, lemon juice, cornstarch, garlic, ground ginger, and water. Stir well until the cornstarch has dissolved and everything is mixed. Cook for about 1 to 2 minutes or until the sauce has slightly thickened.

Step 4: Add the chicken back to the pan and toss to coat in the sauce. Take the pan off the heat and serve the maple glazed chicken right away. Enjoy!

Notes

I suggest weighing the chicken or using 2 large chicken breasts and slicing them in half to make 4 servings. Make sure you sliced the chicken to about 1-inch or a little less in thickness. Feel free to swap the lemon juice with apple cider vinegar. If you prefer more sauce, simply double the sauce ingredients.

July 8, 2022 0 comment
0 FacebookTwitterPinterestEmail
General Recipes

Shrimp Fra Diavolo

by Rebecca July 8, 2022
written by Rebecca

Prep time: 10 mins | Cook time: 22 mins | Total time: 32 mins | Yield: 4 servings

This easy and quick Shrimp Fra Diavolo is a very savory shrimp with just the right amount of spice. A mouthwatering dinner option best serve over pasta and some crusty bread on the side to scoop up all the delicious sauce!

Ingredients

5 tablespoons olive oil

1 pound shrimp (cleaned, deveined, tail-on medium shrimp)

1/2 c. white wine (or use regular cooking white wine)

28 ounces tomatoes (whole peeled canned San Marjano tomatoes)

1/2 teaspoon oregano

1 tablespoon garlic (4-5 fresh garlic cloves – minced)

1/2 teaspoon paprika (sweet paprika)

1 teaspoon hot sauce

1 teaspoon chili flakes (or use 1/2 to 1 teaspoon., depending on your heat preference)

1/2 bunch of fresh herbs (basil and parsley – chopped)

salt

How to make Shrimp Fra Diavolo

Step 1: After removing the shells of shrimps, set the shells aside. Add the shrimp to a bowl and toss in 1 tbsp olive oil and salt. Set aside.

Step 2: To a food processor, add the tomatoes with the juice. Blend until coarsely pureed and set aside.

Step 3: In a deep, heavy bottom pan, heat 2 tablespoons of olive oil. Then, add the shrimp and saute for not more than 1 to 2 minutes per side until cooked. On a plate, transfer the shrimp. In the pan, leave the shells and tails.

Step 4: In the same pan, add the rest of the oil along with the minced garlic, chili flakes, and oregano. Saute for about 1 to 2 minutes until the edges of the garlic begin to brown. Pour in the white wine and deglaze the pan. Adjust the heat to medium and continue to cook for another 5 minutes. Then, remove the shrimp shells/tails and discard them.

Step 5: Add the pureed tomatoes to the pan along with the paprika and half tsp salt. Bring the mixture to a rolling boil. Once boiling, adjust the heat to medium. Put the lid on and simmer everything for about 10 to 12 minutes or until the sauce has thickened and the oil comes on the top.

Step 6: Adjust the salt according to taste, then stir in the hot sauce.

Step 7: Add the shrimp back to the pan and remove it from the heat. Before serving, stir in the fresh chopped herbs.

Step 8: Serve right away over pasta with some crusty bread along the side. Enjoy!

Shrimp Fra Diavolo

Rebecca Prep time: 10 mins | Cook time: 22 mins | Total time: 32 mins | Yield: 4 servings This easy and quick Shrimp Fra Diavolo is a very savory shrimp… General Recipes Shrimp Fra Diavolo European Print This
Serves: 4 Prep Time: 10 mins Cooking Time: 22 mins 22 mins
Nutrition facts: 200 calories 20 grams fat
Rating: 5.0/5
( 1 voted )

Ingredients

  • 5 tablespoons olive oil
  • 1 pound shrimp (cleaned, deveined, tail-on medium shrimp)
  • 1/2 c. white wine (or use regular cooking white wine)
  • 28 ounces tomatoes (whole peeled canned San Marjano tomatoes)
  • 1/2 teaspoon oregano
  • 1 tablespoon garlic (4-5 fresh garlic cloves - minced)
  • 1/2 teaspoon paprika (sweet paprika)
  • 1 teaspoon hot sauce
  • 1 teaspoon chili flakes (or use 1/2 to 1 teaspoon., depending on your heat preference)
  • 1/2 bunch of fresh herbs (basil and parsley - chopped)
  • salt

Instructions

Step 1: After removing the shells of shrimps, set the shells aside. Add the shrimp to a bowl and toss in 1 tbsp olive oil and salt. Set aside.

Step 2: To a food processor, add the tomatoes with the juice. Blend until coarsely pureed and set aside.

Step 3: In a deep, heavy bottom pan, heat 2 tablespoons of olive oil. Then, add the shrimp and saute for not more than 1 to 2 minutes per side until cooked. On a plate, transfer the shrimp. In the pan, leave the shells and tails.

Step 4: In the same pan, add the rest of the oil along with the minced garlic, chili flakes, and oregano. Saute for about 1 to 2 minutes until the edges of the garlic begin to brown. Pour in the white wine and deglaze the pan. Adjust the heat to medium and continue to cook for another 5 minutes. Then, remove the shrimp shells/tails and discard them.

Step 5: Add the pureed tomatoes to the pan along with the paprika and half tsp salt. Bring the mixture to a rolling boil. Once boiling, adjust the heat to medium. Put the lid on and simmer everything for about 10 to 12 minutes or until the sauce has thickened and the oil comes on the top.

Step 6: Adjust the salt according to taste, then stir in the hot sauce.

Step 7: Add the shrimp back to the pan and remove it from the heat. Before serving, stir in the fresh chopped herbs.

Step 8: Serve right away over pasta with some crusty bread along the side. Enjoy!

July 8, 2022 0 comment
0 FacebookTwitterPinterestEmail
General Recipes

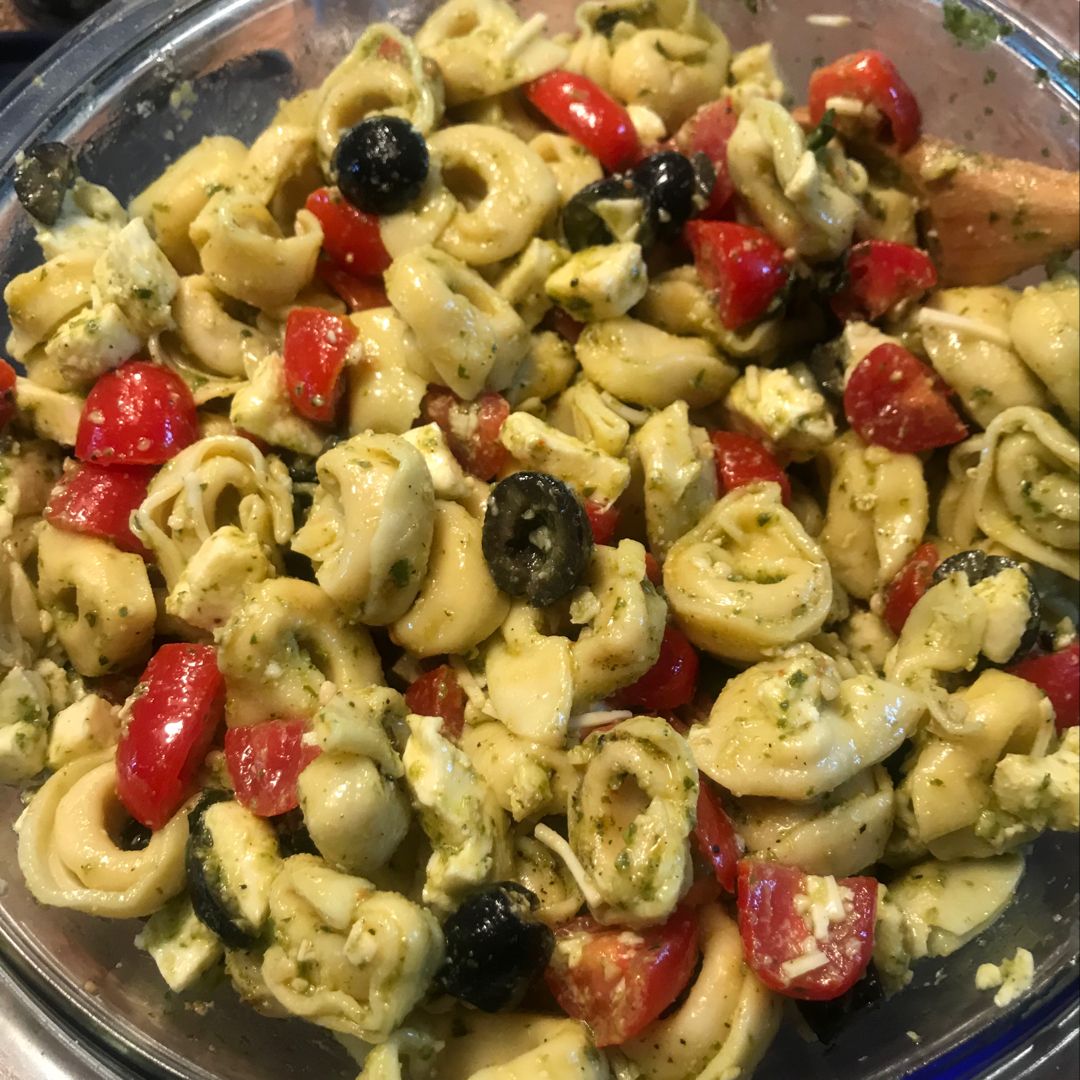
Cheese Tortellini Pesto Pasta Salad

by Rebecca July 8, 2022
written by Rebecca

YIELD: 10-12 servings

This cheese tortellini pesto pasta salad is a great meatless dinner option. This salad is also amazing to pair with grilled chicken breasts, burgers, or steaks.

Ingredients

1/3 c. olive oil to start, then add more to loosen

1 large clove of garlic, finely minced

1 (14 ounces) can of whole artichoke hearts, drained, quartered lengthwise then halved crossways

1 (6 ounces) can of medium black olives, drained, sliced in half lengthwise

2 rounded cups or 1 (10 ounces) cont. grape tomatoes, halved lengthwise

1 green bell pepper, cleaned out and thinly julienned into 1” long pieces

real Parmesan (do not use the green can kind

1 (8 ounces) jar basil pesto

10-12 ounces fresh mozzarella cheese, cubed

1 (20 ounces) package of fresh or frozen cheese-filled tortellini, cooked al dente, cold rinsed and drained well

1/2 teaspoon salt to start, then add more to taste

How to make Cheese Tortellini Pesto Pasta Salad

Step 1: Add all the ingredients to a large bowl except for the tortellini. Gently fold until well combined. Using a plate, cover the bowl and set it aside.

Step 2: Following the package directions cook the tortellini in a large saucepan or small pot with gently boiling salted water until al dente. Drain when done and immediately rinse with cold water.

Step 3: Into the pesto-veggie mixture, add the cool and well-drained tortellini. Gently fold. Adjust the salt, Parmesan, and olive oil according to taste.

Step 4: Serve the salad right away or place it in the fridge until ready to enjoy. Before serving the refrigerated salad, drizzle a little olive oil, add a bit of salt, and Parmesan.

Notes:

To slightly stretch the salad, add some cooked regular or tri-coloured rotini (half of a 1-pound box) and mix. Add extra salt, olive oil, and Parmesan cheese. You might need to add more garlic as well.

This salad is also great with grilled chicken breasts, burgers, or steaks on the side.

If using quartered artichoke hearts, simply cut them in half crossways.

Cheese Tortellini Pesto Pasta Salad

Rebecca YIELD: 10-12 servings This cheese tortellini pesto pasta salad is a great meatless dinner option. This salad is also amazing to pair with grilled chicken breasts, burgers, or steaks. Ingredients… General Recipes Cheese Tortellini Pesto Pasta Salad European Print This
Serves: 10-12
Nutrition facts: 200 calories 20 grams fat
Rating: 5.0/5
( 1 voted )

Ingredients

  • 1/3 c. olive oil to start, then add more to loosen
  • 1 large clove of garlic, finely minced
  • 1 (14 ounces) can of whole artichoke hearts, drained, quartered lengthwise then halved crossways
  • 1 (6 ounces) can of medium black olives, drained, sliced in half lengthwise
  • 2 rounded cups or 1 (10 ounces) cont. grape tomatoes, halved lengthwise
  • 1 green bell pepper, cleaned out and thinly julienned into 1” long pieces
  • real Parmesan (do not use the green can kind
  • 1 (8 ounces) jar basil pesto
  • 10-12 ounces fresh mozzarella cheese, cubed
  • 1 (20 ounces) package of fresh or frozen cheese-filled tortellini, cooked al dente, cold rinsed and drained well
  • 1/2 teaspoon salt to start, then add more to taste

Instructions

Step 1: Add all the ingredients to a large bowl except for the tortellini. Gently fold until well combined. Using a plate, cover the bowl and set it aside.

Step 2: Following the package directions cook the tortellini in a large saucepan or small pot with gently boiling salted water until al dente. Drain when done and immediately rinse with cold water.

Step 3: Into the pesto-veggie mixture, add the cool and well-drained tortellini. Gently fold. Adjust the salt, Parmesan, and olive oil according to taste.

Step 4: Serve the salad right away or place it in the fridge until ready to enjoy. Before serving the refrigerated salad, drizzle a little olive oil, add a bit of salt, and Parmesan.

Notes

To slightly stretch the salad, add some cooked regular or tri-coloured rotini (half of a 1-pound box) and mix. Add extra salt, olive oil, and Parmesan cheese. You might need to add more garlic as well. This salad is also great with grilled chicken breasts, burgers, or steaks on the side. If using quartered artichoke hearts, simply cut them in half crossways.

July 8, 2022 0 comment
0 FacebookTwitterPinterestEmail
Newer Posts
Older Posts

Popular Posts

  • 1

    Crispy Crunchy Parmesan Potatoes

    March 21, 2020
  • 2

    CROCK POT SMOTHERED PORK CHOPS

    March 21, 2020
  • Facebook
  • Twitter

@2019 - All Right Reserved.


Back To Top