Cook it once
  • Home
  • Privacy Policy
  • Recipes
    • KETO
    • LC
    • WW
  • Tips
  • Contact
Cook it once
  • Home
  • Privacy Policy
  • Recipes
    • KETO
    • LC
    • WW
  • Tips
  • Contact
Category:

General Recipes

General Recipes

Garlic Shrimp Pasta in Red Wine Tomato Sauce

by Rebecca July 11, 2022
written by Rebecca

Prep Time: 10 mins | Cook Time: 20 mins | Total Time: 30 mins | Servings: 4

Enjoy a very indulgent, quite fancy dinner with this delicious garlic shrimp pasta in red wine tomato sauce. It is a very simple dish to prepare that guarantees a restaurant-quality spaghetti style.

Ingredients

1 tbsp olive oil

1 pound shrimp, peeled

⅛ tsp red pepper flakes

Salt and Pepper for seasoning

Red Wine Sauce:

6 cloves garlic

1 tbsp olive oil

½ onion, chopped

½ c. tomato puree (from the can)

28 ounces diced tomatoes (1 can)

½ c. fresh basil leaves

½ tsp onion powder

1 tsp Italian seasoning

½ tsp garlic powder

½ tsp salt

¼ tsp black pepper

½ c. red wine (such as Chianti)

Pasta:

½ c. Parmesan Cheese

8 oz. Spaghetti

How to make Garlic Shrimp Pasta in Red Wine Tomato Sauce

Step 1: Heat the olive oil in a large skillet over medium-high heat. Add the shrimp to the skillet once the oil is hot and generously season with salt, black pepper, and red pepper flakes. Cook the shrimp for about 2 minutes until just cooked through, flipping once. To a large plate, transfer the shrimp.

Sauce:

Step 2: In a large skillet, drizzle 1 tbsp olive oil. Once the oil is hot, add the onion and garlic to the skillet and cook over medium heat until the garlic is aromatic and the onion is translucent. Next, add the tomato puree and continue to cook for another minute. Then, add the diced onion and pour in the red wine. Stir well and bring everything to a boil.

Step 3: To the skillet, add the basil, garlic powder, onion powder, Italian seasoning, and salt. Adjust the heat to low and allow the sauce to simmer.

Pasta:

Step 4: Following the package directions, cook the spaghetti. When done, drain the spaghetti and set it aside.

Final Assembly:

Step 5: Into the simmering red wine, tomato sauce, add the spaghetti and shrimp. Toss well.

Step 6: Serve right away with sprinkles of Parmesan cheese. Enjoy!

Nutrition Facts:

Amount Per Serving: Calories 464, Calories from Fat 81, Fat 9g14%, Saturated Fat 2g13%, Cholesterol 294mg98%, Sodium 2127mg92%, Potassium 859mg25%, Carbohydrates 55g18%, Fiber 3g13%, Sugar 7g8%, Protein 38g76%, Vitamin A 1485IU30%, Vitamin C 68.3mg83%, Calcium 368mg37%, Iron 5.3mg29%

Garlic Shrimp Pasta in Red Wine Tomato Sauce

Rebecca Prep Time: 10 mins | Cook Time: 20 mins | Total Time: 30 mins | Servings: 4 Enjoy a very indulgent, quite fancy dinner with this delicious garlic shrimp pasta… General Recipes Garlic Shrimp Pasta in Red Wine Tomato Sauce European Print This
Serves: 4 Prep Time: 10 mins Cooking Time: 20 mins 20 mins
Nutrition facts: 464 calories 9 fat
Rating: 5.0/5
( 1 voted )

Ingredients

  • 1 tbsp olive oil
  • 1 pound shrimp, peeled
  • ⅛ tsp red pepper flakes
  • Salt and Pepper for seasoning
  • Red Wine Sauce:
  • 6 cloves garlic
  • 1 tbsp olive oil
  • ½ onion, chopped
  • ½ c. tomato puree (from the can)
  • 28 ounces diced tomatoes (1 can)
  • ½ c. fresh basil leaves
  • ½ tsp onion powder
  • 1 tsp Italian seasoning
  • ½ tsp garlic powder
  • ½ tsp salt
  • ¼ tsp black pepper
  • ½ c. red wine (such as Chianti)
  • Pasta:
  • ½ c. Parmesan Cheese
  • 8 oz. Spaghetti

Instructions

Step 1: Heat the olive oil in a large skillet over medium-high heat. Add the shrimp to the skillet once the oil is hot and generously season with salt, black pepper, and red pepper flakes. Cook the shrimp for about 2 minutes until just cooked through, flipping once. To a large plate, transfer the shrimp.

Sauce:

Step 2: In a large skillet, drizzle 1 tbsp olive oil. Once the oil is hot, add the onion and garlic to the skillet and cook over medium heat until the garlic is aromatic and the onion is translucent. Next, add the tomato puree and continue to cook for another minute. Then, add the diced onion and pour in the red wine. Stir well and bring everything to a boil.

Step 3: To the skillet, add the basil, garlic powder, onion powder, Italian seasoning, and salt. Adjust the heat to low and allow the sauce to simmer.

Pasta:

Step 4: Following the package directions, cook the spaghetti. When done, drain the spaghetti and set it aside.

Final Assembly:

Step 5: Into the simmering red wine, tomato sauce, add the spaghetti and shrimp. Toss well.

Step 6: Serve right away with sprinkles of Parmesan cheese. Enjoy!

July 11, 2022 0 comment
0 FacebookTwitterPinterestEmail
General Recipes

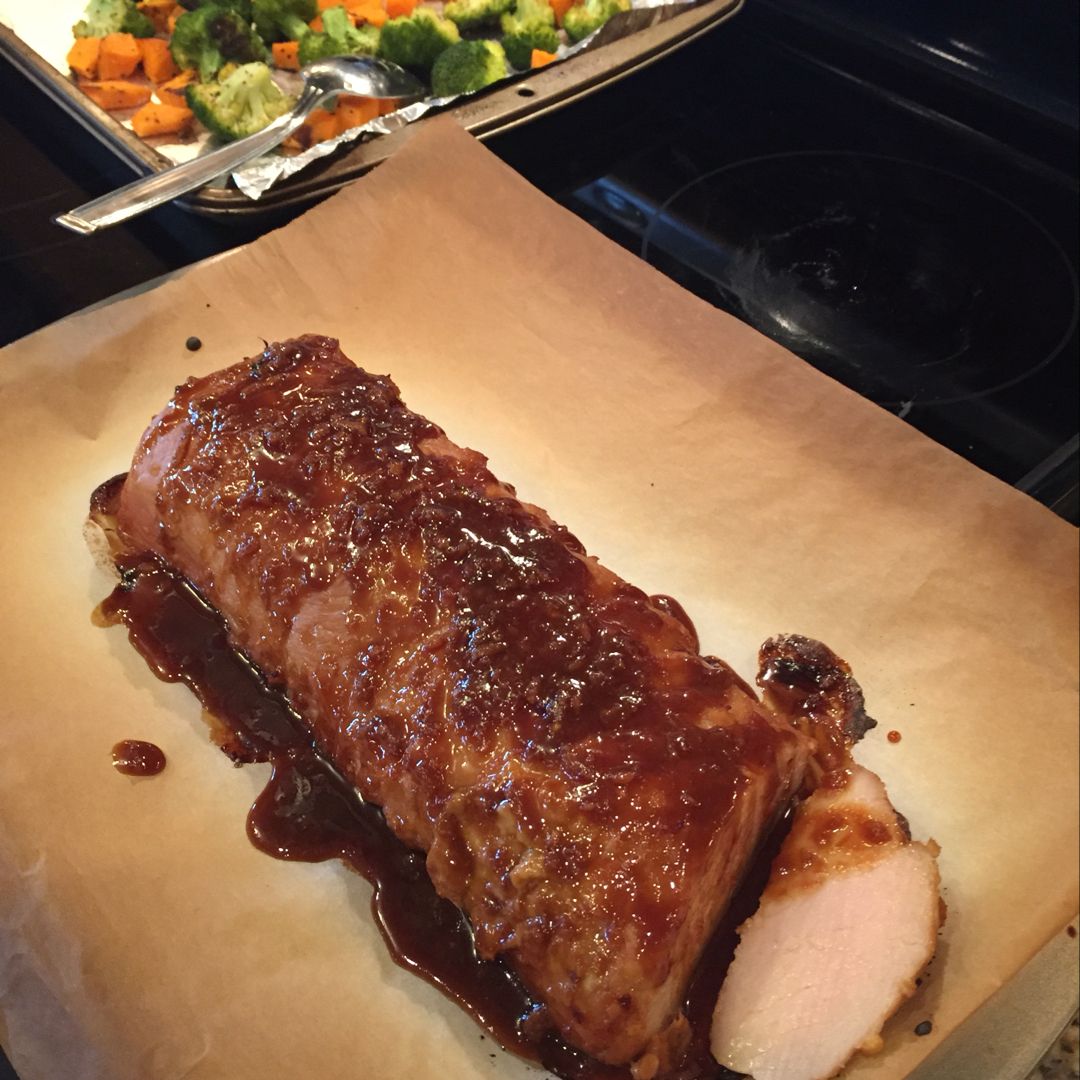
Teriyaki Pork Tenderloin with Maple-Ginger Glaze

by Rebecca July 11, 2022
written by Rebecca

Prep Time: 5 mins | Cook Time: 20 mins | Total Time: 25 mins | Servings: 2 as a main; 4 with some sides

I am obsessed with this Teriyaki Pork Tenderloin with Maple-Ginger Glaze. This is made with only a few simple ingredients combined to guarantee the best dinner option! The simple, healthy, and gluten-free ginger-glaze, marinade is made with a simple four-ingredient. The secret is the grated ginger. To make sure the marinade sip into the pork, marinate for at least an hour or preferably overnight. After baking, the tenderloin gets that impressive, very beautiful golden crust. Serve this Teriyaki Pork Tenderloin over ramen or quinoa with steamed bok choy on the side.

Ingredients

1 lb. pork tenderloin

2 large garlic cloves, minced

¼ c. organic maple syrup

2” fresh ginger root, minced

2 tbsp thinly sliced scallions for garnish

¼ c. gluten-free tamari

How to make Teriyaki Pork Tenderloin with Maple-Ginger Glaze

Step 1: Place the maple syrup, tamari, garlic, and ginger in a small mixing bowl. Mix well until smooth. To a resealable plastic bag, transfer the marinade and add the pork. Toss to coat well. Place in the fridge for at least an hour up to overnight to marinate the pork.

Step 2: Prepare the oven. Preheat it to 500 degrees.

Step 3: On a parchment paper-lined baking sheet, transfer the marinated pork. Place in the preheated oven and roast for about 20 minutes or until the top of the pork is nicely browned. Remove from the oven when done and let the pork rest on a cutting board for at least 10 minutes.

Step 4: In the meantime, pour the rest of the marinade into a small saucepan and cook for about 5 minutes over medium heat, stirring often until reduced by half.

Step 5: In the bias, slice the pork and drizzle with the reduced sauce. Garnish with scallions and serve the Teriyaki Pork Tenderloin right away over quinoa or ramen with steamed bok choy on the side. Enjoy!

Teriyaki Pork Tenderloin with Maple-Ginger Glaze

Rebecca Prep Time: 5 mins | Cook Time: 20 mins | Total Time: 25 mins | Servings: 2 as a main; 4 with some sides I am obsessed with this Teriyaki… General Recipes Teriyaki Pork Tenderloin with Maple-Ginger Glaze European Print This
Serves: 2 Prep Time: 5 mins Cooking Time: 20 mins 20 mins
Nutrition facts: 200 calories 20 grams fat
Rating: 5.0/5
( 1 voted )

Ingredients

  • 1 lb. pork tenderloin
  • 2 large garlic cloves, minced
  • ¼ c. organic maple syrup
  • 2” fresh ginger root, minced
  • 2 tbsp thinly sliced scallions for garnish
  • ¼ c. gluten-free tamari

Instructions

Step 1: Place the maple syrup, tamari, garlic, and ginger in a small mixing bowl. Mix well until smooth. To a resealable plastic bag, transfer the marinade and add the pork. Toss to coat well. Place in the fridge for at least an hour up to overnight to marinate the pork.

Step 2: Prepare the oven. Preheat it to 500 degrees.

Step 3: On a parchment paper-lined baking sheet, transfer the marinated pork. Place in the preheated oven and roast for about 20 minutes or until the top of the pork is nicely browned. Remove from the oven when done and let the pork rest on a cutting board for at least 10 minutes.

Step 4: In the meantime, pour the rest of the marinade into a small saucepan and cook for about 5 minutes over medium heat, stirring often until reduced by half.

Step 5: In the bias, slice the pork and drizzle with the reduced sauce. Garnish with scallions and serve the Teriyaki Pork Tenderloin right away over quinoa or ramen with steamed bok choy on the side. Enjoy!

July 11, 2022 0 comment
0 FacebookTwitterPinterestEmail
General Recipes

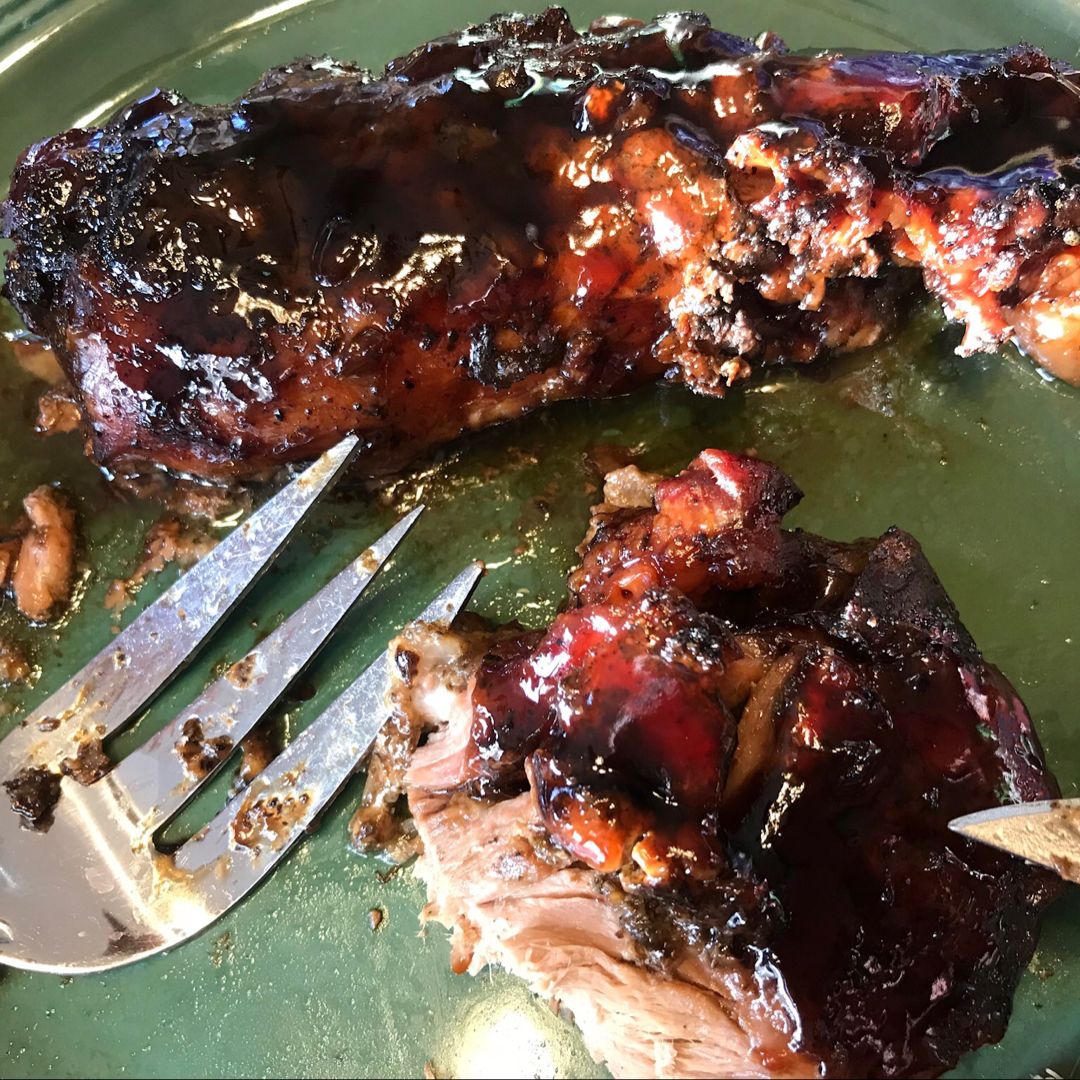
Crock-Pot Brown Sugar & Balsamic–Glazed Pork Tenderloin

by Rebecca July 9, 2022
written by Rebecca

PREP TIME: 15 MINS | COOK TIME: 8 HRS | SERVES: 6

This glazed pork tenderloin has been one of my favorite crockpot dishes. Melt-in-your-mouth roast glazed in simple brown sugar and balsamic glaze. It is insanely easy to make and a no-fuss. All you need are to combine the ingredients, set the pork tenderloin to cook in your pot and glaze it during the last hour of cooking. The broiling step is recommended if you prefer a more caramelized crust. An extra step that I highly recommend for the best results! This crock-pot, brown sugar & balsamic glazed pork tenderloin is a must-try!

Ingredients

2 lbs pork tenderloin

1 tsp ground sage

1 garlic clove, crushed

1 tbsp cornstarch

1/2 c. brown sugar

1/2 c. water

1/4 c. balsamic vinegar

2 tbsp soy sauce

1/2 c. water

1/2 tsp salt

1/4 tsp pepper

How to make Crock-Pot Brown Sugar & Balsamic–Glazed Pork Tenderloin

Step 1: Combine the seasonings (sage, salt, pepper, and garlic). Then, rub this on the entire tenderloin.

Step 2: In your slow cooker, pour half a cup of water. Add the tenderloin and set to cook for 6 to 8 hours on low.

Step 3: In the last 1 hour of cooking the roast, whisk the glaze ingredients (brown sugar, cornstarch, balsamic vinegar, water, and soy sauce) in a small saucepan. Cook for about 4 minutes over medium heat, stirring until the mixture has thickened.

Step 4: During the last hour of cooking, brush the roast with the glaze about 2 or 3 times. If you prefer a more caramelized crust, transfer the roast to an aluminium-lined sheet pan and glaze. Broil for about 1 to 2 minutes or until bubbly and caramelized. Do this about 2 to 3 times until you have achieved your desired crust.

Step 5: Serve the brown sugar & balsamic glazed pork tenderloin right away with the rest of the glaze along the side. Enjoy!

Crock-Pot Brown Sugar & Balsamic–Glazed Pork Tenderloin

Rebecca PREP TIME: 15 MINS | COOK TIME: 8 HRS | SERVES: 6 This glazed pork tenderloin has been one of my favorite crockpot dishes. Melt-in-your-mouth roast glazed in simple brown… General Recipes Crock-Pot Brown Sugar & Balsamic–Glazed Pork Tenderloin European Print This
Serves: 6 Prep Time: 15 mins Cooking Time: 8 hrs 8 hrs
Nutrition facts: 200 calories 20 grams fat
Rating: 5.0/5
( 1 voted )

Ingredients

  • 2 lbs pork tenderloin
  • 1 tsp ground sage
  • 1 garlic clove, crushed
  • 1 tbsp cornstarch
  • 1/2 c. brown sugar
  • 1/2 c. water
  • 1/4 c. balsamic vinegar
  • 2 tbsp soy sauce
  • 1/2 c. water
  • 1/2 tsp salt
  • 1/4 tsp pepper

Instructions

Step 1: Combine the seasonings (sage, salt, pepper, and garlic). Then, rub this on the entire tenderloin.

Step 2: In your slow cooker, pour half a cup of water. Add the tenderloin and set to cook for 6 to 8 hours on low.

Step 3: In the last 1 hour of cooking the roast, whisk the glaze ingredients (brown sugar, cornstarch, balsamic vinegar, water, and soy sauce) in a small saucepan. Cook for about 4 minutes over medium heat, stirring until the mixture has thickened.

Step 4: During the last hour of cooking, brush the roast with the glaze about 2 or 3 times. If you prefer a more caramelized crust, transfer the roast to an aluminium-lined sheet pan and glaze. Broil for about 1 to 2 minutes or until bubbly and caramelized. Do this about 2 to 3 times until you have achieved your desired crust.

Step 5: Serve the brown sugar & balsamic glazed pork tenderloin right away with the rest of the glaze along the side. Enjoy!

July 9, 2022 0 comment
0 FacebookTwitterPinterestEmail
General Recipes

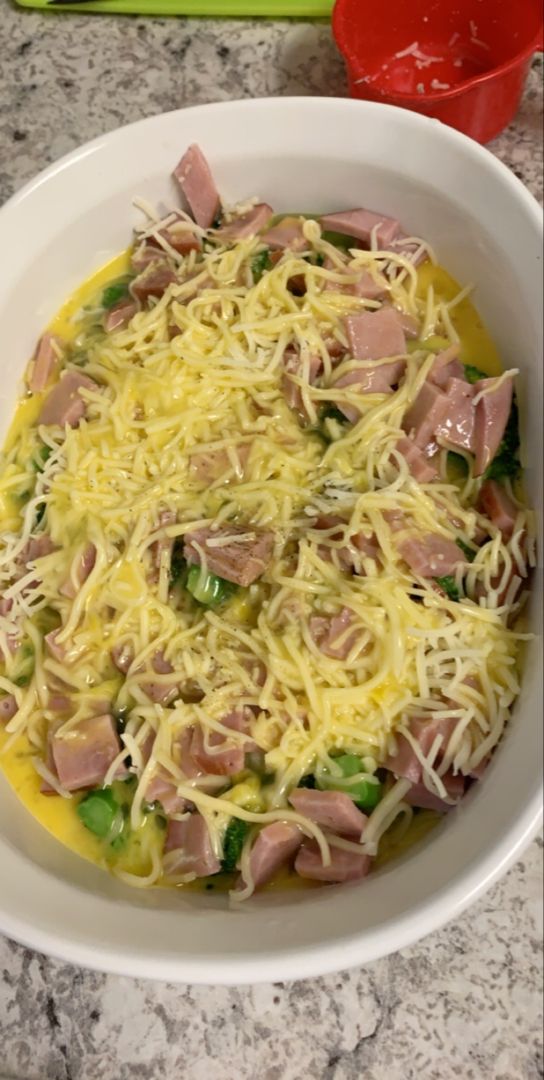
BROCCOLI, HAM, AND MOZZARELLA BAKED WITH EGGS

by Rebecca July 9, 2022
written by Rebecca

Prep time: 15 mins | Cook time: 45 mins | Total time: 1 hr | Yield: 8 SERVINGS

This casserole is packed with broccoli, ham, and Mozzarella with just enough egg to hold everything together. It’s a filling, low-carb breakfast casserole that is great even for lunch or dinner. For an easy and super quick breakfast, store this casserole in the fridge for up to a week and simply reheat. Plus, this easy recipe is very versatile. You can vary the ingredients based on what is available.

INGREDIENTS

10 eggs, beaten well

6 c. chopped broccoli pieces, blanched for about 2 minutes, then drained well

1 c. grated Mozzarella

2 c. diced ham

1/3 c. thinly sliced green onion (optional, but good)

fresh-ground black pepper, to taste

1 teaspoon Spike Seasoning (or other all-purpose seasoning blends)

HOW TO MAKE BROCCOLI, HAM, AND MOZZARELLA BAKED WITH EGGS

Step 1: Prepare the oven. Preheat it to 375 degrees F or 190 degrees C. Using a nonstick spray, grease a 9 x 12-inch casserole dish.

Step 2: In a medium-sized pot, pour in water and bring to a boil.

Step 3: In the meantime, dice the ham, slice the green onions, and measure the mozzarella cheese.

Step 4: Add the broccoli to the boiling water and cook for just 2 minutes. After 2 minutes, pour the broccoli into a colander and drain well.

Step 5: In the prepared casserole dish, layer the broccoli, ham, mozzarella, and green onions (optional). On top, sprinkle the Spike Seasoning and fresh-ground black pepper. Over everything, pour the beaten egg.

Step 6: Stir everything using a fork until just coated in egg. Place in the preheated oven and bake for about 35 to 45 minutes or until the mixture is set and beginning to lightly brown.

Step 7: Remove from the oven when done and serve the casserole with sour cream if desired. You can store this in the fridge for at least a week and simply reheat it in the microwave.

NUTRITION FACTS:

YIELD: 8 SERVING SIZE: 1
Amount Per Serving: Calories: 221 | Total Fat: 11g | Saturated Fat: 4g | Unsaturated Fat: 6g | Cholesterol: 265mg | Sodium: 600mg | Carbohydrates: 6g | Fiber: 4g | Sugar: 2g | Protein: 21g

BROCCOLI, HAM, AND MOZZARELLA BAKED WITH EGGS

Rebecca Prep time: 15 mins | Cook time: 45 mins | Total time: 1 hr | Yield: 8 SERVINGS This casserole is packed with broccoli, ham, and Mozzarella with just enough… General Recipes BROCCOLI, HAM, AND MOZZARELLA BAKED WITH EGGS European Print This
Serves: 8 Prep Time: 15 mins Cooking Time: 45 mins 45 mins
Nutrition facts: 221 calories 11 fat
Rating: 5.0/5
( 1 voted )

Ingredients

  • 10 eggs, beaten well
  • 6 c. chopped broccoli pieces, blanched for about 2 minutes, then drained well
  • 1 c. grated Mozzarella
  • 2 c. diced ham
  • 1/3 c. thinly sliced green onion (optional, but good)
  • fresh-ground black pepper, to taste
  • 1 teaspoon Spike Seasoning (or other all-purpose seasoning blends)

Instructions

Step 1: Prepare the oven. Preheat it to 375 degrees F or 190 degrees C. Using a nonstick spray, grease a 9 x 12-inch casserole dish.

Step 2: In a medium-sized pot, pour in water and bring to a boil.

Step 3: In the meantime, dice the ham, slice the green onions, and measure the mozzarella cheese.

Step 4: Add the broccoli to the boiling water and cook for just 2 minutes. After 2 minutes, pour the broccoli into a colander and drain well.

Step 5: In the prepared casserole dish, layer the broccoli, ham, mozzarella, and green onions (optional). On top, sprinkle the Spike Seasoning and fresh-ground black pepper. Over everything, pour the beaten egg.

Step 6: Stir everything using a fork until just coated in egg. Place in the preheated oven and bake for about 35 to 45 minutes or until the mixture is set and beginning to lightly brown.

Step 7: Remove from the oven when done and serve the casserole with sour cream if desired. You can store this in the fridge for at least a week and simply reheat it in the microwave.

July 9, 2022 0 comment
0 FacebookTwitterPinterestEmail
General Recipes

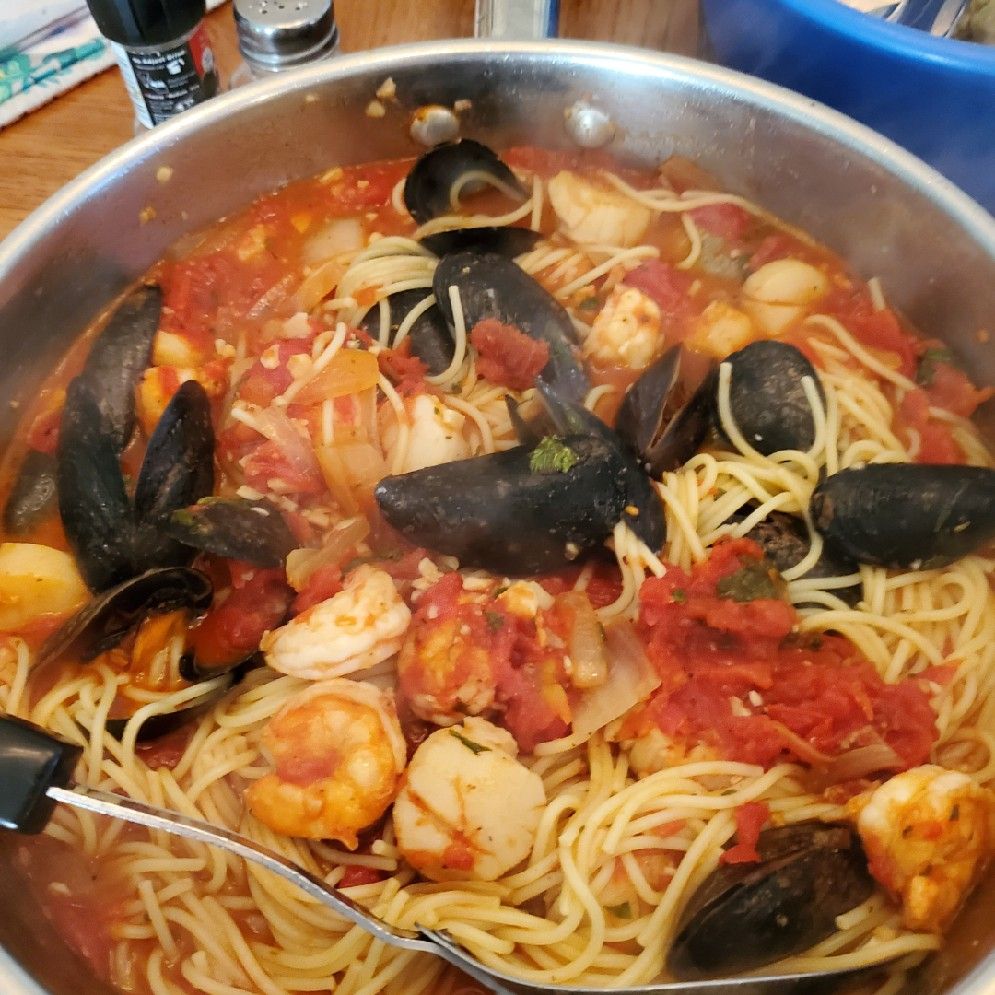
Seafood Pasta

by Rebecca July 9, 2022
written by Rebecca

PREP TIME: 15 mins | COOK TIME: 15 mins | TOTAL TIME: 30 mins | YIELD: 3 people

This seafood pasta is an amazing weeknight dinner that you can easily make in a single pot in under thirty minutes. It is a delicious seafood pasta made with only a few simple ingredients, mostly you already have on hand. Serve this seafood pasta in a homemade tomato pasta sauce by itself or with your favorite side dishes such as roasted carrots, sauteed asparagus, and more!

If you are searching for another easy, quick, and simple recipe, you have to give this seafood pasta a try. It is an incredibly delicious weeknight dinner perfect to feed the family. This is packed with all kinds of seafood tossed in a fresh homemade seafood pasta sauce.

Make this impressively delicious seafood pasta for a quick dinner or simple, date night with your fave glass of wine.

Ingredients

2 tbsp olive oil

4 ounces (115 grams) shelled and deveined shrimp

10 ounces (300 grams) of spaghetti

3 cloves garlic, minced

4 ounces (115 grams) of scallops

8 ounces (226 grams) Manila clams

1 tbsp chopped Italian basil leaves

1 tsp sugar/brown sugar

1 can tomato sauce (28 ounces/800 grams whole peeled tomatoes)

chopped Italian parsley, for garnishing

salt to taste

How to make Seafood Pasta

Step 1: Following the package directions, cook the spaghetti. Drain when done and set aside.

Step 2: In a blender or food processor, place the whole can of the whole peeled tomatoes. Blend and set aside.

Step 3: Add olive oil to a hot skillet over medium heat. Add the garlic and saute until aromatic. Next, add the shrimp along with Manila clams and scallops. Stir well and add the tomato sauce and basil leaves. Cook further until almost done. To taste, season with salt and sugar.

Step 4: Into the skillet, add the spaghetti and stir well until coated in sauce. Before serving, garnish with some chopped parsley. Enjoy!

NUTRITION FACTS:

Yield: 3, Serving Size: 1
Amount Per Serving: Calories 431, Total Fat 12g, Saturated Fat 2g, Trans Fat 0g, Unsaturated Fat 9g, Cholesterol 70mg, Sodium 2152mg, Carbohydrates 47g, Fiber 4g, Sugar 9g, Protein 35g

Seafood Pasta

Rebecca PREP TIME: 15 mins | COOK TIME: 15 mins | TOTAL TIME: 30 mins | YIELD: 3 people This seafood pasta is an amazing weeknight dinner that you can easily… General Recipes Seafood Pasta European Print This
Serves: 3 Prep Time: 15 mins Cooking Time: 15 mins 15 mins
Nutrition facts: 431 calories 12 fat
Rating: 5.0/5
( 1 voted )

Ingredients

  • 2 tbsp olive oil
  • 4 ounces (115 grams) shelled and deveined shrimp
  • 10 ounces (300 grams) of spaghetti
  • 3 cloves garlic, minced
  • 4 ounces (115 grams) of scallops
  • 8 ounces (226 grams) Manila clams
  • 1 tbsp chopped Italian basil leaves
  • 1 tsp sugar/brown sugar
  • 1 can tomato sauce (28 ounces/800 grams whole peeled tomatoes)
  • chopped Italian parsley, for garnishing
  • salt to taste

Instructions

Step 1: Following the package directions, cook the spaghetti. Drain when done and set aside.

Step 2: In a blender or food processor, place the whole can of the whole peeled tomatoes. Blend and set aside.

Step 3: Add olive oil to a hot skillet over medium heat. Add the garlic and saute until aromatic. Next, add the shrimp along with Manila clams and scallops. Stir well and add the tomato sauce and basil leaves. Cook further until almost done. To taste, season with salt and sugar.

Step 4: Into the skillet, add the spaghetti and stir well until coated in sauce. Before serving, garnish with some chopped parsley. Enjoy!

July 9, 2022 0 comment
0 FacebookTwitterPinterestEmail
General Recipes

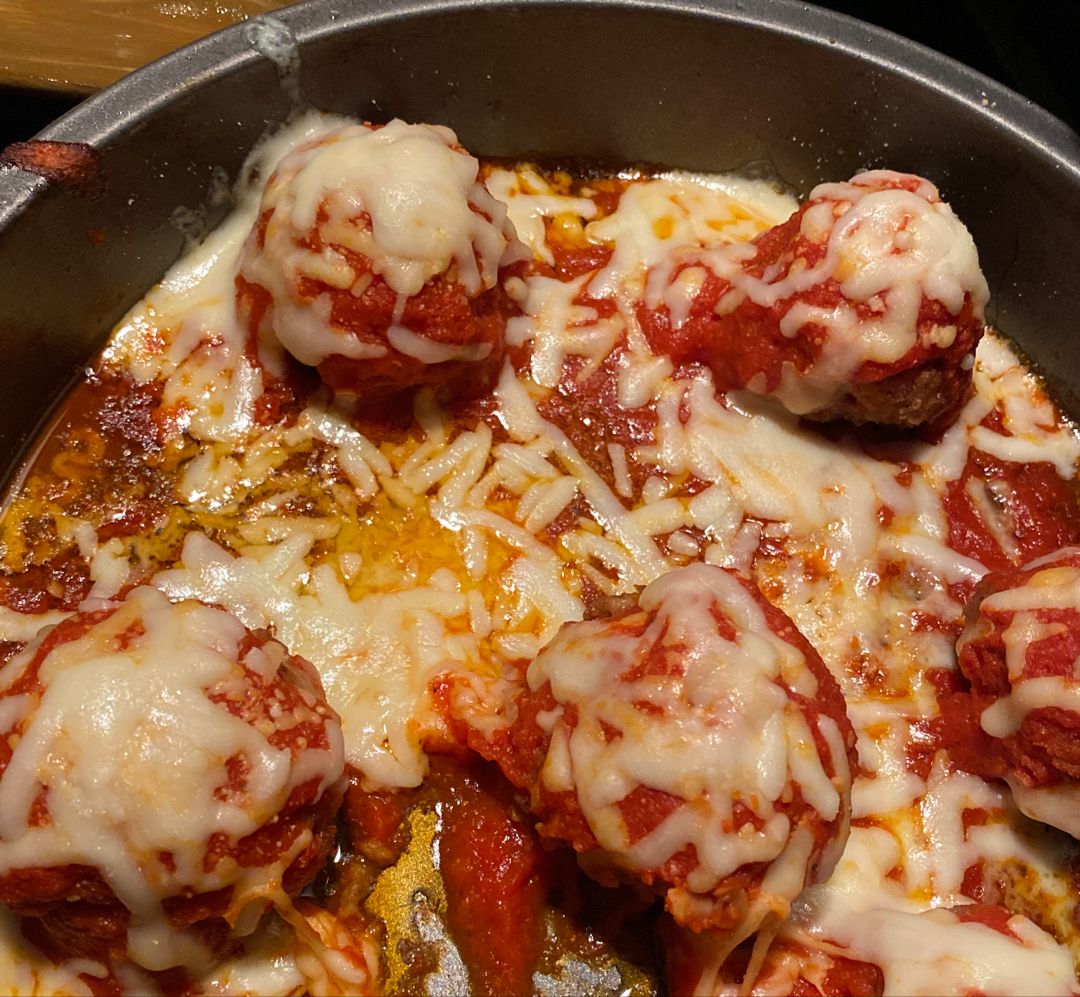
Easy Baked Meatballs

by Rebecca July 9, 2022
written by Rebecca

PREP TIME: 15 mins | COOK TIME: 15 mins | TOTAL TIME: 30 mins | SERVINGS: 36 meatballs (3 dozen)

These delicious, easy-baked meatballs are made with ground beef, Parmesan cheese, plenty of spices, eggs, breadcrumbs, and water. Incredibly easy to make and ready in no time. Super good you’ll never make meatballs, another way again!

Ingredients

Easy Baked Meatballs:

1 large egg

2 tsp garlic powder

1 lb ground beef

2 tsp onion powder

1 and 1/2 tsp Italian seasoning

3/4 c. breadcrumbs

1/2 c. freshly grated Parmesan cheese

1/2 c. lukewarm water

1/2 tsp ground black pepper

1 tsp salt (less if desired, but meat loves salt)

Easy Marinara Sauce:

2 cloves garlic, minced

3 tbsp olive oil

1 (28 oz) can of crushed tomatoes

1 tsp sugar

1 and 1/2 tsp Italian seasoning

Extra Parmesan cheese, for serving

1/2 teaspoon salt

1/4 tsp crushed red pepper flakes (optional)

How to make Easy Baked Meatballs

Easy Baked Meatballs:

Step 1: Prepare the oven. Preheat it to 425 degrees F. Using parchment paper, line a large baking sheet and set aside.

Step 2: Place the ground meat, garlic powder, onion powder, Italian seasoning, black pepper, salt, egg, cheese, and breadcrumbs in a large bowl. Mix well until combined. Gradually add in the water, a couple of tbsp at a time, mixing using your hands until just combined. Make sure not to overmix the mixture. At this point, the mixture should be very moist but still hold its form when rolled into meatballs.

Step 3: Scoop about 1 tbsp of meat using an ice cream scoop or large spoon. Place the mixture into your palms and shape it into a ball. On the prepared baking sheet, place the meatball. Do the same with the remaining mixture.

Step 4: Bake in the preheated oven for about 12 to 15 minutes or until the meatballs are completely cooked.

Easy Marinara Sauce:

Step 5: While the meatballs are baking, heat the oil in a medium-sized pan over medium-low heat. Once the oil is hot, add the garlic to the pan and saute for about a minute or until the garlic is aromatic and golden. Next, add the crushed red pepper flakes (optional) followed by the crushed tomatoes, salt, sugar, and seasoning. Stir well until mixed, and let the sauce simmer for at least 10 minutes, stirring often. To taste, season with extra salt and pepper.

Step 6: Add the cooked meatballs to the sauce and toss to coat. Enjoy!

Easy Baked Meatballs

Rebecca PREP TIME: 15 mins | COOK TIME: 15 mins | TOTAL TIME: 30 mins | SERVINGS: 36 meatballs (3 dozen) These delicious, easy-baked meatballs are made with ground beef, Parmesan… General Recipes Easy Baked Meatballs European Print This
Serves: 36 Prep Time: 15 mins Cooking Time: 15 mins 15 mins
Nutrition facts: 200 calories 20 grams fat
Rating: 5.0/5
( 1 voted )

Ingredients

  • Easy Baked Meatballs:
  • 1 large egg
  • 2 tsp garlic powder
  • 1 lb ground beef
  • 2 tsp onion powder
  • 1 and 1/2 tsp Italian seasoning
  • 3/4 c. breadcrumbs
  • 1/2 c. freshly grated Parmesan cheese
  • 1/2 c. lukewarm water
  • 1/2 tsp ground black pepper
  • 1 tsp salt (less if desired, but meat loves salt)
  • Easy Marinara Sauce:
  • 2 cloves garlic, minced
  • 3 tbsp olive oil
  • 1 (28 oz) can of crushed tomatoes
  • 1 tsp sugar
  • 1 and 1/2 tsp Italian seasoning
  • Extra Parmesan cheese, for serving
  • 1/2 teaspoon salt
  • 1/4 tsp crushed red pepper flakes (optional)

Instructions

Easy Baked Meatballs:

Step 1: Prepare the oven. Preheat it to 425 degrees F. Using parchment paper, line a large baking sheet and set aside.

Step 2: Place the ground meat, garlic powder, onion powder, Italian seasoning, black pepper, salt, egg, cheese, and breadcrumbs in a large bowl. Mix well until combined. Gradually add in the water, a couple of tbsp at a time, mixing using your hands until just combined. Make sure not to overmix the mixture. At this point, the mixture should be very moist but still hold its form when rolled into meatballs.

Step 3: Scoop about 1 tbsp of meat using an ice cream scoop or large spoon. Place the mixture into your palms and shape it into a ball. On the prepared baking sheet, place the meatball. Do the same with the remaining mixture.

Step 4: Bake in the preheated oven for about 12 to 15 minutes or until the meatballs are completely cooked.

Easy Marinara Sauce:

Step 5: While the meatballs are baking, heat the oil in a medium-sized pan over medium-low heat. Once the oil is hot, add the garlic to the pan and saute for about a minute or until the garlic is aromatic and golden. Next, add the crushed red pepper flakes (optional) followed by the crushed tomatoes, salt, sugar, and seasoning. Stir well until mixed, and let the sauce simmer for at least 10 minutes, stirring often. To taste, season with extra salt and pepper.

Step 6: Add the cooked meatballs to the sauce and toss to coat. Enjoy!

July 9, 2022 0 comment
0 FacebookTwitterPinterestEmail
General Recipes

Bacon Egg Muffins (Keto)

by Rebecca July 9, 2022
written by Rebecca

Prep Time: 5 mins | Cook Time: 20 mins | Total Time: 25 mins | Servings: 12 egg muffins

I love these bacon, egg muffins! They have been my favorite, and go-to for a grab-and-go breakfast or snack on the go. These muffins are naturally low carb which is a huge plus. To make these keto bacon, egg muffins, all you need are a few simple ingredients: eggs, cheese, bacon, and fresh herbs. Throw these filling muffins together in under twenty-five minutes.

These bacon, egg muffins are also freezer friendly. After baking, let the muffins cool fully. Place them in the freezer bag and freeze for up to 1 month. When ready to serve, reheat fresh muffins in the microwave for about 30 to 45 seconds or 1-1 ½ minutes from frozen.

These muffins are incredibly easy to throw together. Whip these muffins up at the beginning of the week for an easy and quick on-the-go breakfast/brunch or even snack. I often make a big batch as these muffins are gone way too fast! This simple muffin recipe is also easy to customize. You can throw in some veggies such spinach, bell peppers, mushrooms, or jalapeños if you want a little heat. As for the cheese, feta or mozzarella cheese are also a great option. You can even use diced ham or crumbled sausage in the muffin batter.

Ingredients

⅓ c. heavy cream

12 eggs

½ tsp dry mustard powder

2 tbsp fresh parsley or fresh herbs

3 ½ ounces cheddar cheese, shredded

8 slices of bacon, cooked and crumbled

2 green onions

black pepper to taste

How to make Bacon, Egg Muffins (Keto)

Step 1: Prepare the oven. Preheat it to 375 degrees F.

Step 2: In a bowl, place the eggs, cream, dry mustard, and pepper. Mix well until blended.

Step 3: Ready a muffin tin. Grease well.

Step 4: Into the prepared muffin tin, divide the cheese, bacon, and onions. On top, sprinkle the parsley, then pour the eggs over.

Step 5: Place in the preheated oven and bake for about 20 to 25 minutes or until set.

Nutrition Facts:

Calories: 181 kcal | Carbohydrates: 1g | Protein: 9g | Fat: 15g | Saturated Fat: 6g | Cholesterol: 191mg | Sodium: 214mg | Potassium: 112mg | Fiber: 0g | Sugar: 0g | Vitamin A: 500IU | Vitamin C: 1.2mg | Calcium: 91mg | Iron: 1mg

Bacon Egg Muffins (Keto)

Rebecca Prep Time: 5 mins | Cook Time: 20 mins | Total Time: 25 mins | Servings: 12 egg muffins I love these bacon, egg muffins! They have been my favorite,… General Recipes Bacon Egg Muffins (Keto) European Print This
Serves: 12 Prep Time: 5 mins Cooking Time: 20 mins 20 mins
Nutrition facts: 181 calories 15 fat
Rating: 5.0/5
( 1 voted )

Ingredients

  • ⅓ c. heavy cream
  • 12 eggs
  • ½ tsp dry mustard powder
  • 2 tbsp fresh parsley or fresh herbs
  • 3 ½ ounces cheddar cheese, shredded
  • 8 slices of bacon, cooked and crumbled
  • 2 green onions
  • black pepper to taste

Instructions

Step 1: Prepare the oven. Preheat it to 375 degrees F.

Step 2: In a bowl, place the eggs, cream, dry mustard, and pepper. Mix well until blended.

Step 3: Ready a muffin tin. Grease well.

Step 4: Into the prepared muffin tin, divide the cheese, bacon, and onions. On top, sprinkle the parsley, then pour the eggs over.

Step 5: Place in the preheated oven and bake for about 20 to 25 minutes or until set.

July 9, 2022 0 comment
0 FacebookTwitterPinterestEmail
General Recipes

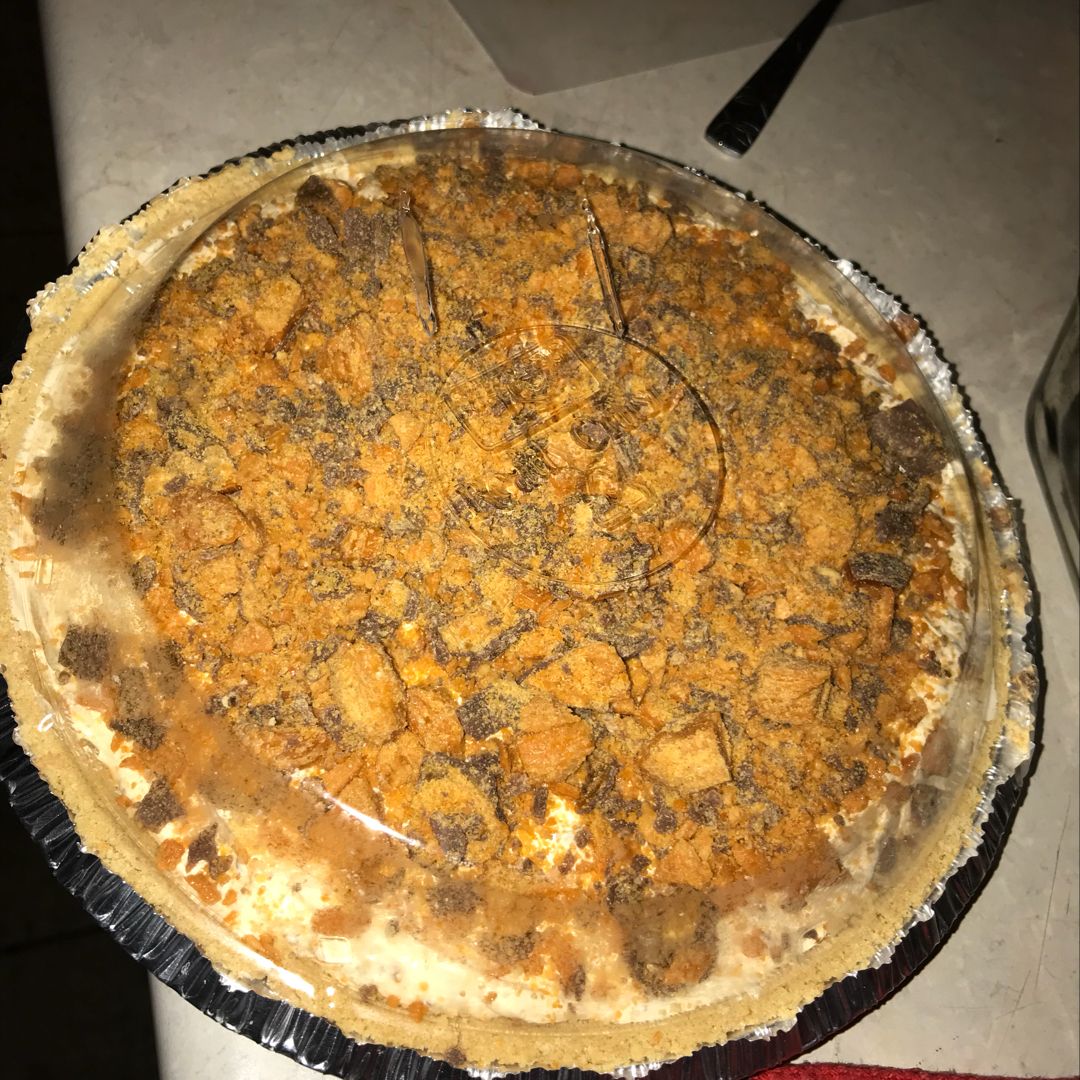
NO BAKE BUTTERFINGER PIE

by Rebecca July 9, 2022
written by Rebecca

Prep Time: 15 mins | Total Time: 15 mins | Yield: 8 people

No-bake desserts are my favorite! I do not have to turn the oven on, all I need to do is gather the ingredients, mix, and assemble. I do not mind the waiting time as most of the no-bake desserts need to be chilled for a few hours. One of my top favorite no-bake desserts is this no-bake Butter-finger pie. It is made with four ingredients. The steps are pretty straightforward. Just mix, assemble, and chill. This Butter-finger pie is super great no wonder why everyone is raving about this!

This Butter-finger pie is light and creamy. It’s a perfectly sweet dessert that you can easily make in minutes. I have been making this Butter-finger pie for years. My love for no-bake dessert started way back. I always love desserts, and no-bake dessert recipes have been my go-to for an easy and quick dessert.

When I moved out of my parent’s house, I struggled for months! I rented a very small apartment. I did not have an oven, just an old stove, and refrigerator. I made sure to make ends meet until I finally was on my feet. I love baking, and without an oven, I could not bake anything! I resort to no-bake desserts, and I immediately fell in love! I have made so many no-bake desserts, including this light, creamy, and decadent Butter-finger dessert!

Ingredients

1 (12 ounces) container cool whip, thawed

1 (8 ounces) package of cream cheese, room temperature

7 (2.1 ounces) Butter-finger candy bars, crushed

1 (9”) pre-made Graham cracker pie crust

HOW TO MAKE NO-BAKE BUTTERFINGER PIE

Step 1: Mix the softened cream cheese with a cool whip and 6 crushed Butterfingers. Then, spoon this into the prepared Graham cracker crust and top with the rest of the crushed Butter-finger.

Step 2: Place in the fridge to chill for at least 4 hours.

NO BAKE BUTTERFINGER PIE

Rebecca Prep Time: 15 mins | Total Time: 15 mins | Yield: 8 people No-bake desserts are my favorite! I do not have to turn the oven on, all I need… General Recipes NO BAKE BUTTERFINGER PIE European Print This
Serves: 8 Prep Time: 15 mins
Nutrition facts: 200 calories 20 grams fat
Rating: 5.0/5
( 1 voted )

Ingredients

  • 1 (12 ounces) container cool whip, thawed
  • 1 (8 ounces) package of cream cheese, room temperature
  • 7 (2.1 ounces) Butter-finger candy bars, crushed
  • 1 (9”) pre-made Graham cracker pie crust

Instructions

Step 1: Mix the softened cream cheese with a cool whip and 6 crushed Butterfingers. Then, spoon this into the prepared Graham cracker crust and top with the rest of the crushed Butter-finger.

Step 2: Place in the fridge to chill for at least 4 hours.

July 9, 2022 0 comment
0 FacebookTwitterPinterestEmail
General Recipes

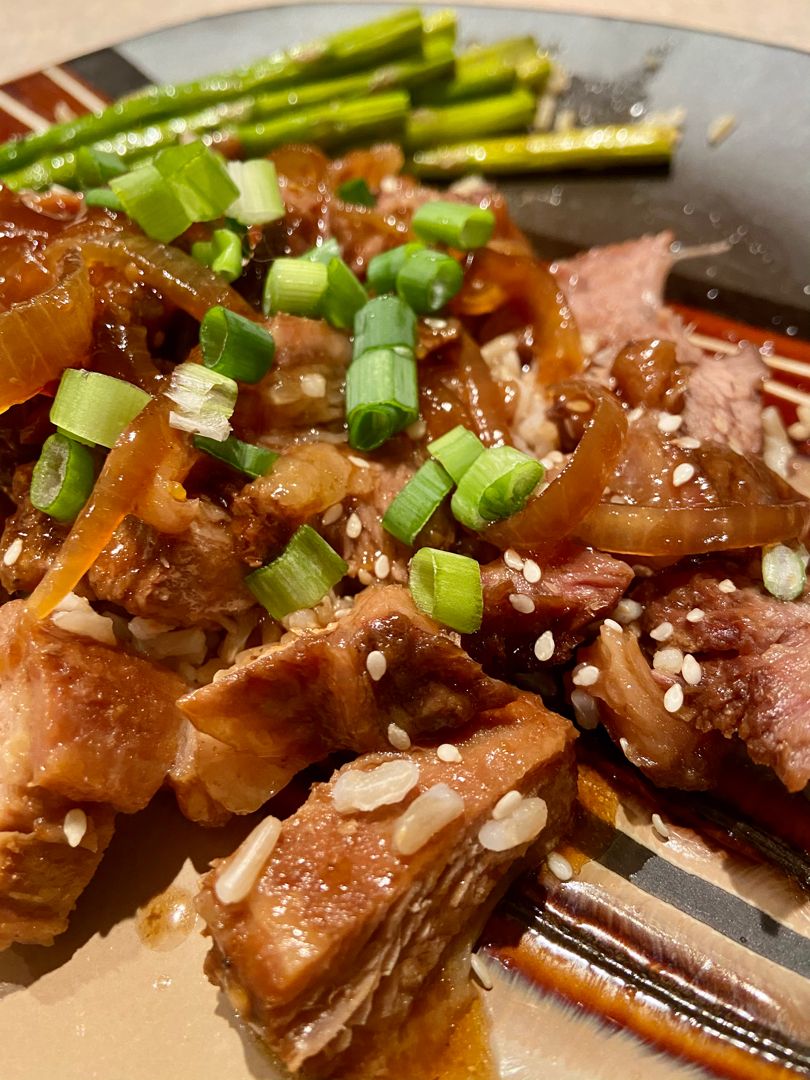
Slow Cooker Korean Beef Short Ribs (Kalbi)

by Rebecca July 9, 2022
written by Rebecca

PREP TIME: 10 mins | COOK TIME: 6 hrs | TOTAL TIME: 6 hrs 10 mins

Fall-off-the-bone tender ribs braised in a flavor-bursting marinade that turned into a delicious slightly sweet and savory sauce. This Slow Cooker Korean Beef Short Ribs (Kalbi) is another amazing slow cooker recipe that your entire family will surely love. Serve this Korean dish with rice and drizzle the sauce over it.

INGREDIENTS

1 medium yellow onion, thinly sliced

4-6 lbs beef short ribs

1 c. soy sauce

2 tbsp rice vinegar

1 tbsp ginger, minced

½ c. dark brown sugar

1 tbsp sesame oil

5 cloves garlic, minced

1 c. beef broth

1 tsp red pepper flakes, optional or 2 tbsp Gochujang

½ tbsp black pepper

To finish:

¼ c. cold water

2 tbsp cornstarch

1 tsp toasted sesame seeds for garnish

2-3 green onions, sliced on the diagonal into 1” pieces for garnish

How to make Slow Cooker Korean Beef Short Ribs (Kalbi)

Step 1: In the bottom of a slow cooker, arrange the short ribs and sprinkle the thinly sliced onion on top.

Step 2: Whisk the soy sauce, beef broth, rice vinegar, brown sugar, black pepper, sesame oil, garlic, ginger, and red pepper flakes until combined. Pour this on top of the short ribs.

Step 3: Put the lid on and set to cook for 6 to 8 hours on low or 3 to 4 hours on high.

Step 4: Into the cold water, add the cornstarch and mix well until blended. When the Kalbi is almost ready to serve, stir this into the slow cooker until blended into the sauce and juices from the meat. Replace the lid and continue to cook for additional 20 minutes or until the liquid has slightly thickened.

Step 5: To a serving platter, transfer the ribs and sprinkle with sesame seeds and green onions. Remove the fat from the cooking liquid using a fat separator. Drizzle the sauce over the meat and rice.

Step 6: Serve and enjoy!

NUTRITION FACTS:

Calories: 632 kcal | Carbohydrates: 31g | Protein: 56g | Saturated Fat: 11g | Cholesterol: 156mg | Sodium: 2958mg | Fiber: 1g | Sugar: 23g

Slow Cooker Korean Beef Short Ribs (Kalbi)

Rebecca PREP TIME: 10 mins | COOK TIME: 6 hrs | TOTAL TIME: 6 hrs 10 mins Fall-off-the-bone tender ribs braised in a flavor-bursting marinade that turned into a delicious slightly… General Recipes Slow Cooker Korean Beef Short Ribs (Kalbi) European Print This
Prep Time: 10 mins Cooking Time: 6 hrs 6 hrs
Nutrition facts: 632 calories 20 grams fat
Rating: 5.0/5
( 1 voted )

Ingredients

  • 1 medium yellow onion, thinly sliced
  • 4-6 lbs beef short ribs
  • 1 c. soy sauce
  • 2 tbsp rice vinegar
  • 1 tbsp ginger, minced
  • ½ c. dark brown sugar
  • 1 tbsp sesame oil
  • 5 cloves garlic, minced
  • 1 c. beef broth
  • 1 tsp red pepper flakes, optional or 2 tbsp Gochujang
  • ½ tbsp black pepper
  • To finish:
  • ¼ c. cold water
  • 2 tbsp cornstarch
  • 1 tsp toasted sesame seeds for garnish
  • 2-3 green onions, sliced on the diagonal into 1” pieces for garnish

Instructions

Step 1: In the bottom of a slow cooker, arrange the short ribs and sprinkle the thinly sliced onion on top.

Step 2: Whisk the soy sauce, beef broth, rice vinegar, brown sugar, black pepper, sesame oil, garlic, ginger, and red pepper flakes until combined. Pour this on top of the short ribs.

Step 3: Put the lid on and set to cook for 6 to 8 hours on low or 3 to 4 hours on high.

Step 4: Into the cold water, add the cornstarch and mix well until blended. When the Kalbi is almost ready to serve, stir this into the slow cooker until blended into the sauce and juices from the meat. Replace the lid and continue to cook for additional 20 minutes or until the liquid has slightly thickened.

Step 5: To a serving platter, transfer the ribs and sprinkle with sesame seeds and green onions. Remove the fat from the cooking liquid using a fat separator. Drizzle the sauce over the meat and rice.

Step 6: Serve and enjoy!

July 9, 2022 0 comment
0 FacebookTwitterPinterestEmail
General Recipes

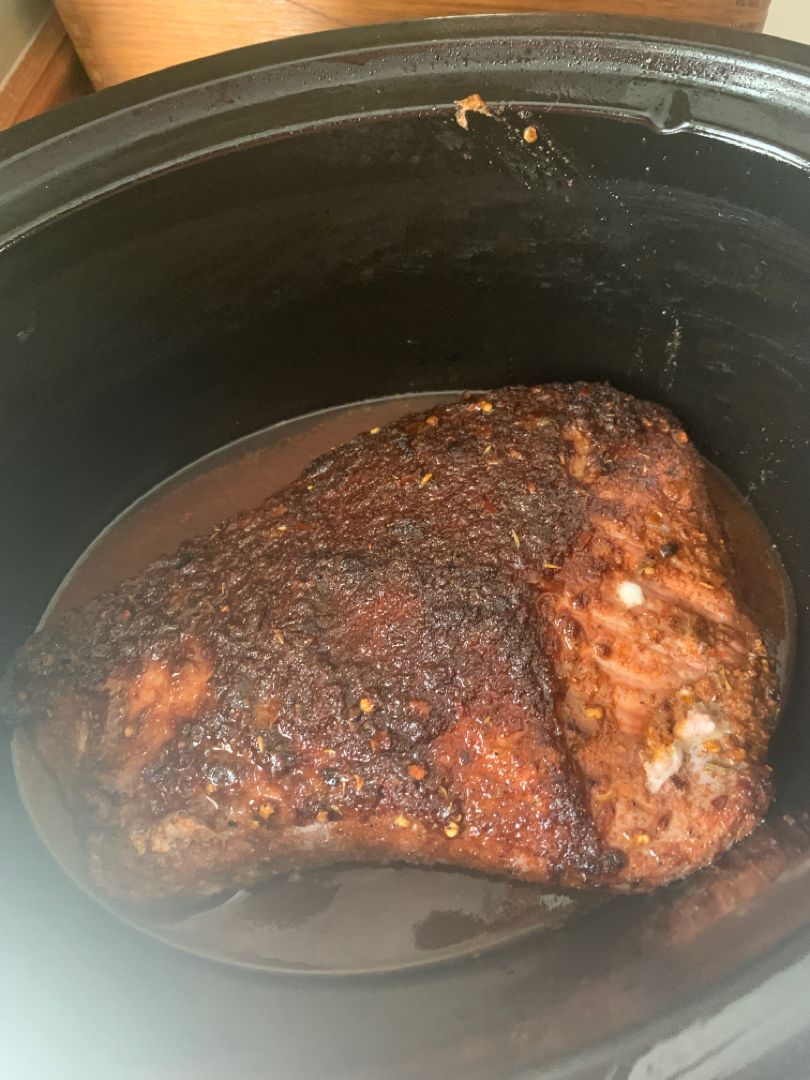
SLOW COOKER BEEF BRISKET

by Rebecca July 9, 2022
written by Rebecca

TOTAL TIME: 8 hrs 15 mins | PREP TIME: 15 mins | COOK TIME: 8 hrs | SERVINGS: 8-10 people

This slow cooker beef brisket is a great dinner option with juicy, flavor-exploding beef brisket that is way better than any restaurant. For an easy meal and stress-free entertainment, make this ahead and simply reheat.

INGREDIENTS

SLOW COOKER:

1 tbsp beef bouillon

1 tbsp reduced-sodium soy sauce

2 tbsp Worcestershire sauce

4-5 lbs beef brisket, trimmed of excess fat

1/2 c. homemade barbecue sauce

1 c. water

SPICE RUB:

1 tbsp chili powder

2 tbsp packed brown sugar

2 teaspoons EACH garlic powder, salt

2 tbsp paprika

1 teaspoon EACH onion powder, chipotle powder, pepper

1/4 tsp cayenne pepper – optional for extra heat

1/2 tsp dried thyme

BARBECUE SAUCE:

1/4 c. seedless blackberry preserves

1/3 c. molasses

1 1/2 c. ketchup

1/3 c. packed brown sugar

1/4 c. apple cider vinegar

1 tbsp mesquite liquid smoke, optional but recommended

1 tbsp reserved Spice Rub

HOW TO MAKE SLOW COOKER BEEF BRISKET

Step 1: Prepare the oven. Preheat it to 425 degrees F. Using parchment paper or foil, line a large baking sheet with sides/jelly roll pan and set aside.

Step 2: Using nonstick cooking spray, grease a 6-quart or larger slow cooker.

Step 3: After trimming the excess fat of the brisket, rinse and pat the brisket dry. Slice the brisket in half if using extra-long brisket to fit them in your slow cooker.

Step 4: Place the Spice Rub ingredients in a medium bowl. Mix well until combined. Into a medium bowl, reserve 1 tbsp of the Spice Rub. Over the meat, rub the remaining spice rub and place it on the prepared baking sheet. Allow the brisket to sit for about 30 minutes at room temperature or keep it in the fridge for up to 24 hours. Then, place the brisket in the preheated oven and bake for about 30 minutes.

Step 5: To the bowl with the reserved spice rub, add the barbecue sauce ingredients and mix well until blended. Add half of the barbecue sauce to a slow cooker along with 1 c water, 2 tbsp Worcestershire, 2 tbsp reduced-sodium soy sauce, and 1 tbsp beef bouillon. Stir well. Then, add the brisket. Put the lid on and set it to cook for 8 to 10 hours on a low setting until the brisket is very tender. Flip the brisket halfway through baking. Cook the brisket further if it is still tough.

Step 6: To a foil-lined baking sheet, transfer the brisket and brush with barbecue sauce. Broil the brisket until slightly caramelized. This will take about 5 to 10 minutes.

Step 7: In the meantime, simmer or microwave the rest of the barbecue sauce until warmed through.

Step 8: Before serving, brush the brisket again with the barbecue sauce. If desired, slice the brisket across the grain or chop. Serve the brisket plain with the rest of the barbecue sauce or in sandwiches.

Note:

To make the brisket in advance, cook the brisket until tender. Then, take the removable ceramic insert and store the brisket in the fridge. Skip off the hardened fat the next day and cook the brisket in a slow cooker on a low setting for 1 to 2 hours or until warmed through. Then, continue with the recipe.

SLOW COOKER BEEF BRISKET

Rebecca TOTAL TIME: 8 hrs 15 mins | PREP TIME: 15 mins | COOK TIME: 8 hrs | SERVINGS: 8-10 people This slow cooker beef brisket is a great dinner option… General Recipes SLOW COOKER BEEF BRISKET European Print This
Serves: 8-10 Prep Time: 15 mins Cooking Time: 8 hrs 8 hrs
Nutrition facts: 200 calories 20 grams fat
Rating: 5.0/5
( 1 voted )

Ingredients

  • SLOW COOKER:
  • 1 tbsp beef bouillon
  • 1 tbsp reduced-sodium soy sauce
  • 2 tbsp Worcestershire sauce
  • 4-5 lbs beef brisket, trimmed of excess fat
  • 1/2 c. homemade barbecue sauce
  • 1 c. water
  • SPICE RUB:
  • 1 tbsp chili powder
  • 2 tbsp packed brown sugar
  • 2 teaspoons EACH garlic powder, salt
  • 2 tbsp paprika
  • 1 teaspoon EACH onion powder, chipotle powder, pepper
  • 1/4 tsp cayenne pepper - optional for extra heat
  • 1/2 tsp dried thyme
  • BARBECUE SAUCE:
  • 1/4 c. seedless blackberry preserves
  • 1/3 c. molasses
  • 1 1/2 c. ketchup
  • 1/3 c. packed brown sugar
  • 1/4 c. apple cider vinegar
  • 1 tbsp mesquite liquid smoke, optional but recommended
  • 1 tbsp reserved Spice Rub

Instructions

Step 1: Prepare the oven. Preheat it to 425 degrees F. Using parchment paper or foil, line a large baking sheet with sides/jelly roll pan and set aside.

Step 2: Using nonstick cooking spray, grease a 6-quart or larger slow cooker.

Step 3: After trimming the excess fat of the brisket, rinse and pat the brisket dry. Slice the brisket in half if using extra-long brisket to fit them in your slow cooker.

Step 4: Place the Spice Rub ingredients in a medium bowl. Mix well until combined. Into a medium bowl, reserve 1 tbsp of the Spice Rub. Over the meat, rub the remaining spice rub and place it on the prepared baking sheet. Allow the brisket to sit for about 30 minutes at room temperature or keep it in the fridge for up to 24 hours. Then, place the brisket in the preheated oven and bake for about 30 minutes.

Step 5: To the bowl with the reserved spice rub, add the barbecue sauce ingredients and mix well until blended. Add half of the barbecue sauce to a slow cooker along with 1 c water, 2 tbsp Worcestershire, 2 tbsp reduced-sodium soy sauce, and 1 tbsp beef bouillon. Stir well. Then, add the brisket. Put the lid on and set it to cook for 8 to 10 hours on a low setting until the brisket is very tender. Flip the brisket halfway through baking. Cook the brisket further if it is still tough.

Step 6: To a foil-lined baking sheet, transfer the brisket and brush with barbecue sauce. Broil the brisket until slightly caramelized. This will take about 5 to 10 minutes.

Step 7: In the meantime, simmer or microwave the rest of the barbecue sauce until warmed through.

Step 8: Before serving, brush the brisket again with the barbecue sauce. If desired, slice the brisket across the grain or chop. Serve the brisket plain with the rest of the barbecue sauce or in sandwiches.

Notes

To make the brisket in advance, cook the brisket until tender. Then, take the removable ceramic insert and store the brisket in the fridge. Skip off the hardened fat the next day and cook the brisket in a slow cooker on a low setting for 1 to 2 hours or until warmed through. Then, continue with the recipe.

July 9, 2022 0 comment
0 FacebookTwitterPinterestEmail
Newer Posts
Older Posts

Popular Posts

  • 1

    Crispy Crunchy Parmesan Potatoes

    March 21, 2020
  • 2

    CROCK POT SMOTHERED PORK CHOPS

    March 21, 2020
  • Facebook
  • Twitter

@2019 - All Right Reserved.


Back To Top