Cook it once
  • Home
  • Privacy Policy
  • Recipes
    • KETO
    • LC
    • WW
  • Tips
  • Contact
Cook it once
  • Home
  • Privacy Policy
  • Recipes
    • KETO
    • LC
    • WW
  • Tips
  • Contact
Category:

General Recipes

General Recipes

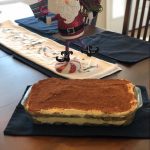
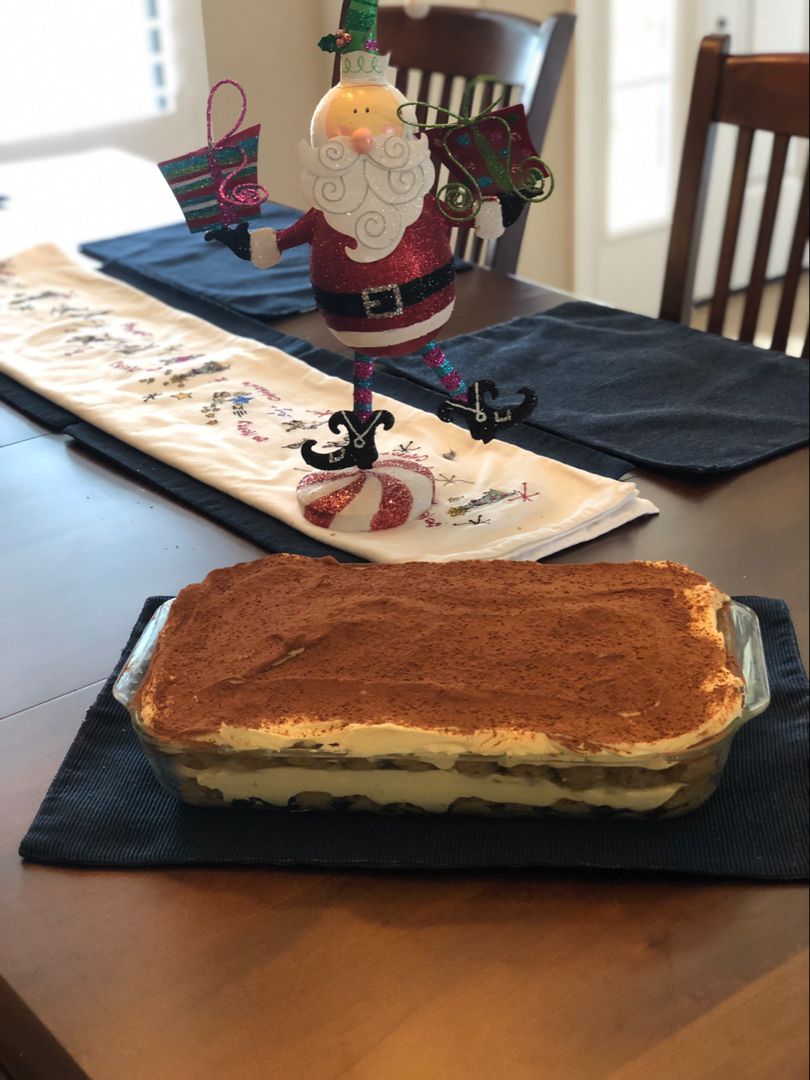
AUTHENTIC TIRAMISU RECIPE FROM ITALY

by Rebecca July 12, 2022
written by Rebecca

Prep Time: 30 mins | Total Time: 30 mins

I always love Tiramisu and to learn how to whip up an authentic Tiramisu is such a blast! Tiramisu is an amazing dessert perfect for every occasion.

Ingredients

2 c. espresso, brewed and cooled – Instant is fine: Caffe D’Vita Imported Instant Espresso

5 cups/1250 g. of Mascarpone

1 lb Savoiardi Ladyfingers

4 tablespoons Ghirardelli Unsweetened Cocoa

5 tablespoons white sugar C&H Sugar

5 eggs, separated (yolks only)

HOW TO MAKE AUTHENTIC TIRAMISU RECIPE FROM ITALY

Step 1: After making the espresso, set it aside to cool.

Step 2: To a mixing bowl, separate the eggs and add only the yolk. Add the sugar and whisk well by hand until the sugar has completely dissolved. Make sure not to whip the eggs. Remember that we are not trying to get volume, but only to dissolve the sugar.

Step 3: To the mixing bowl, slowly add the mascarpone, mixing until everything is combined. At this point, the cream should be light yellow and not runny. Make sure to avoid overmixing.

Step 4: For this recipe, you can use Kahlua or any other liquor. To the cooled espresso, add 1 shot glass (adjust according to taste) of your preferred liquor/Kahlua. My go-to alternative is Kahlua flavoring because it does not contain any alcohol, but you get the same taste.

Step 5: Ready the ladyfingers and your dish. For this recipe, I use a Pyrex 3-quart baking dish. Start dipping the ladyfingers into the espresso about three pieces at a time. You want the ladyfingers to be soft and covered in espresso, but not falling apart. Into the dish, lay the ladyfingers in a row and snuggle them up next to each other, filling the whole pan with a layer of ladyfingers.

Step 6: On top of the ladyfingers, add half of the mascarpone mixture. To make an even layer, smooth out the mascarpone mixture. Make sure to avoid putting too much pressure on the mascarpone, or the ladyfingers will break apart.

Step 7: Do the same steps. Add another layer of the ladyfingers on top and spread another half of the mascarpone over.

Step 8: Sprinkle the final layer with cocoa powder. Tent the dish using plastic wrap and place it in the fridge for at least 4 hours to set.
AUTHENTIC TIRAMISU RECIPE FROM ITALY

Rebecca Prep Time: 30 mins | Total Time: 30 mins I always love Tiramisu and to learn how to whip up an authentic Tiramisu is such a blast! Tiramisu is an… General Recipes AUTHENTIC TIRAMISU RECIPE FROM ITALY European Print This
Prep Time: 30 mins
Nutrition facts: 200 calories 20 grams fat
Rating: 5.0/5
( 1 voted )

Ingredients

  • 2 c. espresso, brewed and cooled - Instant is fine: Caffe D'Vita Imported Instant Espresso
  • 5 cups/1250 g. of Mascarpone
  • 1 lb Savoiardi Ladyfingers
  • 4 tablespoons Ghirardelli Unsweetened Cocoa
  • 5 tablespoons white sugar C&H Sugar
  • 5 eggs, separated (yolks only)

Instructions

Step 1: After making the espresso, set it aside to cool.

Step 2: To a mixing bowl, separate the eggs and add only the yolk. Add the sugar and whisk well by hand until the sugar has completely dissolved. Make sure not to whip the eggs. Remember that we are not trying to get volume, but only to dissolve the sugar.

Step 3: To the mixing bowl, slowly add the mascarpone, mixing until everything is combined. At this point, the cream should be light yellow and not runny. Make sure to avoid overmixing.

Step 4: For this recipe, you can use Kahlua or any other liquor. To the cooled espresso, add 1 shot glass (adjust according to taste) of your preferred liquor/Kahlua. My go-to alternative is Kahlua flavoring because it does not contain any alcohol, but you get the same taste.

Step 5: Ready the ladyfingers and your dish. For this recipe, I use a Pyrex 3-quart baking dish. Start dipping the ladyfingers into the espresso about three pieces at a time. You want the ladyfingers to be soft and covered in espresso, but not falling apart. Into the dish, lay the ladyfingers in a row and snuggle them up next to each other, filling the whole pan with a layer of ladyfingers.

Step 6: On top of the ladyfingers, add half of the mascarpone mixture. To make an even layer, smooth out the mascarpone mixture. Make sure to avoid putting too much pressure on the mascarpone, or the ladyfingers will break apart.

Step 7: Do the same steps. Add another layer of the ladyfingers on top and spread another half of the mascarpone over.

Step 8: Sprinkle the final layer with cocoa powder. Tent the dish using plastic wrap and place it in the fridge for at least 4 hours to set.
July 12, 2022 0 comment
0 FacebookTwitterPinterestEmail
General Recipes

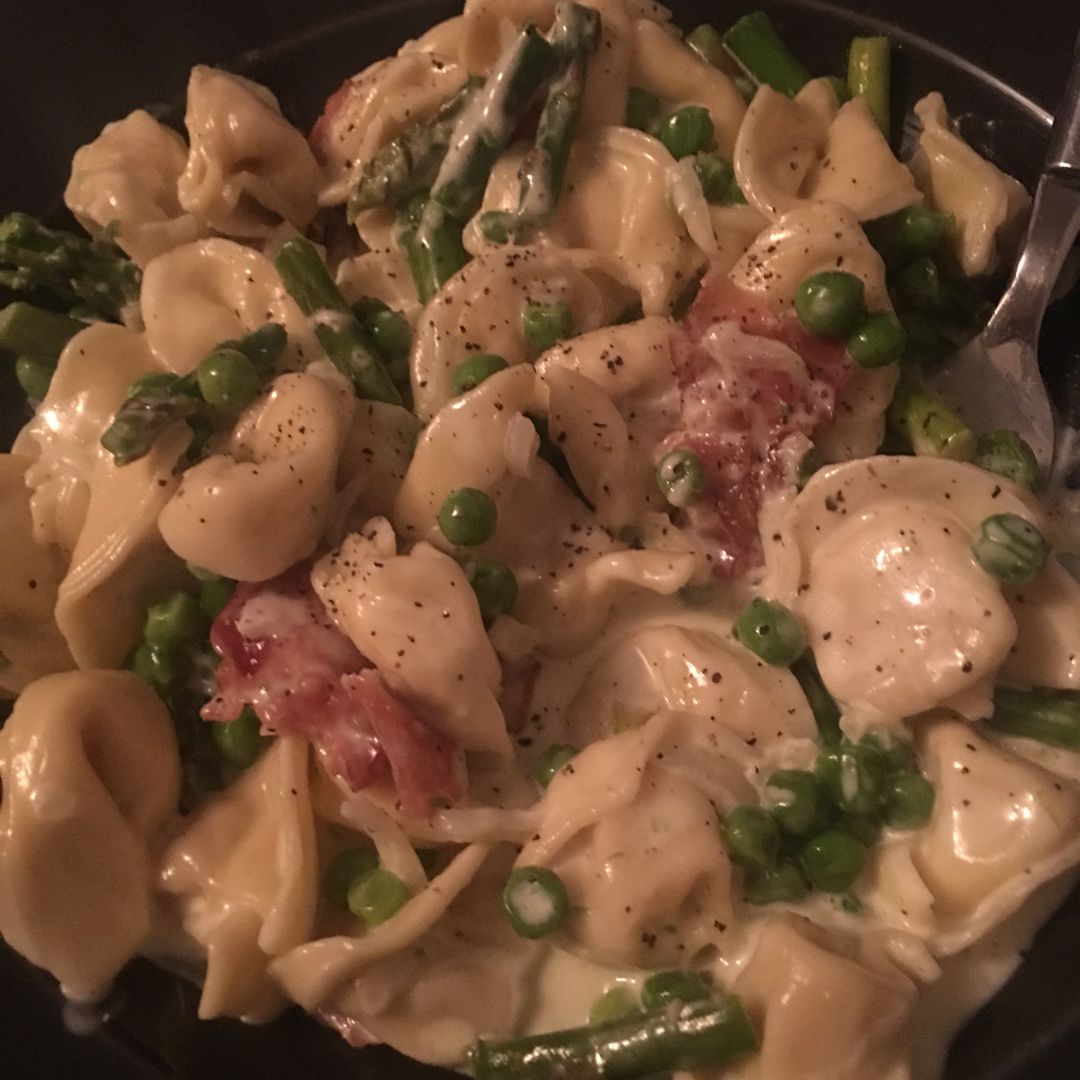
Creamy Spring Tortellini with Peas Asparagus and Bacon

by Rebecca July 12, 2022
written by Rebecca

Prep Time: 5 mins | Cook Time: 25 mins | Total Time: 30 mins | Servings: 2

This tortellini is a very comforting dish packed with peas, asparagus, and crispy bacon in a creamy Parmesan cream sauce. It is an easy dinner option that is made with only a few simple ingredients. Have this Creamy Spring Tortellini with Peas, Asparagus and Bacon ready on your dinner table in under thirty minutes and enjoy a filling, loaded with veggies meal that even your fussiest eaters will absolutely love!

I love easy and quick recipes like this Creamy Spring Tortellini with Peas Asparagus and Bacon. They are my go-to during the busiest, even lazy days. And I can whip them up with a fuss in minutes! This amazing dish is another great addition to your menu rotation. So simple yet super good!

Ingredients

Oil for cooking

2 lg garlic cloves

1/2 small yellow onion, thinly sliced

9 ounces three cheese tortellini

1 c. chopped asparagus

1 c. heavy whipping cream

1/2 c. shaved Parmesan cheese

3/4 c peas you can use frozen peas

.25 pound crispy slices of bacon (5-6 slices)

Salt

Fresh cracked black pepper

How to make Creamy Spring Tortellini with Peas, Asparagus and Bacon

Step 1: Following the package directions cook the tortellini. Drain when done and set aside.

Step 2: Into a preheated cooking pan, add a few tbsp oils. Then, add the onions and saute over medium heat until translucent. Next, add the peas and asparagus. Continue to cook until they begin to soften. Add and press in the garlic and sprinkle with salt and pepper. Stir well and cook the veggies for another 5 minutes.

Step 3: While stirring, pour in the heavy cream. Stir in the shaved Parmesan cheese until melted. If needed, season with extra salt and pepper.

Step 4: Add the tortellini to the pan and toss well. Continue to cook for a few minutes more. Add the chopped crispy cooked bacon and stir well.

Step 5: Remove the pan from the heat and serve the Creamy Spring Tortellini with Peas Asparagus and Bacon immediately. Enjoy!

Nutrition Facts:

Calories: 1214 kcal | Carbohydrates: 74g | Protein: 42g | Fat: 84g | Saturated Fat: 42g | Cholesterol: 265mg | Sodium: 1380mg | Potassium: 532mg | Fiber: 9g | Sugar: 9g | Vitamin A: 2865IU | Vitamin C: 29.2mg | Calcium: 595mg | Iron: 5.9mg

Creamy Spring Tortellini with Peas Asparagus and Bacon

Rebecca Prep Time: 5 mins | Cook Time: 25 mins | Total Time: 30 mins | Servings: 2 This tortellini is a very comforting dish packed with peas, asparagus, and crispy… General Recipes Creamy Spring Tortellini with Peas Asparagus and Bacon European Print This
Serves: 2 Prep Time: 5 mins Cooking Time: 25 mins 25 mins
Nutrition facts: 1214 calories 84 fat
Rating: 5.0/5
( 1 voted )

Ingredients

  • Oil for cooking
  • 2 lg garlic cloves
  • 1/2 small yellow onion, thinly sliced
  • 9 ounces three cheese tortellini
  • 1 c. chopped asparagus
  • 1 c. heavy whipping cream
  • 1/2 c. shaved Parmesan cheese
  • 3/4 c peas you can use frozen peas
  • .25 pound crispy slices of bacon (5-6 slices)
  • Salt
  • Fresh cracked black pepper

Instructions

Step 1: Following the package directions cook the tortellini. Drain when done and set aside.

Step 2: Into a preheated cooking pan, add a few tbsp oils. Then, add the onions and saute over medium heat until translucent. Next, add the peas and asparagus. Continue to cook until they begin to soften. Add and press in the garlic and sprinkle with salt and pepper. Stir well and cook the veggies for another 5 minutes.

Step 3: While stirring, pour in the heavy cream. Stir in the shaved Parmesan cheese until melted. If needed, season with extra salt and pepper.

Step 4: Add the tortellini to the pan and toss well. Continue to cook for a few minutes more. Add the chopped crispy cooked bacon and stir well.

Step 5: Remove the pan from the heat and serve the Creamy Spring Tortellini with Peas Asparagus and Bacon immediately. Enjoy!

July 12, 2022 0 comment
0 FacebookTwitterPinterestEmail
General Recipes

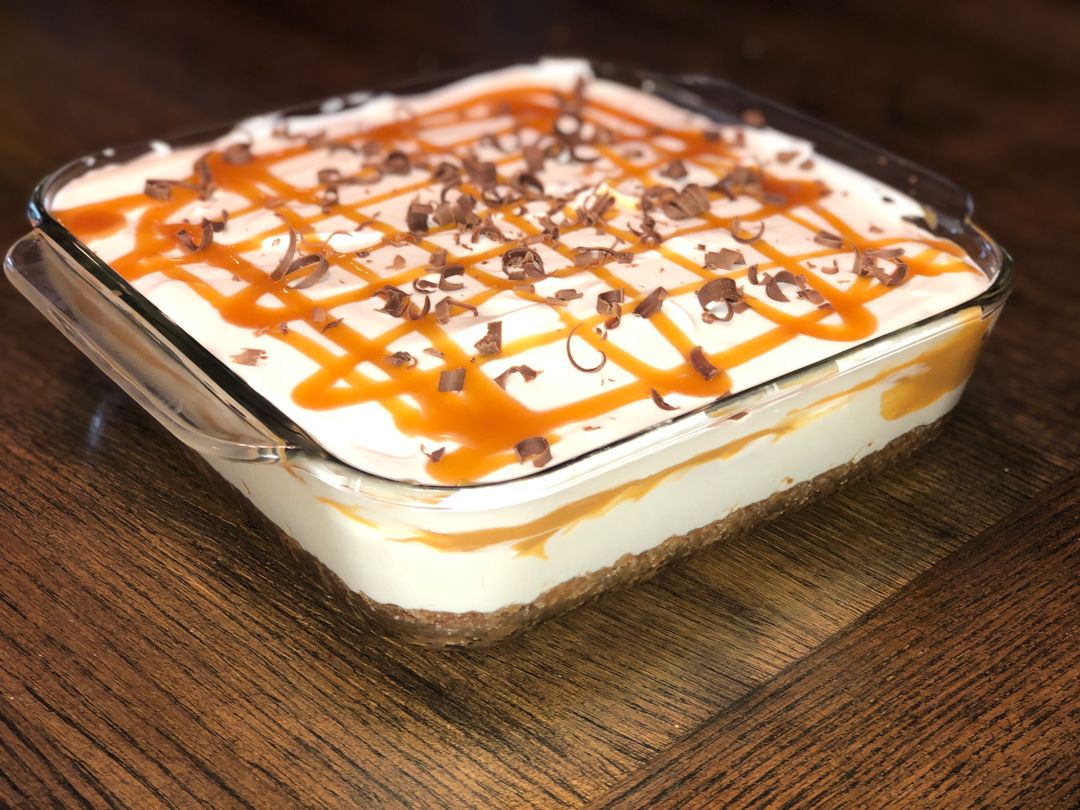
BUTTERSCOTCH LUSH

by Rebecca July 11, 2022
written by Rebecca

Prep time: 30 mins | Total time: 30 mins | Yield: 12 SERVINGS

This four-layer dessert is a very decadent treat perfect for every occasion! This butterscotch lush has layers of the cream cheese layer, pudding layer, and whipped cream layer with a Graham cracker crust and topped with optional toppings.

INGREDIENTS

GRAHAM CRACKER CRUST:

1 stick butter (1/2 c.), melted

1/2 c. sugar

1.5 c Graham crackers, crushed

CREAM CHEESE LAYER:

2 c. heavy cream

1/4 c. sugar

1 package (8 ounces) cream cheese, softened

PUDDING LAYER:

2 small packages of butterscotch instant pudding

2.5 c. milk

WHIPPED CREAM LAYER:

3 tablespoons powdered sugar

1 c. heavy cream

TOPPINGS (OPTIONAL):

Chocolate bar – shaved

Butterscotch ice cream topping

HOW TO MAKE BUTTERSCOTCH LUSH

Step 1: To make the Graham cracker crust: Prepare the oven. Preheat it to 350 degrees F. Whisk the Graham cracker crumbs, melted butter, and sugar. Into the bottom of an 8 x 8-inch baking dish, press the mixture. Place in the preheated oven and bake for about 15 minutes.

Step 2: For the cream cheese layer, beat the cream cheese and sugar using a hand mixer until fluffy. Next, add 2 c heavy cream and continue to beat until stiff peaks form. Then, layer the cream cheese over the cooled Graham crust.

Step 3: Next, for the pudding layer. Mix the milk with the pudding mix. You can add a little more milk if the mixture is too thick. At this point, you should have a mixture thicker than traditional pudding, but still pourable. Over the cream cheese layer, spread the pudding.

Step 4: To make the whipped cream layer, beat the heavy cream with powdered sugar until soft peaks form. Then, spread this on top of the pudding layer.

Step 5: Place in the fridge to chill for at least 4 hours or until set.

Step 6: Across the top, drizzle the warmed butterscotch and sprinkle with pieces of shaved chocolate (optional). Enjoy!

NUTRITION FACTS:

YIELD: 12, SERVING SIZE: 1 slice
Amount Per Serving: CALORIES: 598 | TOTAL FAT: 35g | SATURATED FAT: 22g | TRANS FAT: 1g | UNSATURATED FAT: 11g | CHOLESTEROL: 103mg | SODIUM: 226mg | CARBOHYDRATES: 67g | FIBER: 1g | SUGAR: 56g | PROTEIN: 6g

BUTTERSCOTCH LUSH

Rebecca Prep time: 30 mins | Total time: 30 mins | Yield: 12 SERVINGS This four-layer dessert is a very decadent treat perfect for every occasion! This butterscotch lush has layers… General Recipes BUTTERSCOTCH LUSH European Print This
Serves: 12 Prep Time: 30 mins
Nutrition facts: 598 calories 35 fat
Rating: 5.0/5
( 1 voted )

Ingredients

  • GRAHAM CRACKER CRUST:
  • 1 stick butter (1/2 c.), melted
  • 1/2 c. sugar
  • 1.5 c Graham crackers, crushed
  • CREAM CHEESE LAYER:
  • 2 c. heavy cream
  • 1/4 c. sugar
  • 1 package (8 ounces) cream cheese, softened
  • PUDDING LAYER:
  • 2 small packages of butterscotch instant pudding
  • 2.5 c. milk
  • WHIPPED CREAM LAYER:
  • 3 tablespoons powdered sugar
  • 1 c. heavy cream
  • TOPPINGS (OPTIONAL):
  • Chocolate bar - shaved
  • Butterscotch ice cream topping

Instructions

Step 1: To make the Graham cracker crust: Prepare the oven. Preheat it to 350 degrees F. Whisk the Graham cracker crumbs, melted butter, and sugar. Into the bottom of an 8 x 8-inch baking dish, press the mixture. Place in the preheated oven and bake for about 15 minutes.

Step 2: For the cream cheese layer, beat the cream cheese and sugar using a hand mixer until fluffy. Next, add 2 c heavy cream and continue to beat until stiff peaks form. Then, layer the cream cheese over the cooled Graham crust.

Step 3: Next, for the pudding layer. Mix the milk with the pudding mix. You can add a little more milk if the mixture is too thick. At this point, you should have a mixture thicker than traditional pudding, but still pourable. Over the cream cheese layer, spread the pudding.

Step 4: To make the whipped cream layer, beat the heavy cream with powdered sugar until soft peaks form. Then, spread this on top of the pudding layer.

Step 5: Place in the fridge to chill for at least 4 hours or until set.

Step 6: Across the top, drizzle the warmed butterscotch and sprinkle with pieces of shaved chocolate (optional). Enjoy!

July 11, 2022 0 comment
0 FacebookTwitterPinterestEmail
General Recipes

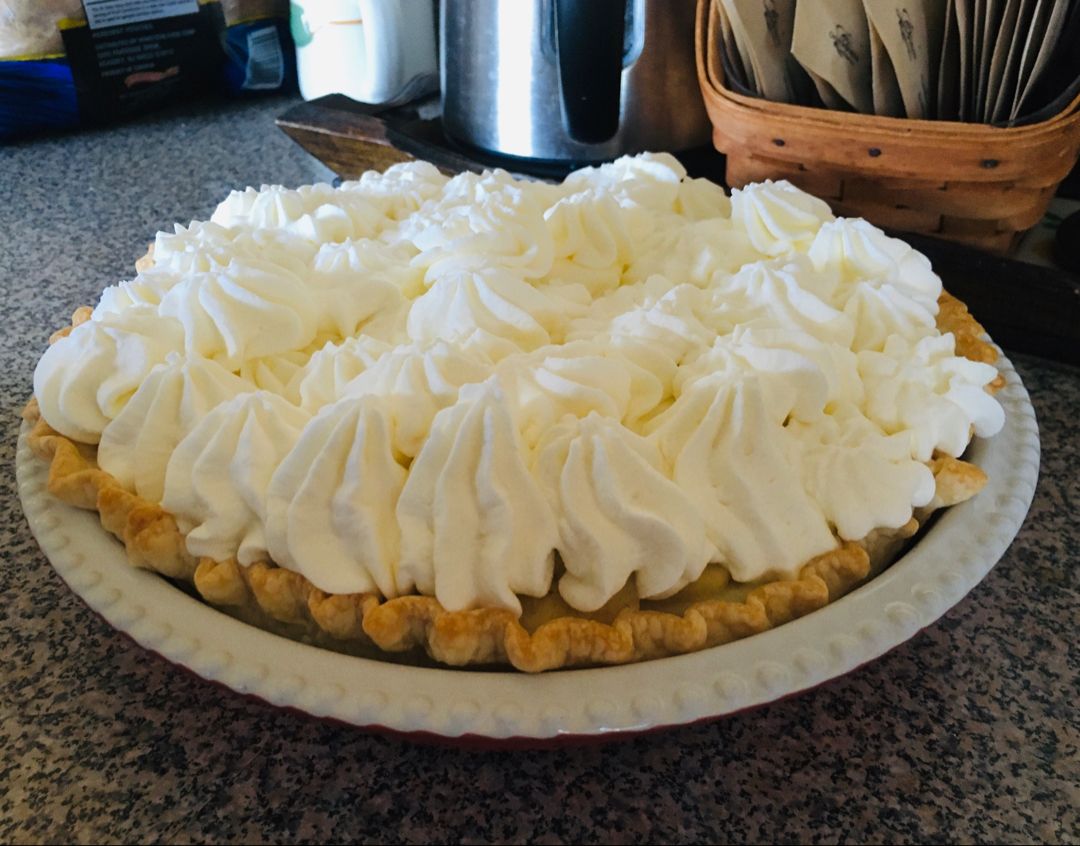
Old Fashioned Banana Cream Pie

by Rebecca July 11, 2022
written by Rebecca

Prep Time: 45 mins | Cook Time: 35 mins | Total Time: 1 hr 20 mins | Servings: 8

Decadent and creamy, this nostalgic dessert that you can easily make at home. My favorite classic, very irresistible dessert option!

INGREDIENTS

9-INCH SINGLE-CRUST PIE PASTRY:

2 to 4 tbsp ice water

1 ¼ c. all-purpose flour

3 tbsp shortening regular or butter flavored, very cold

¼ c. unsalted butter, very cold

1 ½ tsp apple cider vinegar

¼ tsp salt

VANILLA CUSTARD:

3 tbsp butter

¼ c. cornstarch

3 c. 2% milk

1 c. sugar

2 large eggs, lightly beaten

1 ½ tsp vanilla extract

½ tsp salt

FOR THE REST:

1 c. heavy whipping cream

2 large firm bananas, sliced

⅓ c. shredded sweetened coconut, optional

3 to 4 tbsp powdered sugar, I use 3 for a less sweet whipped cream to offset the sweet custard

How to make Old Fashioned Banana Cream Pie

PIE CRUST:

Step 1: In the bowl of a food processor, place the flour and salt. Pulse for about 4 or 5 times until blended.

Step 2: Into small pieces, cut the butter and shortening. Add them to the flour and blend for about 20 seconds or until you have a mixture that resembles coarse crumbs.

Step 3: To the food processor, add the vinegar and 2 tbsp water. Pulse about 6 times. Add extra water, a little at a time, and pulse until the mixture starts to hold together.

Step 4: Shape the pastry into a ball and place it on a sheet of plastic wrap. Slightly flatten the ball using your hand and wrap it in the plastic wrap. Place in the fridge for at least 1 hour or up to 2 days.

Step 5: Take the pasty from the fridge when ready to roll out and allow it to rest for about 10 to 15 minutes on the counter. Place the pastry on a lightly floured large board and roll in a circle about 1/8-inch thick using a rolling pin until it is large enough to fit in your pie plate, with around 1-inch of pastry going beyond the rim of the plate. Gently press the pastry down into the plate. Using a sharp knife, trim the edges evenly to around half an inch of the edges of the pan. Over and under, tuck the edge of the crust. Then, crimp or flute the edges.

Step 6: In the freezer, place the pie plate for no more than 30 minutes.

BLIND BAKE THE PIE CRUST:

Step 7: To the middle of the oven, position the oven rack. Then, preheat the oven to 400 degrees.

Step 8: Take the pie plate out of the freezer. Using foil, line the pie pastry. Lightly press down the foil and tight it up to the fluted or crimped edges. With pie weights or dry beans, fill the foil-lined crust. Place in the preheated oven and bake for about 20 minutes or until the edges are light golden brown.

Step 9: Take the dish out of the oven when done and very carefully lift and remove the foil and pie weights. Prick the bottom surface of the crust using a fork. Adjust the oven temperature to 375 degrees F and return the pie plate to the oven. Resume baking for another 10 to 15 minutes or until the whole crust is golden brown.

Step 10: Let the crust cool fully before filling.

CUSTARD (NO TEMPERING METHOD):

Step 11: In a medium-sized saucepan, place the sugar, cornstarch, and salt. In a bowl, whisk the eggs and milk until the eggs are completely blended. Into the dry mixture, gradually pour in the milk mixture, stirring constantly while pouring until completely smooth.

Step 12: Place the pan over medium heat. Cook the custard mixture for about 5 to 6 minutes, whisking constantly until thickened. Decrease the heat if the mixture starts to boil. Immediately take the pan off the heat once the mixture has thickened. Using a wooden spoon, stir in the butter and vanilla until well blended.

Step 13: Into a medium bowl, pour the hot mustard. Onto the surface of the custard, press a plastic wrap. This will prevent a film from forming. Place in the fridge for at least 1 hour or until the custard is chilled. You can also whip this up ahead and just keep it in the fridge overnight.

WHIPPED CREAM:

Step 14: Beat the heavy cream with 3 tbsp powdered sugar until stiff peaks form. If needed, add extra powdered sugar according to taste.

TO ASSEMBLE THE PIE:

Step 15: Into the crust, spread half of the custard. To about half-inch thickness, slice the bananas and evenly arrange them over the custard layer. On top of the bananas, spoon the rest of the custard and evenly spread them to cover the bananas. Next, spread the whipped cream on top. If desired, garnish with toasted coconut.

Step 16: Place in the fridge for 1 to 2 hours up to overnight before slicing. Enjoy!

OPTIONAL TOASTED COCONUT TOPPING:

Prepare the oven and preheat it to 350 degrees F. In a small baking dish, place the coconut. Bake in the preheated oven for about 5 to 6 minutes, stirring halfway, until the coconut is golden brown and toasted. Allow the toasted coconut to cool fully before sprinkling it on top of the pie.

NUTRITION FACTS:

Calories: 542 kcal · Carbohydrates: 59 g · Protein: 8 g · Fat: 31 g · Saturated Fat: 18 g · Cholesterol: 115 mg · Sodium: 328 mg · Potassium: 309 mg · Fiber: 2 g · Sugar: 36 g · Vitamin A: 914 IU · Vitamin C: 3 mg · Calcium: 139 mg · Iron: 1 mg

Old Fashioned Banana Cream Pie

Rebecca Prep Time: 45 mins | Cook Time: 35 mins | Total Time: 1 hr 20 mins | Servings: 8 Decadent and creamy, this nostalgic dessert that you can easily make… General Recipes Old Fashioned Banana Cream Pie European Print This
Serves: 8 Prep Time: 45 mins Cooking Time: 35 mins 35 mins
Nutrition facts: 542 calories 31 fat
Rating: 5.0/5
( 1 voted )

Ingredients

  • 9-INCH SINGLE-CRUST PIE PASTRY:
  • 2 to 4 tbsp ice water
  • 1 ¼ c. all-purpose flour
  • 3 tbsp shortening regular or butter flavored, very cold
  • ¼ c. unsalted butter, very cold
  • 1 ½ tsp apple cider vinegar
  • ¼ tsp salt
  • VANILLA CUSTARD:
  • 3 tbsp butter
  • ¼ c. cornstarch
  • 3 c. 2% milk
  • 1 c. sugar
  • 2 large eggs, lightly beaten
  • 1 ½ tsp vanilla extract
  • ½ tsp salt
  • FOR THE REST:
  • 1 c. heavy whipping cream
  • 2 large firm bananas, sliced
  • ⅓ c. shredded sweetened coconut, optional
  • 3 to 4 tbsp powdered sugar, I use 3 for a less sweet whipped cream to offset the sweet custard

Instructions

PIE CRUST:

Step 1: In the bowl of a food processor, place the flour and salt. Pulse for about 4 or 5 times until blended.

Step 2: Into small pieces, cut the butter and shortening. Add them to the flour and blend for about 20 seconds or until you have a mixture that resembles coarse crumbs.

Step 3: To the food processor, add the vinegar and 2 tbsp water. Pulse about 6 times. Add extra water, a little at a time, and pulse until the mixture starts to hold together.

Step 4: Shape the pastry into a ball and place it on a sheet of plastic wrap. Slightly flatten the ball using your hand and wrap it in the plastic wrap. Place in the fridge for at least 1 hour or up to 2 days.

Step 5: Take the pasty from the fridge when ready to roll out and allow it to rest for about 10 to 15 minutes on the counter. Place the pastry on a lightly floured large board and roll in a circle about 1/8-inch thick using a rolling pin until it is large enough to fit in your pie plate, with around 1-inch of pastry going beyond the rim of the plate. Gently press the pastry down into the plate. Using a sharp knife, trim the edges evenly to around half an inch of the edges of the pan. Over and under, tuck the edge of the crust. Then, crimp or flute the edges.

Step 6: In the freezer, place the pie plate for no more than 30 minutes.

BLIND BAKE THE PIE CRUST:

Step 7: To the middle of the oven, position the oven rack. Then, preheat the oven to 400 degrees.

Step 8: Take the pie plate out of the freezer. Using foil, line the pie pastry. Lightly press down the foil and tight it up to the fluted or crimped edges. With pie weights or dry beans, fill the foil-lined crust. Place in the preheated oven and bake for about 20 minutes or until the edges are light golden brown.

Step 9: Take the dish out of the oven when done and very carefully lift and remove the foil and pie weights. Prick the bottom surface of the crust using a fork. Adjust the oven temperature to 375 degrees F and return the pie plate to the oven. Resume baking for another 10 to 15 minutes or until the whole crust is golden brown.

Step 10: Let the crust cool fully before filling.

CUSTARD (NO TEMPERING METHOD):

Step 11: In a medium-sized saucepan, place the sugar, cornstarch, and salt. In a bowl, whisk the eggs and milk until the eggs are completely blended. Into the dry mixture, gradually pour in the milk mixture, stirring constantly while pouring until completely smooth.

Step 12: Place the pan over medium heat. Cook the custard mixture for about 5 to 6 minutes, whisking constantly until thickened. Decrease the heat if the mixture starts to boil. Immediately take the pan off the heat once the mixture has thickened. Using a wooden spoon, stir in the butter and vanilla until well blended.

Step 13: Into a medium bowl, pour the hot mustard. Onto the surface of the custard, press a plastic wrap. This will prevent a film from forming. Place in the fridge for at least 1 hour or until the custard is chilled. You can also whip this up ahead and just keep it in the fridge overnight.

WHIPPED CREAM:

Step 14: Beat the heavy cream with 3 tbsp powdered sugar until stiff peaks form. If needed, add extra powdered sugar according to taste.

TO ASSEMBLE THE PIE:

Step 15: Into the crust, spread half of the custard. To about half-inch thickness, slice the bananas and evenly arrange them over the custard layer. On top of the bananas, spoon the rest of the custard and evenly spread them to cover the bananas. Next, spread the whipped cream on top. If desired, garnish with toasted coconut.

Step 16: Place in the fridge for 1 to 2 hours up to overnight before slicing. Enjoy!

OPTIONAL TOASTED COCONUT TOPPING:

Prepare the oven and preheat it to 350 degrees F. In a small baking dish, place the coconut. Bake in the preheated oven for about 5 to 6 minutes, stirring halfway, until the coconut is golden brown and toasted. Allow the toasted coconut to cool fully before sprinkling it on top of the pie.

July 11, 2022 0 comment
0 FacebookTwitterPinterestEmail
General Recipes

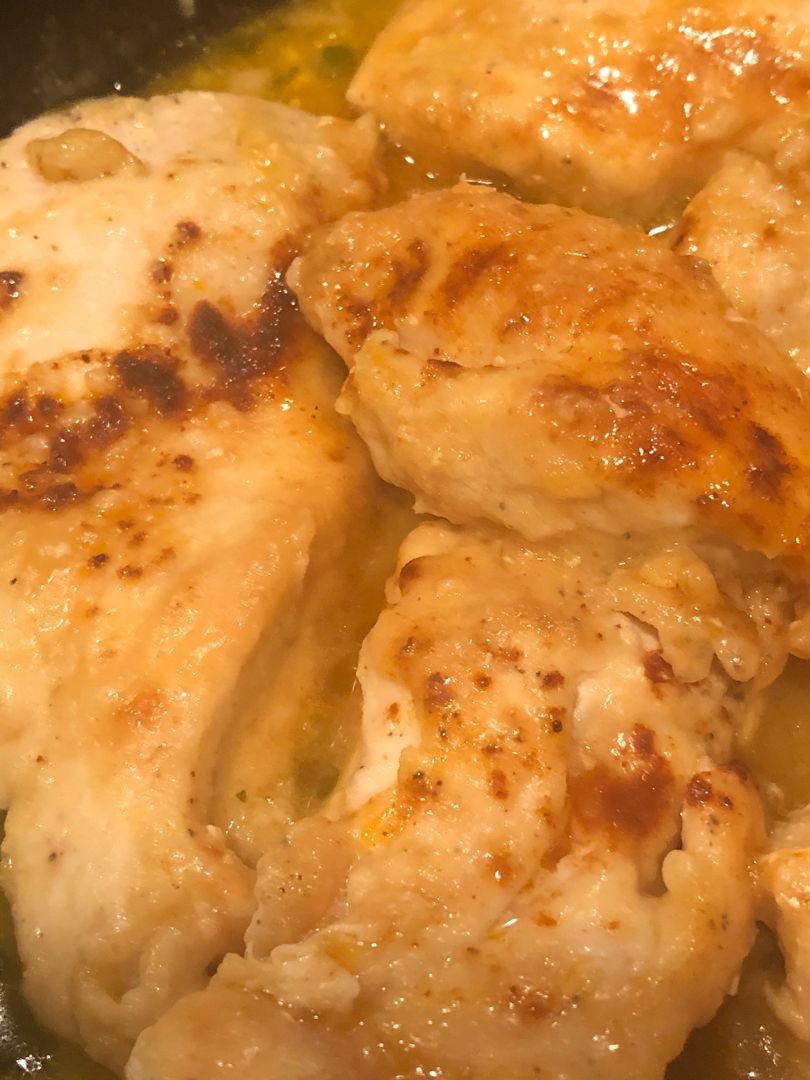
Lemon Butter Chicken

by Rebecca July 11, 2022
written by Rebecca

PREP TIME: 5 MINS | COOK TIME: 15 MINS | TOTAL TIME: 20 MINS | SERVINGS: 4

Pan-fried chicken coated in a simple, yet very delicious lemon butter sauce. A great weeknight dinner option that you can easily make in under twenty minutes. This amazing dish is made with only a few simple ingredients. A pretty-straightforward chicken dish that makes the best dinner!

This lemon butter chicken has been one of my top favorites dinners for years! It is super easy and quick to make. The ingredients required to make this dish are mostly pantry ingredients, and the steps are super simple! The bright lemon flavor of this lemon butter chicken adds an amazing burst to this incredible dish. Pair this lemon butter chicken with rice, pasta, or mashed potatoes for a filling weeknight meal. Or serve this with some veggies for a low-carb option.

INGREDIENTS

1 tbsp olive oil

3 tbsp butter, divided

2-3 chicken breasts, cut in half lengthwise

1/4 tsp garlic powder

1/2 c. chicken broth

Fresh parsley, chopped, to taste (optional)

2 tbsp lemon juice + zest of 1/2 lemon

Flour for dredging

Salt & pepper to taste

How to make Lemon Butter Chicken

Step 1: In half lengthwise, slice the chicken breasts to make thinner cutlets. Then, sprinkle the chicken breasts with salt, pepper, and garlic powder. In flour, dredge the cutlets, making sure they are evenly coated.

Step 2: Into a skillet, heat the olive oil and 1 tbsp butter over medium-high heat. Add the chicken cutlets to the pan once the oil is hot and sear for about 4 to 5 minutes on each side or until golden. Set the cooked chicken cutlets aside when done.

Step 3: In the now-empty pan, pour in the chicken broth, lemon juice plus zest, and add the rest of the butter. Allow the mixture to bubble for a few minutes before returning the chicken to the pan. Continue to cook for a couple of minutes more or until completely cooked and the sauce has further reduced.

NUTRITION FACTS:

Calories: 246 kcal, Carbohydrates: 2g, Protein: 24g, Fat: 15g, Saturated Fat: 7g, Trans Fat: 1g, Cholesterol: 95mg, Sodium: 314mg, Potassium: 456mg, Fiber: 1g, Sugar: 1g, Vitamin A: 297IU, Vitamin C: 6mg, Calcium: 11mg, Iron: 1mg

Lemon Butter Chicken

Rebecca PREP TIME: 5 MINS | COOK TIME: 15 MINS | TOTAL TIME: 20 MINS | SERVINGS: 4 Pan-fried chicken coated in a simple, yet very delicious lemon butter sauce. A… General Recipes Lemon Butter Chicken European Print This
Serves: 4 Prep Time: 5 mins Cooking Time: 15 mins 15 mins
Nutrition facts: 246 calories 15 fat
Rating: 5.0/5
( 1 voted )

Ingredients

  • 1 tbsp olive oil
  • 3 tbsp butter, divided
  • 2-3 chicken breasts, cut in half lengthwise
  • 1/4 tsp garlic powder
  • 1/2 c. chicken broth
  • Fresh parsley, chopped, to taste (optional)
  • 2 tbsp lemon juice + zest of 1/2 lemon
  • Flour for dredging
  • Salt & pepper to taste

Instructions

Step 1: In half lengthwise, slice the chicken breasts to make thinner cutlets. Then, sprinkle the chicken breasts with salt, pepper, and garlic powder. In flour, dredge the cutlets, making sure they are evenly coated.

Step 2: Into a skillet, heat the olive oil and 1 tbsp butter over medium-high heat. Add the chicken cutlets to the pan once the oil is hot and sear for about 4 to 5 minutes on each side or until golden. Set the cooked chicken cutlets aside when done.

Step 3: In the now-empty pan, pour in the chicken broth, lemon juice plus zest, and add the rest of the butter. Allow the mixture to bubble for a few minutes before returning the chicken to the pan. Continue to cook for a couple of minutes more or until completely cooked and the sauce has further reduced.

July 11, 2022 0 comment
0 FacebookTwitterPinterestEmail
General Recipes

SEAFOOD PAPPARDELLE

by Rebecca July 11, 2022
written by Rebecca

Prep Time: 10 mins | Cook Time: 20 mins | Total Time: 30 mins | Servings: 4

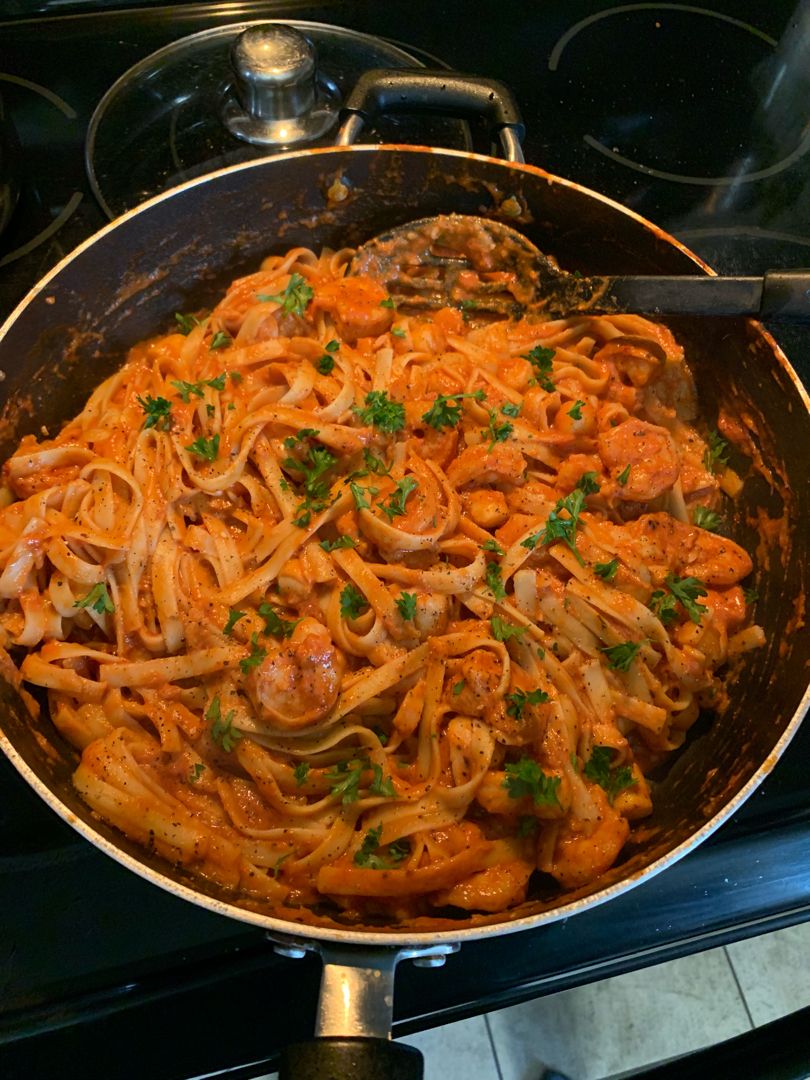
This seafood pappardelle is loaded with scallops, shrimp, and pasta in a very delectable spicy tomato-cream sauce. This recipe is another one of the favorite seafood pasta recipes that are incredibly easy to make and ready in under thirty minutes. This is perfect if you are searching for a delicious, easy seafood pasta recipe.

This pasta few weeks I have been trying out different recipes. I instantly fell in love with this seafood pappardelle as this hits all the sweet spots. Not only that this is very easy and fast to make, but this is also amazing for entertaining! It is a pretty straightforward recipe that doesn’t need any hard-to-find ingredients or difficult steps to make. This seafood pappardelle is very simple, yet so good!

INGREDIENTS

1 tbsp unsalted butter

1 tbsp extra virgin olive oil

1 pound shrimp, peeled and deveined

1 pound scallops

2 garlic cloves, minced

8 ounces pappardelle pasta or any long thick pasta

1/2 tsp crushed red pepper

1/4 c. heavy cream

chopped flat-leaf parsley to serve

1 1/2 c. tomato sauce store-bought is fine

HOW TO MAKE SEAFOOD PAPPARDELLE

Step 1: Heat the oil and butter in a large skillet over medium-high heat. Once the oil is hot and the butter has melted, add the scallops and shrimp to the skillet and sear for about 1 minute on each side. Then, set the scallops and shrimps aside.

Step 2: Adjust the heat to medium and add the garlic and pepper flakes to the now-empty pan. Cook until tender but not brown. Then, add the tomato sauce and heavy cream. Place the scallops and shrimp back into the pan and gently simmer for about 7 to 8 minutes. Make sure not to overcook the shrimps.

Step 3: In the meantime, cook the pappardelle pasta in another pot following the package directions. Drain when done and add to the sauce. Toss well.

Step 4: Serve the seafood pappardelle right away garnished with some flat-leaf parsley. Enjoy!

SEAFOOD PAPPARDELLE

Rebecca Prep Time: 10 mins | Cook Time: 20 mins | Total Time: 30 mins | Servings: 4 This seafood pappardelle is loaded with scallops, shrimp, and pasta in a very… General Recipes SEAFOOD PAPPARDELLE European Print This
Serves: 4 Prep Time: 10 mins Cooking Time: 20 mins 20 mins
Nutrition facts: 200 calories 20 grams fat
Rating: 5.0/5
( 1 voted )

Ingredients

  • 1 tbsp unsalted butter
  • 1 tbsp extra virgin olive oil
  • 1 pound shrimp, peeled and deveined
  • 1 pound scallops
  • 2 garlic cloves, minced
  • 8 ounces pappardelle pasta or any long thick pasta
  • 1/2 tsp crushed red pepper
  • 1/4 c. heavy cream
  • chopped flat-leaf parsley to serve
  • 1 1/2 c. tomato sauce store-bought is fine

Instructions

Step 1: Heat the oil and butter in a large skillet over medium-high heat. Once the oil is hot and the butter has melted, add the scallops and shrimp to the skillet and sear for about 1 minute on each side. Then, set the scallops and shrimps aside.

Step 2: Adjust the heat to medium and add the garlic and pepper flakes to the now-empty pan. Cook until tender but not brown. Then, add the tomato sauce and heavy cream. Place the scallops and shrimp back into the pan and gently simmer for about 7 to 8 minutes. Make sure not to overcook the shrimps.

Step 3: In the meantime, cook the pappardelle pasta in another pot following the package directions. Drain when done and add to the sauce. Toss well.

Step 4: Serve the seafood pappardelle right away garnished with some flat-leaf parsley. Enjoy!

July 11, 2022 0 comment
0 FacebookTwitterPinterestEmail
General Recipes

Loaded Denver Omelet Muffins

by Rebecca July 11, 2022
written by Rebecca

Prep time: 30 mins | Cook time: 30 mins | Total time: 1-hr | Yield: 12 Muffins

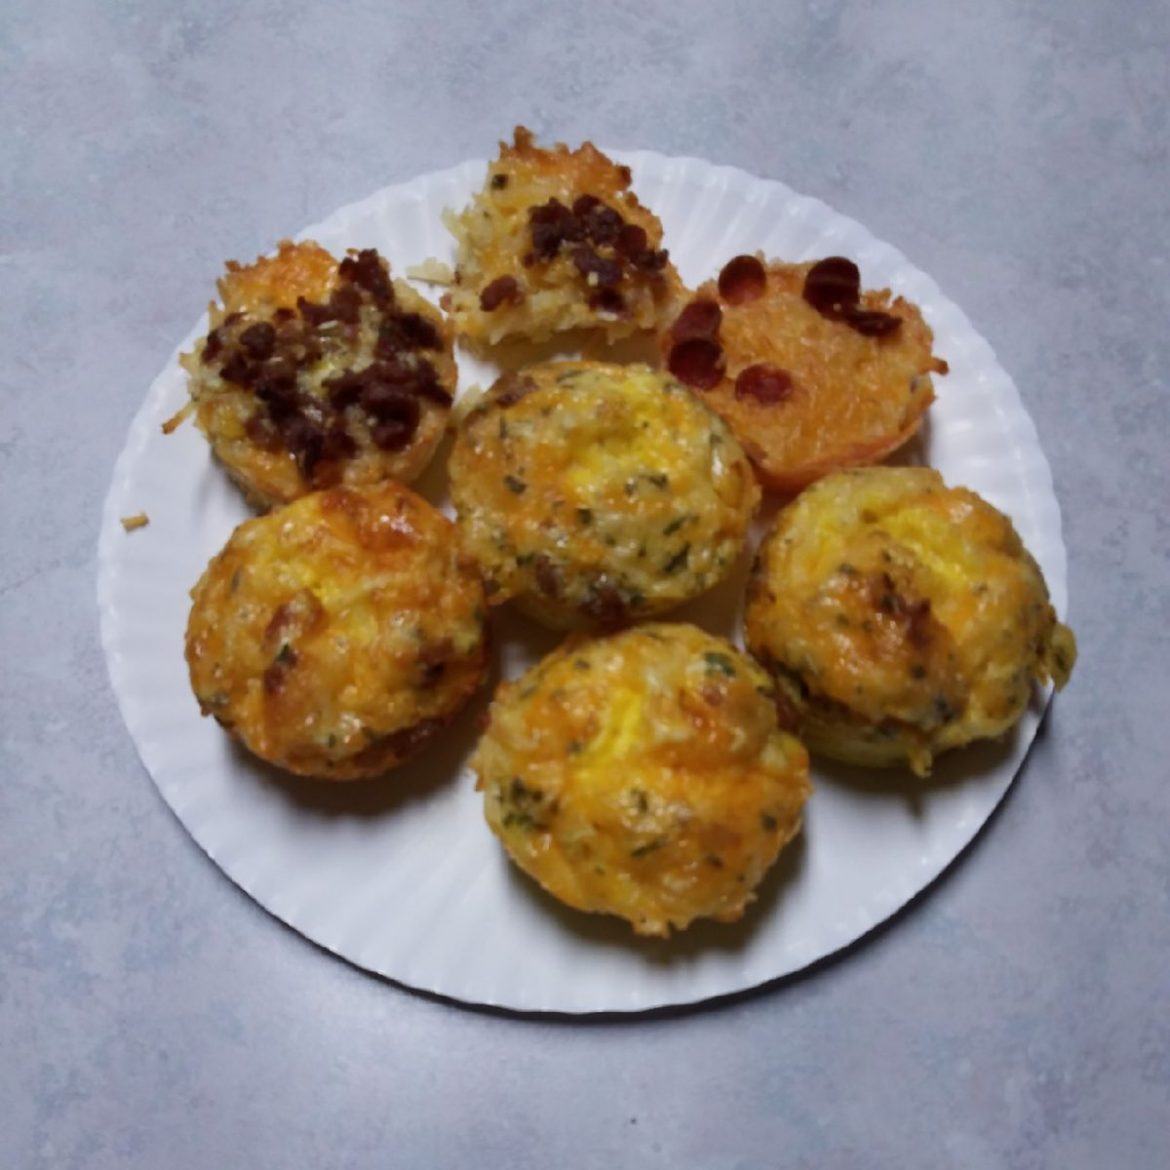
No more waiting in line for a table with these loaded Denver Omelet Muffins. All you need is a little planning ahead. If you love brunch but hate the hassle of falling in a long line, then you have to give these cheesy, crispy omelette muffins a try very soon. These delicious omelette muffins are made with just a few simple ingredients and ready in a snap. Loaded with your favorite breakfast must-haves from hash browns, ham, and tons of cheese, I’m pretty sure everyone will love every bite of these omelette muffins. For a complete breakfast and to bring extra goodness and color, serve these omelette muffins with some fresh fruit.

Ingredients

1 tbsp olive oil

2 1/4 c. shredded hash browns (thawed and press with a paper towel)

1 1/2 c. Cheddar/Jack Cheese

1/4 c. ham (diced into 1/4-inch pieces)

3 tbsp red bell pepper (diced)

3 tbsp green bell pepper (diced)

2 tbsp milk

5 eggs (whisked)

salt and pepper to taste

3 green onion stalks (diced)

How to make Loaded Denver Omelet Muffins

Step 1: Prepare the oven. Preheat it to 425 degrees F. Using cooking spray, grease a muffin pan.

Step 2: Place the thawed hash browns and 1 tbsp olive oil in a large bowl. Mix well. Into the prepared muffin pan, tight press the mixture, shaping them into the muffin pan. Into each muffin pan, add 1 tbsp of cheese.

Step 3: Place in the preheated oven and bake for about 15 minutes or until the edges of the muffins have browned and the cheese has melted.

Step 4: Beat the eggs, milk, salt, and pepper in a small bowl. Then, add the ham, green and red bell peppers, and green onions. Fill each muffin cup with this mixture and sprinkle extra cheese on top.

Step 5: Return to the oven and resume baking for another 15 minutes.

Nutrition Facts:

Yield: 12 Muffins, Serving Size: 1 Muffin
Amount Per Serving: Calories 225, Total Fat 16g, Saturated Fat 5g, Trans Fat 0g, Unsaturated Fat 10g, Cholesterol 95mg, Sodium 424mg, Carbohydrates 14g, Fiber 1g, Sugar 1g, Protein 8g

Loaded Denver Omelet Muffins

Rebecca Prep time: 30 mins | Cook time: 30 mins | Total time: 1-hr | Yield: 12 Muffins No more waiting in line for a table with these loaded Denver Omelet… General Recipes Loaded Denver Omelet Muffins European Print This
Serves: 12 Prep Time: 30 mins Cooking Time: 30 mins 30 mins
Nutrition facts: 225 calories 16 fat
Rating: 5.0/5
( 1 voted )

Ingredients

  • 1 tbsp olive oil
  • 2 1/4 c. shredded hash browns (thawed and press with a paper towel)
  • 1 1/2 c. Cheddar/Jack Cheese
  • 1/4 c. ham (diced into 1/4-inch pieces)
  • 3 tbsp red bell pepper (diced)
  • 3 tbsp green bell pepper (diced)
  • 2 tbsp milk
  • 5 eggs (whisked)
  • salt and pepper to taste
  • 3 green onion stalks (diced)

Instructions

Step 1: Prepare the oven. Preheat it to 425 degrees F. Using cooking spray, grease a muffin pan.

Step 2: Place the thawed hash browns and 1 tbsp olive oil in a large bowl. Mix well. Into the prepared muffin pan, tight press the mixture, shaping them into the muffin pan. Into each muffin pan, add 1 tbsp of cheese.

Step 3: Place in the preheated oven and bake for about 15 minutes or until the edges of the muffins have browned and the cheese has melted.

Step 4: Beat the eggs, milk, salt, and pepper in a small bowl. Then, add the ham, green and red bell peppers, and green onions. Fill each muffin cup with this mixture and sprinkle extra cheese on top.

Step 5: Return to the oven and resume baking for another 15 minutes.

July 11, 2022 0 comment
0 FacebookTwitterPinterestEmail
General Recipes

Spanish Seafood Paella Recipe

by Rebecca July 11, 2022
written by Rebecca

Prep Time: 10 mins | Cook Time: 35 mins | Total Time: 45 mins | Servings: 6 people

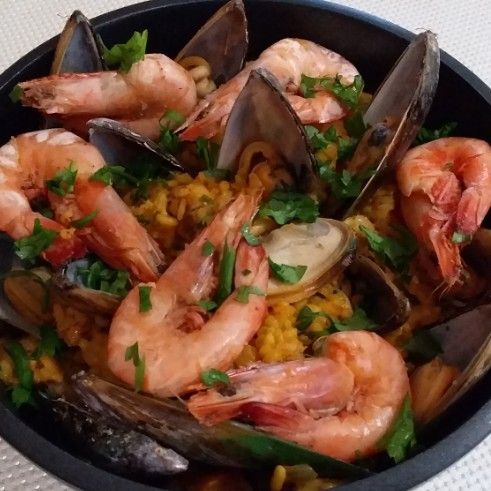
Making paella is an art. The presentation and the combination of flavors are beyond amazing! This Spanish Seafood Paella is easily made with the freshest wild-caught shellfish along with a bit of chicken andouille sausage and saffron.

Ingredients

1 pound wild large shrimp (tails on)

5 tablespoons extra virgin olive oil + more as needed

1 Spanish onion, diced

2 cups Calasparra, risotto, or forbidden white rice (organic)

1 teaspoon smoked Spanish paprika

3 cloves of garlic, grated

2 links chicken andouille sausage, sliced

1/2 pound black mussels

2 lobster tails (cut in half lengthwise)

1/2 pound Manilla clams

1 teaspoon red pepper flakes + more to taste

1/2 teaspoon ground coriander

1 teaspoon garlic powder

1 pinch of saffron threads

3 cups shrimp stock or vegetable stock

1/4 cup flat-leaf parsley (roughly chopped)

1/2 cup steamed green peas (optional)

1 lemon, cut into wedges

1/2 cup green olives (optional)

3/4 cup dry white wine

1 teaspoon sea salt + more to taste

How to make Spanish Seafood Paella

Step 1: Cut the lobster tails lengthwise using kitchen shears. Rinse the lobsters and pat them dry. Place them in the bowl with the shrimp.

Step 2: Drizzle the lobsters and shrimp with a lug of olive oil and season with salt, black pepper, garlic powder, coriander, red pepper flakes, and smoked paprika. Set aside at room temperature.

Step 3: Heat the shrimp or vegetable stock and season with sea salt. Then, add the saffron threads. Put the lid on and let it steep while starting the paella.

Step 4: Heat 3 tbsp of olive oil in a large deep skillet. Once the oil is hot, add the diced onion and sprinkle with sea salt. Saute the onion until translucent. Next, add the garlic. Stir and cook for a few seconds more before stirring in the rice, making sure it will be nicely coated in olive oil.

Step 5: Pour in half of the white wine and allow it to simmer until almost evaporated. Whisk in the saffron stock and bring everything to a boil. Put the lid on and adjust the heat to low. Cook for about 20 minutes. Then, turn the heat off. Do not cover the cover and let the rice sit for about 5 minutes.

Step 6: Heat a lug of olive oil in another skillet. Once the oil is hot, add the andouille sausage and sear until golden. Then, add the lobster tails and toss well.

Step 7: Add the shrimp after about 1 minute and stir well to coat. Continue to cook for another 3 minutes or until the shrimps curled up and the lobster tail shells are red. Pour everything over the paella rice.

Step 8: Add the clams and mussels to the now-empty pan. Pour in the rest of the white wine. Put the lid on and cook for a couple of minutes until they open and release the seawater. Place them as well on the top of the paella.

Step 9: Set aside the juices of the clams.

Step 10: Serve the paella right away with sprinkles of green peas and parsley. Garnish with some lemon wedges. Enjoy!

Nutrition Facts:

Calories: 510 kcal | Carbohydrates: 60g | Protein: 28g | Fat: 15g | Saturated Fat: 2g | Polyunsaturated Fat: 2g | Monounsaturated Fat: 10g | Trans Fat: 1g | Cholesterol: 156mg | Sodium: 845mg | Potassium: 482mg | Fiber: 4g | Sugar: 2g | Vitamin A: 660IU | Vitamin C: 12mg | Calcium: 101mg | Iron: 5mg

Spanish Seafood Paella Recipe

Rebecca Prep Time: 10 mins | Cook Time: 35 mins | Total Time: 45 mins | Servings: 6 people Making paella is an art. The presentation and the combination of flavors… General Recipes Spanish Seafood Paella Recipe European Print This
Serves: 6 Prep Time: 10 mins Cooking Time: 35 mins 35 mins
Nutrition facts: 510 calories 15 fat
Rating: 5.0/5
( 1 voted )

Ingredients

  • 1 pound wild large shrimp (tails on)
  • 5 tablespoons extra virgin olive oil + more as needed
  • 1 Spanish onion, diced
  • 2 cups Calasparra, risotto, or forbidden white rice (organic)
  • 1 teaspoon smoked Spanish paprika
  • 3 cloves of garlic, grated
  • 2 links chicken andouille sausage, sliced
  • 1/2 pound black mussels
  • 2 lobster tails (cut in half lengthwise)
  • 1/2 pound Manilla clams
  • 1 teaspoon red pepper flakes + more to taste
  • 1/2 teaspoon ground coriander
  • 1 teaspoon garlic powder
  • 1 pinch of saffron threads
  • 3 cups shrimp stock or vegetable stock
  • 1/4 cup flat-leaf parsley (roughly chopped)
  • 1/2 cup steamed green peas (optional)
  • 1 lemon, cut into wedges
  • 1/2 cup green olives (optional)
  • 3/4 cup dry white wine
  • 1 teaspoon sea salt + more to taste

Instructions

Step 1: Cut the lobster tails lengthwise using kitchen shears. Rinse the lobsters and pat them dry. Place them in the bowl with the shrimp.

Step 2: Drizzle the lobsters and shrimp with a lug of olive oil and season with salt, black pepper, garlic powder, coriander, red pepper flakes, and smoked paprika. Set aside at room temperature.

Step 3: Heat the shrimp or vegetable stock and season with sea salt. Then, add the saffron threads. Put the lid on and let it steep while starting the paella.

Step 4: Heat 3 tbsp of olive oil in a large deep skillet. Once the oil is hot, add the diced onion and sprinkle with sea salt. Saute the onion until translucent. Next, add the garlic. Stir and cook for a few seconds more before stirring in the rice, making sure it will be nicely coated in olive oil.

Step 5: Pour in half of the white wine and allow it to simmer until almost evaporated. Whisk in the saffron stock and bring everything to a boil. Put the lid on and adjust the heat to low. Cook for about 20 minutes. Then, turn the heat off. Do not cover the cover and let the rice sit for about 5 minutes.

Step 6: Heat a lug of olive oil in another skillet. Once the oil is hot, add the andouille sausage and sear until golden. Then, add the lobster tails and toss well.

Step 7: Add the shrimp after about 1 minute and stir well to coat. Continue to cook for another 3 minutes or until the shrimps curled up and the lobster tail shells are red. Pour everything over the paella rice.

Step 8: Add the clams and mussels to the now-empty pan. Pour in the rest of the white wine. Put the lid on and cook for a couple of minutes until they open and release the seawater. Place them as well on the top of the paella.

Step 9: Set aside the juices of the clams.

Step 10: Serve the paella right away with sprinkles of green peas and parsley. Garnish with some lemon wedges. Enjoy!

July 11, 2022 0 comment
0 FacebookTwitterPinterestEmail
General Recipes

Easy Buttermilk Biscuits: 3 Ingredients

by Rebecca July 11, 2022
written by Rebecca

SERVINGS: 12 biscuits

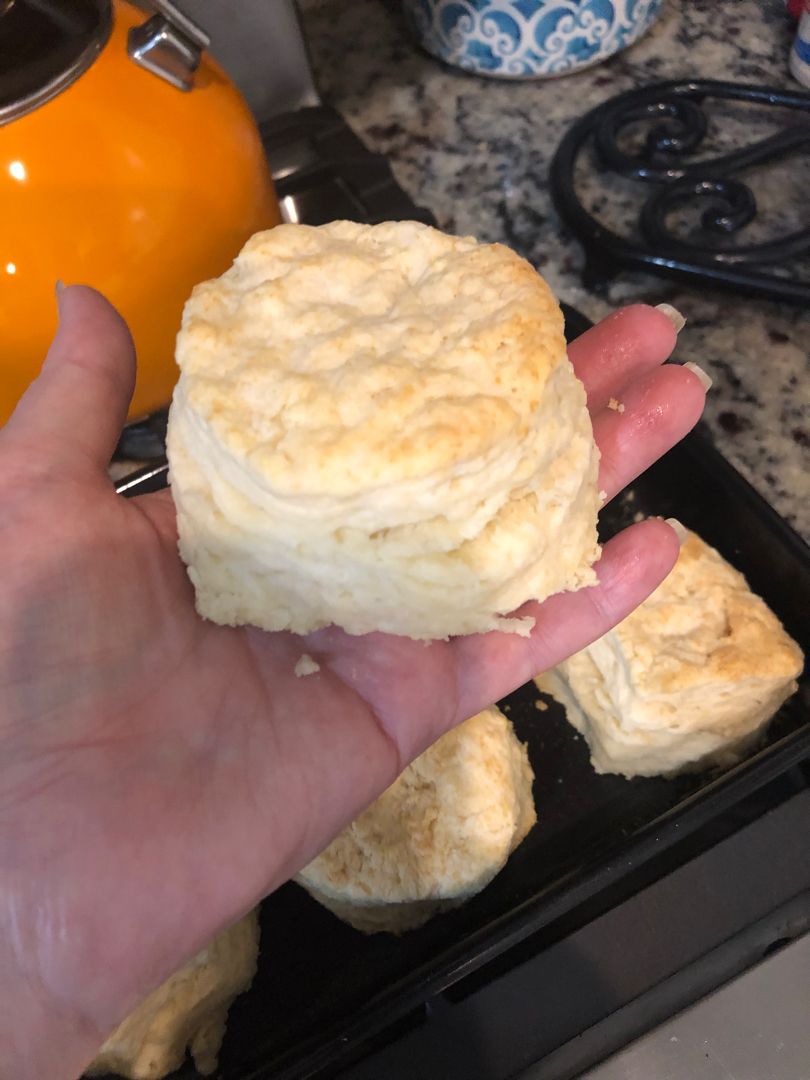
These three-ingredient easy buttermilk biscuits turned out perfect always! It is the perfect recipe for flaky buttermilk biscuits. If needed, you can substitute buttermilk with plain milk. Fill a measuring cup with milk and add 1 tablespoon of either lemon juice or white vinegar. Stir well and allow it to sit for about 5 to 10 minutes. As for the rising flour, you can also swap it with all-purpose flour. Note that for every cup of all-purpose flour, you should add two tsp of baking powder and half tsp of salt. Mix well, and remember to re-measure before you add it to the recipe.

INGREDIENTS

1 c. buttermilk

1 stick butter 1 stick equals ½ c.

2½ c. self-rising flour

How to make Easy Buttermilk Biscuits: 3 Ingredients

Step 1: Place the stick of butter in the freezer. And chill the measured buttermilk and flour.

Step 2: Toss the grated butter in the flour a little at a time. Then, add the buttermilk and stir well until just blended. Add and stir 1 to 2 tbsp buttermilk if the dough feels dry.

Step 3: On a lightly floured surface, place the dough and pat it down to about half an inch thickness. Then, fold in half and pat again to half an inch. Do the same step 4 times.

Step 4: Pat down using your hands or with a rolling pin to around half-inch thickness.

Step 5: With a straight down and up motion, cut the dough using a biscuit cutter. Make sure not to twist. On a parchment-lined baking sheet, place the biscuits nearly touching each piece.

Step 6: Place in a 450 degrees F oven and bake for about 12 to 14 minutes or until lightly browned. If desired, you can brush the biscuits with melted butter.

NOTE:

You can yield about 12 biscuits if using a 2 1/2 inch biscuit cutter. To get the most biscuits from the dough, re-roll the dough and cut again.

NUTRITION FACTS:

Serving: 1biscuit, Calories: 106kcal, Carbohydrates: 20g, Protein: 4g, Fat: 1g, Saturated Fat: 1g, Polyunsaturated Fat: 1g, Monounsaturated Fat: 1g, Cholesterol: 2mg, Sodium: 22mg, Potassium: 53mg, Fiber: 1g, Sugar: 1g, Vitamin A: 34IU, Calcium: 27mg, Iron: 1mg

Easy Buttermilk Biscuits: 3 Ingredients

Rebecca SERVINGS: 12 biscuits These three-ingredient easy buttermilk biscuits turned out perfect always! It is the perfect recipe for flaky buttermilk biscuits. If needed, you can substitute buttermilk with plain milk.… General Recipes Easy Buttermilk Biscuits: 3 Ingredients European Print This
Serves: 12
Nutrition facts: 106 calories 1 fat
Rating: 5.0/5
( 1 voted )

Ingredients

  • 1 c. buttermilk
  • 1 stick butter 1 stick equals ½ c.
  • 2½ c. self-rising flour

Instructions

Step 1: Place the stick of butter in the freezer. And chill the measured buttermilk and flour.

Step 2: Toss the grated butter in the flour a little at a time. Then, add the buttermilk and stir well until just blended. Add and stir 1 to 2 tbsp buttermilk if the dough feels dry.

Step 3: On a lightly floured surface, place the dough and pat it down to about half an inch thickness. Then, fold in half and pat again to half an inch. Do the same step 4 times.

Step 4: Pat down using your hands or with a rolling pin to around half-inch thickness.

Step 5: With a straight down and up motion, cut the dough using a biscuit cutter. Make sure not to twist. On a parchment-lined baking sheet, place the biscuits nearly touching each piece.

Step 6: Place in a 450 degrees F oven and bake for about 12 to 14 minutes or until lightly browned. If desired, you can brush the biscuits with melted butter.

Notes

You can yield about 12 biscuits if using a 2 1/2 inch biscuit cutter. To get the most biscuits from the dough, re-roll the dough and cut again.

July 11, 2022 0 comment
0 FacebookTwitterPinterestEmail
General Recipes

Sweet and Spicy Orange Salmon

by Rebecca July 11, 2022
written by Rebecca

Prep Time: 20 mins | Cook Time: 20 mins | Total Time: 40 mins | Servings: 4

If you are searching for another quick, easy, and healthy dinner idea, then you have to try this sweet and spicy orange salmon. It’s a very simple dish that is big with flavor. Serve this salmon with a simple side salad on the side or with rice or mashed potatoes.

Ingredients

1 teaspoon sesame oil

juice from one orange about 1/4 c.

1/4 c. reduced-sodium soy sauce

zest from one orange

1/4 c. honey

salmon fillet between 1 1/2-2 pounds total

3 tablespoons sriracha more or less to taste

How to make Sweet and Spicy Orange Salmon

Step 1: In a bowl, place the orange juice, orange zest, soy sauce, honey, sesame oil, and sriracha. Mix well until blended. Set aside 1/4 c of the sauce in another bowl for glazing.

Step 2: To a shallow dish or plastic bag, add the remaining sauce along with the salmon. Marinate the salmon for about 20 minutes, flipping halfway through.

Step 3: In the meantime, prepare the oven. Preheat it to 400 degrees F. Make sure to place the oven rack in the middle position near the top.

Step 4: Using foil, line a baking sheet and grease with cooking spray.

Step 5: On the prepared sheet, transfer the salmon, skin-side down. Place in the preheated oven and bake for about 18 minutes. Remove from the oven and brush the salmon with the reserved 1/4 cup of the sauce. Adjust the oven to 425 degrees F and return the sheet to the upper oven rack. Broil the salmon for approximately 2 minutes or until the edges of the salmon start to crisp and brown.

Notes:

If desired, you can divide the reserved 1/4 cup of the sauce into two bowls (one bowl for brushing the salmon before broiling and the other half for drizzling). Adjust the cooking time if using thinner salmon fillets.

You can keep any leftovers in the fridge for up to 3 days.

Nutrition Facts:

Amount Per Serving (1 gram), Calories 83, Calories from Fat 9, Fat 1g2%, Saturated Fat 1g6%, Polyunsaturated Fat 1g, Monounsaturated Fat 1g, Sodium 790mg34%, Potassium 54mg2%, Carbohydrates 19g6%, Fiber 1g4%, Sugar 18g20%, Protein 1g2%, Vitamin A 16IU0%, Vitamin C 7mg8%, Calcium 5mg1%, Iron 1mg6%

Sweet and Spicy Orange Salmon

Rebecca Prep Time: 20 mins | Cook Time: 20 mins | Total Time: 40 mins | Servings: 4 If you are searching for another quick, easy, and healthy dinner idea, then… General Recipes Sweet and Spicy Orange Salmon European Print This
Serves: 4 Prep Time: 20 mins Cooking Time: 20 mins 20 mins
Nutrition facts: 83 calories 1 fat
Rating: 5.0/5
( 1 voted )

Ingredients

  • 1 teaspoon sesame oil
  • juice from one orange about 1/4 c.
  • 1/4 c. reduced-sodium soy sauce
  • zest from one orange
  • 1/4 c. honey
  • salmon fillet between 1 1/2-2 pounds total
  • 3 tablespoons sriracha more or less to taste

Instructions

Step 1: In a bowl, place the orange juice, orange zest, soy sauce, honey, sesame oil, and sriracha. Mix well until blended. Set aside 1/4 c of the sauce in another bowl for glazing.

Step 2: To a shallow dish or plastic bag, add the remaining sauce along with the salmon. Marinate the salmon for about 20 minutes, flipping halfway through.

Step 3: In the meantime, prepare the oven. Preheat it to 400 degrees F. Make sure to place the oven rack in the middle position near the top.

Step 4: Using foil, line a baking sheet and grease with cooking spray.

Step 5: On the prepared sheet, transfer the salmon, skin-side down. Place in the preheated oven and bake for about 18 minutes. Remove from the oven and brush the salmon with the reserved 1/4 cup of the sauce. Adjust the oven to 425 degrees F and return the sheet to the upper oven rack. Broil the salmon for approximately 2 minutes or until the edges of the salmon start to crisp and brown.

Notes

If desired, you can divide the reserved 1/4 cup of the sauce into two bowls (one bowl for brushing the salmon before broiling and the other half for drizzling). Adjust the cooking time if using thinner salmon fillets. You can keep any leftovers in the fridge for up to 3 days.

July 11, 2022 0 comment
0 FacebookTwitterPinterestEmail
Newer Posts
Older Posts

Popular Posts

  • 1

    Crispy Crunchy Parmesan Potatoes

    March 21, 2020
  • 2

    CROCK POT SMOTHERED PORK CHOPS

    March 21, 2020
  • Facebook
  • Twitter

@2019 - All Right Reserved.


Back To Top